Have a stash of resin at home. Why not unleash your creativity and turn it into something practical yet unique. The world of DIY resin crafts is waiting to be explored. With the right combination of resin and molds, the possibilities are endless. You can create an array of home decor items, accessories, and quirky trinkets that will make you feel like a master baker – minus the edible part. Once you start experimenting with resin, it’s easy to get hooked.
The thrill of creating something new and beautiful is addictive, and the best part: It’s a versatile medium that can be molded into countless shapes and designs. If you’re ready to get creative, we’ve got 37 DIY resin crafts to inspire your next project.
Resin Tray
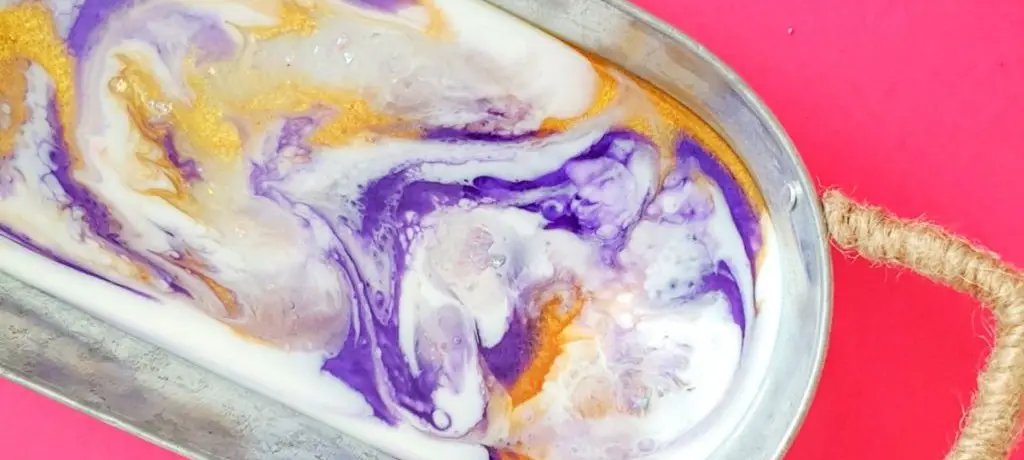
For newcomers to the world of epoxy art, a resin tray is an excellent starting point. Its spacious design allows for creative experimentation with swirling patterns and vibrant colors as you work, you’ll gain valuable insight into how different hues interact and blend together. To get started, simply select a tray that suits your style – wood or metal options are great choices.
Alternatively, if you’re still feeling uncertain, a budget-friendly plastic tray is a perfect stepping stone to help build your confidence.
Resin Sprinkle Rings
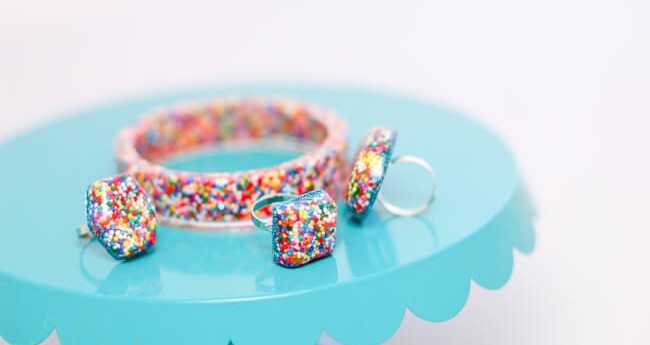
Imagine wearing a ring that sparks your inner child and makes you crave a sweet treat. That’s exactly what happens when you put on one of these unique resin rings, adorned with sprinkles – the perfect excuse to indulge in some ice cream or cupcakes.
While it may seem counterintuitive to create jewelry from edible decorations, these funky rings make an exception, and the best part: you can involve your kids in the crafting process and create a dozen (or more) of these delightful accessories during family time. Not only will they be thrilled with their new bling, but you’ll also have a stash for future slumber parties or special occasions. Why stop at rings? These DIY creations can easily be transformed into stylish bracelets too.
For more inspiration on making your own wearable masterpieces, check out these other DIY ring tutorials that are sure to become your new favorite accessories.
Ocean Art On Pallet Wood
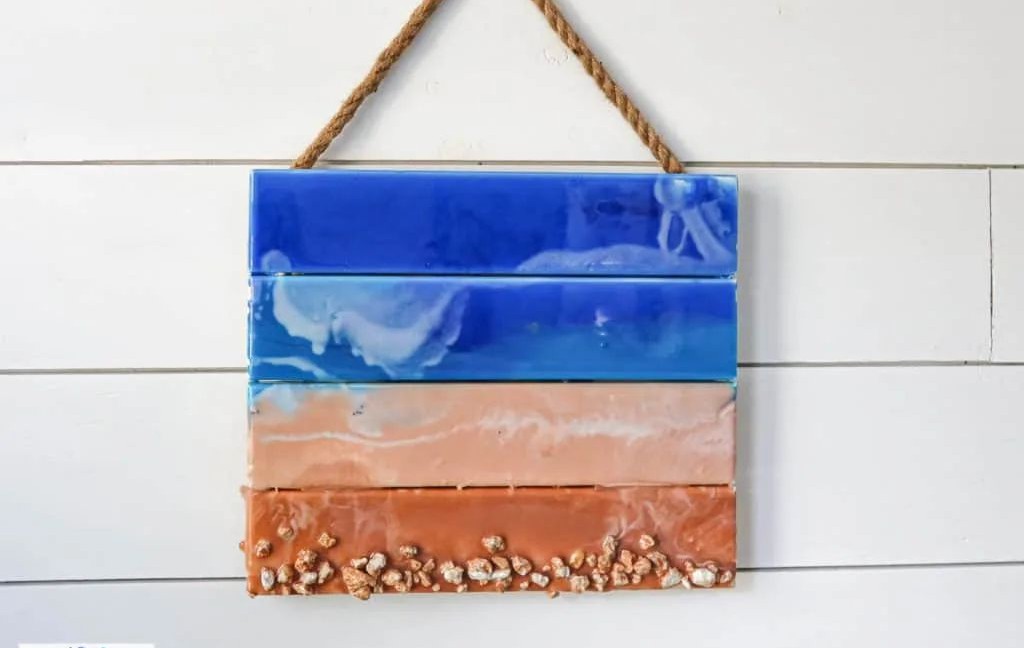
Epoxy pouring has evolved into an art form that encourages creativity. Its versatility has led to innovative ways to create new items or revamp old ones. A DIY project that showcases this is the transformation of a piece of pallet wood into something unique. To get started, acquire a pallet from a local hardware store or online retailer. Additionally, you’ll need a large, flat-head paintbrush and acrylic paint in various shades to match the ocean-beach theme.
For an authentic beachy look, incorporate blue resin dye and green hues to create a blended effect.
Gold Leaf Resin Coasters
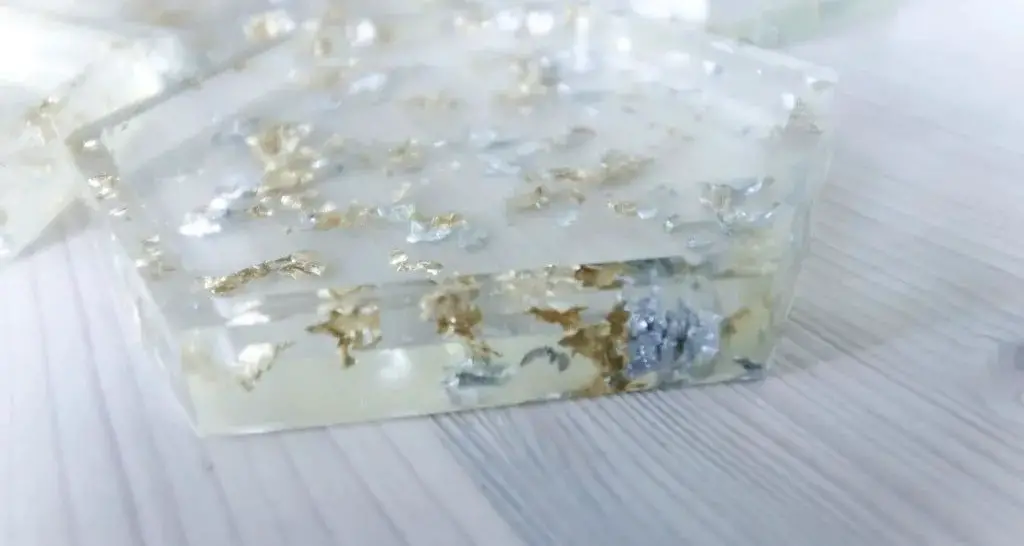
For smaller resin projects that can be completed quickly, consider creating gold leaf coasters. The subtle addition of golden flakes will add a touch of sophistication to any room. You can obtain gold leaf gilding flakes and coaster molds from the same source. To enhance the effect, you can introduce a few drops of dye, but for maximum visibility, use clear resin and let the metallic flecks shine through.
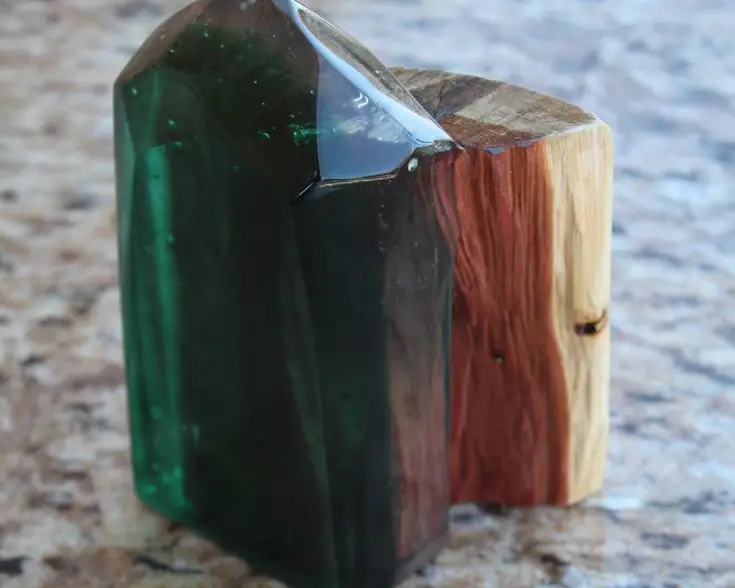
Resin River Candle Holder
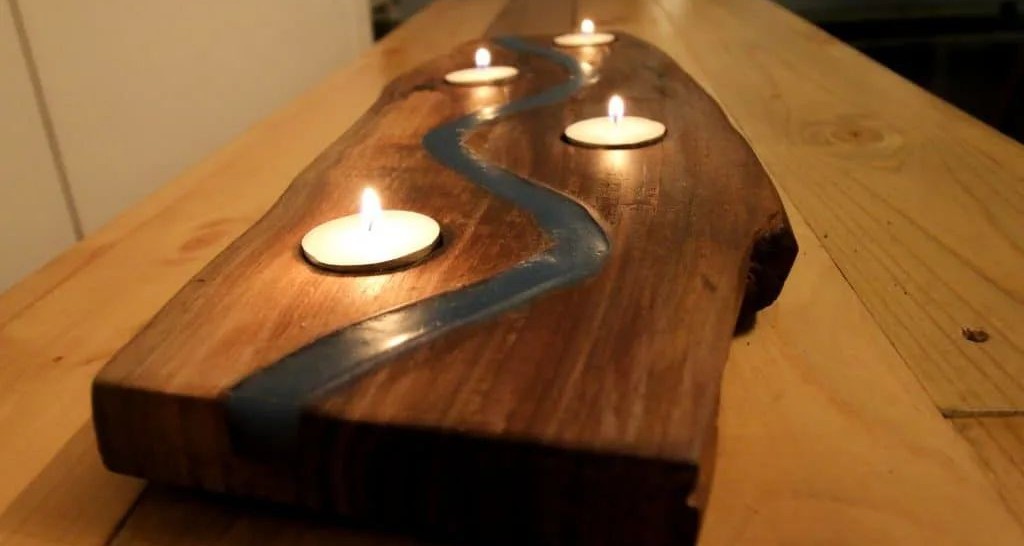
As I gazed upon the rustic wooden candle holder, my eyes landed on the meandering blue vein that seemed to flow like a miniature river through the wood’s natural grain. The aesthetic resemblance was uncanny, wasn’t it? But what you’re looking at is actually a resin river, expertly poured onto a sturdy block of wood. And if you’re feeling crafty, you can replicate this exact design for yourself.
To get started, gather your materials: tealight candles, a bottle of resin, and a reliable block of wood that can withstand the heat of the flames. With these simple supplies, you’ll be well on your way to creating a unique piece of home decor that’s sure to spark conversations.
Dorm Room Wall Decor

Elevate your dorm room’s ambiance with a creative twist – consider adding a layer of resin to give it an extra boost. This budget-friendly approach allows you to get crafty and utilize your wall space in a unique way. To get started, gather basic materials like brushes, canvas, and a drop cloth to protect your workspace. With these essentials, you can create a personalized collage featuring photos with friends and family or even a vision board.
For an added touch of sparkle, simply mix a spoonful or two of glitter powder into the resin before applying it to the canvas. If you’re looking for more DIY inspiration, I’ve got some exciting projects up my sleeve that are sure to delight teen girls like yourself.
Resin Keychain

Get creative with this DIY resin keychain project. Not only is it an easy and fun activity, but it’s also super customizable, allowing you to personalize each keychain with a special message or design. The best part? It’s a great way to create unique gifts for friends and family. To get started, you’ll need some molds: You can use traditional flat keychain blanks or go for something more personalized like letter molds.
With just a few of these DIY resin keychains, you’ll have a stash ready to share with loved ones.
Resin Autumn Leaf Pendant
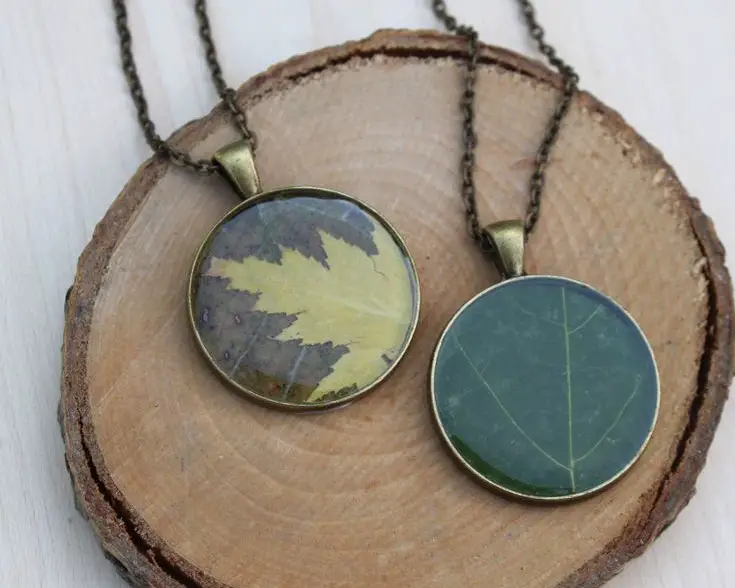
As we’ve already created rings, let’s elevate our crafting game by making a resin autumn leaf pendant. There’s something undeniably charming about the vibrant hues and rustic charm of autumn leaves, don’t you agree? To bring this earthy, rustic chain to life, start by collecting your leaves. Why not make it a fun family activity? Grab the kids and head outdoors for a cool autumn day. As you stroll through nature, encourage them to collect an assortment of leaves.
This will not only keep them engaged but also create a wonderful opportunity for quality time. Once you’ve gathered your leaves, grab some jewelry bezel, and you’ll be well on your way to crafting this stunning pendant. If you’ve saved your leaves, why not try out our DIY leaf candle holder tutorial as well? The possibilities are endless.
Marbled Gold Leaf Resin Oblique Holders
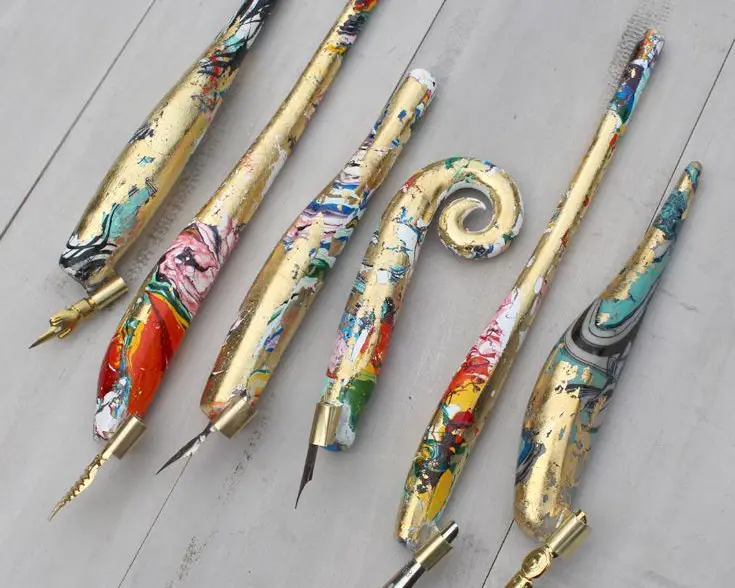
Discover a unique way to spend your leisure time by creating oblique calligraphy holders using resin. It’s an intriguing DIY project that can be accomplished on a lazy summer day. To begin, swap traditional liquid resin for epoxy modeling clay. If you have leftover gold leaf foil from our previous coaster project, this is the perfect opportunity to repurpose it. Once you have your materials ready, take out the calligraphy nib you’ll be customizing and let’s get started.
Maui Fish Hook Resin Necklace
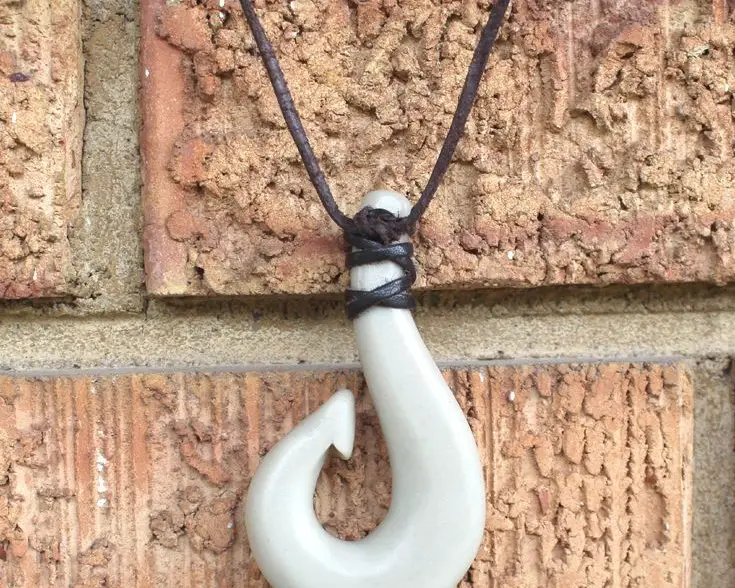
Disney’s iconic characters have long been a source of creative inspiration for craft enthusiasts. Maui’s fish hook from Moana has always fascinated me with its unique design. Why not recreate this captivating piece as a resin necklace? It’s time to revisit your resin clay and get molding. You might be amazed by the uncanny resemblance epoxy clay takes on when it dries, mimicking ceramic textures.
Once you’re satisfied with your creation, grab a leather cord and tie everything together for a stunning finish.
Resin Tree Branch Jewelry Organiser
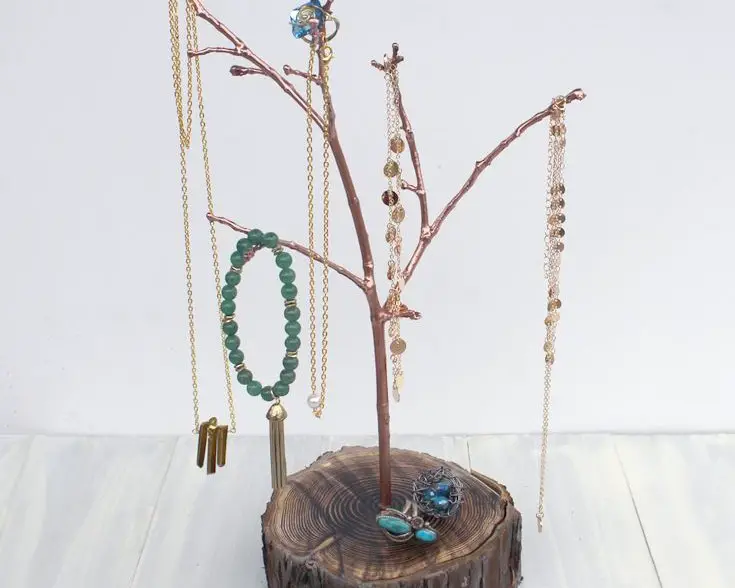
Elevate your jewelry organization game without breaking the bank. Those visually stunning tree-like organizers may be tempting, but the pricey tag can be a major turn-off. However, with some basic sculpting skills, you can create a one-of-a-kind piece using resin, and the best part: it won’t put a dent in your wallet. Start by gathering a log slice as the base, and let your creativity shine. You’ll have a beautifully crafted organizer that’s uniquely yours.
For more inspiring adult crafts, explore our curated collection.
Paper Mosaic Resin Picture Frame
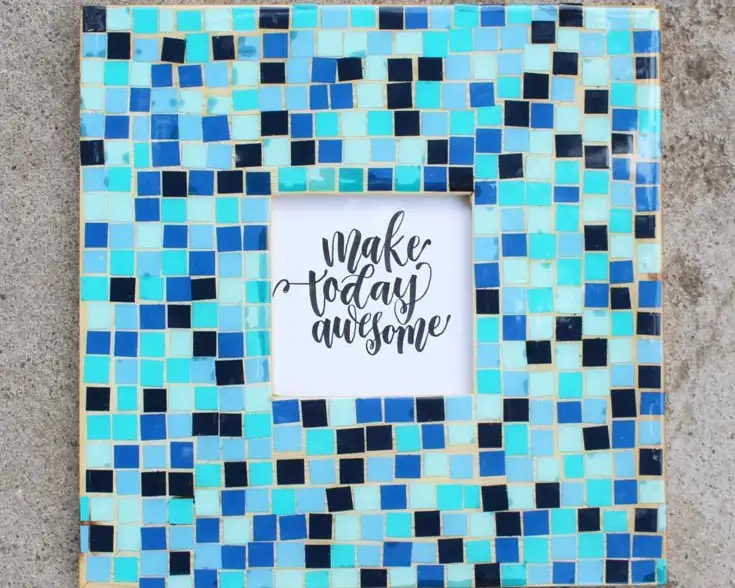
The beauty of mosaic art lies in its intricate design, but reproducing such a masterpiece can be daunting without the necessary tiles. Fortunately, you don’t have to sacrifice perfectly good pieces just to achieve that tile-like aesthetic. A more creative approach involves using resin to craft your desired pattern, allowing for complete customization with the colors of your choice.
To get started, gather the following materials: a wooden frame, various shades of colored cardstock, and a roll of painter’s tape.
Resin Cameo Pins
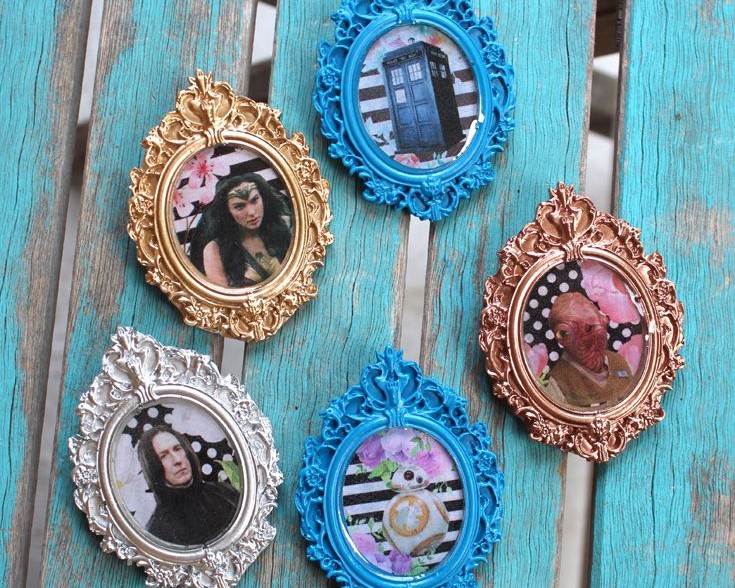
While traditional cameo pins evoke a bygone era, they’re often passed down as treasured family heirlooms. Why not create some unique and playful modern cameos that will delight future generations? Imagine the excitement on your kids’ faces when you reveal Harry Potter or Doctor Who-themed resin cameos. To get started, you’ll need to acquire a vintage cameo pin mold. Before that, decide on the photos you want to use, resize them, and then print them out.
Galaxy Painted Resin Clock
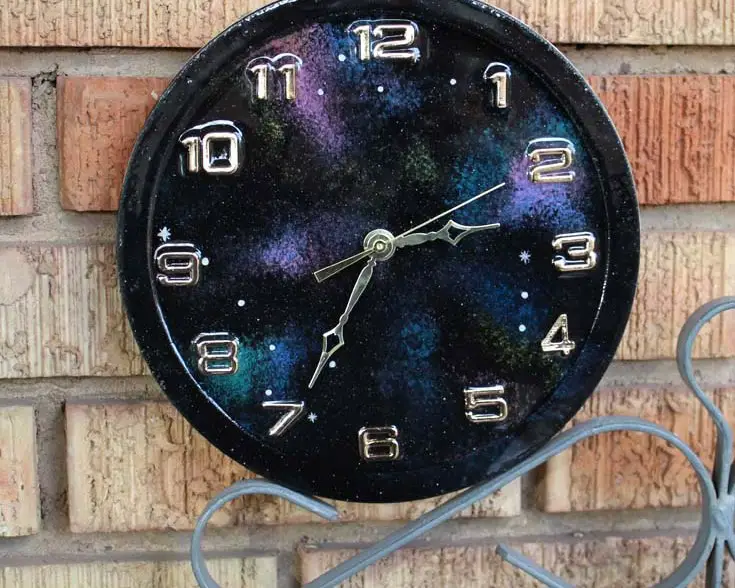
The resin clock’s eerie resemblance to a Doctor Who episode is undeniable. The purple-green-gold glaze has an otherworldly quality that transports me straight into the Whoniverse. As if summoned by the TARDIS, I’m compelled to recreate this cosmic timepiece. To achieve this intergalactic effect, you’ll need clockmaker hardware and self-adhesive numbers from a reliable supplier – the adhesive backing ensures hassle-free application.
Geometric Place Card Holders

Transform your place card and holder game with a simple DIY project that requires just 15 minutes of hands-on time. This clever creation will leave plain and boring options in the dust, plus, you can use these geometric resin holders to display cherished photos, making them an even more meaningful keepsake. To get started, gather your materials: geometric resin casting molds, colored leaf sheets, and craft wire.
With these essentials at hand, you’ll be well on your way to crafting a truly unique and eye-catching holder that’s sure to impress. And if you’ve got some extra wire lying around, why not use it to create a special gift – like the wire ornaments featured in this blog post.
DIY Resin Geometric Wood Bookends
Taking it a step further, let’s put those geometric molds to good use by creating unique resin-wood bookends. With the molds already at your disposal, you’re just a few steps away from crafting one-of-a-kind bookends that will add a touch of elegance to any room. To take it to the next level, feel free to experiment with different colors and textures once the resin has set. You can then use gentle sandpaper to smooth out the surface, ensuring a professional finish.
The best part is, you can make a batch of six or more, perfect for gifting to friends and family or decorating your own personal space.
Resin Cast Geometric Succulent Planters
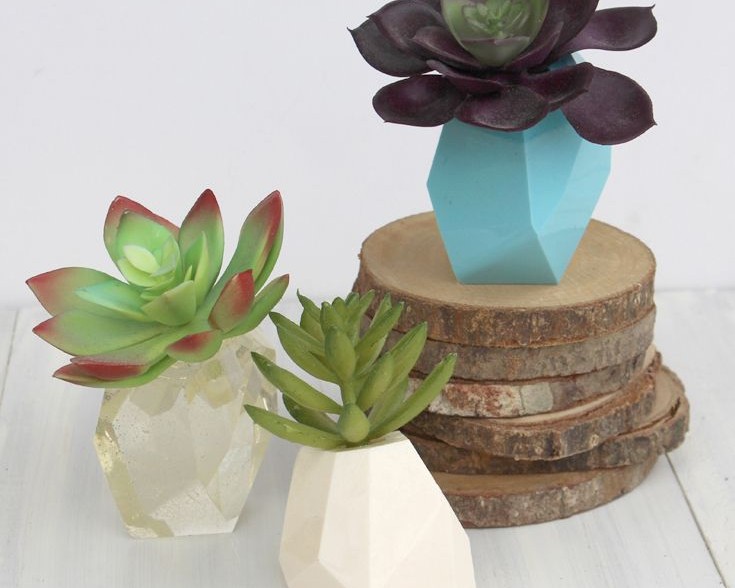
As predicted, working with resin has become an all-consuming passion, hasn’t it? You’re now replacing one household item after another with their resin counterparts, a testament to the medium’s addictive nature. Those geometric molds are proving to be incredibly versatile, too – just take this DIY geometric planter for succulents, which perfectly blends earthy charm from the succulents themselves with an edgy urban-cool from the planters.
If you’re feeling inspired, why not explore further and discover 20 ingenious dollar store planter ideas that will fuel your creativity even more.
Resin Seashell Soap Dish

Take a moment to appreciate the mesmerizing allure of this seashell soap dish, which seems to capture the essence of the ocean’s vastness, the beach’s serenity, and the vibrant colors of the shells. But before we dive into crafting this treasure, let’s start by collecting decorative seashells that are wide enough to cradle soap for our base. Why stop at one? Let’s create dozens!
To get started, gather blue and green dyes, stirring sticks, mixing cups, and disposable gloves to protect your hands from the resin’s sticky grasp. Next, combine the dyes with some added sparkle in the form of glitter, then cast your resin masterpiece and let your creativity shine. If you’re looking for more DIY inspiration, be sure to explore our collection of projects designed specifically for teenagers.
Glitter Resin Tumbler

Have you ever gazed upon the plethora of pricey resin tumblers at your local gift shop? If the idea of crafting one yourself to save a few bucks is music to your ears, then I’ve got just the DIY project for you. To get started, be prepared to stock up on an abundance of glitter – yes, you read that right, a lot. In addition to the sparkly stuff, you’ll also need some glitter paint and painter’s tape to really make this project pop.
And, of course, a basic stainless-steel tumbler like this one is the foundation upon which your masterpiece will be built.
Resin Unicorn Ring Dish
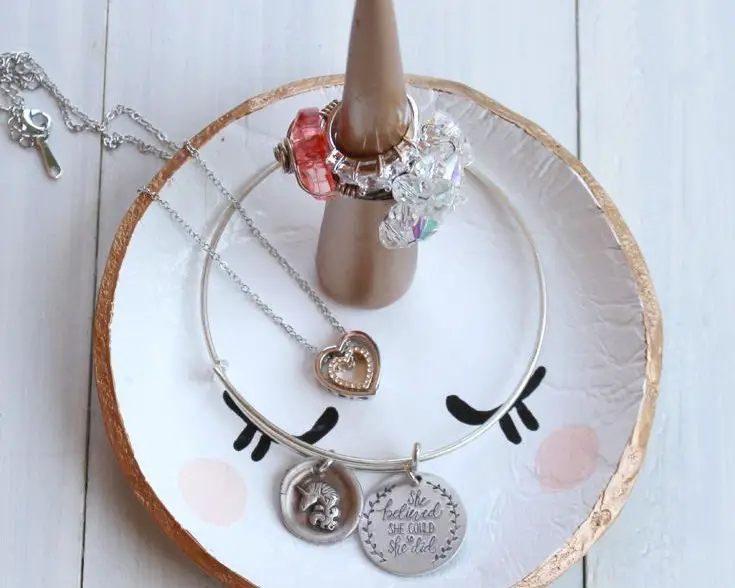
Unleashing creativity, we’re taking unicorns to new heights by infusing them with an extra dash of whimsy – in the form of resin and sparkles. The perfect blend of magic and artistry, this DIY project combines the enchanting world of unicorns with the tactile pleasure of crafting. Get ready to don your gloves and dive into a sea of sparkle, as we set out to create these mesmerizing resin unicorn rings.
DIY Resin Notebook
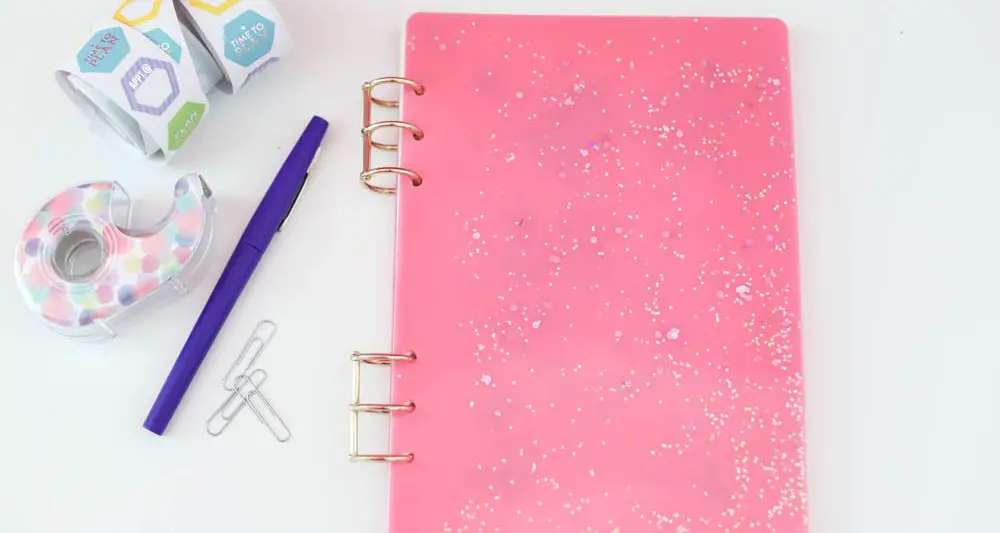
As the new school year approaches, the excitement is palpable – but so is the sense of routine setting in. However, there’s a way to make this transition more enjoyable: crafting a unique DIY resin notebook. To get started, you’ll need a notebook mold, notebook rings, and paper. If you’re feeling adventurous, consider adding some color with dye. Once your supplies are ready, it’s time to set the resin in motion.
After that, unleash your creativity by decorating the notebook with embellishments and stickers – the more, the merrier.
Resin Crystal
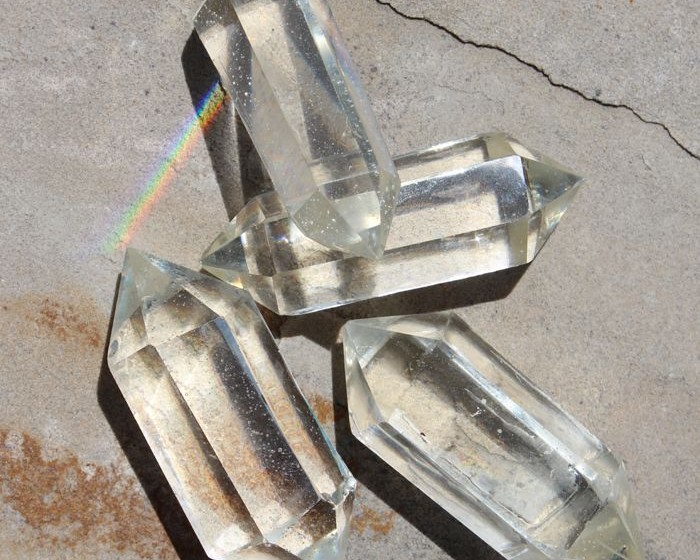
Crafting with crystals has been known to possess remarkable therapeutic benefits. The process of transforming resin into a crystal-inspired creation is an incredibly soothing experience. As you gaze upon the finished product, holding it up to the light allows for a mesmerizing display of rainbows and colors dancing across its surface. Not only does this art form provide a sense of accomplishment, but it can also be repurposed as a beautiful paperweight or decorative piece.
Simply start by securing your resin crystal mold from here, and let your creative journey begin.
Resin Succulent Embellished Frame
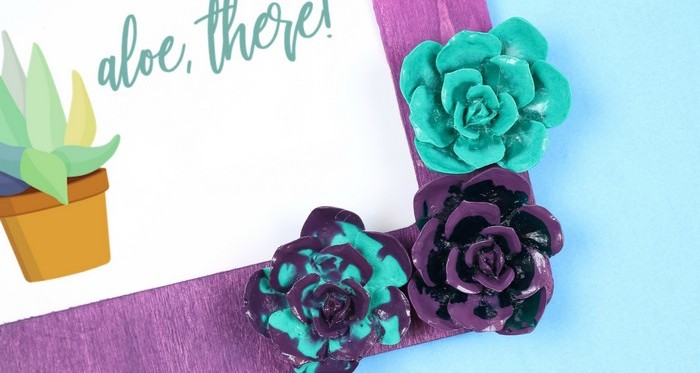
Imagine transforming ordinary objects into extraordinary works of art with the magic of resin succulent molds. These molds are not for coating real succulents, but rather for creating unique decorative pieces. By layering different colored dyes within the molds, you can achieve stunning swirl patterns that add a touch of elegance to any setting.
The possibilities are endless – use them as embellishments to enhance your favorite frames or craft projects, or simply display them proudly on their own. Whether you’re an experienced crafter or just starting out, resin succulent molds offer a fun and creative way to express yourself.
Resin Drawer Or Door Pull
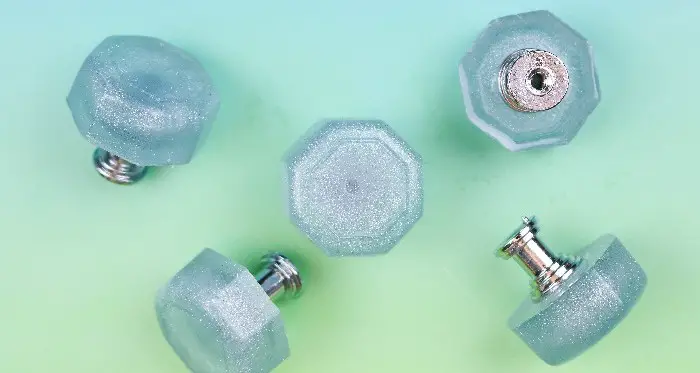
Resin doorknobs have been a staple in DIY projects for quite some time now, and it’s easy to see why. With the ability to experiment with colors, patterns, size, and more, creating one is an incredibly versatile and fun project; the possibilities are truly endless, as you can use almost any mold at your disposal to set the resin.
Of course, a knob base is also necessary for completion, but after that, it’s simply a matter of attaching the doorknob and stepping back to appreciate the burst of color and creativity this little decor piece brings to an entire room.
Resin Bookmarks
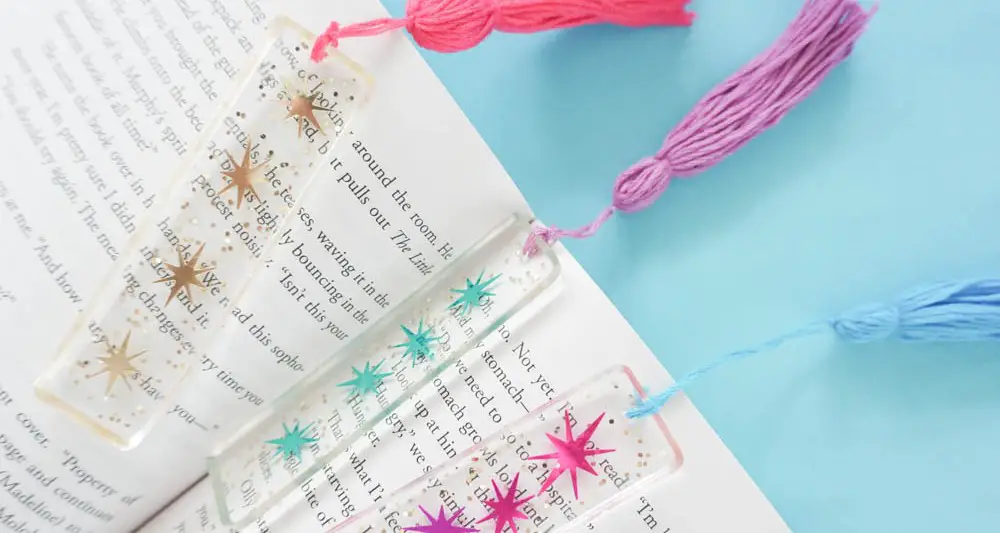
Without any list of DIY projects being truly complete, we mustn’t forget the humble bookmark. That’s why I’m excited to share these easy-to-make DIY resin bookmarks that are sure to delight. But will they really be as simple to create as they seem? The answer is a resounding yes. With just a few basic supplies and some straightforward instructions, you’ll be whipping up your own bookmarks in no time.
A little secret I’ll let you in on: having a can of mold release spray on hand will make the process even smoother. Not only will it simplify removal from the molds, but it’ll also save you the hassle of worrying about chipping those delicate corners. And to put the finishing touches on your new bookmark, simply add a sassy tassel and you’re good to go.
Resin Glitter Earrings
As our collection of handmade accessories has grown to include resin rings, bracelets, and pendants, it’s time to complete the set with a pair of sparkly glitter earrings. Unlike many others available in stores, which often feature metal, plastic, or unconventional materials like feathers, our resin earrings offer a unique touch. By embracing this trend and not compromising on sparkle, you’ll be well on your way to creating a stunning accessory that’s truly one-of-a-kind.
Rainbow Resin Glitter Earrings
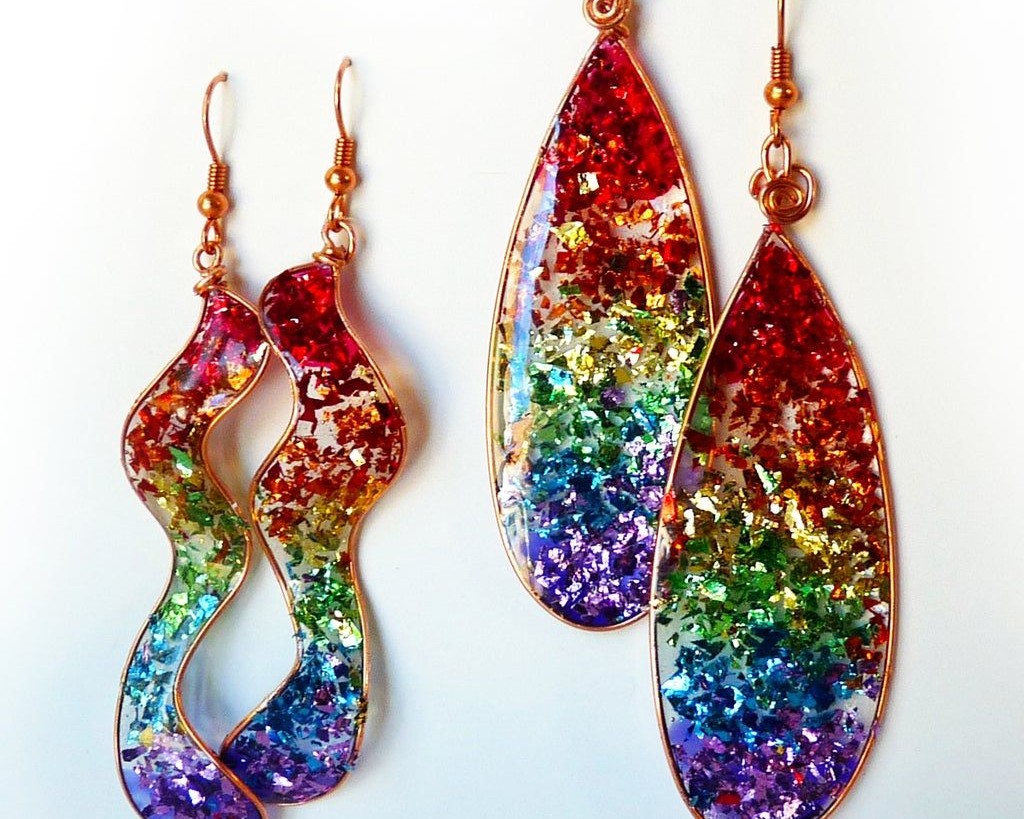
The DIY trend continues. Our next project features not one, but multiple resin earrings that shine bright with glitter, sparkle, and a kaleidoscope of rainbow colors. If you’re already familiar with crafting basics, you likely have everything you need – just remember to stock up on earring blanks and the full spectrum of colorful hues required for this dazzling design. And if you’re looking for more creative projects to bring in some extra cash, check out our curated collection.
Pressed Flower Resin Jewelry
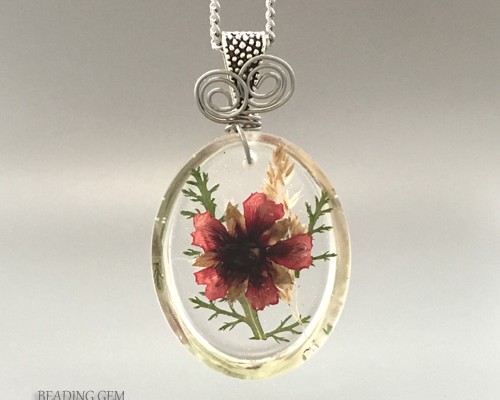
Given the success of incorporating unconventional materials like sprinkles and leaves into jewelry designs, why not take it a step further with pressed flowers? It’s an idea that’s sure to bloom. To get started, you’ll need a substantial supply of pressed flowers – either purchase them at your local craft store or create them yourself at home once you’ve settled on the color of dye you’ll be using. Don’t forget to grab some toothpicks along the way.
These tiny tools will aid in positioning and adjusting the flowers once the resin is poured, helping to smooth out any unwanted bubbles or folds that may form.
DIY Resin Hair Clips
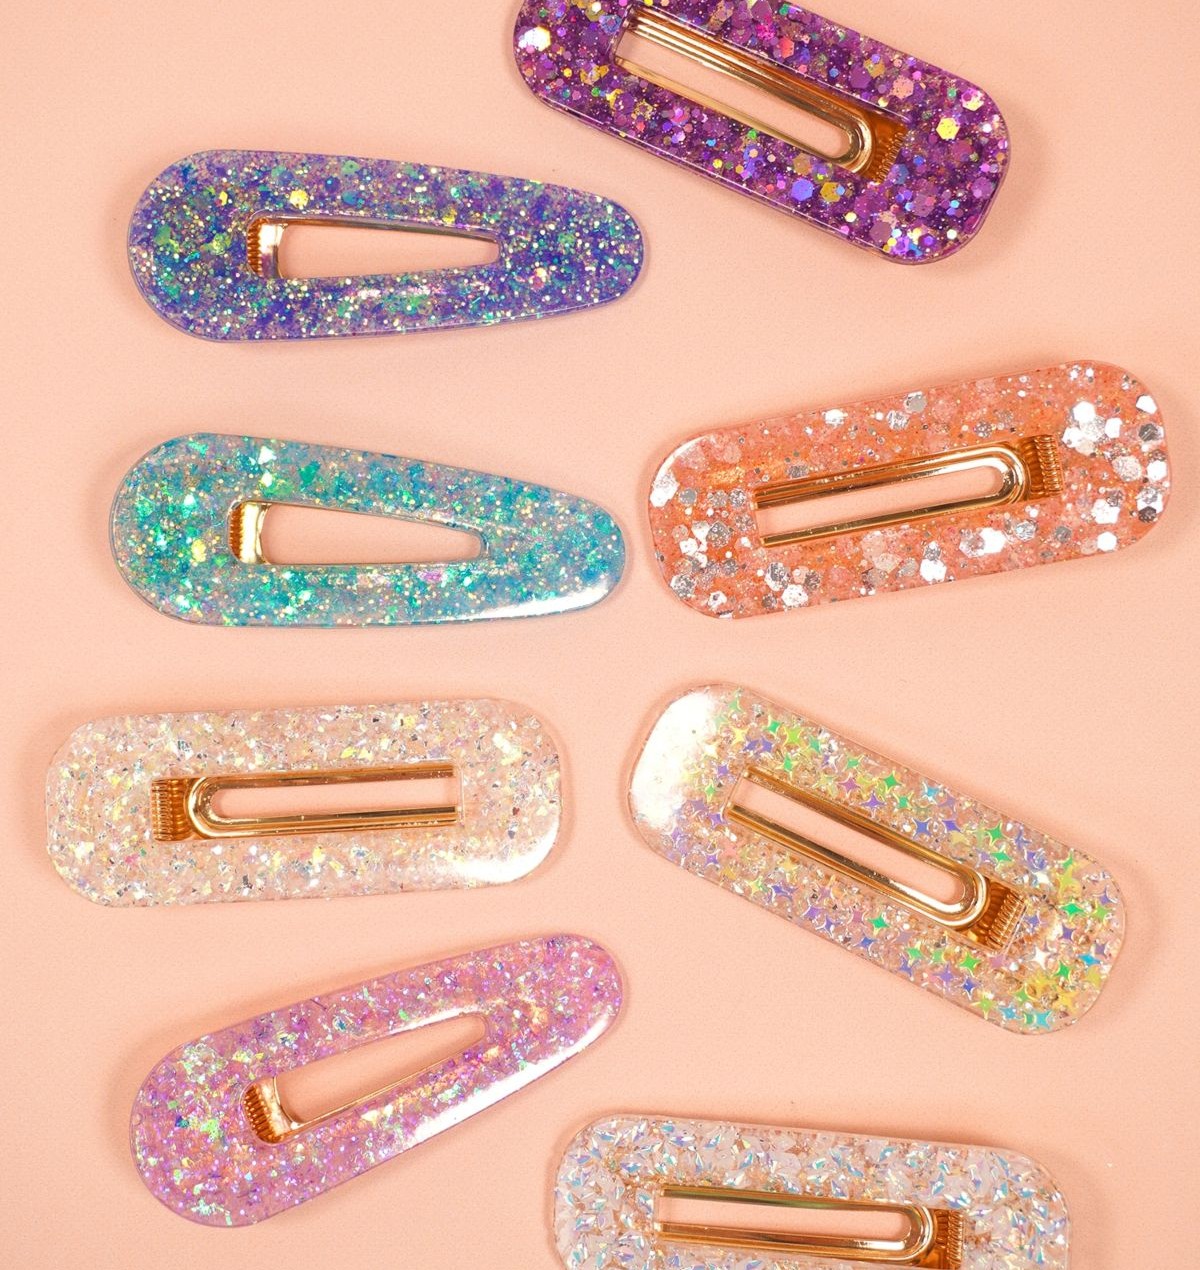
Transforming ordinary hair clips into dazzling, sparkling accessories is an upcycling project that’s hard to resist. To get started, you’ll need silicone hair clip molds or bobby pin blanks – both options will yield stunning results. Once you have your chosen mold, use toothpicks or tweezers to arrange your sparkles and mix-ins with precision. When it’s time to pour in the resin, a syringe is a great tool for avoiding messy overspills.
And if you’re looking for more creative ideas that are sure to delight girls of all ages, be sure to explore our collection of cute crafts.
3 Tier Resin Tray
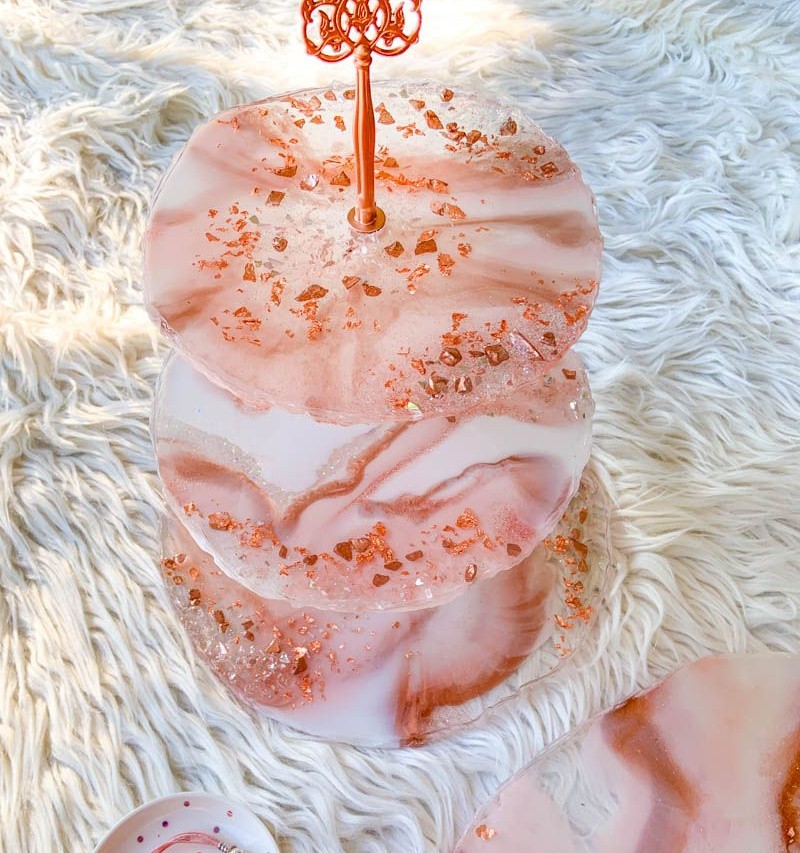
Building upon your existing resin tray-making skills, we’re now taking it up a notch by creating not one, but three tiers of trays. This time, we’re forgoing traditional molds in favor of a silicone mat, allowing for a more hands-on and creative approach. With some simple steps and a dash of patience, you’ll be able to craft three rustic-chic trays with minimal mess and fuss.
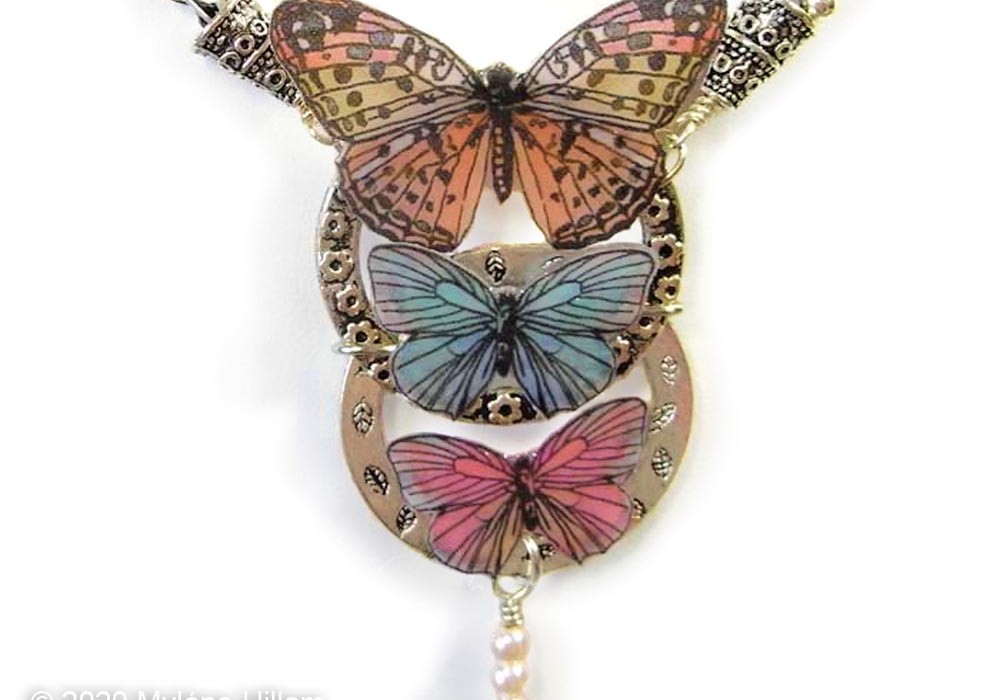
Resin Comb And Mirror
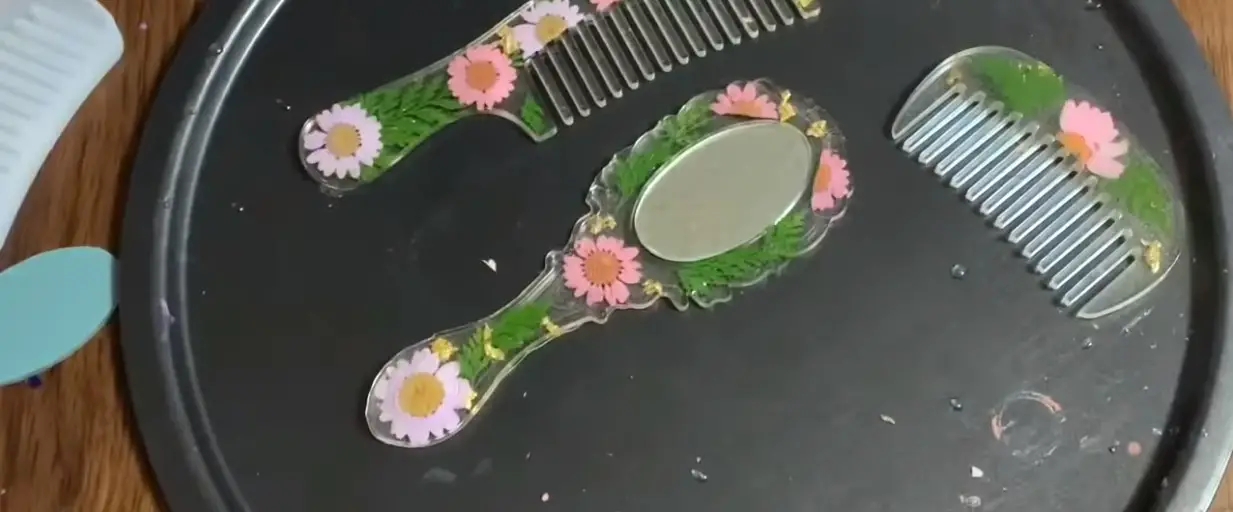
As I delve into this intriguing project, a hair comb and mirror set caught my attention – a mesmerizing fusion of flowers, leaves, sparkles, and glitter all within a single resin mold. The prospect of combining these elements in a harmonious blend is undeniably captivating. To facilitate the creative process, it’s essential to acquire a high-quality comb and mirror mold set from a reputable supplier.
Rest assured that this set includes an accurately sized mirror piece, ensuring you’re well-prepared to tackle the project. Once you’ve procured the necessary materials, simply pour the resin into the mold, add your desired embellishments, and allow it to dry completely before carefully removing the pieces.
Resin Bowl
Imagine setting your kitchen island aglow with a stunning resin bowl that not only serves a purpose but also doubles as a beautiful centerpiece. Picture it filled with fragrant potpourri or a bouquet of fresh limes, their citrusy aroma wafting through the air. The pièce de résistance: A delicate rim adorned with peridot stones, adding an extra layer of visual interest to this already gorgeous piece. And the best part.
You have complete control over the design, choosing from a range of shapes, sizes, and colors that perfectly complement your home’s aesthetic. If you want to take it up a notch, simply add some pressed leaves for a pop of natural beauty, effortlessly capturing the essence of the great outdoors.
DIY Coral And Shell Resin Bangles
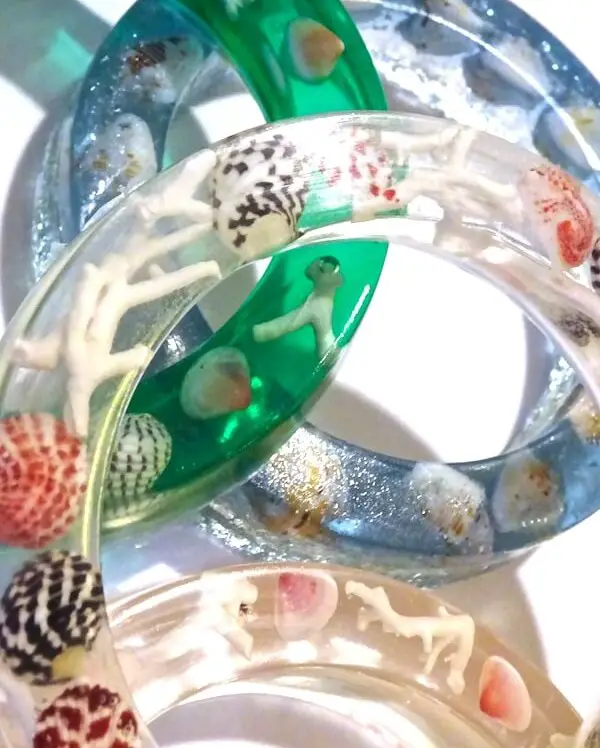
These statement-making bangles are truly one-of-a-kind pieces that will undoubtedly make you stand out from the crowd. To create this unique DIY project, you’ll need to dig into your collection of seashells and also acquire a bangle resin mold from the specified source. The set includes six different size molds, allowing you to craft bangles that suit various purposes – whether it’s for showcasing at the beach, wearing to a party, or simply adding a touch of coastal charm to your everyday look.
Resin Food Magnets DIY
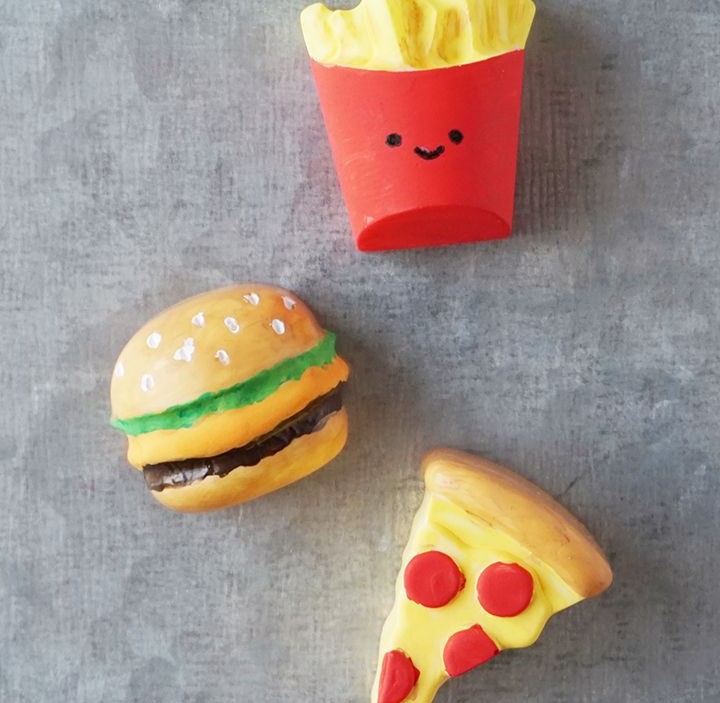
While resin magnets may not be the first thing that comes to mind when it comes to decorating your kitchen or refrigerator, they’re a great way to add some personality to your space. To get started, I recommend having at least half a dozen of these magnets on hand, which will give you a solid foundation for creating a unique and eye-catching display. Of course, the key to making resin magnets truly stand out is in the details.
With a little practice and patience, you can learn to paint and detail your magnets to look like real food – no goopy messes here. As you get more comfortable with the process, you’ll find yourself whipping up dozens of these magnets for friends and family. So why not start crafting today? Grab some silicone food molds and let your creativity shine.
DIY Resin Photo Holder Or Stand

Get ready to shine with another creative DIY project. This time, we’re combining the elegance of gold leaf foil with the sparkle of glitter and the luster of gloss. To start, mix your resin with the gold foil, adding an extra pinch of magic with some added glitter. Pour the mixture into a mold and let it set. Meanwhile, gather a packet of wire photo clips, which will be instrumental in bringing this project to life.
Faux Sea Glass Wall Hanging
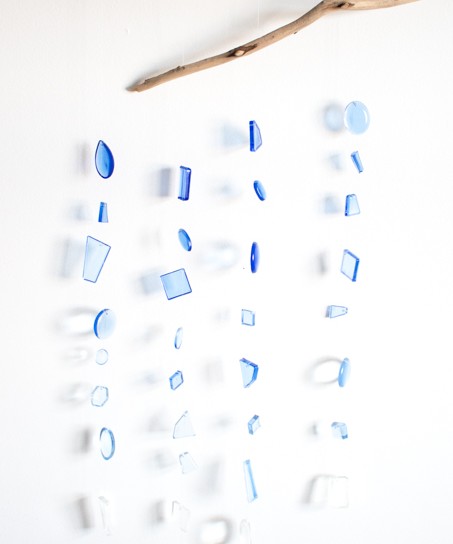
The allure of this craft project lies in its intricate details. The tiny resin shapes, infused with color, add a whimsical touch as they dangle from above. Meanwhile, the rustic branch, reminiscent of a driftwood treasure, lends an air of natural elegance. Perhaps what I adore most is the harmonious balance between these two elements.
This piece would be mesmerizing when displayed outside on your front porch, its gentle swaying in the breeze evoking a sense of serenity, much like a silent wind chime.
DIY Dragonfly Wind Chimes

The elusive nature of dragonflies has always fascinated me, as they seem to effortlessly evade our attempts to observe them up close. Their ethereal beauty is truly captivating, making it tempting to want to capture one in a jar and examine its intricate features. However, I understand the importance of respecting these creatures’ freedom, so instead, we can create a whimsical dragonfly-inspired wind chime using resin and other materials.
To get started on this project, gather your supplies, including the dragonfly cookie cutter, fishing wire, and any other creative elements you’d like to incorporate.