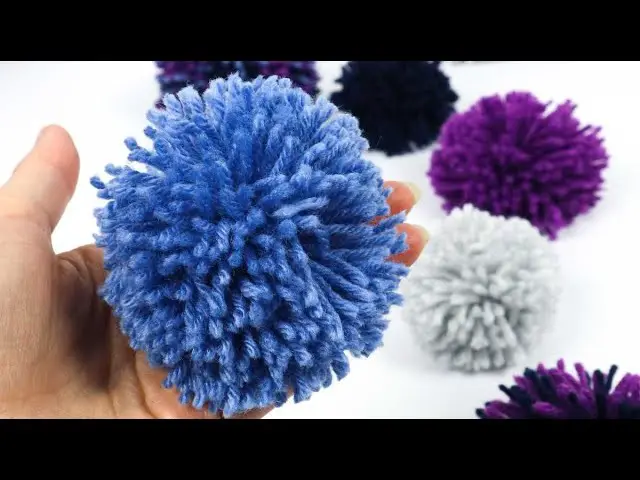
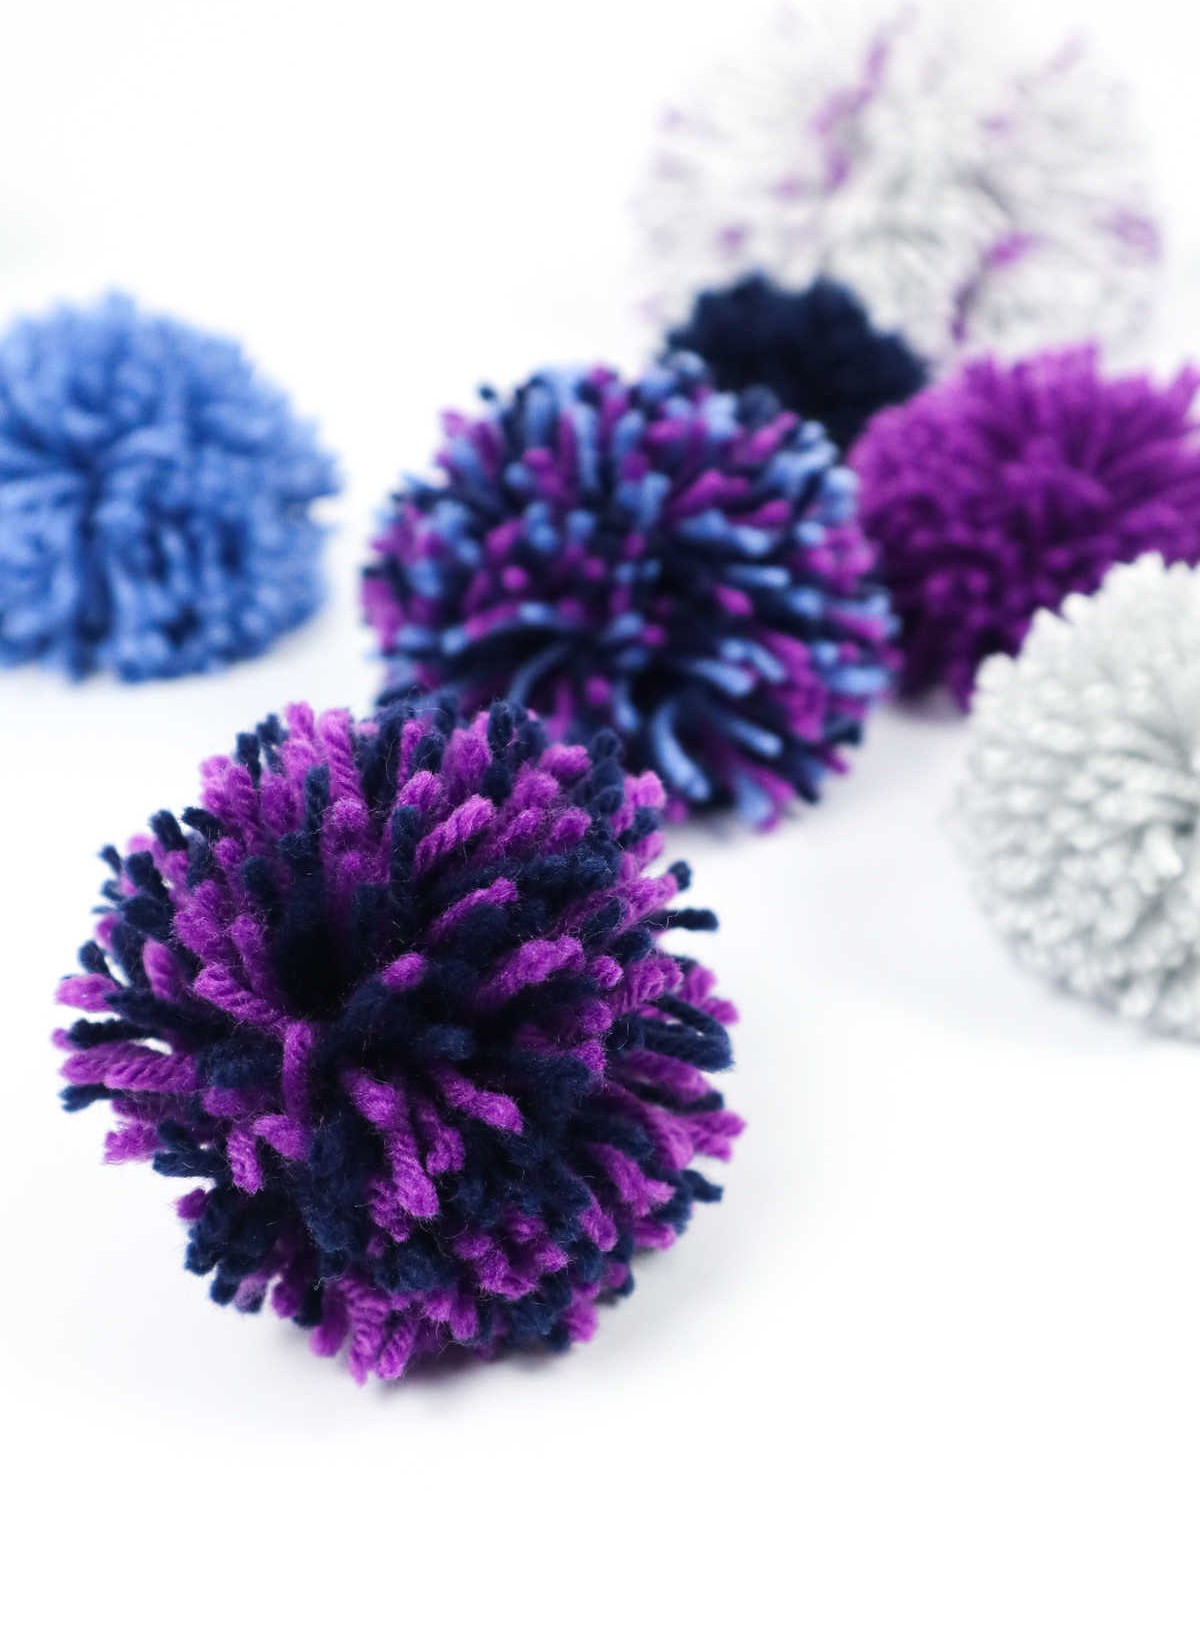
Making yarn pom poms is a fun and accessible project that can bring a burst of color and creativity to any craft or clothing project. This DIY activity is suitable for kids, teens, and adults alike, and the best part? It’s incredibly easy and inexpensive to make your own!
Pom poms are a craft staple that can add a touch of whimsy to anything from hats to scarves to bags. And once you start making them, you’ll be hooked – they’re so versatile and fun to create.
One of the best things about making your own pom poms is how easy it is. With just an hour or two of dedicated time, you can whip up dozens of these colorful little balls and store them away for future projects.
What’s more, when you make your own pom poms, you get to customize every aspect of the process. Experiment with different sizes, colors, shapes, and fluffiness levels to create a unique look that’s all your own.
Supplies and Tools You’ll Need
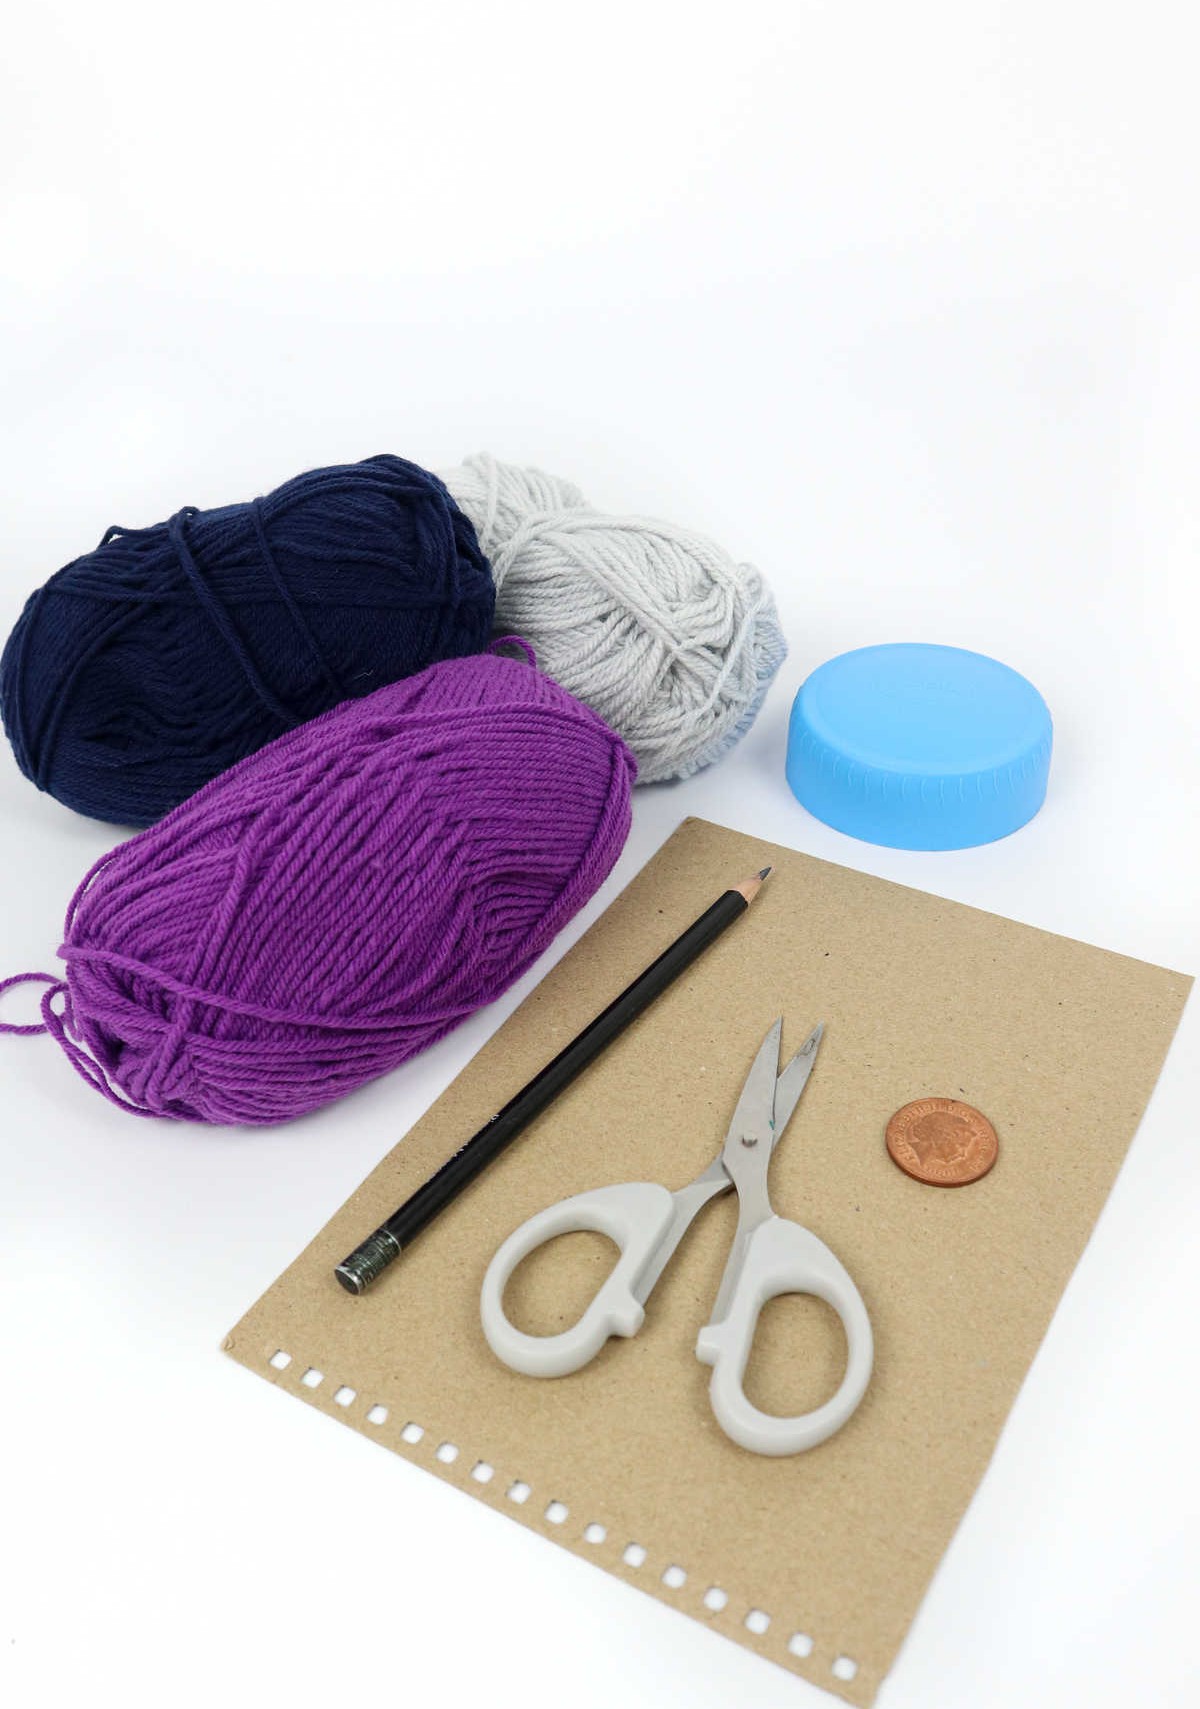
With minimal investment, you can craft your own pom pom maker using everyday materials. A simple cardboard creation is just as effective as a store-bought one. To get started, gather these essential supplies: a piece of sturdy cardboard, an empty shaker lid to serve as the base, a pencil for marking and shaping, scissors for cutting the yarn, some knitting yarn in your preferred color, and a small coin for creating the center of the pom pom.
With these basic materials at hand, you’re ready to start crafting your very own DIY pom pom maker.
Watch: DIY Yarn Pom Poms (Step-by-Step)
How to Make Yarn Pom Poms
With your arsenal of crafting essentials at the ready, it’s time to start creating those fluffy little wonders – pom poms! Begin by putting your materials to good use.
Step 1
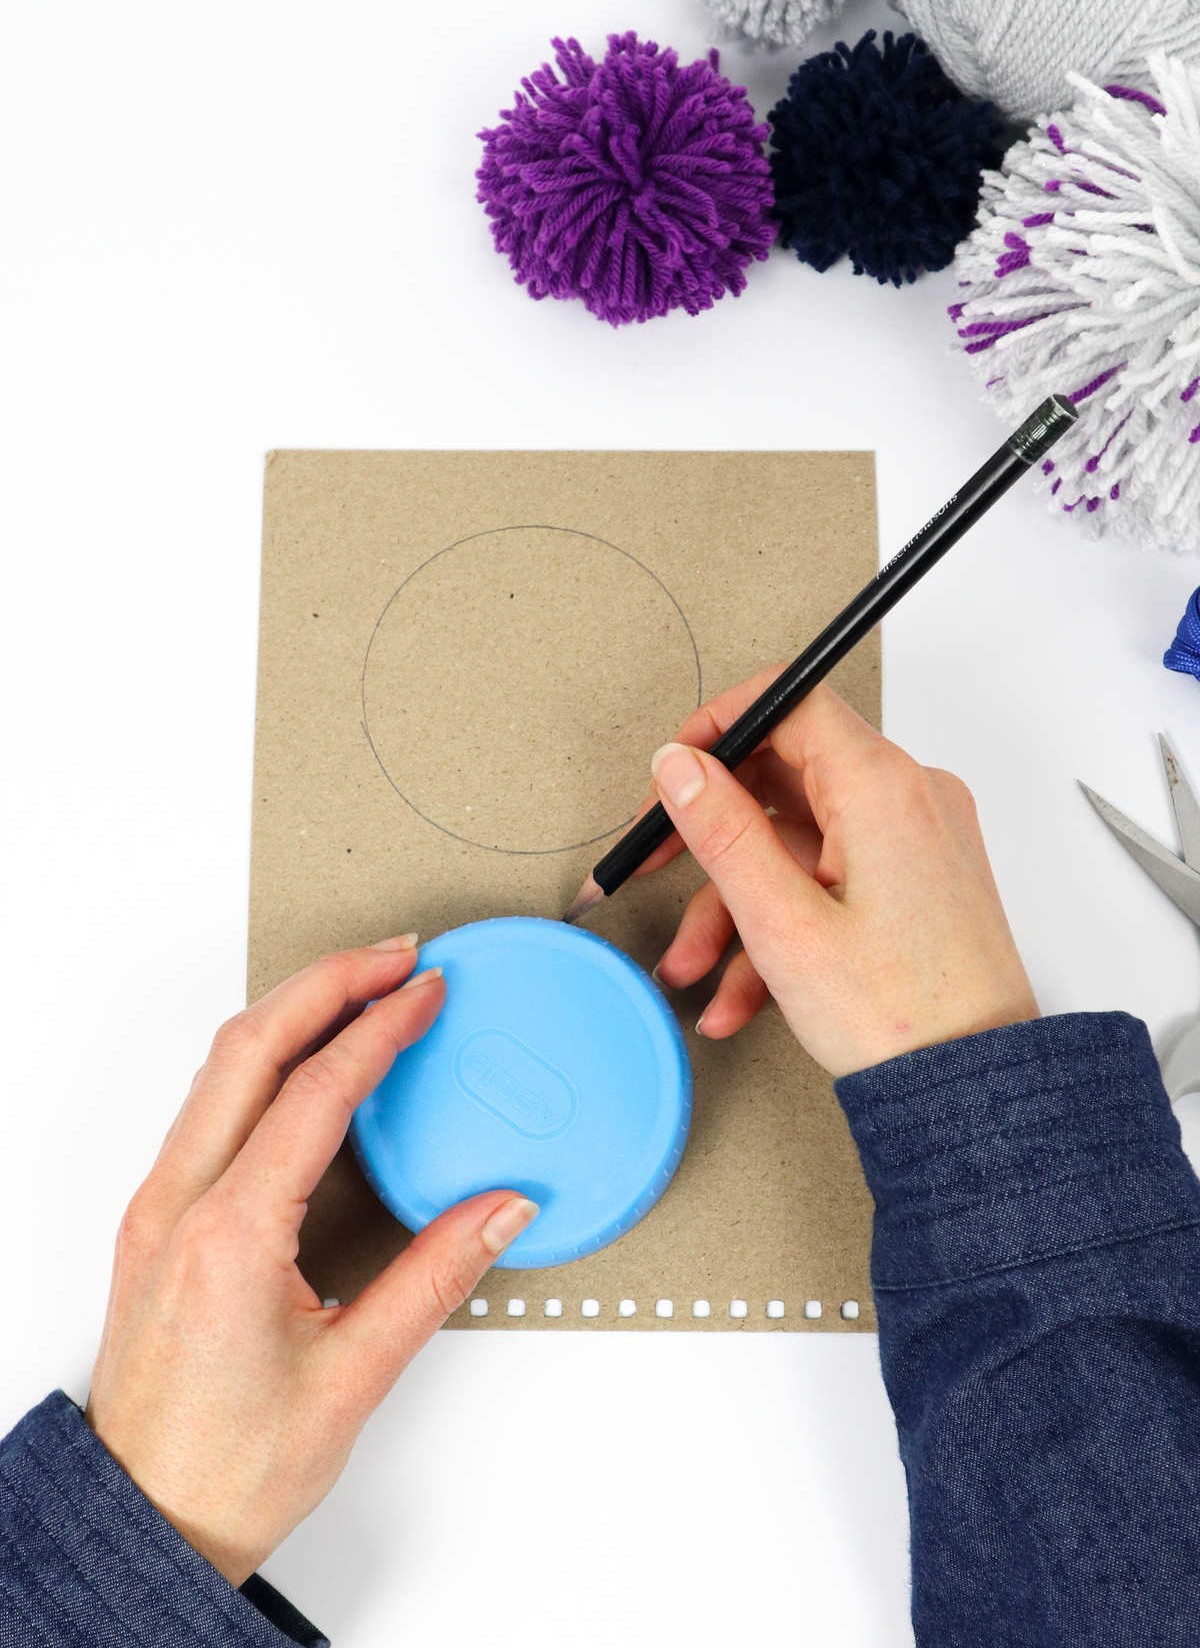
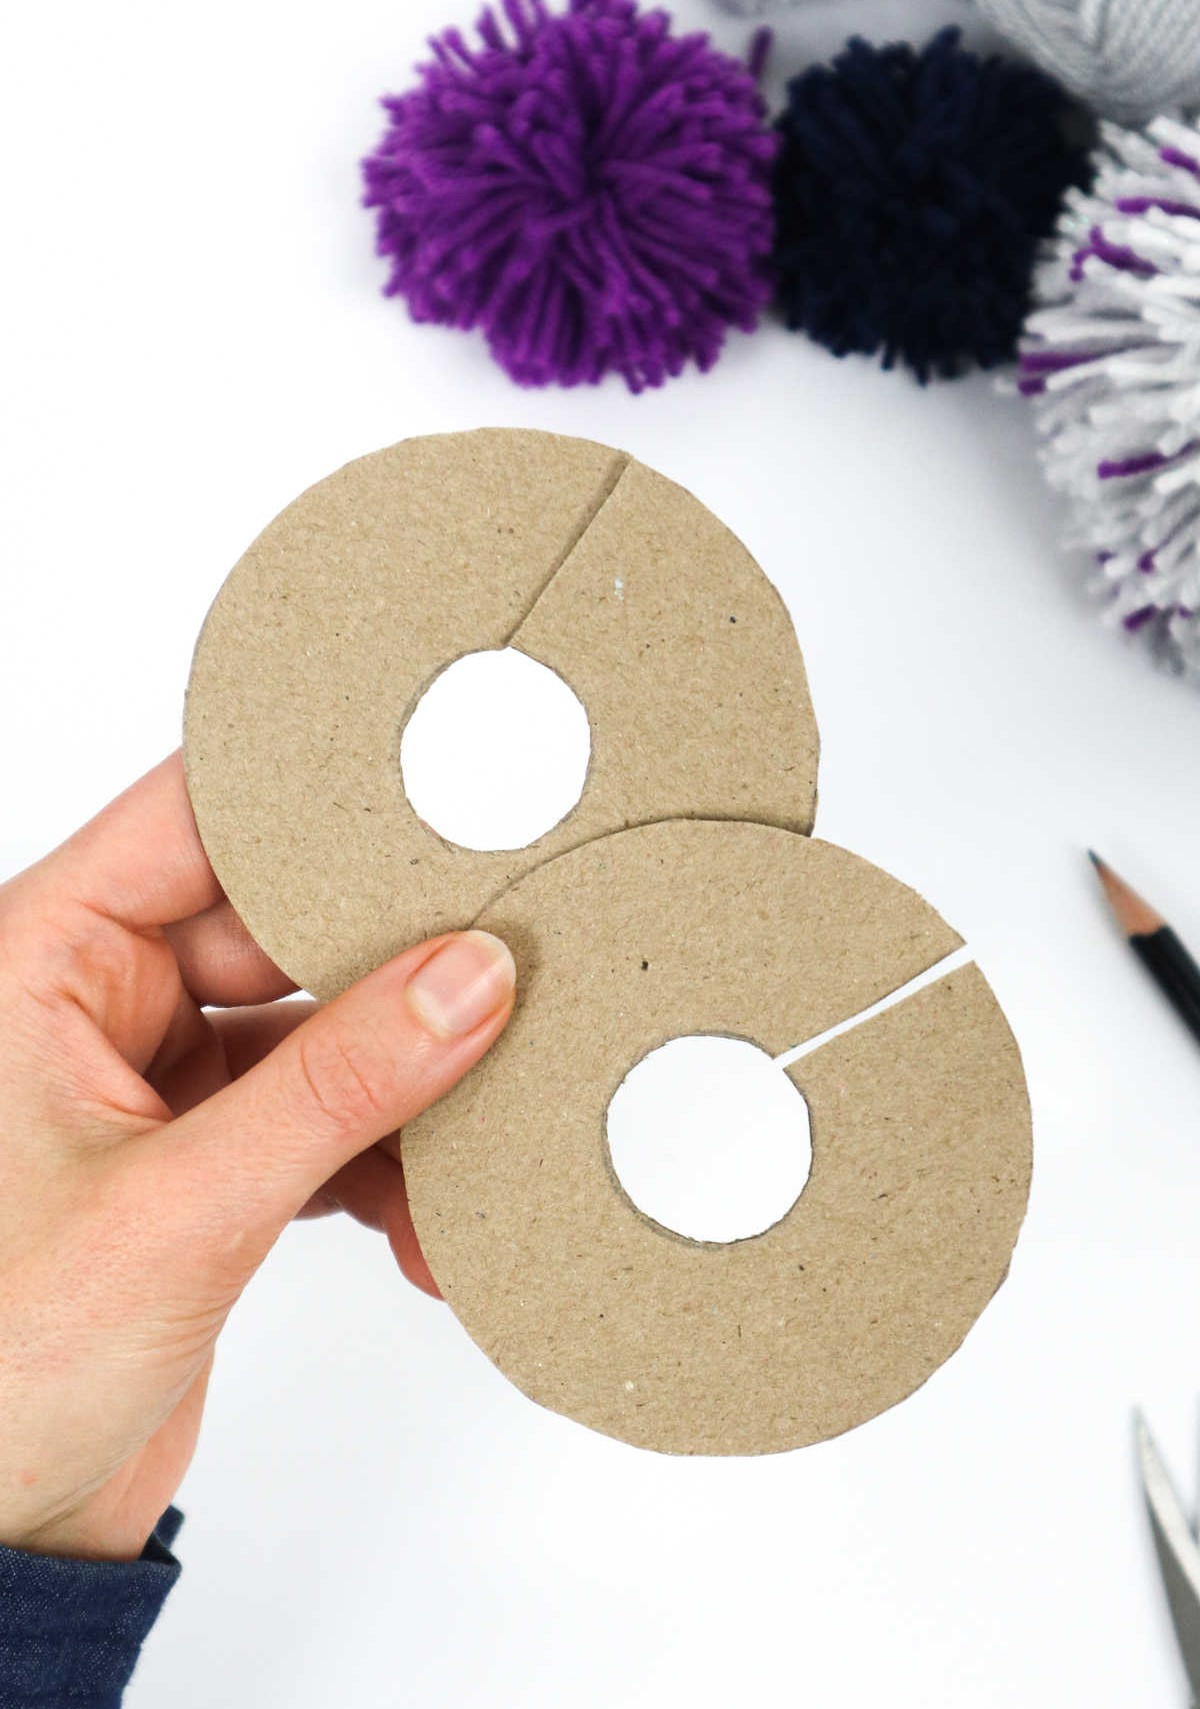
To begin, take a cardboard sheet as the base. Cover it with a lid, bowl or any other container that serves as a size reference. Use a pencil to create an outline around the perimeter of the cardboard. Repeat this process by drawing another outline around the same area, effectively creating a template. This will be your guide for measuring and cutting out the desired shape.
Step 2
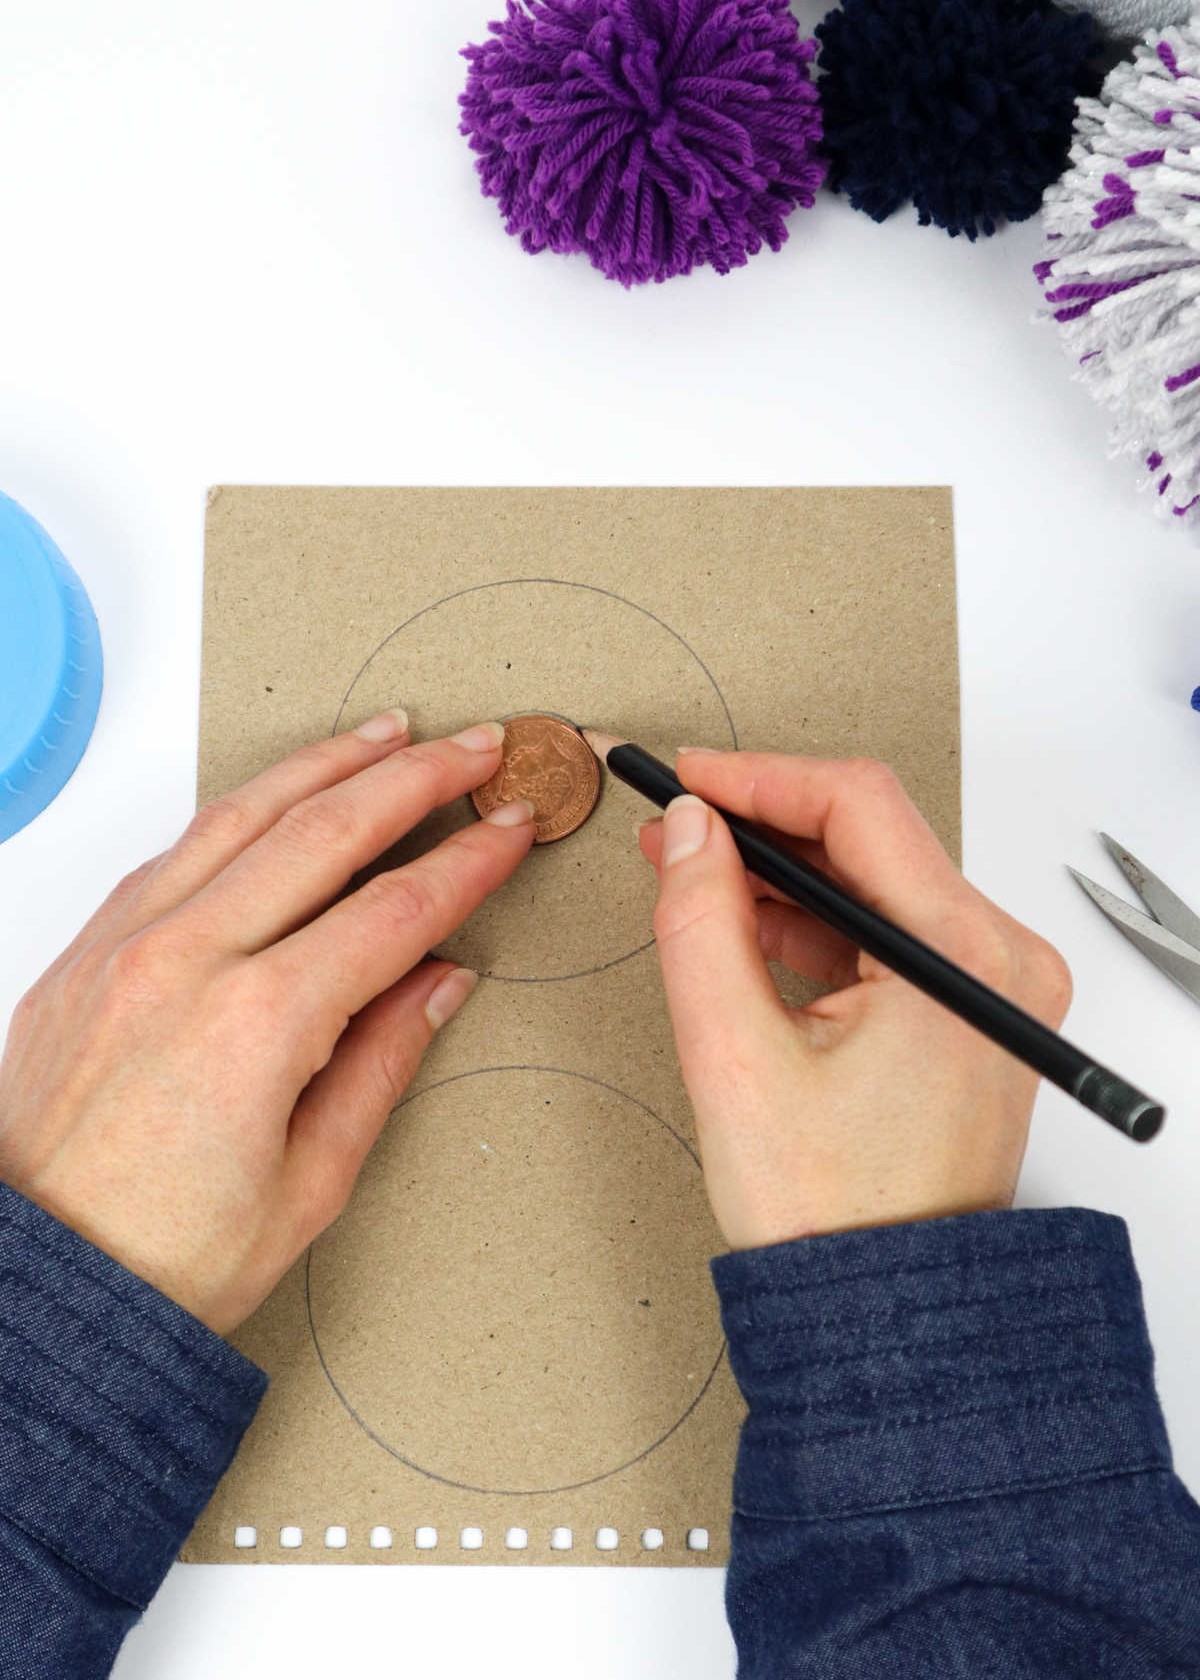
Visualize the coin’s placement by drawing a continuous line around itself within the previously drawn circular boundary. This will create a distinct inner circle that is smaller than the outer one.
Step 3
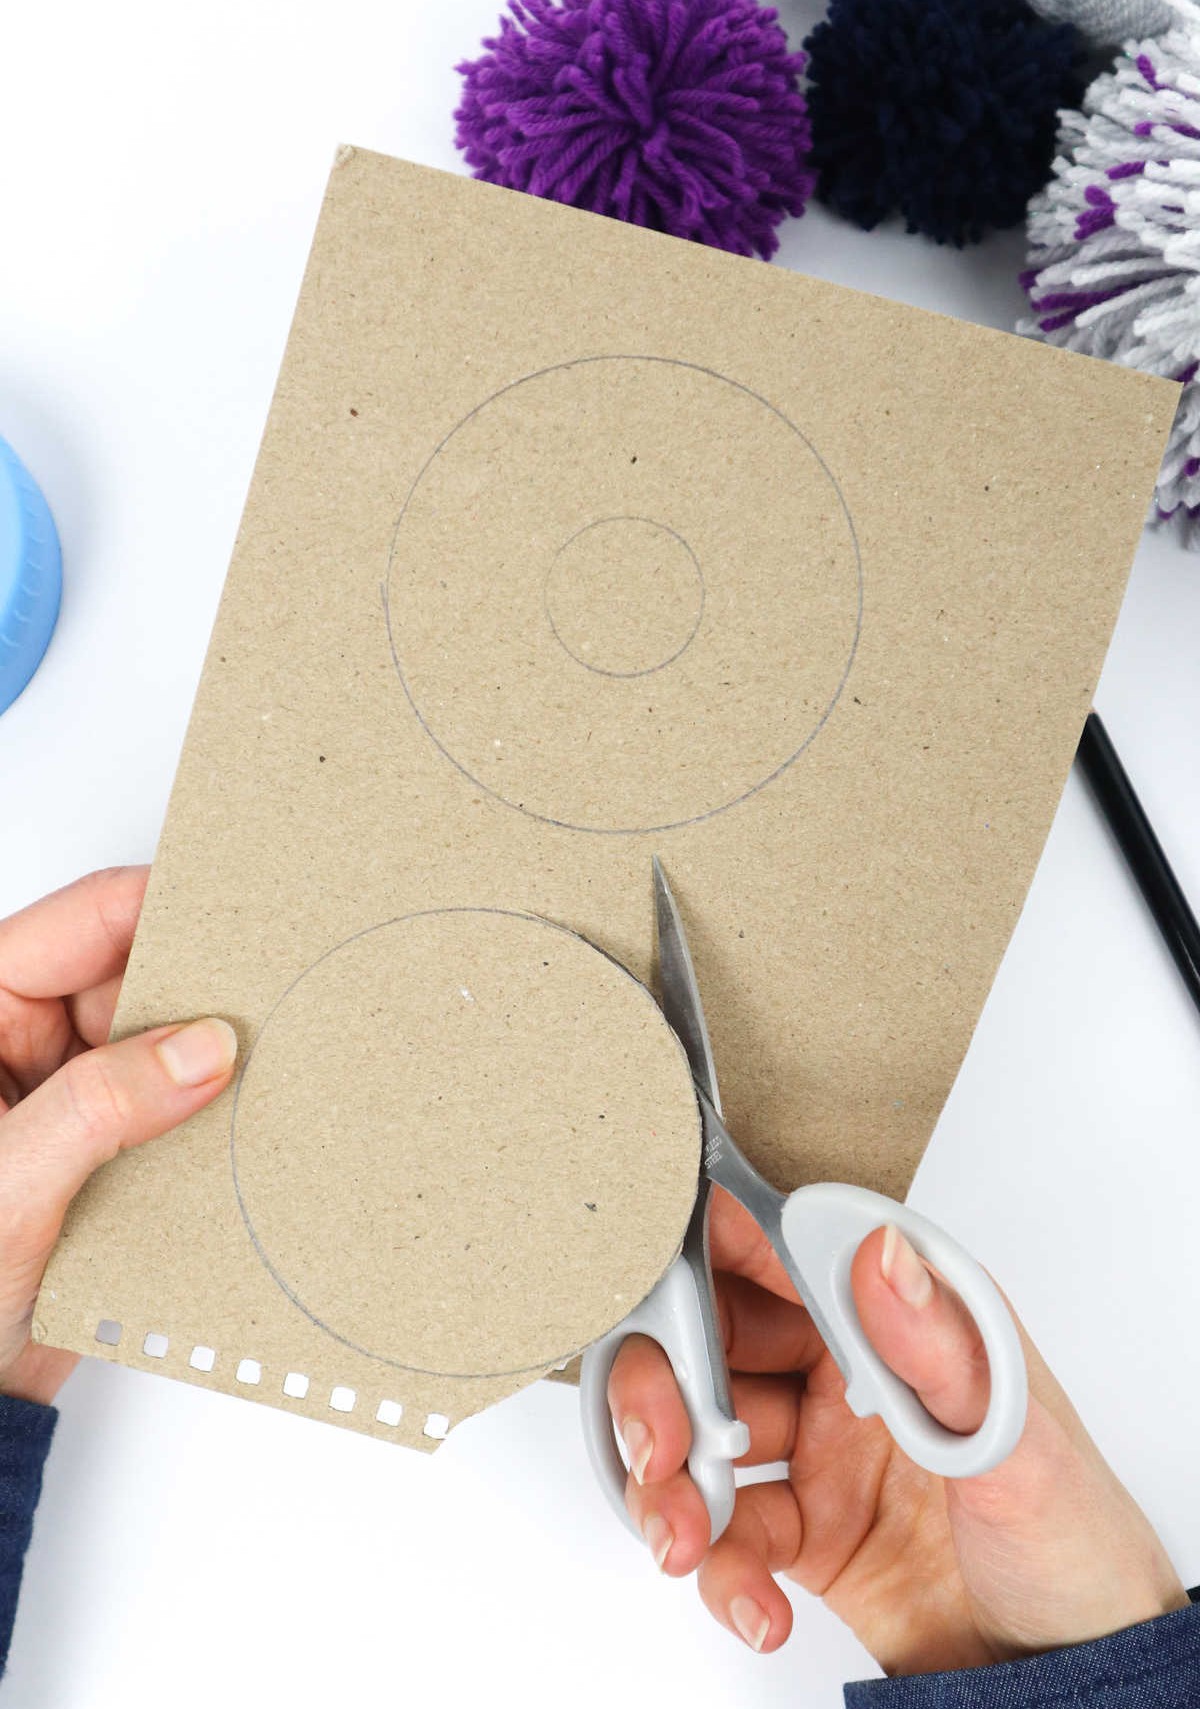
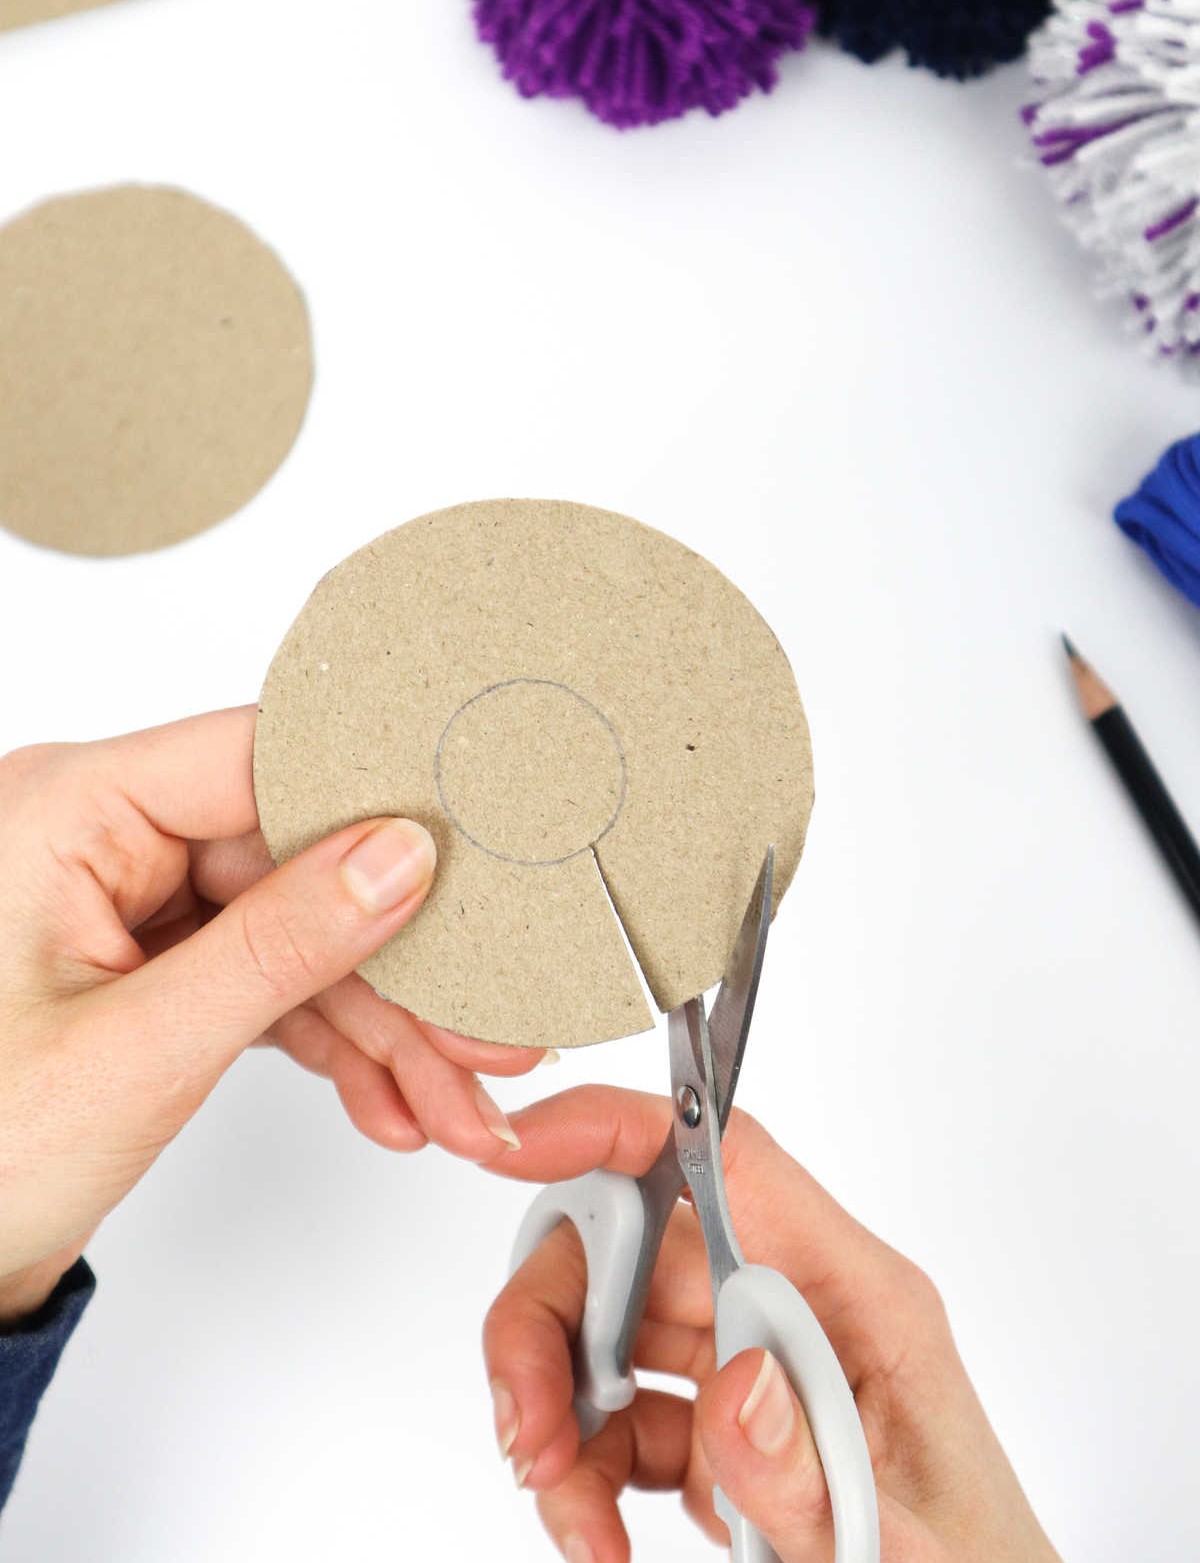
To detach the design from its backing, simply use scissors or a craft knife to create a diagonal incision through the center of the outline, cutting all the way to the inner edge. This will allow you to carefully pry the design away from its adhesive backing and remove it completely.
Step 4
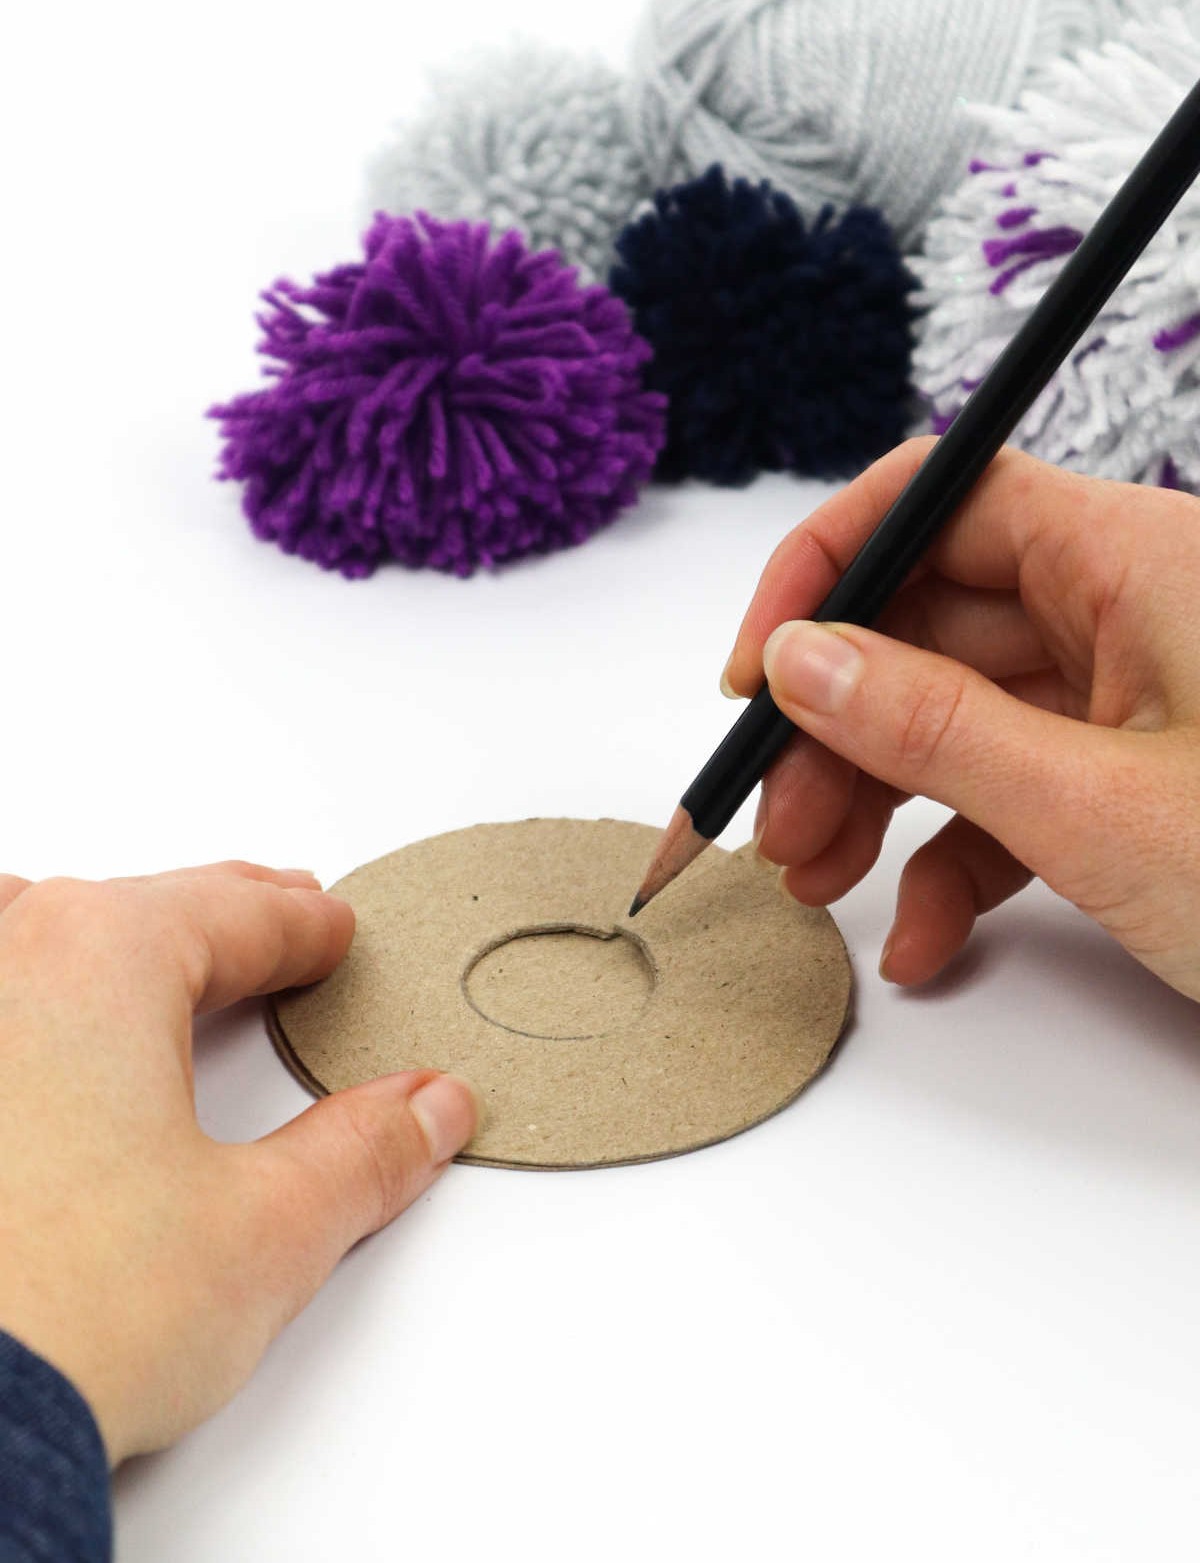
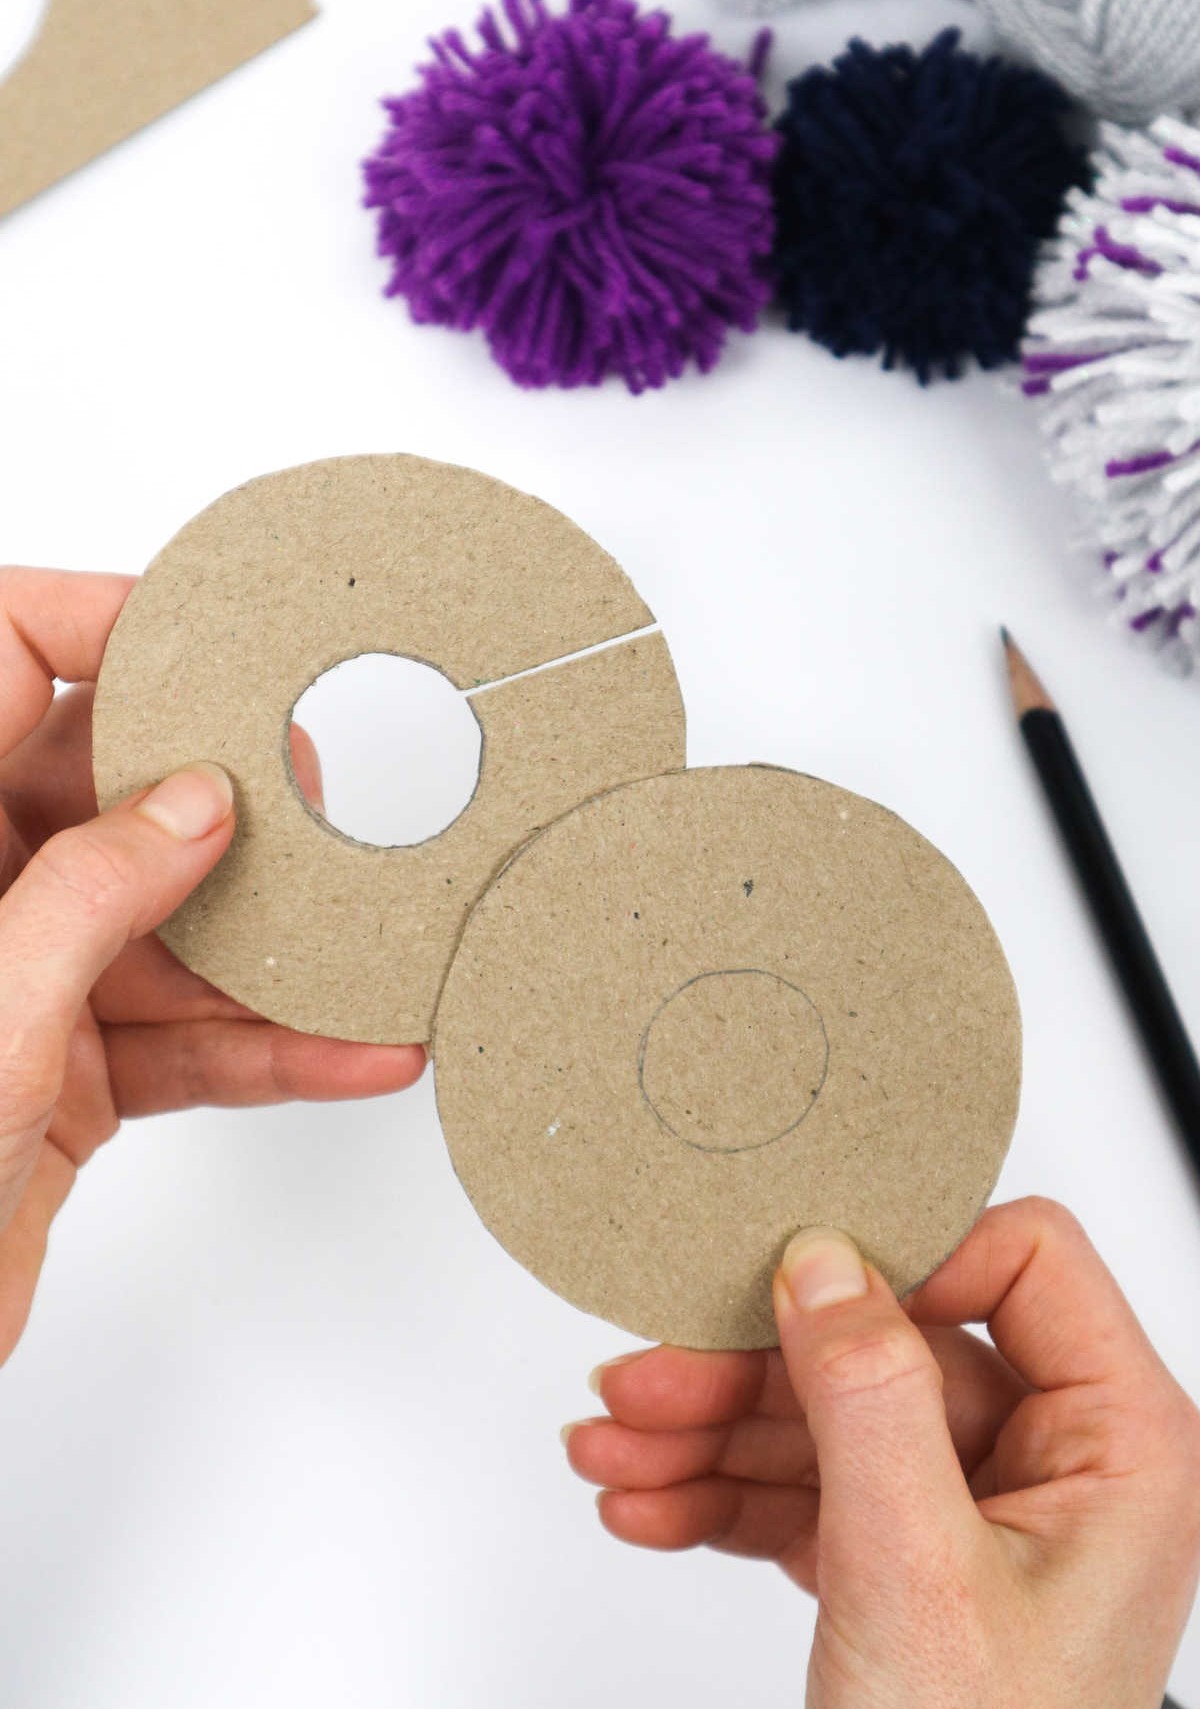
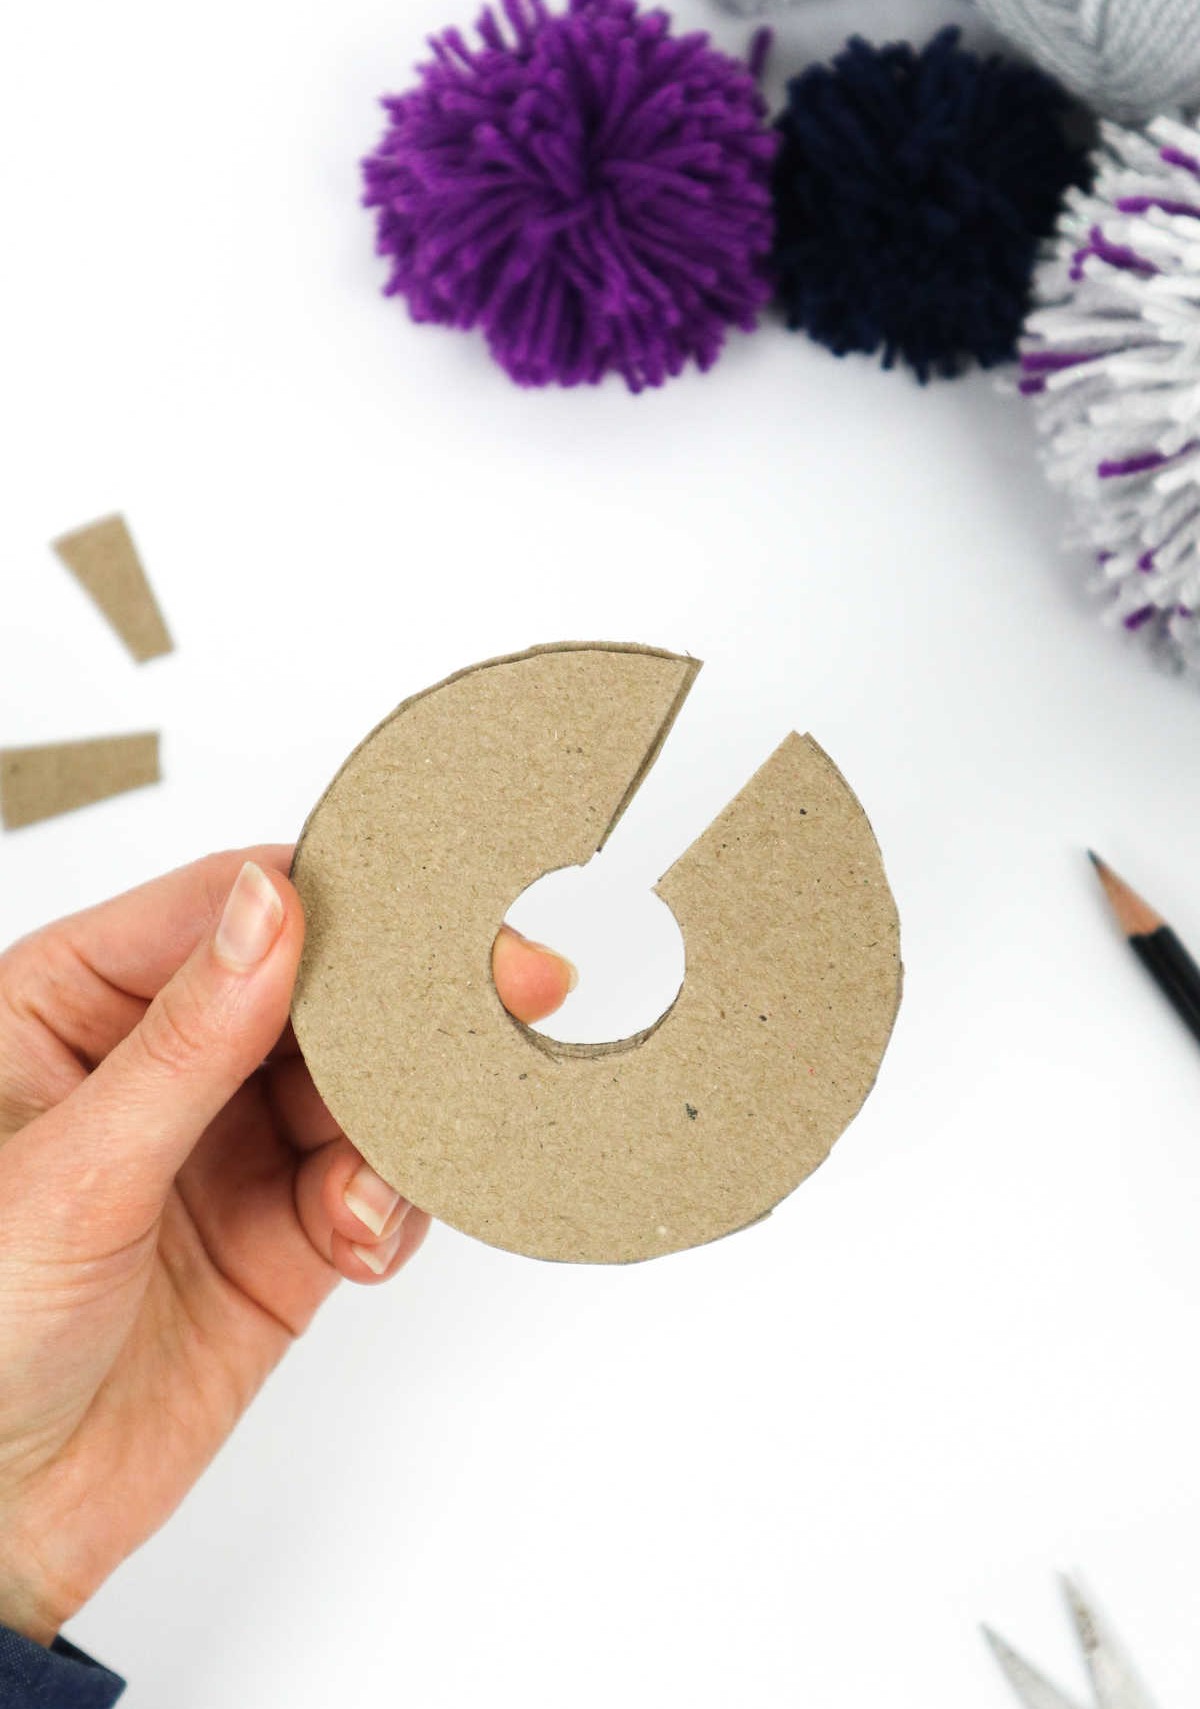
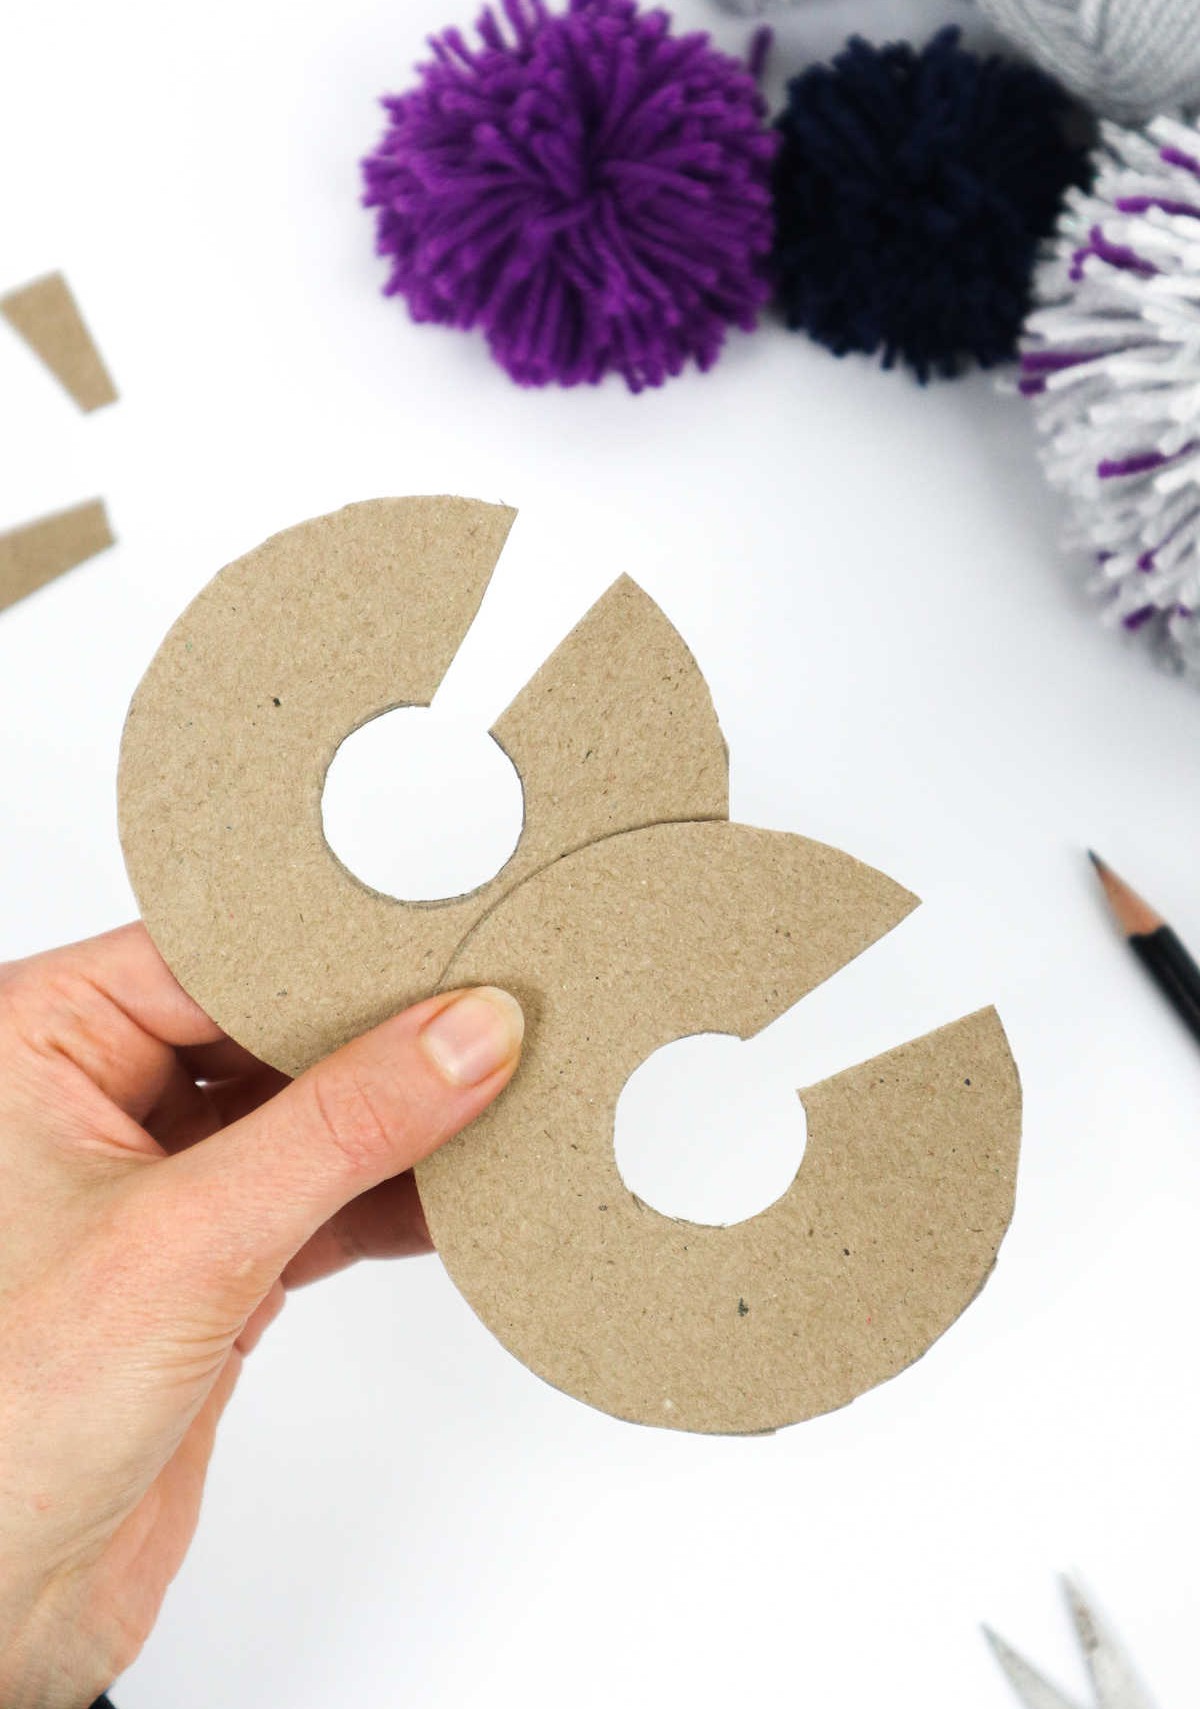
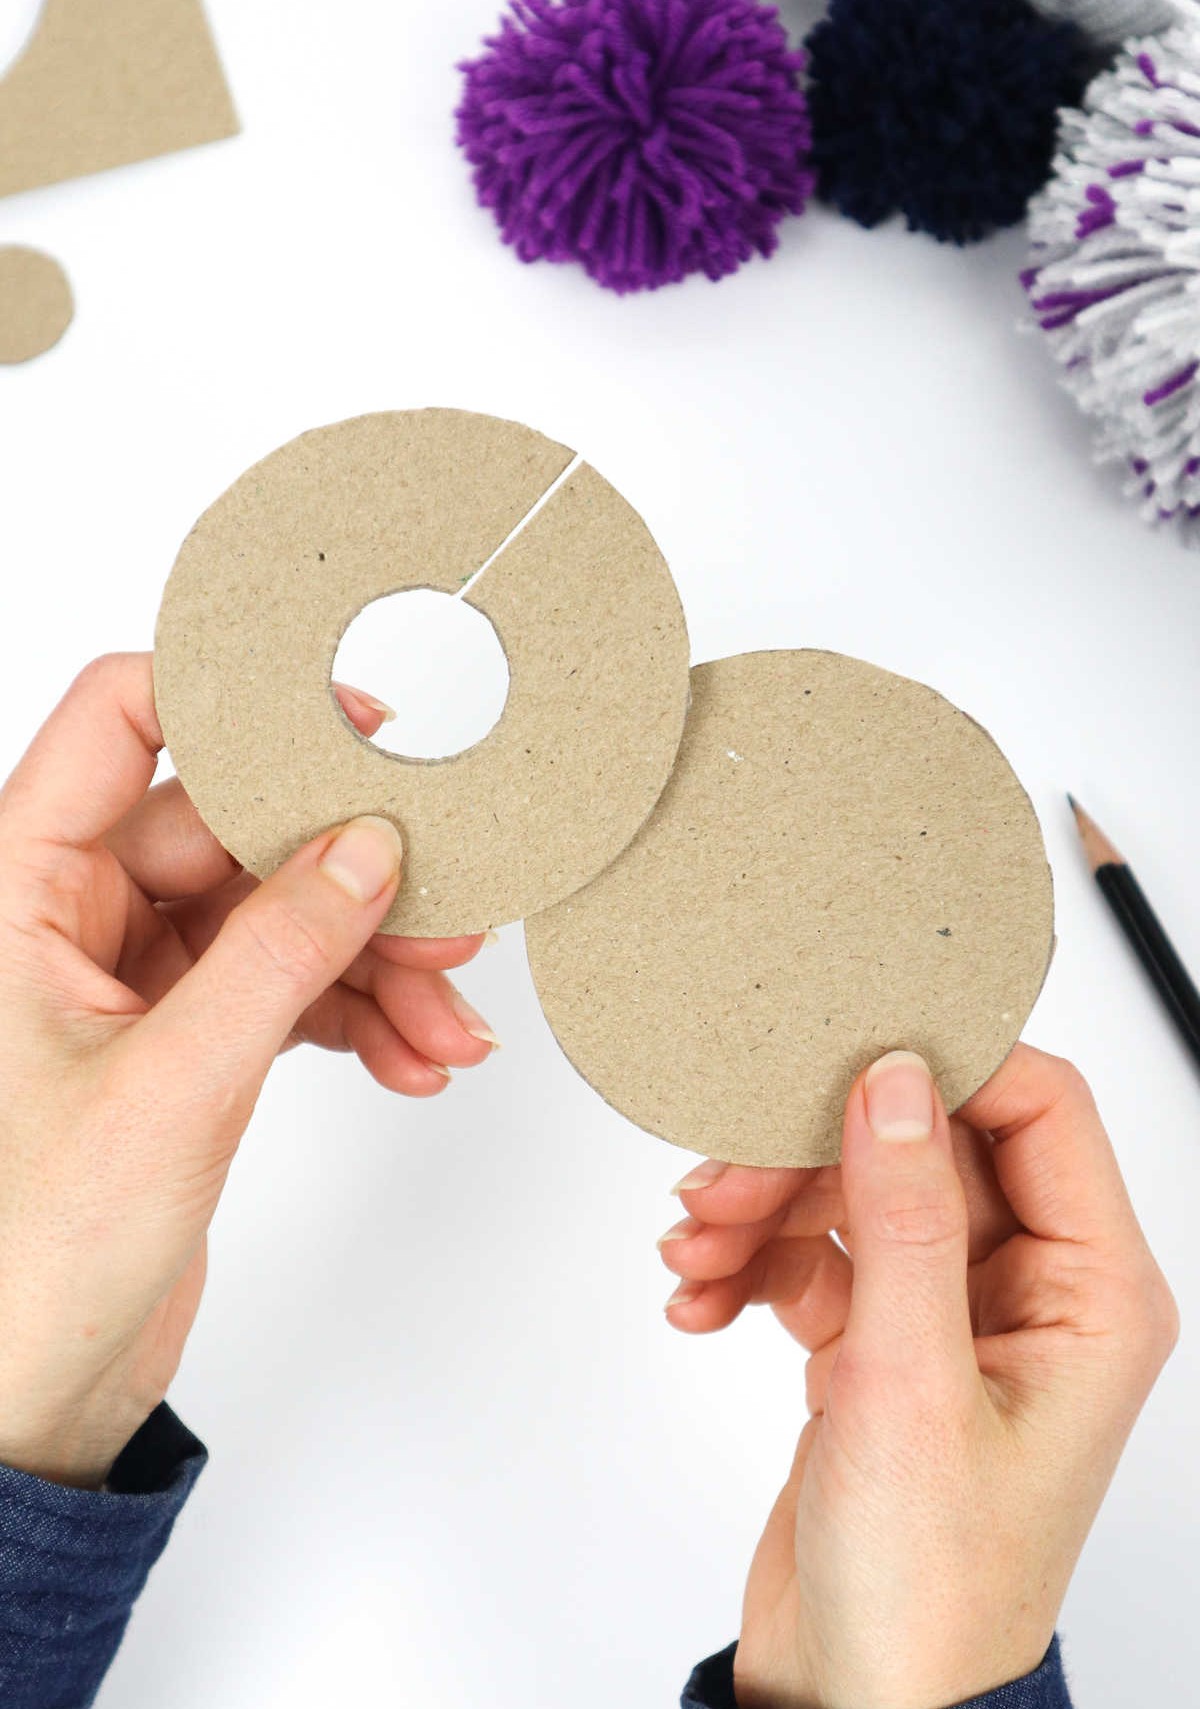
Use the donut hole circle disk as a guide and align it with each cutout piece. Use a pencil to draw an outline of the inner circle onto the top layer, then carefully cut out the inner circle for both pieces. Next, position the disks on top of their respective base layers and trim any excess cardboard from the earlier incision, creating a small entrance for your yarn to wrap around later.
Step 5
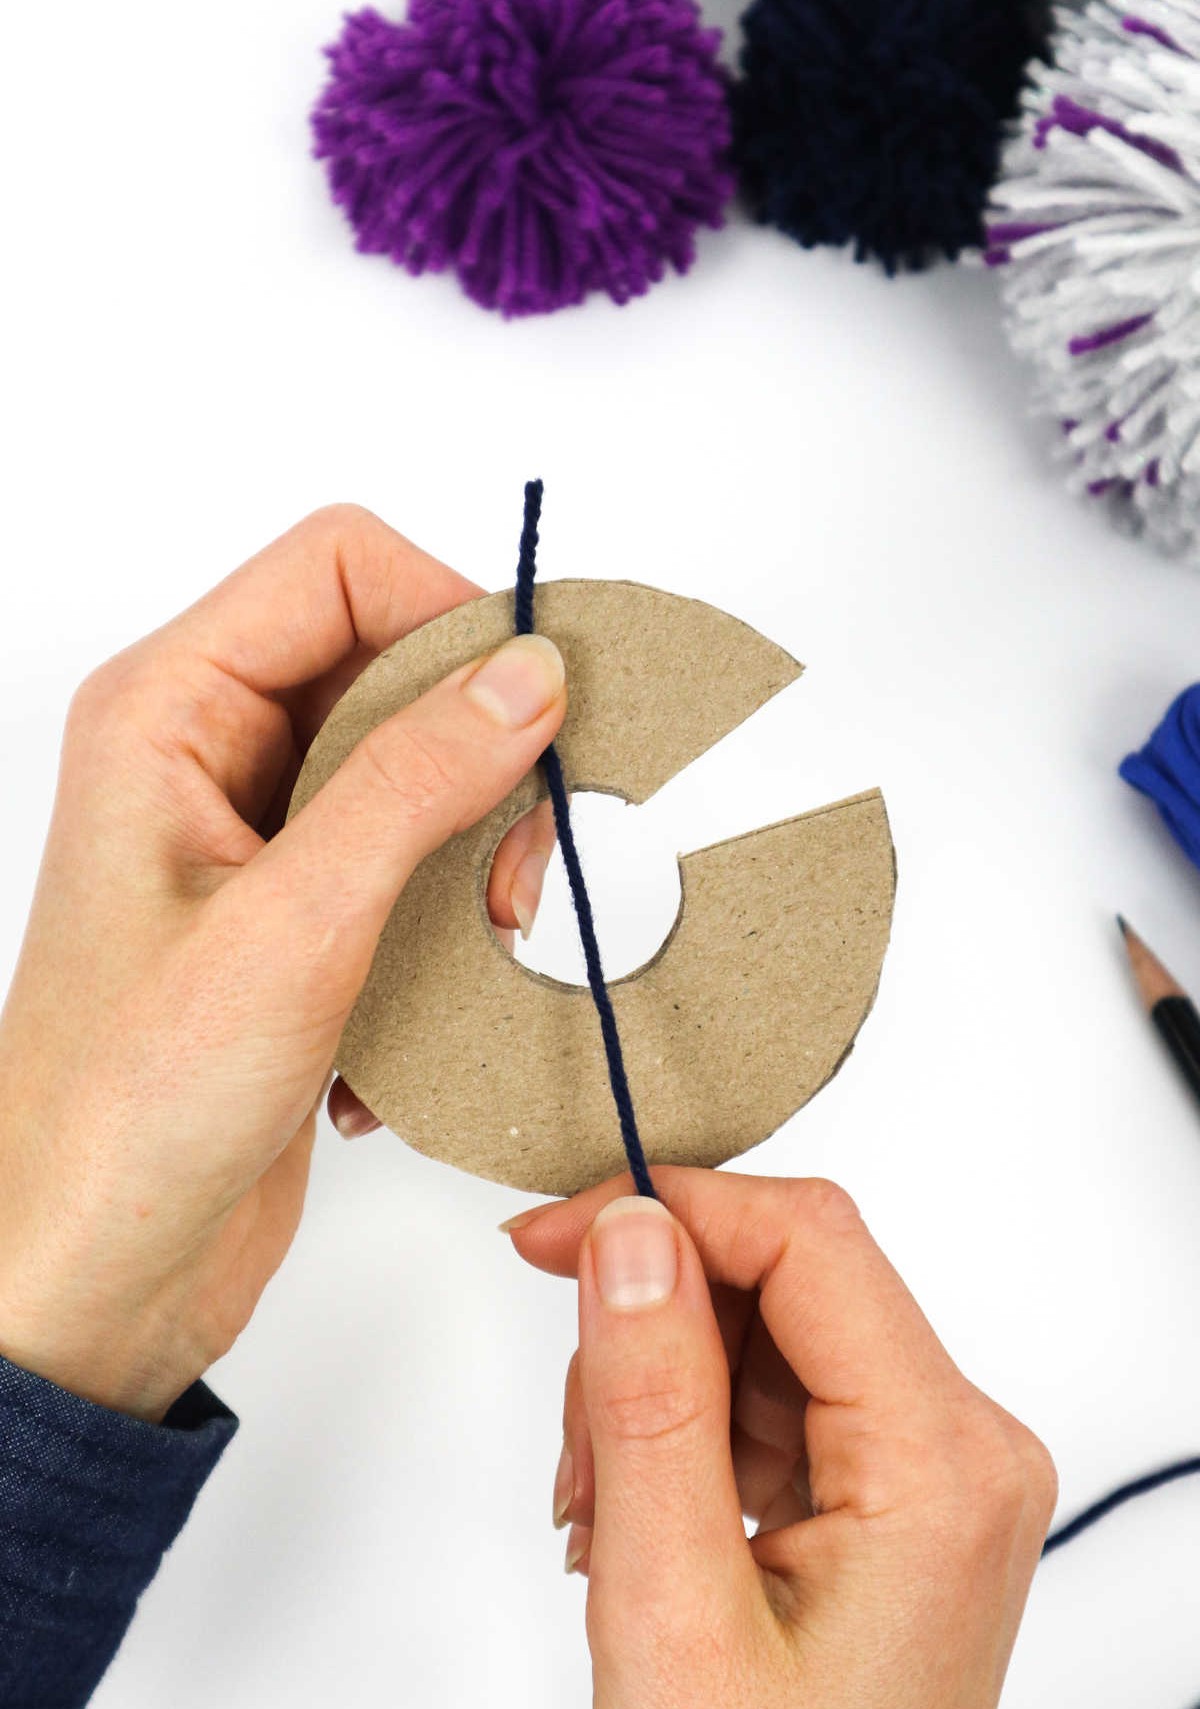
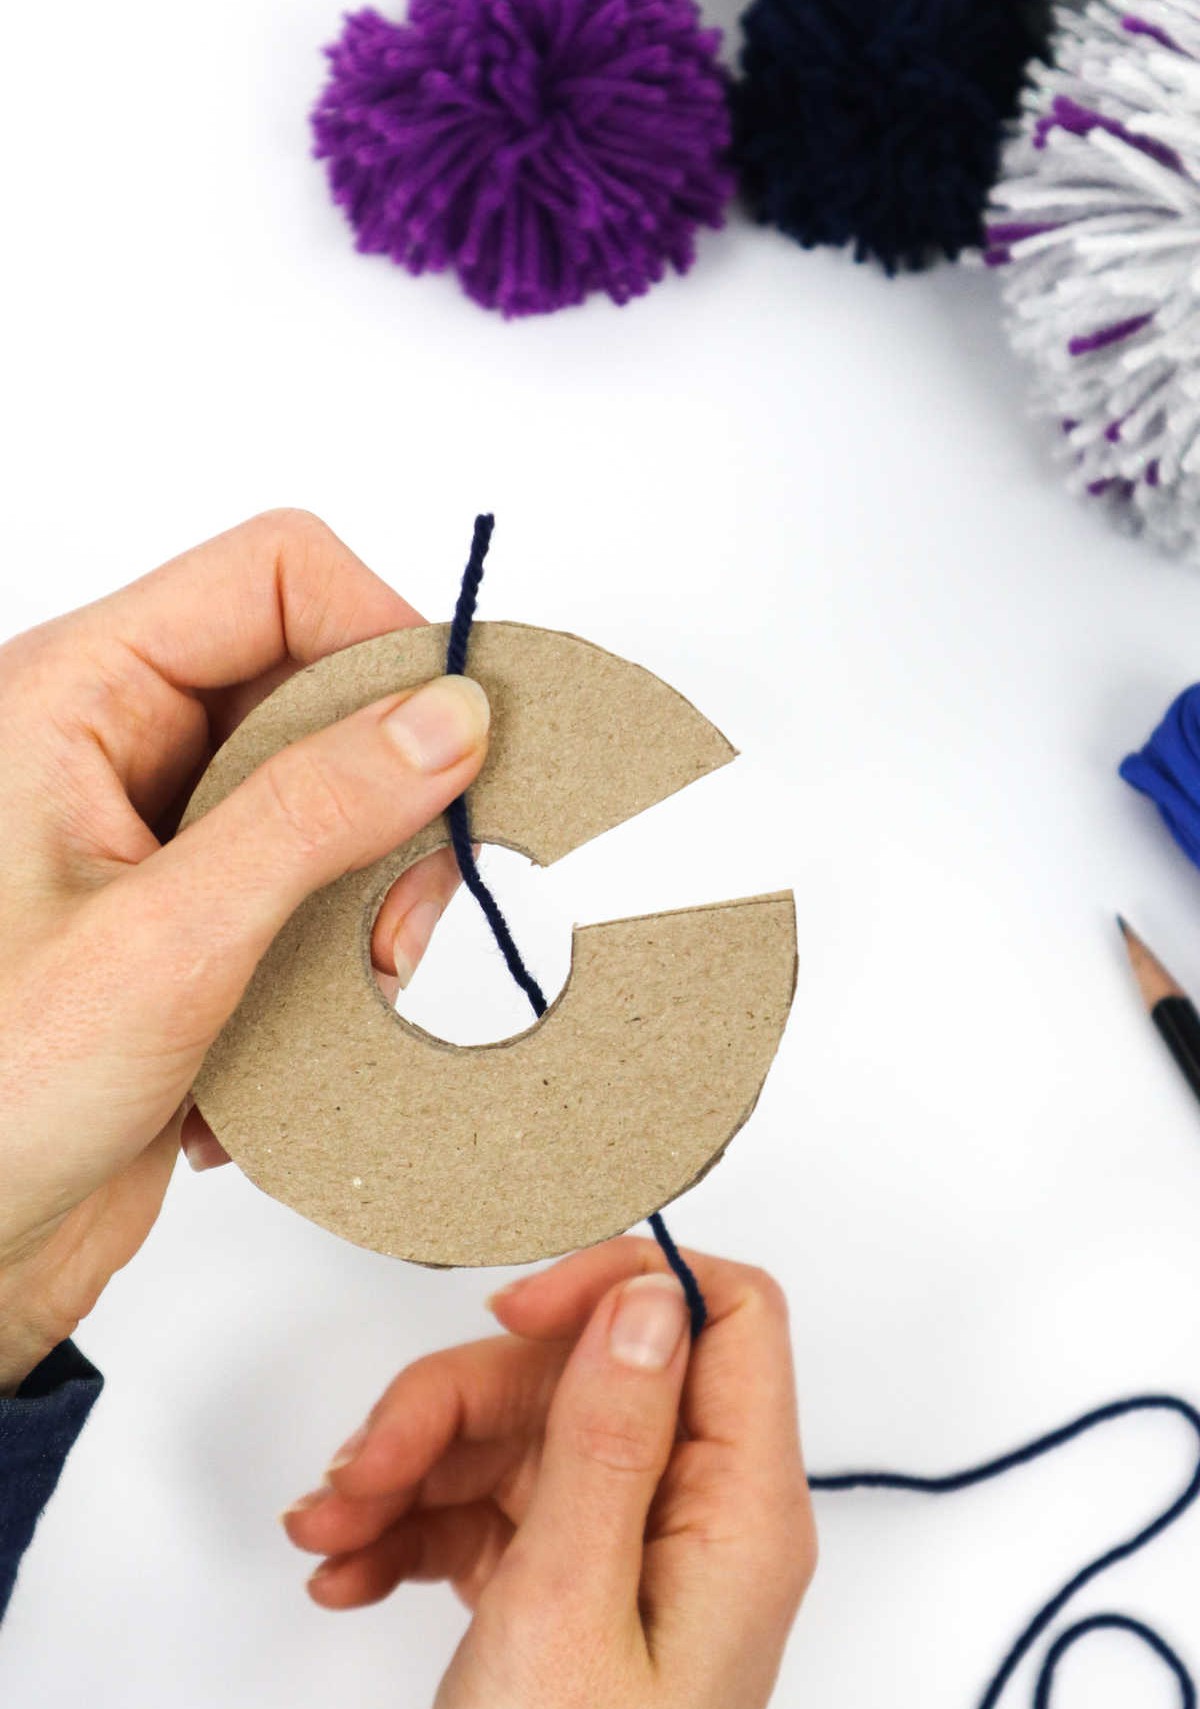
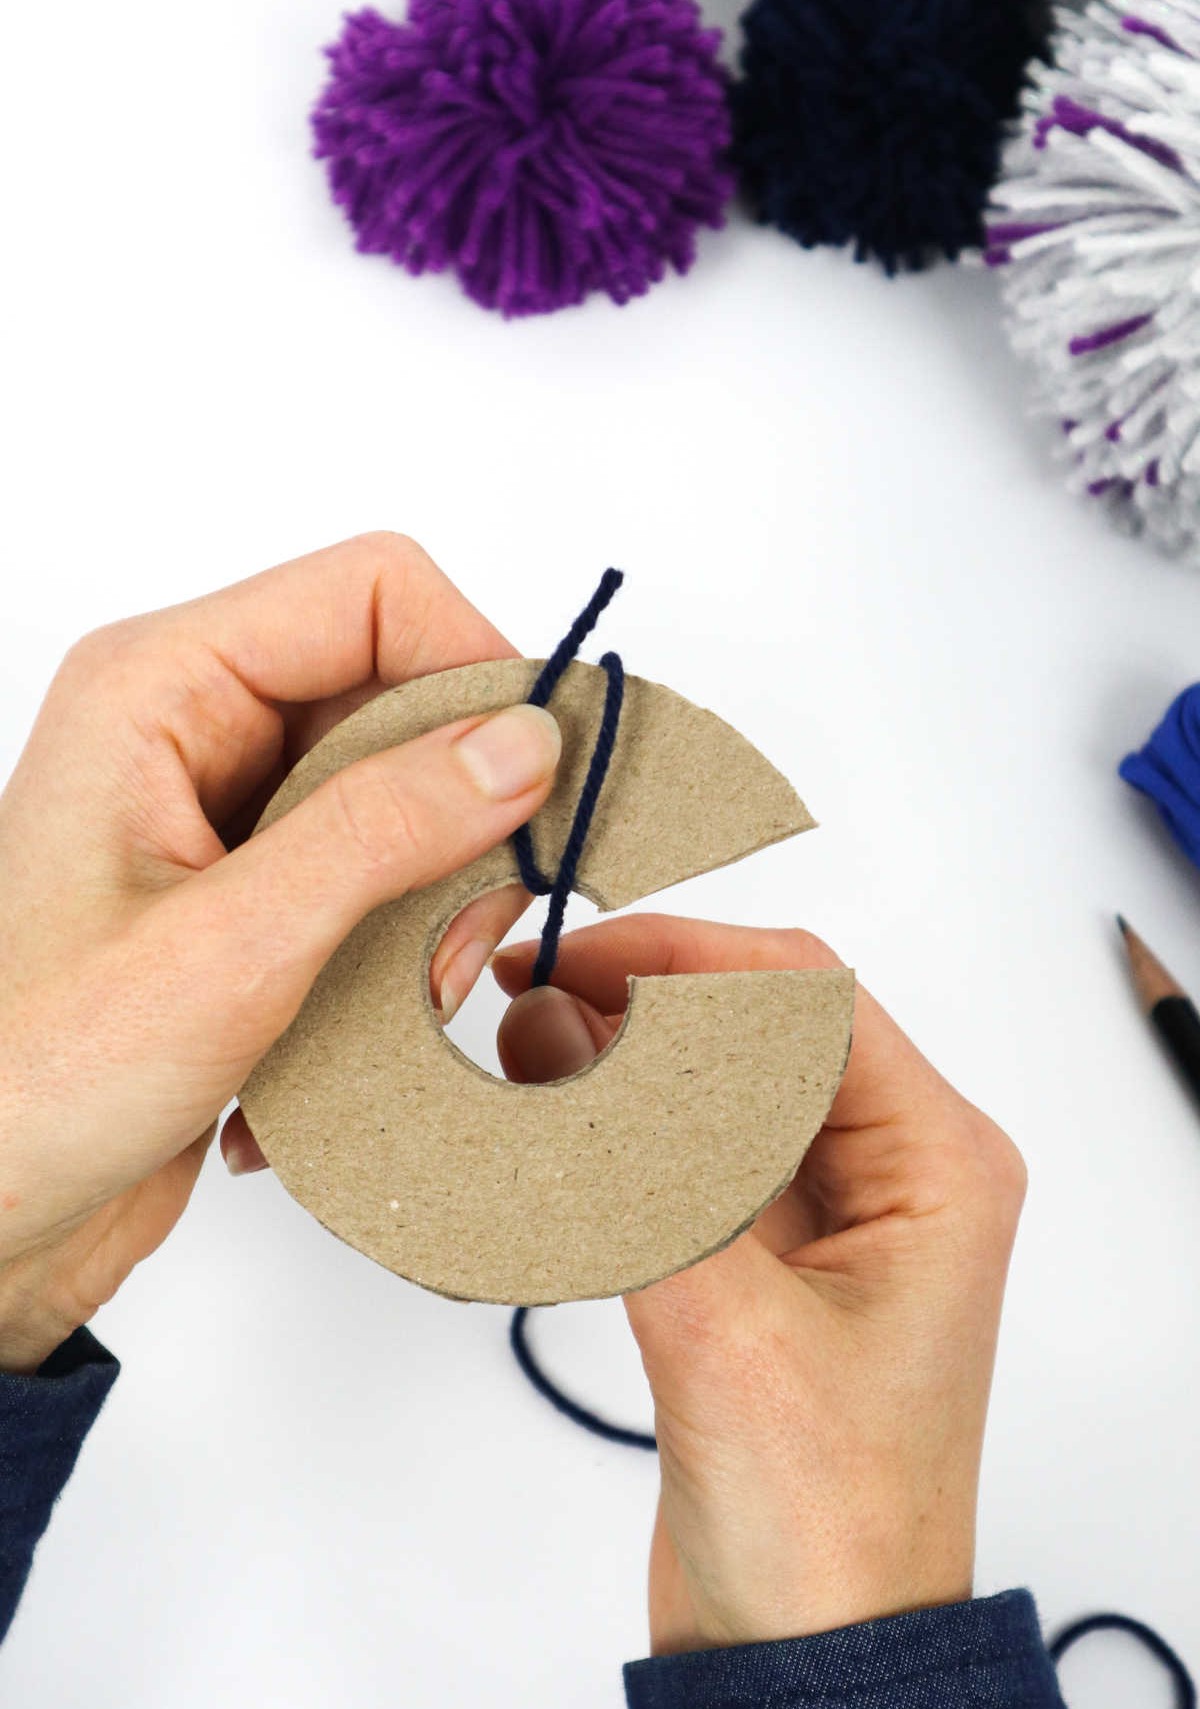
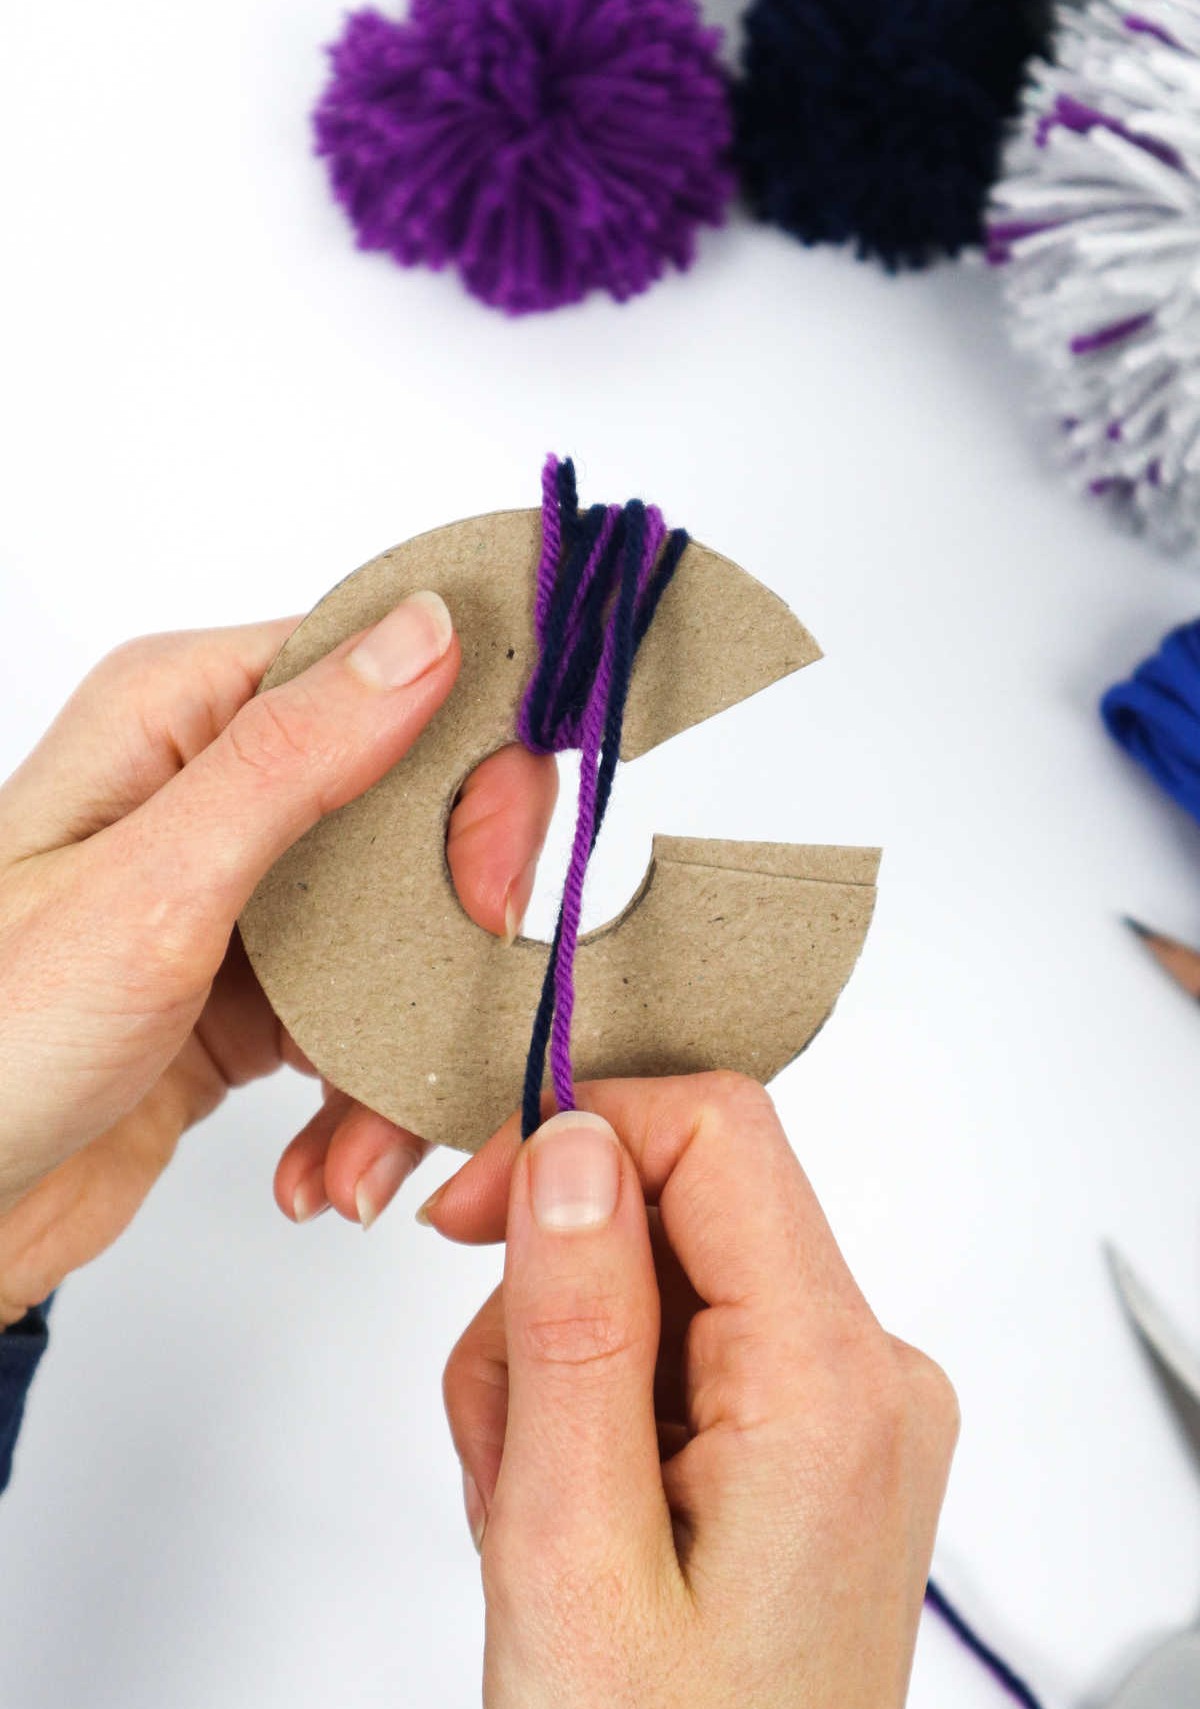
To start, thread a single strand of yarn through the hole in the disk, with the end facing upwards. Then, begin winding the yarn around the top edge of the disk, directly above the opening.
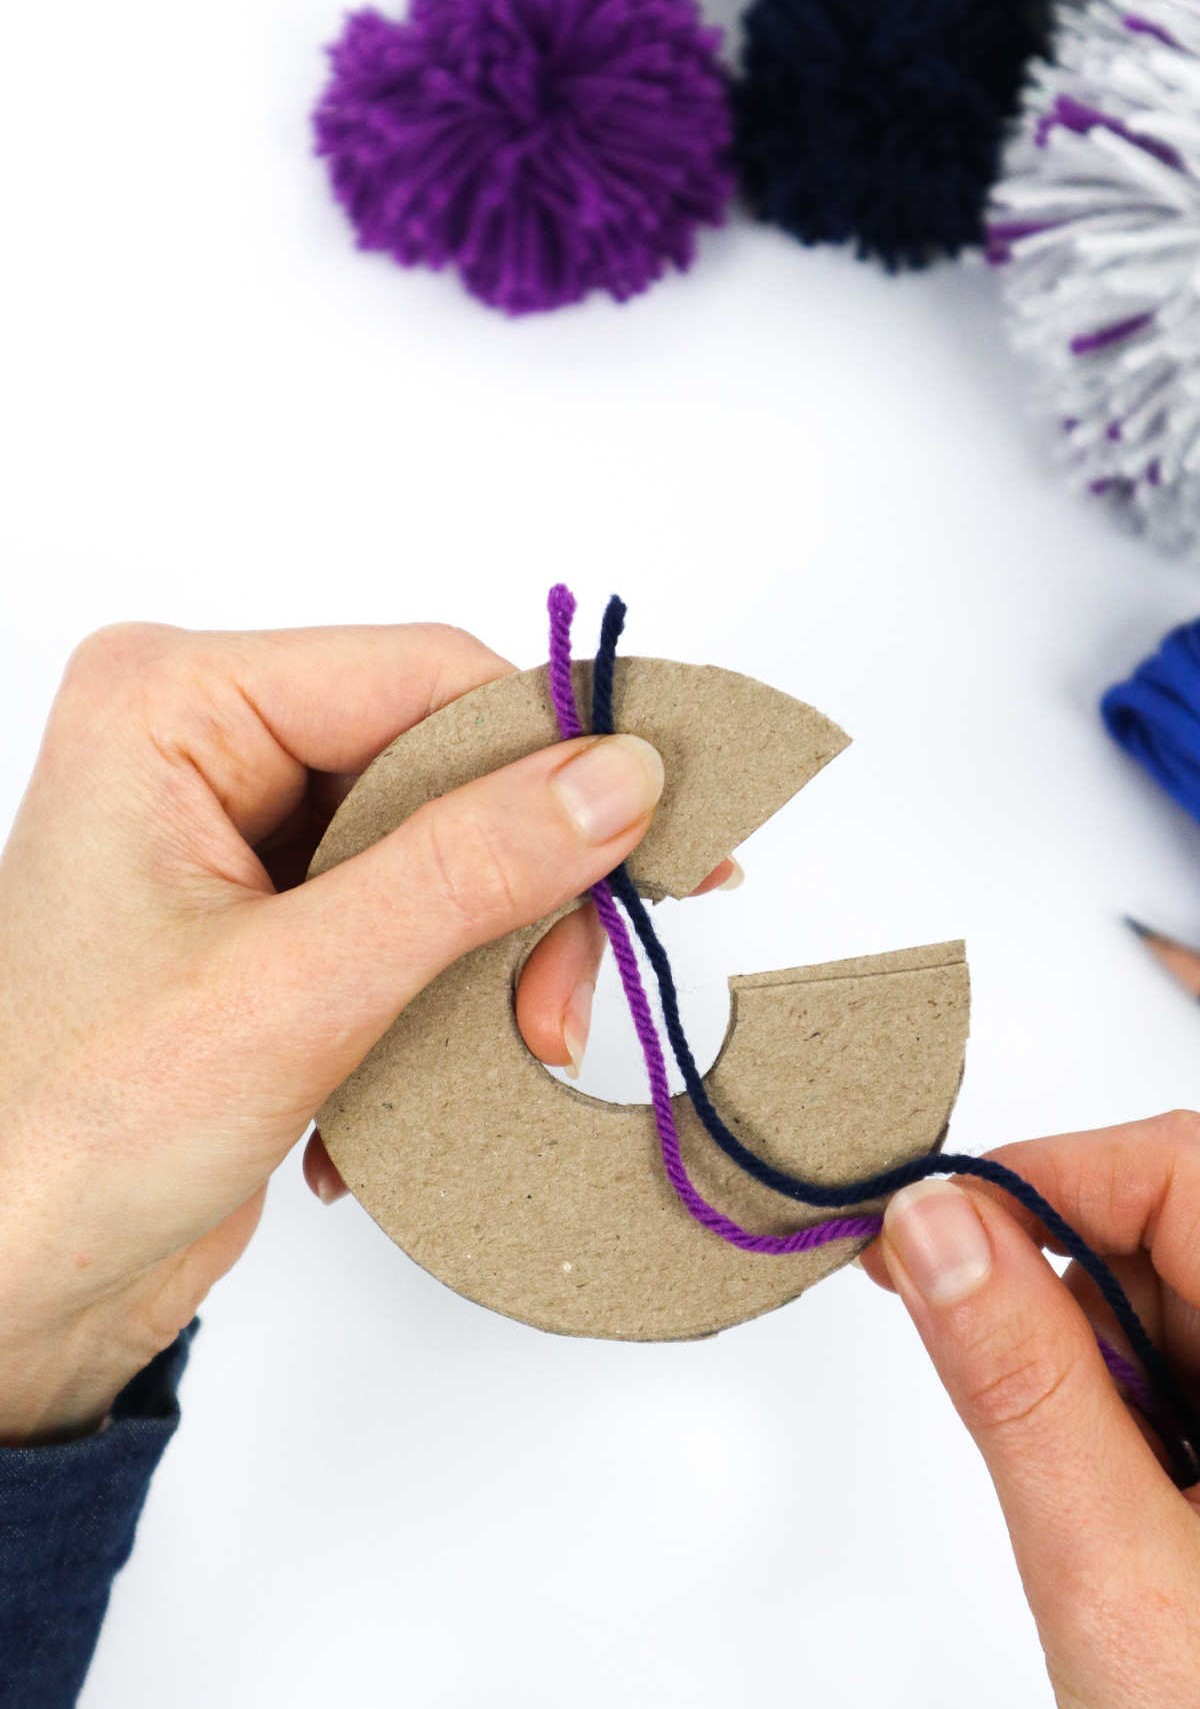
If you’d like to incorporate another color, you can work with two strands of yarn – one for each color you’re using. Simply wrap them together around the disk.
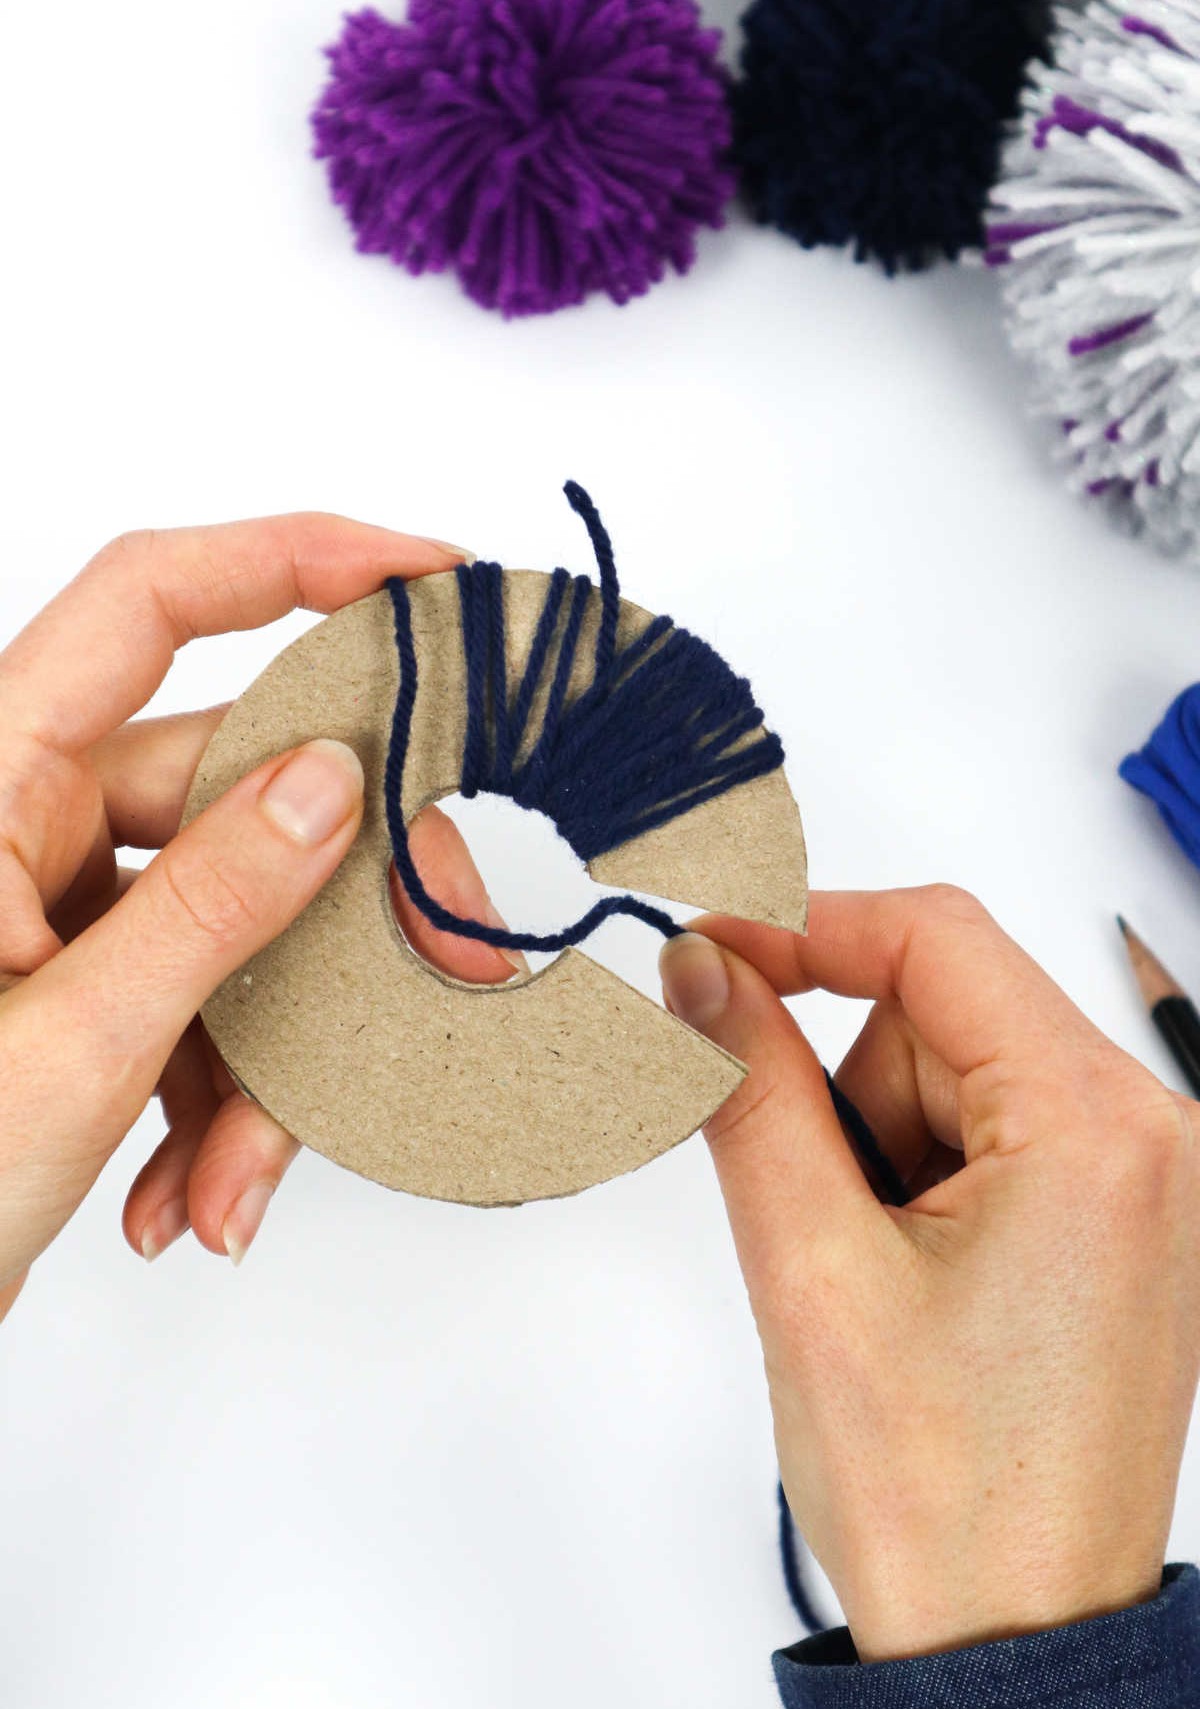
Continue wrapping the yarn in a consistent pattern, moving around the circumference of the disk.
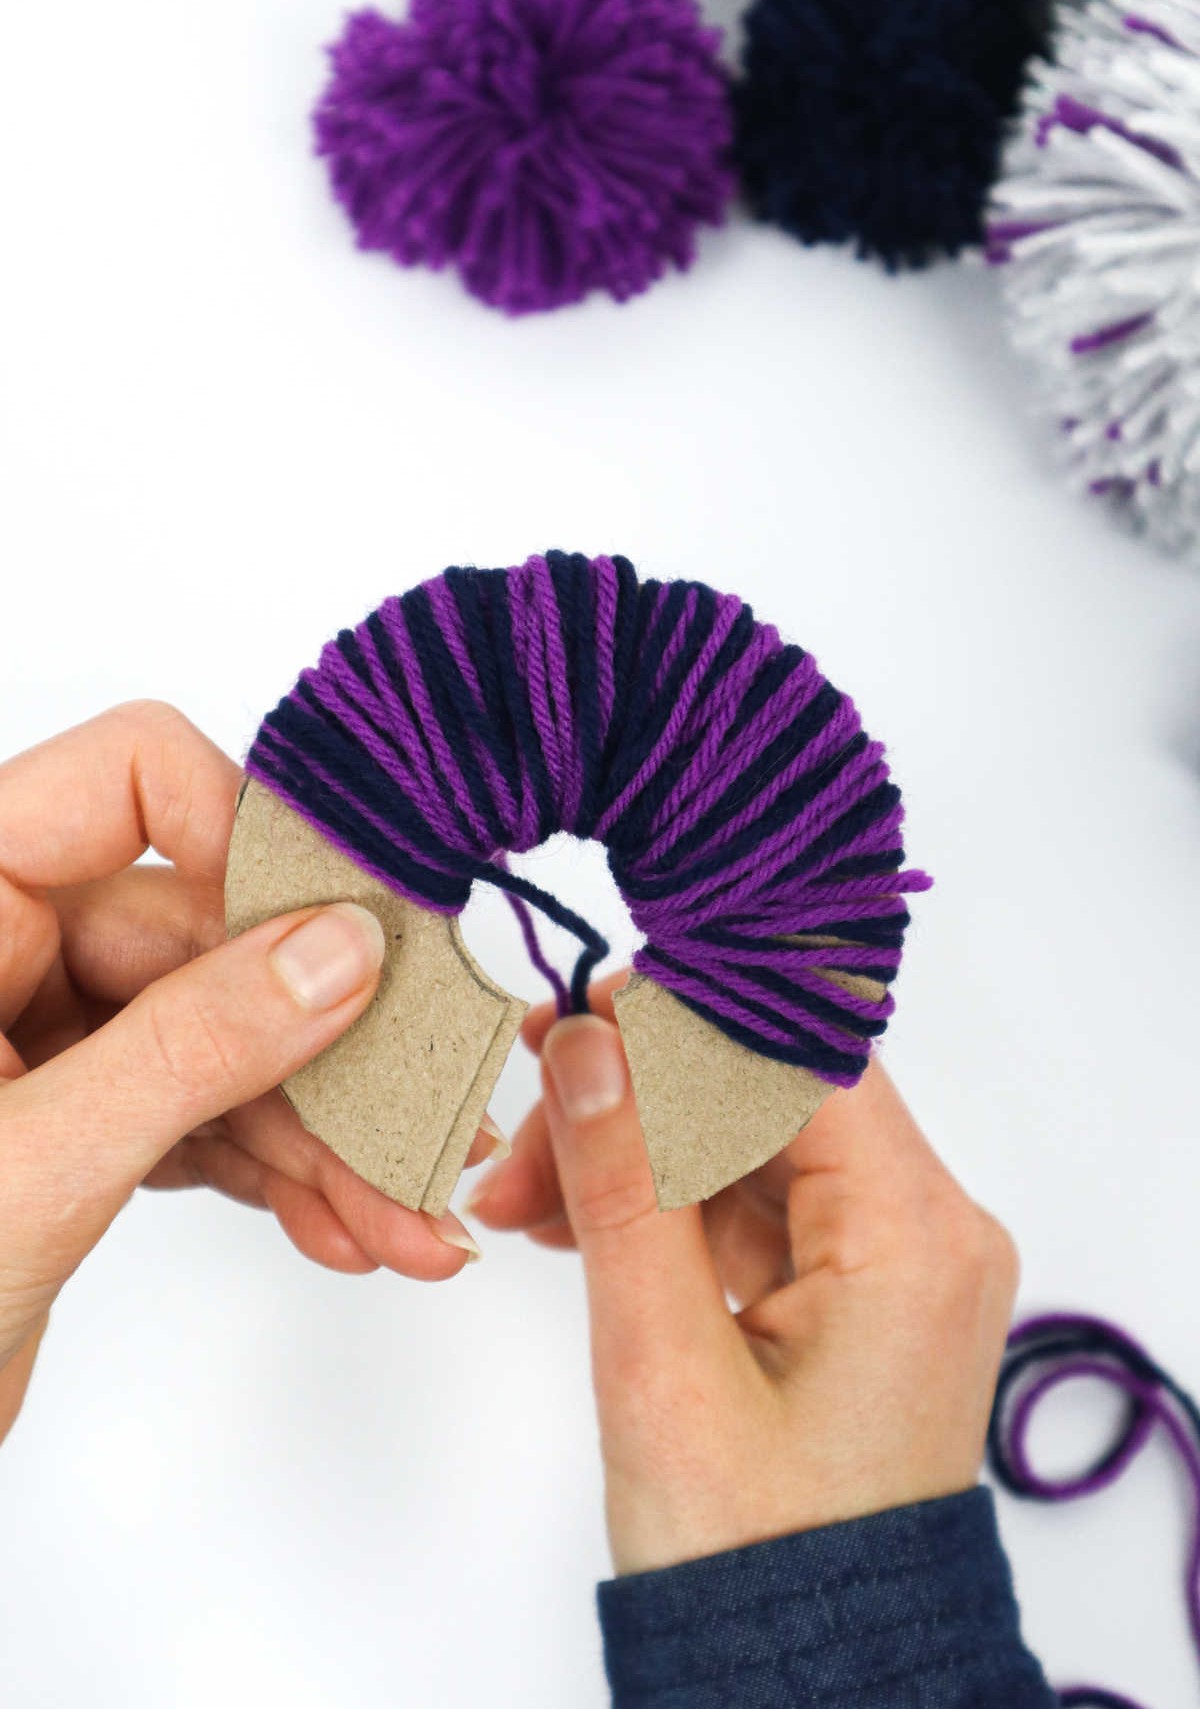
Once you’ve completed the wrapping process, simply trim the excess yarn with scissors.
Step 6
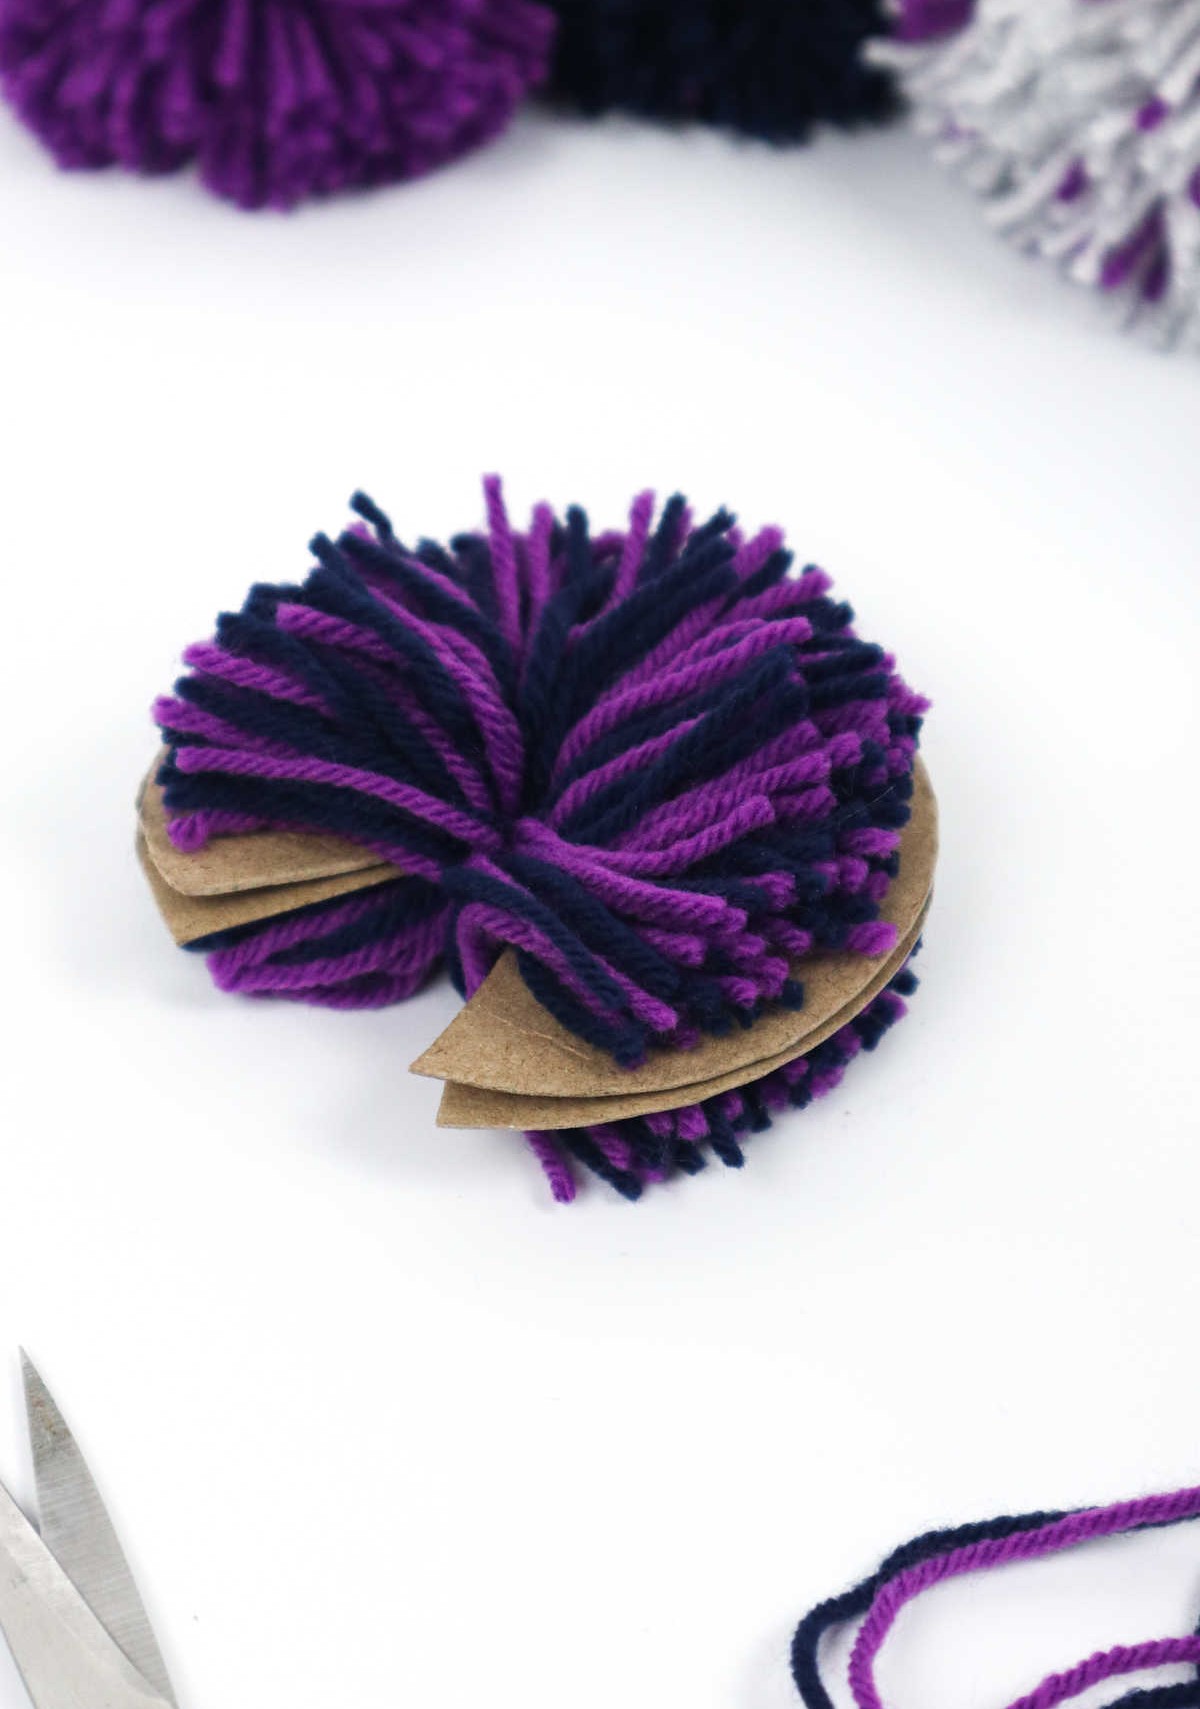
As you continue crafting, don’t put away those scissors just yet – they’ll come in handy for cutting through the yarn. You’ll notice a small slit between the two disks; cut along this opening from the entrance of one disk and work your way around it. Be sure to keep a firm grip on the yarn as you make the cut, or it may slip through the central hole and disappear.
Step 7
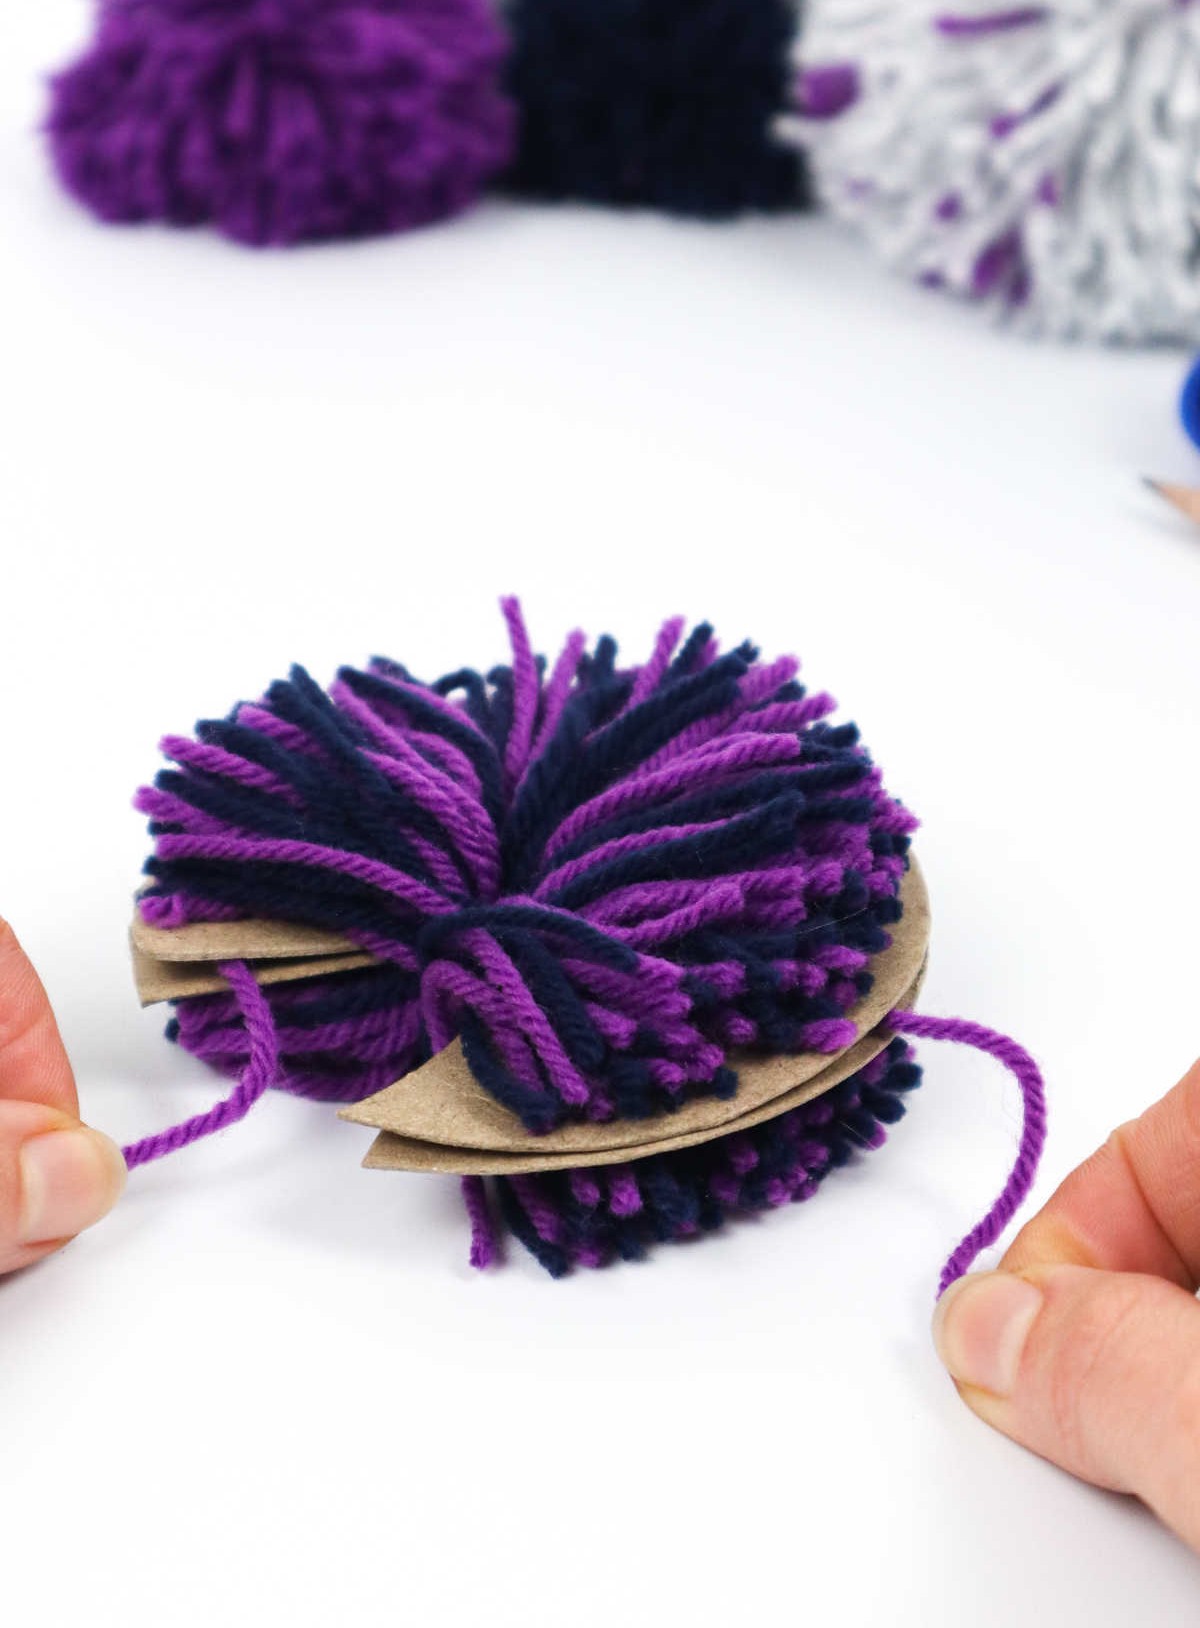
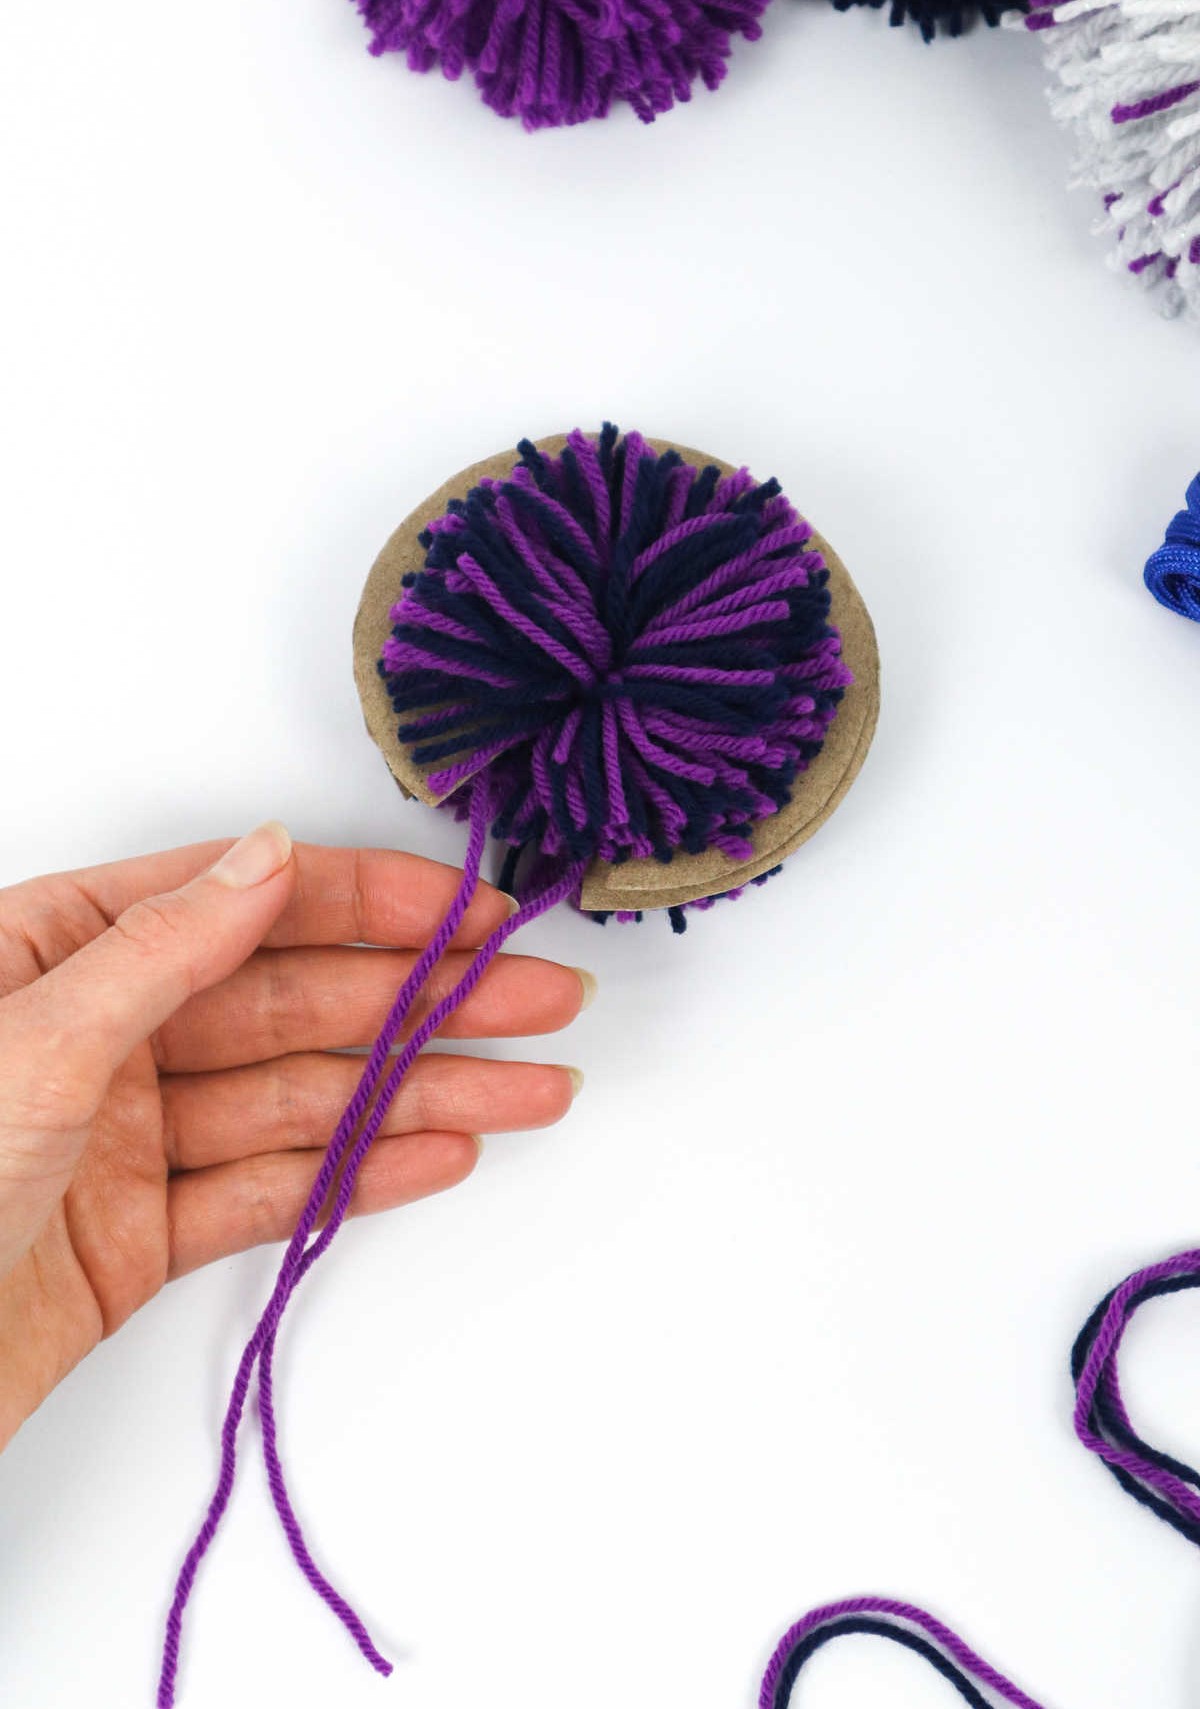
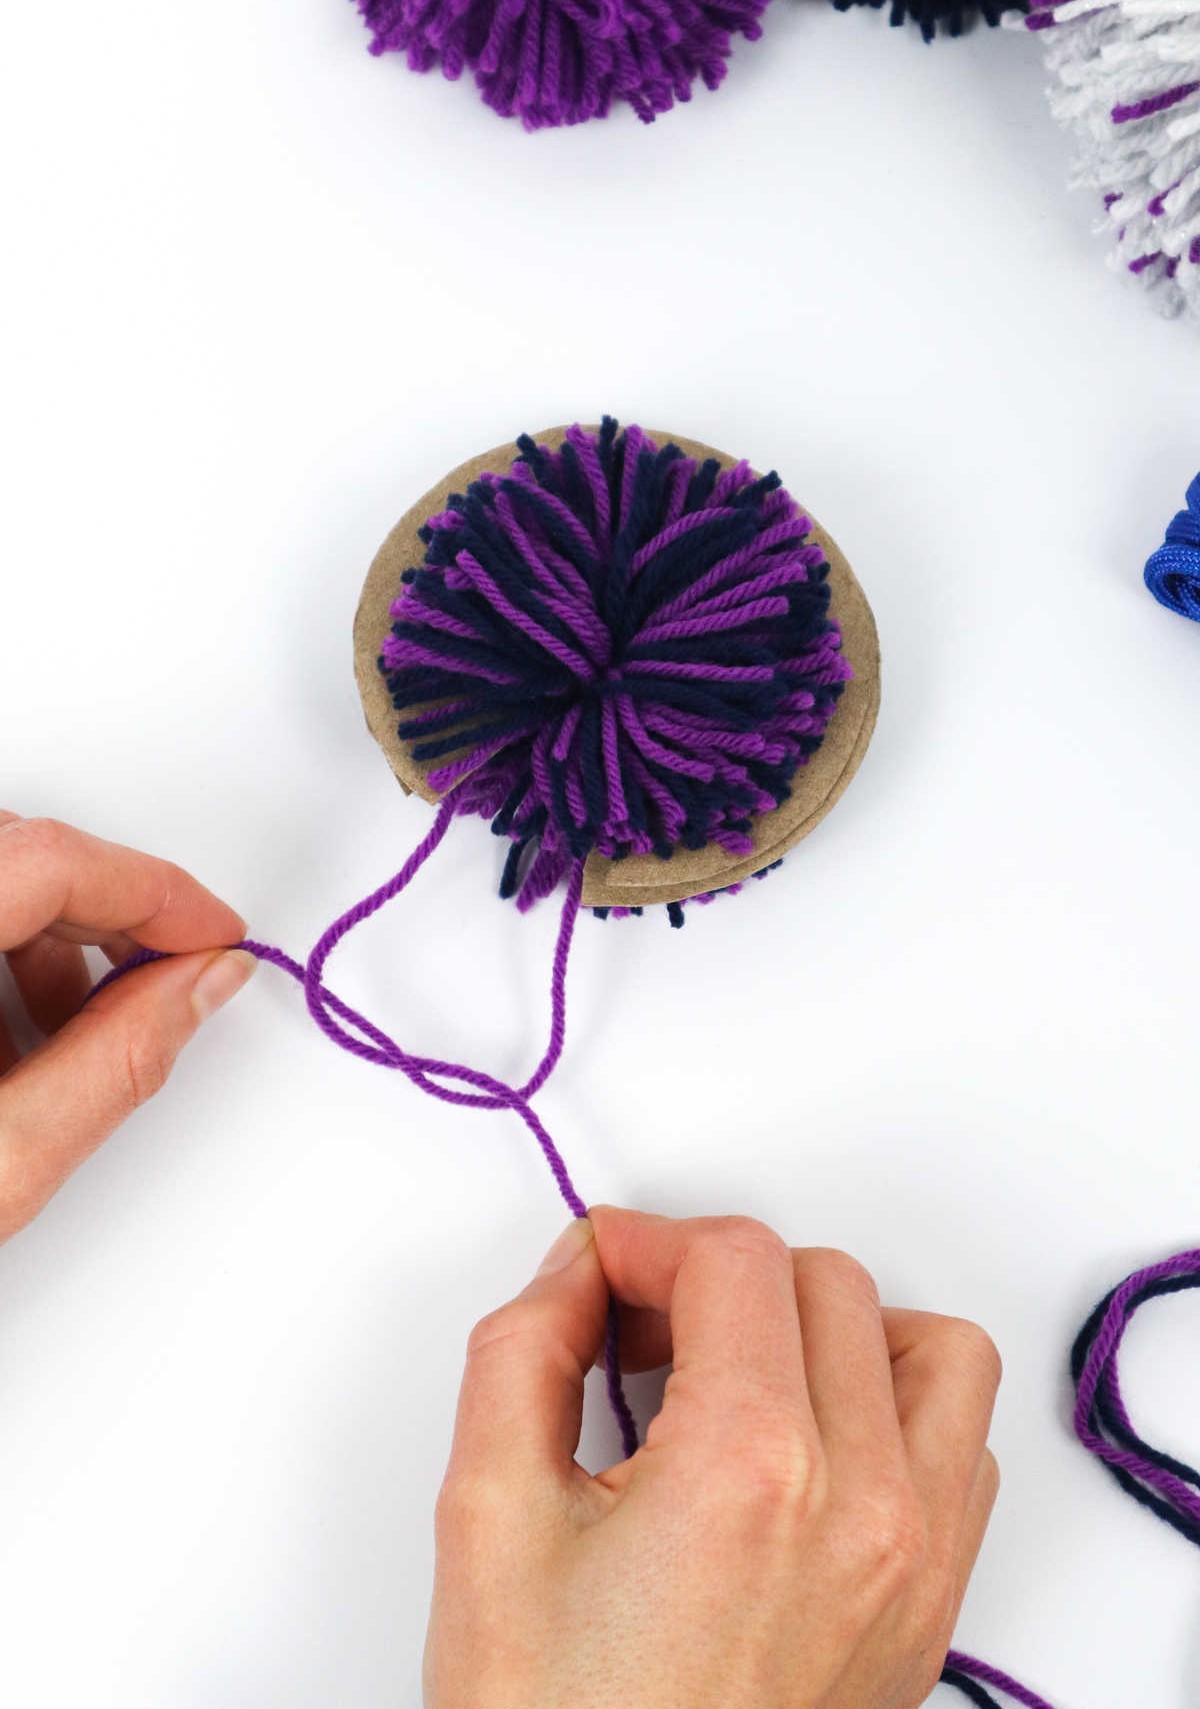
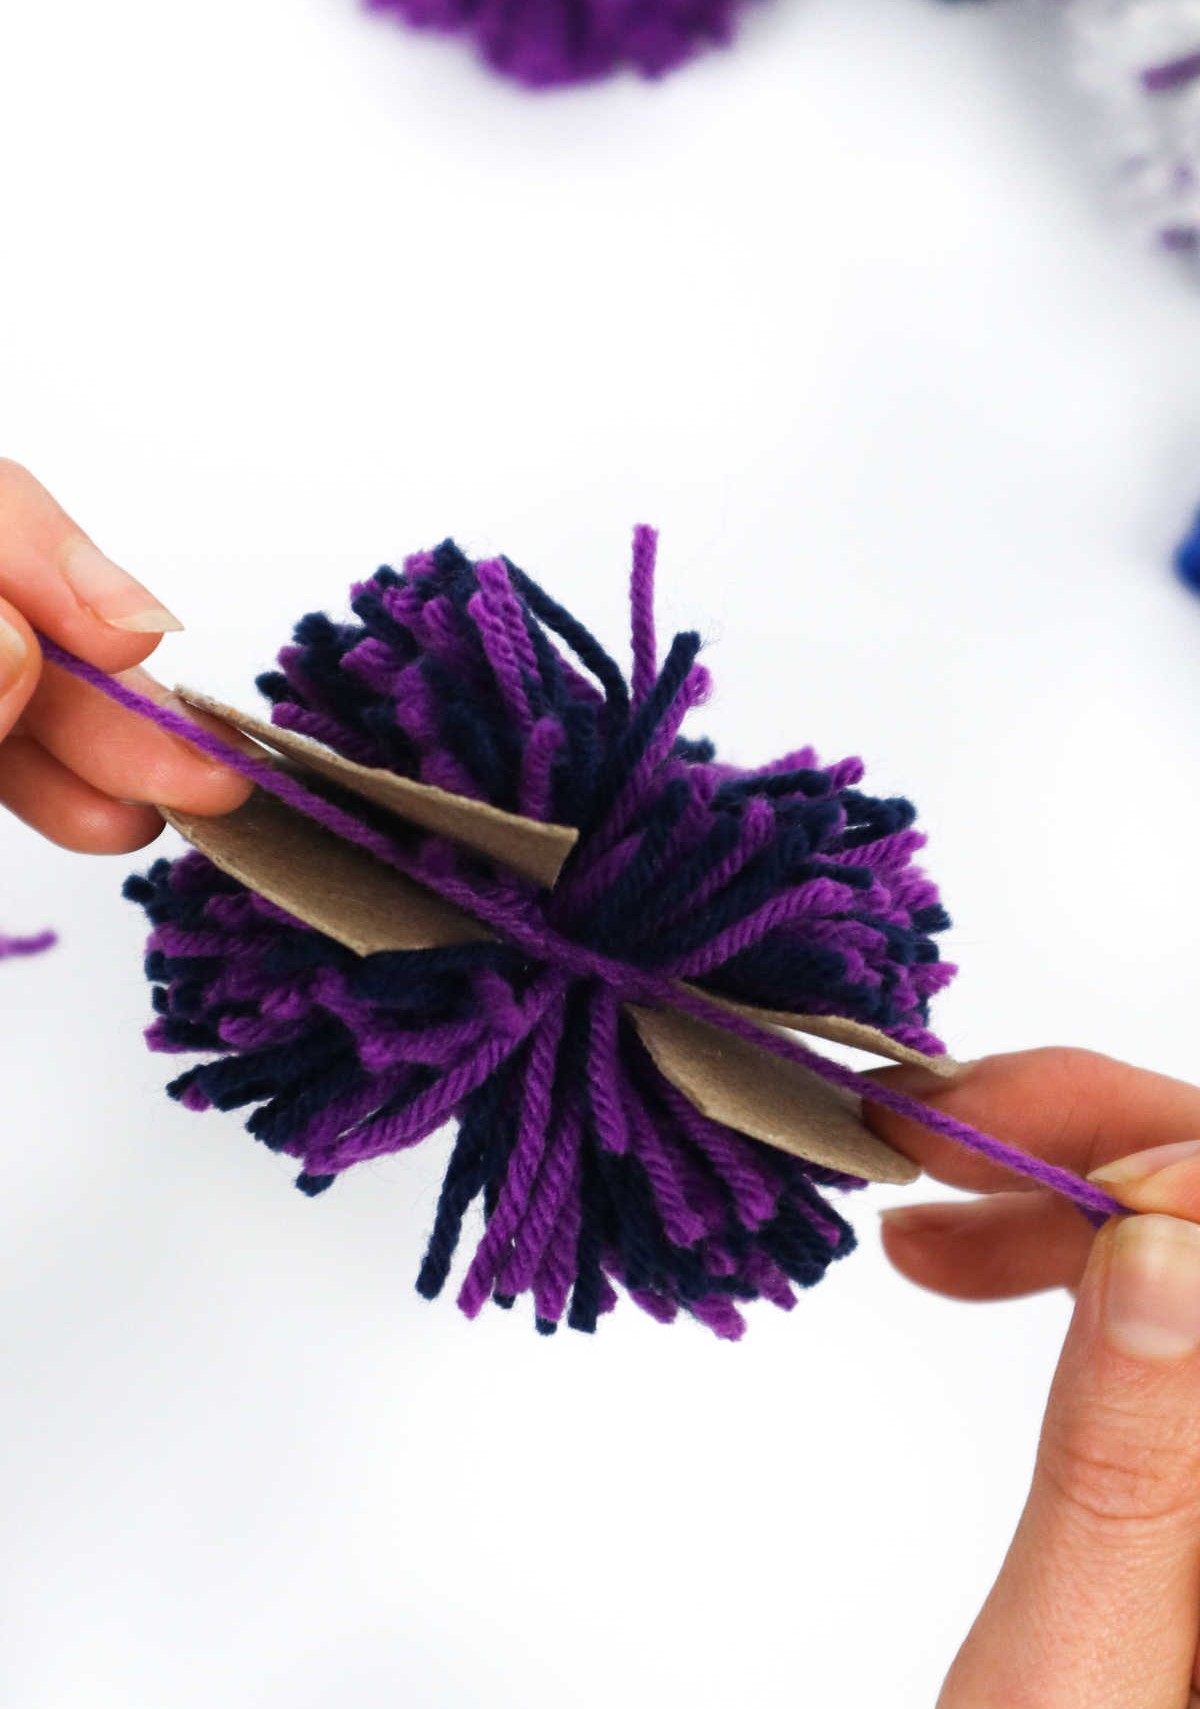
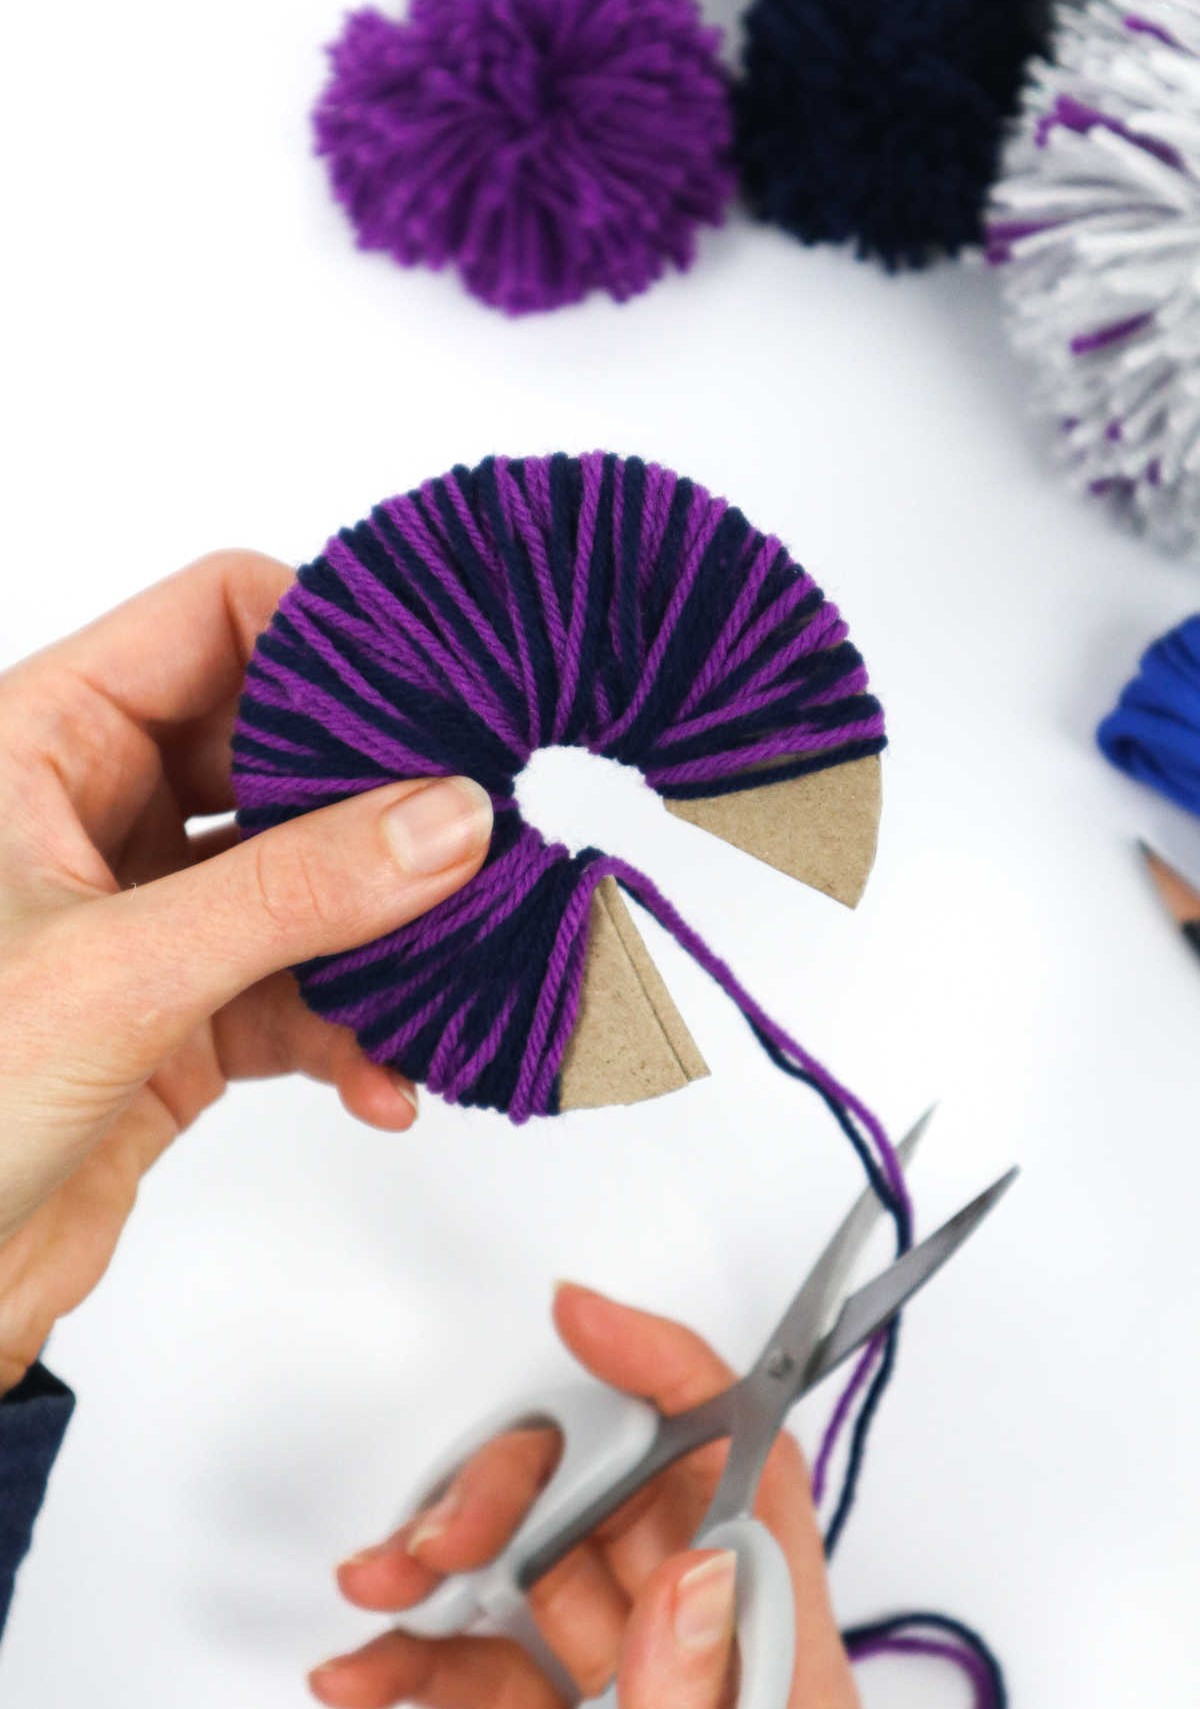
To begin, carefully cut a length of yarn measuring eight to ten inches. Insert one end of the yarn between the two disks, making sure it’s centered. Gently pull the yarn out through the entrance on either side, leaving the other end still nestled within the disk. Next, take both ends of the yarn and wrap them around each other twice, forming a secure knot at the base of the yarn inside the disk. Tighten the knot to ensure it remains in place, effectively securing the yarn within the disk.
Step 8
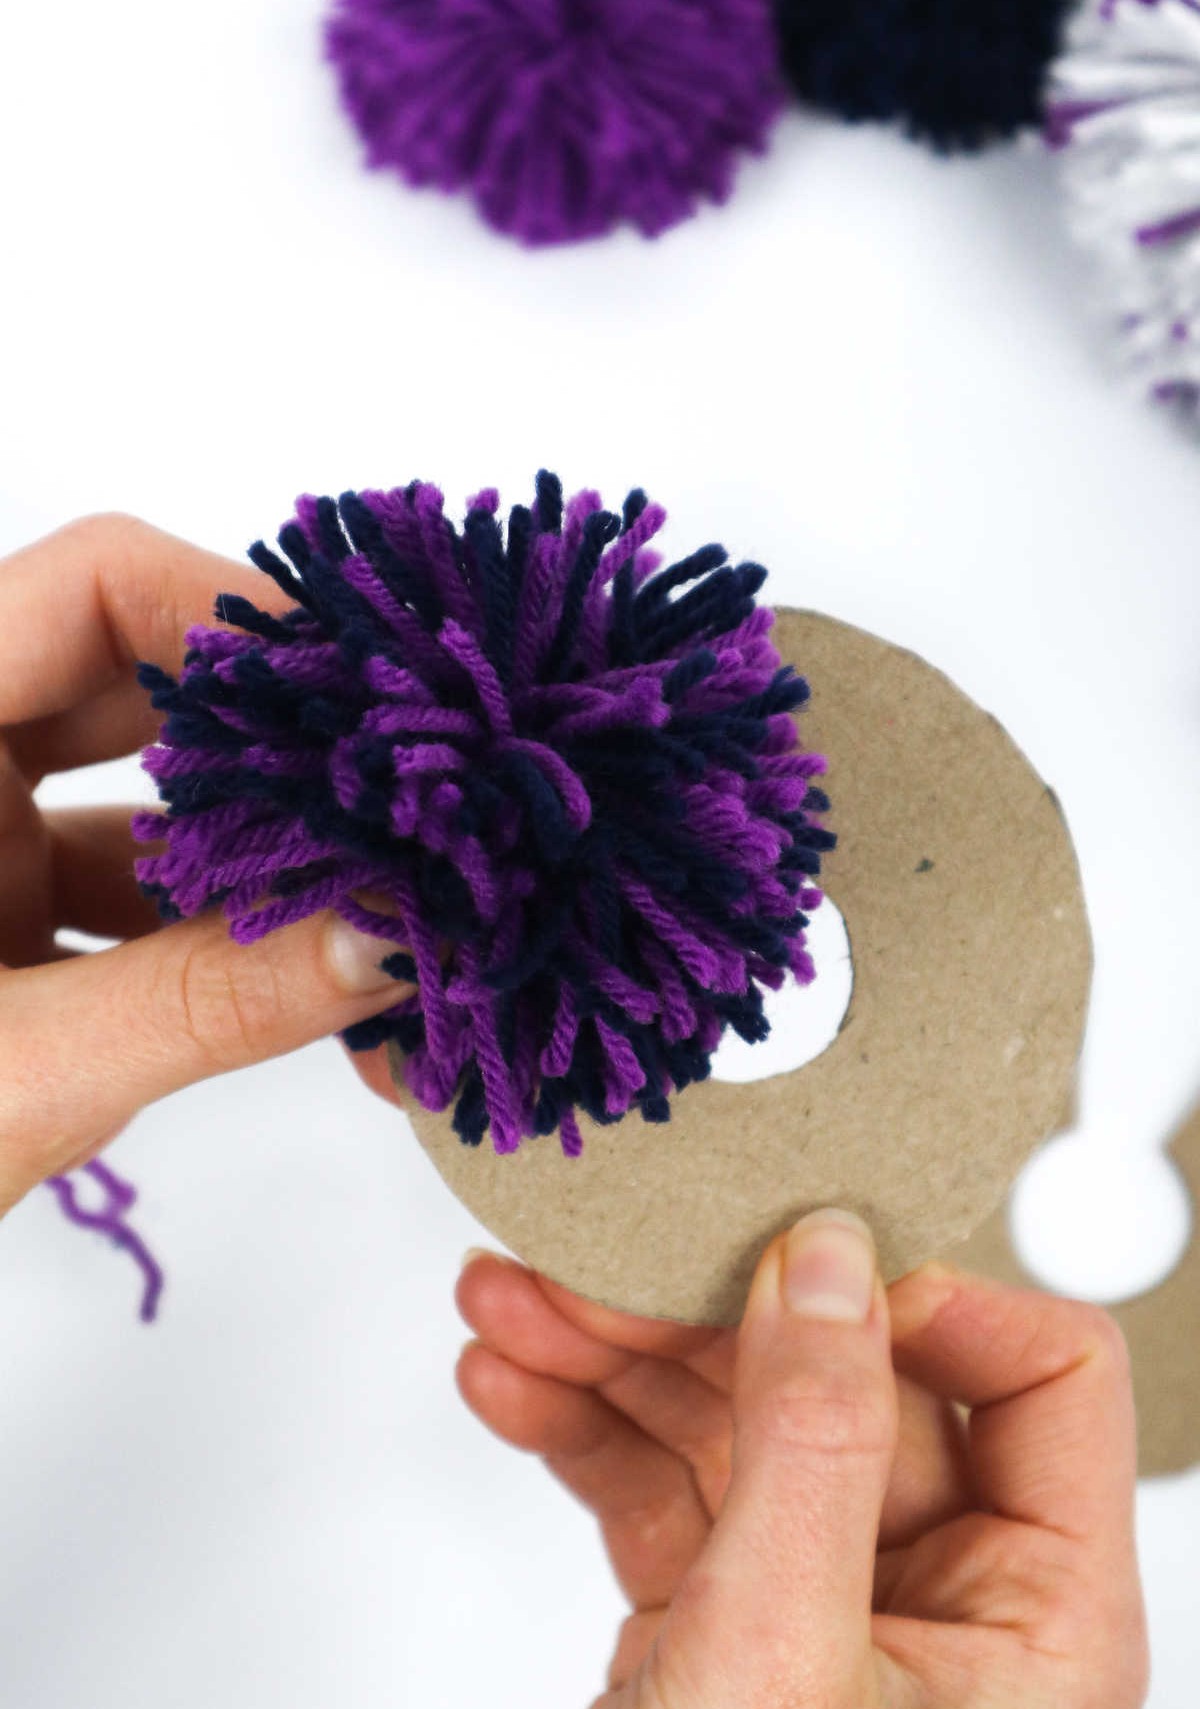
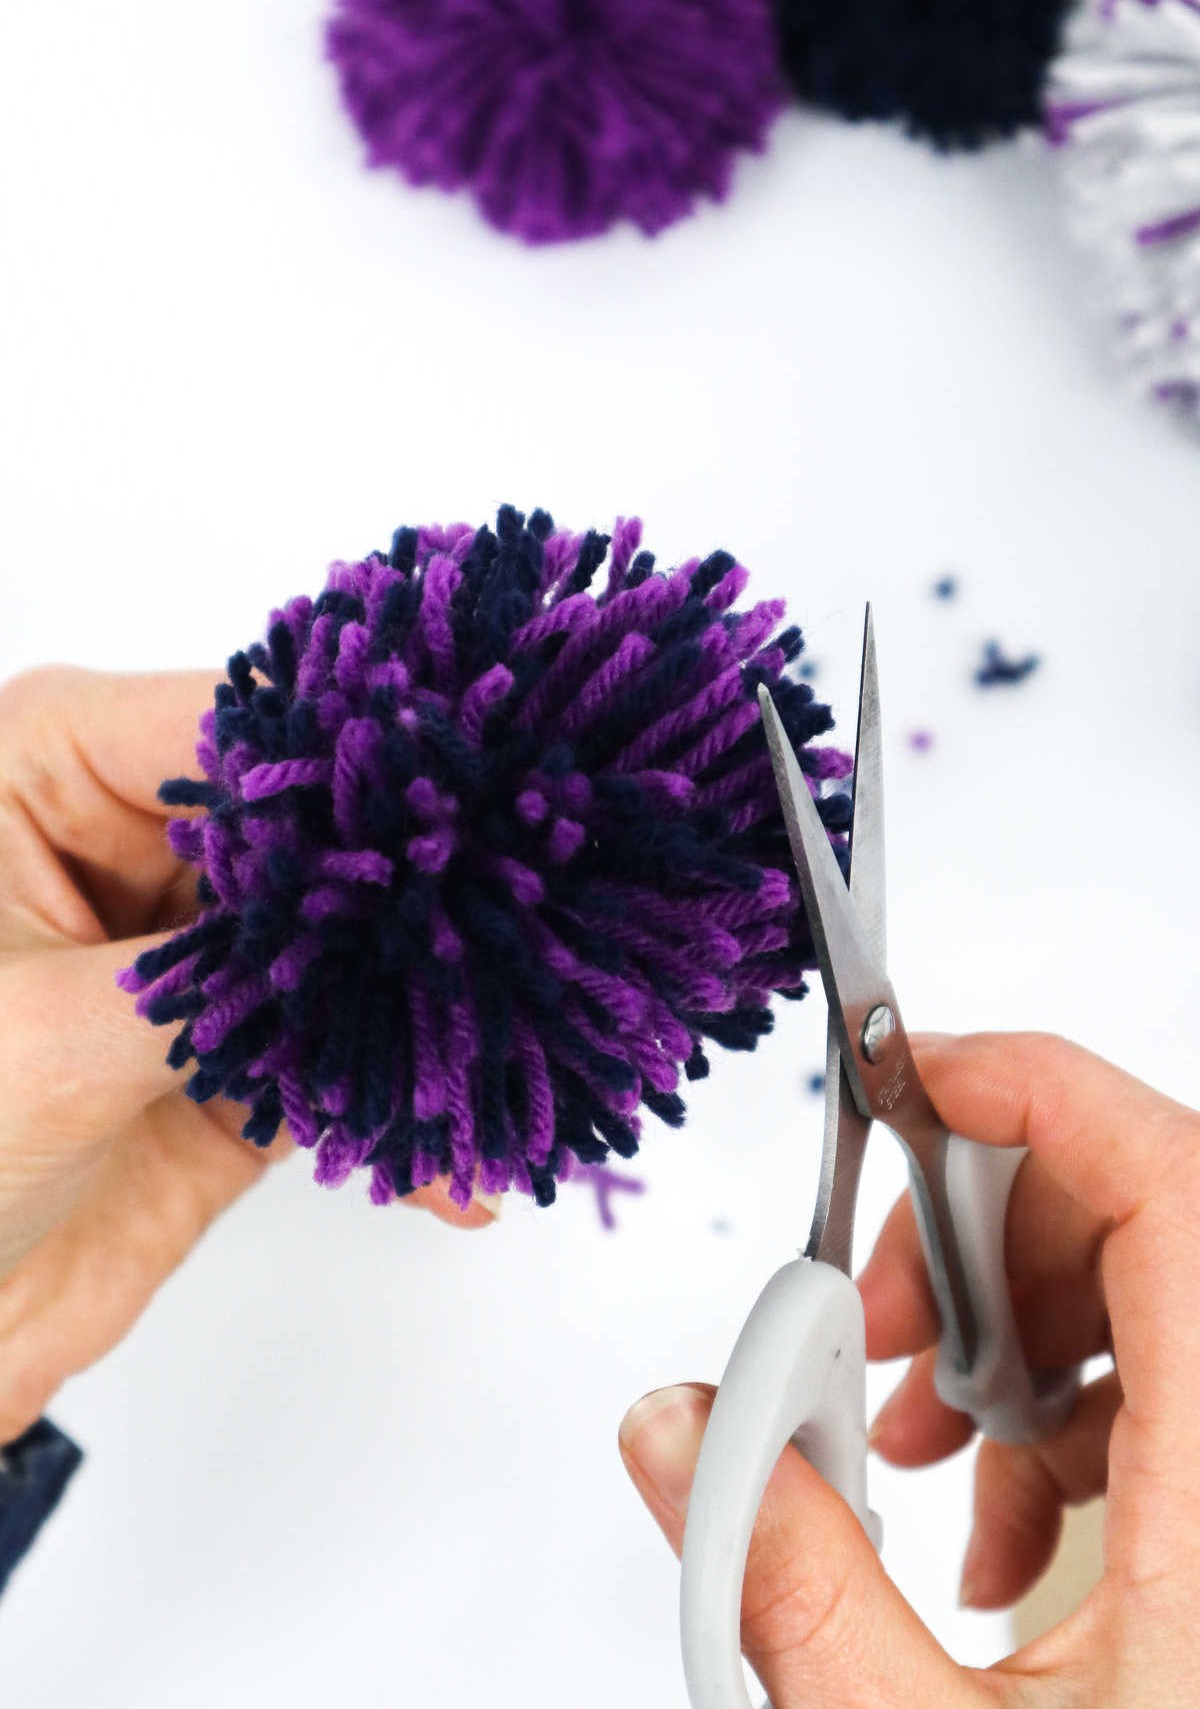
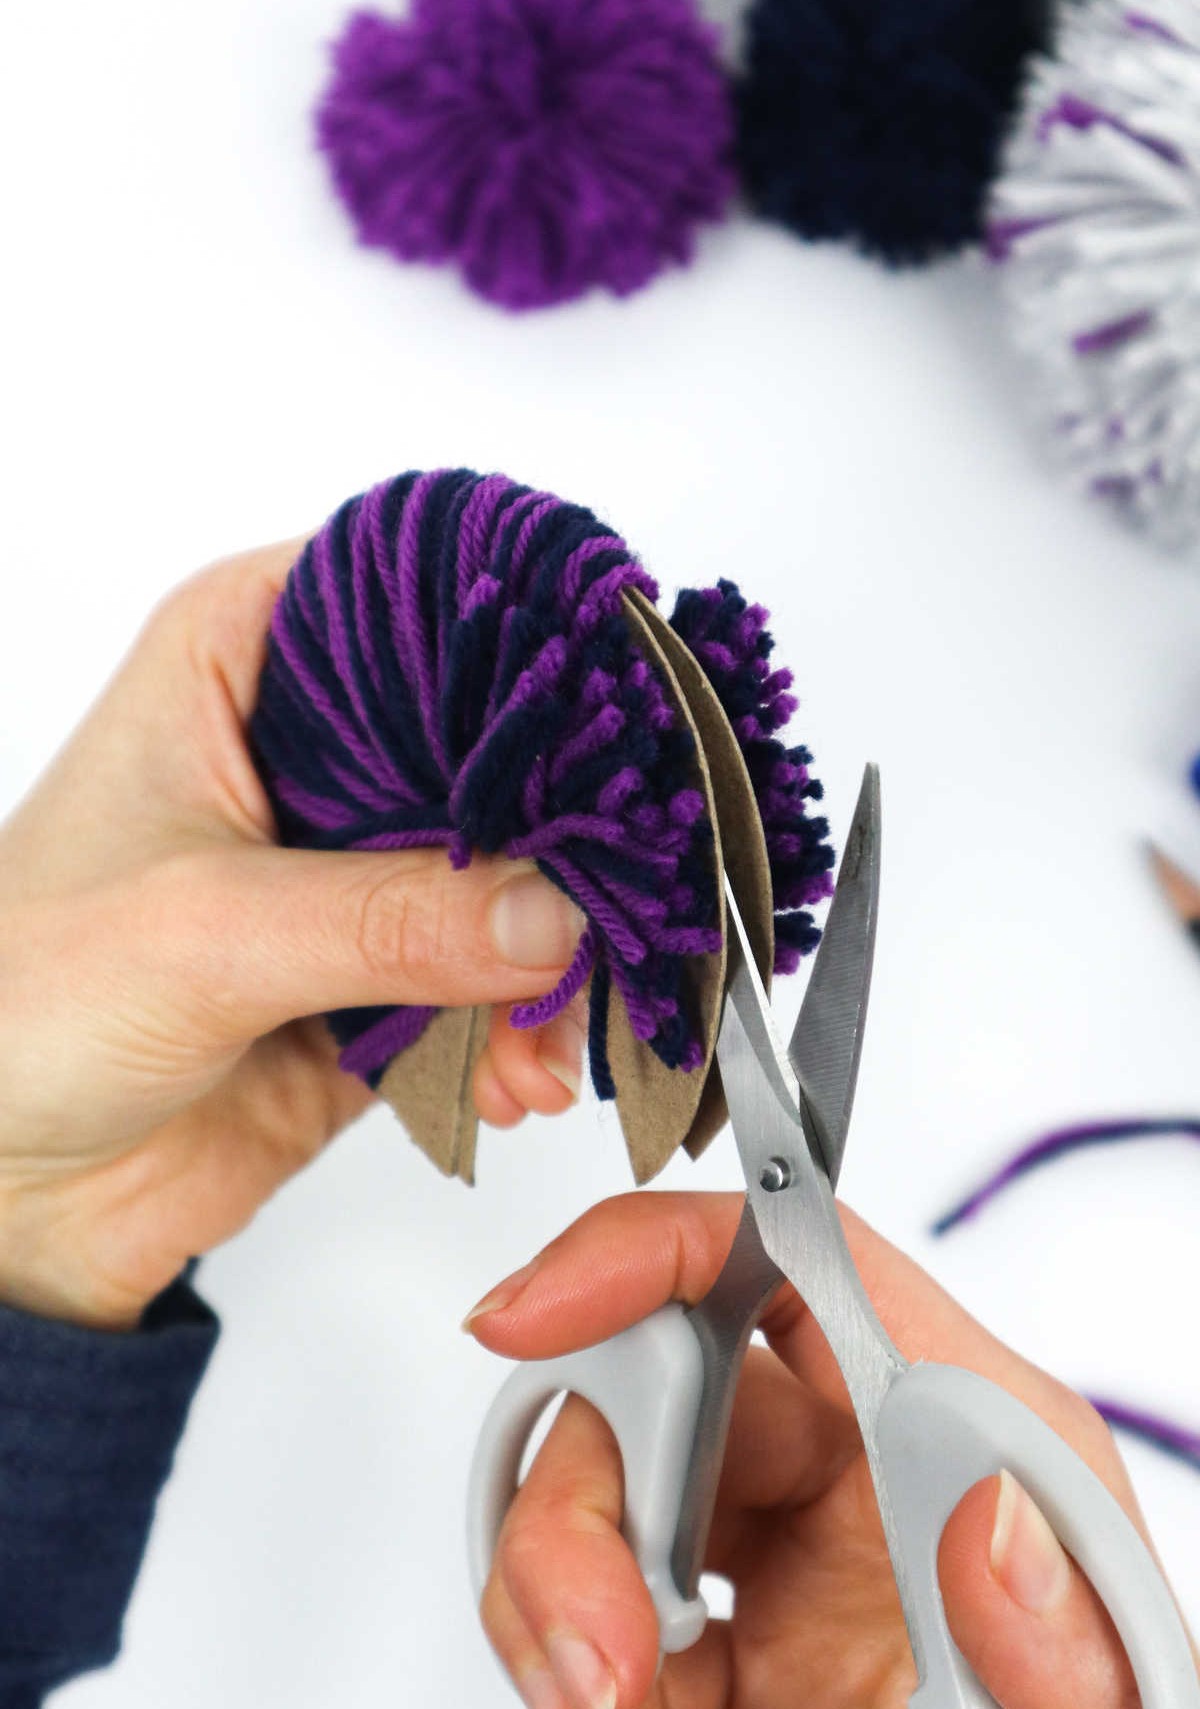
As you hold the pom pom in place, gently slide the excess material through the entrance. Although it already appears quite impressive, there’s still some fine-tuning to be done. To achieve a perfectly fluffy and well-proportioned pom pom, take a pair of scissors and trim the edges with precision. With these few simple steps, your creative project is now complete!
How Do You Make Yarn Pom Poms Fluffy?
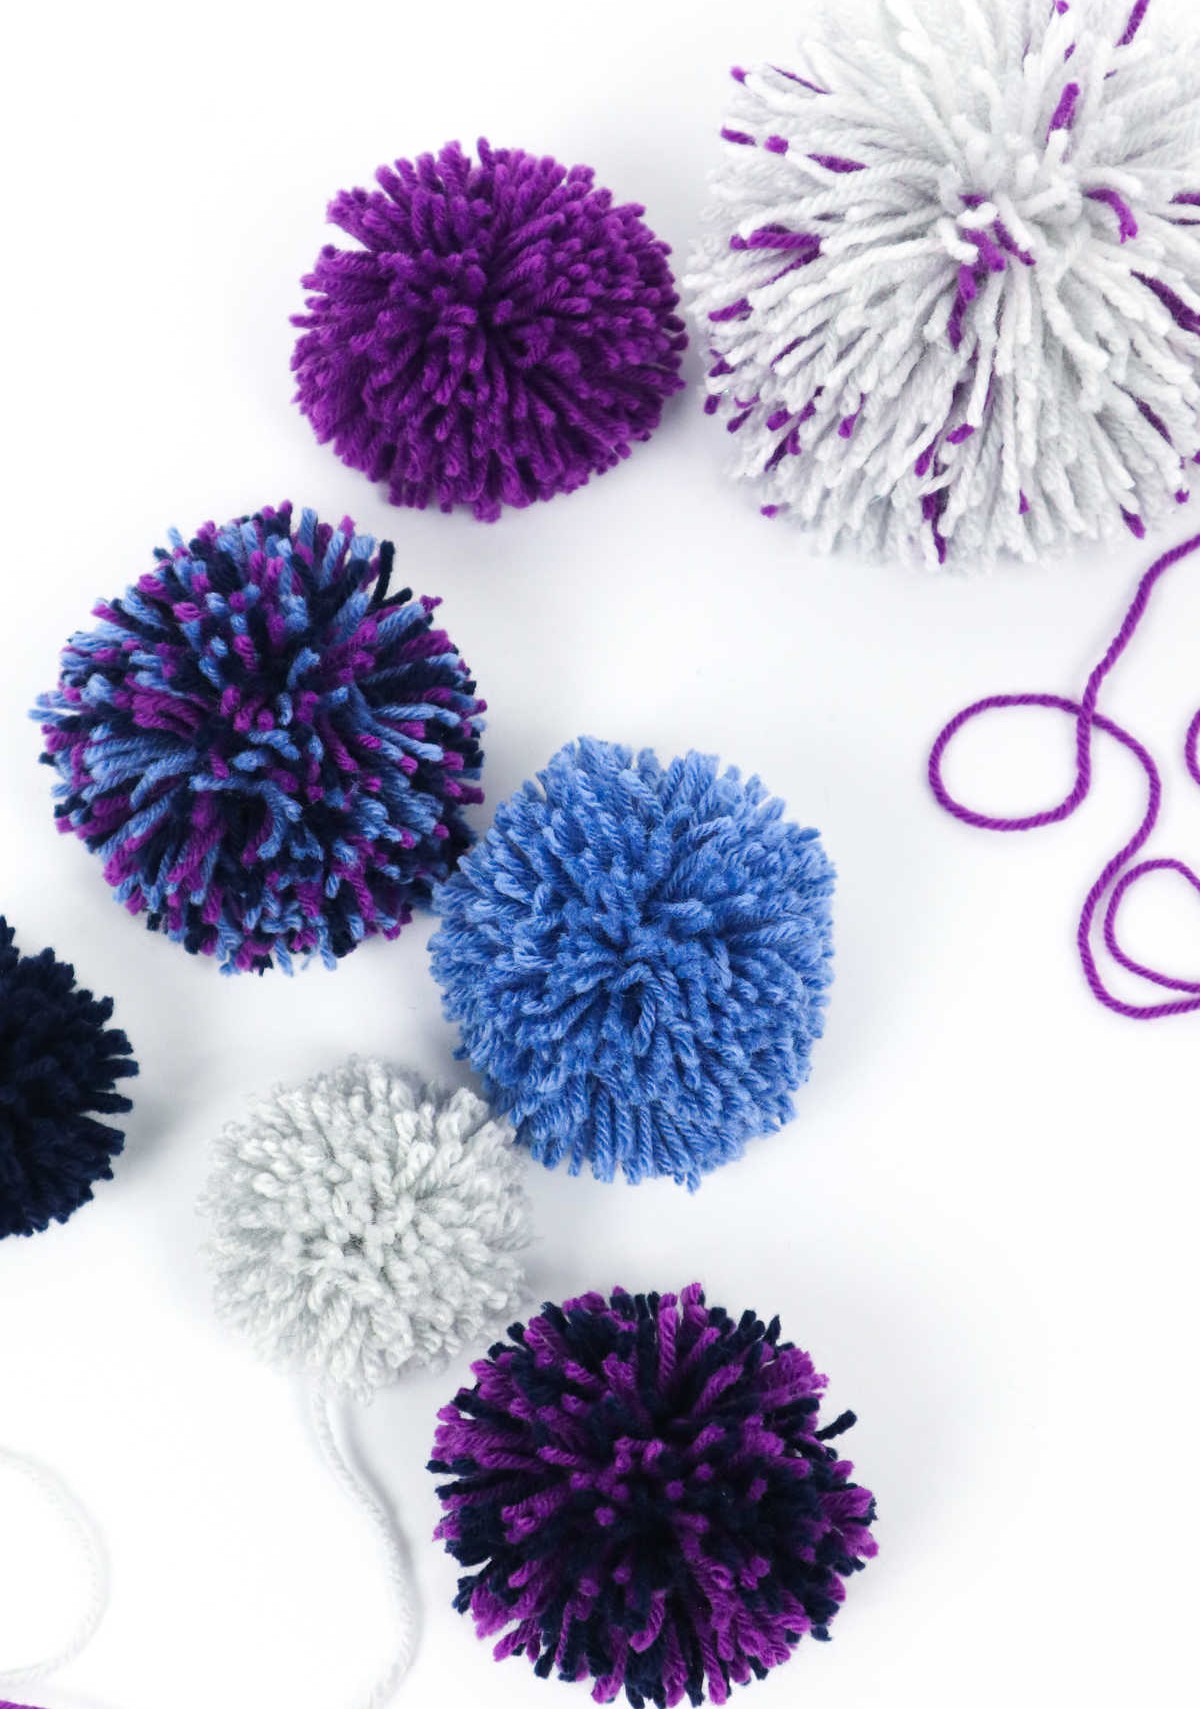
To achieve optimal puffiness, consider layering yarn around the disk – the more you wrap, the thicker and fluffier your final product will become. Alternatively, or in conjunction with wrapping, you can utilize a grooming brush to tease out individual strands, amplifying their overall texture and volume. The result is a surprisingly substantial and luxuriant pom pom that’s sure to impress.
Where Can You Use These Pom Poms?
When it comes to creative endeavors, pom poms are incredibly versatile. They can be seamlessly integrated into various projects, elevating their aesthetic appeal and adding a touch of whimsy. Here’s a rundown of the numerous ways you can utilize these colorful little orbs: From adorning your Christmas tree with festive flair to crafting a unique garland that adds visual interest to any room.
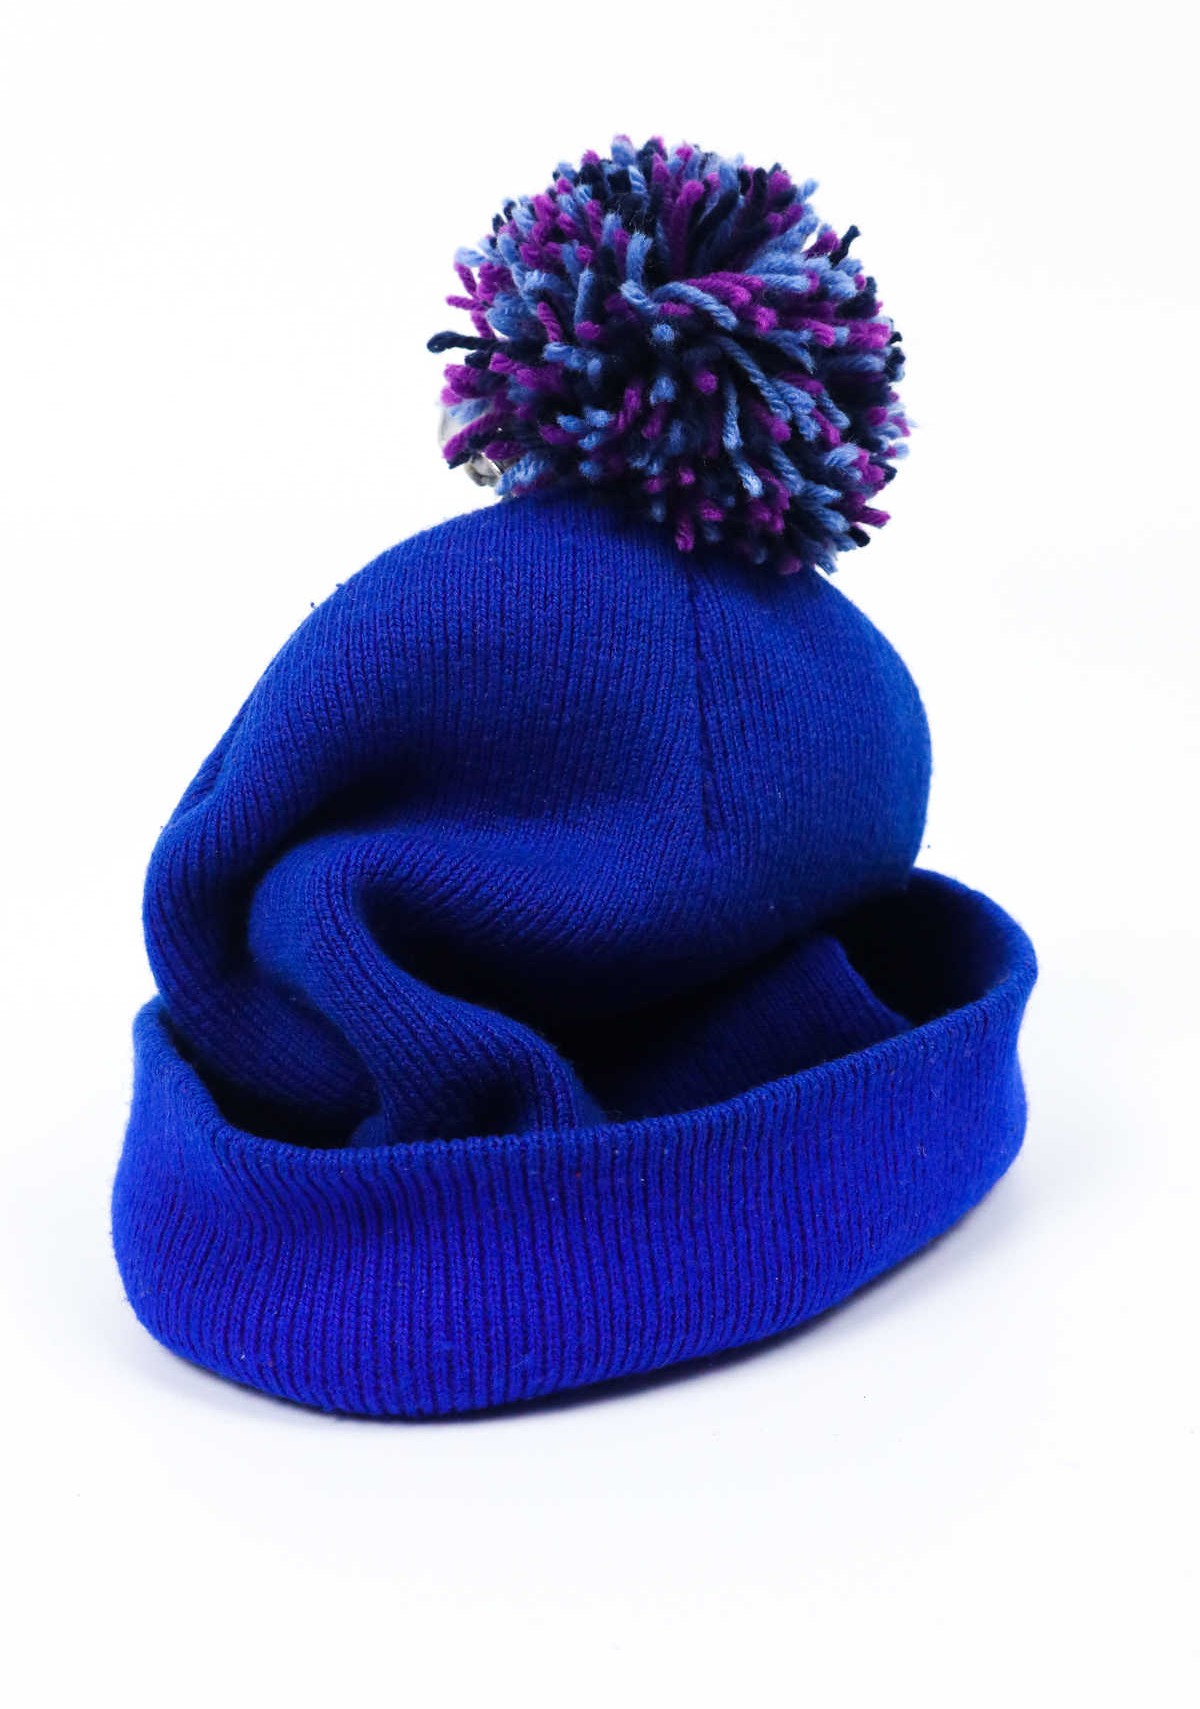
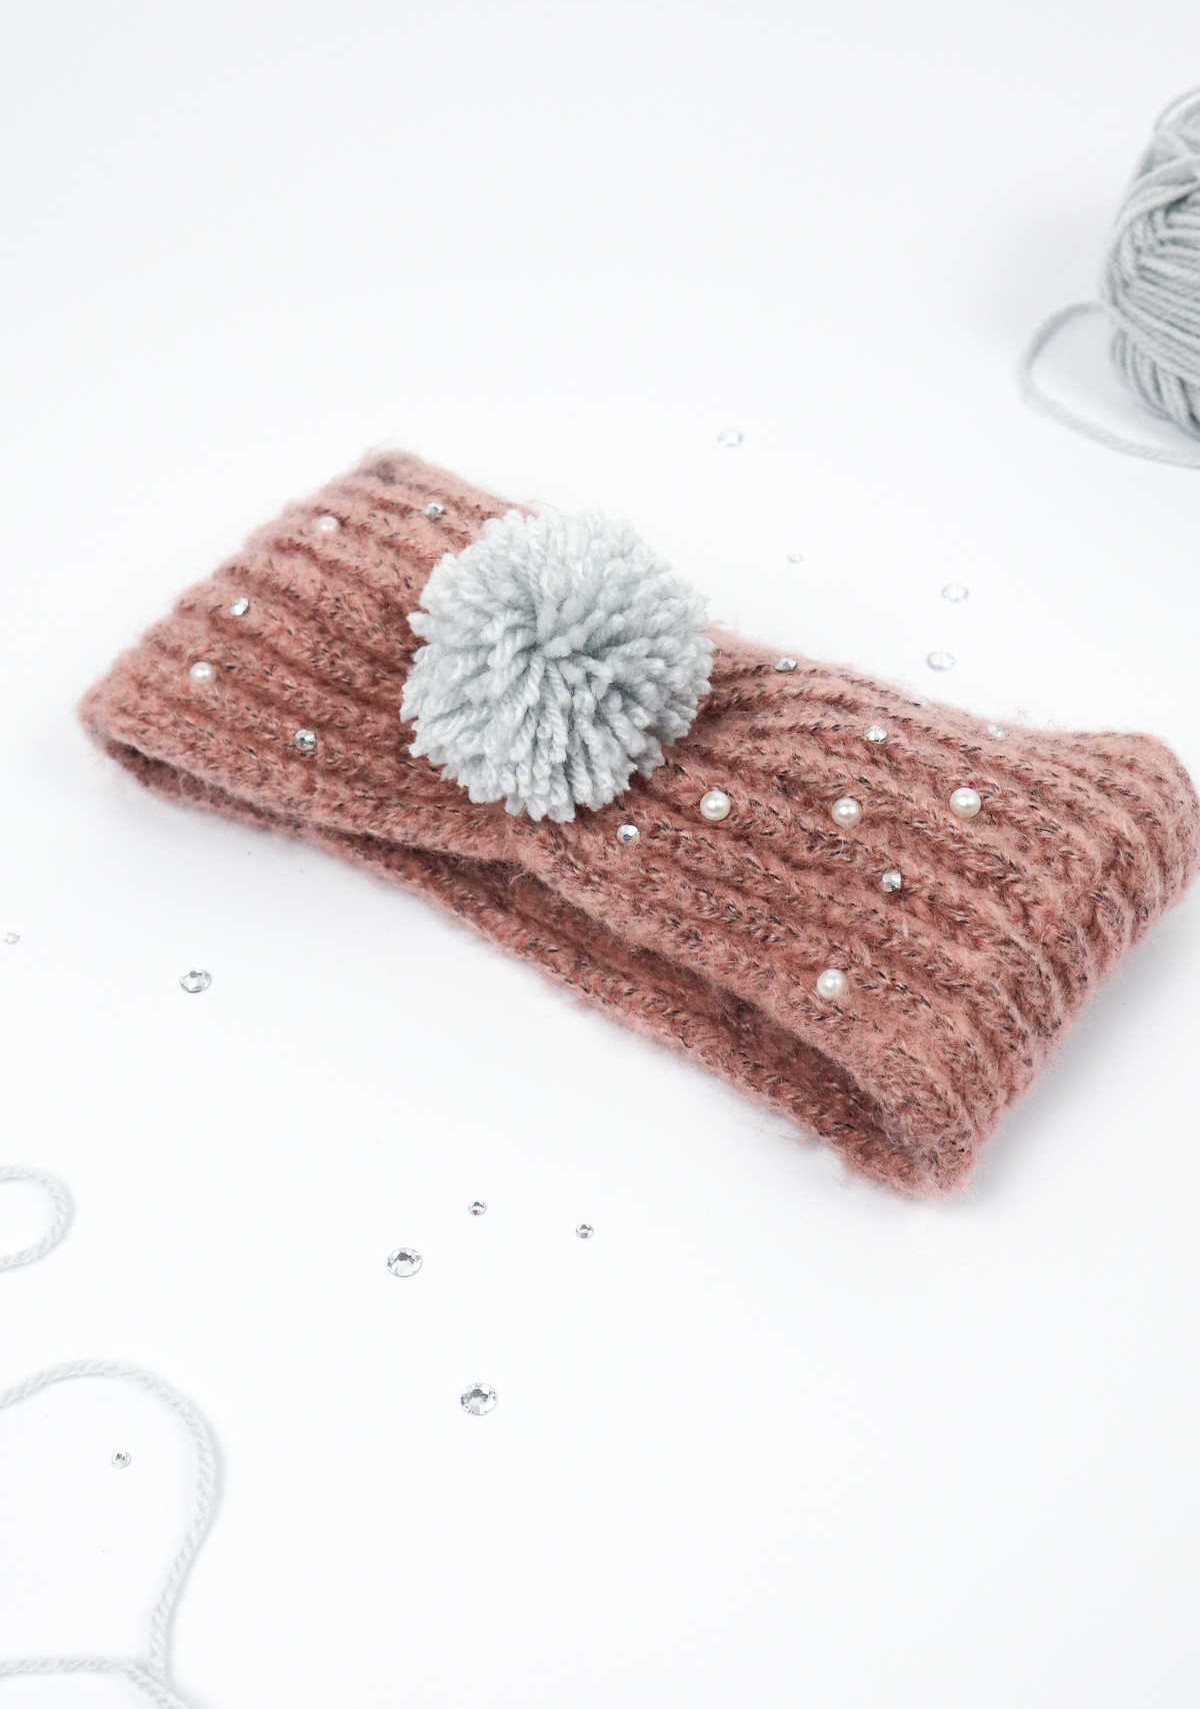
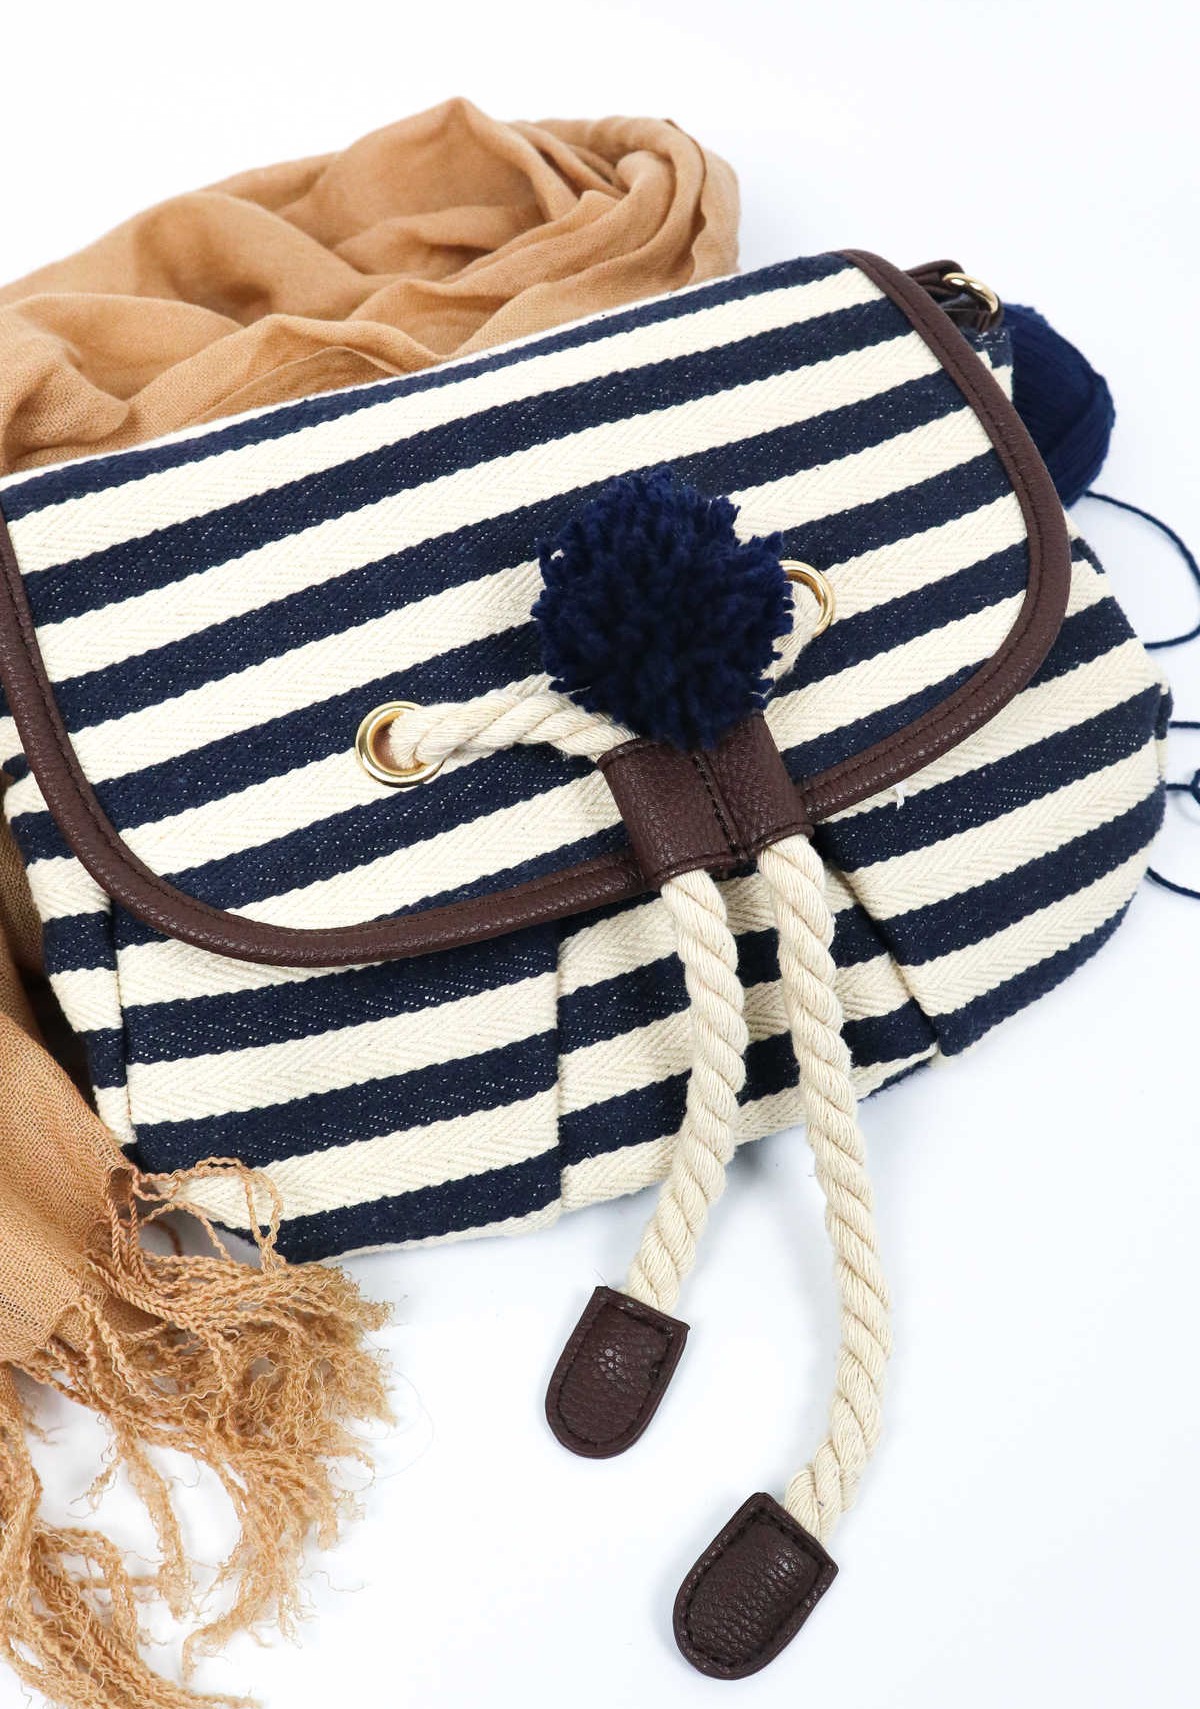
Pom poms also make great embellishments for hats, beanies, and headbands, while their soft texture and playful nature make them an ideal addition to bags, scarves, and accessories. If you’re looking for a thoughtful gift or want to add some personality to goodie bags or gift boxes, pom poms can help create a charming presentation. Moreover, these diminutive decorations can be used in craft projects to produce one-of-a-kind mats or rugs that bring warmth and coziness to any space.
How to Make Yarn Pom Poms
Get ready to learn the art of creating yarn pom poms, a versatile craft perfect for embellishing clothing, accessories, and more. With just 20 minutes invested, you’ll be well on your way to creating these charming additions. Authoritative guidance from Karo @ CraftsyHacks.com will guide you through the process, ensuring a seamless experience. So, what are you waiting for? Start crafting today!
Equipment
To complete the task at hand, you will need to gather a few basic materials. A shaker lid, often used for mixing cocktails, serves as a makeshift container. Alternatively, you could use a glass or a small bowl of your choice. For making precise cuts, a pencil is essential. To cut through any obstacles, scissors are necessary. Finally, a coin can come in handy when measuring tiny amounts of an ingredient.
Materials
Instructions
To start crafting your pom-pom, gather all necessary supplies. Begin by tracing two circles on a piece of cardboard using a lid or glass bowl as a guide. Place a coin in the center of one circle and trace its outline, then repeat the process for the second circle. Cut out both disks from the cardboard sheet. Next, make an incision along the middle of the disk with the inner circle and cut around the inner outline to create a donut hole.
Align the two disks with the donut hole on top and draw the outline of the inner circle onto the bottom disk. Repeat the process for the second disk. Then, widen the incision to create an entrance for both disks. Take a strand of yarn (or two strands for a two-colored pom-pom) and pass it through the hold in the middle of the disks. Begin wrapping the yarn around the entire disk, working your way along its surface. Once you’re satisfied with the thickness of the yarn, cut off the excess ends.
Next, insert scissors between the disks to cut around them, cutting through the yarn as you go while holding it in place to prevent it from falling through the hole. Cut a new length of yarn (about 8-10 inches) and pull it between the disks, bringing it out on either side of the entrance. Secure the yarn with two knots, then slide it off the disks and trim the edges to even them out. Your pom-poms should now resemble fluffy, round balls.