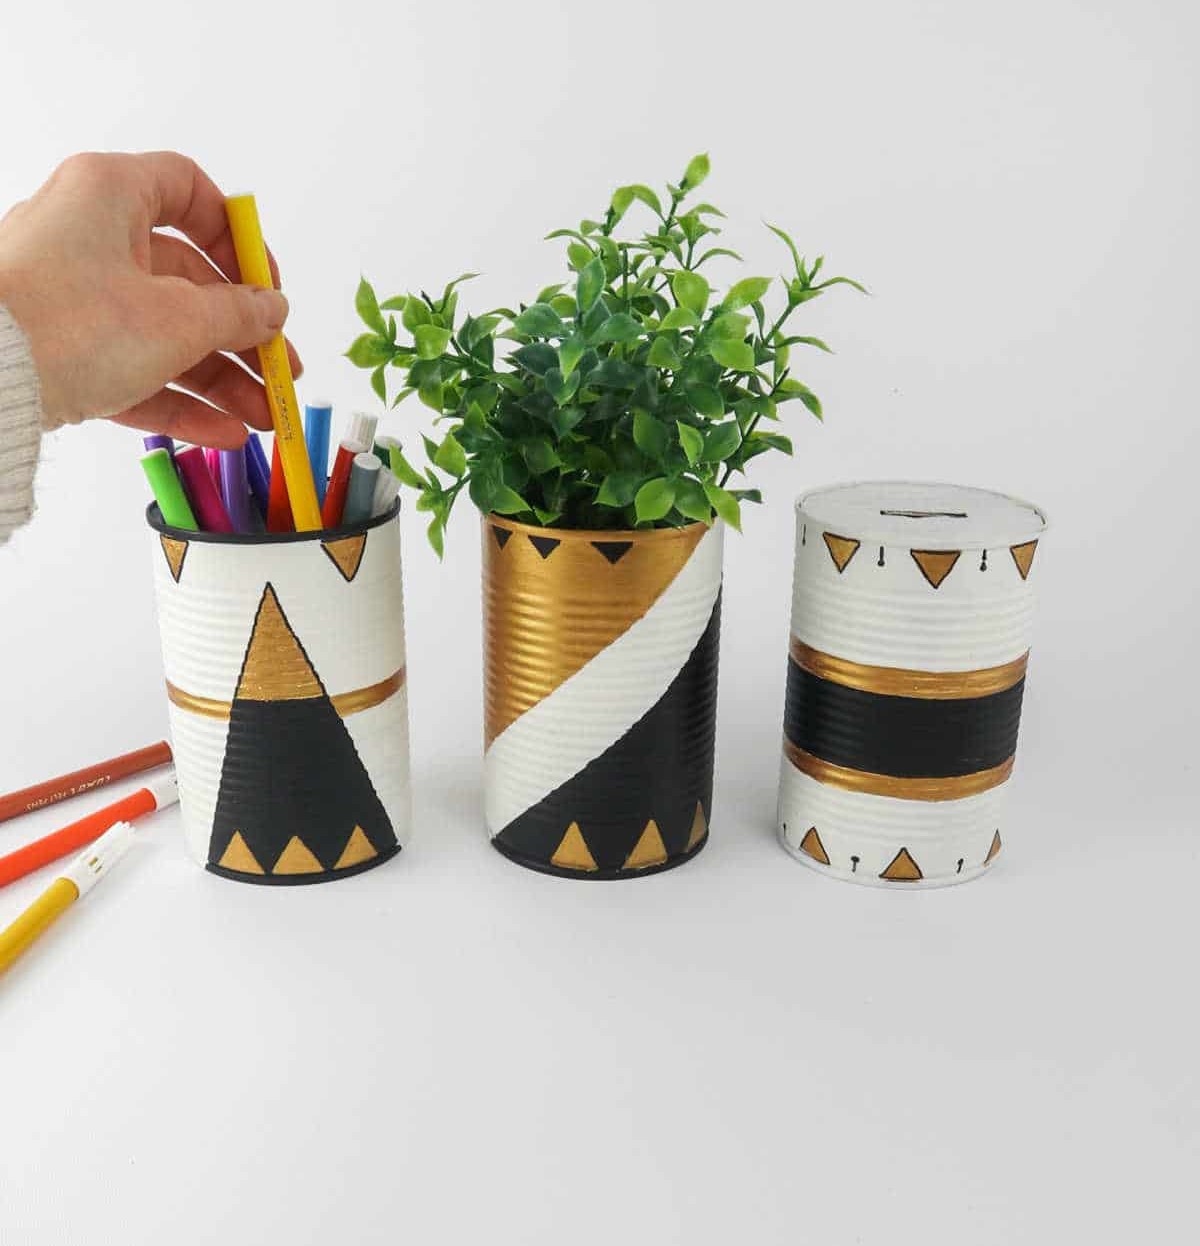
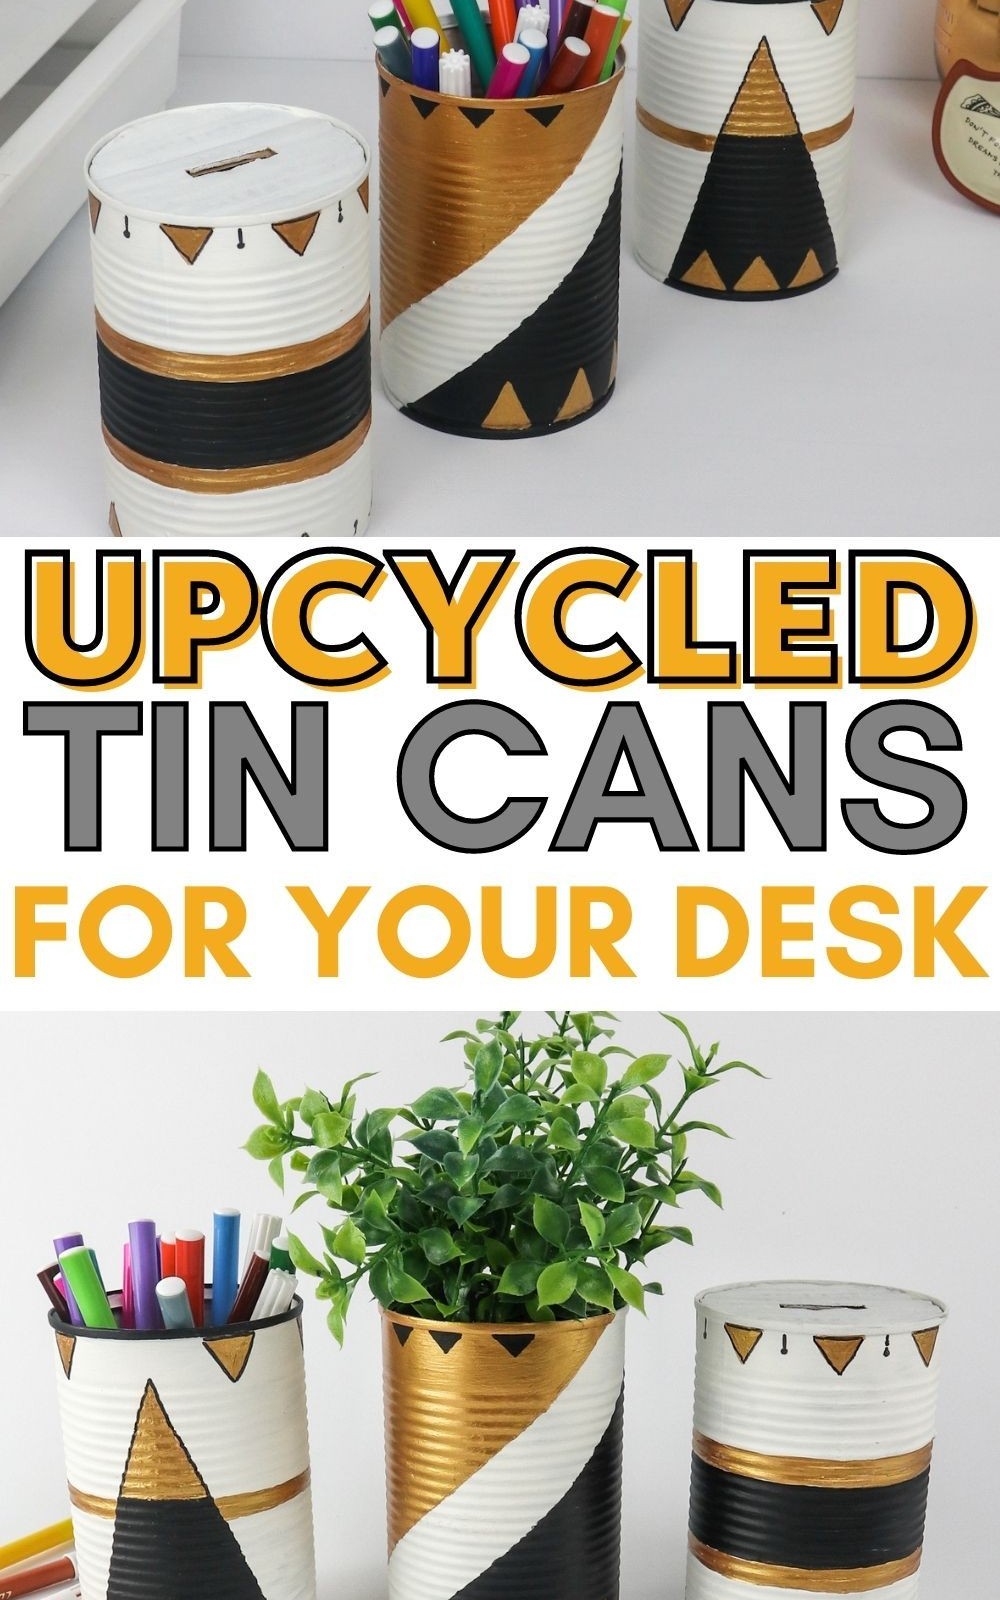
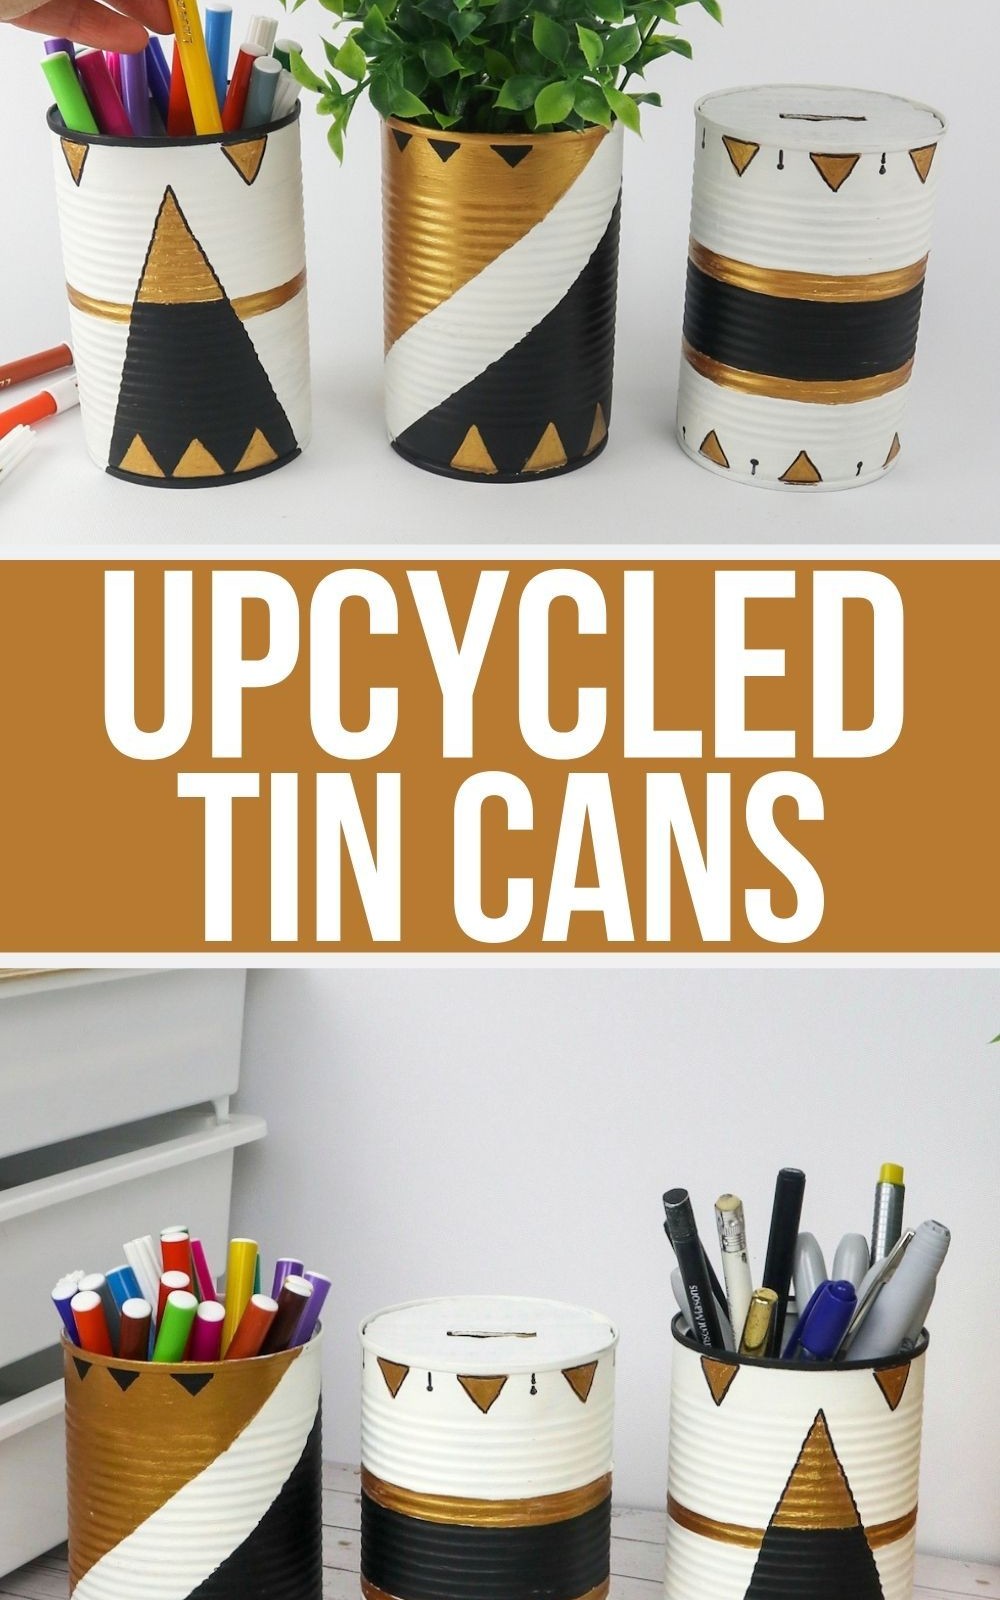
Transform ordinary tin cans into functional and stylish desk organizers with a simple upcycle! As anyone who’s shopped for office supplies knows, storage solutions can be pricey unless you find them on sale or opt for affordable alternatives. But what if I told you that with just a few basic crafting tools and some creative flair, you could turn a humble tin can into a beautiful pencil holder or even a tiny desktop planter? The possibilities are endless!
First, let’s take a look at the supplies you’ll need to get started.
Supplies You’ll Need
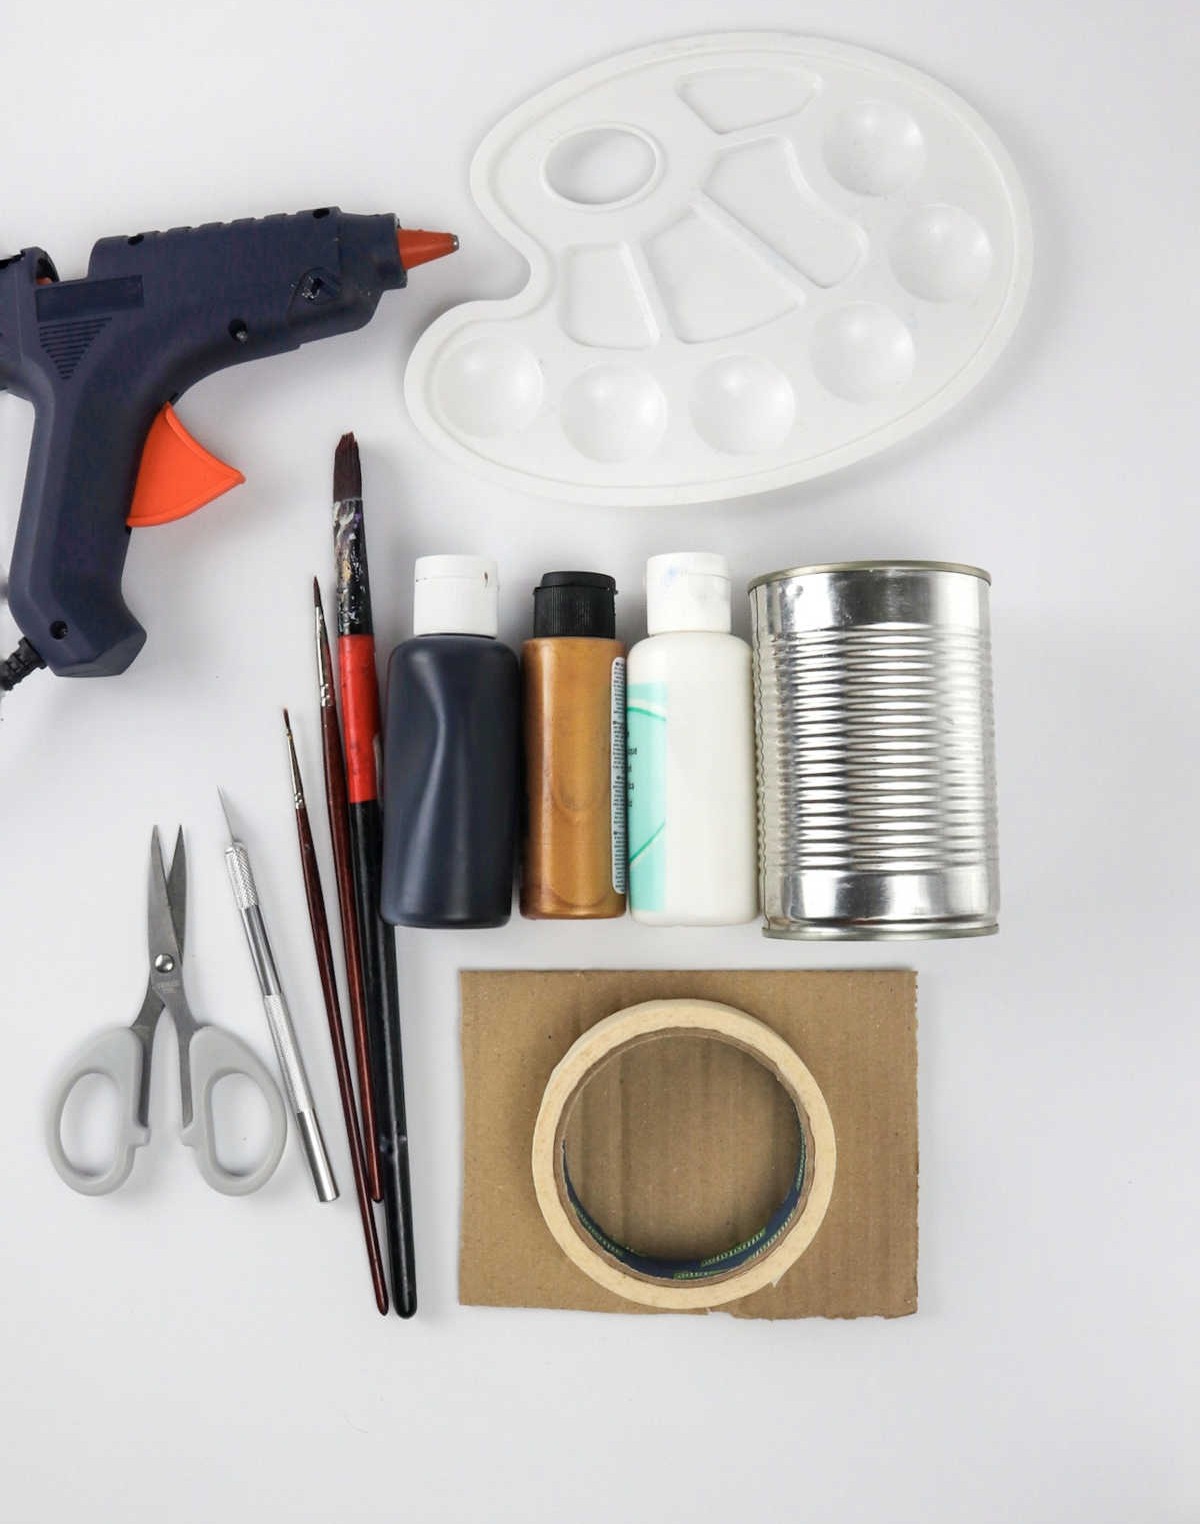
Gather your arsenal of creative tools by collecting the essential supplies: acrylic paint, a paint palette or a jar lid, masking tape, various paintbrushes, scissors, and a glue gun if you plan on getting crafty with additional materials. Don’t forget to lay out some newspapers around the workspace to contain any potential mess.
How to Upcycle Tin Cans
Step 1
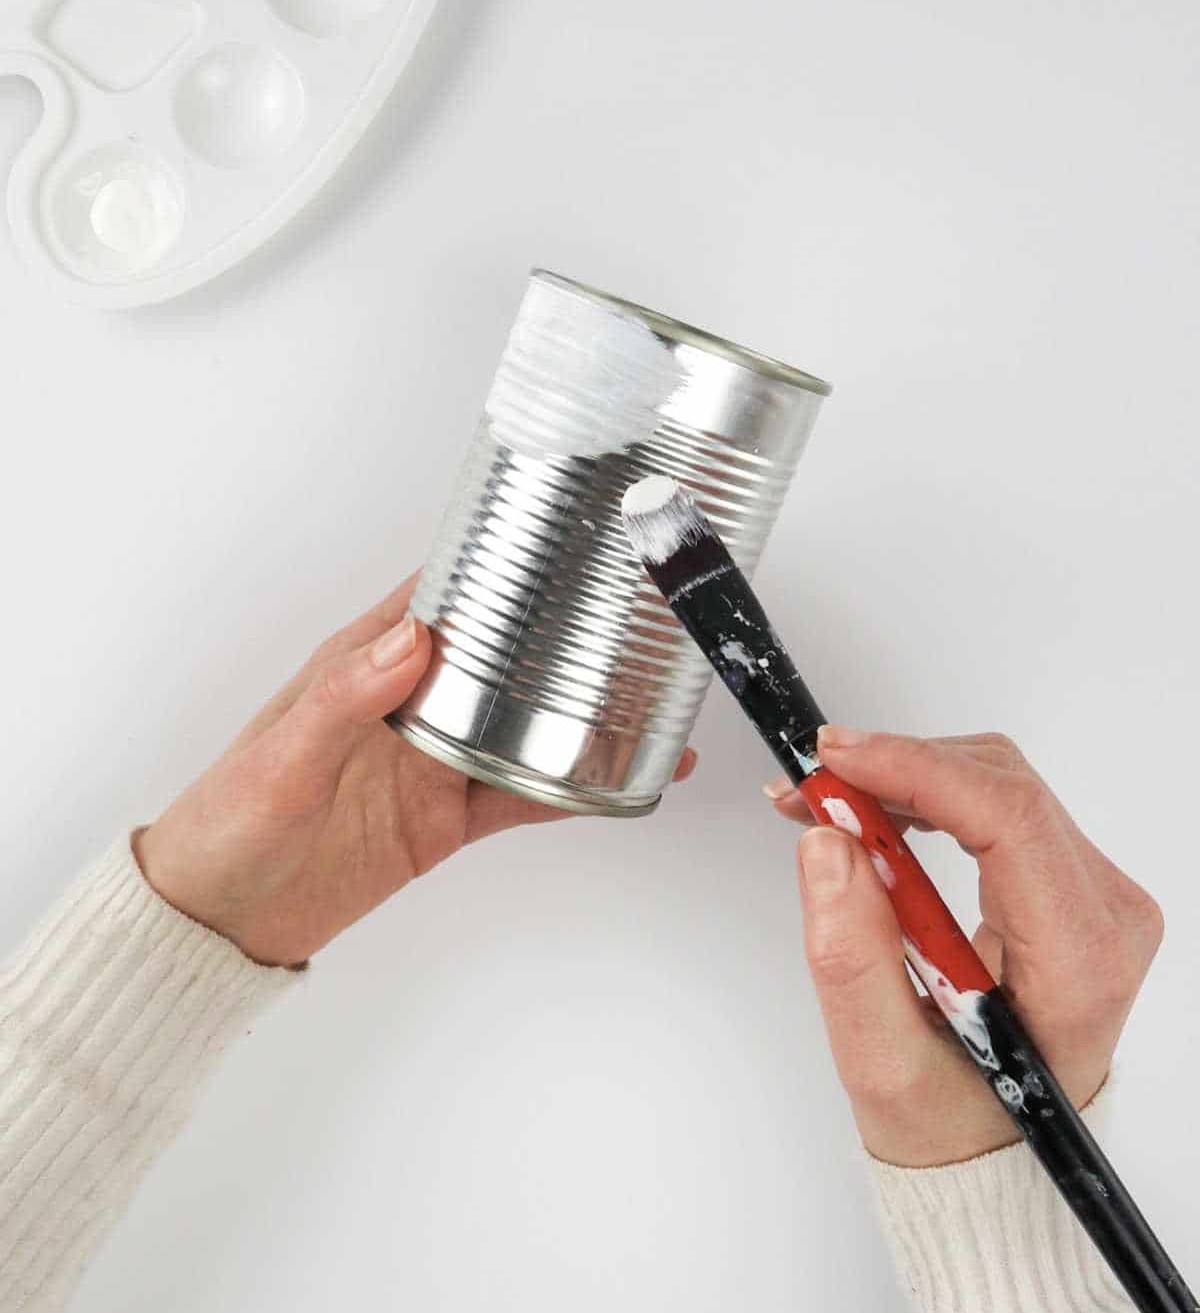
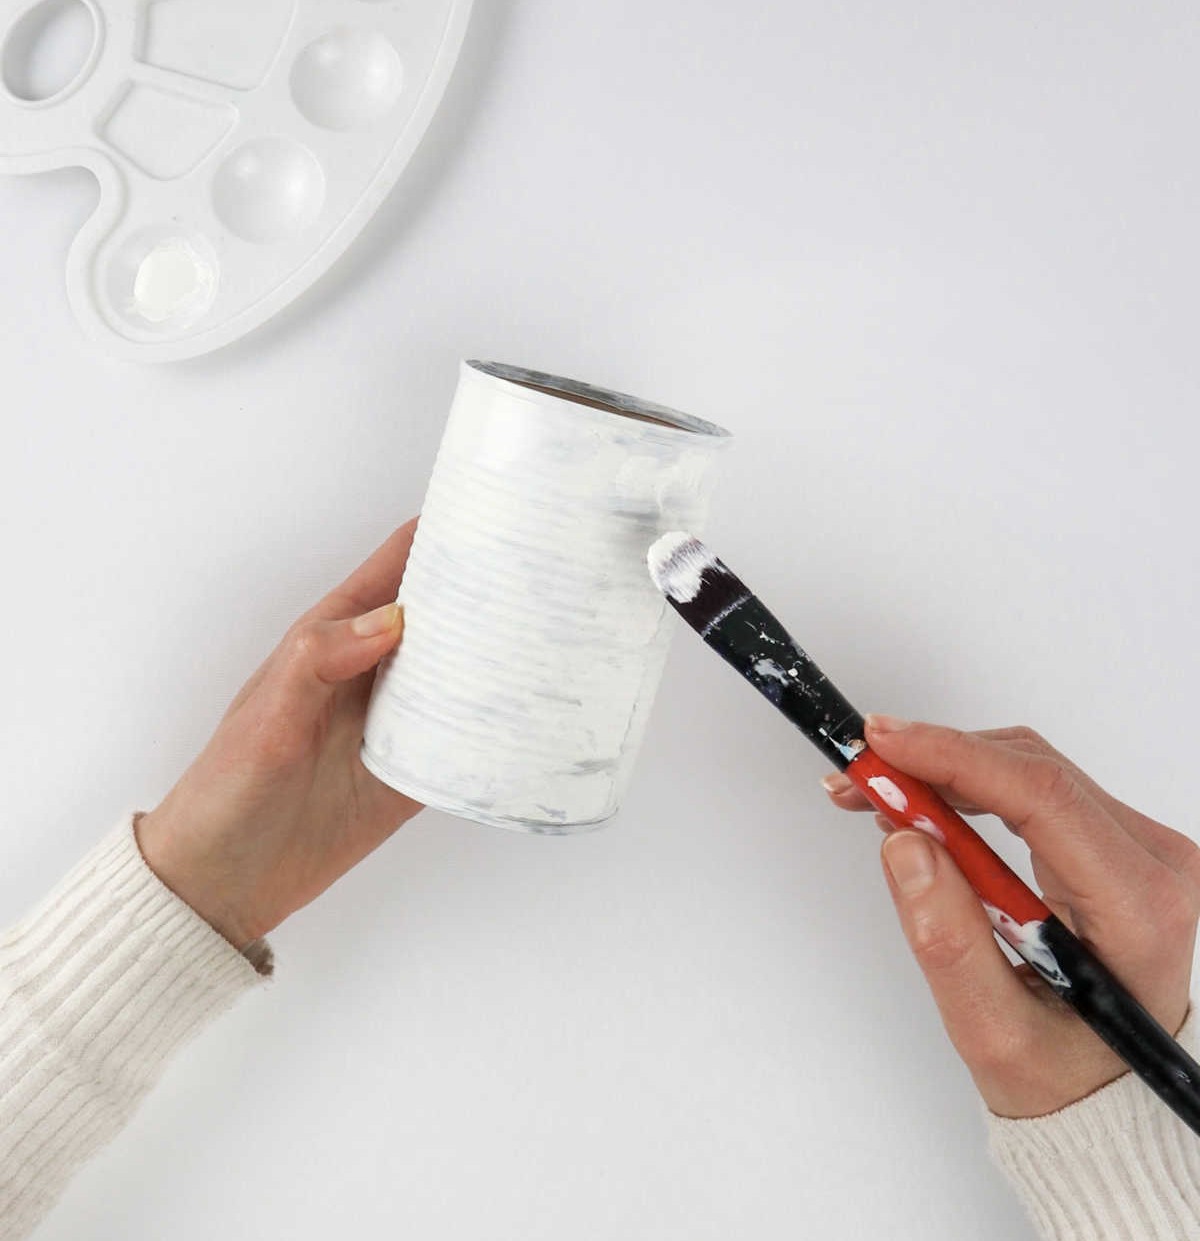
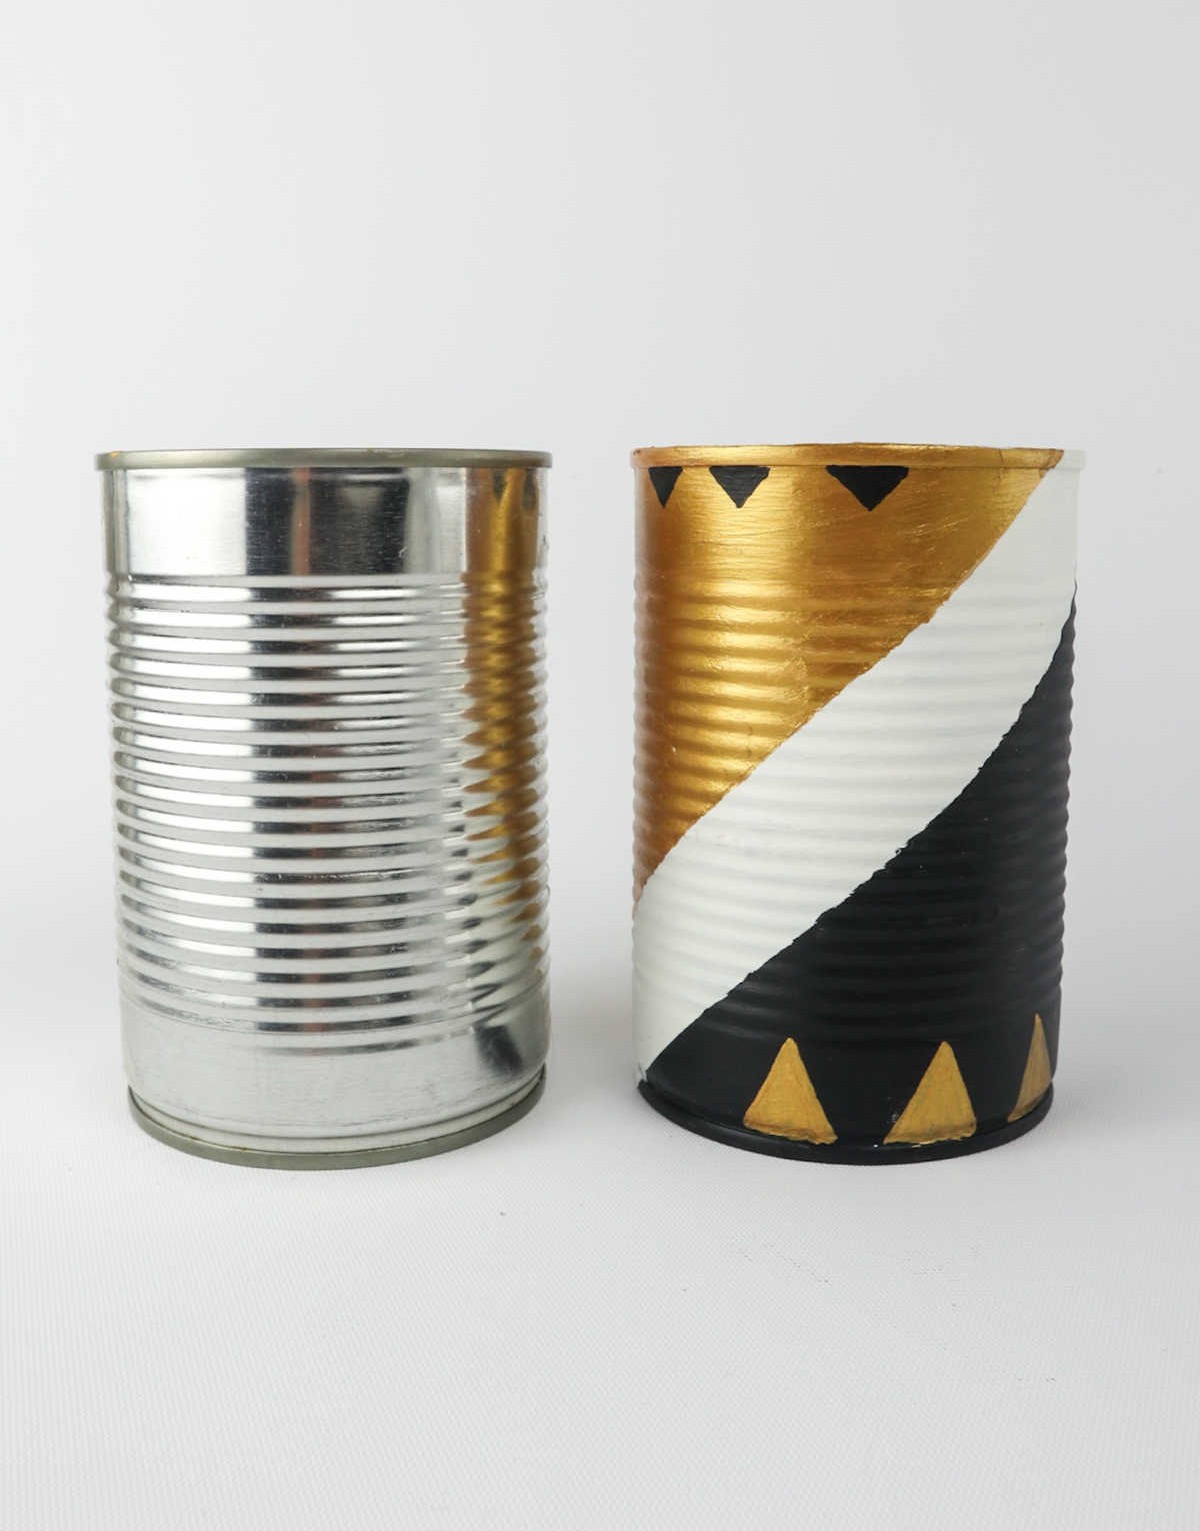
Before diving in, take a moment to lay out a few newspapers nearby – they’ll come in handy for containing any stray paint spills. Now it’s time to transform those tin cans into masterpieces! Grab your trusty paintbrush and begin by applying a base coat of white paint. You can opt for acrylic or another type of paint specifically designed for metal surfaces, such as tin. Be patient and allow the first layer to fully dry before adding additional coats for optimal coverage.
Step 2
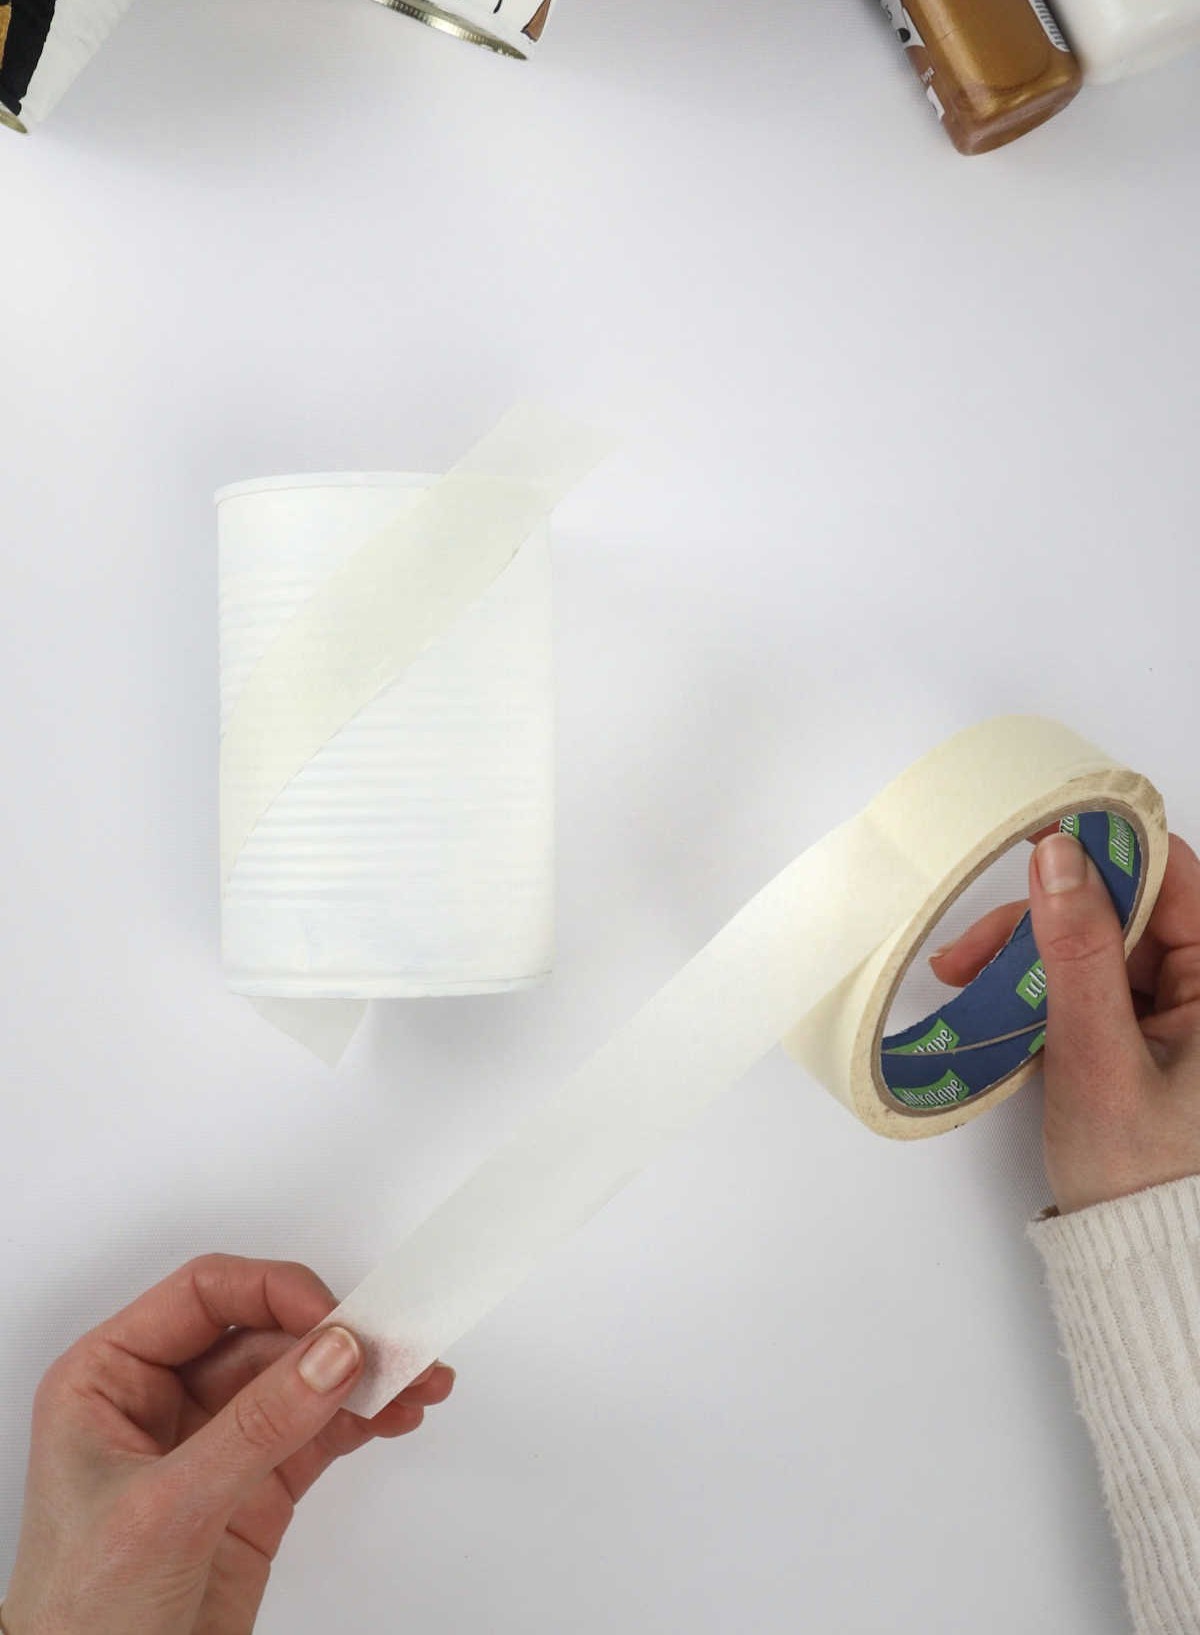
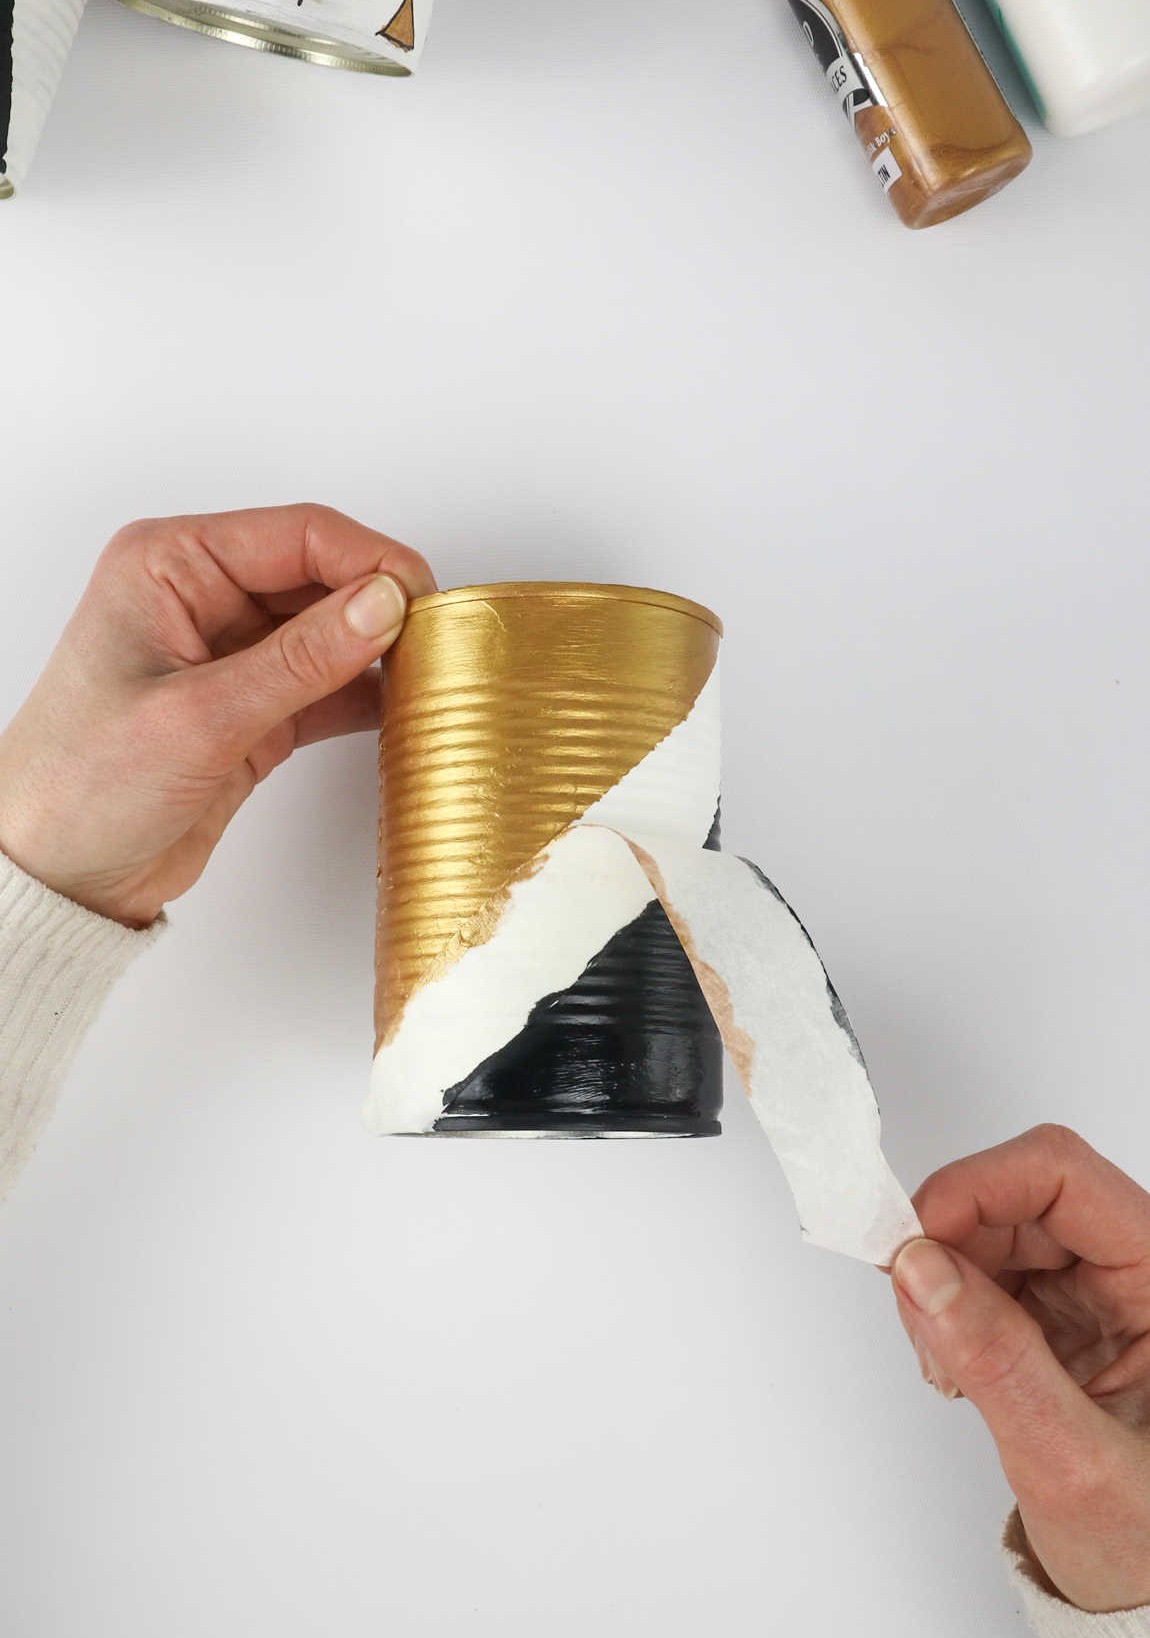
To create a visually appealing and well-defined design, consider dividing your canvas into distinct areas using masking tape or painter’s tape. This simple trick allows you to focus on one section at a time, preventing unwanted color bleed and ensuring a crisp, precise finish. By segmenting your artwork in this manner, you’ll be able to envision your overall composition and execute it with greater ease, resulting in a final product that showcases your artistic vision.
Step 3
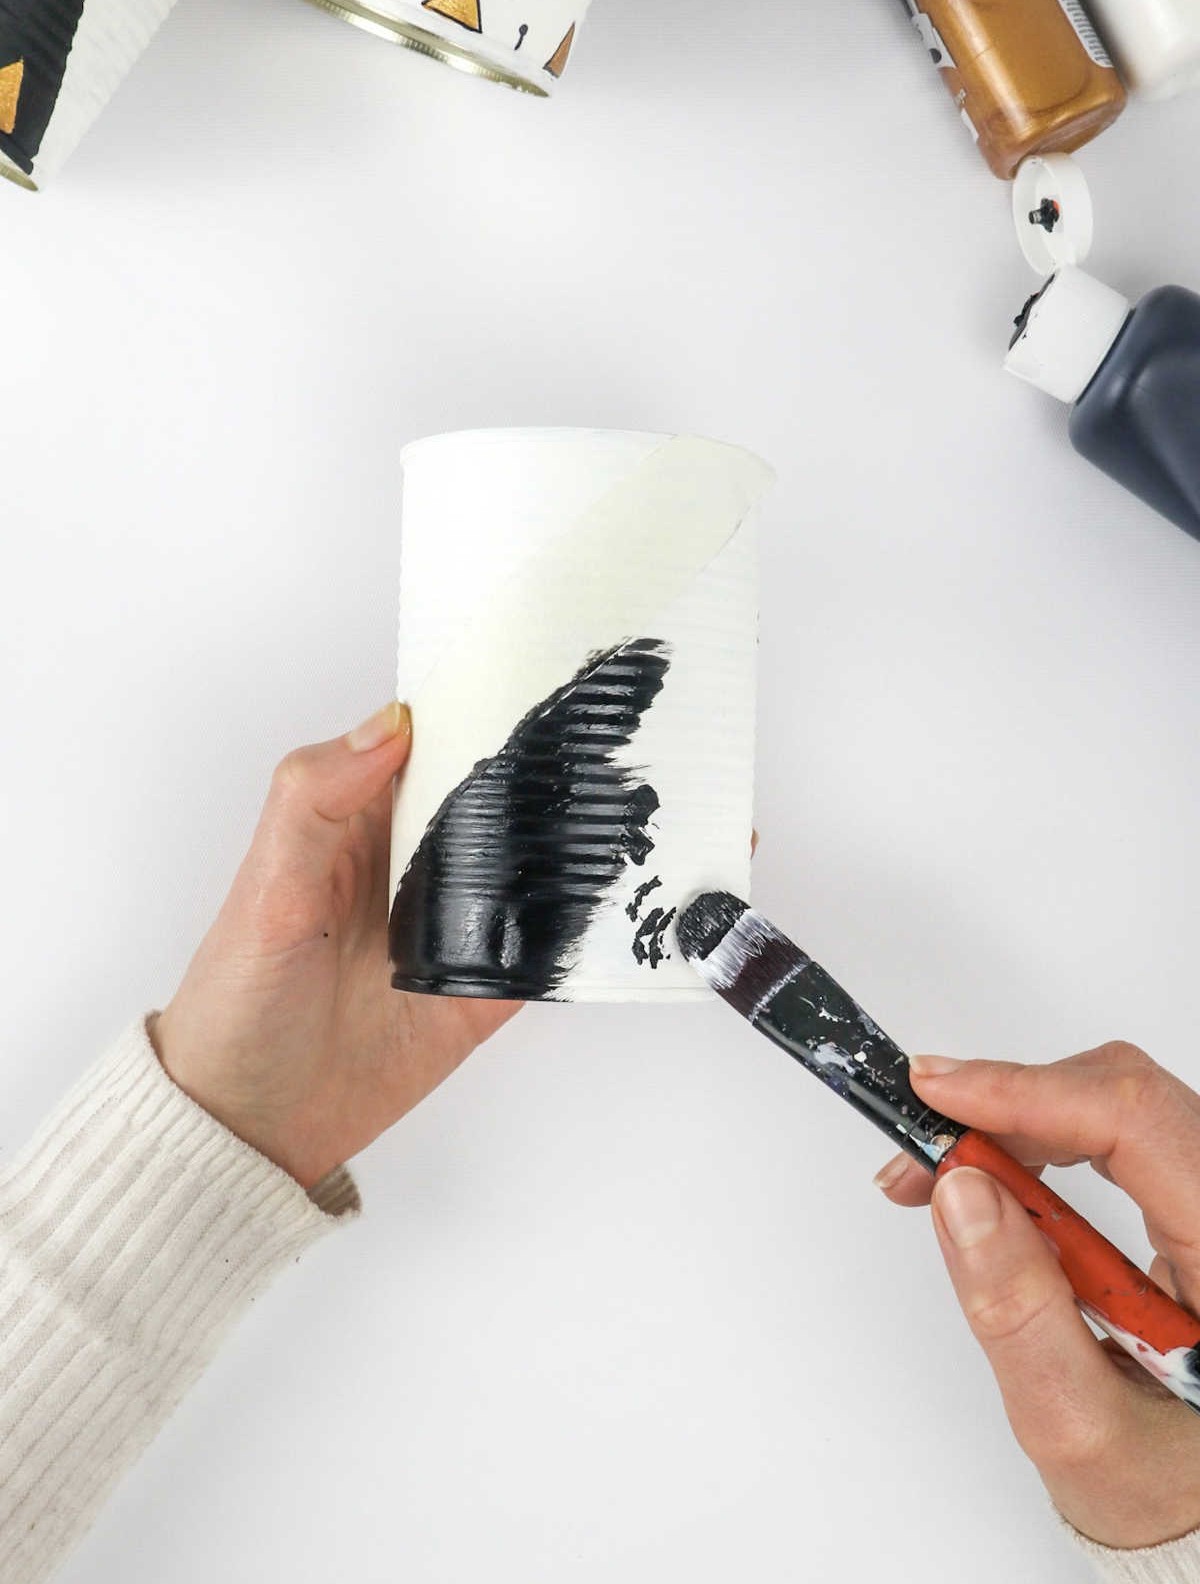

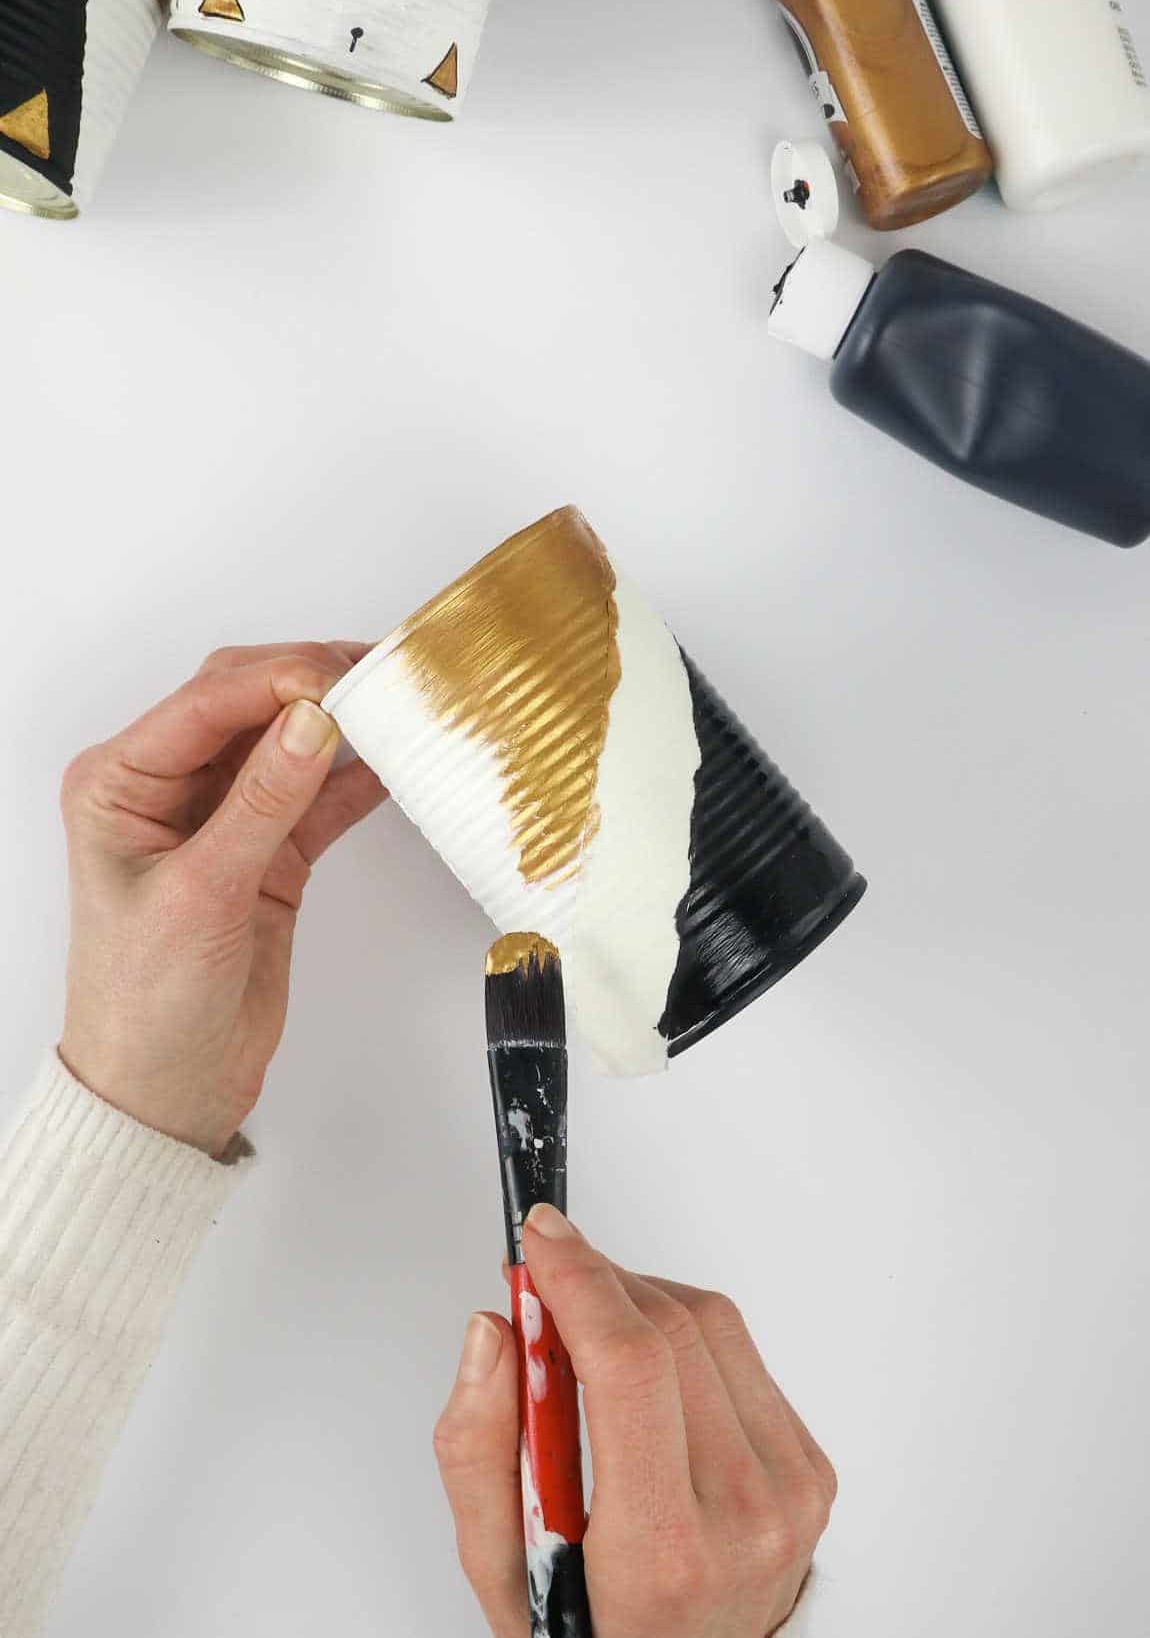
Transform the canvas with your unique design, incorporating a range of colors and patterns that reflect your personal style. For this project, we’re opting for a striking combination of black and gold, featuring intricate Aztec-inspired detailing. Feel free to experiment with other metallic hues or take a more subdued approach, embracing muted florals and soft pastels to create a look that’s both elegant and understated.
Step 4
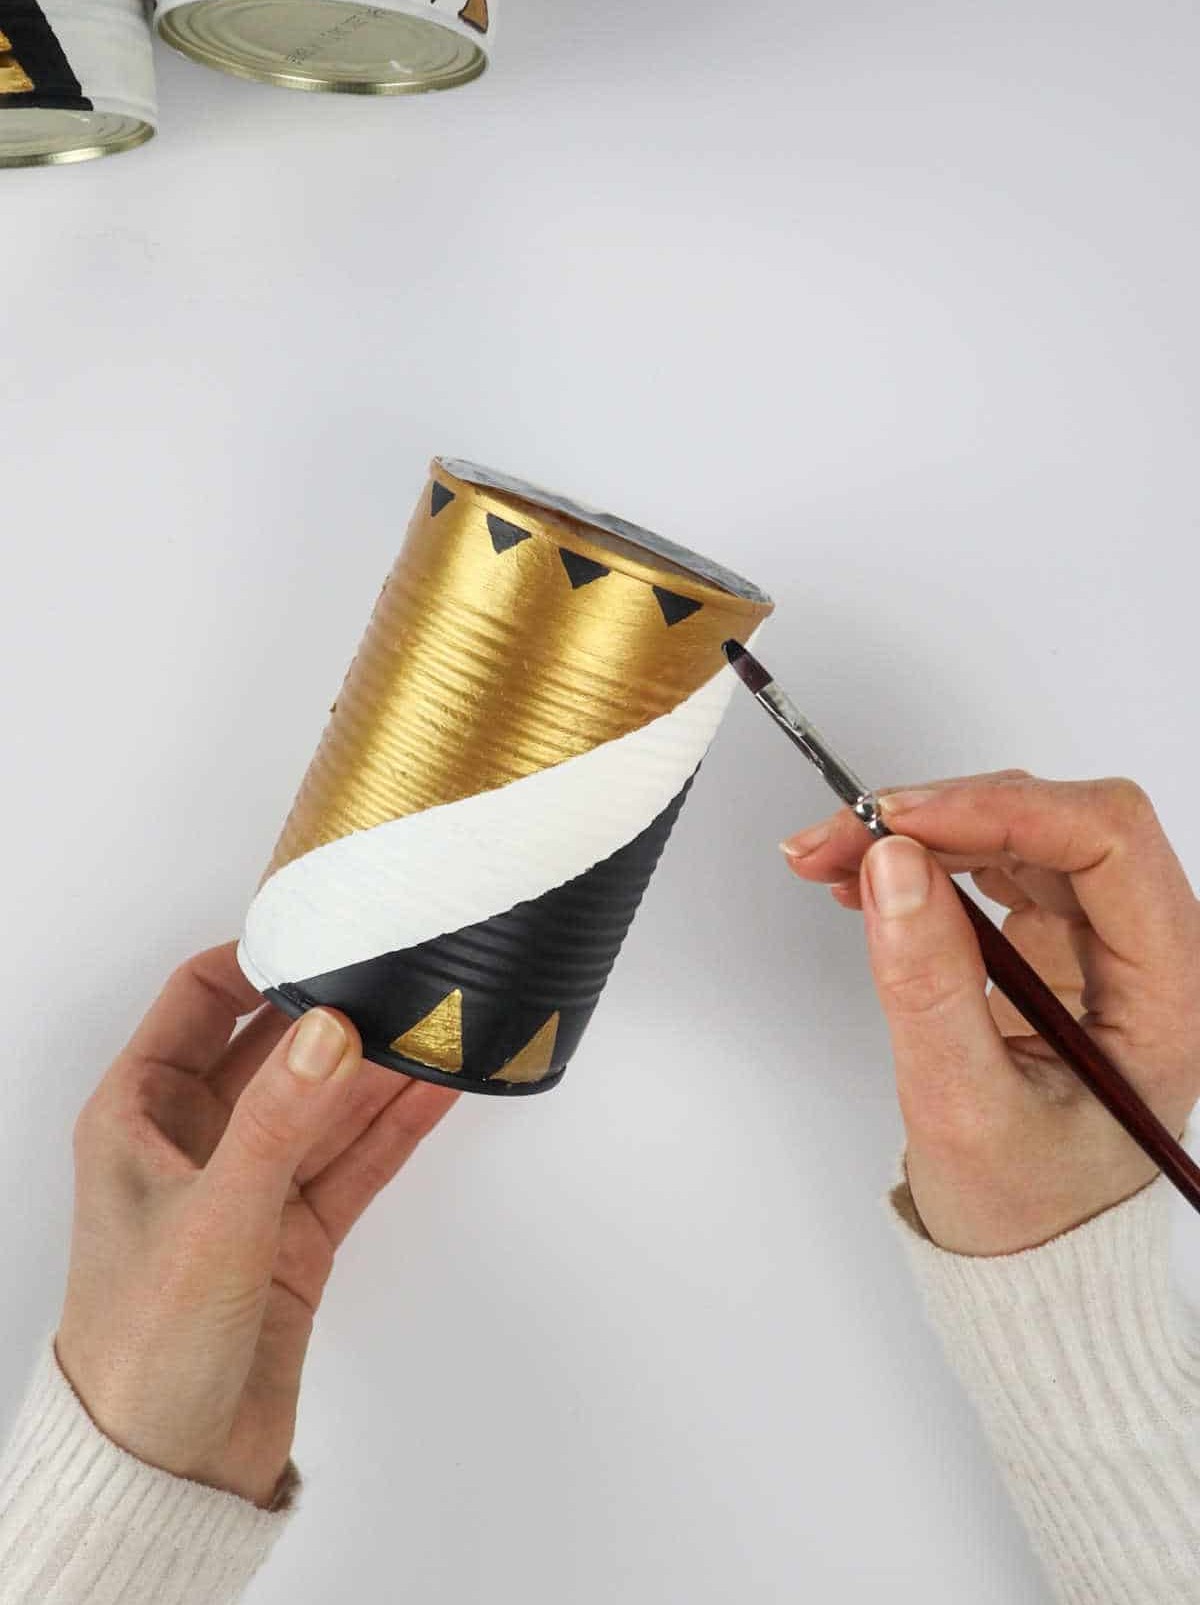
Once you’ve completed painting the surface and are satisfied with your design, it’s time to reveal the tape. Before moving on to the detailing and embellishments – if applicable – ensure that the canvas is completely dry.
To add the finer details of your design, use a thin-bristle paintbrush, a detailing brush, or even a permanent marker. As with previous steps, allow the surface to dry thoroughly to prevent any smudges from forming.
Step 5
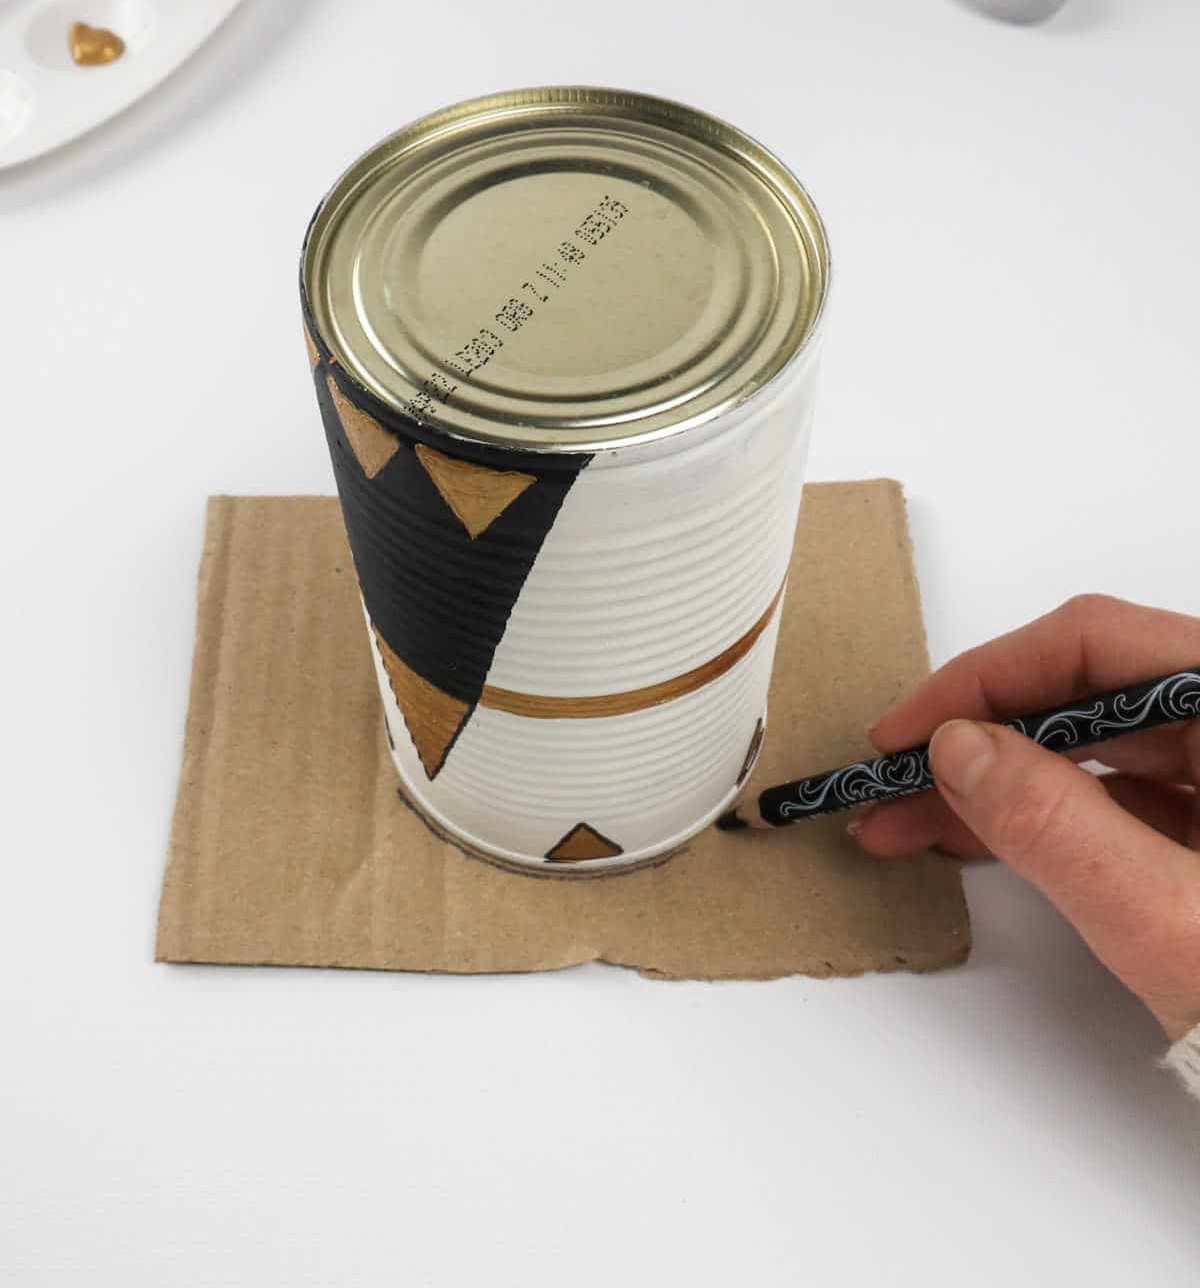
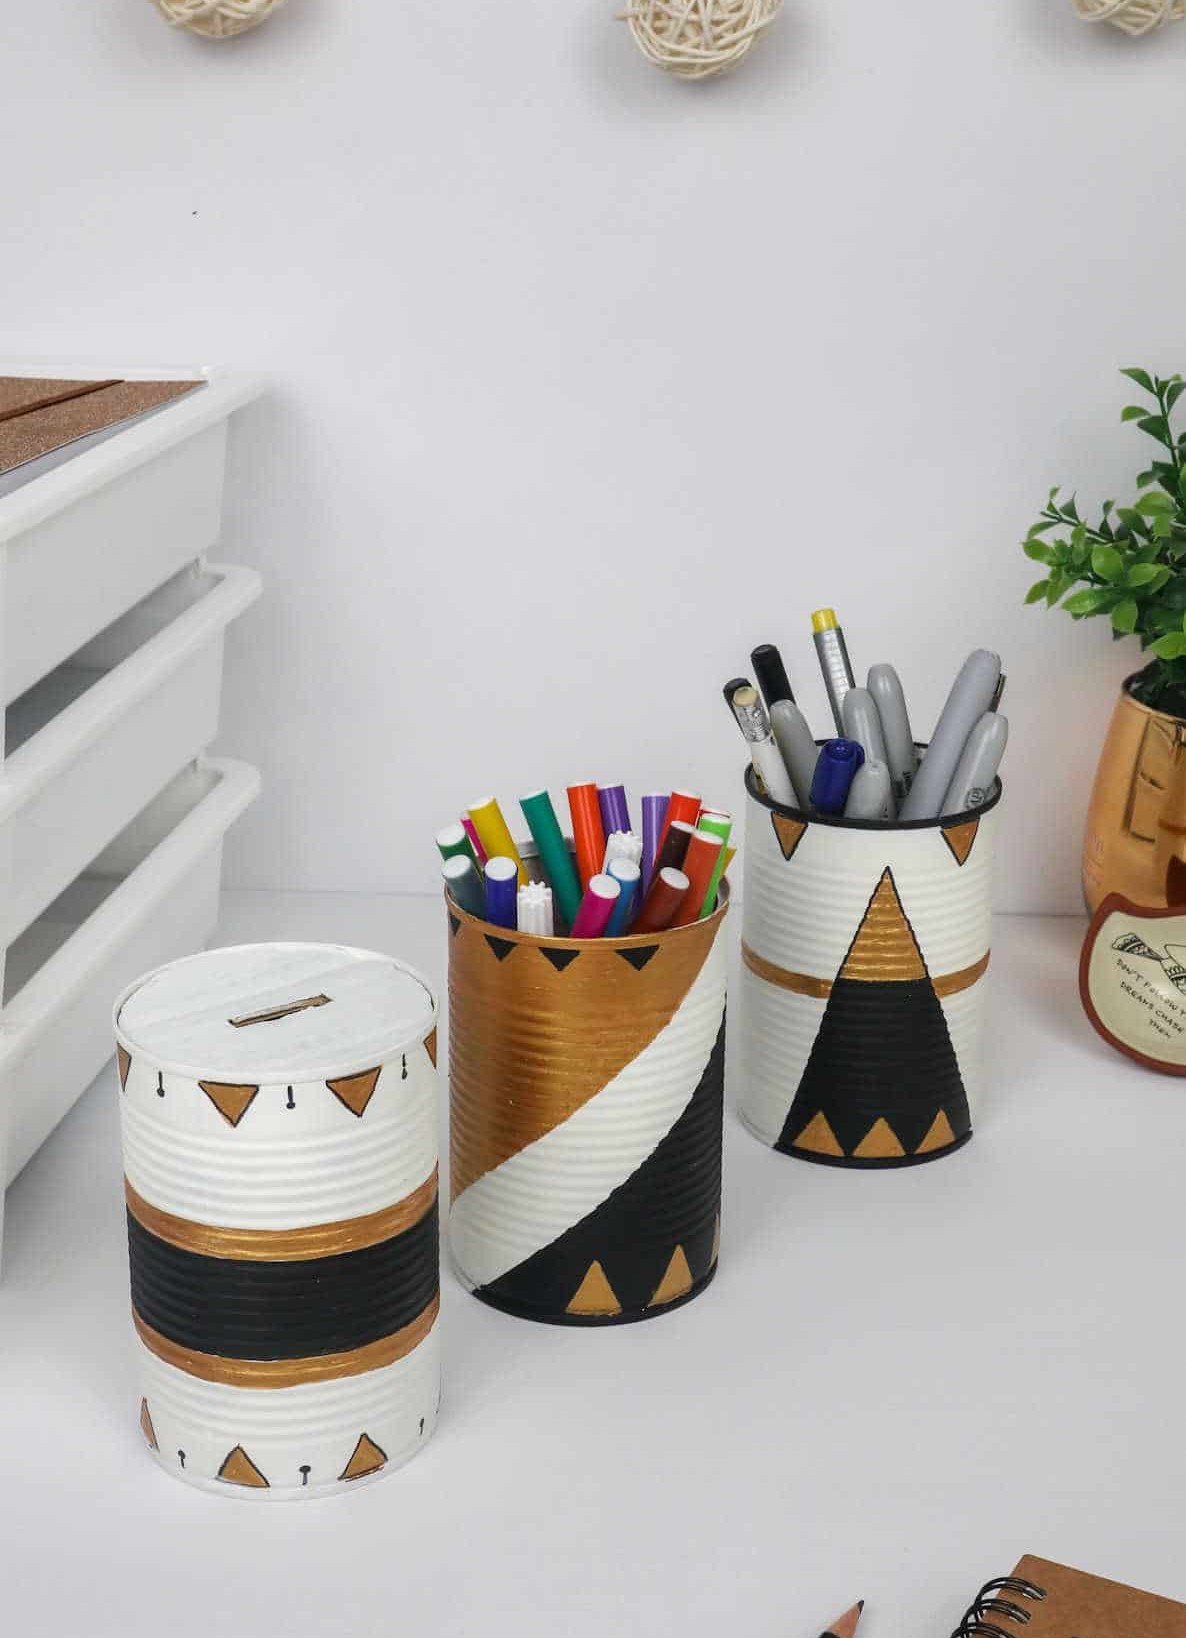
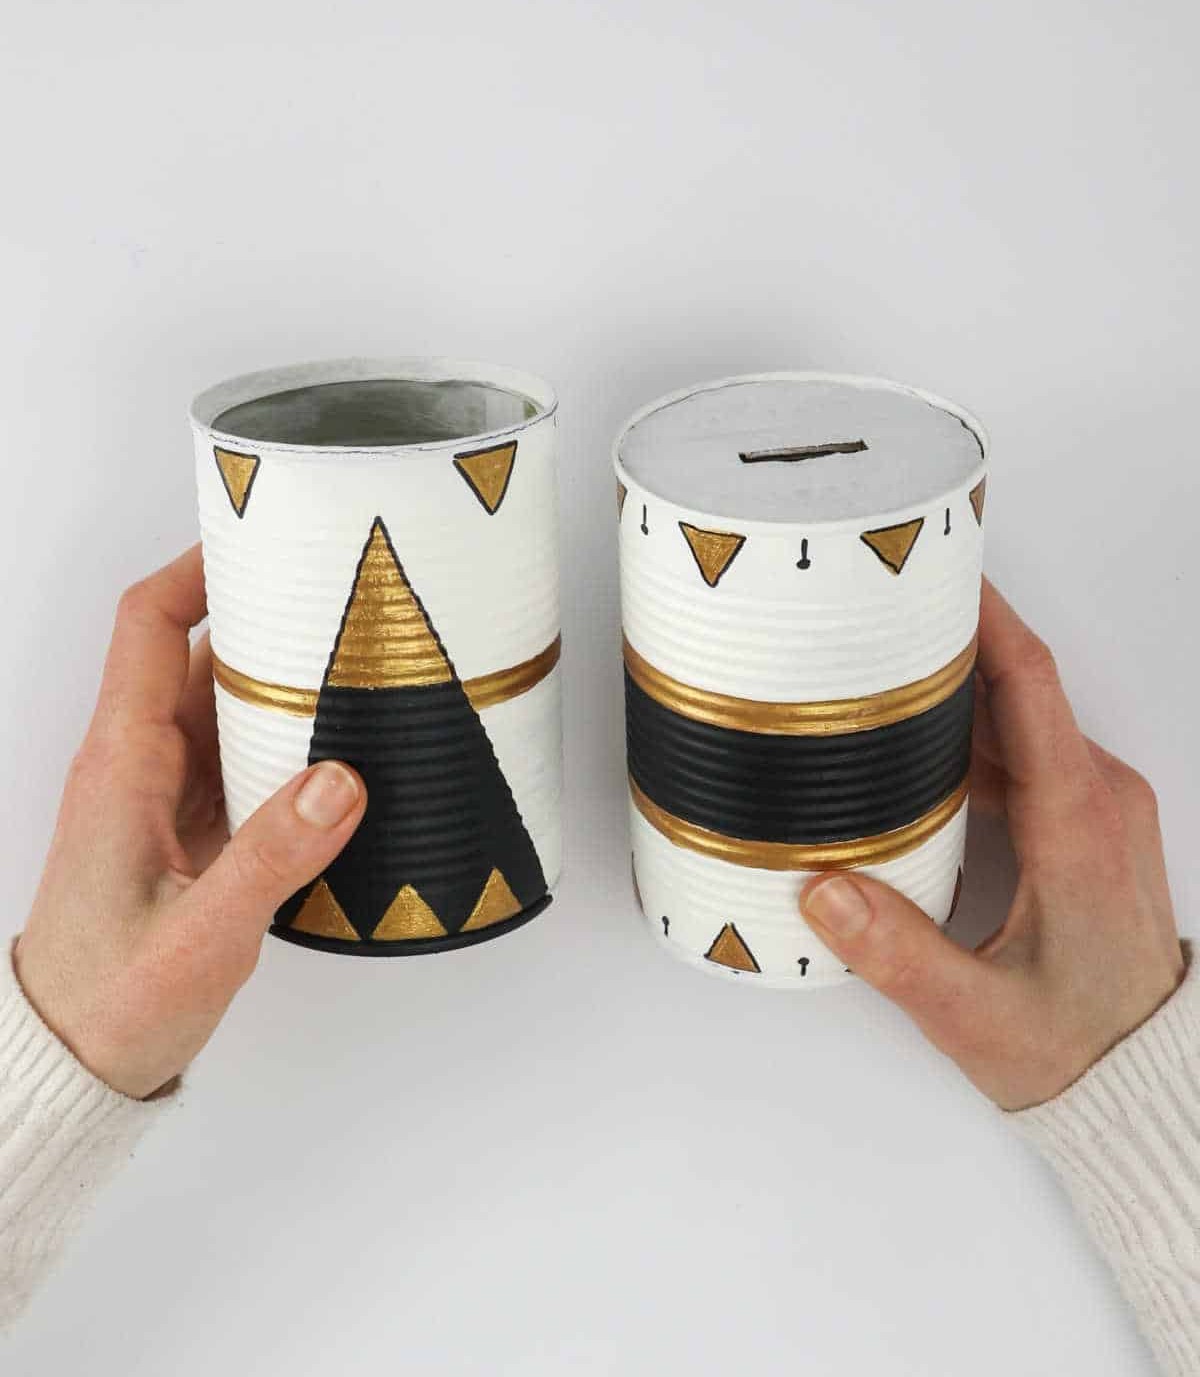
Now that your tin has thoroughly dried and cured, it’s time to put your creativity to work. Your pencil holders are now ready for action, and you can fill them with your favorite stationery items. But why stop there? The possibilities are endless when it comes to repurposing this humble tin can. Consider turning it into a mini tabletop planter, complete with its own tiny flora. Or, if you’re feeling thrifty, use it as a piggy bank or money box to stash away your coins and bills.
Whatever your heart desires, the possibilities are truly endless.
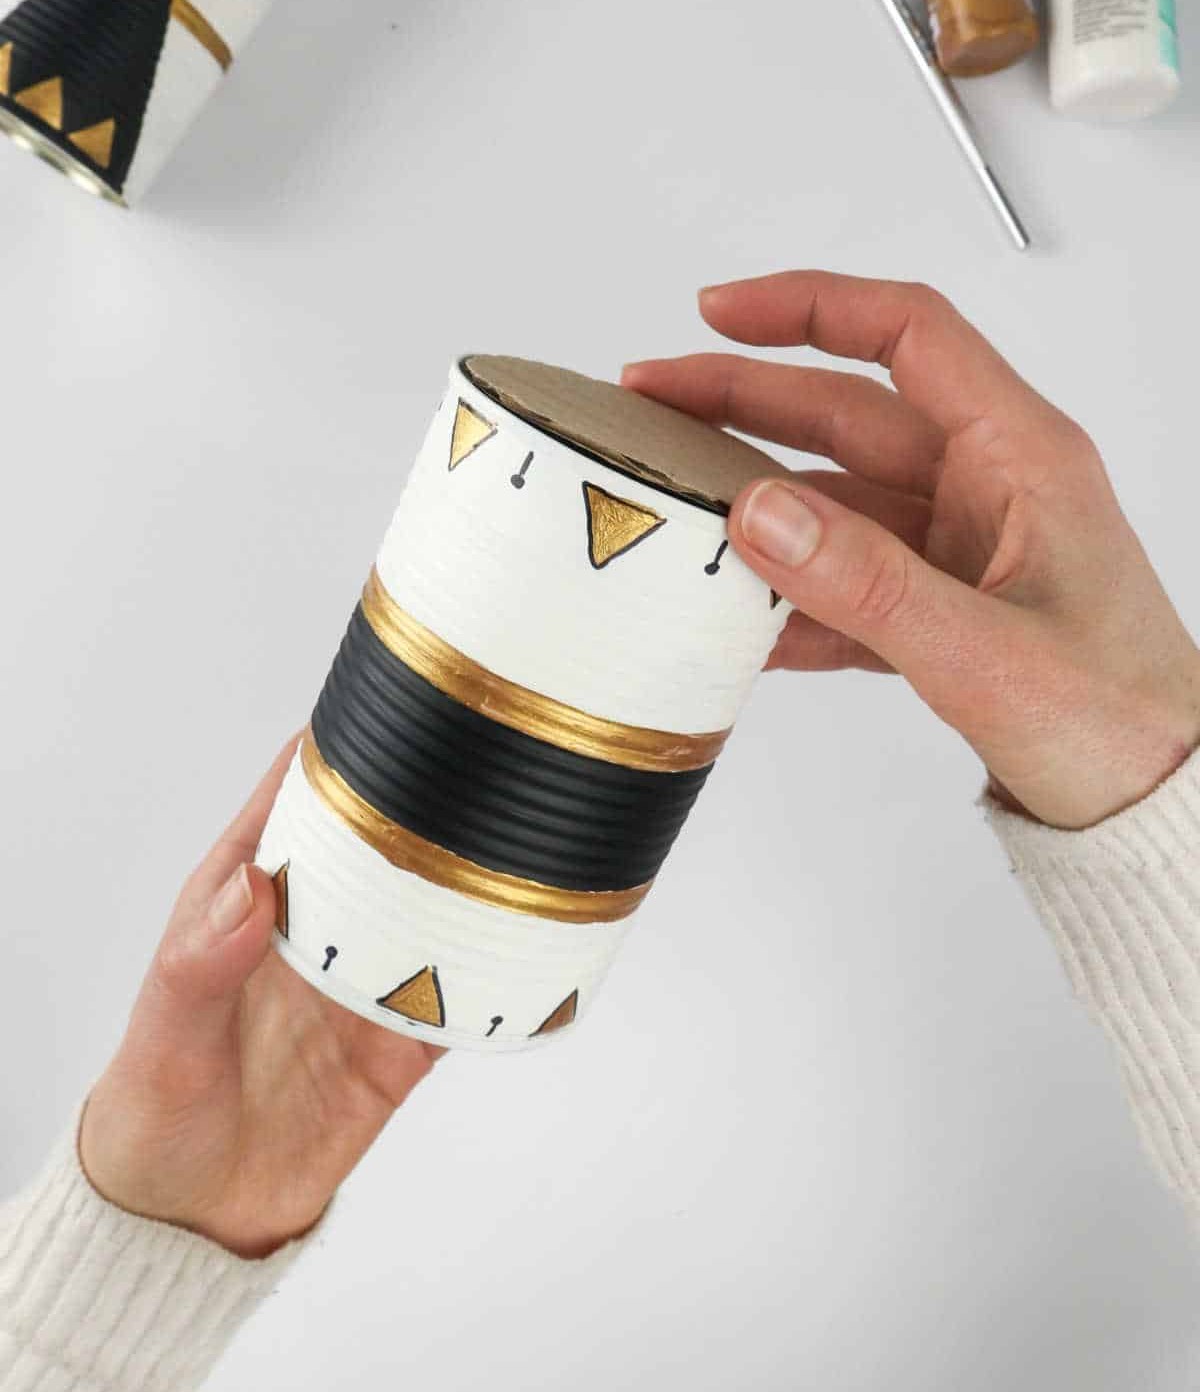
To get started on your creative journey, grab a piece of cardboard and measure the diameter of the mouth of the can. This will give you a sense of the scale and proportions you’ll be working with, allowing you to plan out your project from start to finish.
Step 6
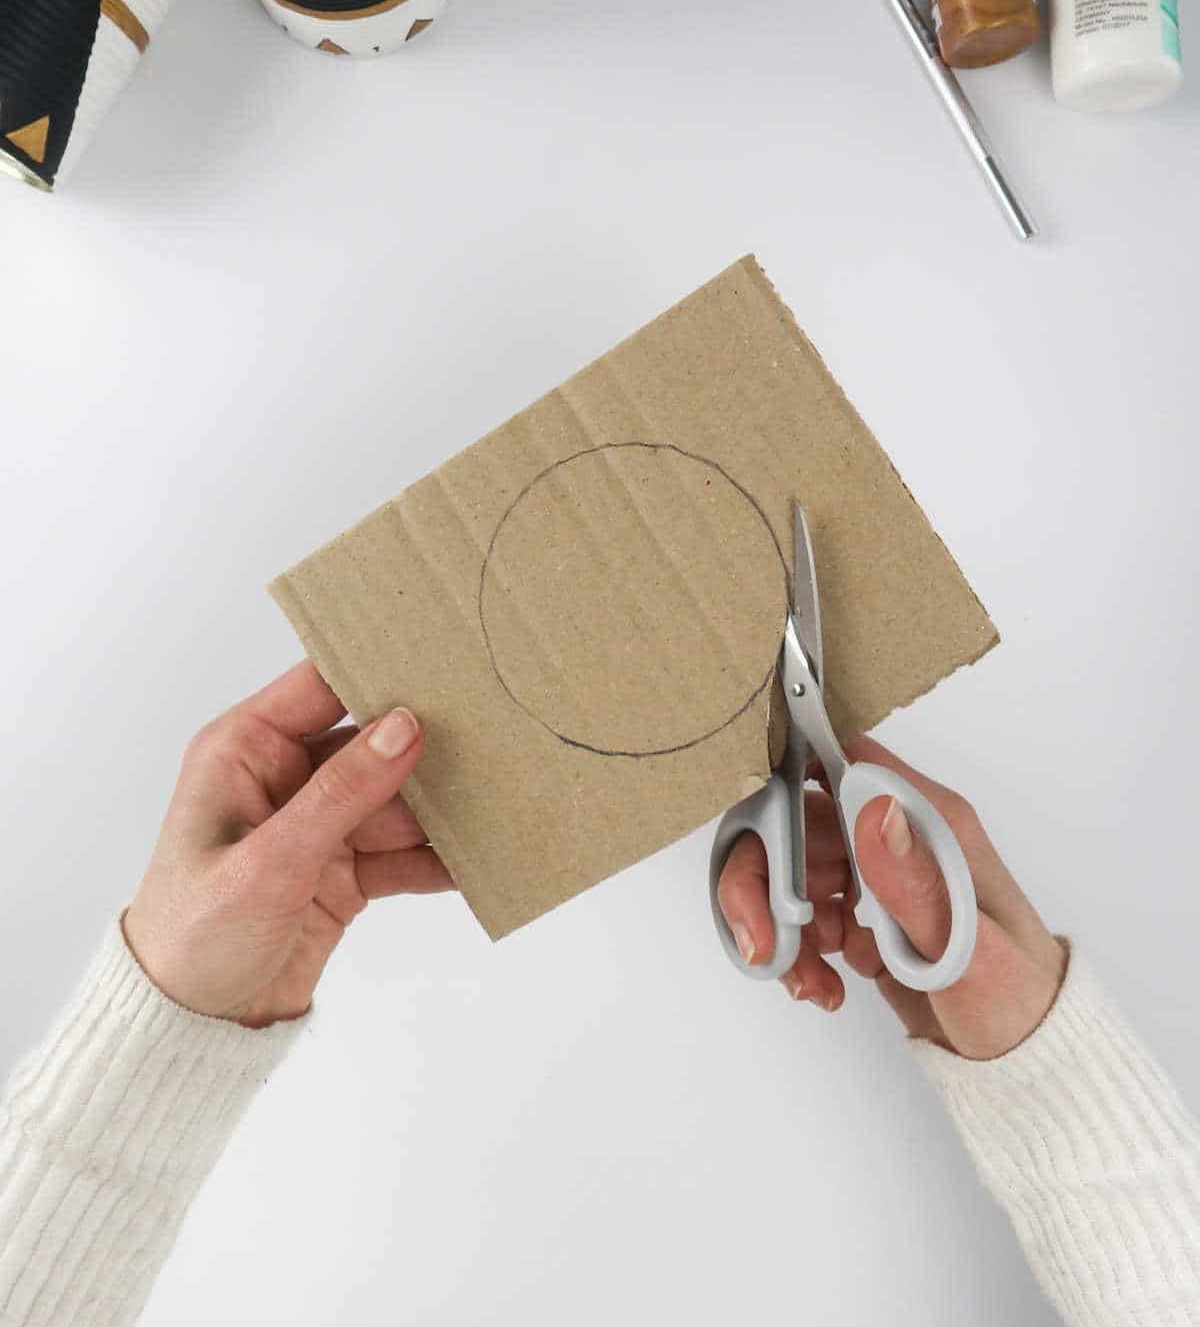
When it comes to creating the lid for your money box, precision is key. To ensure a secure fit, use a reliable pair of scissors to carefully cut out the traced shape. Make sure to take your time and get the dimensions just right, as this will be the topmost layer holding everything together.
Step 7
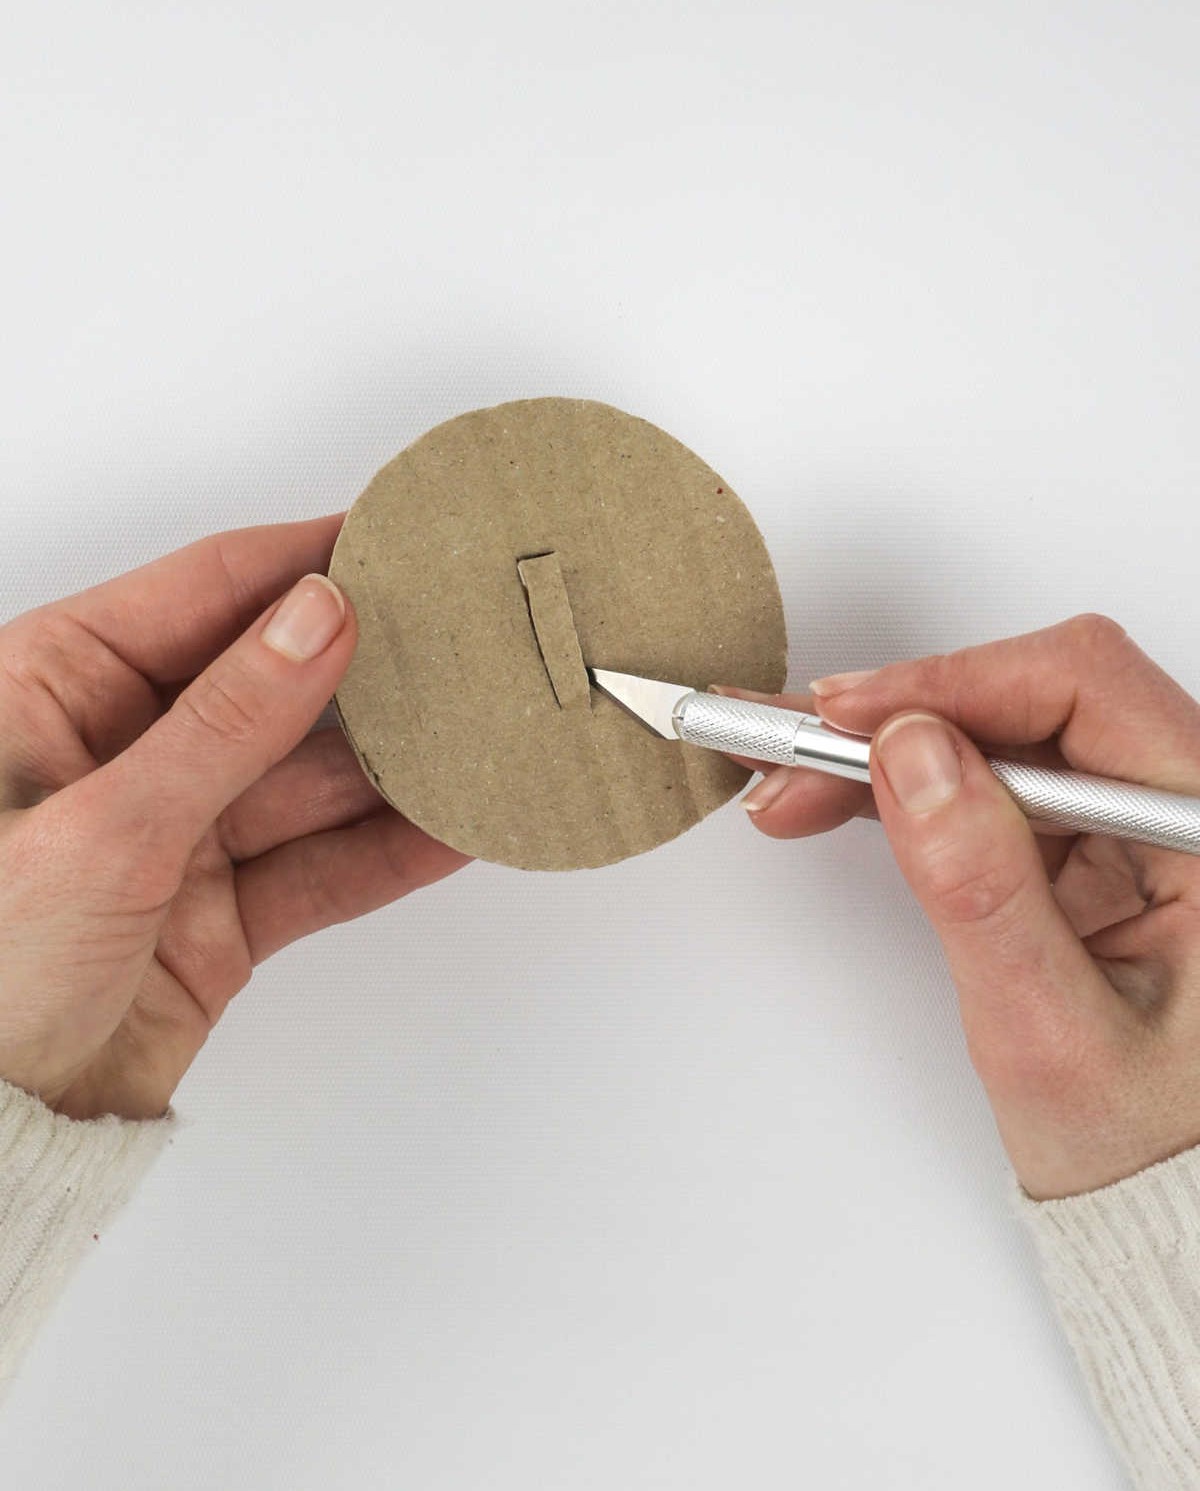
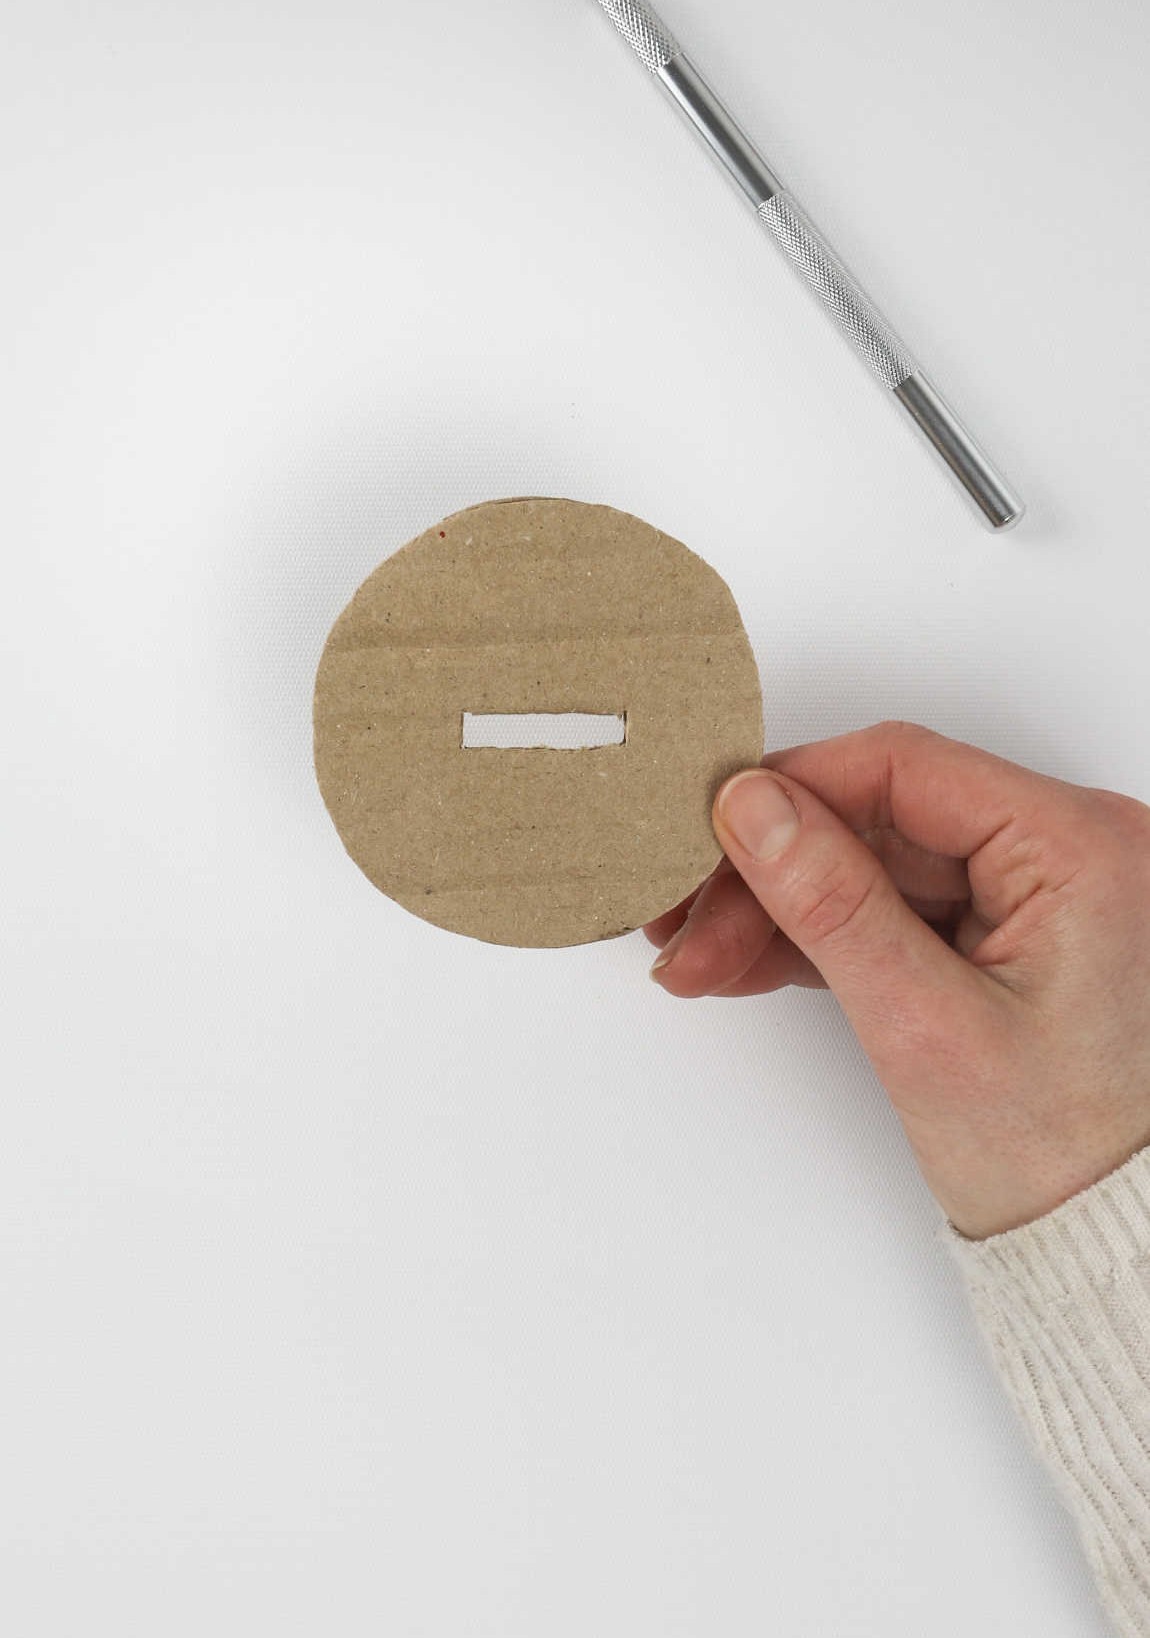
To create the coin slit, begin by placing a marker at the center of the cardboard cutout and drawing a rectangular shape. This will be the opening where coins will be inserted. Next, utilize a craft knife or hobby knife to carefully cut through the marked rectangle, taking care to navigate any potential corners with precision. For a seamless finish, ensure that you make clean cuts around these tricky areas.
Alternatively, consider opting for rounded corners instead to add a touch of elegance to your design.
Step 8
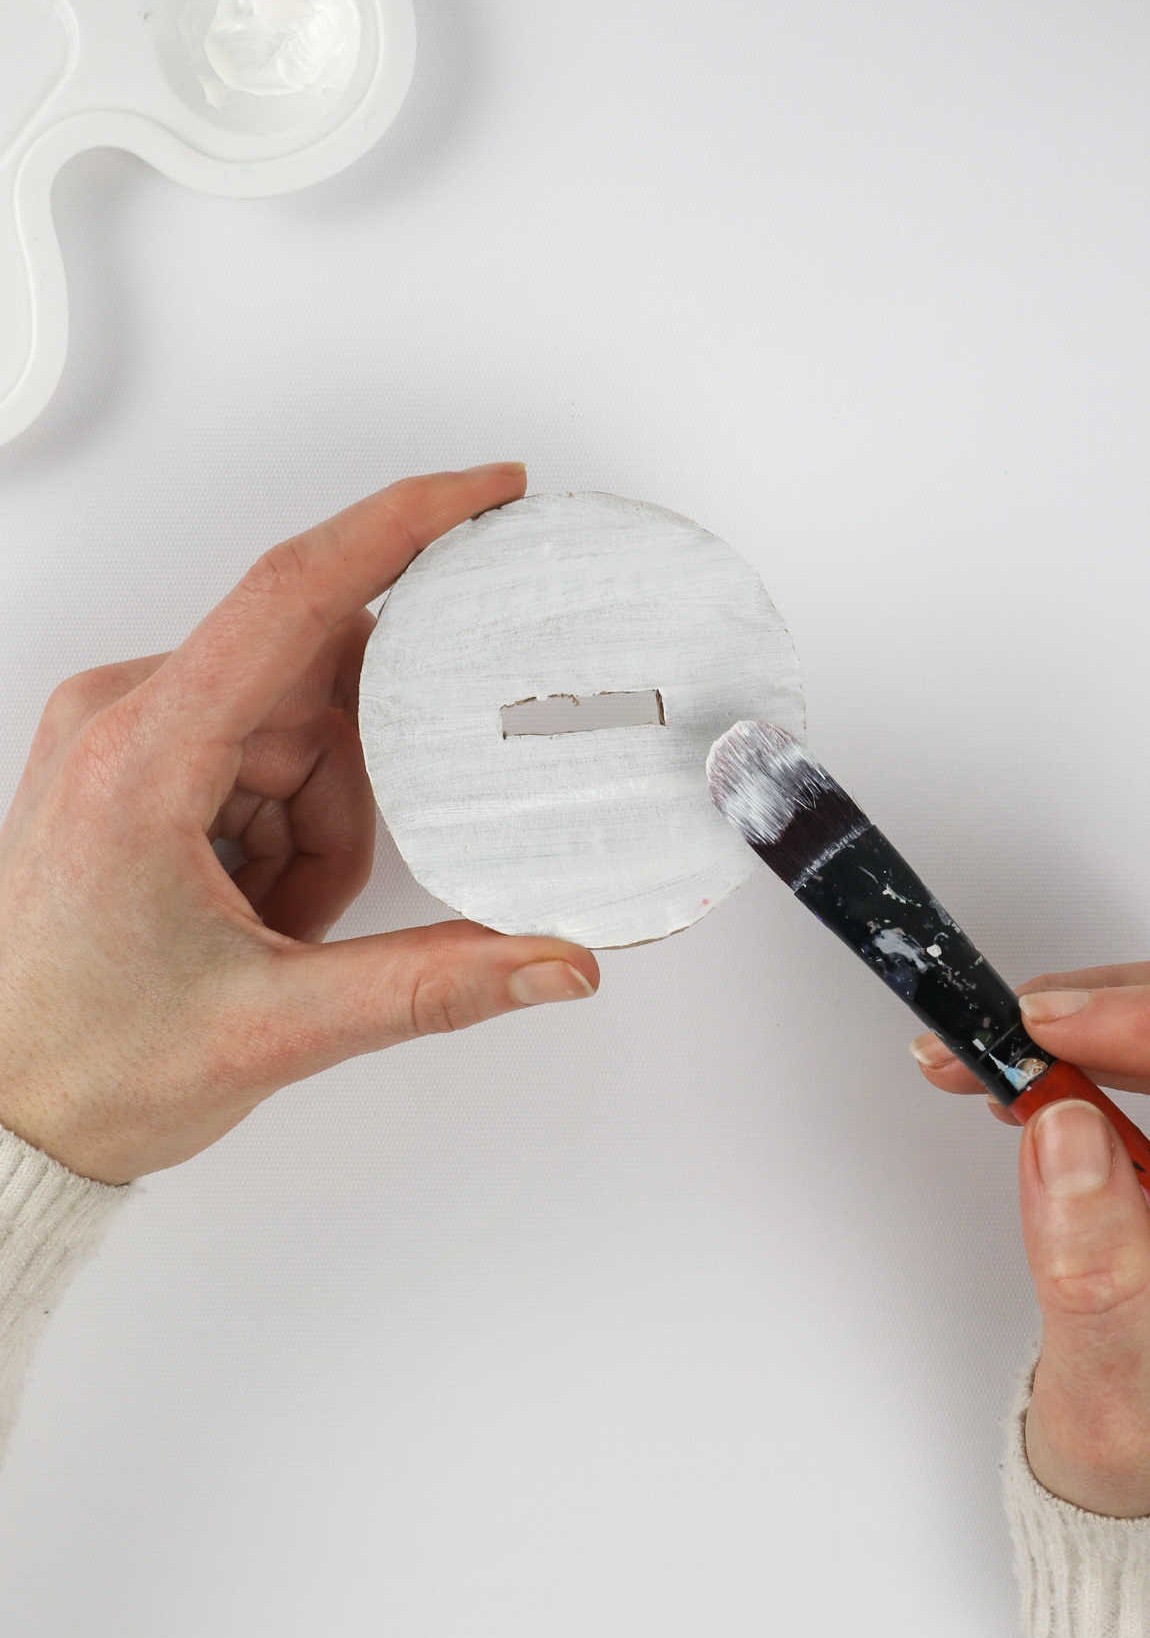
As you continue to bring your art project to life, revisit the cardboard with a rich foundation by applying a sturdy base coat using your trusty paintbrush. Allow this initial layer to dry before adding an additional layer or two to ensure a smooth, even finish.
Step 9
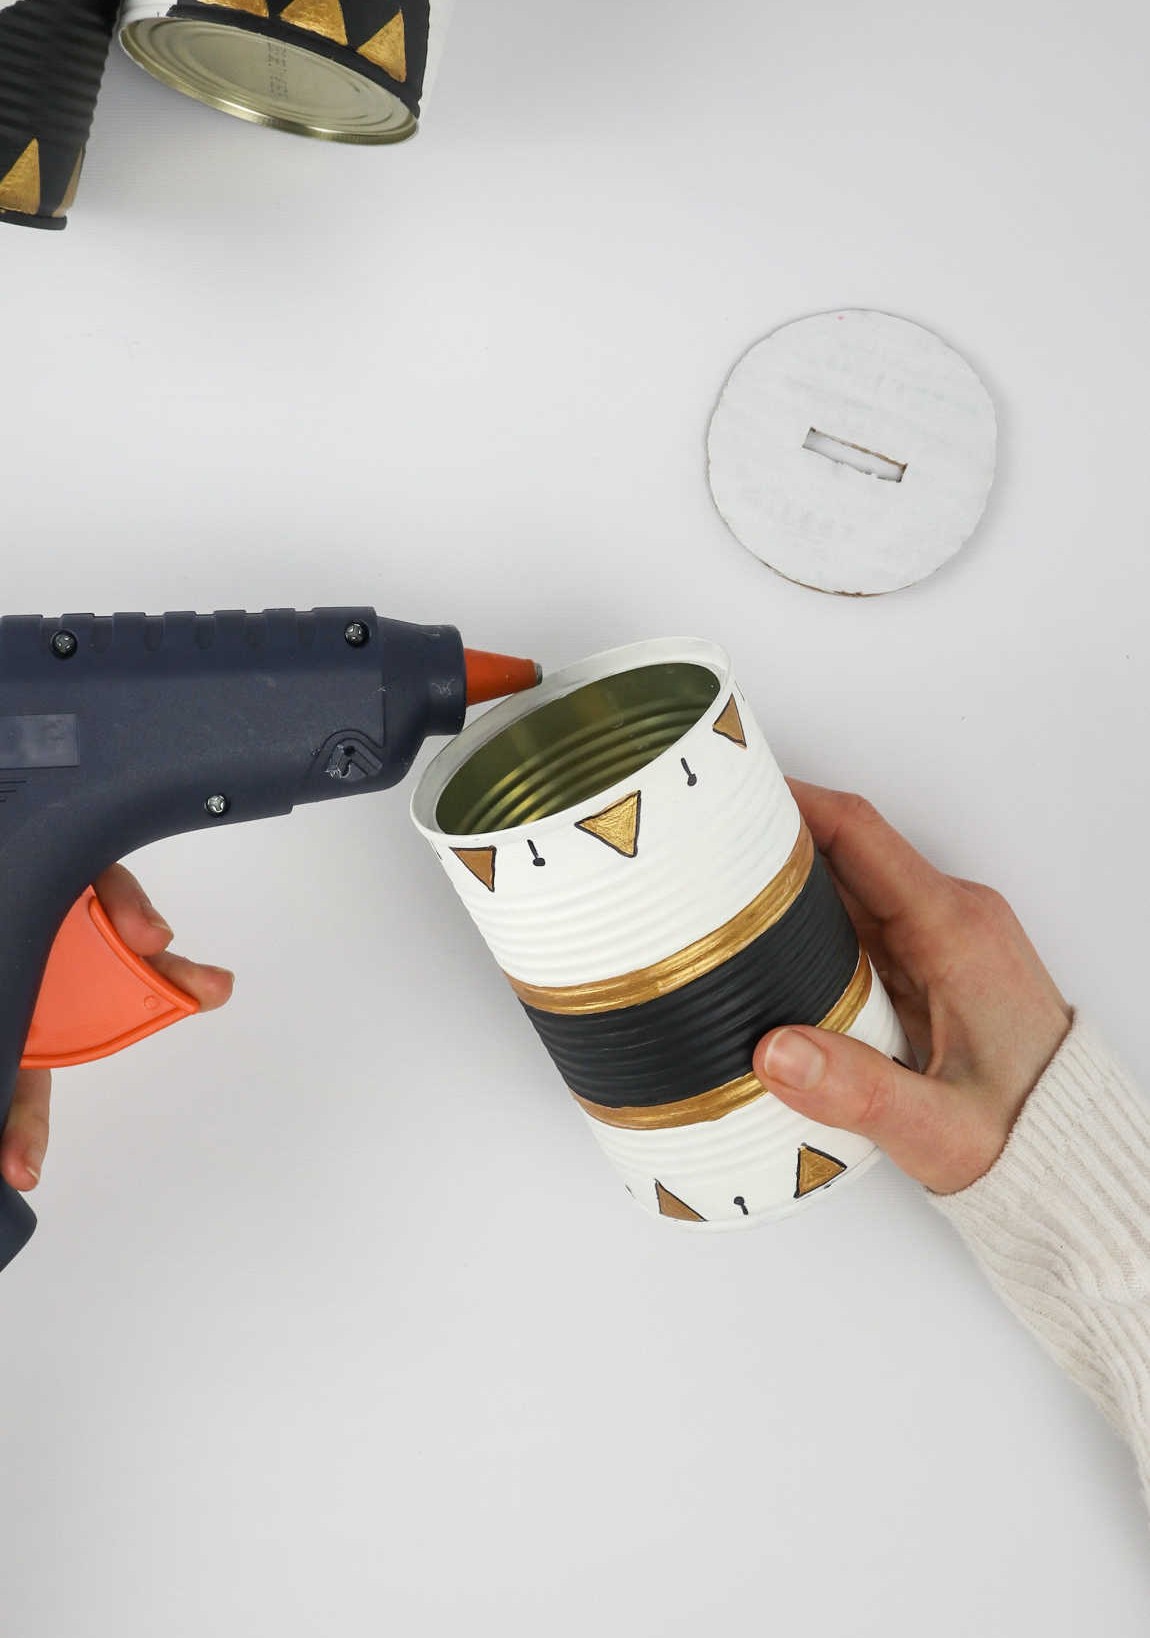
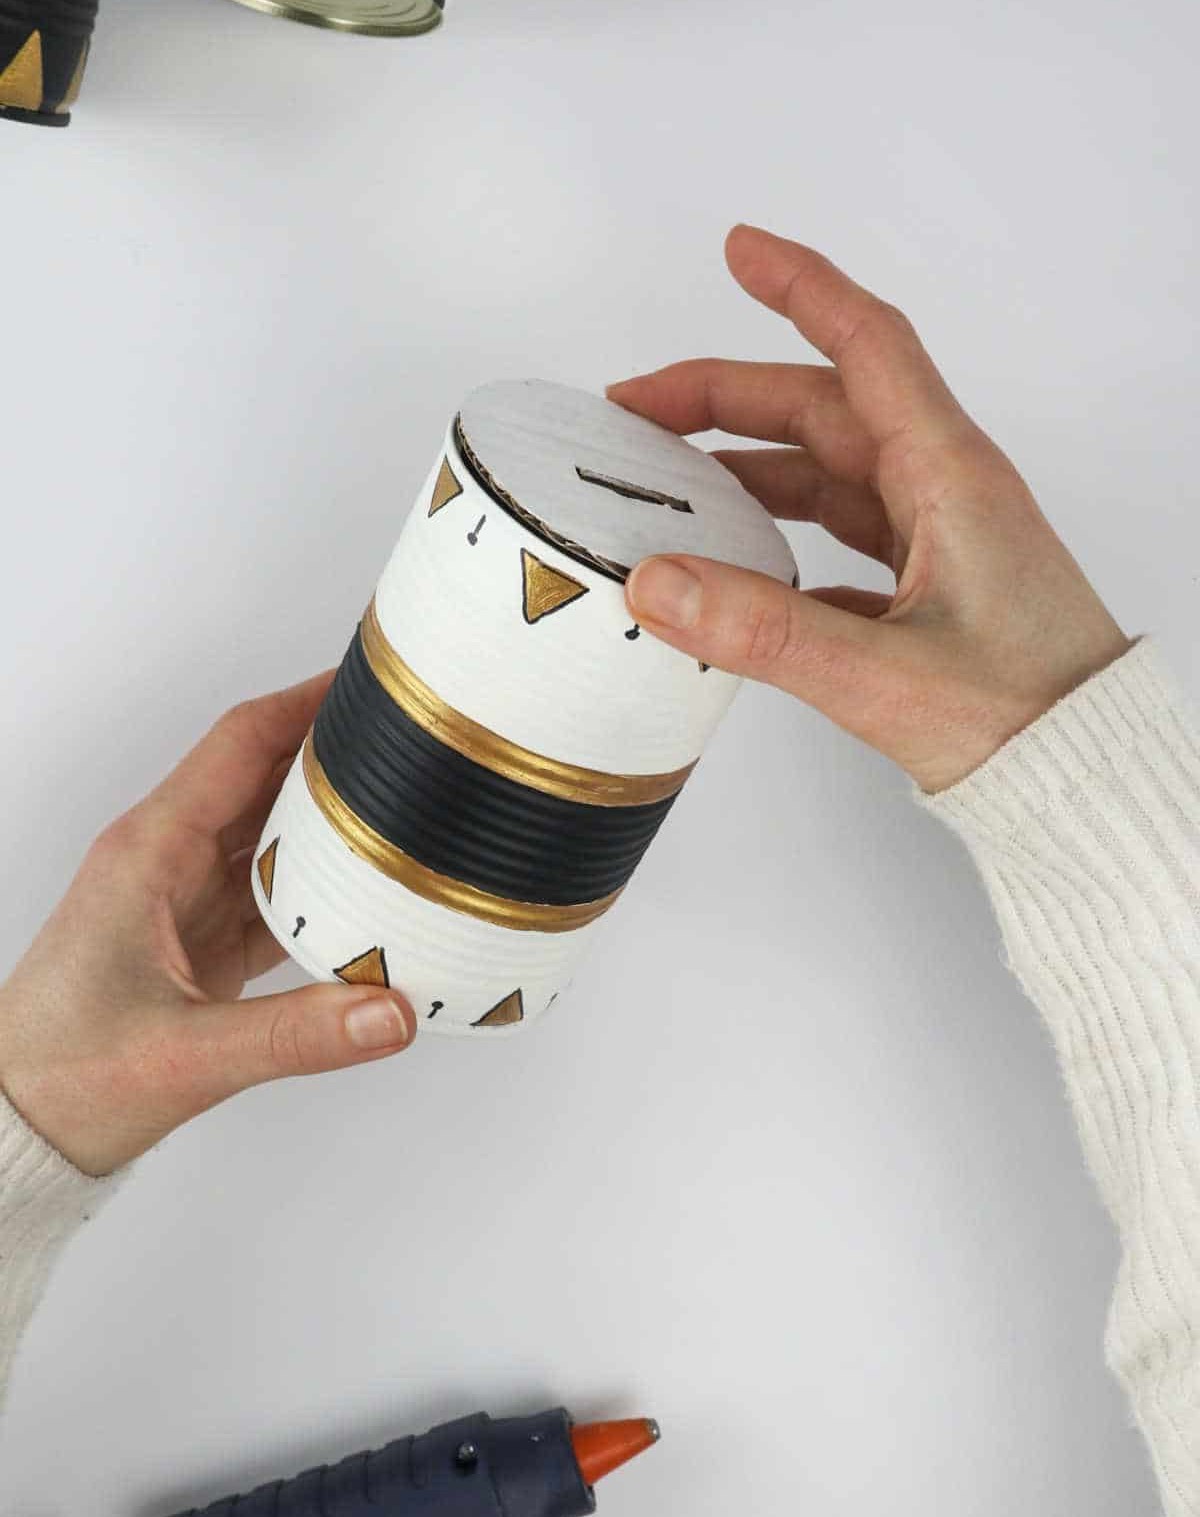
As you prepare to secure the lid of your can, grab your reliable hot glue gun and get ready to create a snug fit. Allow the glue sufficient time to air dry, ensuring a strong bond between the lid and the can’s mouth. Once the glue has fully dried, your tin cans are now ready for use.
Where Can You Use These Upcycled Tin Cans?
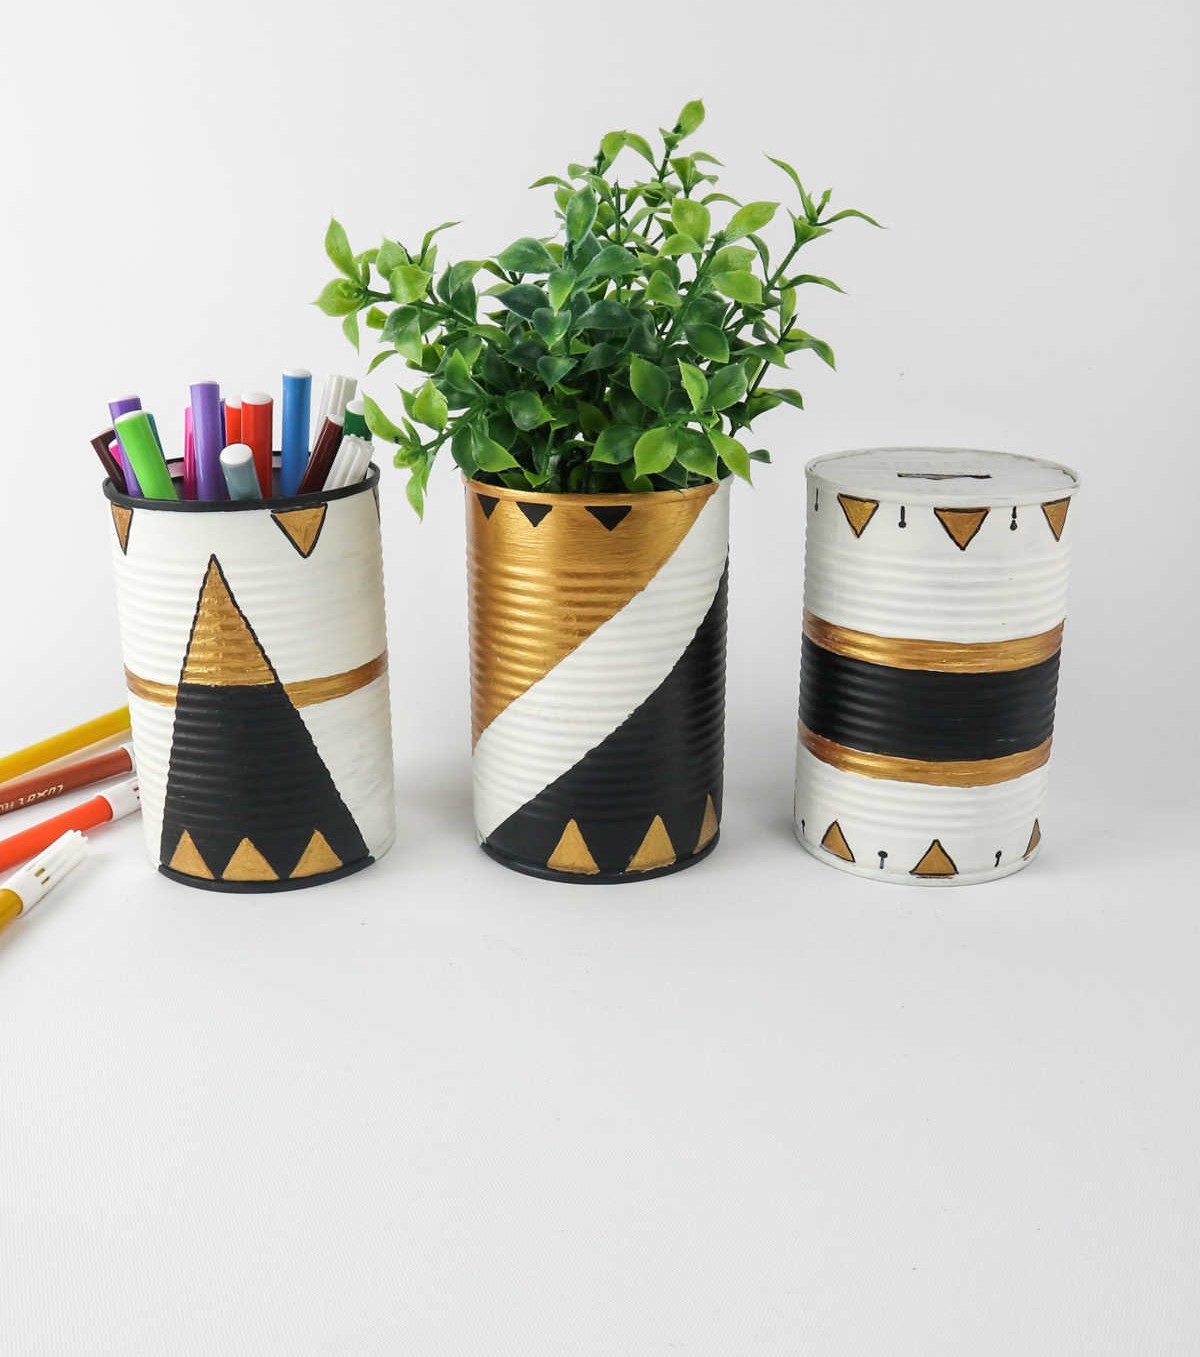
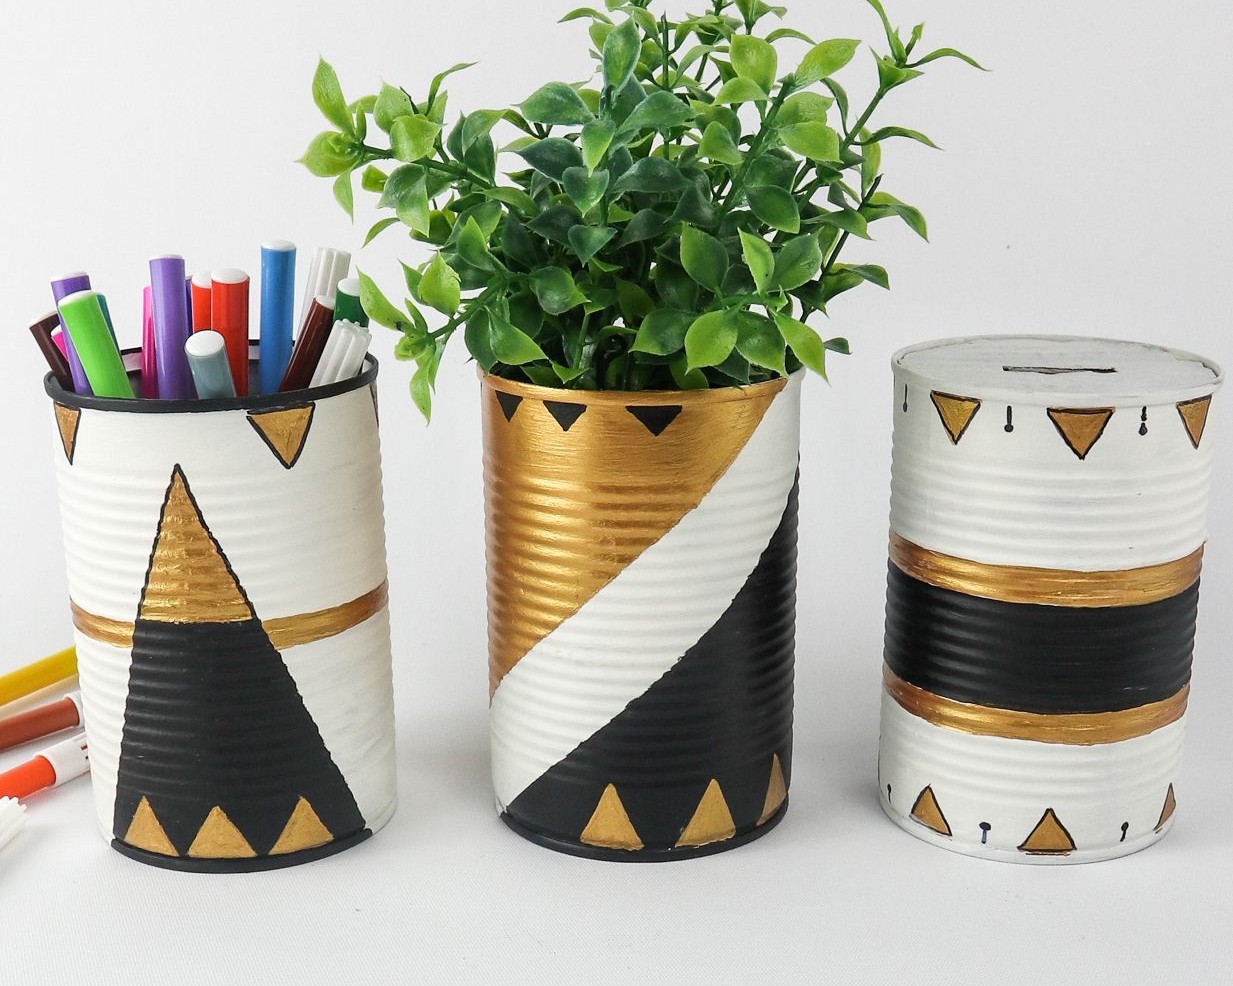
Transform your desk or shelves with these upcycled tin cans, which can be used to store knick knacks, stationery, or even utensils. The possibilities are endless! For instance, you can create a unique planter by following the same method and adding drainage holes for water to seep through. If you’re looking for more creative ideas, check out these 20 genius dollar store planter ideas for inspiration.
Upcycled Tin Cans
Transform old tin cans into functional desk organizers that keep your writing utensils tidy. This upcycling project requires minimal time and effort, making it perfect for a quick craft session. The total crafting time is approximately 50 minutes, with 30 minutes dedicated to the actual crafting process and an additional 20 minutes spent on preparation and clean-up.
Equipment
When it comes to preparing for your DIY crafting endeavors, having the right tools at your disposal is essential. A paint palette or even a simple jar lid can serve as a makeshift surface for mixing colors and applying paints. In addition to this versatile base, you’ll want to have a selection of high-quality paintbrushes on hand. These will allow you to smoothly apply colors to your project, whether it’s a piece of canvas or a piece of wood.
To further refine your craft, consider investing in a pair of scissors and a hobby knife. The former will enable you to cut through various materials with precision, while the latter will provide the fine control needed for intricate cuts and details.
Materials
For any DIY enthusiast, crafting a unique piece of art can be an exciting and creative experience. To help you get started on your artistic journey, here’s a list of materials that you may want to consider having on hand: cardboard, acrylic paint, masking tape, and a glue gun (if needed). These supplies are versatile and can be used in a variety of projects, from decorative designs to functional creations.
Instructions
To begin, gather all necessary materials and lay down newspapers to protect against any accidental splatters during the painting process. Coat the tin can with multiple layers of vibrant acrylic paint. For crisp, defined edges, utilize masking tape to prevent smudges from forming. Once the paint has dried, grab a permanent marker or detailing brush to start designing patterns on the can. Allow it to dry completely before moving forward.
If you’re looking to transform your upcycled tin can into pen holders, you’re almost done! For those who prefer to create a money holder or piggy bank, cut out a rectangular slit in cardboard for depositing coins. Verify the lid fits properly and make any necessary adjustments. Secure the lid with a hot glue gun and allow it to dry completely. If you’re opting for a planter instead, puncture a few holes at the bottom of the can to serve as a drainage system.