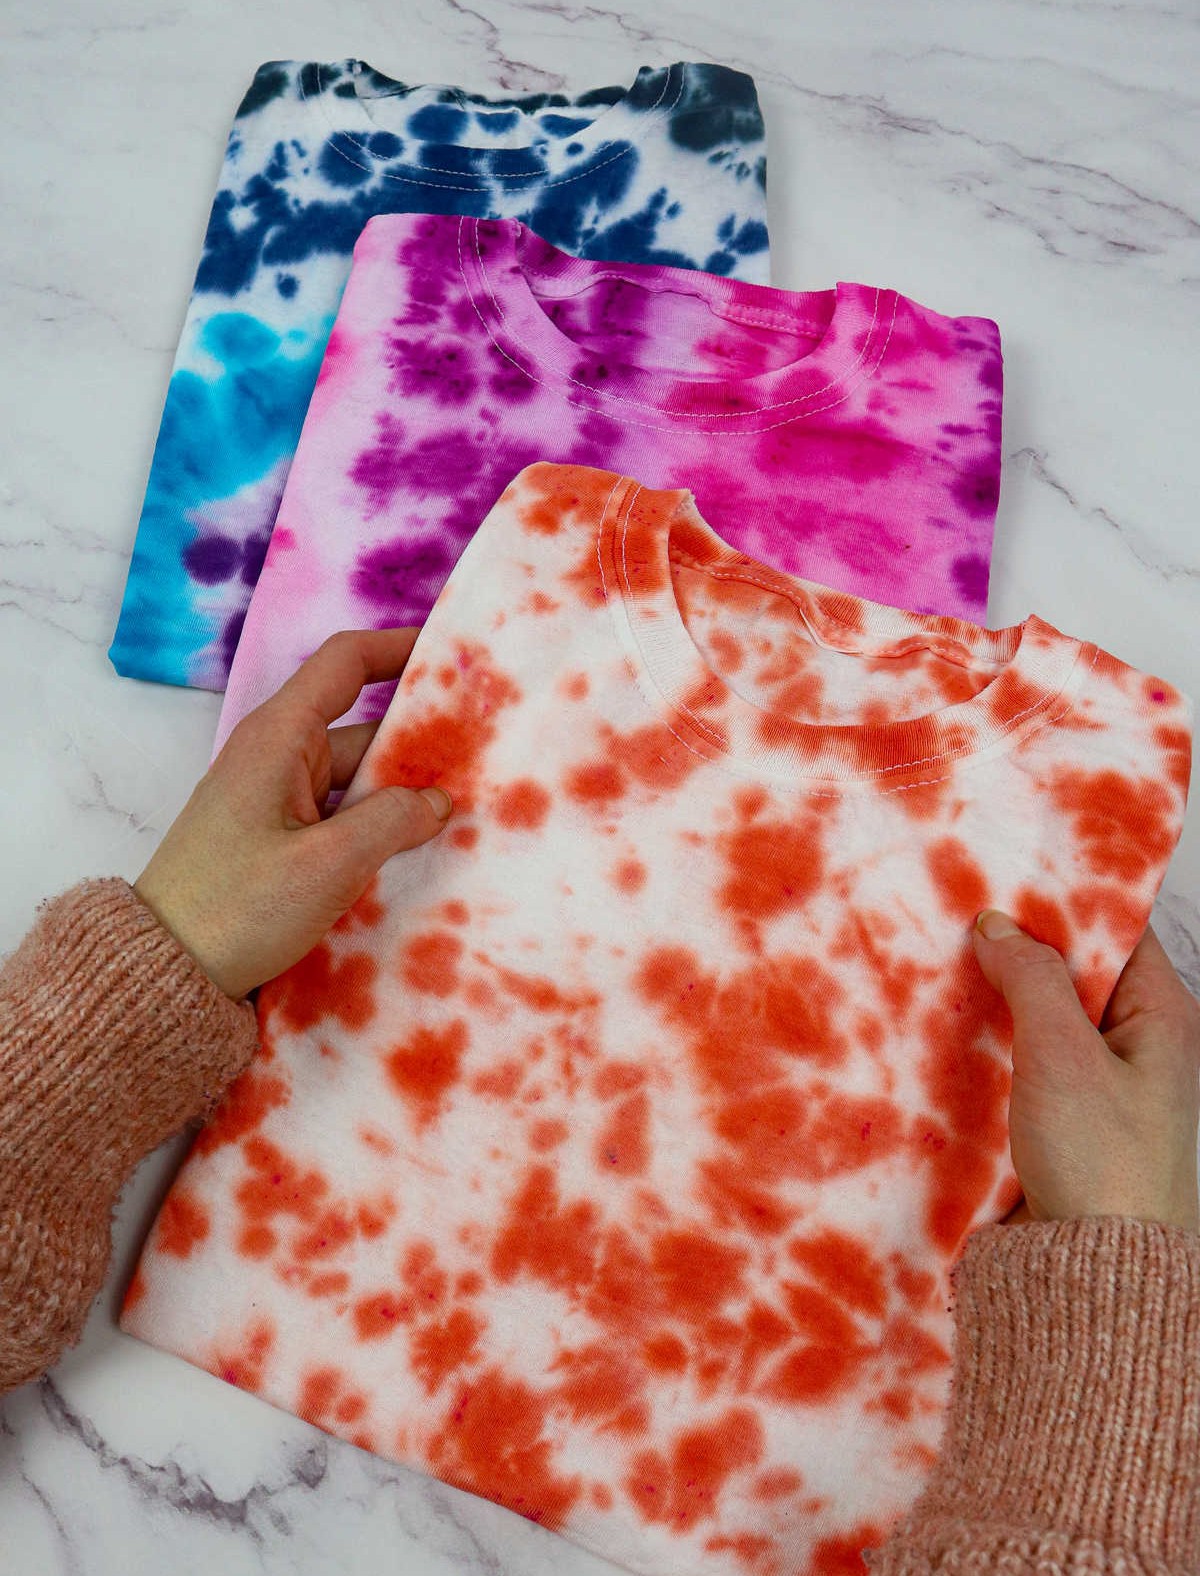
Tie-dye shirts have stood the test of time, remaining a fashion staple in many people’s wardrobes. The process of creating one is not only fun but also accessible to anyone who wants to give it a try. With this DIY tutorial, you’ll be well on your way to making your very own unique and creative clothing piece.
Supplies You’ll Need to Tie Dye a Shirt
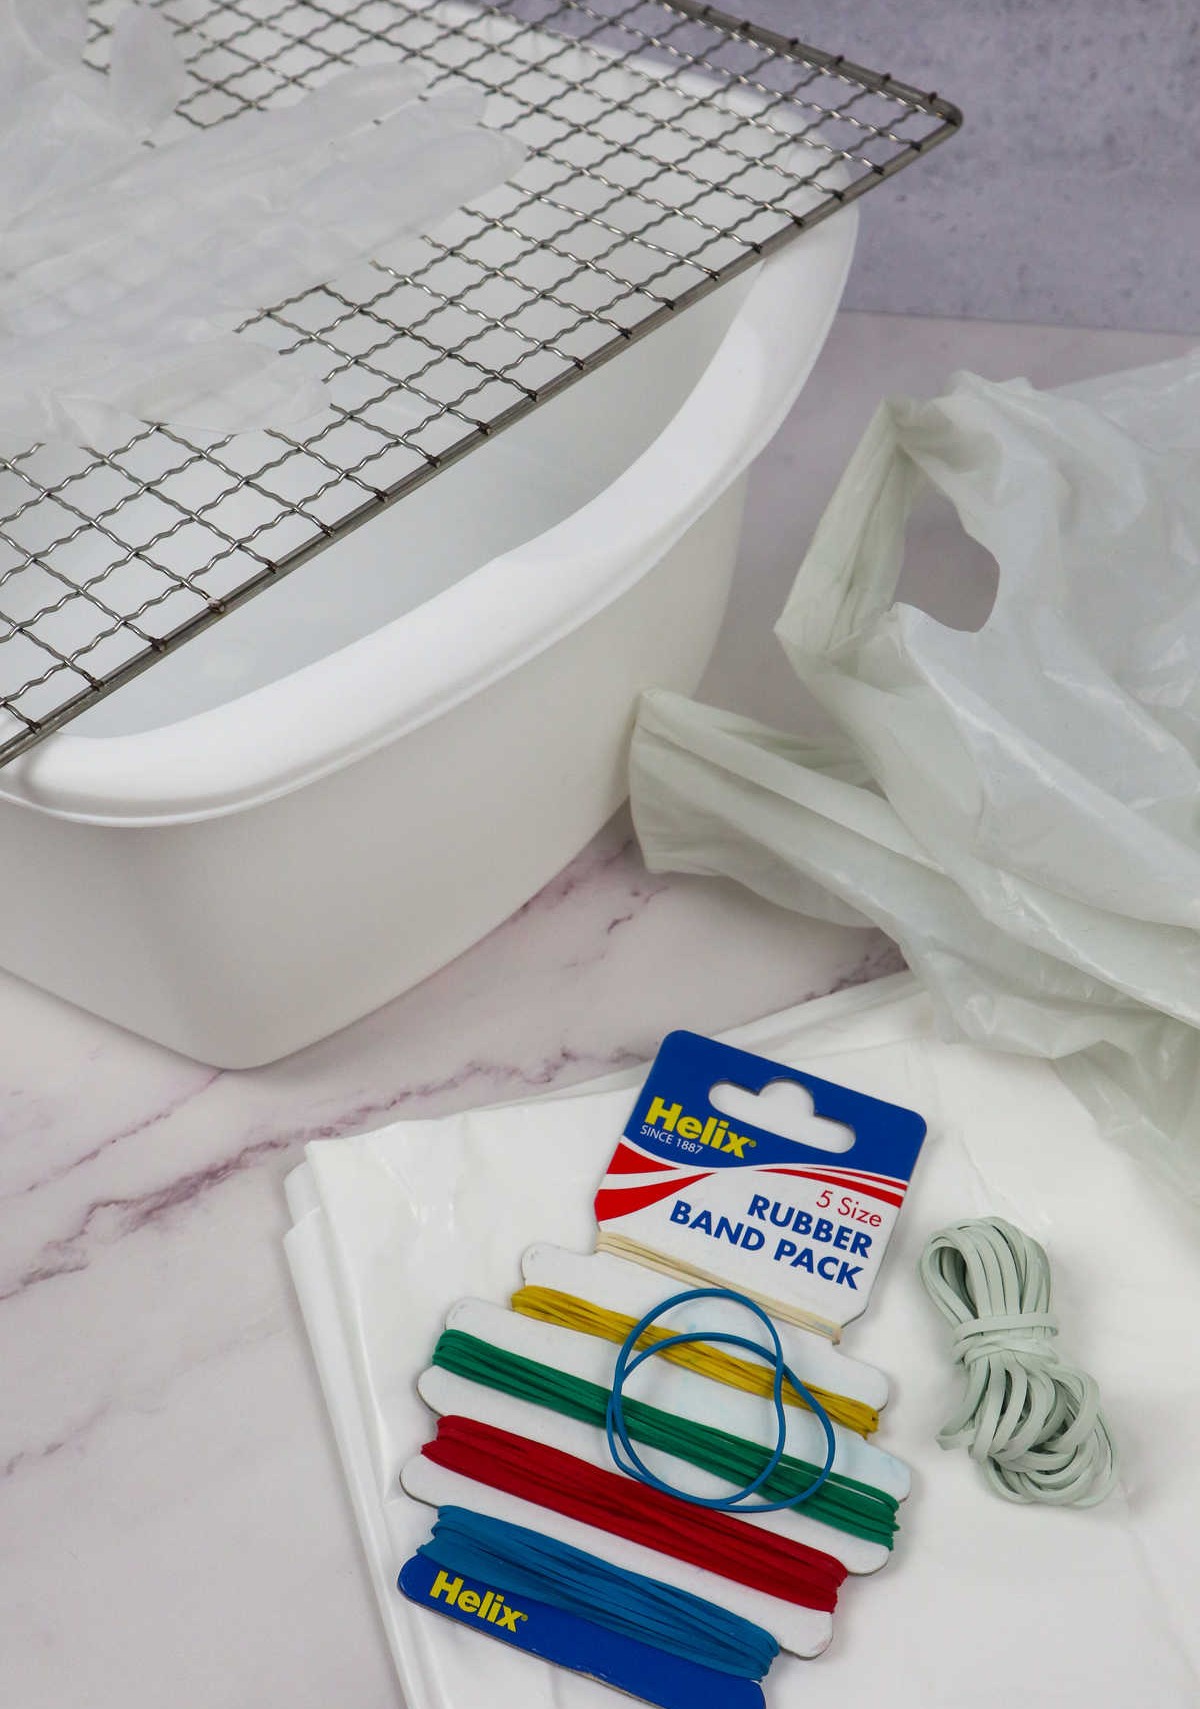
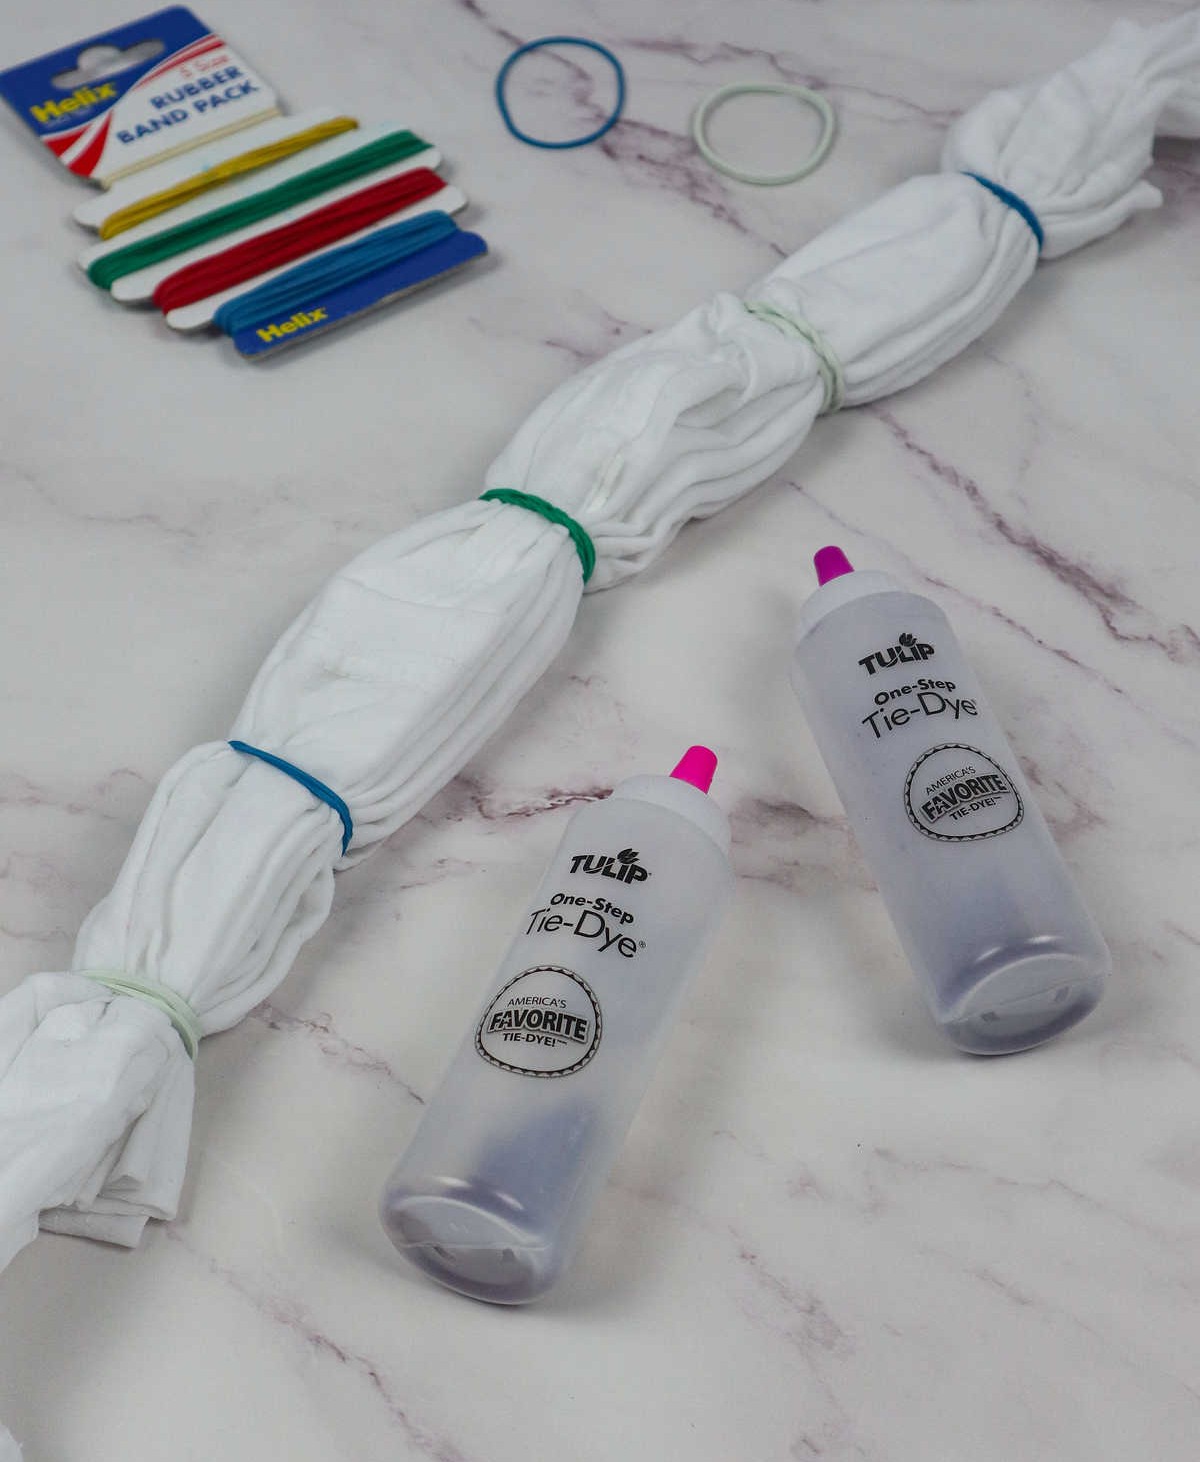
To embark on this creative journey, gather the following essential items:First and foremost, you’ll need some fundamental supplies: rubber bands, latex gloves, a plastic dust sheet, and plastic bags. These will serve as the foundation for your project. As you progress, you may find it helpful to have a few extra tools at your disposal: a washing up bowl (ideal for mixing and containing any mess) and an oven rack (perfect for drying or holding items in place).
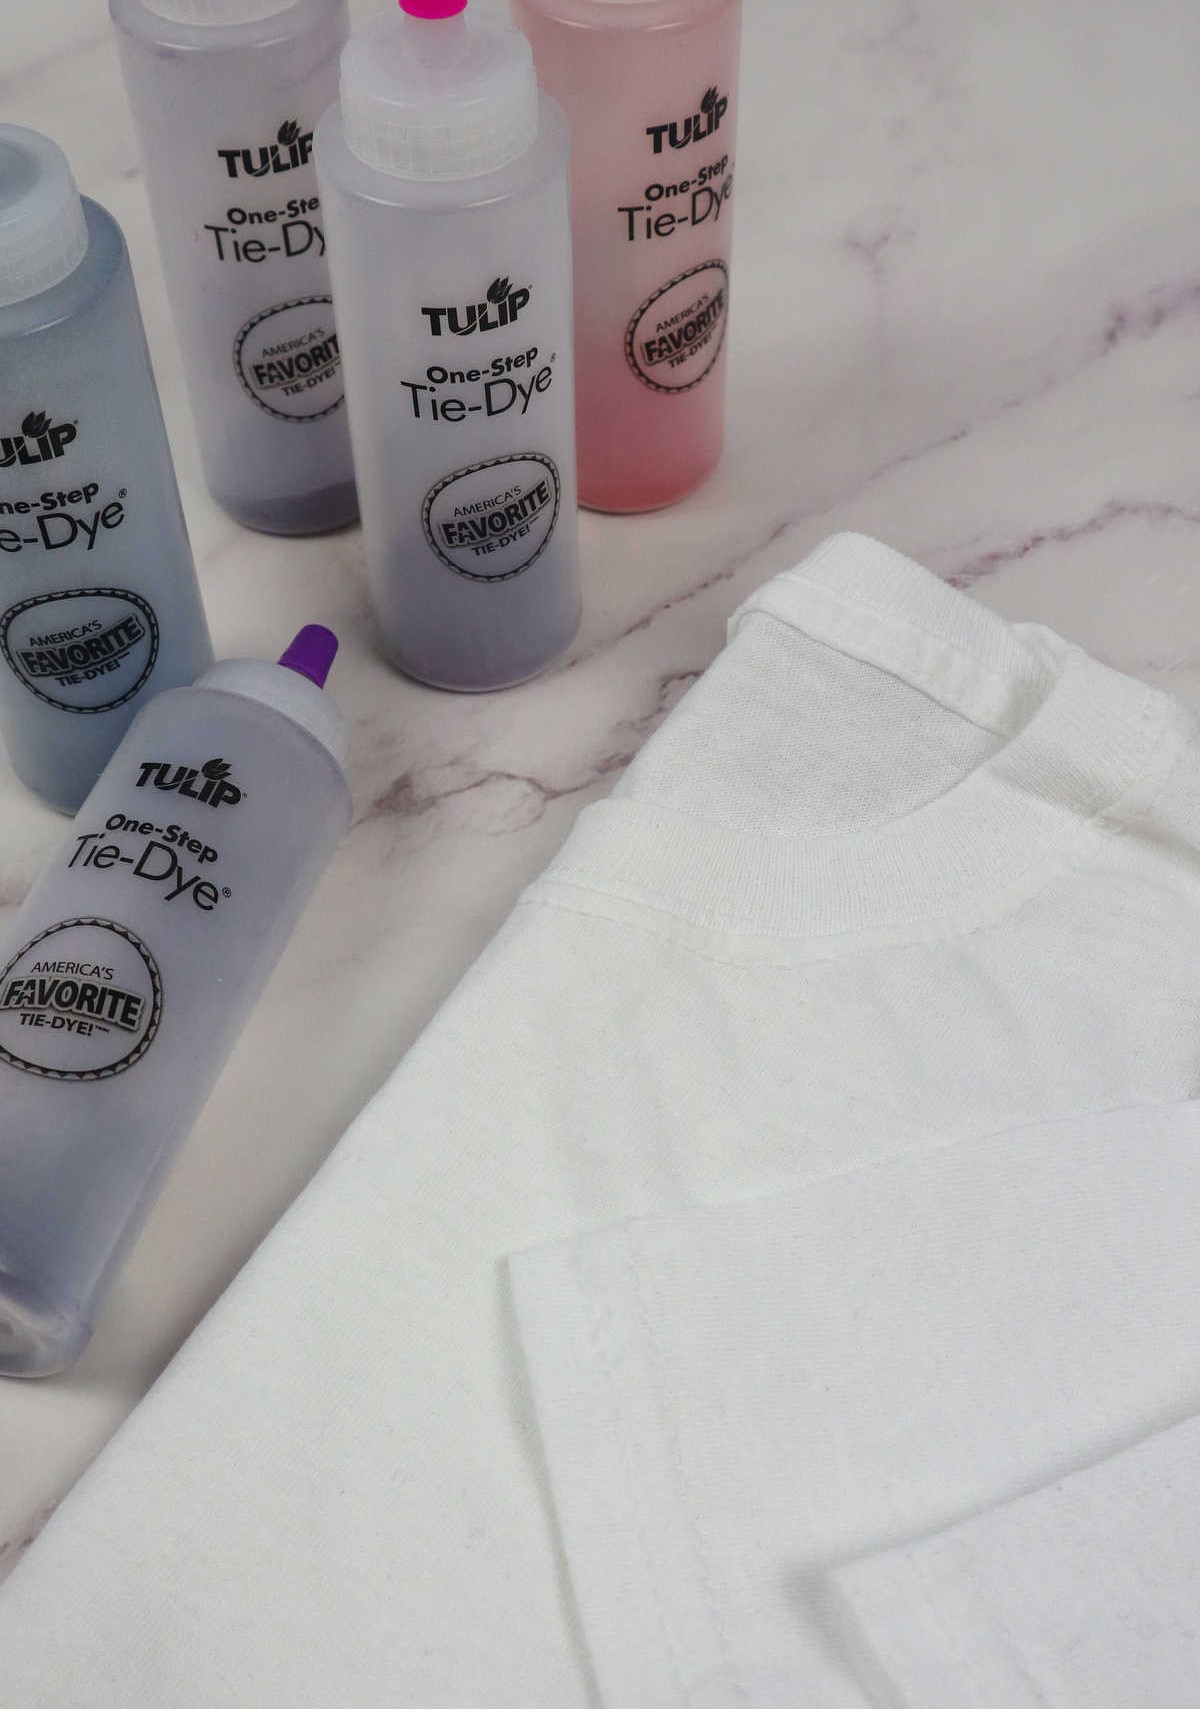
Now that we’ve covered the necessary materials, let’s shift our focus to the artistic aspect. You’ll need a white piece of clothing to serve as the canvas for your masterpiece. Finally, don’t forget the tie-dye kit itself – this will be the catalyst for all the colorful creativity that follows.
How to Tie-Dye T-Shirts
When it comes to tie-dyeing a tee, there’s no one-size-fits-all approach. In fact, different techniques can produce unique and fascinating results. Let me introduce you to three distinct methods you can use to create your own masterpiece. But before we dive in, it’s worth noting that pre-treating the tees with cold water can make all the difference. By doing so, you’ll be able to achieve a beautiful watercolor effect – if that’s the look you’re going for.
Method 1
Step 1
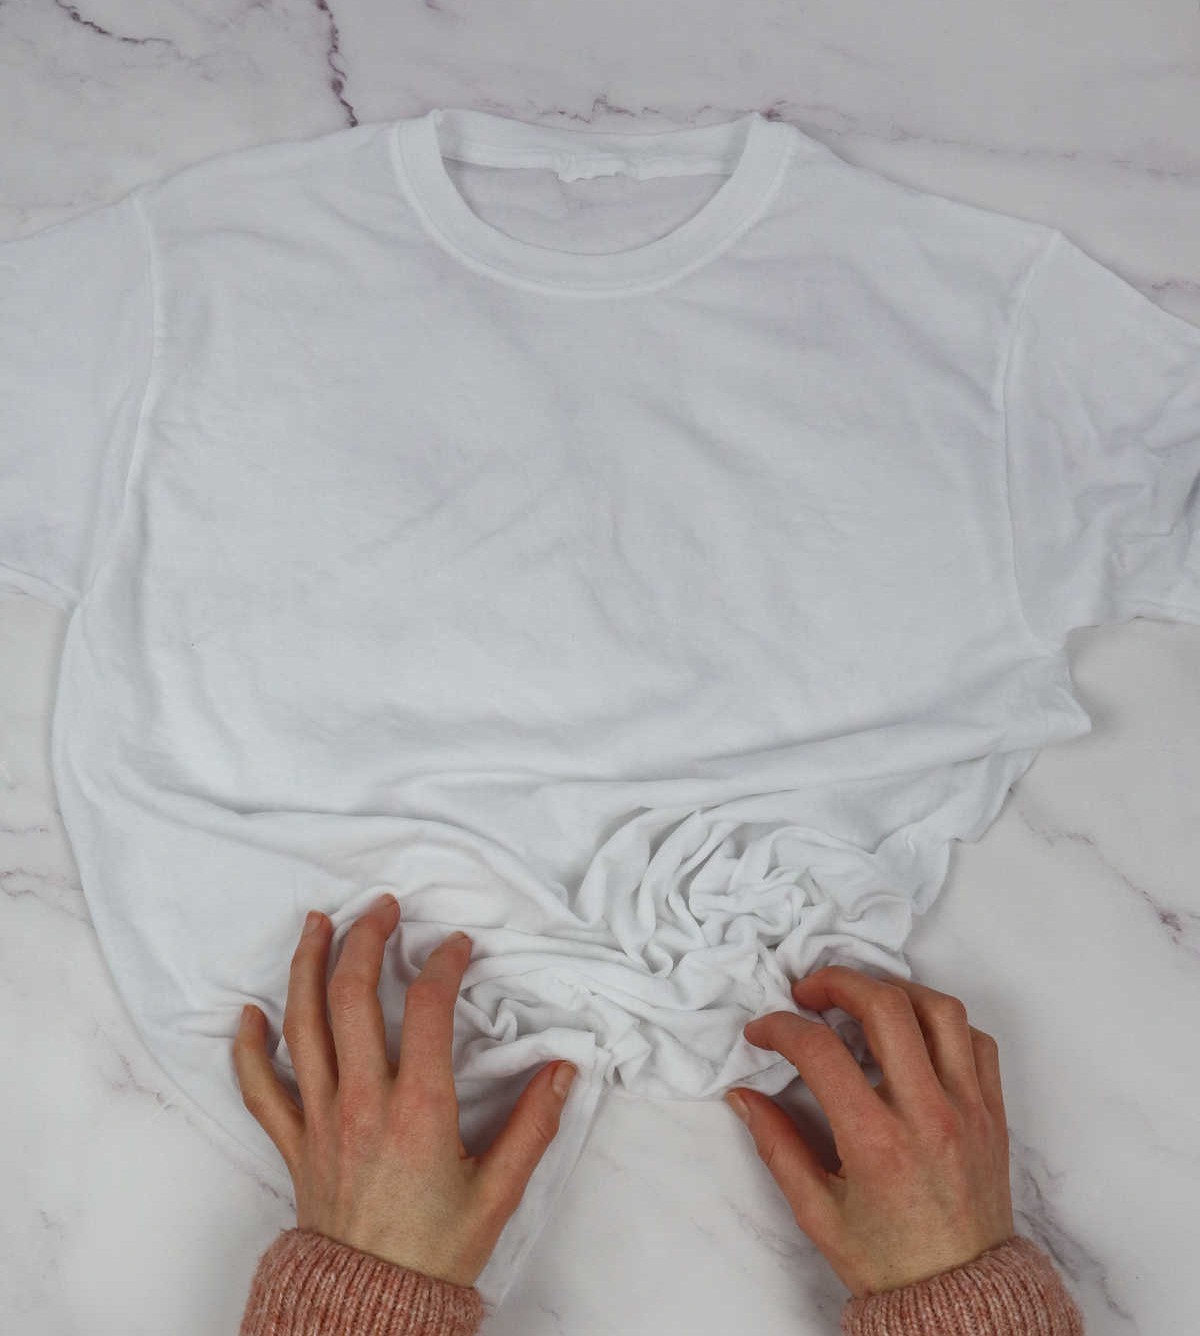
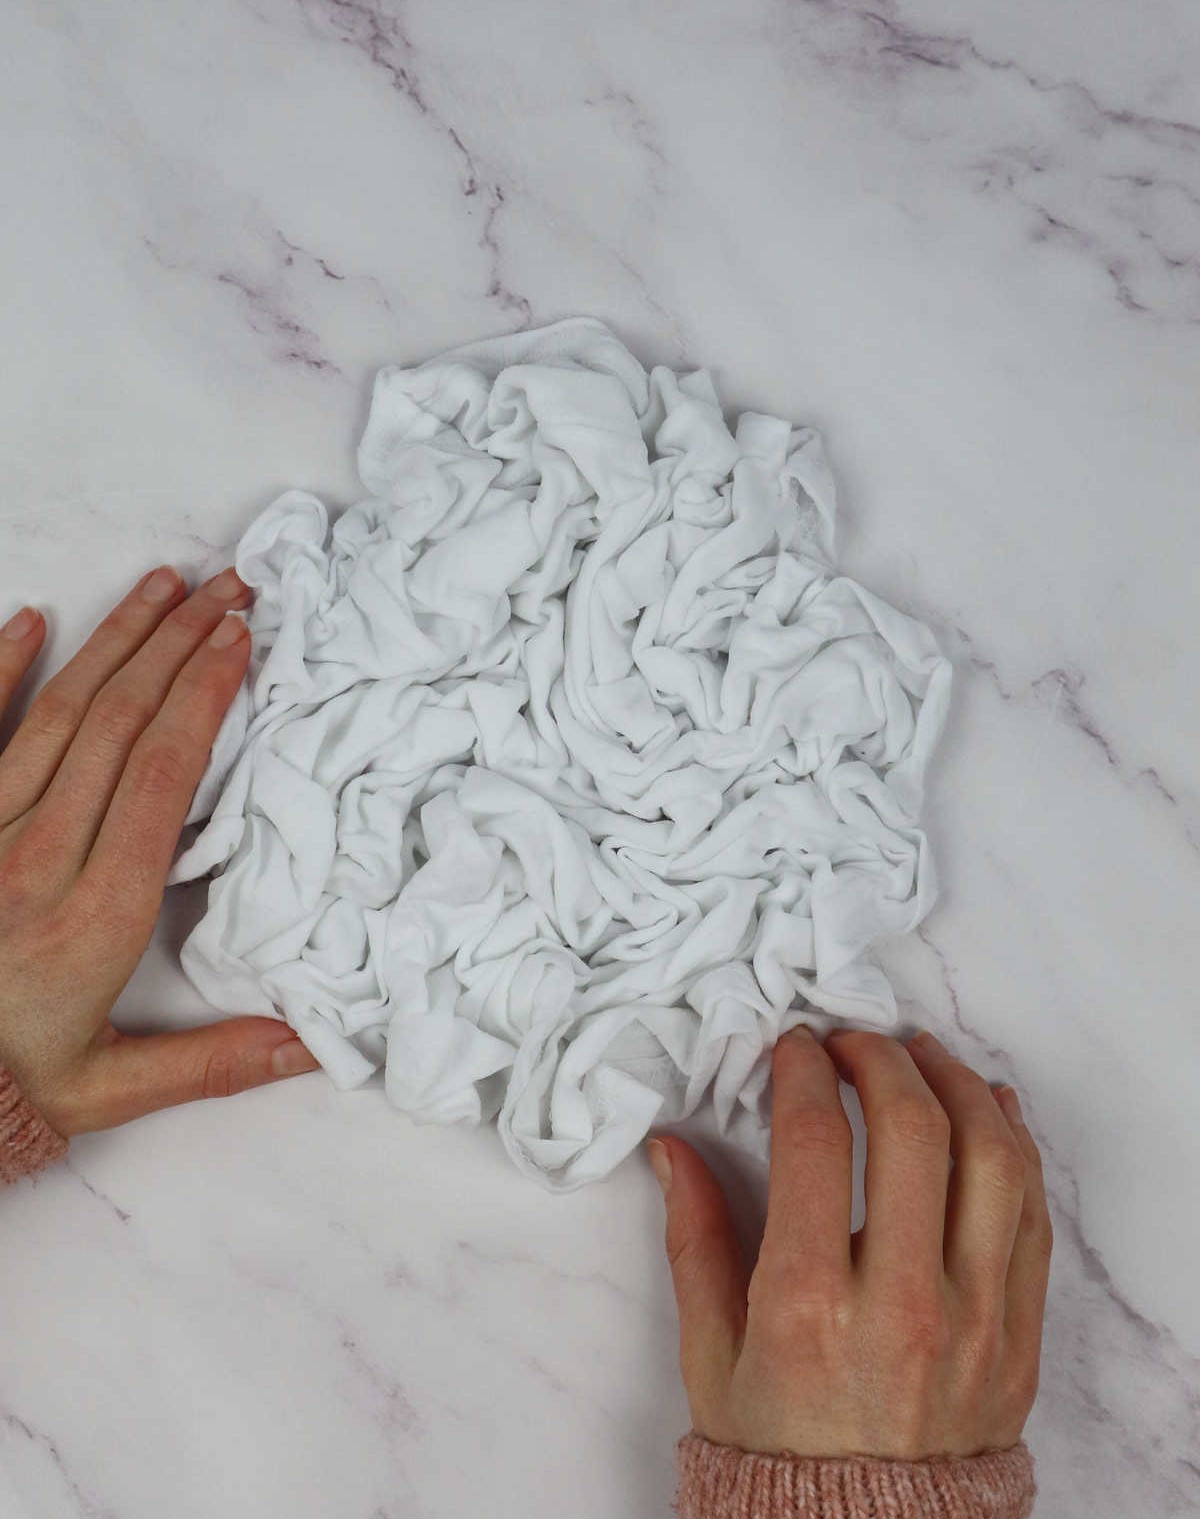
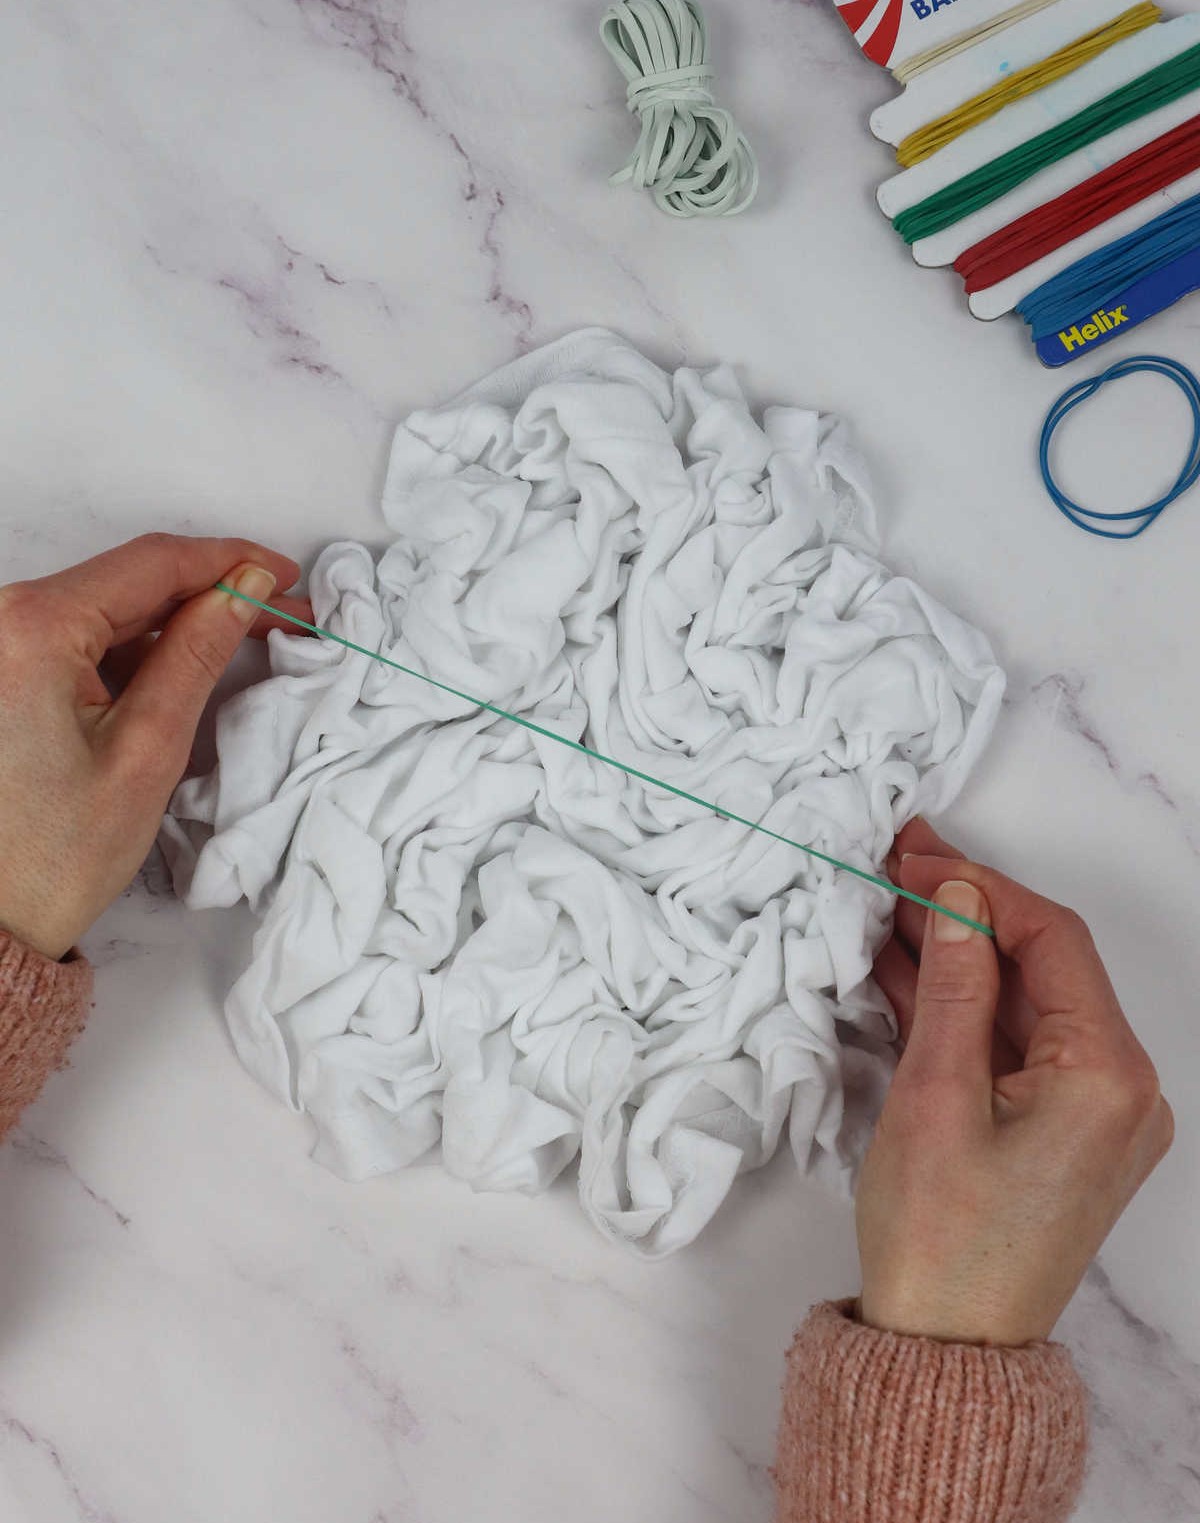
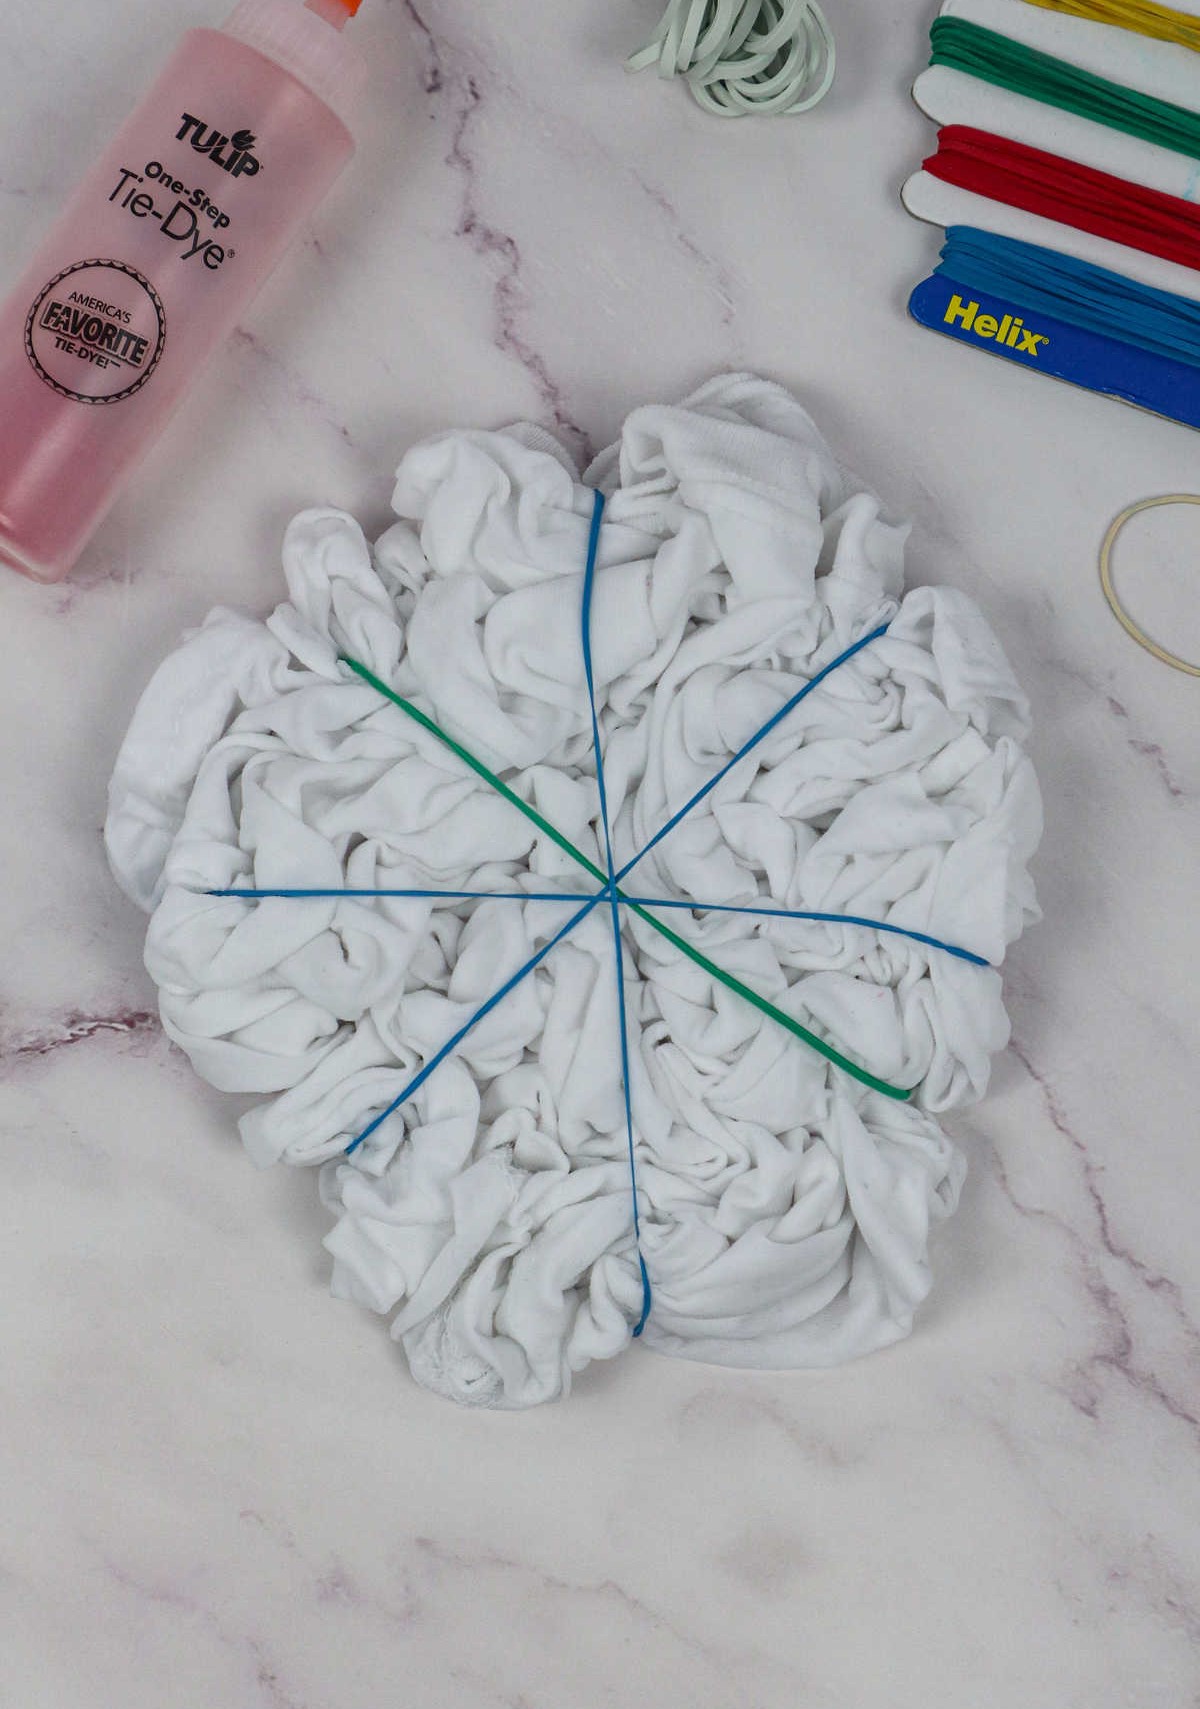
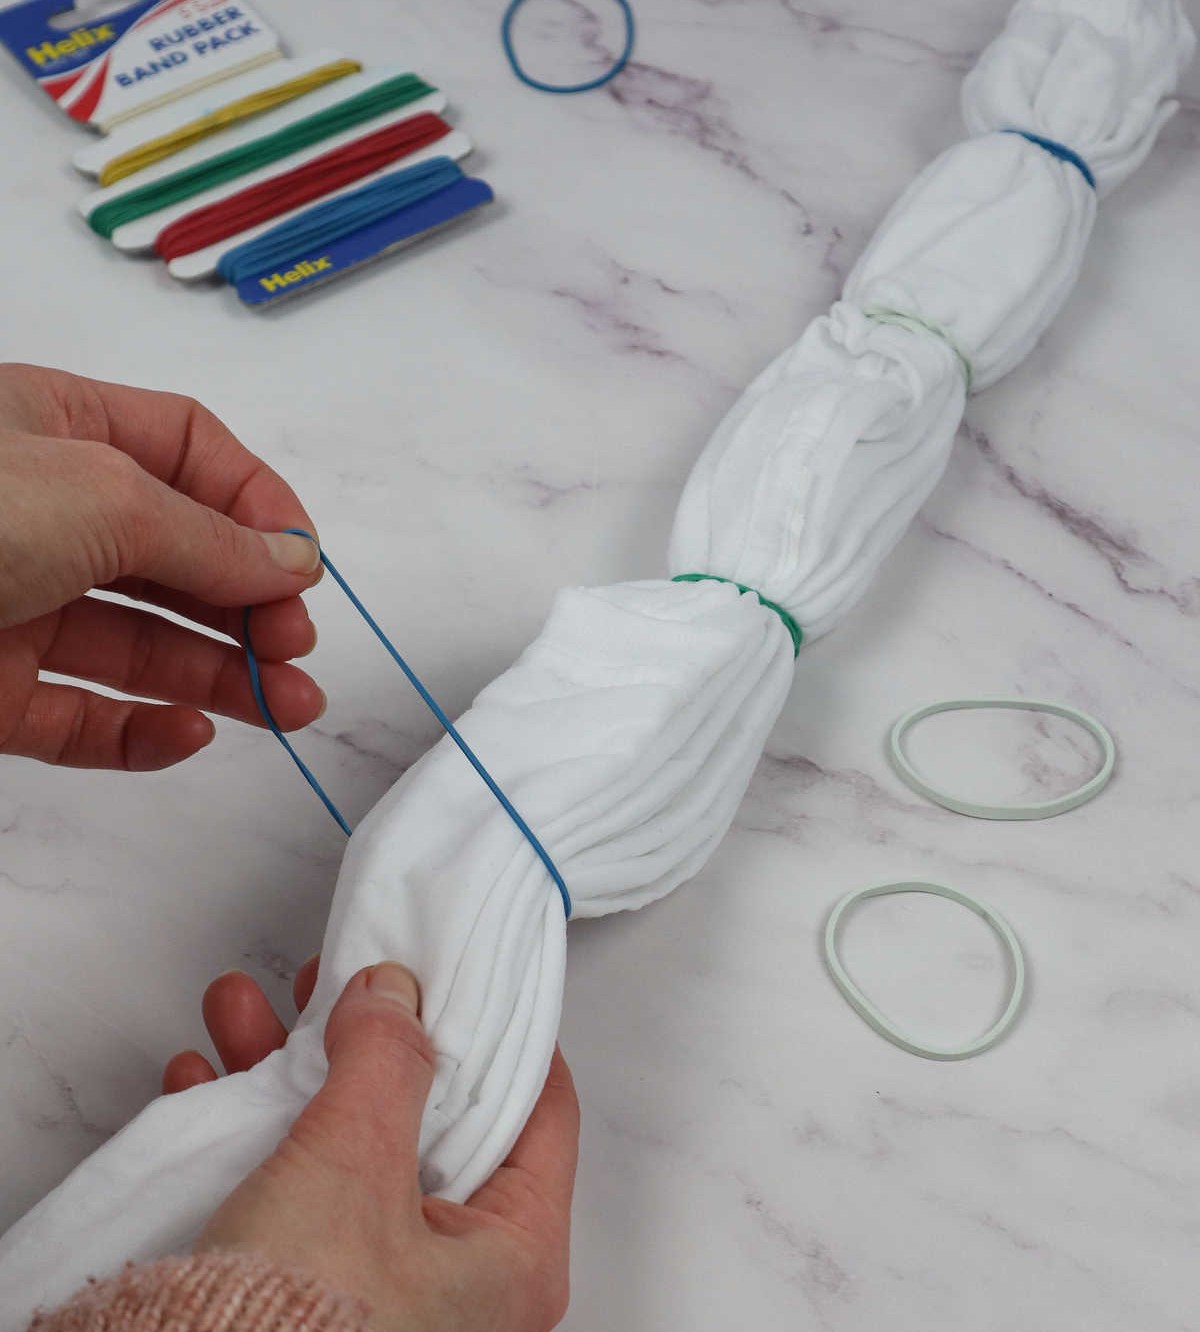
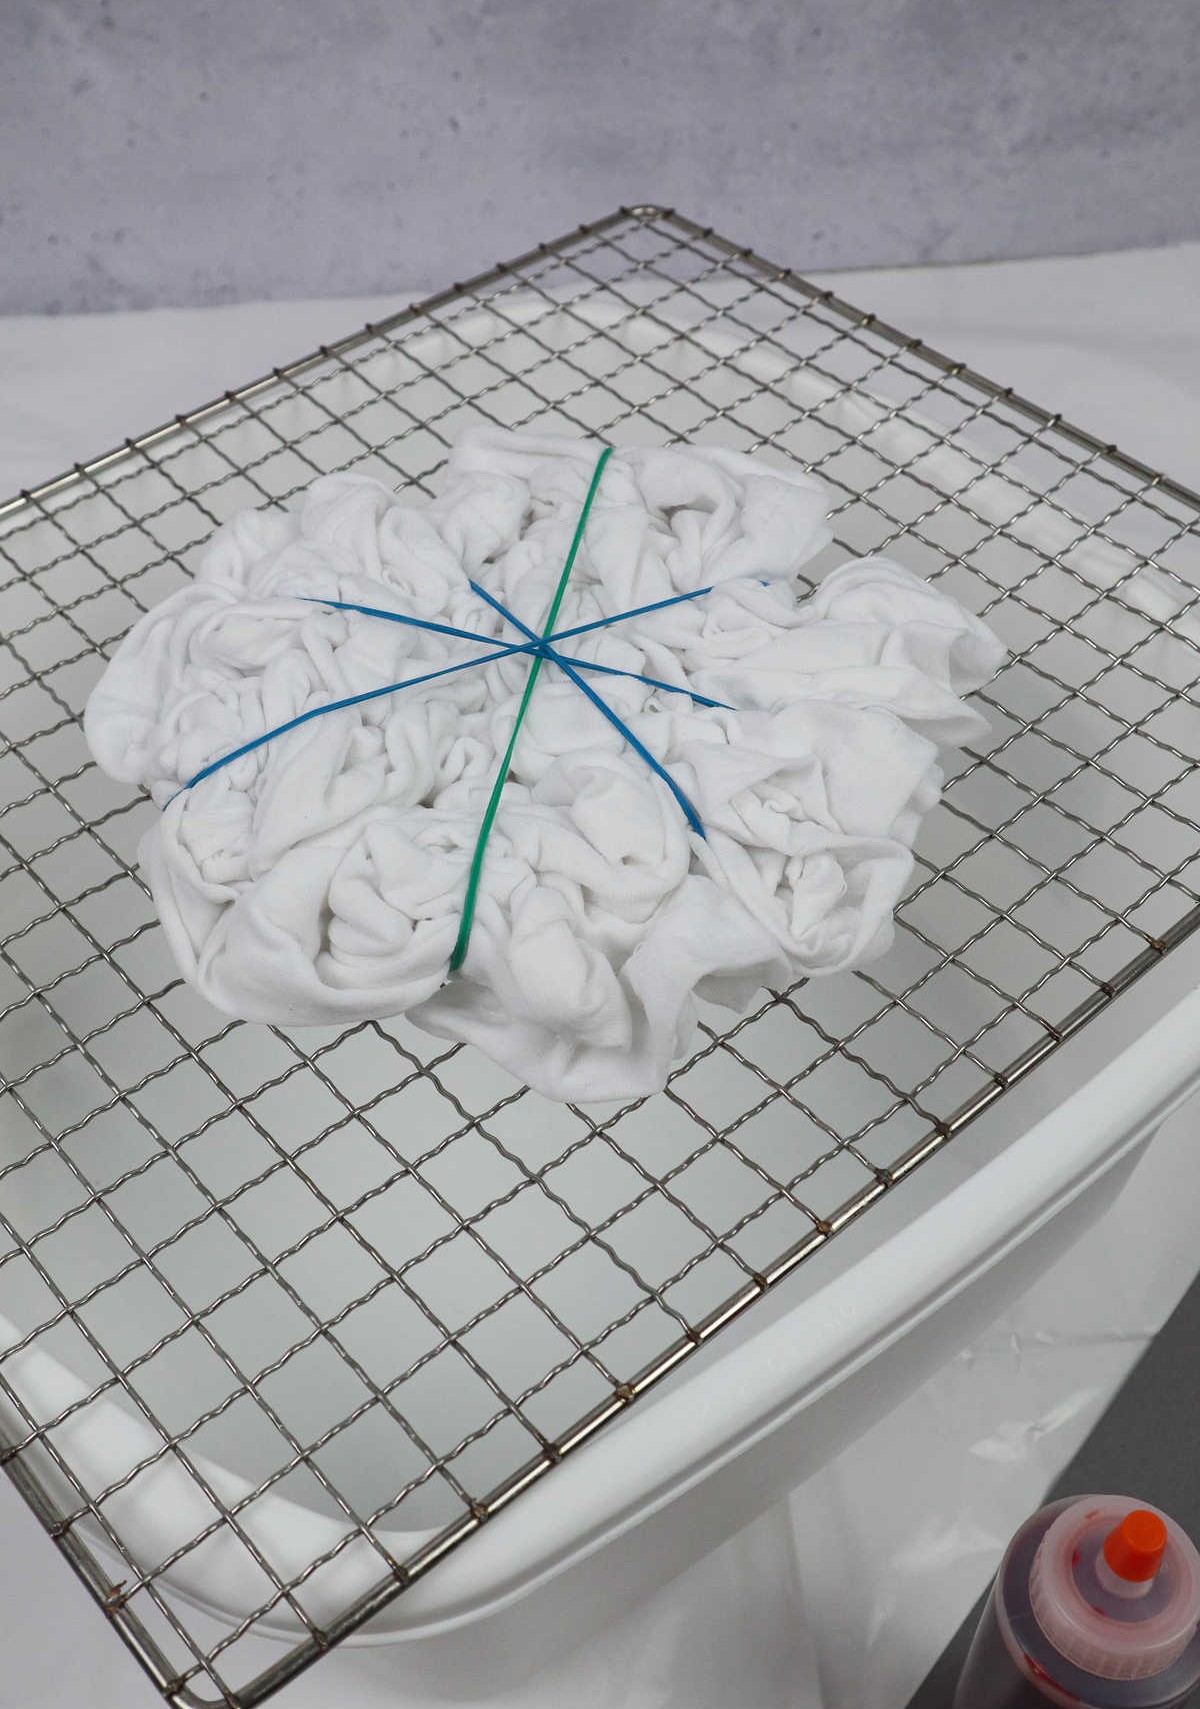
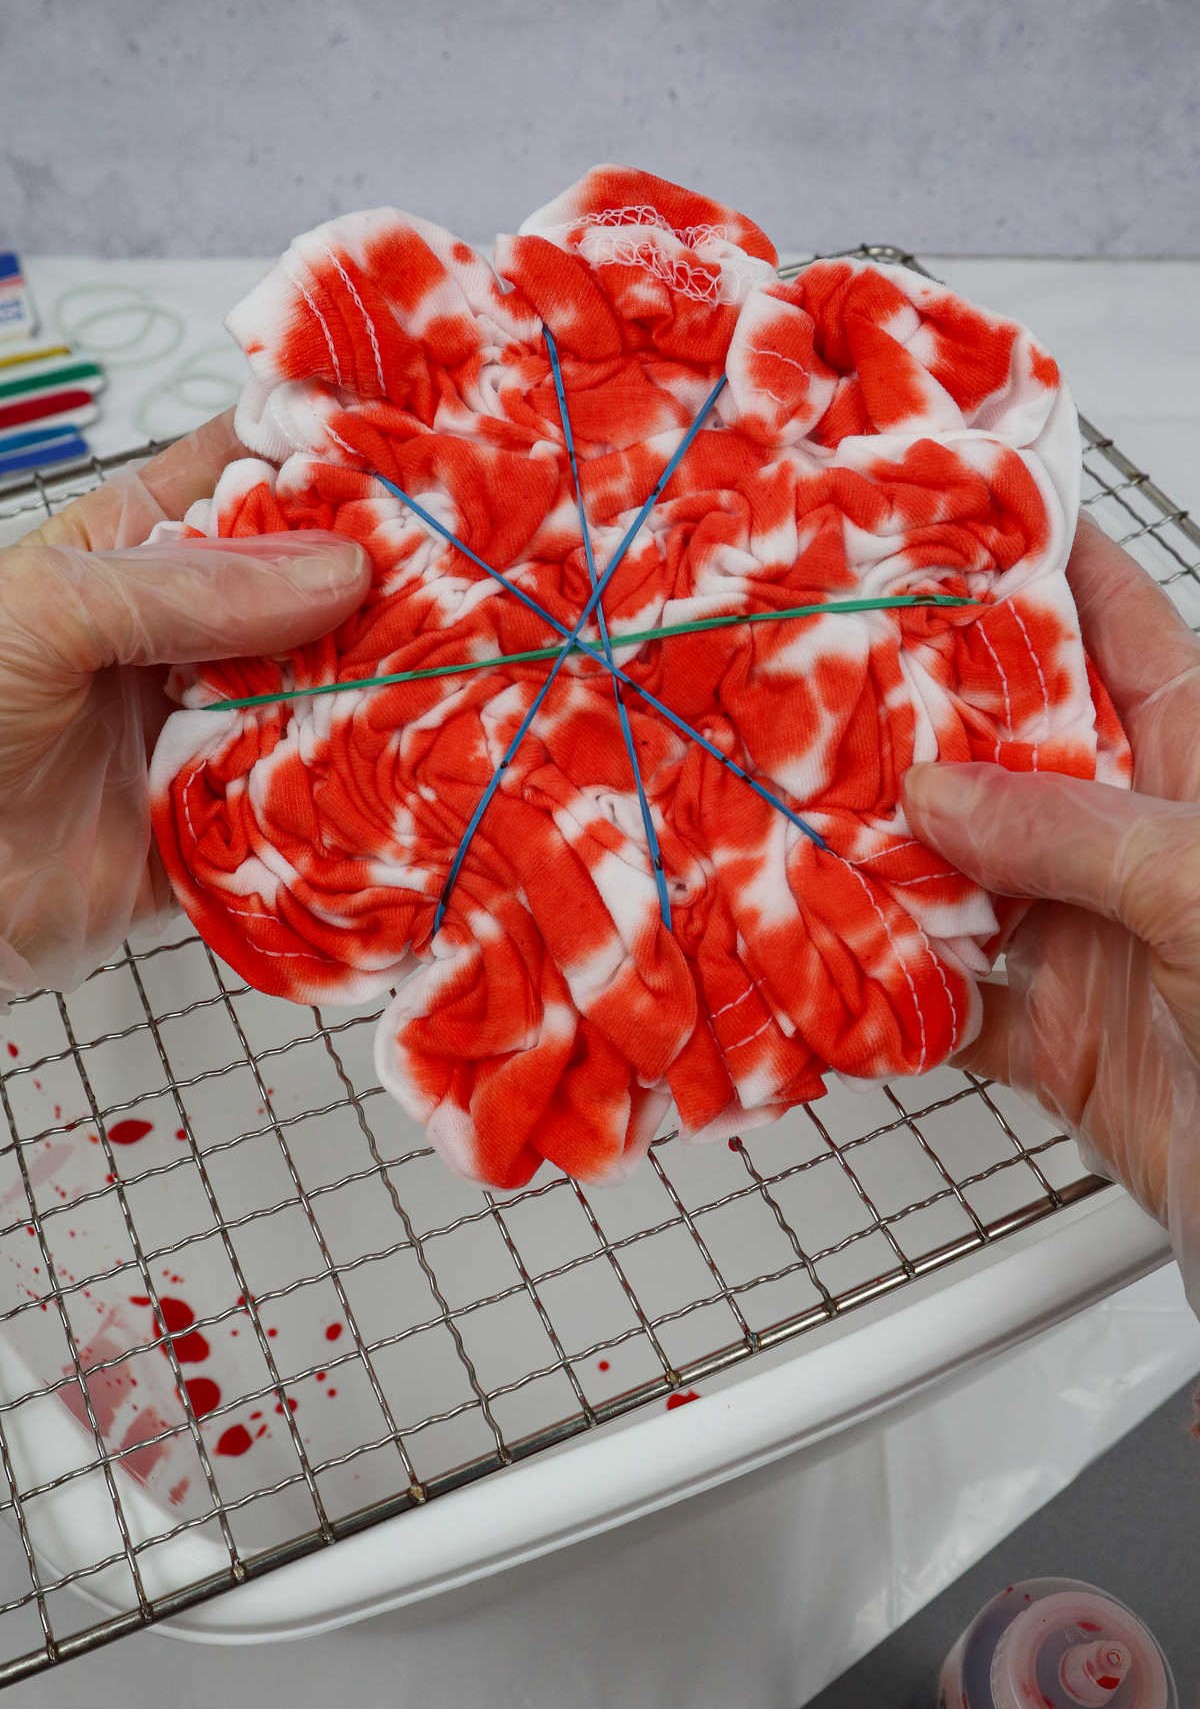
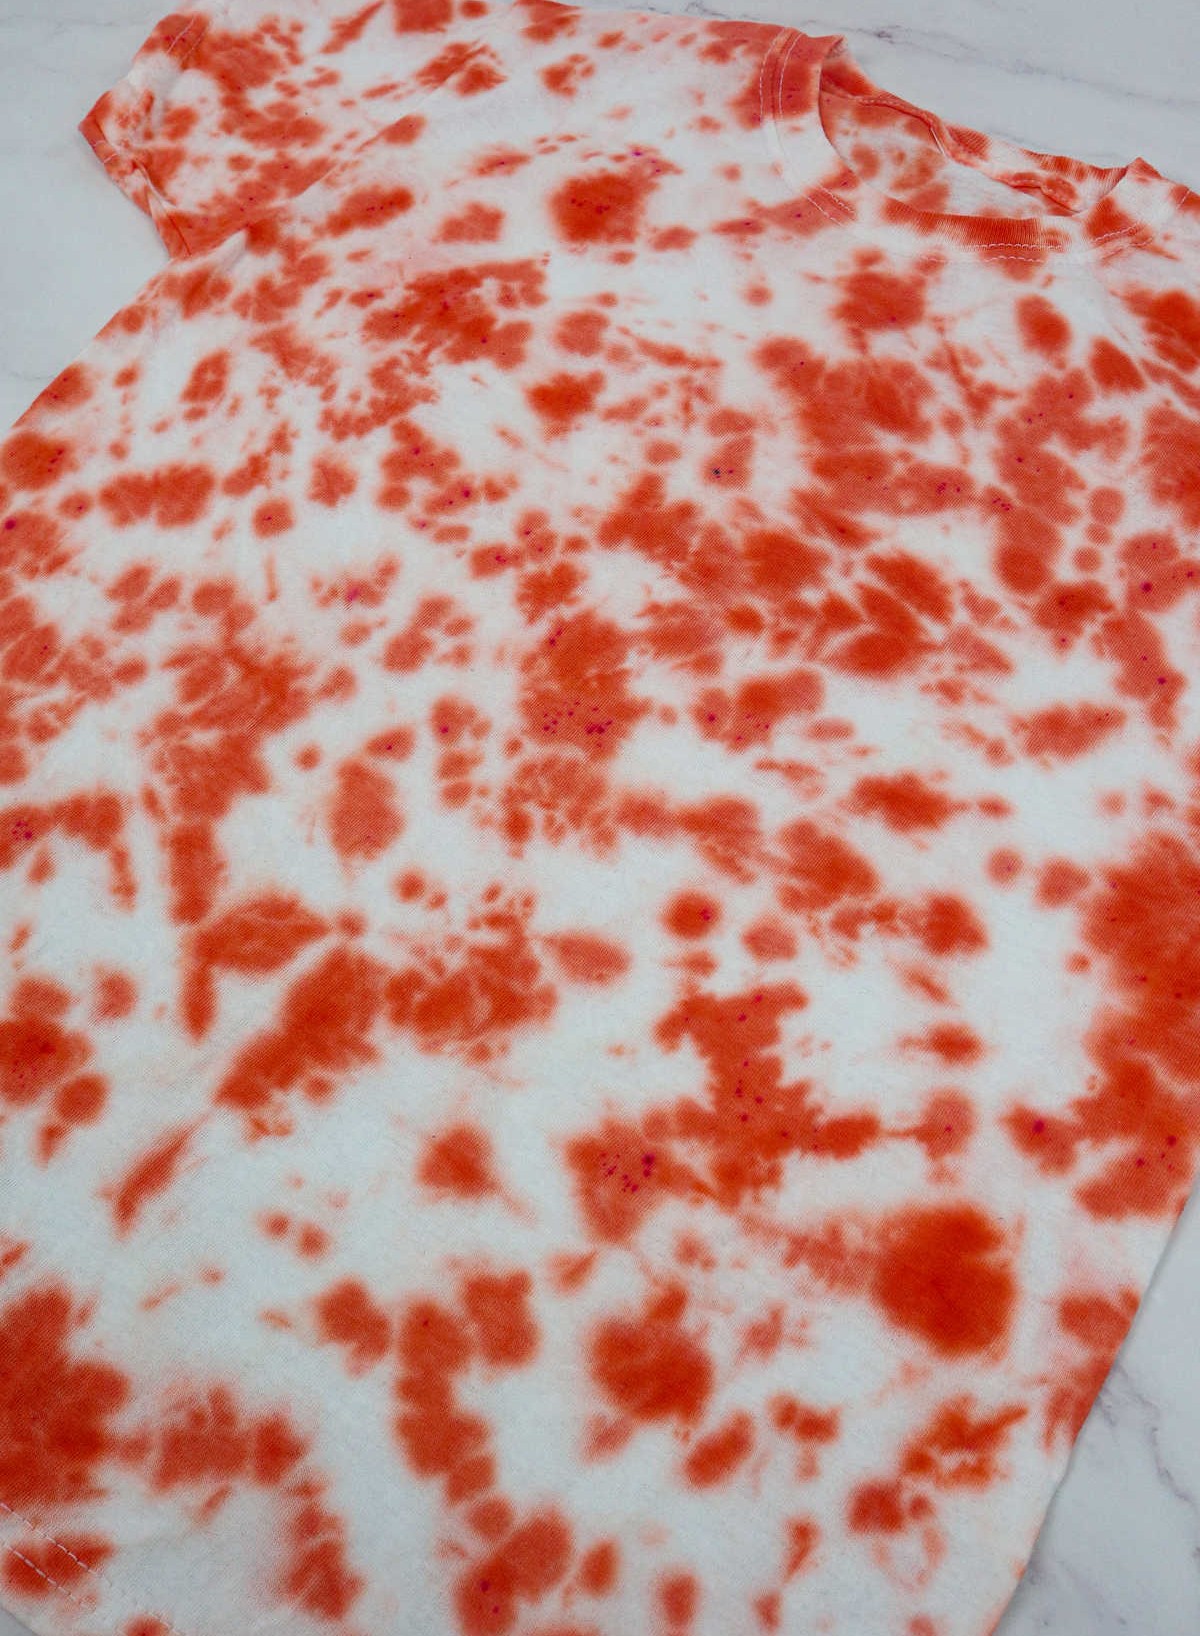
To achieve this unique texture, you’ll need to employ the scrunch or crumble method. This involves randomly folding and gathering the fabric to create a series of irregular creases. Once you’ve achieved the desired level of scrunching, secure the shirt along those folds with tight elastic bands. The tighter the bands, the more pronounced your pattern will be. Moreover, you can also use the bands to create additional patterns on the tee by strategically placing them in different areas.
Method 2
Step 1
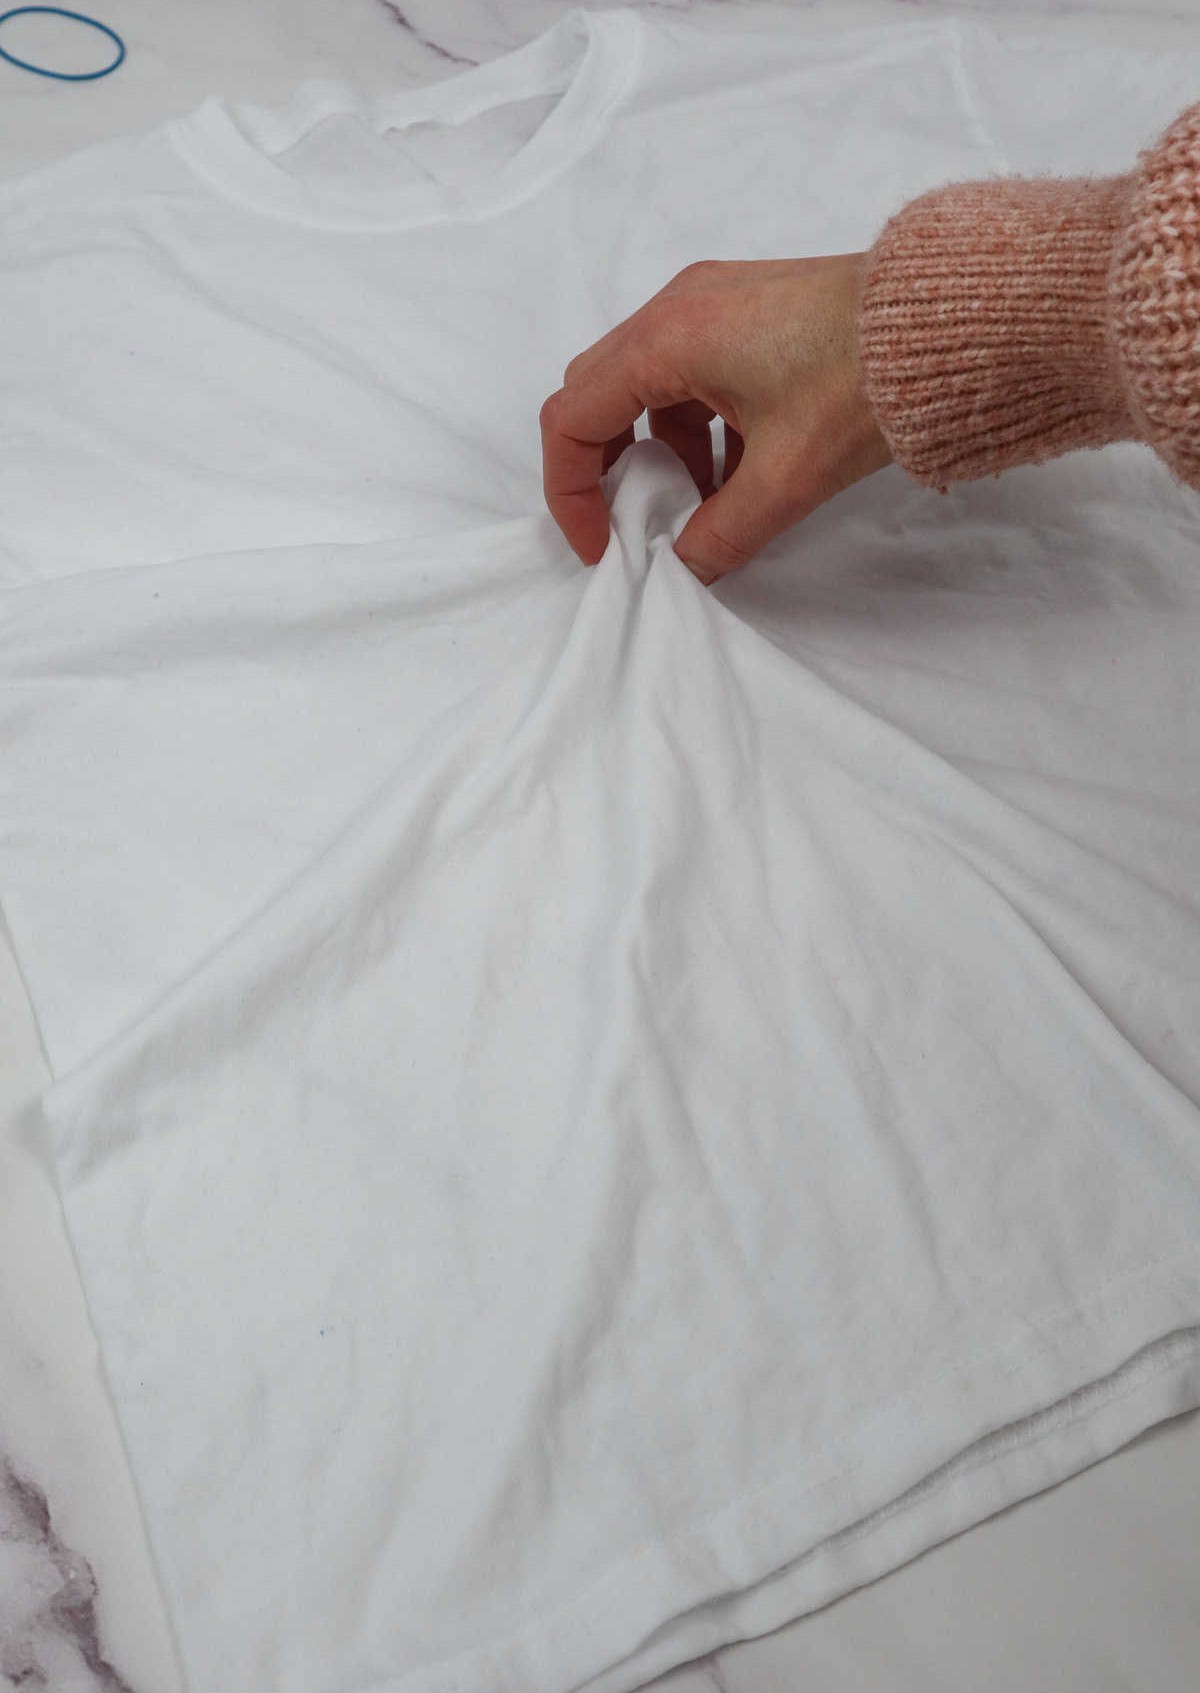
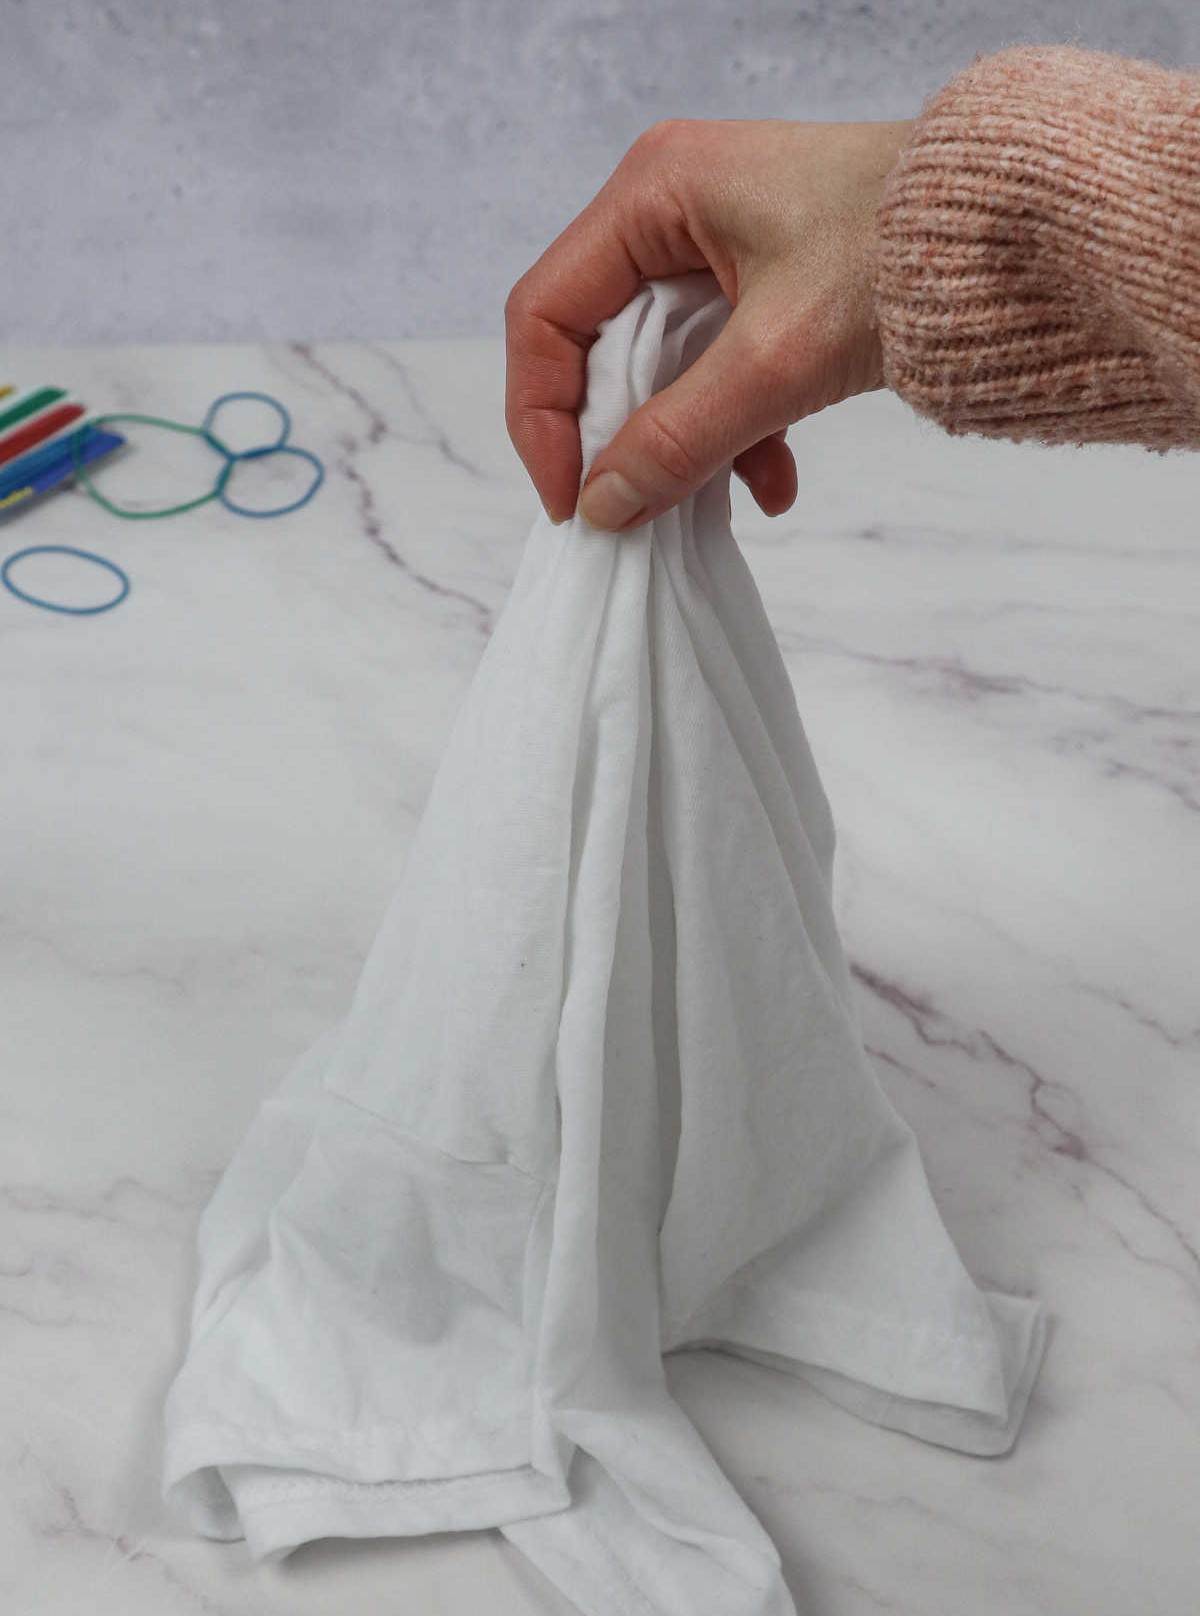
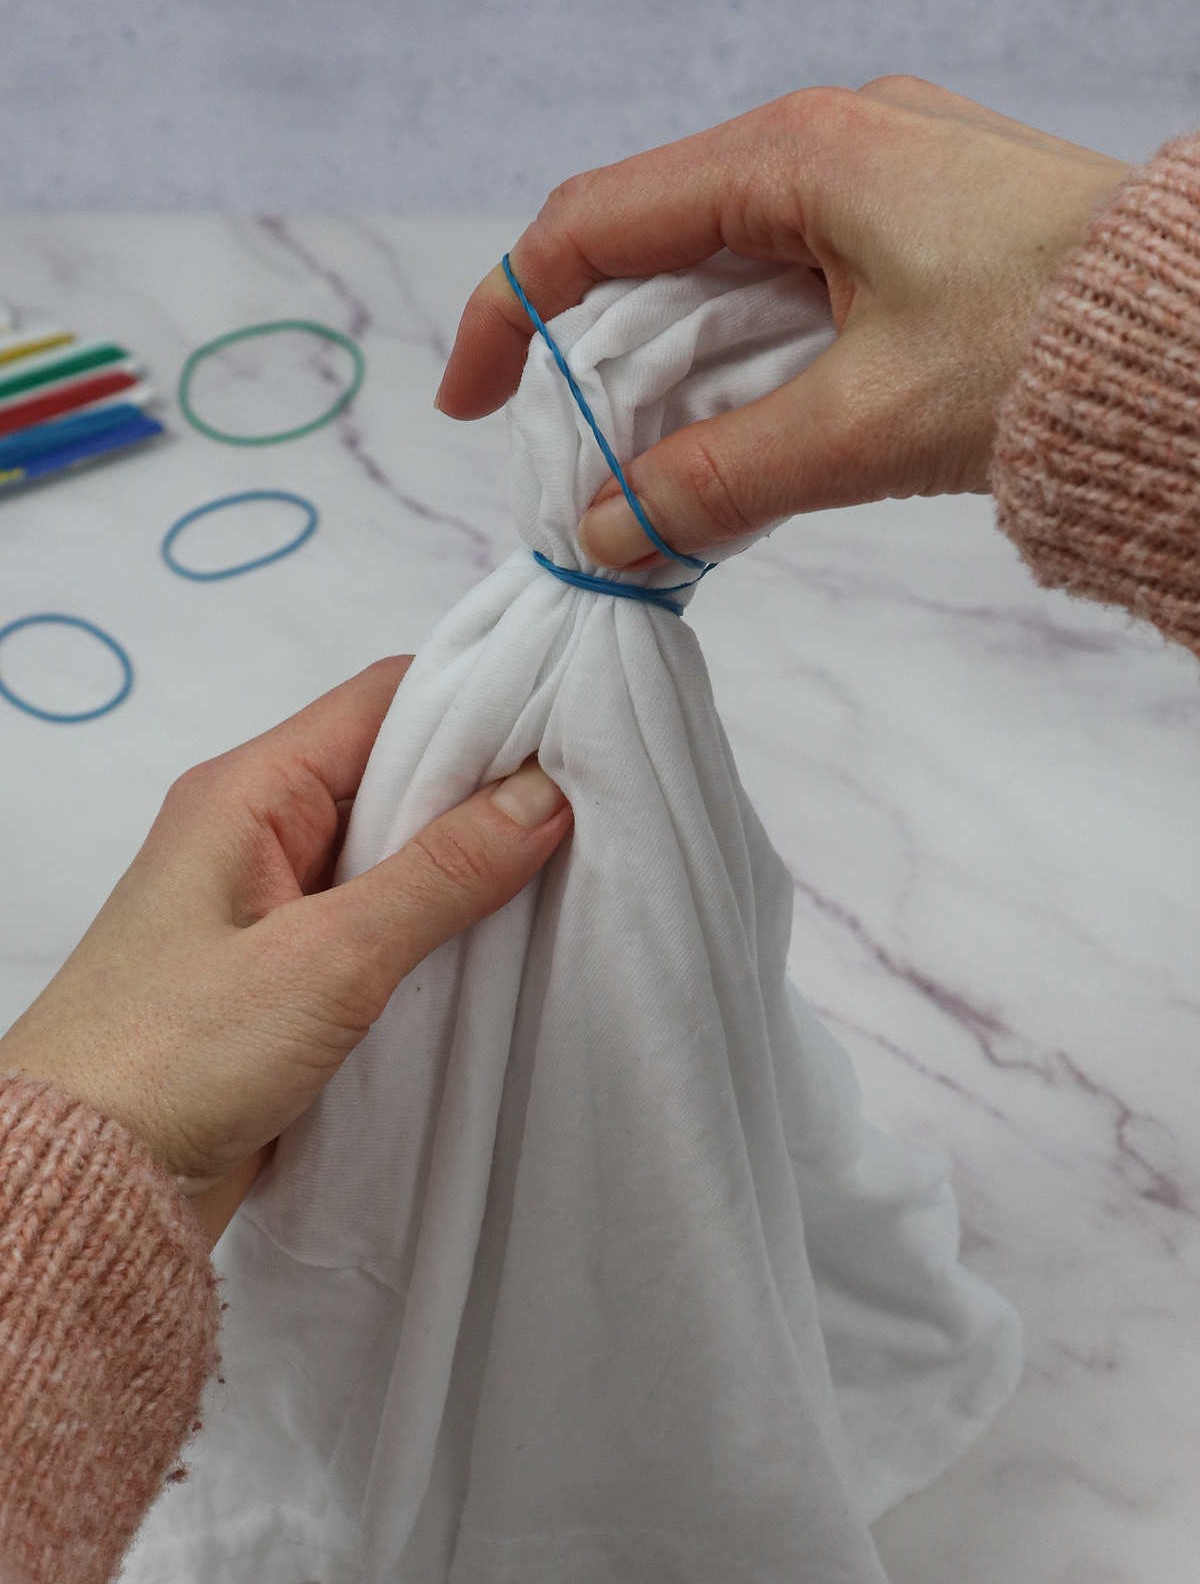
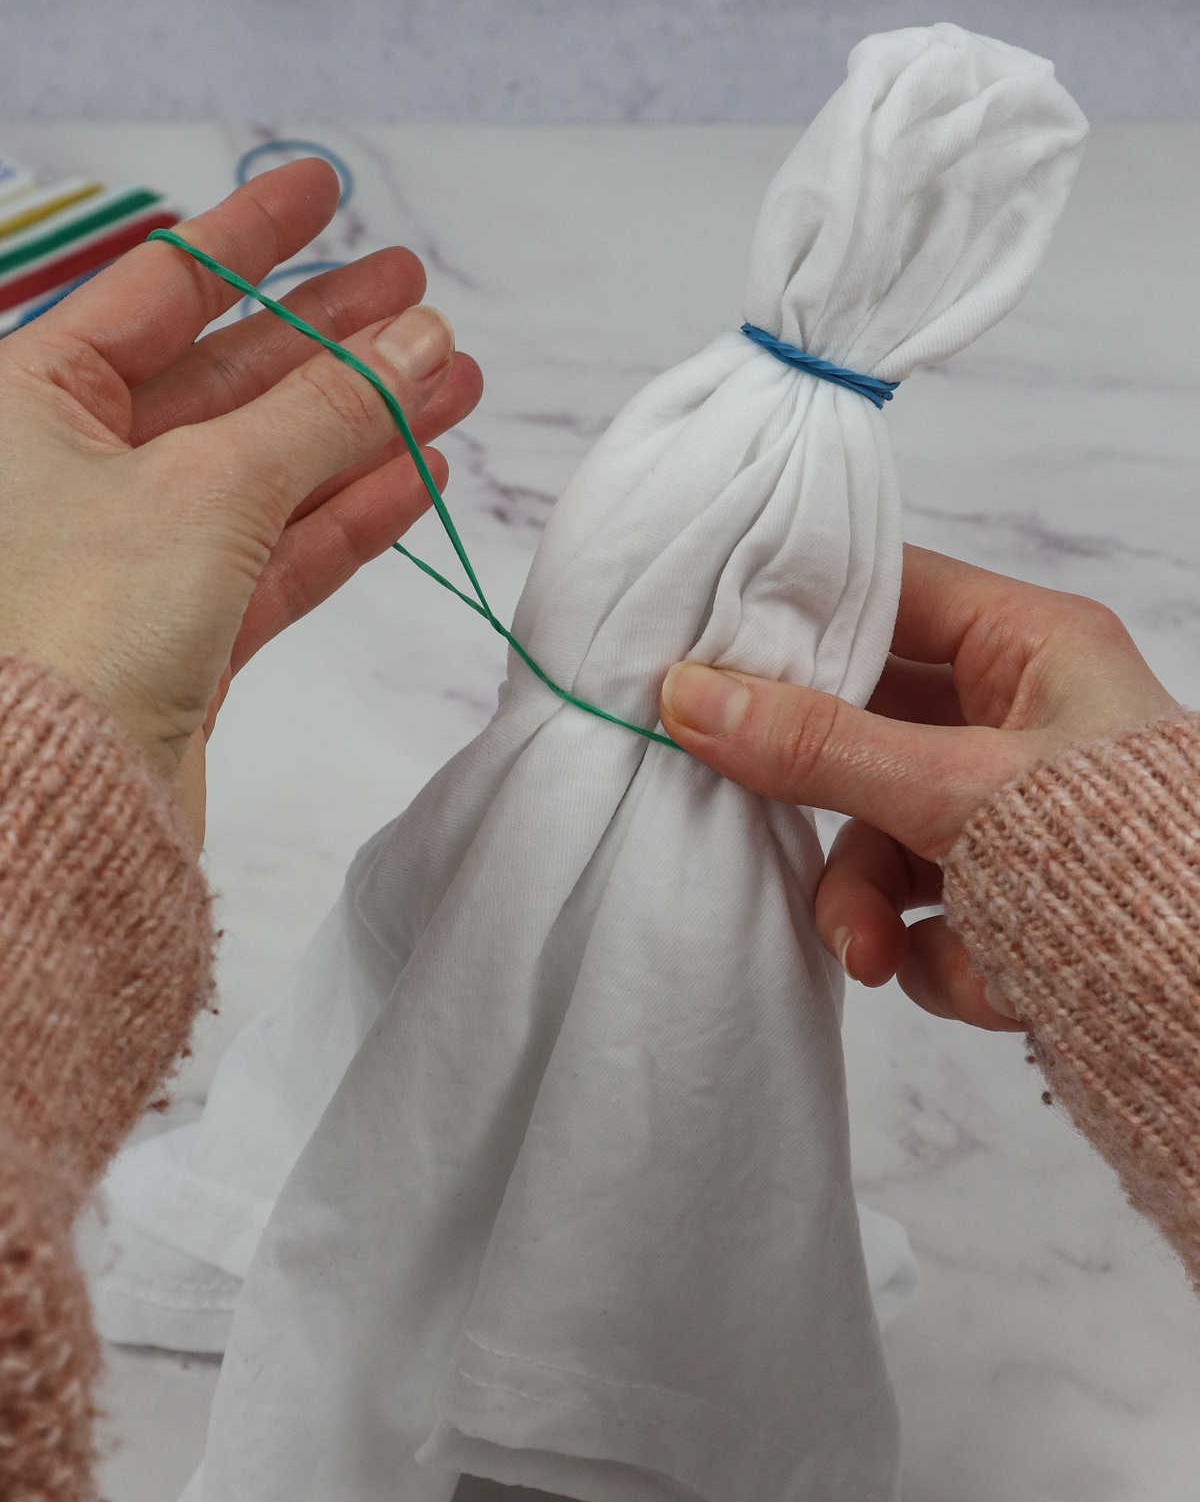
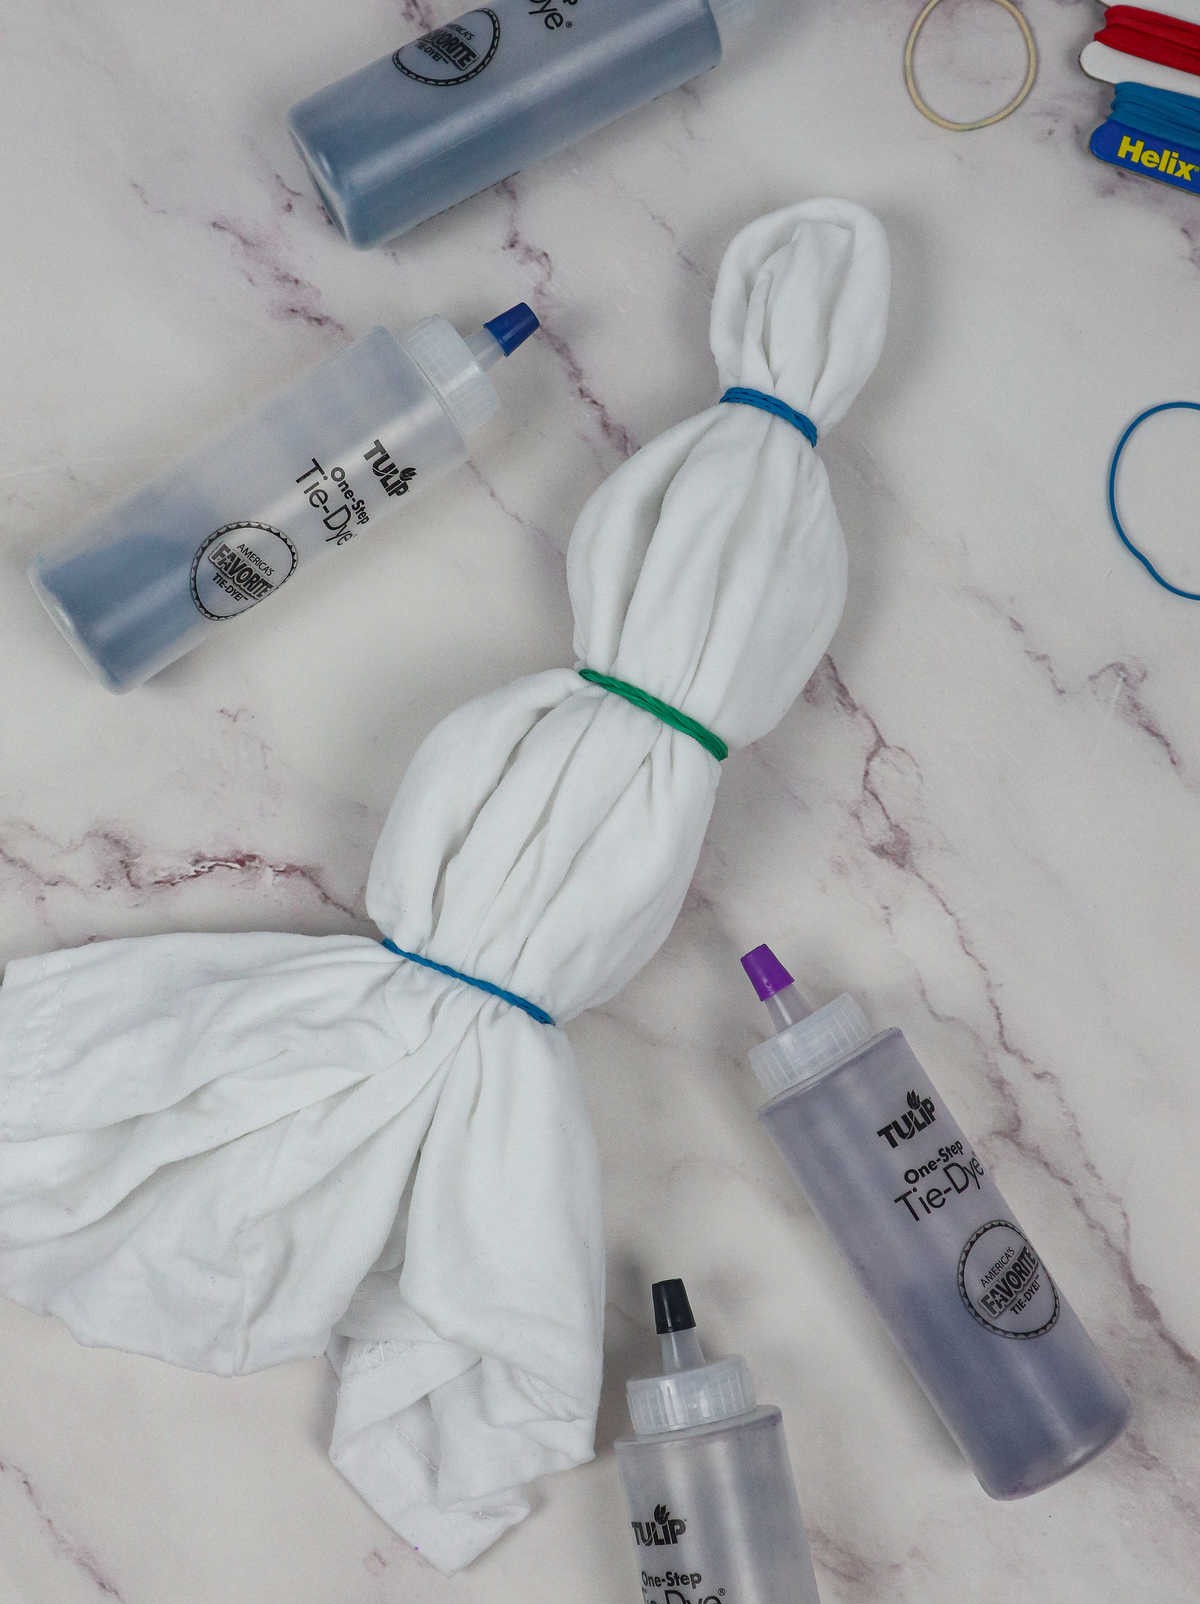
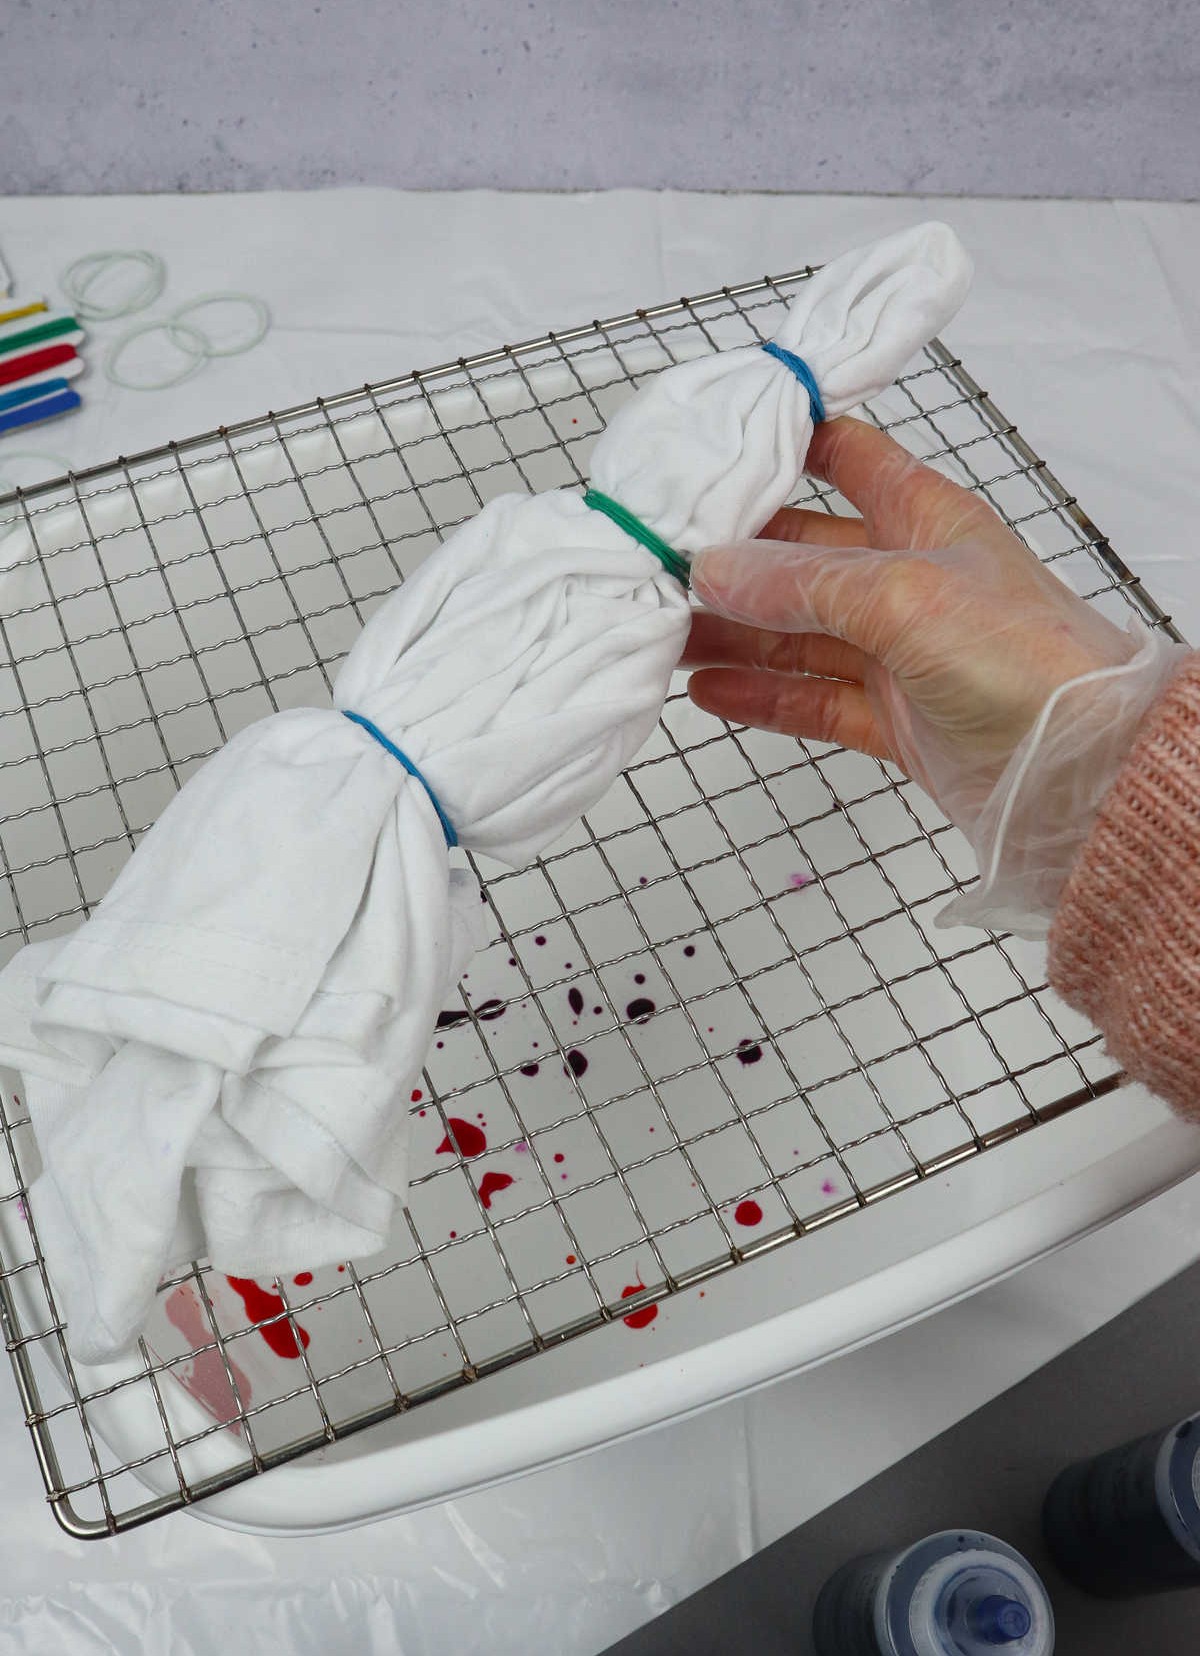
The ‘bulls’-eye method involves creating a small fold at the top of the tee by pinching, pulling, and twisting the fabric until it forms a subtle crease. This technique is demonstrated in the accompanying image. To secure the fold, wrap an elastic band tightly around it to create a knot.For added stability and visual interest, repeat this process with additional elastic bands spaced evenly apart. The more elastics you use, the more dynamic your color pattern will be.
Method 3
While the first two methods are innovative, the third approach, known as the stripes method, is equally impressive. It’s a technique that showcases creativity and problem-solving skills.
Step 1
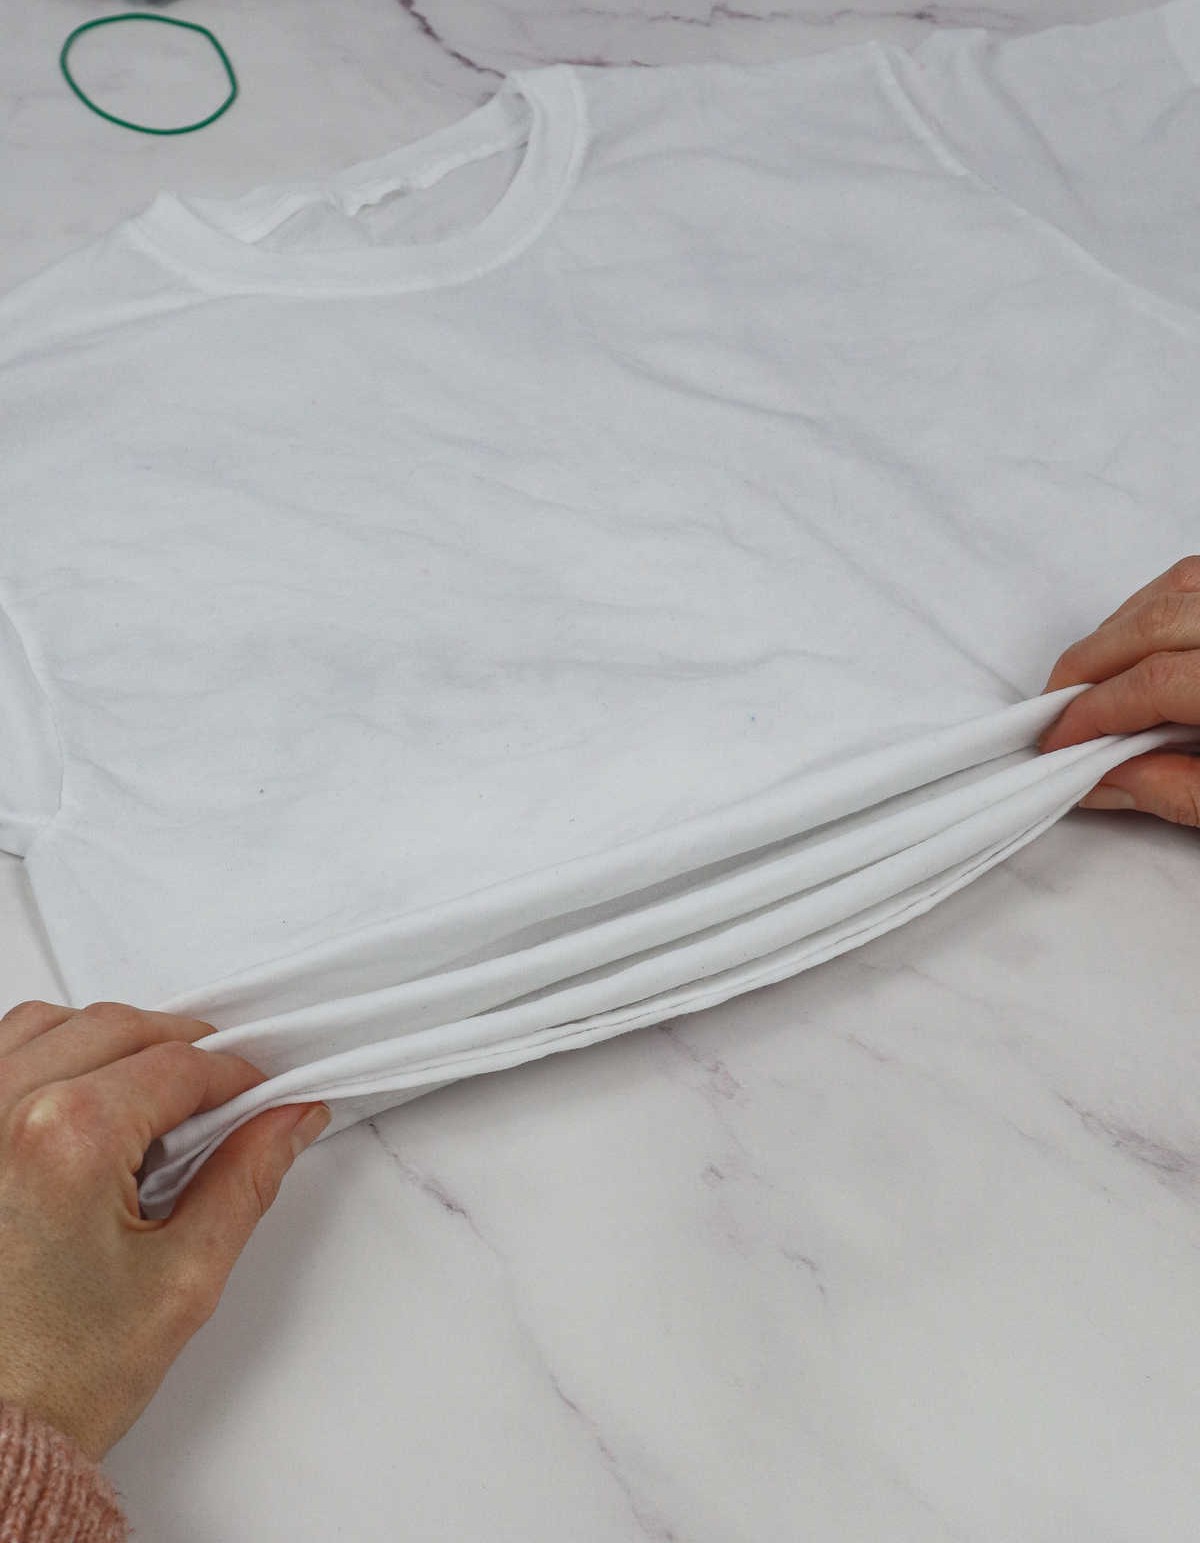
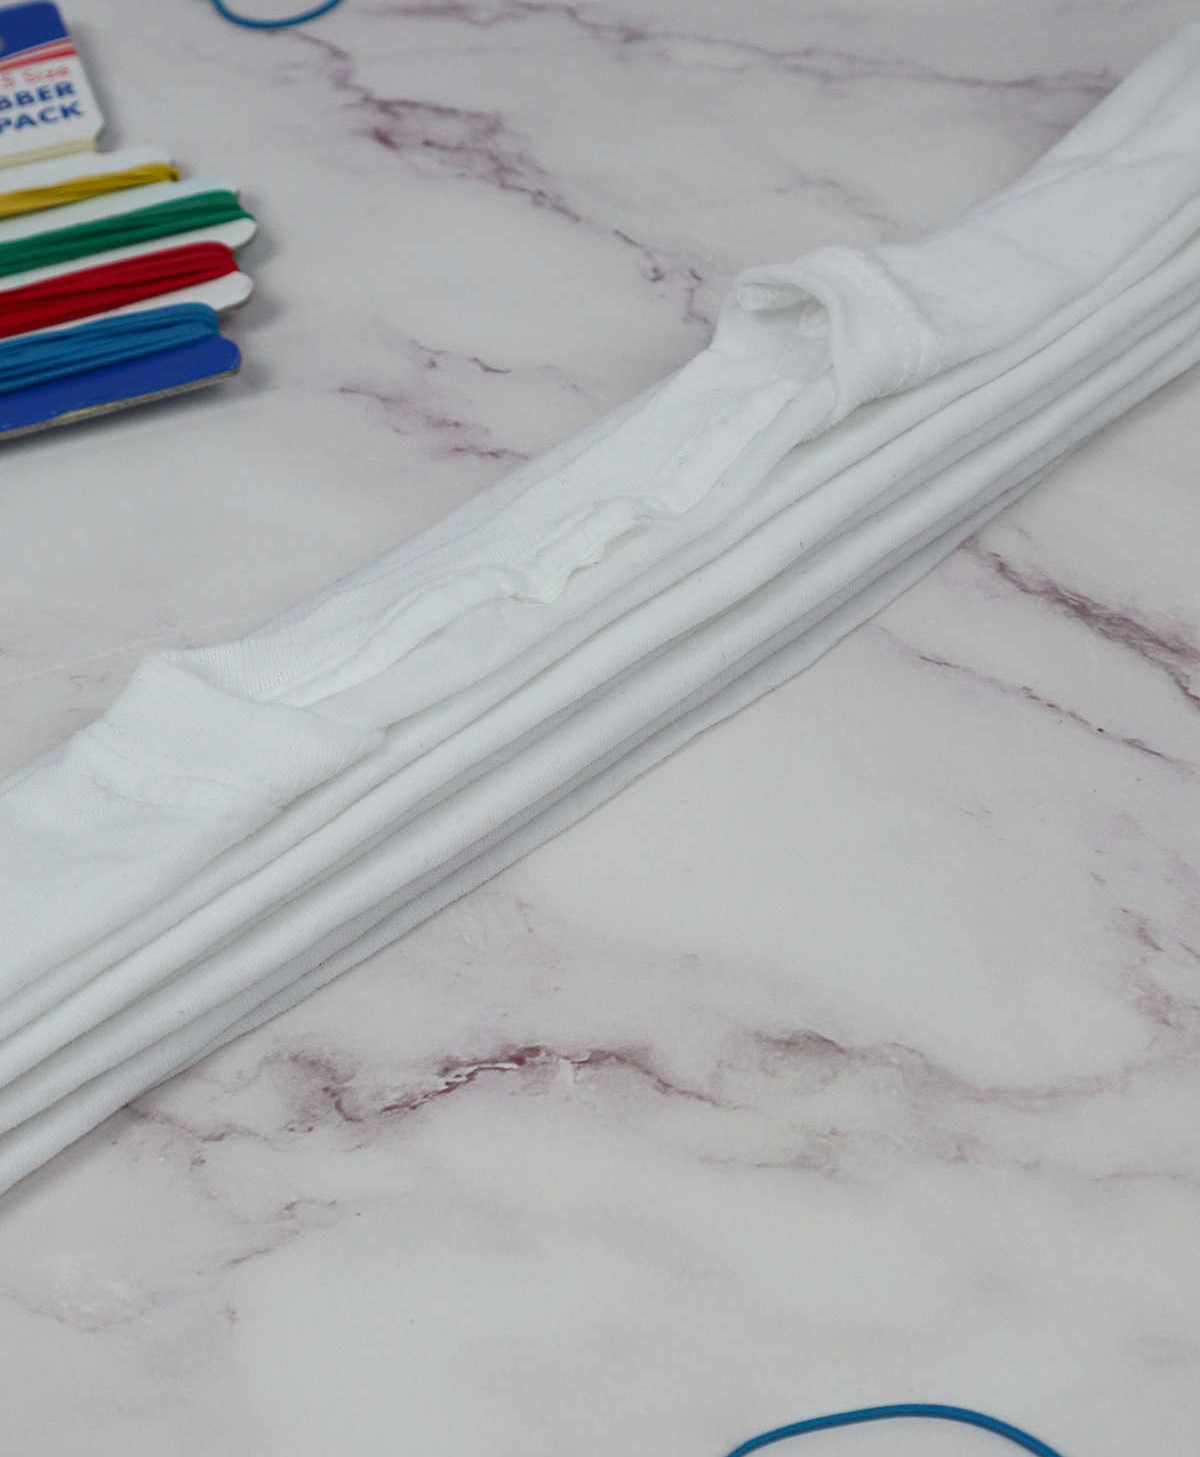
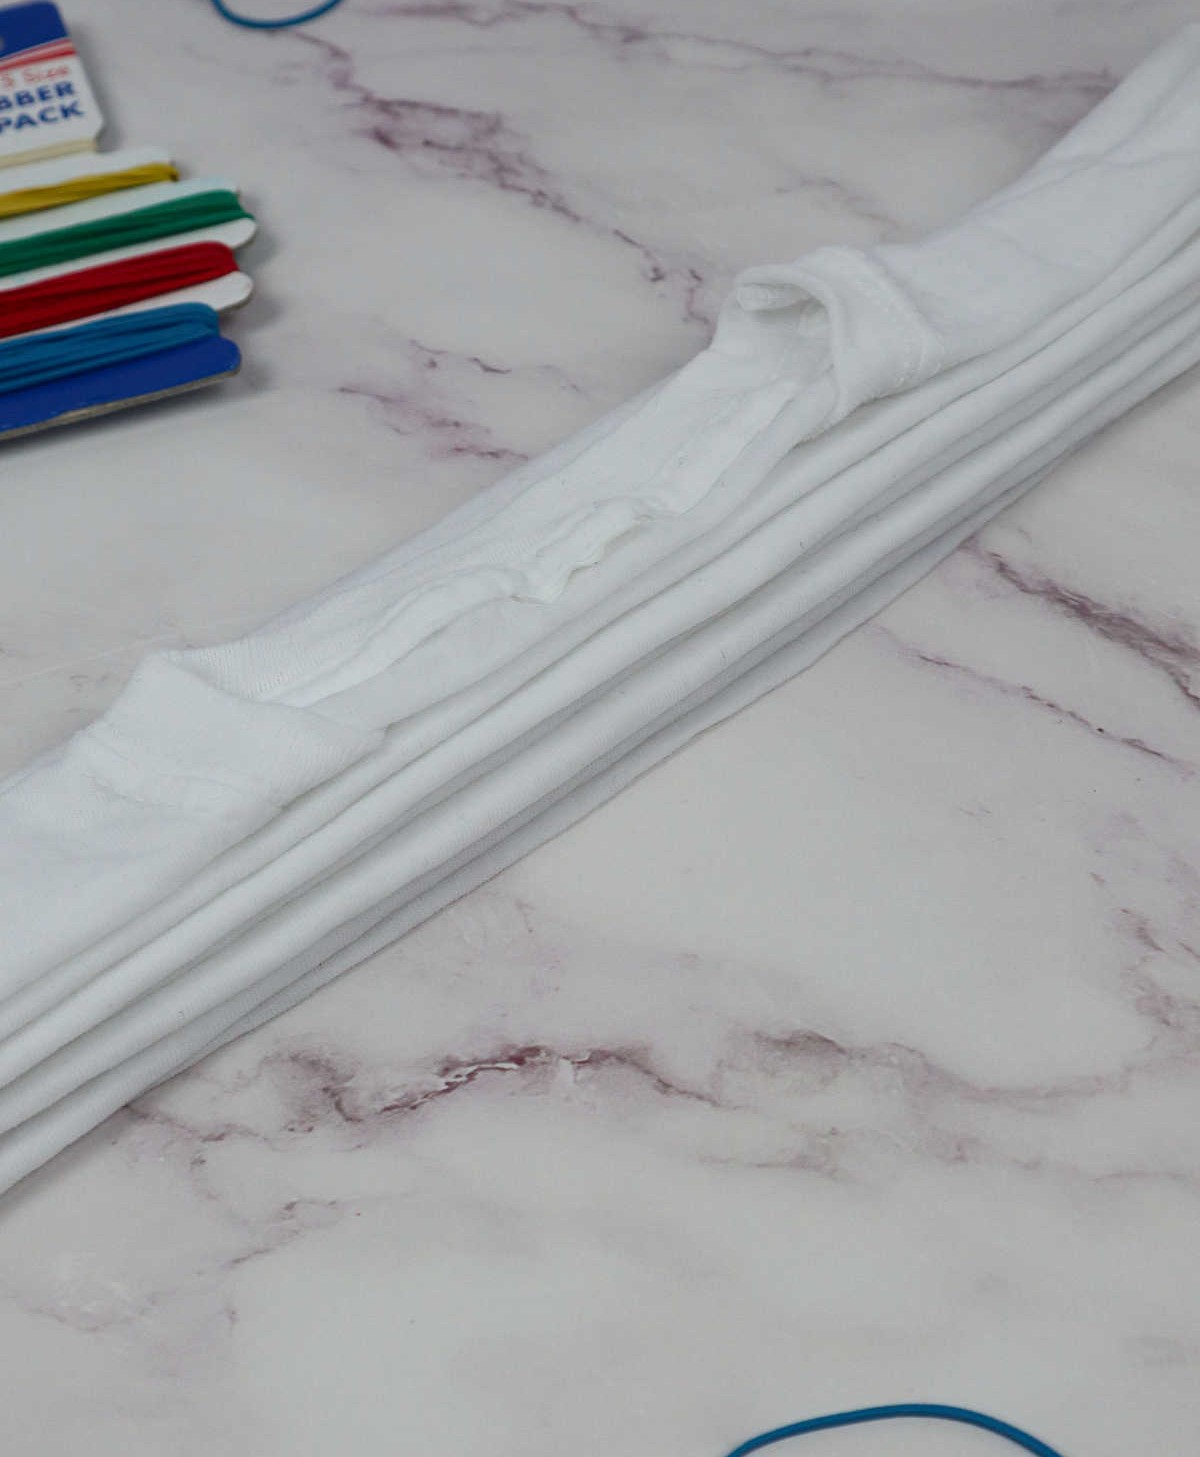
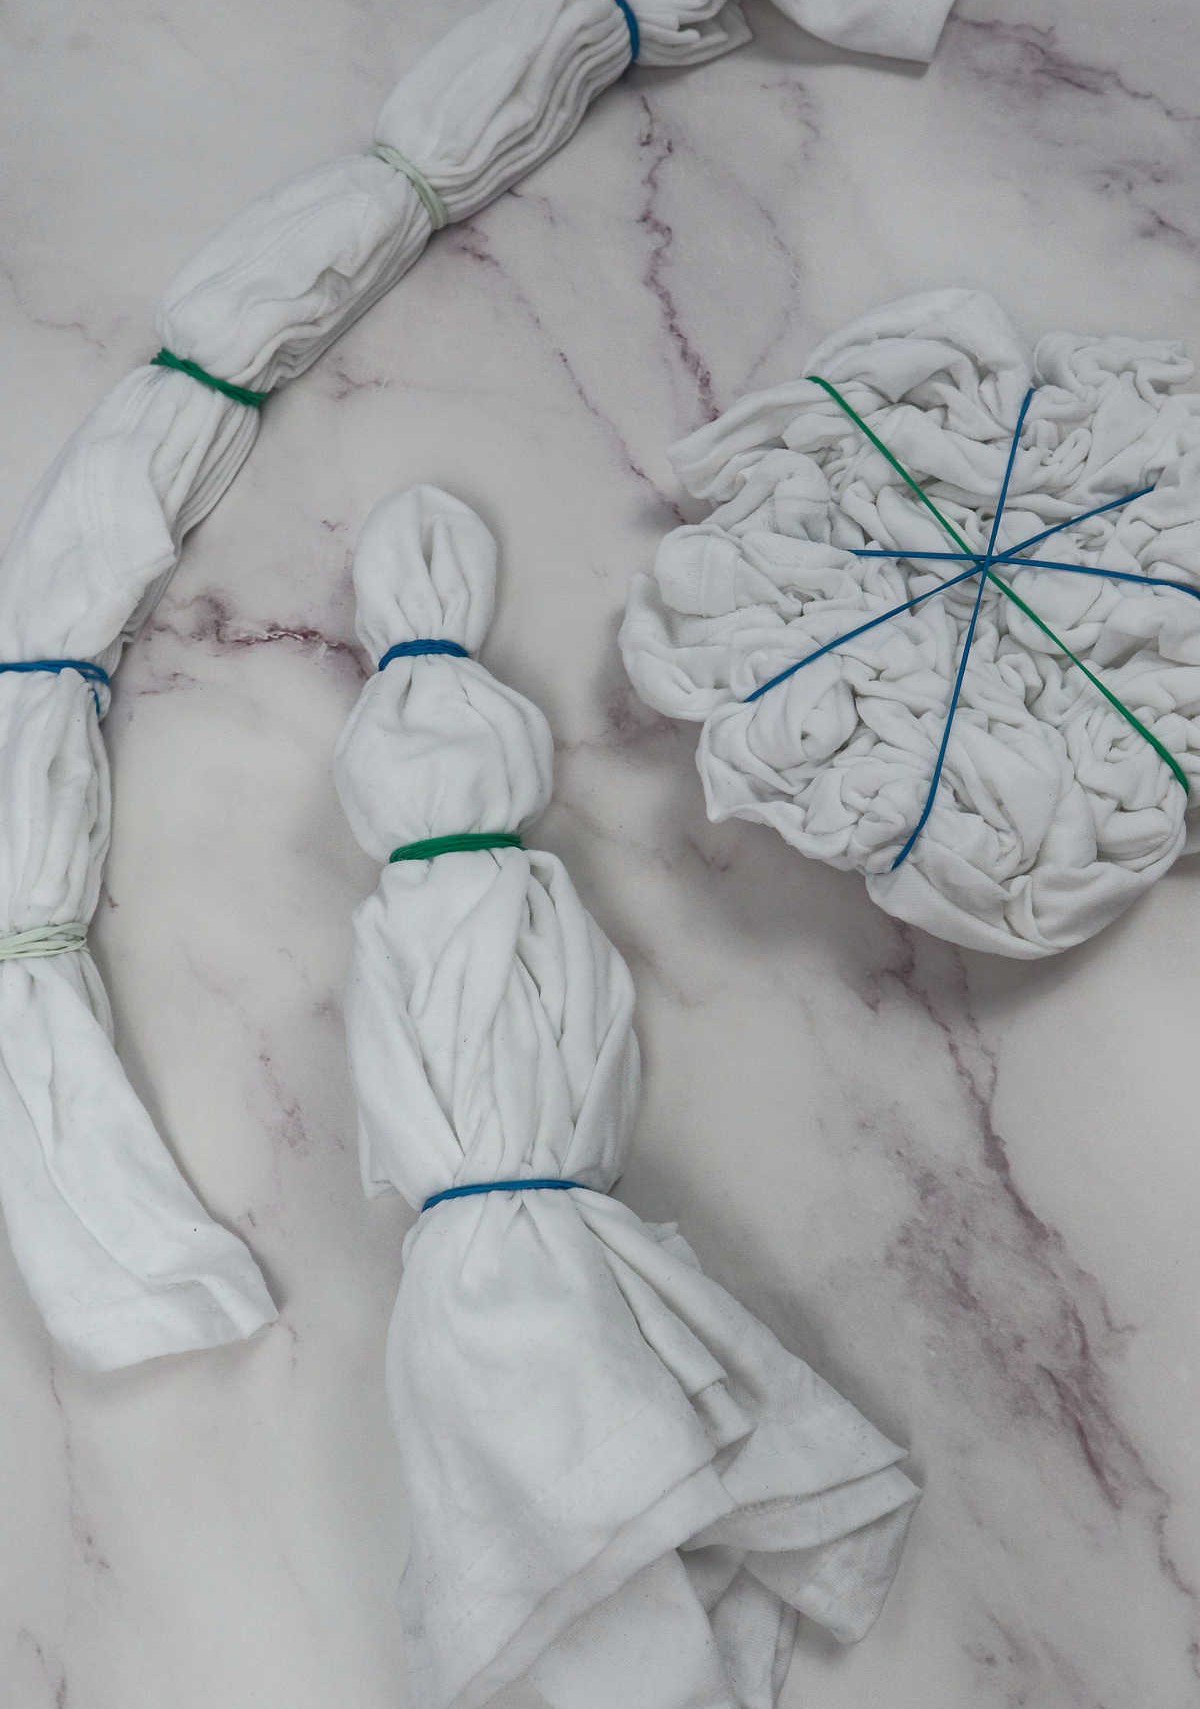
Begin by laying your t-shirt flat on a work surface. You may want to recall creating accordion folds in paper to make a fan-like shape – you’ll be recreating a similar fold here, starting from the base of the tee and working your way up as you go, folding the fabric in a continuous motion.
Dying the Shirts
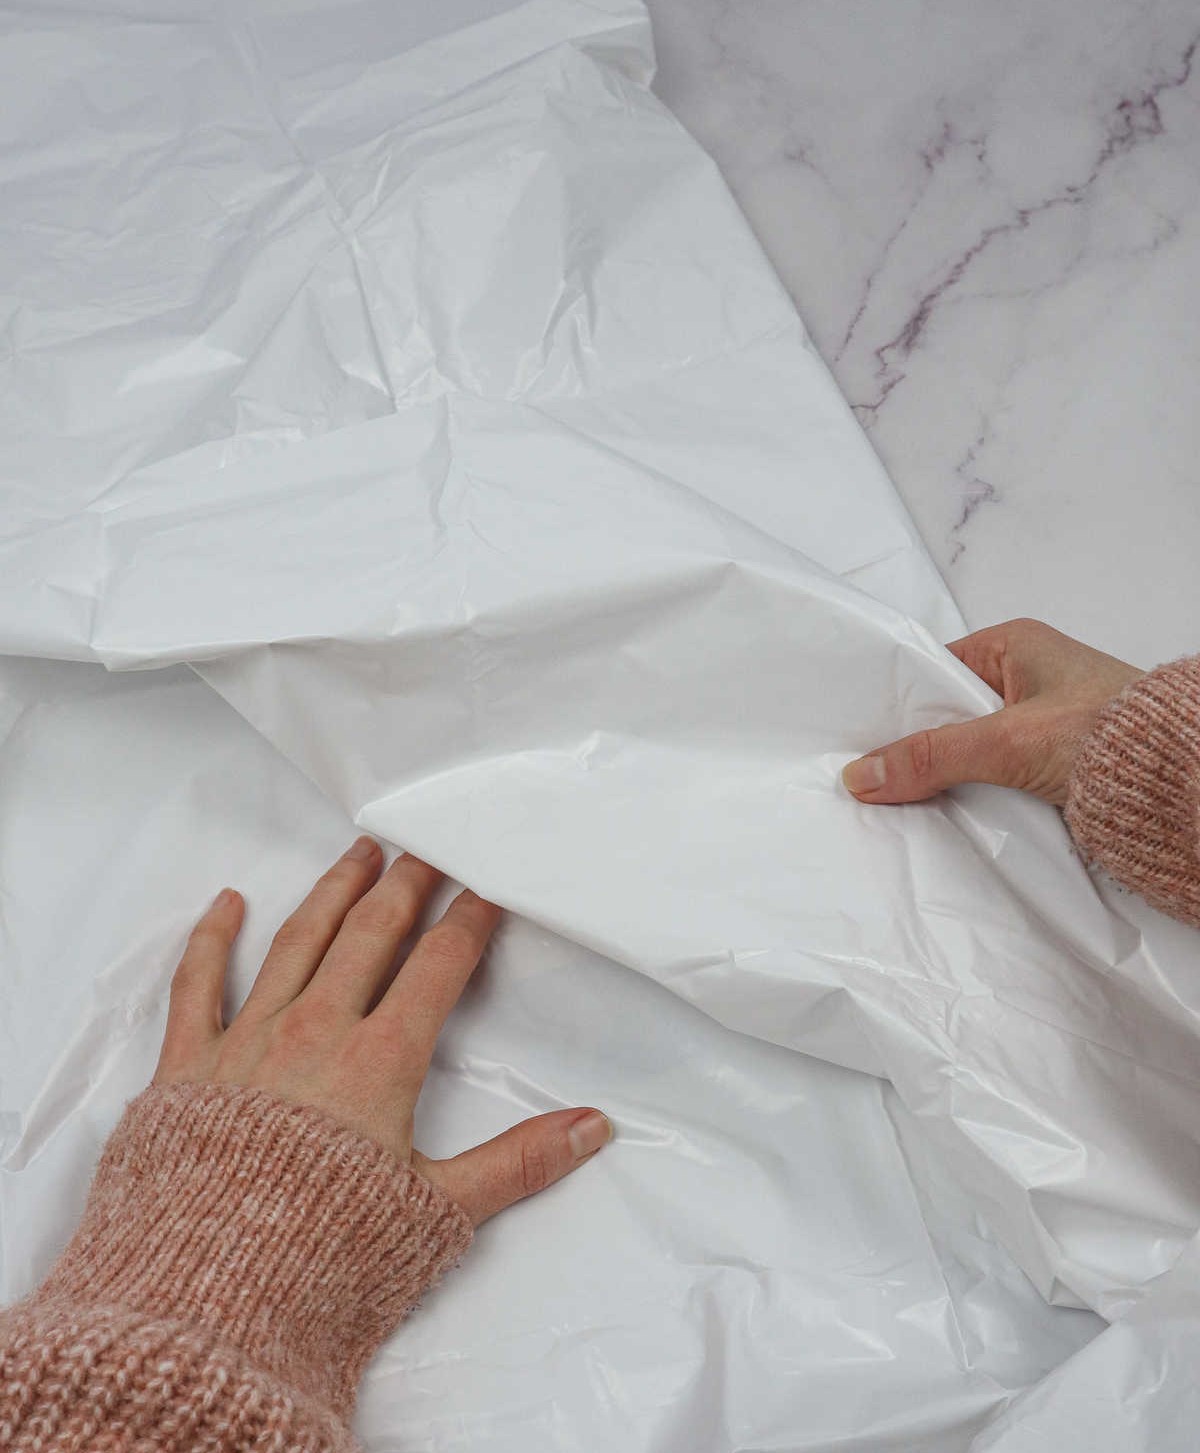
To ensure a clean and safe workspace, begin by laying down a protective plastic sheet to shield your surface from potential stains. It’s also crucial to don protective gear, including gloves for your hands and a smock to cover your clothing. By taking these simple precautions, you’ll be well-prepared to tackle the task at hand without worrying about ruining your surroundings or exposing yourself to any hazardous materials.
Step 1
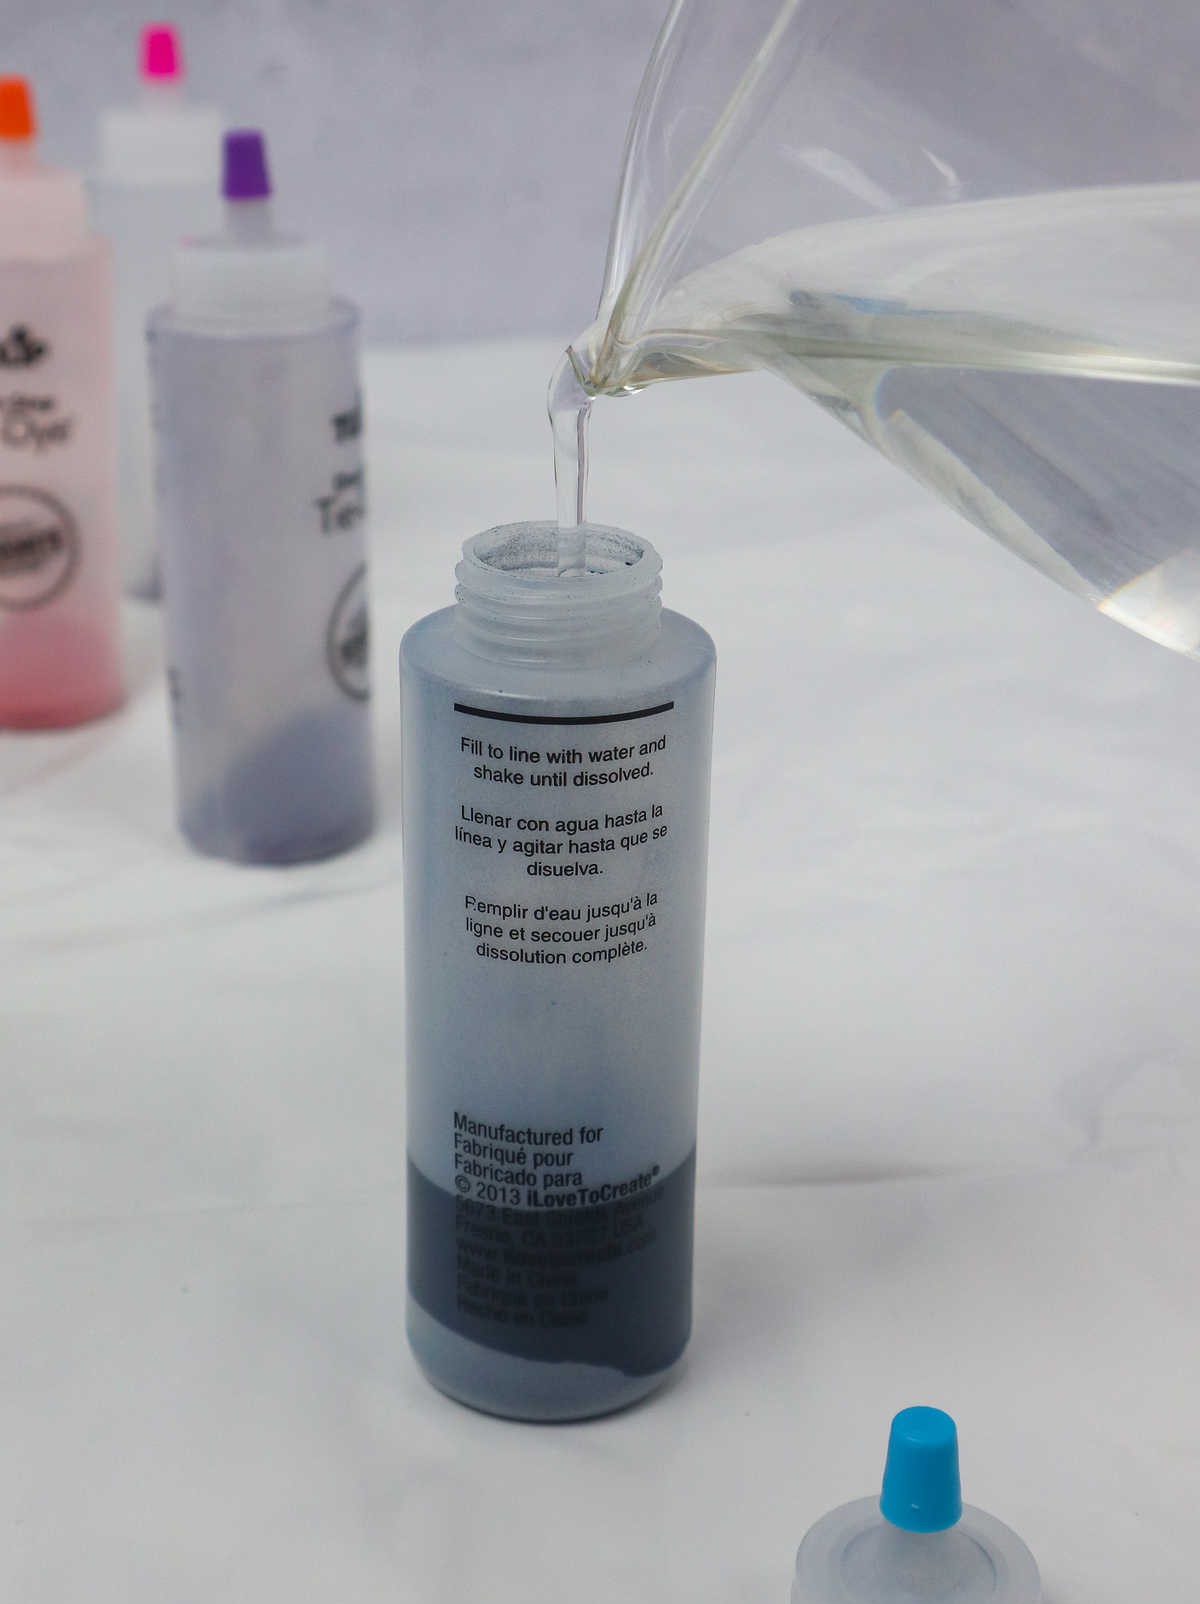
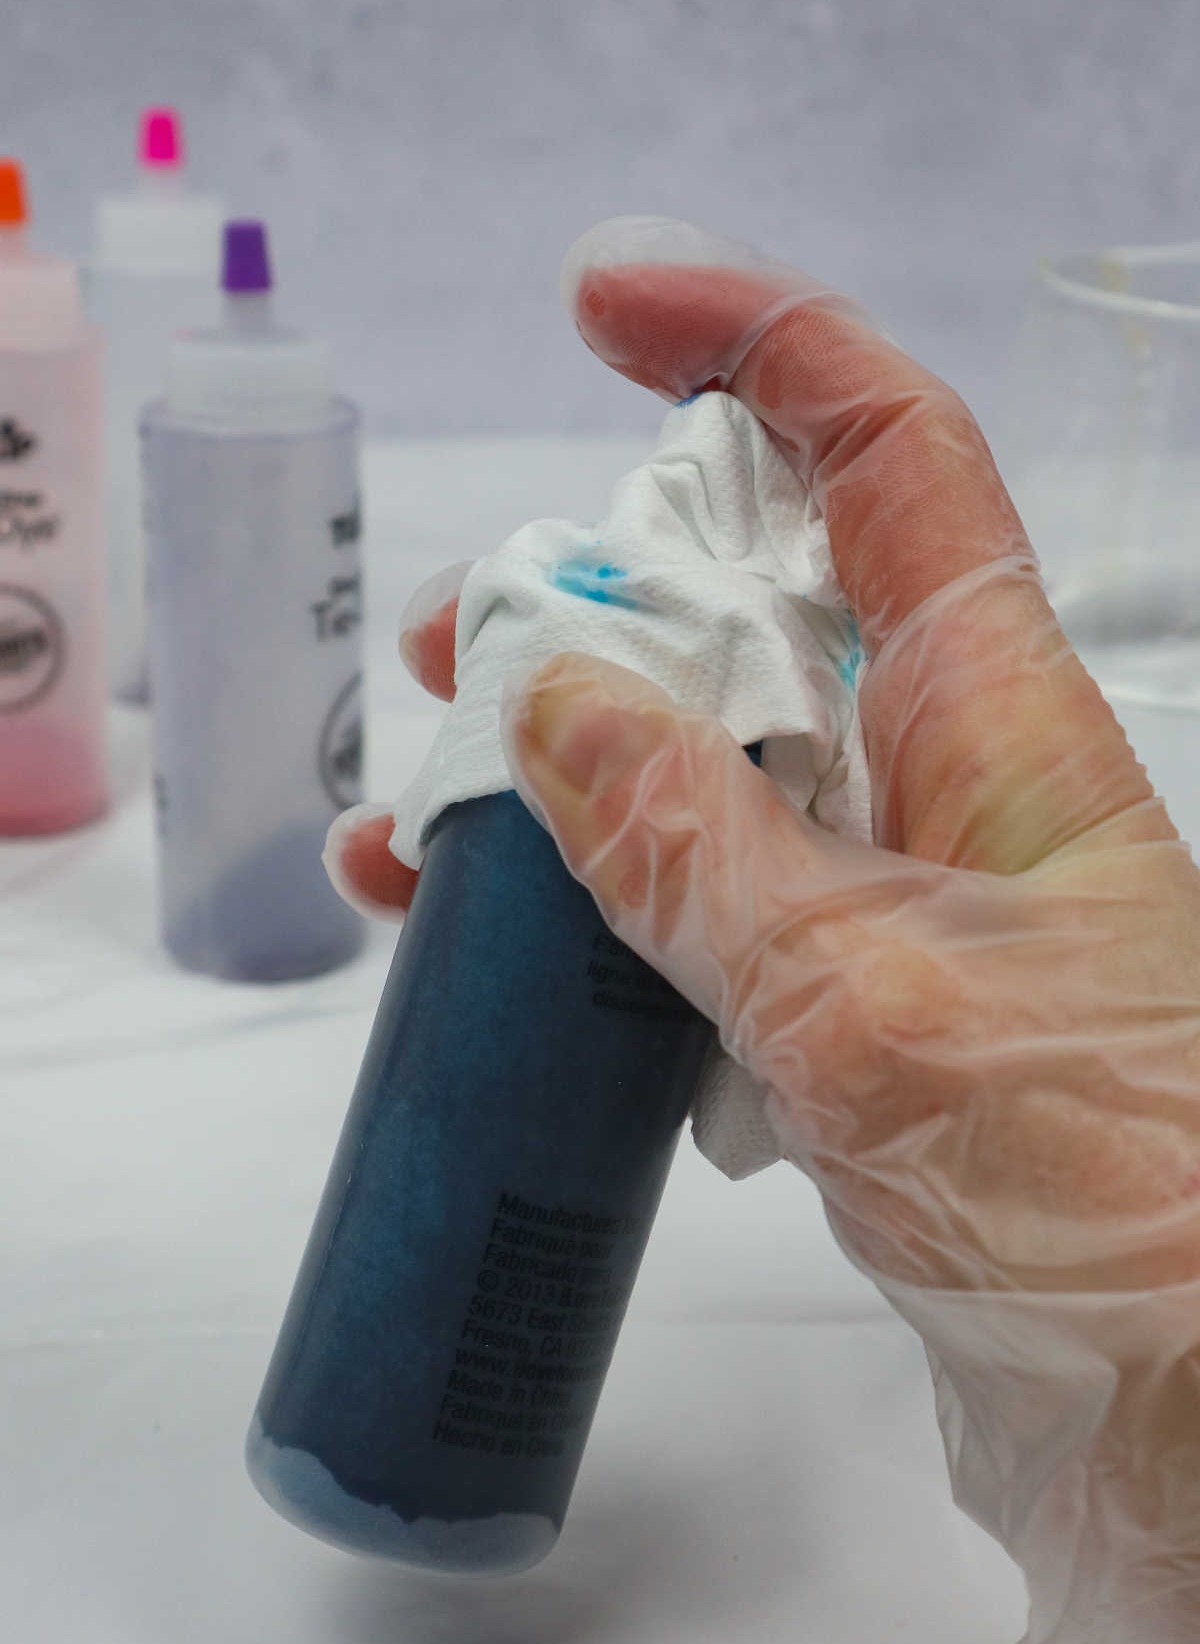
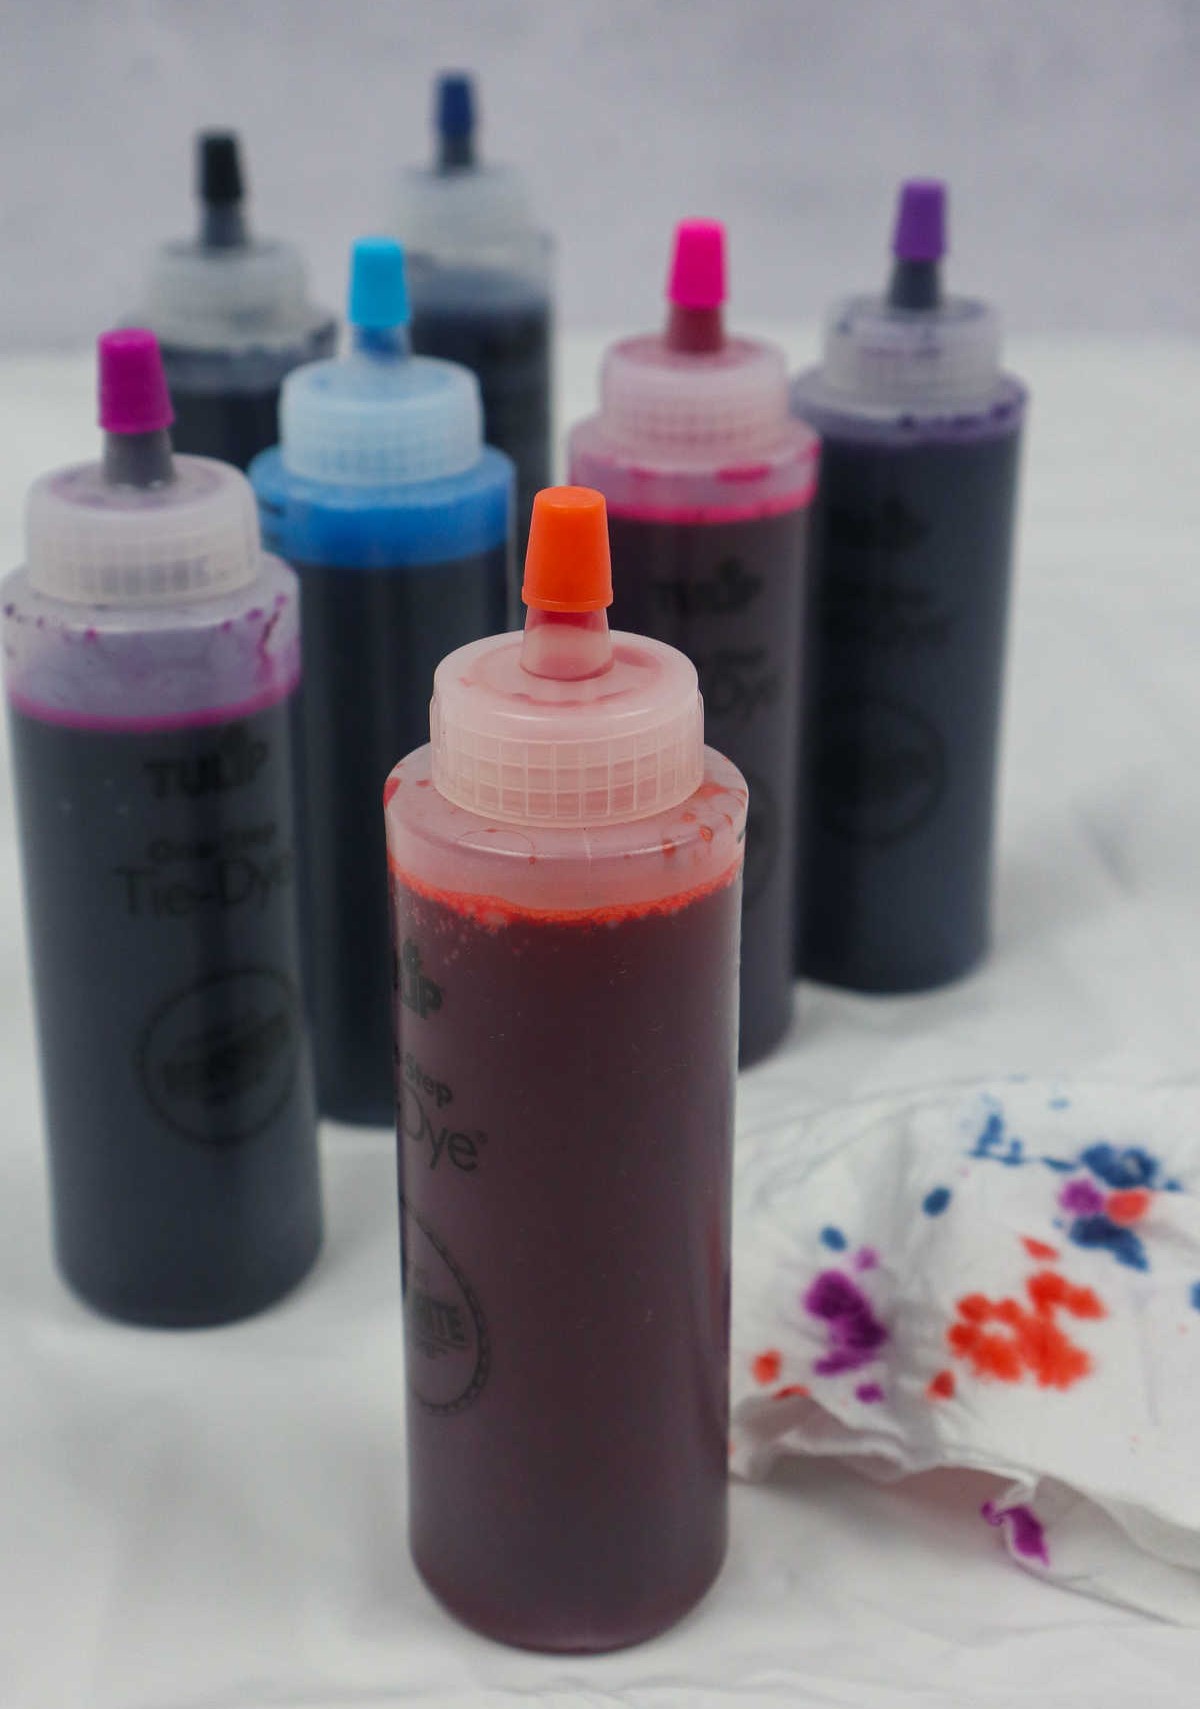
To begin the dyeing process, start by preparing the dyes according to the kit’s instructions. If using this specific dye, simply add water and shake well to combine – just be sure to secure the lid first! No need for a Pollock-esque art project here. As you mix the dye, consider adding soda ash or carbonated soda to help lock in the color and prevent fading on the fabric.
Step 2
To begin the dyeing process, start by placing your first tee on a rack if you have one. While a rack isn’t essential, having a bowl positioned below to catch any spills as you work can be quite helpful in preventing a mess. Begin applying the dye to the top of the tee using your bottle of dye. Feel free to experiment with multiple colors, and don’t forget to cover both the front and back sides.
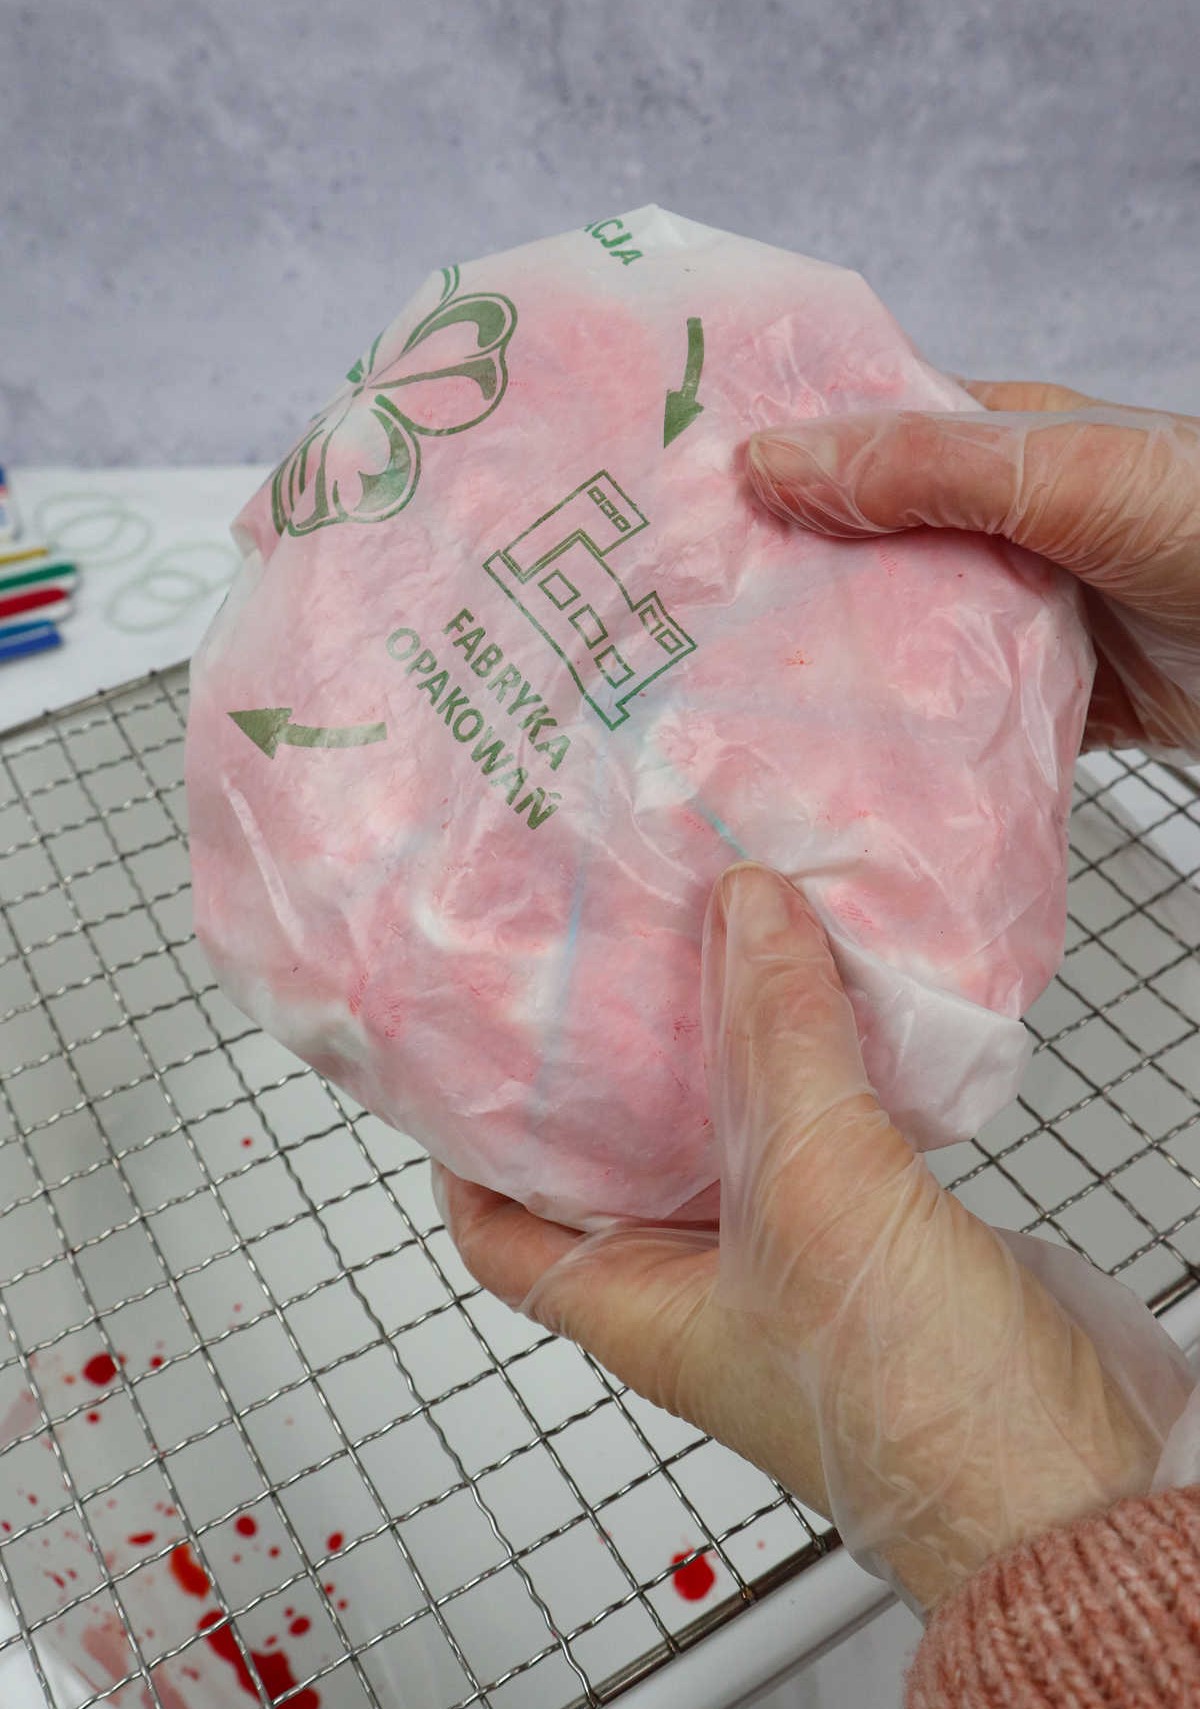
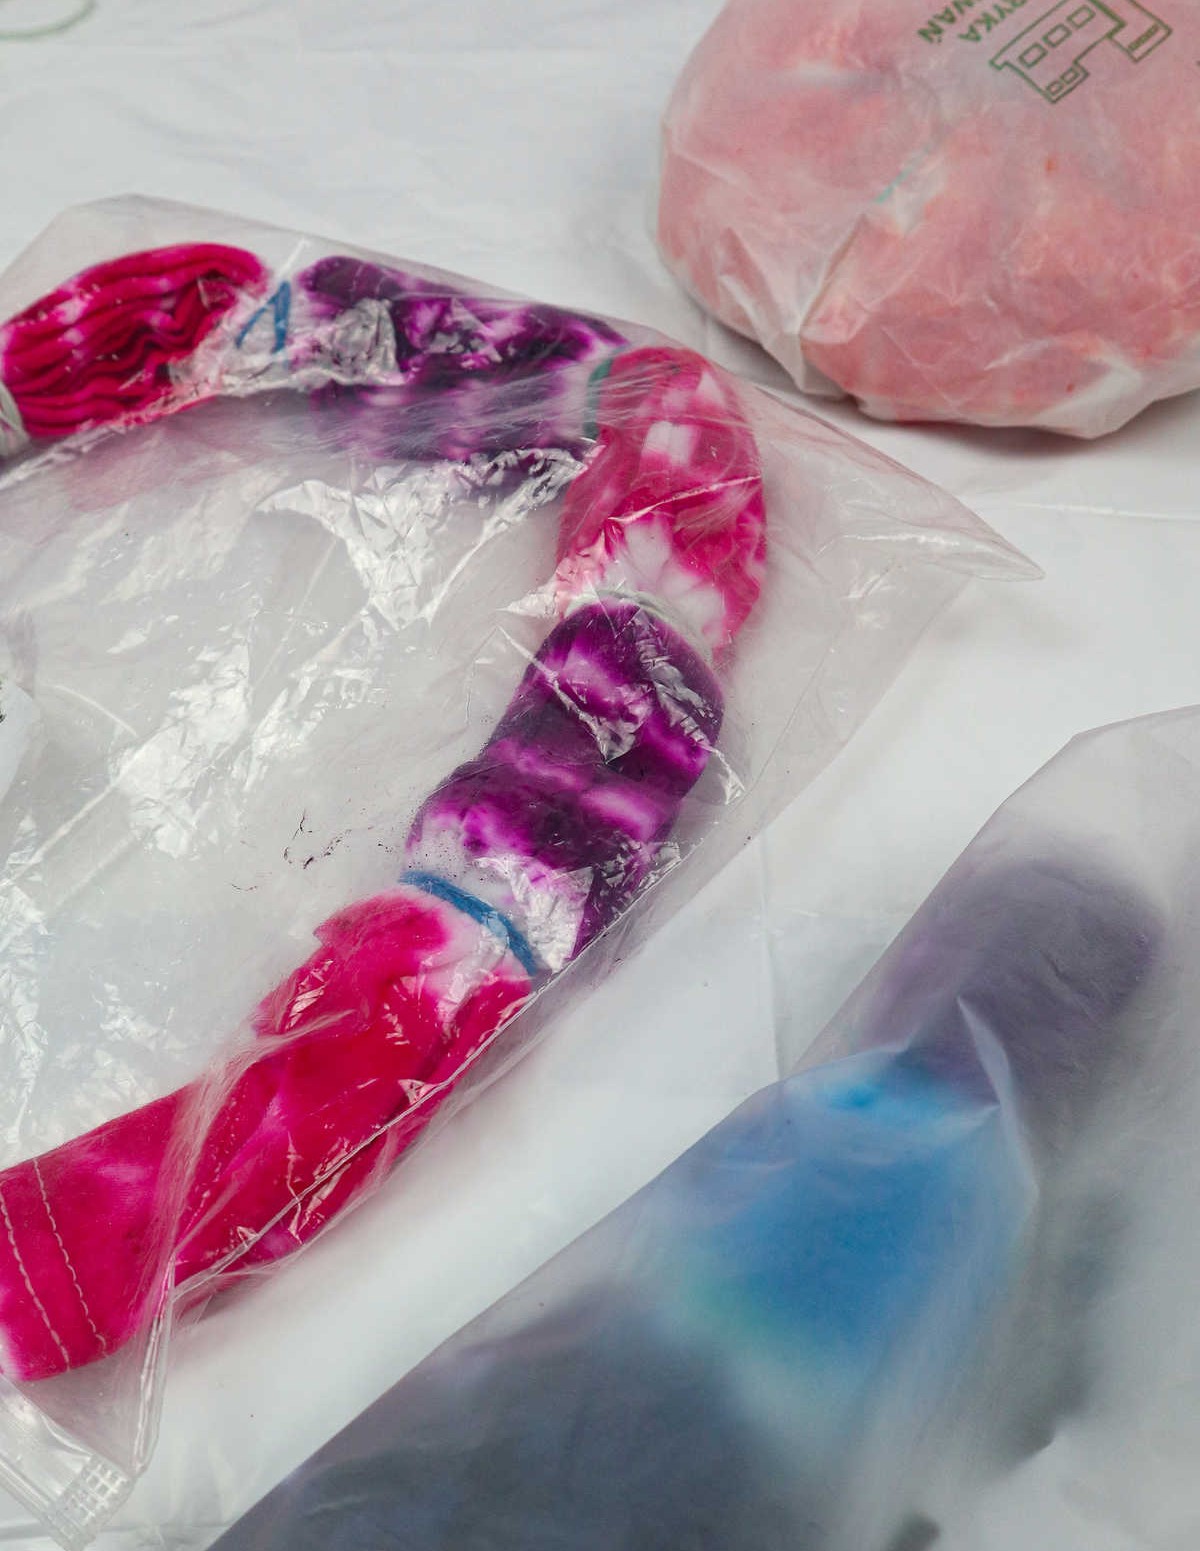
Once you’ve completed the dyeing process, place the tee into a plastic bag to maintain its dampness while the dye sets. Simply set it aside for now, and let the process unfold.
Step 3
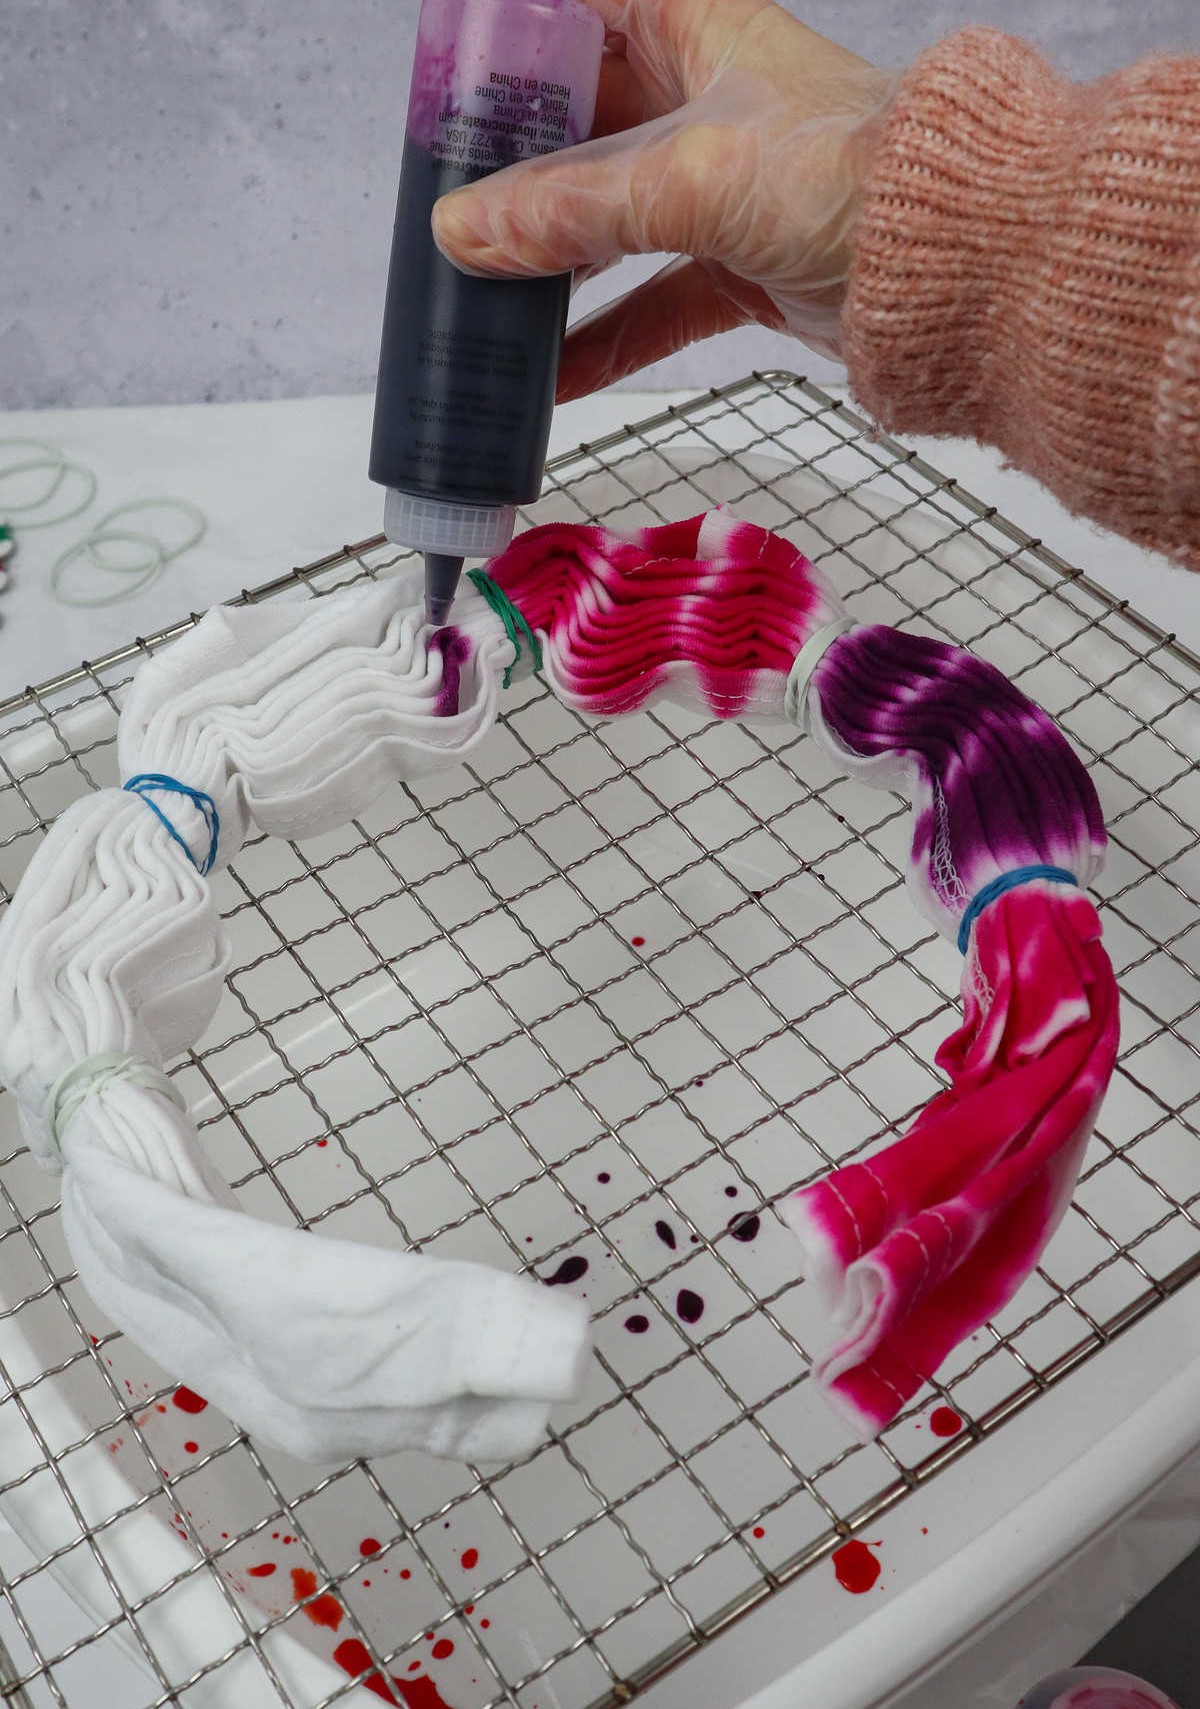
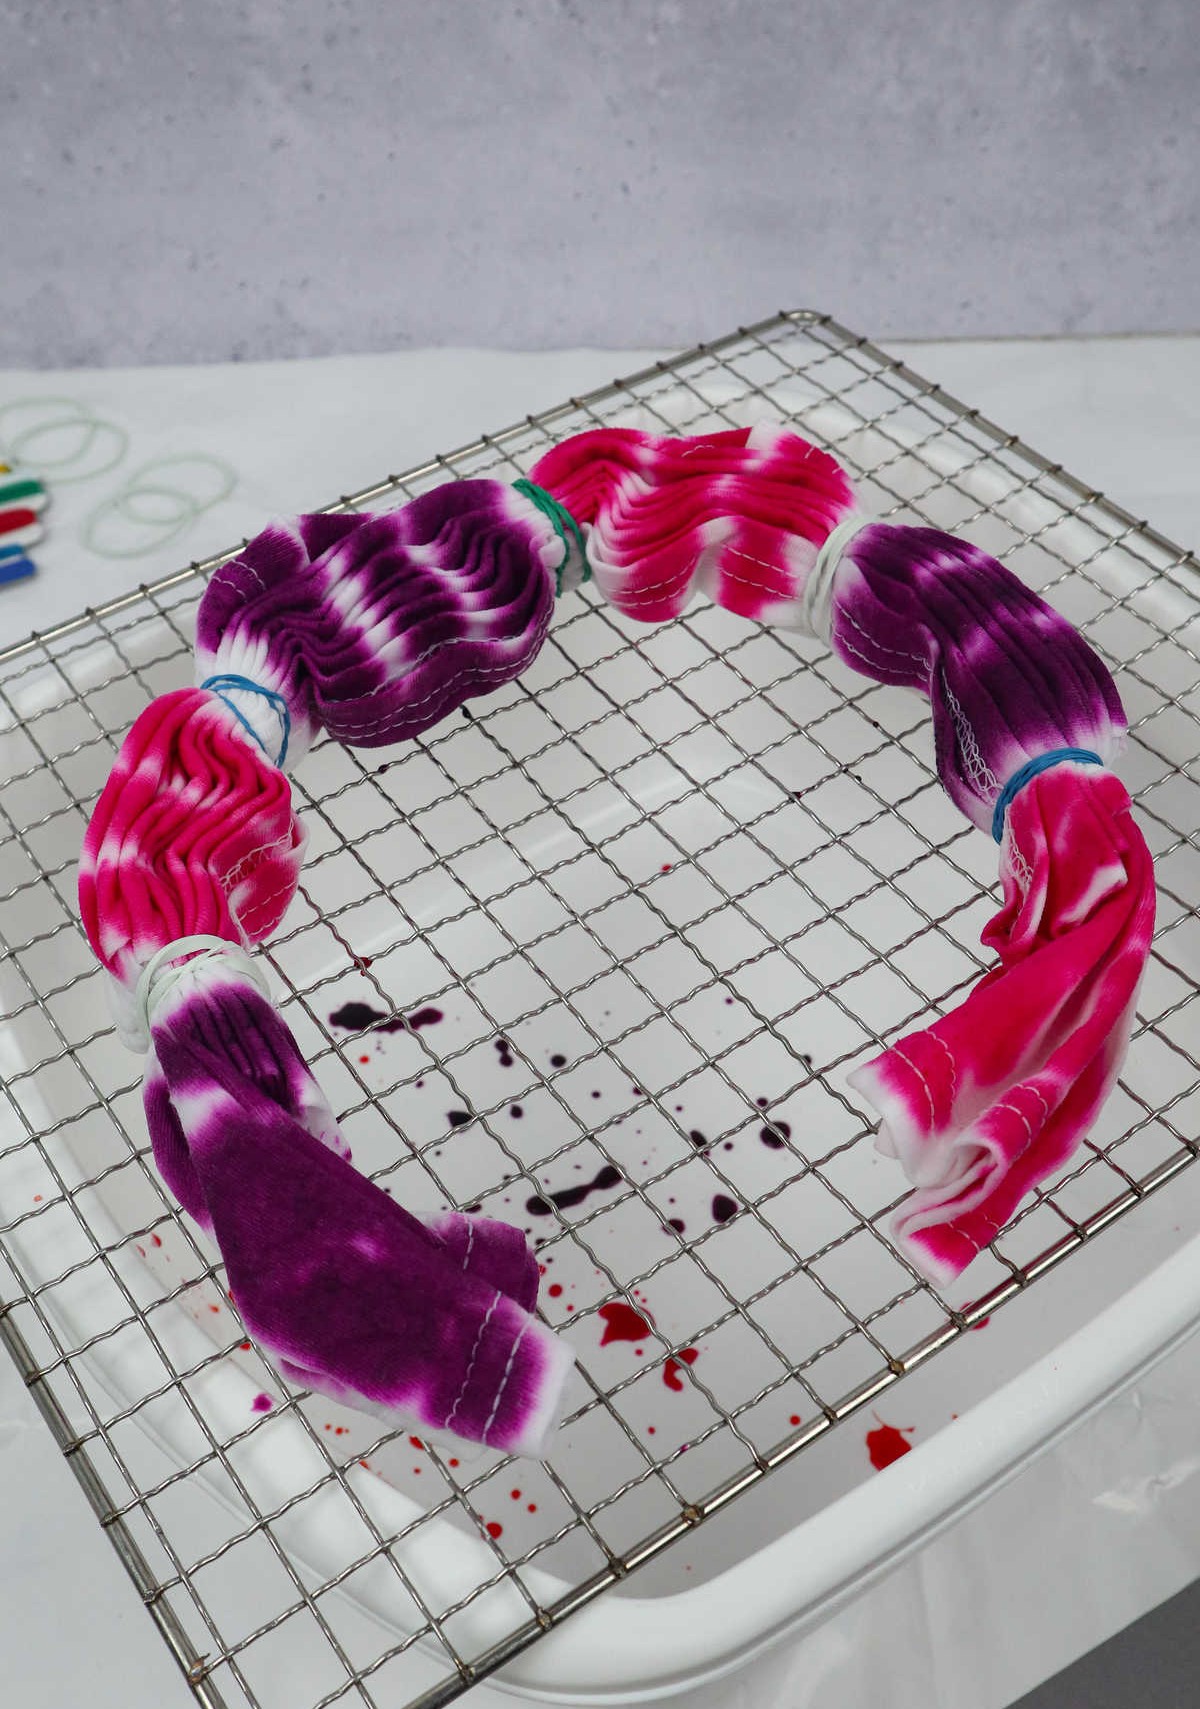
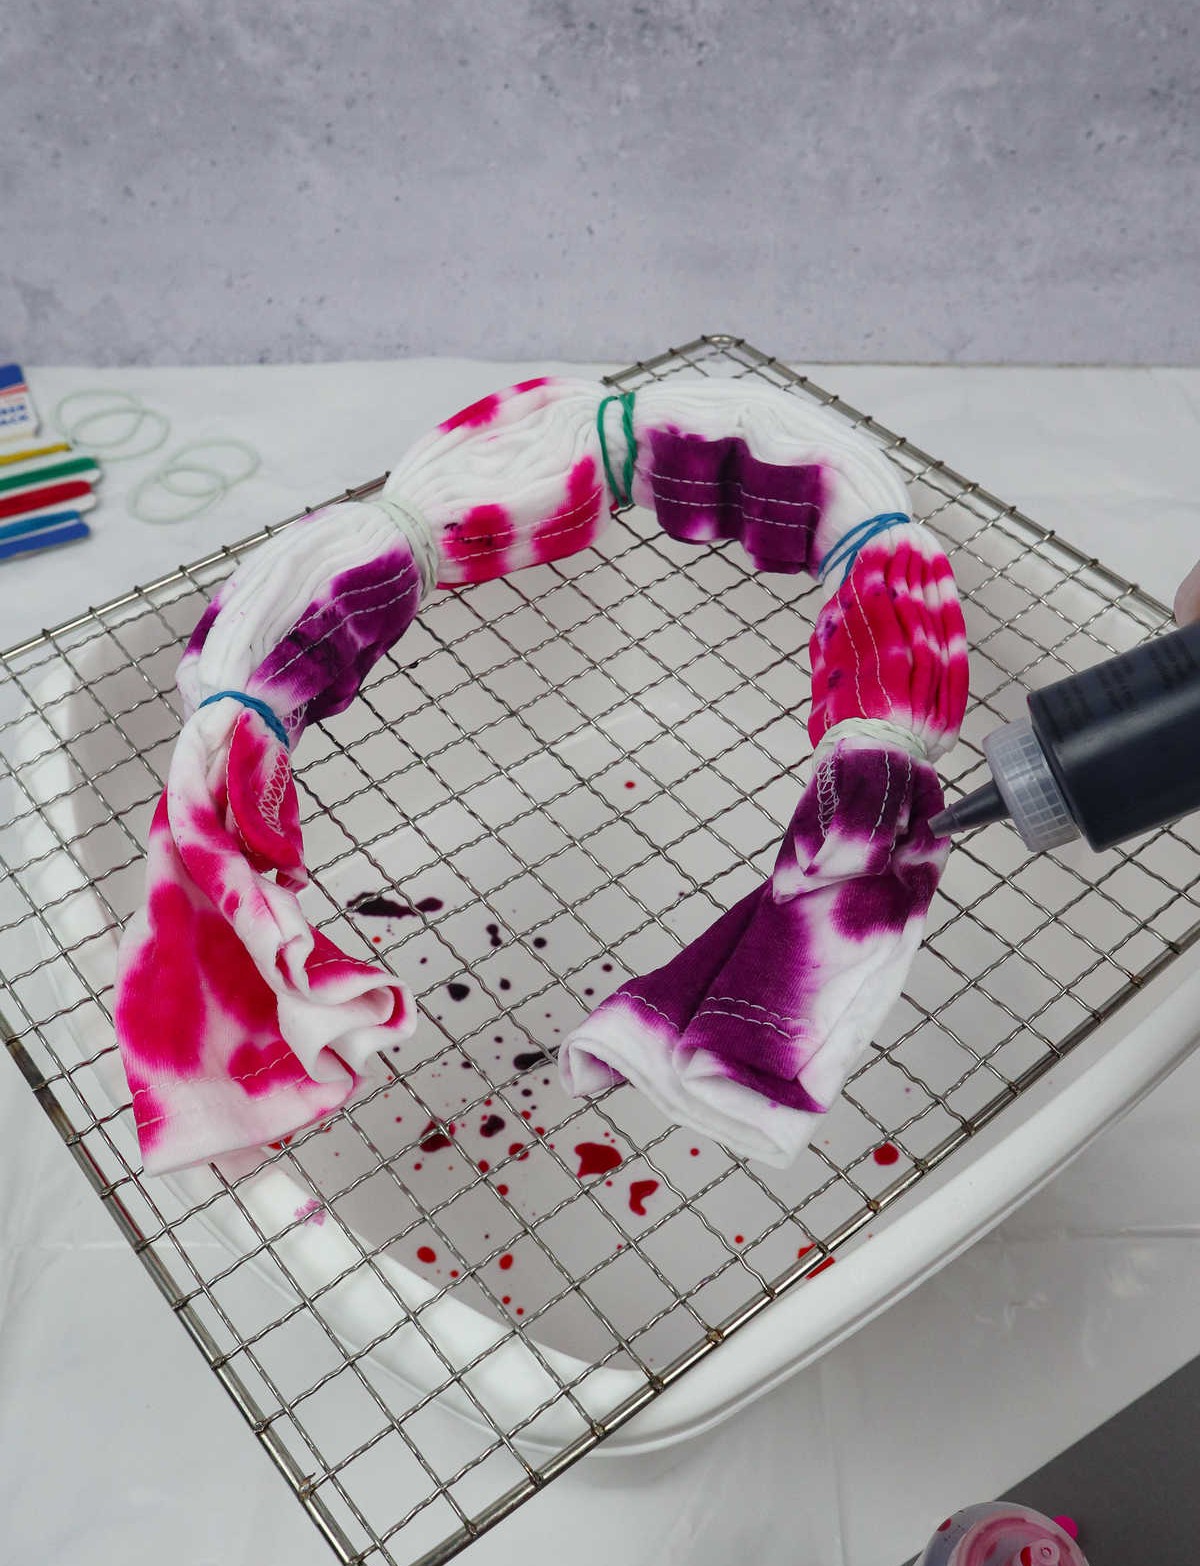
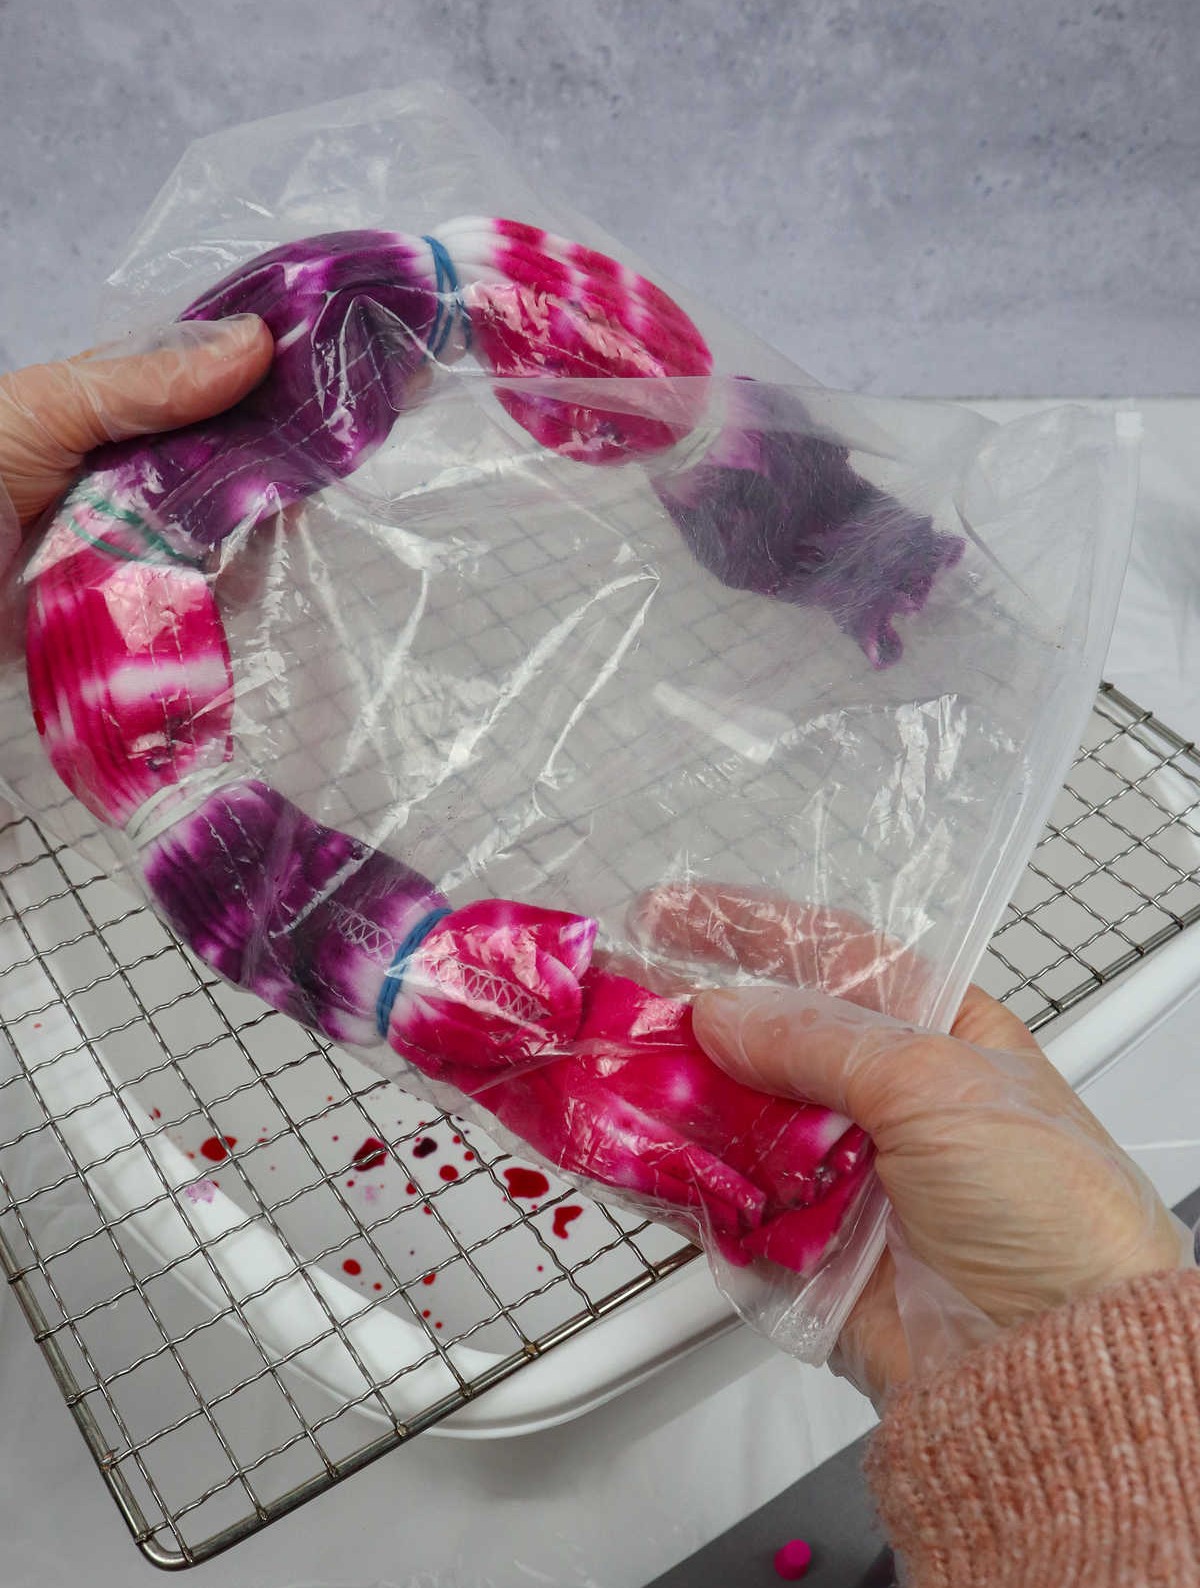
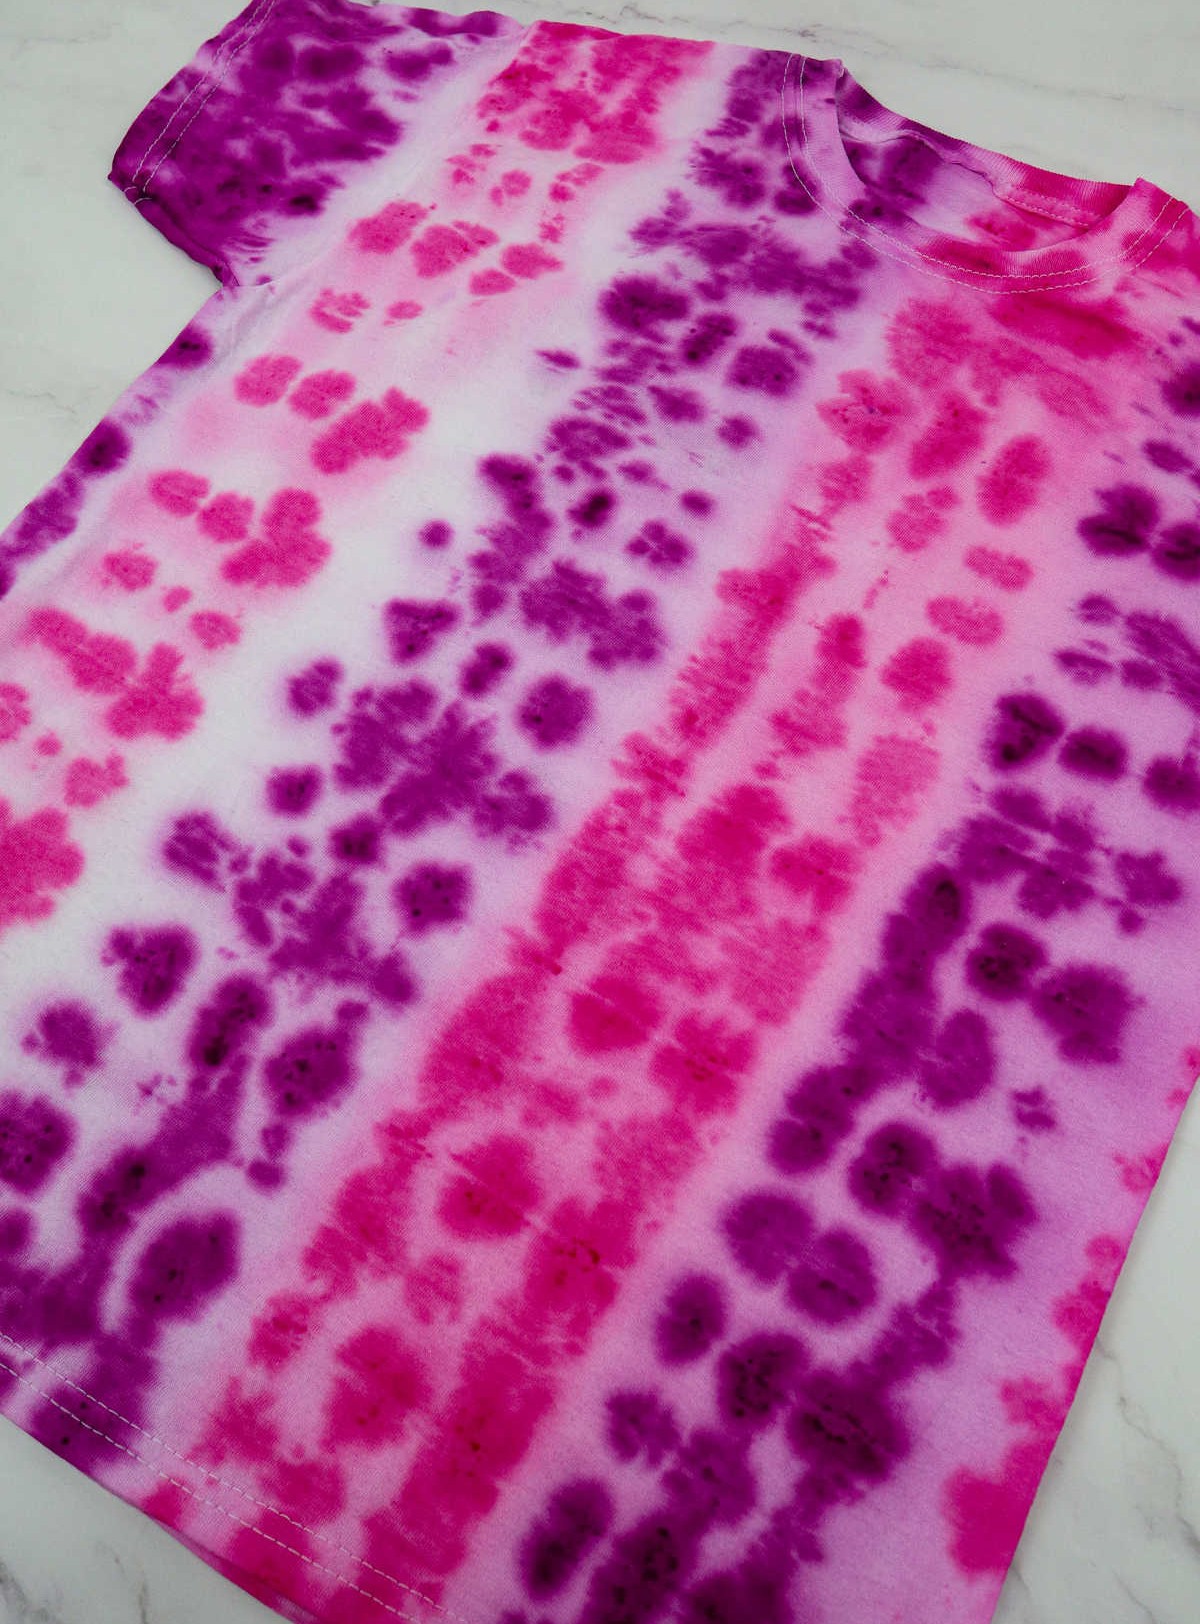
To create a striped design using the tee-dyeing method, start by placing the tee on the rack. Grab a bottle of dye and divide the tee into sections between two bands. You can work with multiple shades to achieve a unique, quirky look. Once you’ve applied the desired colors, flip the tee over and repeat the process for the opposite side. After completing the dyeing process, place the tee in a plastic bag and set it aside to allow the colors to set.
Step 4
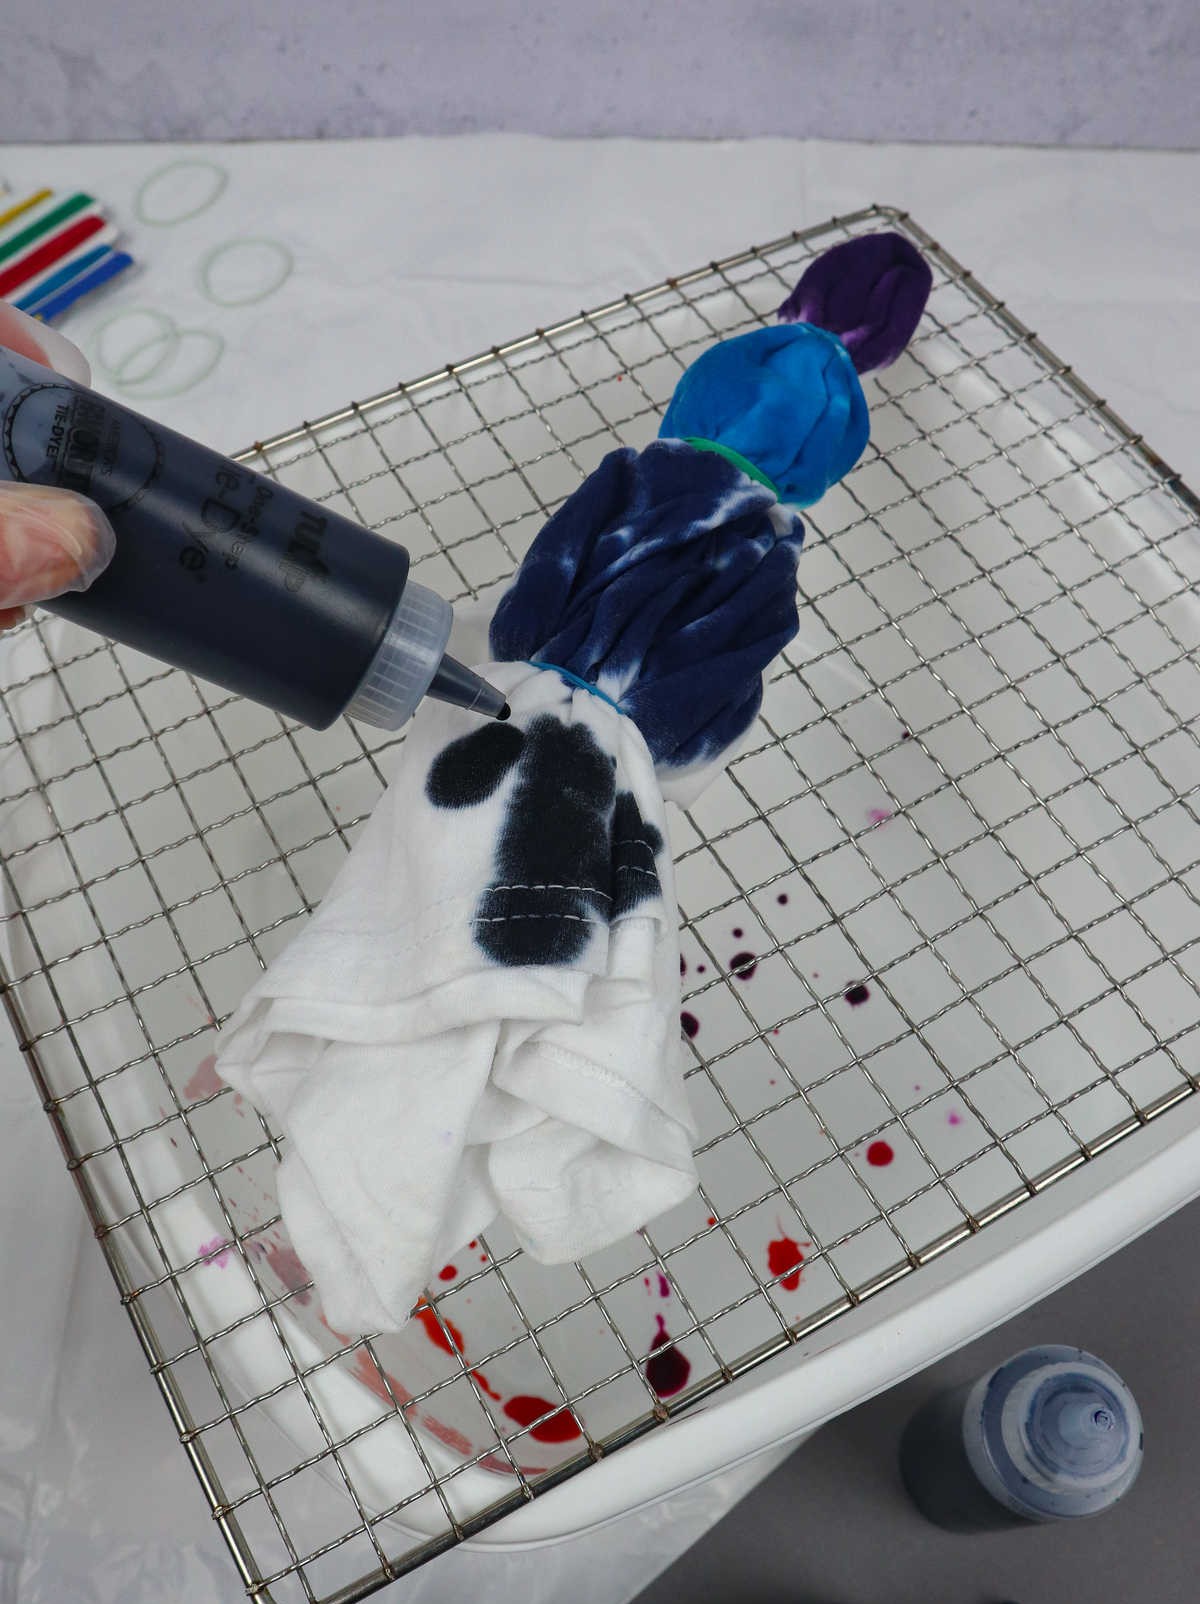
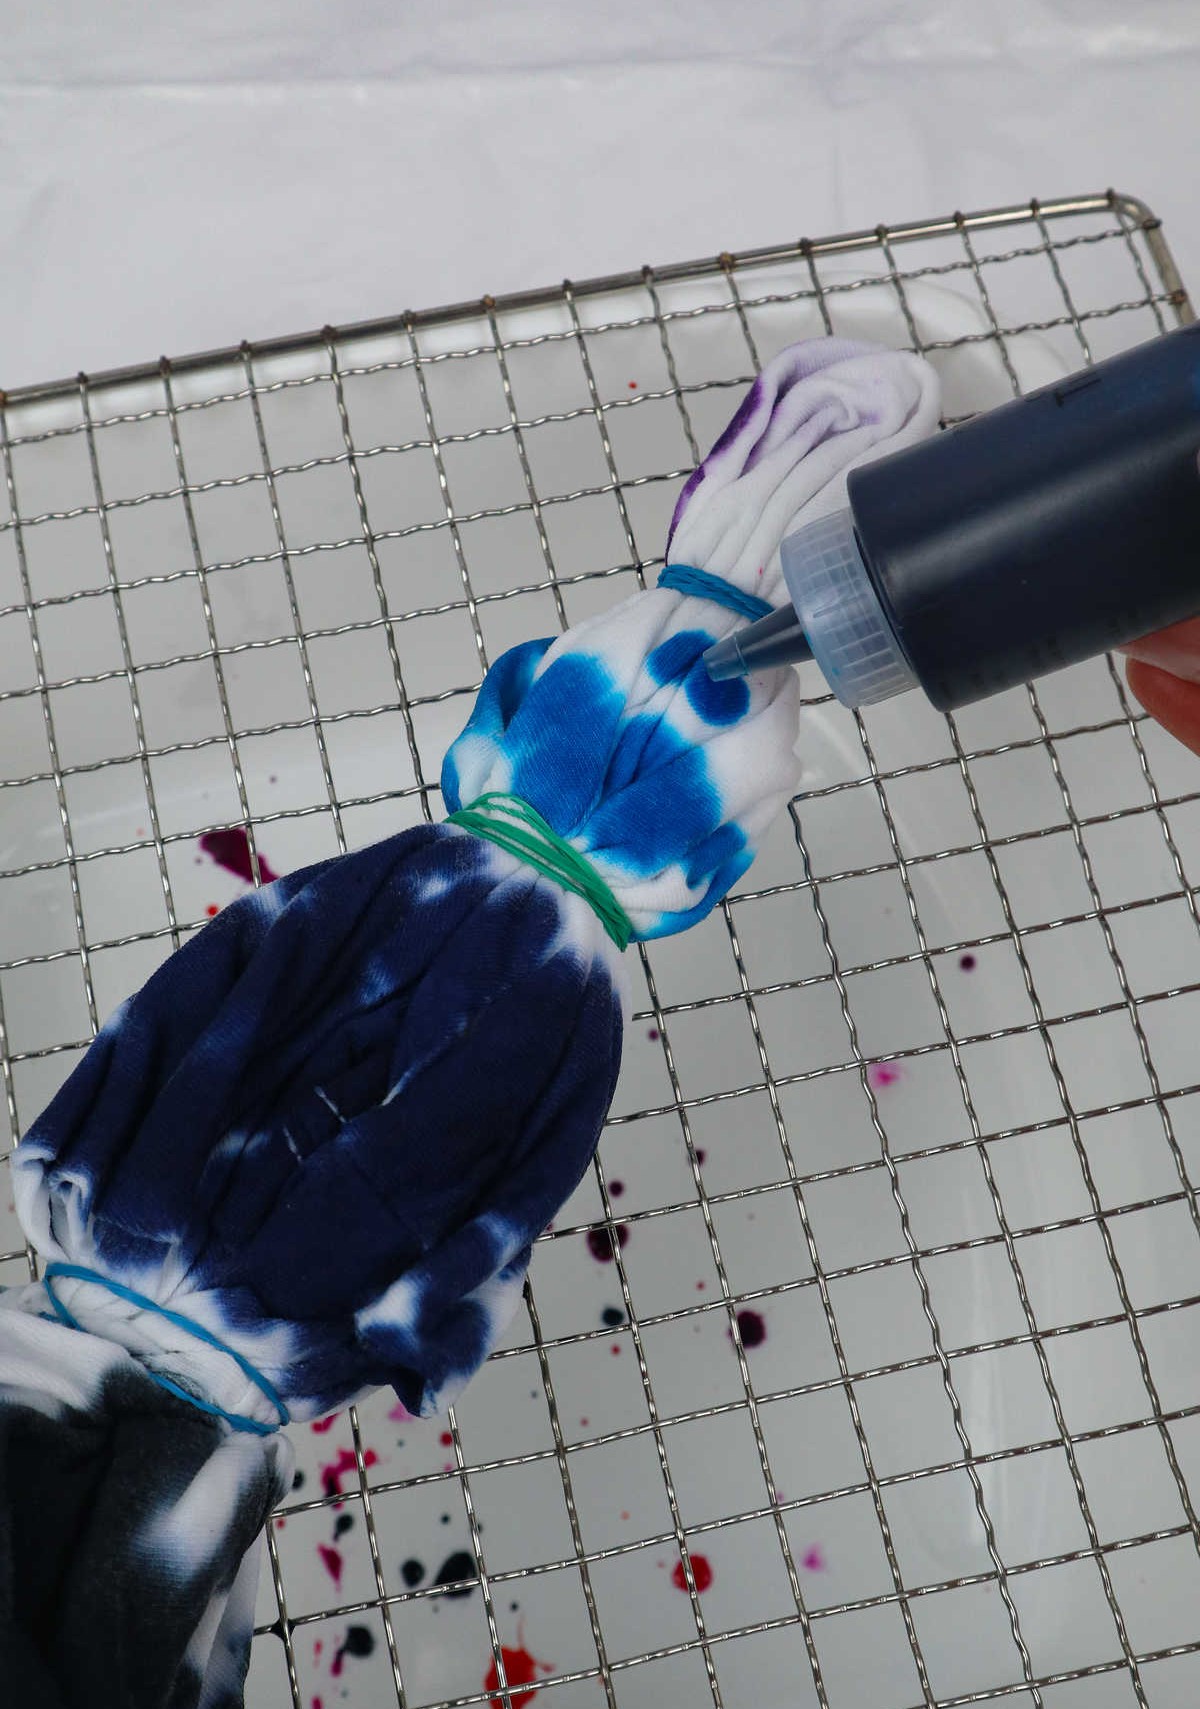
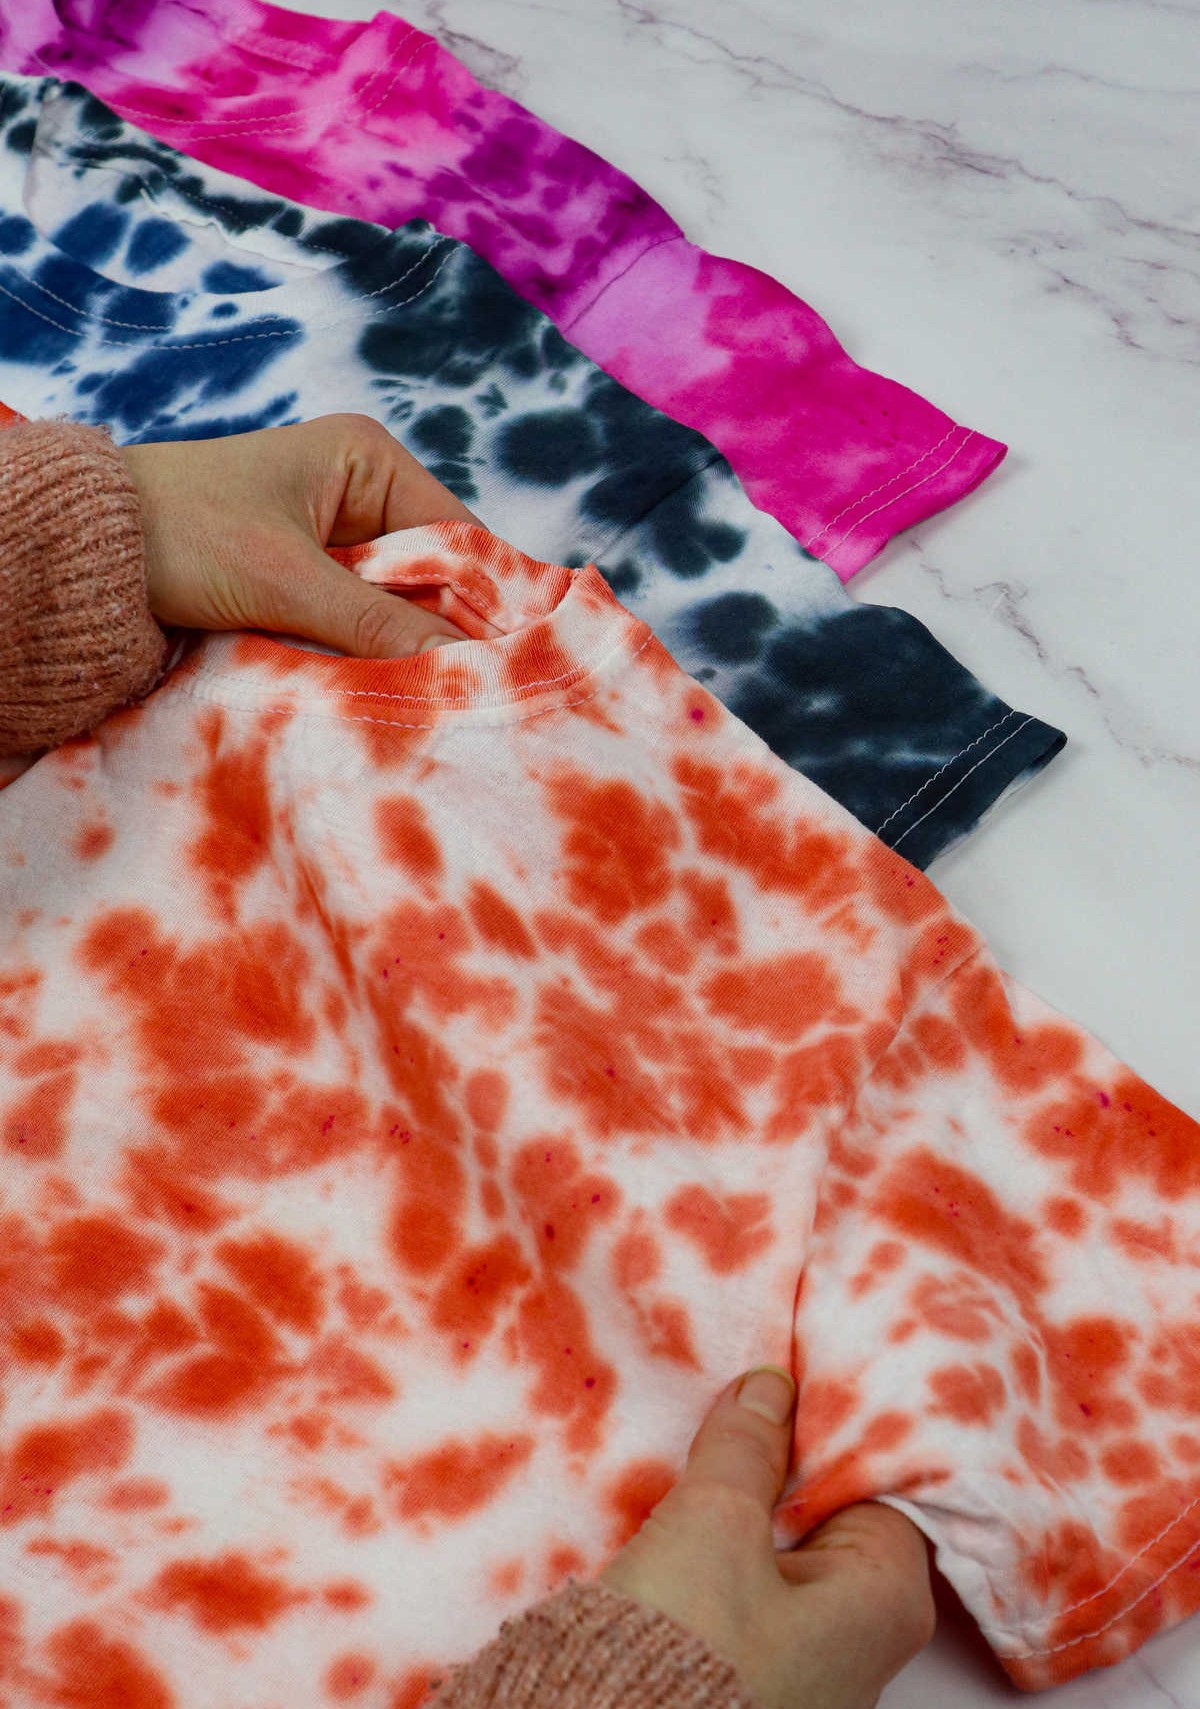
The culmination of your creativity – the final tee – is an exciting stage in the process. As you set the tee on your rack and prepare to add the finishing touches with dye bottles, you’ll be thrilled to discover that this is the perfect canvas for showcasing gradient shades. The deep blue center, which gradually transitions into lighter hues of blue, creates a stunning visual effect that’s sure to impress. And if you’re feeling classic, you can opt for a timeless rainbow color gradient instead.
Once you’ve achieved the desired look, simply flip the tee over, apply dye to the other side, and seal it in a plastic bag to preserve your masterpiece.
Step 5
Allow the dye to penetrate the fabric thoroughly by letting it sit on the tees for a good 8-12 hours. This prolonged exposure enables the dye to form strong bonds with the fibre and fabric, resulting in a richer, more vibrant color. The longer you leave it, the deeper and more intense the hue will be.
Step 6
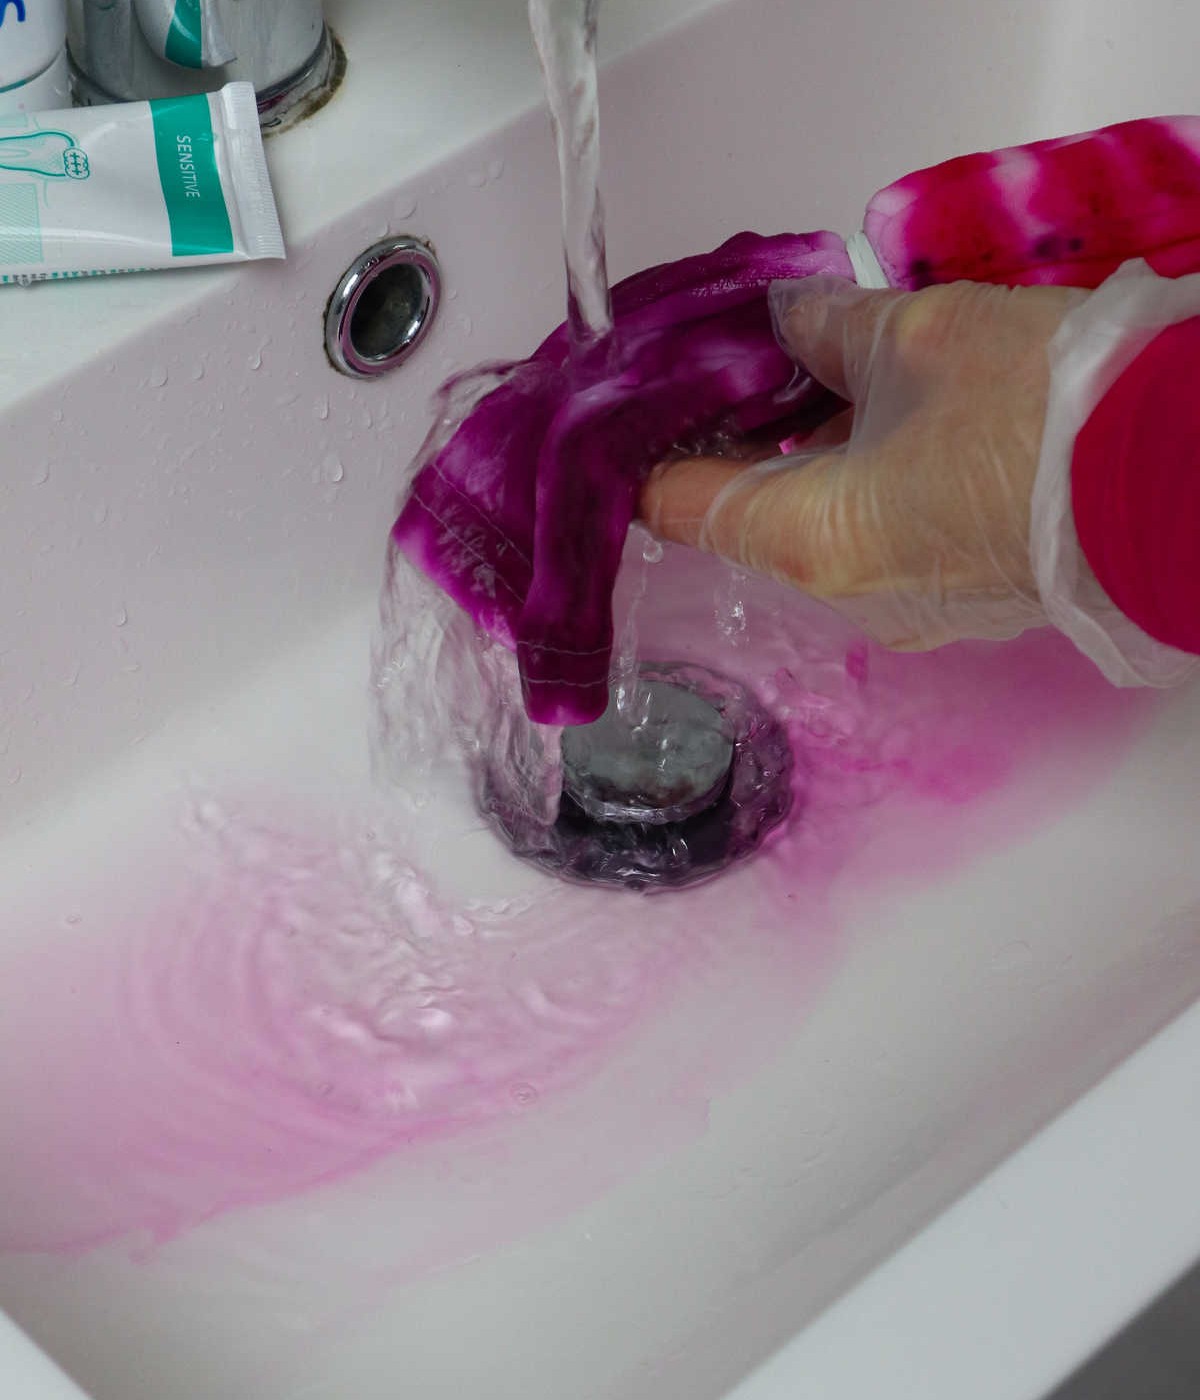
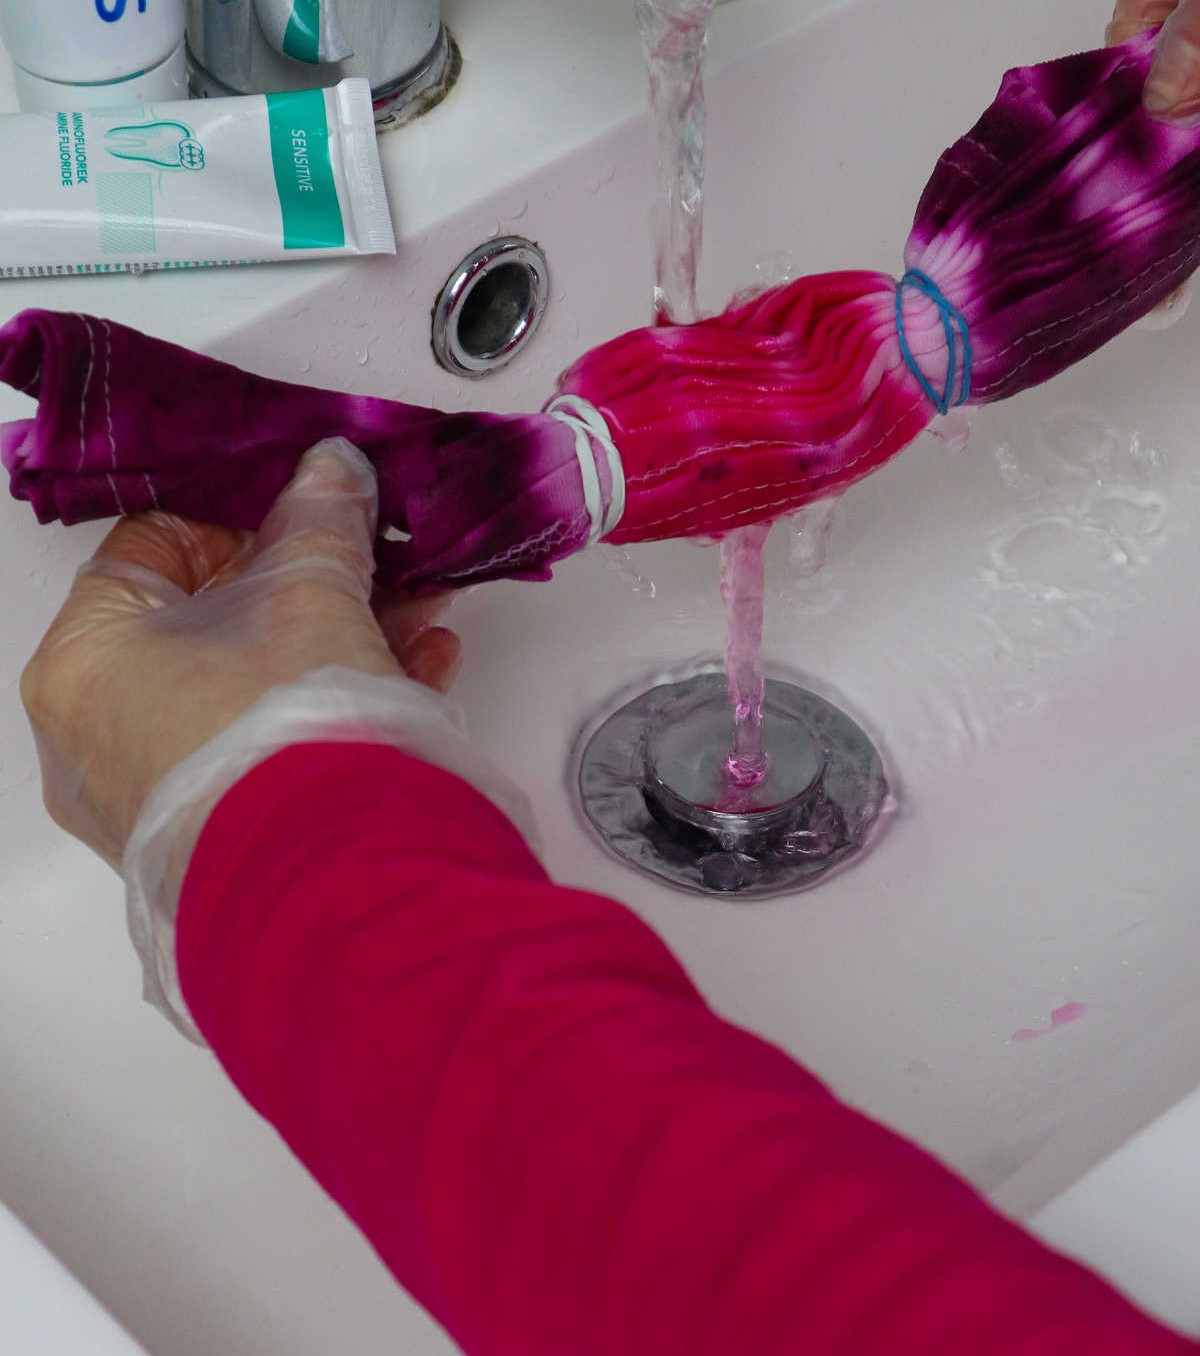
When rinsing the tops, be sure to do so under running water. However, it’s crucial not to let the tees sit in the stream of water for too long, as this could potentially ruin the stain pattern by washing away the dye. Since the dye is still quite intense, take the time to rinse each tee individually and consider wearing gloves while you’re at it to protect your hands from any remaining color.
Step 7
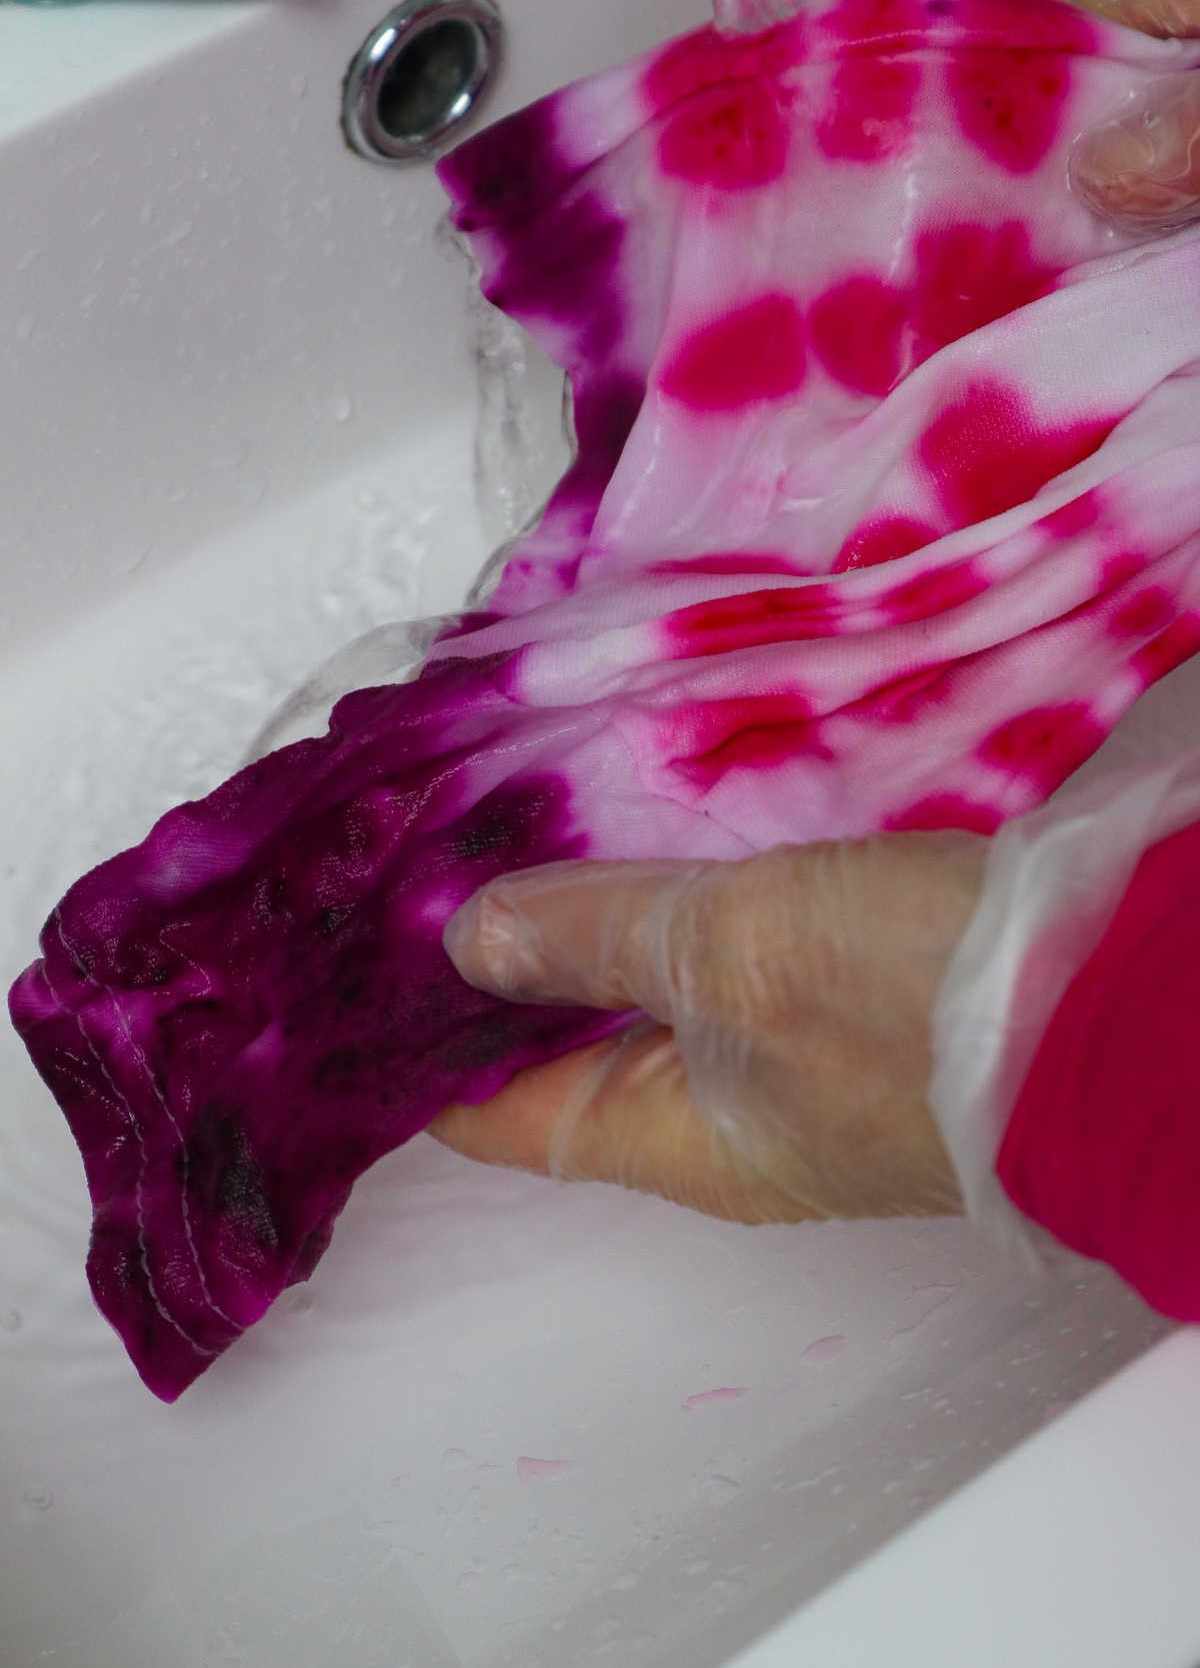
To complete the process, unfold your shirts and gently squeeze out any remaining dye from the creases where the fabric was folded. Then, rinse the tees again with warm water to ensure all excess dye is removed. Once they’re clean, you can either tumble dry them or hang them outside in the sun to air dry – whichever method works best for you.
Is It Best to Tie Dye A Shirt Wet or Dry?
When attempting to achieve a watercolor-inspired effect on your t-shirts, working with a damp or wet garment can be beneficial. The increased porosity of the fabric allows colors to penetrate more freely, resulting in a unique, blended finish. While this approach does sacrifice some control over the dye flow, it’s often preferred for its straightforward nature and ease of use, especially for beginners.
On the other hand, if you’re looking to create sharper, more defined color boundaries, working with a dry t-shirt can be a better option. This method provides greater control over how the dye takes hold on the fabric, allowing for more precise placement and demarcation of colors.
How Do You Tie Dye a Shirt Without a Kit?
When it comes to natural color dyes, the options are plentiful and easily accessible. You can find suitable alternatives right at home, from acrylic paints to food dyes and beyond. However, to achieve a longer-lasting stain when using unconventional dyes for tie-dyeing fabrics, some research is required to ensure success. Furthermore, you’ll need to gather a few additional materials that would typically be included in a standard kit.
How to Tie Dye a Shirt (Step-by-Step)
Want to unleash your creative side and give your wardrobe a unique touch? Look no further than creating your own DIY tie-dye shirts! With just a few simple steps, you can transform plain white shirts into stunning pieces that reflect your personal style. And the best part? You get to enjoy the process and the end result is all yours. To get started, set aside 10 minutes for prep time, followed by an hour of active time to dye your shirt. Then, let it sit for 12 hours before rinsing and drying.
The total time commitment is just under 13 hours, making this a fun and rewarding DIY project that won’t break the bank. And with a cost of only $10, you can create multiple shirts without sacrificing your budget.
Equipment
To tackle the mess, you’ll need a few essential tools at your disposal. A rubber band or two can be particularly useful in securing loose items, while a plastic dust sheet will help contain any debris as you work. For larger tasks, consider having a washing up bowl and oven rack on hand. These may seem like unusual choices, but they can provide valuable storage and organization capabilities as you get to work.
Materials
The essential tools for a successful DIY tie-dye project include latex gloves to protect your hands from stains and inks, plastic bags that can be used as makeshift containers or to wrap around your fabric, a white piece of clothing that serves as the canvas for your artistic creations, and a tie dye kit containing all the necessary chemicals, dyes, and instructions to achieve the desired effects.
Instructions
Before diving into the creative process, make sure you’re adequately prepared. Cover your workspace with a plastic sheet, and wear protective gear like gloves and a smock to shield yourself from any potential stains that might arise. Now, let’s move on to the fascinating process of folding and binding your tees before dyeing them.
You have three distinct methods to choose from: the Scrunch Method, where you scrunch and gather the tee in random folds, securing it with tight-fitting elastic bands; the Bull’s-Eye Method, which involves finding the center of the tee, pinching, folding, and pulling it up before binding it with evenly spaced elastic bands; or the Striped Method, where you create accordion-like folds from the bottom to just under the neck and secure them along the length of the tee using elastic bands.
Once your tees are prepared, it’s time to mix the dye by combining water and carbonate soda. Apply the dye randomly across both sides of the first tee, feeling free to experiment with multiple colors. For the second tee, you can create a gradient effect by applying darker shades in the center and gradually transitioning to lighter hues towards the edges. The third tee can be a simple striped pattern featuring multiple colors.
Ultimately, there’s no right or wrong way – just let your imagination run wild! Once the dyeing process is complete, place each tee in an individual plastic bag, allowing the dye to penetrate for 8-12 hours before rinsing them under warm running water. It’s essential not to soak the tees in a pool of water, as the dye is still strong and may cause staining or ruin the pattern. Rinse the tees thoroughly and dry them completely to reveal your beautifully tie-dyed creations.