Create functional and stylish storage solutions by repurposing old cardboard boxes and a sweater. The need for additional storage space is always present around the house, but the cost of buying specialized containers can add up quickly. Instead of breaking the bank, get creative and make your own storage boxes from readily available materials. With a little bit of imagination, you can turn an old cardboard box into a valuable asset that helps declutter and organize your space.
Supplies and Tools You’ll Need
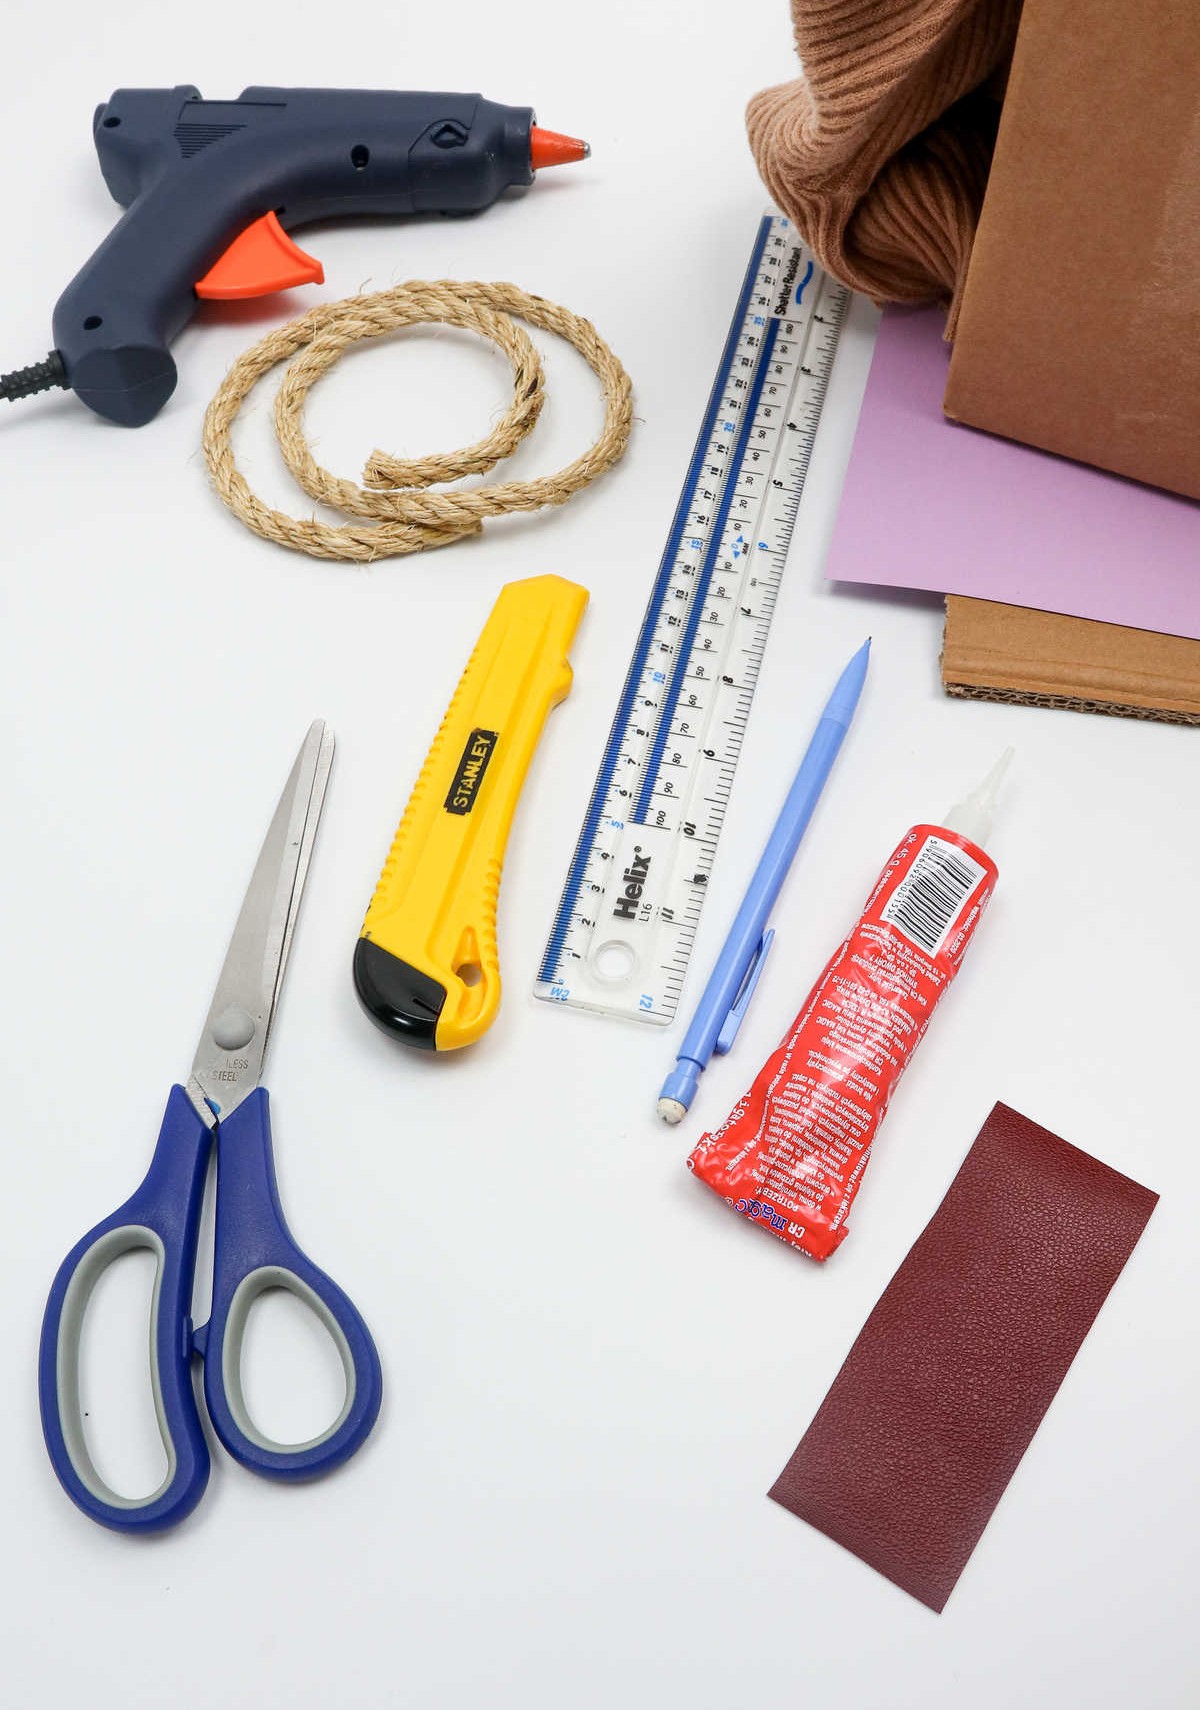
To create your desired piece, you’ll need the following materials: a cardboard box, an old sweater, a hot glue gun, scissors, decorative paper, a cardboard sheet, a length of 1/5” rope measuring 24” long, regular glue, a ruler, a retractable knife, and a pencil. If you’re looking to add some extra flair, consider using leather fabric that’s 1”x6” in size.
How to Make a Storage Box
Get ready to breathe new life into old favorites! This creative project not only involves upcycling cardboard boxes but also transforming an outdated sweater. Chances are you have a few woolly friends collecting dust in your closet, having been retired due to their scratchy texture. For this project, aim for a sweater with elastic properties to ensure a comfortable fit.
Step 1
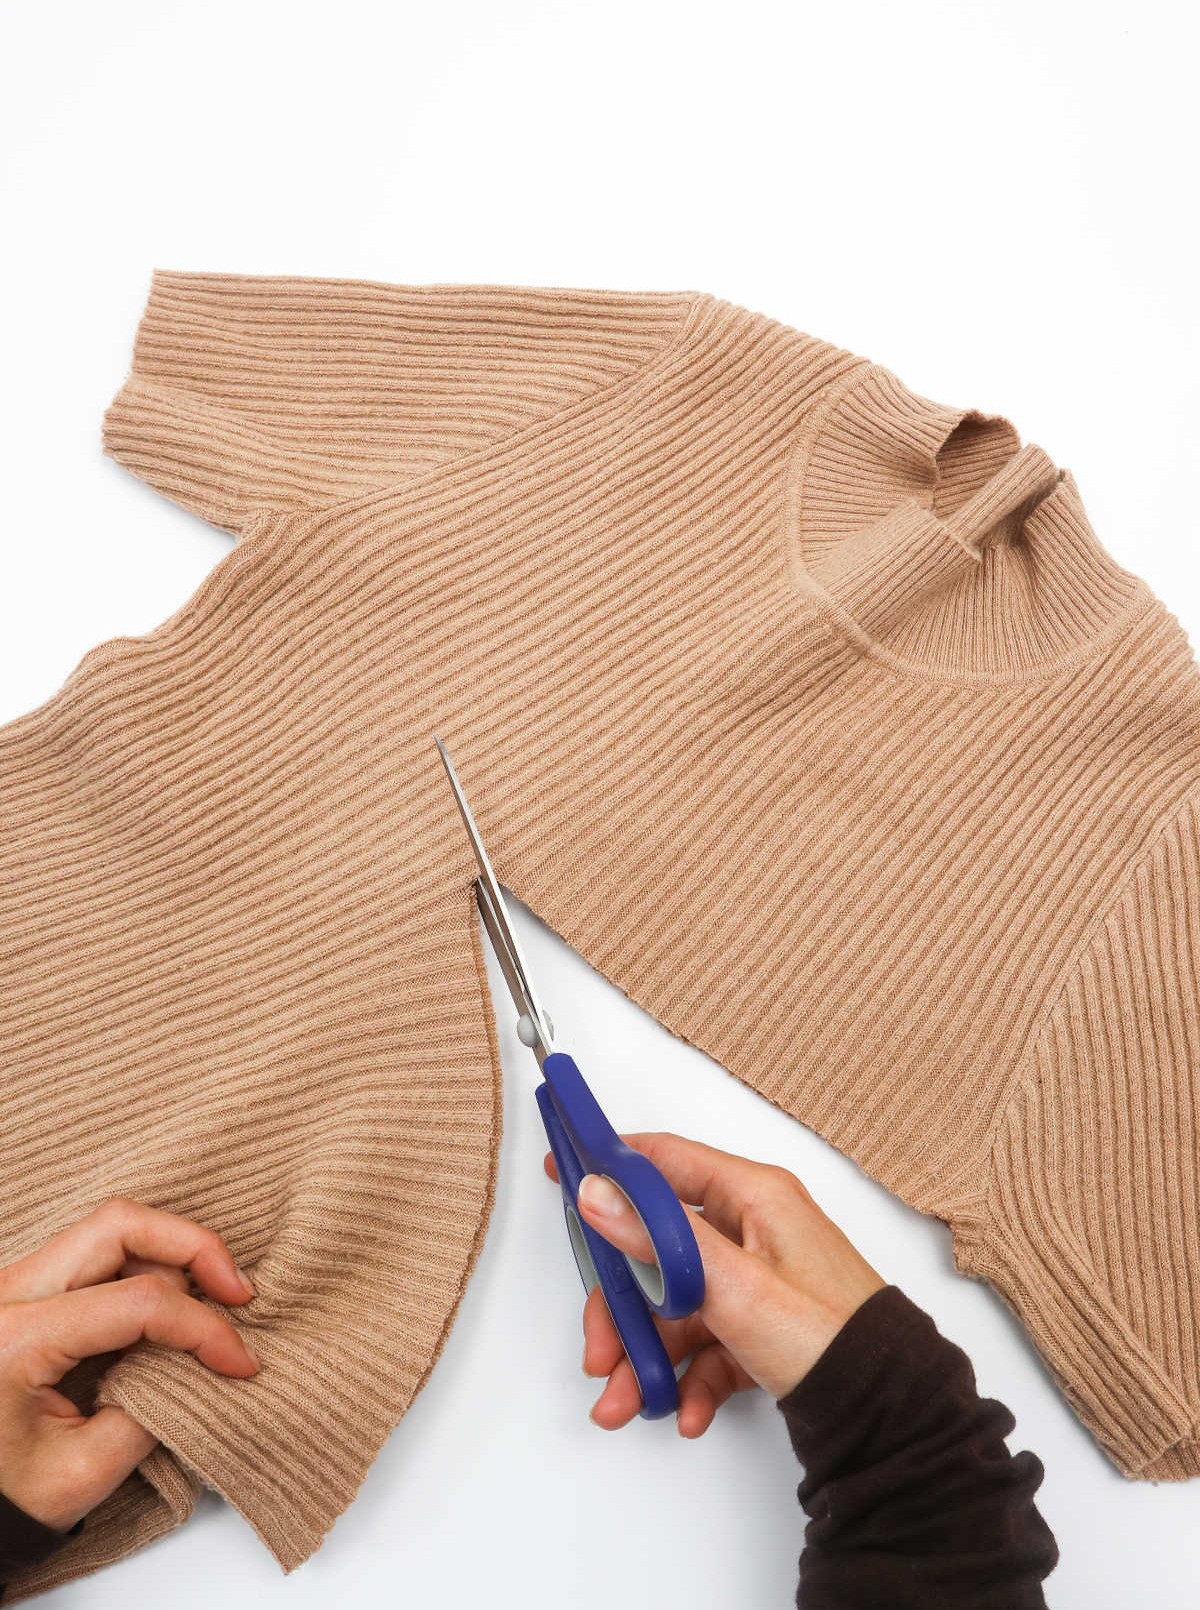
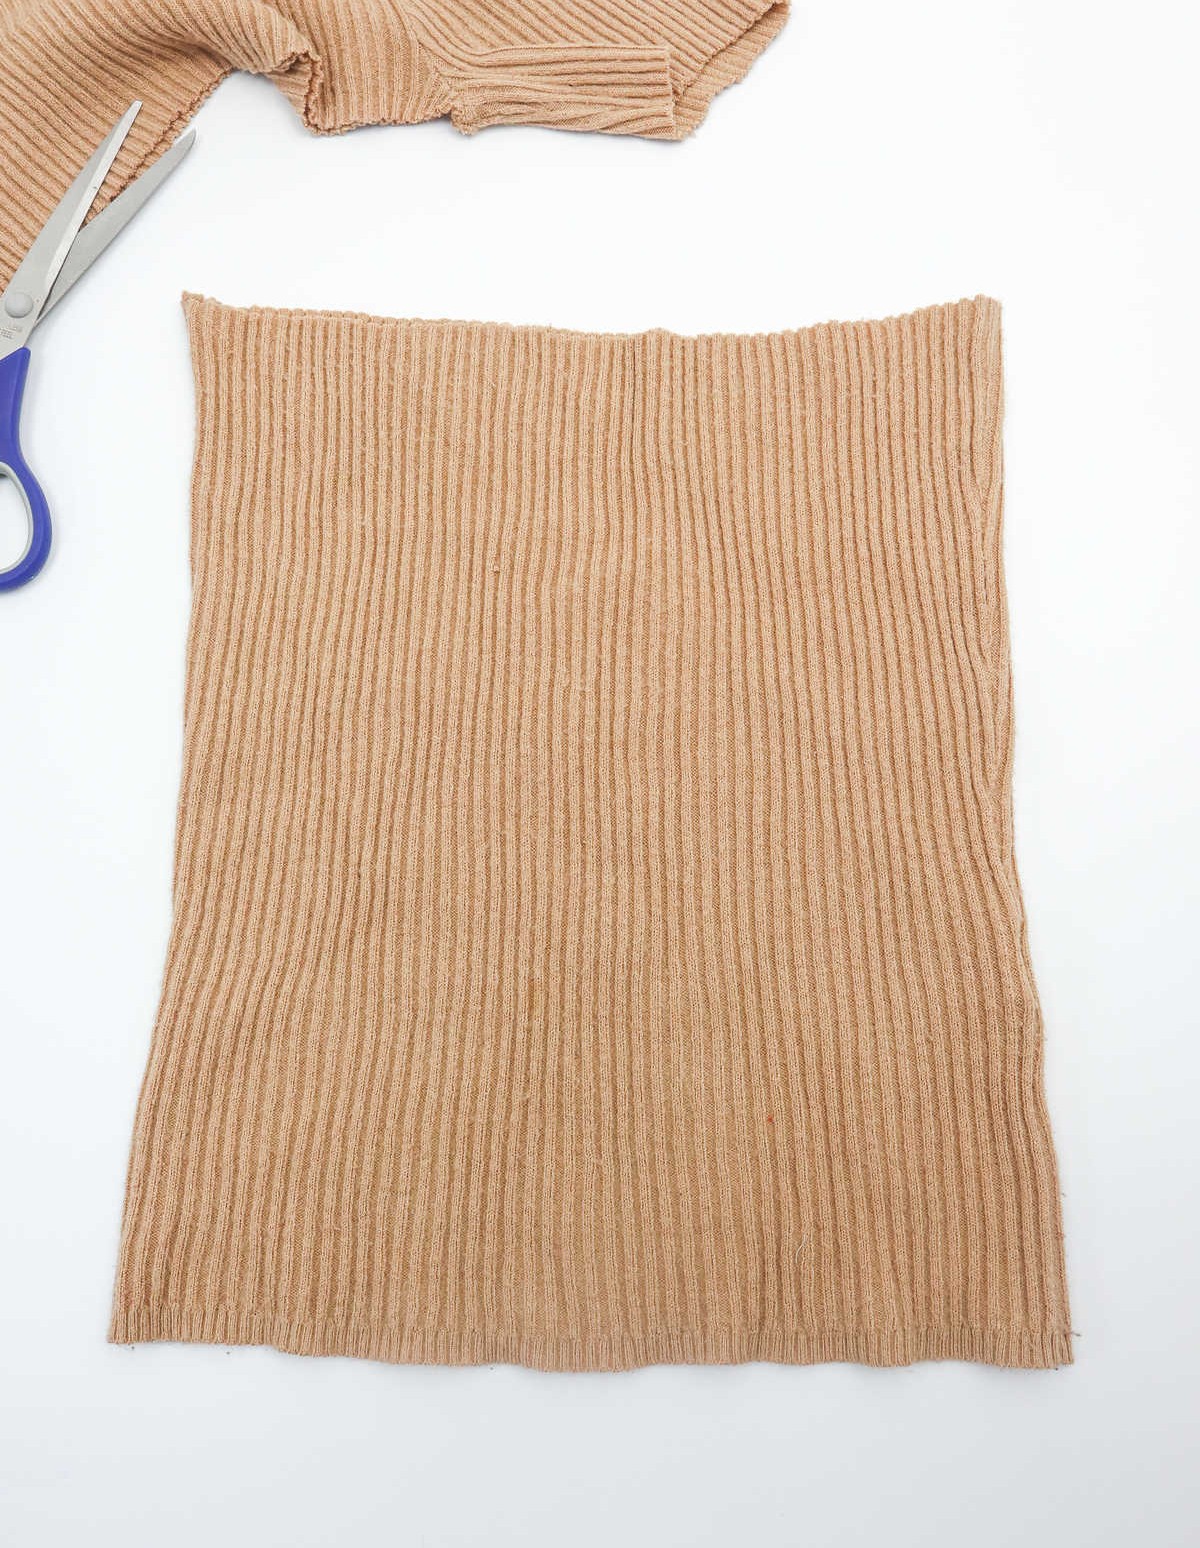
To refashion your old sweater, start by preparing it for the cutting process. Take hold of a pair of scissors and carefully snip along the edge of the garment just below the armhole. It’s essential to cut as close to the arm as possible to maximize the amount of usable fabric you can salvage from the original piece.
Step 2
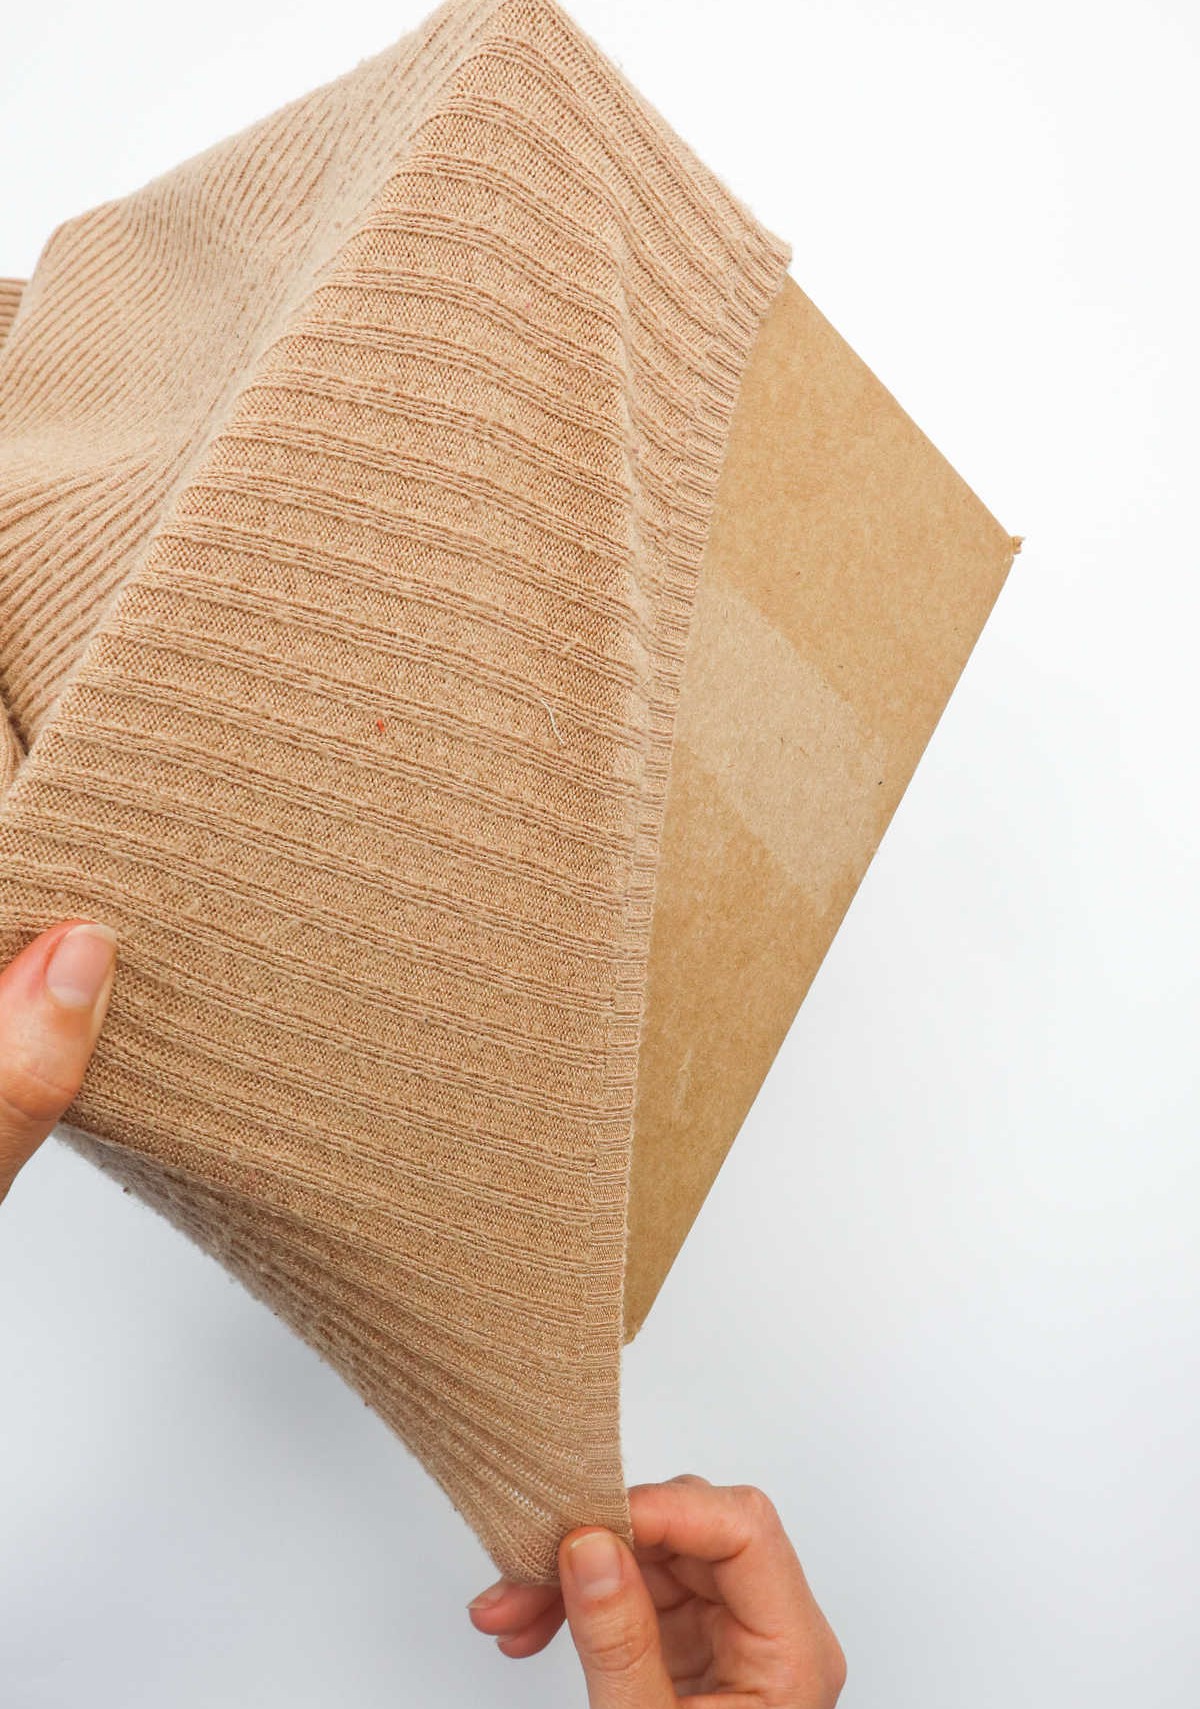
As you prepare to transform your ordinary cardboard box into an extraordinary puppet theater, don’t forget to utilize the stretchiness of your trusty sweater. To do this, drape the sweater over the box, making sure it completely envelops it. The edges of the sweater should ideally reach the base of the inside of the cardboard box, ensuring a snug and secure fit.
Step 3

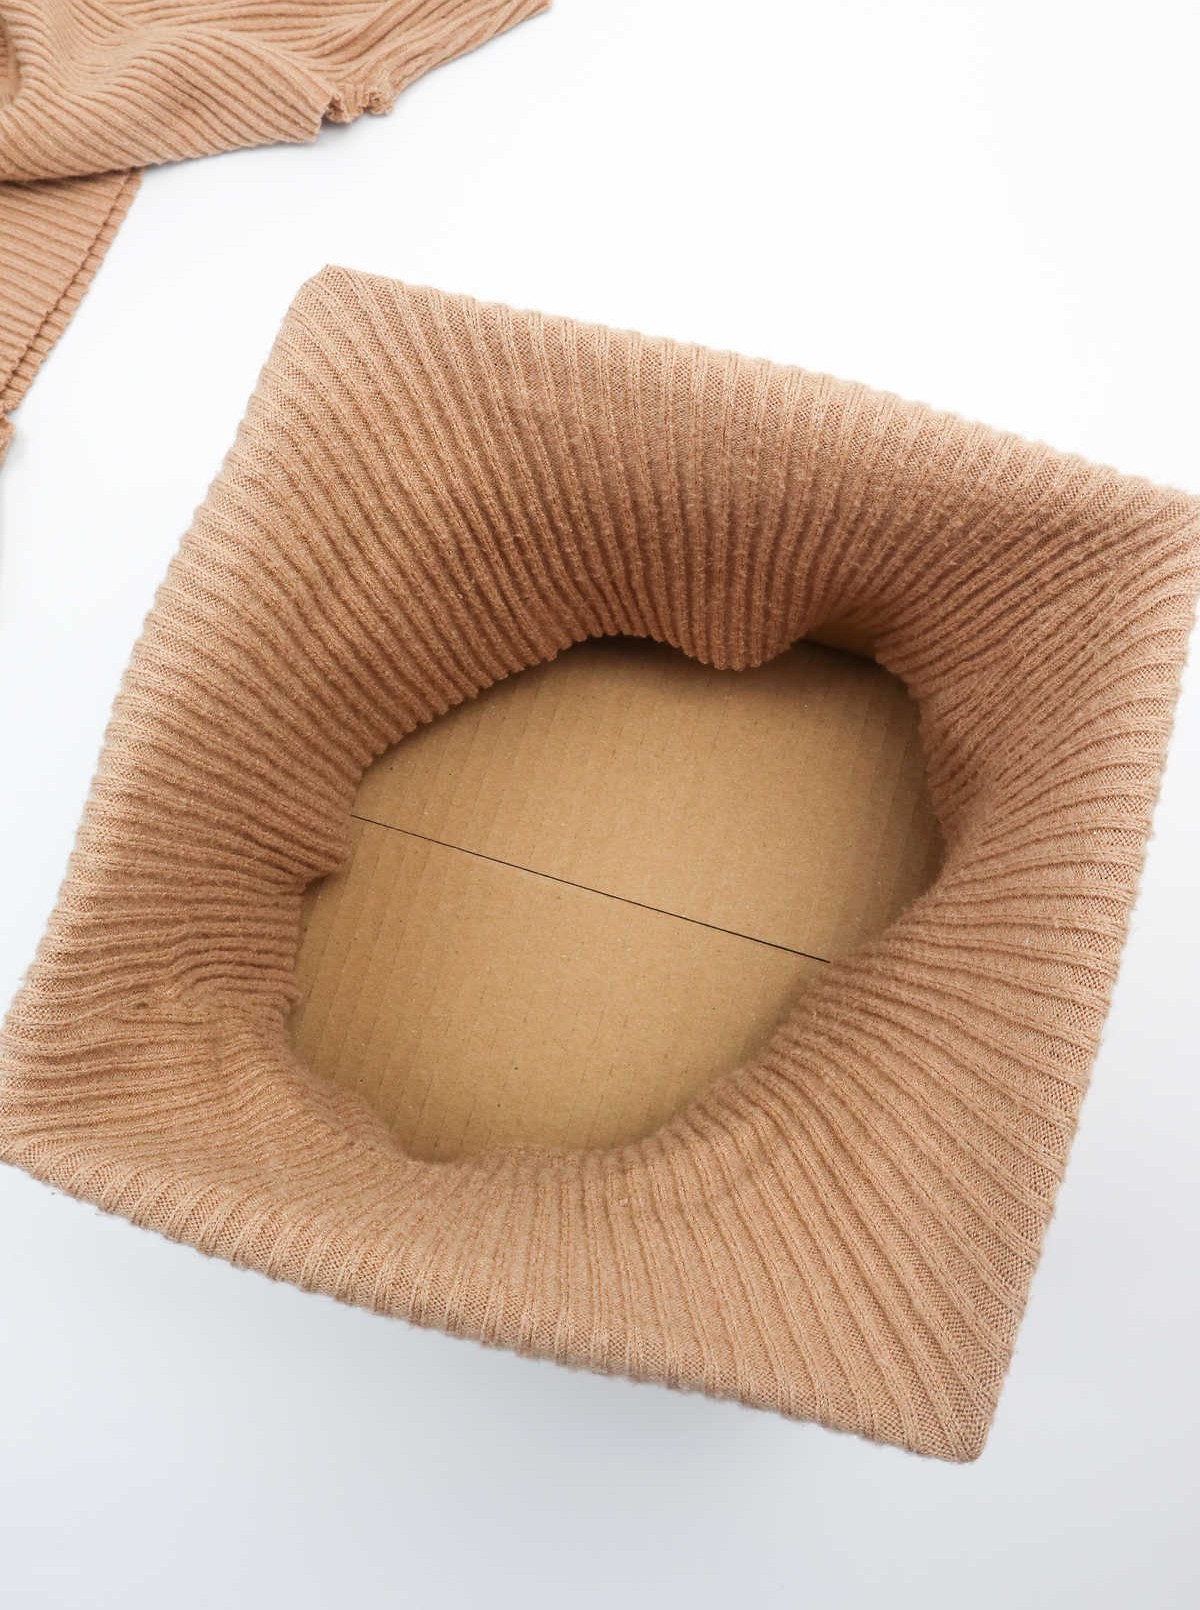
To proceed with the craft, carefully invert the cardboard box, ensuring that the bottom surface is now facing upwards. This will provide a clear view of the base, where you can apply hot glue to secure the sweater’s ends. Aim for a strip at least an inch wide along the base to facilitate a seamless adhesion process. As you work, exercise caution to align the sweater neatly around the cardboard base, taking care not to compromise the overall aesthetic of your project.
Step 4
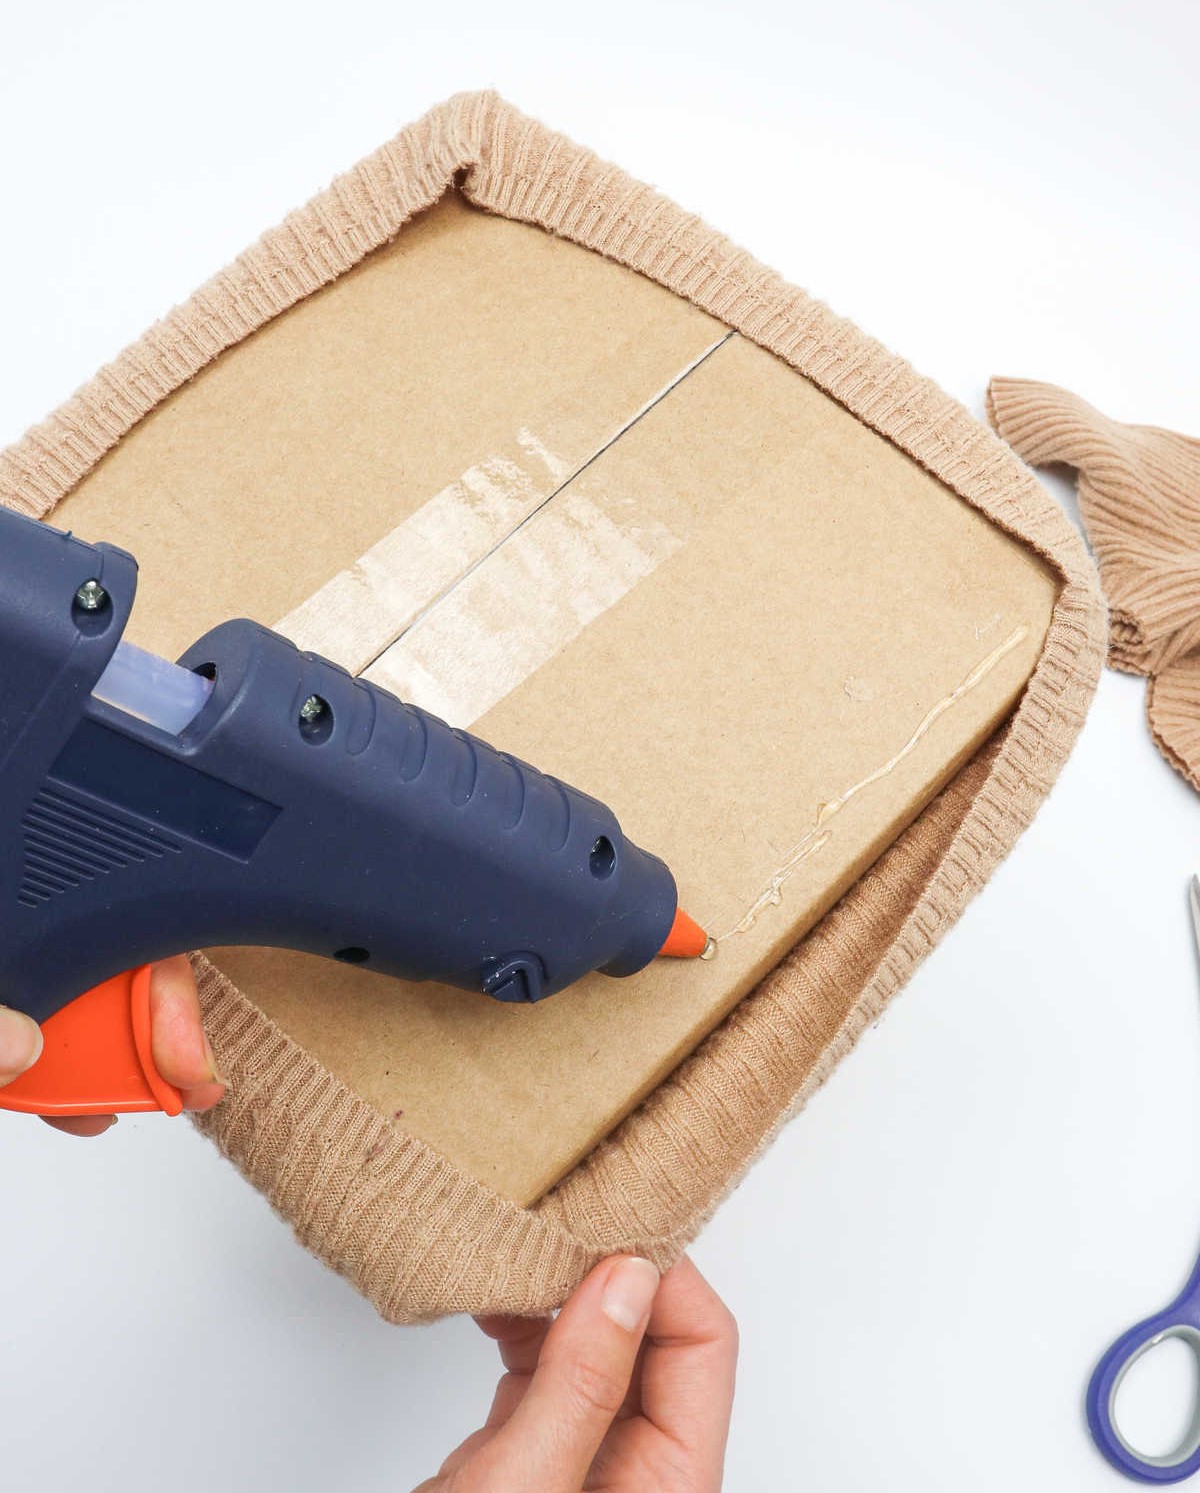
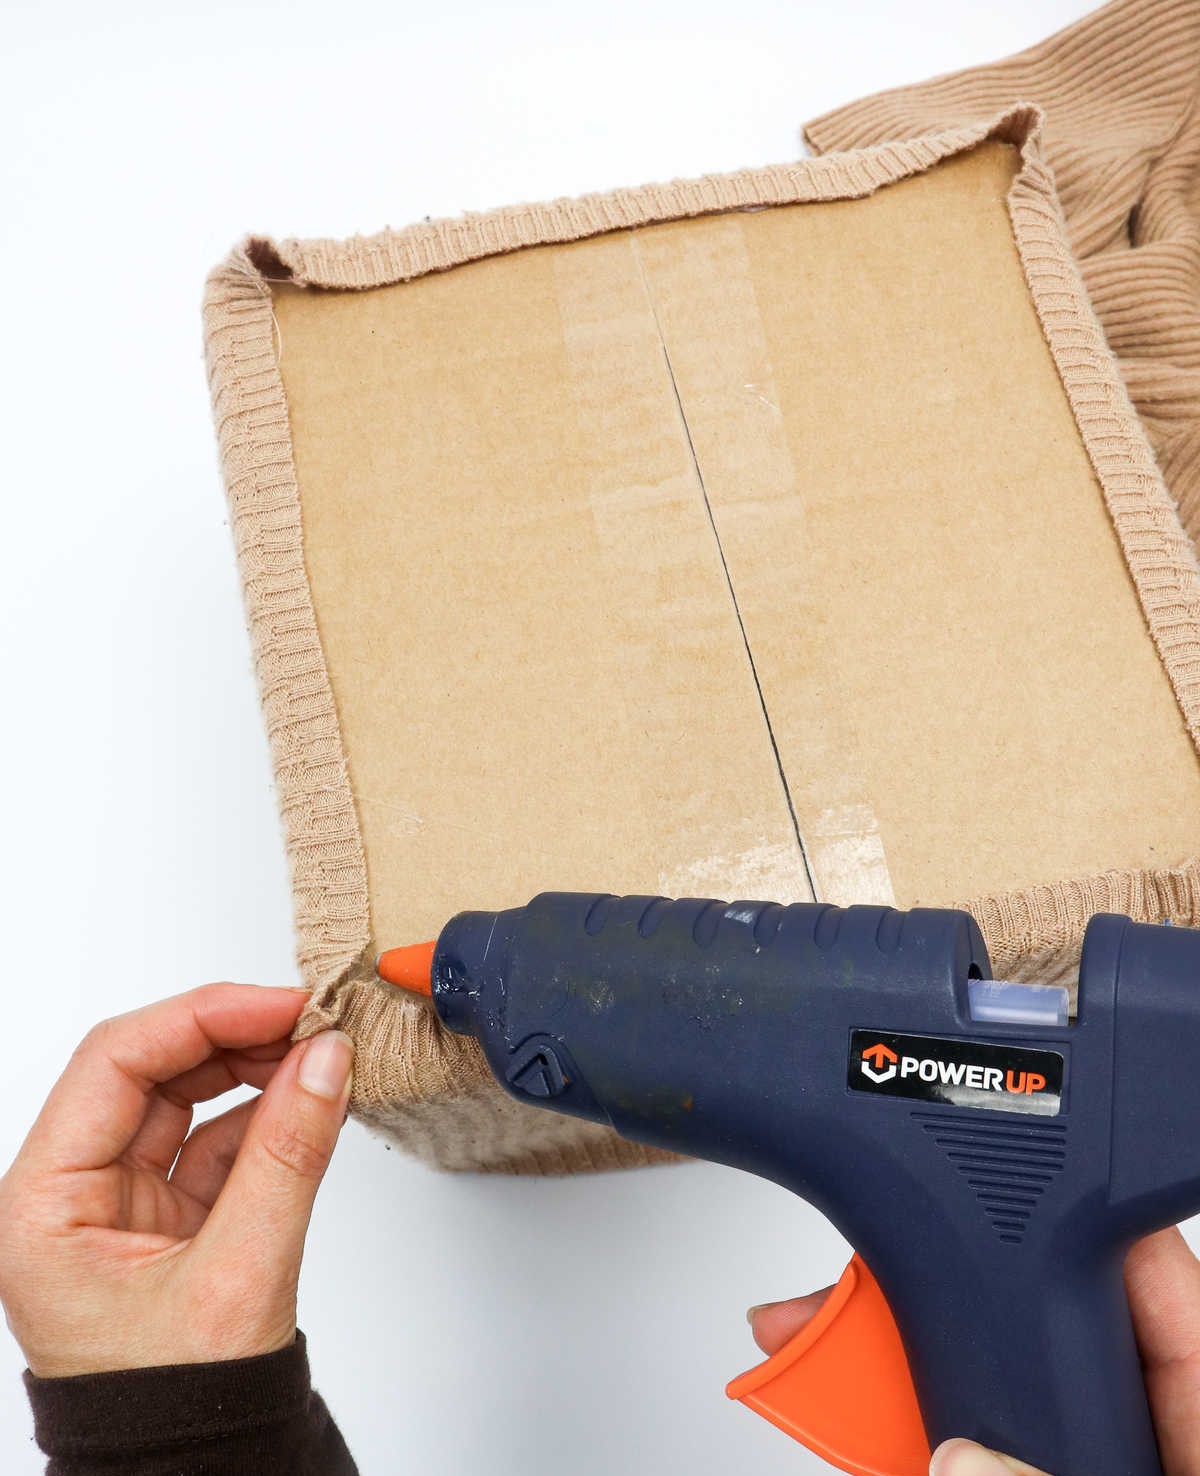
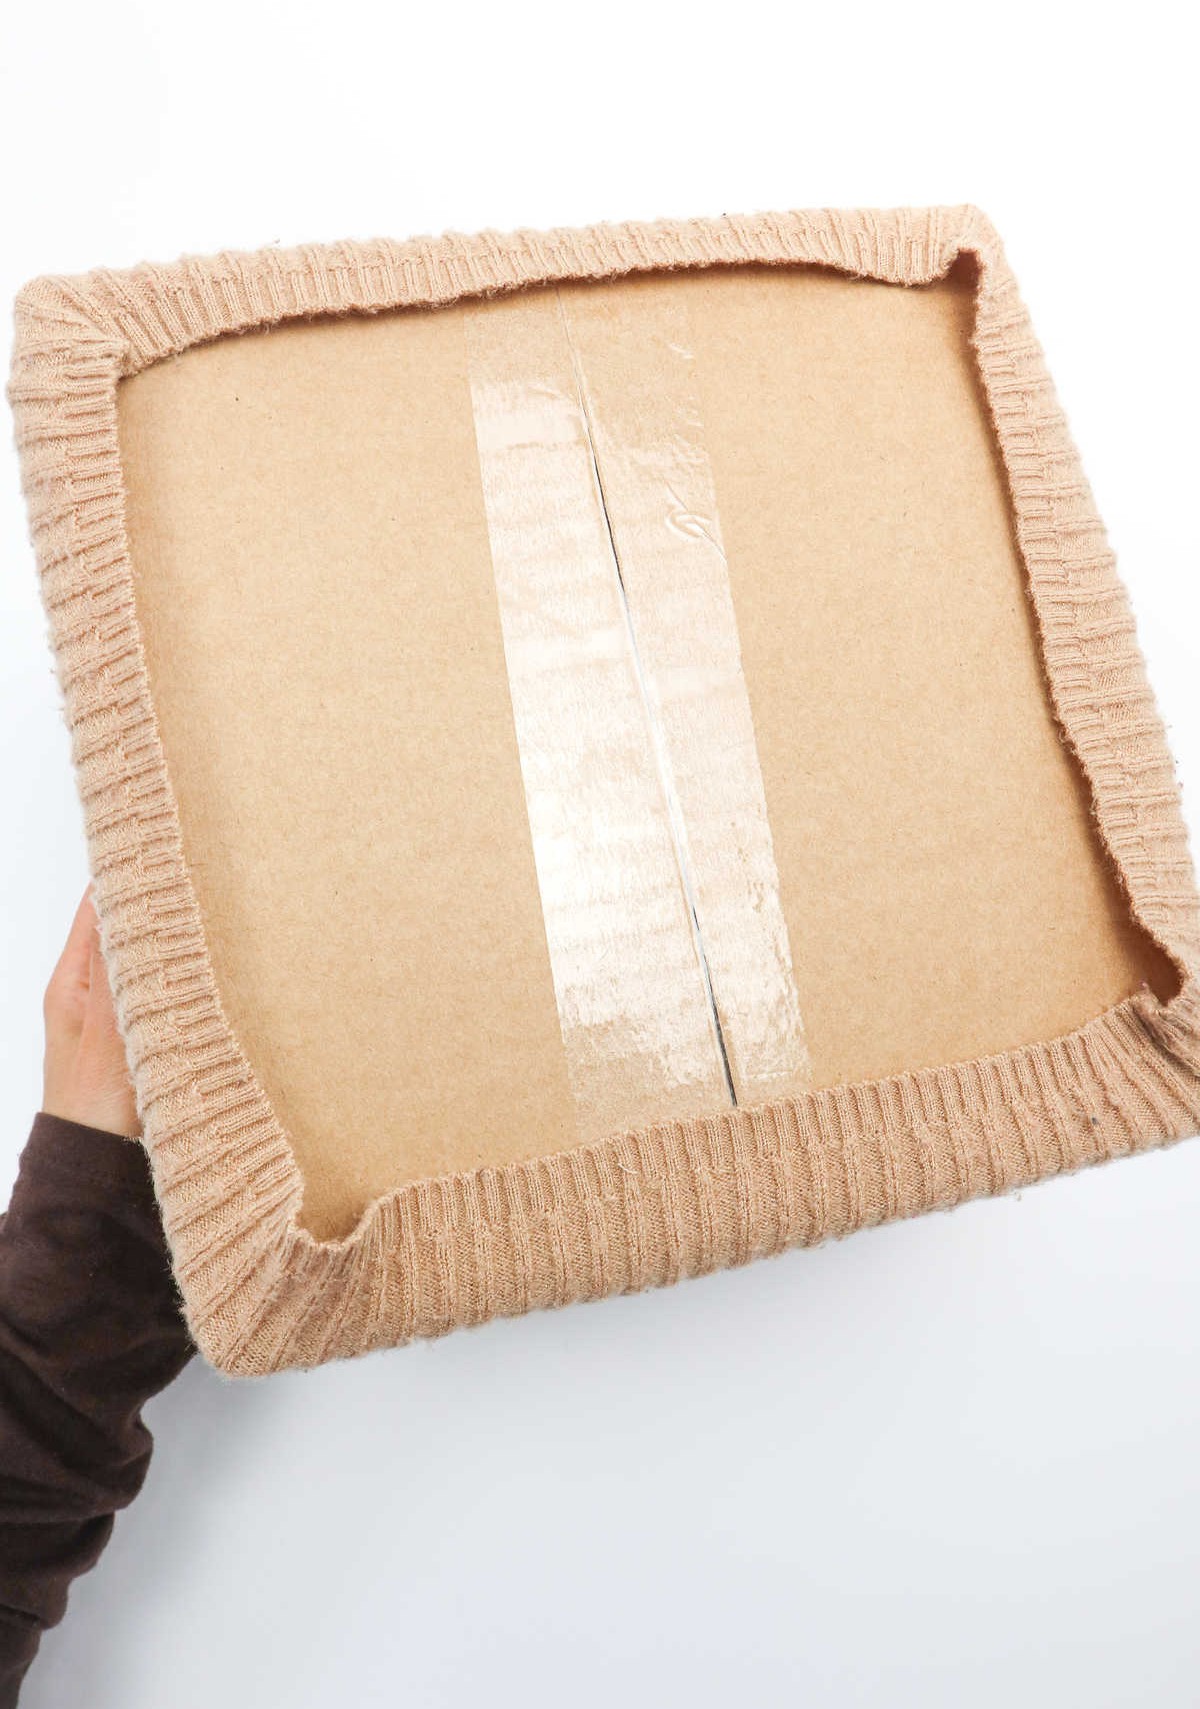
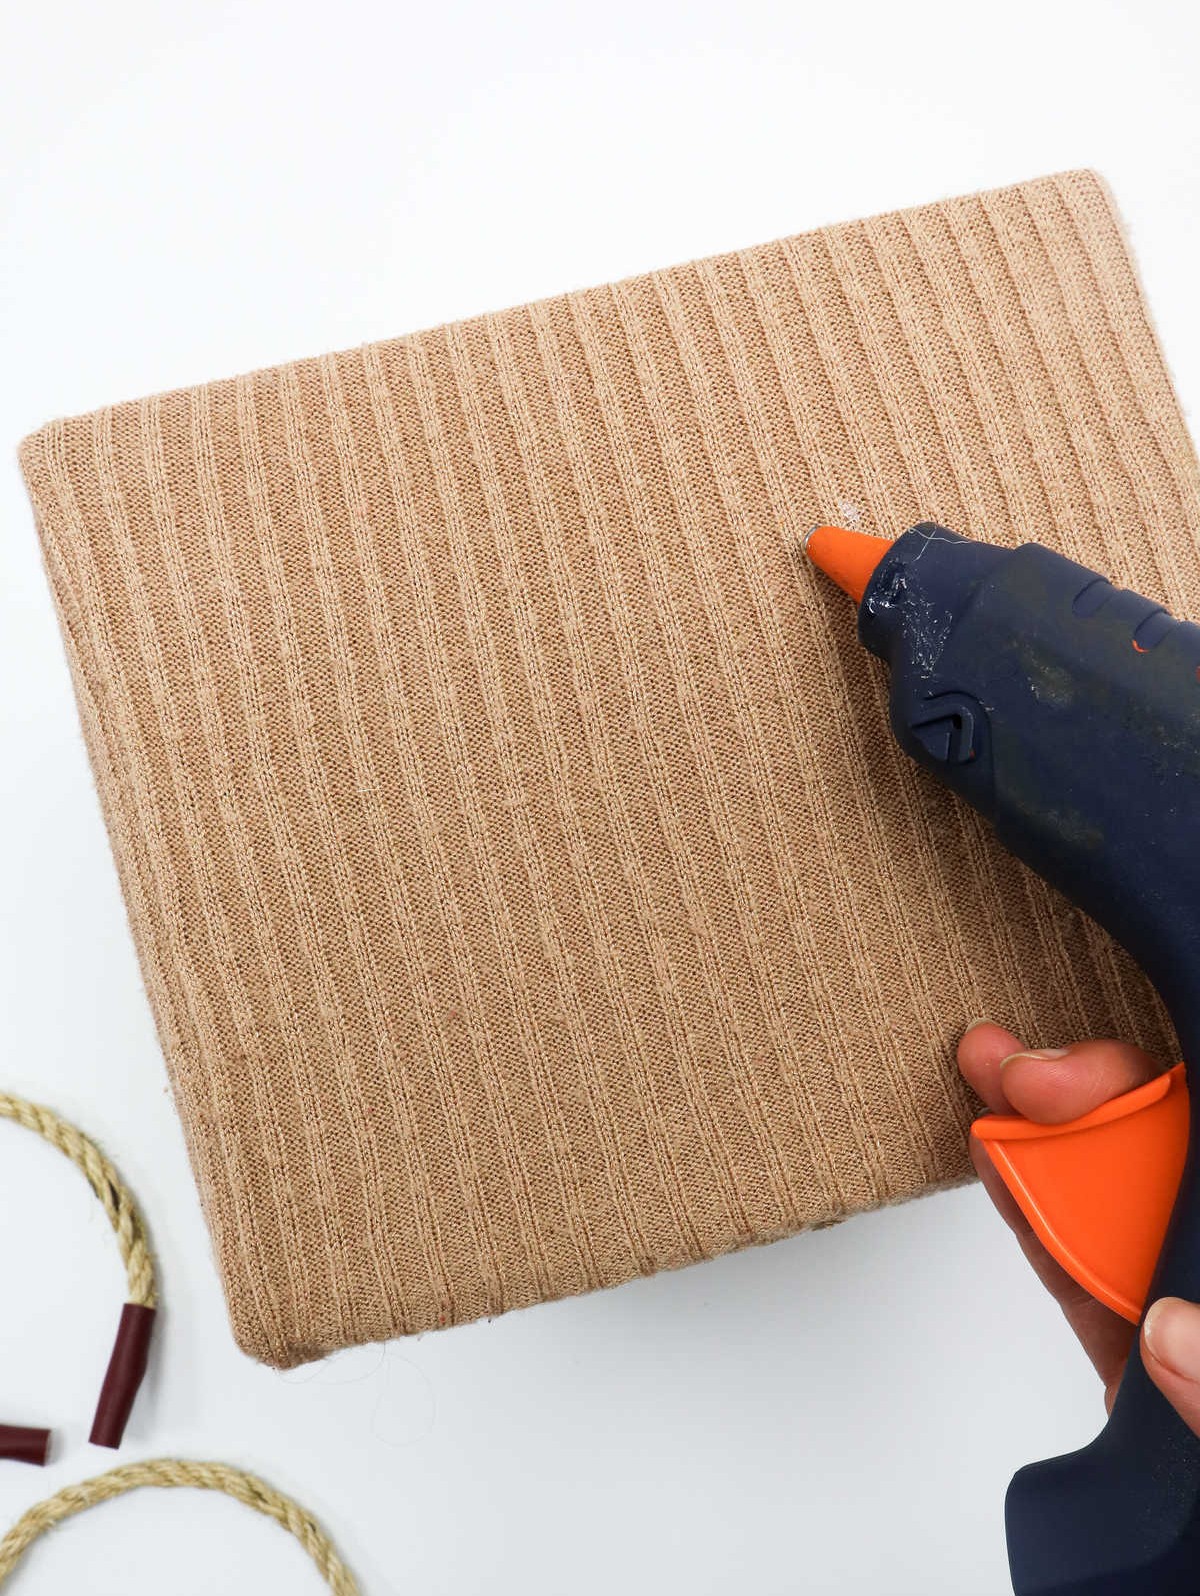
Get your hot glue gun ready! To secure the sweater to the box, begin by applying a thin layer of hot glue around all four sides of the box’s base. Next, carefully unfold the sweater away from the box’s edge and align it with the glue-covered area. Gently press the fabric onto the glue, ensuring a smooth and even adhesion. To prevent wrinkles or bunching at the corners, pinch each corner and apply additional hot glue to flatten it against the base of the box.
This will create a balanced and visually appealing finish.
Step 5
Before flipping the box over, ensure the hot glue at its base has had sufficient time to dry and set. With the box in this position, take a moment to meticulously crease the sweater along the seams by running your finger gently along the edges of the box.
Step 6
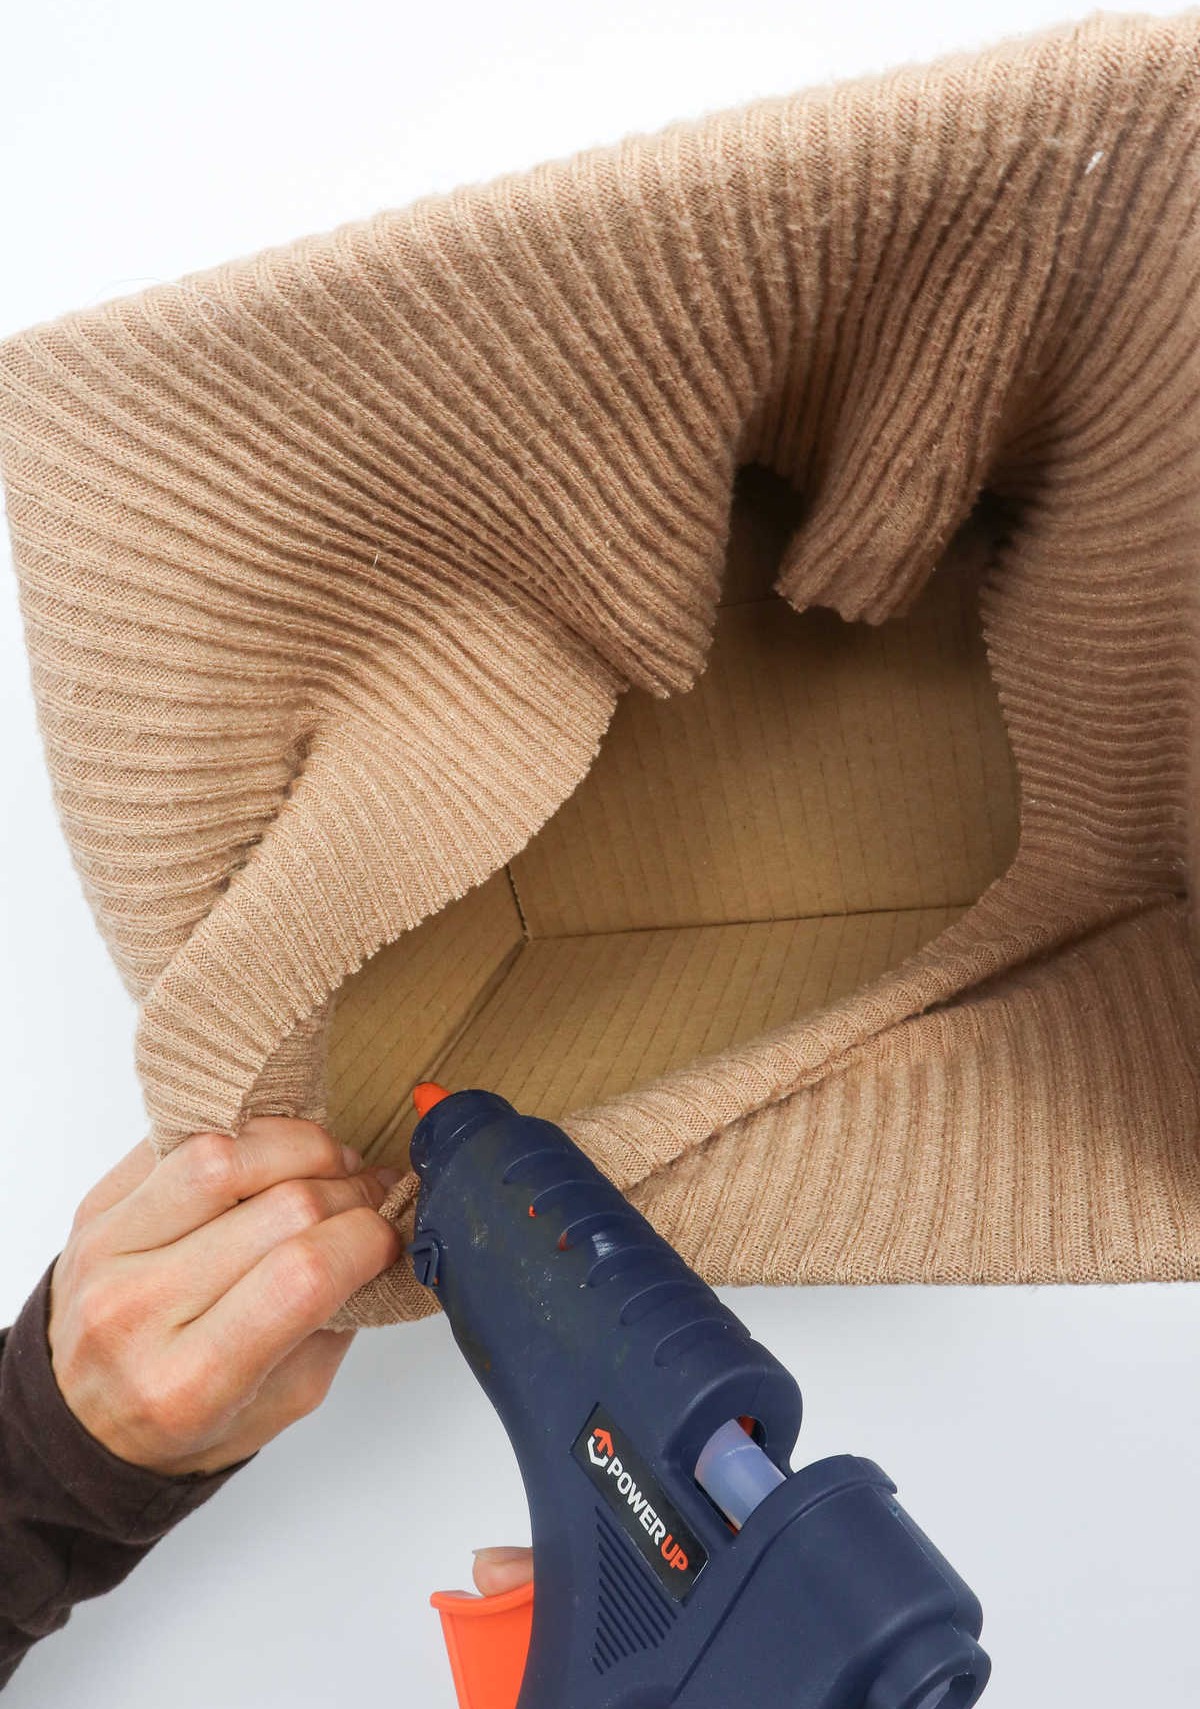
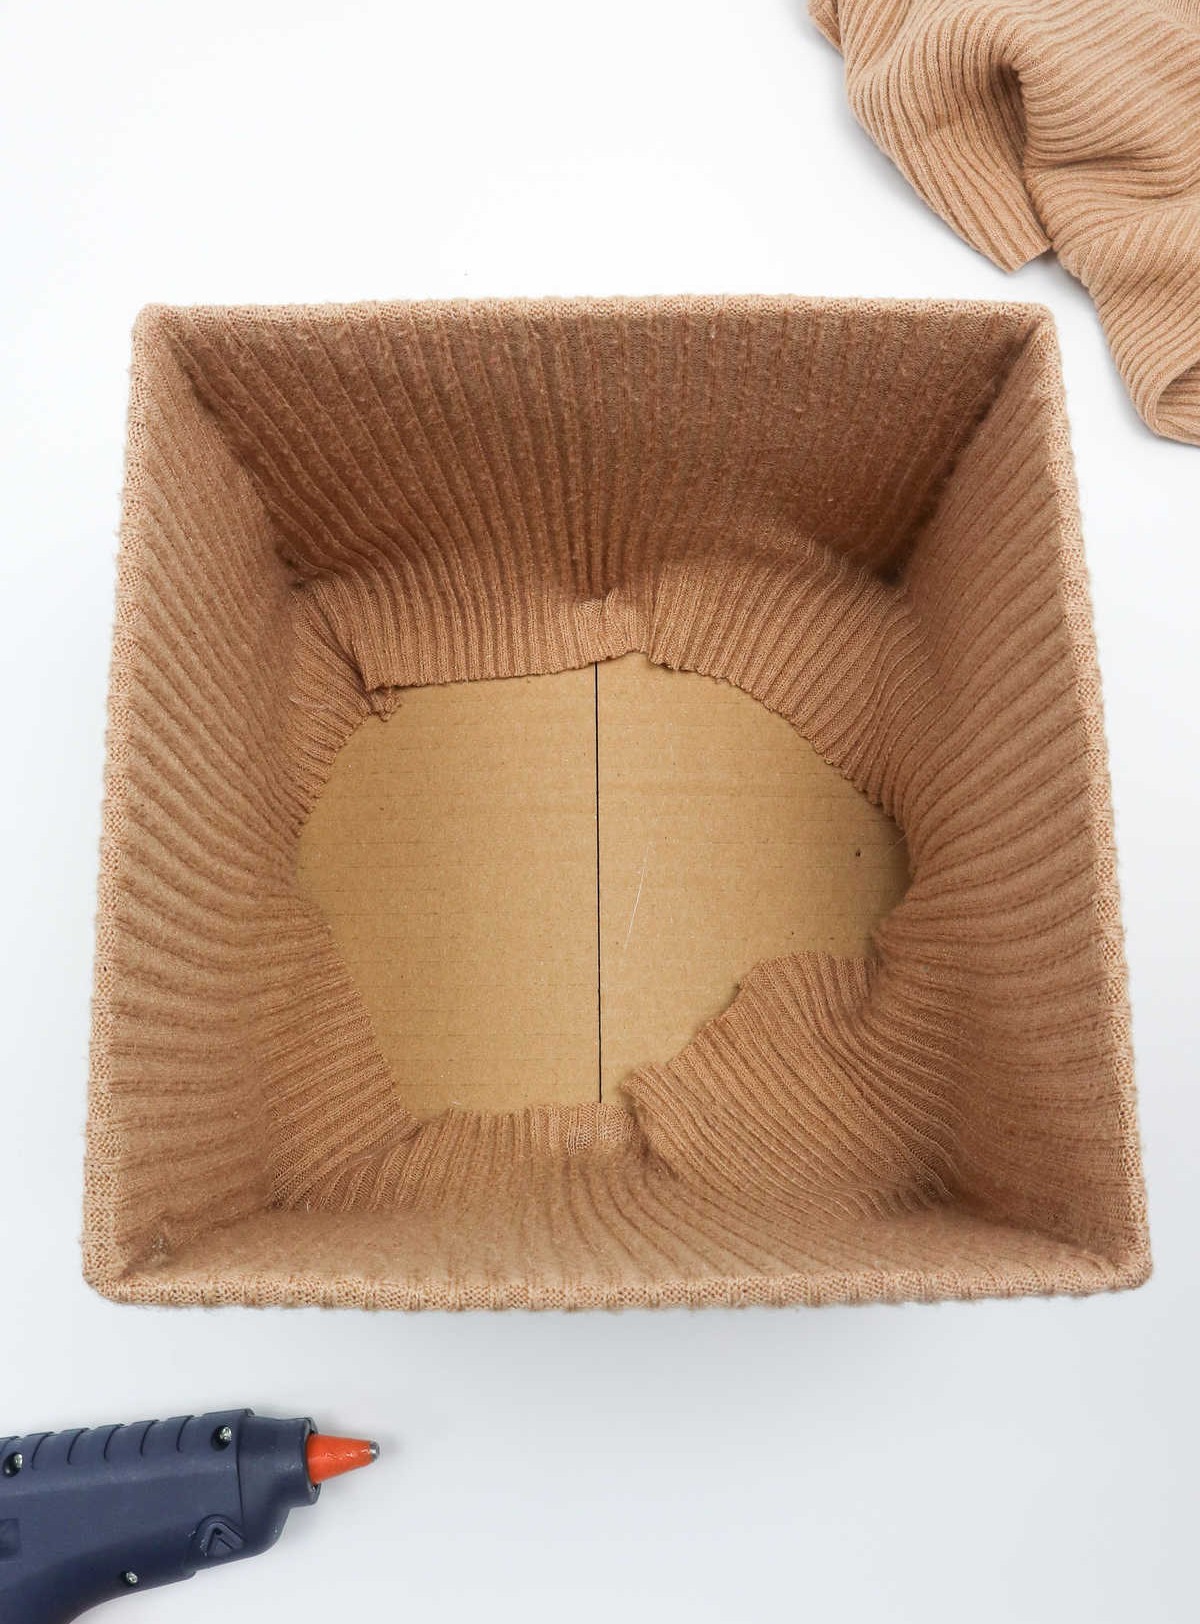
As you reprise your hot glue gun, carefully position all four corners of the box’s interior with a thin bead of adhesive. Next, delicately press the sweater back into place, allowing the glue to secure it firmly onto the box. To ensure a smooth finish, inspect the sweater for any creases or wrinkles and gently tug it taut to conform it to the box’s walls.
Step 7
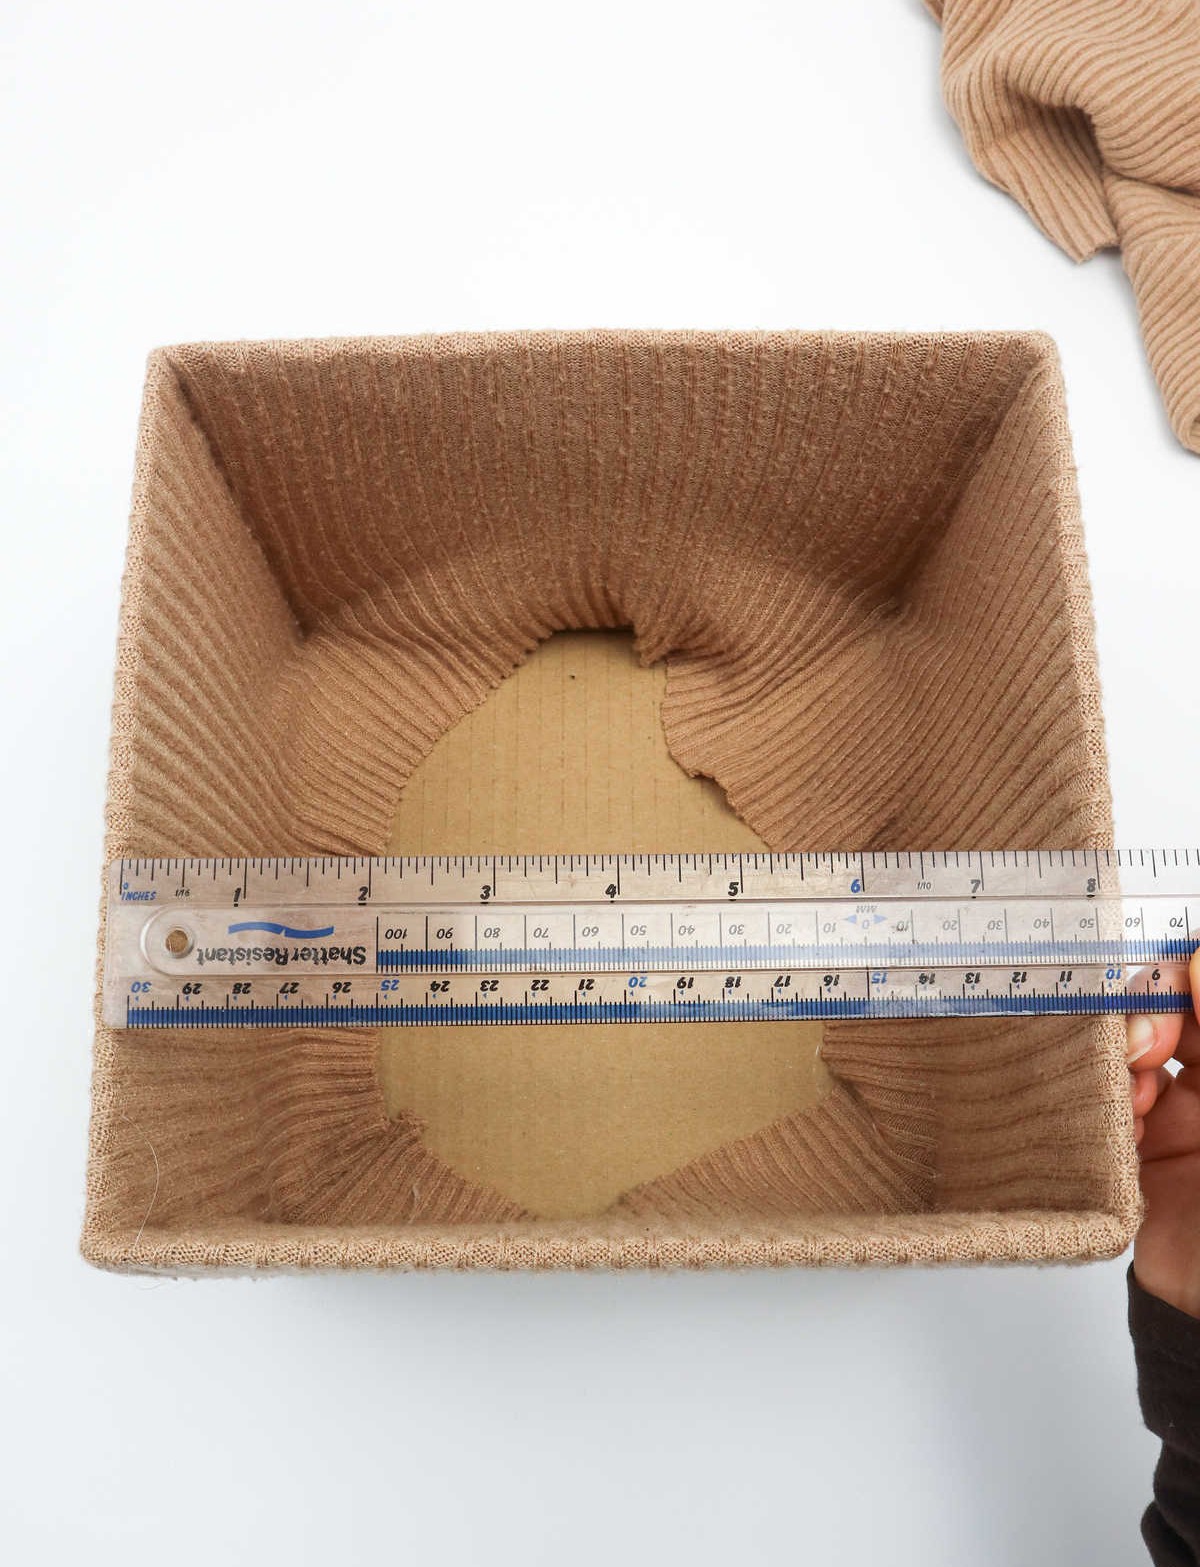
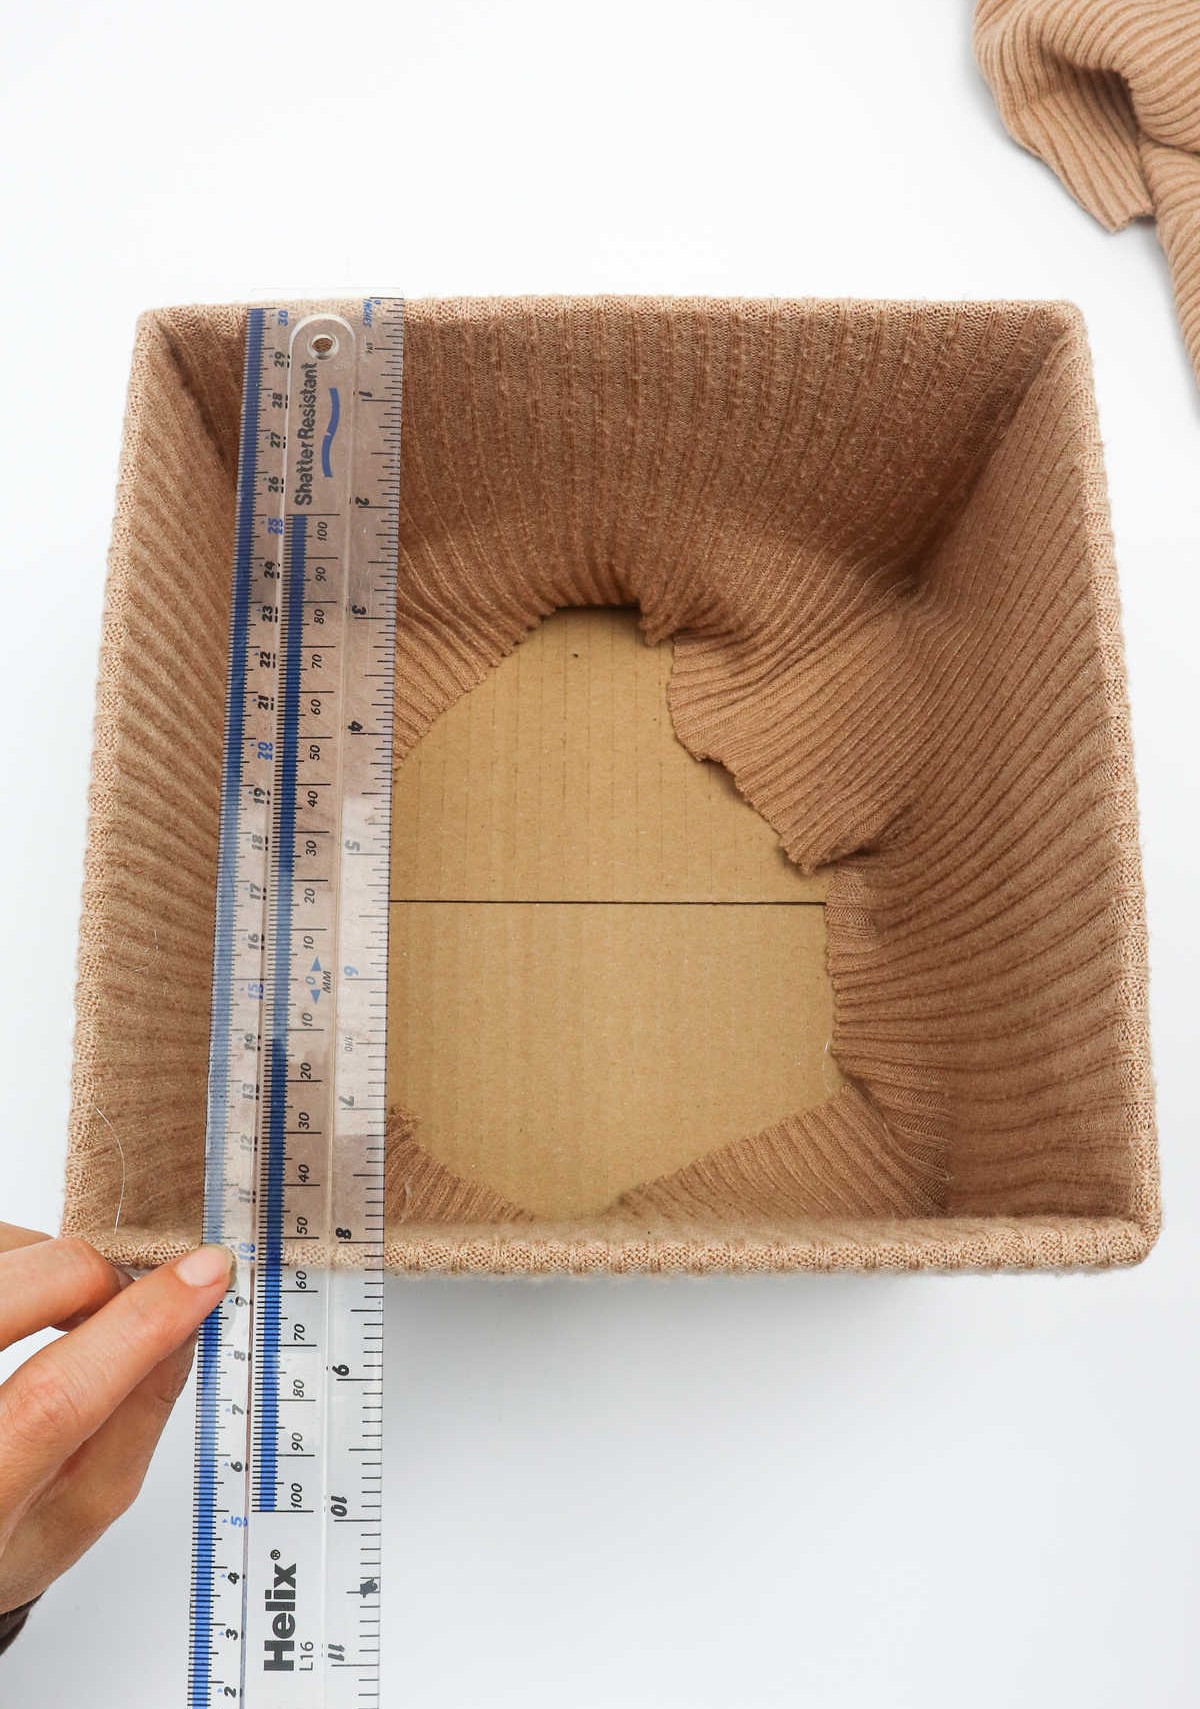
To create a sturdy foundation for your handmade sweater display, it’s essential to start with a well-constructed cardboard base. Begin by measuring the dimensions of the box, ensuring you capture its width, height, and depth. Start by positioning a ruler across the center of the box, directly above the mouth, as depicted in the illustration. Next, measure the opposite side of the box to obtain accurate measurements for all three dimensions.
Step 8
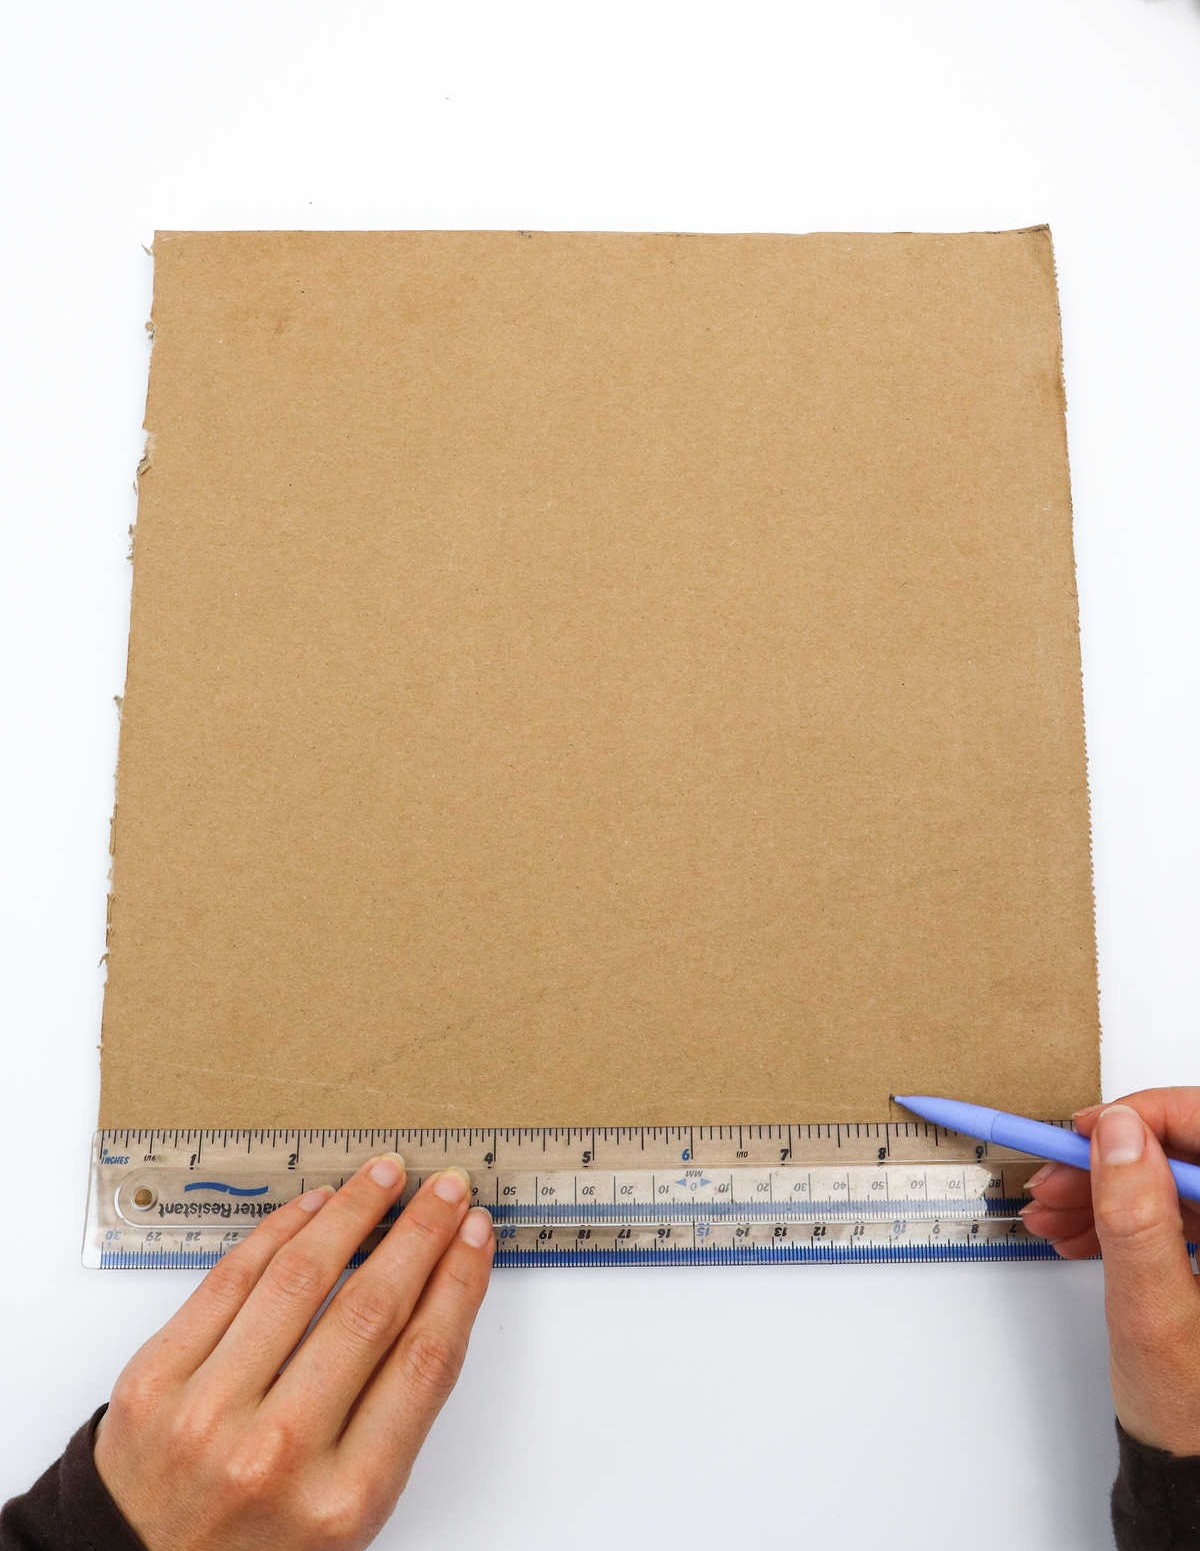
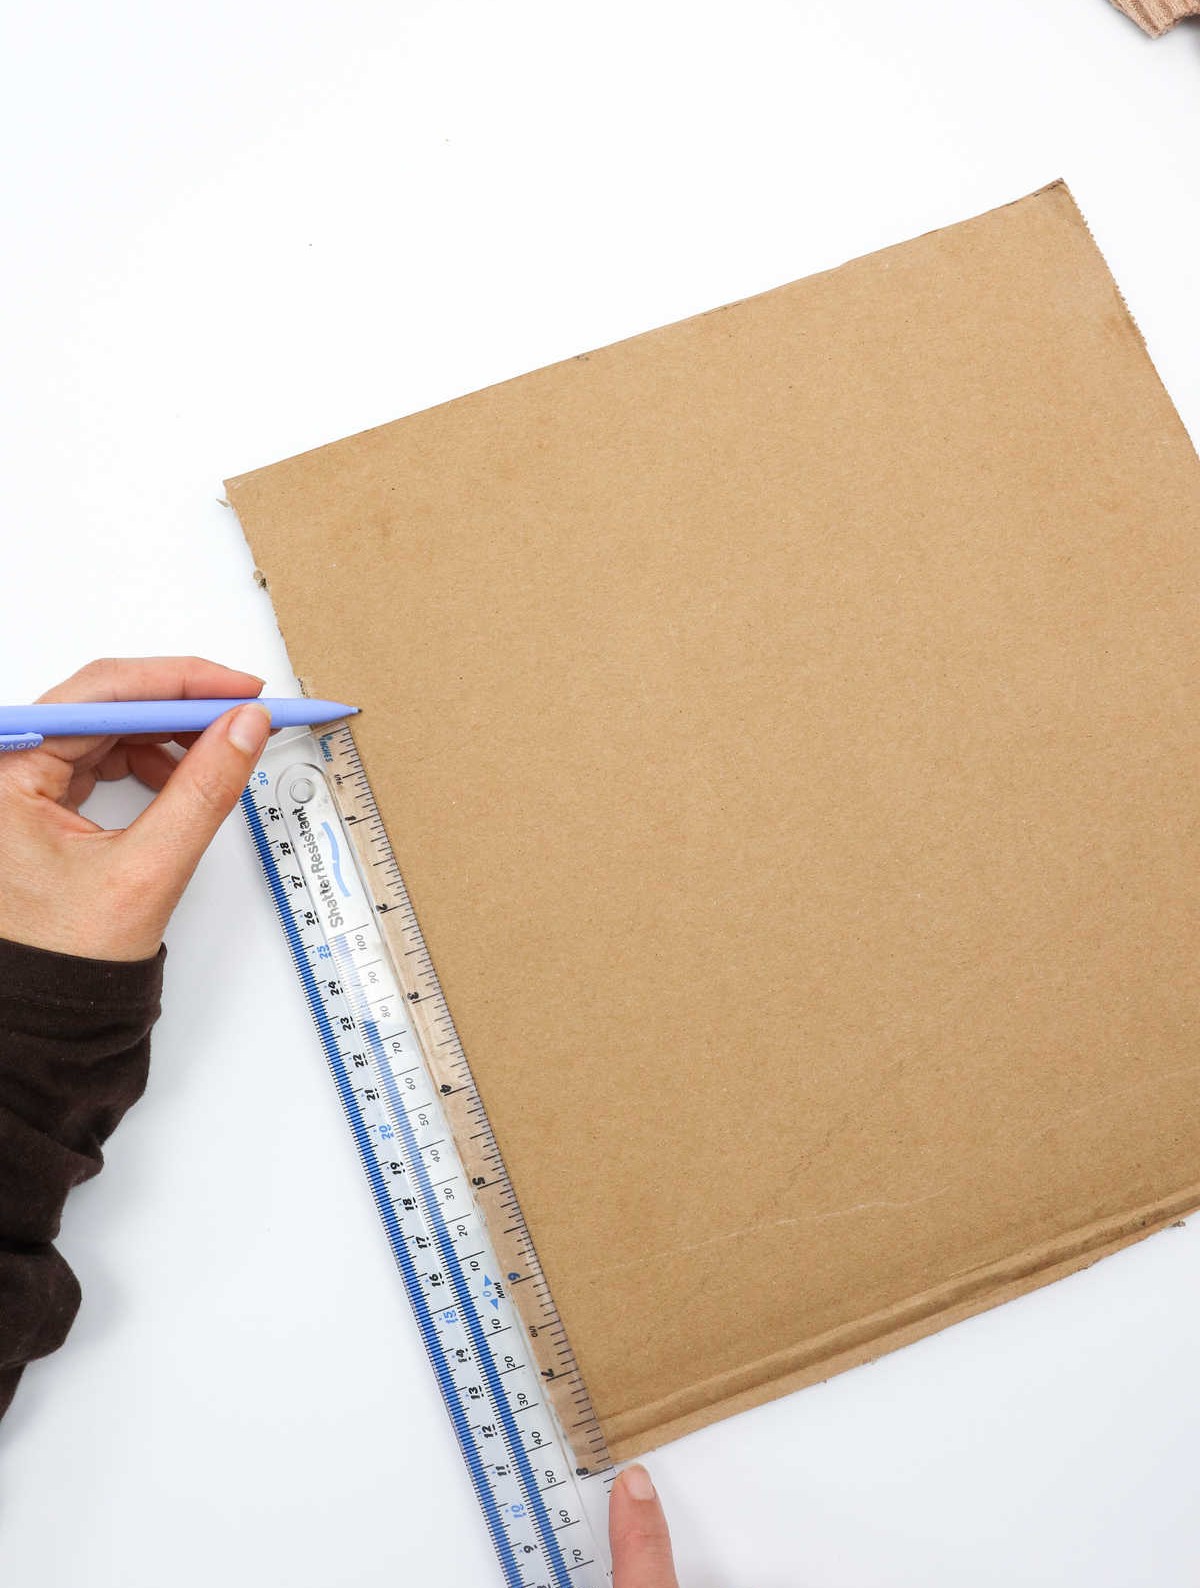
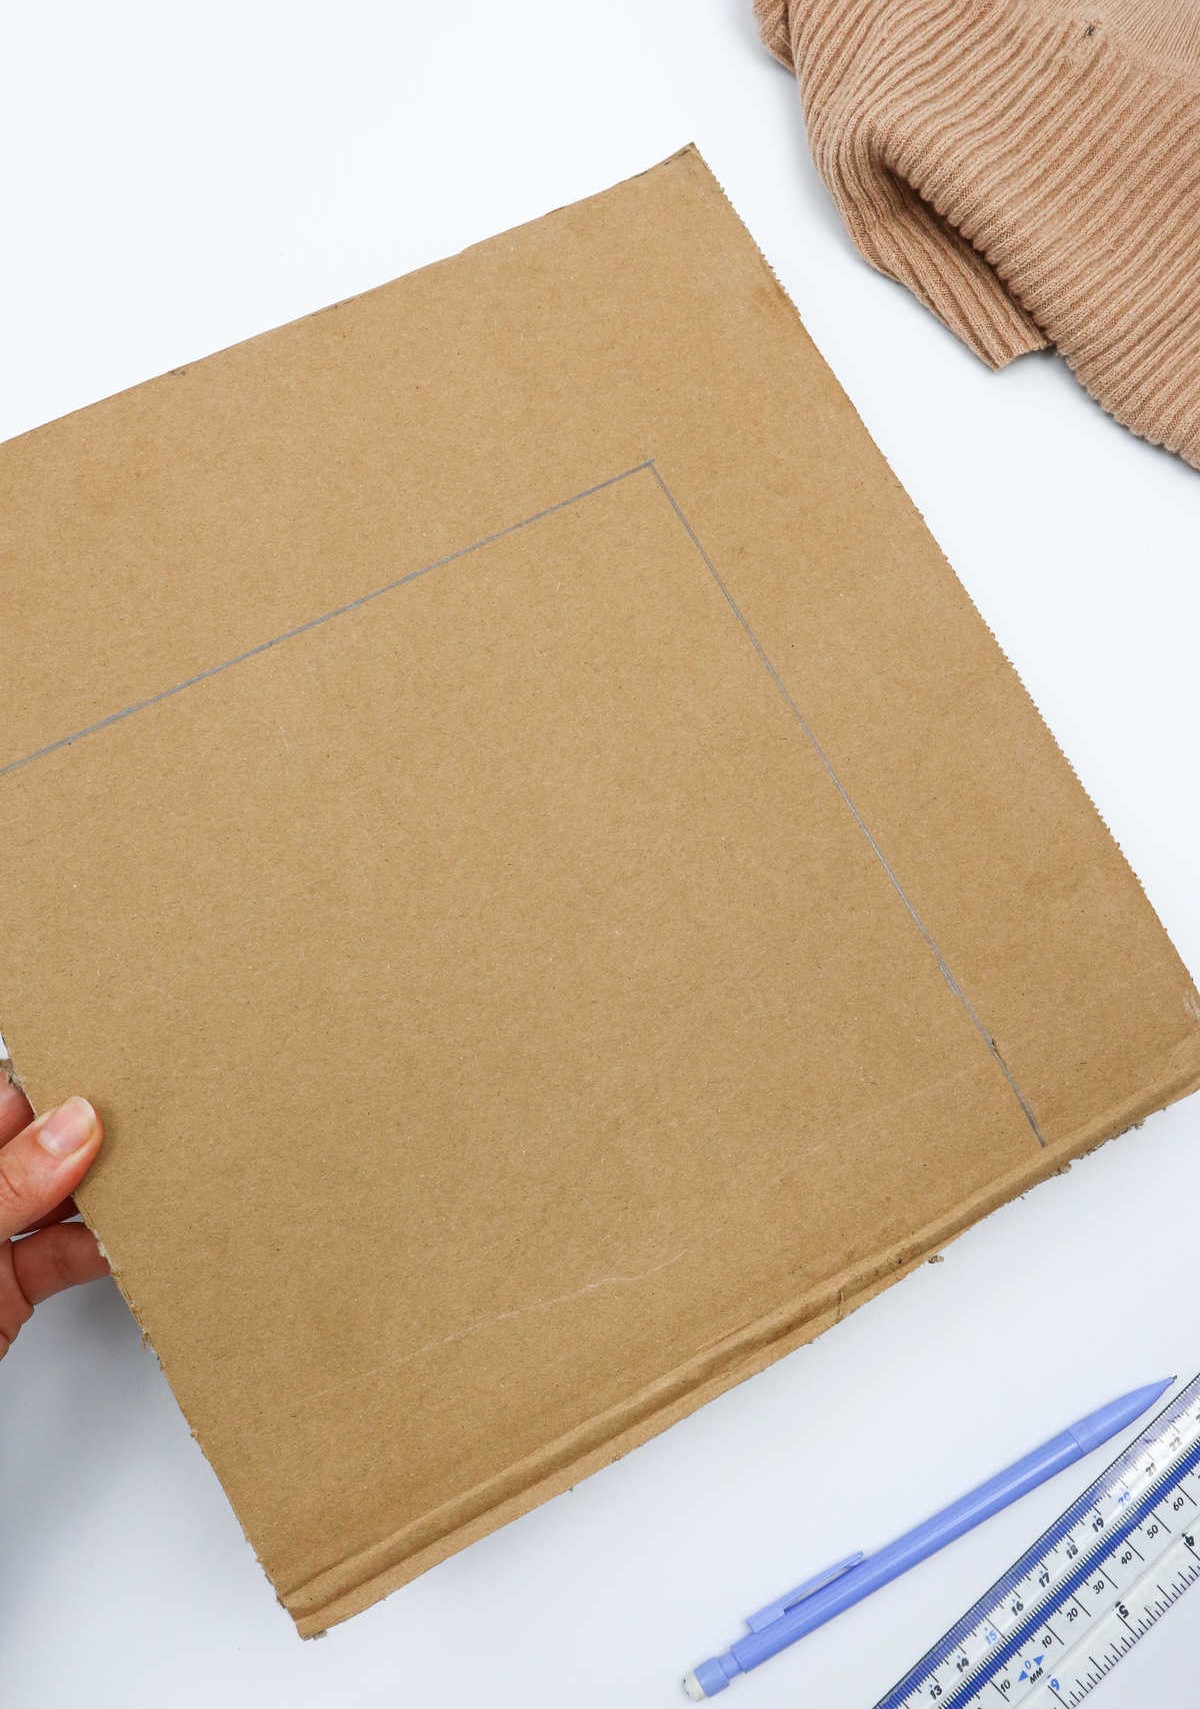
Transfer the measurements from the original cardboard box to a new sheet using a pencil and ruler. Create a template by drawing two parallel lines that intersect with the markings you previously made, ensuring the resulting shape mirrors the base dimensions of the cardboard box.
Step 9
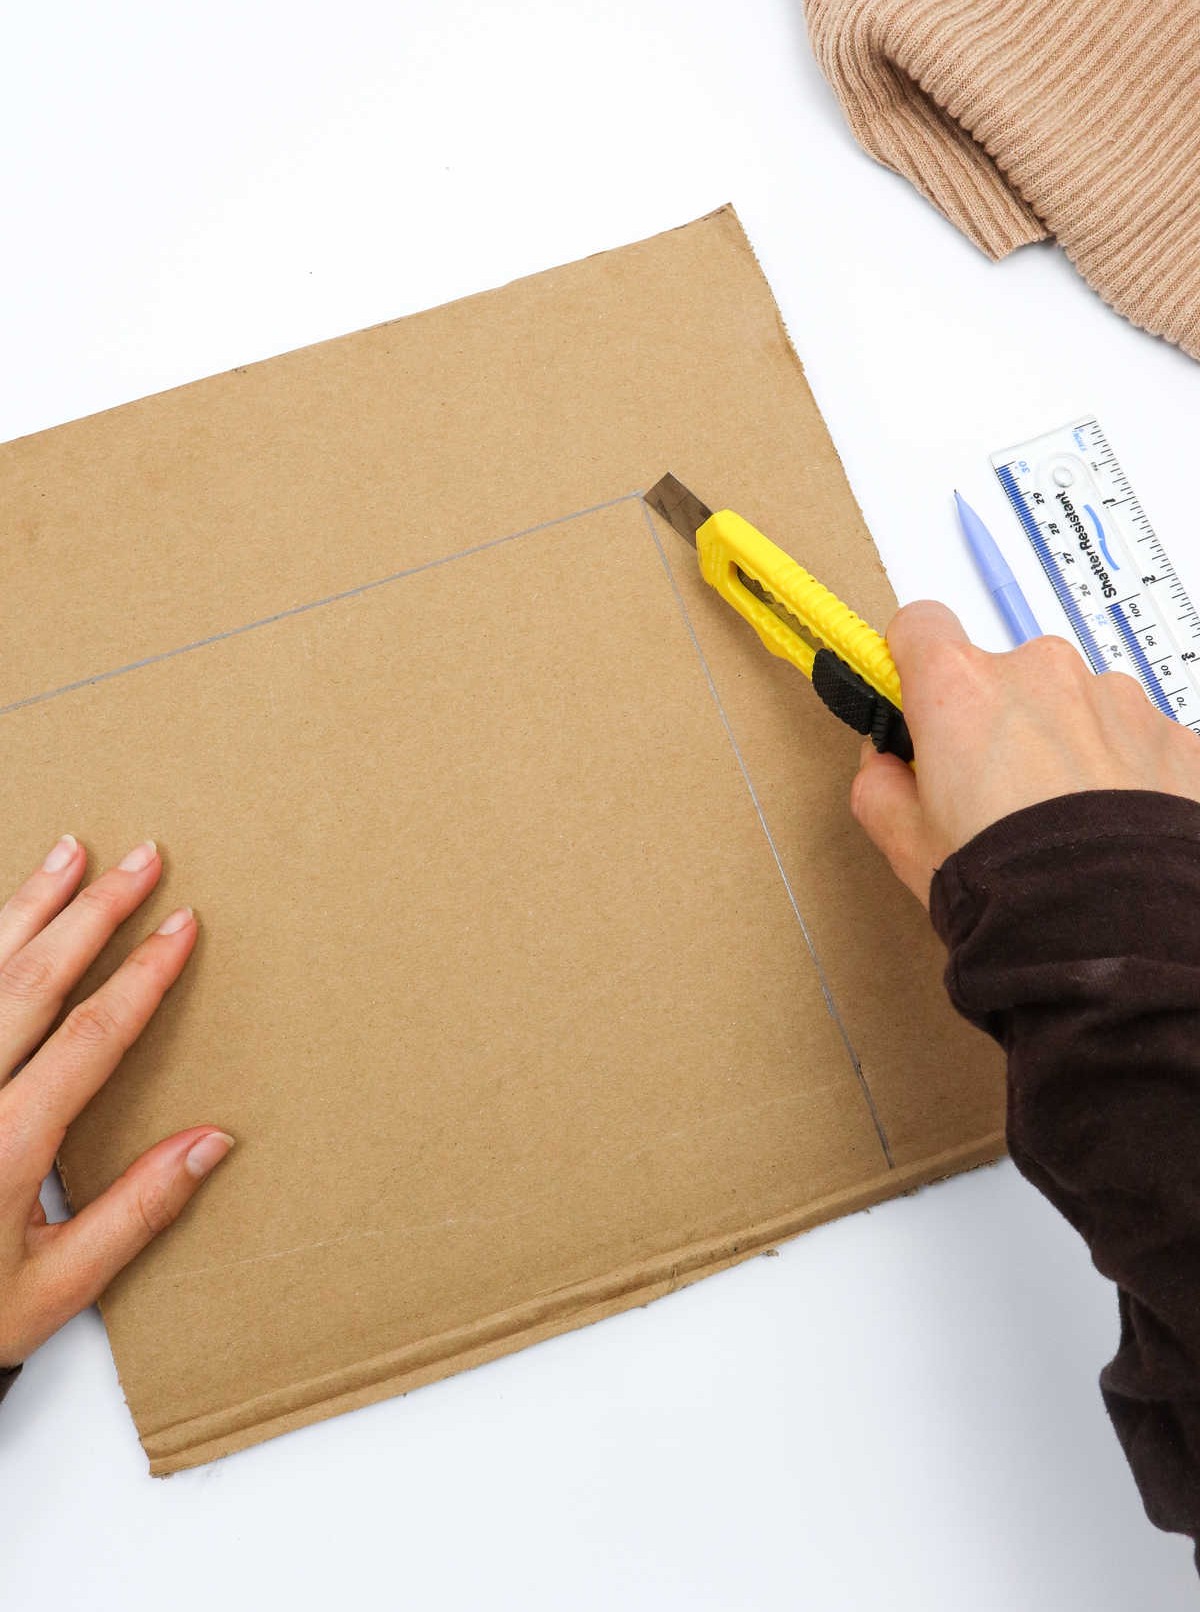

To move forward with crafting your custom gift box, start by carefully cutting the cardboard base using a box cutter. Make sure to wield the tool with precision, as this will ultimately determine the overall shape and structure of your final product. By taking the time to accurately cut the base, you’ll be laying the foundation for a beautifully presented package that’s sure to impress.
Step 10
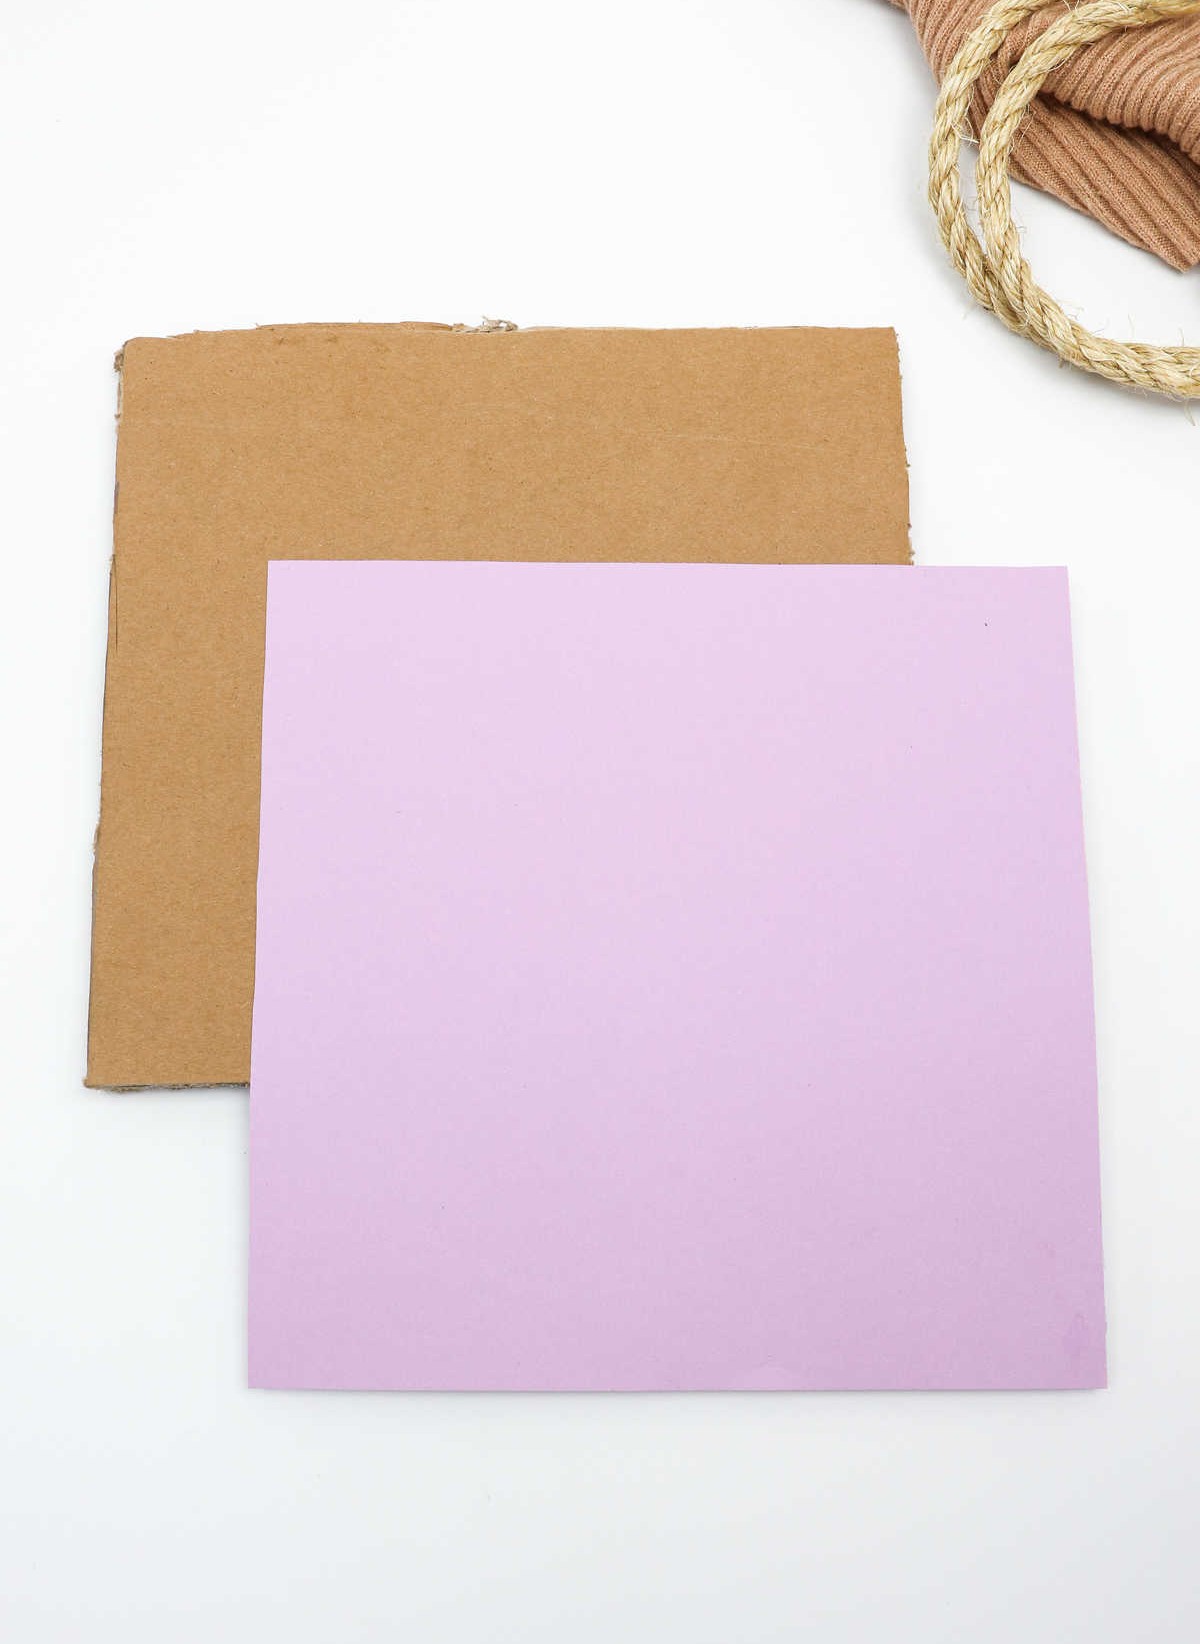

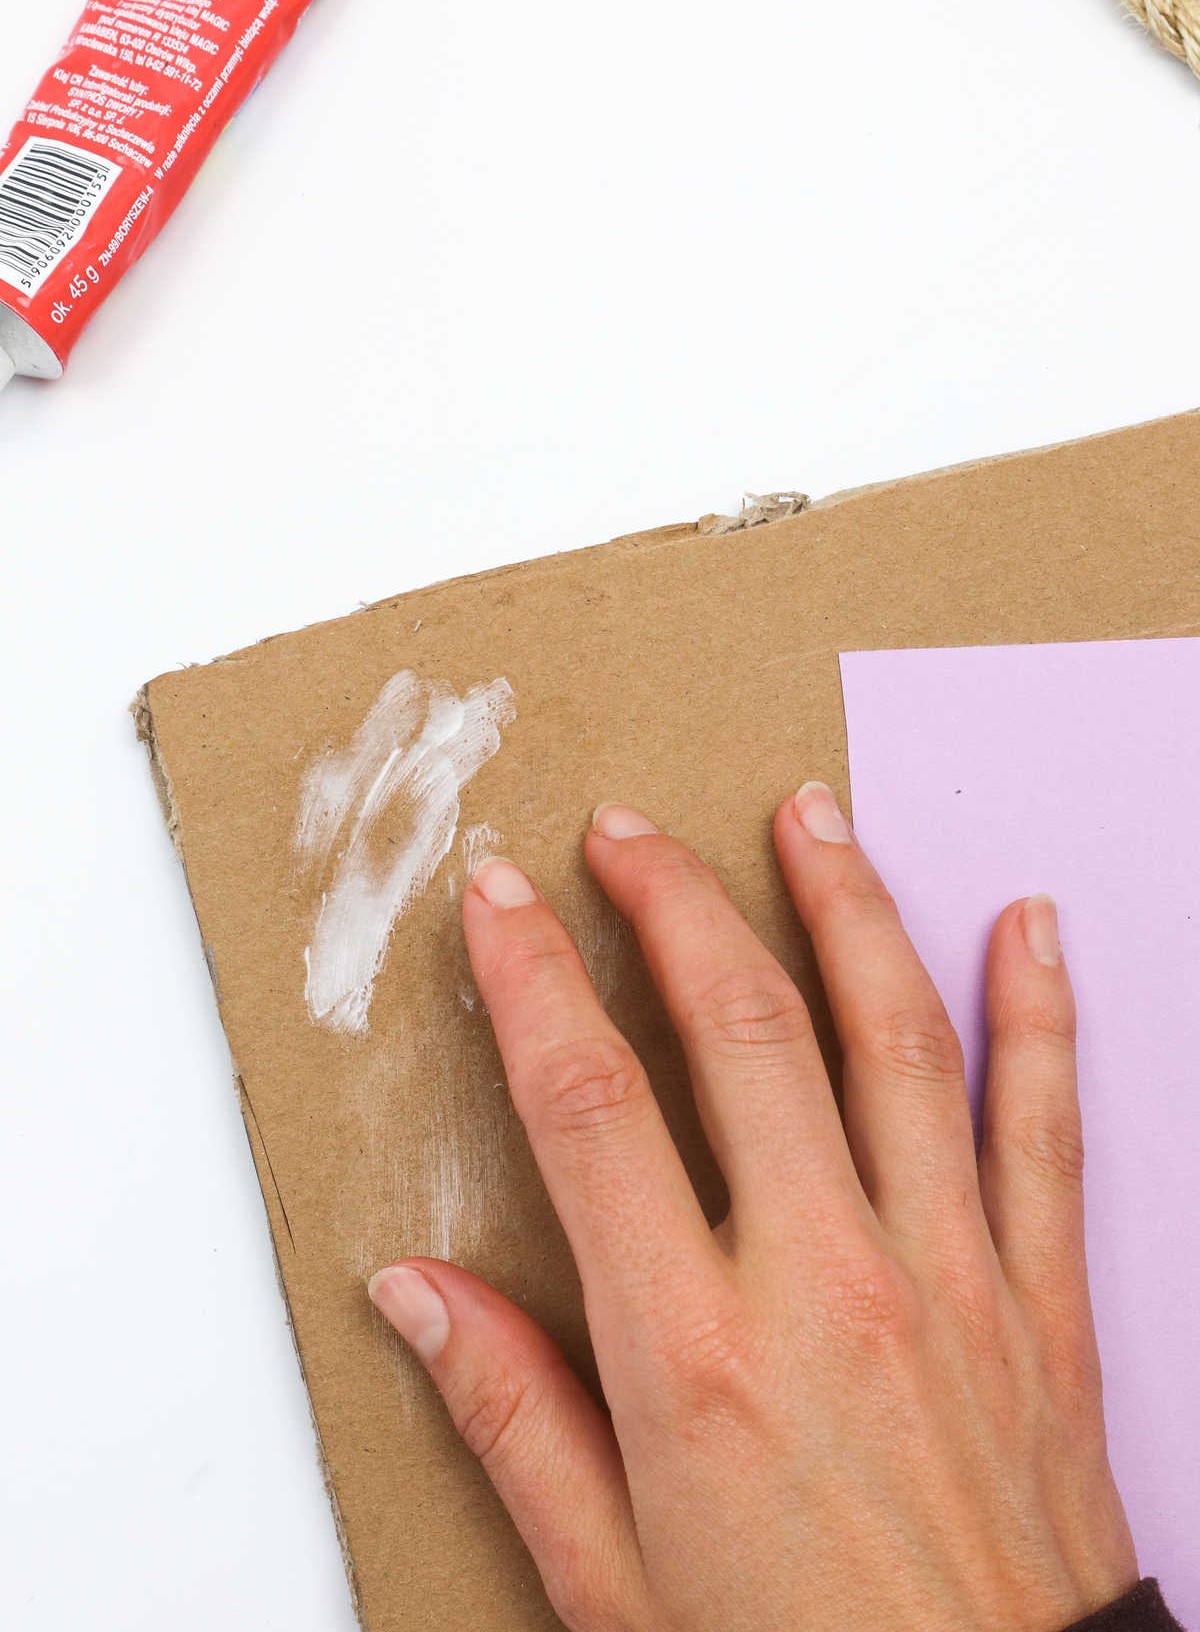
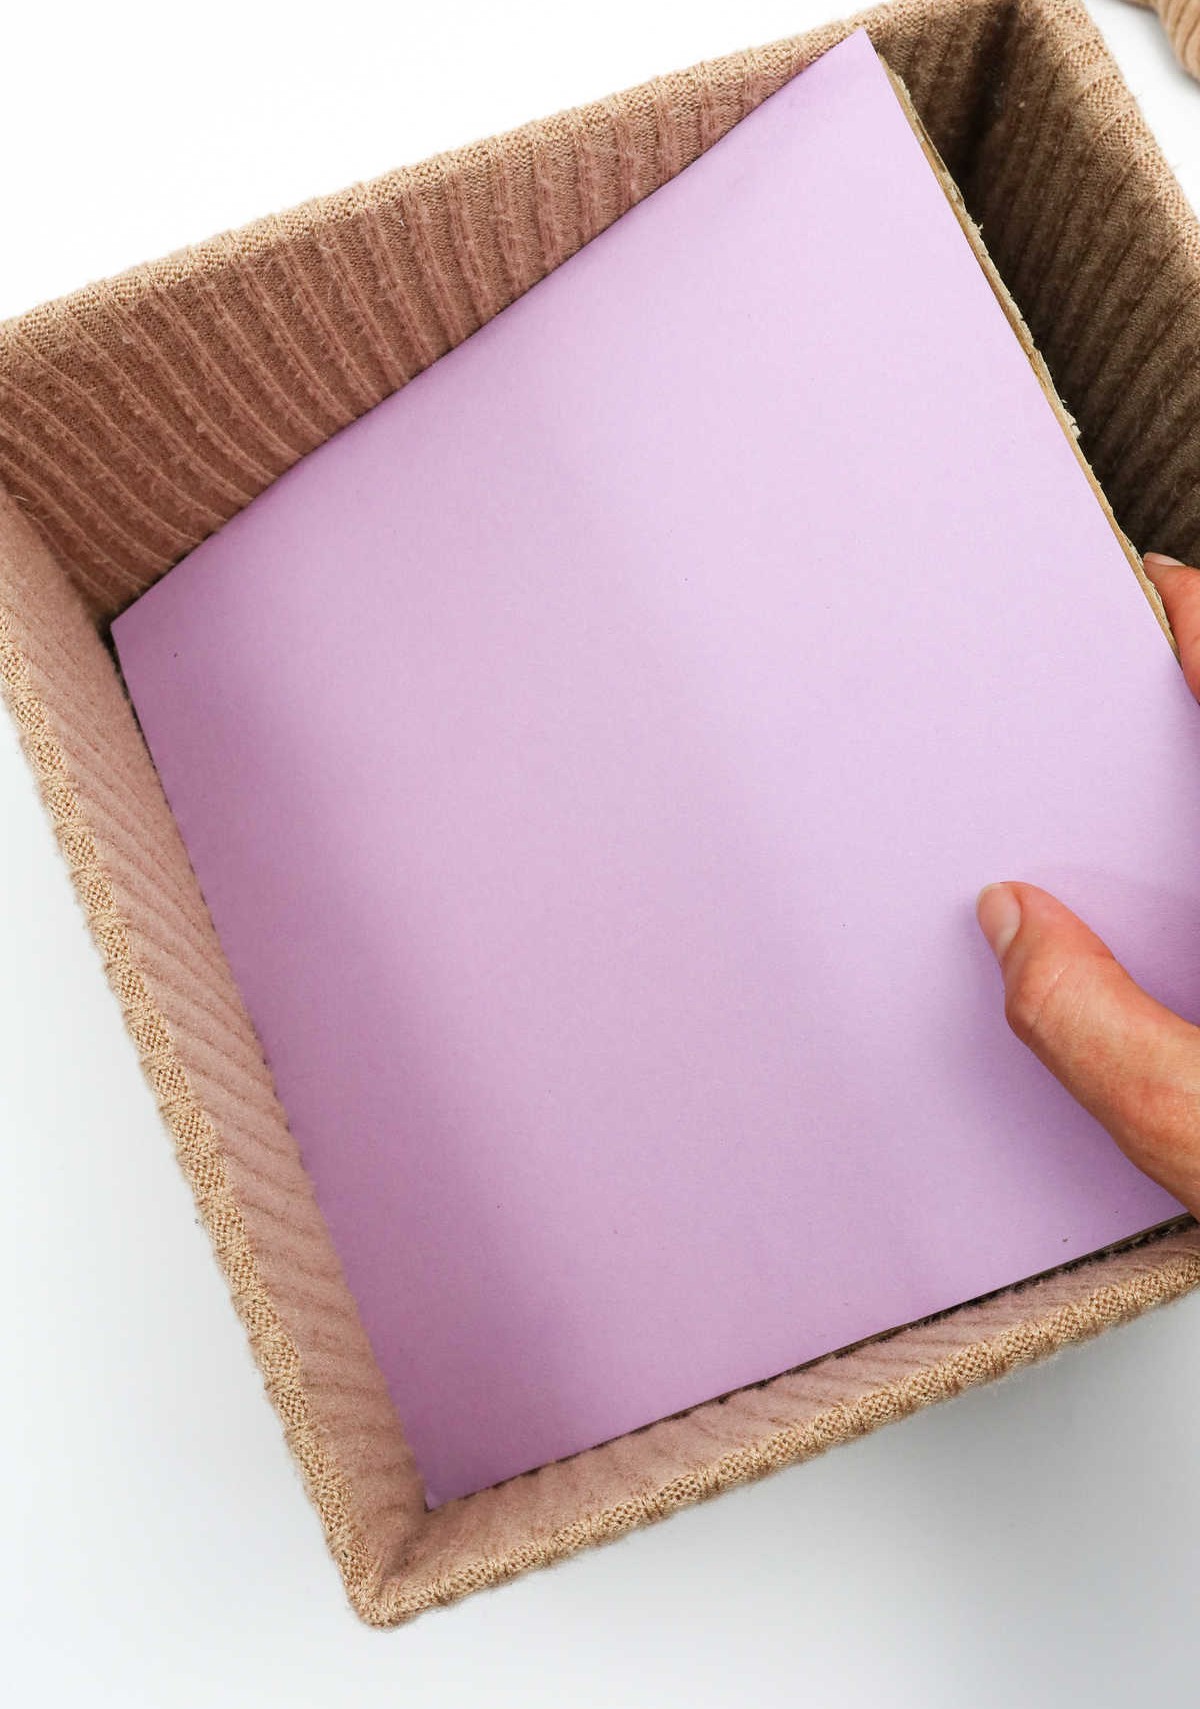
For an added pop of color, consider cutting craft paper to match the dimensions of your cardboard base. This allows you to line the cardboard with a vibrant sheet instead of plain old cardboard. To do this, apply adhesive to the back of the craft paper and attach it to the cardboard. Be sure to let the adhesive dry completely before moving forward.
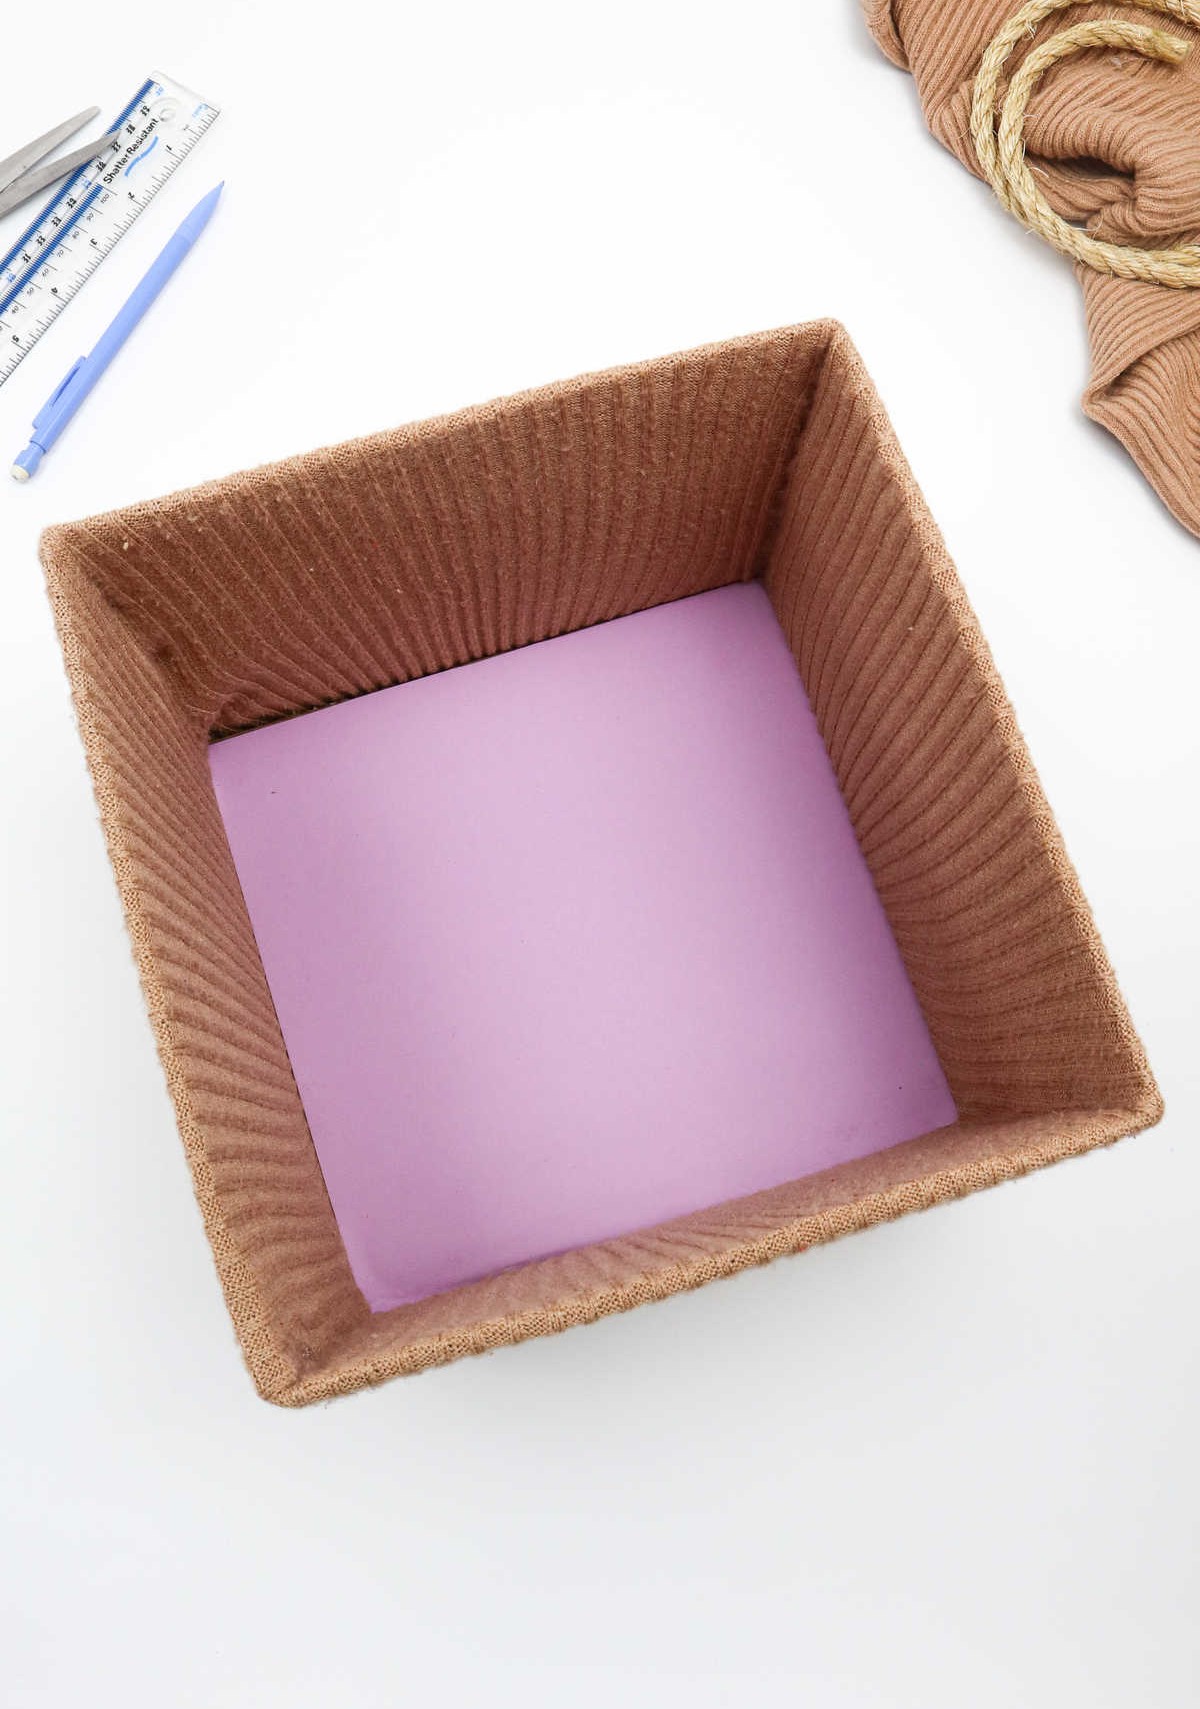
Once the adhesive has dried, place the cardboard base at the bottom of the box and press it gently into position.
This will ensure a smooth fit, covering any uneven folds that may have formed during the sweater’s creation.
Step 11
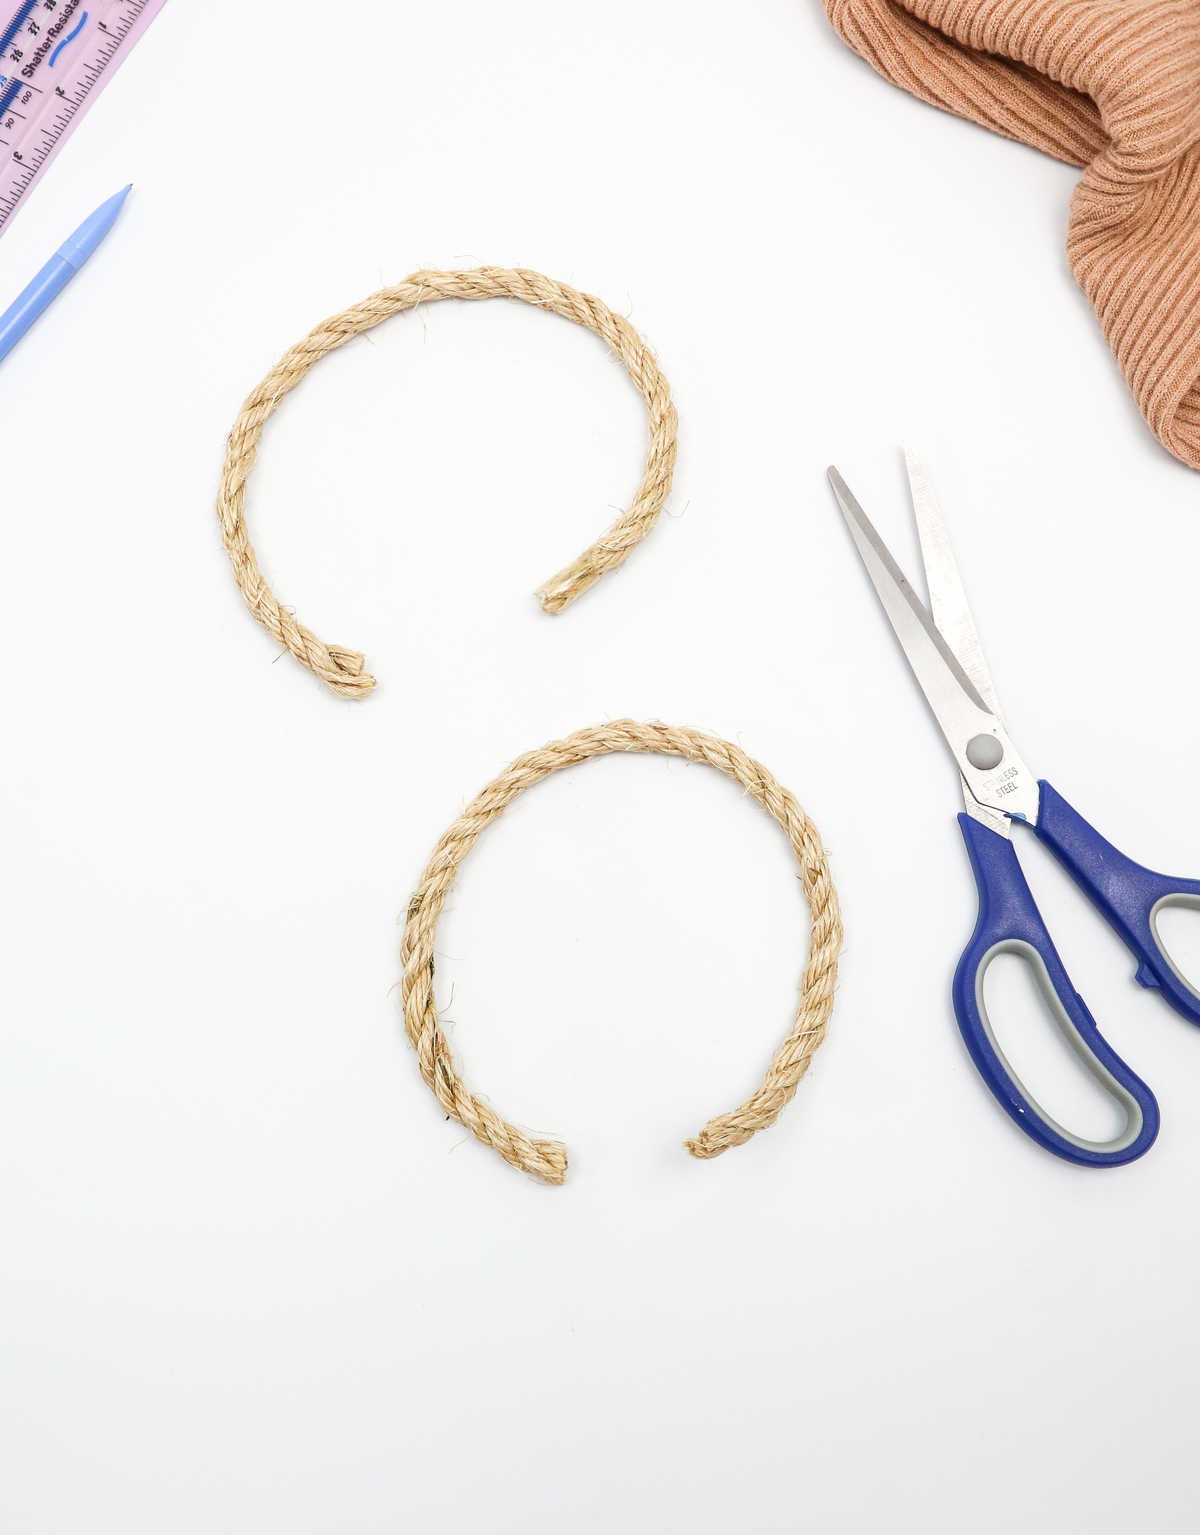
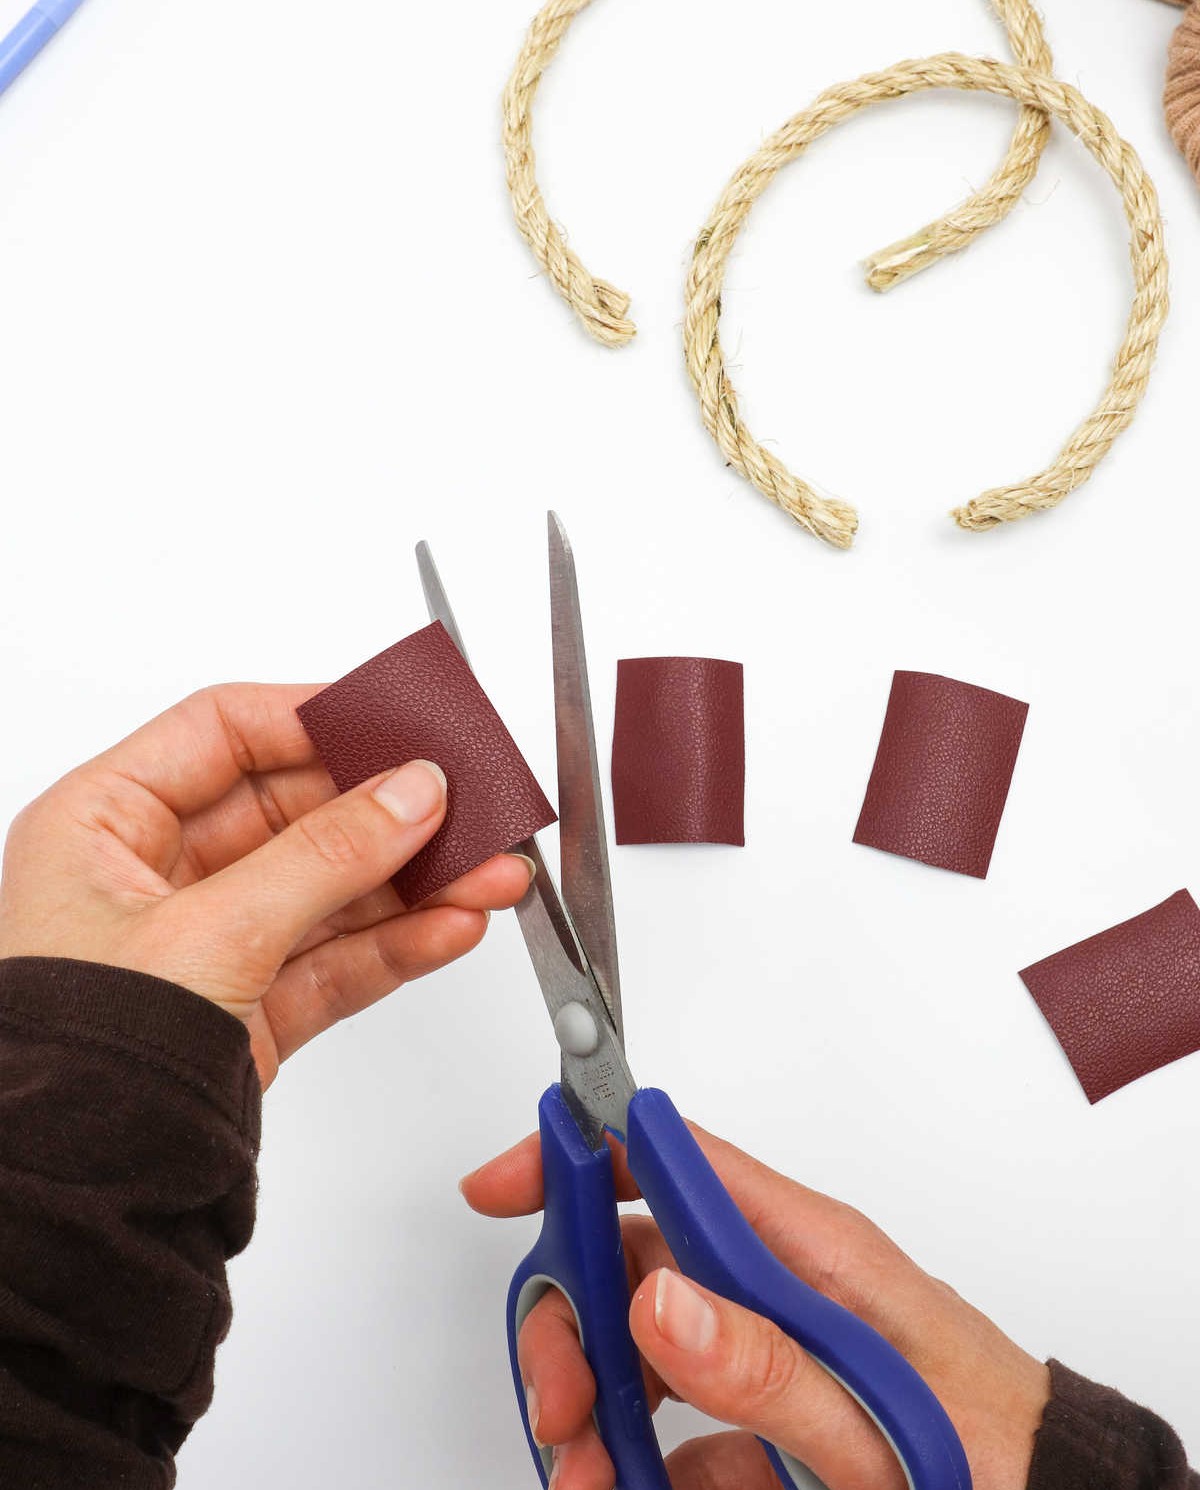
As you’ve finished constructing the wooden container, it’s now essential to add the finishing touches by attaching the handles. A suitable option is to utilize strips of natural fibers like jute or hemp rope. To accomplish this, simply take out your trusty scissors and cut two identical strips to serve as the handles.
Step 12
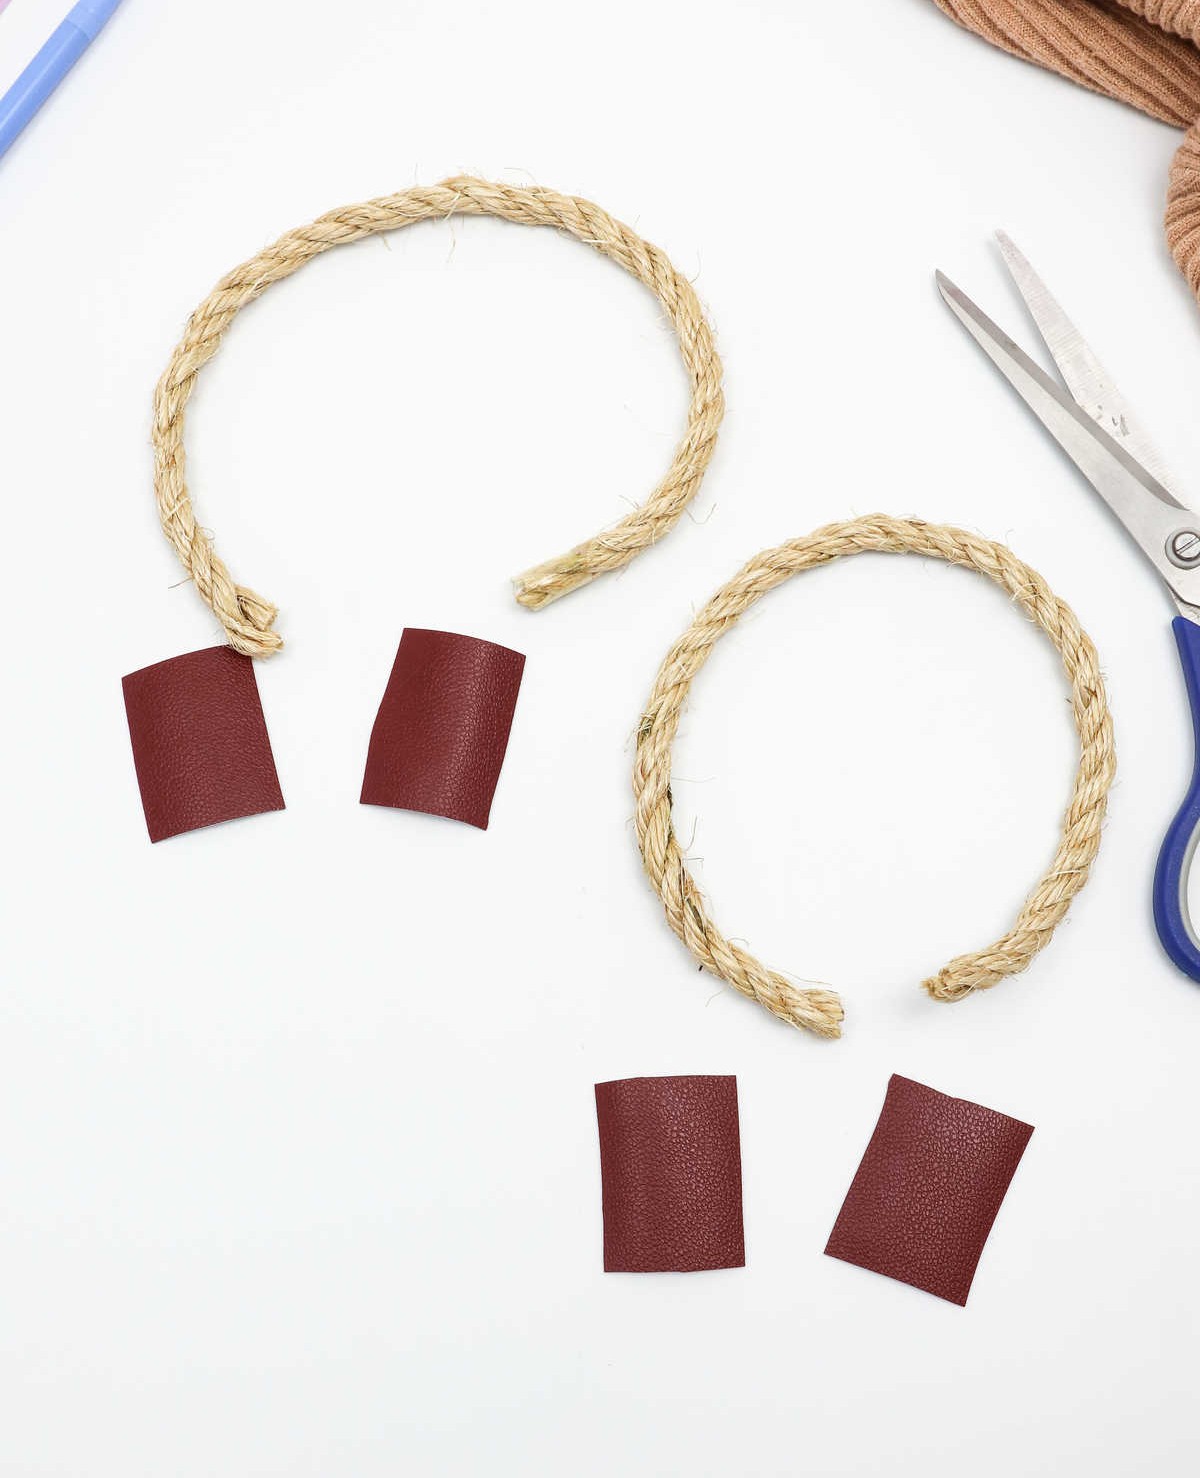

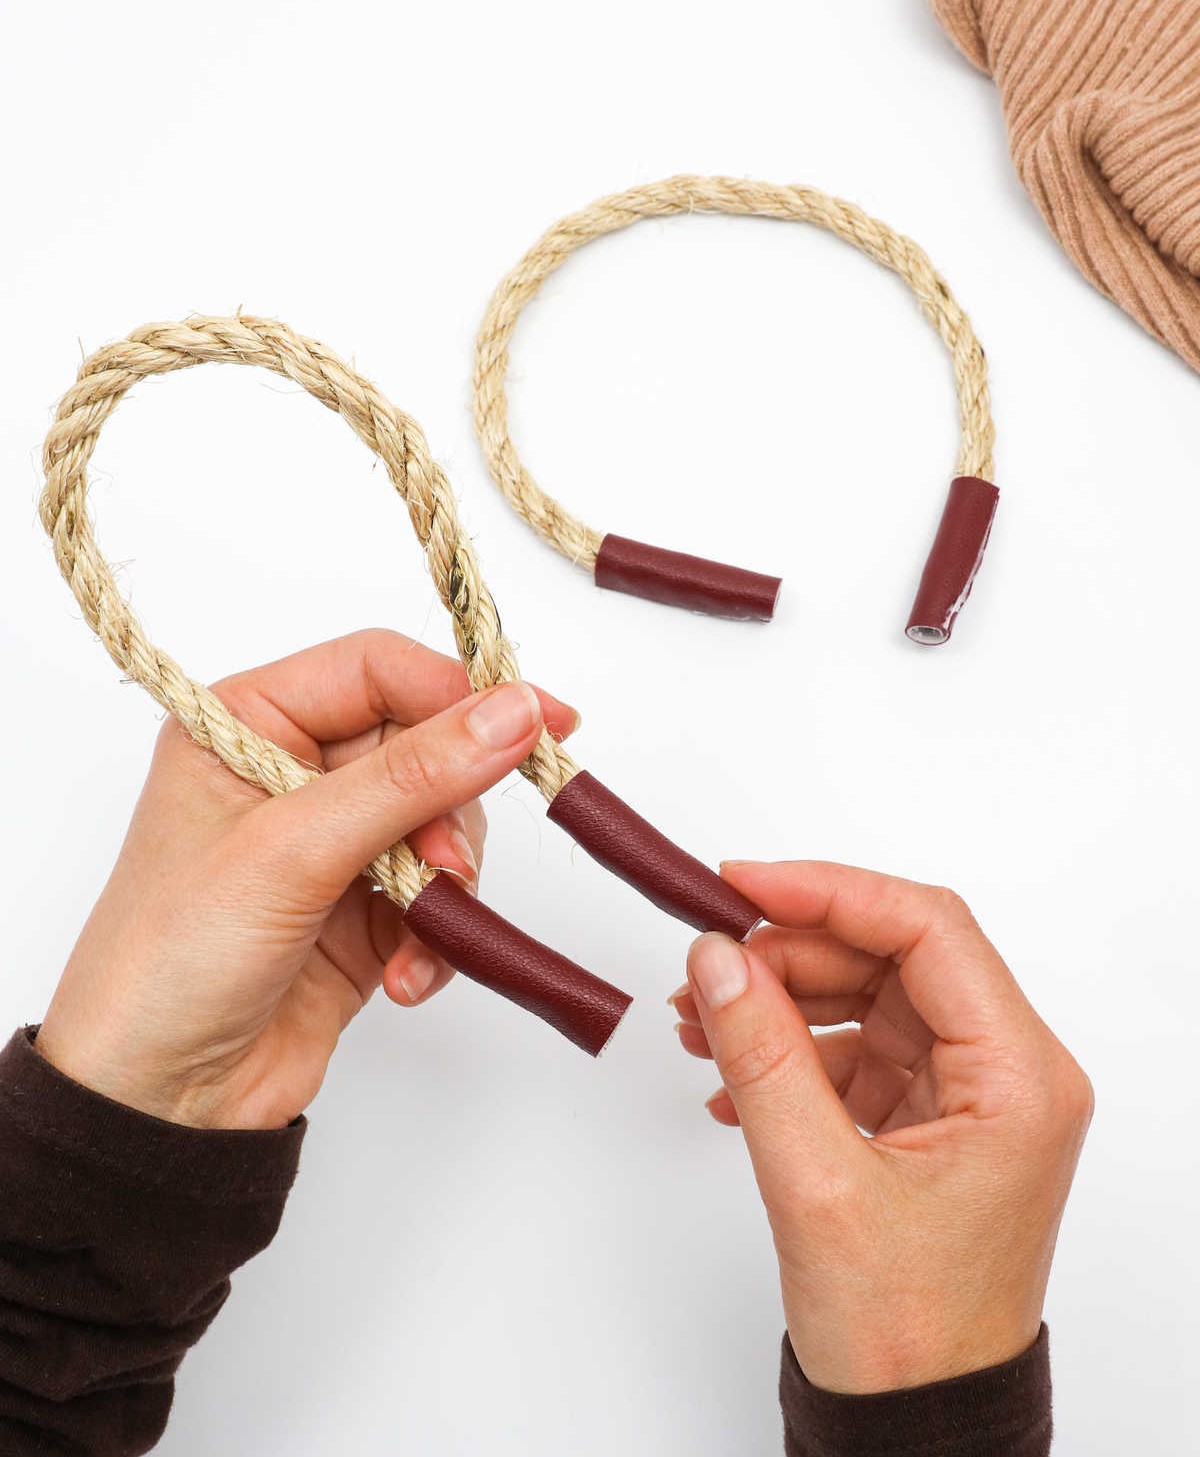
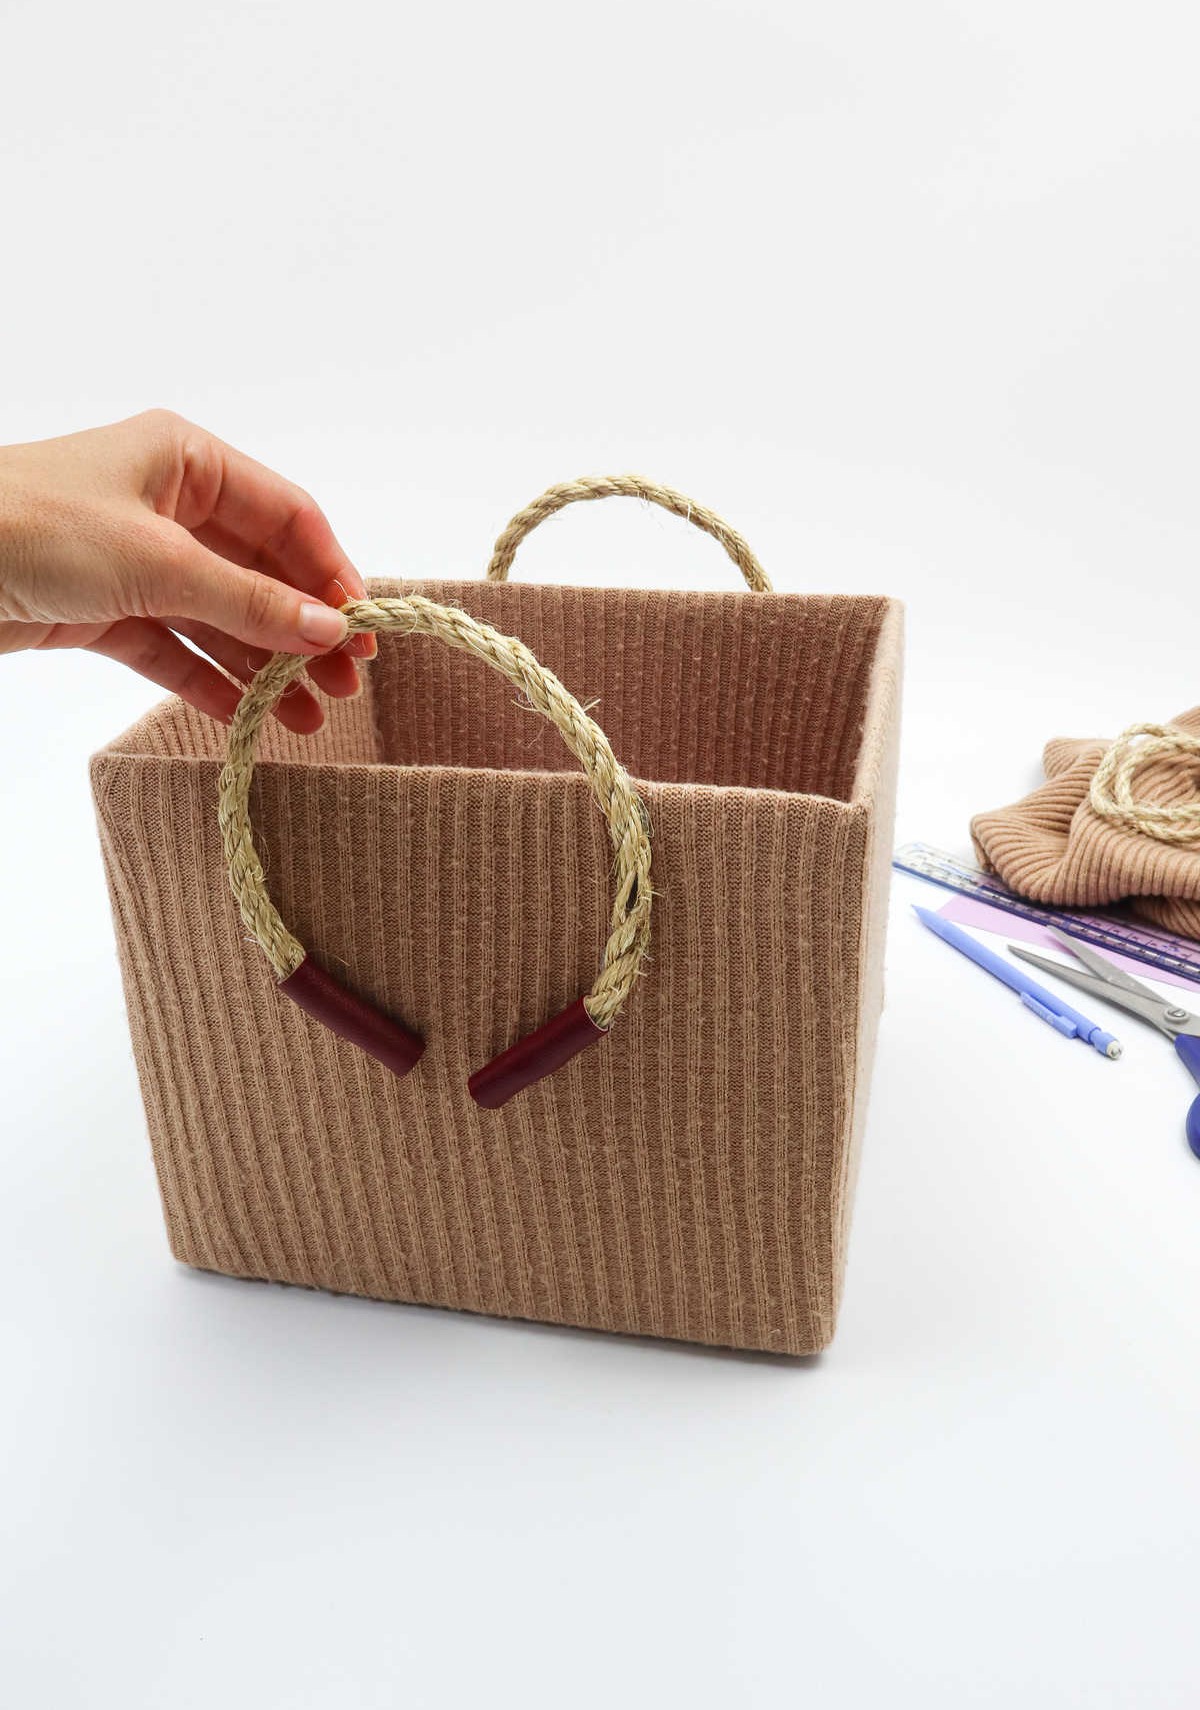
If you’re happy with the natural look of the rope, you can simply attach it to the box as is. However, if you’d like to add an extra pop of color or texture, consider covering the base of the rope with some colored or textured paper. This will not only give your box a fresh new look, but also provide a protective barrier for the ends of the rope. If the rope ever frays or unravels, this paper cover will keep everything secure and in place.
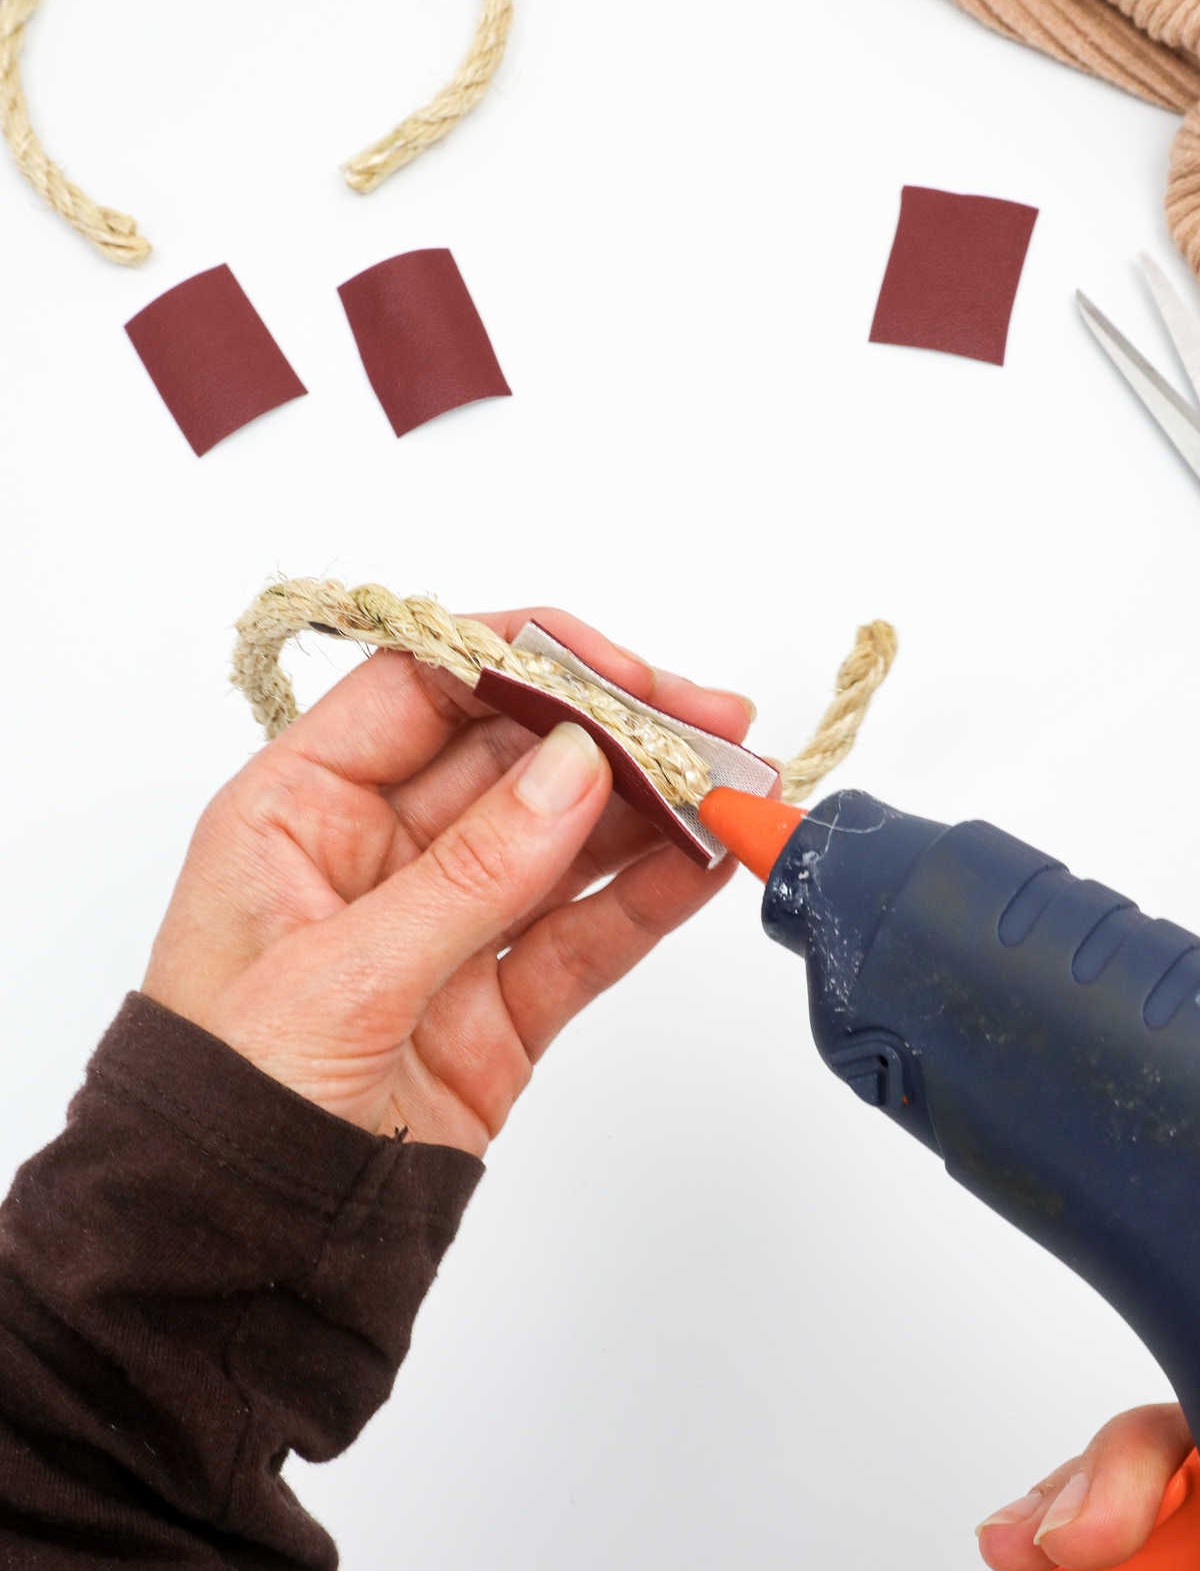
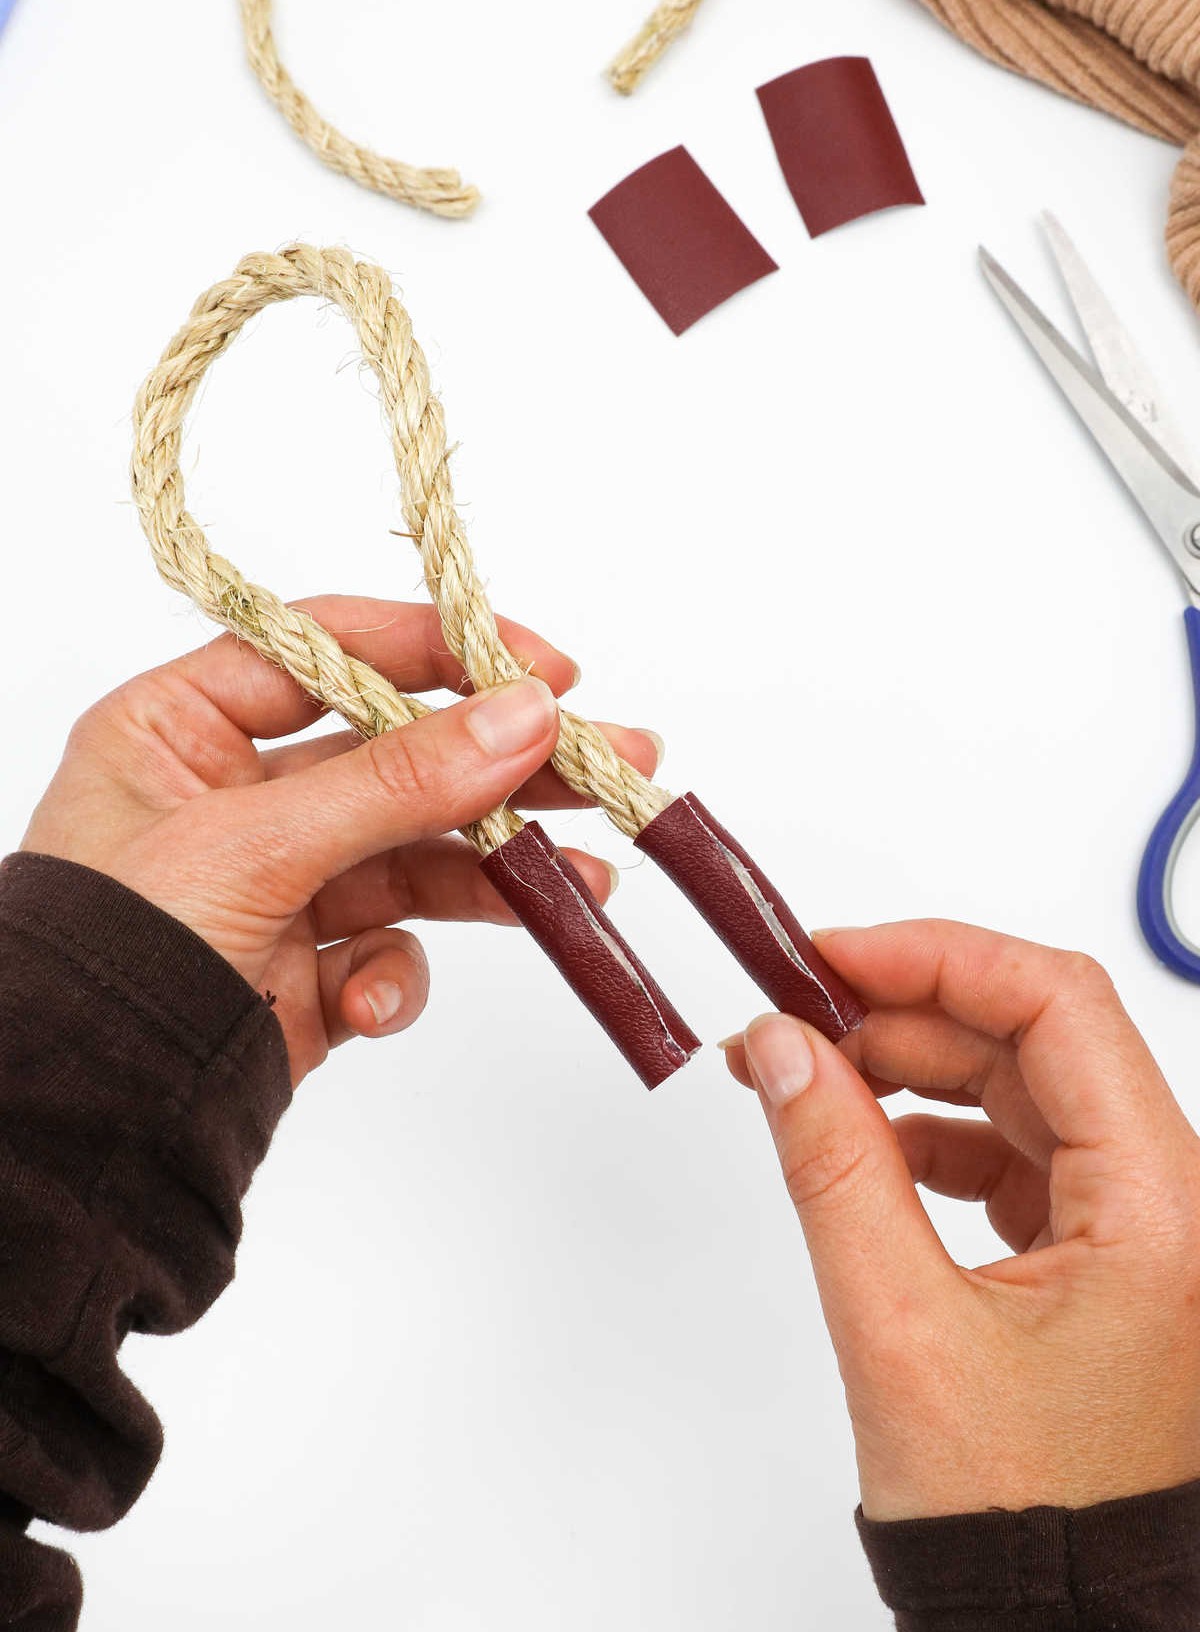
To achieve this look, start by cutting four identical pieces of paper – two for each end of the ropes. Next, twist each piece of paper around the base of its respective rope, holding it firmly in place as you prepare to use your hot glue gun. Apply a thin layer of glue along the rope’s length, then press the paper into place, ensuring it’s securely attached.
Repeat this process for all four ends of the ropes, and you’ll be left with a beautiful, cohesive look that adds an extra layer of visual interest to your box.
Step 13
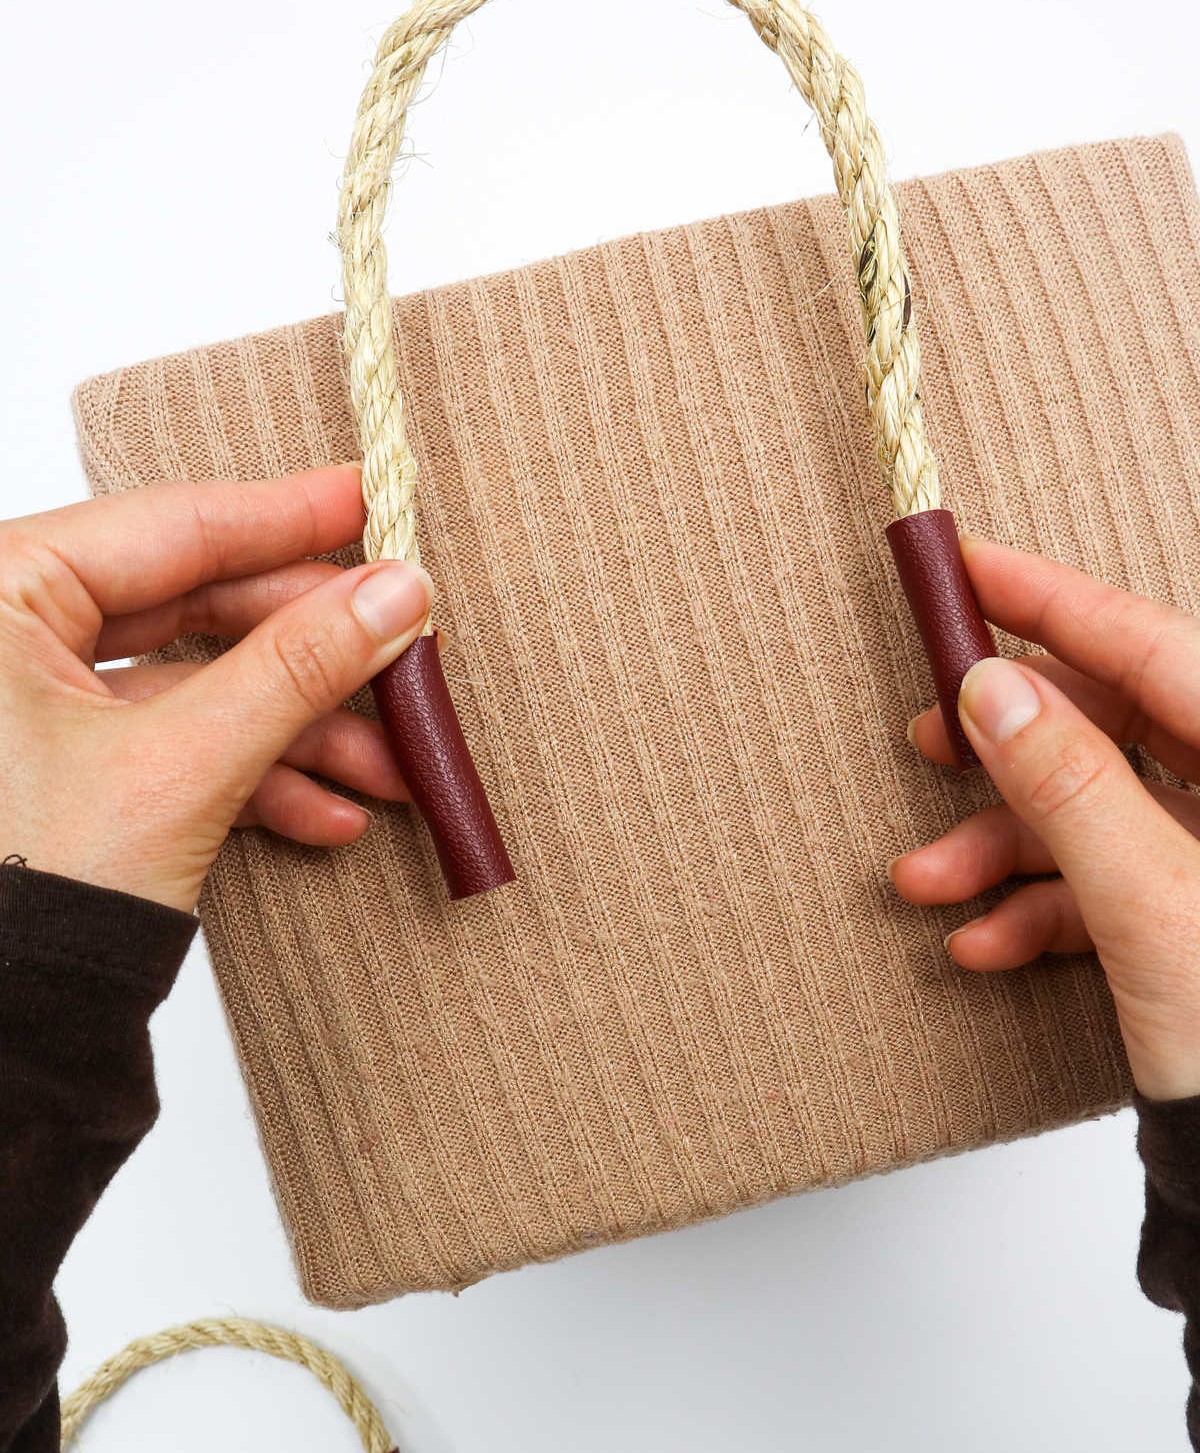
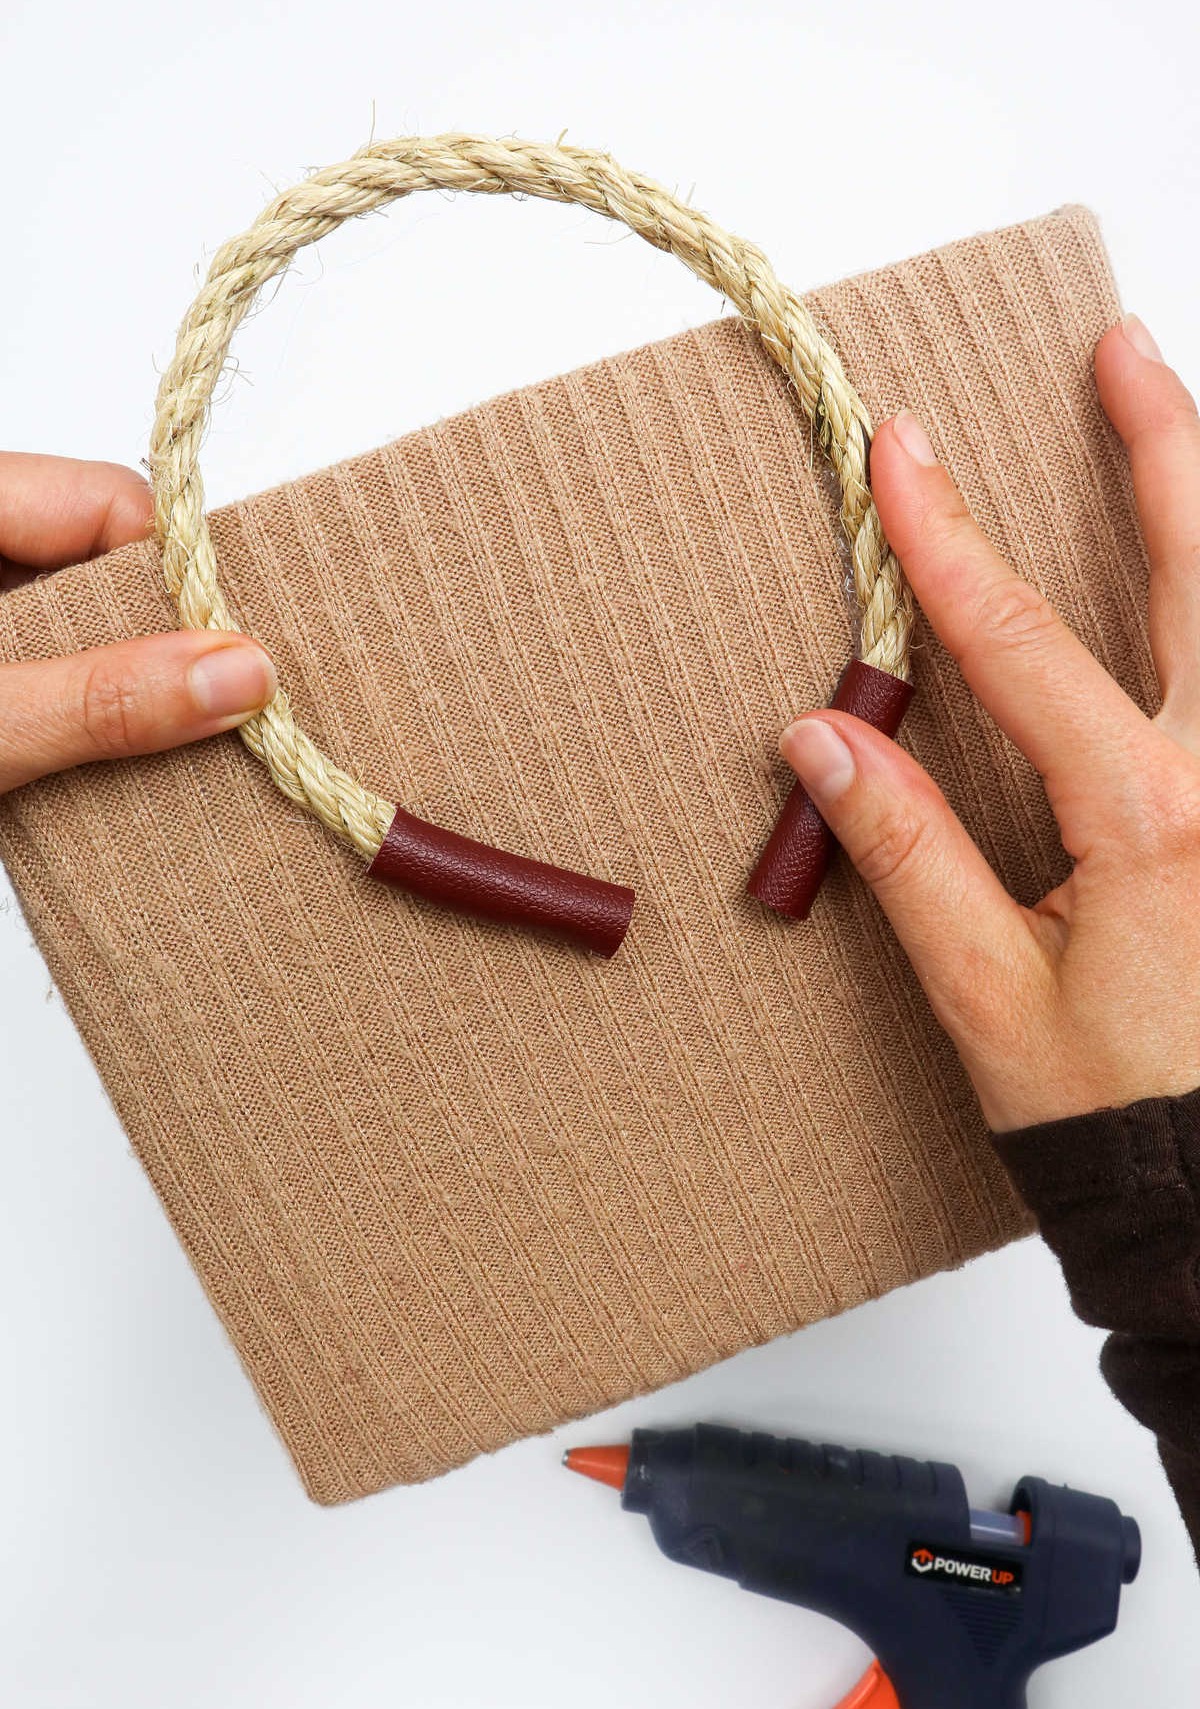
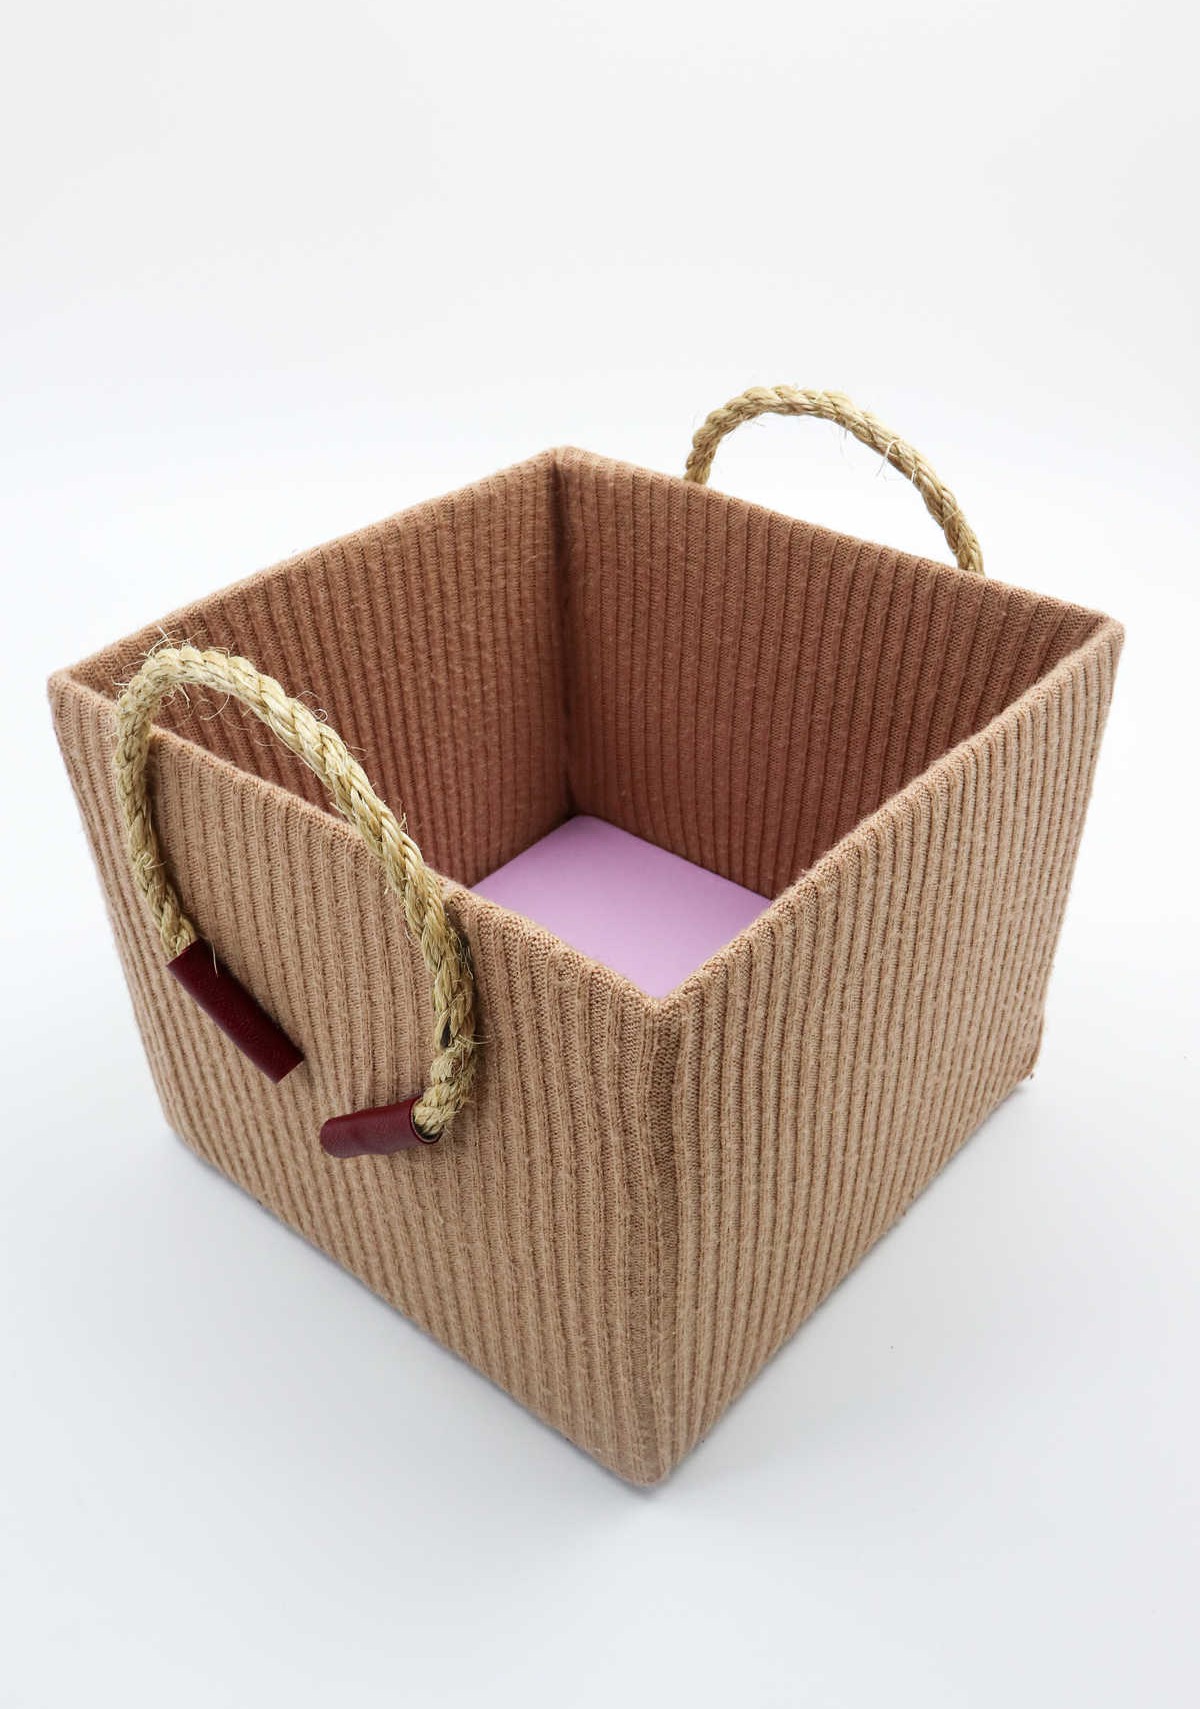
To complete the transformation, first attach the rope to the box. Next, grab your trusty glue gun and apply a small amount of adhesive to the designated area where you want the handles to be situated. With the glue in place, press the ends of the handle down firmly onto the box, ensuring they adhere properly before releasing. This simple step will secure the handles in place, allowing you to comfortably grasp your newly created storage box.
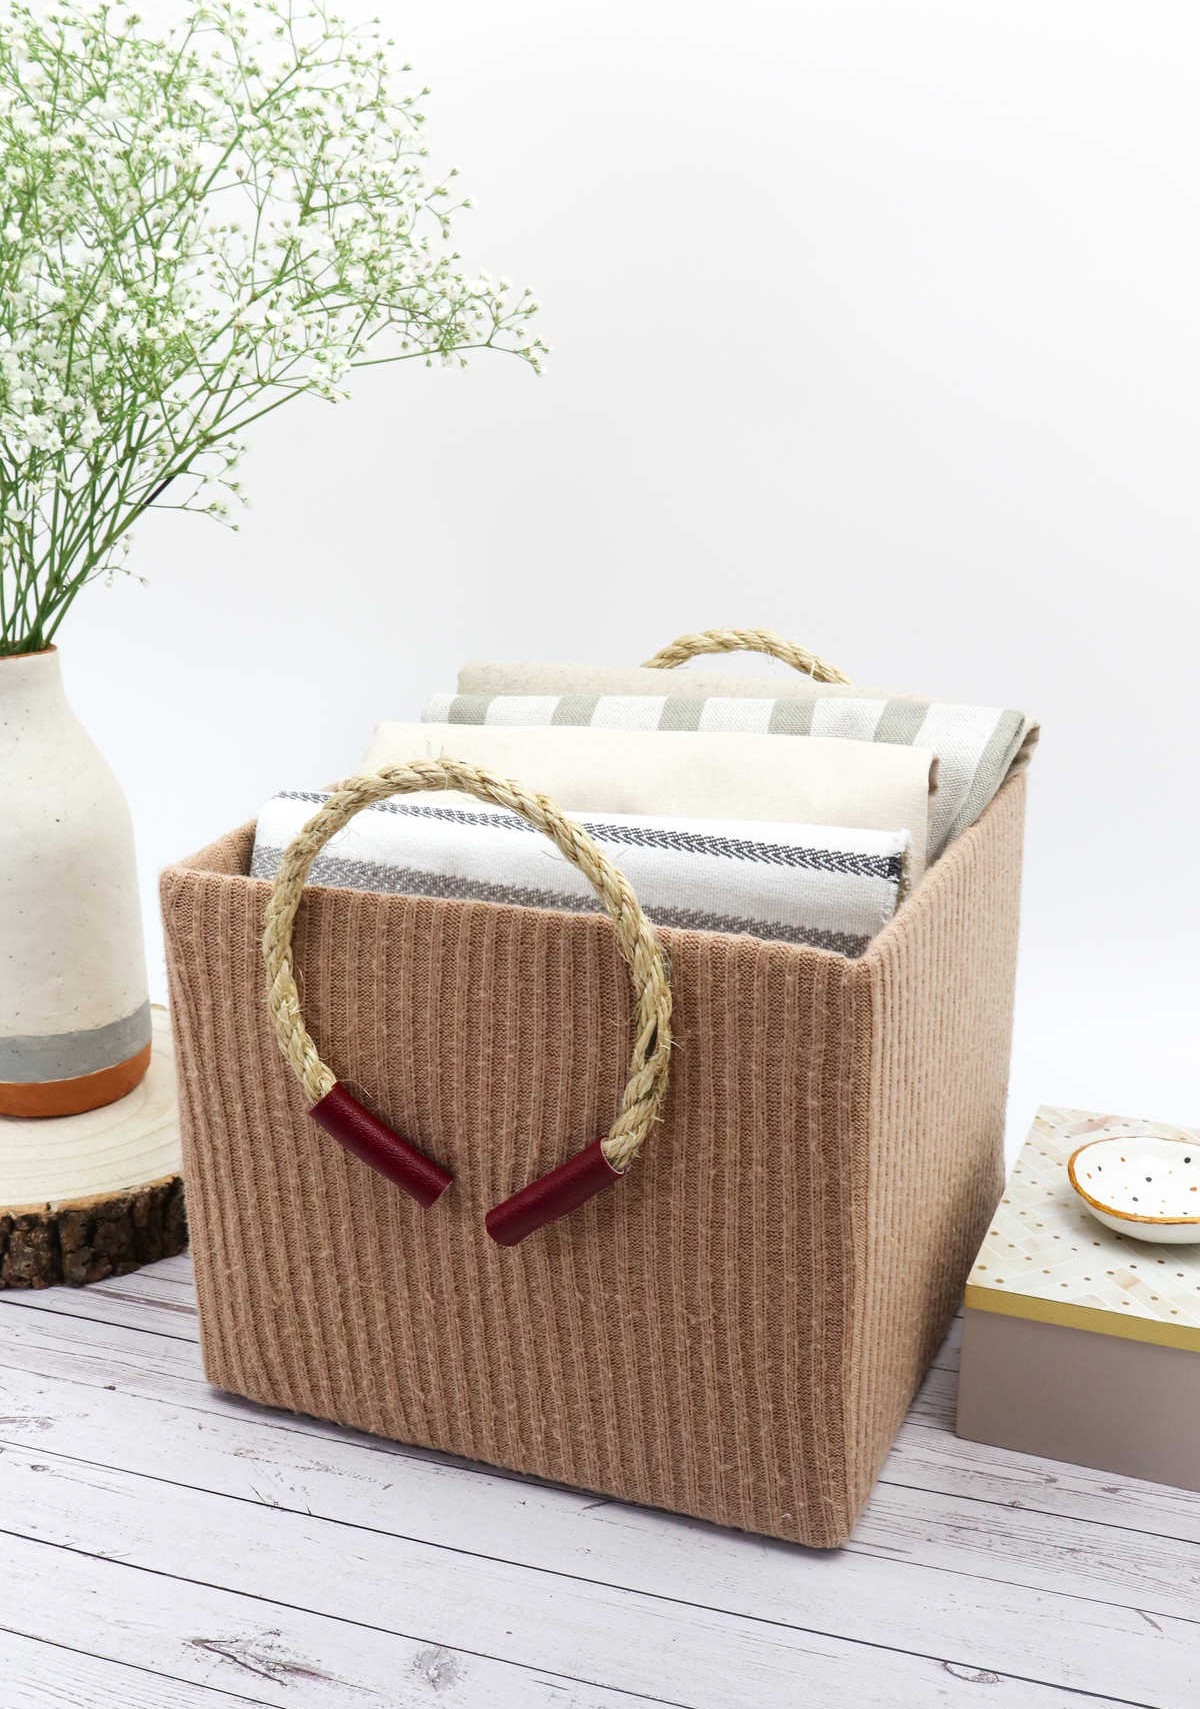
And just like that, your upcycled cardboard box is now a functional and practical storage solution, ready for everyday use.
What Can You Store In This Storage Box?
These versatile storage boxes offer a multitude of uses beyond just decluttering. They can be used to keep an array of items organized and within reach. From the mundane to the creative, here are some examples of what you can store in these boxes: Clothing items like underwear, socks, sweaters, shirts, towels, and more. Accessories such as bags and wallets, scarves, beanies, and gloves find a home here too.
Crafty types will appreciate storing yarn, sewing supplies, and other materials for their next project. Office workers can stash folders, files, documents, and papers in these boxes, while outdoor enthusiasts may prefer to store tools and equipment like camping gear or sports equipment. Cleaning supplies and pantry staples like jars, spice bottles, cereal boxes, utensils, and more are also welcome inhabitants.
Even electronics like wires, chargers, USBs, earphones, and other accessories can be neatly tucked away in these storage boxes.
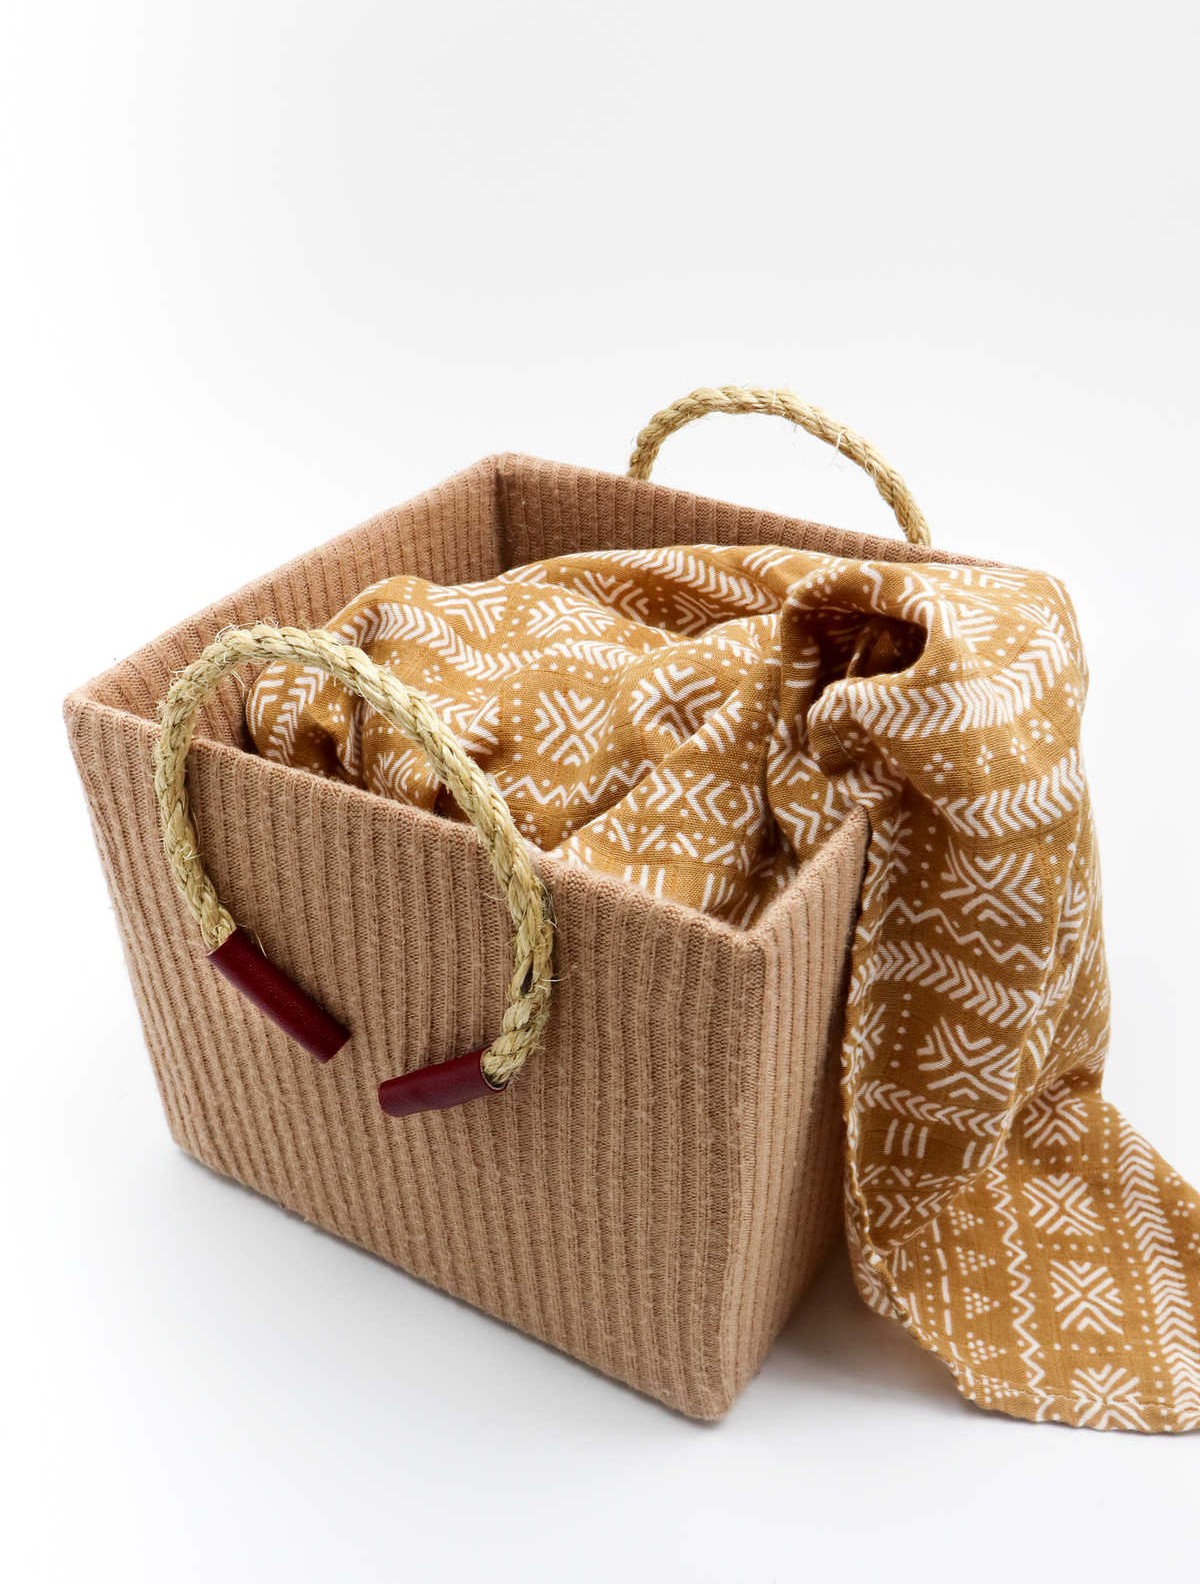
Storage Box Out of an Old Sweater
Transform an old sweater and a cardboard box into a functional organizer in just 35 minutes. With this simple DIY project, you can give new life to items you’d otherwise throw away.
To get started, set aside 25 minutes for active work and 10 additional minutes for preparation. The total time investment is minimal, but the end result will be a practical organizer that makes your daily routine easier.
With this project, you’ll need an old sweater, a cardboard box, and some basic crafting supplies. The estimated cost of materials is just $2, making it an affordable way to declutter and organize your space.
Equipment
When it comes to crafting and DIY projects, having the right tools can make all the difference. A well-stocked toolbox or work area is essential for ensuring that your projects turn out as planned. With this in mind, some of the most essential items to have on hand include a hot glue gun, scissors, glue, ruler, and retractable knife. Additionally, a pencil is also a must-have for jotting down notes and making quick sketches.
By having these basic tools at your disposal, you’ll be able to tackle even the most complex projects with ease.
Materials
Instructions
To begin, gather all necessary supplies. When selecting a sweater for this project, choose one that is stretchy and elastic. Next, cut the sweater just under the arms, then pull it over the box until one end reaches the base of the inside of the box. Ensure the other end can reach the bottom of the outside of the box. Flip the box so the base is facing upwards and line the sweater over the edges to create an inch-wide strip that encases all sides.
Using a hot glue gun, attach the four sides with adhesive, then press the ends of the sweater down to adhere it to the base of the box. Pinch the four corners and press them flat against the base, securing the fabric in place. Once the glue dries, flip the box back over and work on the sweater inside the box. Run a finger along the edges of the box to crease the fabric all the way down to the base, then pull the sweater back and reattach it to the edges using hot glue.
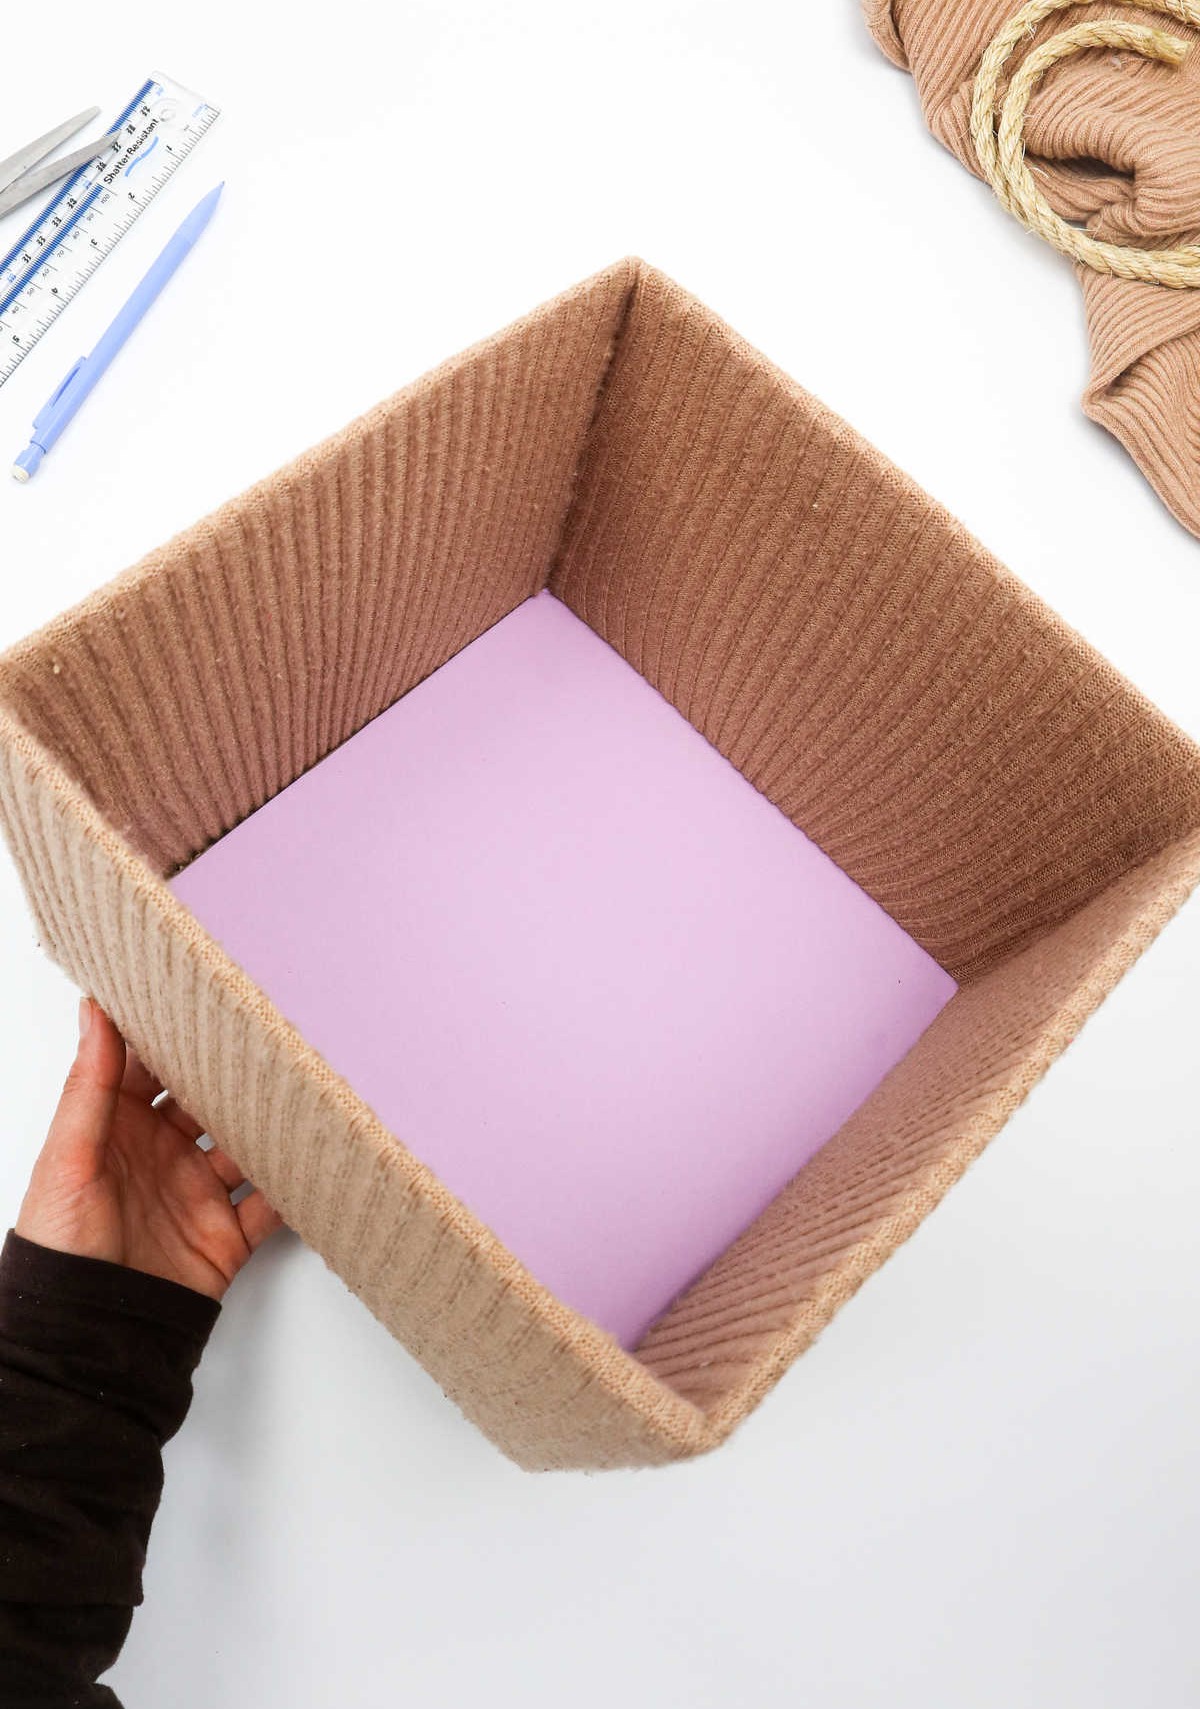
Smooth out the fabric across the walls of the cardboard box, ensuring all four sides are firmly attached to the box, from top to bottom. To create a base for the box, cut a sheet of cardboard to size, measuring both sides of the box over the mouth and across the opening. Use a pencil and ruler to transfer these measurements onto the cardboard sheet, marking the dimensions of the base. Draw two lines to connect the markings, creating a square that matches the base of the cardboard box.
Cut out this square from colored craft paper, then align it with the cardboard base before gluing them together. Place the cardboard cutout at the bottom of the box, ensuring it covers the sweater. For the handles, cut two strips of rope and attach them to the sides of the box as desired. To prevent fraying, cover the ends of the rope with paper by cutting four strips and gluing them around each strip of rope.
Finally, secure the handles to the sides of the box and your storage container is complete.