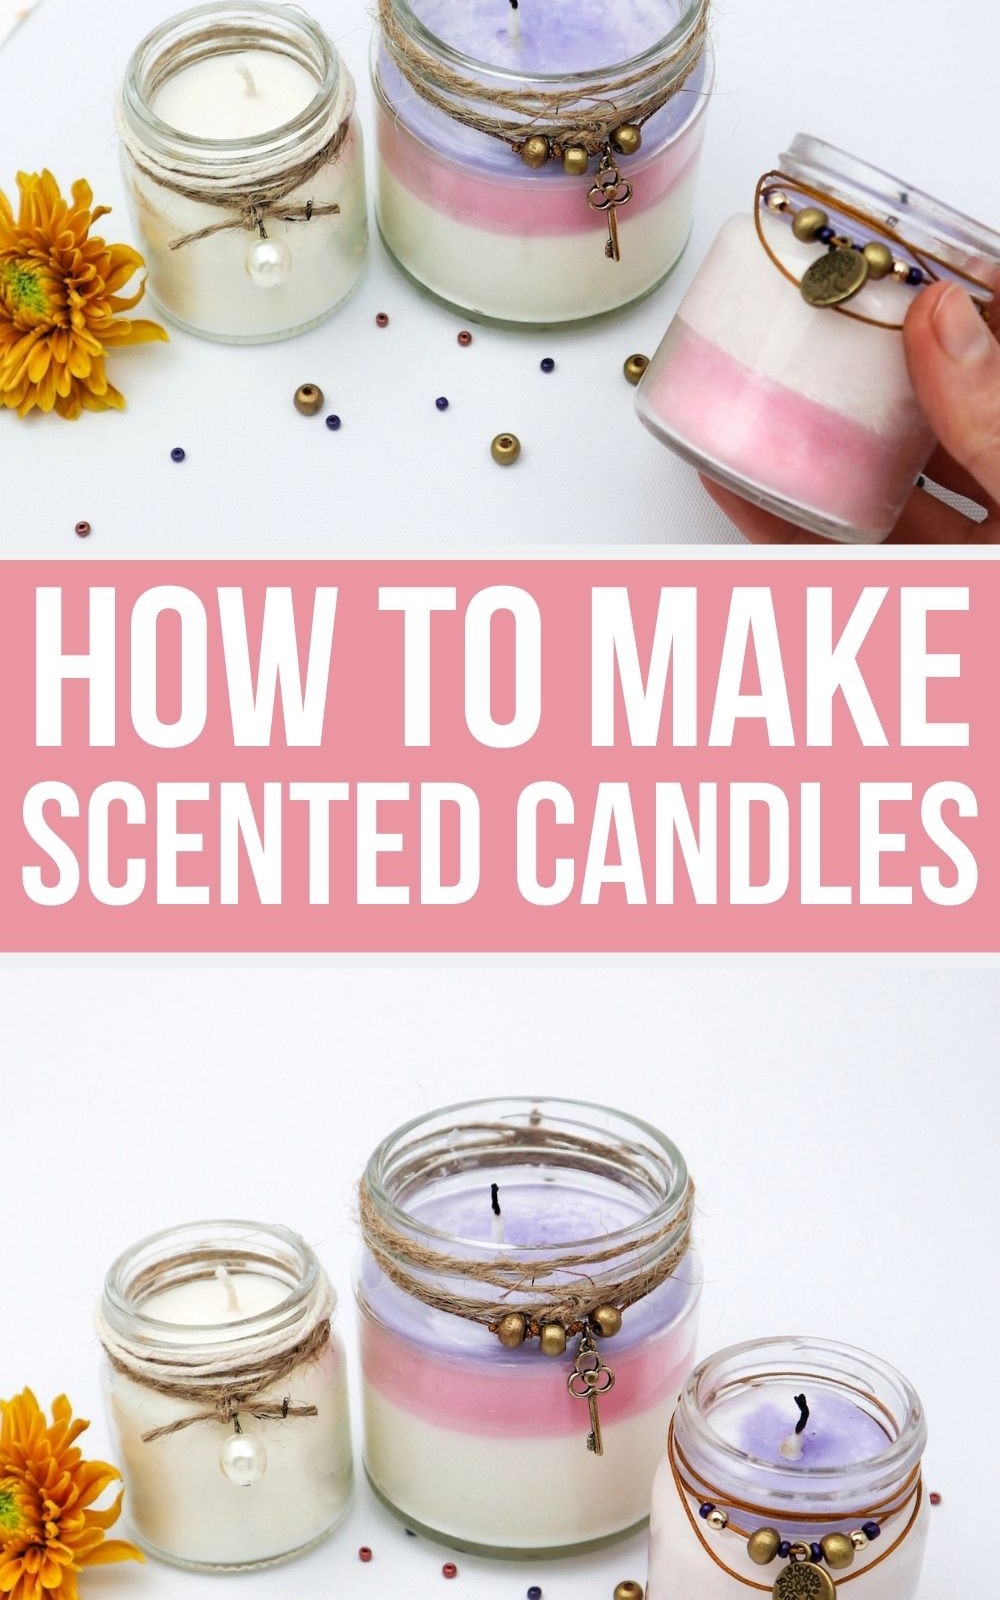
Imagine having the power to create your own unique scented candles that not only fill your space with a delightful aroma but also make for a thoughtful gift or decorative piece. Making your own DIY scented candles is an accessible and enjoyable DIY project that can be completed in no time.
The benefits of having multiple scented candles scattered around the home are undeniable.
They have the ability to transform the ambiance of any room, transporting you to a serene oasis with just a simple flick of the flame.
While it’s easy to find scented candles at stores or online, why not take it up a notch by getting creative and making your own? With minimal materials required, this DIY project is perfect for repurposing old candle jars and giving them new life. So go ahead, get crafty, and enjoy the rewarding experience of creating something with your own hands!
What You’ll Need for Candles
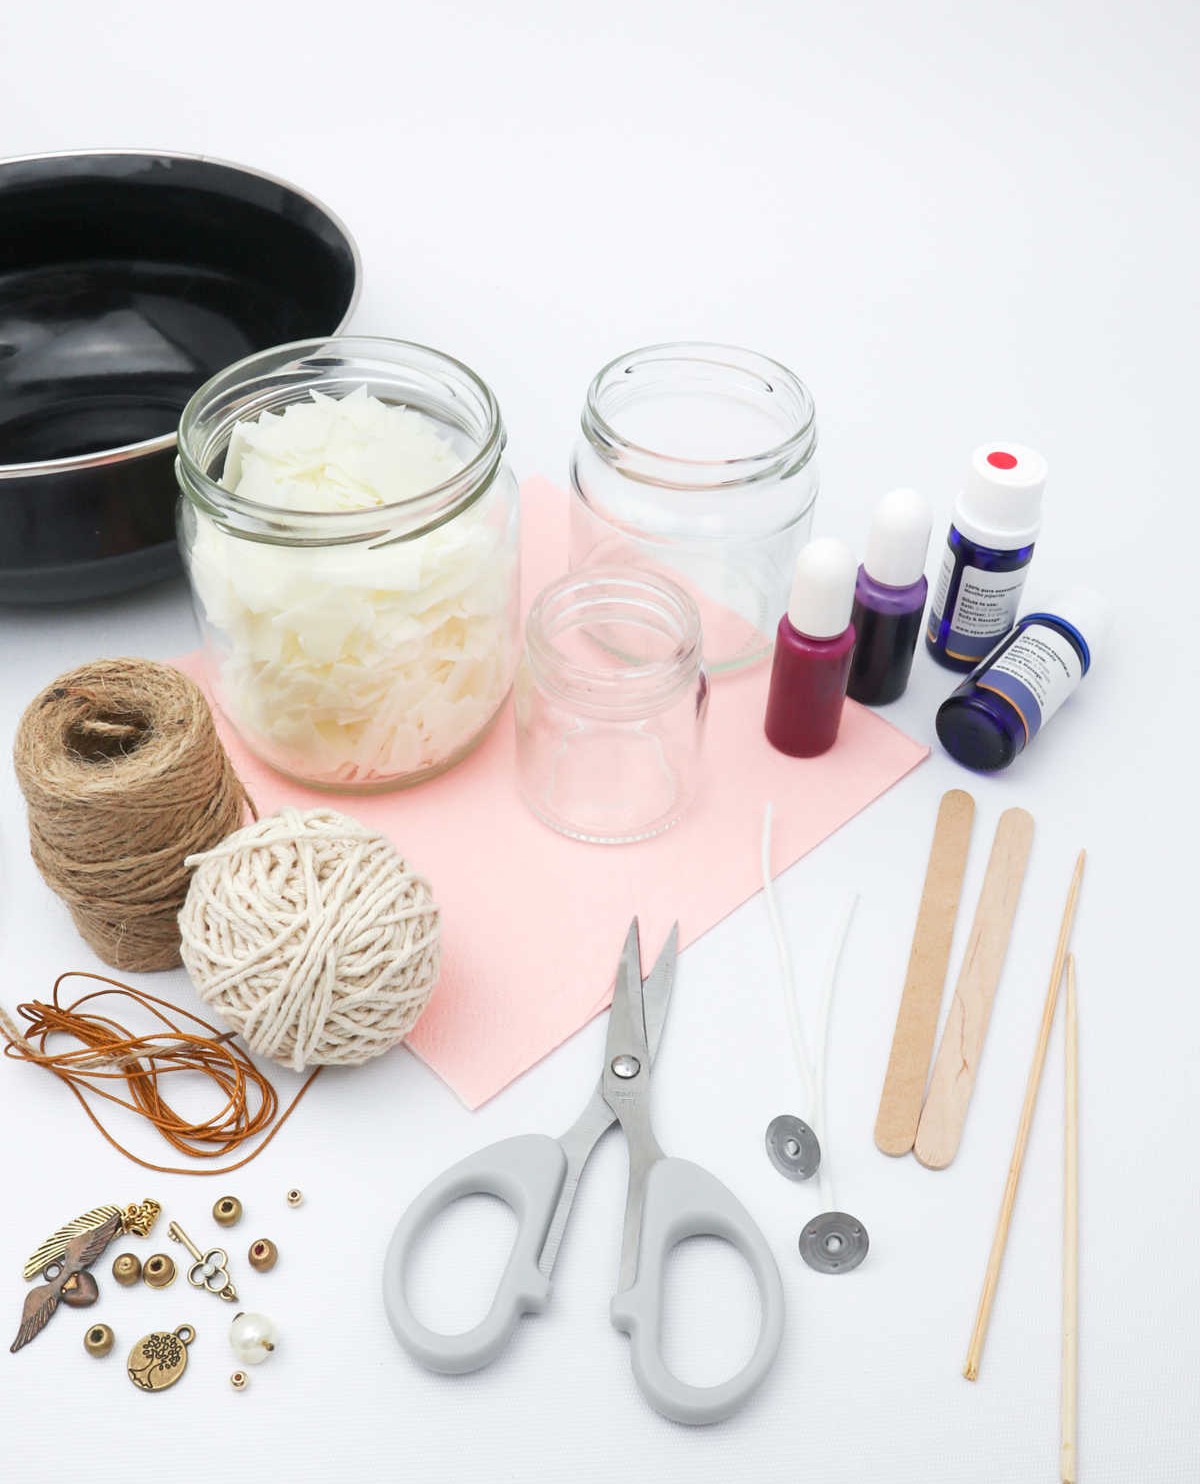
To create your DIY scented candles, you’ll need the following supplies: a collection of mason jars, soy wax flakes in sufficient quantity for melting, wooden skewers and lolly sticks for stirring and shaping, scissors for trimming any excess wick material, essential oils to impart your desired fragrance, candle dye for coloring your wax, pre-cut candle wicks for igniting the flame, an old pot for melting the wax, some jute twine for securing the wicks in place, and finally, charms or beads (if you’re feeling extra creative) to add a personal touch to your finished candles.
How to Make Scented Candles
Crafting candles at home is an accessible and enjoyable activity that can be mastered with basic knowledge. For those who are new to candle-making, this process may seem intimidating, but trust me, it’s surprisingly straightforward. If you’re eager to get started, let’s dive into the steps involved.
Step 1
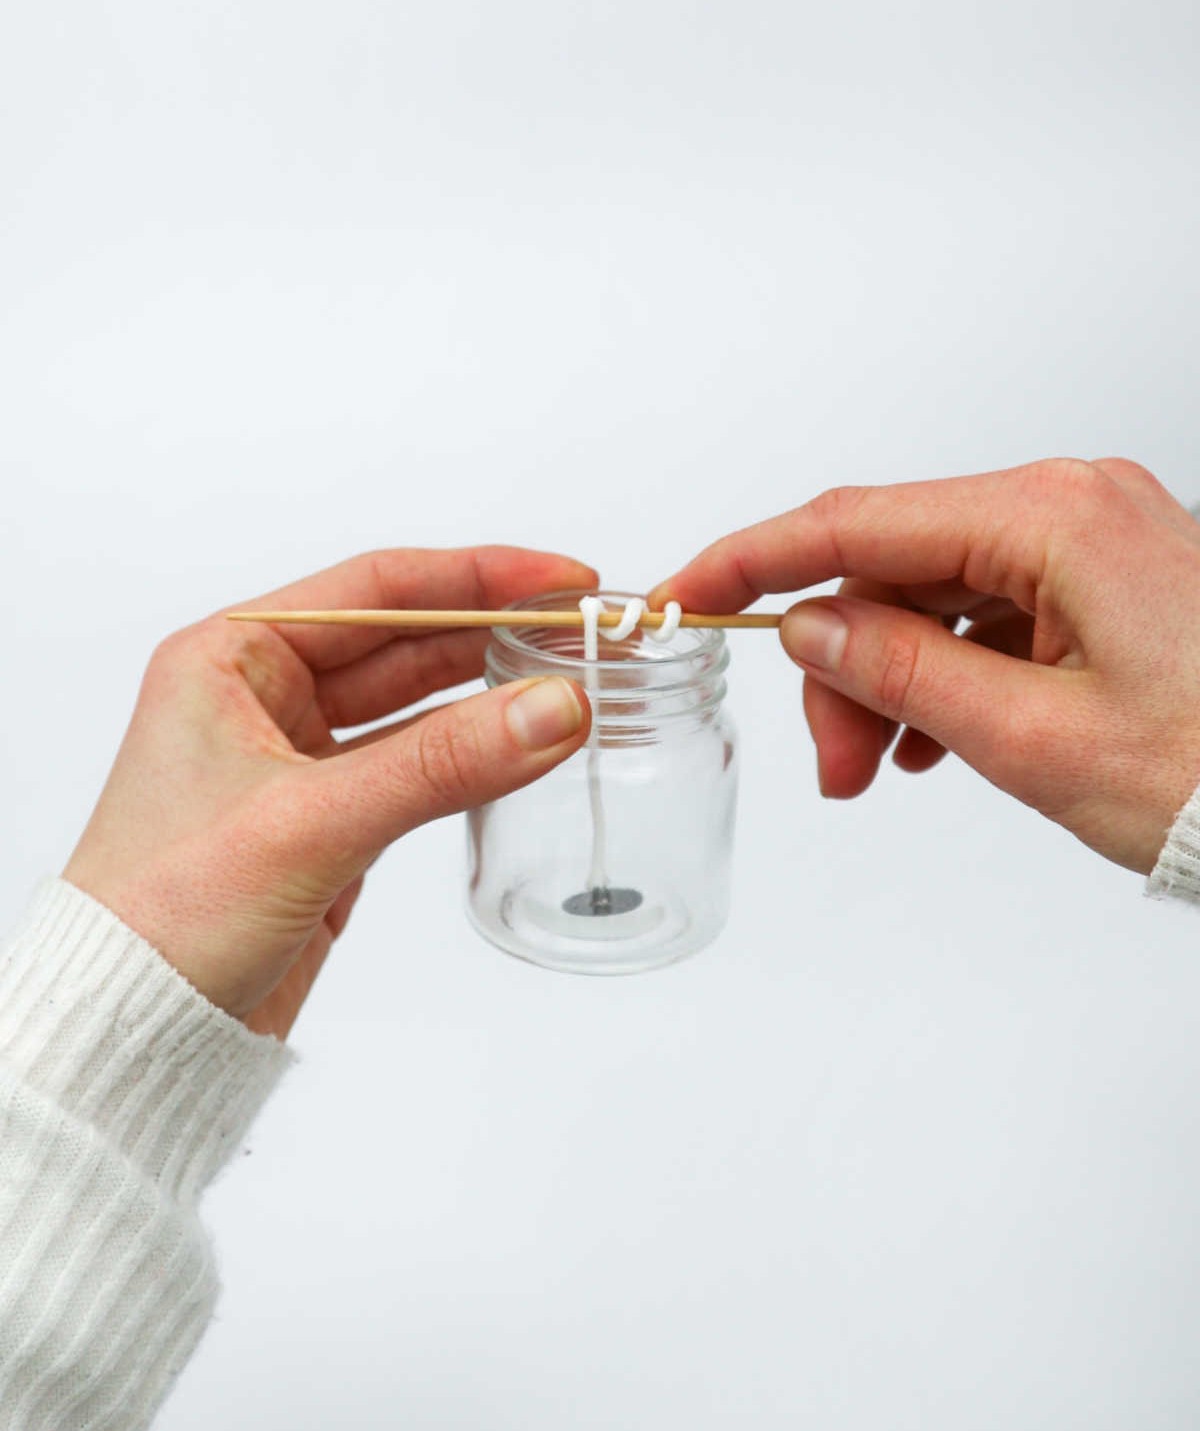
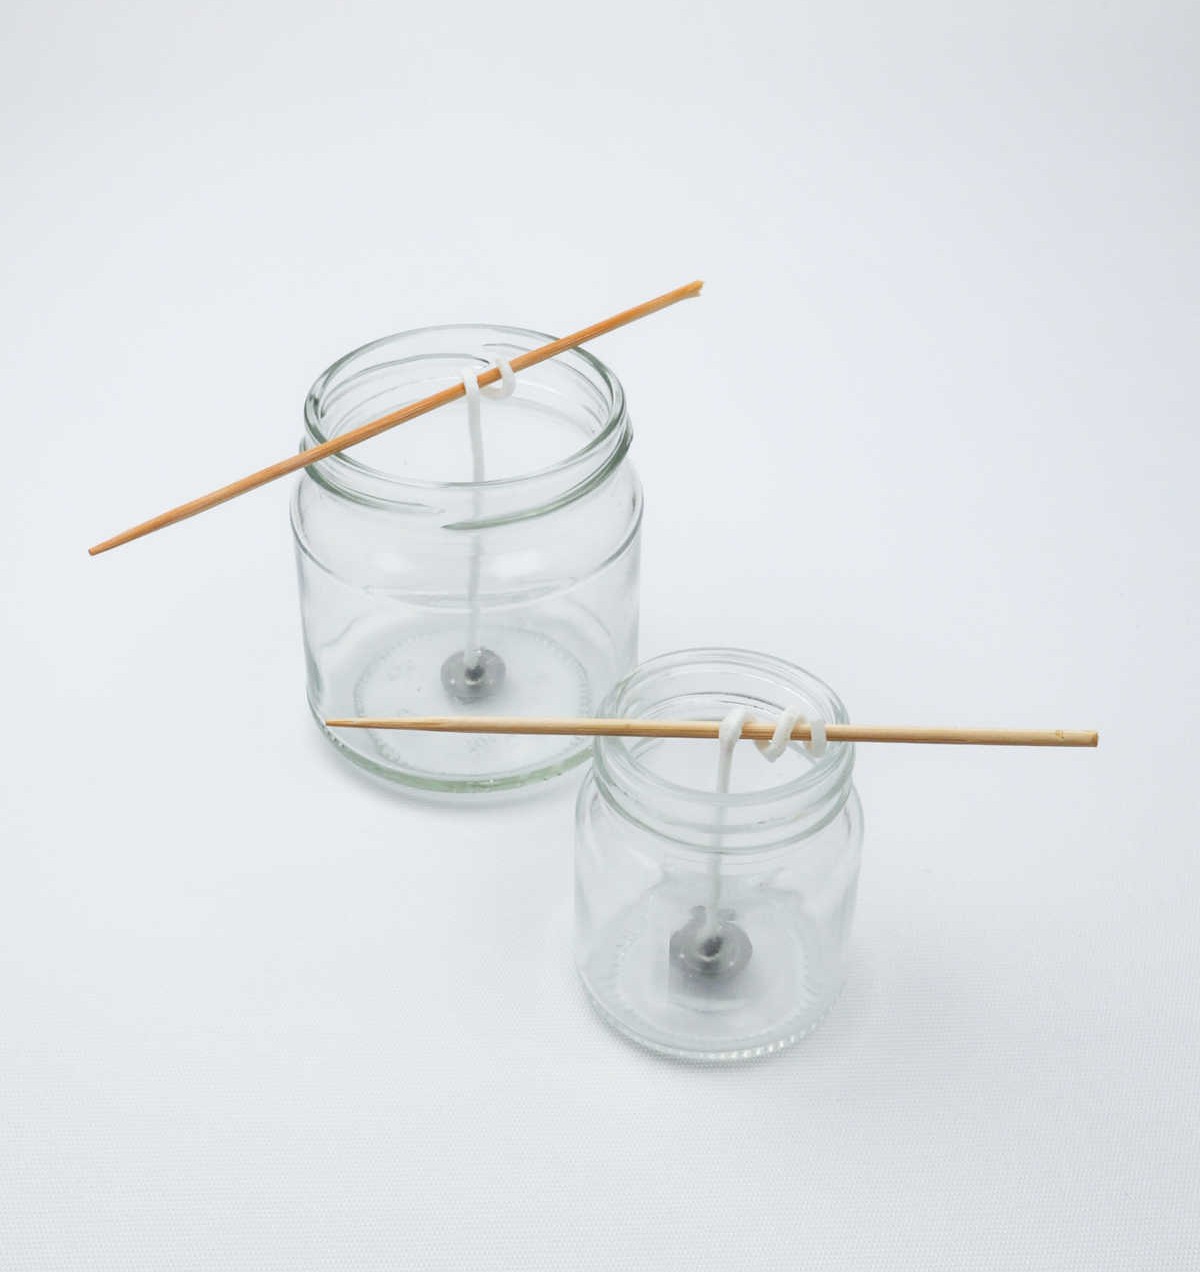
Before proceeding, ensure you’ve selected the jar for your project. Begin by cleaning and drying the inside of the chosen vessel. Next, secure a wooden craft stick or lolly stick by wrapping the wick around it. Allow the end of the wick to gently drop into the jar until the flat metal base rests comfortably at the bottom. Finally, balance the stick on the rim of the jar, making any necessary adjustments to keep the wick securely in place.
Step 2

Place a glass jar containing the wax into a wide-bottomed saucepan filled with water, but ensure the wax doesn’t come into direct contact with the liquid.
Step 3
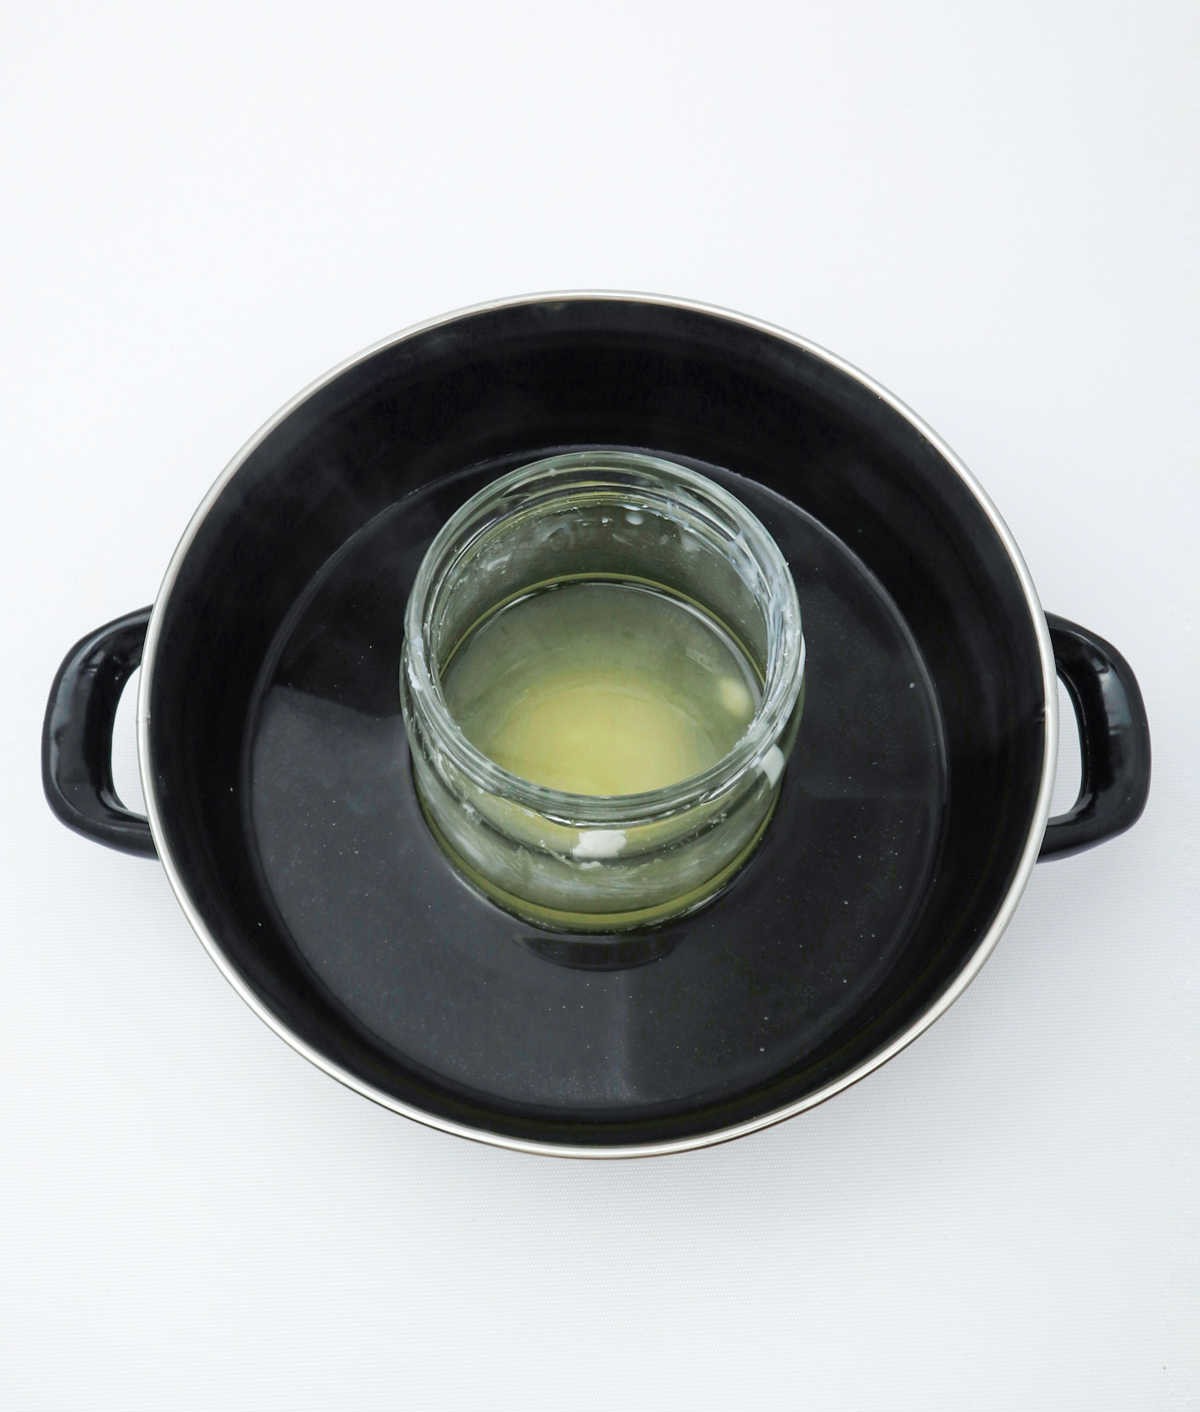
As the pot reaches boiling point, the wax starts to dissolve and liquefy. To ensure a smooth consistency, grab a stirrer and gently coax out any stubborn lumps. Continue stirring the melted wax until it reaches your desired texture, taking care not to overheat or under-melt the mixture.
Step 4
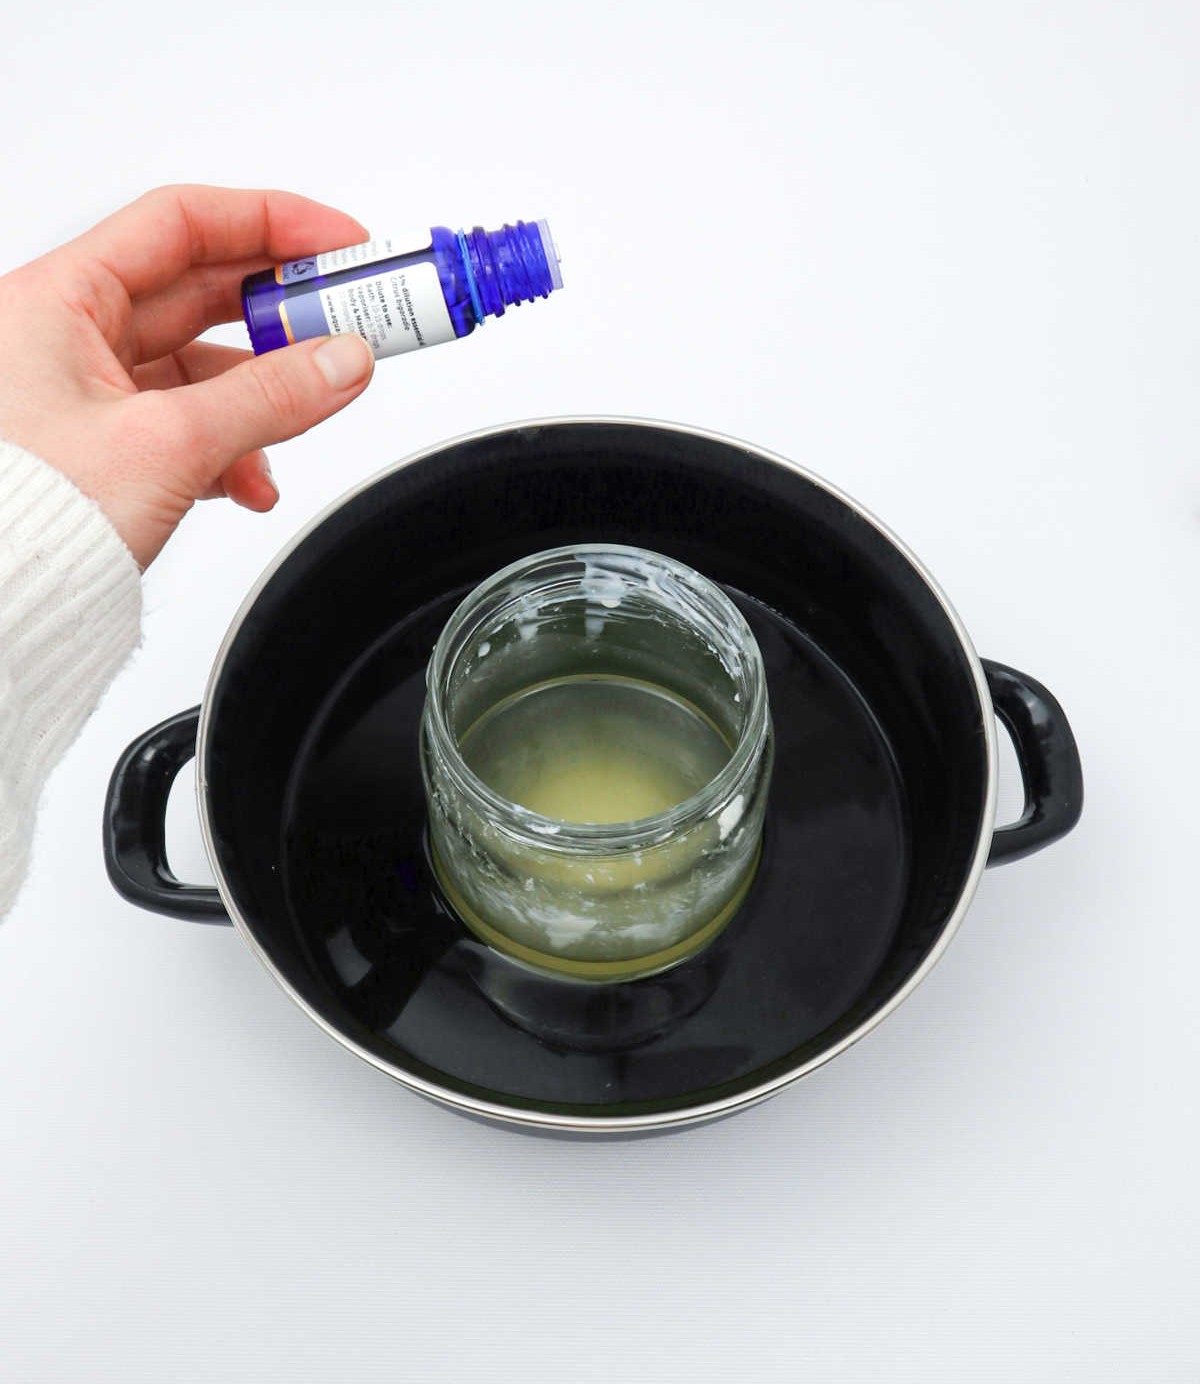
As you combine the essential oil with the wax, take a moment to stir the mixture thoroughly. The swirling motion will help the scents meld together, releasing an intoxicating aroma that’s sure to tantalize your senses. With each pass of the spoon, the fragrance will intensify, much like the anticipation builds as you prepare to pour the finished product.
Step 5
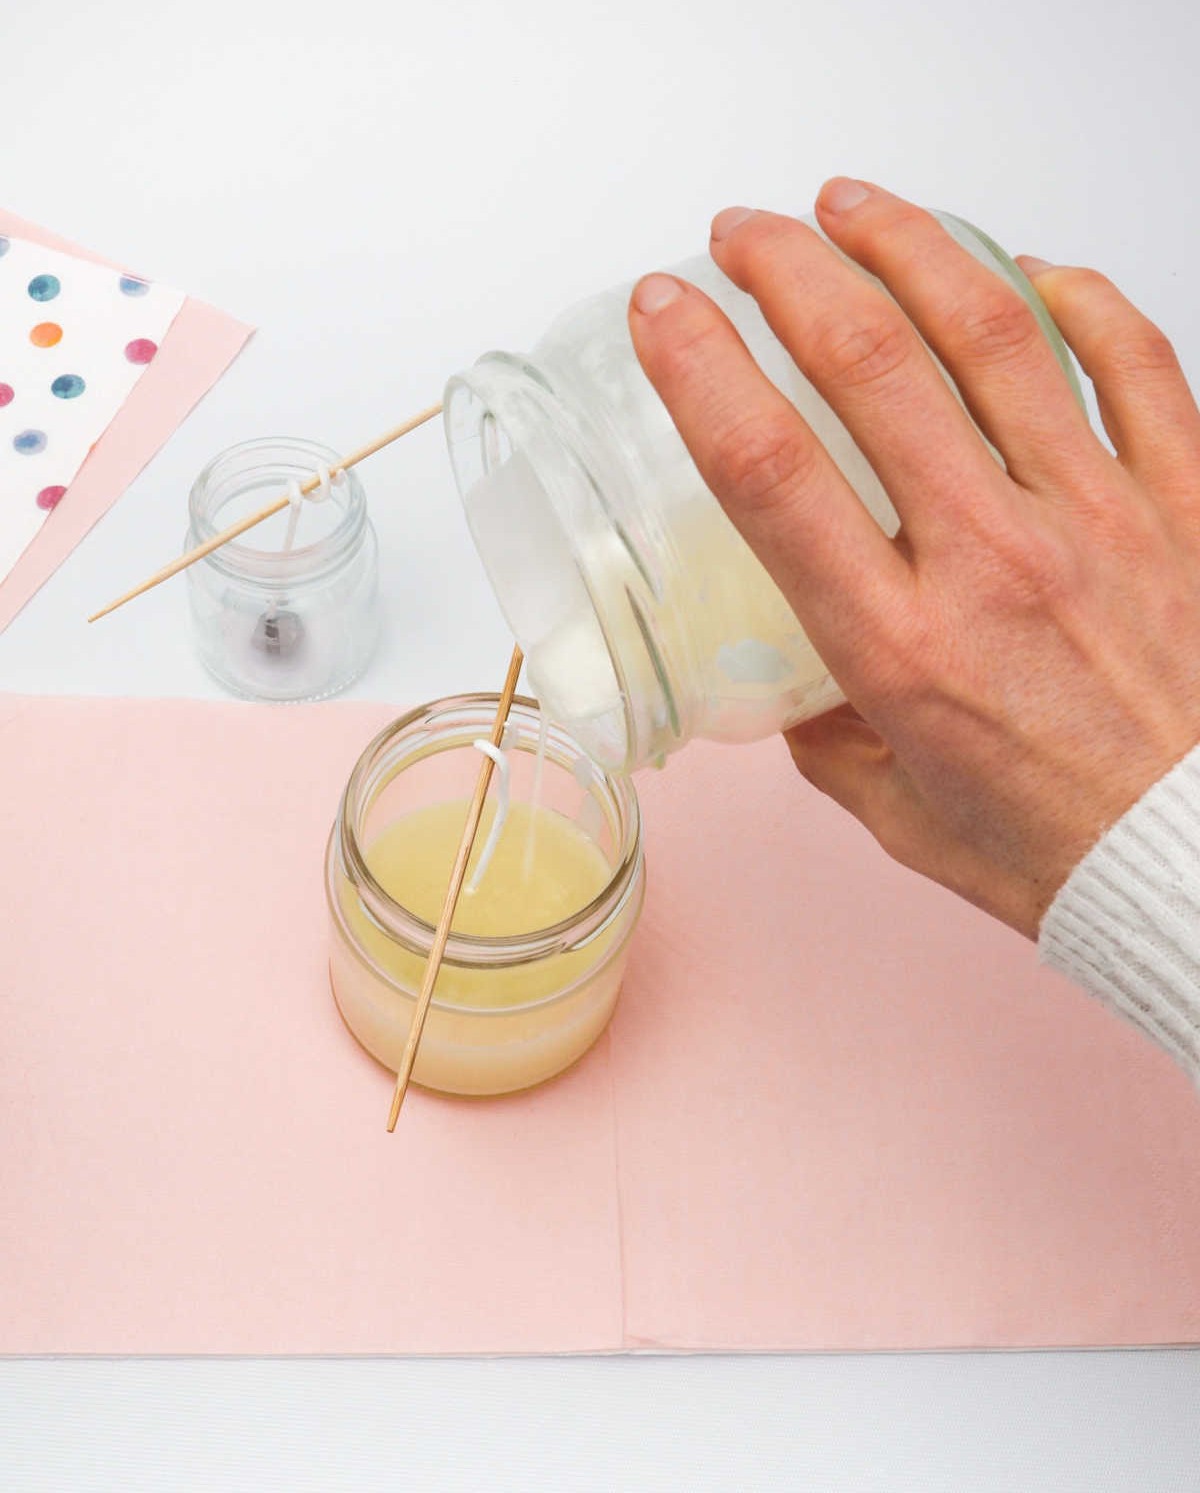
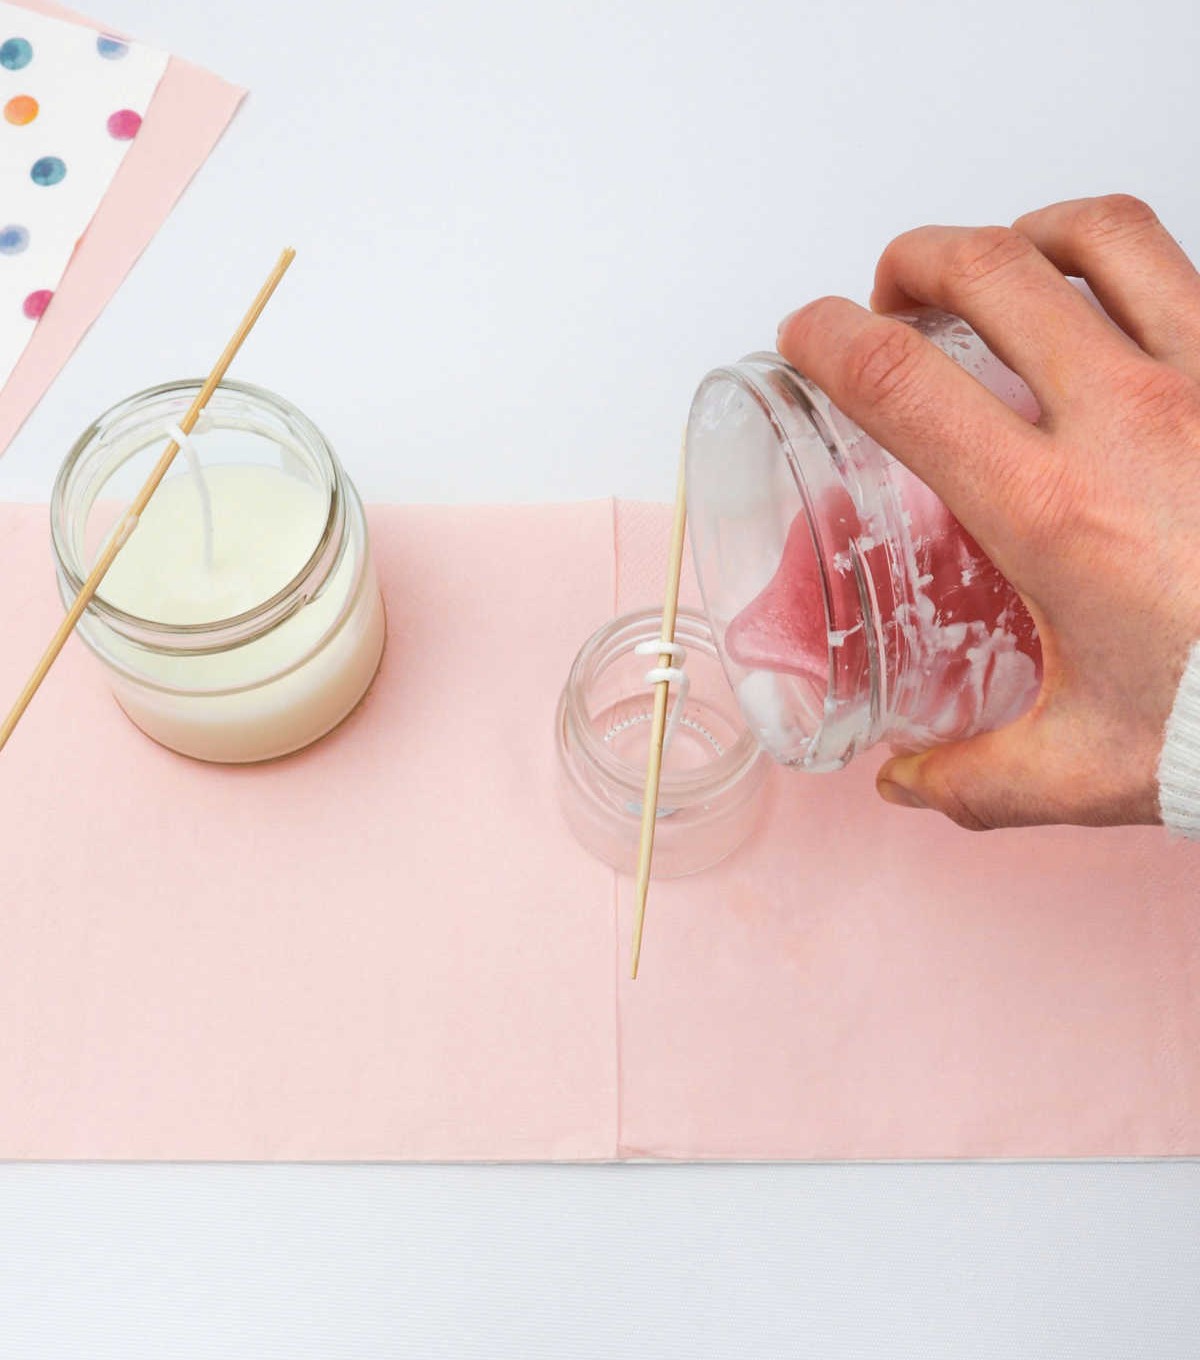
When pouring hot wax into jars, exercise caution to avoid accidents. Ensure the jar is filled to the brim, then carefully wipe down the rim to eliminate any residual spills.
Step 6
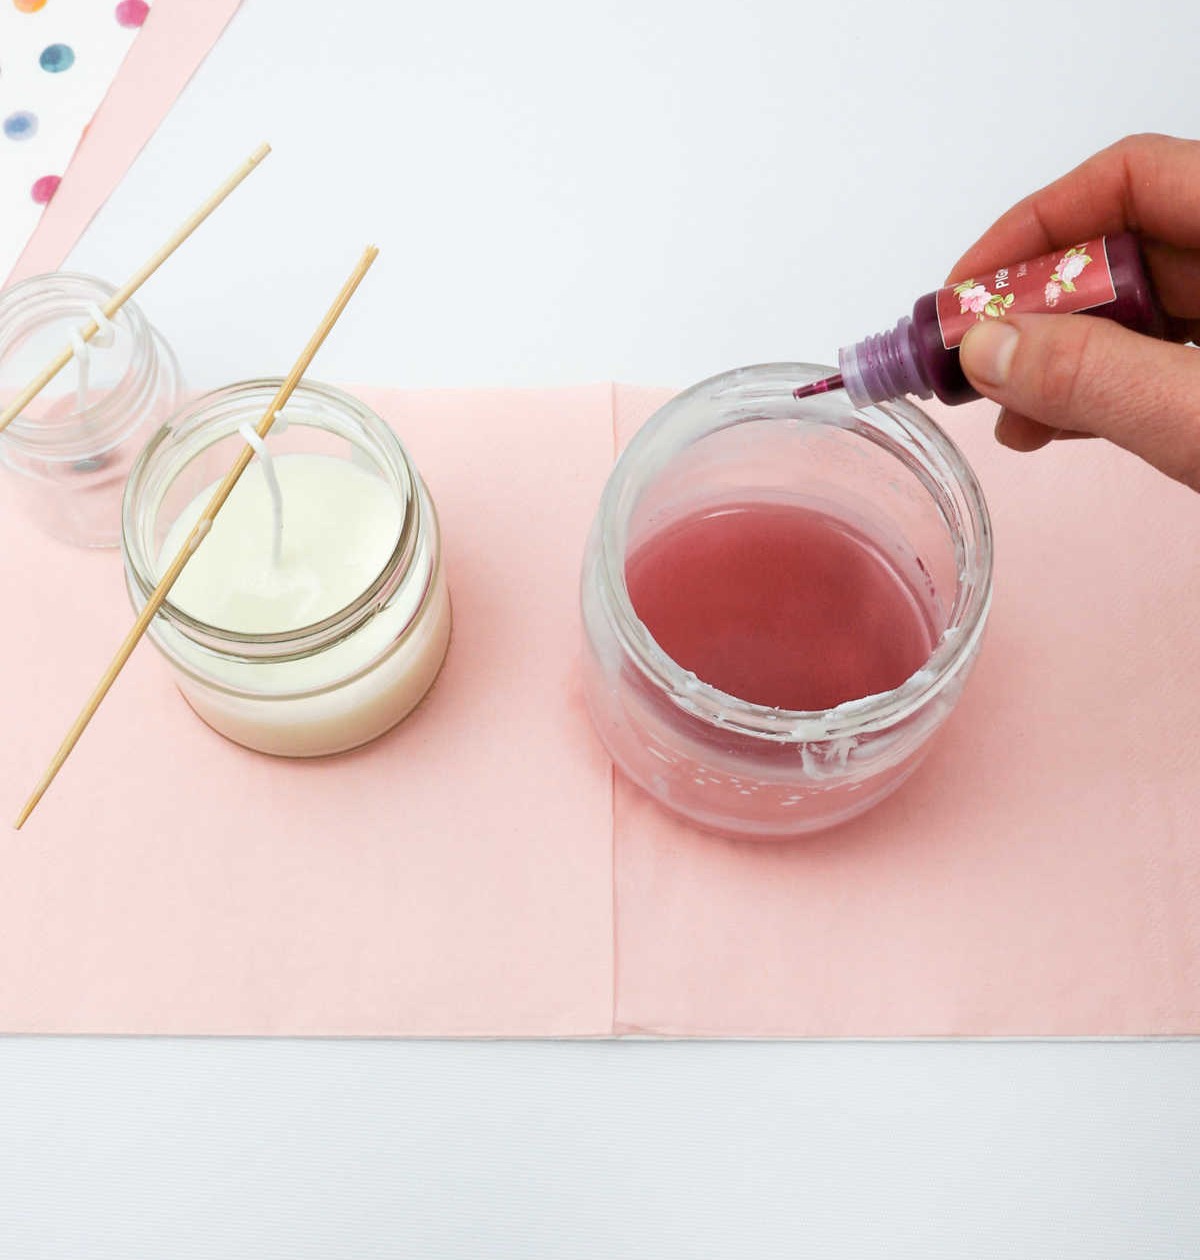
When it comes to coloring your wax, you’re presented with two main options: leaving it in its natural state or infusing it with a pop of color using food-grade dyes. To achieve this, simply add a few drops of the desired hue to the melted wax and stir until the color is fully incorporated into the mixture.
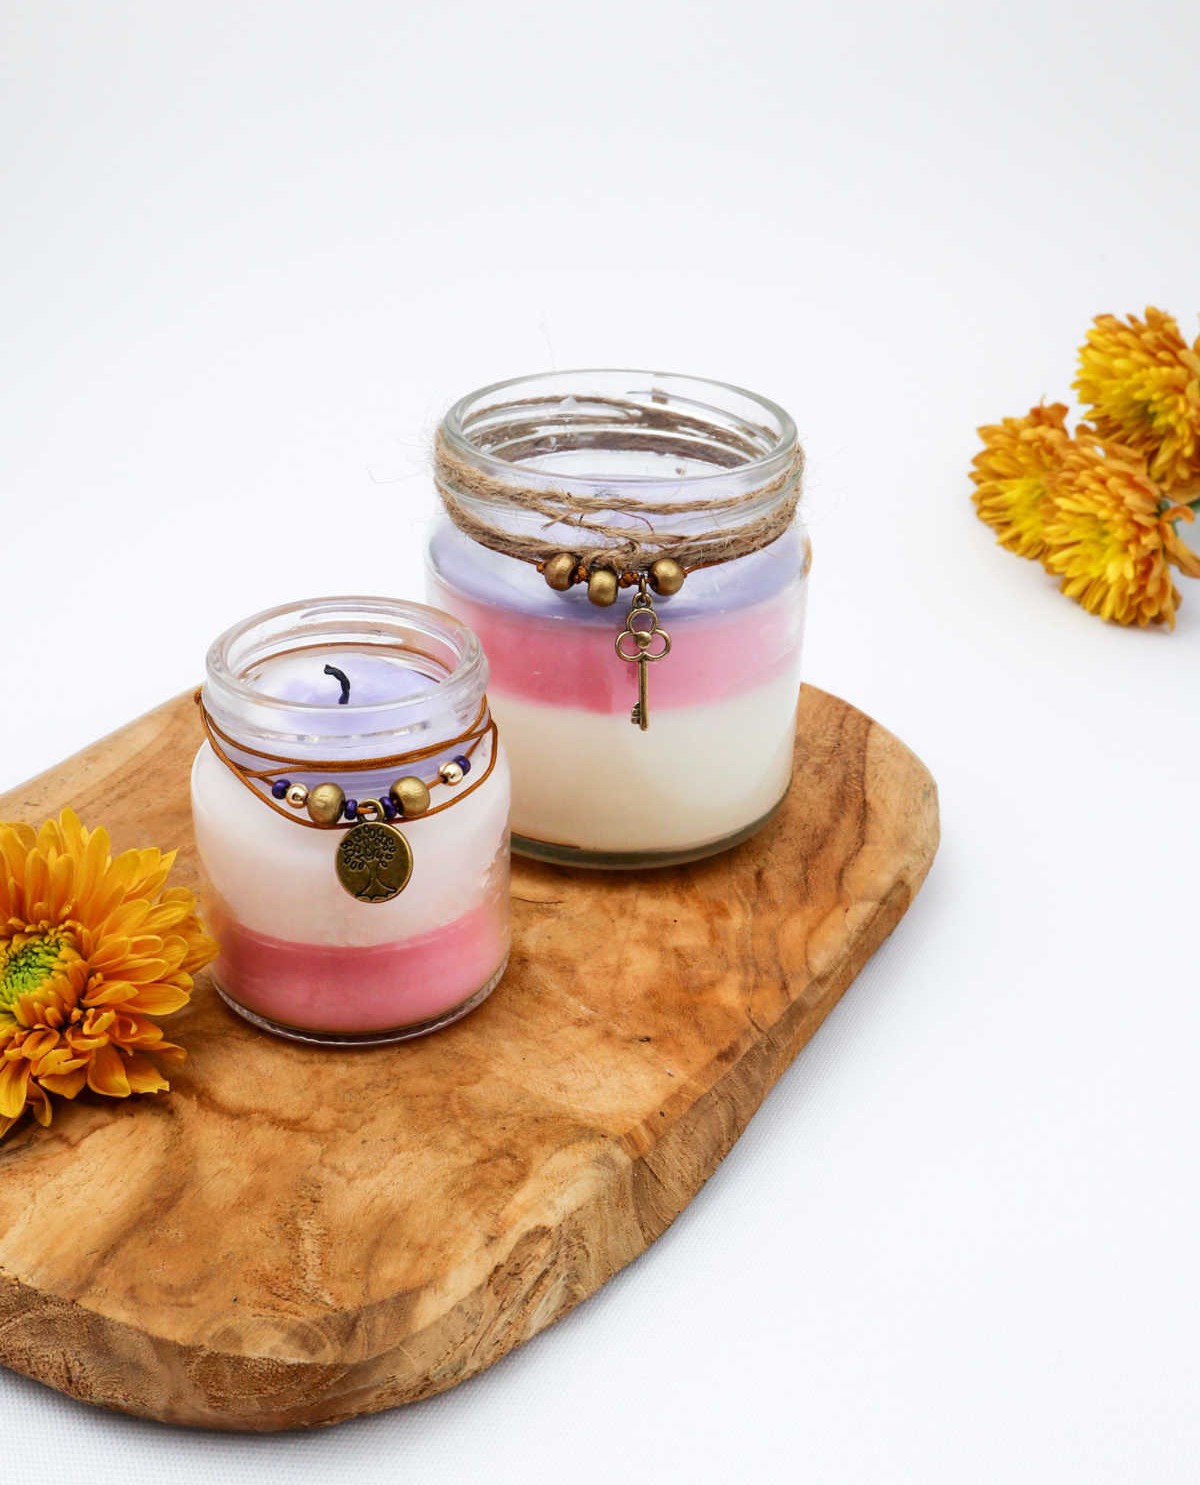
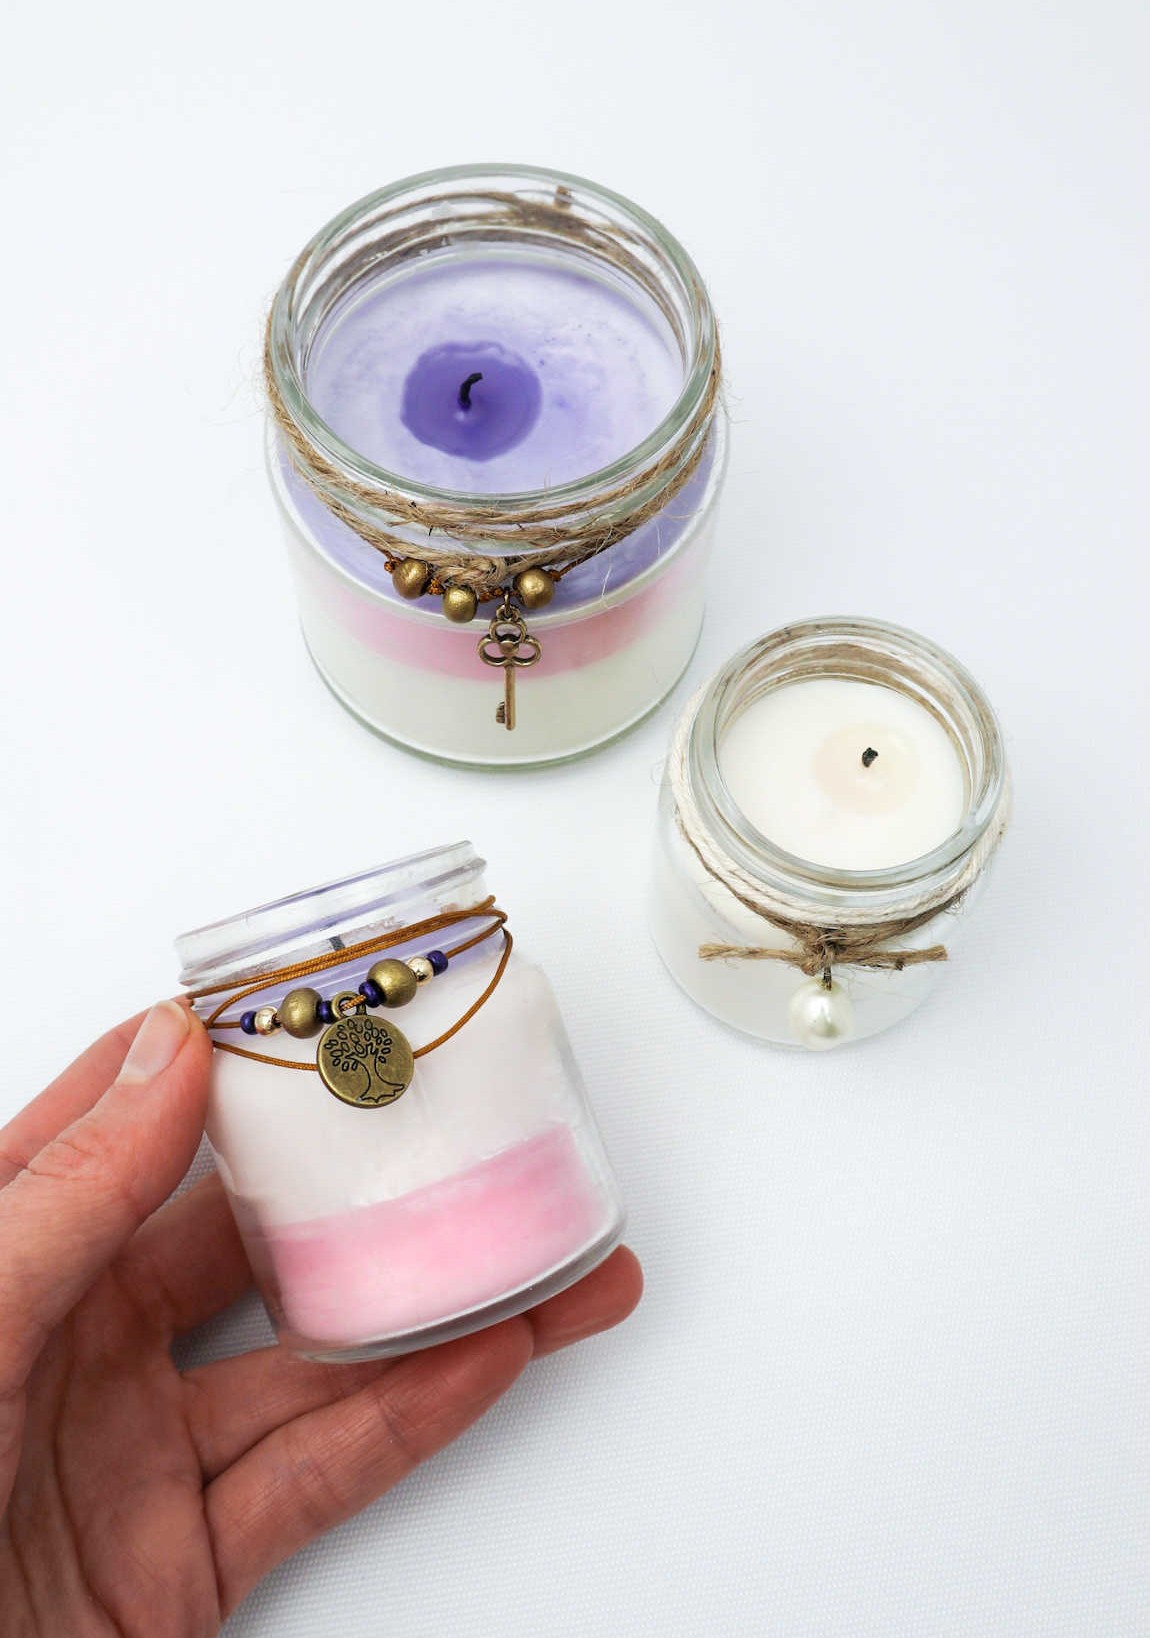
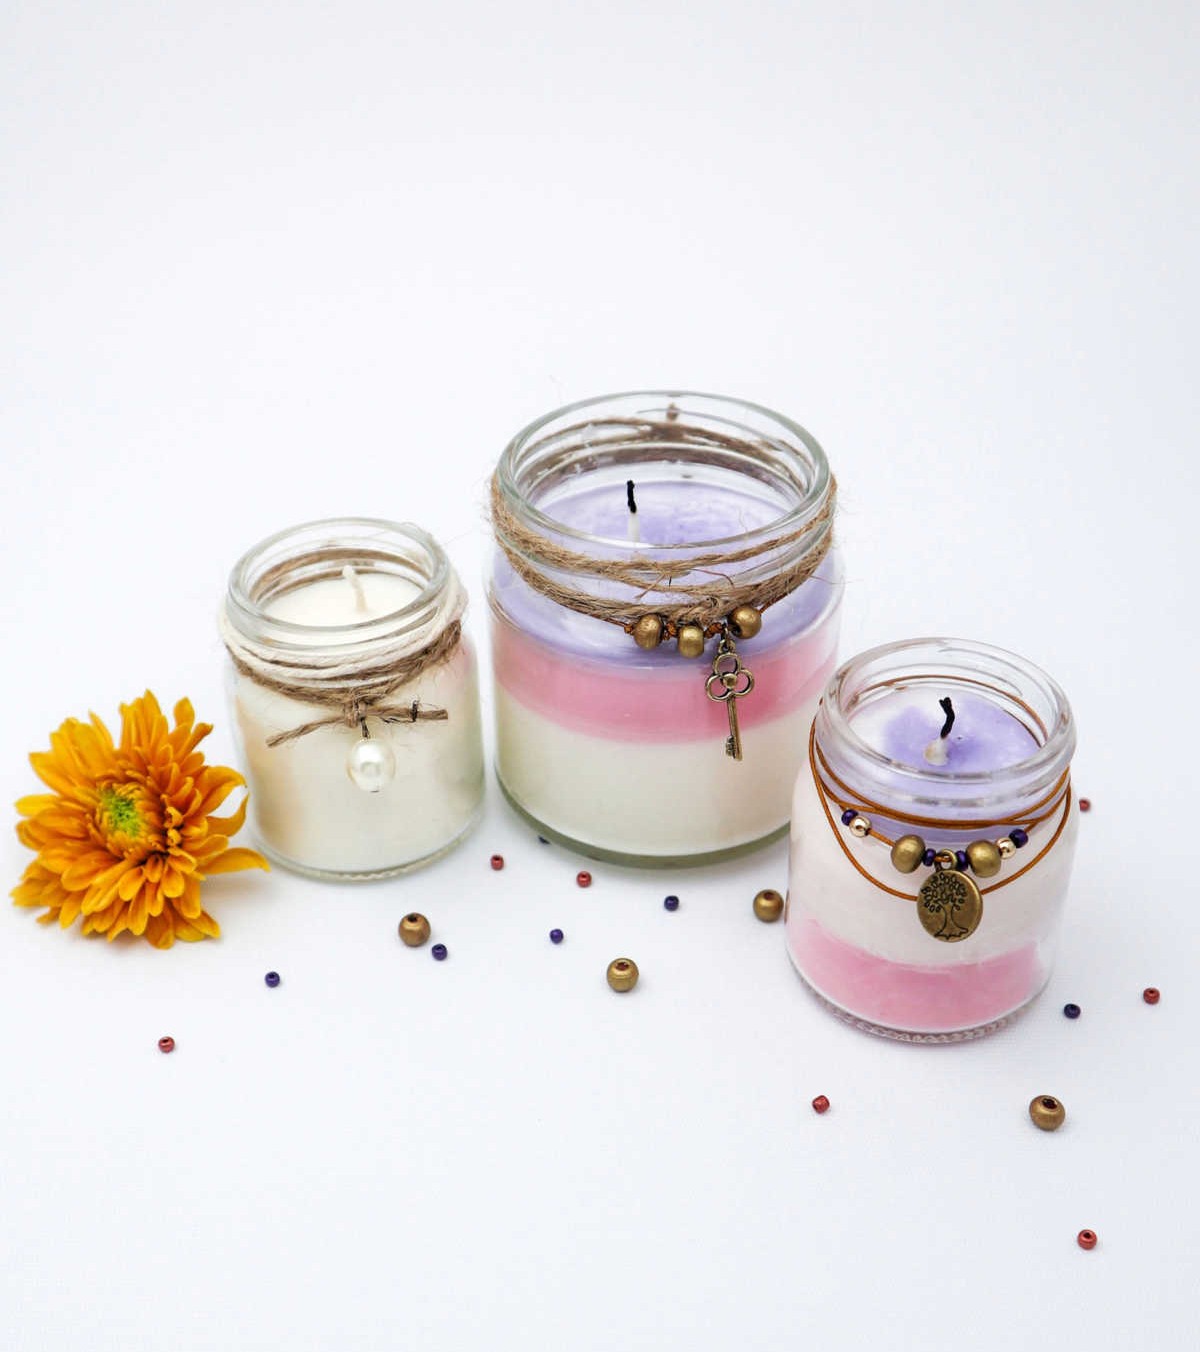
Once the coloring process is complete, you can then pour the wax into your chosen container, allowing for the creation of unique and visually appealing layering patterns.
Step 7
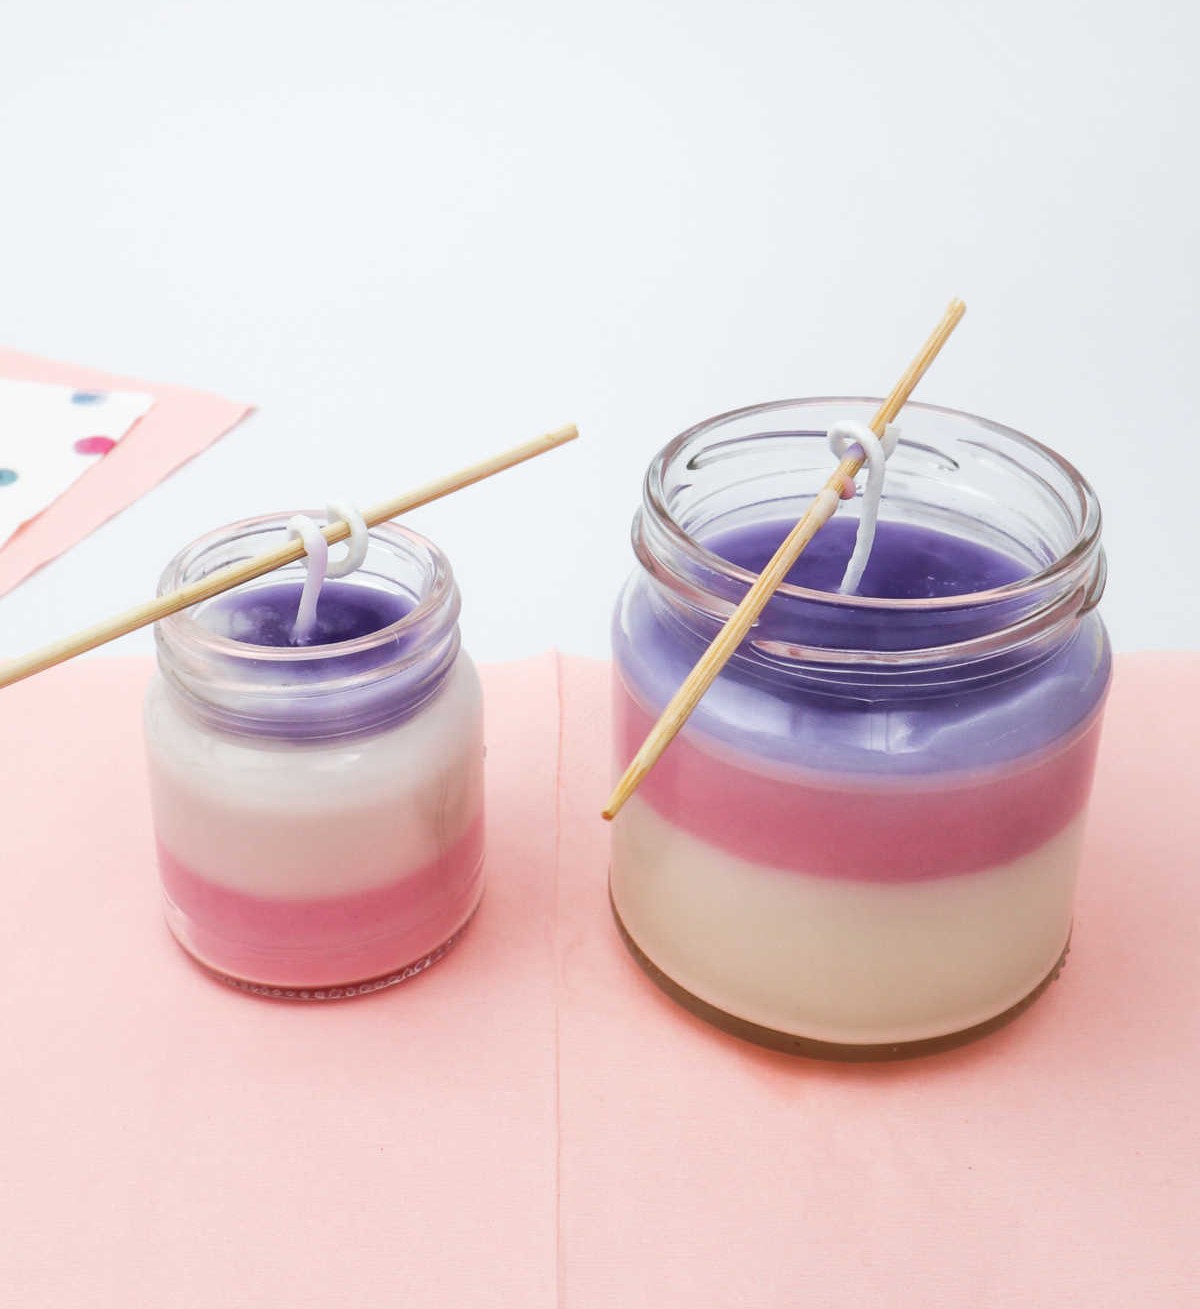
As the wax cools and hardens, the craft stick securing the wick ensures a snug fit, eliminating any risk of the wick becoming dislodged. The process allows for a precise positioning of the wick, guaranteeing a smooth and even burn once lit.
Step 8
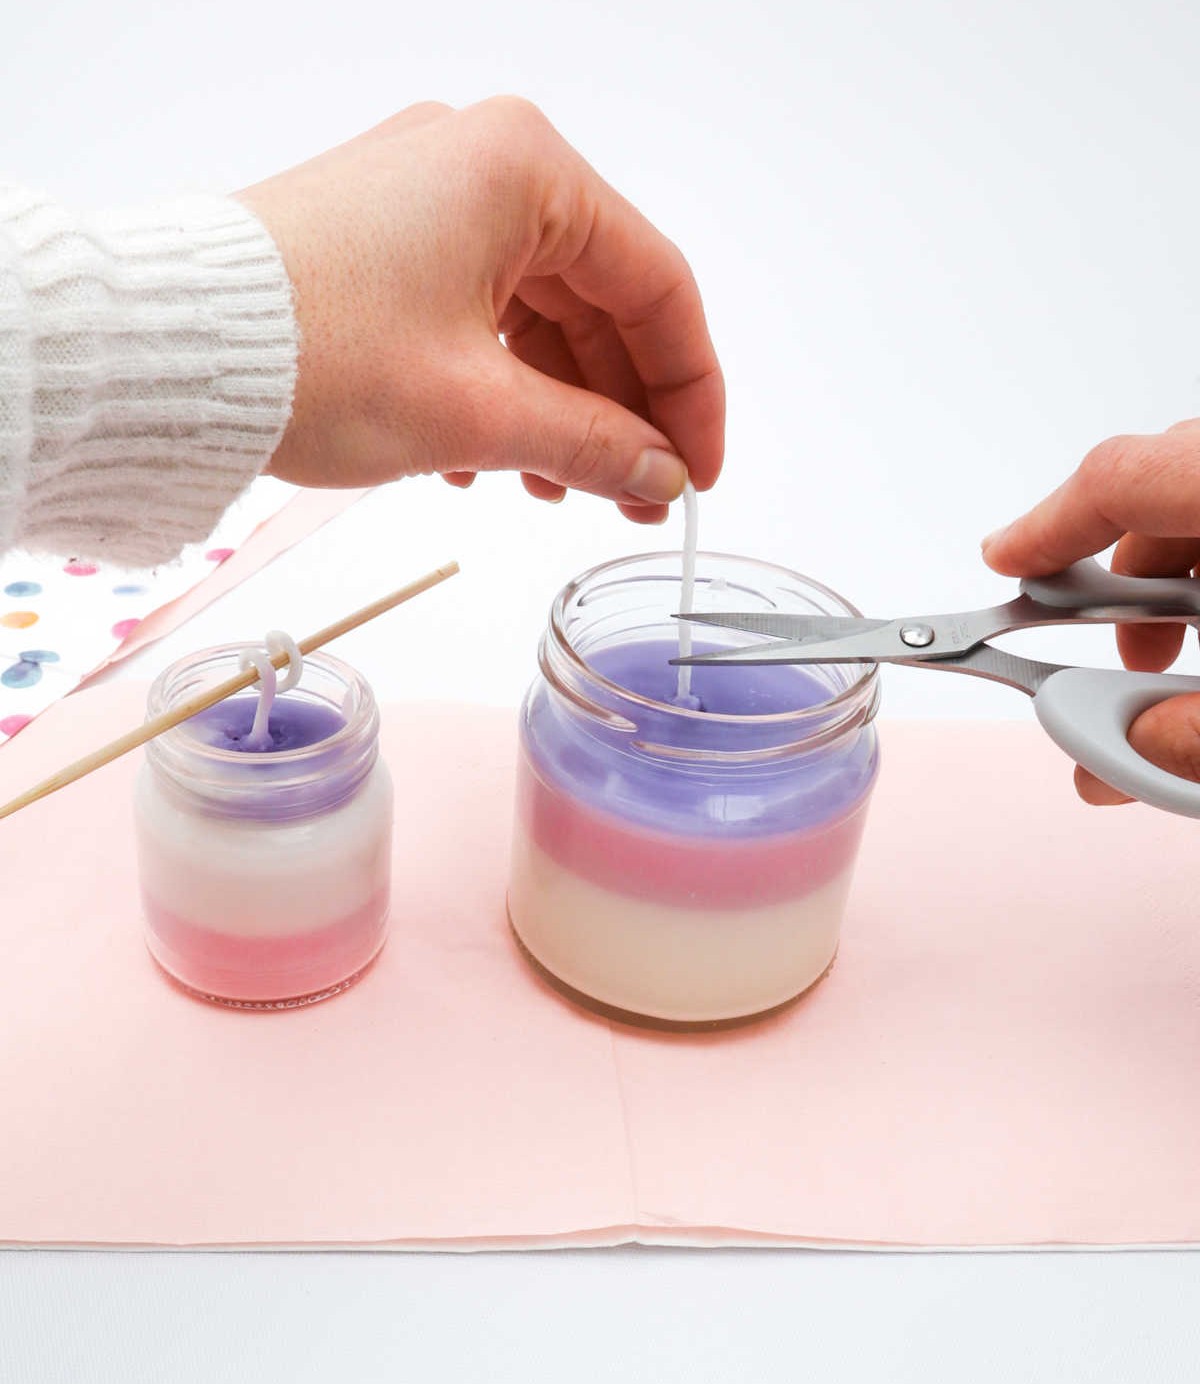
Following the hardening process, it’s essential to gently release the wick from its adhesive bond with the stick. To do this, carefully manipulate the wick to separate it from the stick, taking care not to disturb or dislodge any of the surrounding wax. Once the wick is free, inspect it for any excess material and trim the ends as needed to prevent any potential ignition hazards.
Step 9
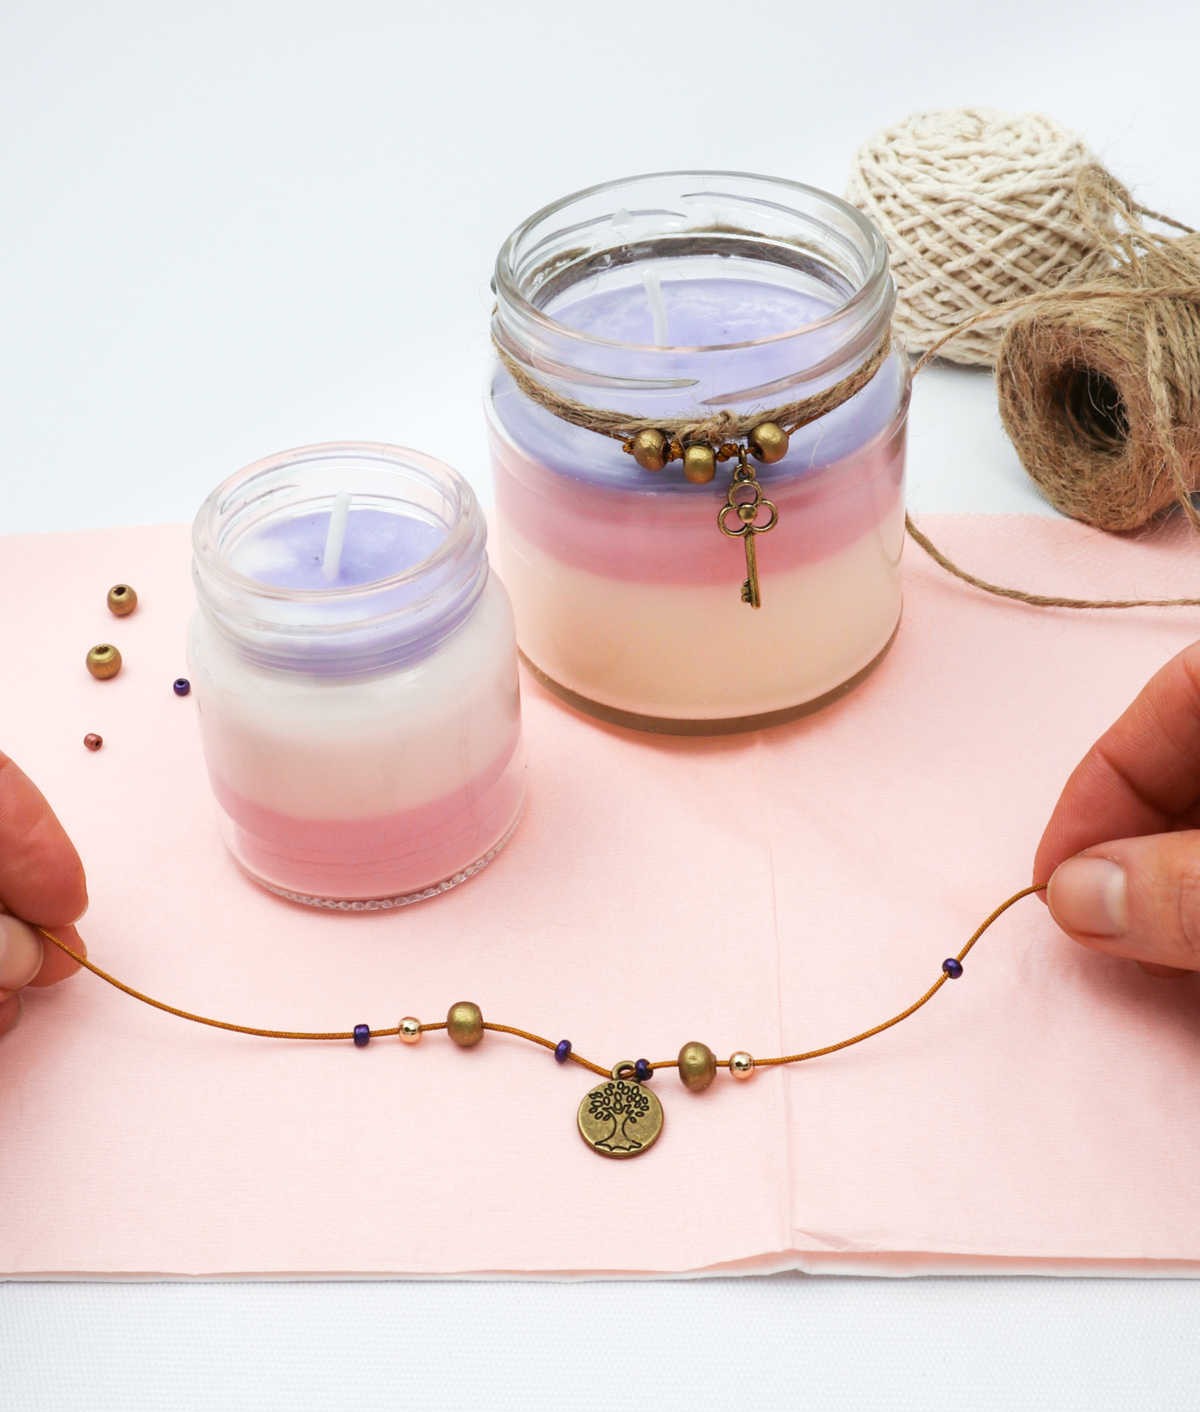
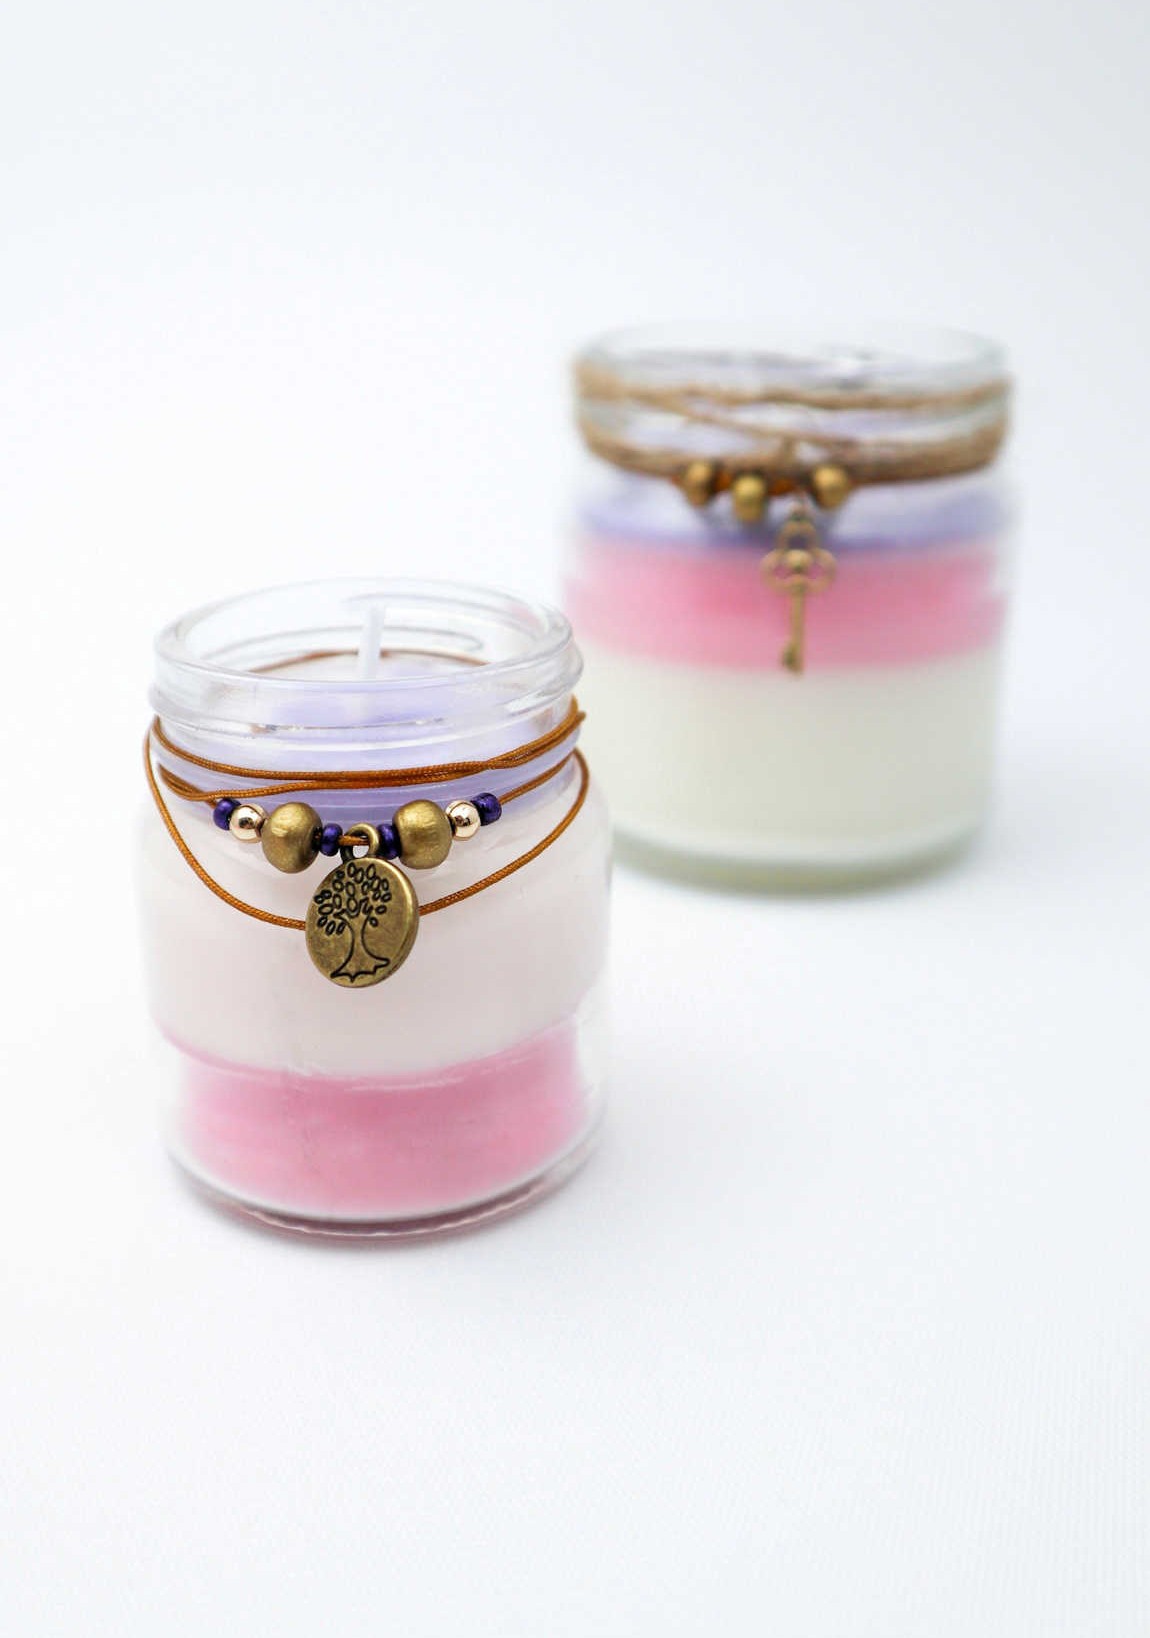
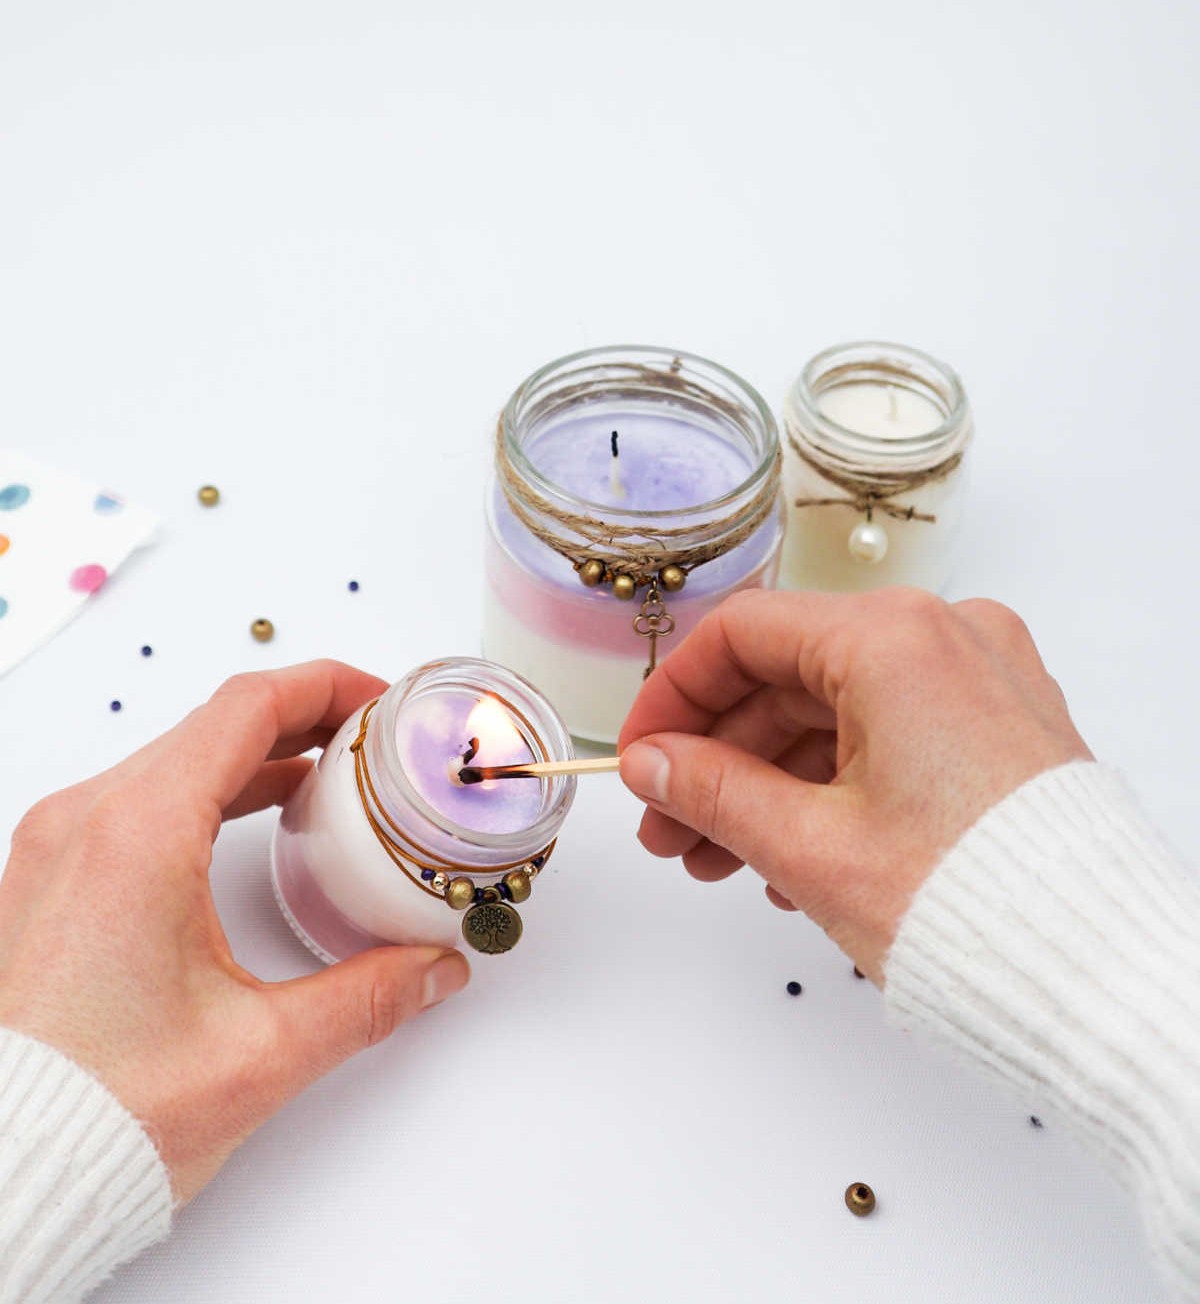
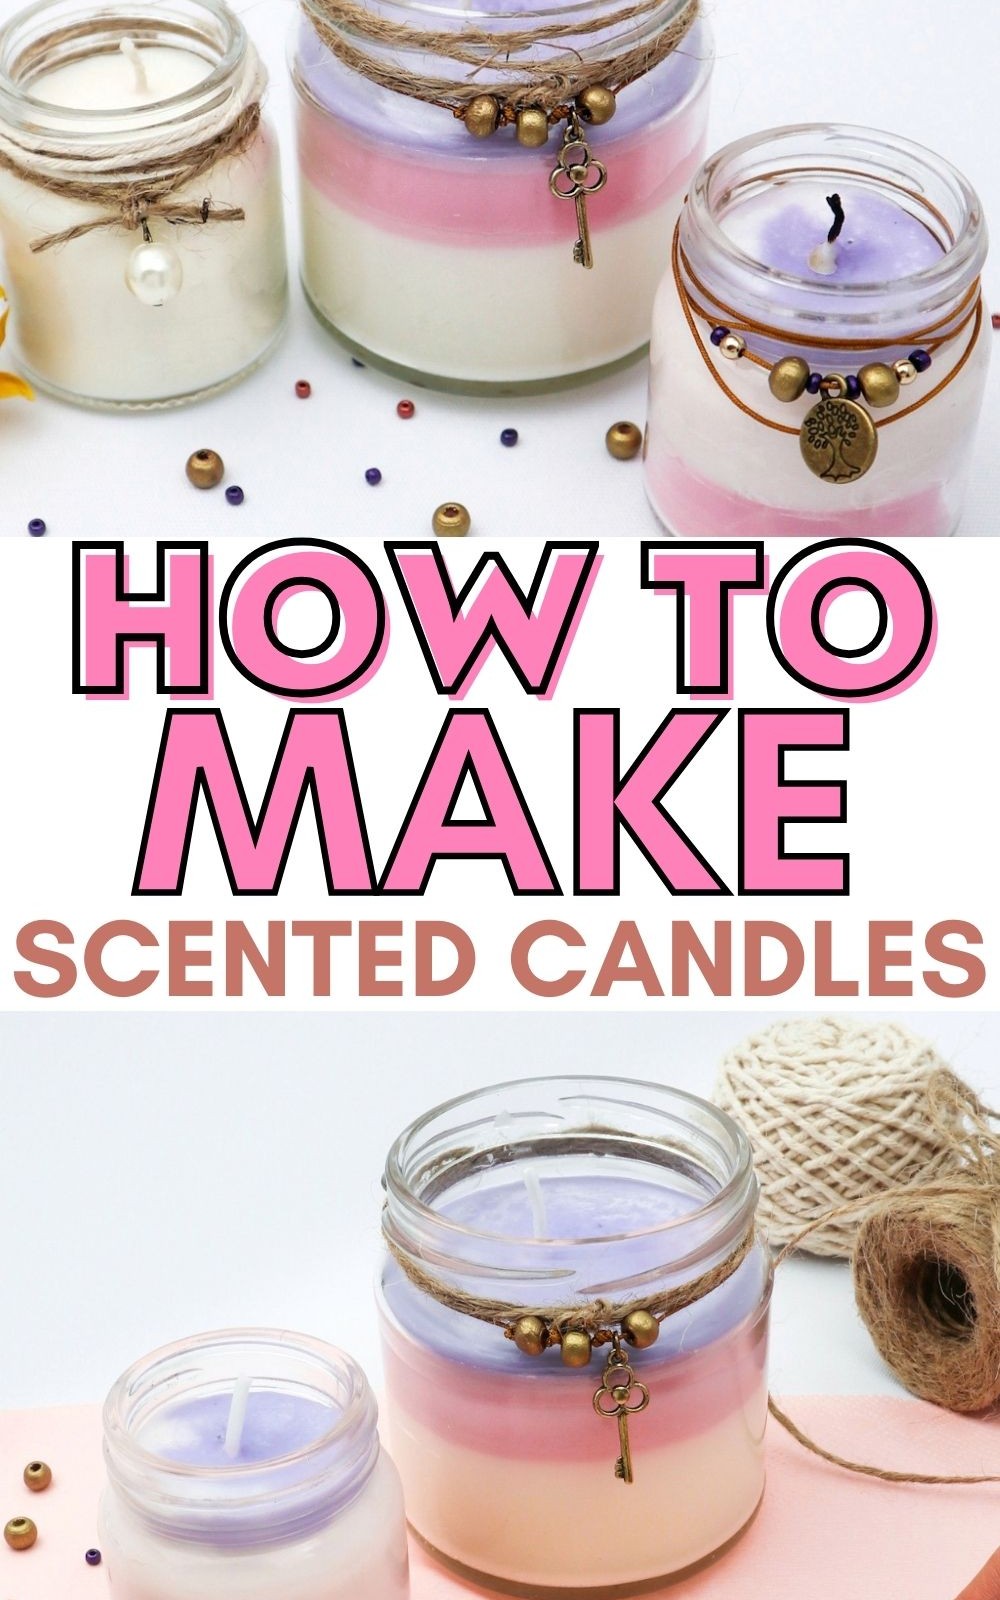
To give your DIY scented candle a unique touch, consider wrapping a length of twine or jute around the rim. This adds a natural, earthy charm to the overall design. You can also incorporate small beads, buttons, and charms to further embellish the candle’s appearance. Once you’ve added these decorative elements, your project is complete and ready for use. Simply light the wick and enjoy the warm, inviting glow of your handmade scented candle.
Is It Cheaper to Make Your Own Candles?
While purchasing candles can be a convenient option, creating them yourself can indeed be more cost-effective. To get started, you’ll only need to acquire wax, essential oils – likely already stocked in your pantry – and a wick. Furthermore, upcycling and repurposing old mason jars can also help reduce expenses. For instance, you could transform these containers into unique decorative pieces for your home, utilizing them to add a touch of elegance and character.
In fact, there are countless DIY spring mason jar ideas waiting to be explored, offering endless opportunities for creativity and savings.
Types of Wax You Can Use for Candles
When selecting a wax for your candle, you’ll want to consider several factors to ensure the perfect choice. From natural waxes to synthetic options, each type has its unique characteristics, benefits, and drawbacks. Let’s dive into the various types of wax available, and explore what makes them suitable or unsuitable for different applications.
Paraffin wax is the most widely used and cost-effective option, making it a popular choice among candle makers.
However, its environmental impact has led many to opt for all-natural waxes instead. Paraffin can be used to create any type of candle, from jarred candles to pillar or tapering designs.
Soy wax is an eco-friendly and all-natural option made from soybean oil. It’s the softest wax available, melting easily and losing its shape. This characteristic makes it suitable for making candles in jars or tins, but less ideal for creating pillar or tapering candles.
Beeswax is another popular natural wax option that offers a unique combination of benefits: it’s natural, versatile, and paraffin-free. Beeswax can be used to create all types of candles, including jarred, pillar, and tapering designs.
Palm wax is known for its distinctive crystal or feather-like pattern, making it a popular choice for creating tapers, pillars, and votives. Like soy wax, palm wax is an all-natural option that offers a unique aesthetic and environmental benefits.
Other plant-based waxes include coconut wax, jojoba wax, candelilla wax, and carnauba wax. Each of these options presents its own set of characteristics, making them suitable or unsuitable for specific applications.
What Candle Wax Holds the Most Fragrance?
While paraffin is notorious for its ability to hold and release fragrances, it’s not without its drawbacks. Despite these limitations, paraffin remains a go-to choice for many scented candle manufacturers. However, there is an alternative worth considering: soy wax candles. With the right essential oils, soy wax can be just as effective at emitting a strong scent as paraffin-based candles, offering a more eco-friendly and sustainable option.
What is the Healthier Candle Wax?
When it comes to choosing a natural wax alternative, the options can seem overwhelming. However, when considering the environmental impact of your decision, opting for an all-natural wax is a healthier choice. These waxes produce fewer toxic chemicals and less soot than their paraffin-based counterparts. The top contenders in this category include beeswax, soy wax, palm wax, and coconut wax.
While these options are all natural and eco-friendly, it’s also important to consider factors beyond the type of wax itself. Cost, scent-holding capacity, and the desired shape and medium are all crucial considerations when selecting the perfect wax for your needs.
What Containers Can You Use for Candles?
When selecting containers for your wax candle, it’s crucial to prioritize heat-resistance. Not all glass or ceramic materials are created equal, so ensure you double-check the specifications before making a final decision.
In general, ceramic containers that are safe for microwave and oven use, as well as pressure canning jars and cast-iron containers, tend to be excellent choices. Glassware also fits the bill. On the other hand, plastic is an absolute no-go.
If done correctly, terracotta can also serve as a suitable container option.
Fragrances You Can Use for Candles
When it comes to selecting scents for your candles, quality matters just as much as quantity. Opting for 100% pure essential oils is crucial, as artificial alternatives may lead to unforeseen side effects. To give you a better idea of what’s available, here are eight popular essential oil options, each with their unique benefits and drawbacks:Lavender oil is renowned for its calming properties, promoting relaxation and natural sleep patterns.
However, excessive or prolonged use can cause headaches. Eucalyptus oil boasts a refreshing minty aroma, earthy notes that combat cold and sinus symptoms, and anti-inflammatory properties. Its uses range from relieving sore throats to controlling allergies. Peppermint oil is another popular choice for its invigorating and decongesting qualities. A few peppermint-scented candles can work wonders in alleviating headaches.
Lemongrass oil has been shown to increase hemoglobin levels, easing joint pain and muscle aches. Citrus essential oils like lemon, lime, and orange are well-loved for their mood-boosting properties and air-purifying abilities. Chamomile essential oil is often praised for its soothing qualities, helping to calm ulcers and sores, as well as reducing anxiety levels.
How to Make Scented Candles
Experience the joy of crafting your own scented candles with this easy DIY tutorial. Not only is making your own candles a fun and creative activity, but it’s also a great way to customize the fragrance and appearance to your liking. With just 30 minutes of active time and an additional 15 minutes for preparation, you can create your very own homemade candles in under an hour. And the best part? You’ll only need $8 worth of materials to get started.
Equipment
Materials
When it comes to crafting unique and personalized candles, having the right materials is essential. This collection of supplies includes the fundamental components necessary for creating one-of-a-kind candles that reflect your personal style. Mason jars provide a rustic and charming container for the finished product, while soy wax flakes serve as the foundation for the candle’s burnable core.
Lolly sticks add a whimsical touch, allowing you to create custom wicks tailored to your desired flame height. Essential oils infuse the candle with distinct scents, ranging from calming lavender to invigorating peppermint. Candle dye enables you to customize the color palette of your candles, adding an extra layer of personalization. Jute twine and charms or beads (optional) provide opportunities to add embellishments and make each candle truly special.
Instructions
To create your DIY scented candle, begin by preparing the candle jar. Ensure that the inside is spotless and dry. Next, balance the wick using a craft or lolly stick to prevent it from tilting or falling out of place. Once the wick is secure, heat some water in a saucepan but avoid letting the wax melt directly on the flame. Instead, let the heat dissolve the wax as you stir occasionally.
As the wax melts, add a few drops of your preferred essential oil and give the mixture a good stir to eliminate any lumps that may form. Once the wax has fully melted, pour it into the prepared candle jar without disturbing the wick. For added flair, you can also introduce a few drops of colored food dye to tint your candle. Allow the wax to harden completely before trimming off any excess wick material. Finally, adorn your candle with twine, charms, and ribbon to give it a personalized touch.
Once complete, light up your creation and take pleasure in the warm glow and inviting aroma of your DIY scented candle.