Resin coasters offer a versatile DIY project that can be tailored to suit various tastes and occasions. Whether you’re seeking a quick and easy craft or something more elaborate, the possibilities are endless. For this tutorial, we’ll focus on creating unique resin coasters using epoxy resin as our medium. This project is perfect for adults and teens looking for a creative outlet.
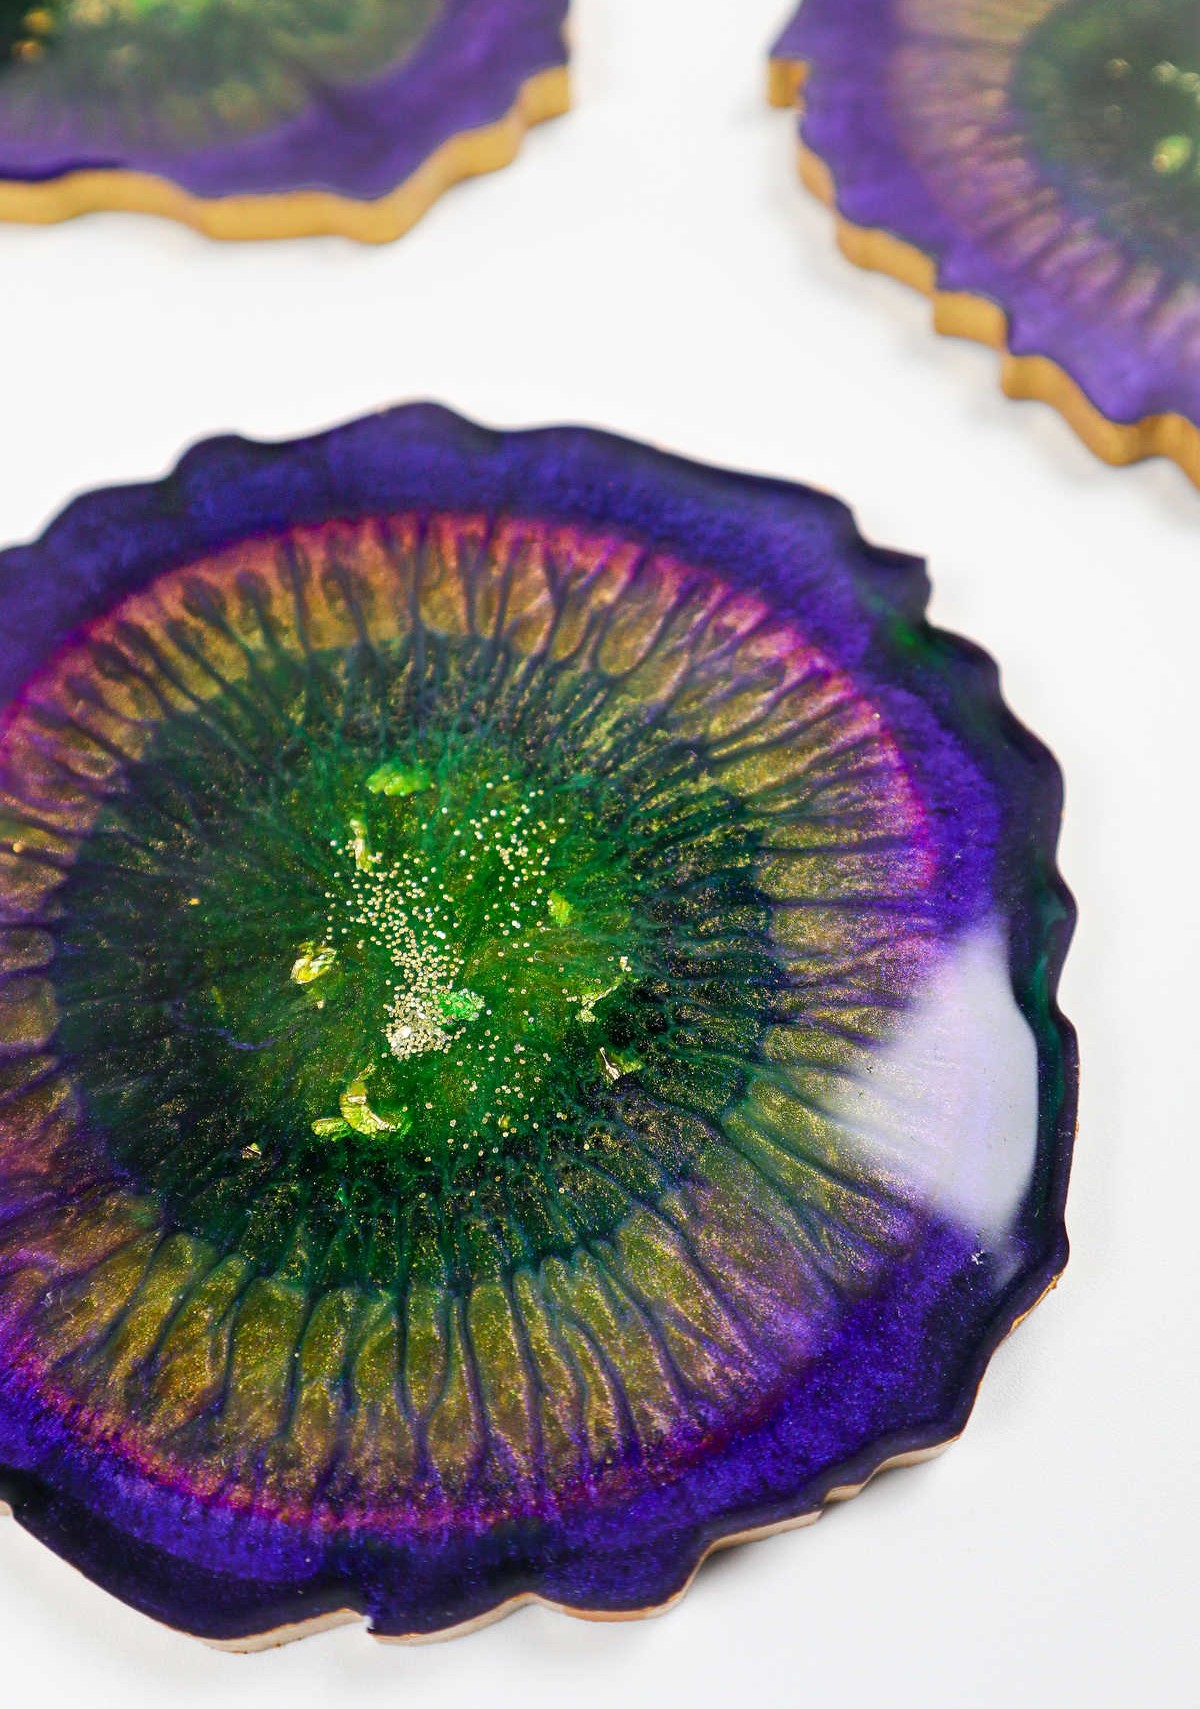
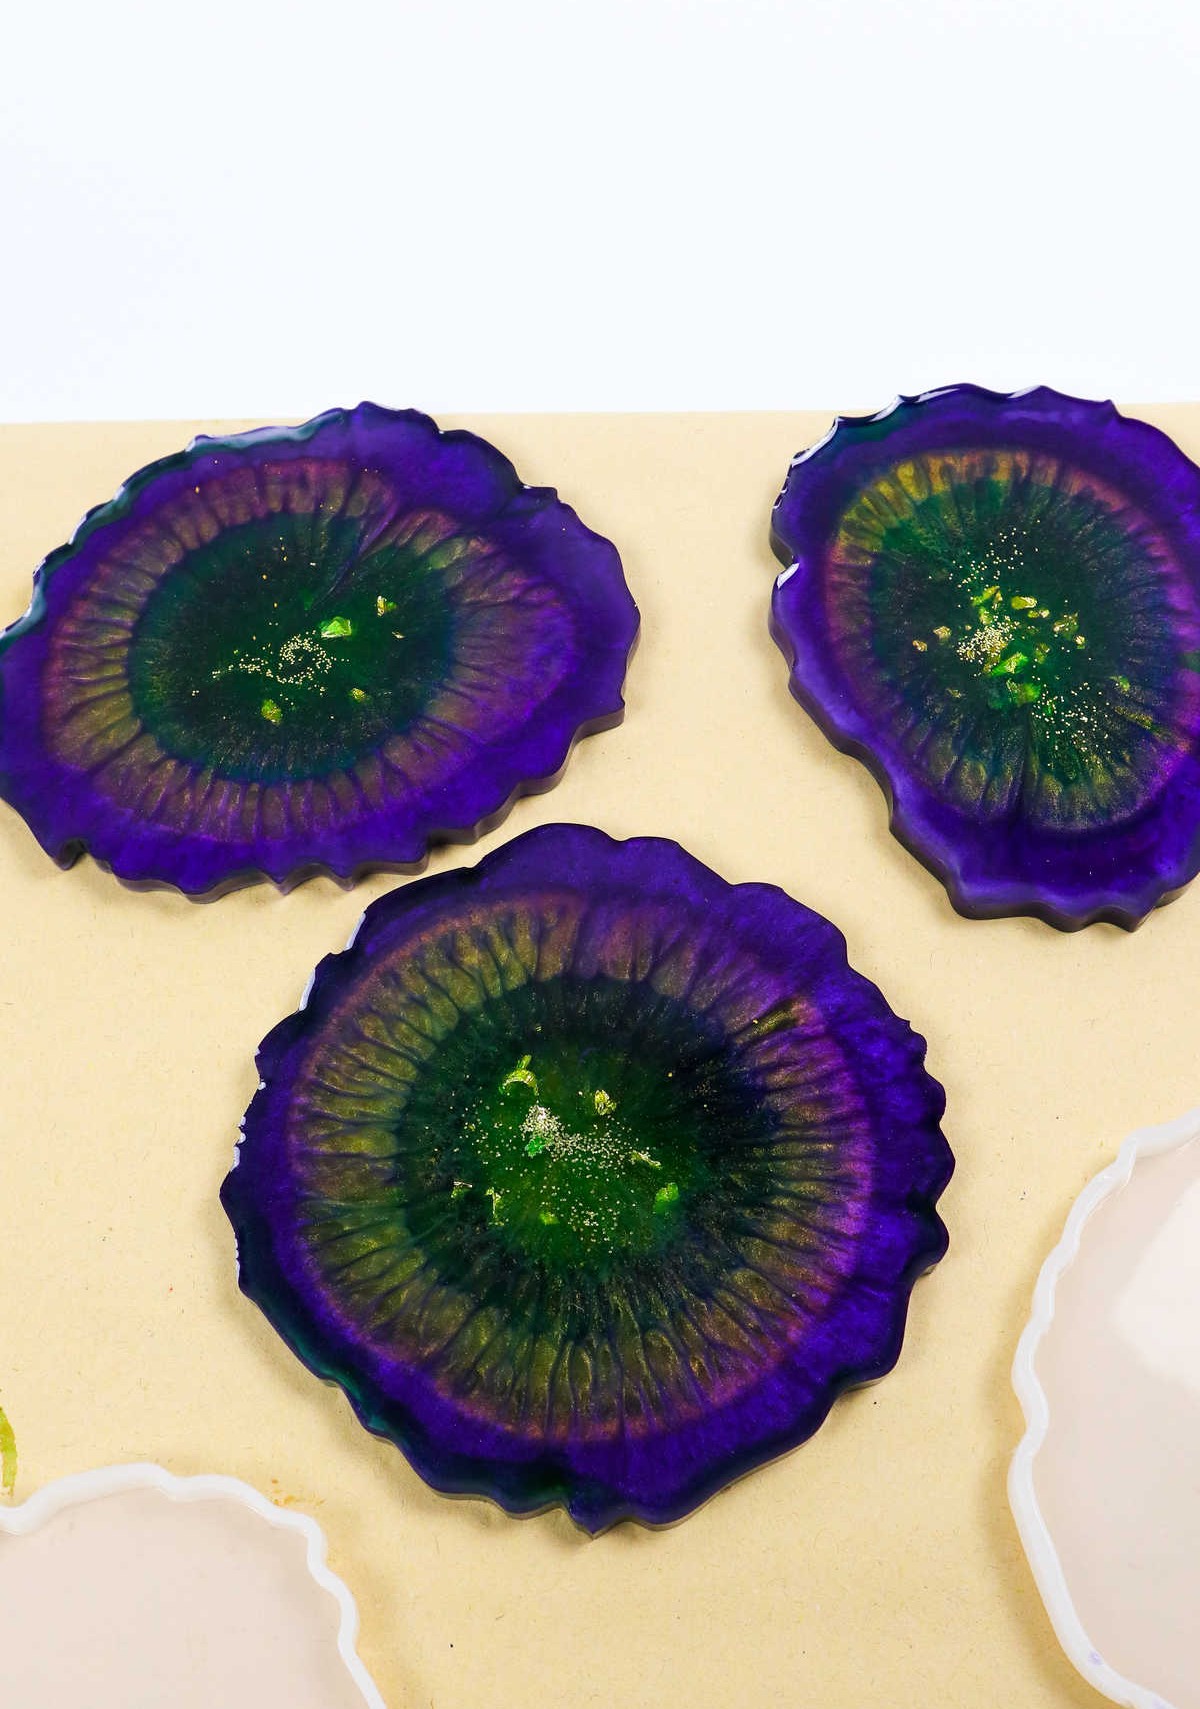
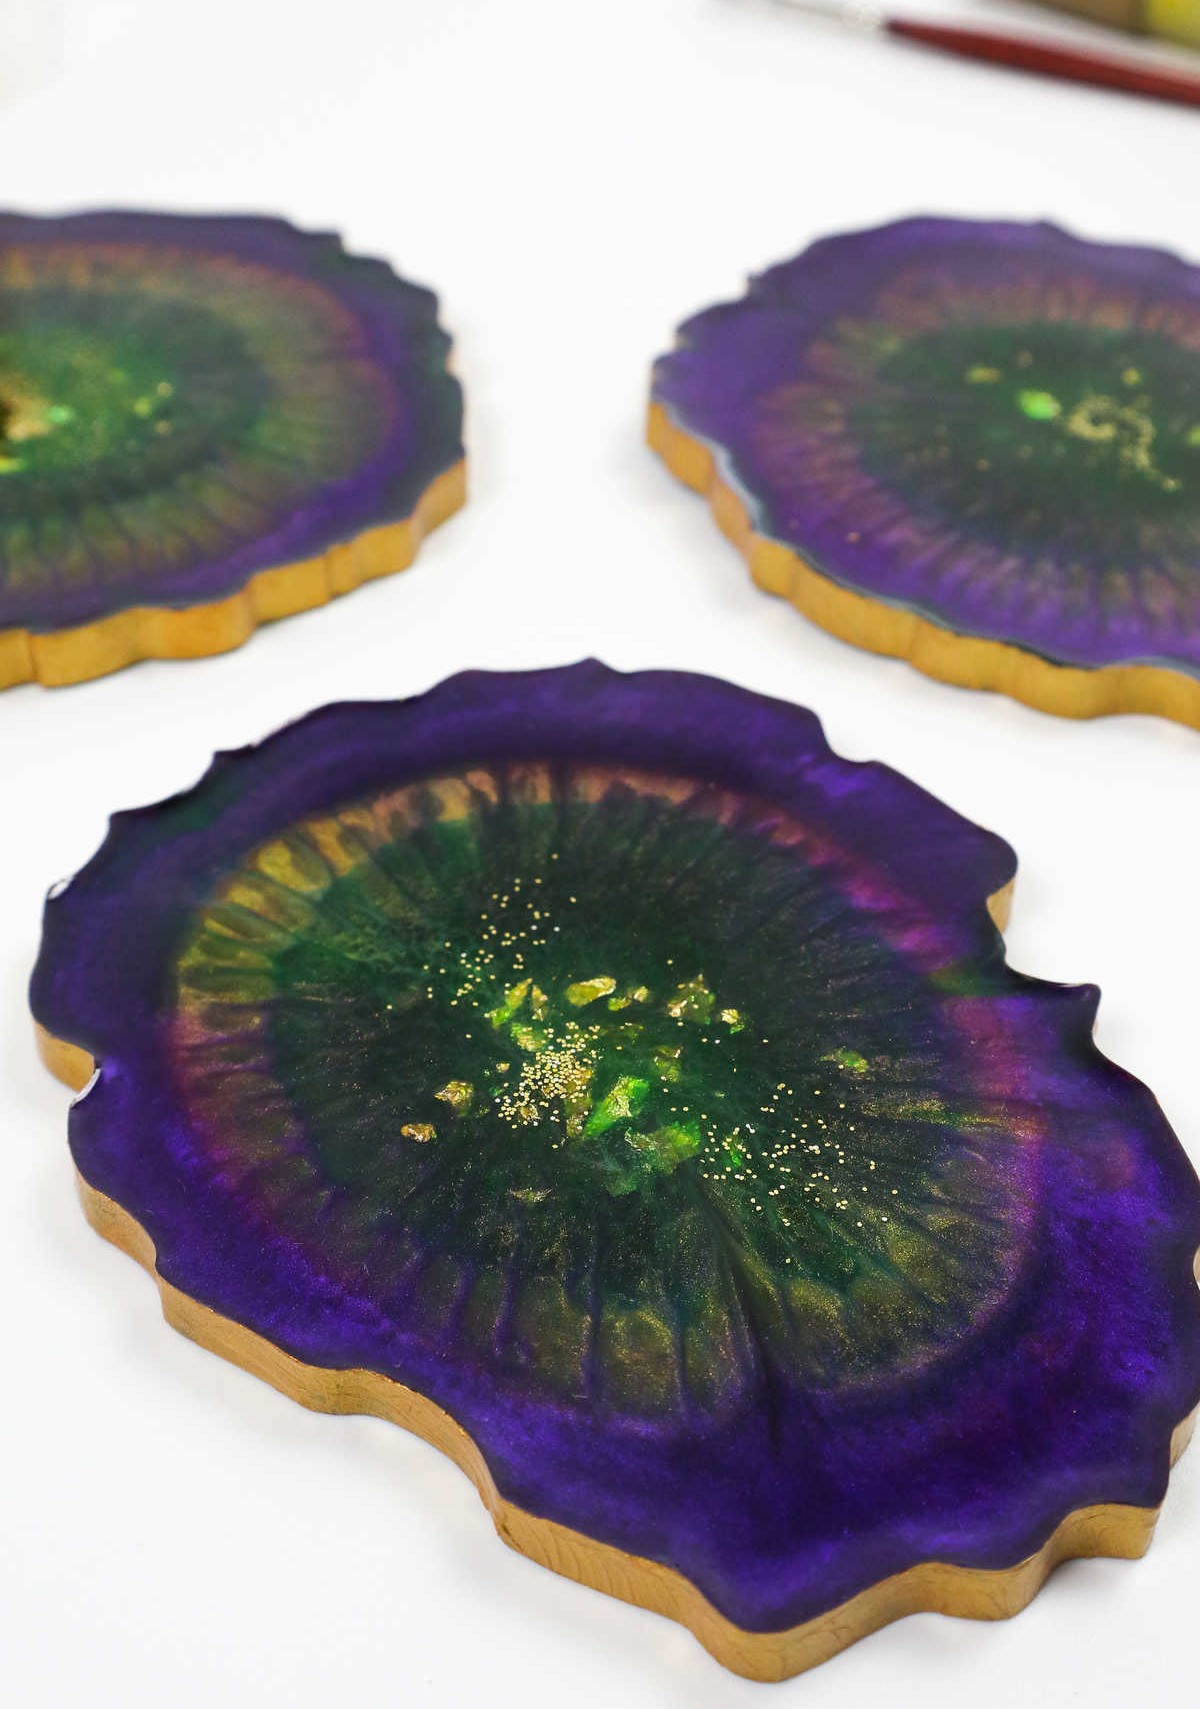
The beauty of working with resin lies in its ability to blend seamlessly with other materials, allowing you to experiment with different textures and colors. In this case, the combination of deep purples, jewel-toned greens, and gold creates a mesmerizing visual effect that’s both elegant and eerie. With just a few simple steps, you can create coasters that are truly one-of-a-kind.
Supplies and Tools You’ll Need
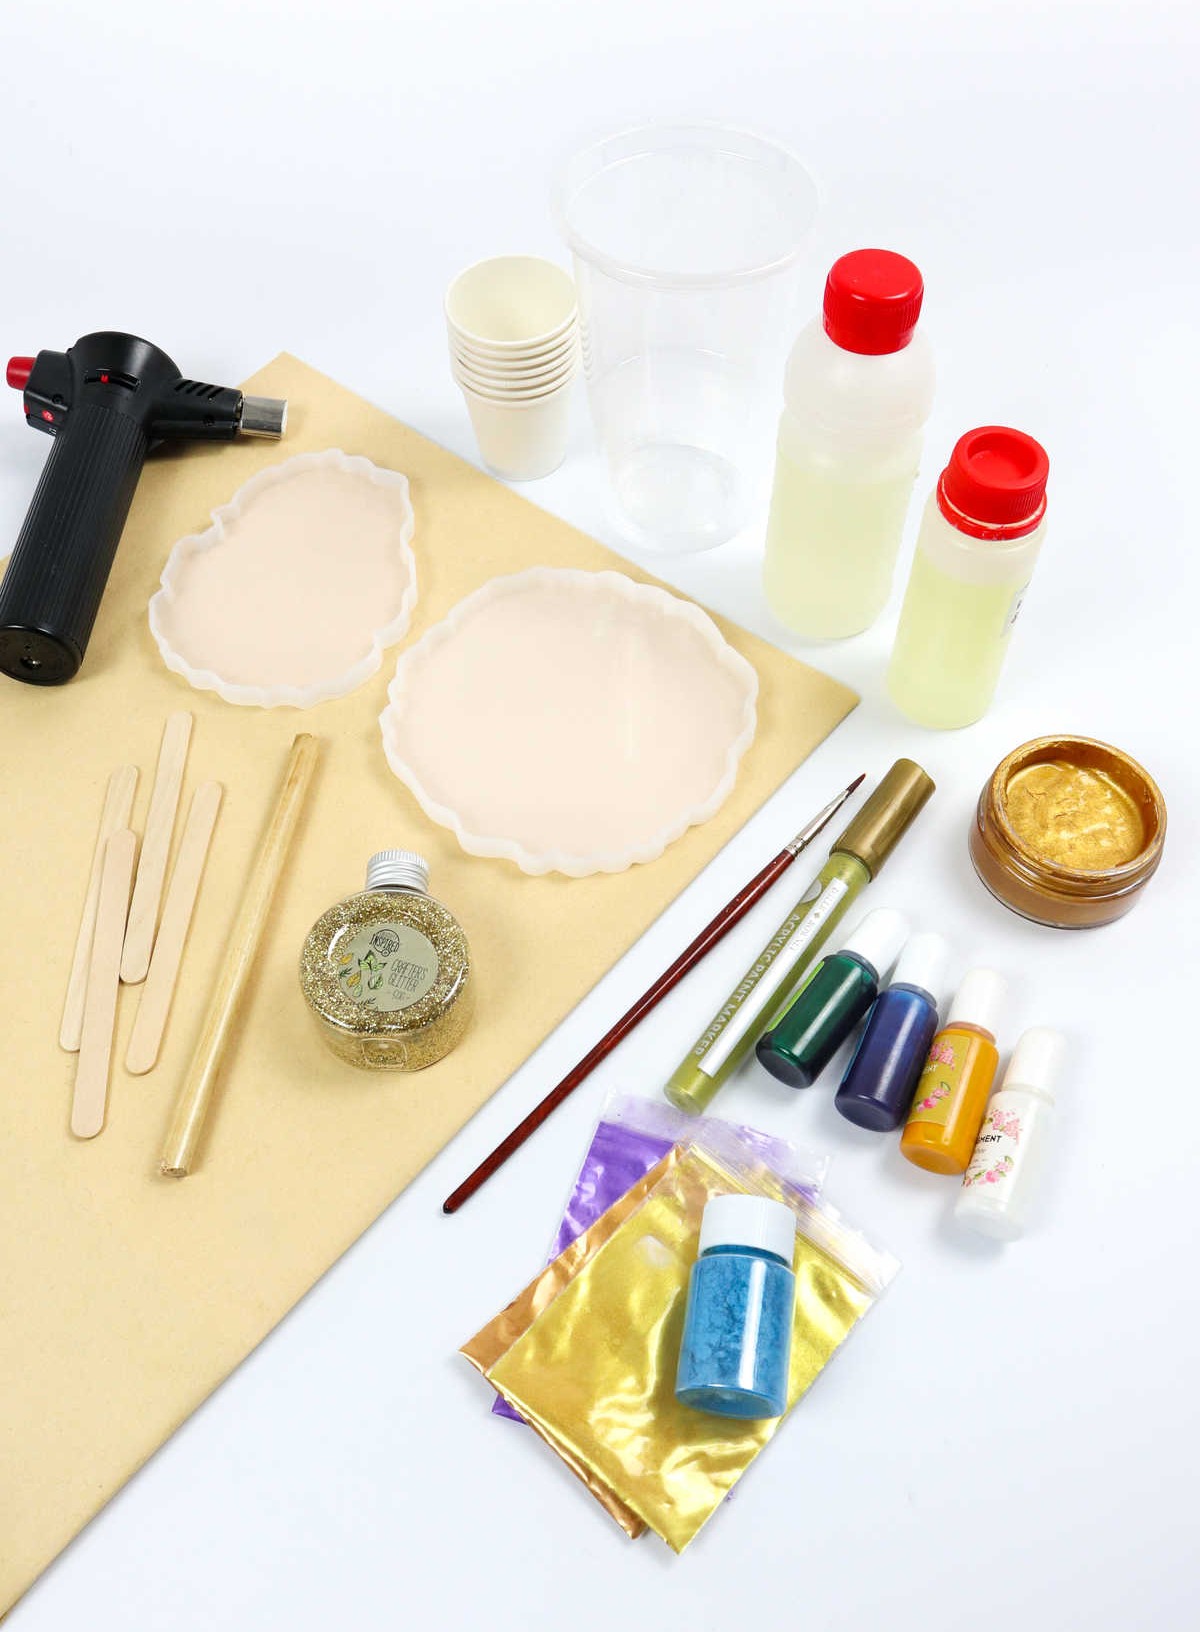
To get started with this resin craft project, you’ll need a few essential materials. Here’s the comprehensive list: Begin by gathering your epoxy resin and hardener. Next, prepare your mold-making arsenal with silicone molds and plastic cups for creating unique shapes. For added decoration, consider using a placemat or other design element. To give your resin a pop of color, you’ll need resin pigments and mica powder.
When working with the sticky stuff, having the right tools is crucial: spatulas will help with mixing and application, while a kitchen torch can aid in creating unique textures. For adding fine details, bring along an acrylic marker or paintbrush, paired with some acrylic paint. To ensure your workspace remains clean and protected, don’t forget to wear a face mask and gloves. If you want to add an extra touch of sparkle, glitter is always an option.
How to Make Resin Coasters
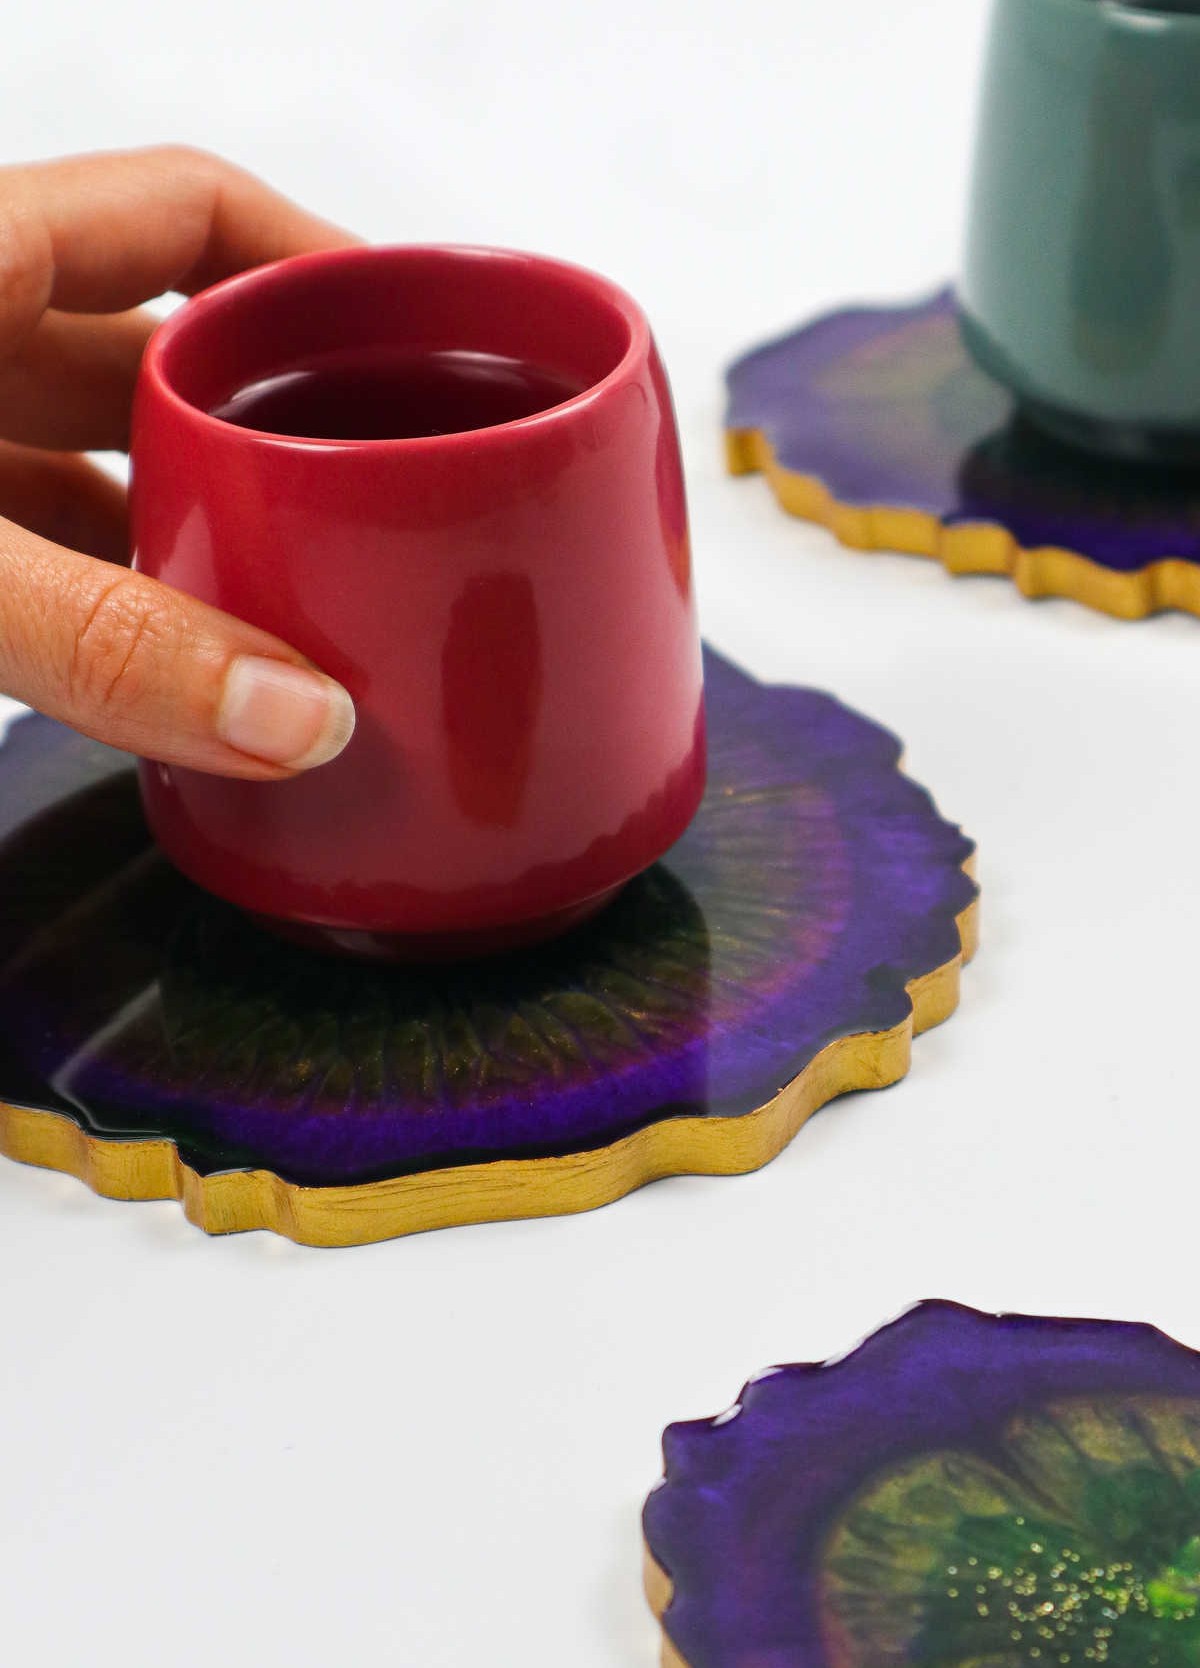
Before diving into the process of working with epoxy resin, it’s essential to grasp its fundamental principles and characteristics. Take some time to familiarize yourself with how epoxy resin behaves, so you can better understand what to expect when using it. This knowledge will be particularly valuable if you plan to employ the resin as a coaster for hot cups, as heat resistance is crucial to maintain the desired color stability over time.
Once you’re equipped with this foundational understanding, we can move forward and begin our project.
Step 1
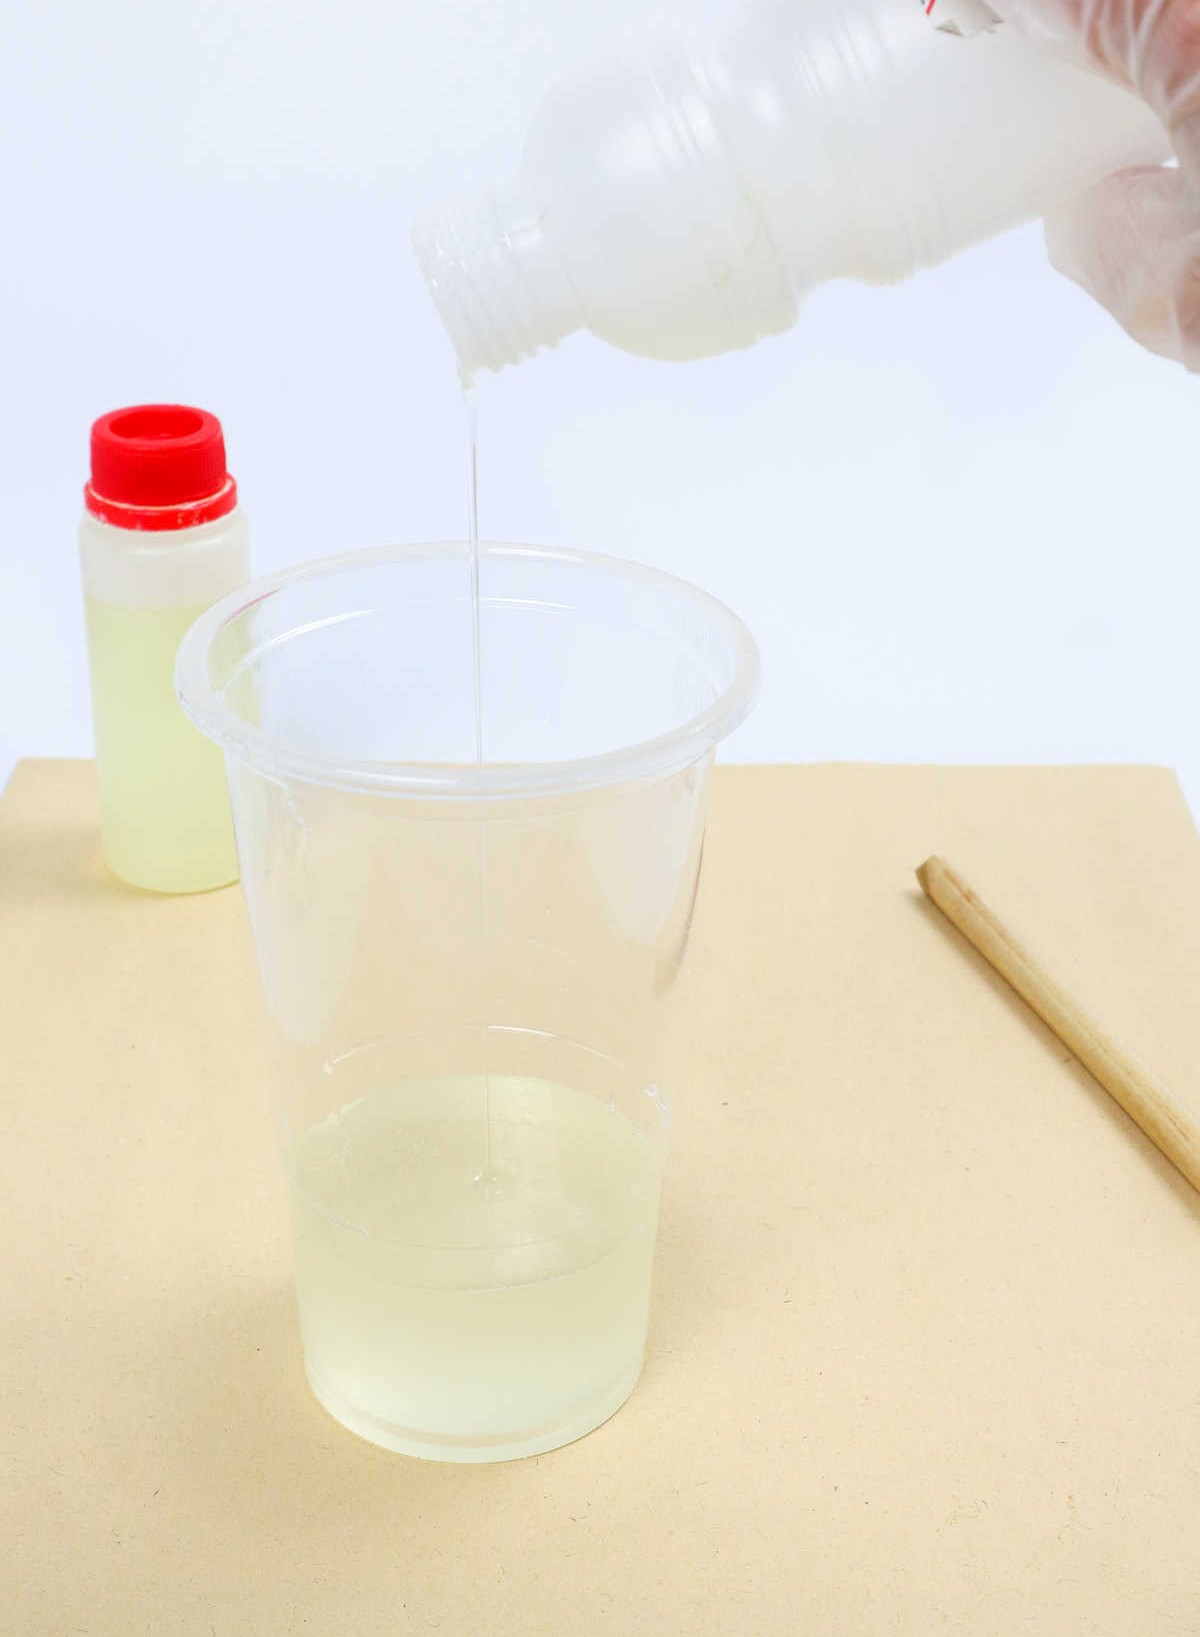
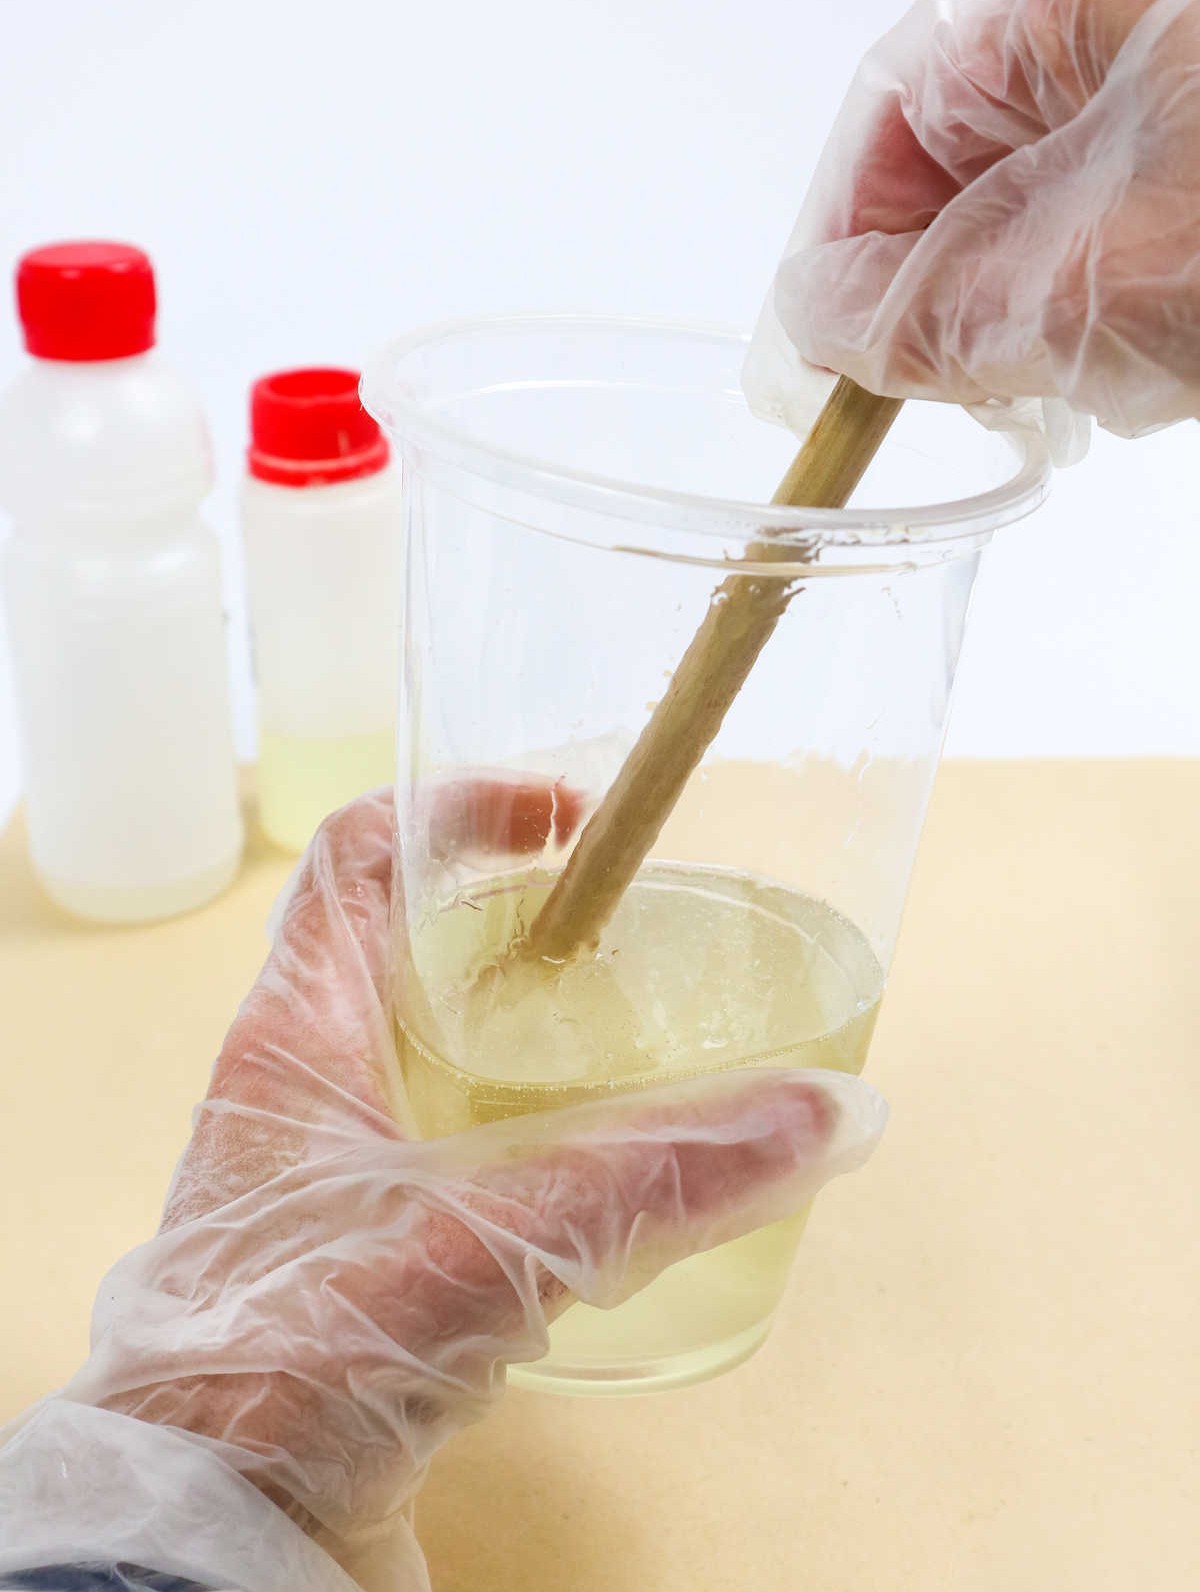
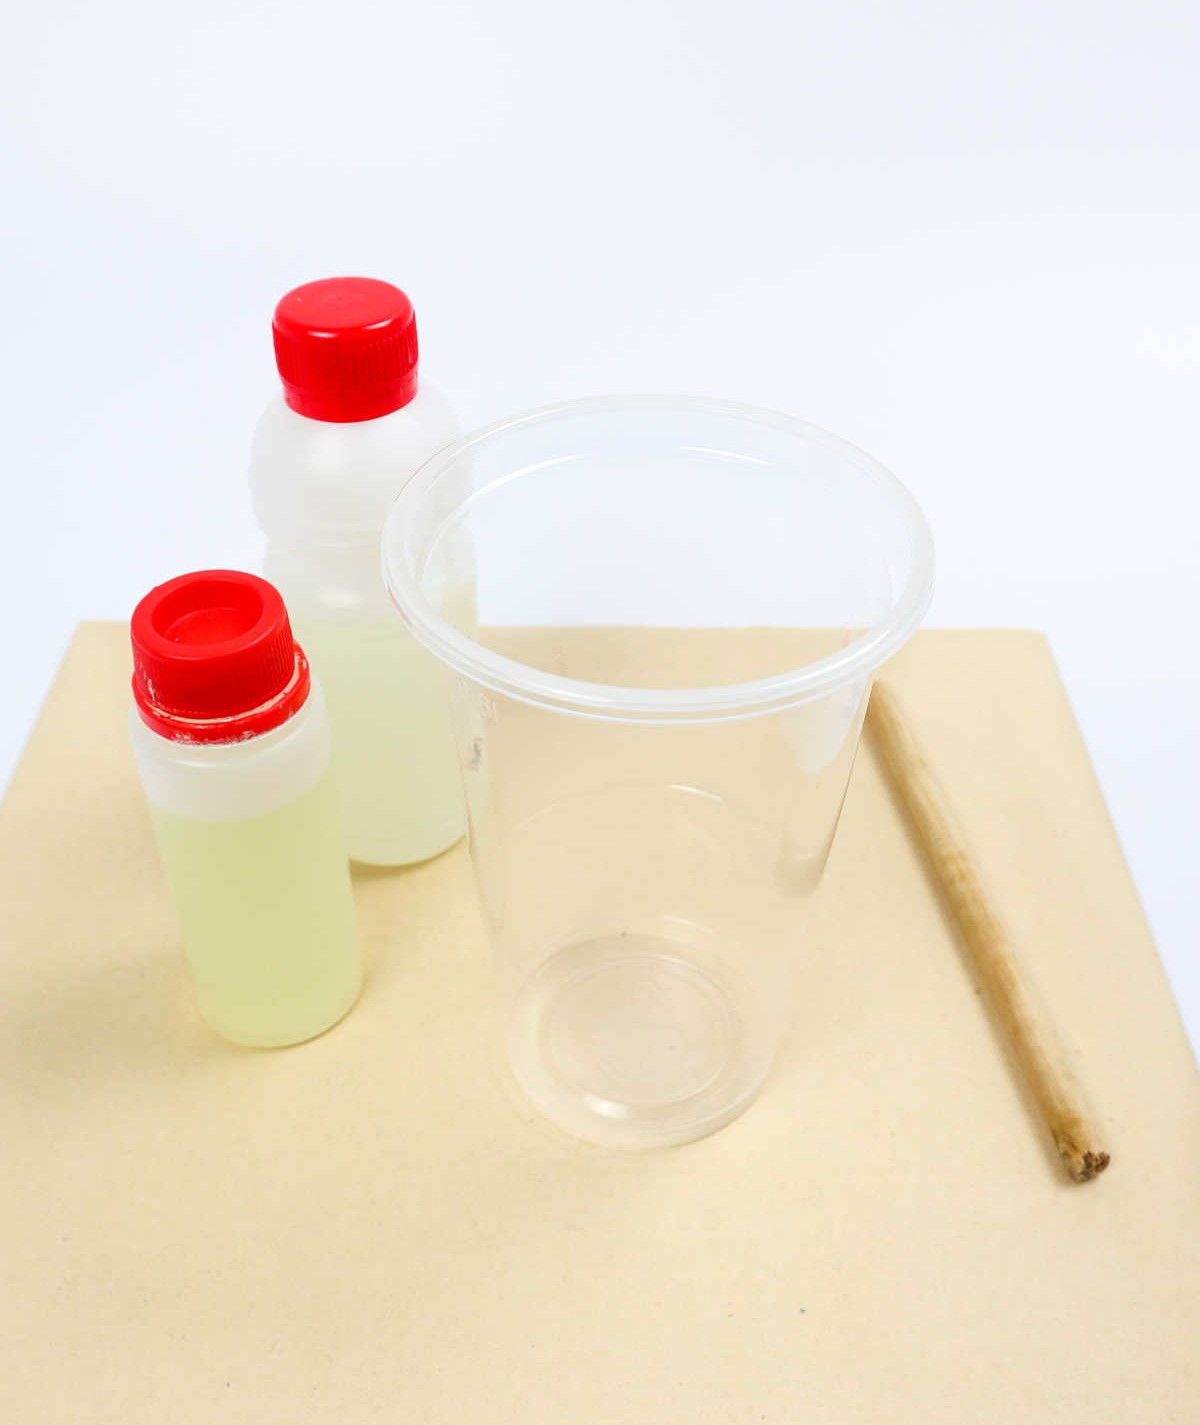
To combine the resin and hardener, pour the correct ratio of each into a plastic cup and thoroughly blend them together. A wooden stick or popsicle stick can serve as an effective mixing tool.
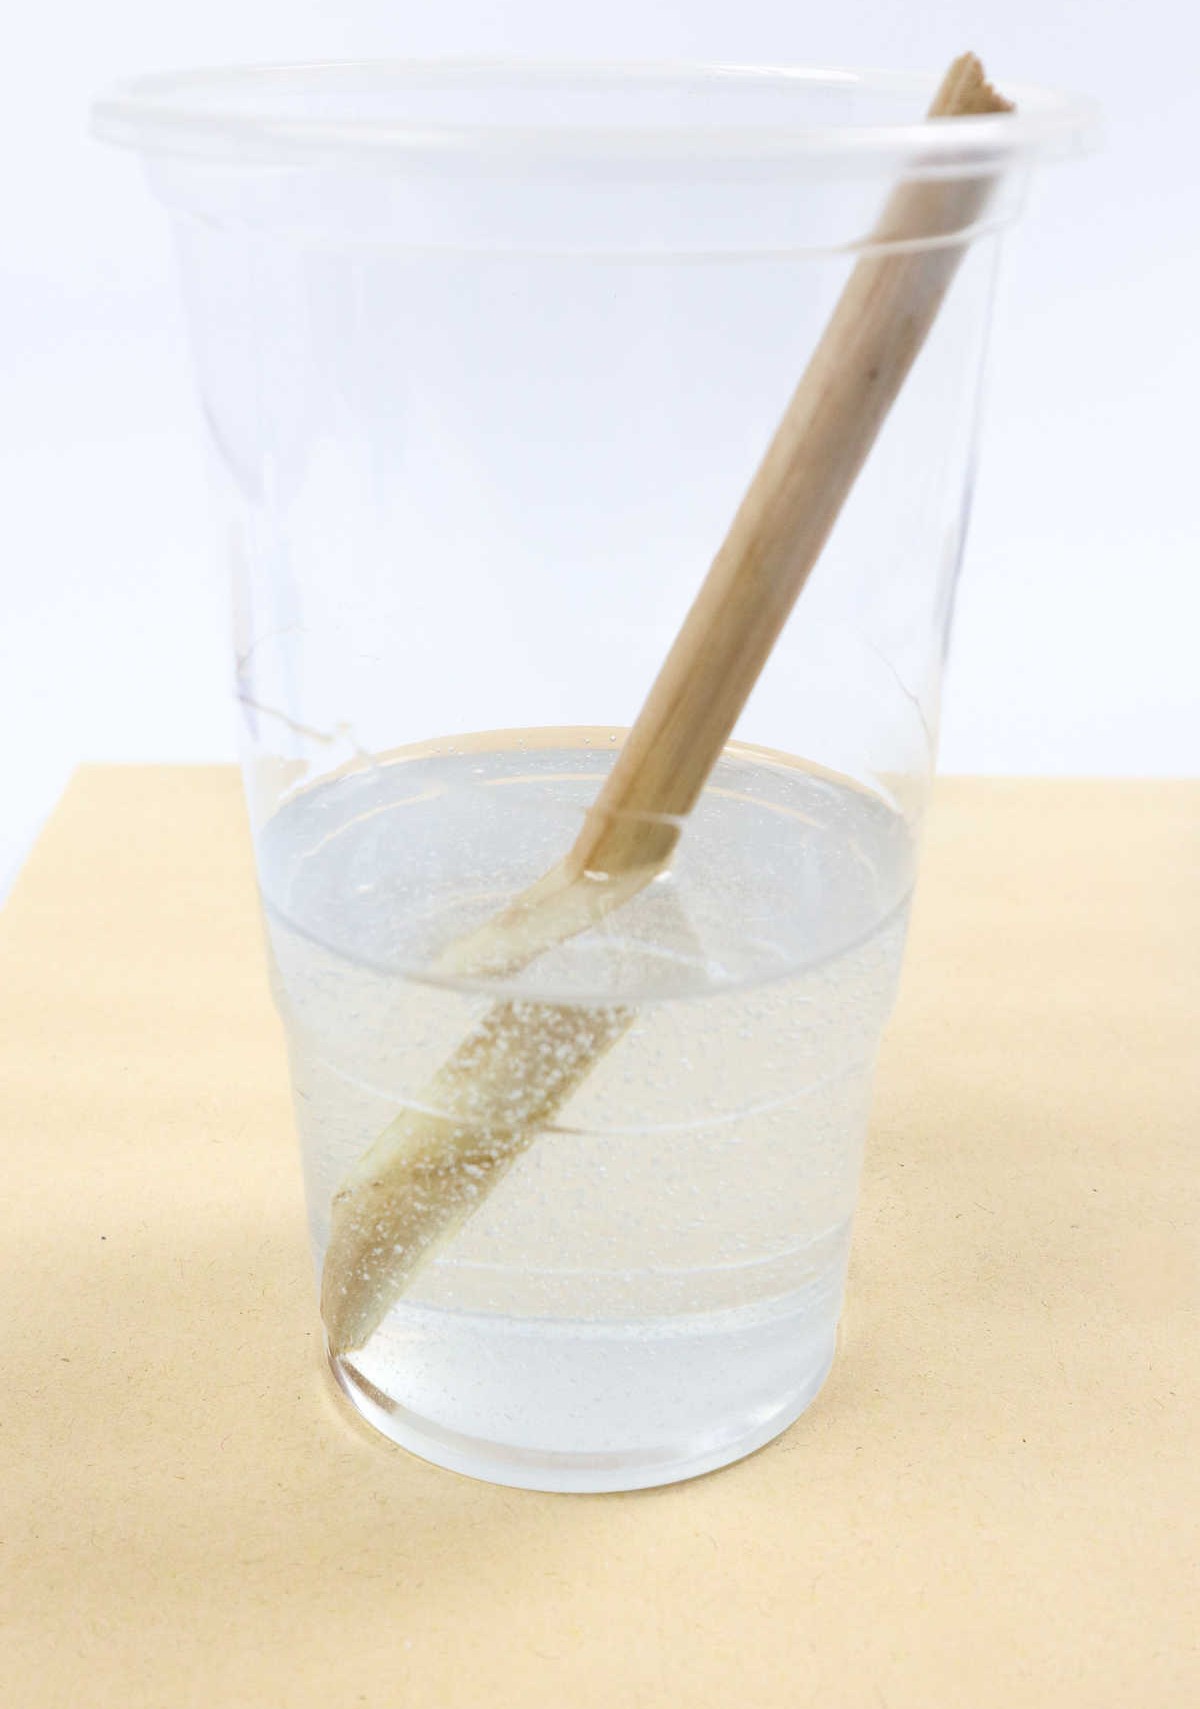
It’s crucial to mix the substances thoroughly to avoid any potential issues with the final product. Don’t be satisfied with your initial stir – take the extra step to ensure they’re well combined, even if it means stirring a bit more.
While bubbles may form during this process, don’t worry; you’ll have the opportunity to address them later.
Step 2
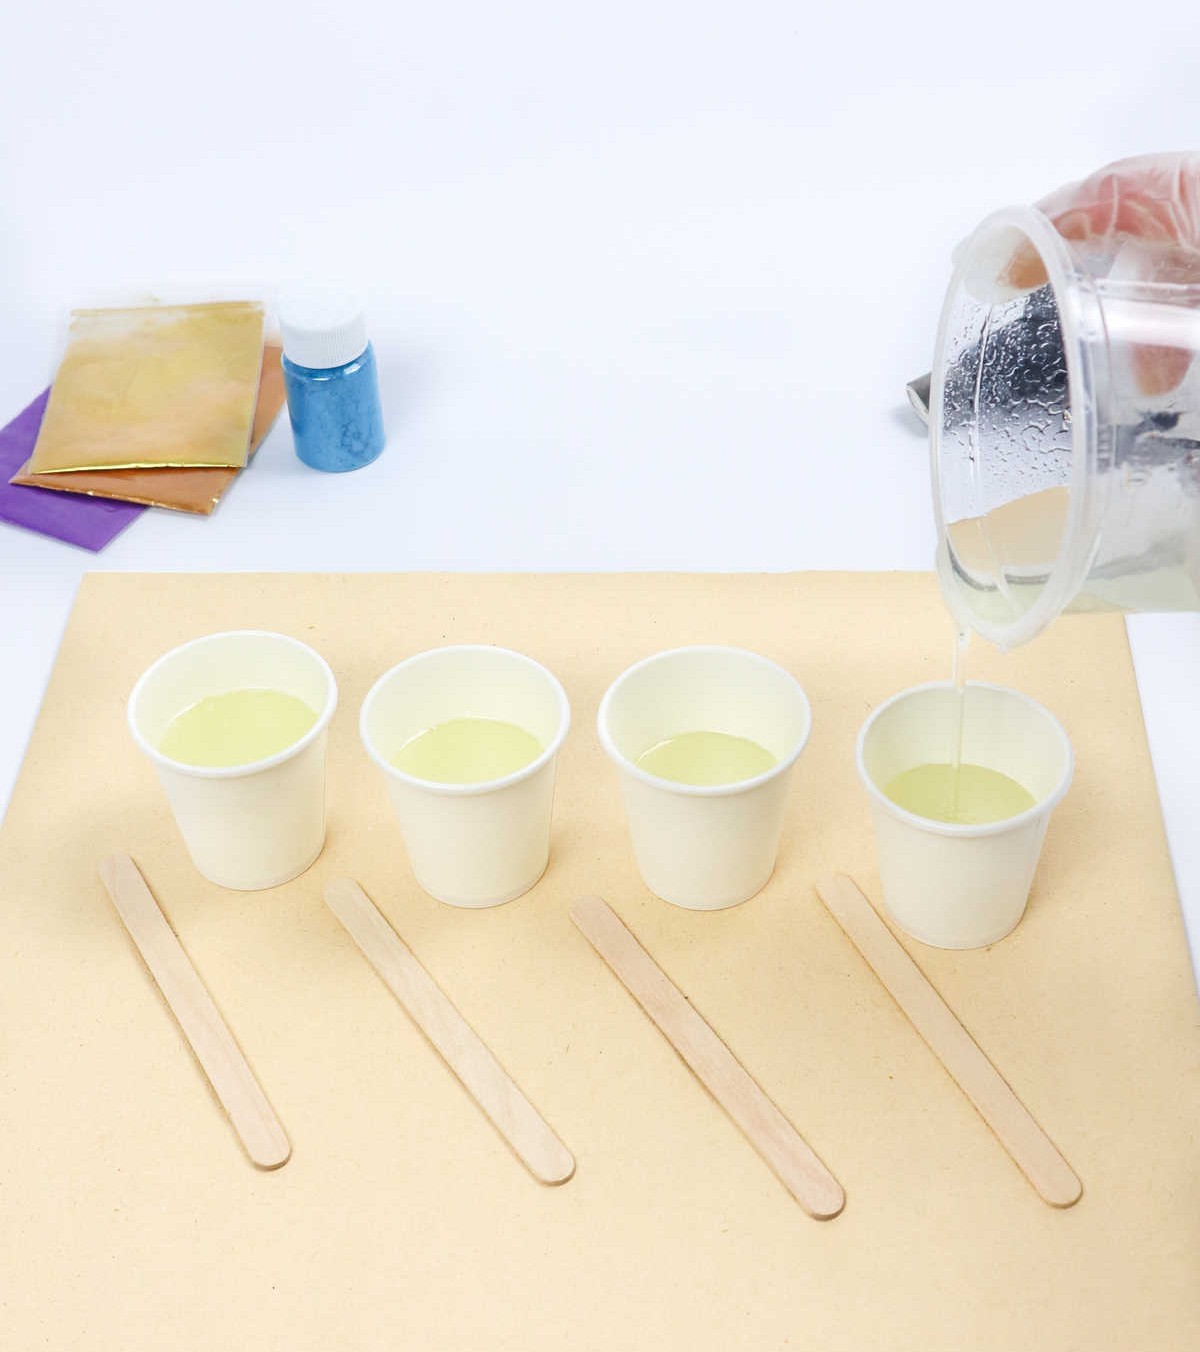
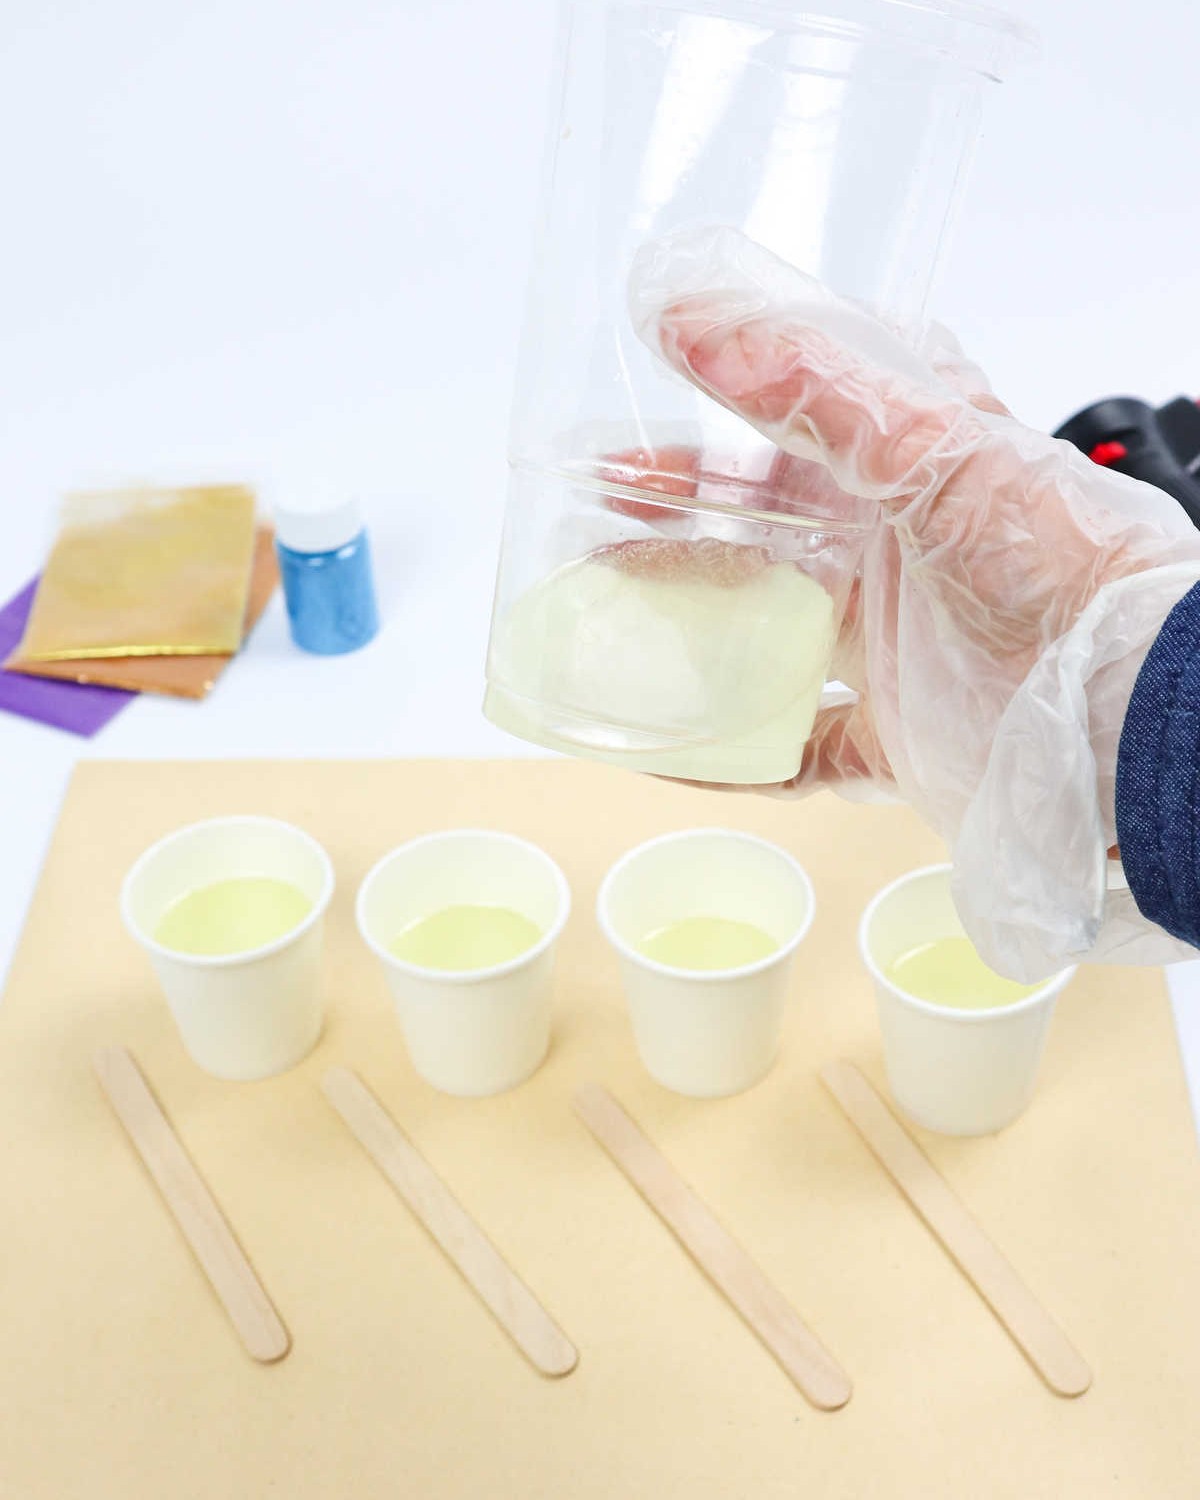
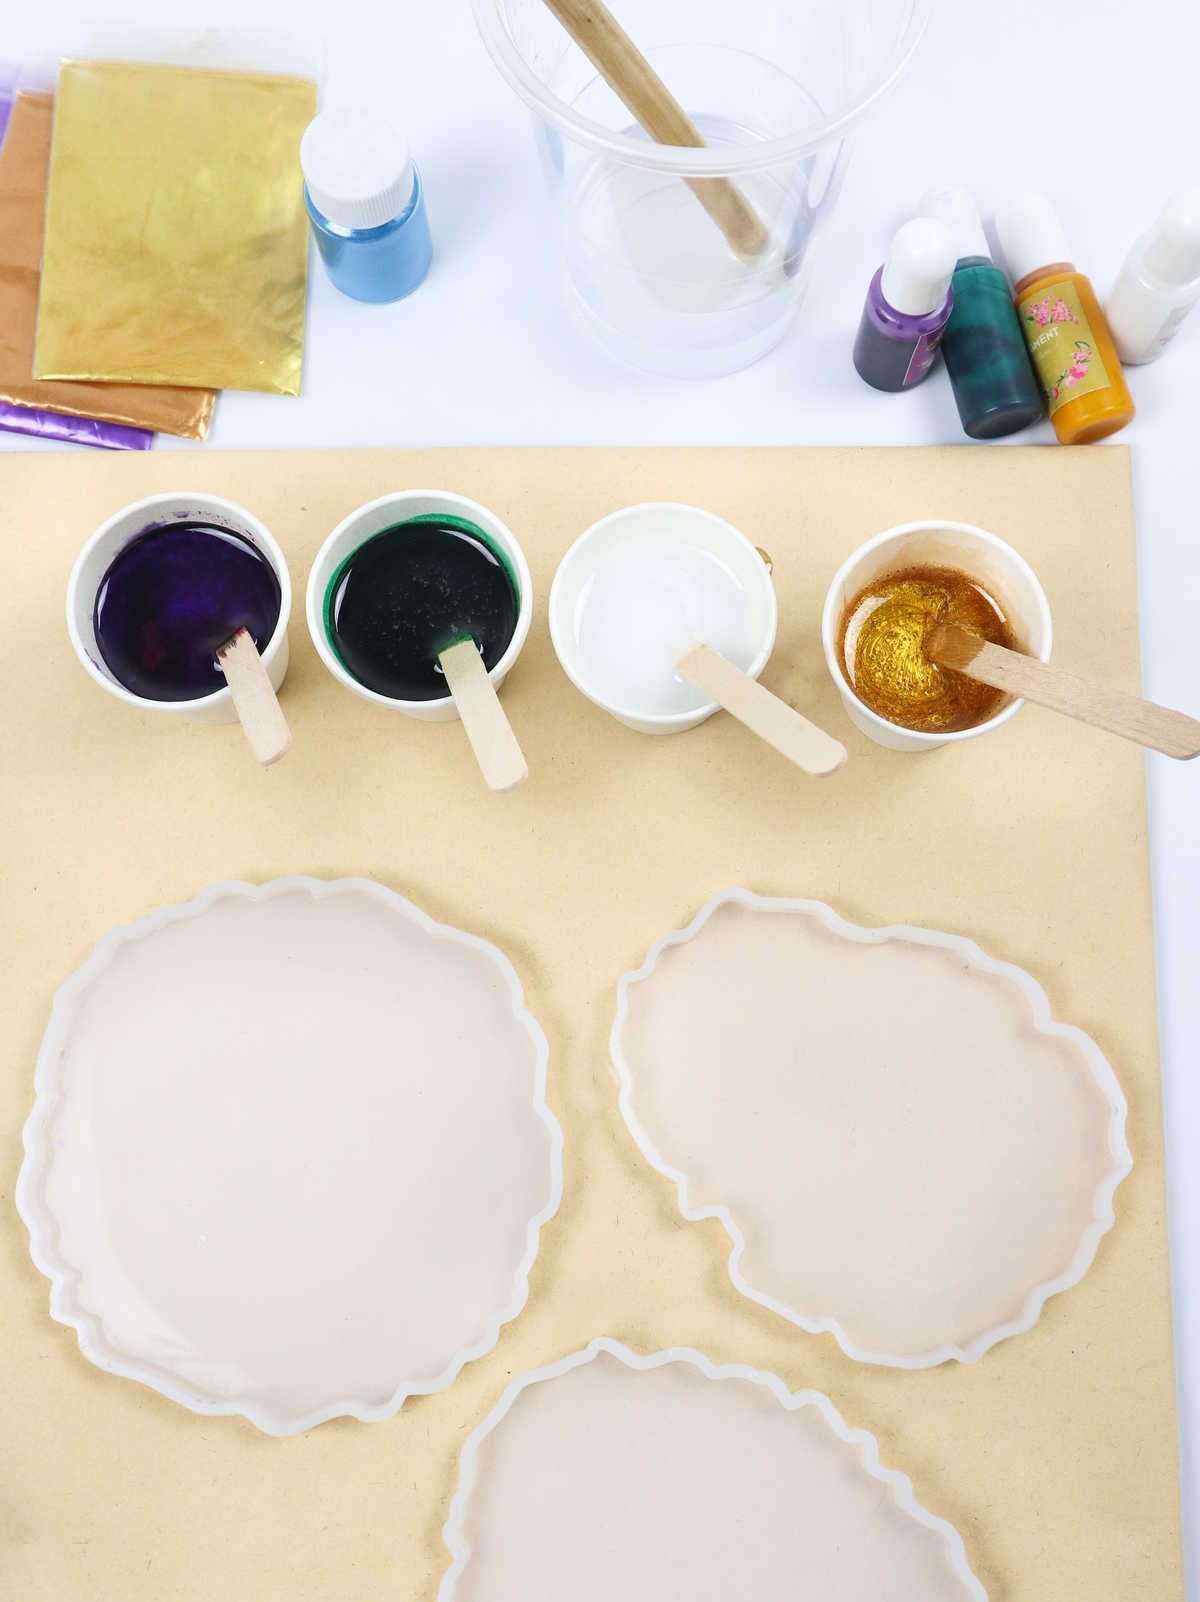
Divide the resin mixture evenly among four separate containers, creating distinct pours. As you proceed with the process, you’ll soon be introducing color variations to each cup. Be sure to reserve a portion of the clear resin separately, as it will be utilized at a later stage.
Step 3
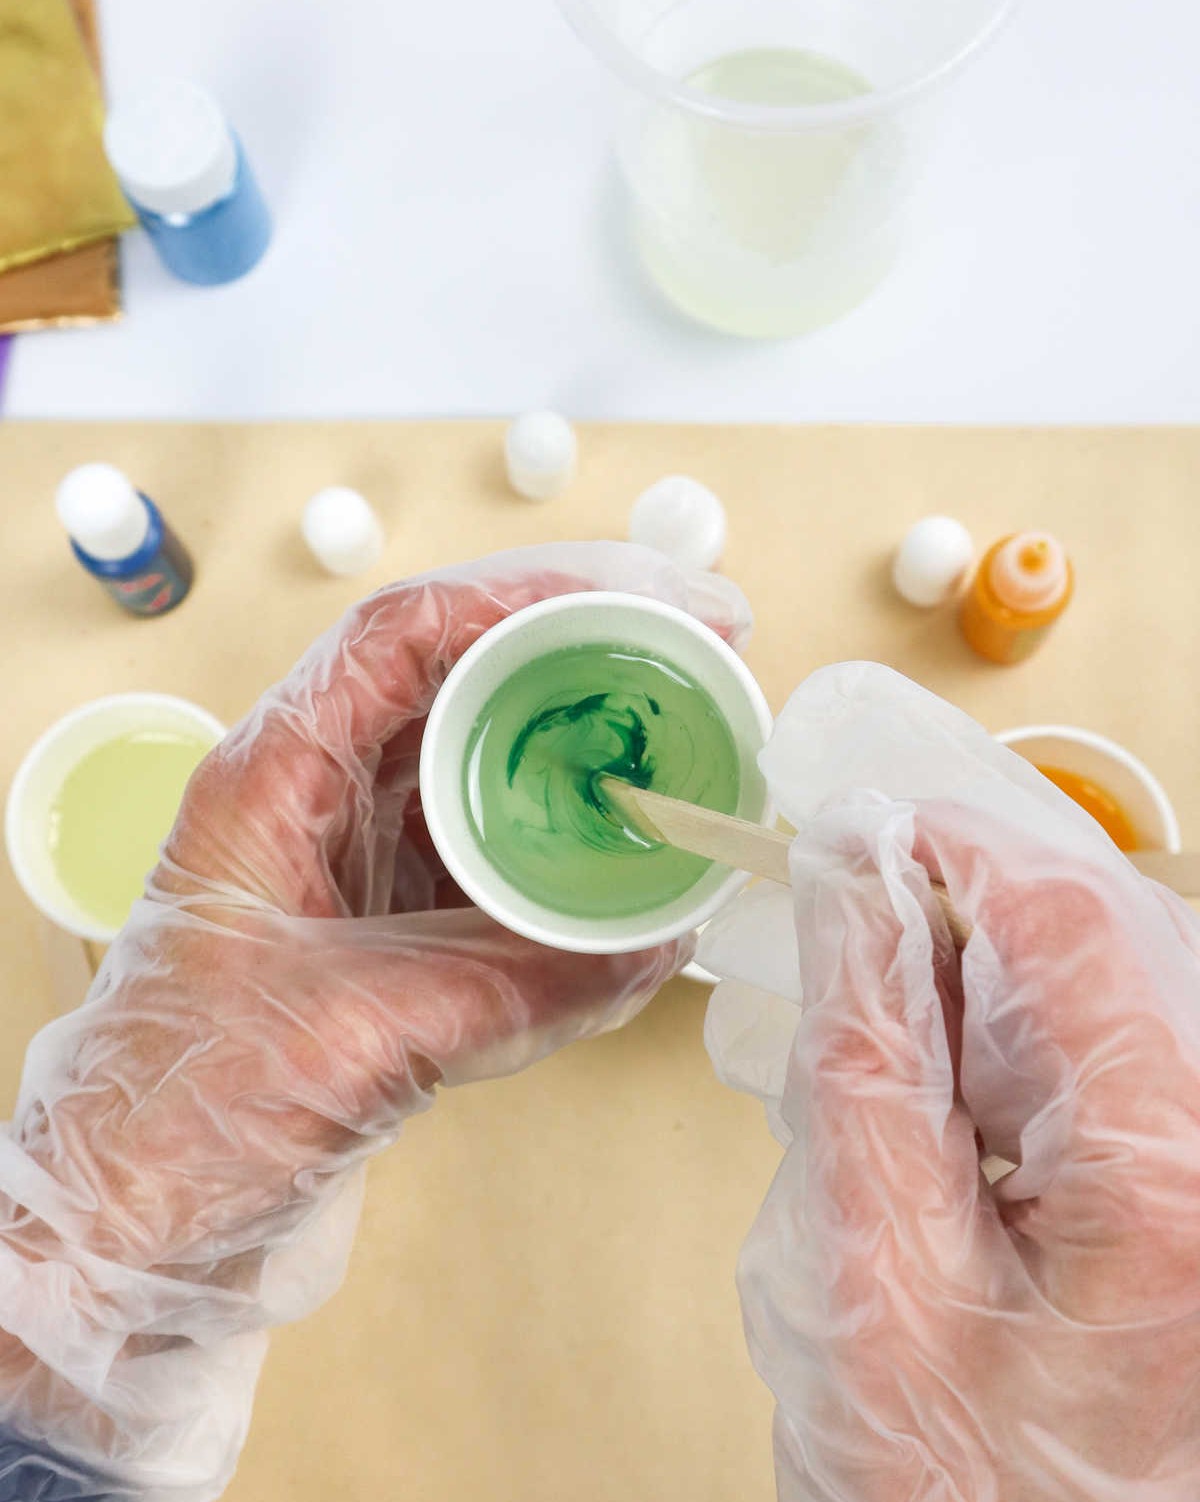
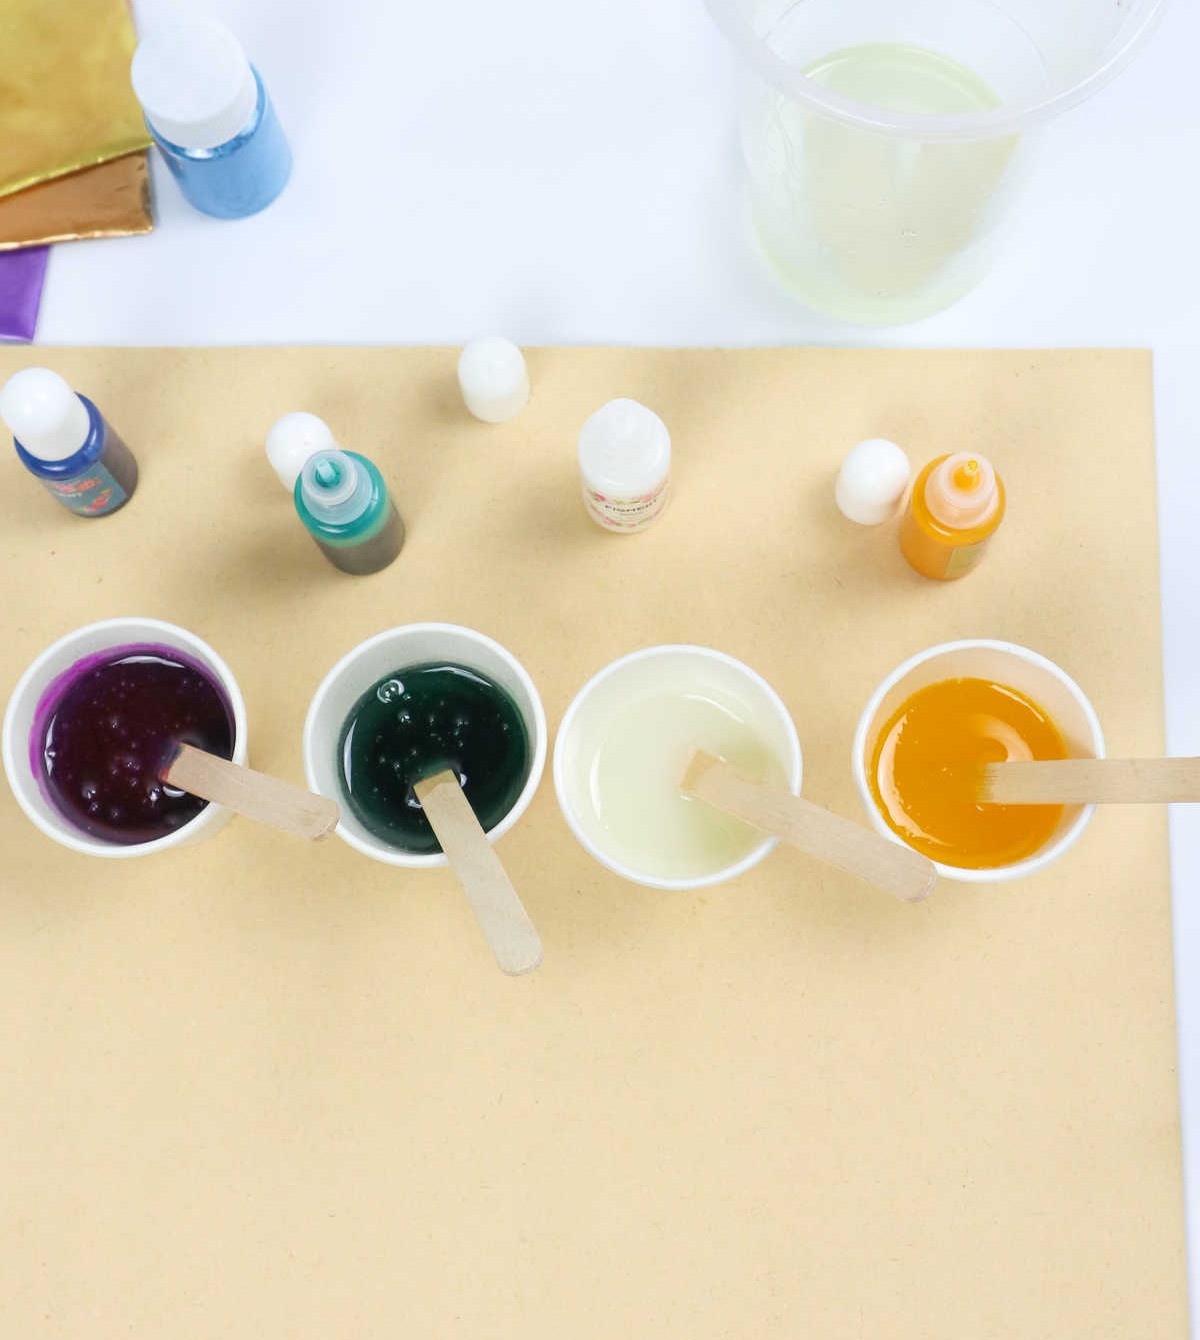
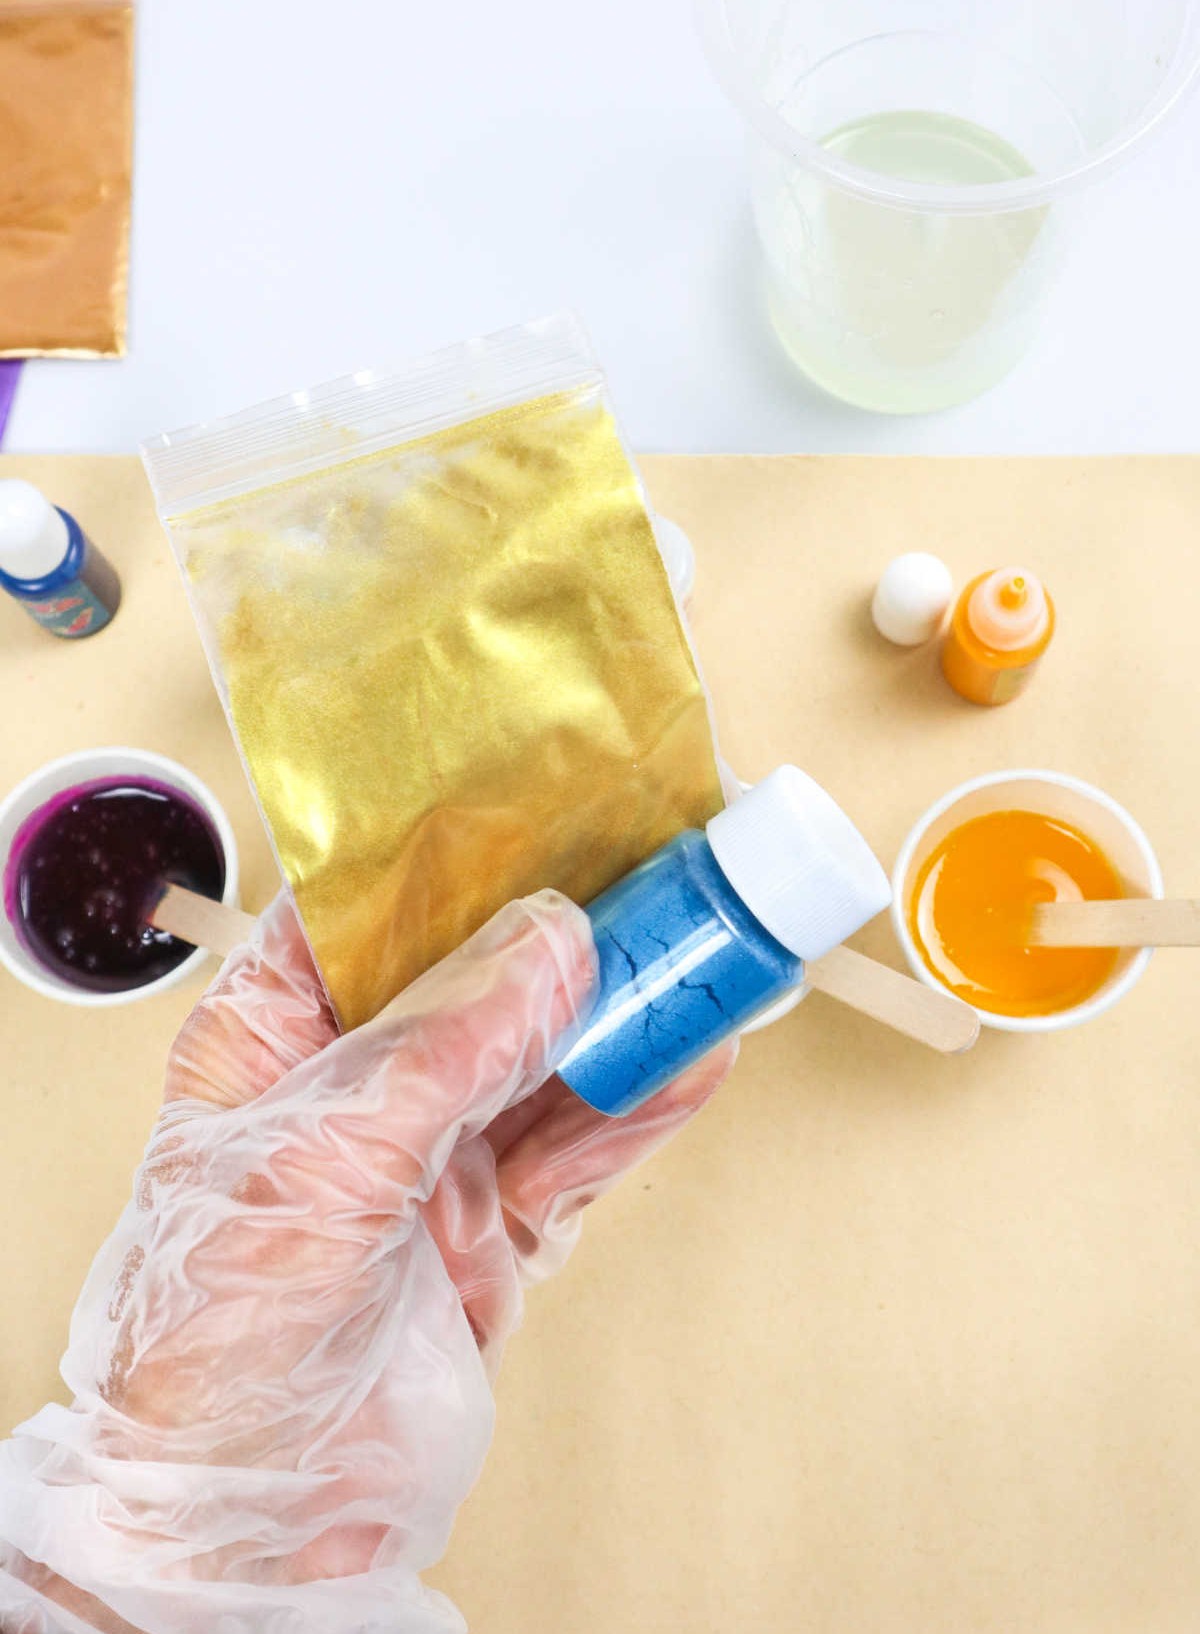
To take your resin creation to the next level, it’s time to introduce vibrant hues and textures. For this, you’ll require a few carefully measured drops of purple, green, gold/yellow, and white dyes. To elevate the appearance even further, consider incorporating mica powder, which will imbue your mixture with an extraordinary silky smoothness and radiant shine. When combining these elements, use a stick to thoroughly stir the colors until they reach the desired intensity and aesthetic.
Additionally, you’re free to experiment with adding glitter (mica) powder to the blend, allowing for a mesmerizing play of light and color.
Step 4
Before proceeding with crafting your coasters, it’s essential to prepare the molds by ensuring they are meticulously clean and free from any residual moisture, oil, or dirt. A thorough cleaning will guarantee a successful molding process, allowing you to produce high-quality coasters.
Step 5
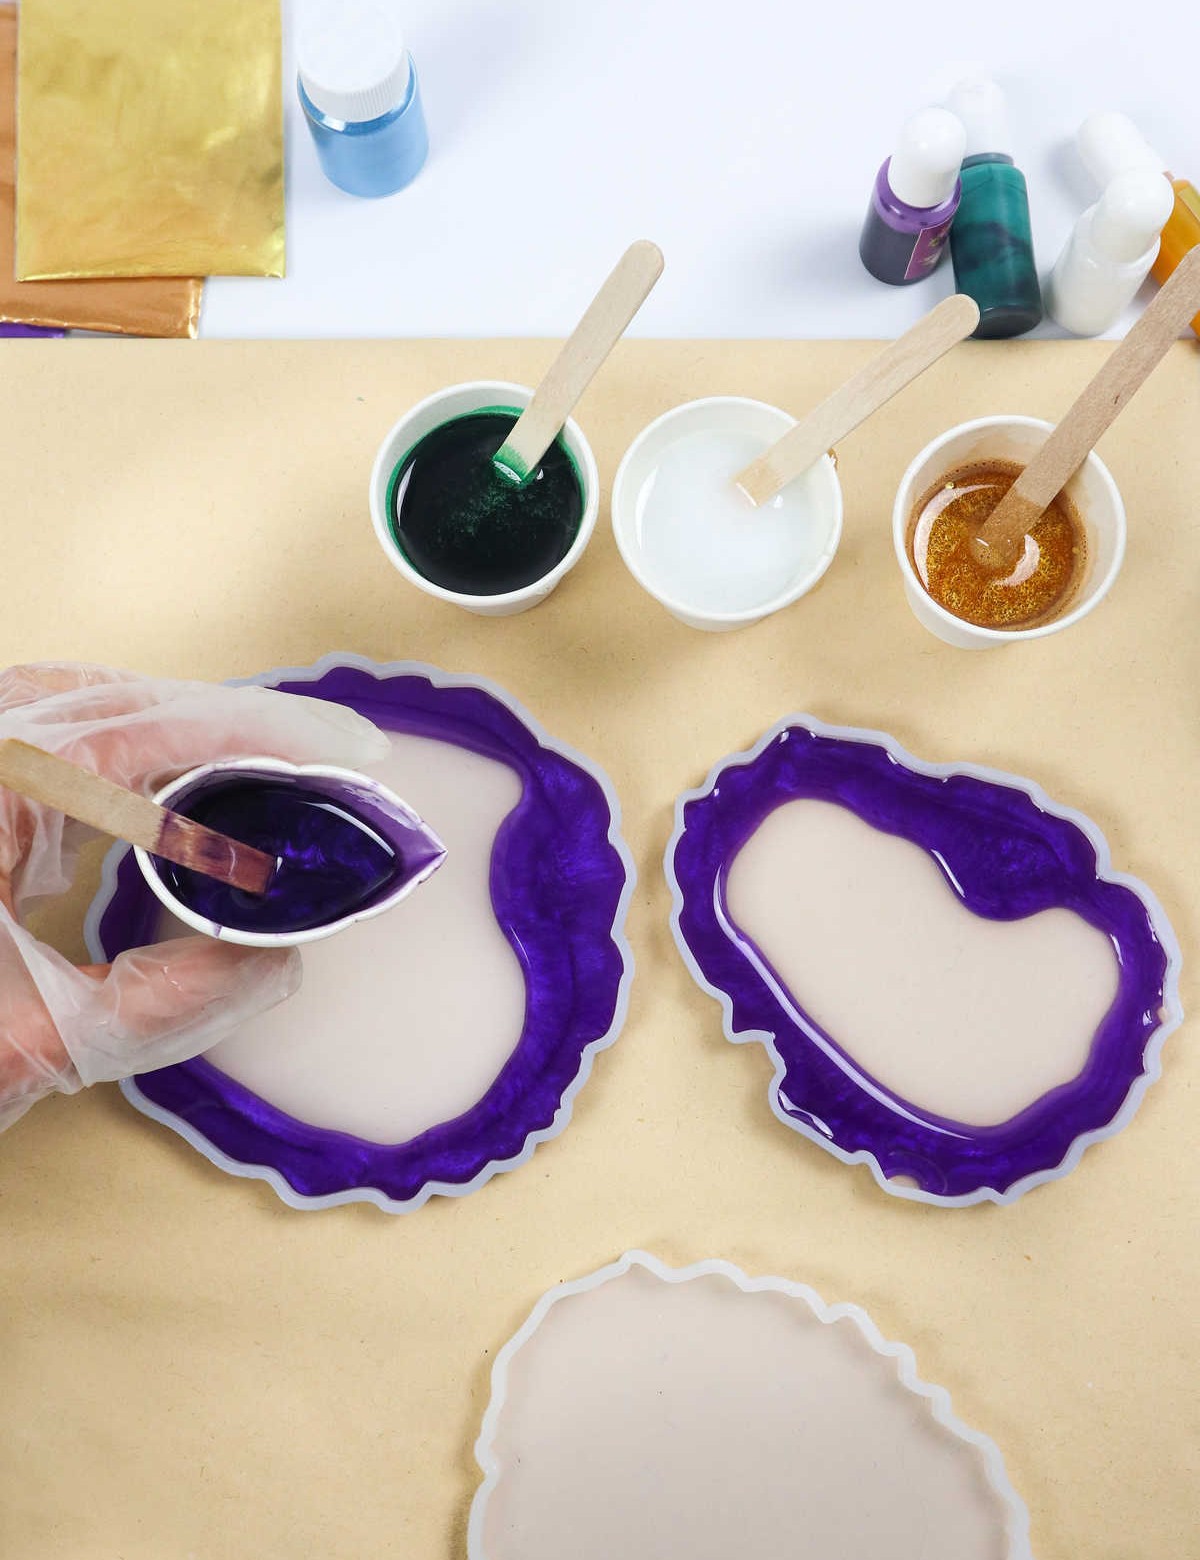
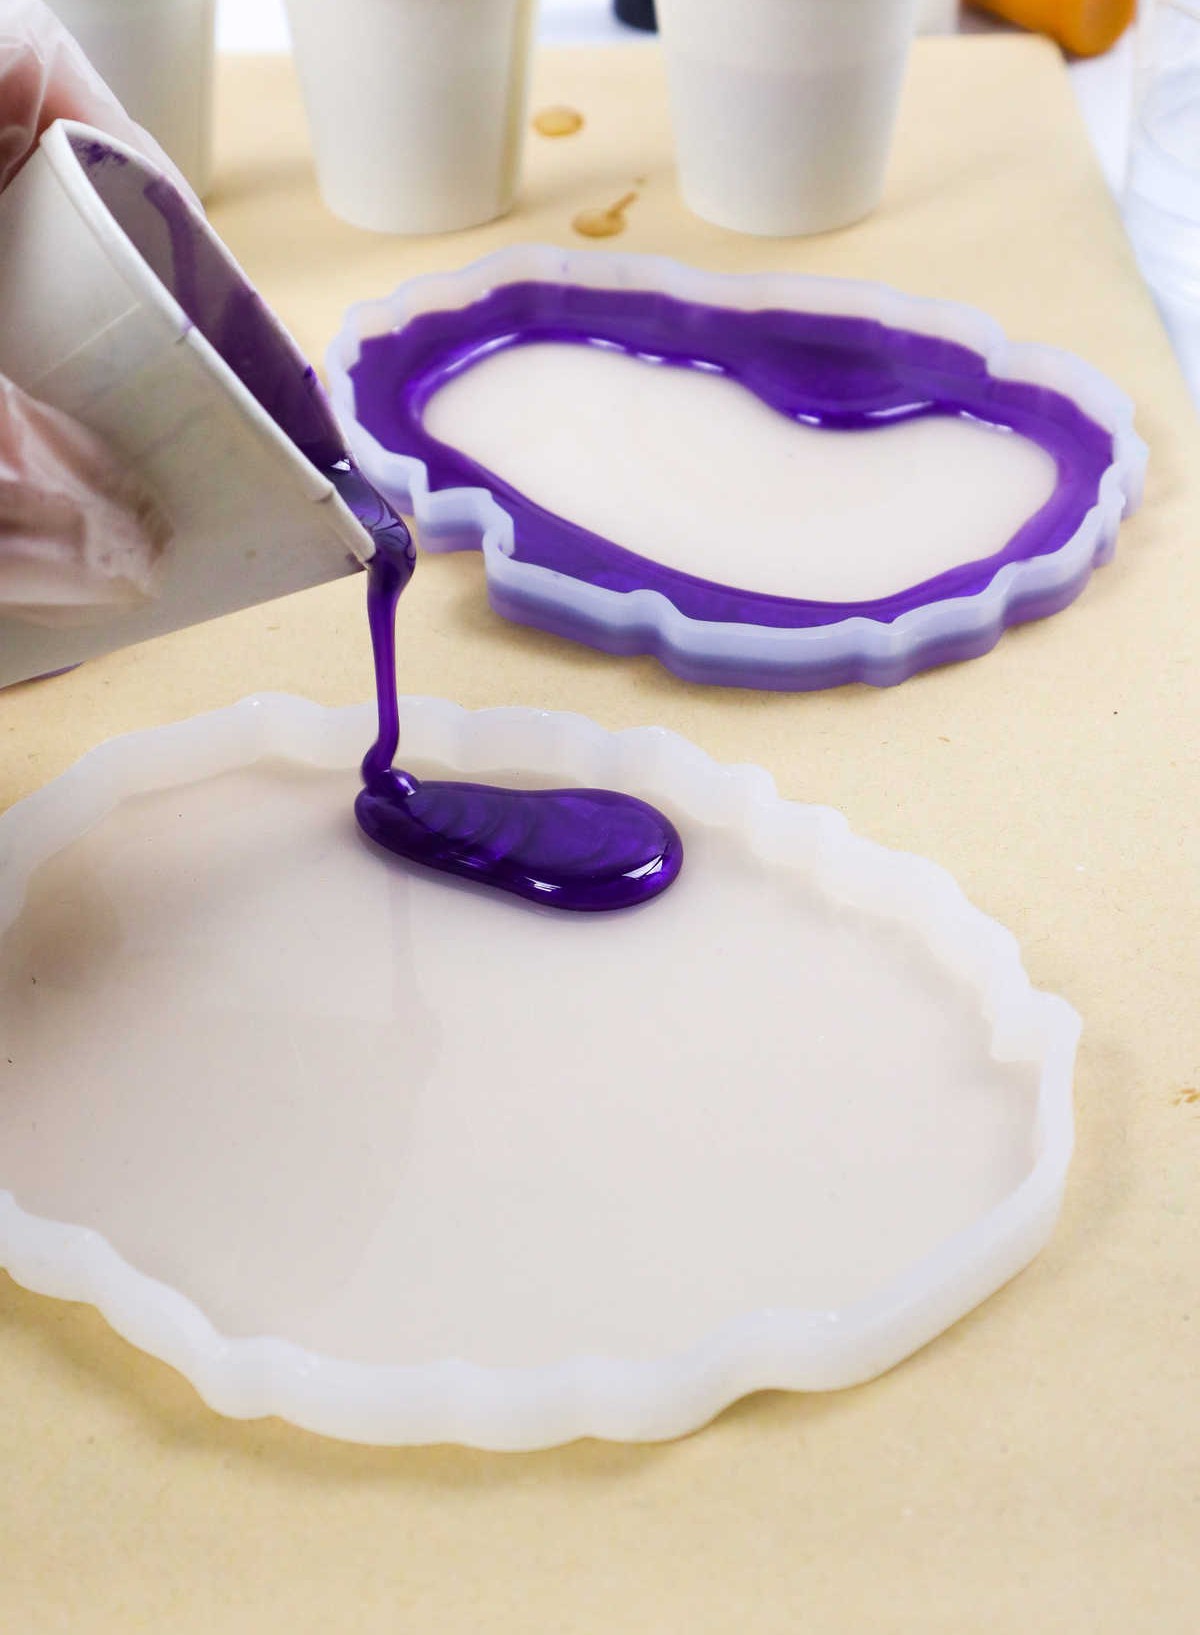
Begin by carefully pouring the outermost layer of colored resin, a rich purple hue in this example, onto the mold. By working from the outside in, towards the center, you’ll gain greater control over the pattern’s development and the resin’s curing process.
Step 6
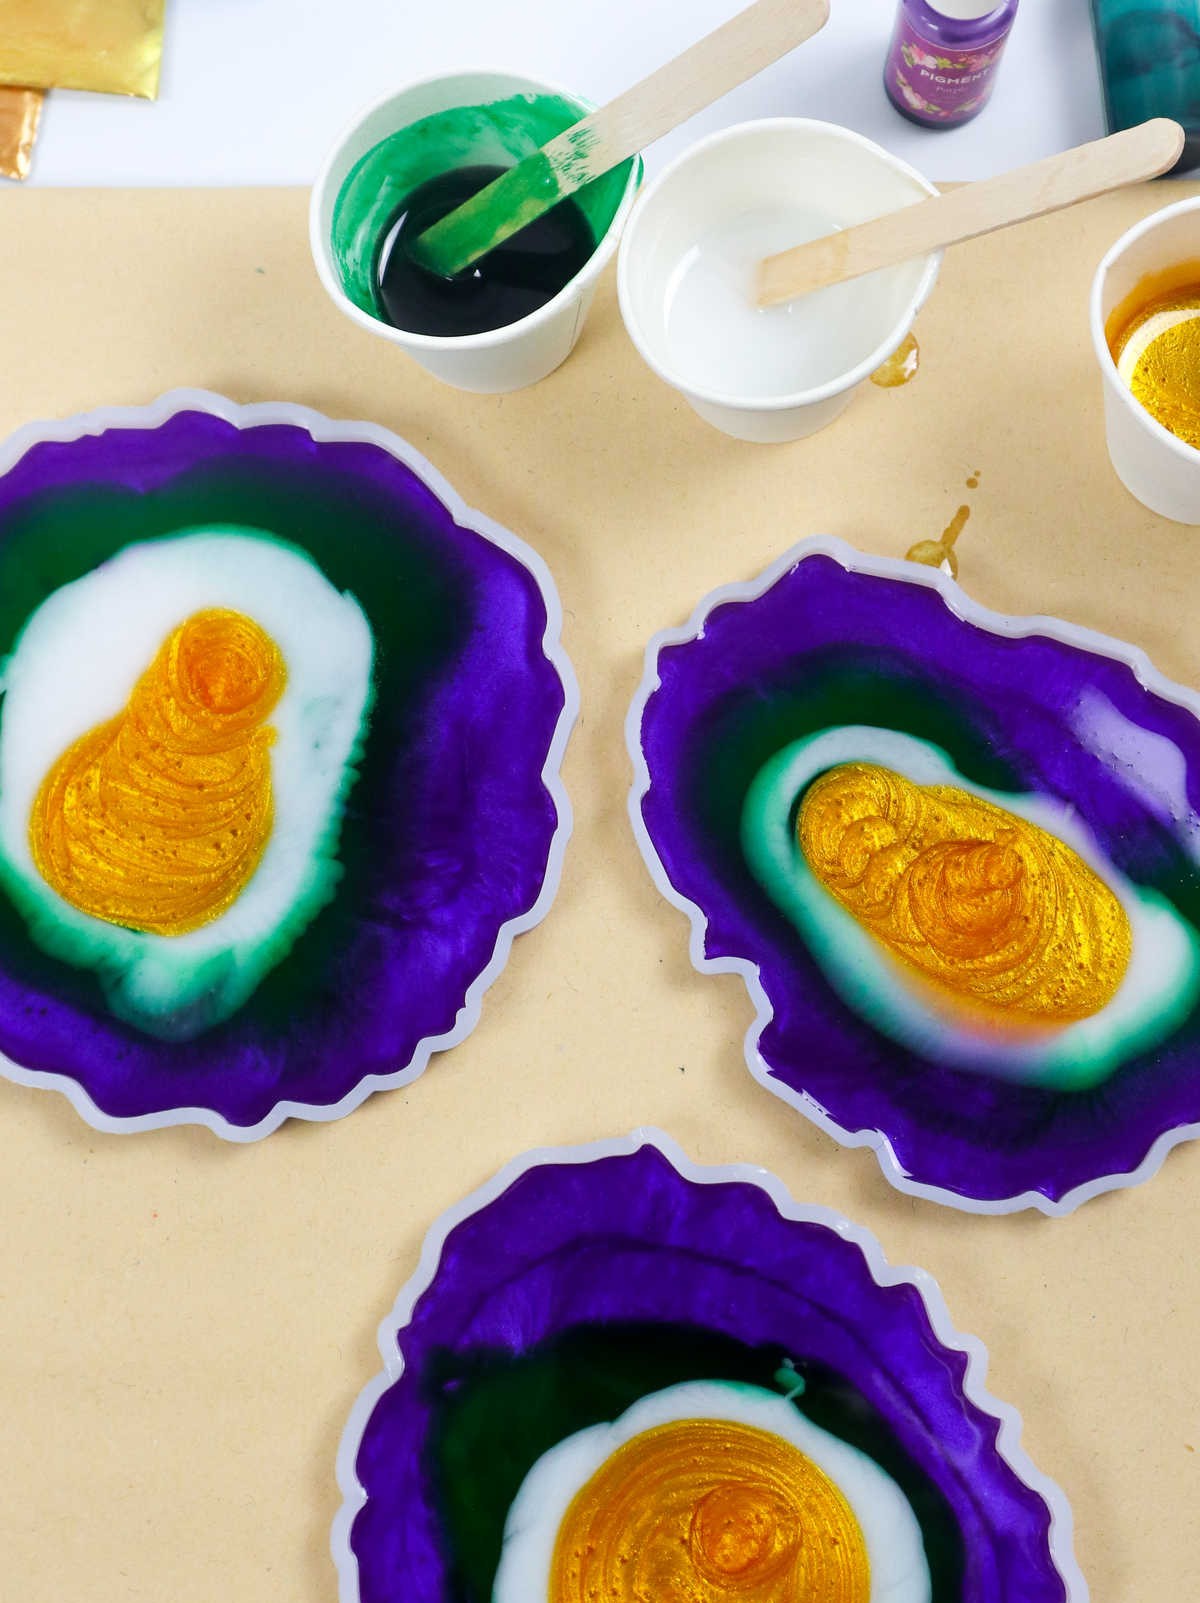
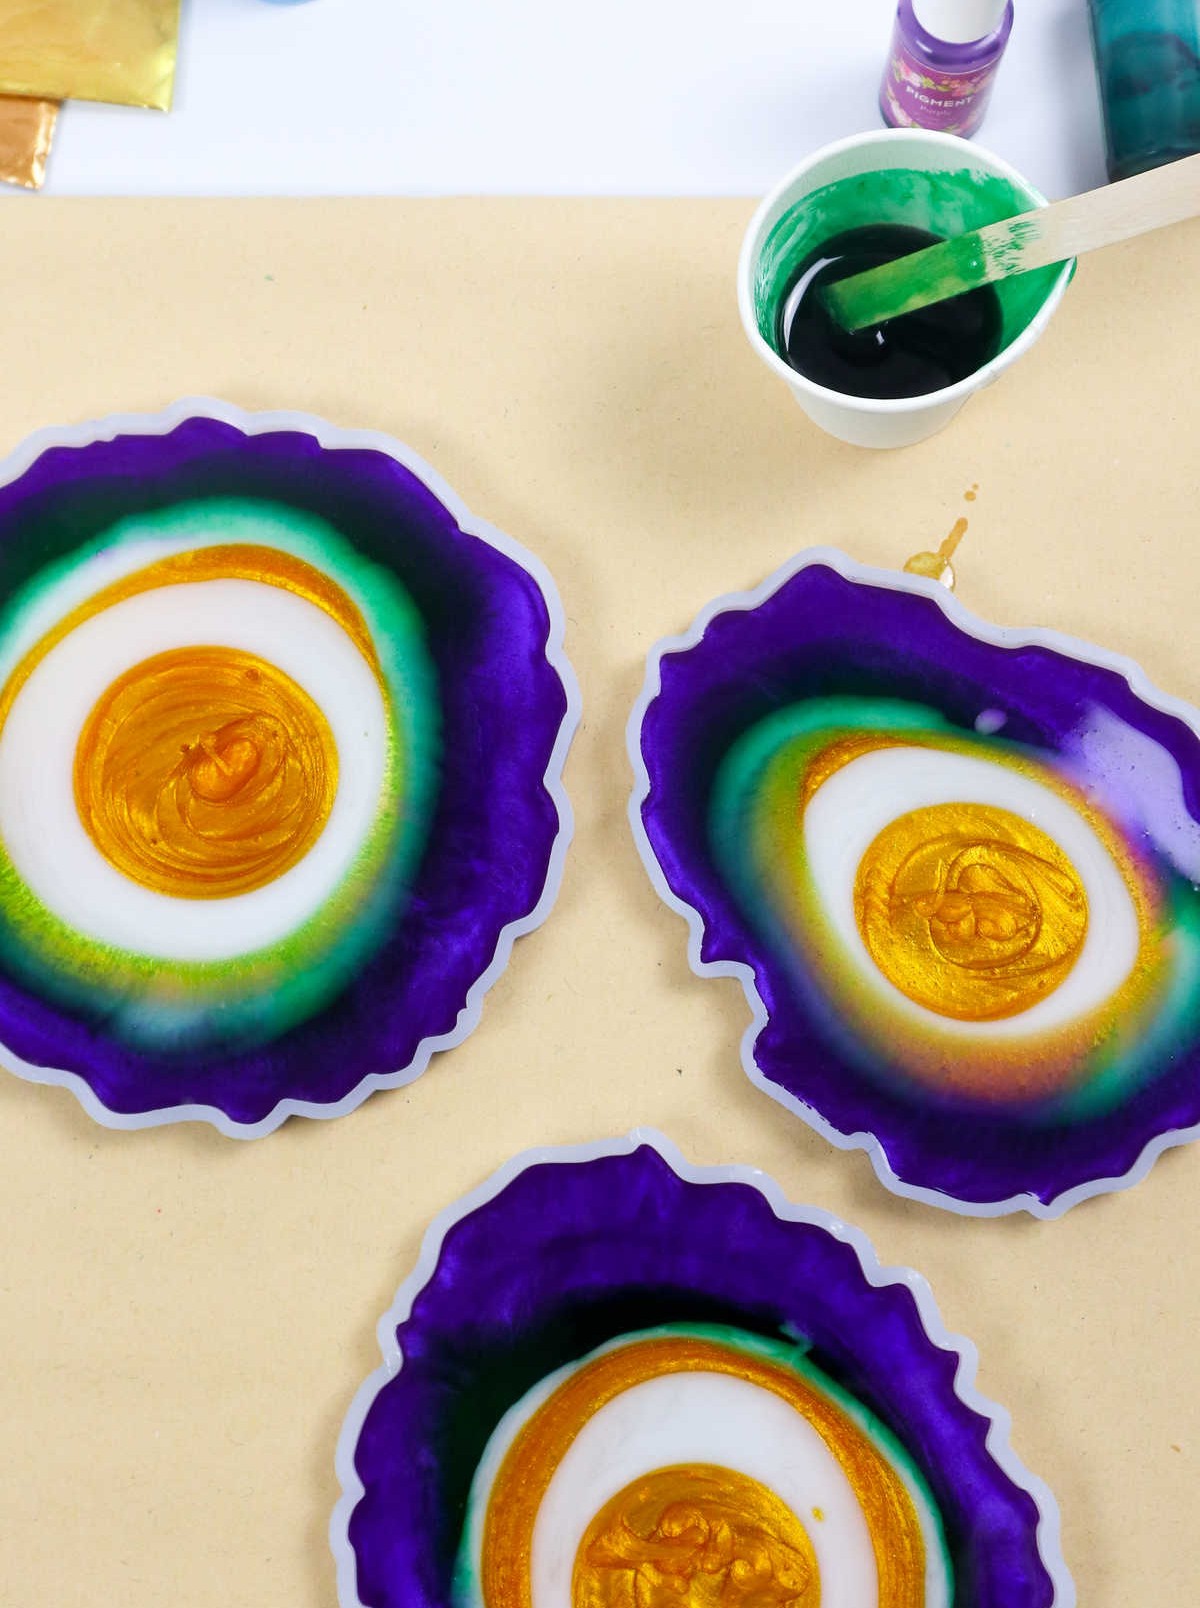
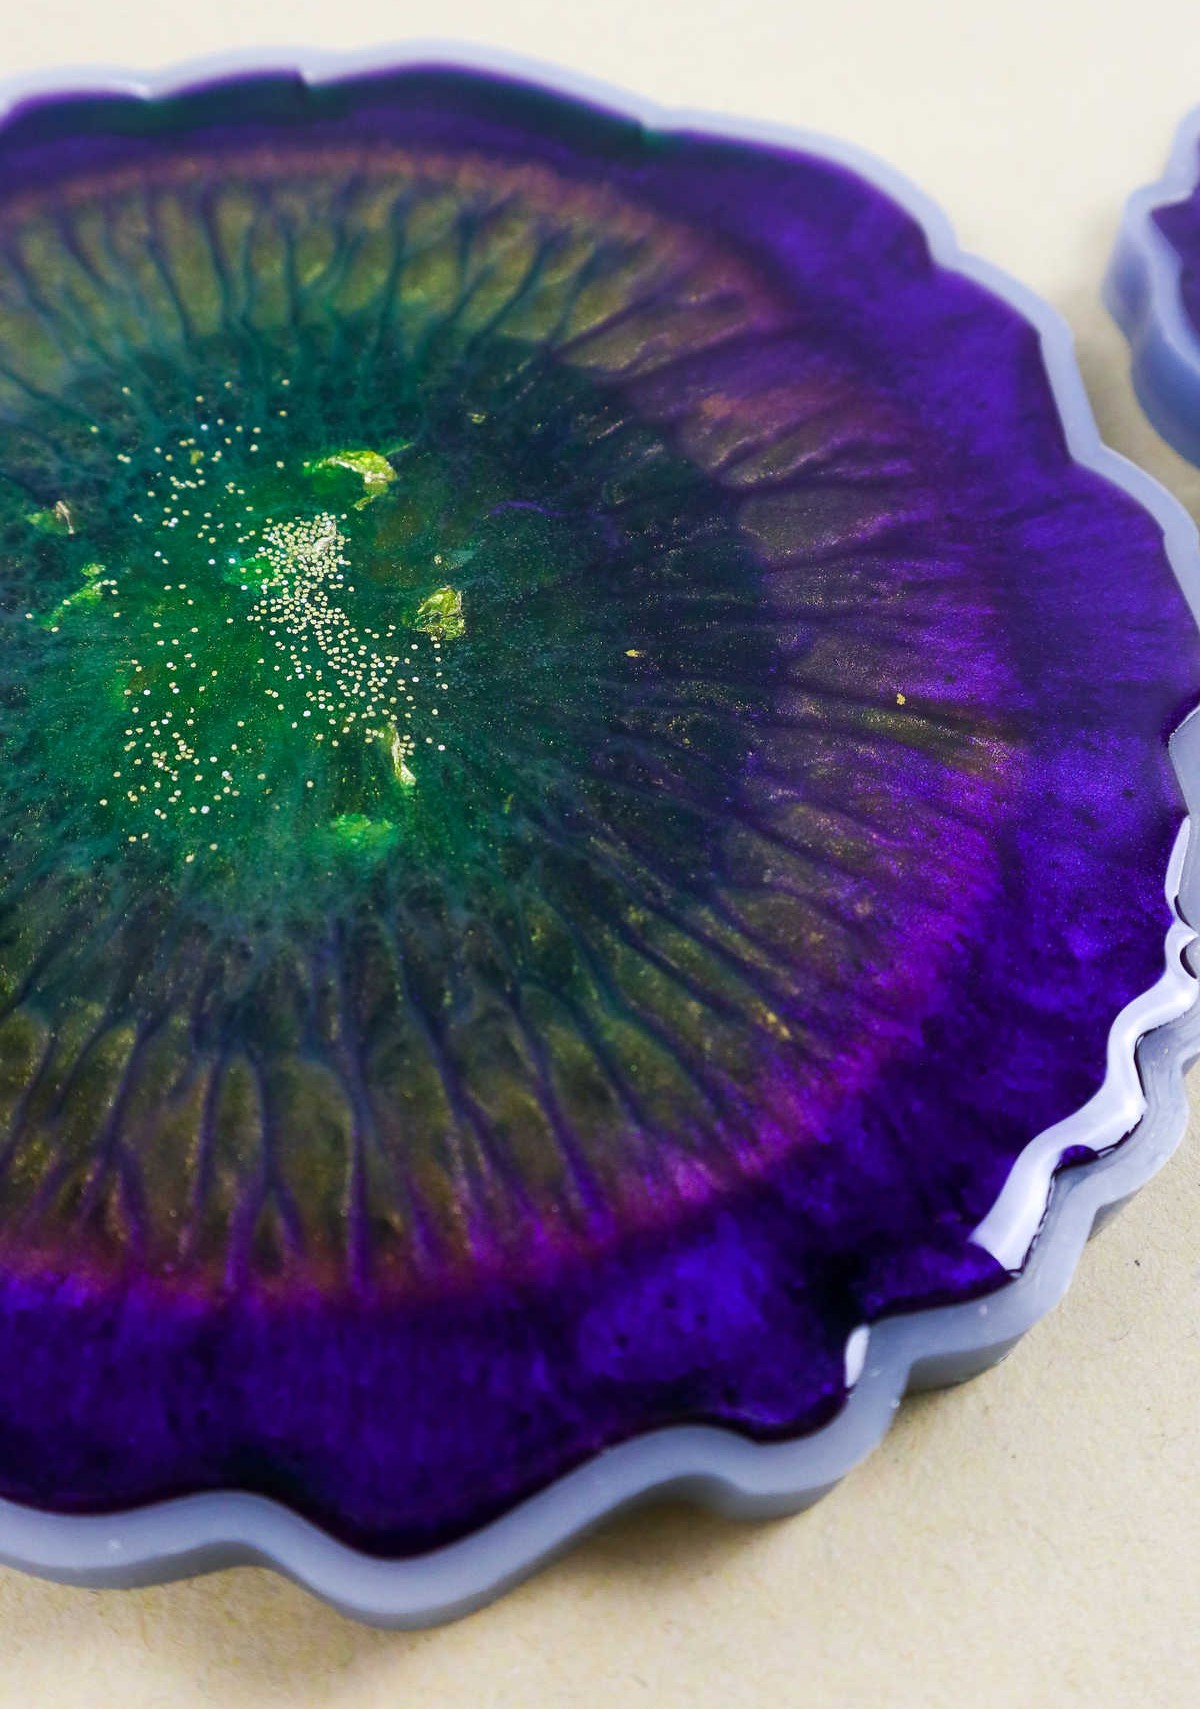
As you continue crafting your coaster, pour the remaining resin into the mold, gradually building up each layer until the center is fully filled with the warm golden hue. The beauty of this process lies in its flexibility – there are no strict guidelines to follow, allowing you to freely explore and refine your design at will.
Step 7

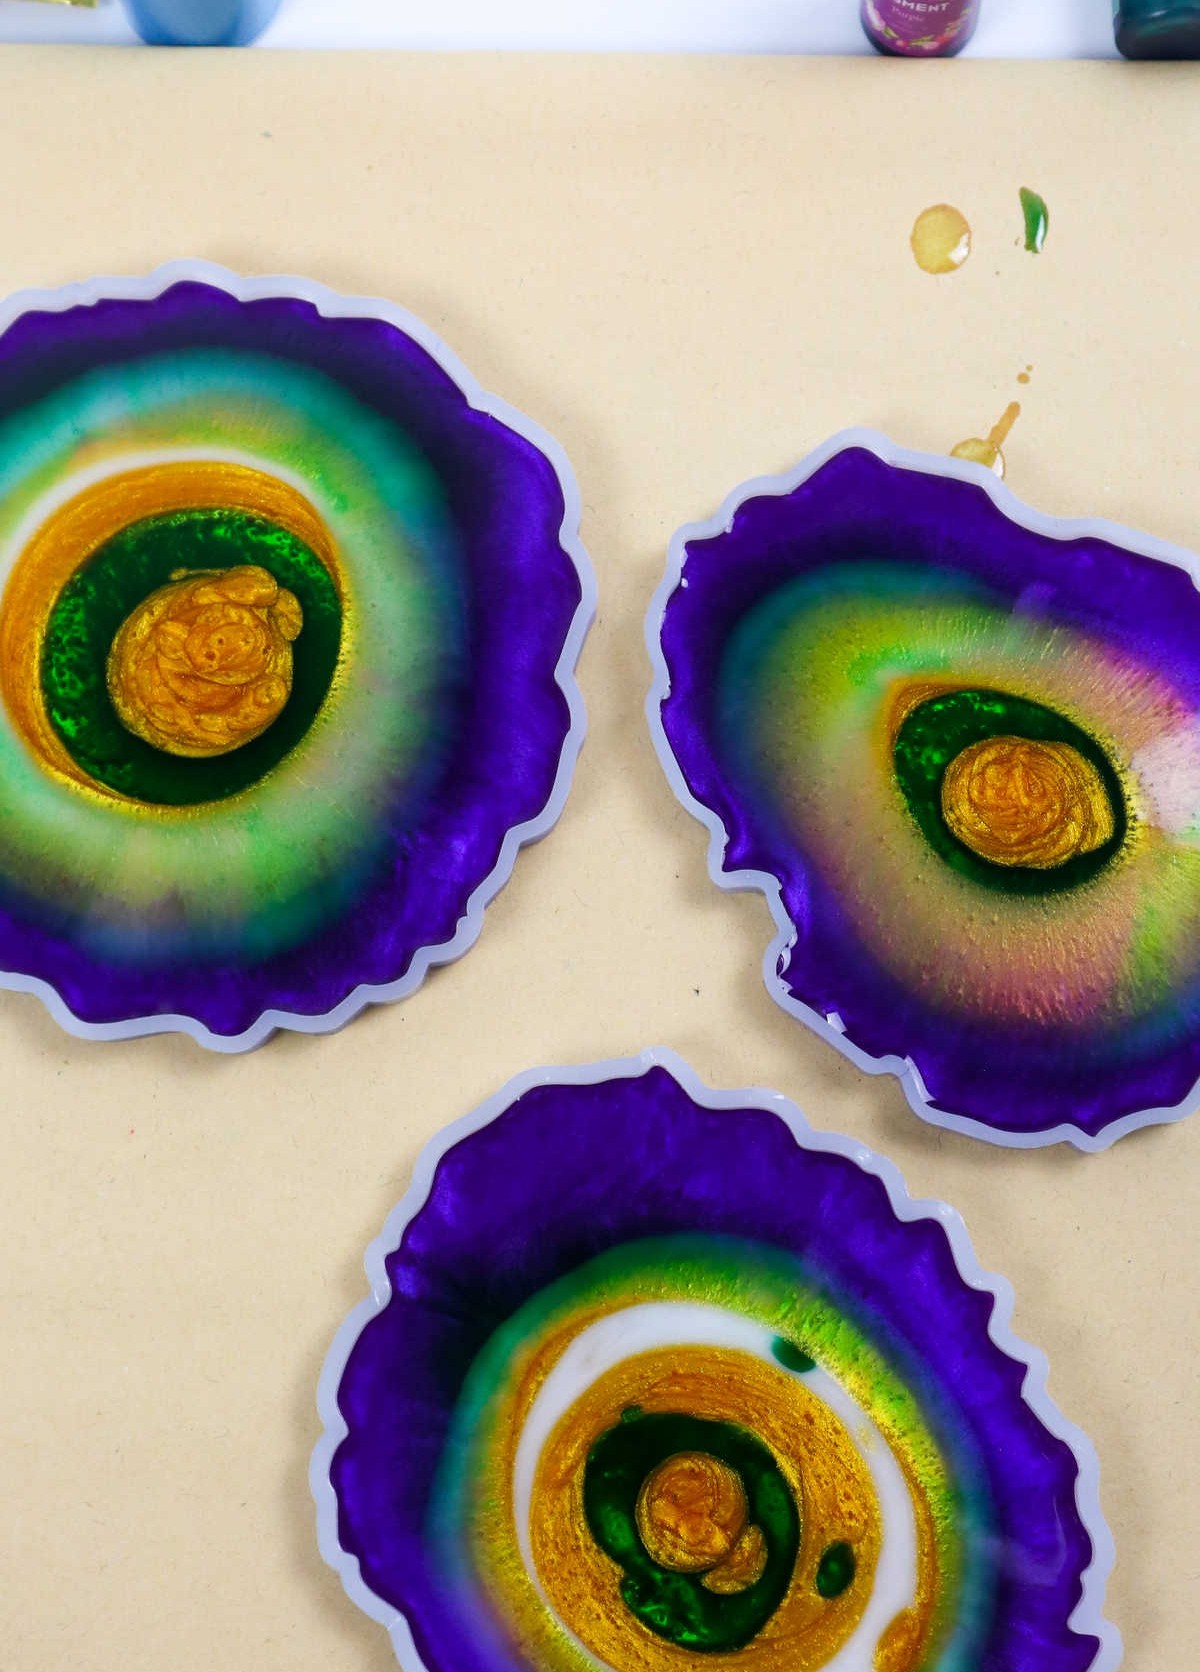
As you recall, you had put aside a clear resin earlier. It’s now time to retrieve it and combine it with the colorful layers you’ve created. By pouring this clear resin over your masterpiece, you’ll achieve a domed effect that allows the colors to spread evenly as they set. This step is crucial in ensuring your artwork turns out visually stunning.
Step 8
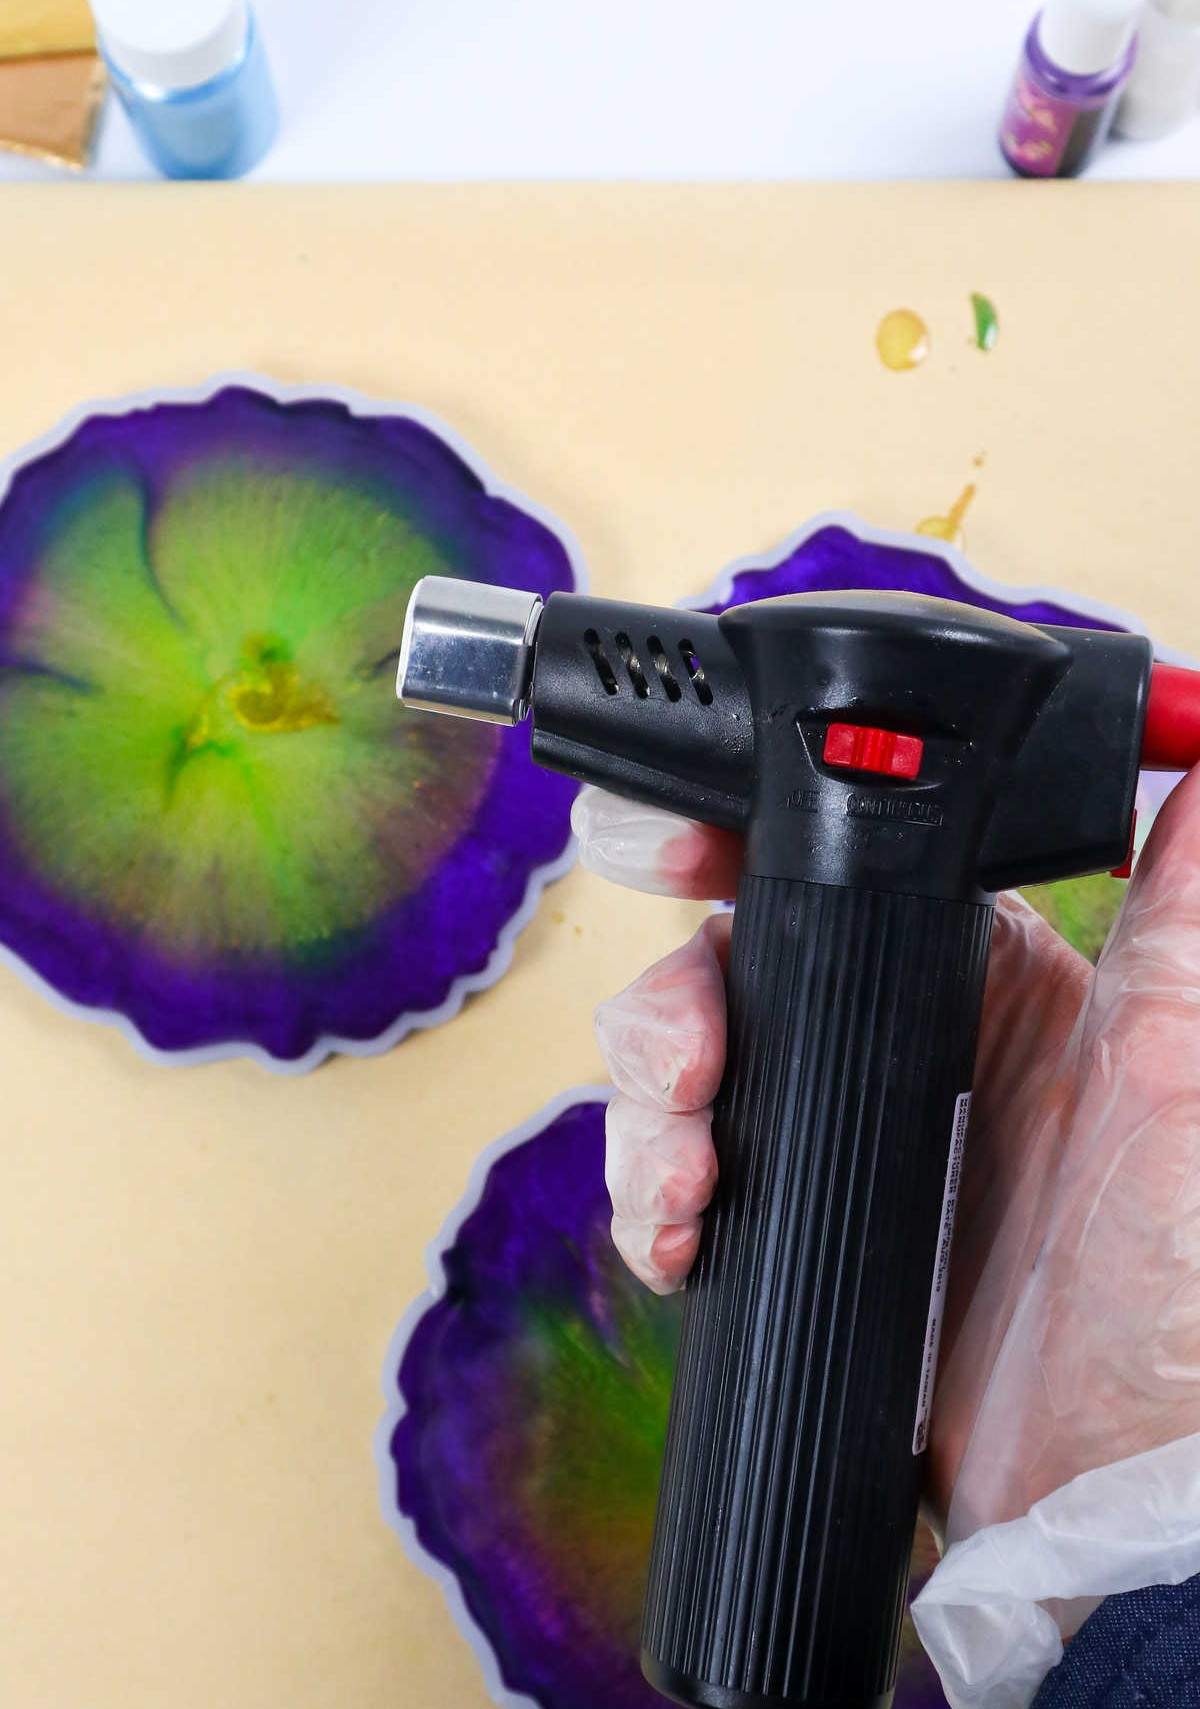
When it comes to eliminating air bubbles from the resin’s surface, you’ll want to act quickly before it hardens. One approach is to gently pop them with a toothpick. Simply prick the bubble and move on to the next one, being mindful not to linger too long near the resin. Alternatively, you can use a blowtorch to swiftly vaporize these imperfections. Be cautious, though, as excessive heat can damage the mold or resin.
Instead, aim for a quick glaze across the surface, allowing any bubbles to vanish instantly.
Step 9
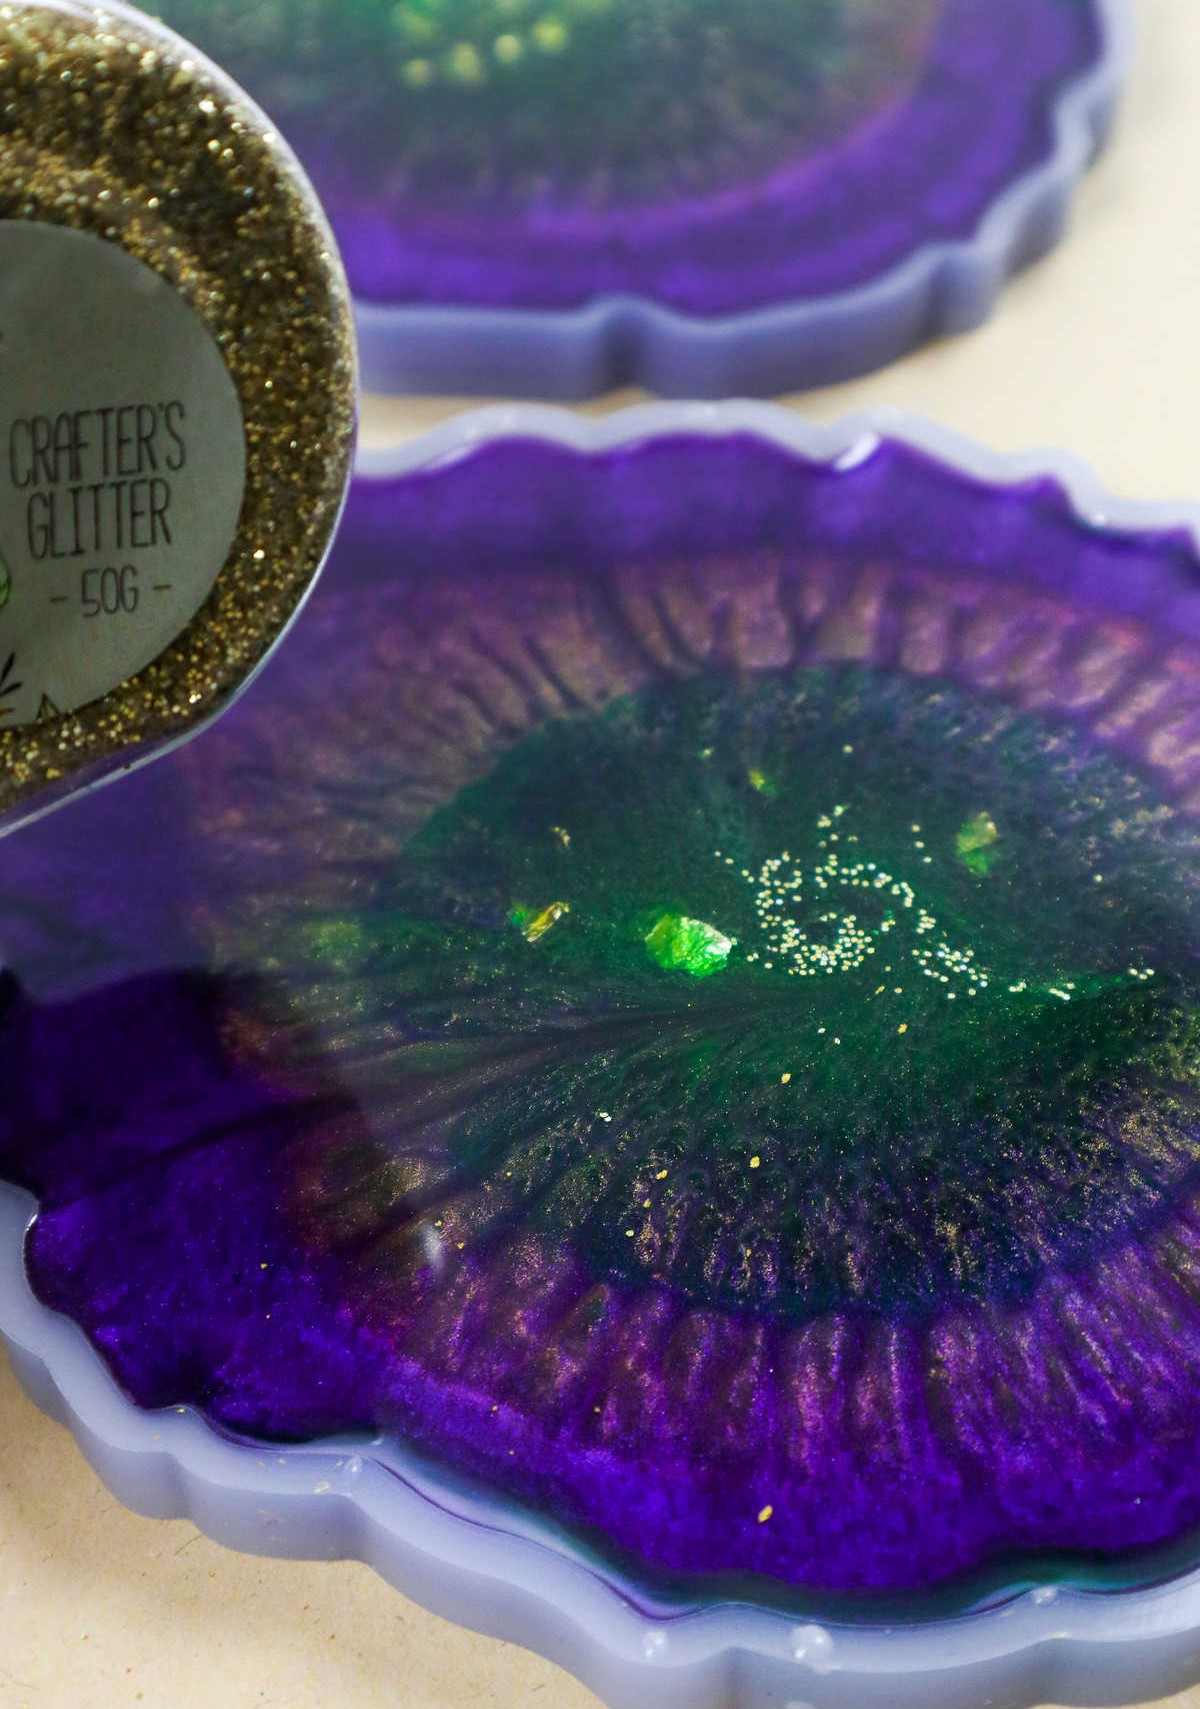
As you near the final stages of creating your unique coasters, it’s the perfect opportunity to infuse them with a touch of personality. Feel free to get creative and add embellishments that reflect your personal style – whether it’s glittering gold flakes, colorful sparkles, or any other decorative elements that catch your eye. This is your chance to make these functional pieces of art truly special.
Step 10
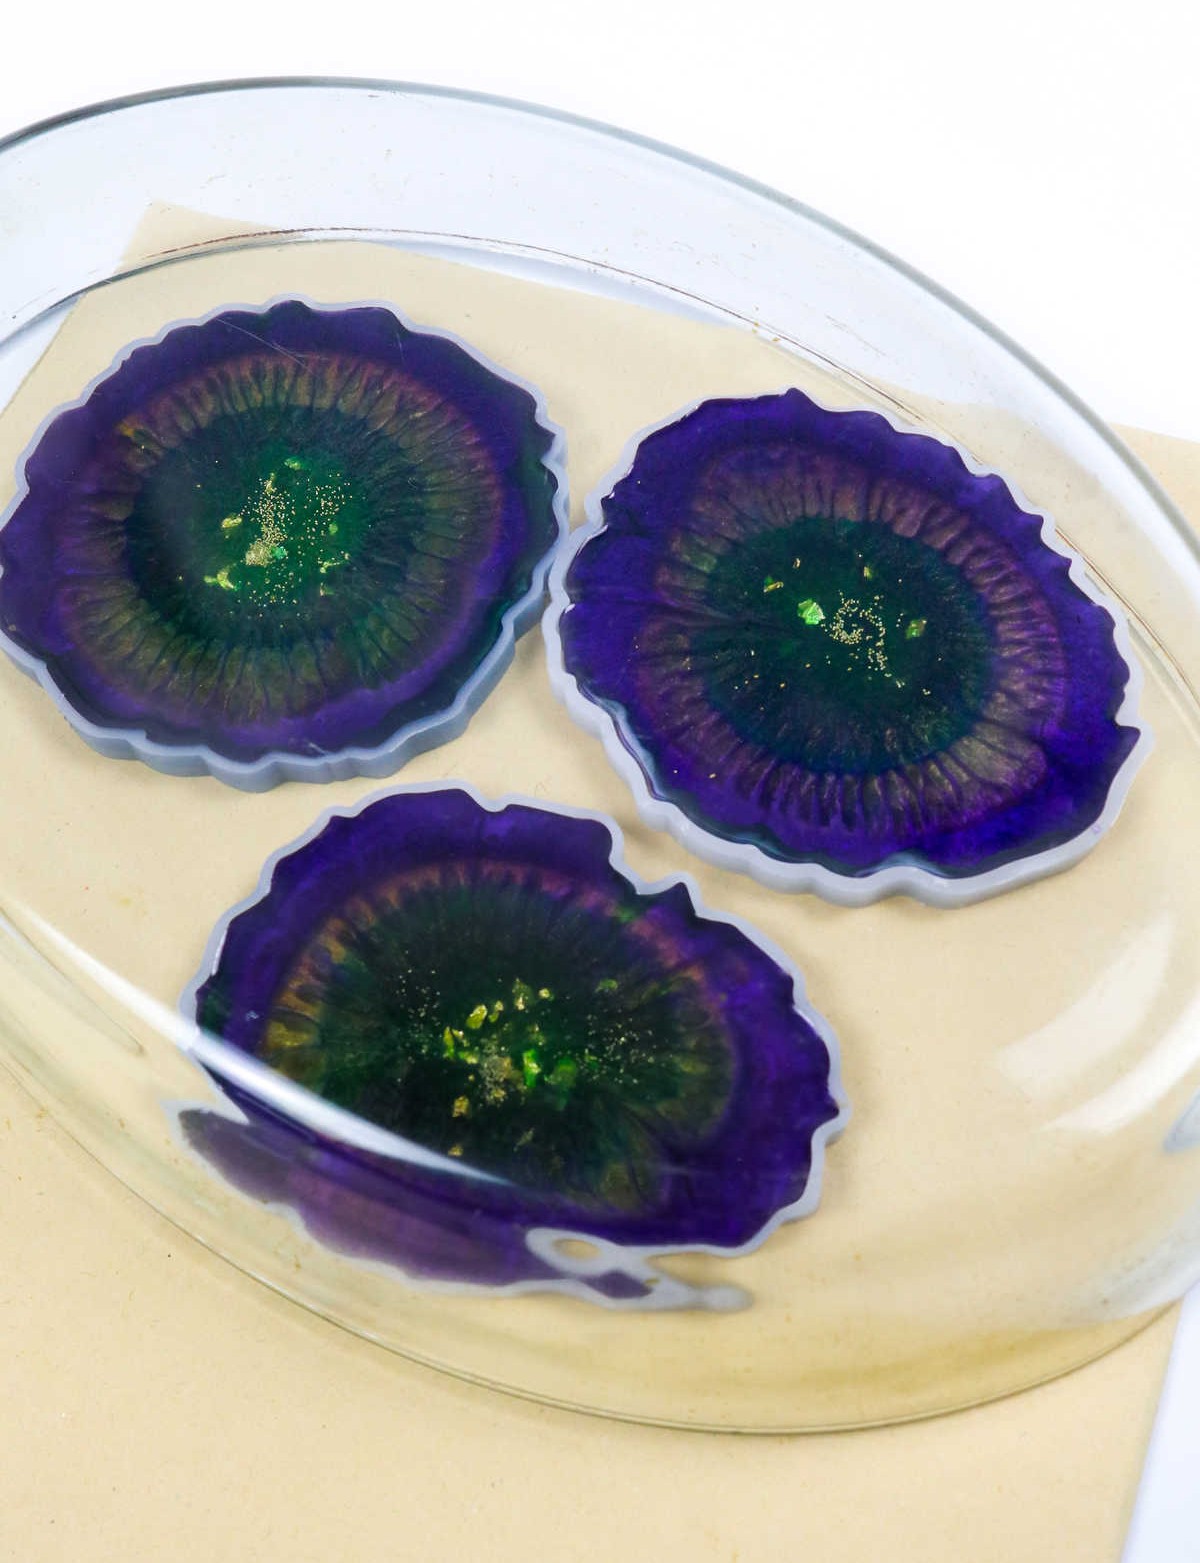
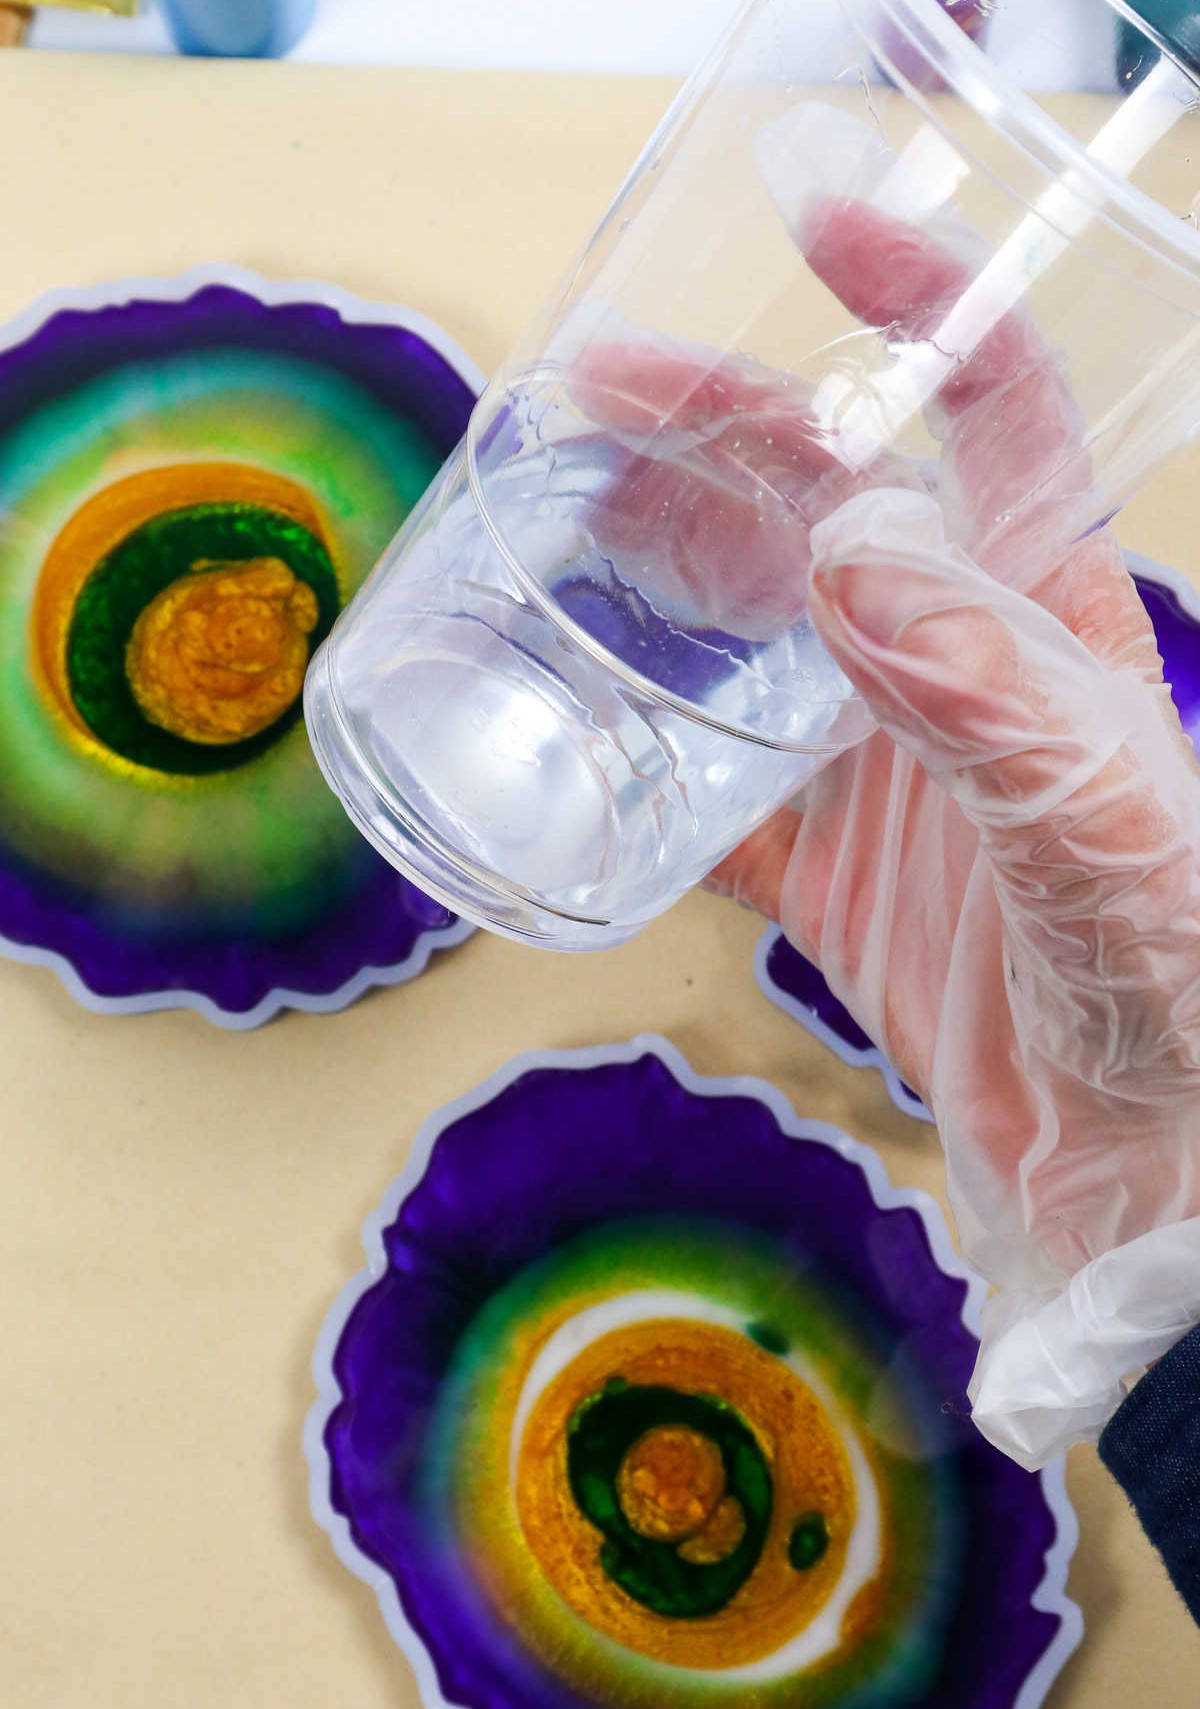
To ensure your newly cleaned coaster remains pristine, apply a protective layer by placing a raised glass or plastic barrier over it. This simple step will safeguard against dust and dirt accumulation while the coaster is drying, which typically takes anywhere from 24 to 48 hours.
Step 11
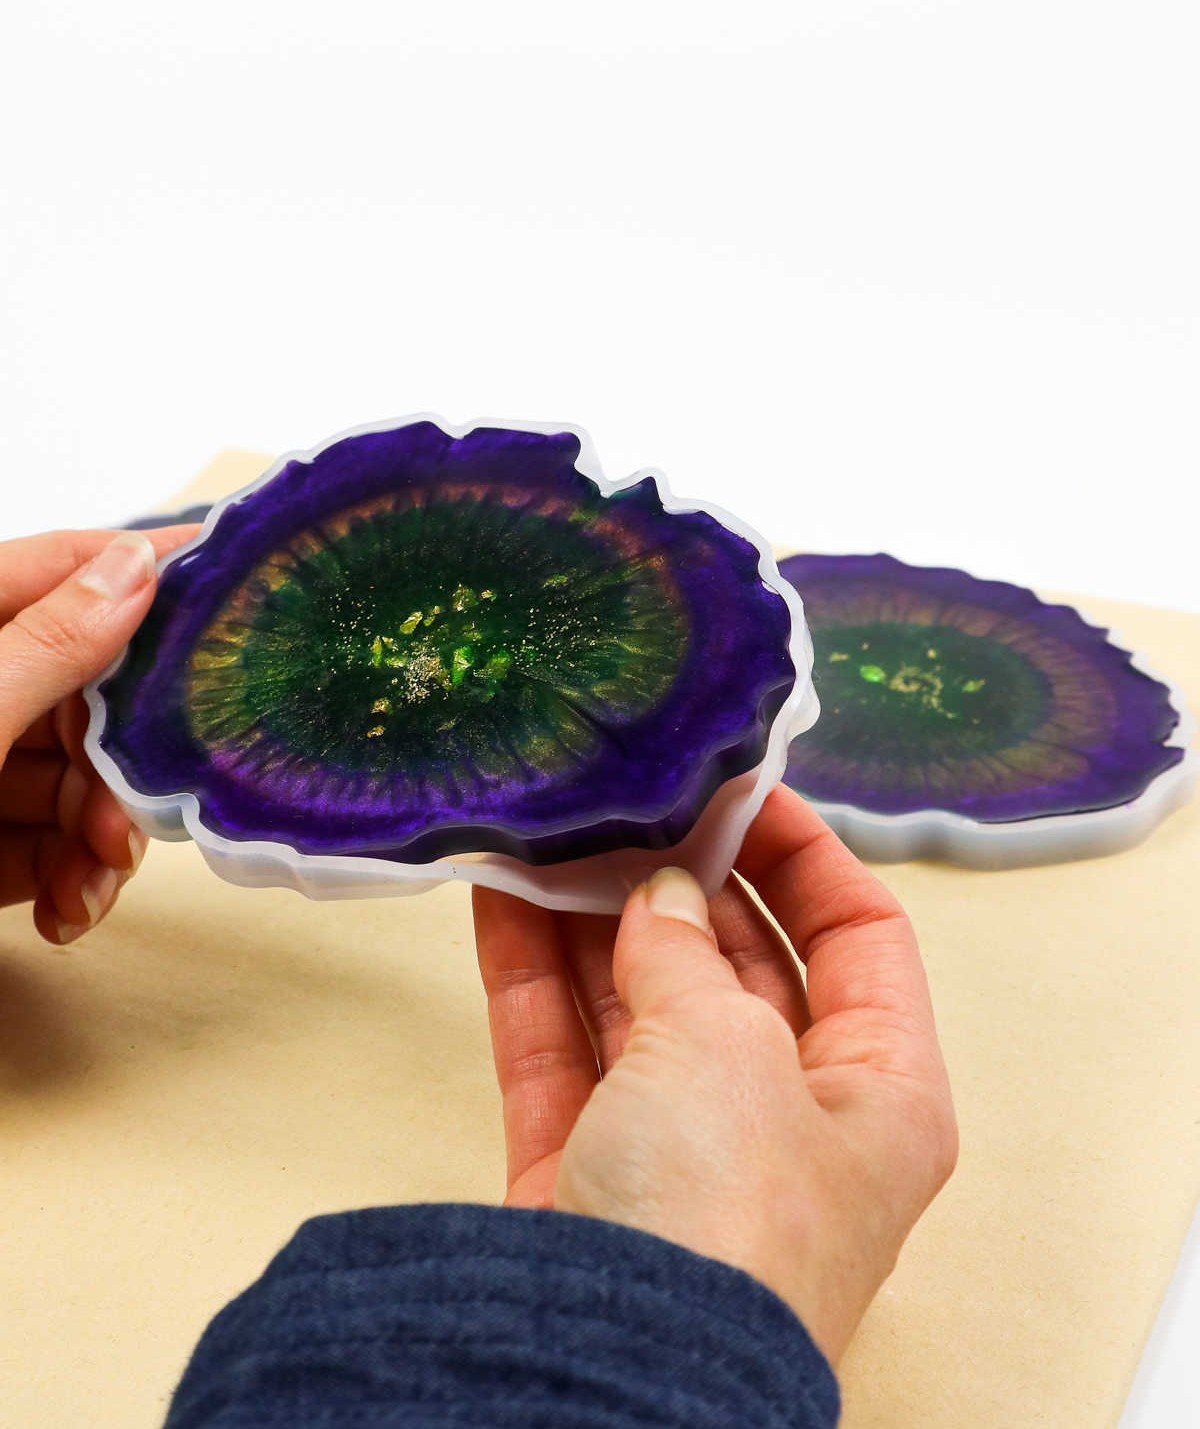
Once the resin has reached its fully cured state, proceed with gentle care to remove the mold and extract your newly created coaster. Start by slowly peeling the mold away from the surface of the coaster, taking caution not to touch or disturb the delicate finish. As the mold comes free, use a light touch to coax the coaster out of its confines, ensuring it remains intact and undamaged.
Step 12
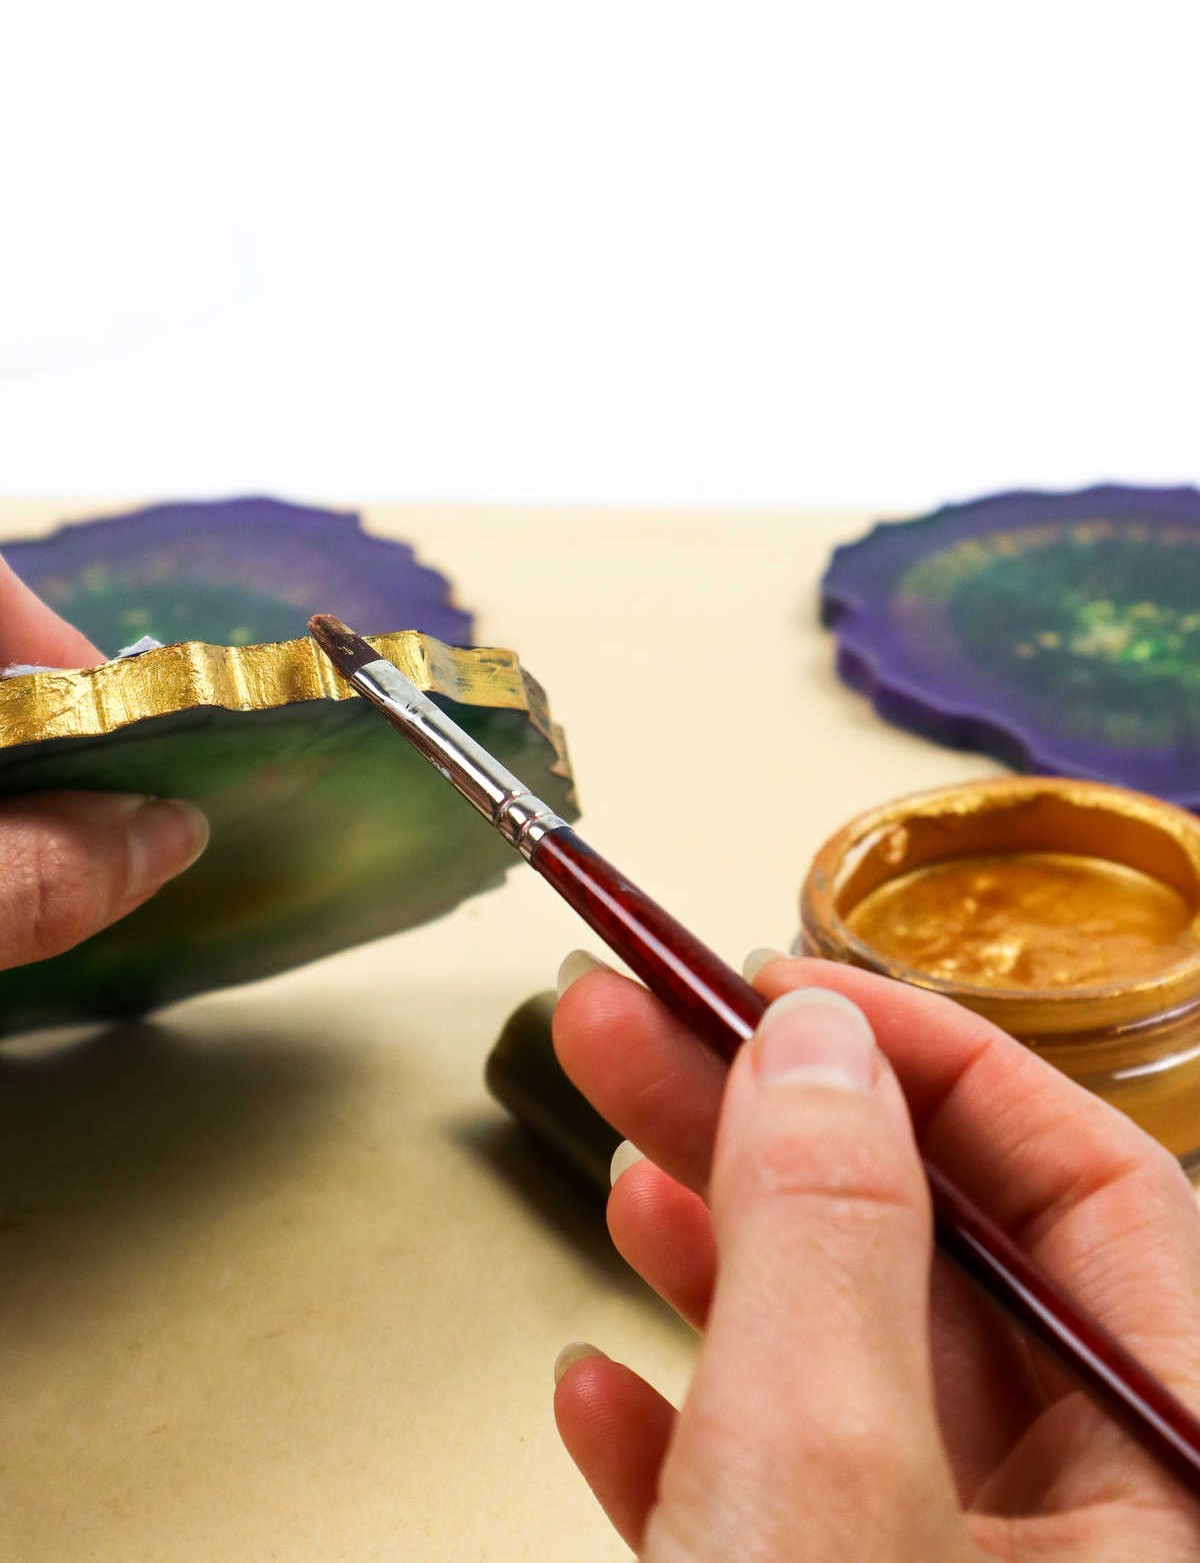
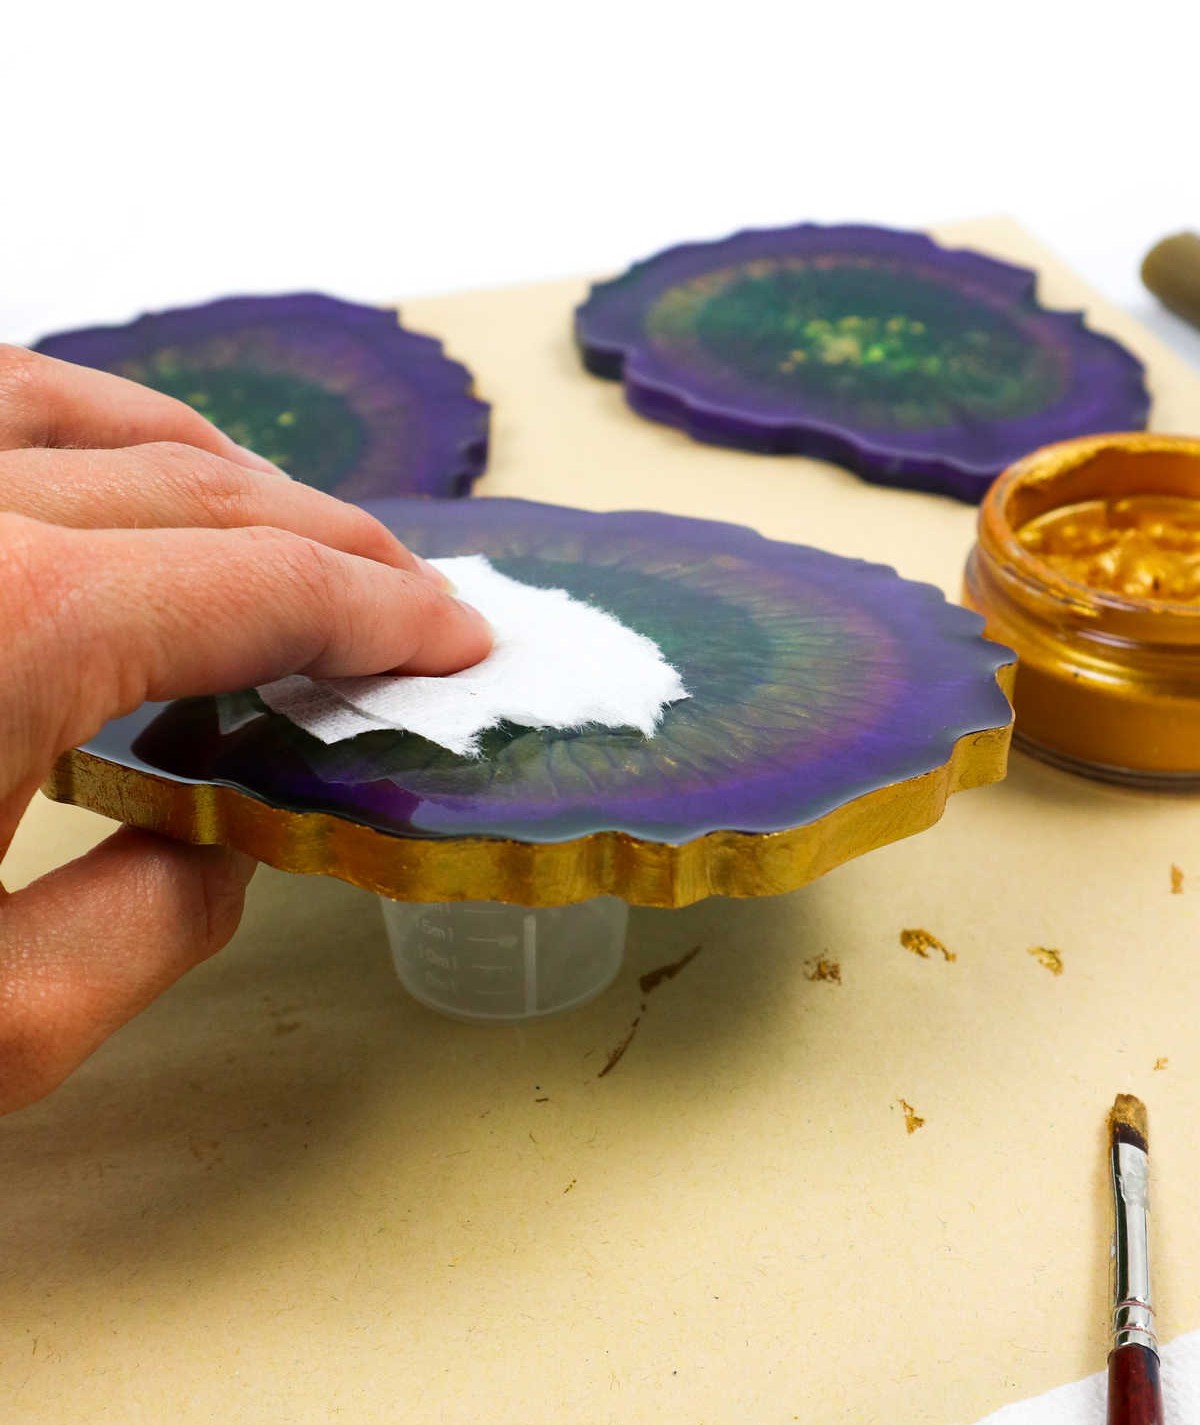
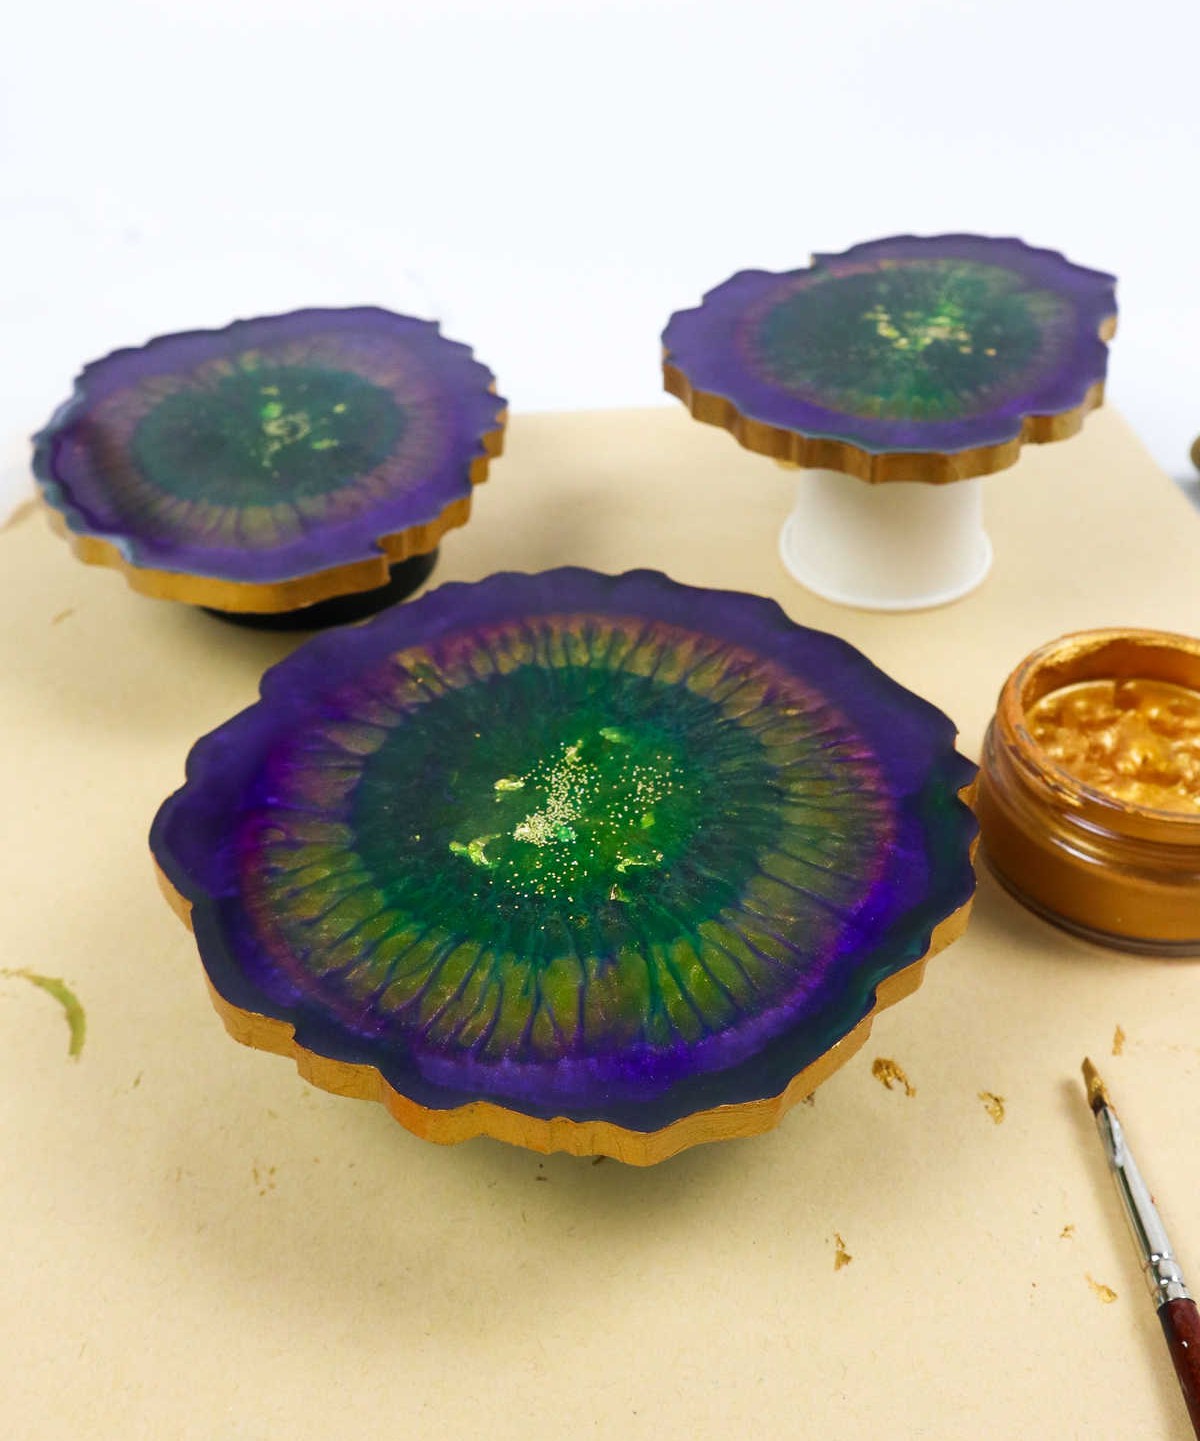
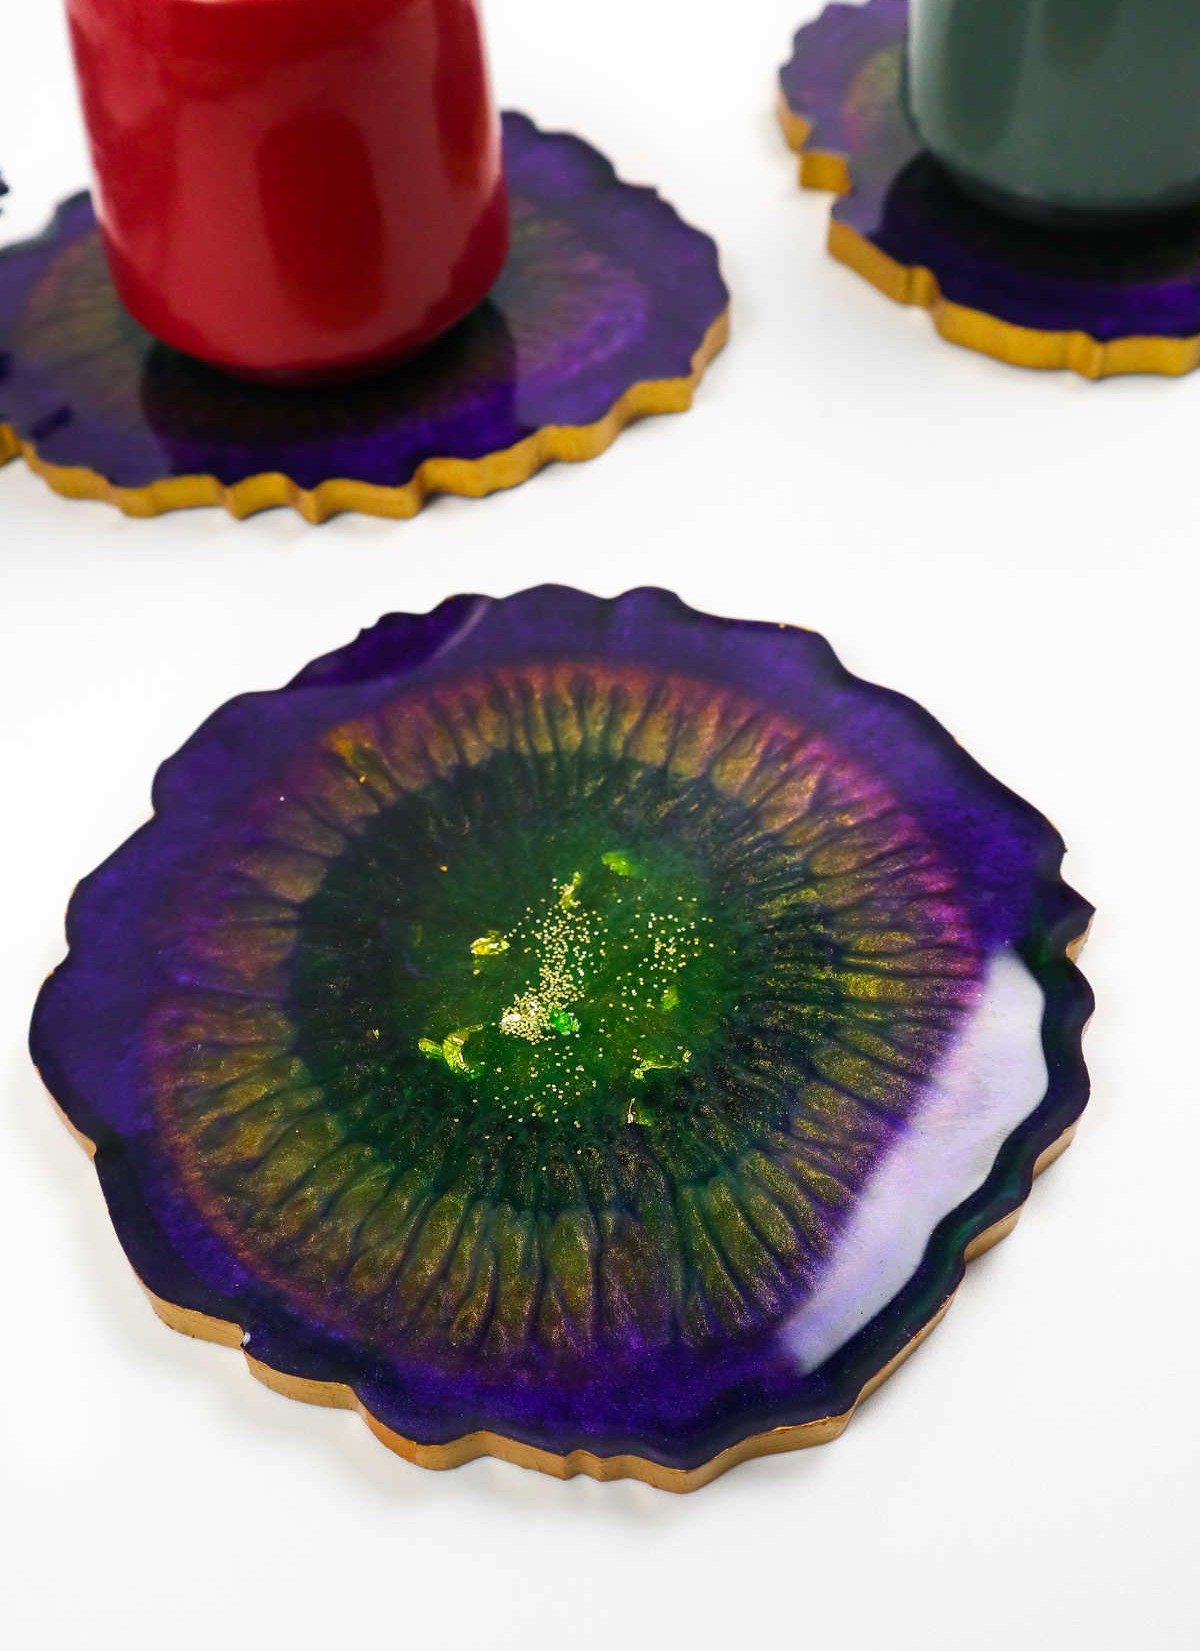
To take your DIY coasters to the next level, you can enhance their appearance by adding a touch of gold. Simply paint the edges with sparkly gold paint for a professional-looking finish. As the paint dries, prop the coaster up on a cup to prevent any smudges or fingerprints from forming. When handling the coaster during this time, use a piece of tissue paper to ensure the glossy surface remains spotless.
Once the paint has fully dried, your coasters are ready for use and can be enjoyed for many years to come.
How Long Should Resin Coasters Sit?
The drying process can be quite lengthy, typically taking anywhere from 24 to 48 hours to complete. A significant factor in determining the drying time is the thickness of your coasters – the thicker they are, the longer it will take for them to fully dry through. As a precautionary measure, it’s recommended that you let them sit and set for at least two days to ensure thorough evaporation.
Is There a Difference Between Epoxy and Resin?
While many may assume that epoxy and resin are interchangeable terms, the reality is that they have distinct differences rooted in their application and purpose. The key distinction lies not only in how they’re utilized but also in what they’re used to create. It’s understandable that this can be a source of confusion, especially when considering the various types of epoxy and resin that exist, such as epoxy coating resin, casting resin, polyester resin, and more.
However, by focusing on one fundamental difference, the distinction between these two substances becomes clearer: Epoxy resin is primarily used for coating applications, whereas casting resin is employed to set or cast objects within molds.
How to Make Sure Coasters Are Heat Resistant
To create a coaster using resin, it’s crucial to ensure the material is heat-resistant. This is because placing hot mugs on a non-heat-resistant surface can cause the resin to degrade or become damaged. To avoid this issue, when selecting your resin, look for products that have been specifically formulated to withstand high temperatures. This will provide you with peace of mind knowing your coaster is designed to handle the heat without compromising its integrity.
How to Make Resin Coasters (Step-by-Step)
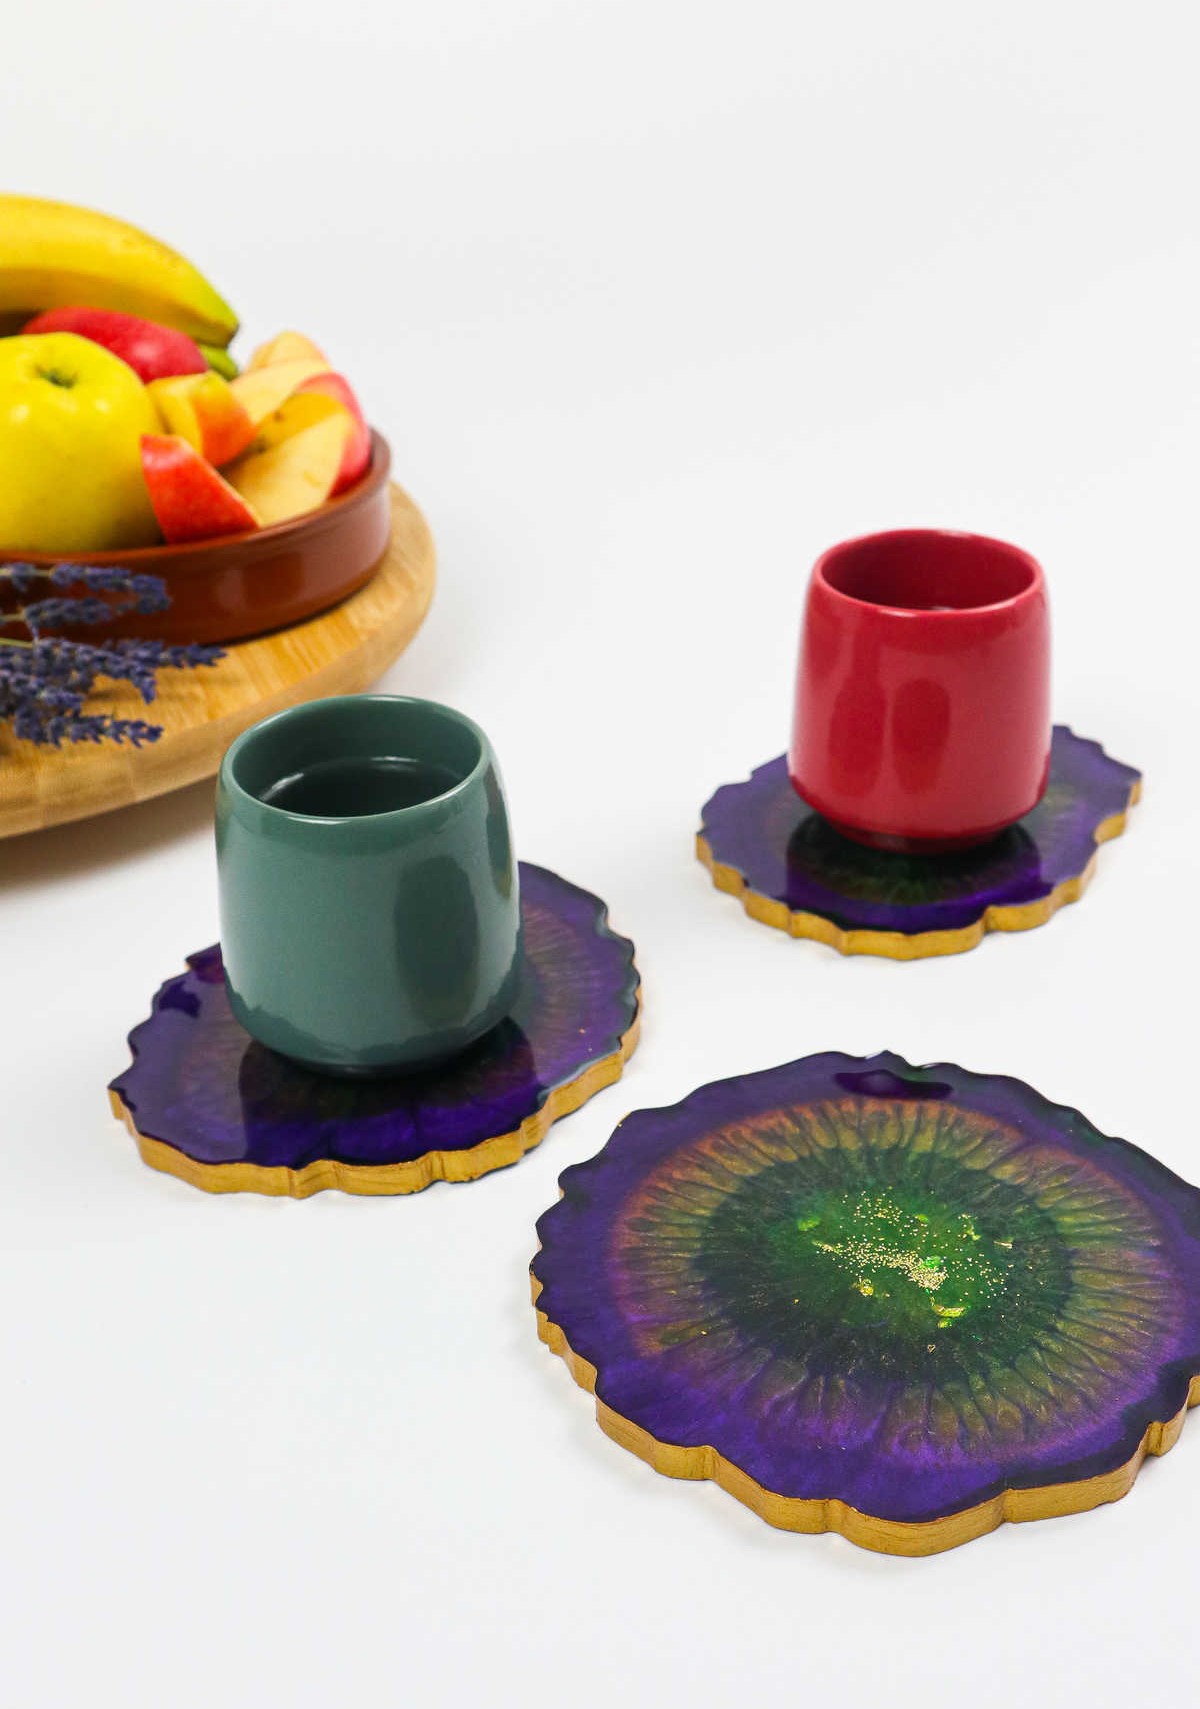
For anyone looking to add a touch of fun and creativity to their home decor, these DIY resin coasters are an excellent choice. Not only are they easy to make, but they’re also perfect for adults and teens alike who enjoy working on DIY projects.
To get started with this project, you’ll need about 10 minutes of prep time, followed by 20 minutes of active crafting. After that, the coasters will require an additional two days to fully cure before you can use them.
In total, you’re looking at a time commitment of around 2 days and 30 minutes.
As for the cost, this project comes in under $20, making it a great option for those on a budget.
Equipment
When it comes to cooking and baking, having the right tools can make all the difference. This is especially true when you’re working with delicate or intricate ingredients that require precision and control. In this regard, a collection of silicone molds, plastic cups, placemats, spatulas, kitchen torch, paint brush, face mask, and gloves can be incredibly valuable assets in your culinary arsenal.
Whether you’re whipping up a cake, crafting candies, or simply trying to achieve the perfect soufflé, having these versatile and multi-purpose tools at your disposal will give you the confidence and flexibility to take on even the most challenging recipes.
Materials
When it comes to crafting unique and creative designs, having the right materials at your disposal is crucial. Epoxy resin, a popular medium for artists and crafters alike, can be mixed with various hardeners to achieve different textures and effects. To add color and depth to your epoxy creations, you can incorporate resin pigments, which come in a range of vibrant hues.
For an added touch of luxury, consider adding mica powder or acrylic paint to give your designs an extra layer of sophistication. And if you want to really make a statement, don’t be afraid to get creative with glitter – just remember to use it sparingly to avoid overwhelming the senses.
Instructions
To embark on this creative journey, gather all the supplies listed and begin by mixing the resin and hardener in a plastic cup using a stick until they’re well combined. This is crucial, as improper mixing can result in uneven hardening of the resin. Set aside a small portion for later use. Next, divide the mixed resin into four smaller cups and add different colors of liquid dye and mica powder to each. Thoroughly mix the colors into the resin.
Pour each colored mixture into the mold, starting from the outermost layer and working your way inwards. This allows for greater control over the color spread. Feel free to experiment with unique patterns and designs. Once satisfied, pour the reserved clear resin over the colored layers. To achieve a domed-effect, pour the clear resin down the center, allowing it to flow evenly to the edges.
Use a toothpick to burst any bubbles that form on the surface or run a blowtorch flame over them to quickly eliminate bubbles – just be cautious not to burn the resin or molds in the process. You can also add gold flakes and glitter at this stage and pour additional resin to create a top coat, following the same bubble-elimination process. Finally, place a raised protector on the coasters to shield them from dirt and dust particles.
Allow the coasters to dry for 24-48 hours before removing them from the mold. To complete the finishing touches, paint the edges with glittery gold paint and display the coasters in an upright position as they dry. Once the paint is dry, your coasters are ready for use.