Discover the joy of crafting your own unique polymer clay earrings. With six inspiring designs, you’ll be motivated to take on a new jewelry project and break free from the cycle of constant buying. While it’s tempting to treat yourself to a new pair of earrings anytime, the financial burden can add up quickly. The solution? Ditch the impulse purchases and get creative! Not only will making your own earrings save you money, but they’ll also become treasured keepsakes.
So, let’s dive in and explore the world of DIY polymer clay earrings together.
Supplies and Tools You’ll Need
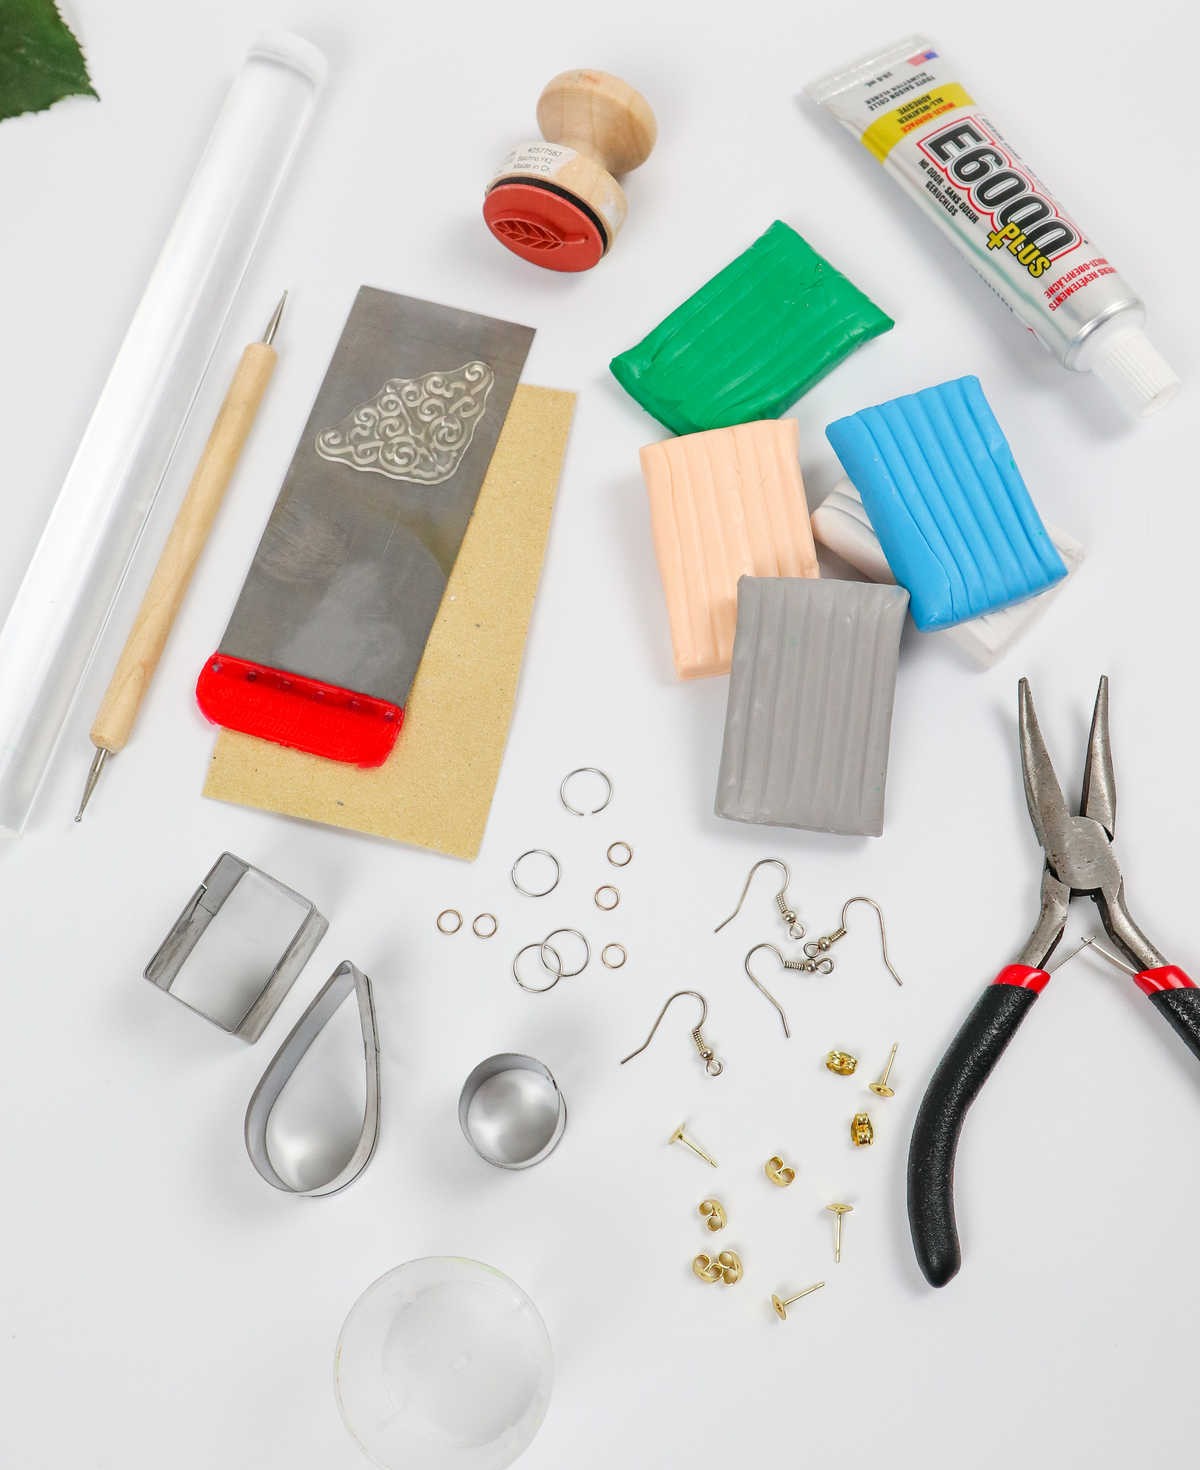
To embark on this DIY project, you’ll need a variety of supplies. Here’s a comprehensive list to ensure you’re well-stocked: First, you’ll require the main material – polymer clay. Additionally, several tools are necessary for shaping and manipulating the clay. Cookie cutters will help you achieve desired shapes, while fine sandpaper is useful for smoothing out any rough edges. A filling knife or any other cutting blade will be needed to refine your designs further.
To add some extra flair, consider using a dotting pen to create intricate details. When it comes to shaping and flattening the clay, a rolling pin is essential. For adding textures and patterns, rubber stamps are a great tool to have. Next, you’ll need some basic jewelry-making supplies like jump rings, earring hooks, earrings posts, and backs. Pliers will come in handy for bending and shaping these components. Finally, secure everything with glue E6000.
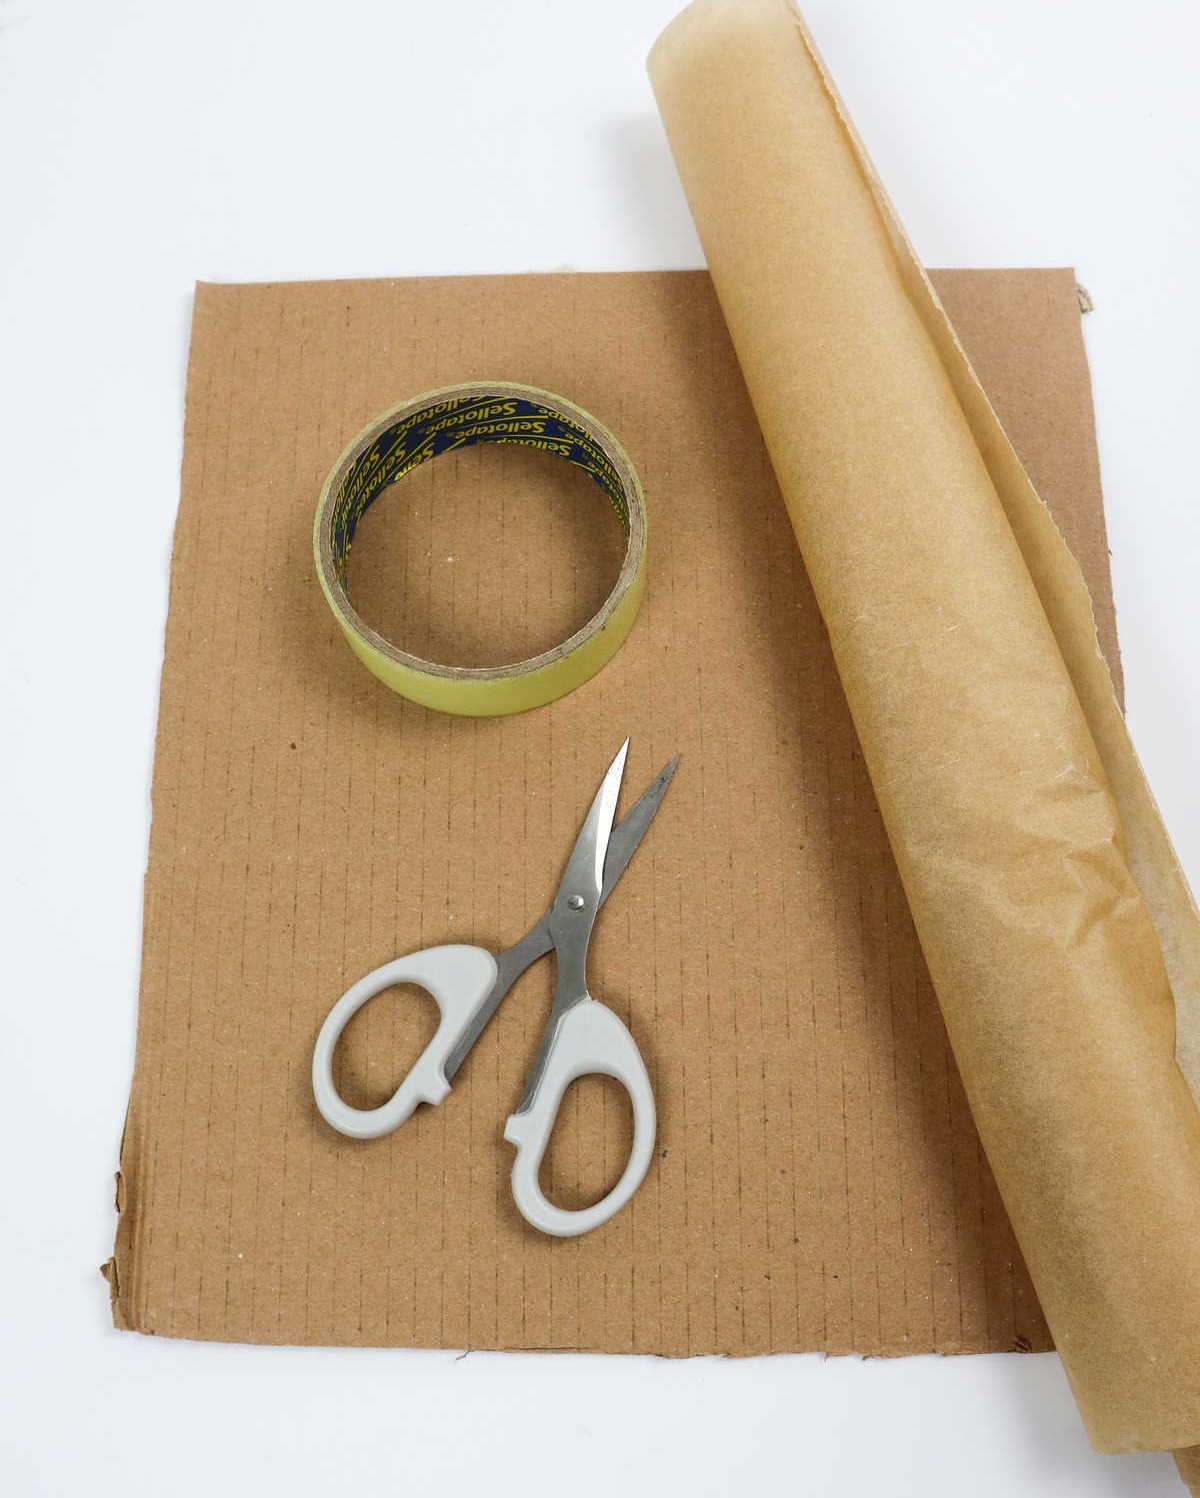
On the preparation side, gather a cardboard piece, parchment paper, sellotape, and scissors to create a clean workspace.
How to Make Polymer Clay Earrings
Before diving into the actual task at hand, it’s essential to get your workspace in order. This means ensuring that you have a dedicated area free from distractions and interruptions. With your supplies and materials organized and within reach, you’ll be able to focus on the task at hand with greater ease. By taking a few minutes to prepare your work surface, you’ll set yourself up for success and avoid wasting time searching for misplaced items or dealing with unnecessary interruptions.
Step 1
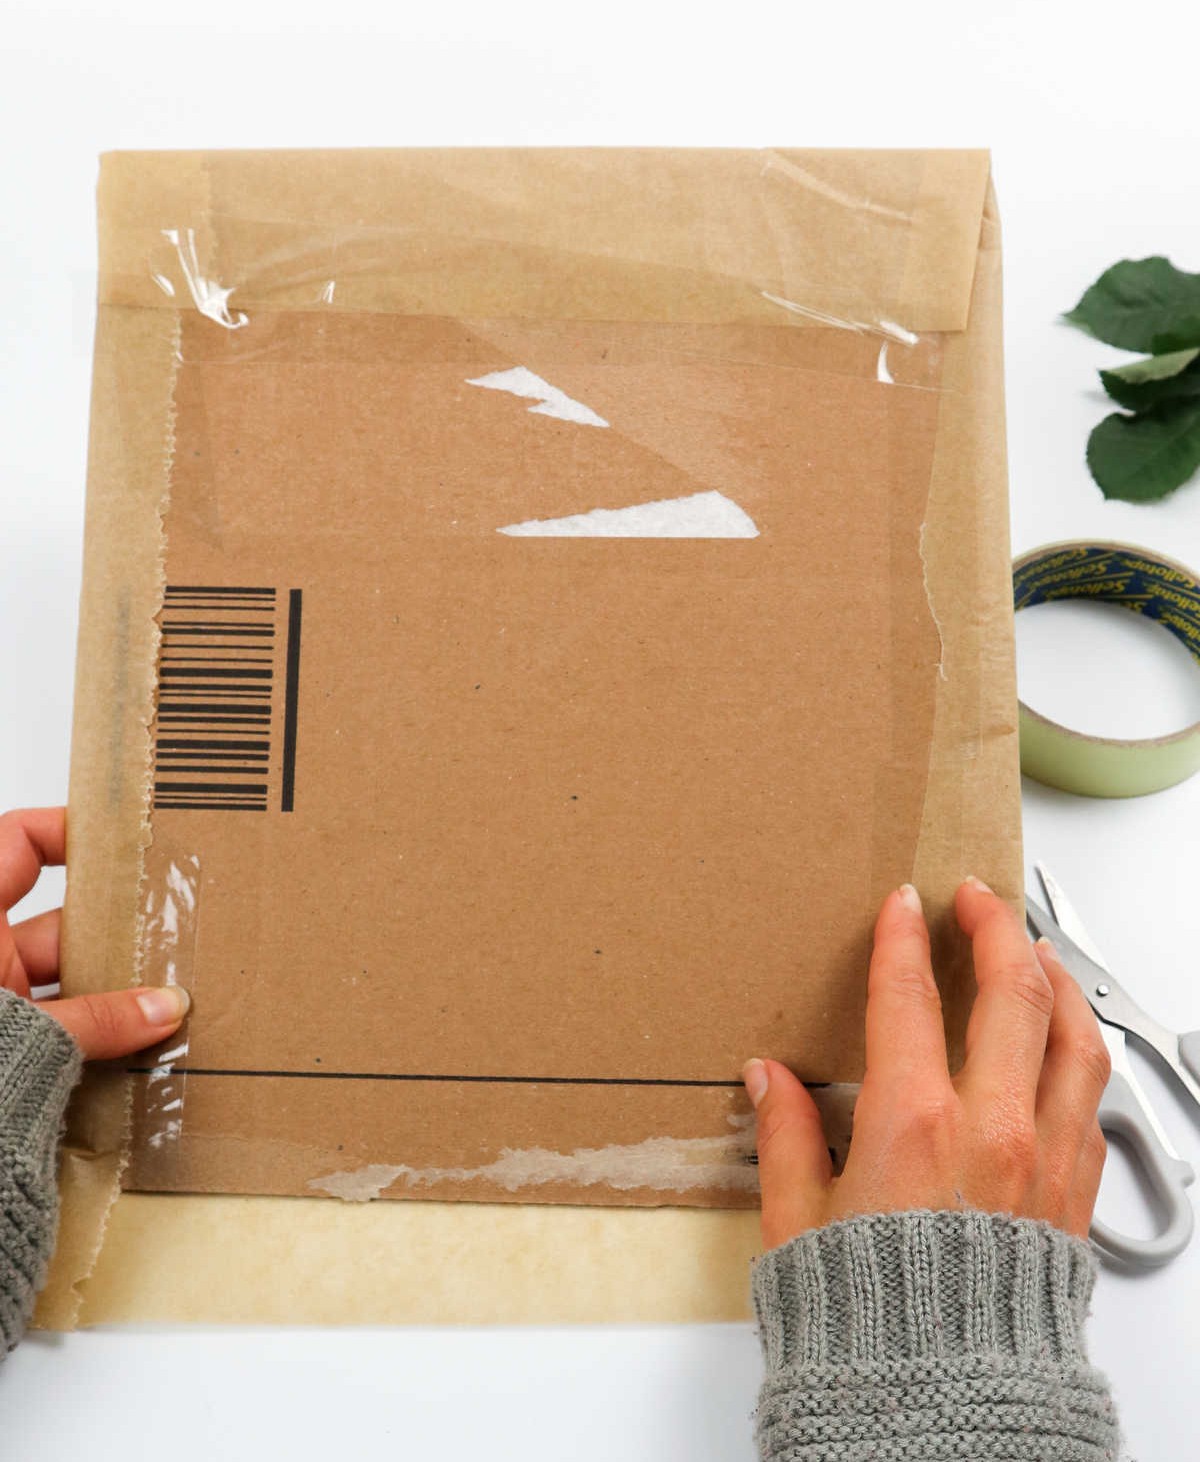
When working with polymer clay, it’s essential to prepare your workspace for the task ahead. Since you’ll be using a sharp blade, you’ll want to ensure that your work surface is protected from any potential damage or scratches. This is where a piece of cardboard comes into play. To create a makeshift cutting mat, start by placing a sheet of parchment paper on the cardboard and secure it with some tape.
This will provide a smooth and stable surface for you to work on while keeping your workspace safe and tidy.
Step 2
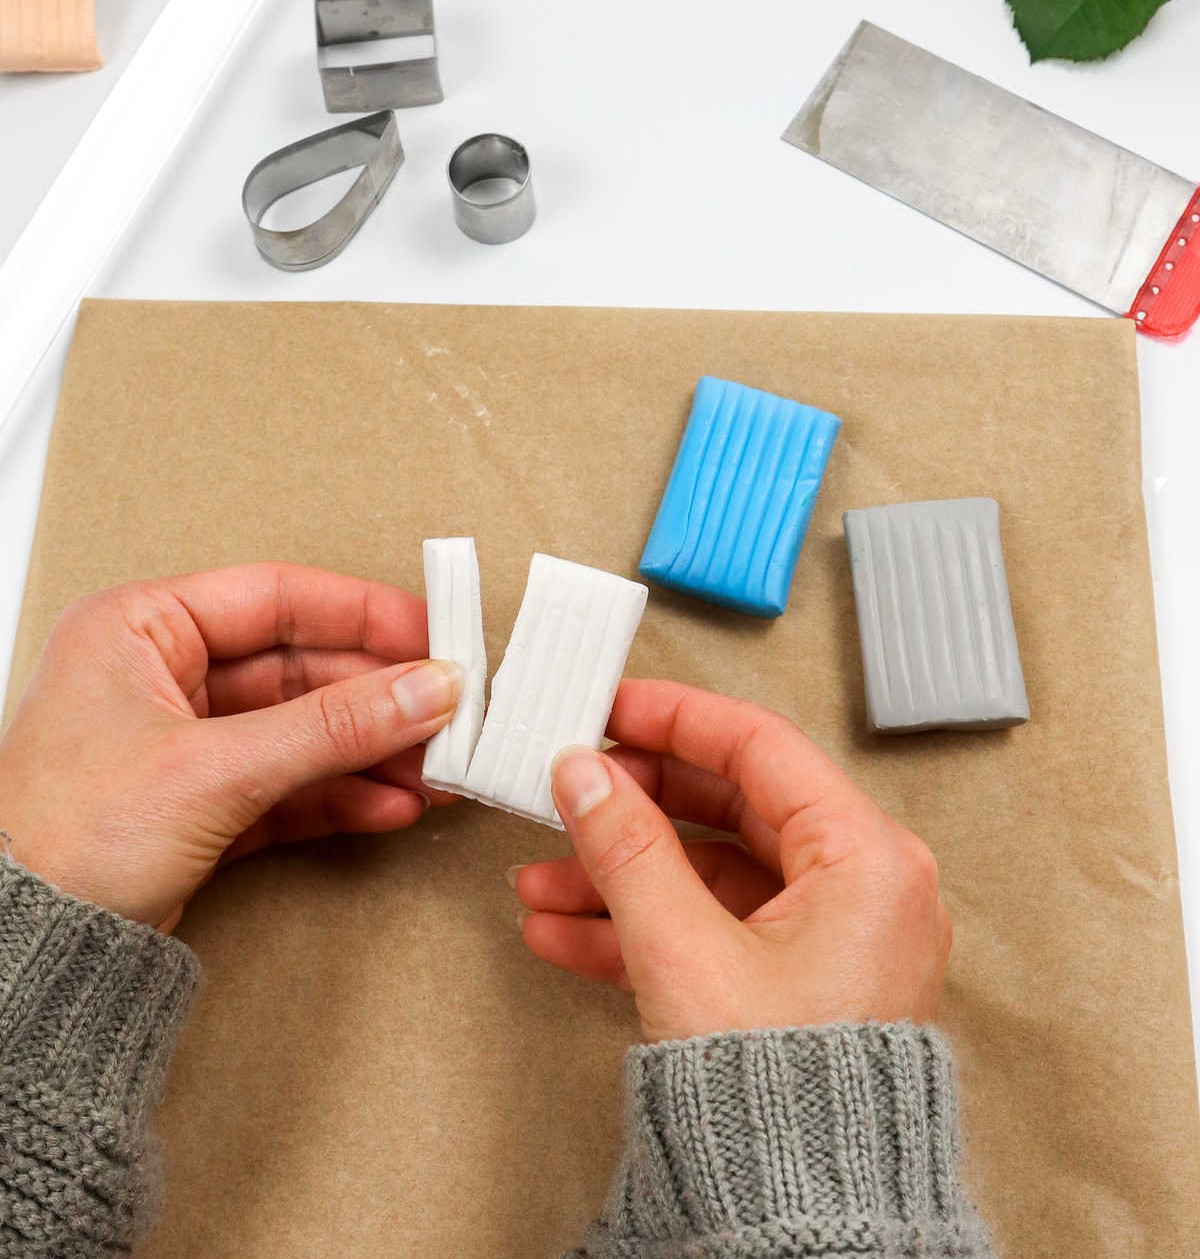
To create a unique and personalized pair of clay earrings, start by selecting the various colors you’d like to use. From each chosen hue, separate out small sections of clay, preparing them for the creative process that’s about to unfold.
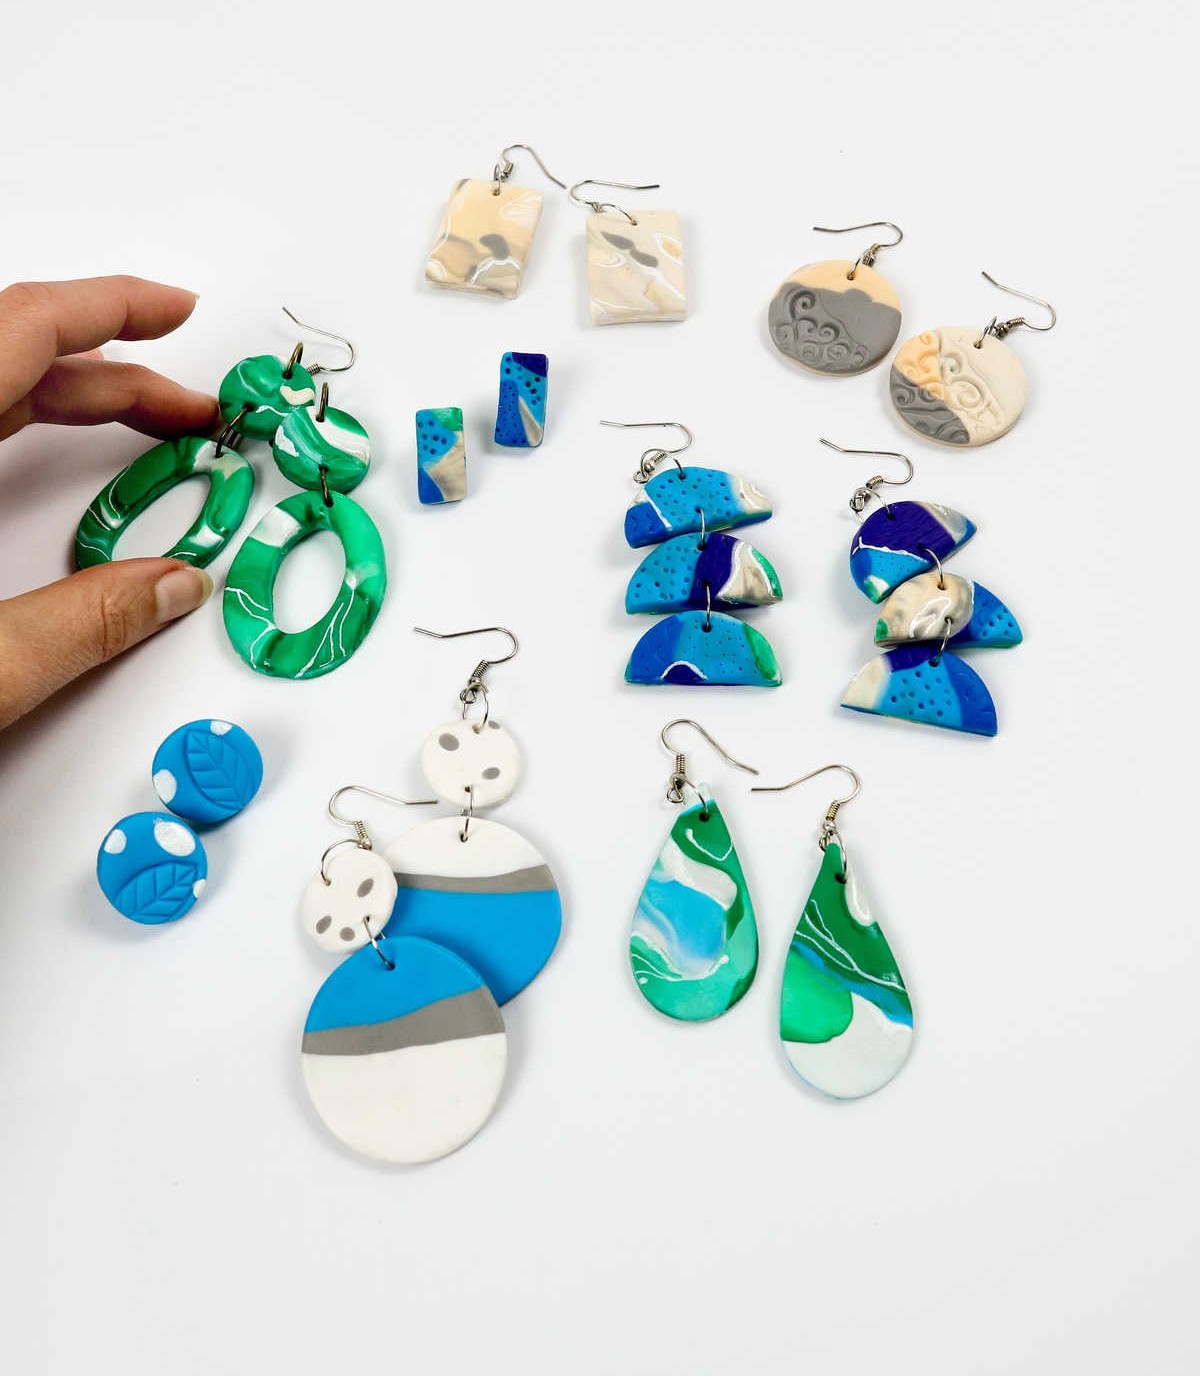
Design 1
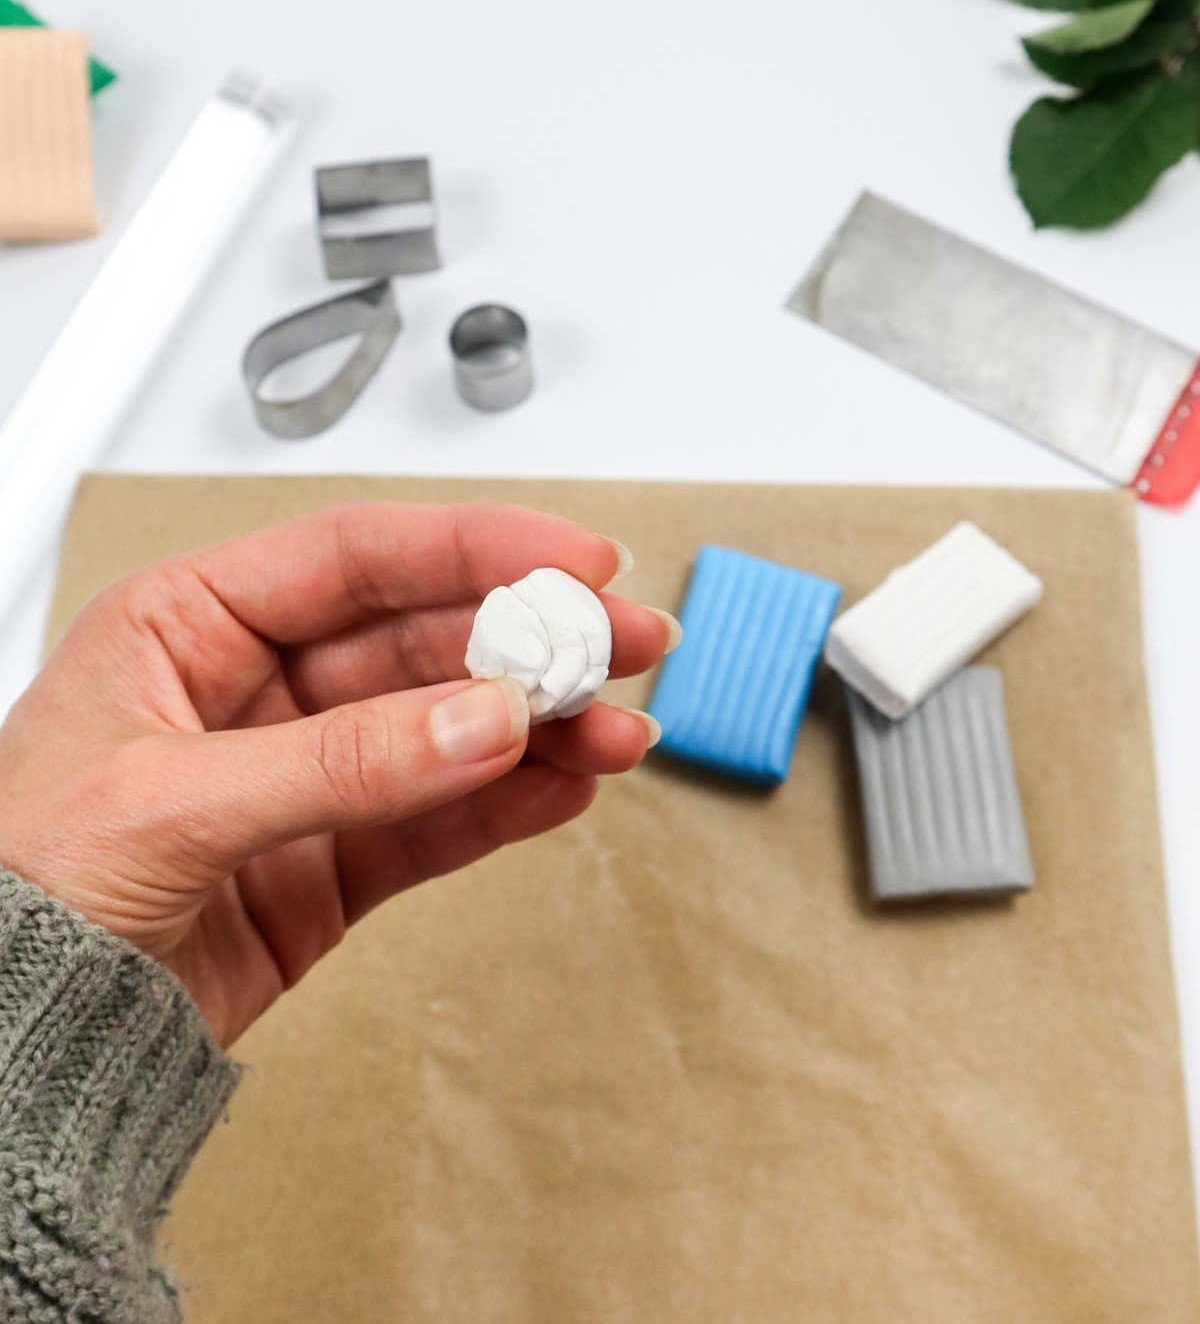
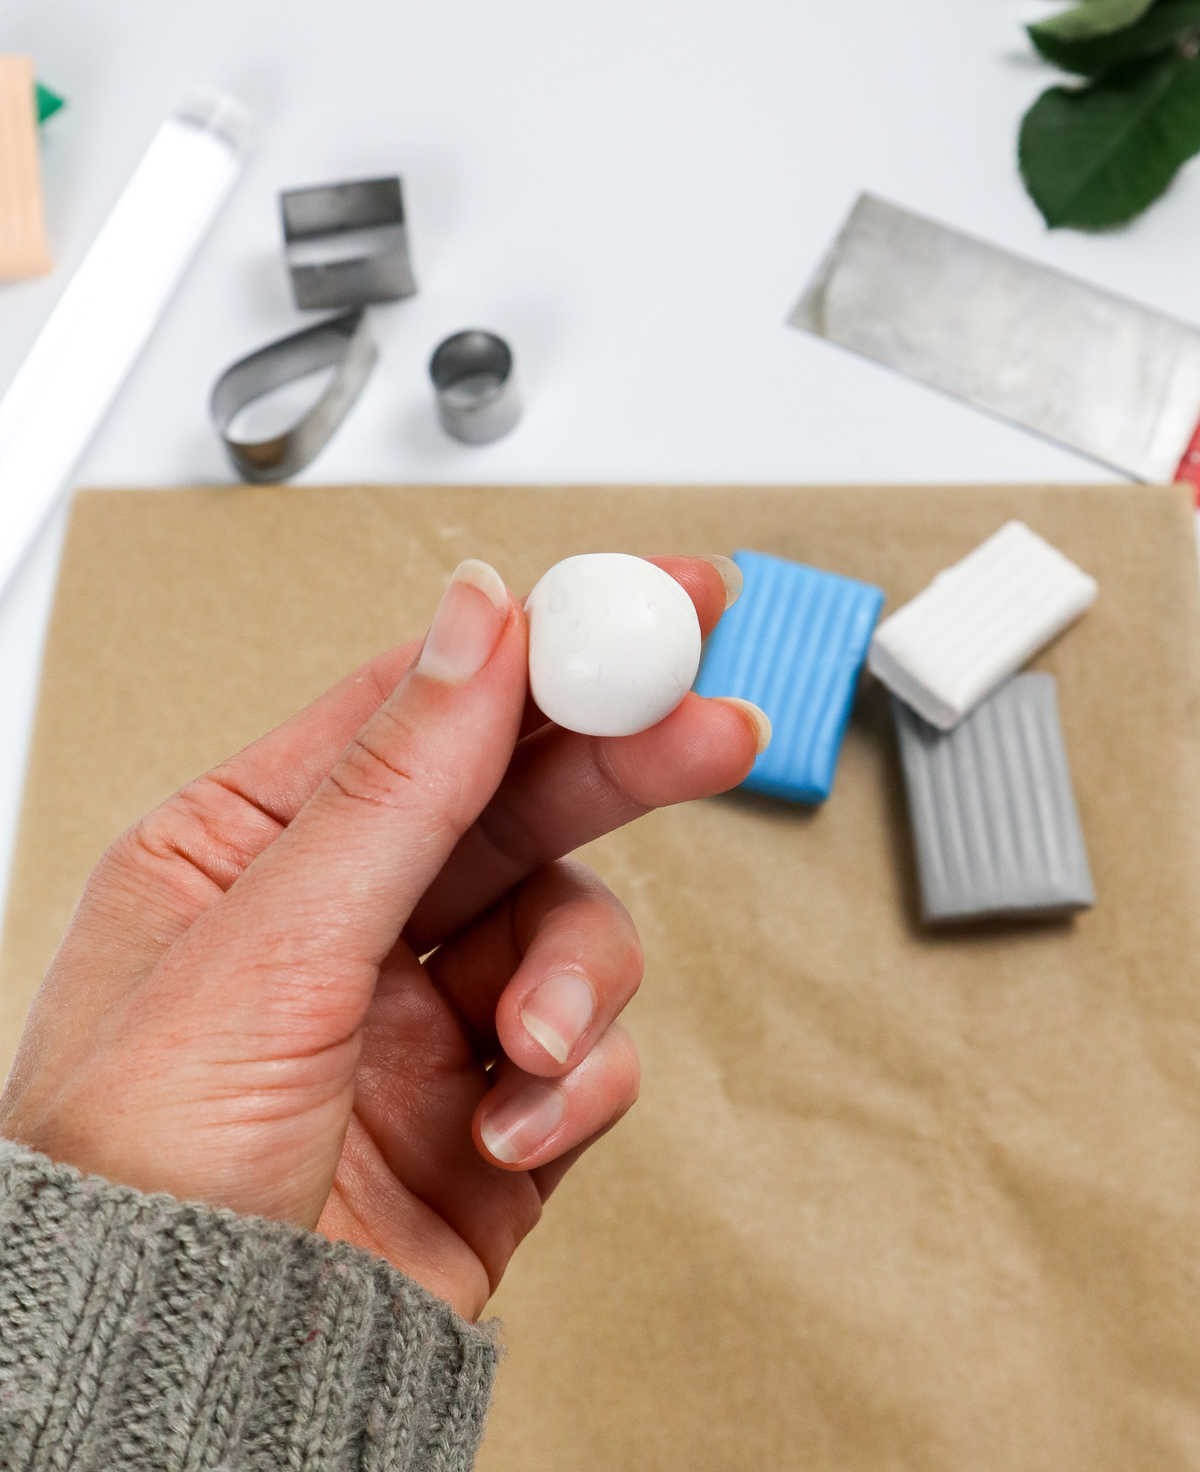
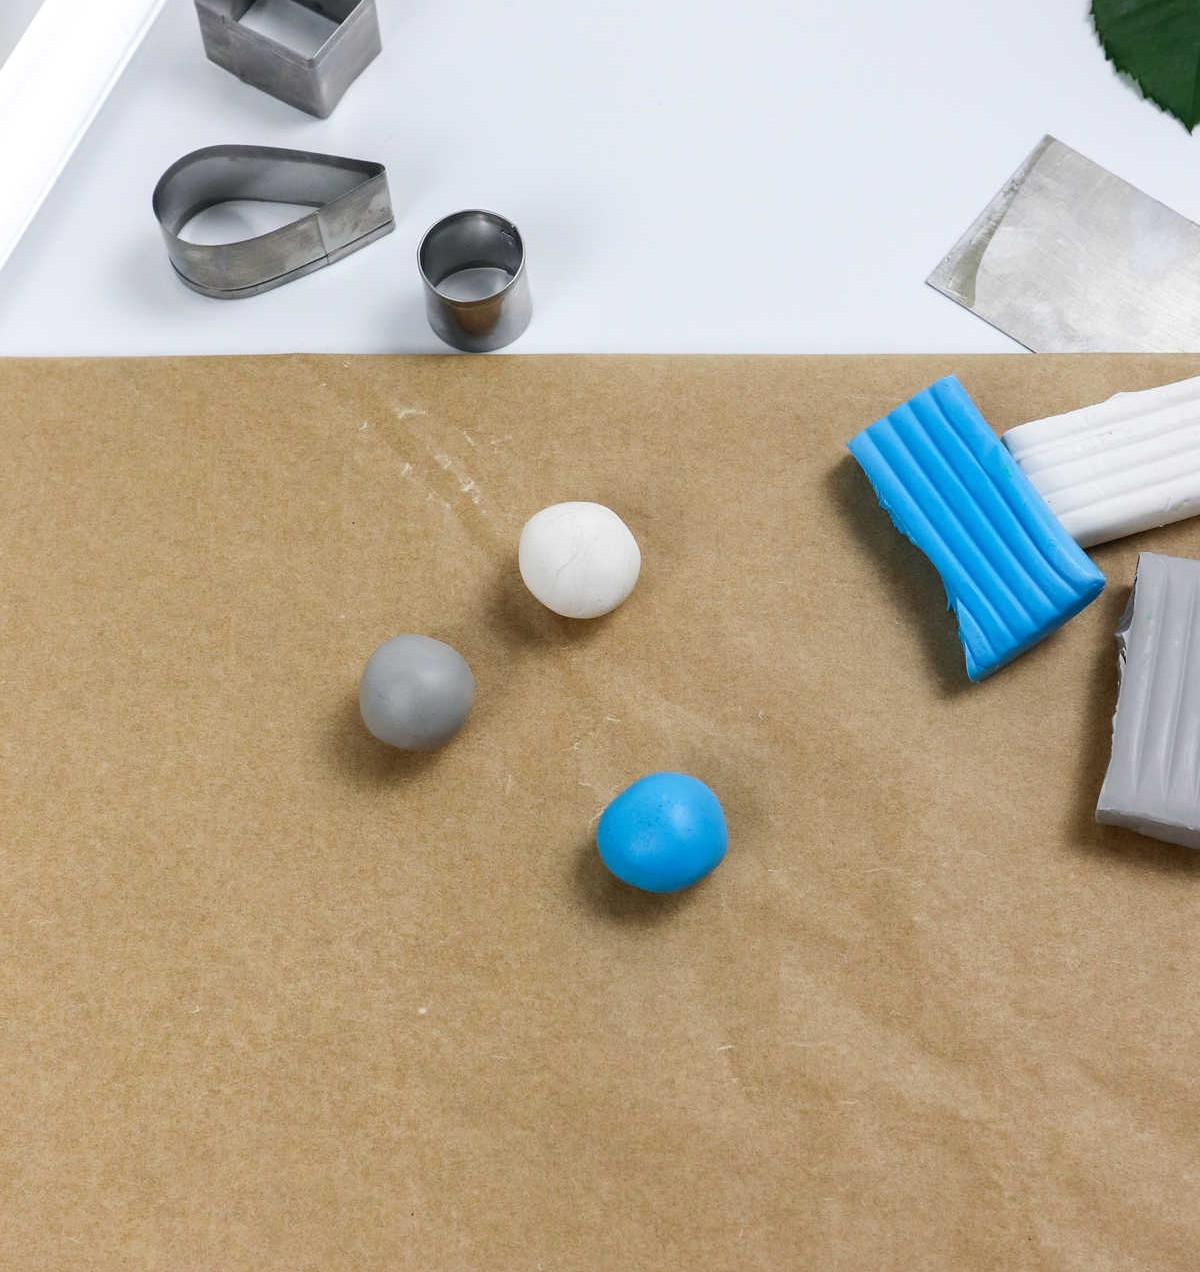
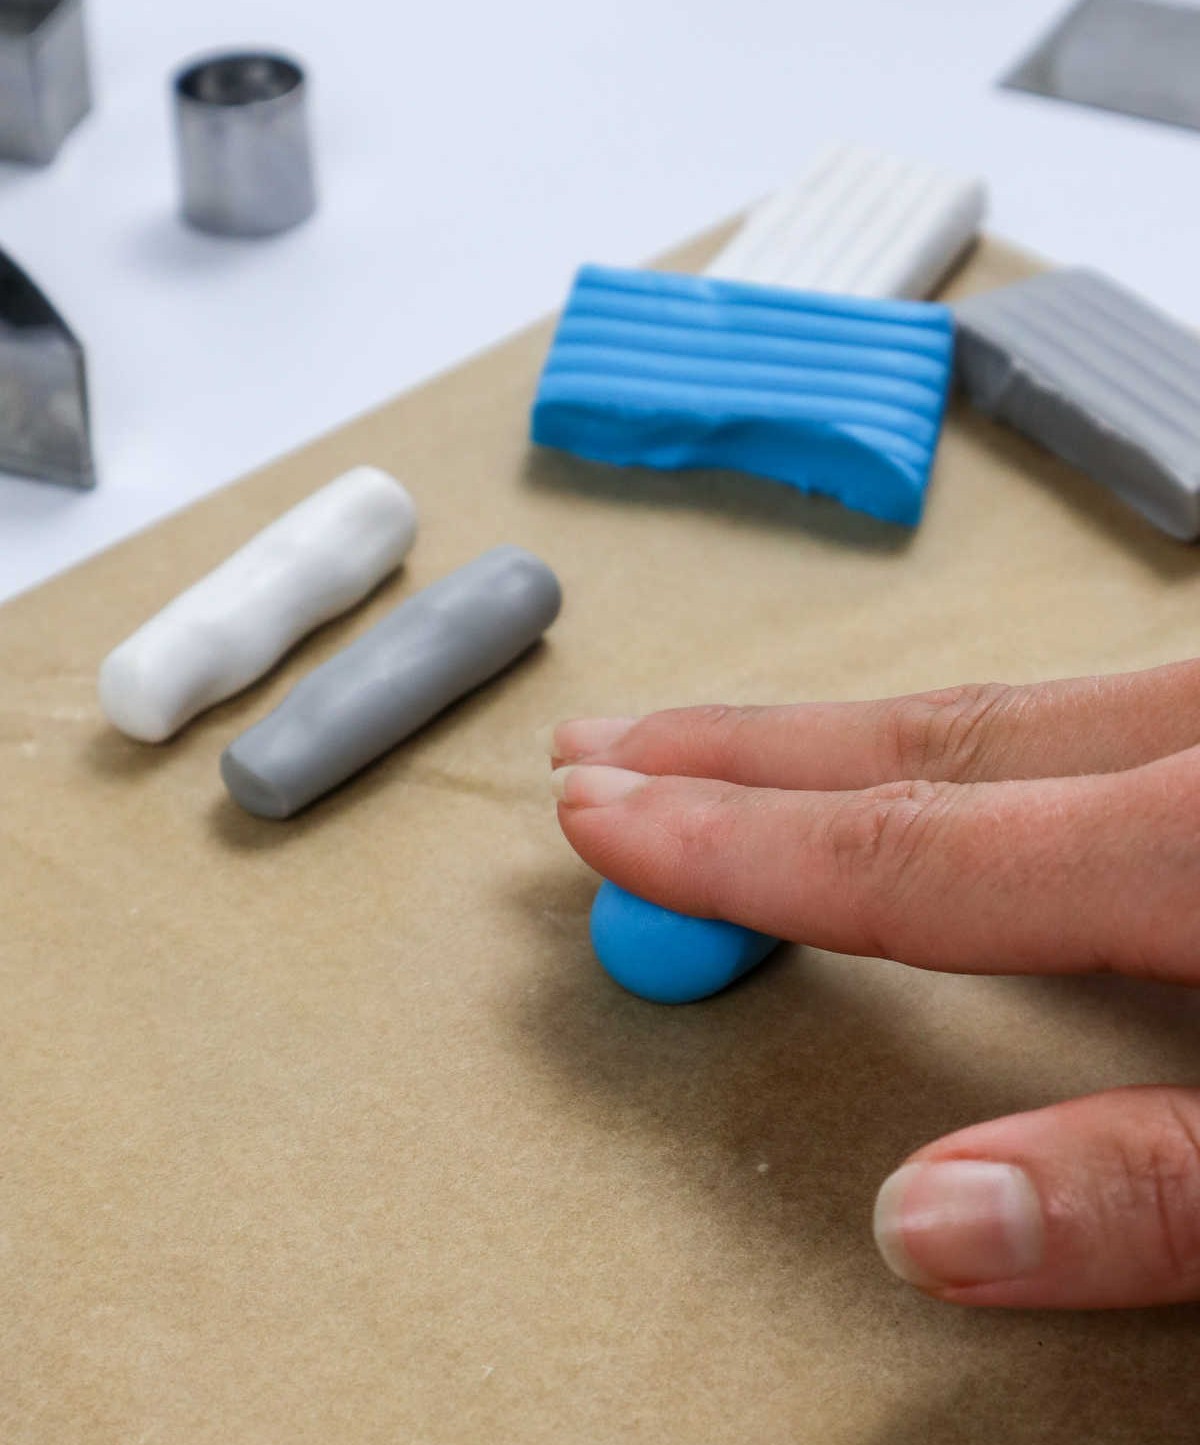
To conditionally prepare your clay for shaping, employ the natural warmth from your fingers and palms to gently soften and stretch each piece. Aim for a consistency that’s firm yet pliable, avoiding an overly squishy texture. Once you’ve achieved this optimal state, shape each color of clay into a ball, much like you would with dough. Repeat this process for all colors in your collection, ensuring they’re uniformly prepared for creative manipulation.
Step 3
Step 4
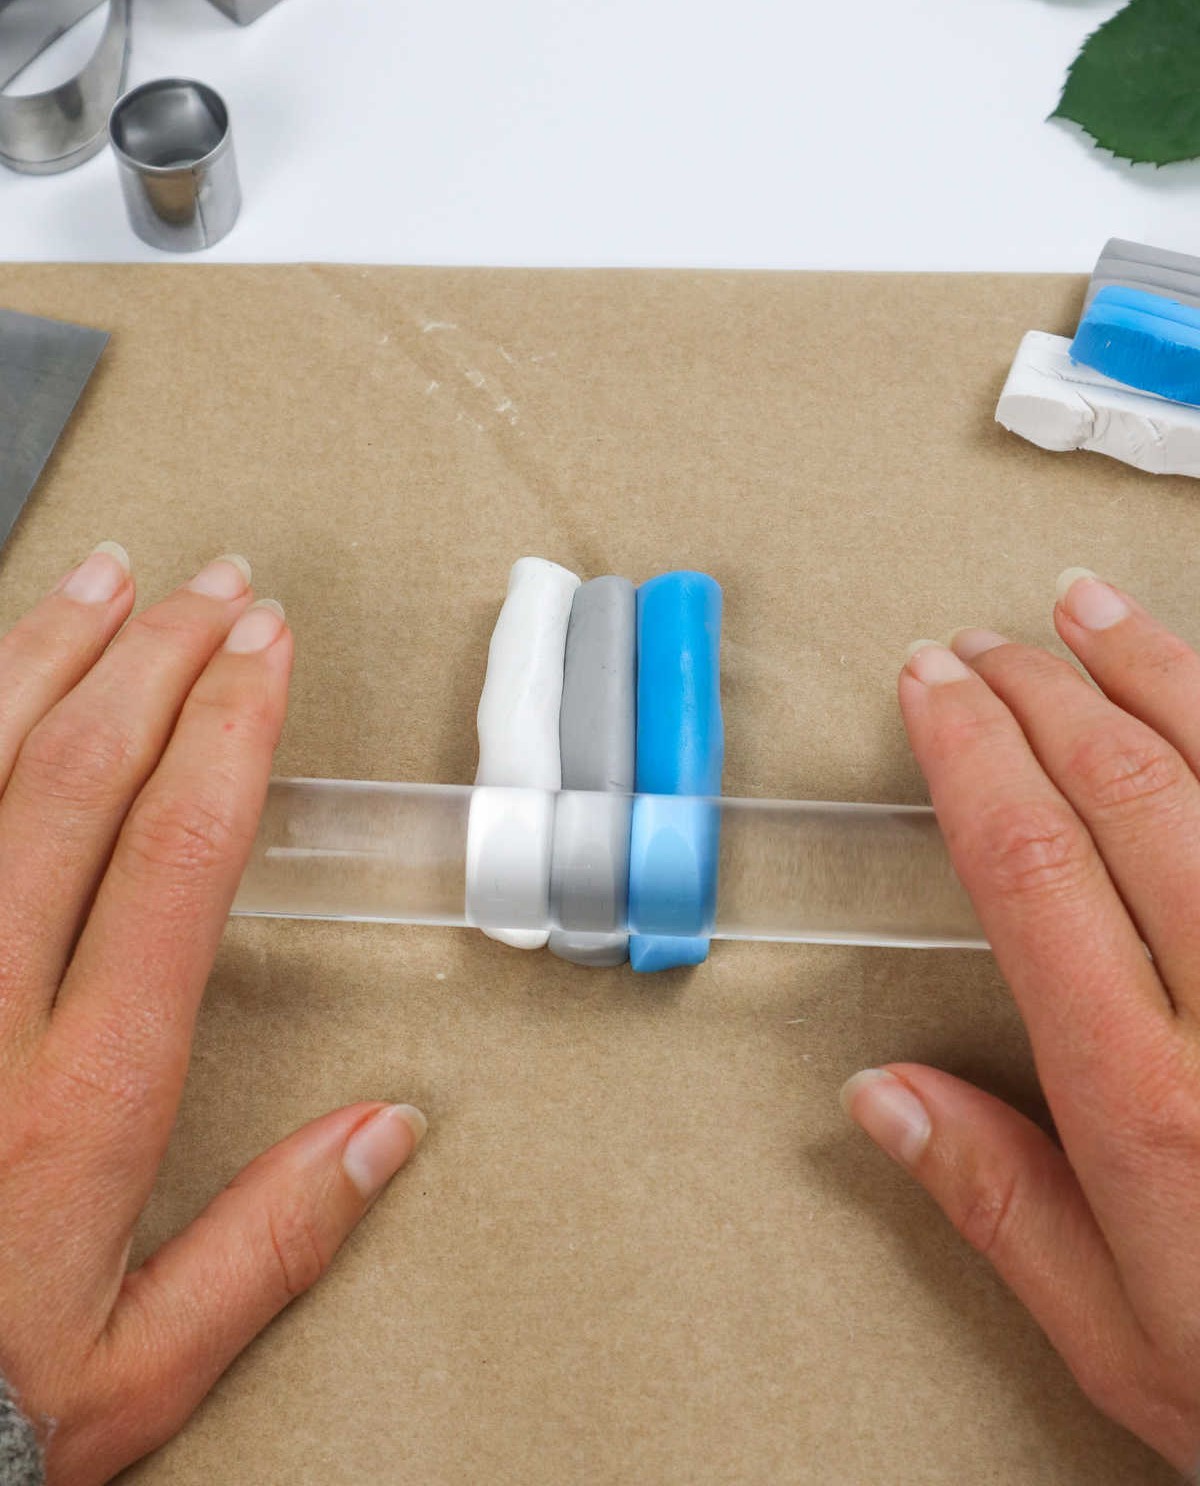
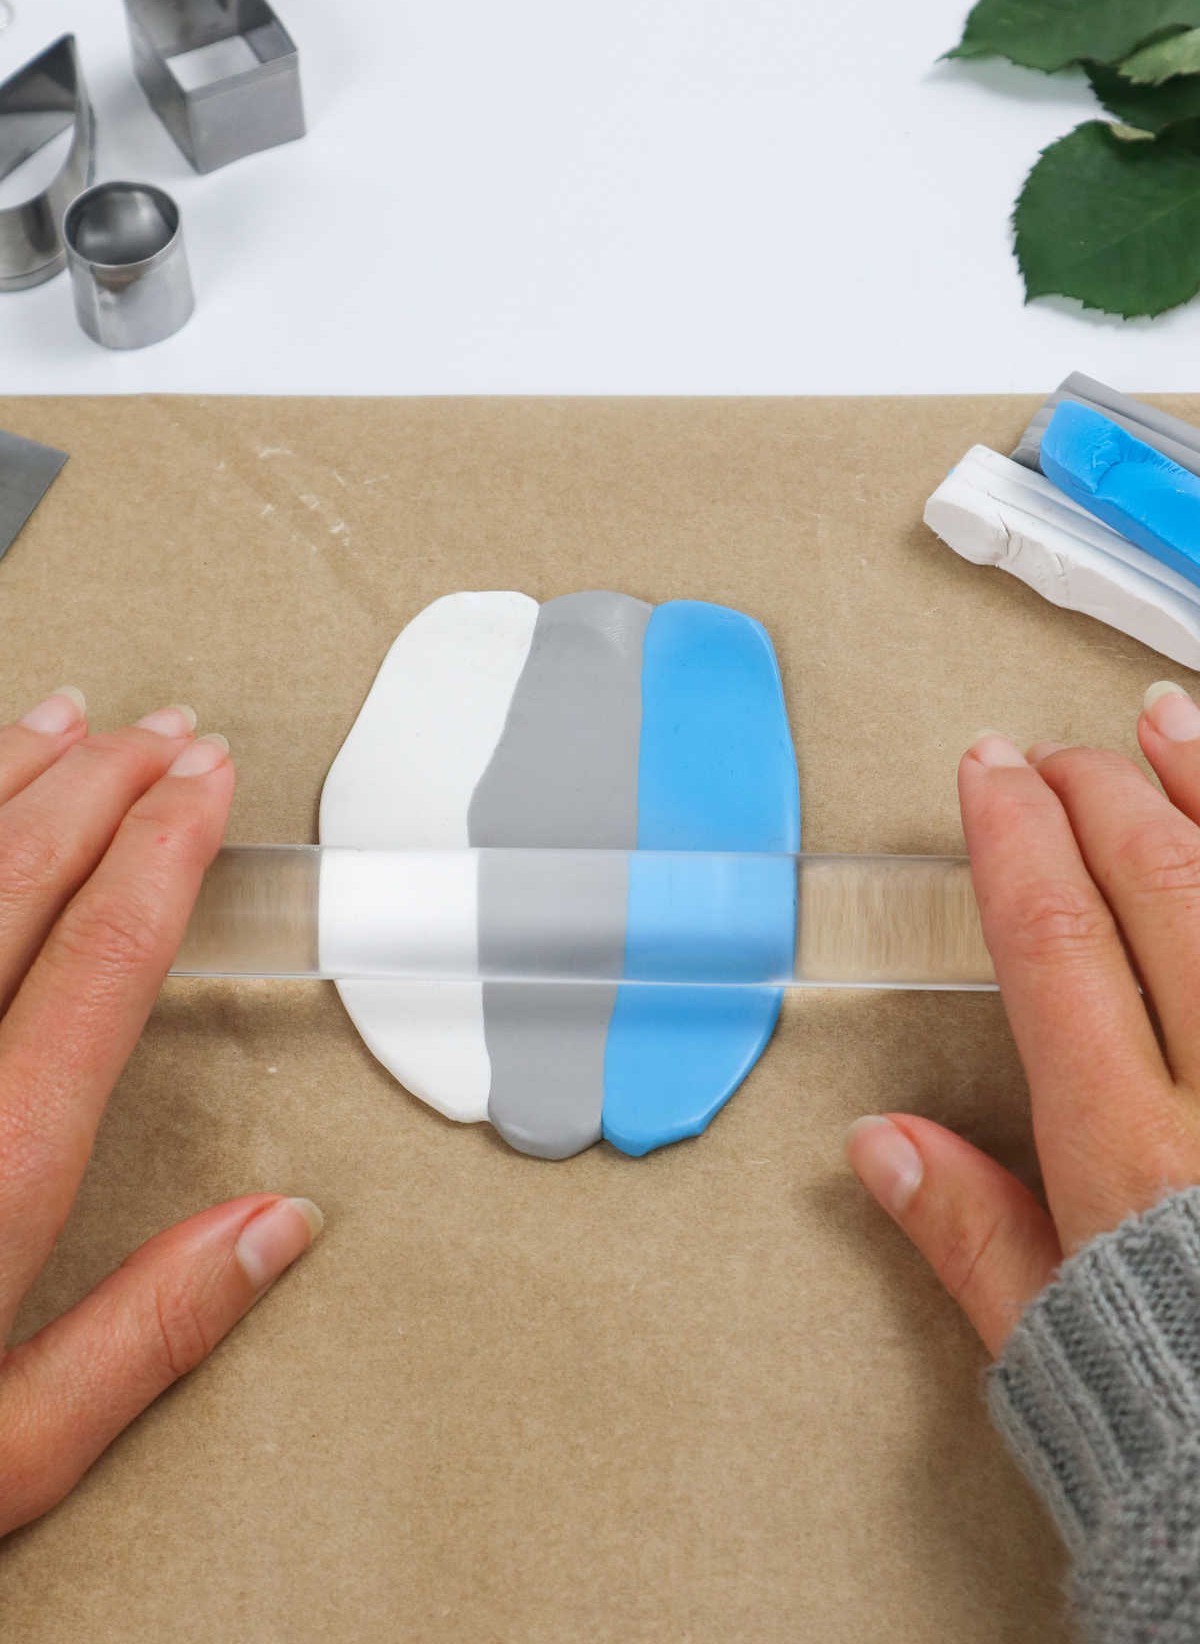


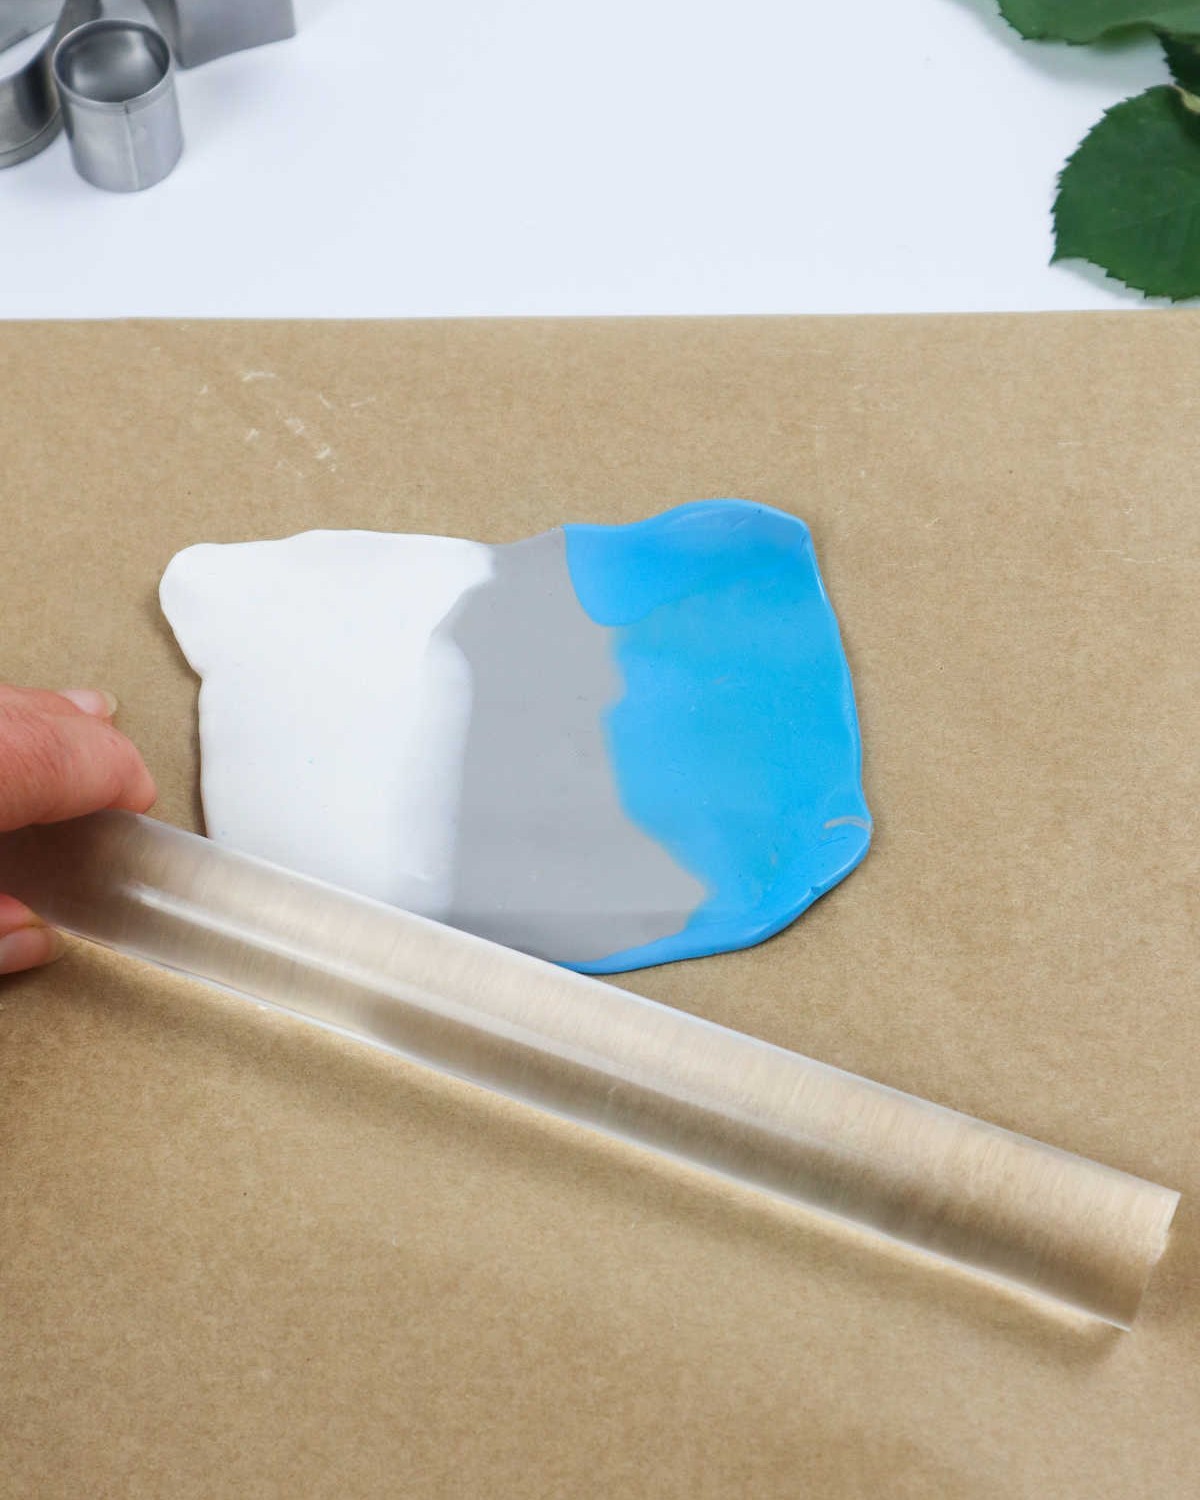
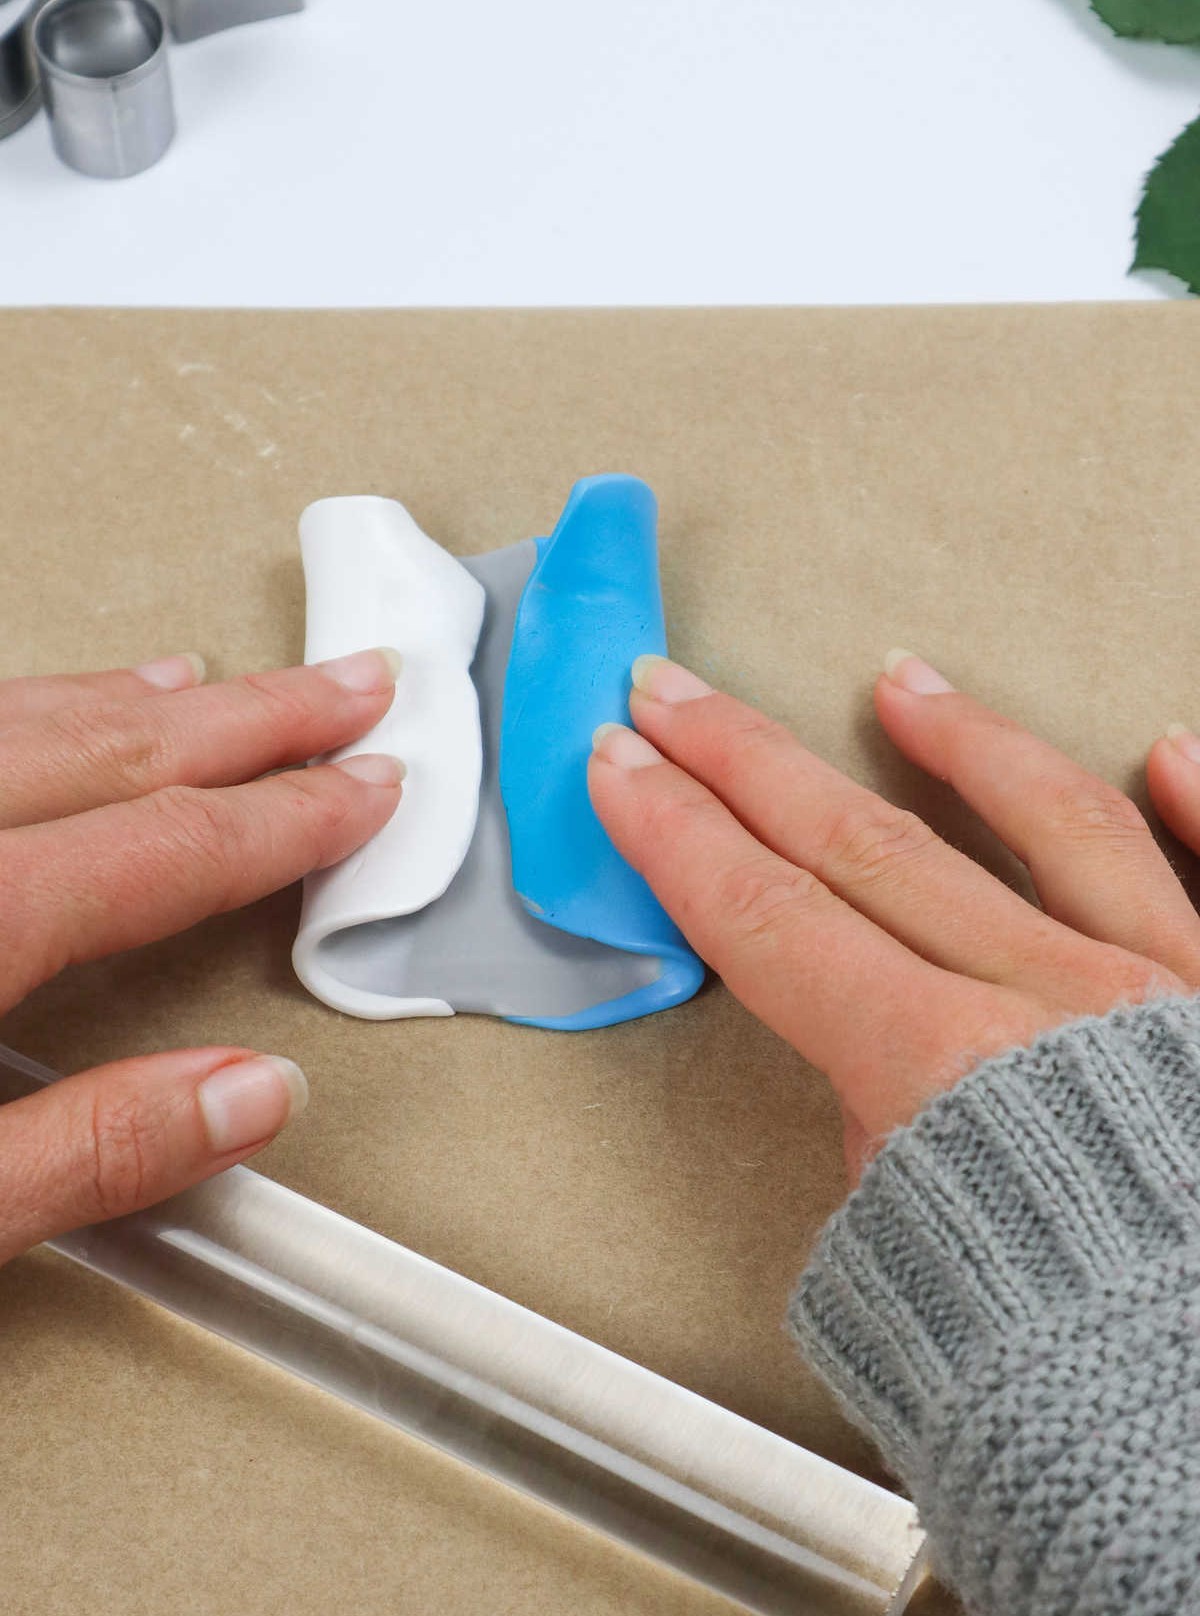
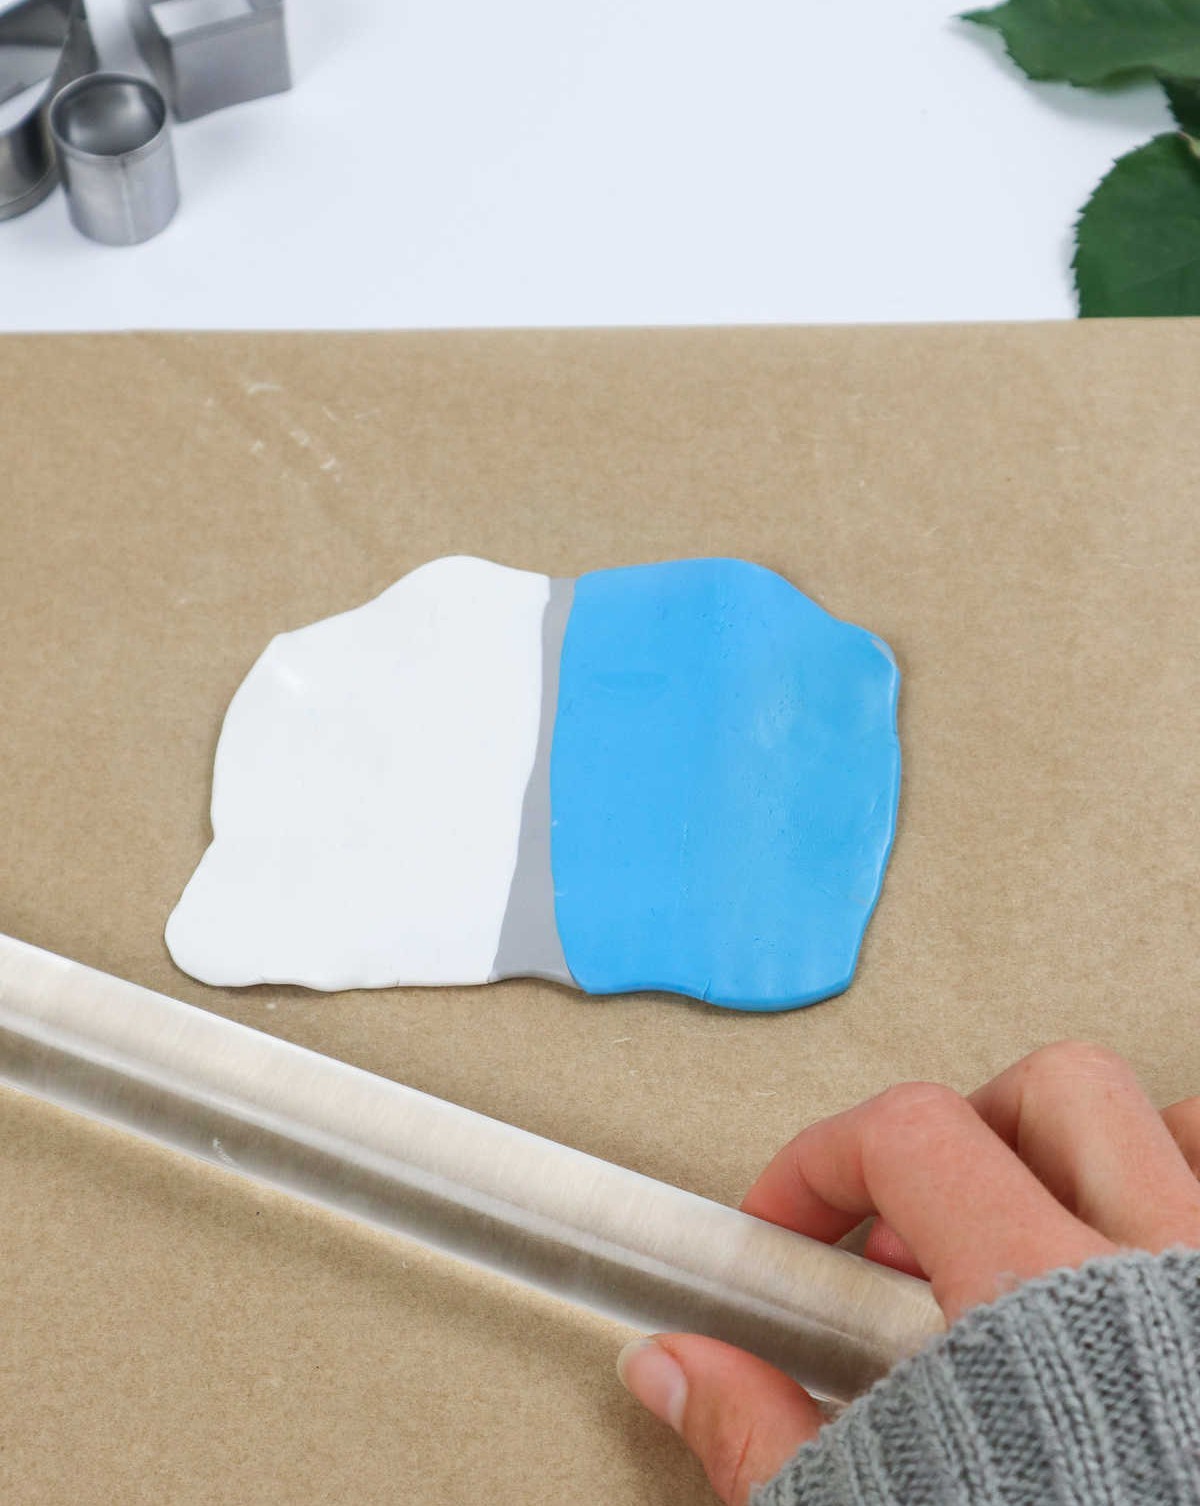
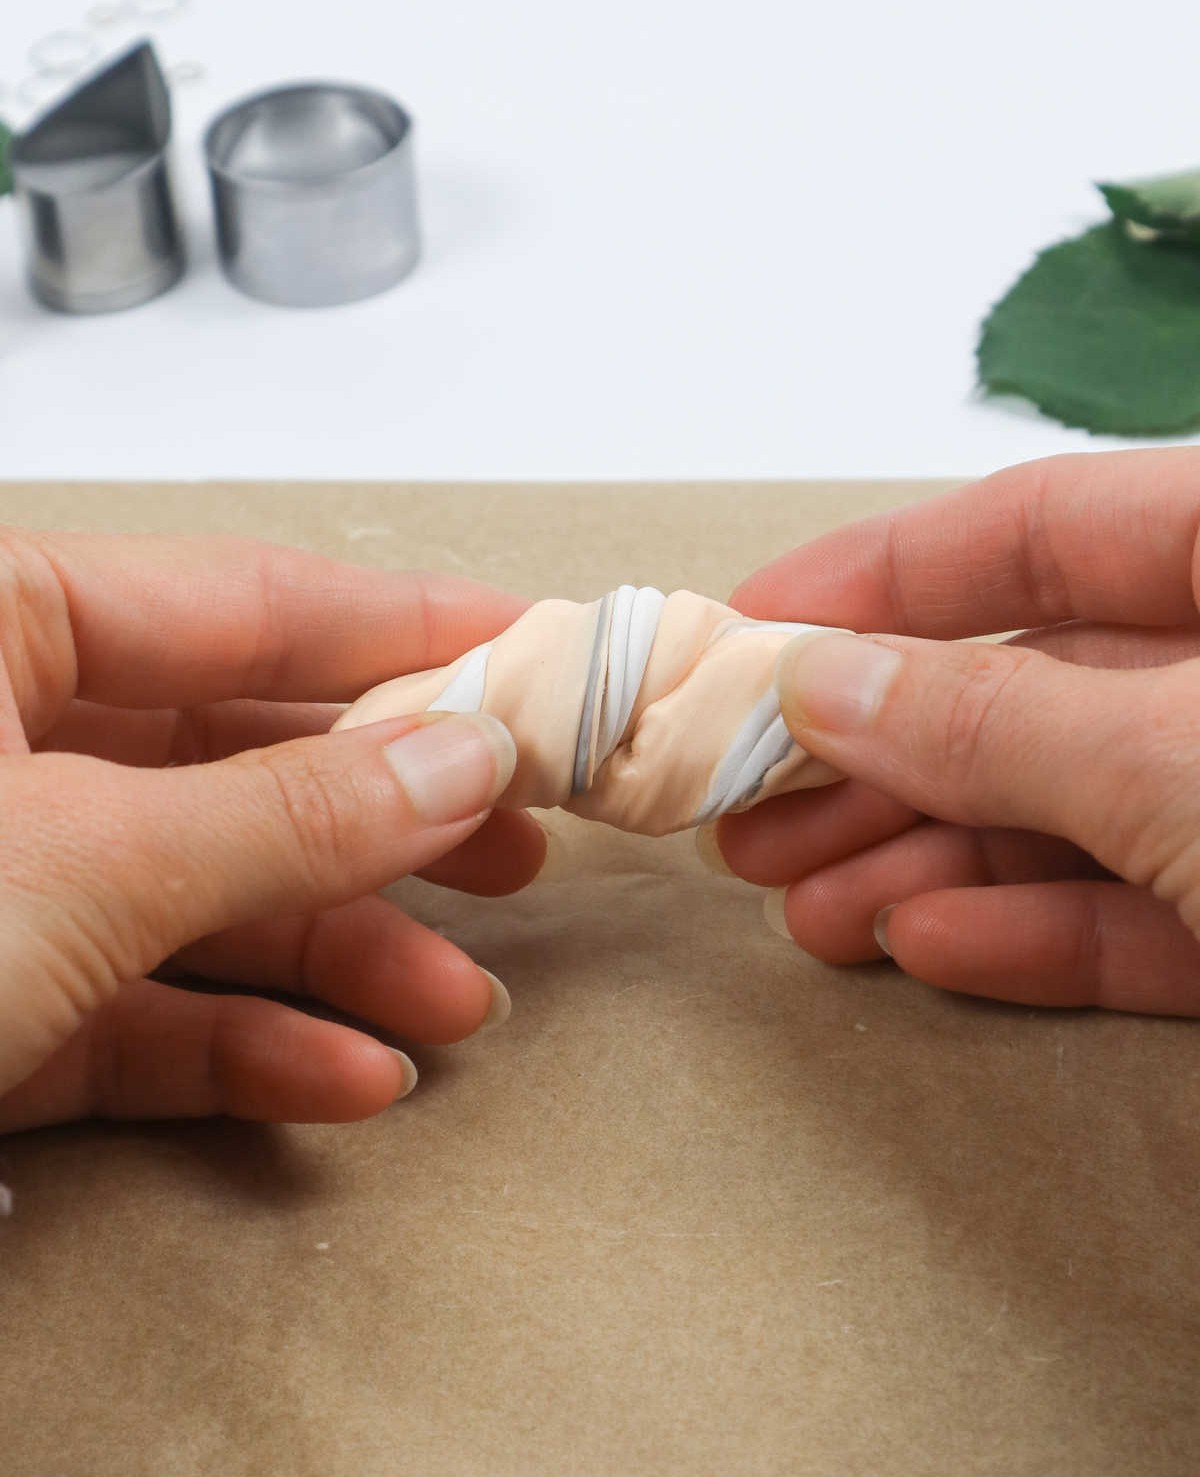
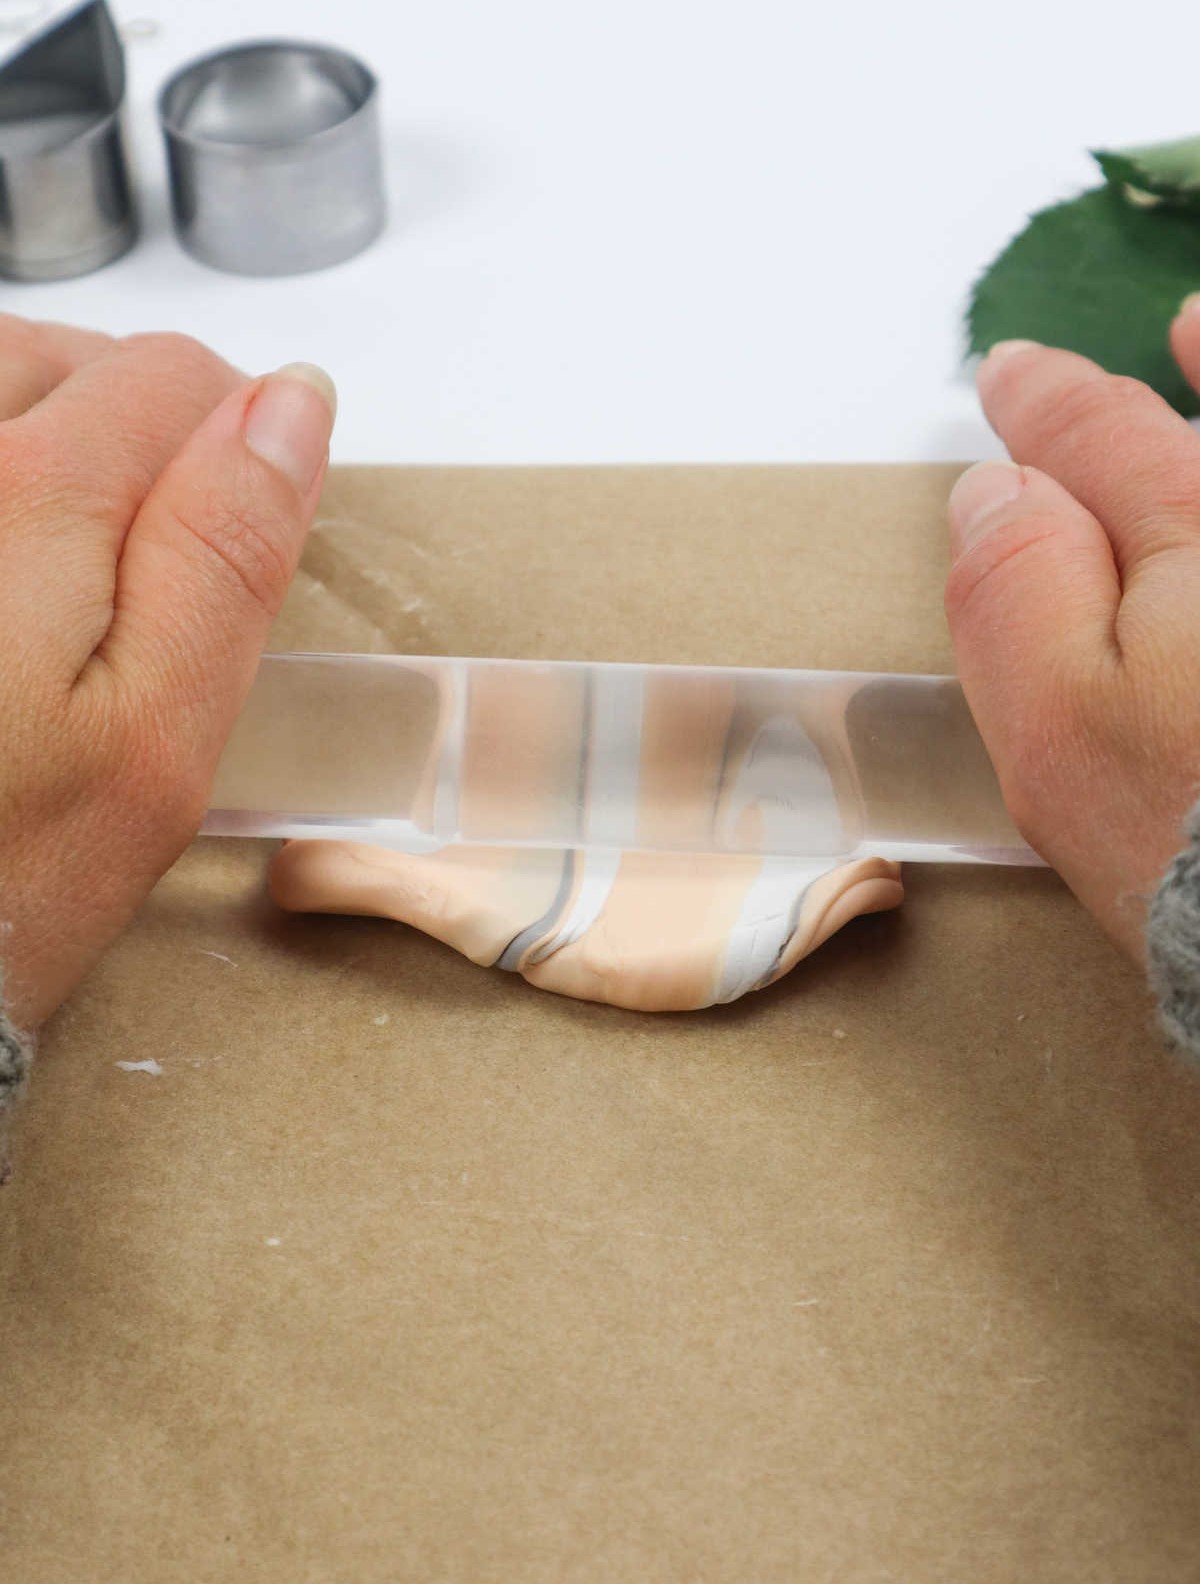
As you progress with the clay manipulation process, take the various rolls and position them side by side, subsequently commencing their fusion into a single, flat entity. It is crucial to continually roll the clay, ensuring the colors meld together seamlessly. Once the desired uniformity is achieved, bring one end of the clay over the other, folding it down in a smooth motion.
Continue this process, oscillating between folding and twisting the clay while simultaneously rolling and flattening it to attain an optimal thickness of approximately 5mm.
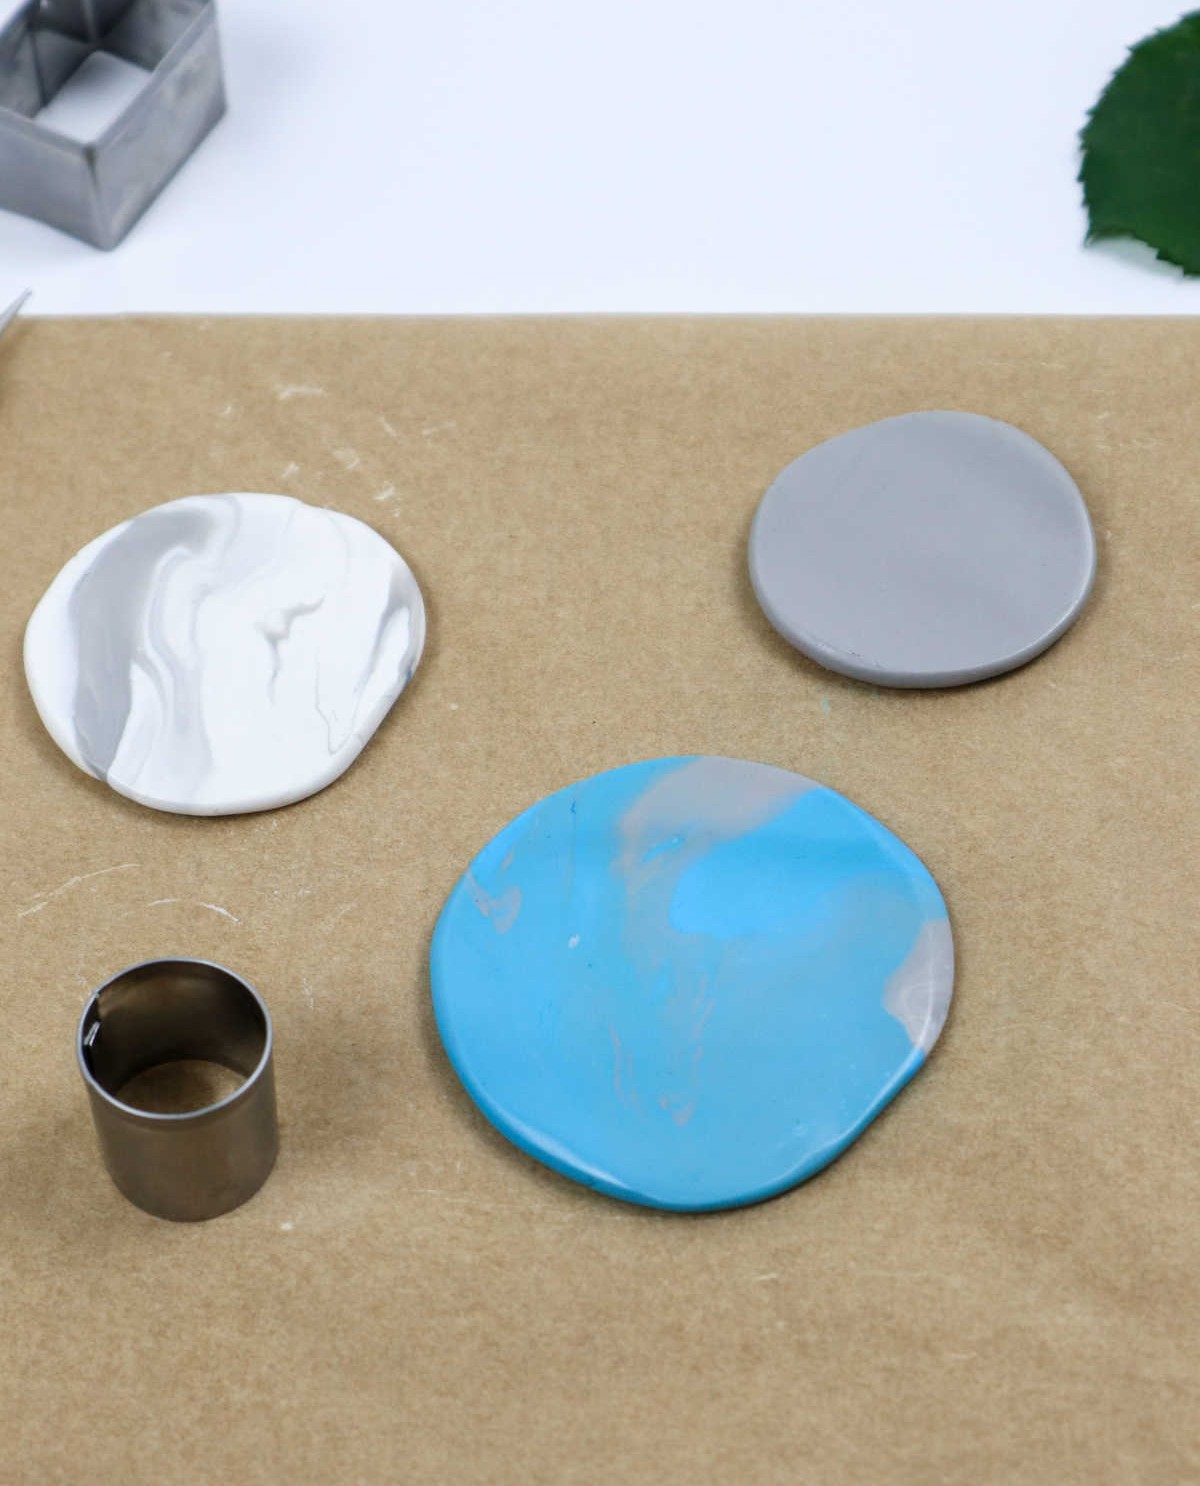
Step 5
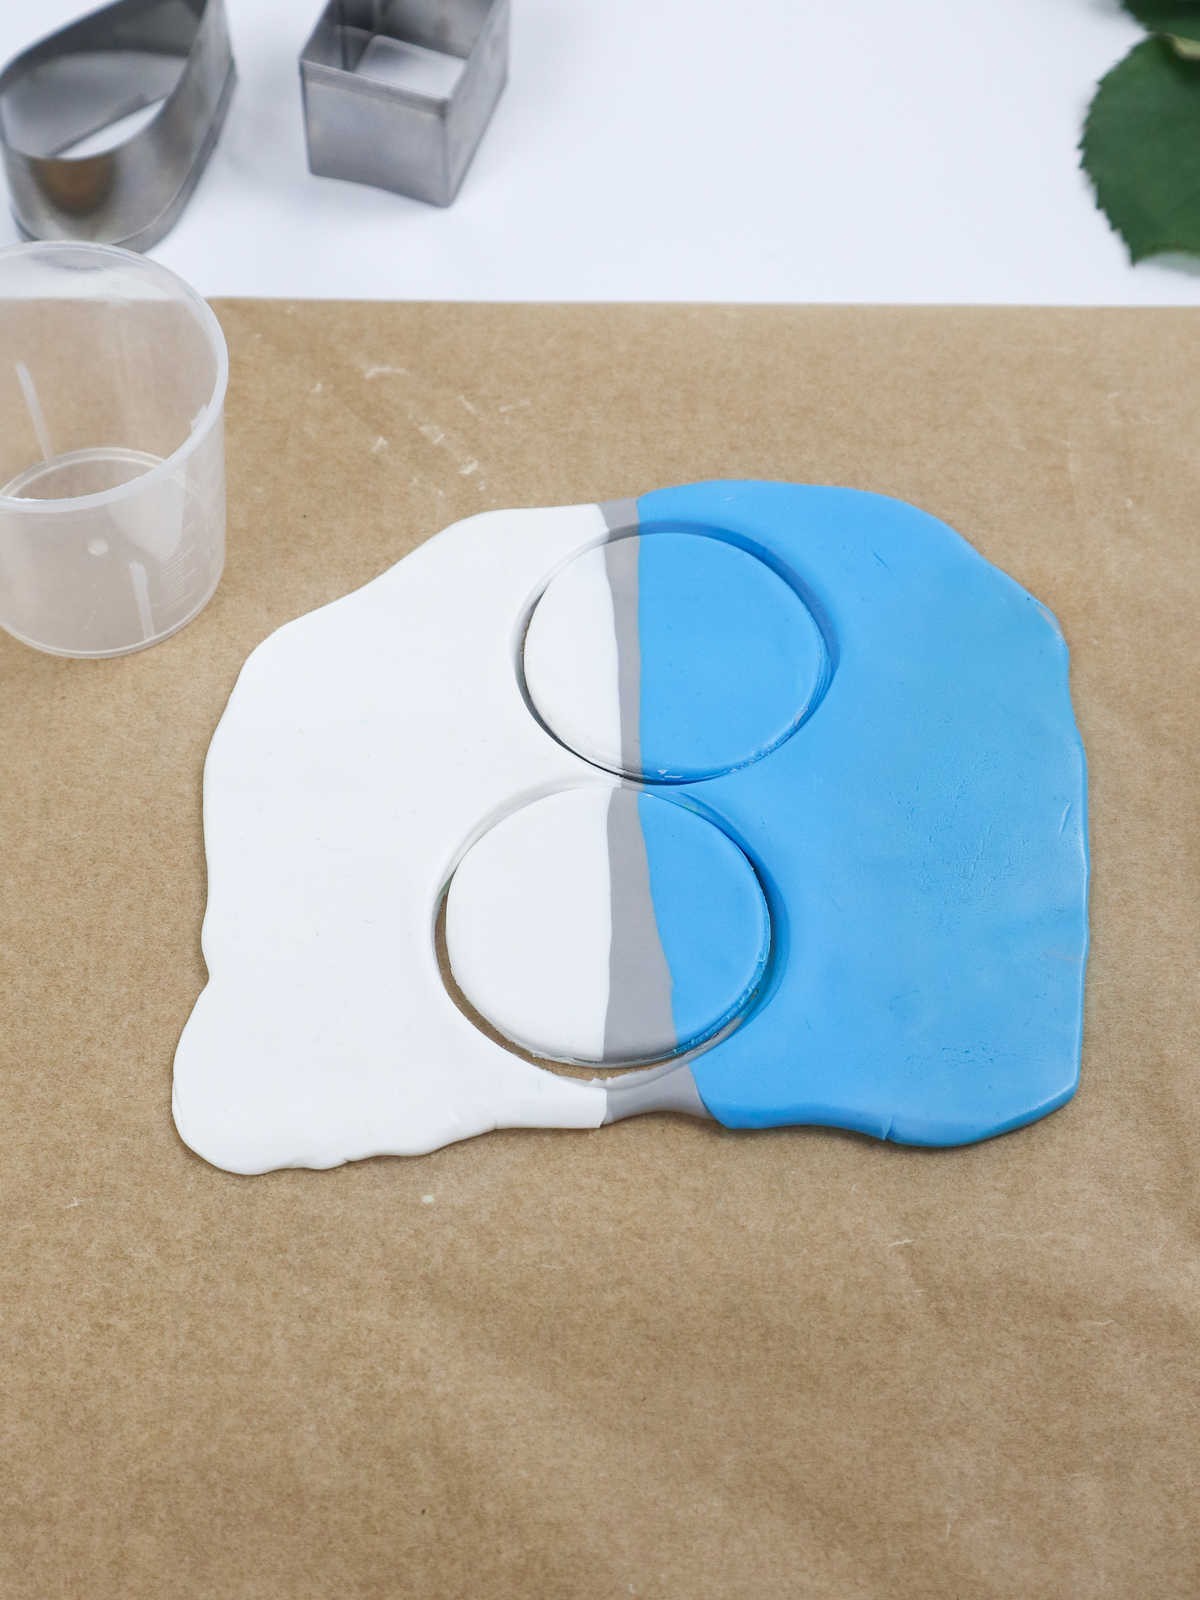
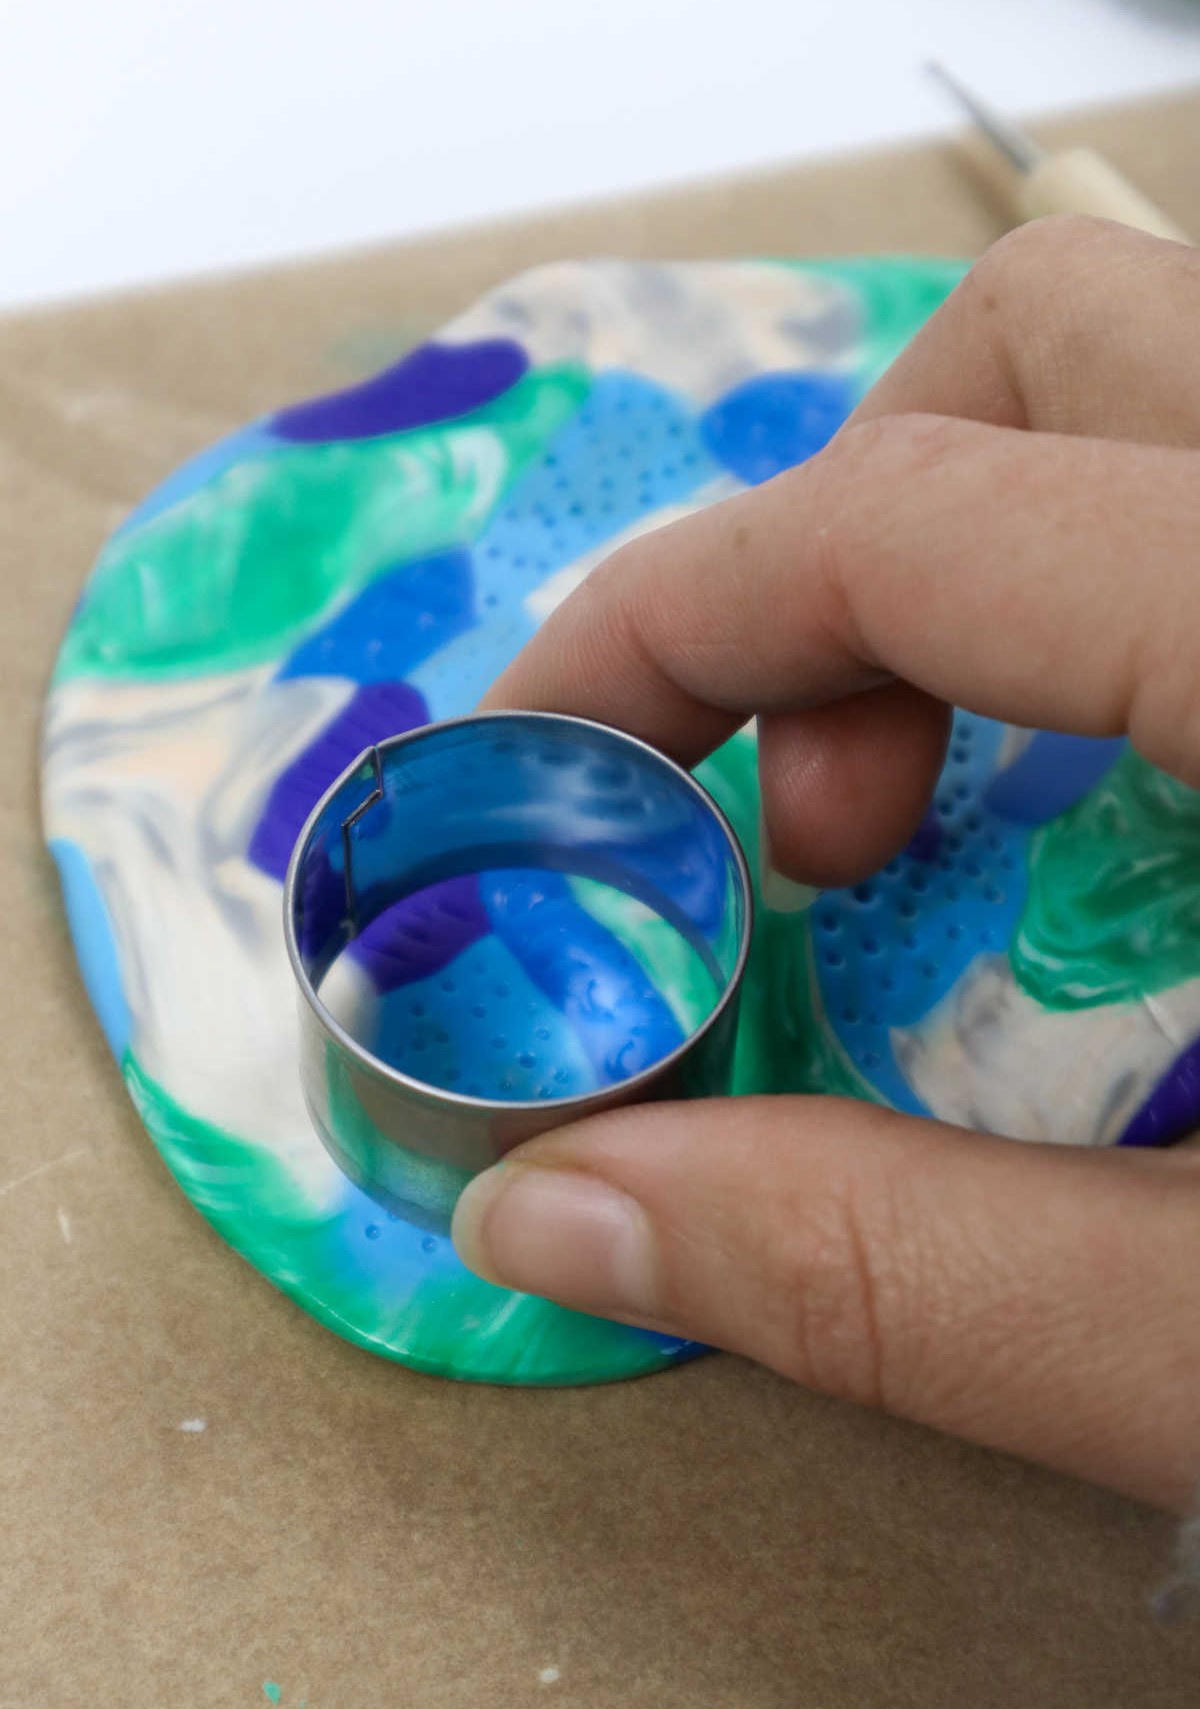
Once you’re satisfied with the blended color palette, use cookie cutters to create a precise design. Gently press each cutter into the clay to shape it into your desired form, such as circles for this project.
Design 2
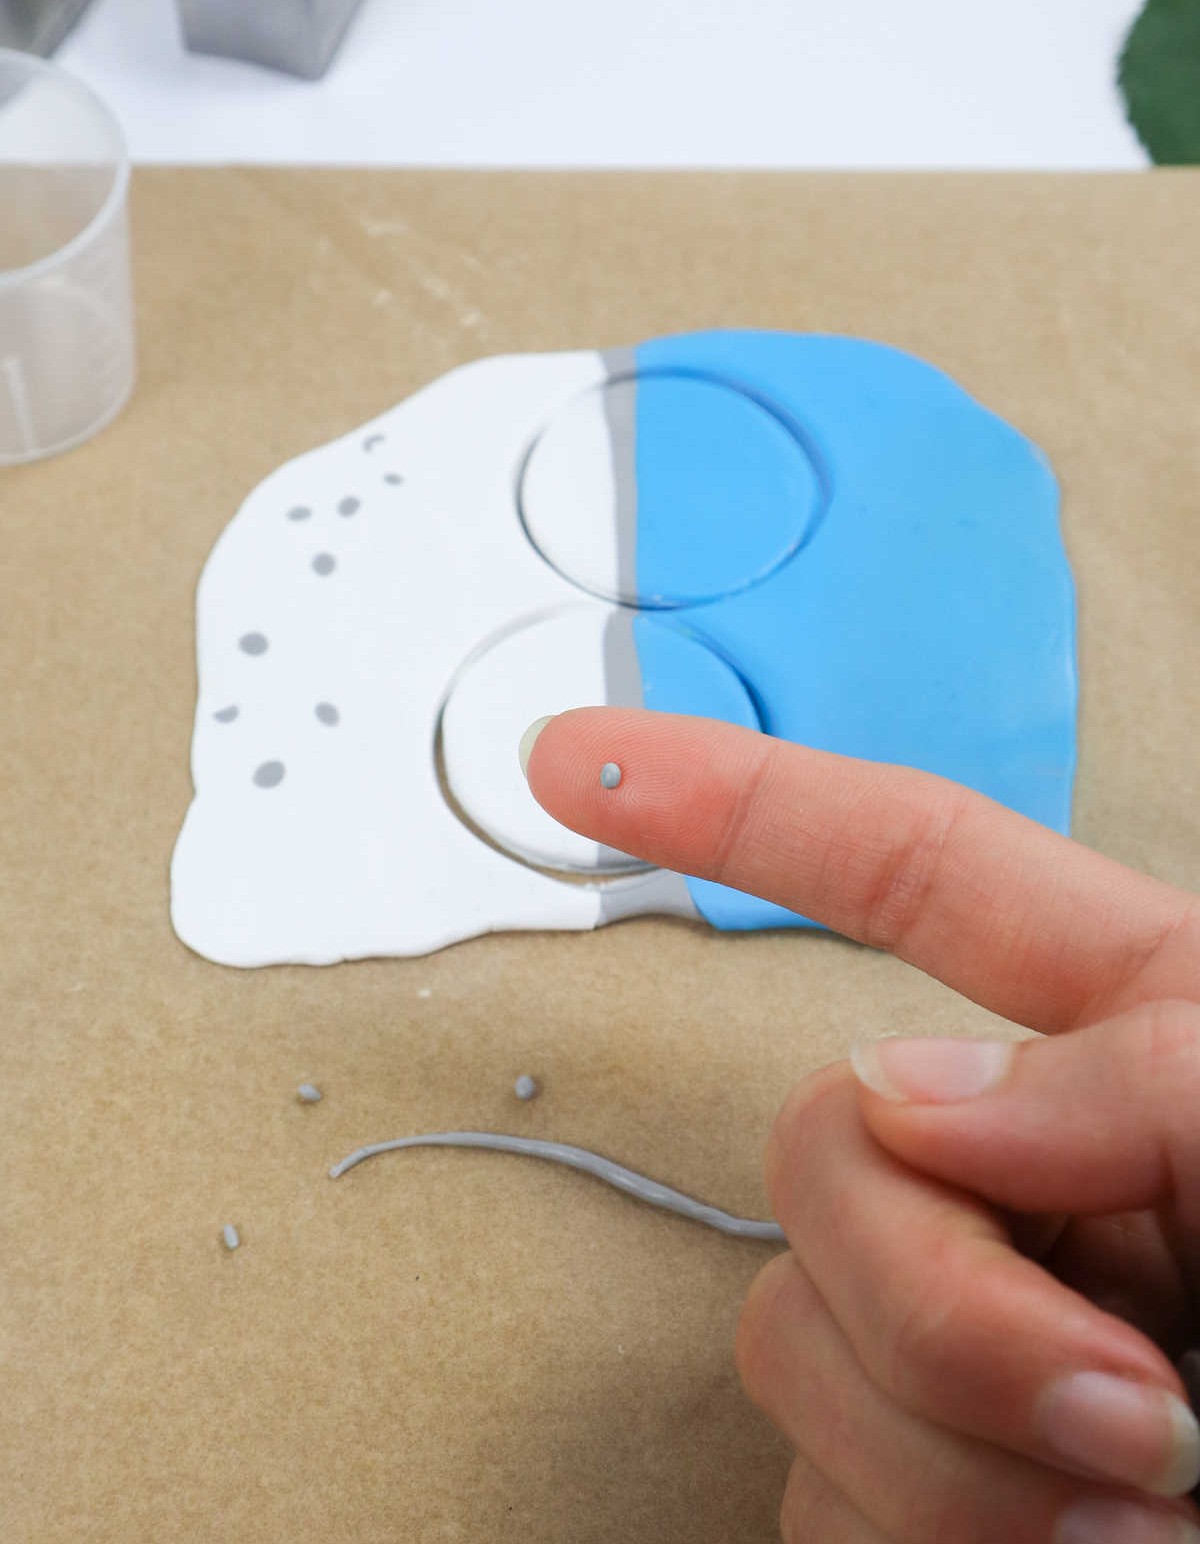
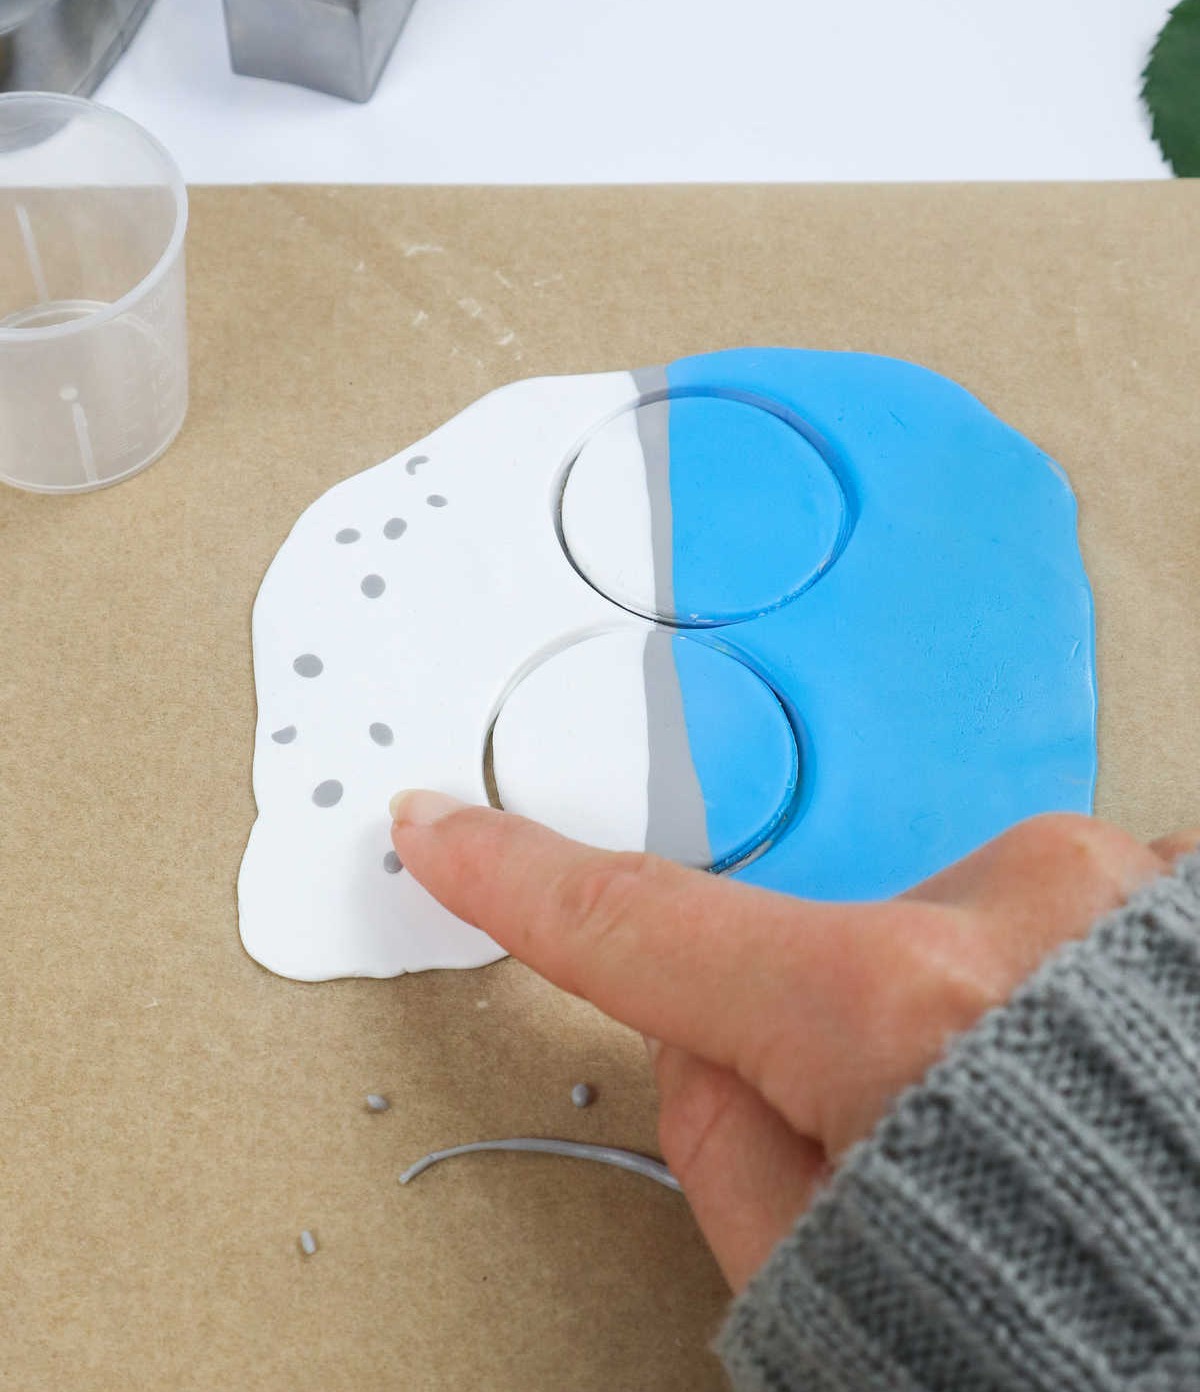
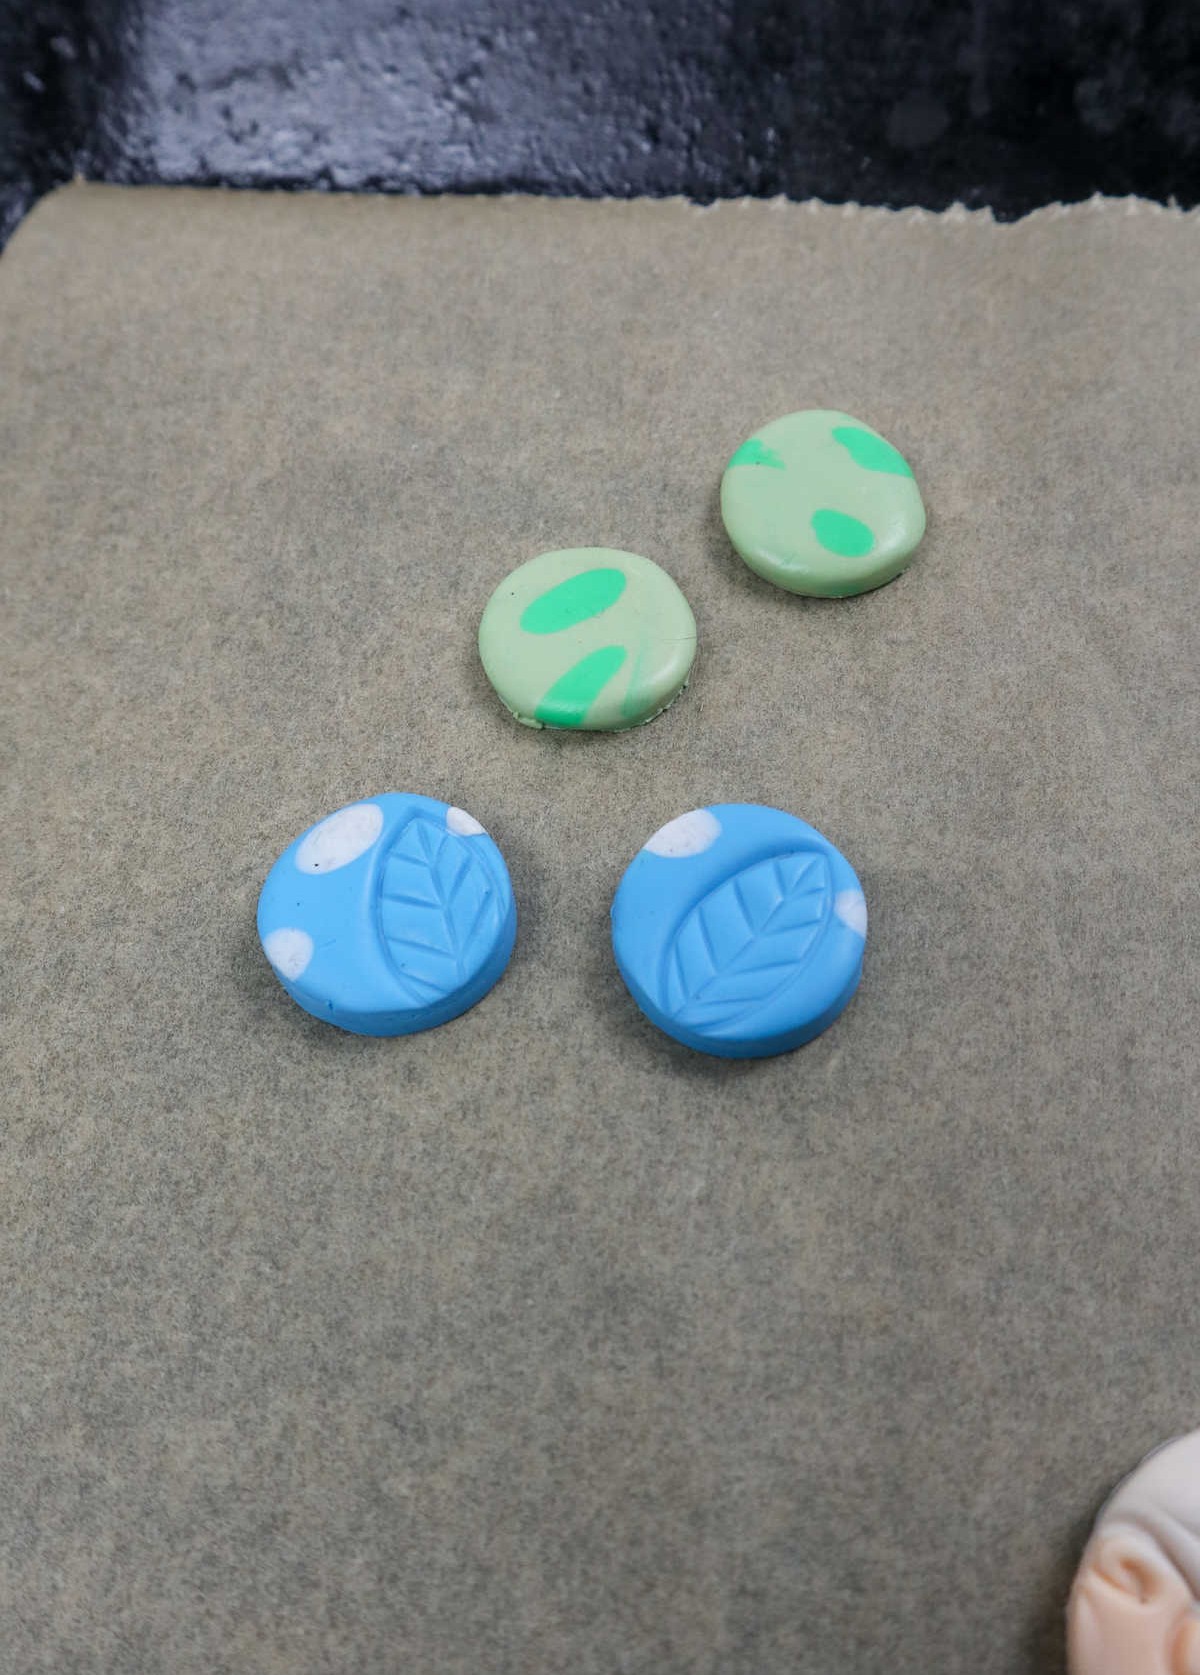
Get creative with your designs by adding more details! You’ve still got some clay left, so take advantage of it. Pinch off small amounts in various colors and roll them into tiny dots. These will add a beautiful speckle effect to your flattened clay. Once you’re happy with the design, use these dots to decorate your earrings. Don’t be afraid to experiment with different shapes and sizes – after all, you’ve got two more earring pairs to create!
Simply cut out another pair of shapes using a cookie cutter, and you’ll have a unique set of earrings that’s all yours.
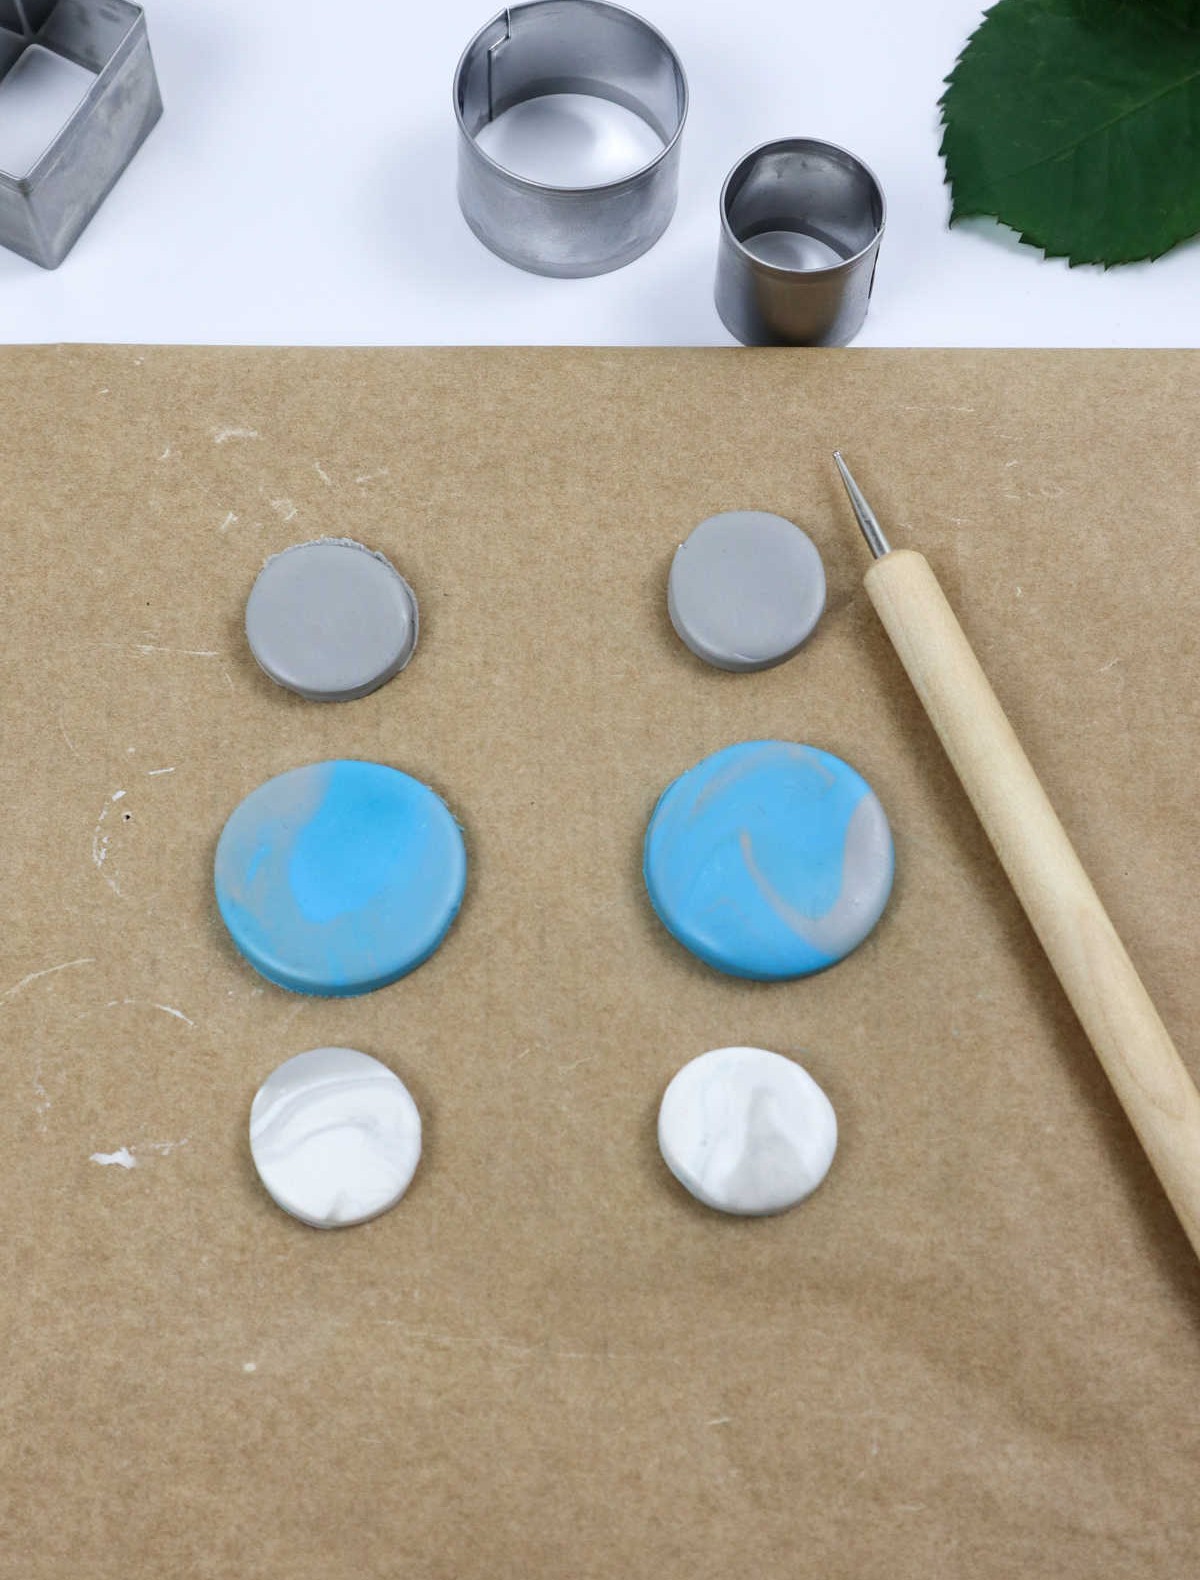
Step 6
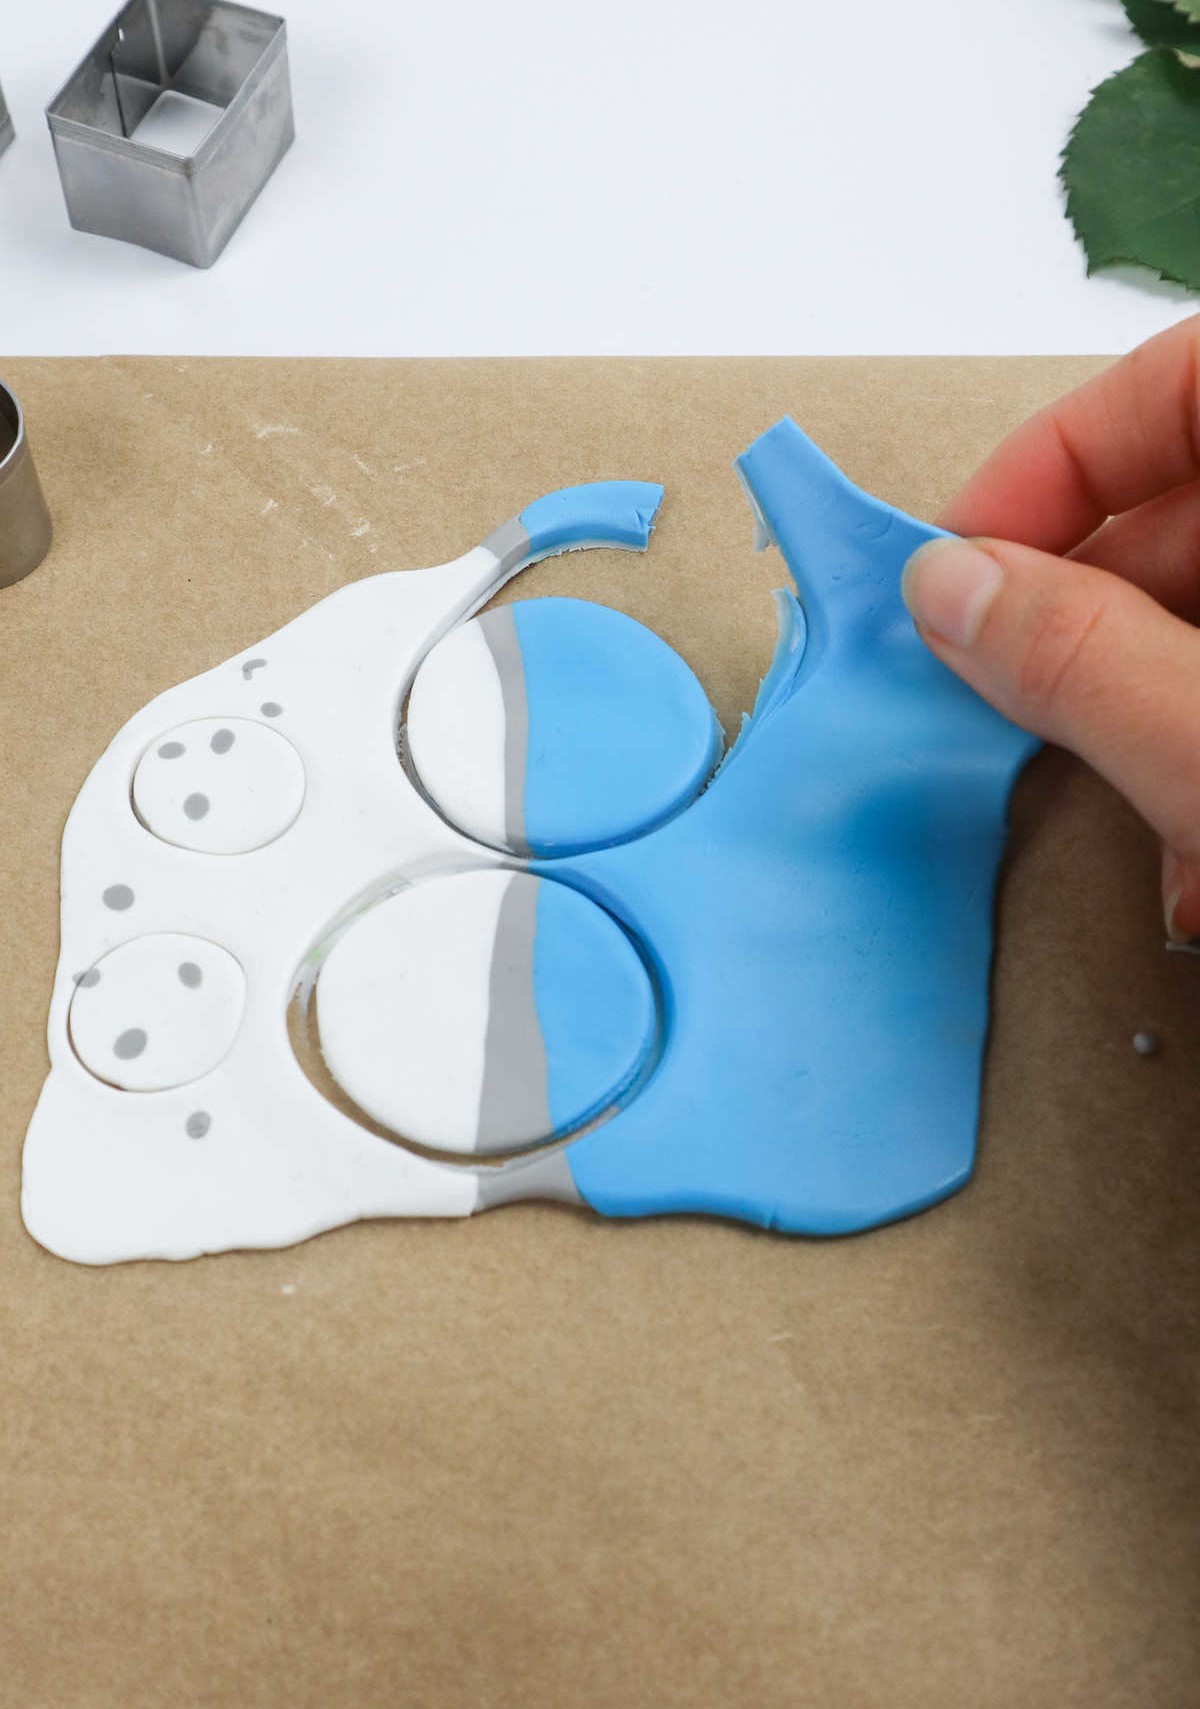
For optimal results, thoroughly remove any excess clay from the shapes you’ve cut out. Set aside this extra clay for future creative endeavors. To efficiently handle the fine clay shavings and scraps that may remain, employ a cutter, toothpick, or pin to delicately trim them away.
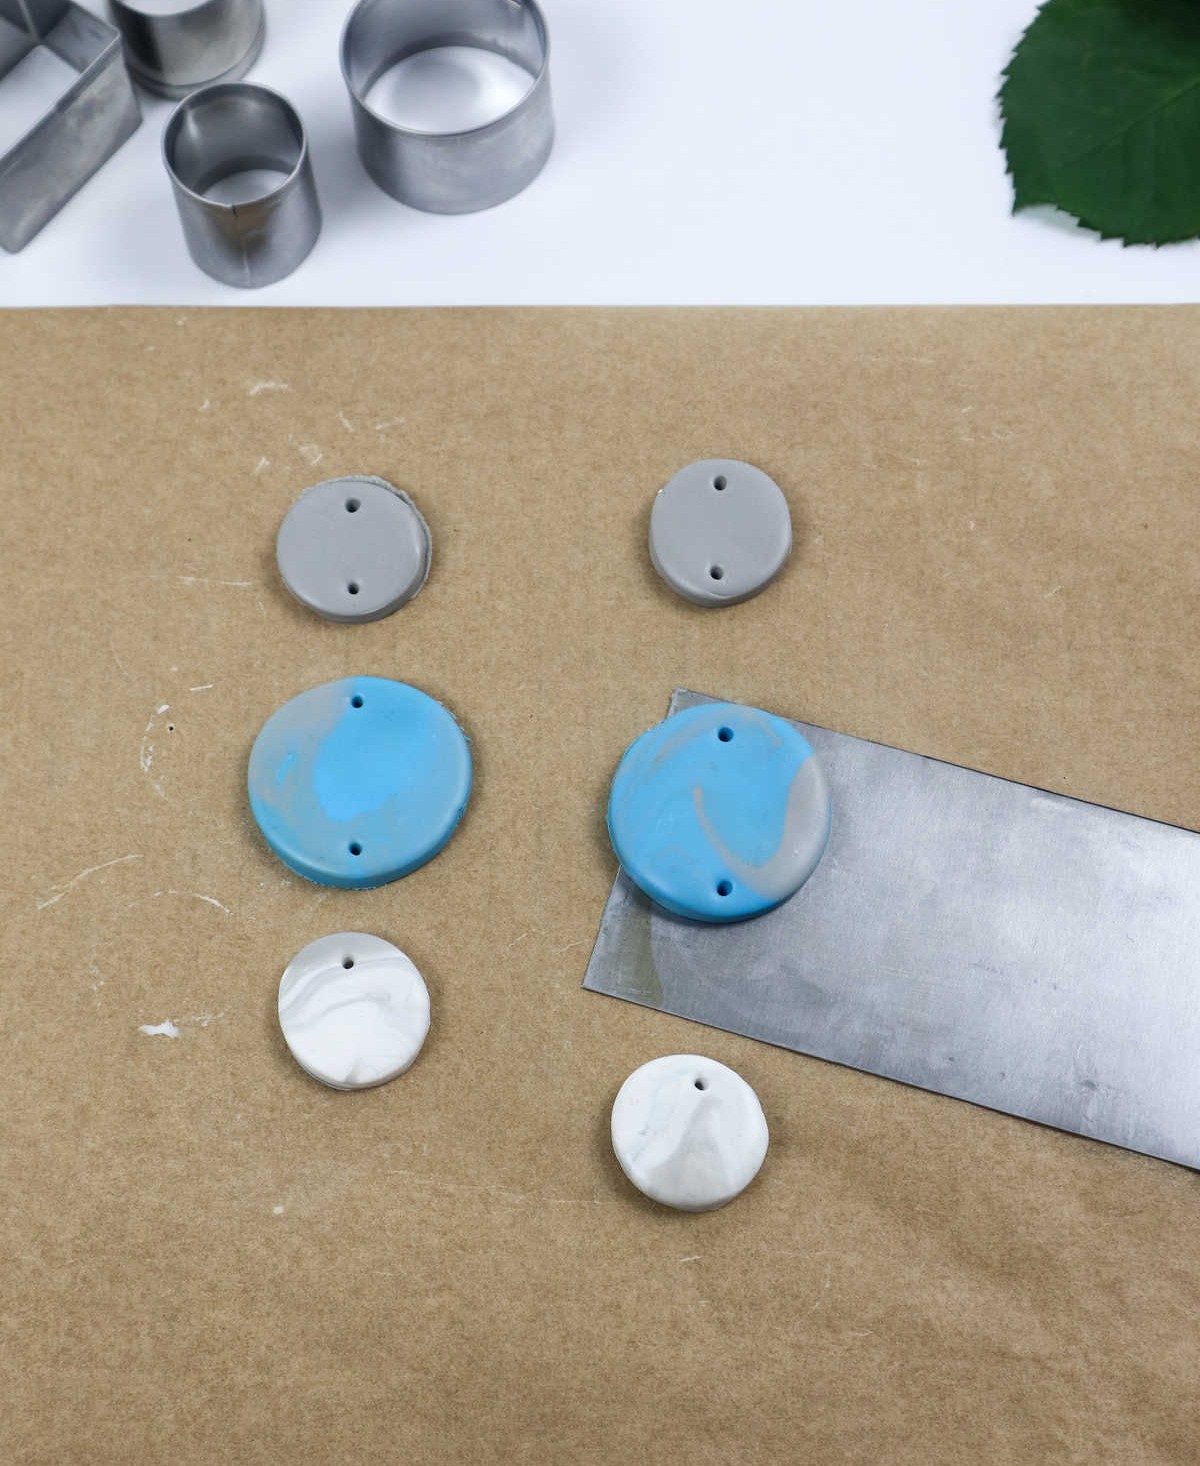
Step 7
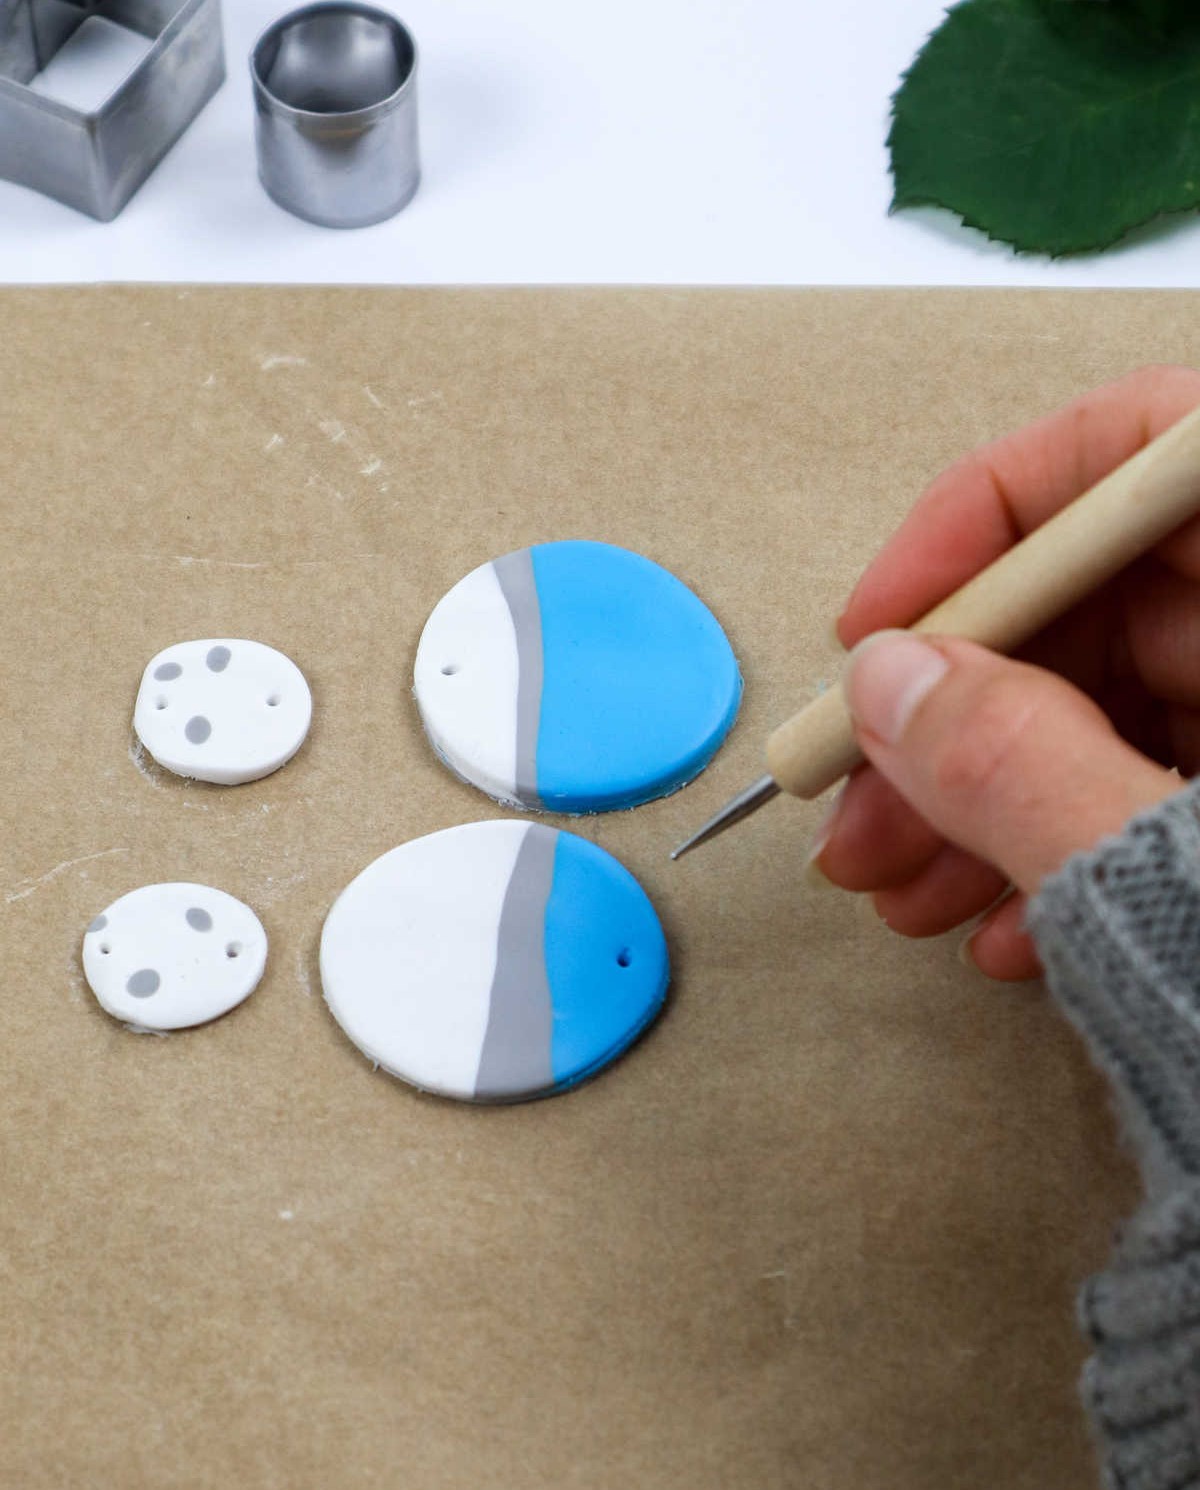
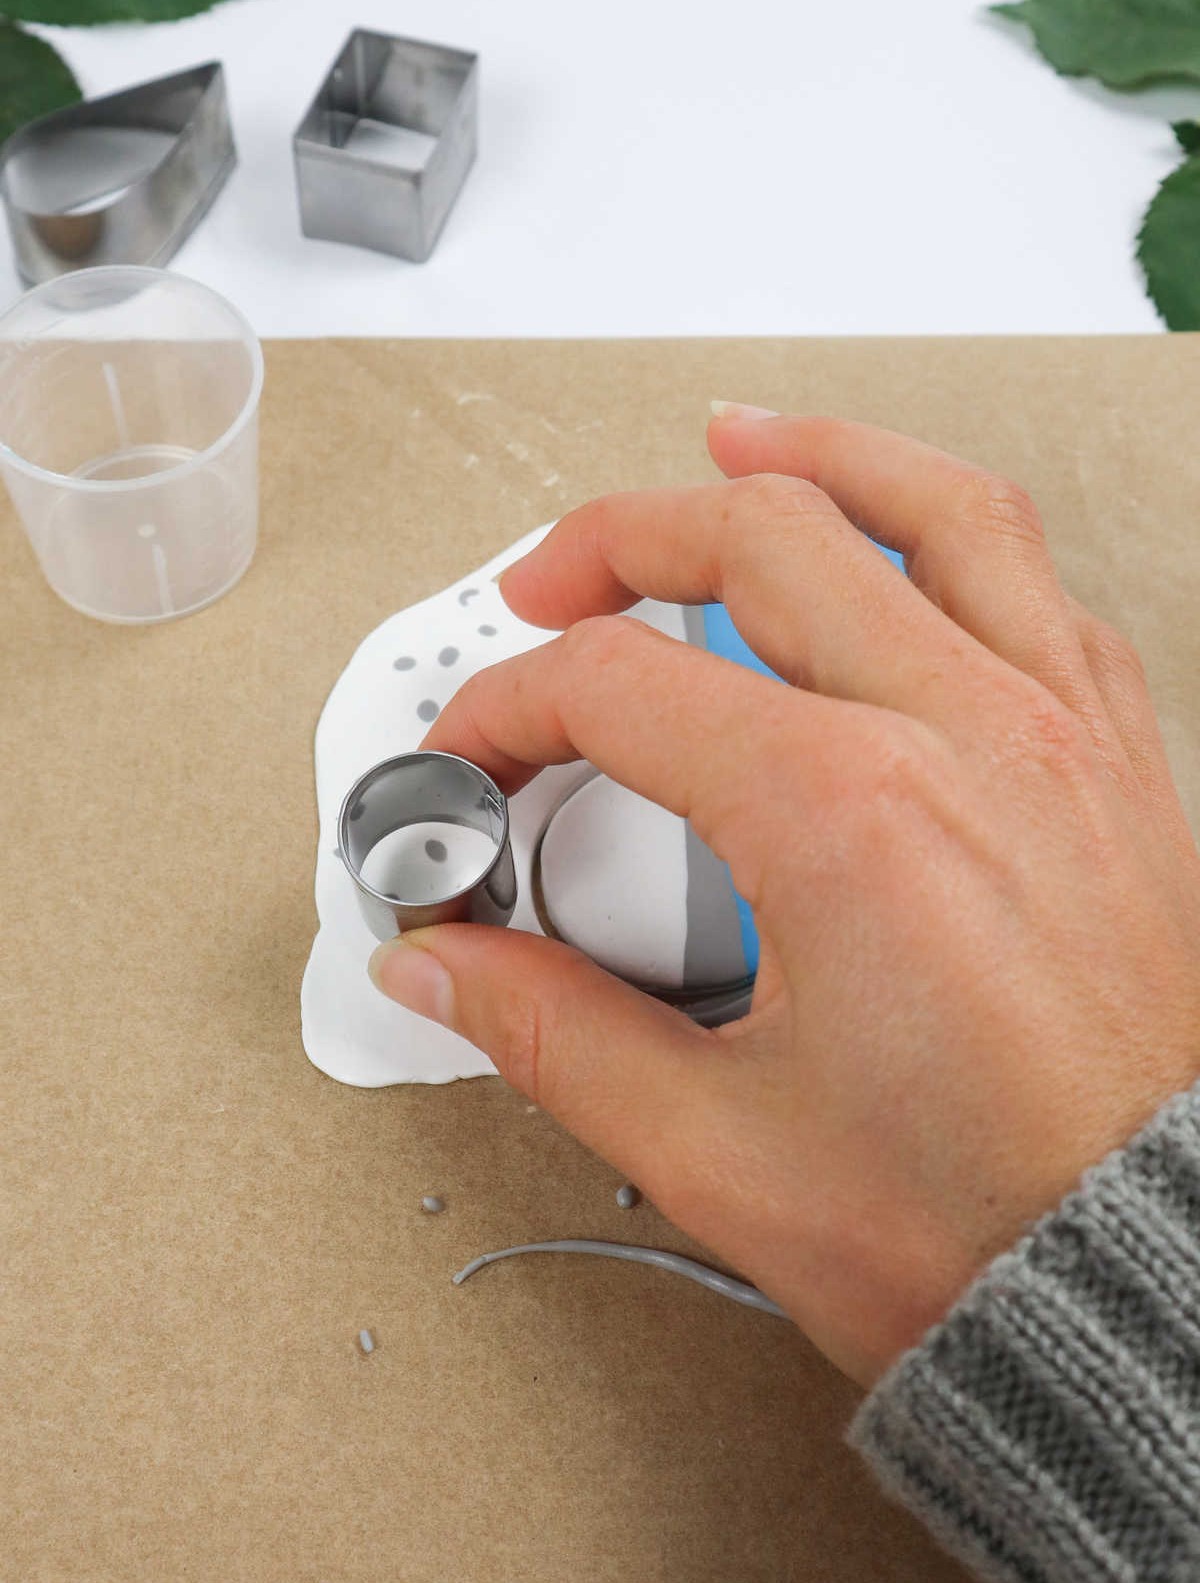
To begin crafting your earring findings, start by making a small incision in the clay using your craft cutter. Position the blade at the desired location for inserting the hooks and gently puncture a tiny hole into the material.
Step 8
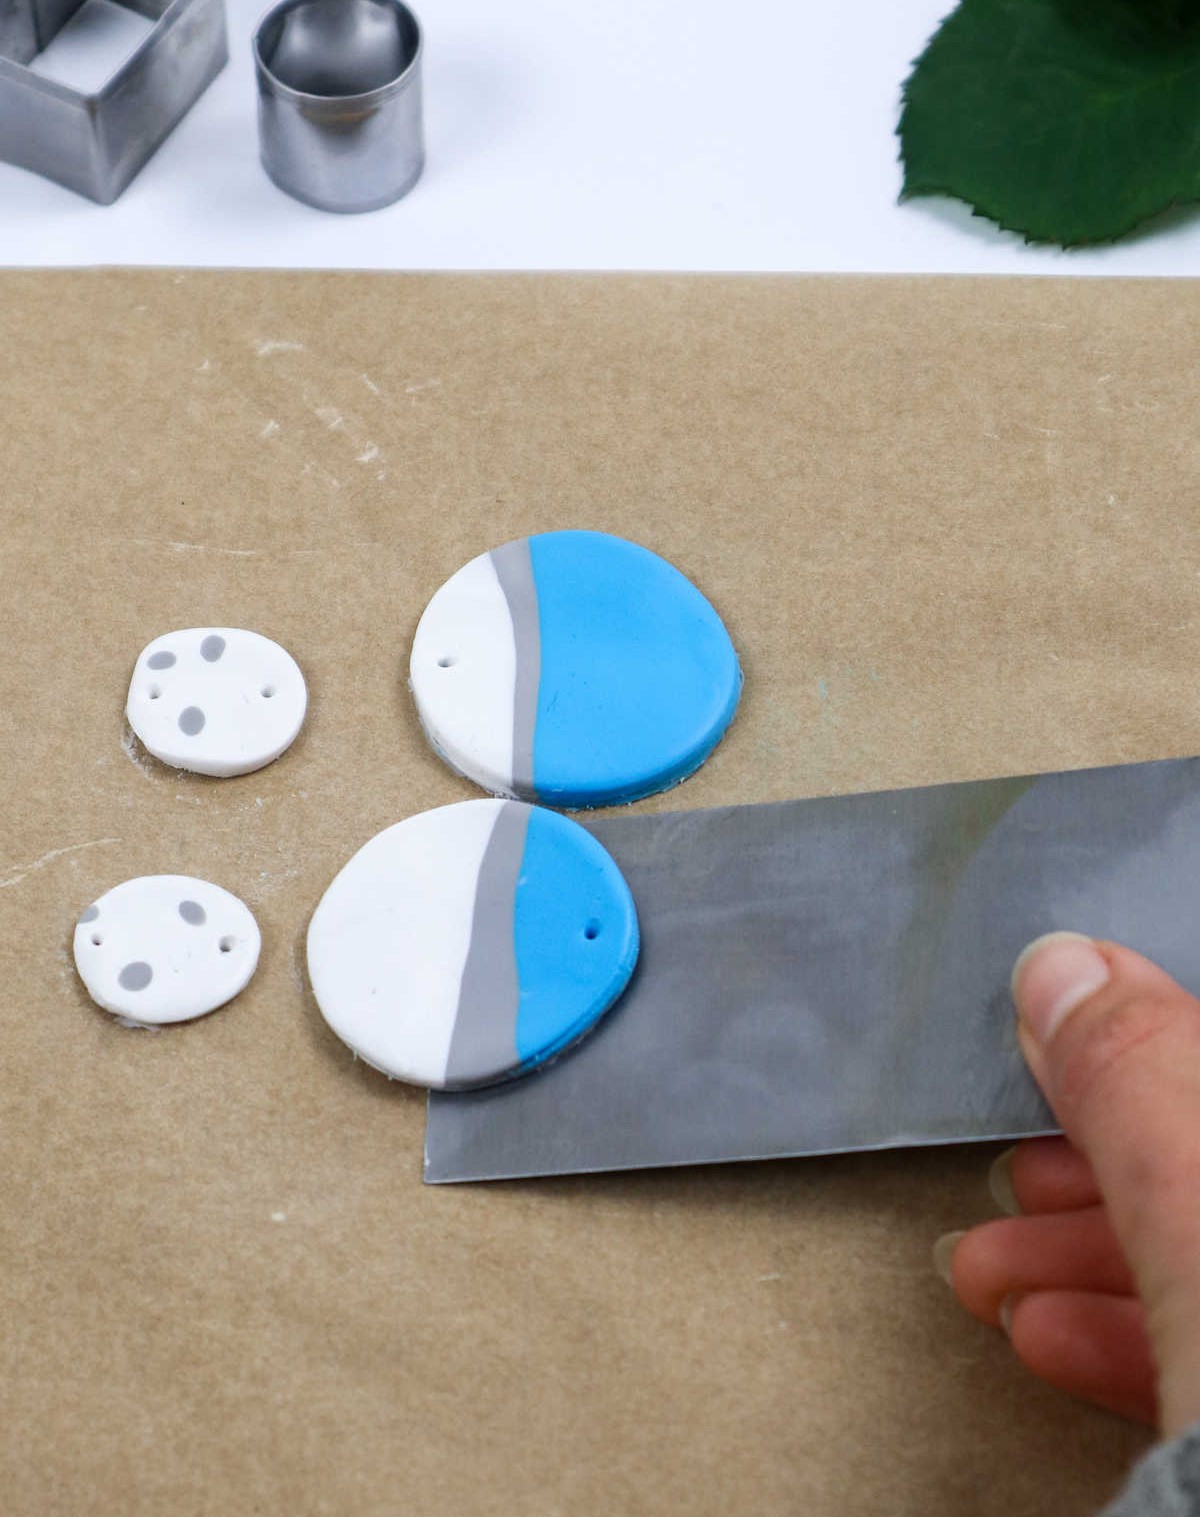
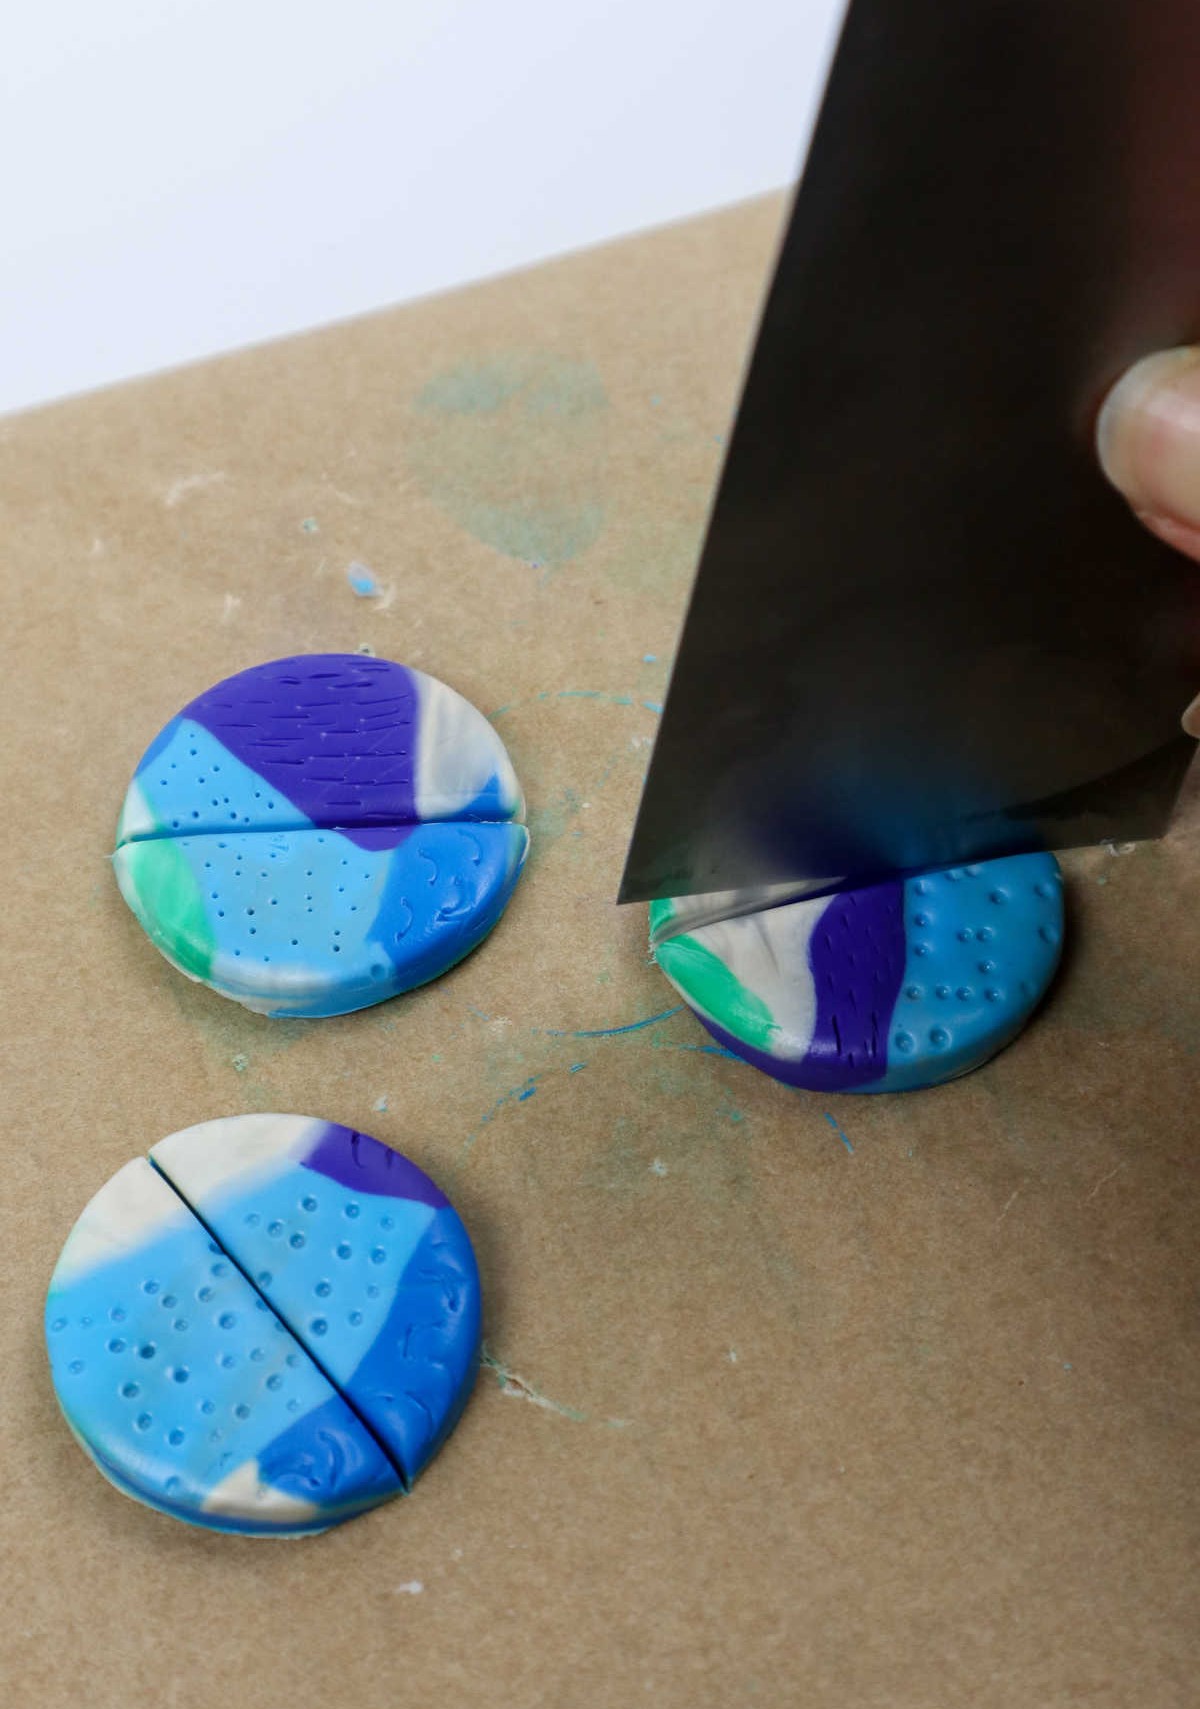
To detach the clay earrings from the parchment paper without compromising their delicate shape, utilize a flat bladed tool or scraper with precision and care. It’s crucial to exercise caution during this step to prevent any damage to the intricate textures or forms of your clay creations.
Design 3
As you continue with your earring-making project, recall the reserved clay from earlier. Divide it into manageable portions and proceed to shape each piece into a flat sheet on parchment paper, much like the initial process. Following this, employ cookie cutters to craft additional pairs of earrings. Next, carefully remove any excess clay around the cut-out shapes and utilize your cutter to create holes for the hooks.
To complete the earring preparation, gently scrape or use a blade to peel away the remaining clay residue.
Step 9
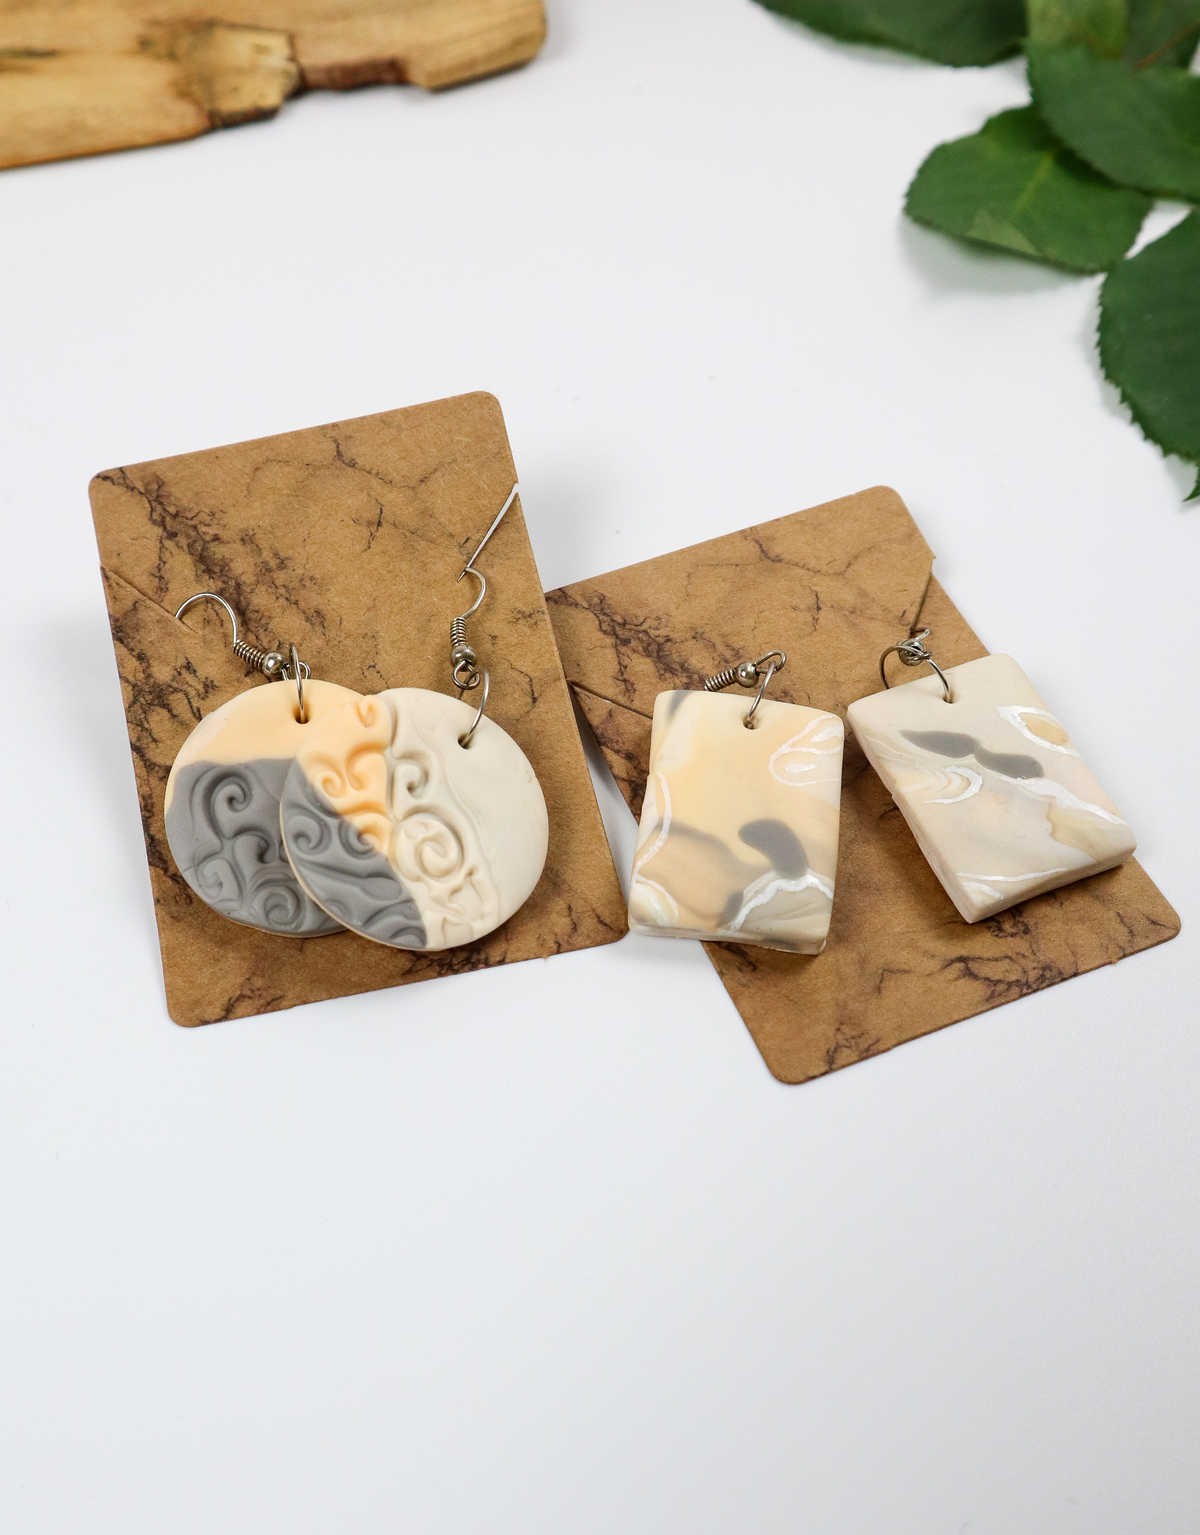
Design 4
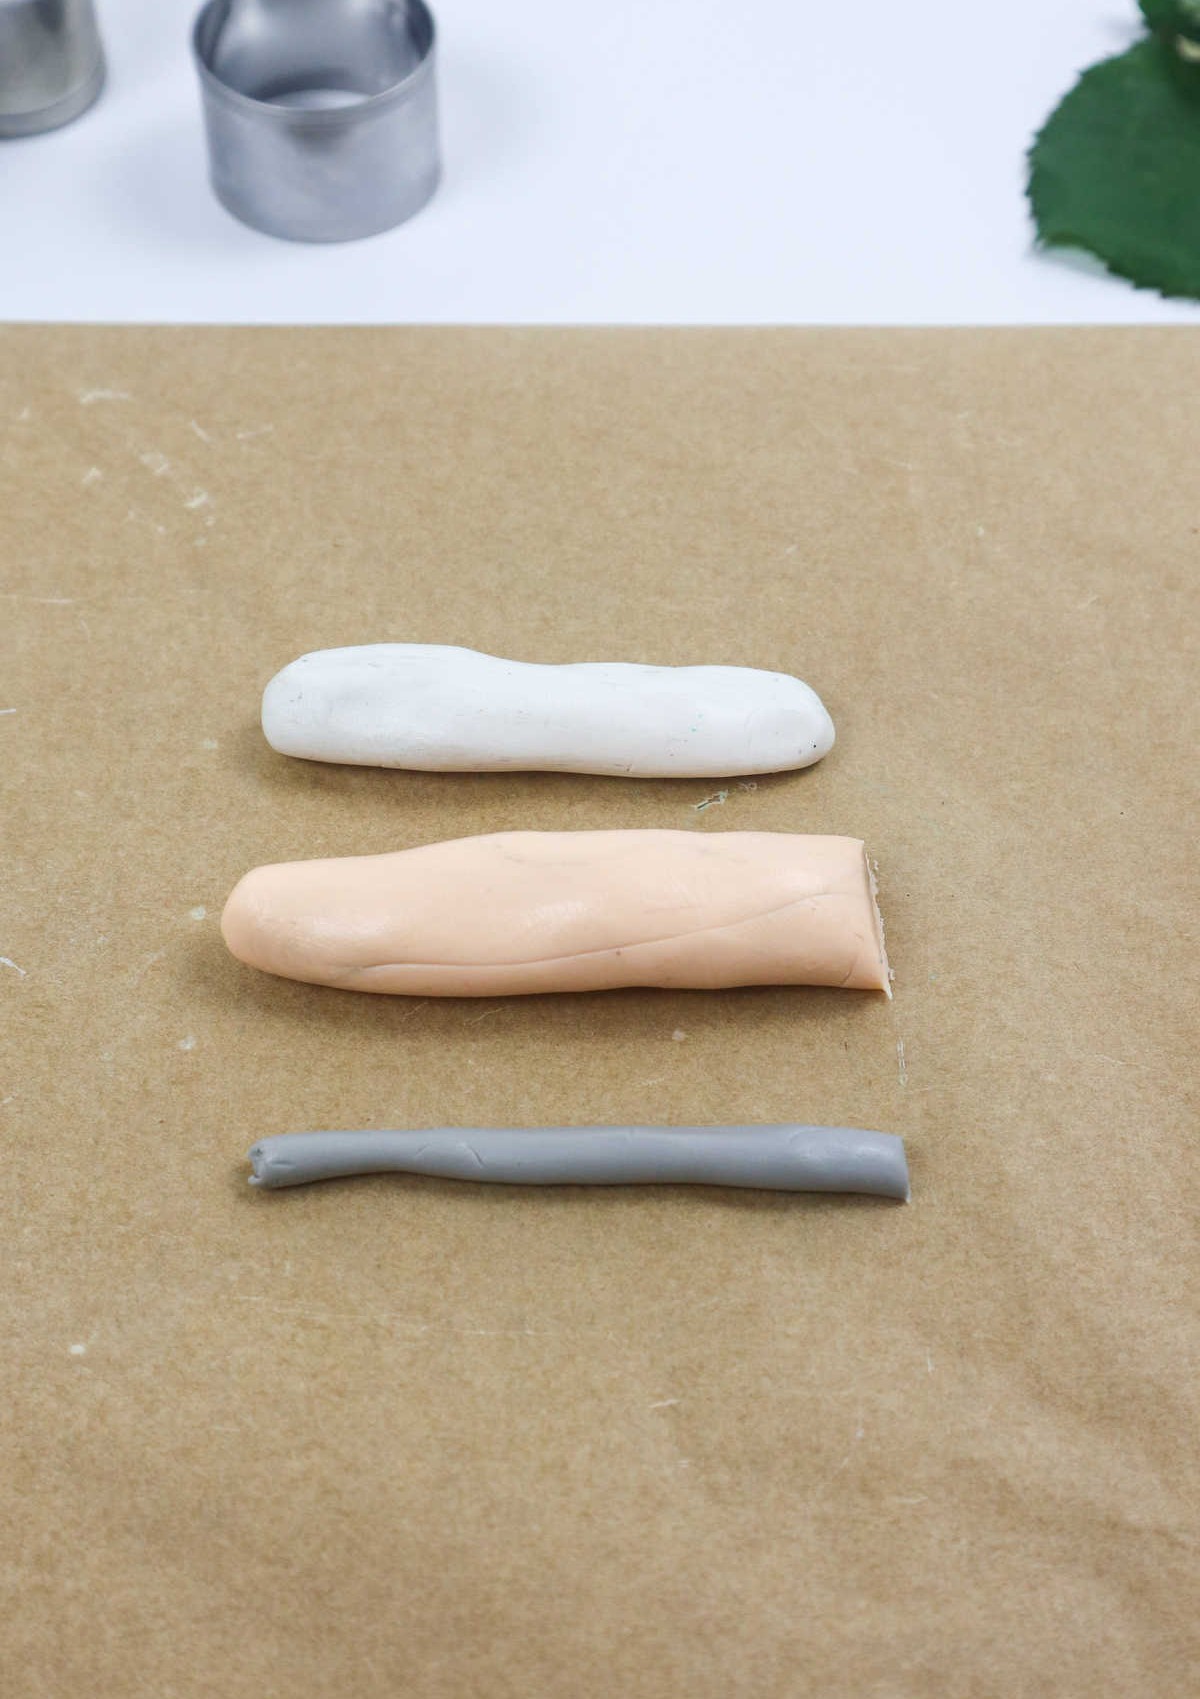
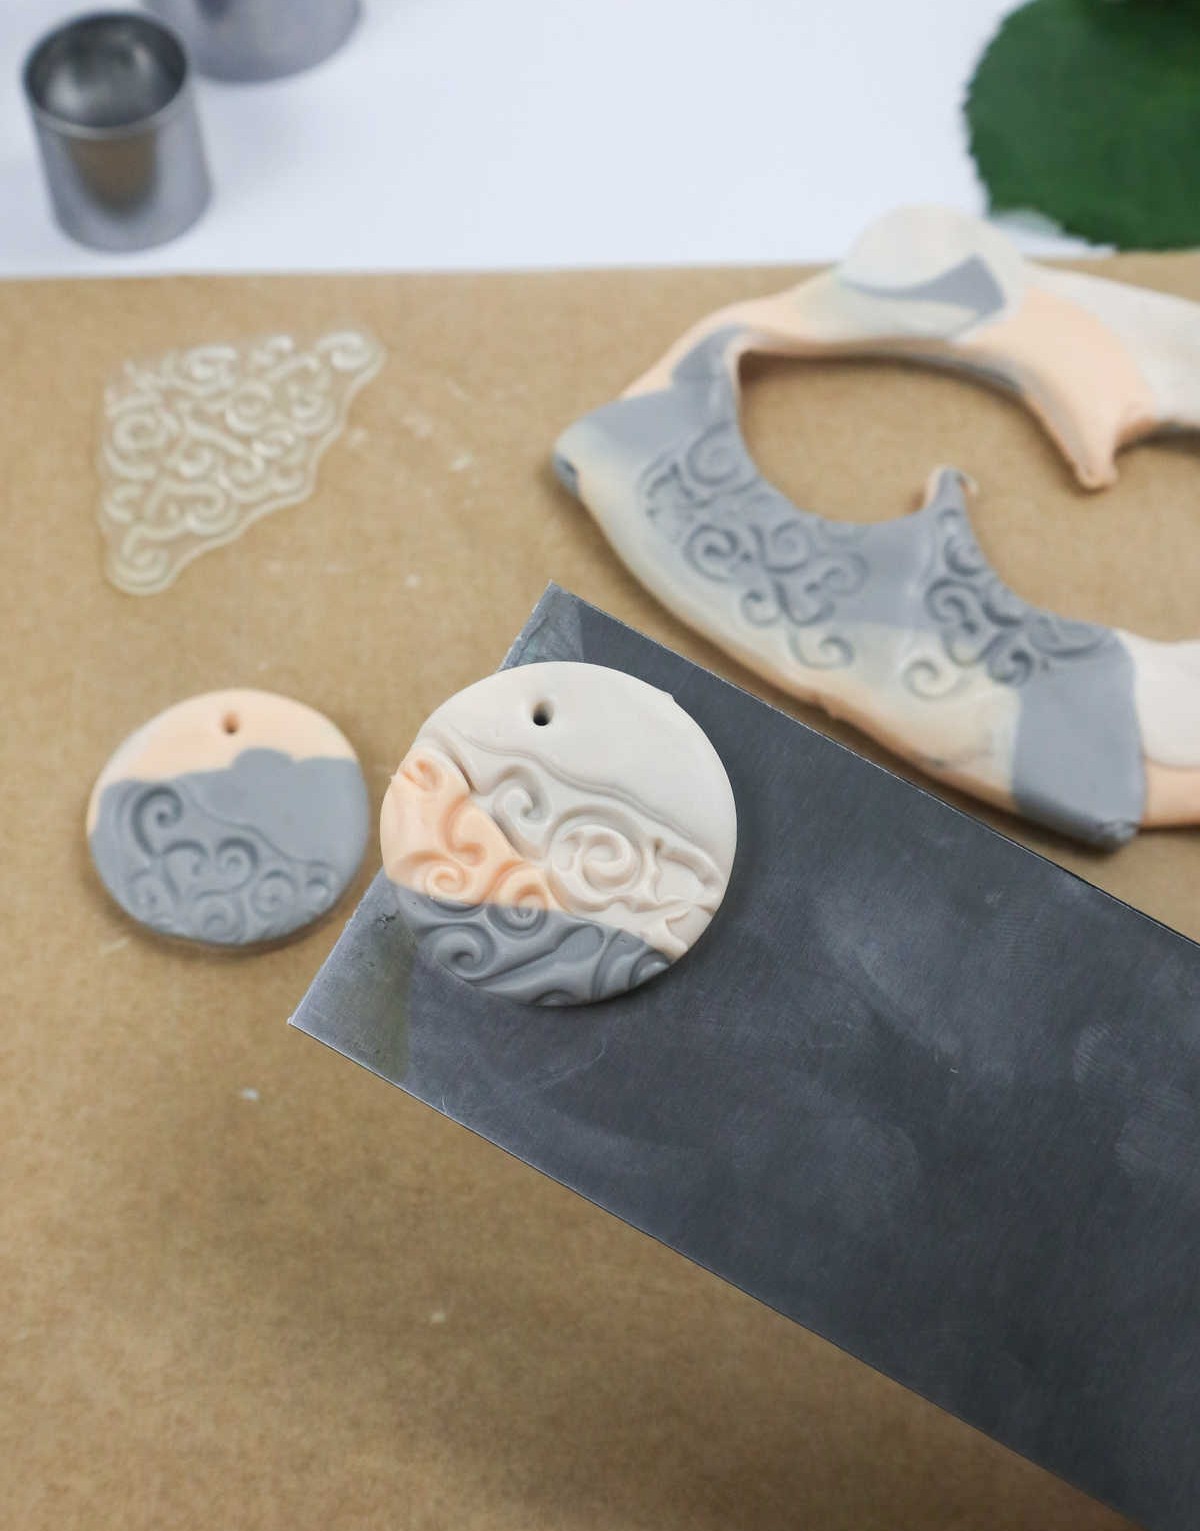
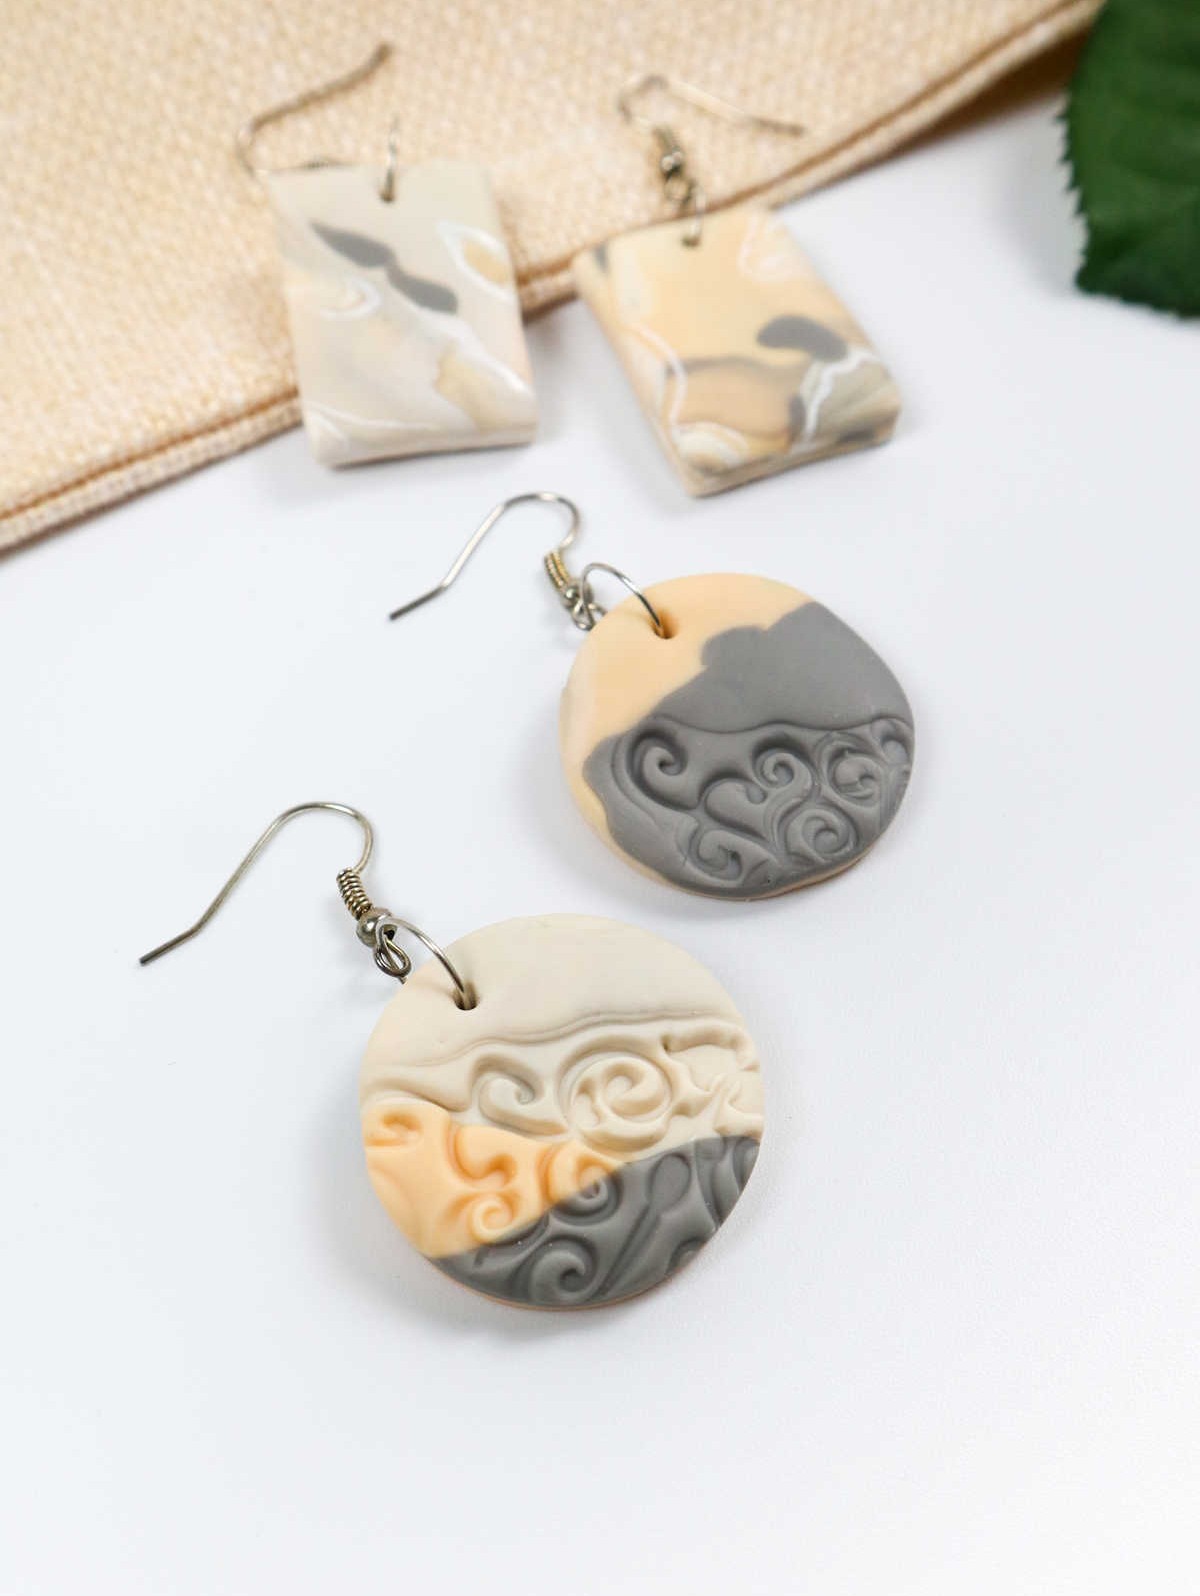
Get creative with your clay experimentation! Try combining different colors like white, grey, and peach to create one-of-a-kind pieces. Roll, twist, and flatten the clay into unique swirling patterns or designs that reflect your personal style. The beauty of this process lies in its freestyle nature, making each pair of earrings truly special. To add an extra layer of complexity and visual interest, consider using stencils to press intricate designs, swirls, and filigree patterns onto the clay.
This technique allows you to achieve a level of precision and detail that might be difficult to replicate by hand alone. With these two approaches combined, the possibilities for creative expression become virtually endless.
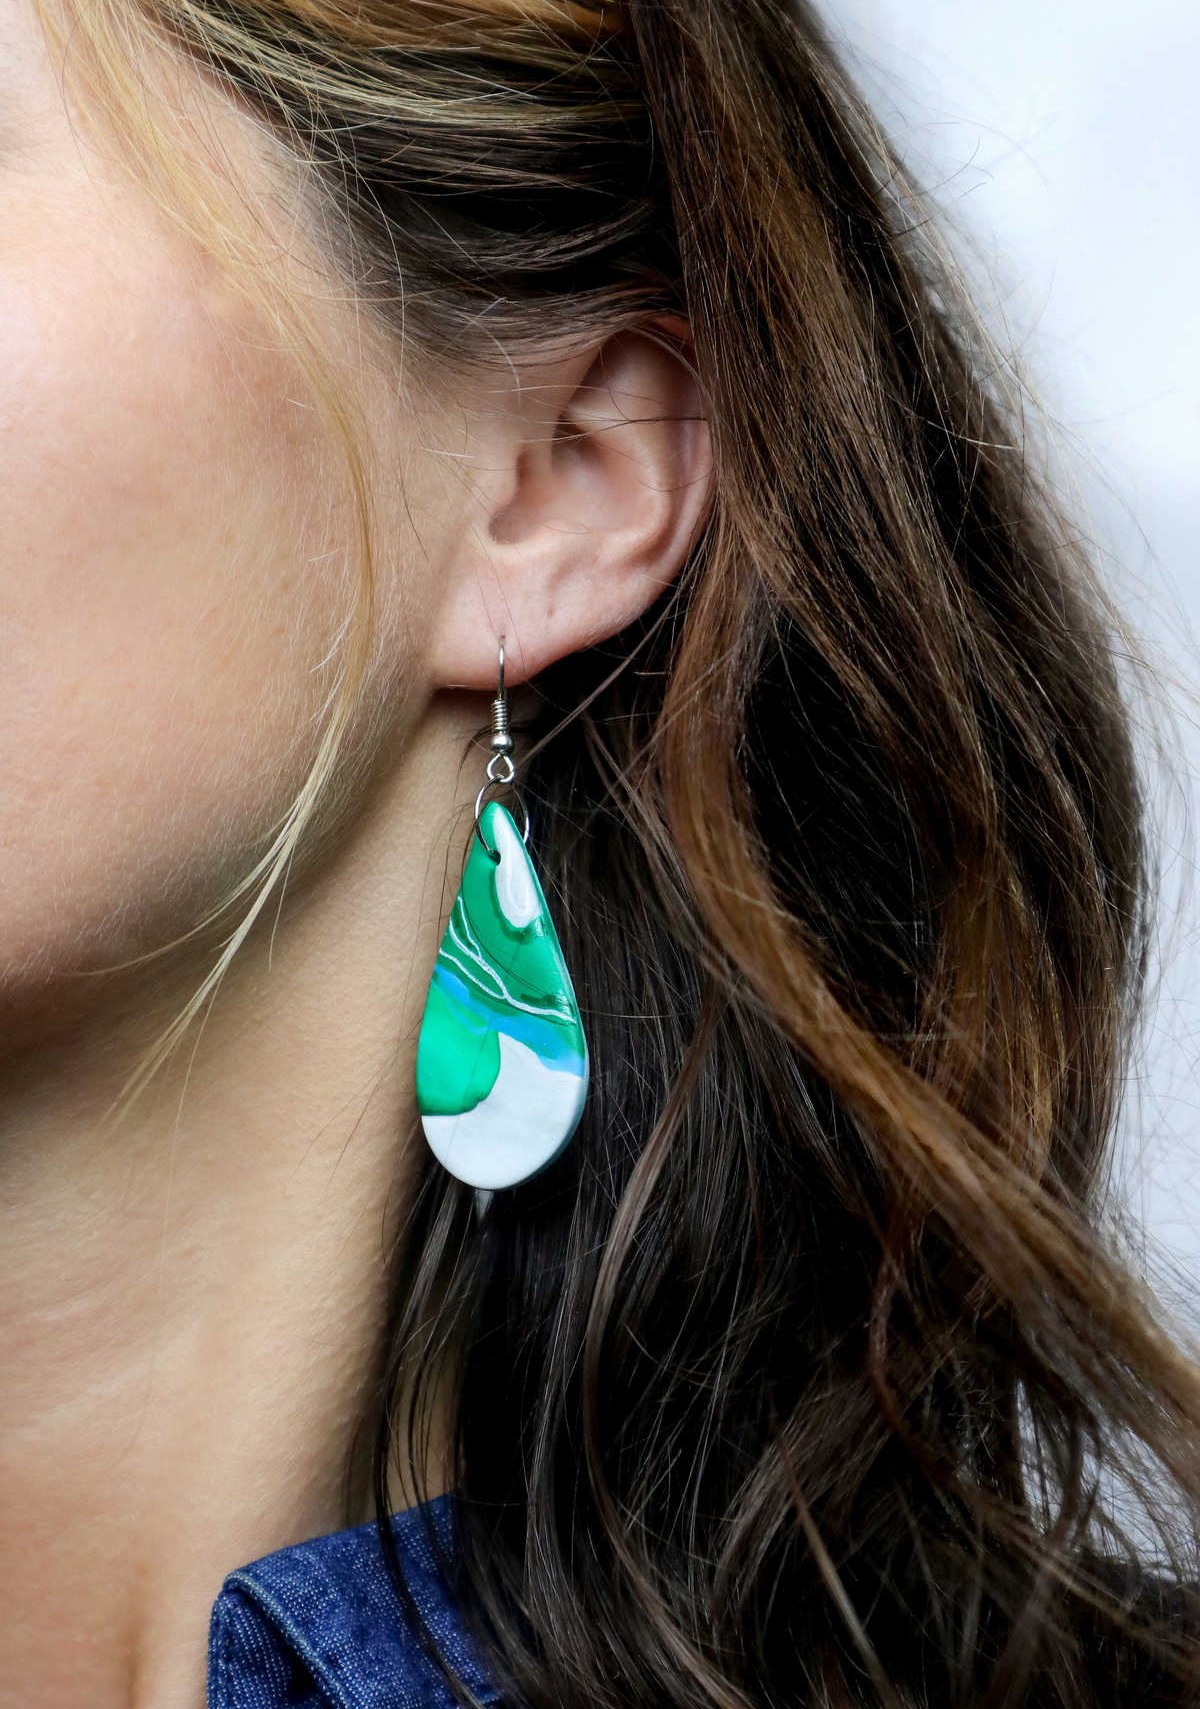
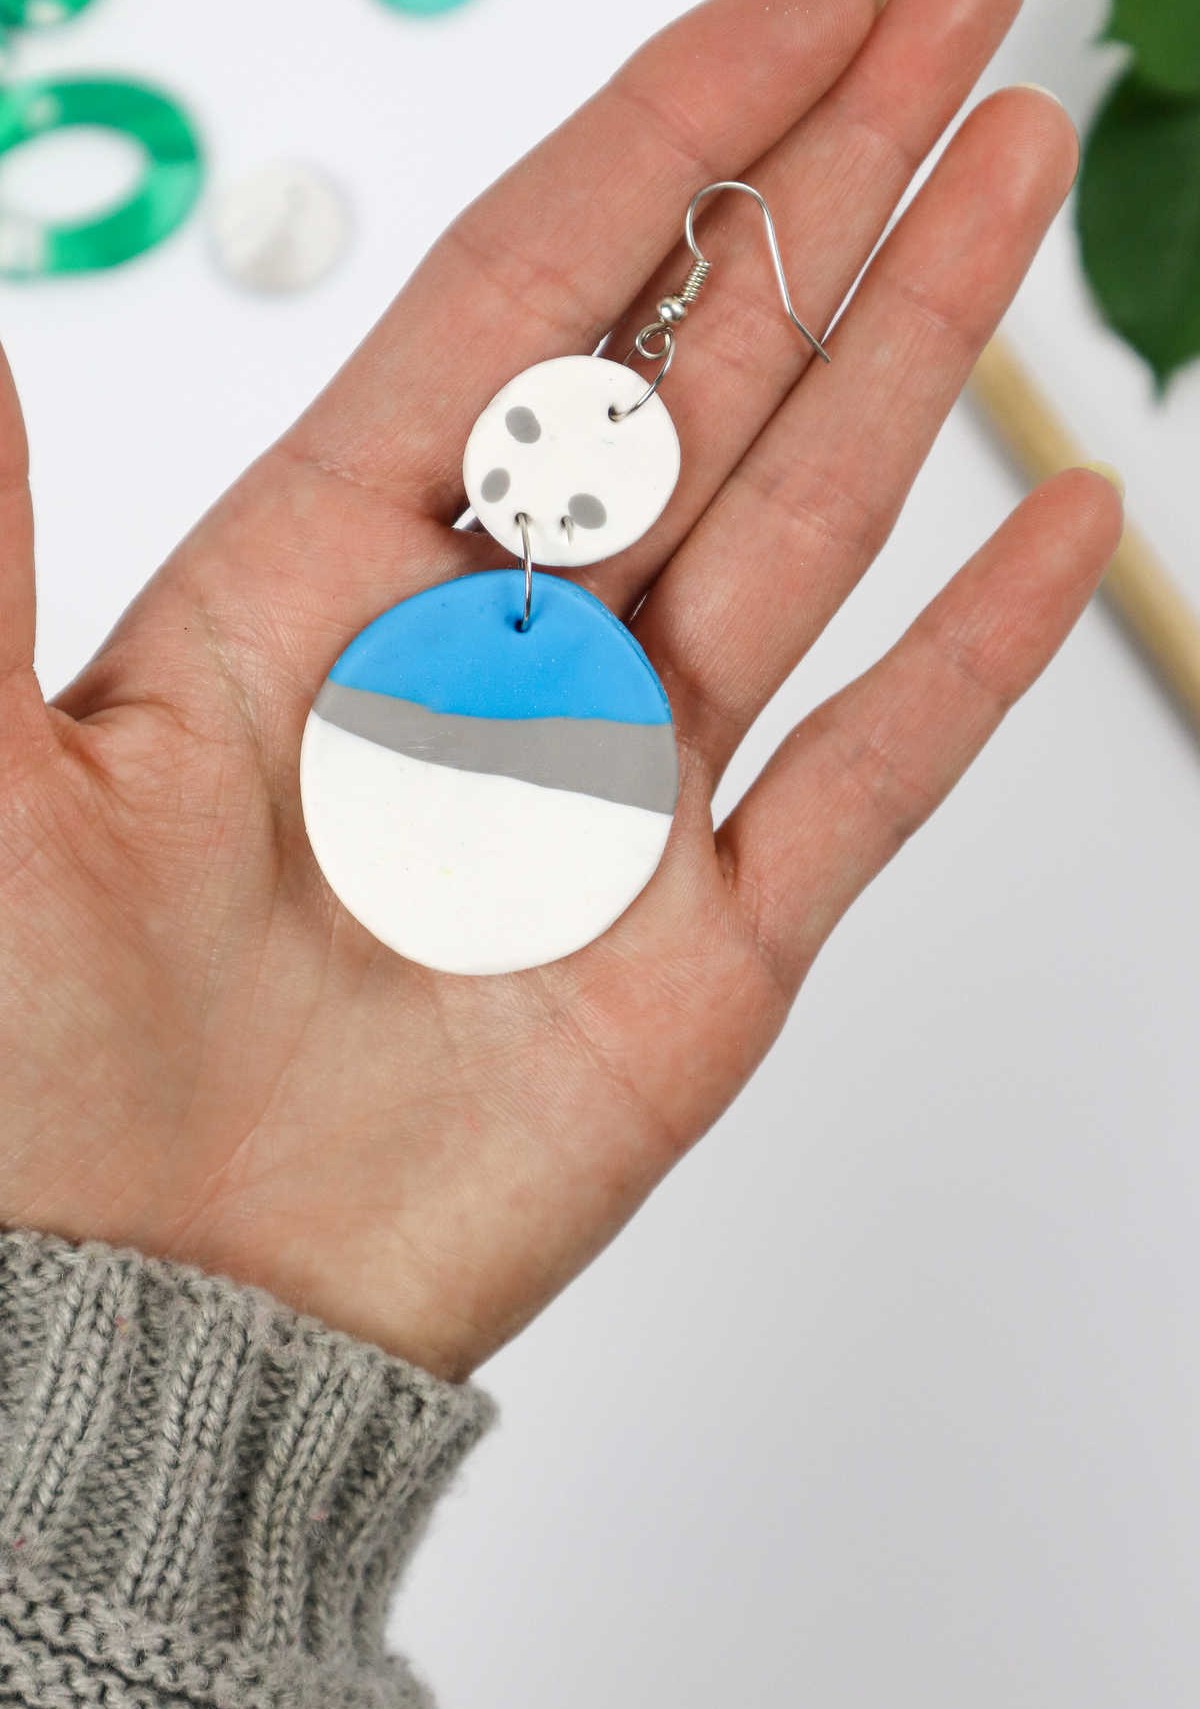
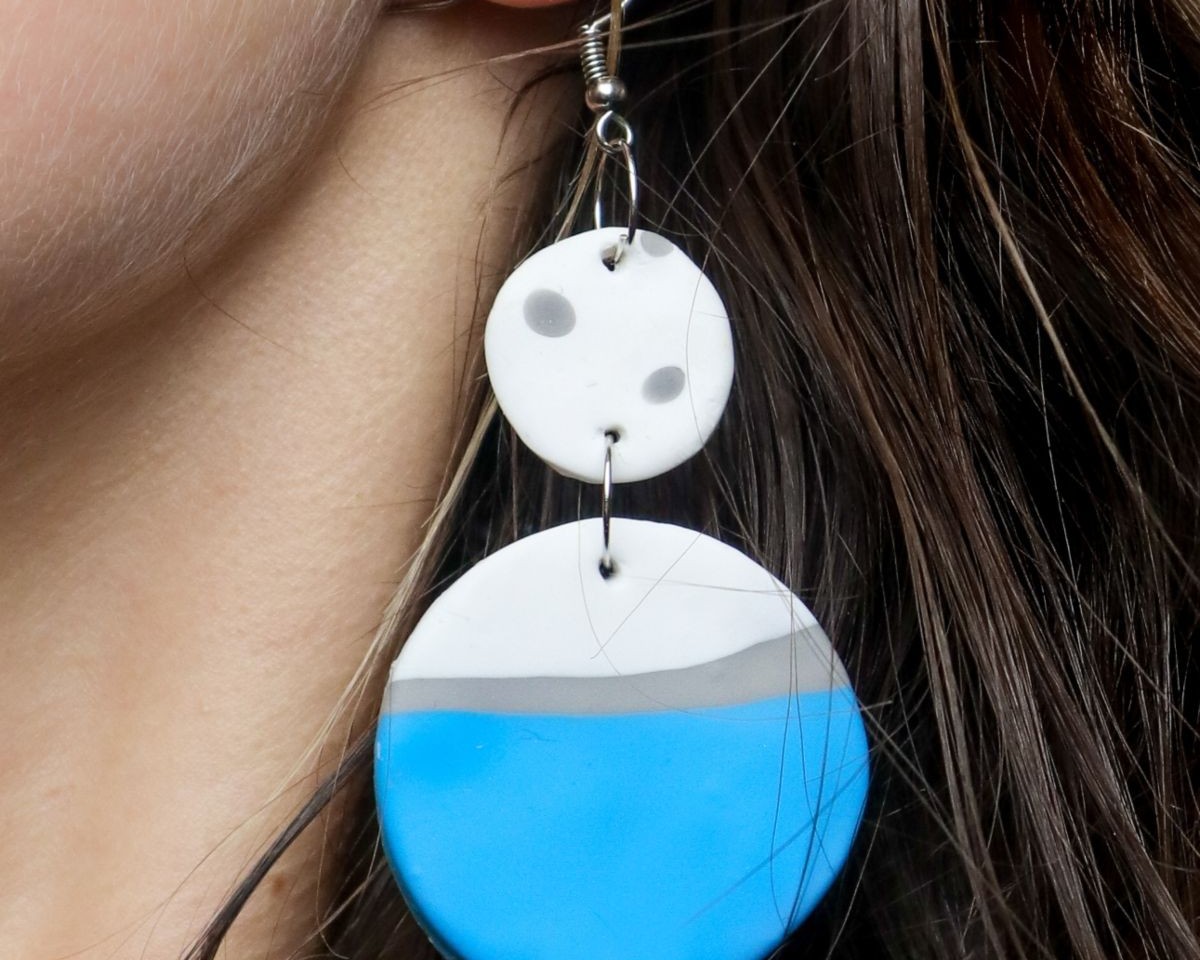
Design 5
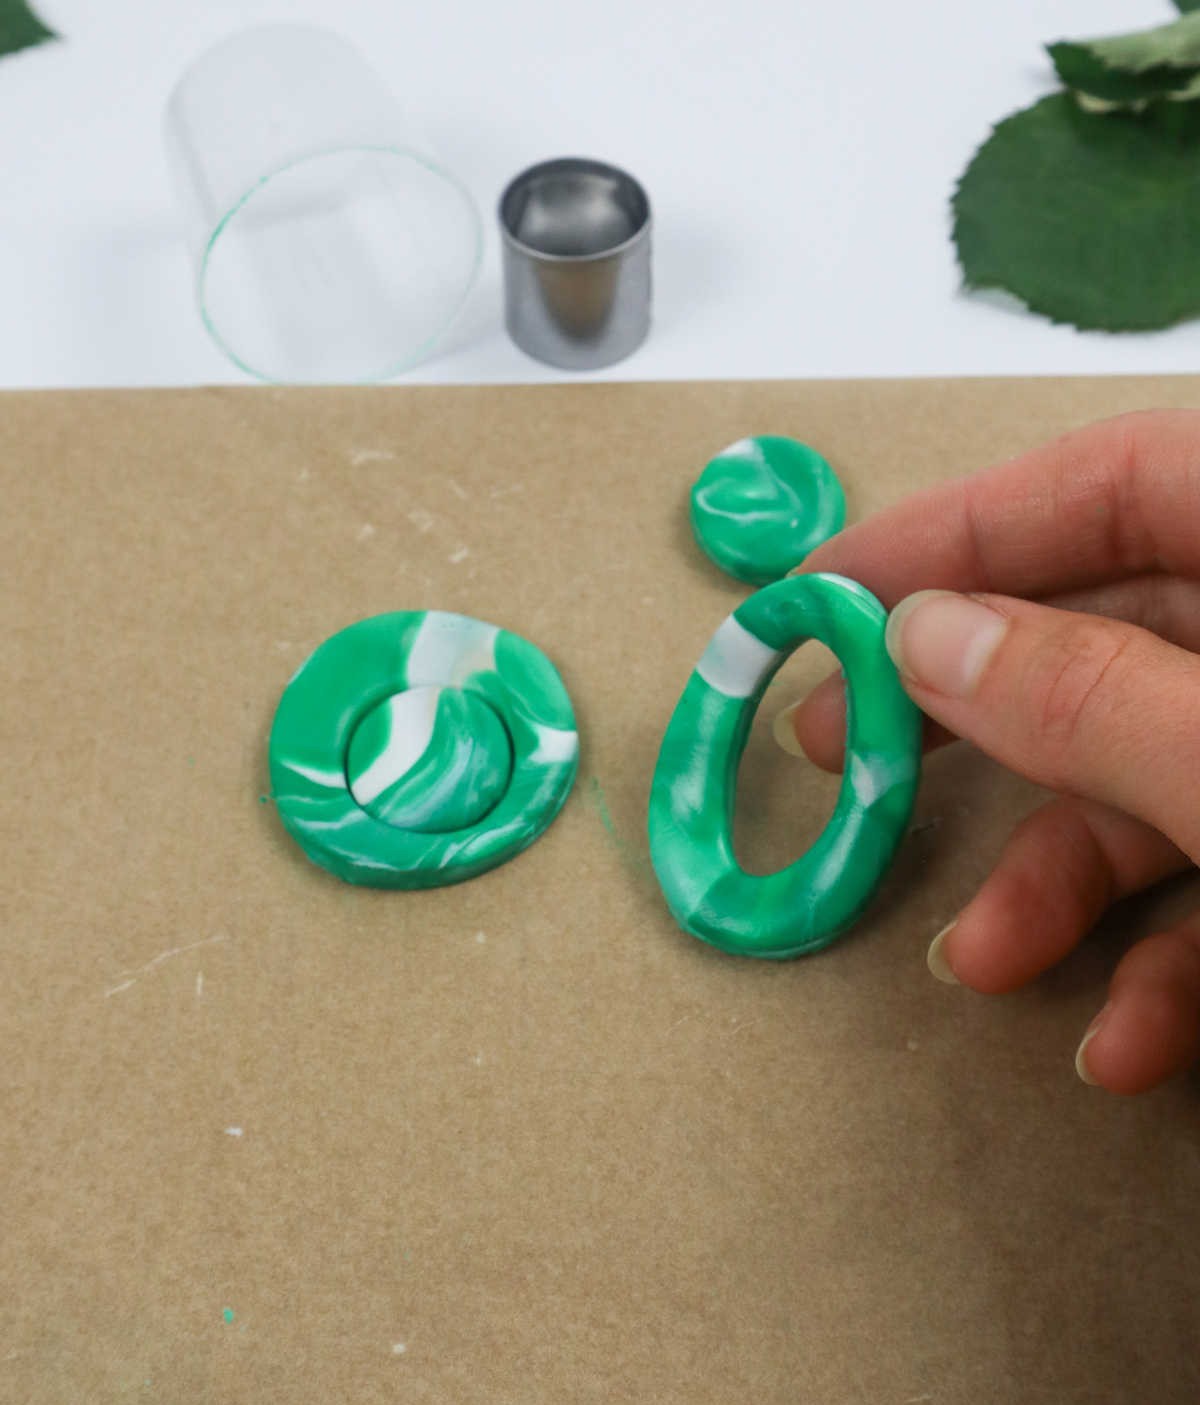
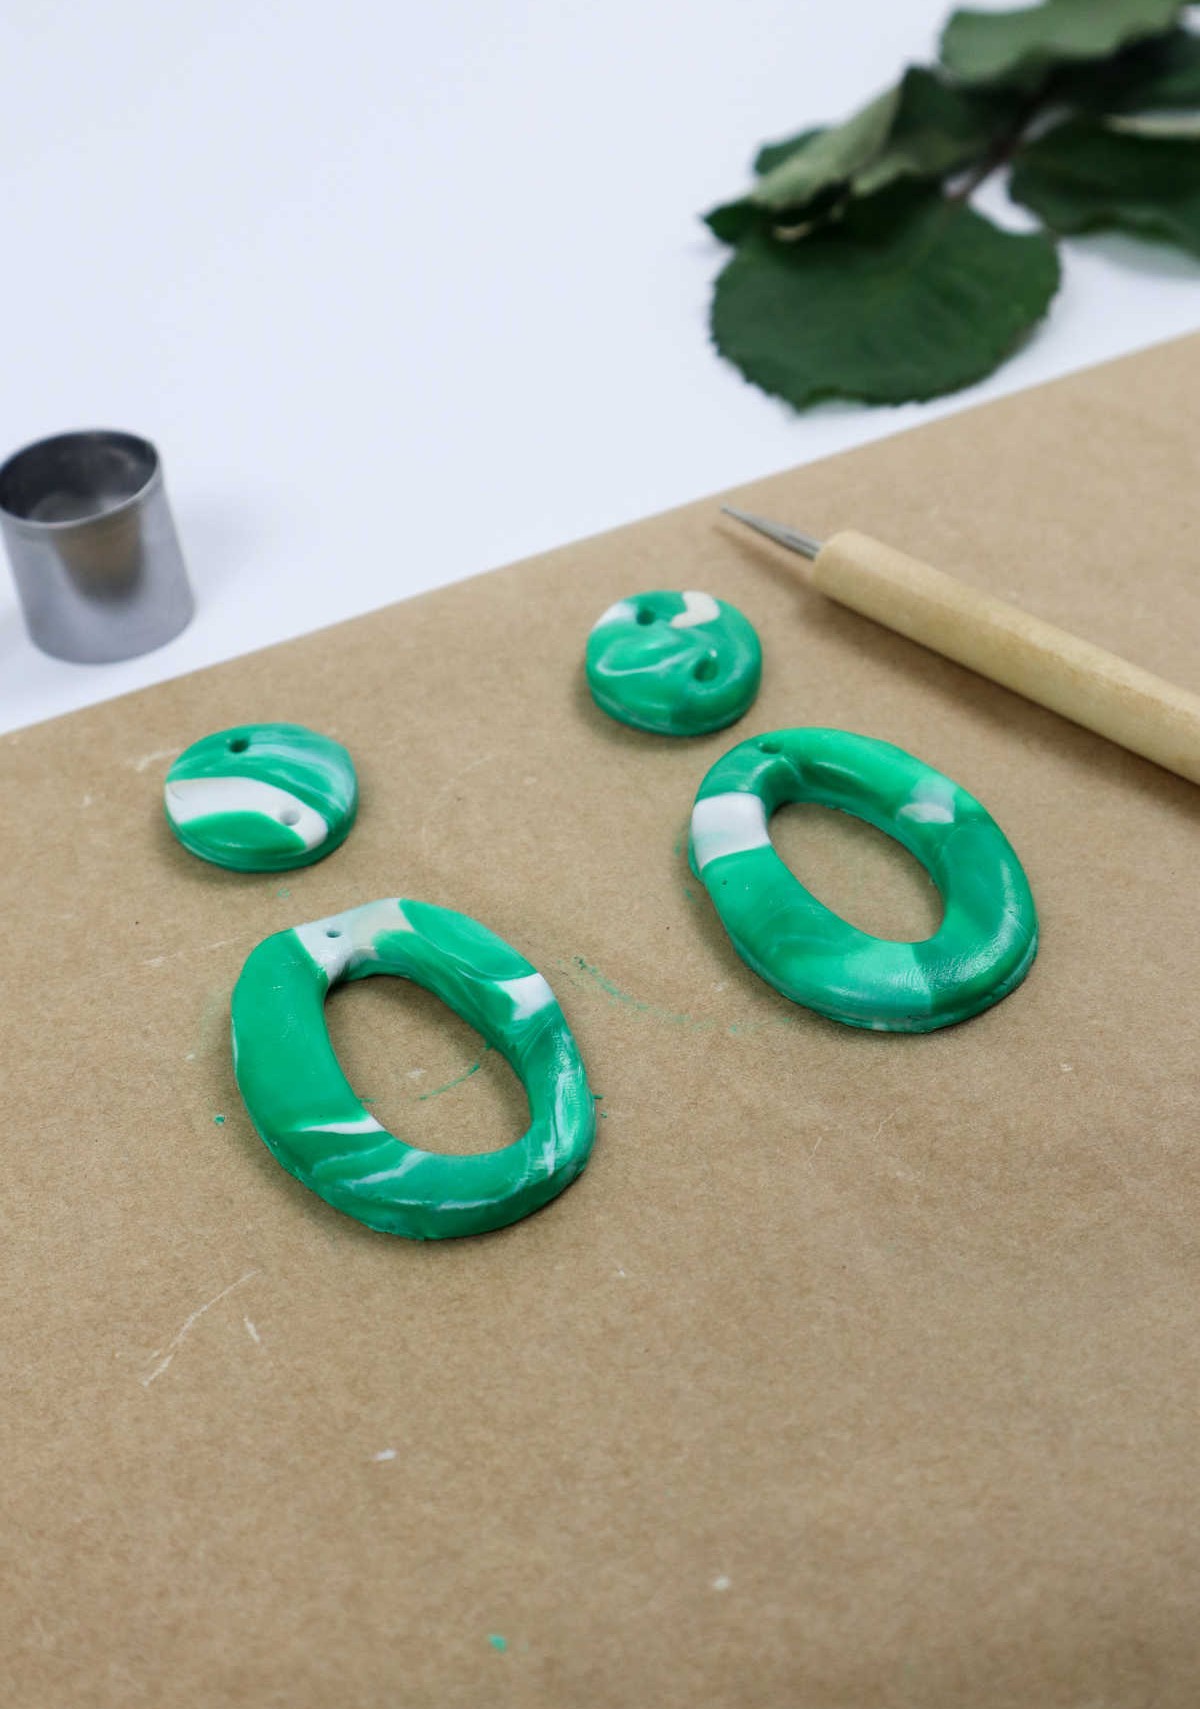
Why not take your creative expression to the next level? You can create a unique two-piece earring set that showcases your artistic flair. The design I’m referencing features a small, stud-like component at the top, with an oval element that drops down from it. To bring this idea to life, simply locate the areas where you’ll be attaching the hooks to the earrings and poke holes in the clay accordingly. Next, secure the oval piece to the bottom of the circle on top, and voilà!
Your handmade earring set is ready to adorn your ears.
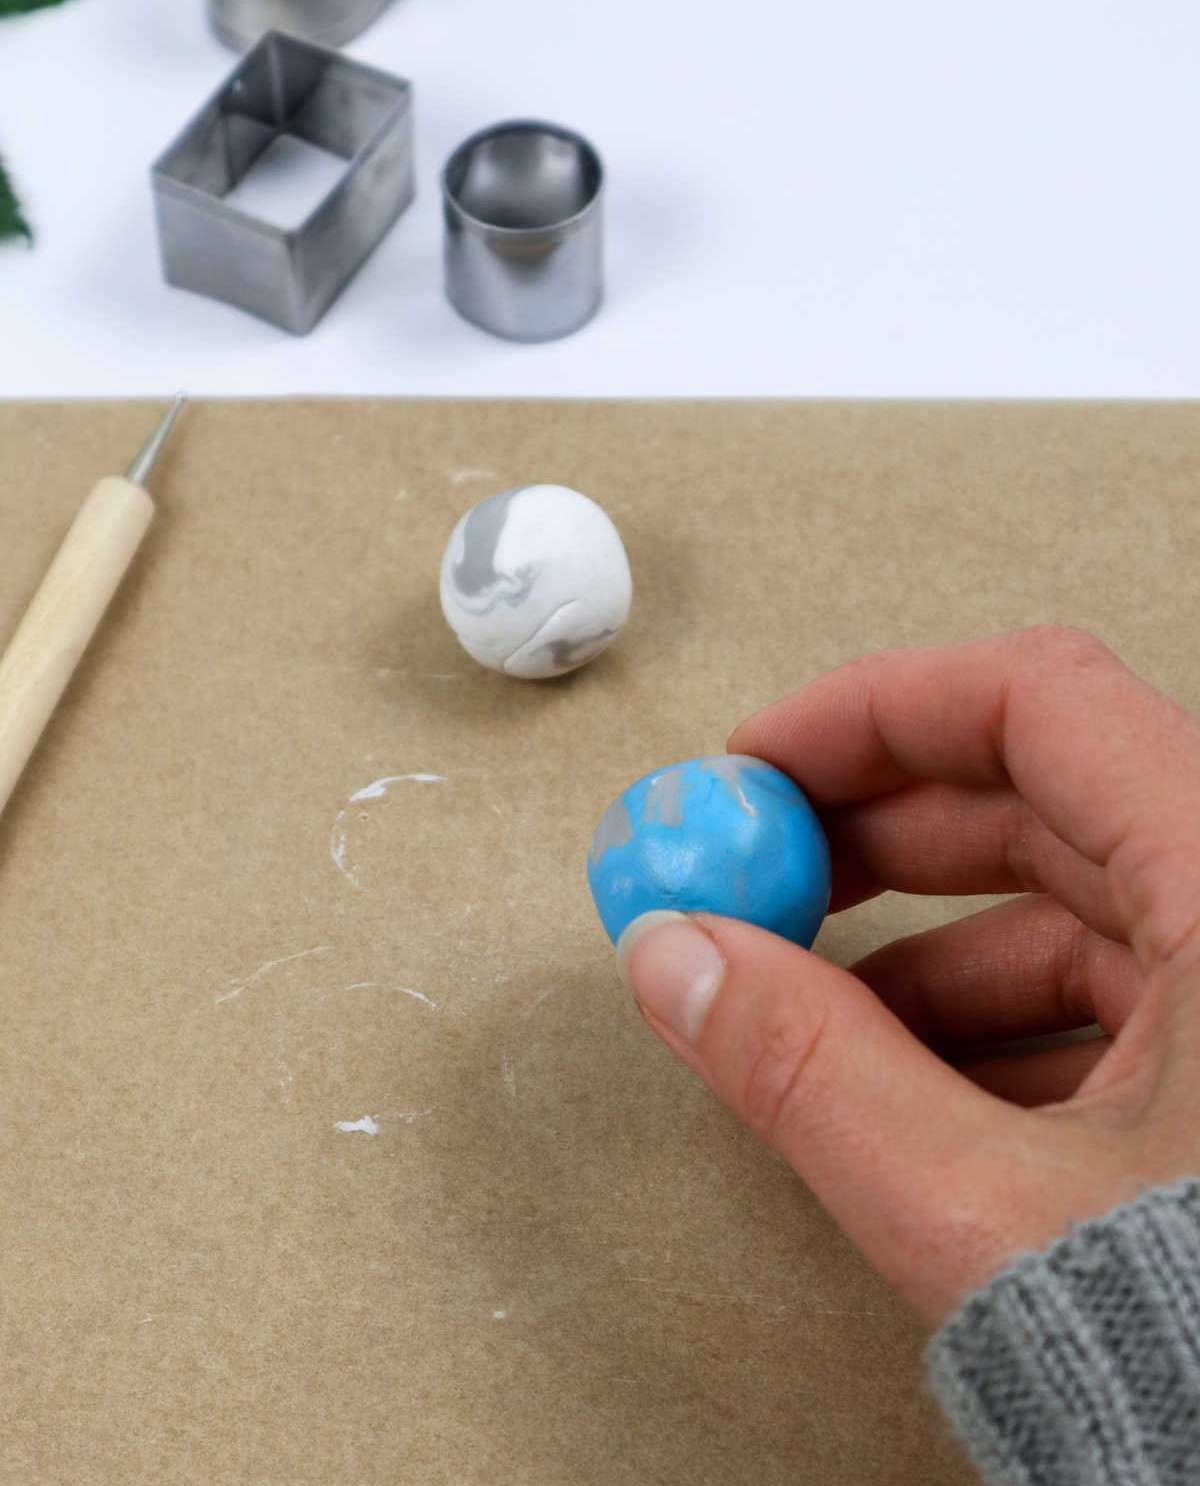
Design 6
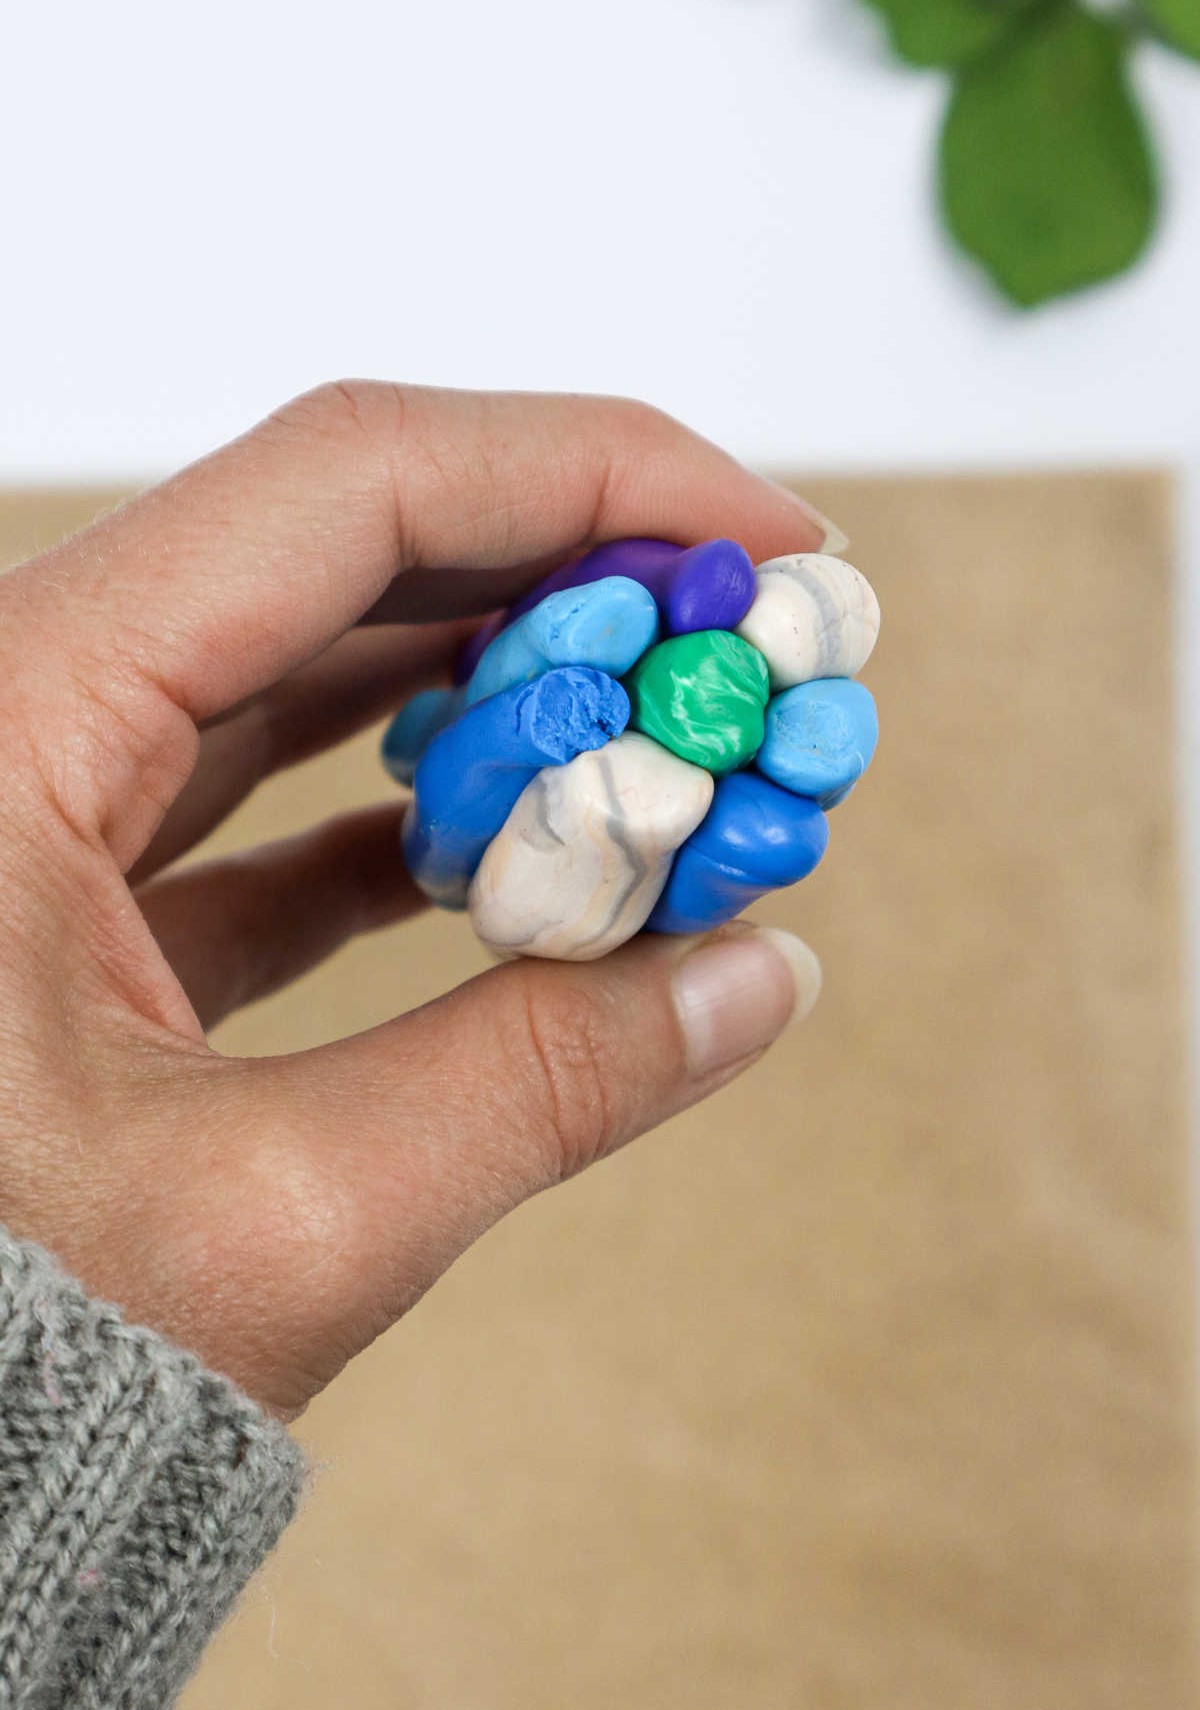
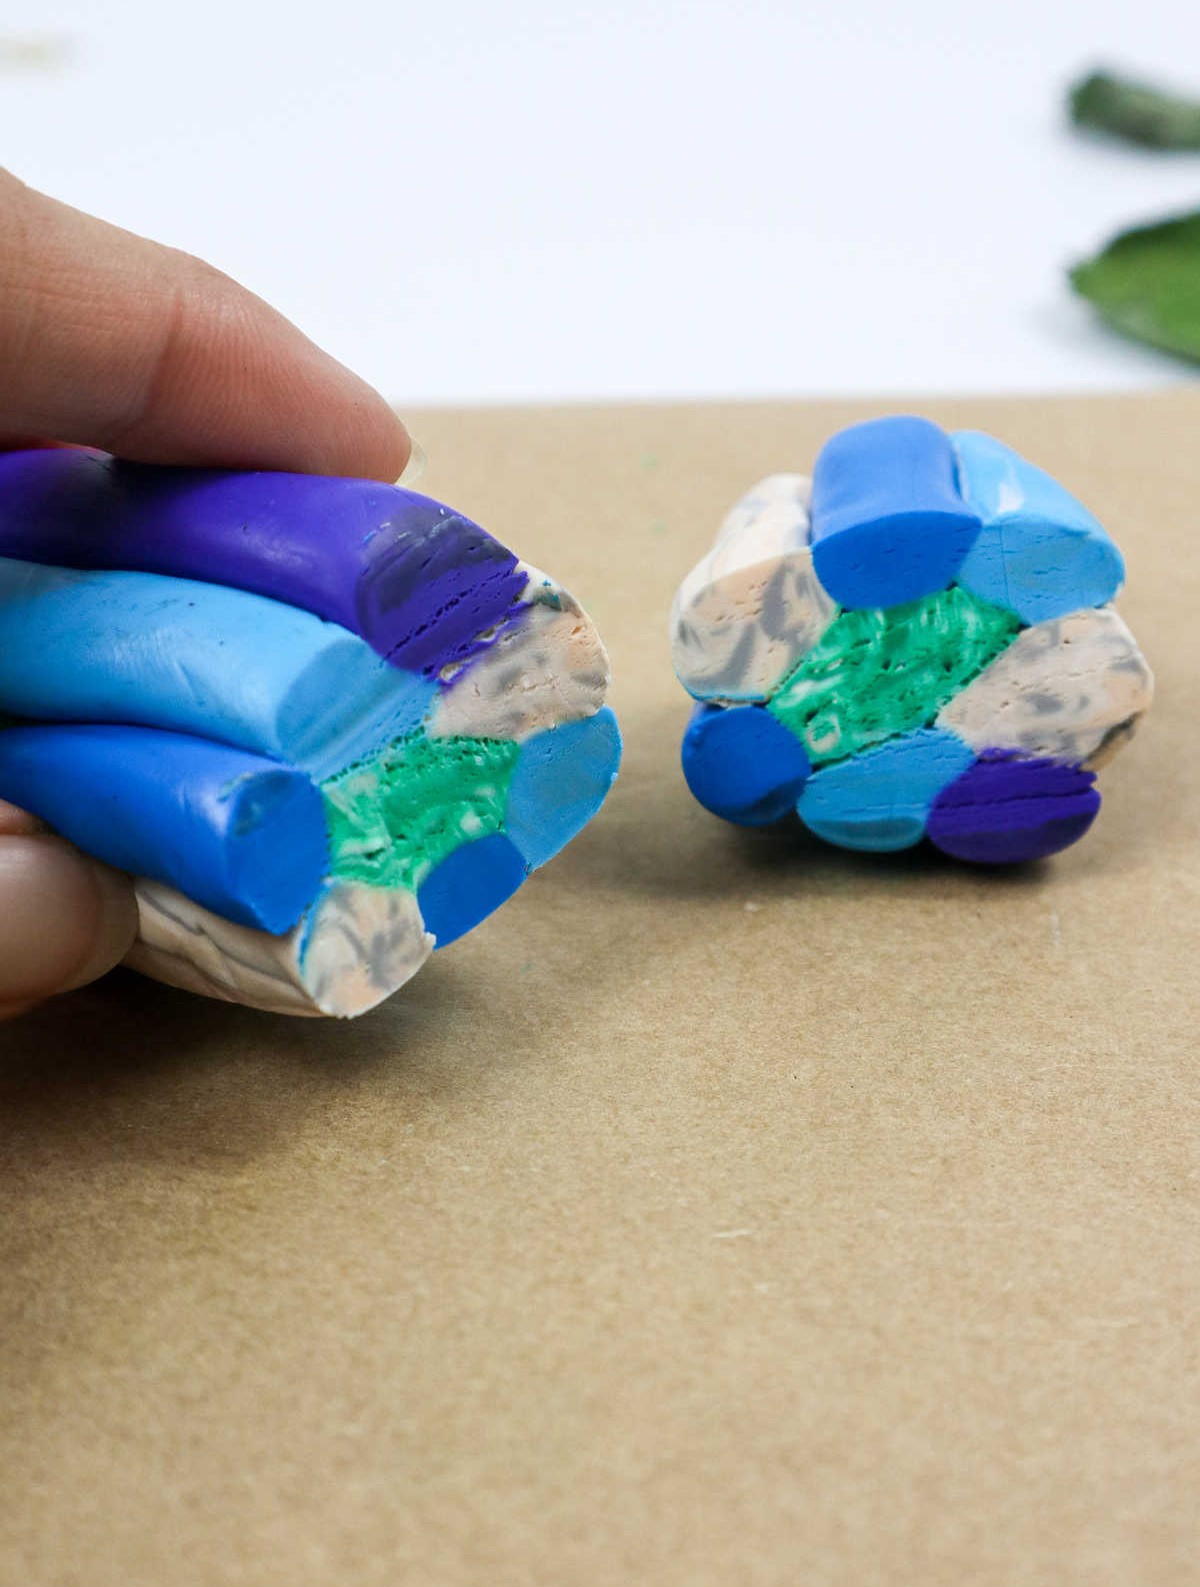
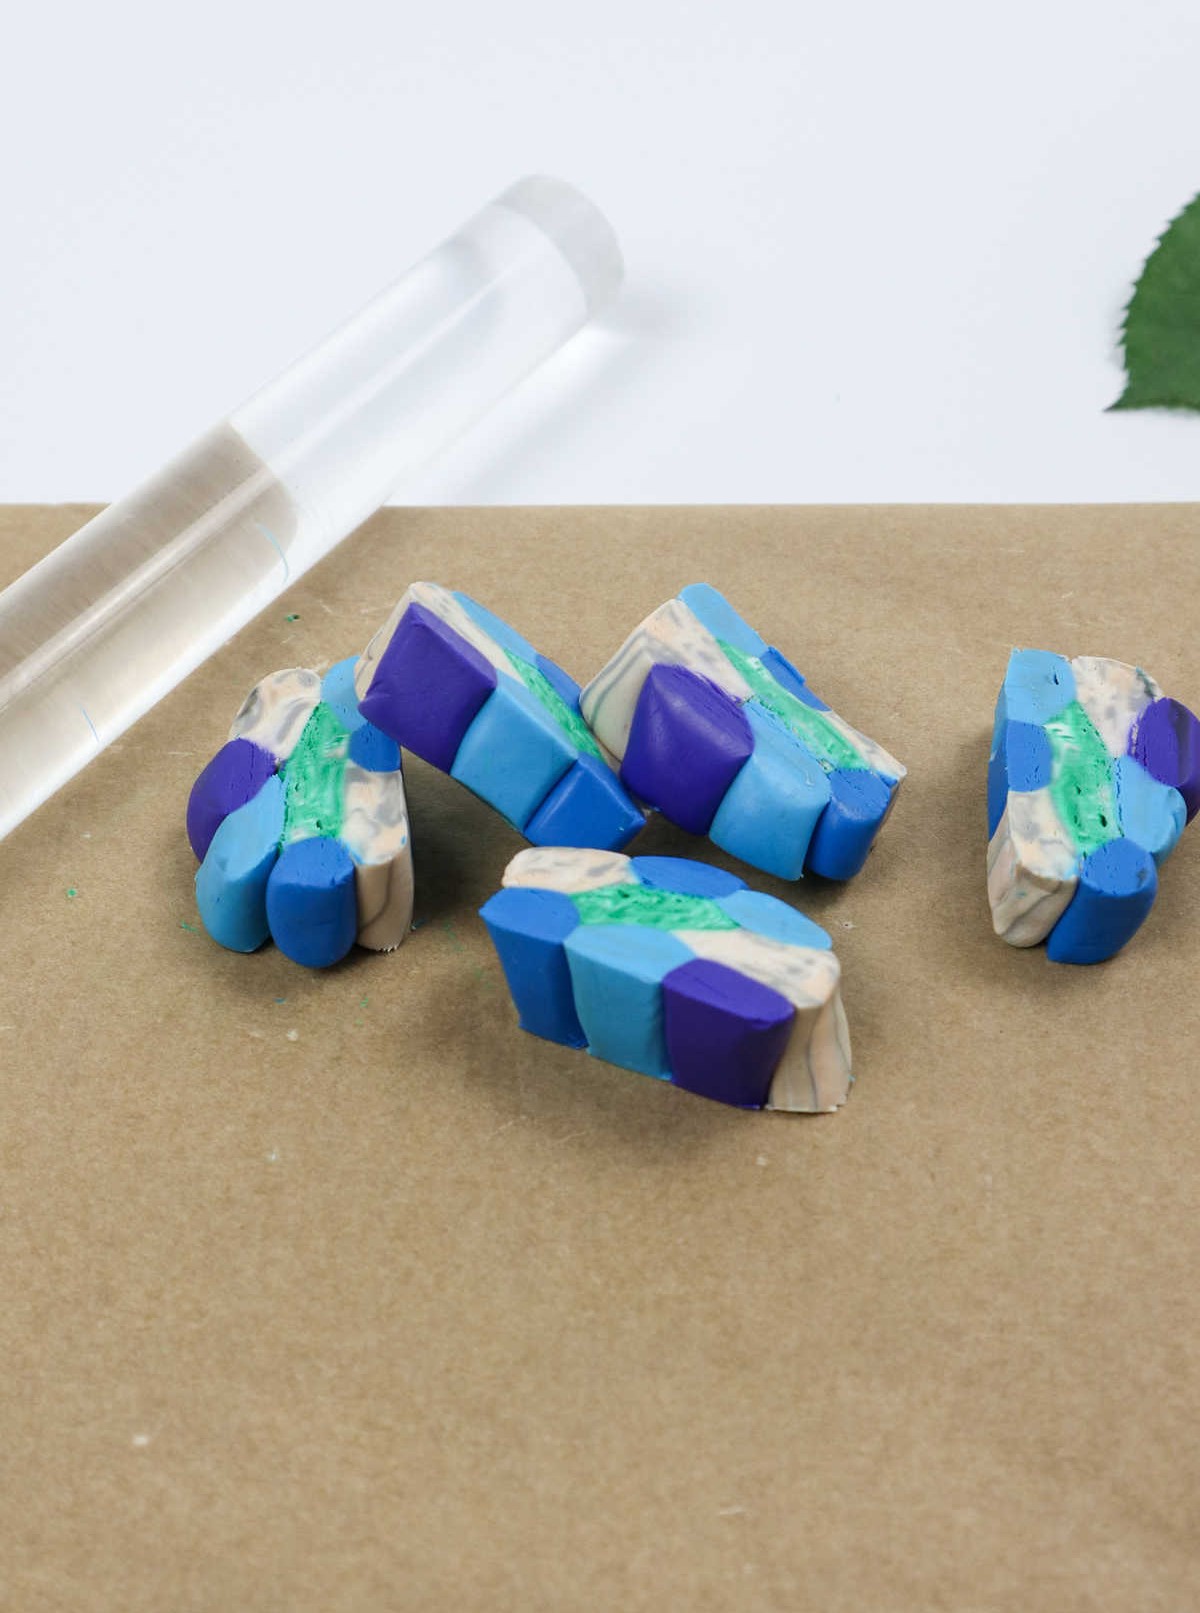
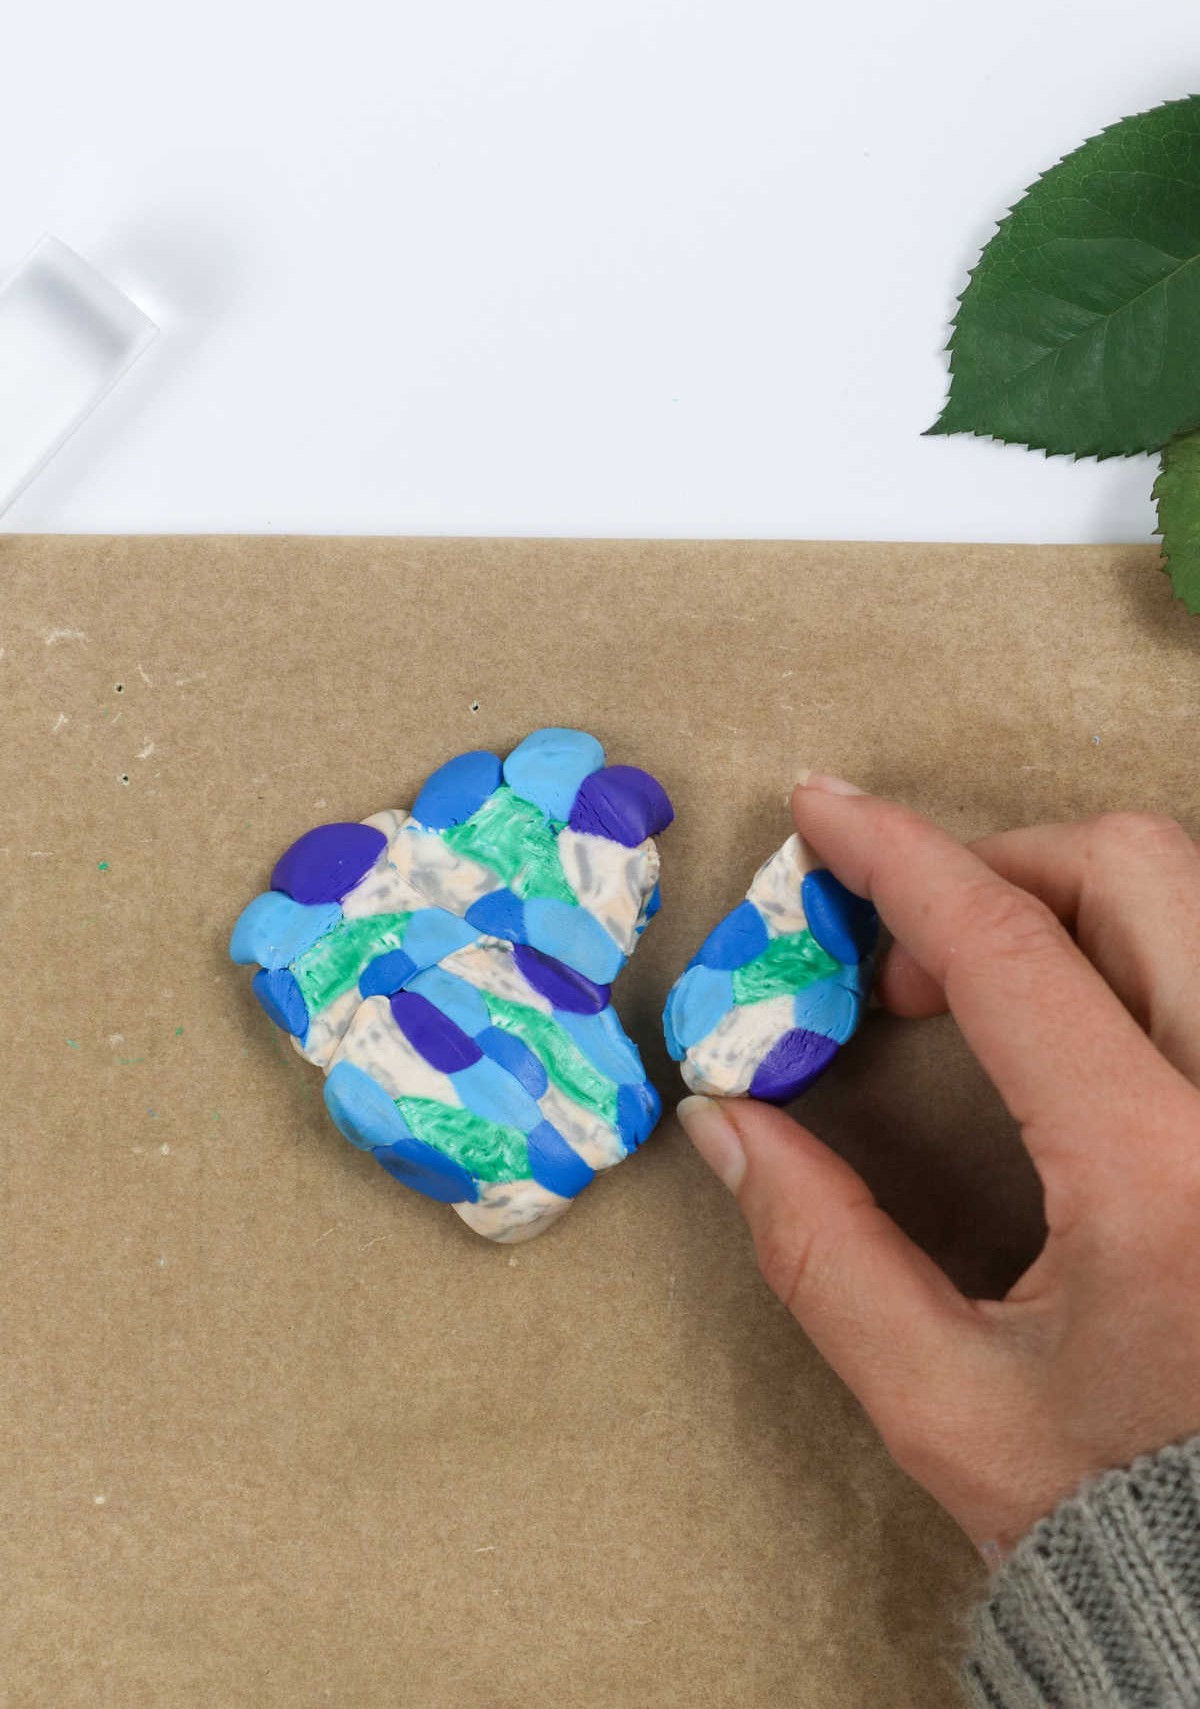
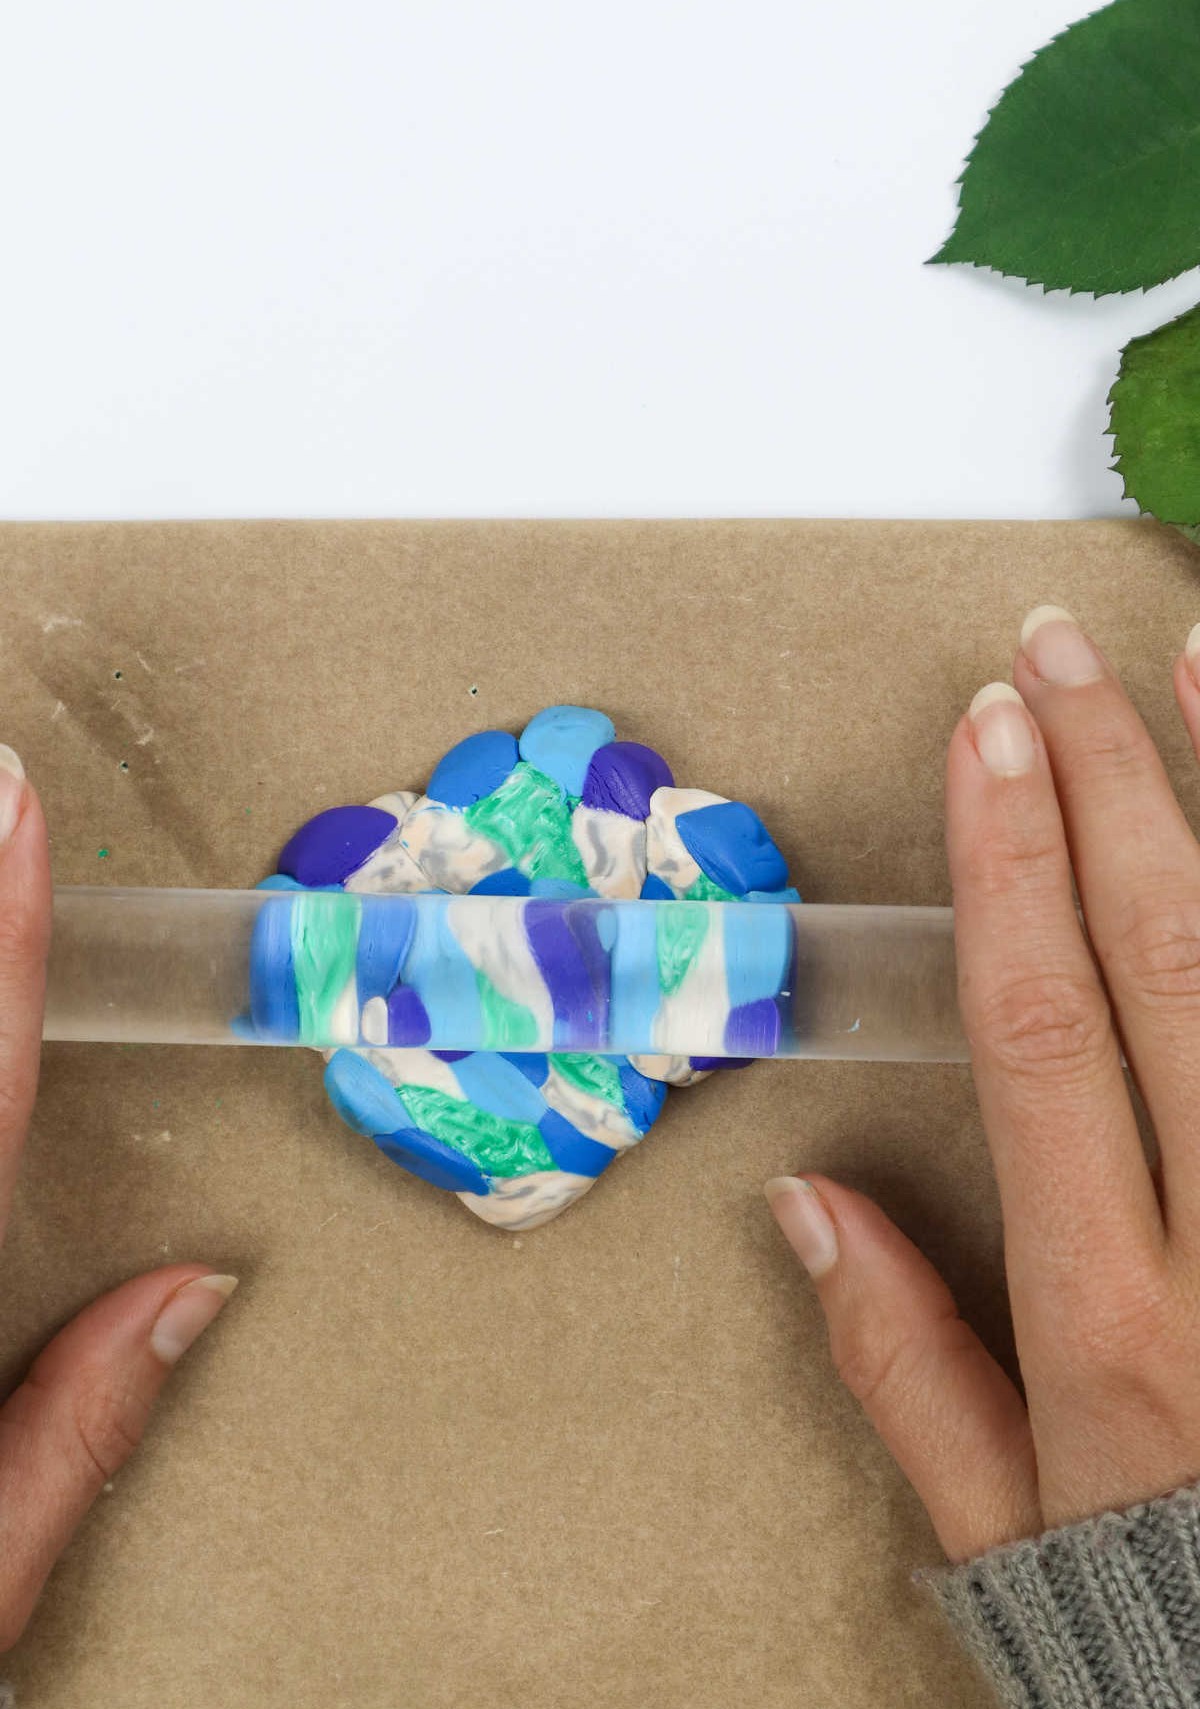
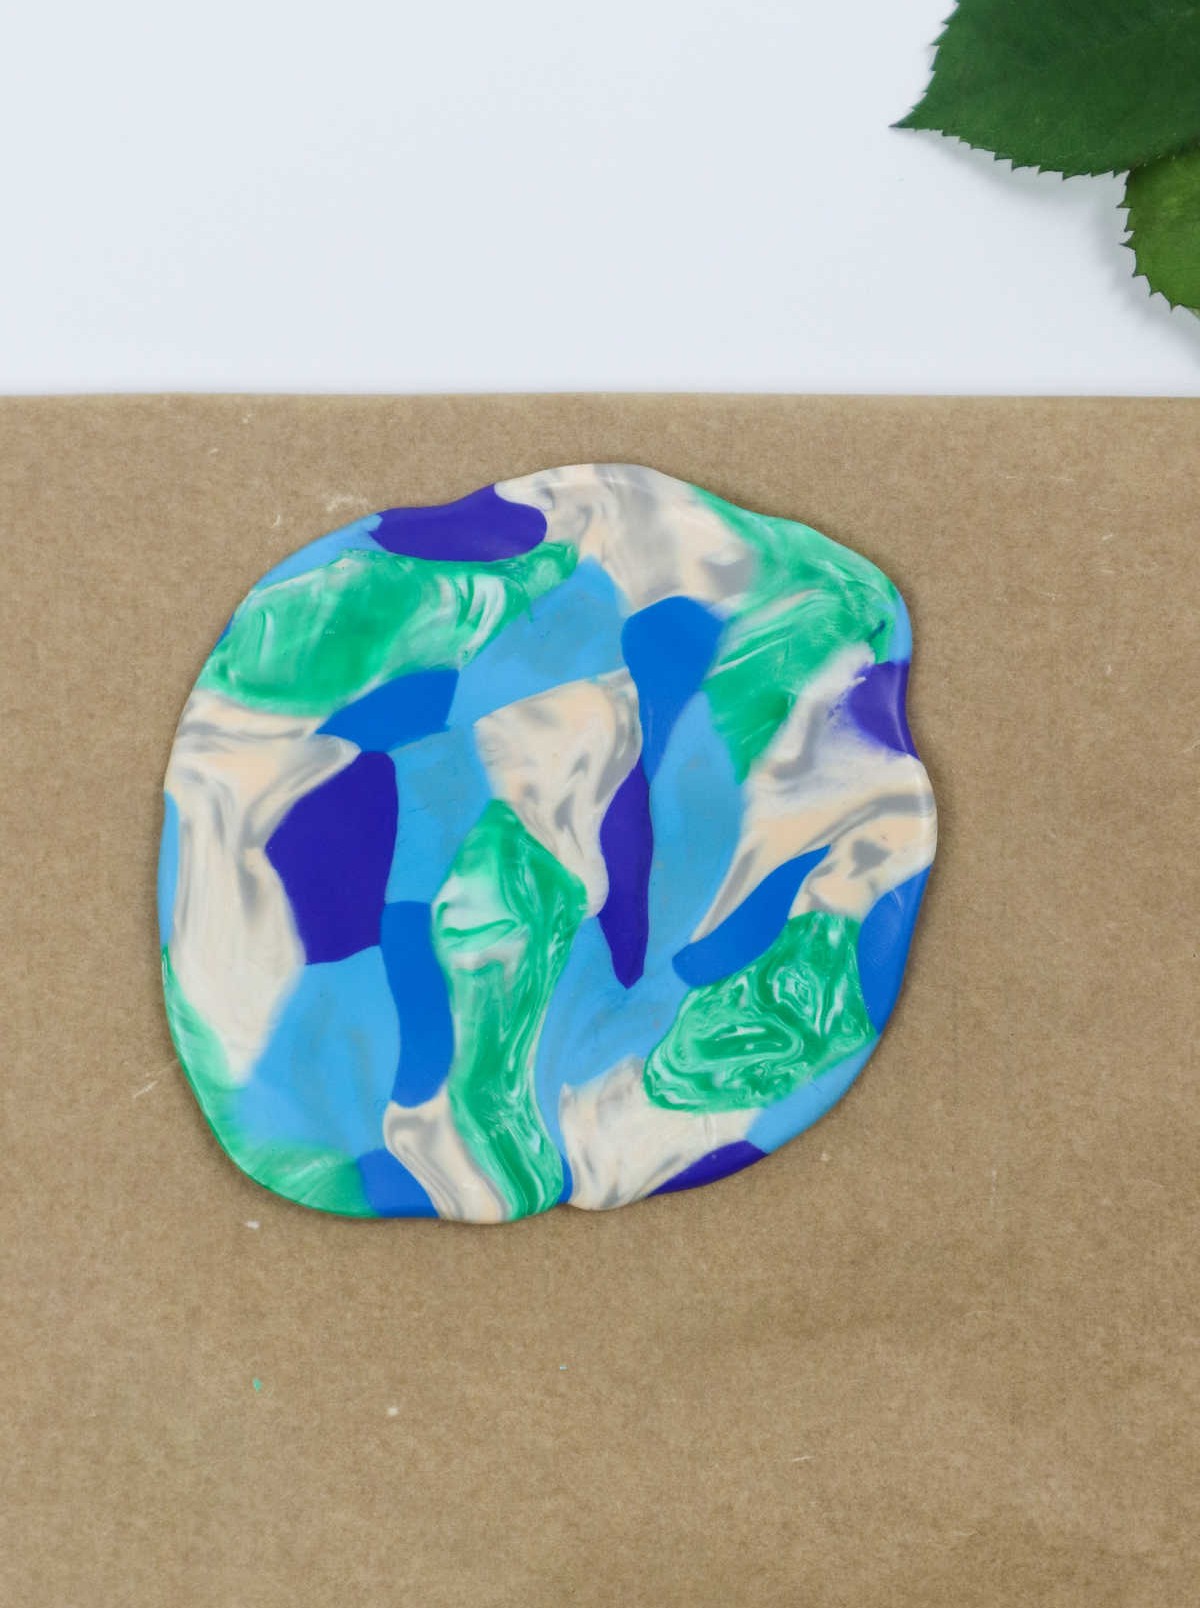

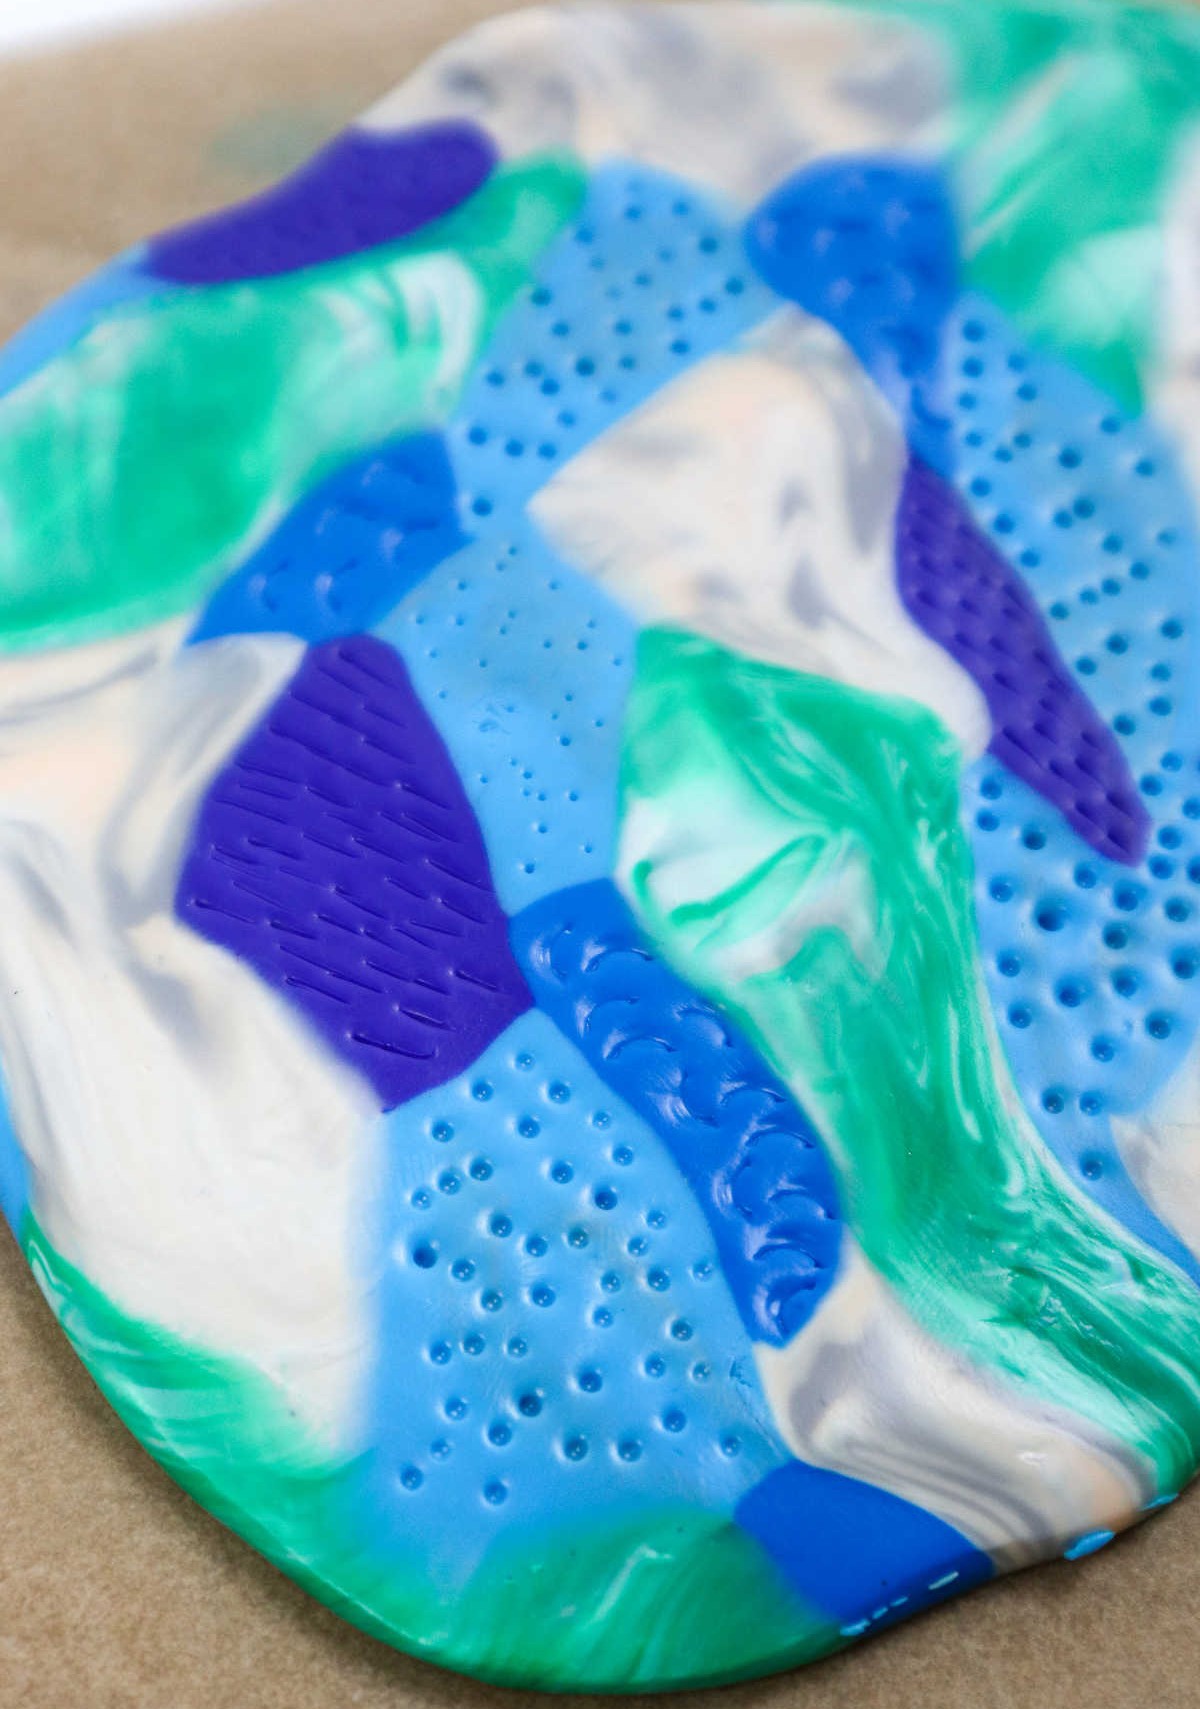
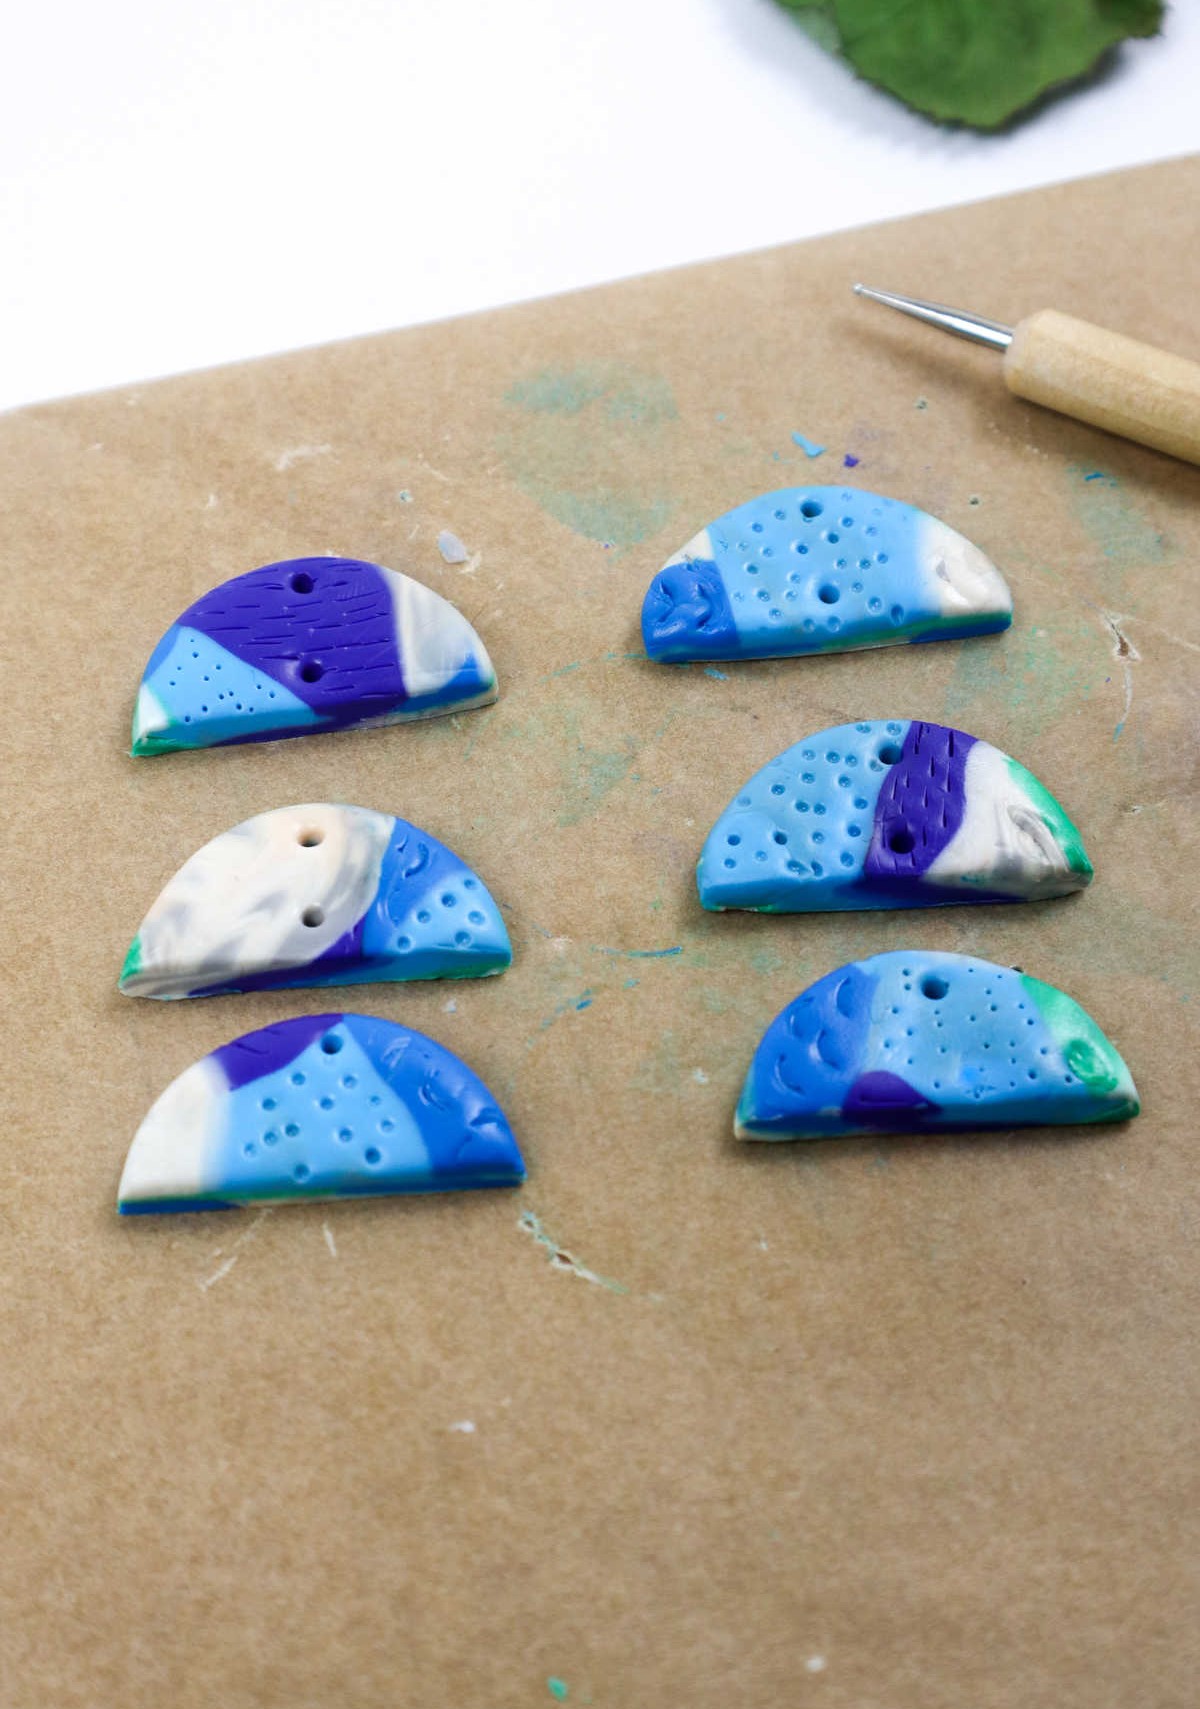
Get ready to unleash your creativity as we take a unique approach to creating a stunning piece of art. To start, gather all the colored clay and slice it into uniform half-inch pieces. This will yield three to five slices depending on the initial length of your clay cylinder. Once you have your slices lined up, press them together to form a single piece before rolling it out into a flat, funky shape. The marbling effect is already impressive, but we’re not stopping there.
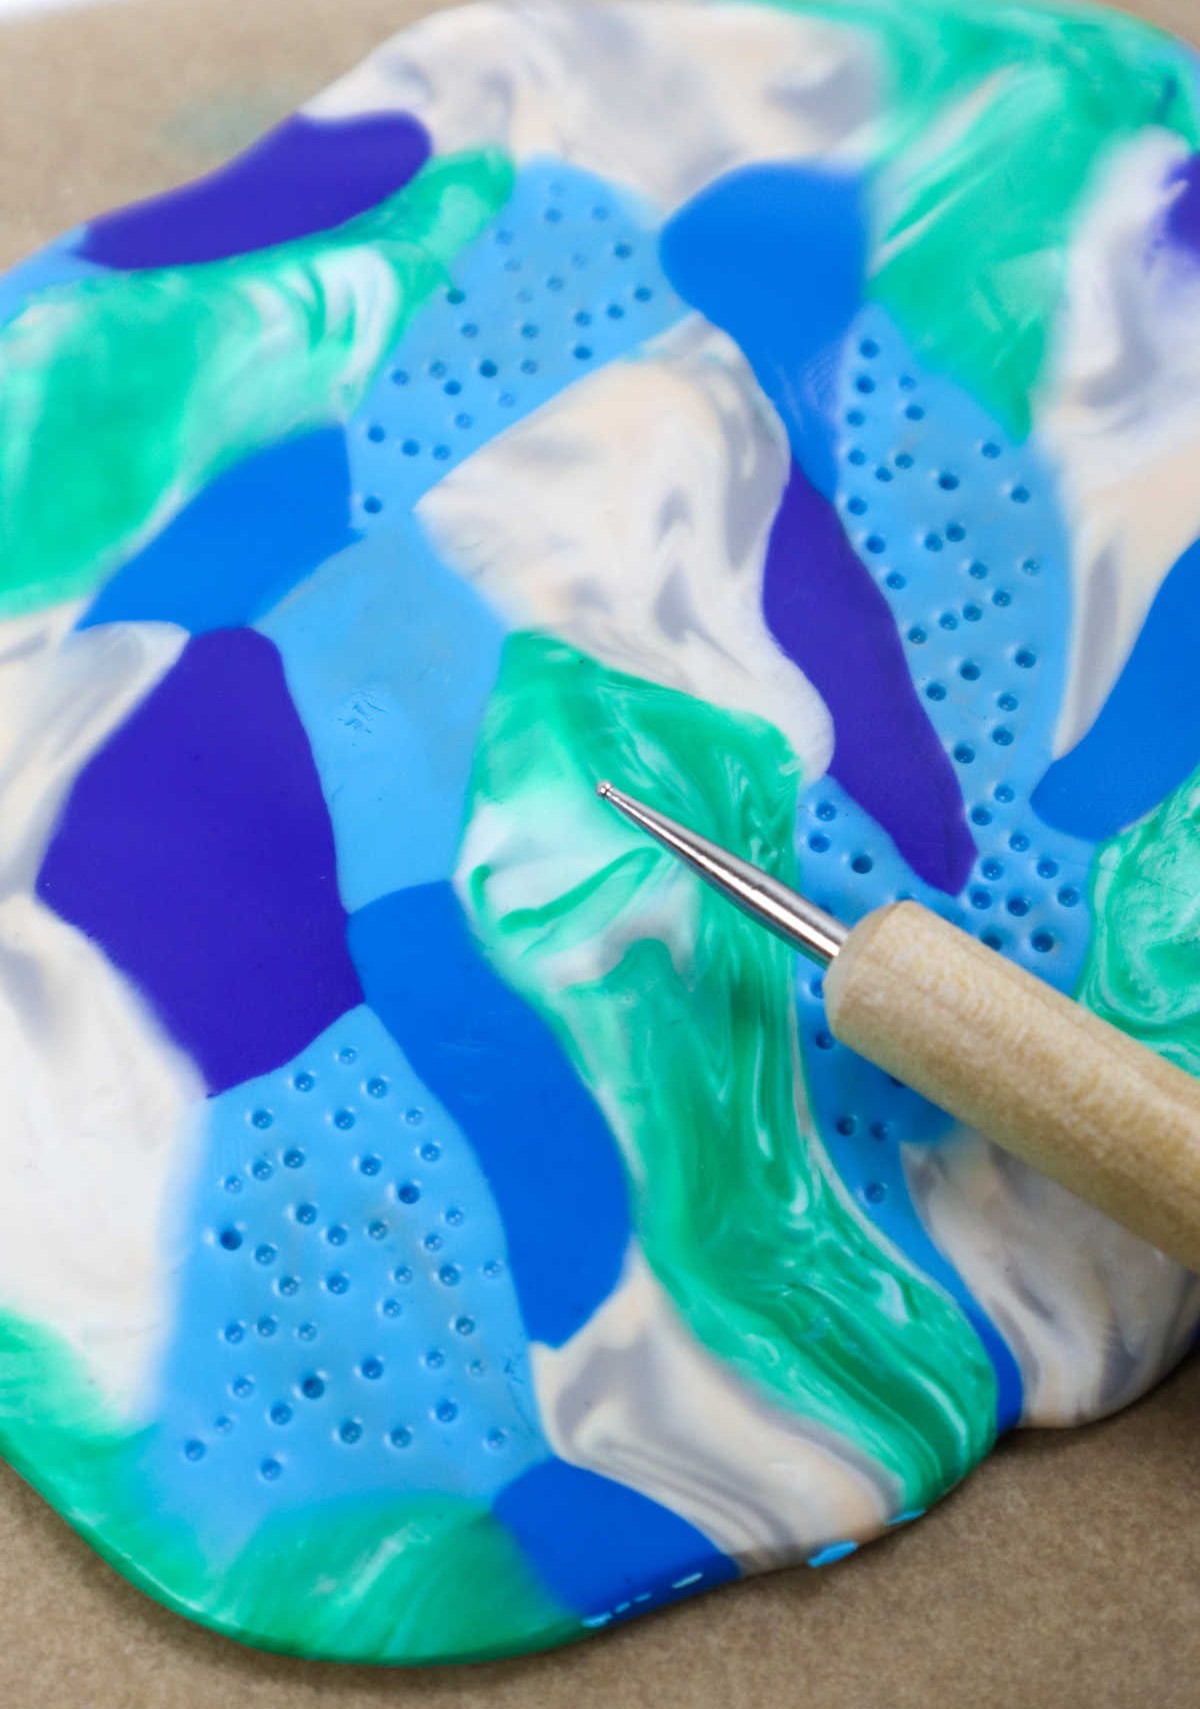
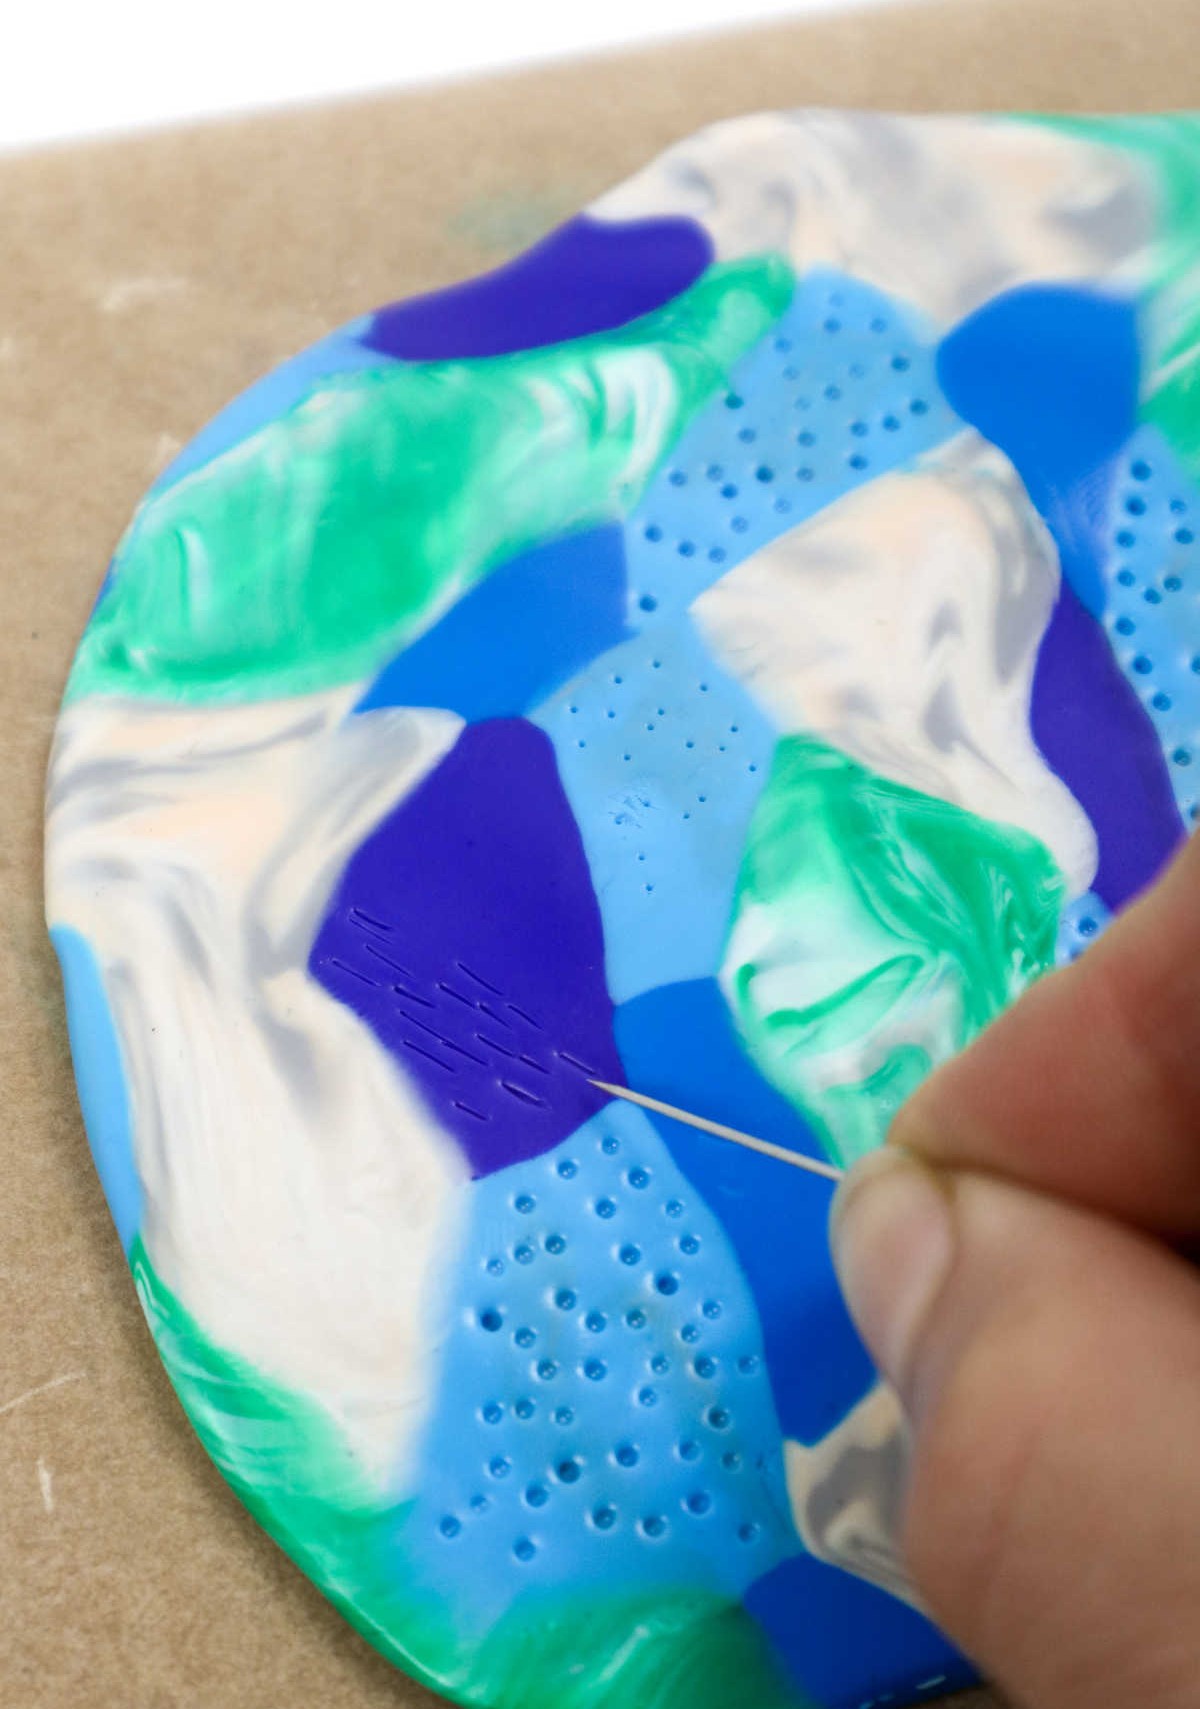
Use a craft tool or even a toothpick to create small holes throughout the clay, adding an extra layer of texture to your design. Want even more visual interest? Employ a scoring tool to add lines and color swatches to your clay masterpiece. This will further enhance the marbling effect and give your piece a truly one-of-a-kind quality. Finally, once you’re satisfied with your pattern, use a cookie cutter or cut out semi-circular shapes like the ones featured here.
With these steps, you’ll be well on your way to creating a show-stopping piece of art that’s sure to impress.
Step 10
As your earring-making journey comes full circle, it’s now time to transfer your creations to a prepared surface. Take a baking tray and line it with parchment paper to create a stable foundation for your newly crafted earrings.
Step 11
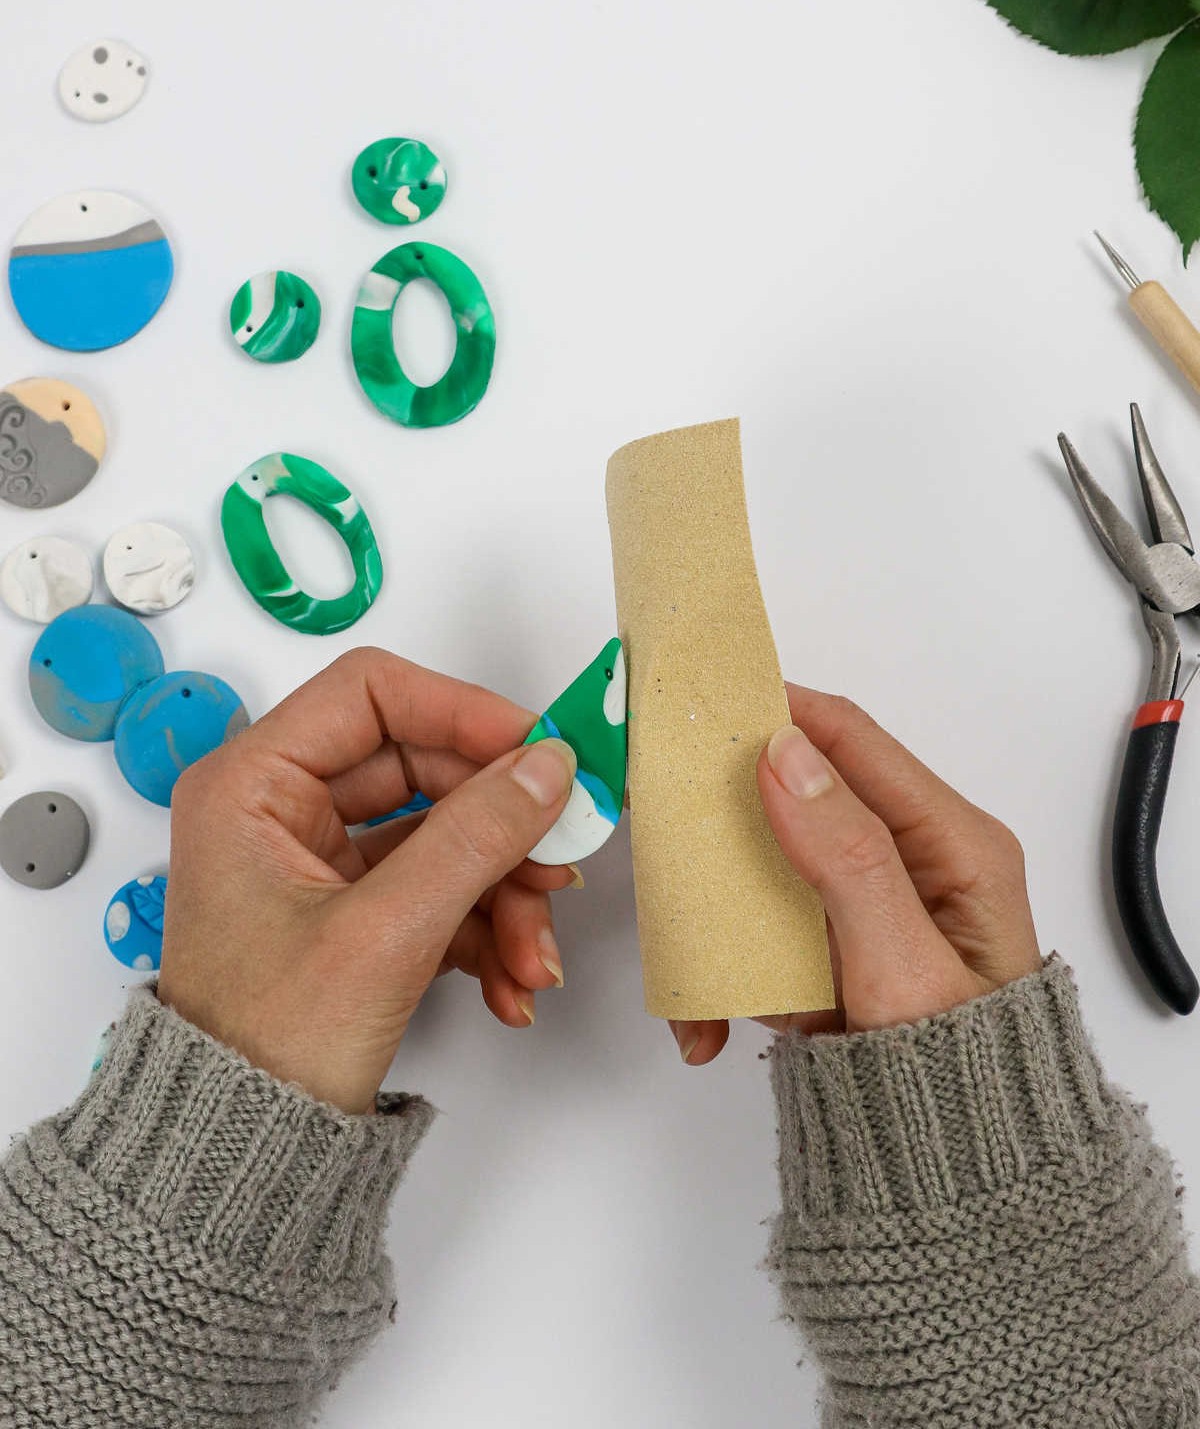
As the final step before wearing or displaying your handmade earrings, it’s essential to refine their texture. A gentle touch with some sandpaper is sufficient to smooth out any rough edges that may have formed during the shaping process. Additionally, this technique allows you to remove any excess clay residue left behind from cutting the earrings. This simple yet effective approach ensures a polished finish and eliminates any potential irritation or discomfort caused by sharp edges.
Step 12


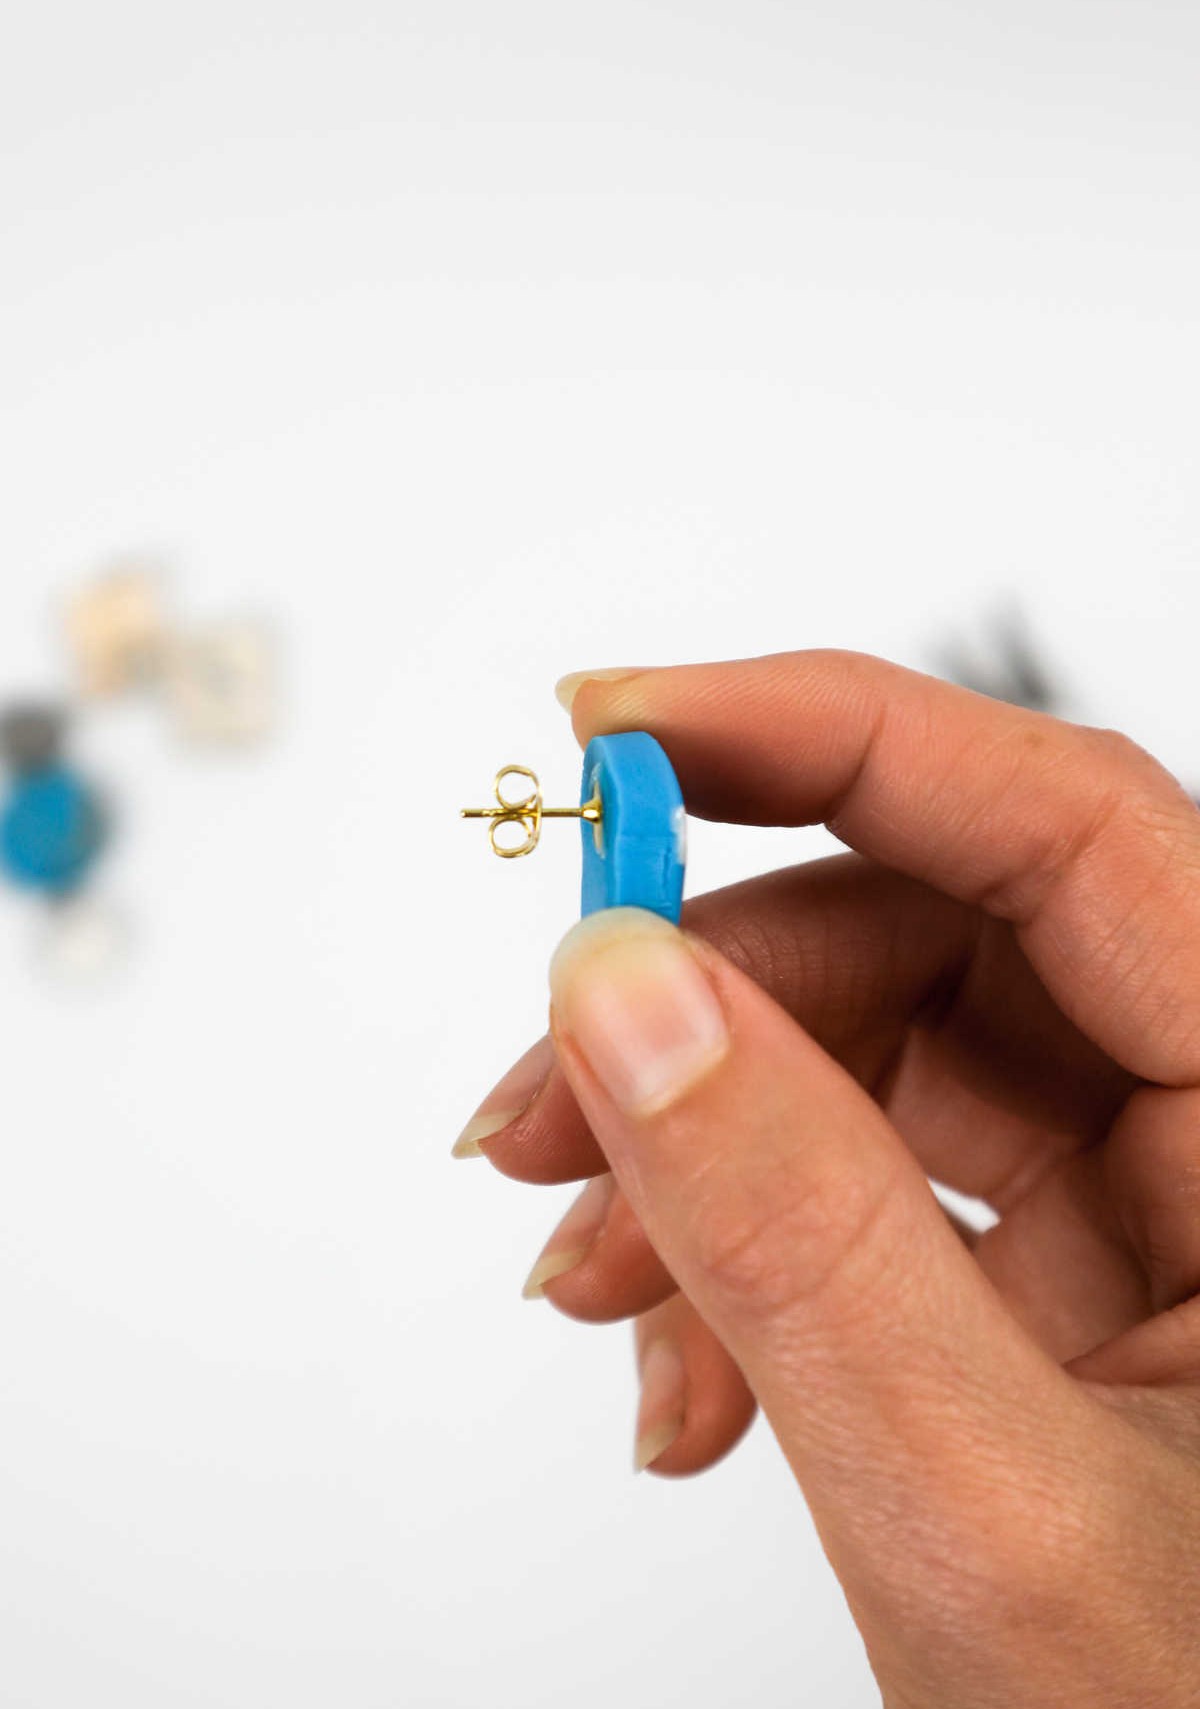
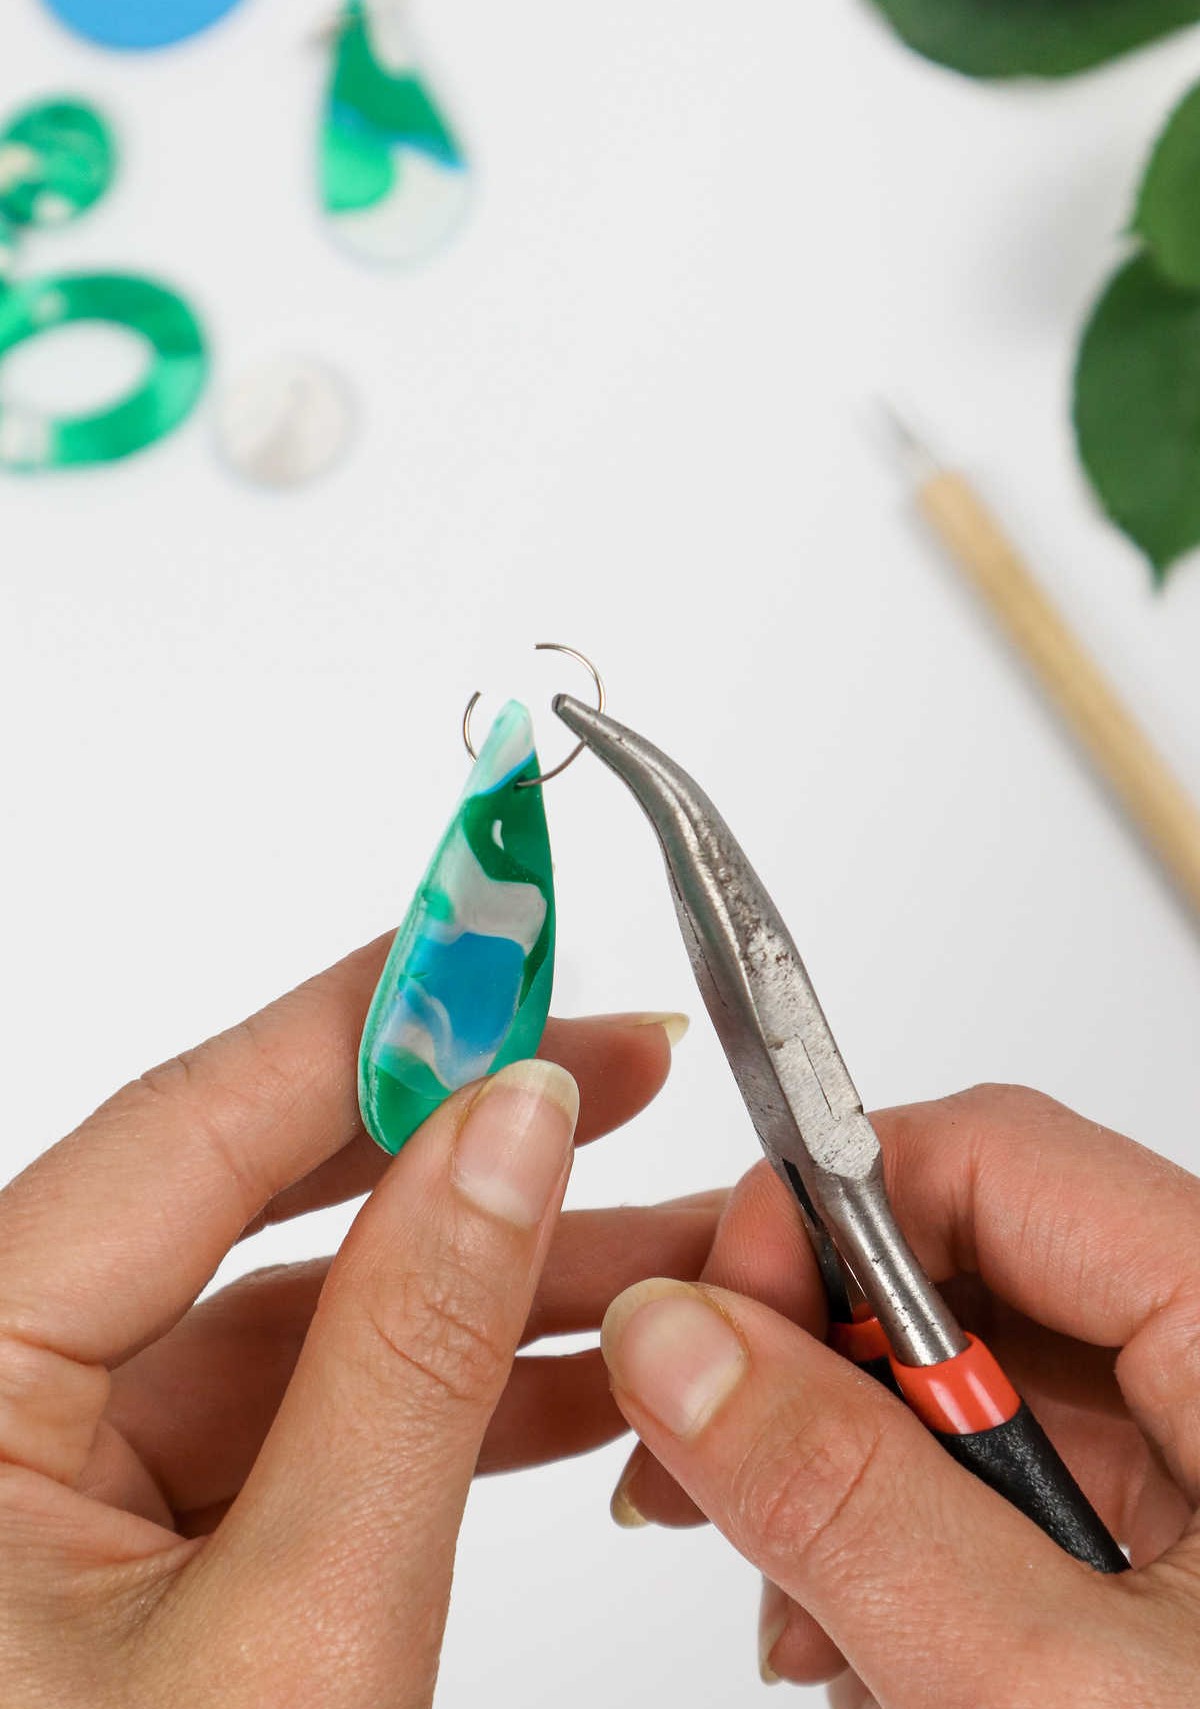
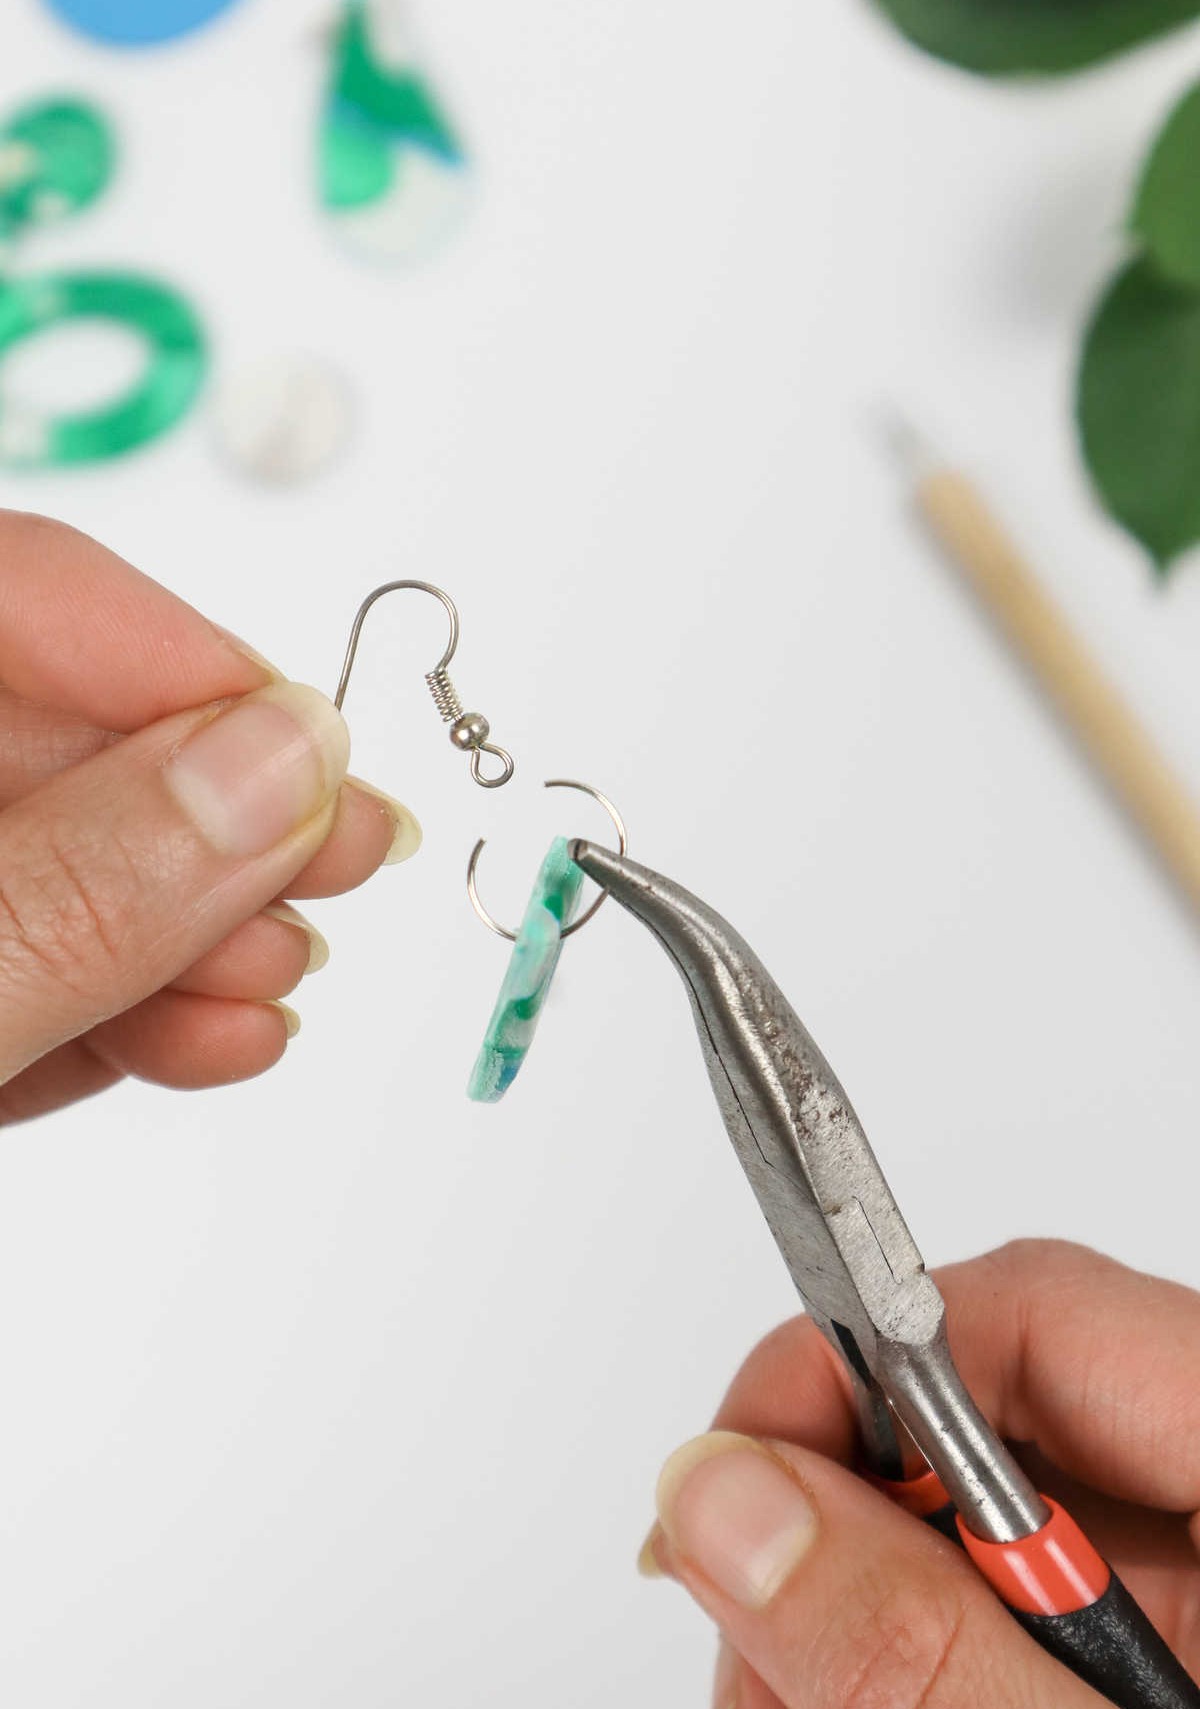
To transform your earrings into studs, utilize a pair of pliers to secure the earring studs to the reverse side with a small amount of adhesive. This approach is specifically designed for earrings that have not been pierced and are intended to be worn as studs. For those earrings that do feature holes, employ the same pliers to attach the hooks and jump rings.
Once this process is complete, you’ll have a beautiful pair of DIY polymer clay earrings ready to adorn your ears or serve as thoughtful gifts.
How Do You Seal Polymer Clay Earrings?

When crafting with polymer clay earrings, sealing the finished product is crucial for its longevity and appearance. Not only does sealing protect the surface from scratches and cuts, but it also imbues the earring with a beautiful finish. Following the sanding process, you can essentially use your earring as-is, taking advantage of the fact that polymer clay doesn’t undergo color shifts during baking, thus preserving vibrant colors.
However, to ensure optimal durability, sealing is still necessary.
For this purpose, you can opt for either a glossy or matte finish varnish spray. While acrylic clay can also be used, its long-term stability is not on par with polymer clay.
How Long Should I Bake Polymer Clay Earrings?
When it comes to baking your earrings, temperature and time are crucial factors to consider. If the temperature is too low, the polymer won’t fuse properly, while excessive heat can cause burning. Similarly, if you don’t bake them long enough, the clay may not set and will crumble, whereas overbaking can lead to cracking. For this project, aim for 30 minutes at 230F (110C).
It’s essential to consult the package instructions for your specific type of clay to ensure you’re using the correct settings. And don’t forget to preheat your oven before starting – it makes a significant difference in the final result.
How Thick Should My Polymer Clay Earrings Be?
When crafting clay earrings, it’s crucial to strike the right balance between thickness and durability. A general guideline is to aim for a thickness of around 5mm. If the clay is too thin, it may not hold up well and is prone to snapping or becoming brittle. On the other hand, if the earrings are too thick, they may not bake properly and could end up feeling heavy and cumbersome on your ears.
How to Make Polymer Clay Earrings (Step-by-Step)
Combine your creativity with polymer clay to craft unique DIY jewelry. This fun and accessible project is perfect for adults and teens looking to create personalized accessories or gifts. With just a few simple steps, you can transform raw materials into stunning pieces that reflect your personal style.
Preparation Time: 10 minutes
Active Crafting Time: 40 minutes
Additional Drying Time: 30 minutes
Total Project Time: 1 hour and 20 minutes
Author: Karo @ CraftsyHacks.com
Equipment
In crafting, having the right tools at your disposal can make all the difference. The following list of essential items is a great starting point for any DIY enthusiast or crafter. From precision instruments like dotting pens and fine sandpaper to versatile tools such as filling knives (or other cutting blades) and pliers, this collection offers something for every creative endeavor.
Additional must-haves include rubber stamps, cookie cutters, scissors, sellotape, rolling pins, and parchment paper – all of which can be used to shape, mold, or decorate a wide range of projects.
Materials
When crafting unique and personalized jewelry pieces, there are several essential components to consider. First, a strong foundation is necessary, which is where polymer clay comes in. This versatile material can be molded and shaped into intricate designs, making it an ideal choice for creating custom earrings. Next, jump rings provide a secure fastening mechanism for attaching the earring hooks.
Earring hooks themselves come in various styles and sizes, offering endless possibilities for customization. Finally, earring posts and backs ensure a comfortable and secure fit for the wearer. To bring these elements together, a reliable adhesive like E6000 glue is crucial in holding everything in place.
Instructions
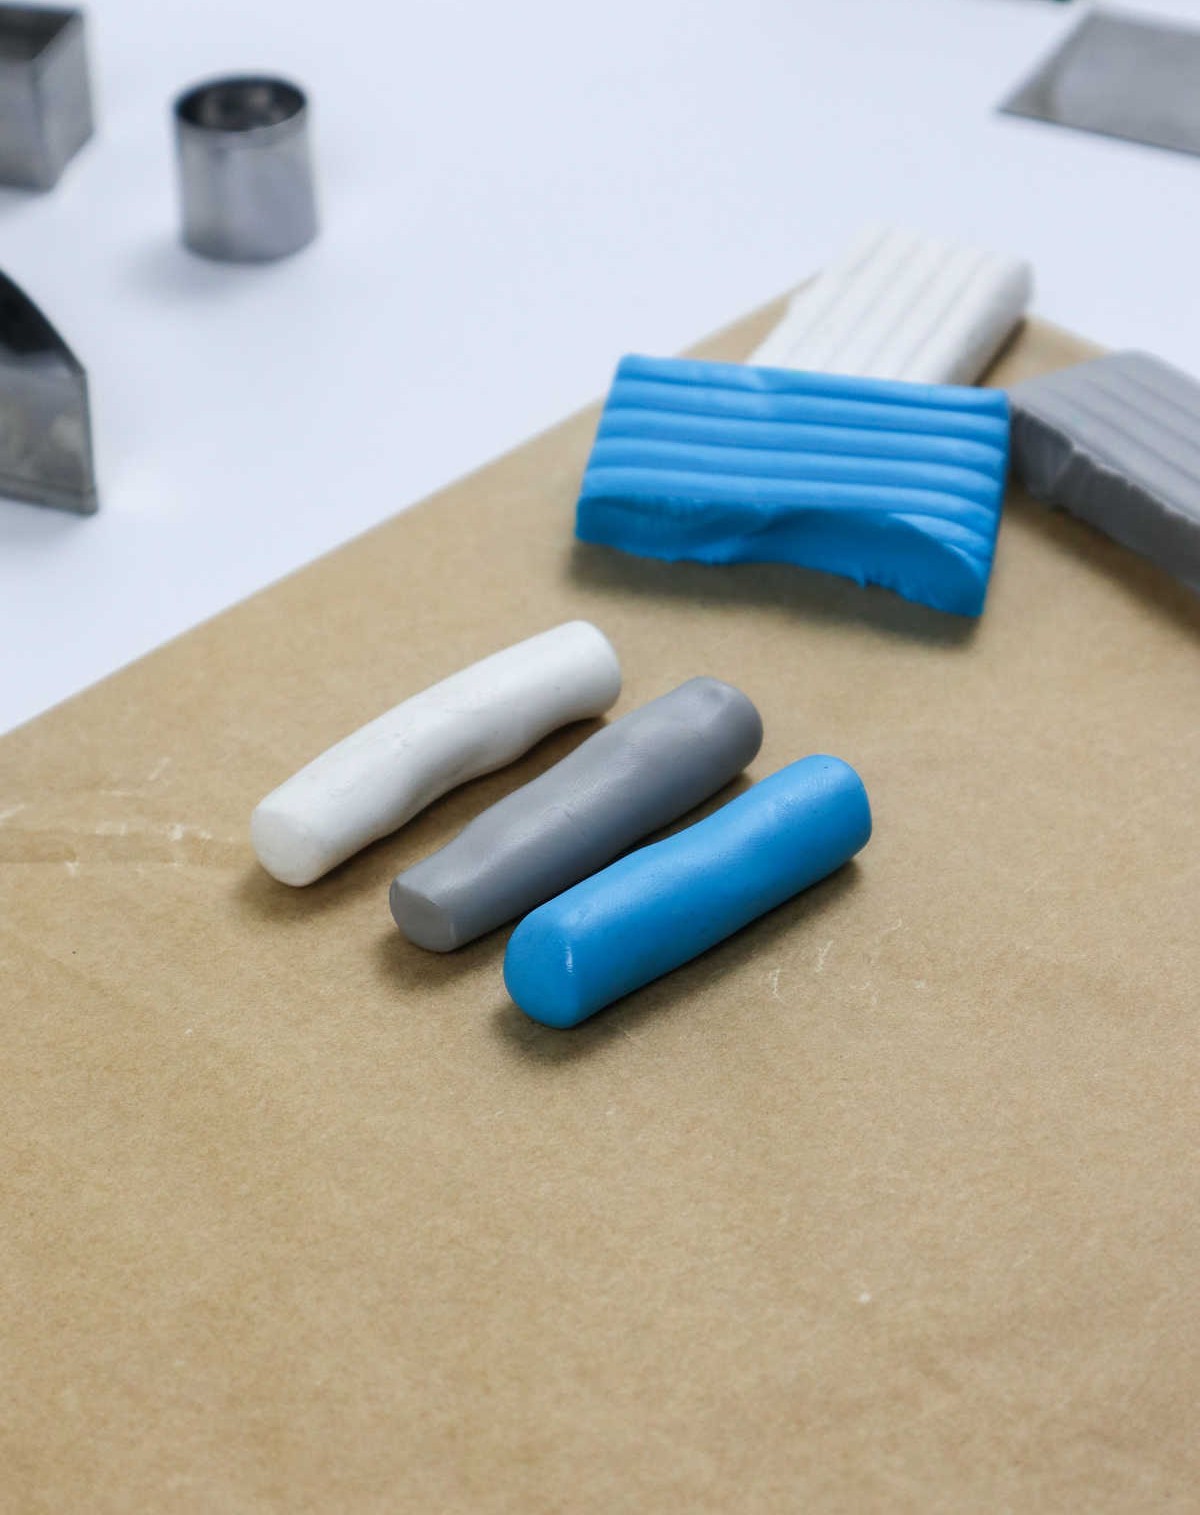
Get ready to unleash your creativity as you embark on this project! Start by preparing your workspace by lining a sheet of cardboard with parchment paper and securing it in place. Next, select the various colors of clay you’ll be using and pinch off the desired amount. Warm up the clay by gently smoothing it with your hands, then roll each piece into cylinders. Line them up and press them together before rolling out a flat sheet approximately 5mm thick.
Feel free to experiment with different colors and techniques by folding, twisting, and rolling the clay to achieve unique patterns. You can also combine different colored rolls of clay, cut them into half-inch pieces, lay them side-by-side, and then roll them together for an additional design element. Don’t be afraid to add some personal touches with designs such as speckling, stenciling, or using craft tools to create textures and patterns.
The possibilities are endless when it comes to colors, textures, and designs! Once you’re satisfied with the appearance of your clay, use cookie cutters in various shapes to create unique earrings. You can also experiment with making two-piece earrings featuring danglers or stick to studs. Remove any excess clay, and feel free to reuse any scraps to make more earrings. Don’t forget to poke holes in each earring for future attachment of jump hooks.
Place the finished earrings on a baking tray lined with parchment paper. Preheat your oven according to the packaging instructions (typically around 30 minutes at 230F or 110C). Cover the baked earrings with aluminum foil to prevent cracking, then let them cool completely. Once cooled, use sandpaper to smooth out any excess clay shavings and achieve a refined finish. You can also apply a clear glossy or matte-finish varnish specifically designed for polymer clay to set the design.
Finally, attach the hooks or studs, and your earrings are ready to wear!