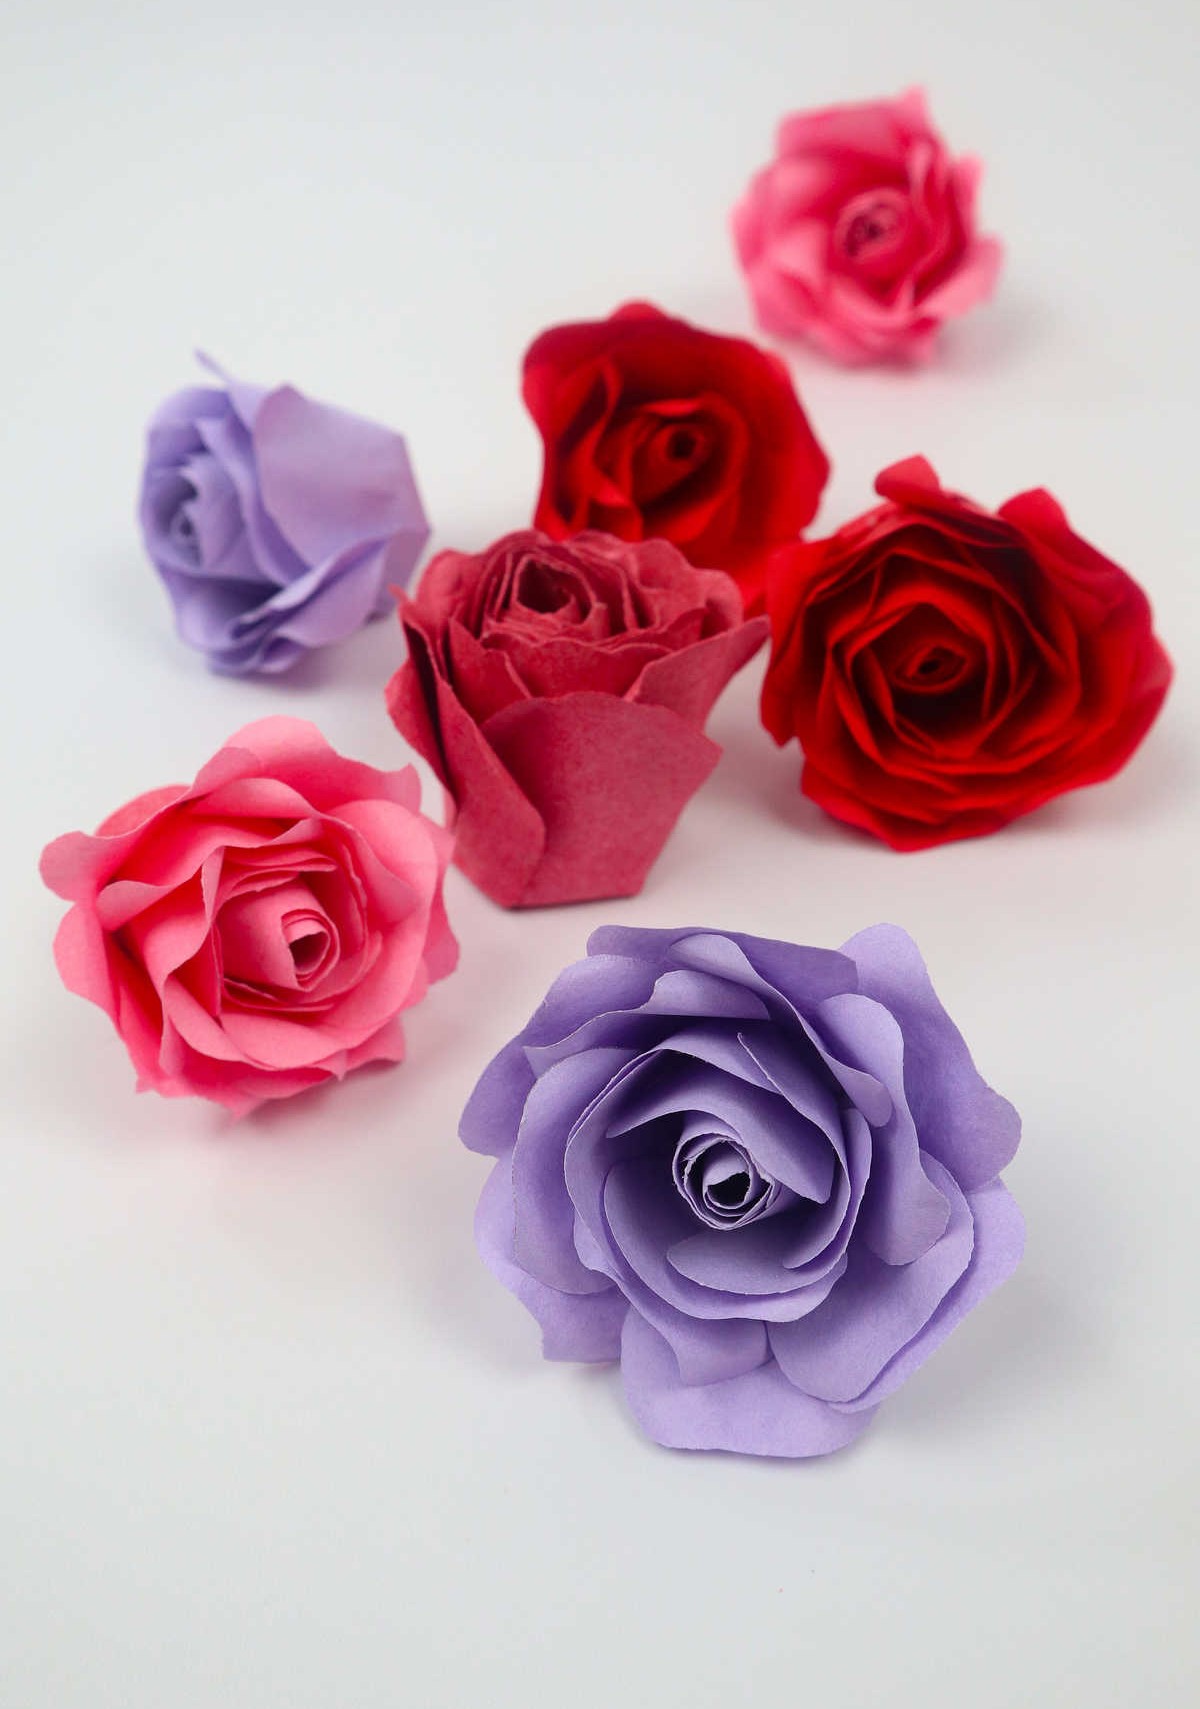
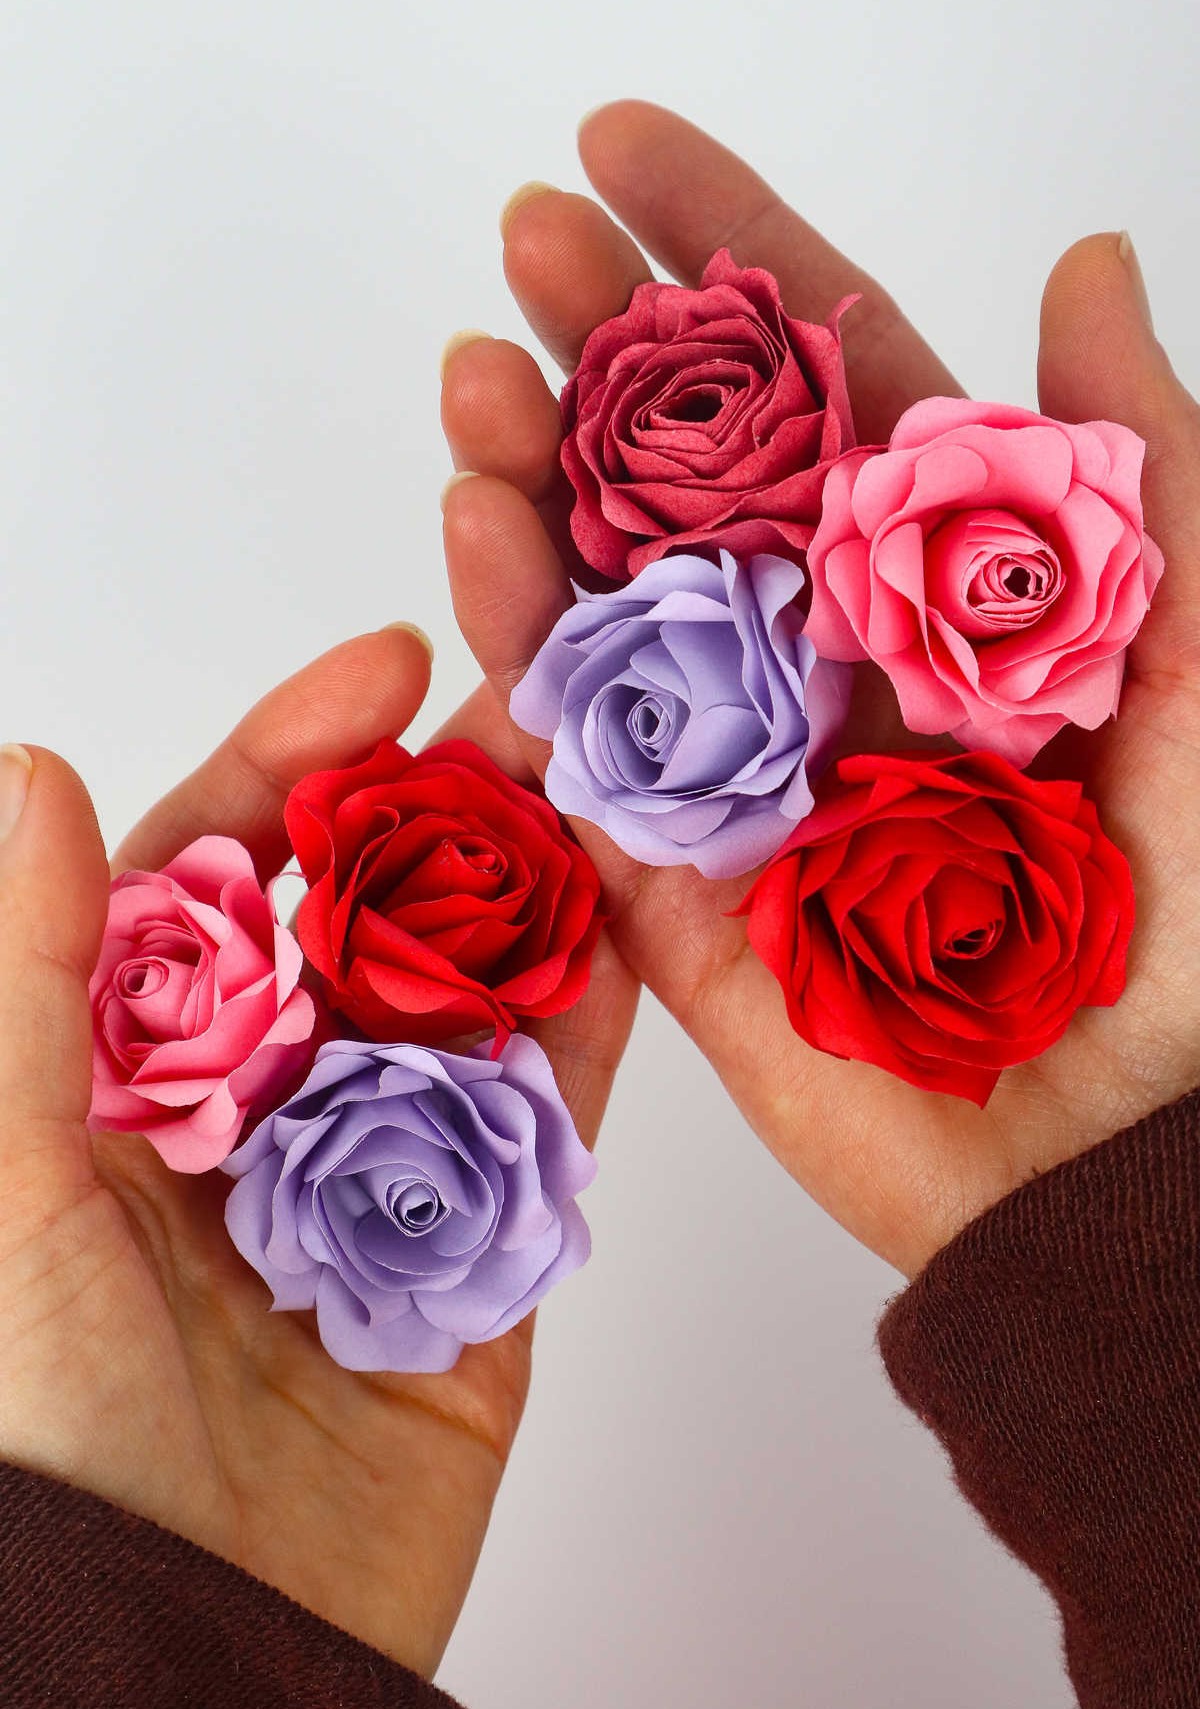
Roses are renowned for their breathtaking beauty. Unleash your creativity and transform plain paper into stunning DIY roses with just a few simple materials. Follow our step-by-step guide to learn how to craft paper roses from scratch, and discover the joy of creating something truly unique.
Paper flowers, particularly paper roses, have a special charm that can elevate any project or setting.
Whether you want to add a touch of elegance to a dull space, create a whimsical atmosphere, or simply enjoy a fun and creative activity, paper roses are an excellent choice.
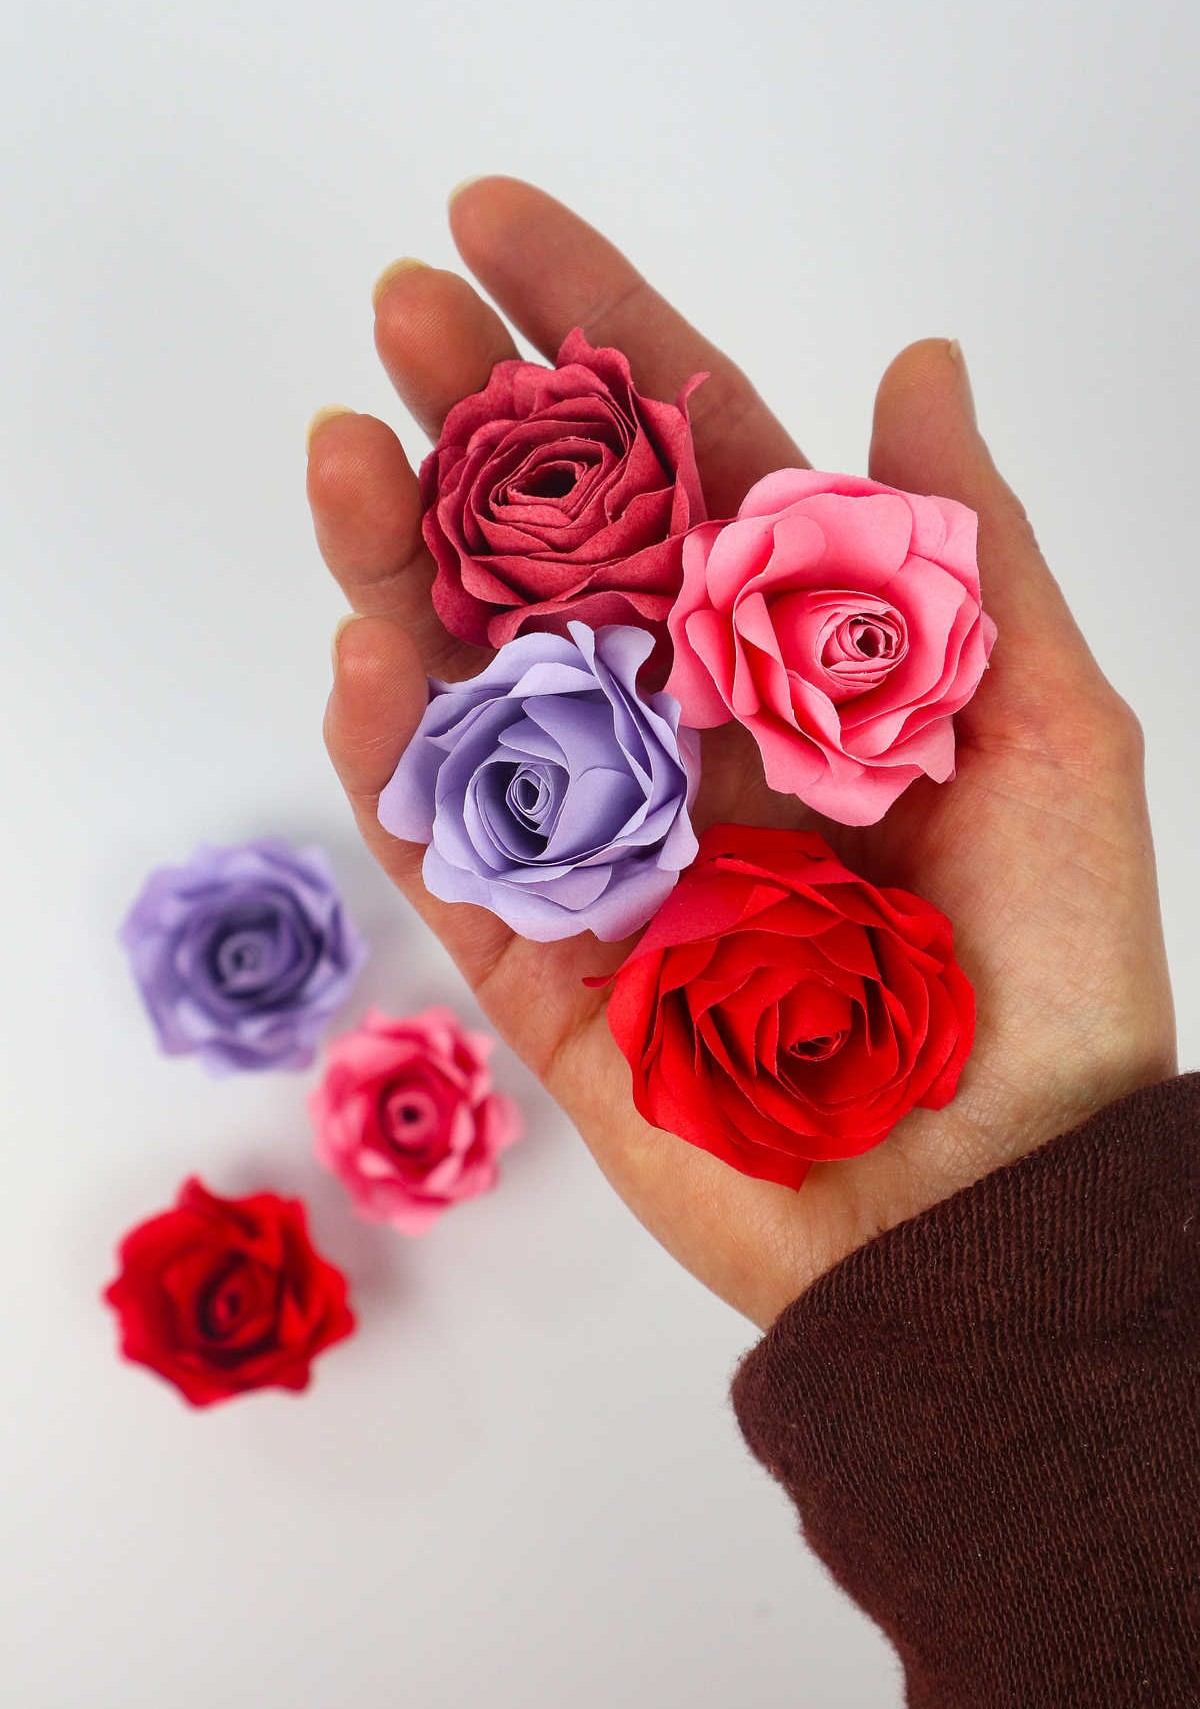
While making paper roses does require some patience, the end result is well worth the effort. To make the most of this craft session, consider preparing a batch of paper roses in advance and storing them for future use. This way, you can enjoy your newly acquired skill whenever you like.
Before we dive into the process, let’s take a look at the essential supplies you’ll need to get started.
Supplies and Tools You’ll Need
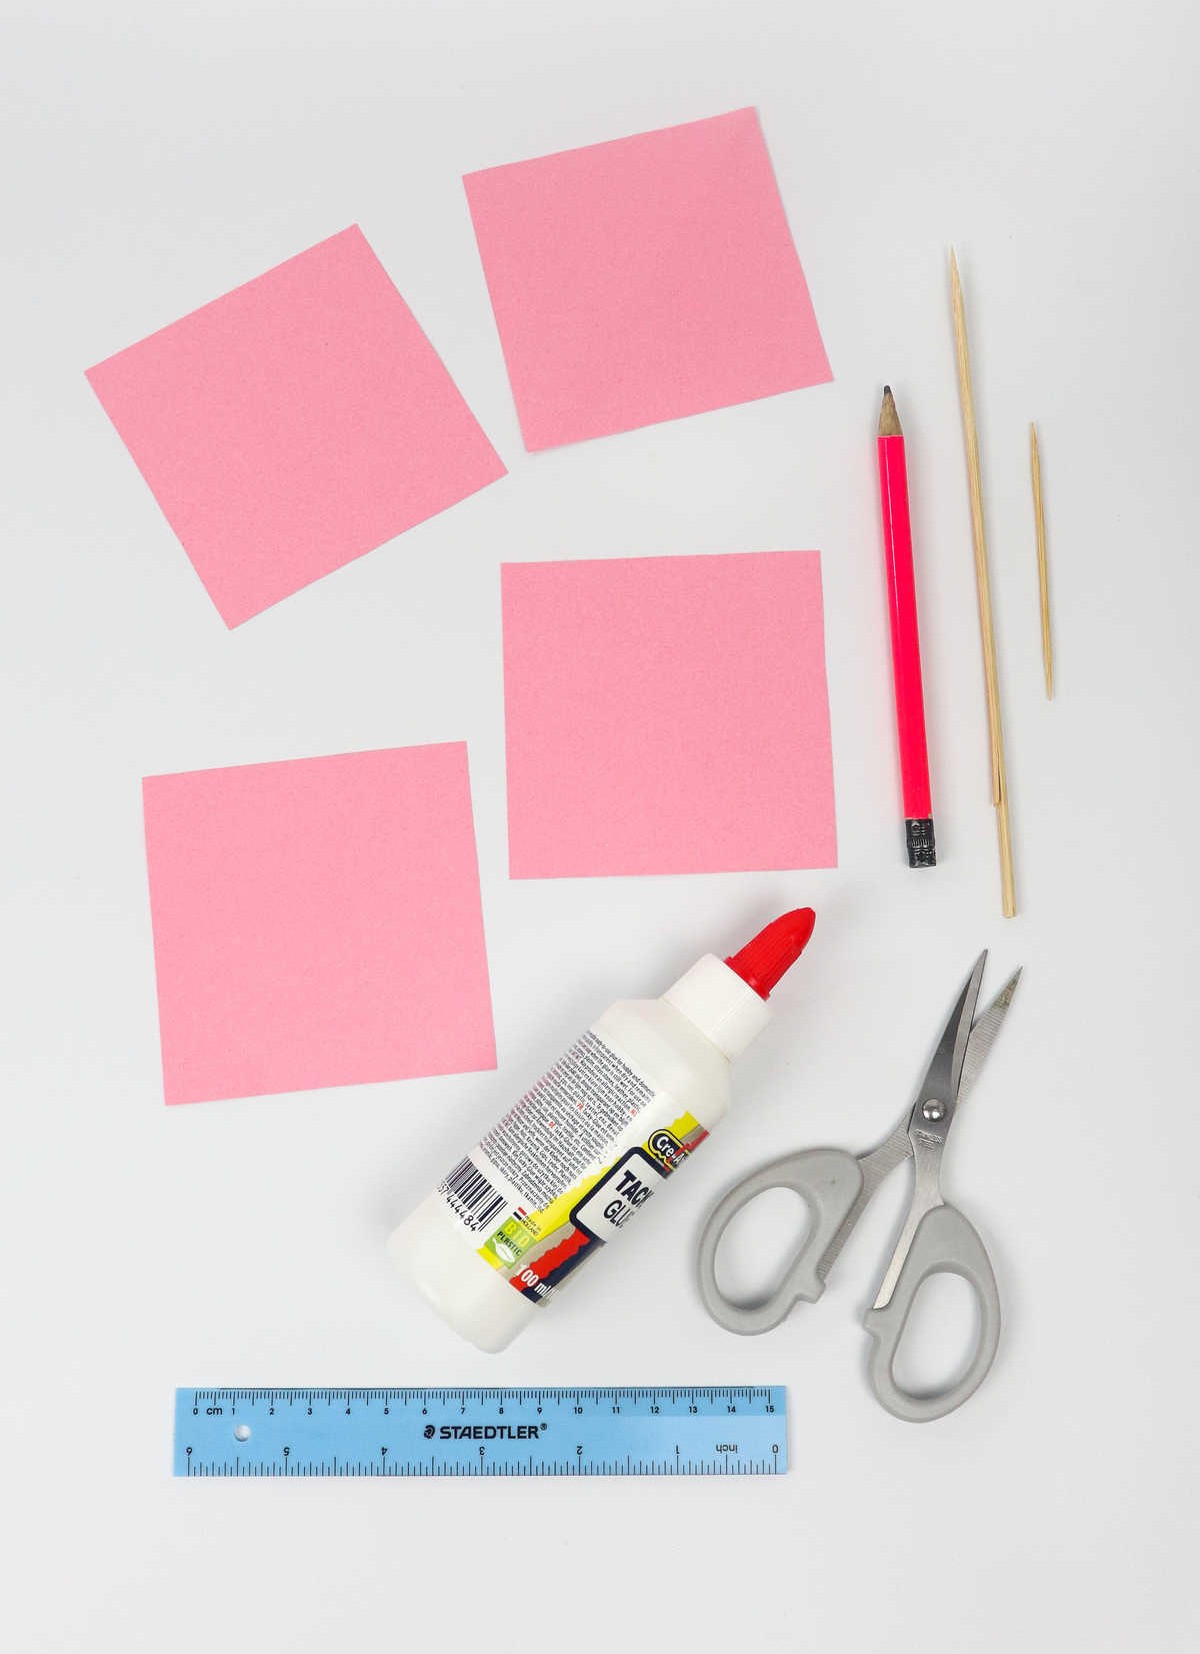
The creative corner of this DIY craft station is stocked with a variety of materials, including 4-inch by 4-inch paper squares, a pencil for jotting down ideas, scissors for precise cuts, a bottle of paper glue to hold everything in place, and three small but mighty tools: toothpicks, wooden skewers, and a ruler for measuring and drawing straight lines.
How to Make Paper Roses
Before diving into the process, it’s crucial to decide on the essential details that will shape your paper creations. This involves selecting the type and color of paper that will ultimately influence the appearance of the flowers you’ll be making. For instance, if you’re using a certain shade of blue paper, the resulting roses might have a more calming effect than those made with red paper. By considering these factors, you can better plan your project and achieve the desired outcome.
Step 1

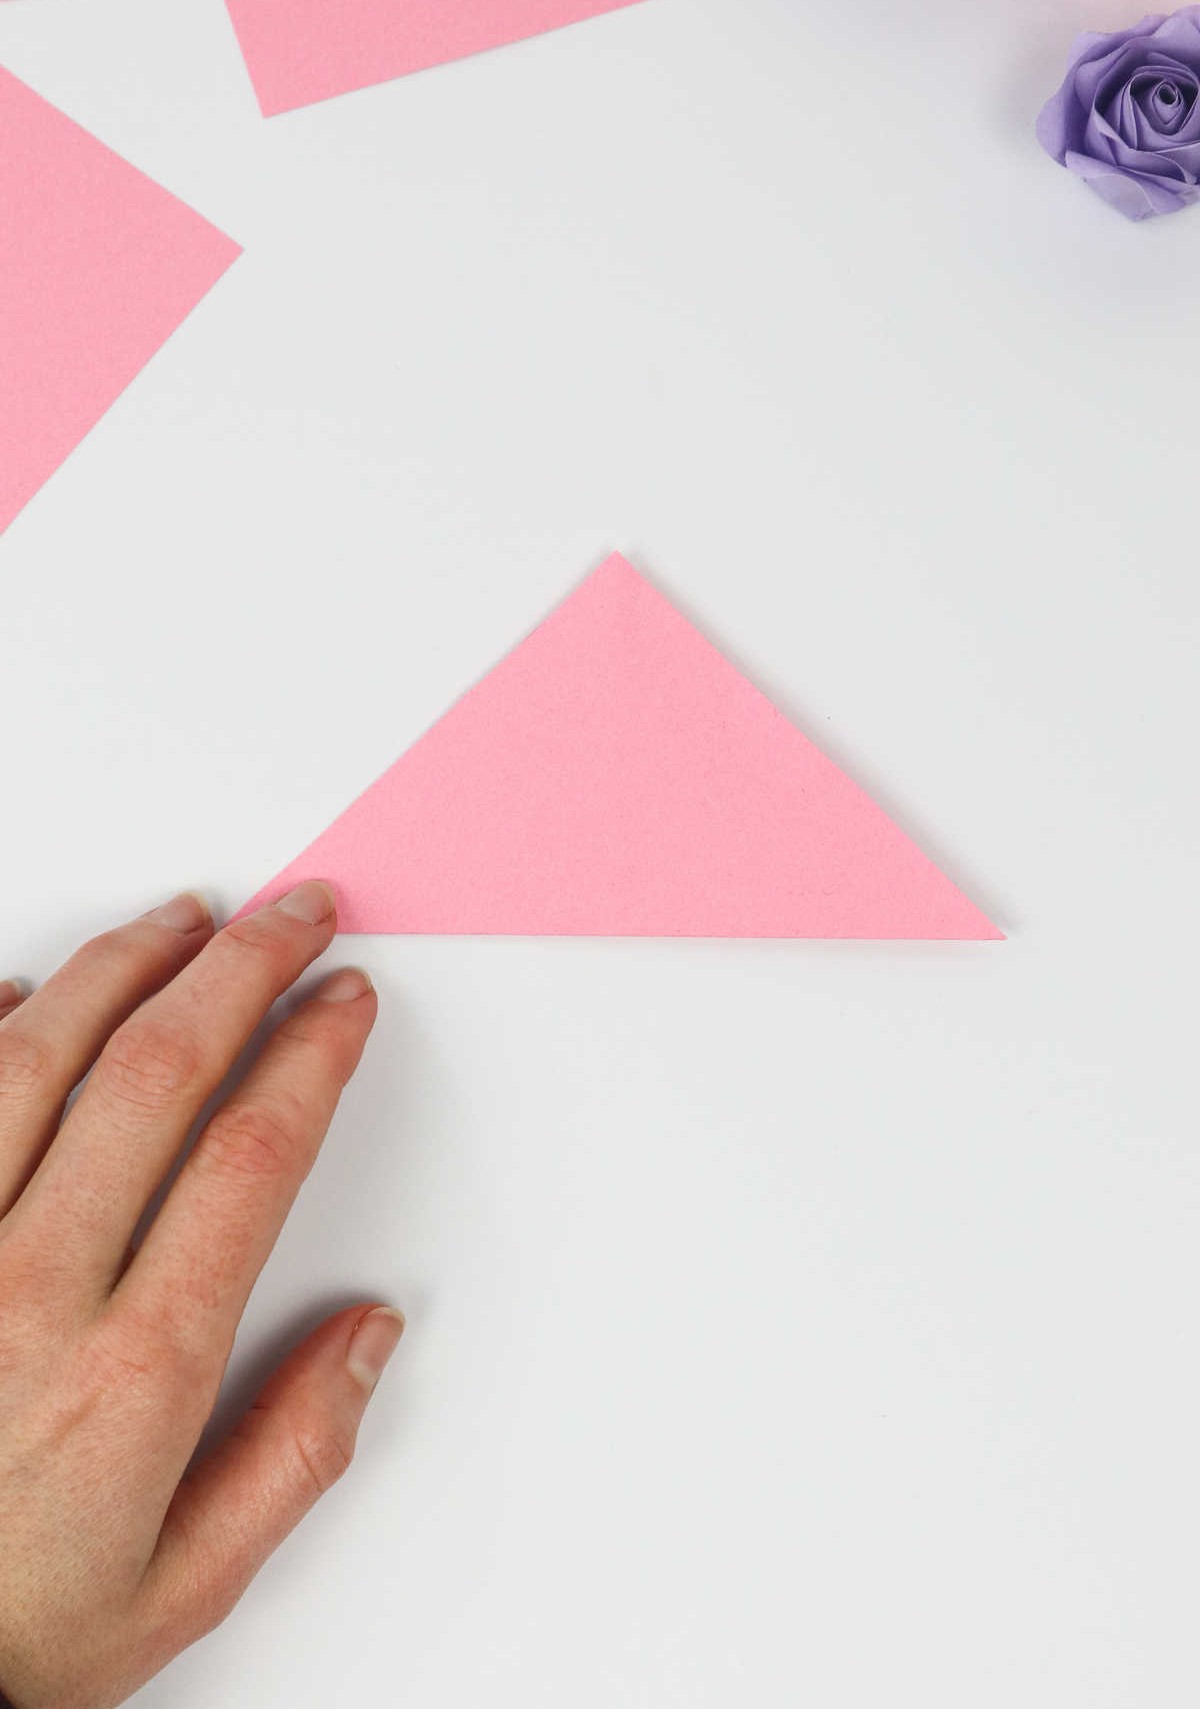
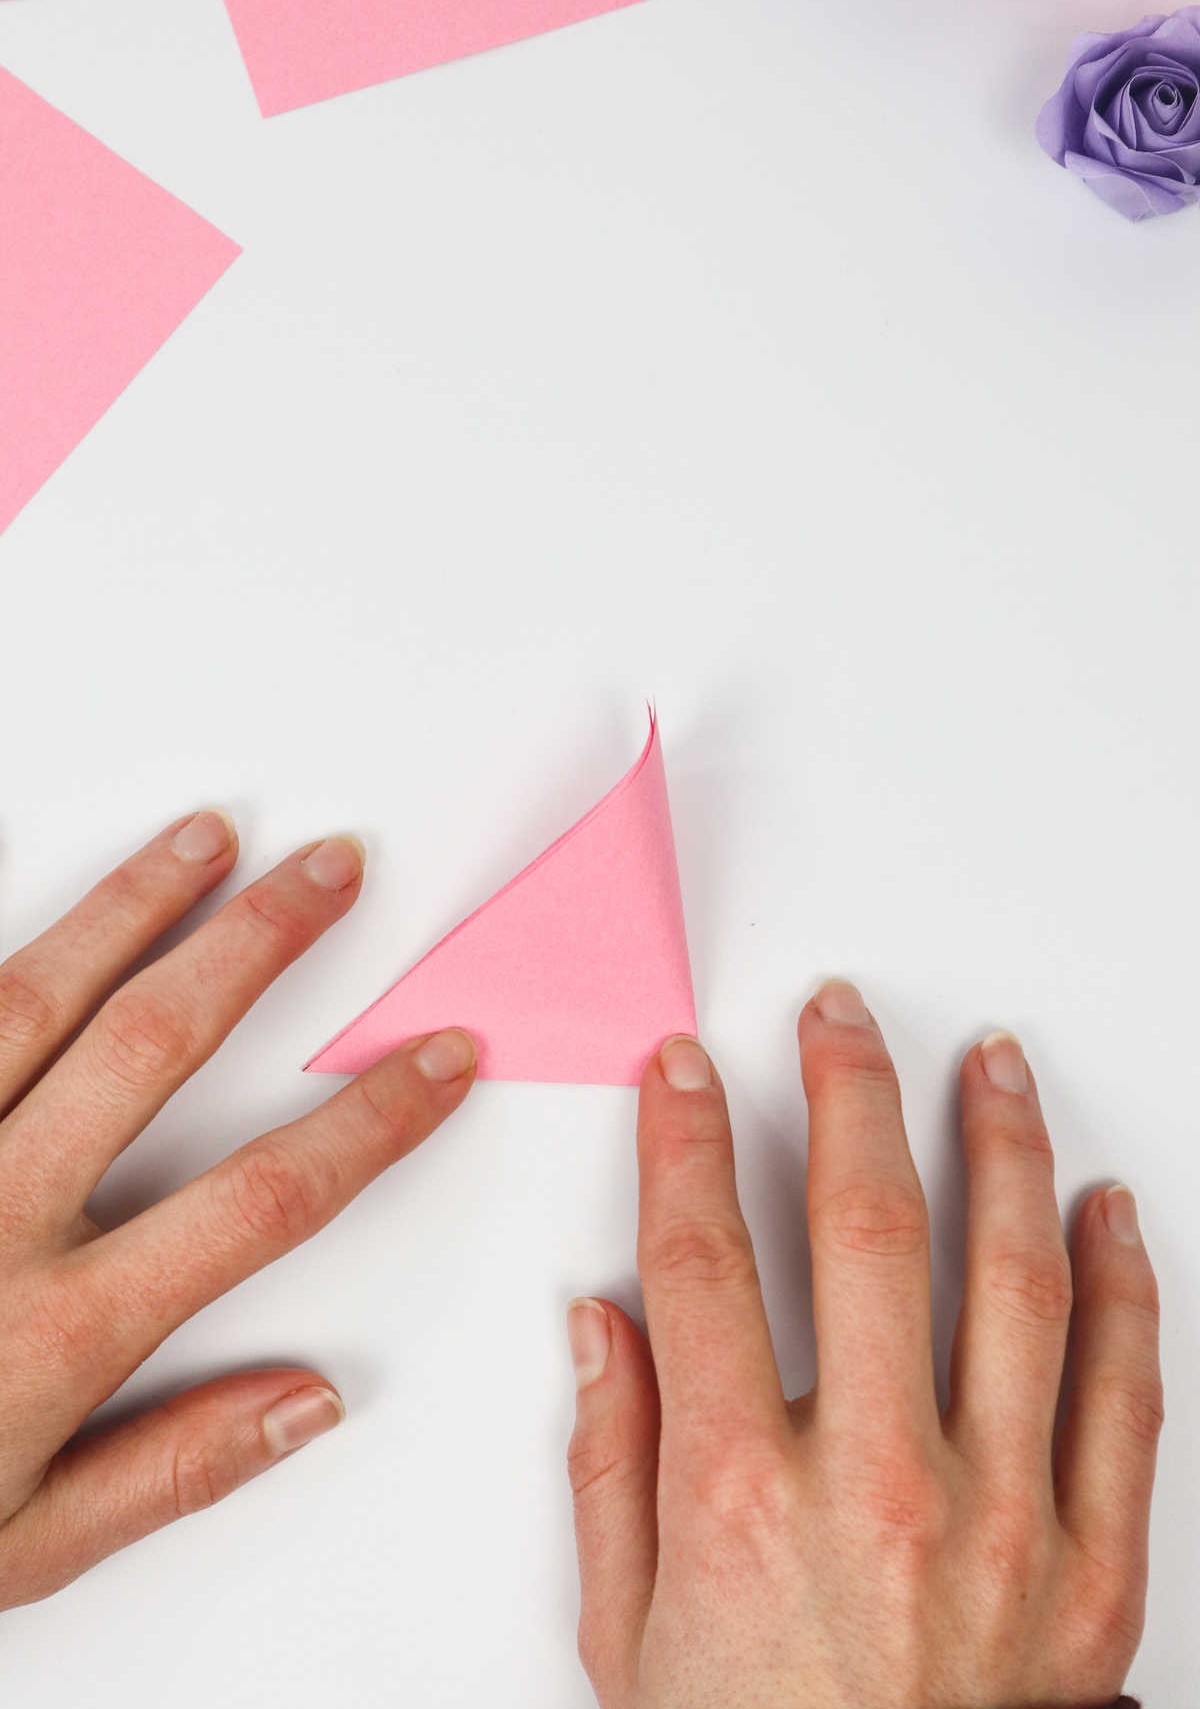
Begin by spreading out your paper on a flat surface. Start by folding one corner towards the opposite corner, creating a triangular shape. Next, fold this triangle in half once more to produce an even smaller triangle. To complete the process, unfold the most recent crease you’ve created and you’ll be left with a perpendicular line running along the center of your folded paper.
Step 2
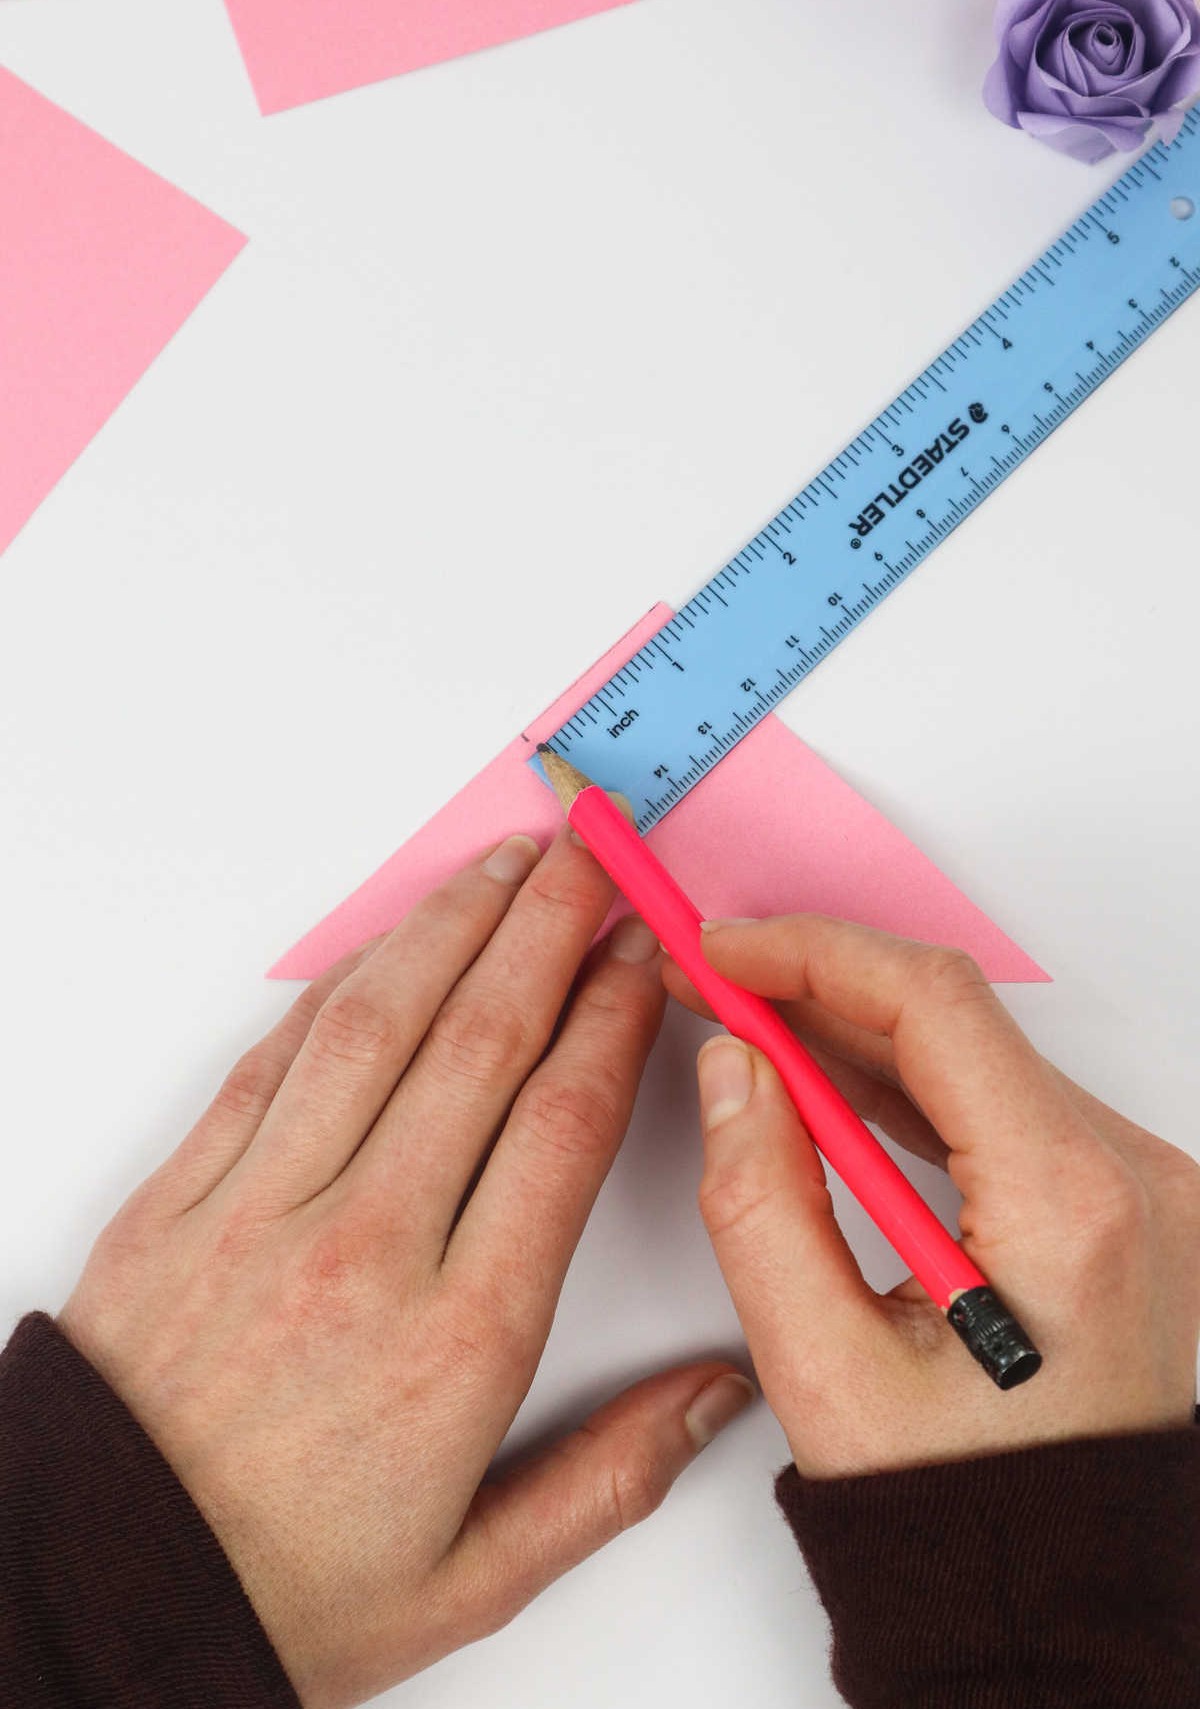
Start by creating a reference point on one long edge of the paper. Mark an area about 1.5 inches from the top with a pencil or pen. This will serve as your guide for the subsequent folds. Next, reach over to the opposite corner and gently pull it towards the marking you just made, applying even pressure to create a crisp crease in the paper. Repeat this process on the other long edge of the paper, making another mark 1.
5 inches from the top and folding the opposing end up to meet it, ensuring a sharp fold as well.
Step 3
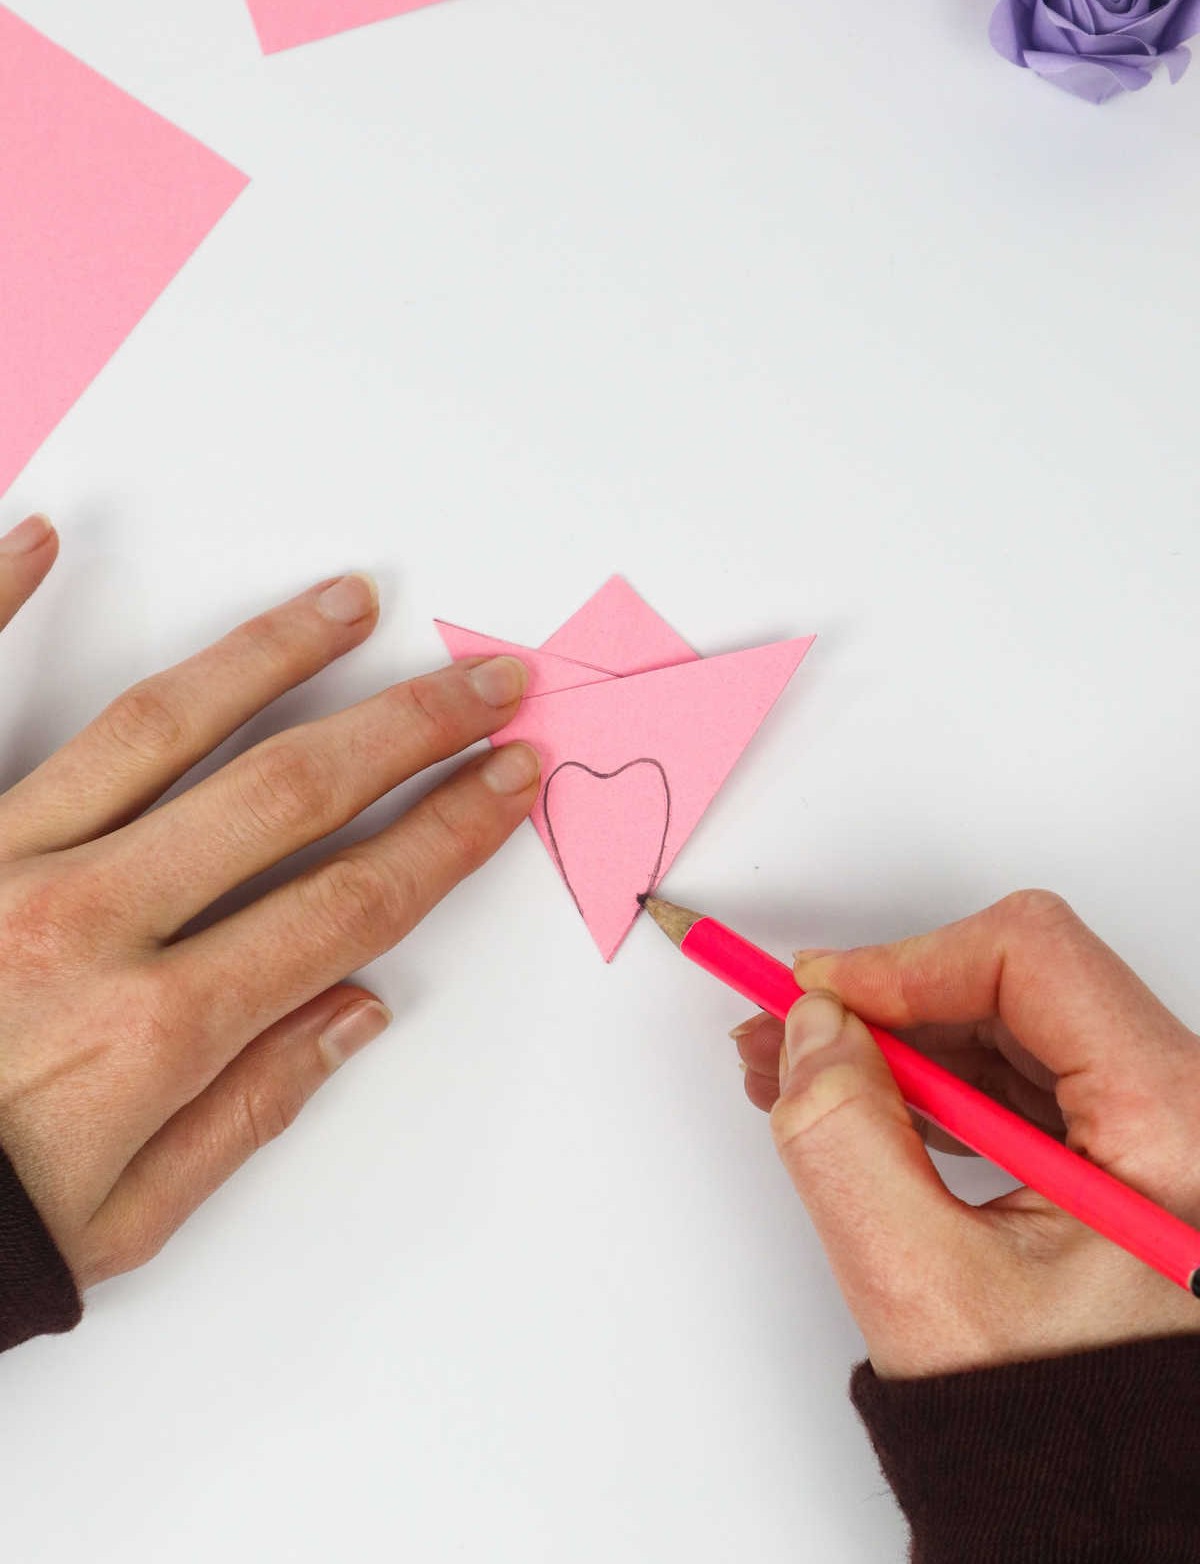
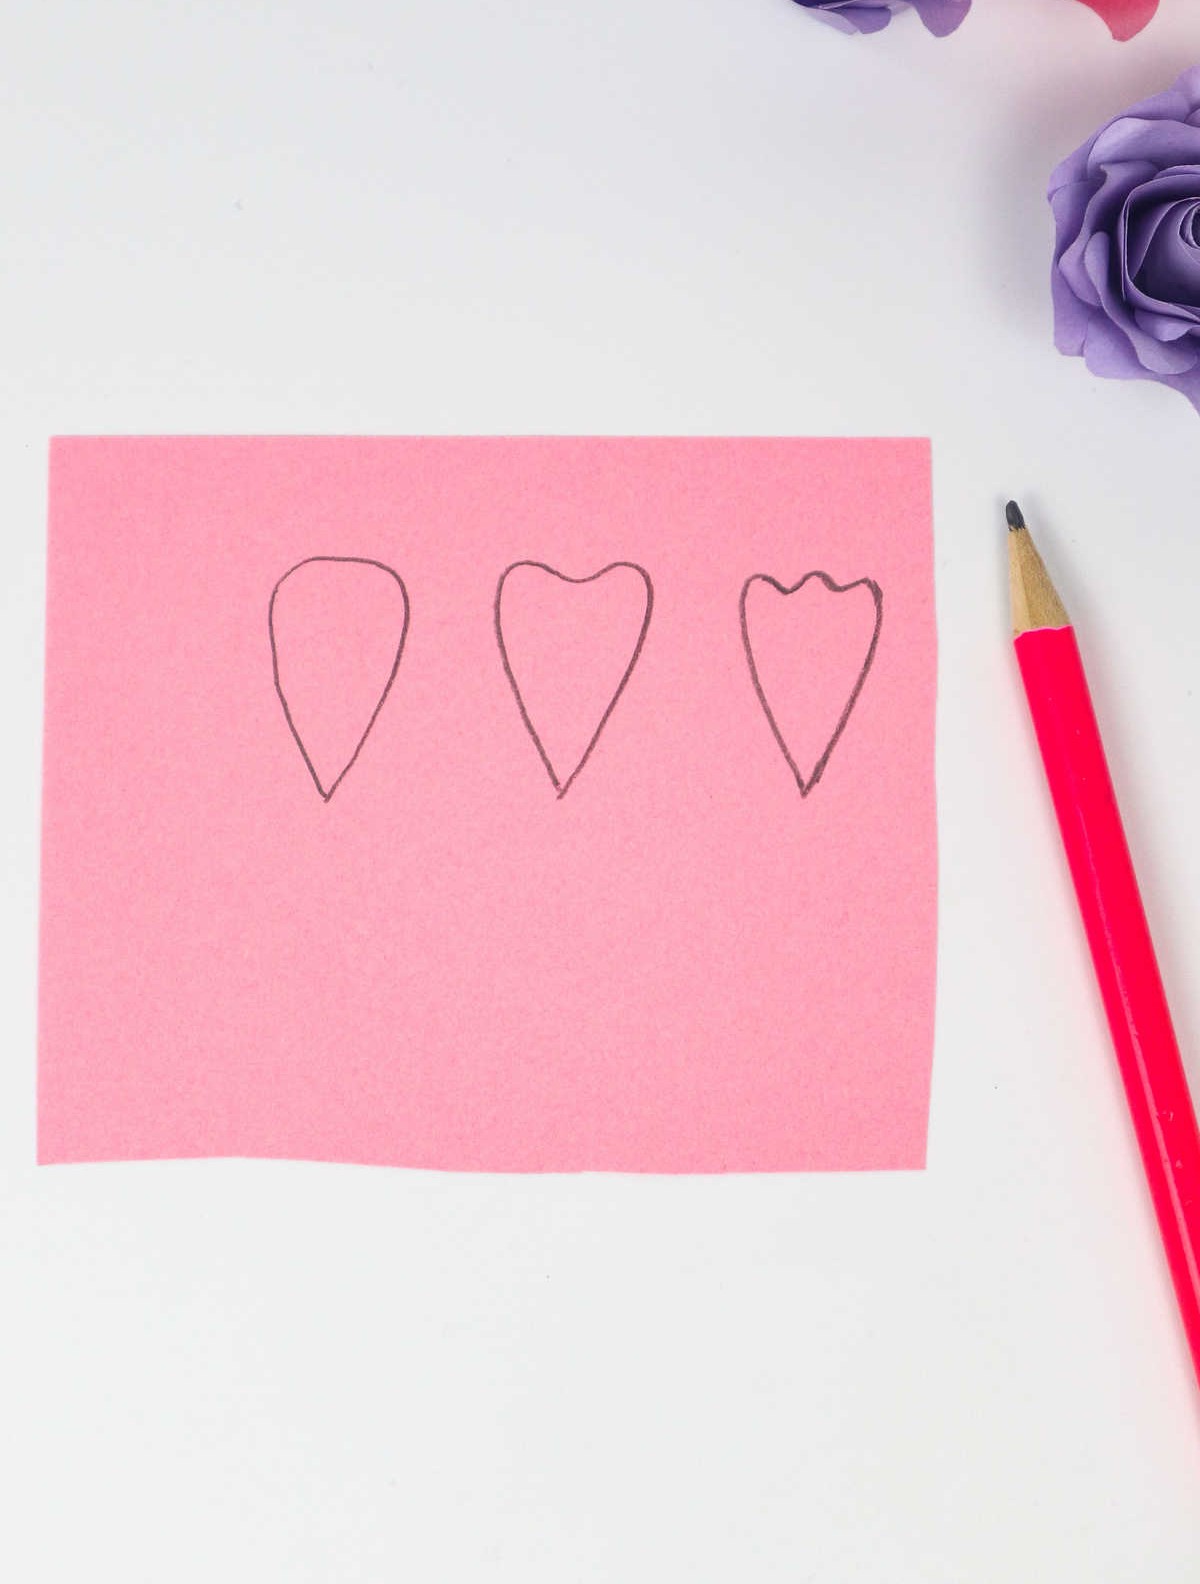
As you revisit your paper, take out your pencil and begin by drawing a small petal at the bottom. This subtle yet creative step marks the starting point of your artistic journey. Feel free to express yourself through varying petal shapes, sizes, and designs – the possibilities are endless.
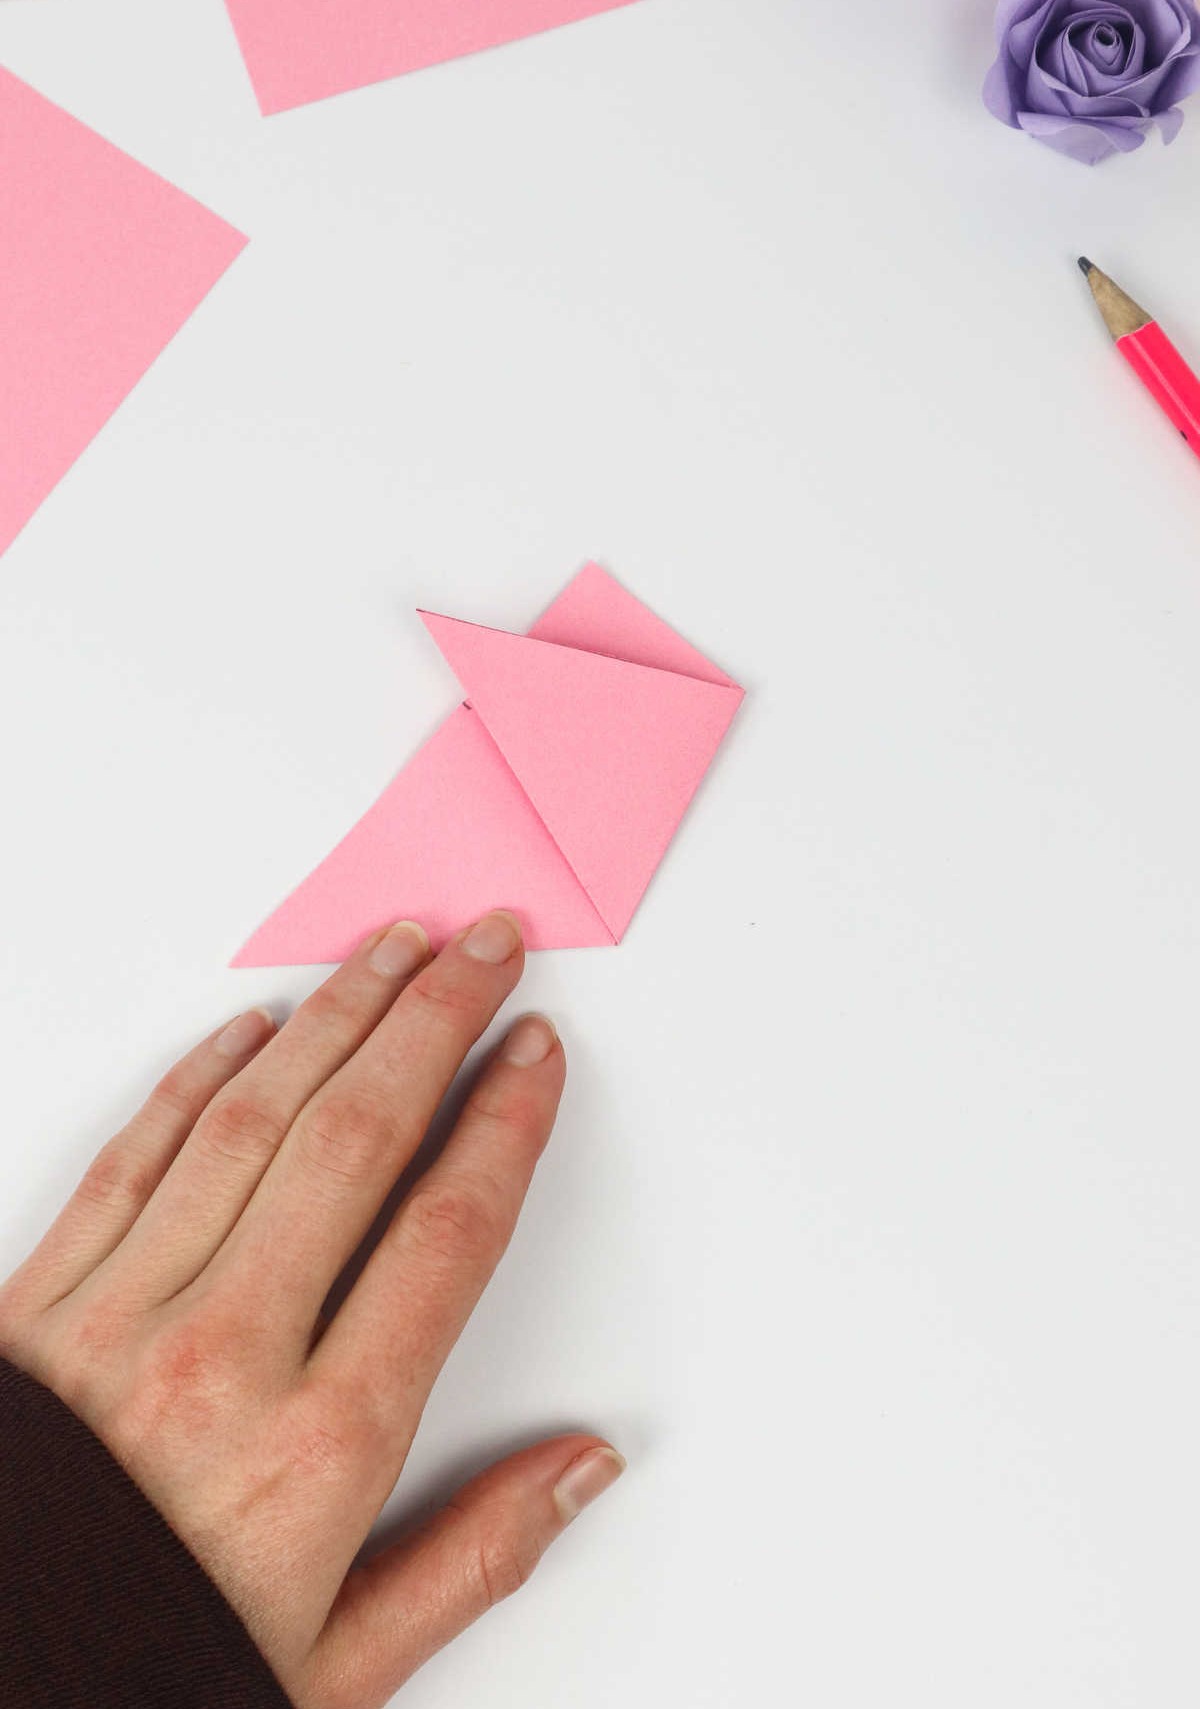
Step 4
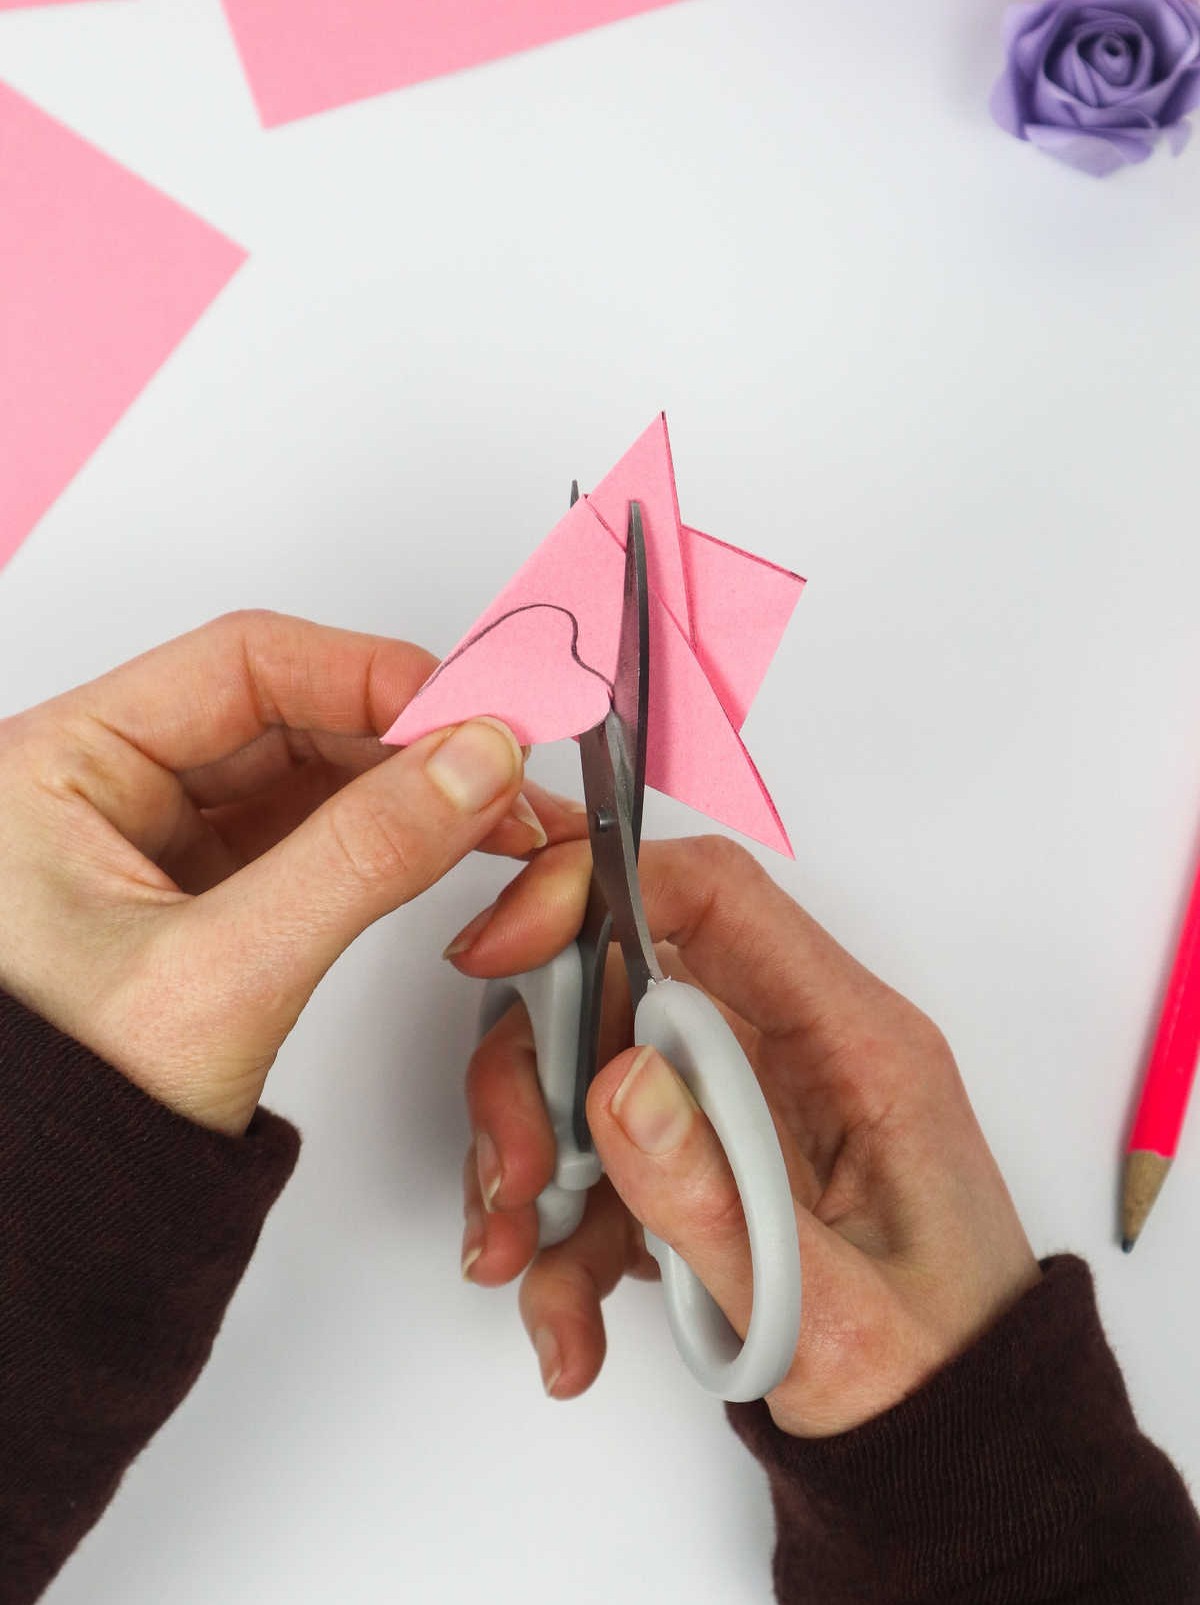
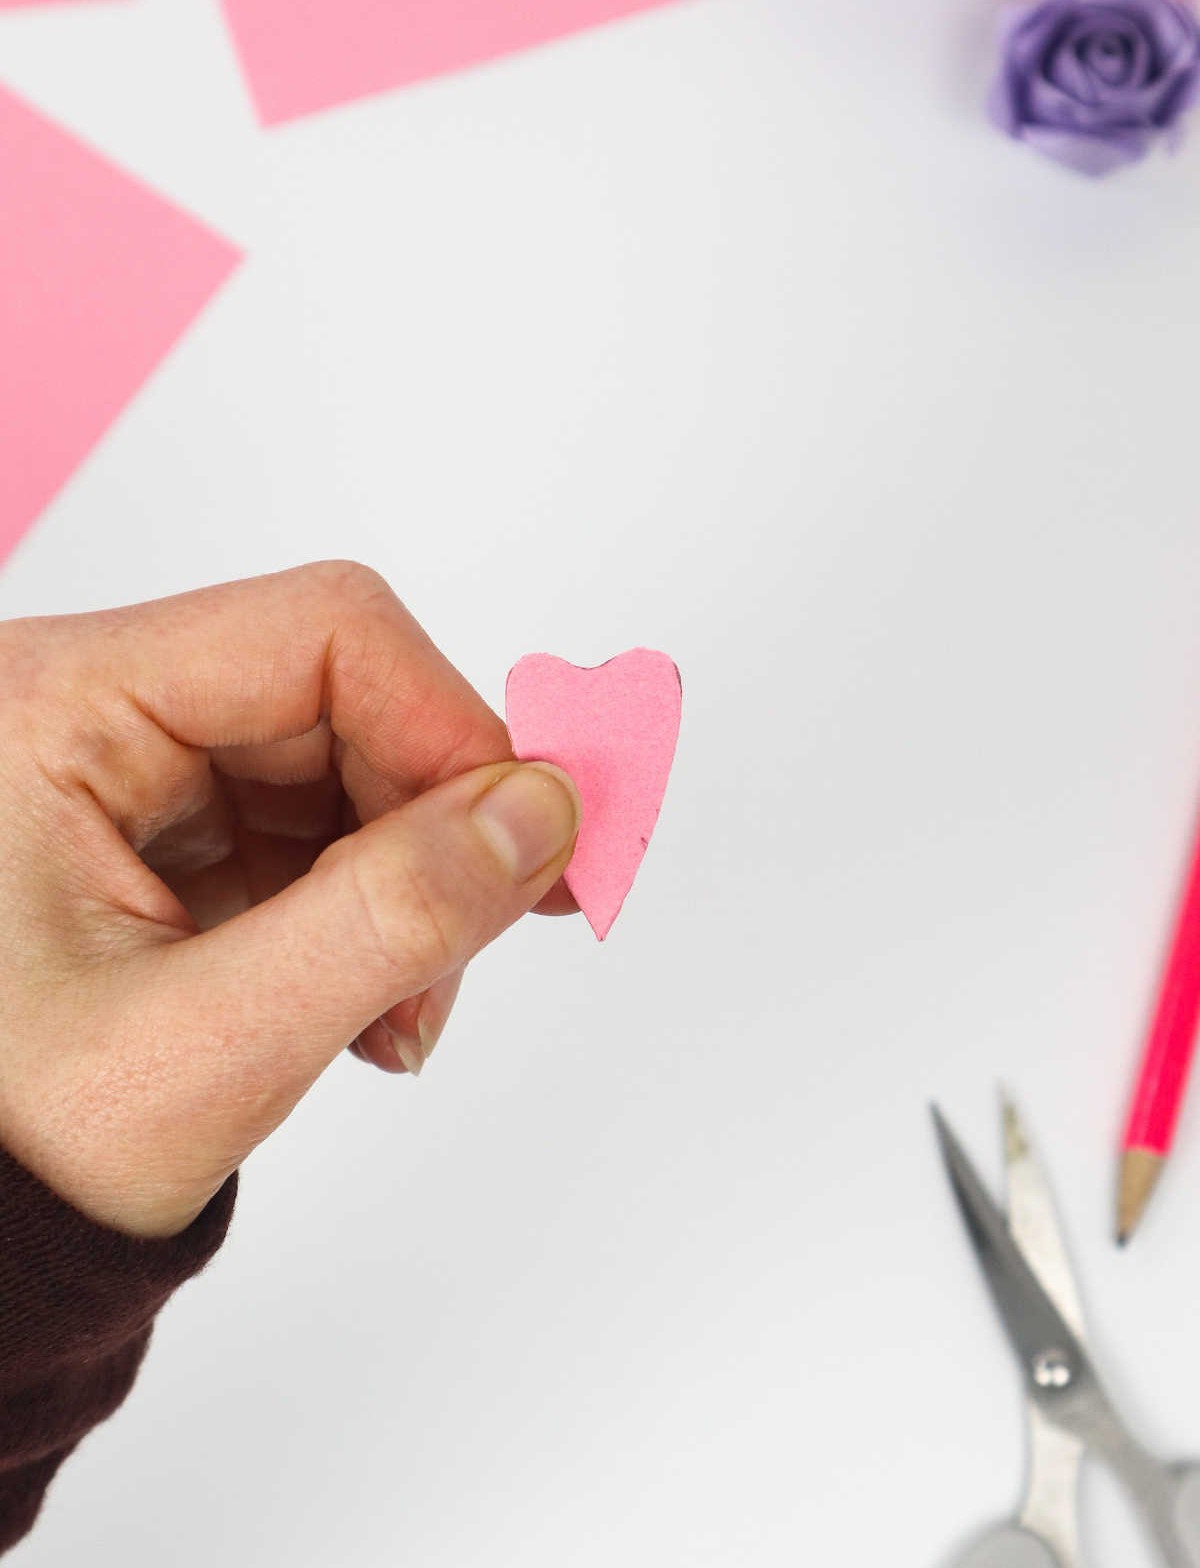
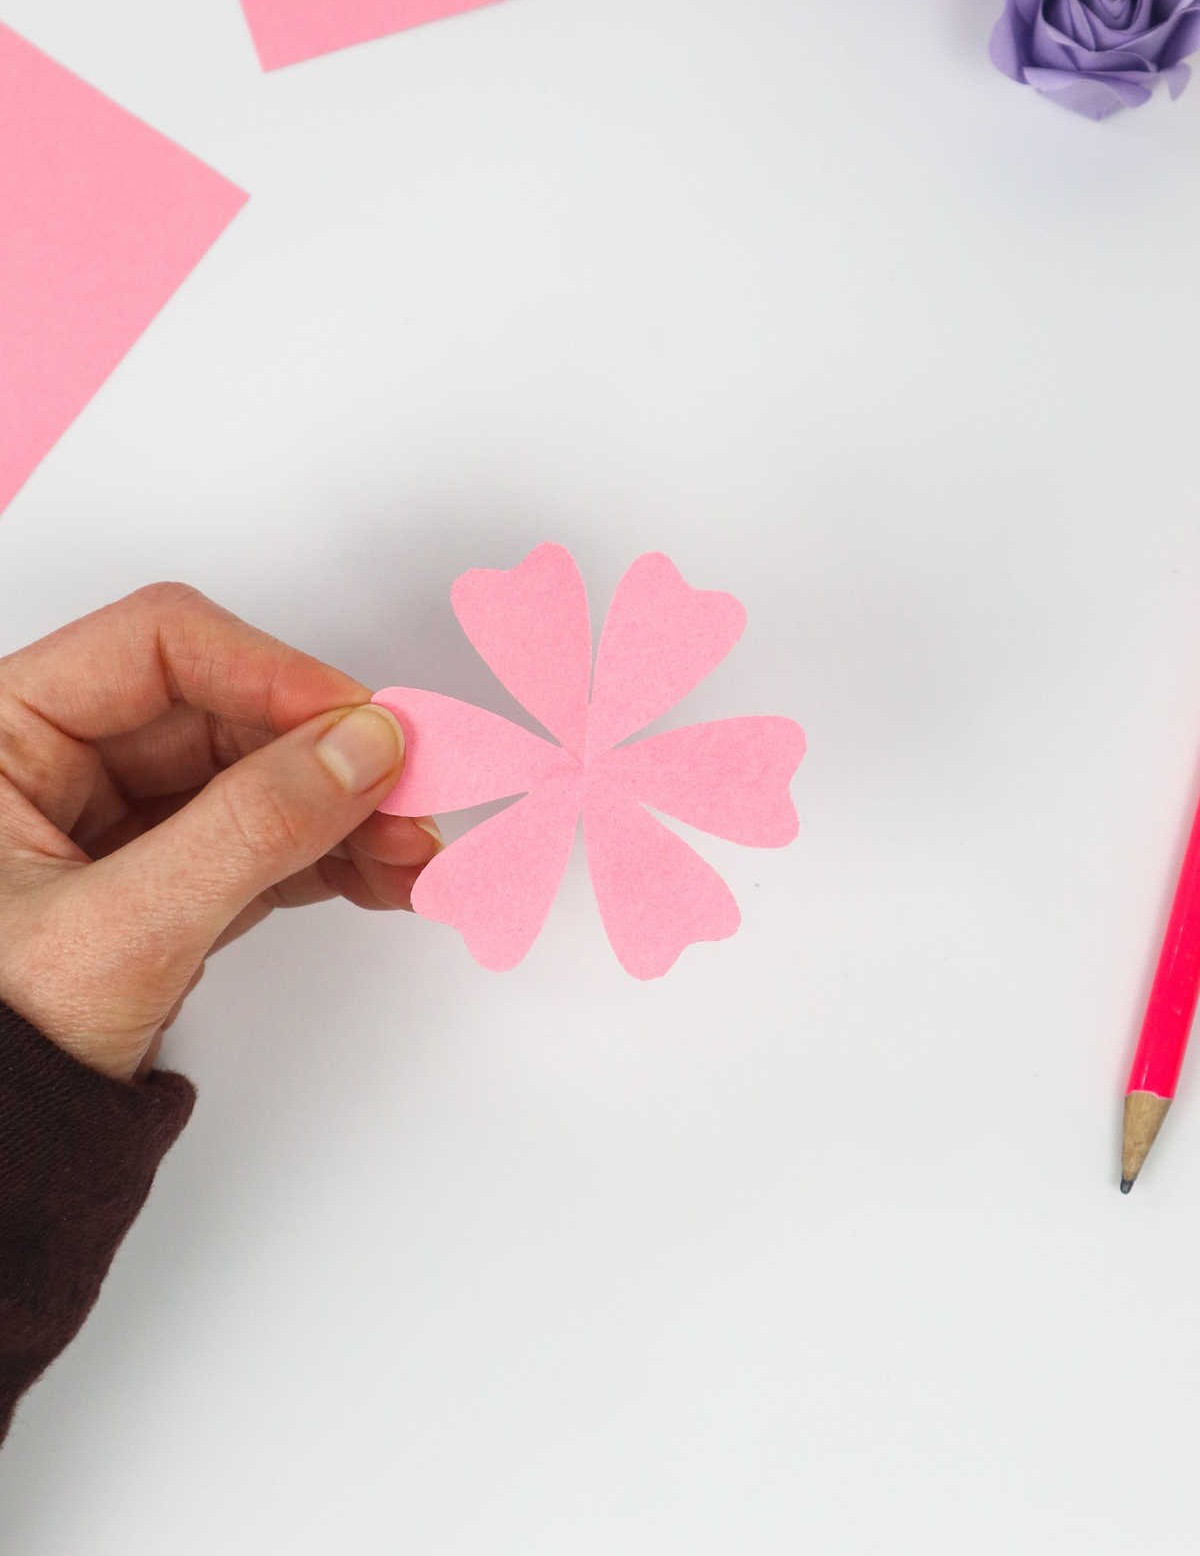
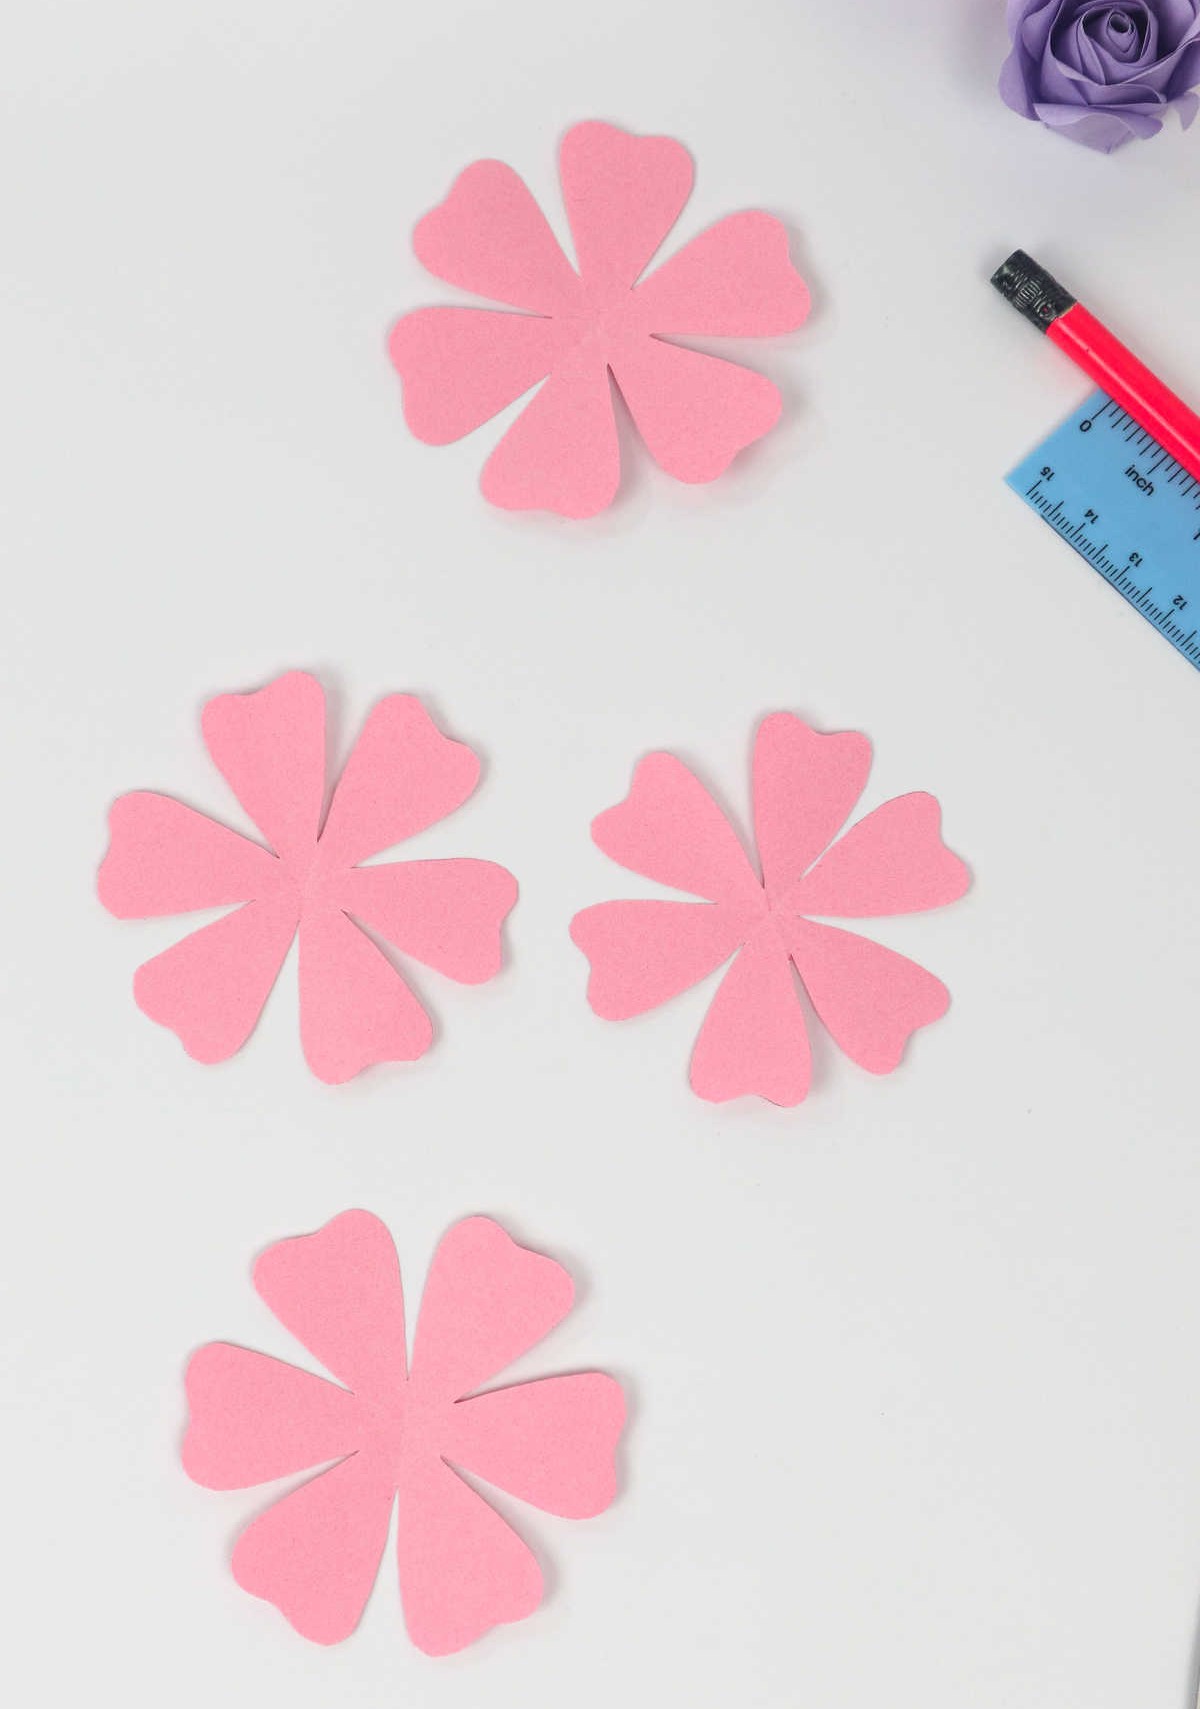
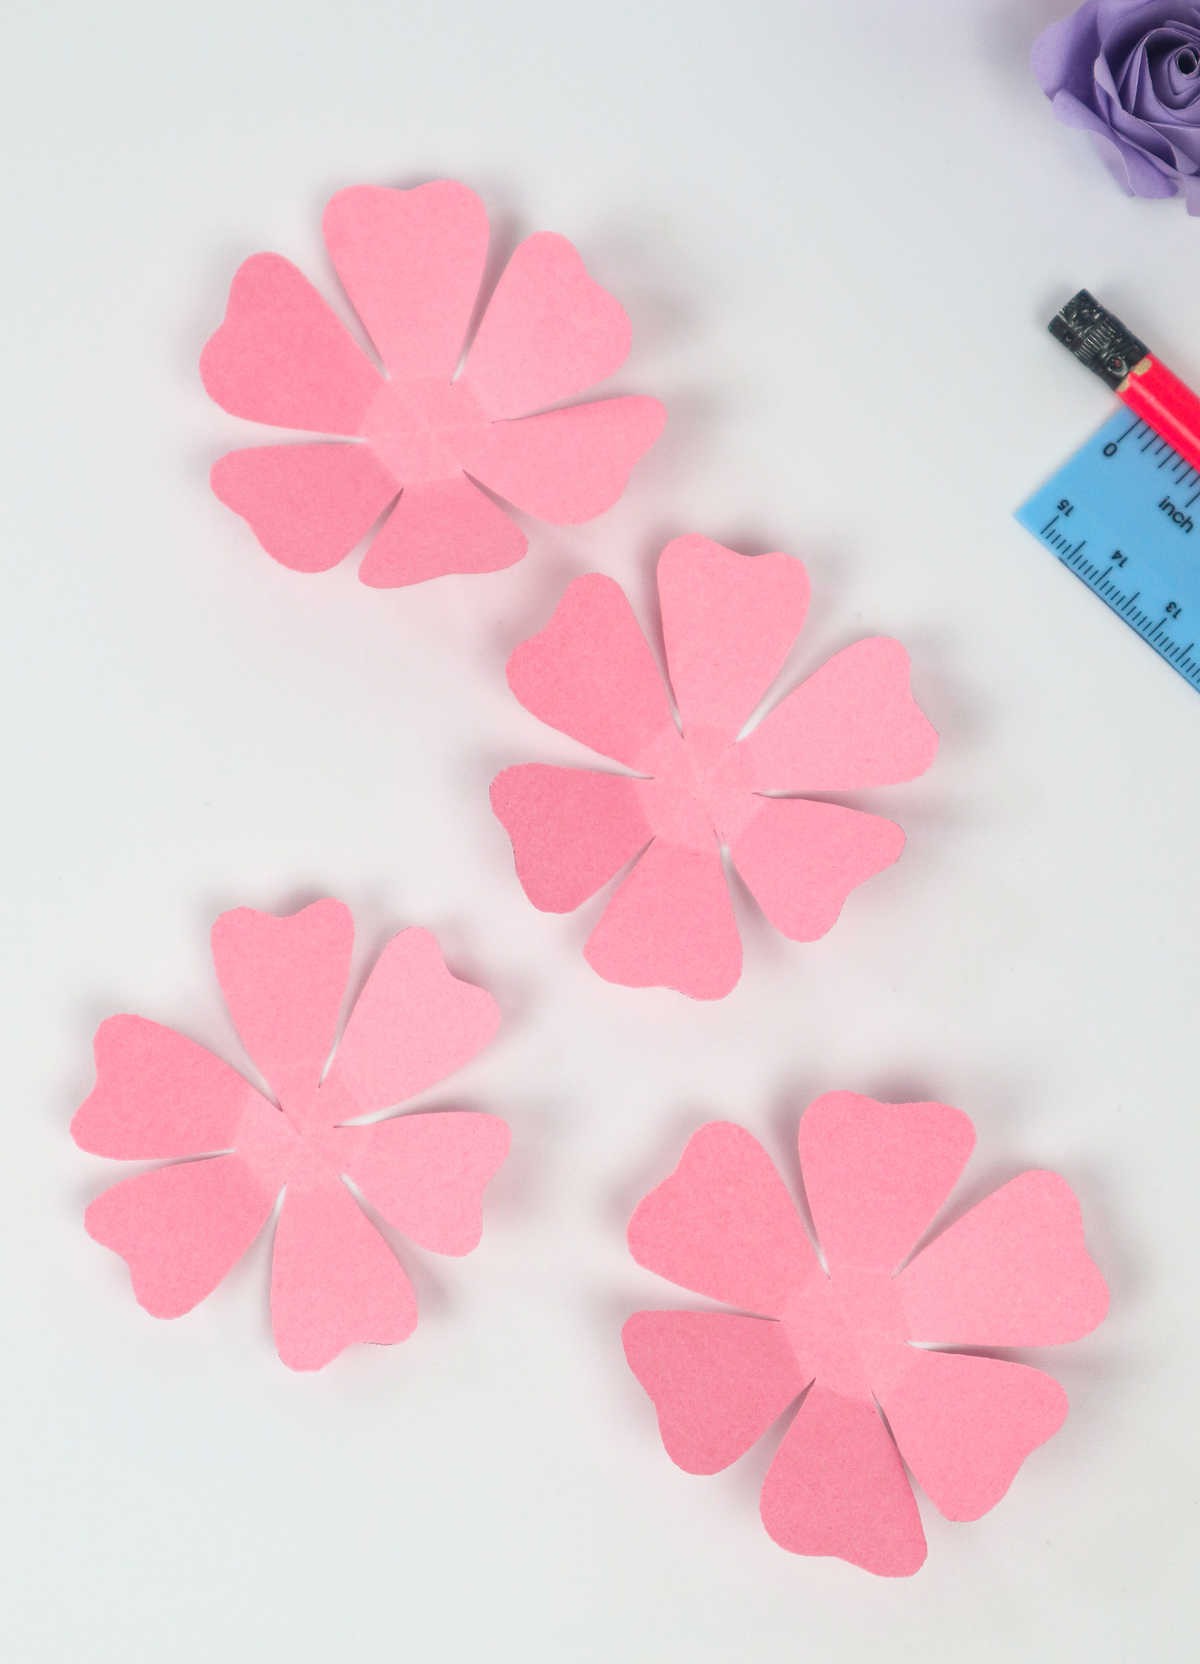
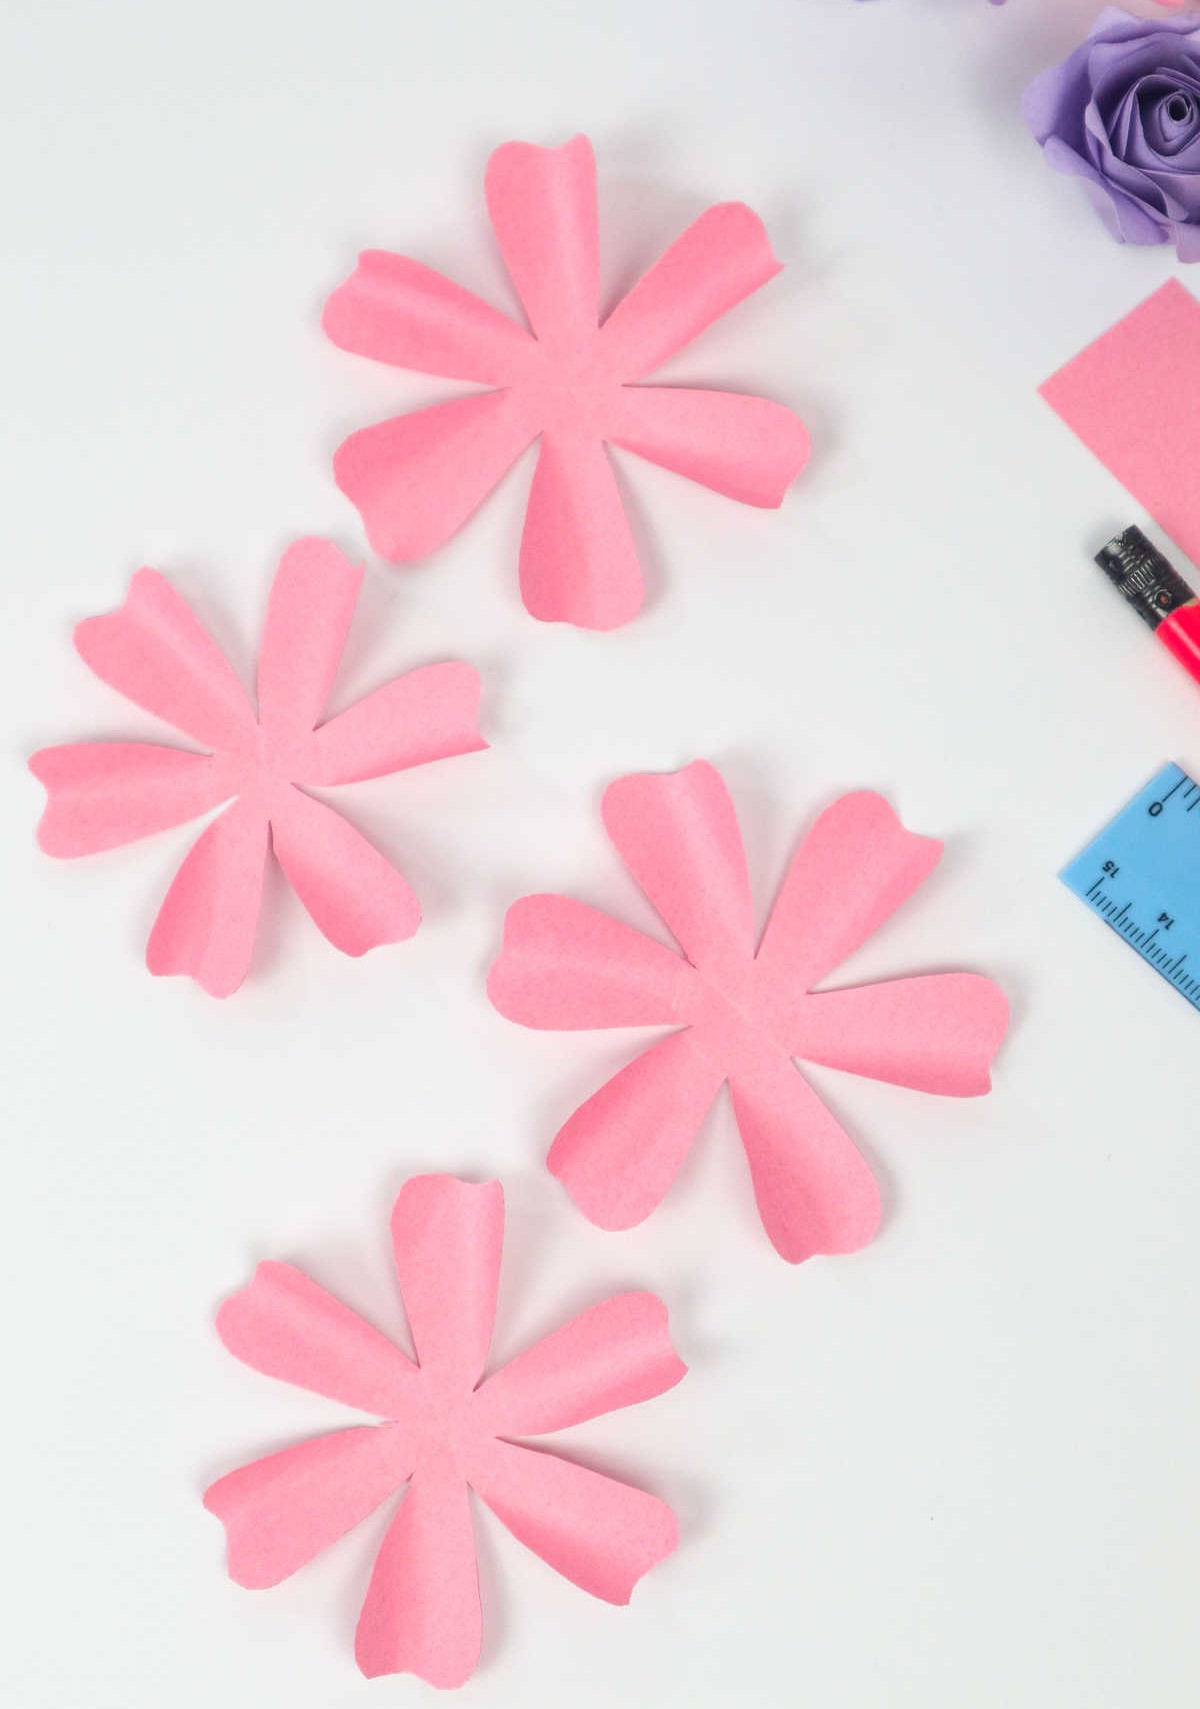
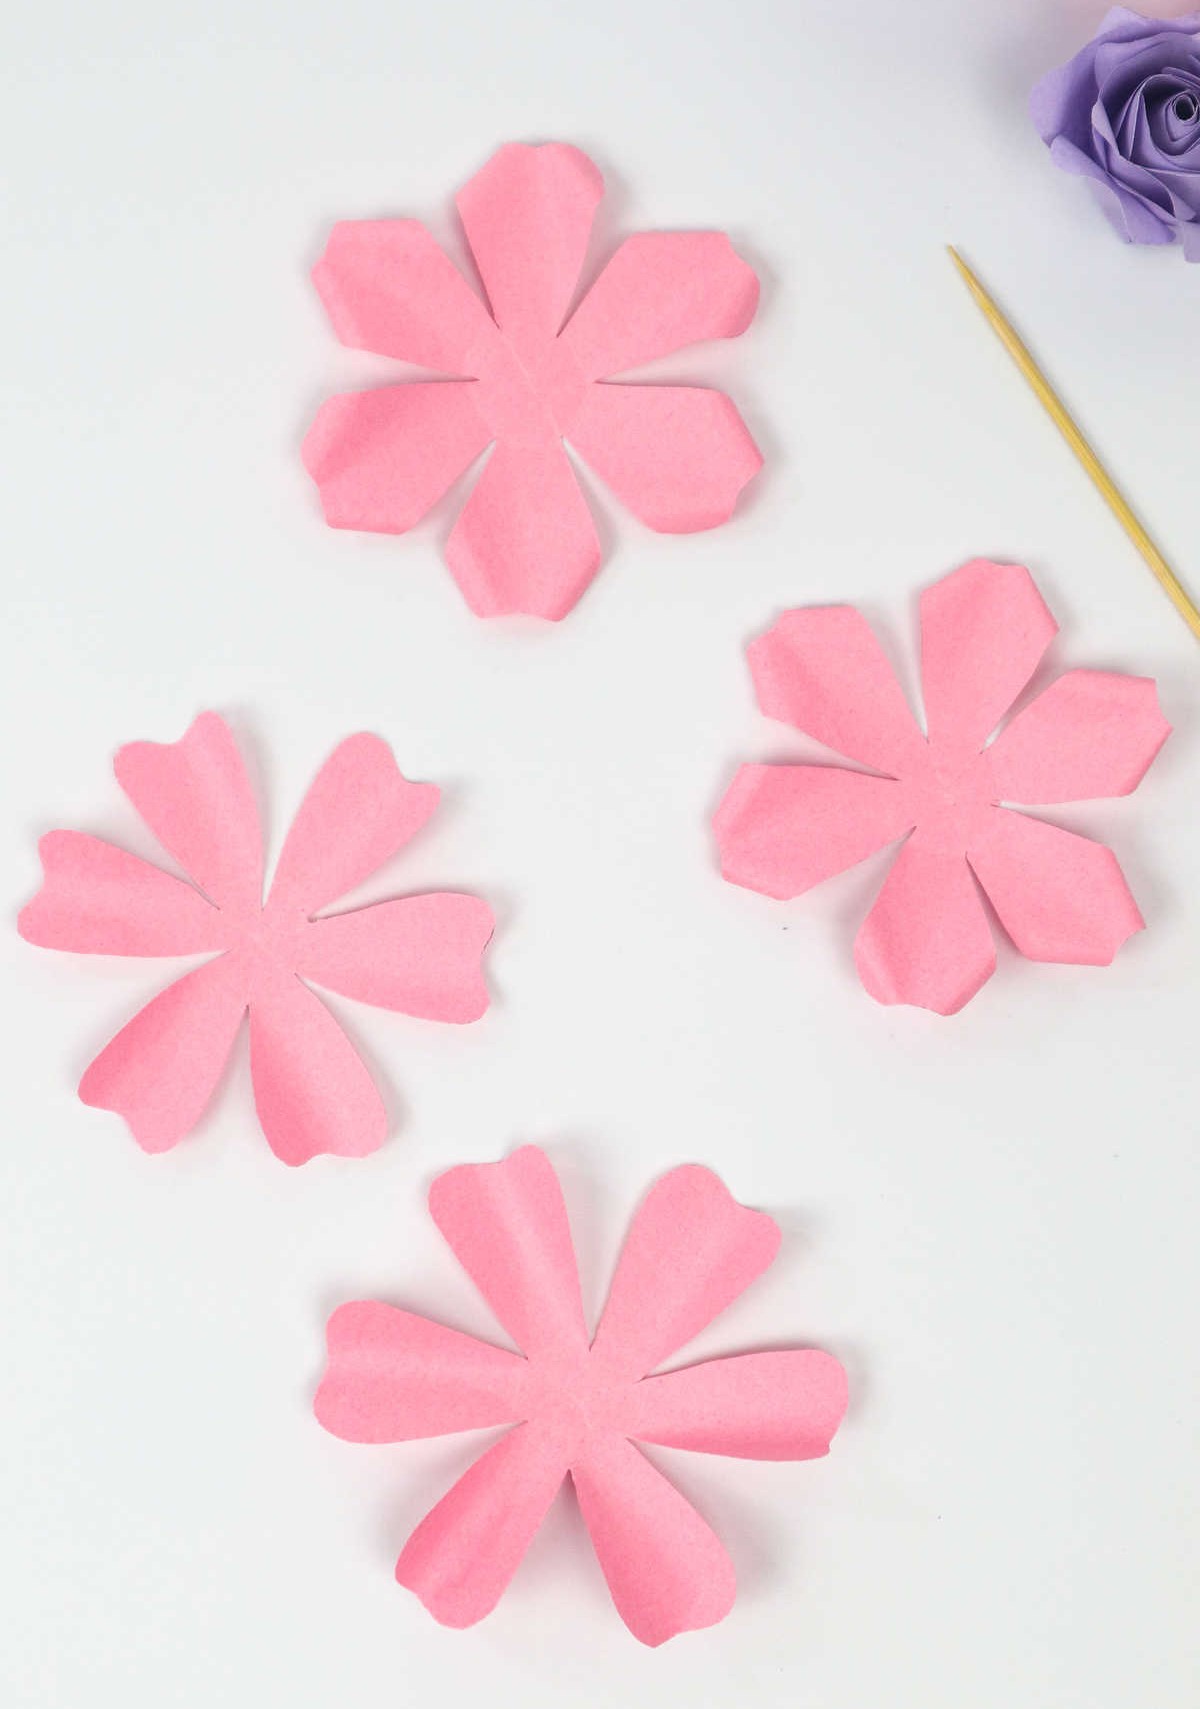
Take a pair of scissors and carefully cut along the petal outline you drew earlier, creating a precise shape. As you open out each cut piece, you’ll notice it forms a beautiful flower with six delicate petals. To achieve uniformity, create three more identical flowers before proceeding to the next step. Ensure all four pieces mirror one another in terms of size and shape.
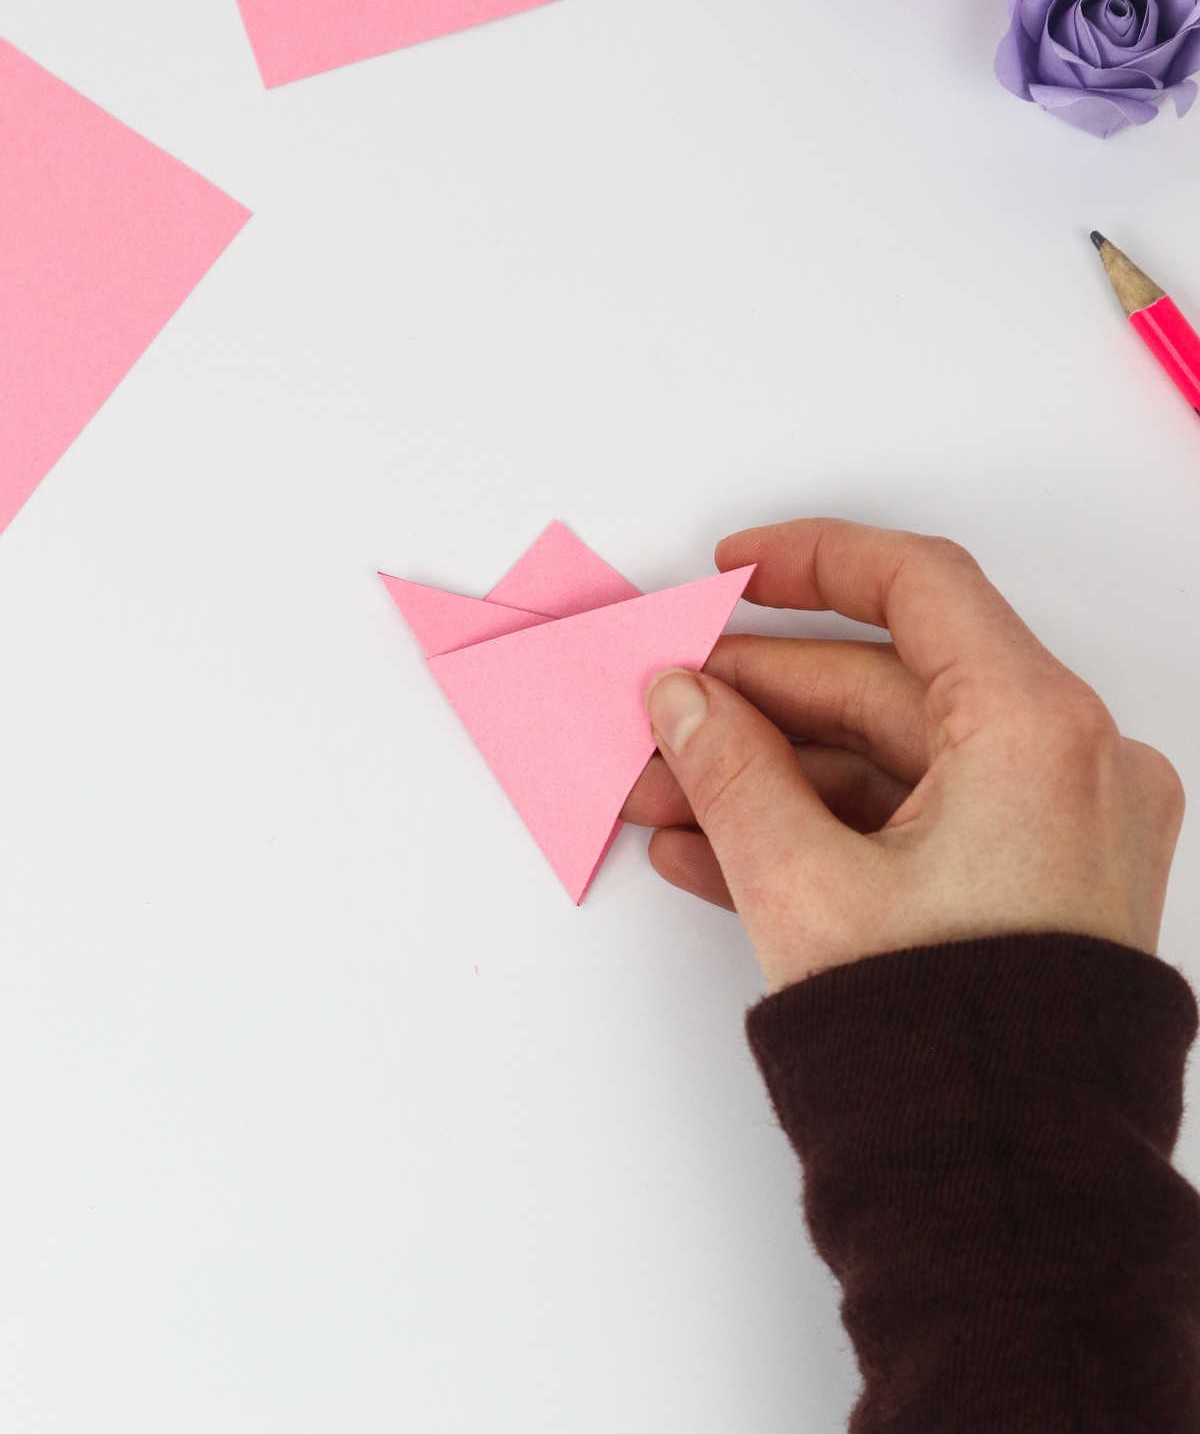
Step 5

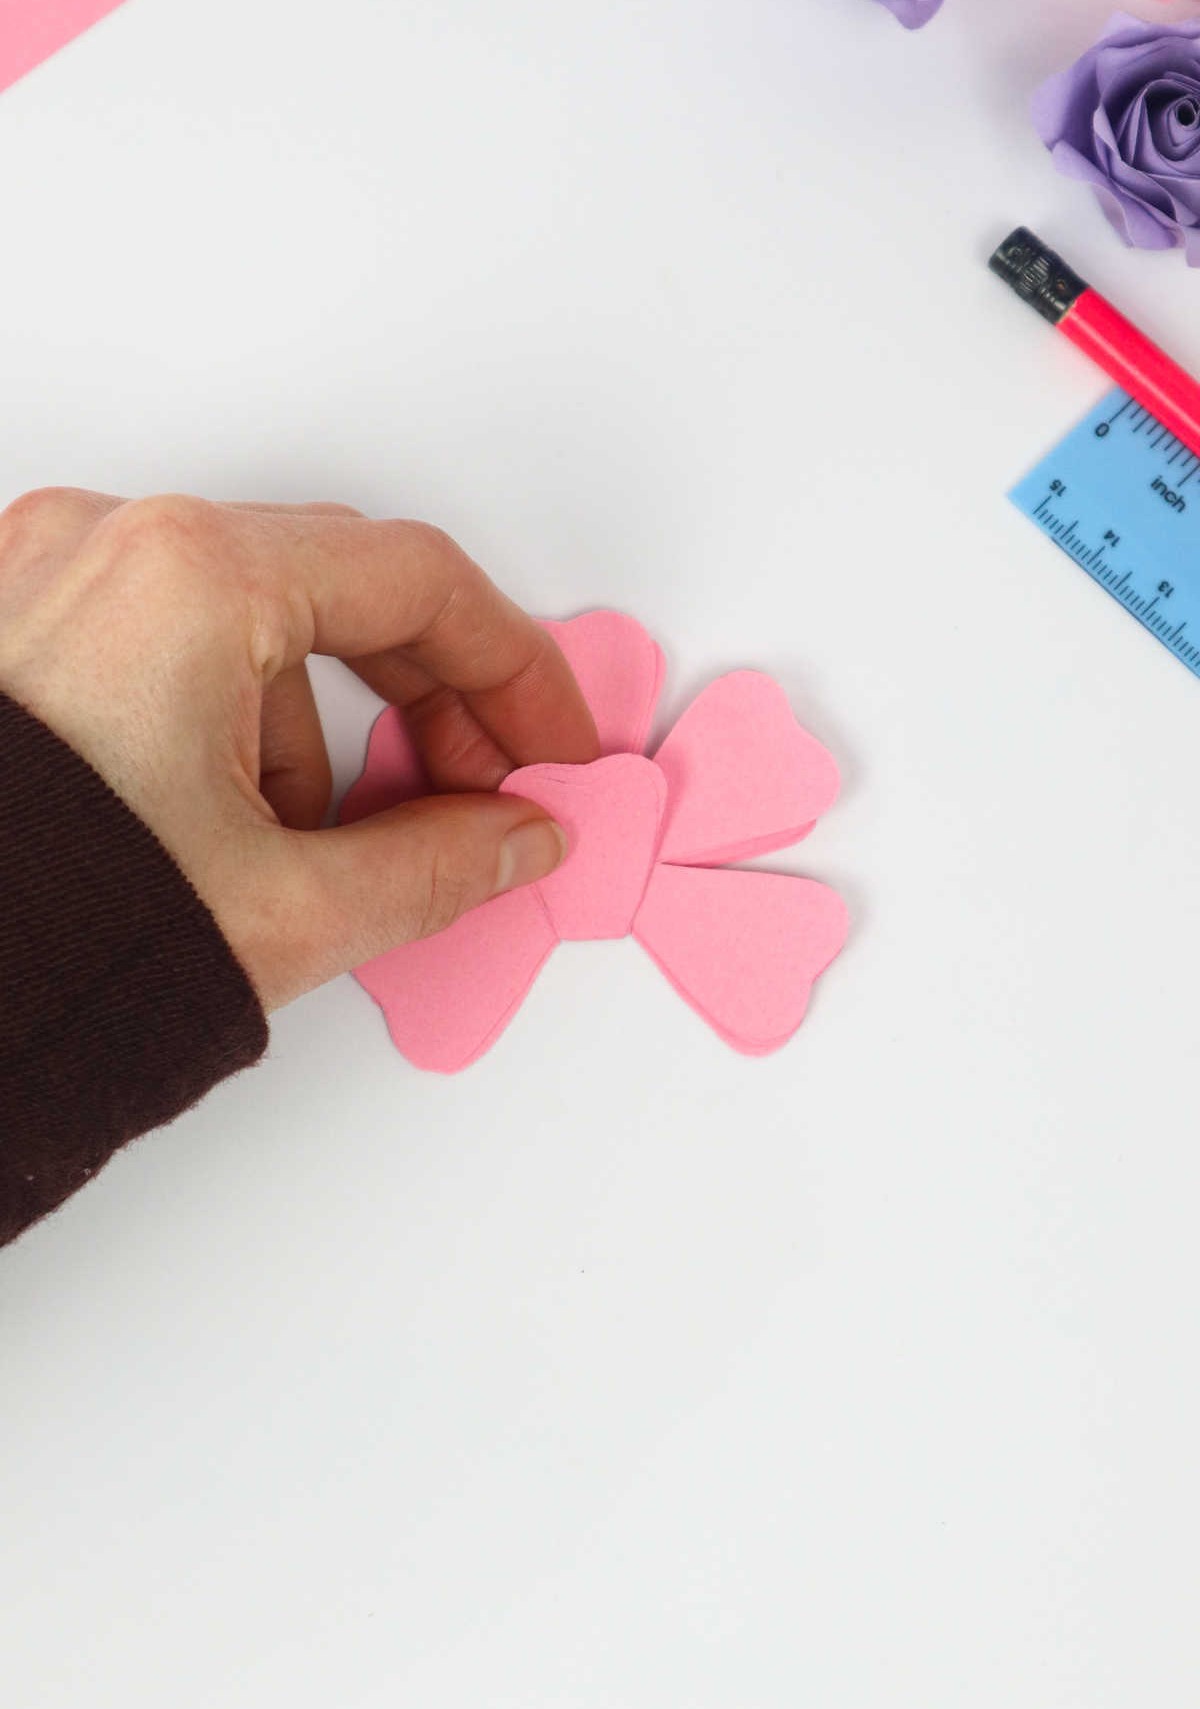
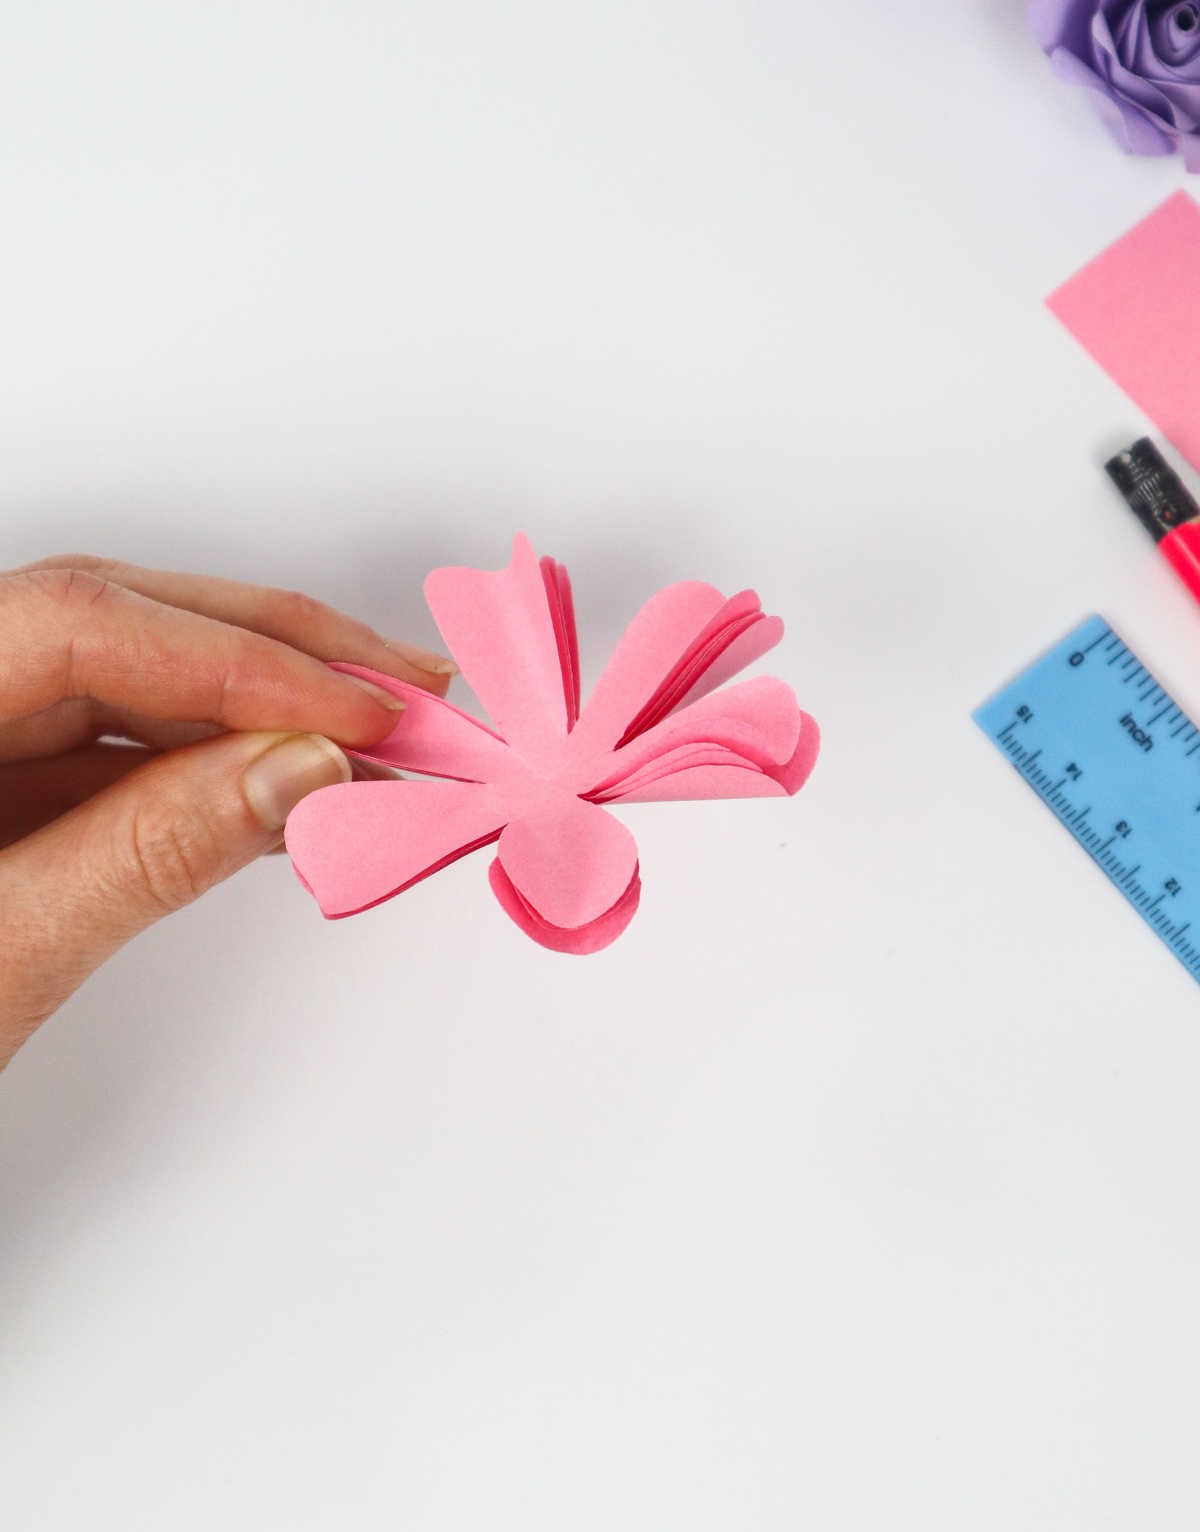
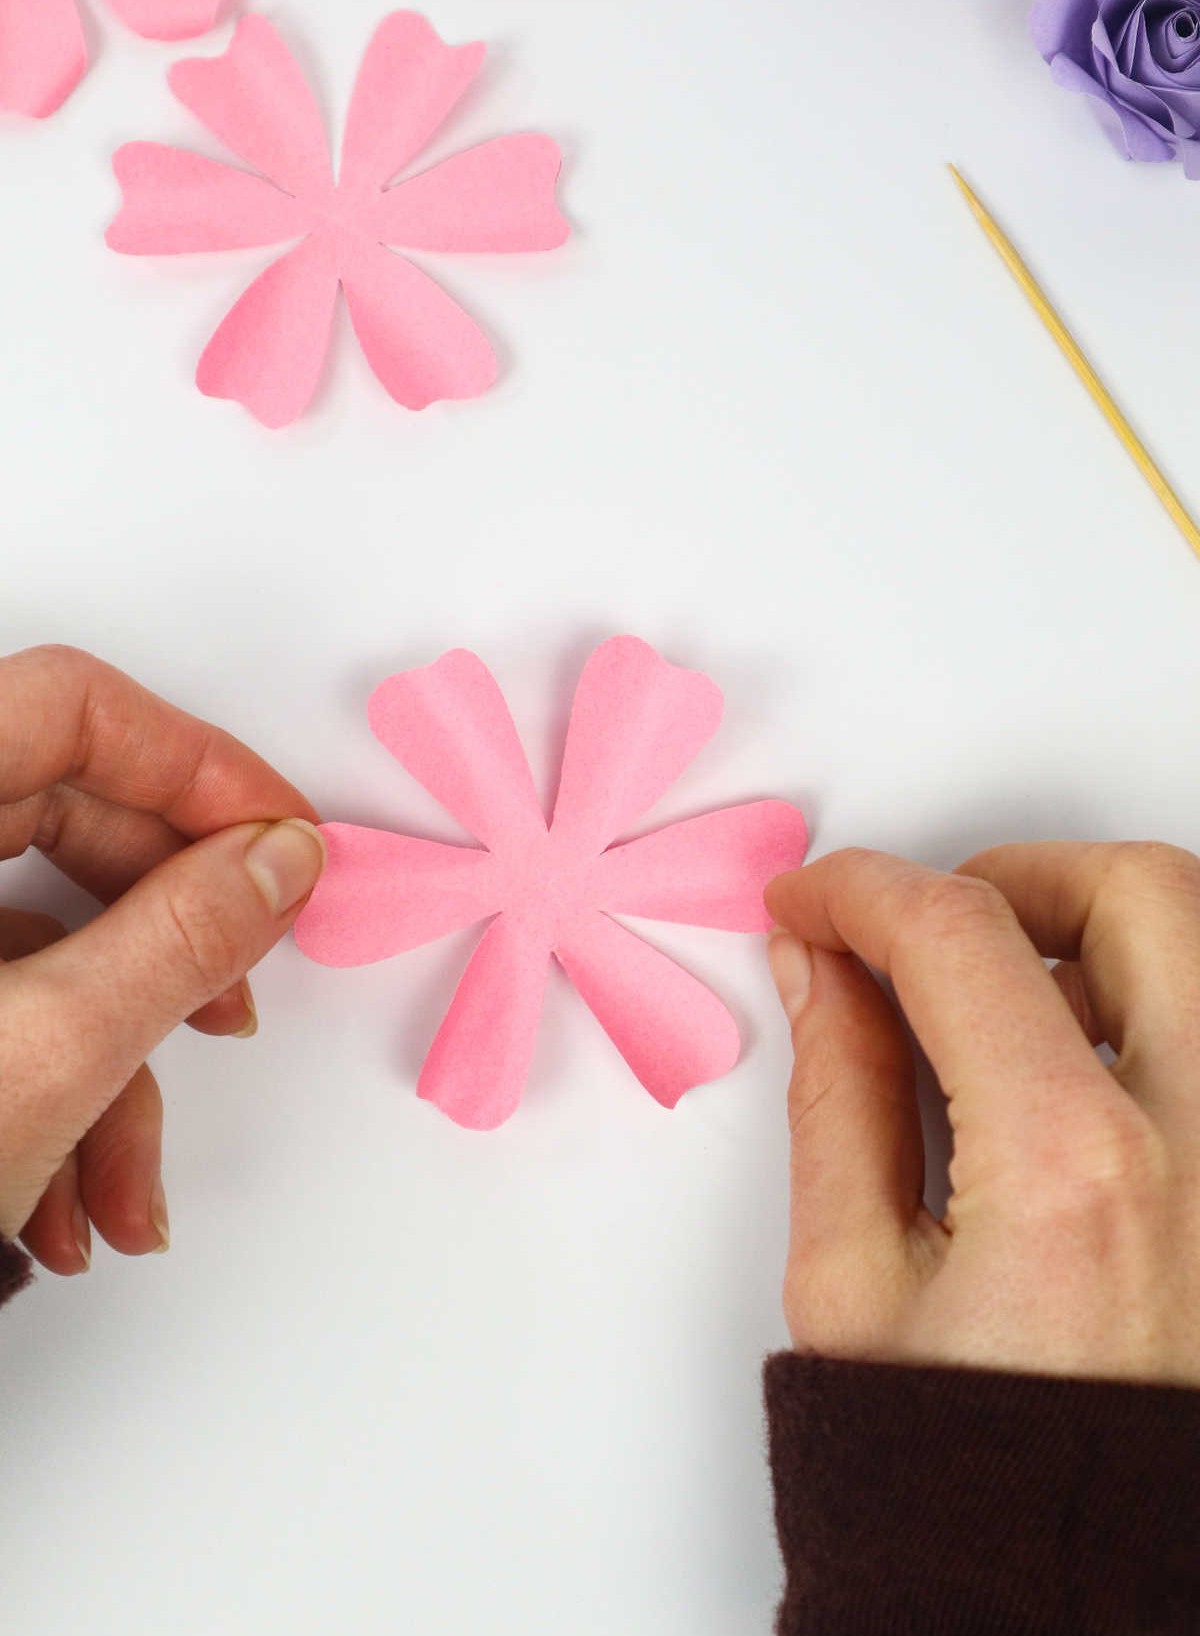
To assemble the paper flower, start by stacking the four individual pieces on top of each other and ensuring they’re aligned properly. Next, take one petal and gently fold it inward, then repeat this process with the remaining five petals. As you do so, make sure to grasp all four flower sheets simultaneously, which will ultimately result in each sheet resembling a hexagonal cup.
Step 6
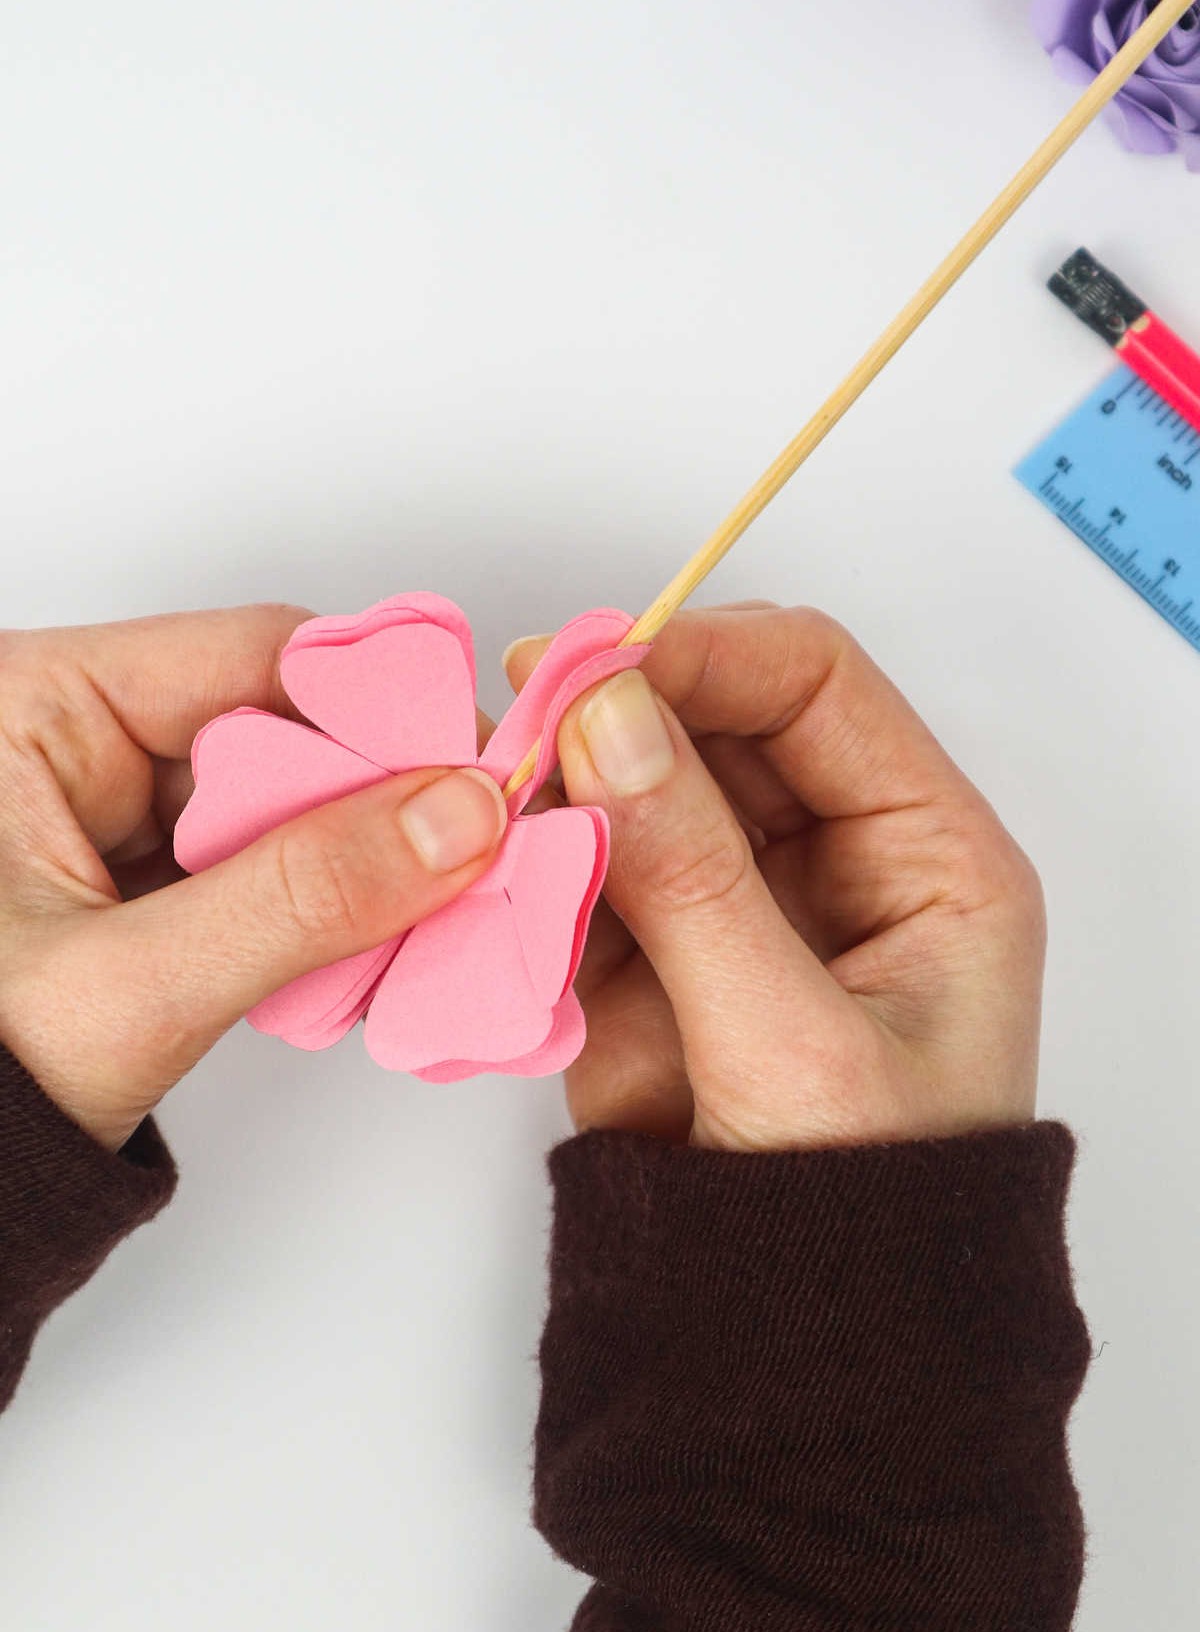
To create the delicate flower-like shape, start by taking a wooden skewer and positioning it at the center of one of the paper petals. Gently wrap the surrounding paper around the skewer to form a curved petal shape. Continue this process with each of the six petals, gradually shaping them into soft, flowing curves that will give your finished flower its unique texture.
Step 7
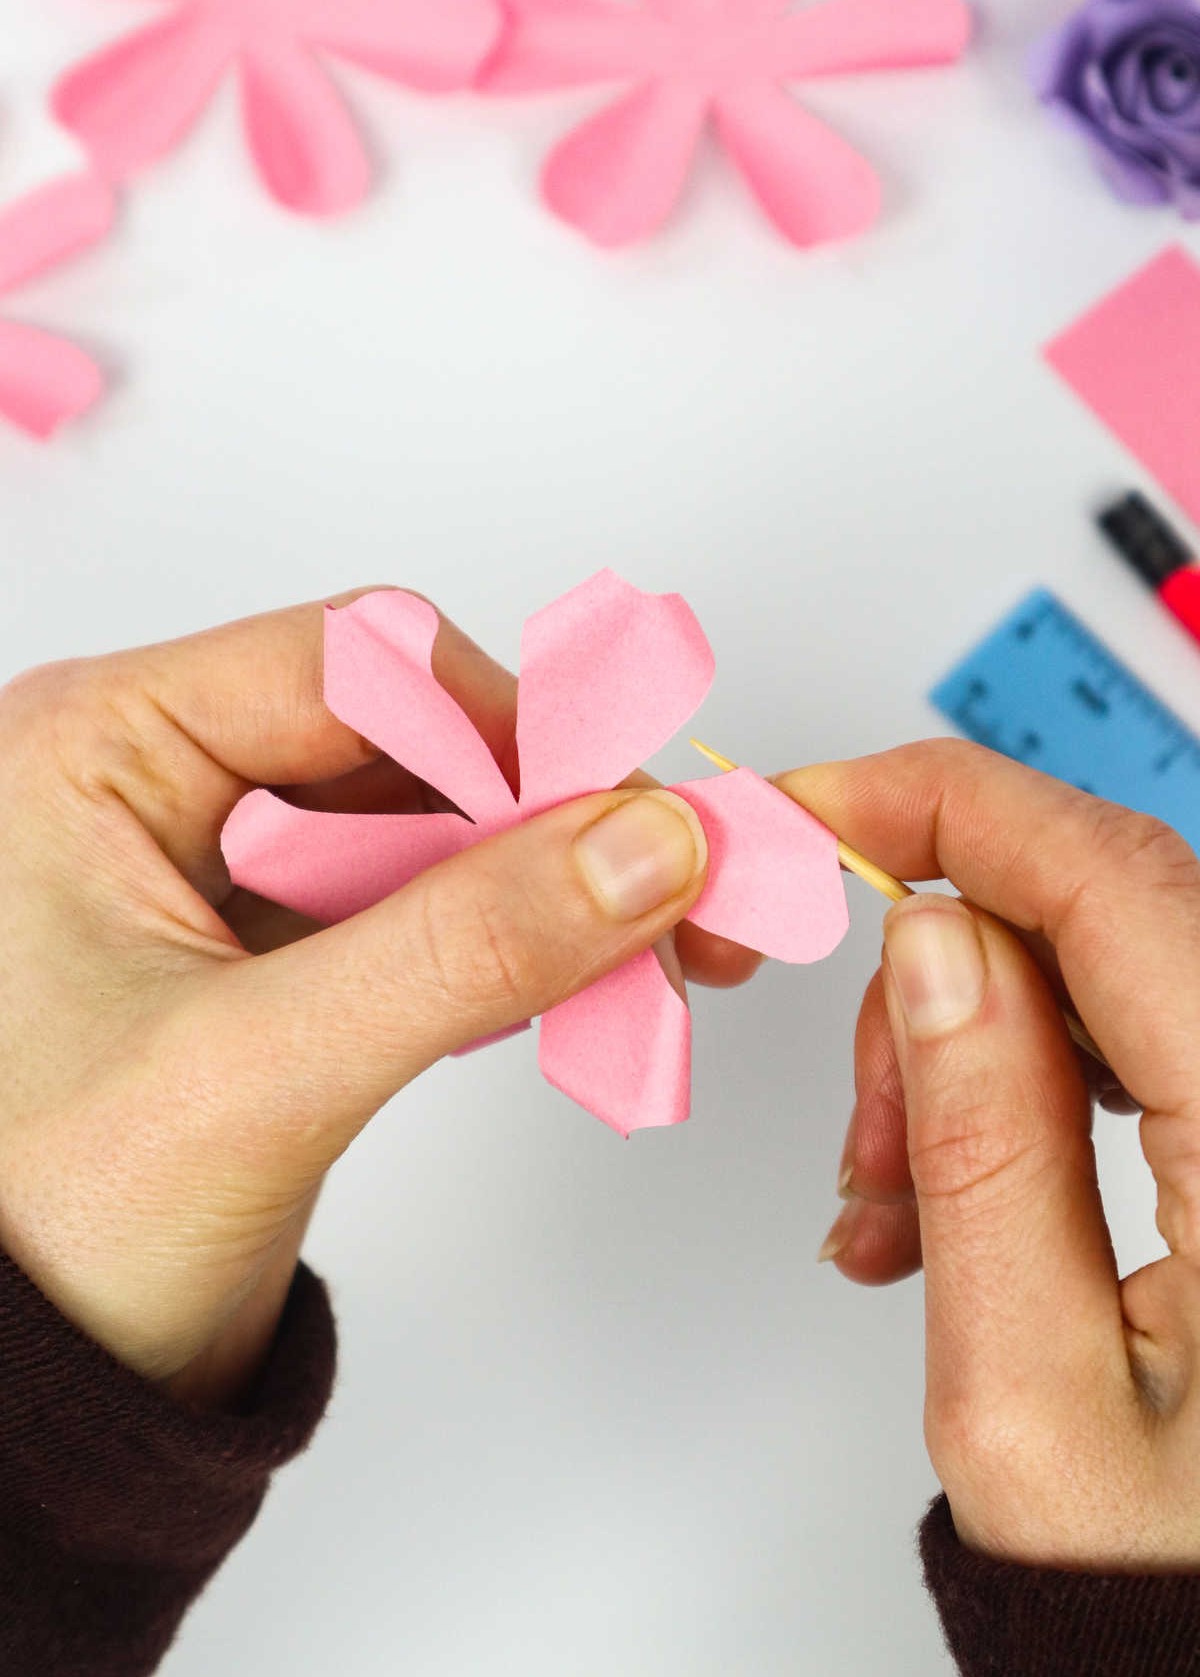
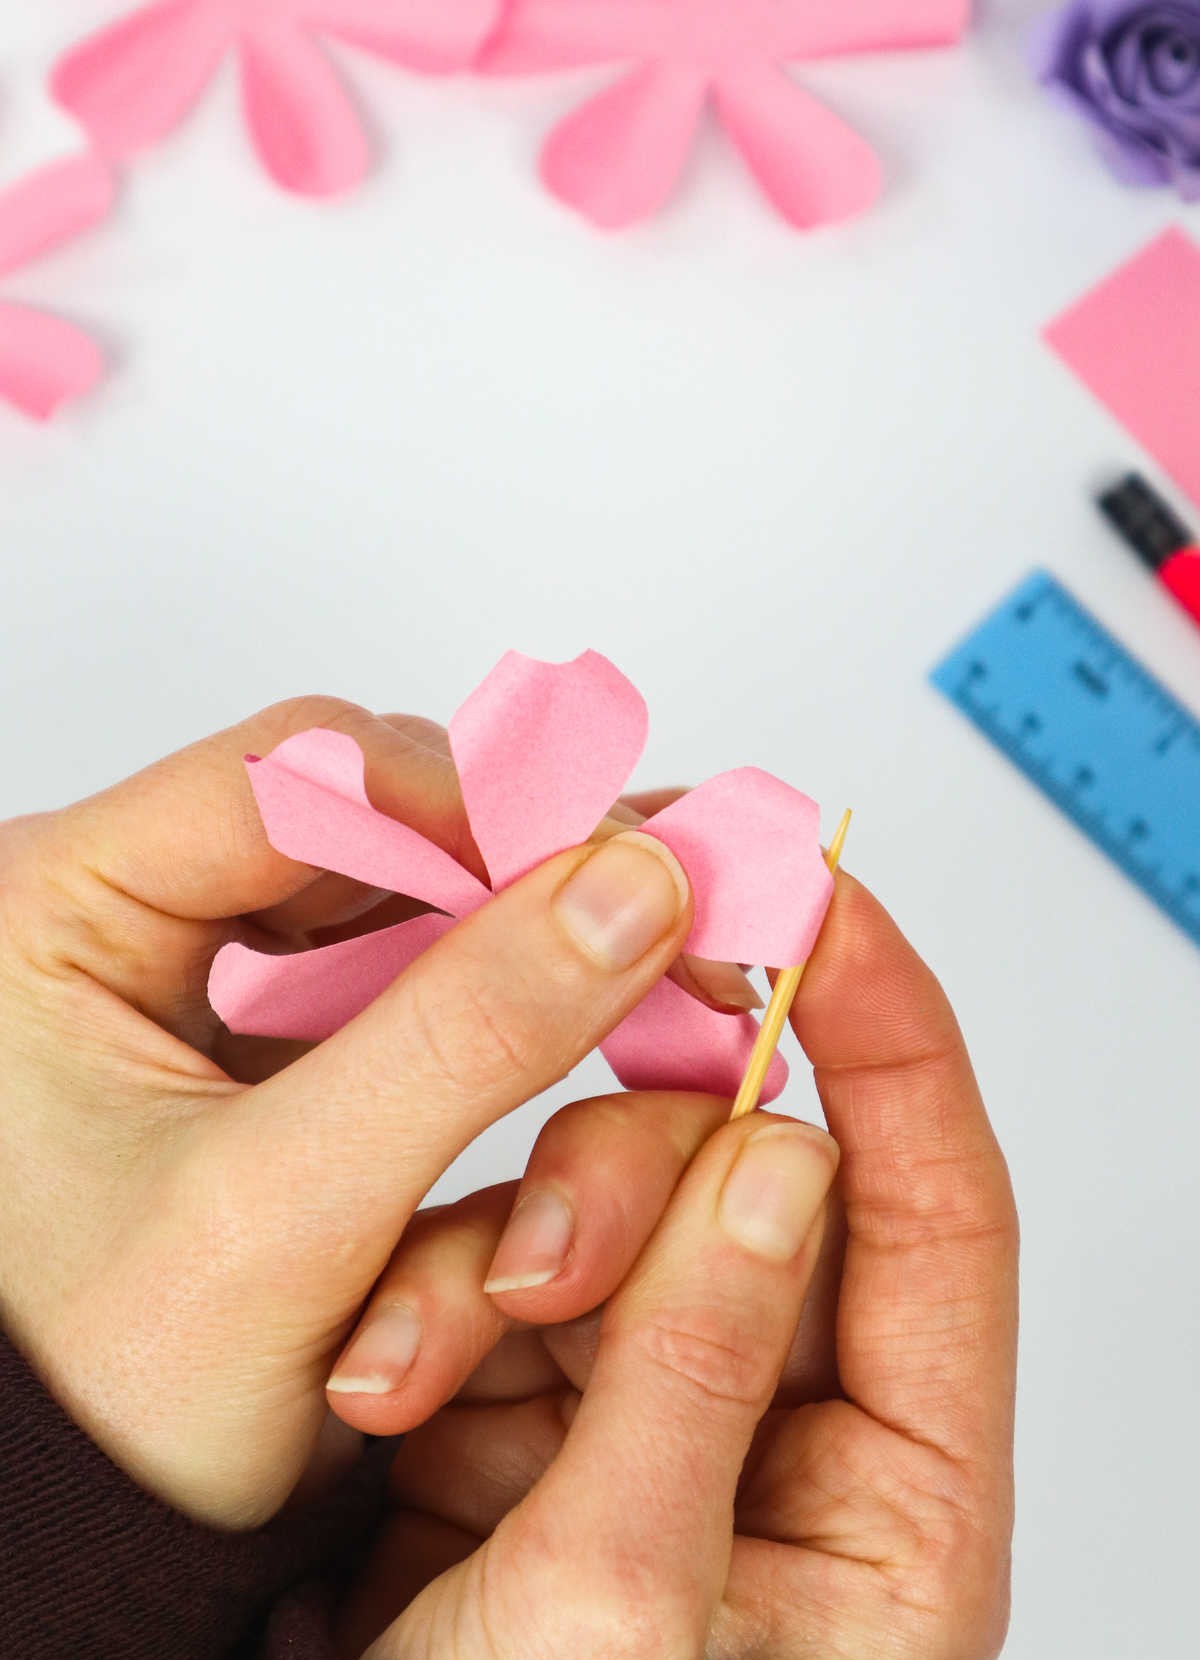
To add an extra layer of dimensionality and visual interest to your flower’s petals, try using a toothpick to curl the tips of each petal. This technique allows you to create varying levels of depth and definition, as well as control the direction of the curl to suit your desired finish. For the outer petals, which typically make up two of the four sheets that form the flower, use this method to give them a more pronounced, dimensional appearance.
The remaining two sheets will be used for the inner petals, where you can maintain a more subtle look.
Step 8
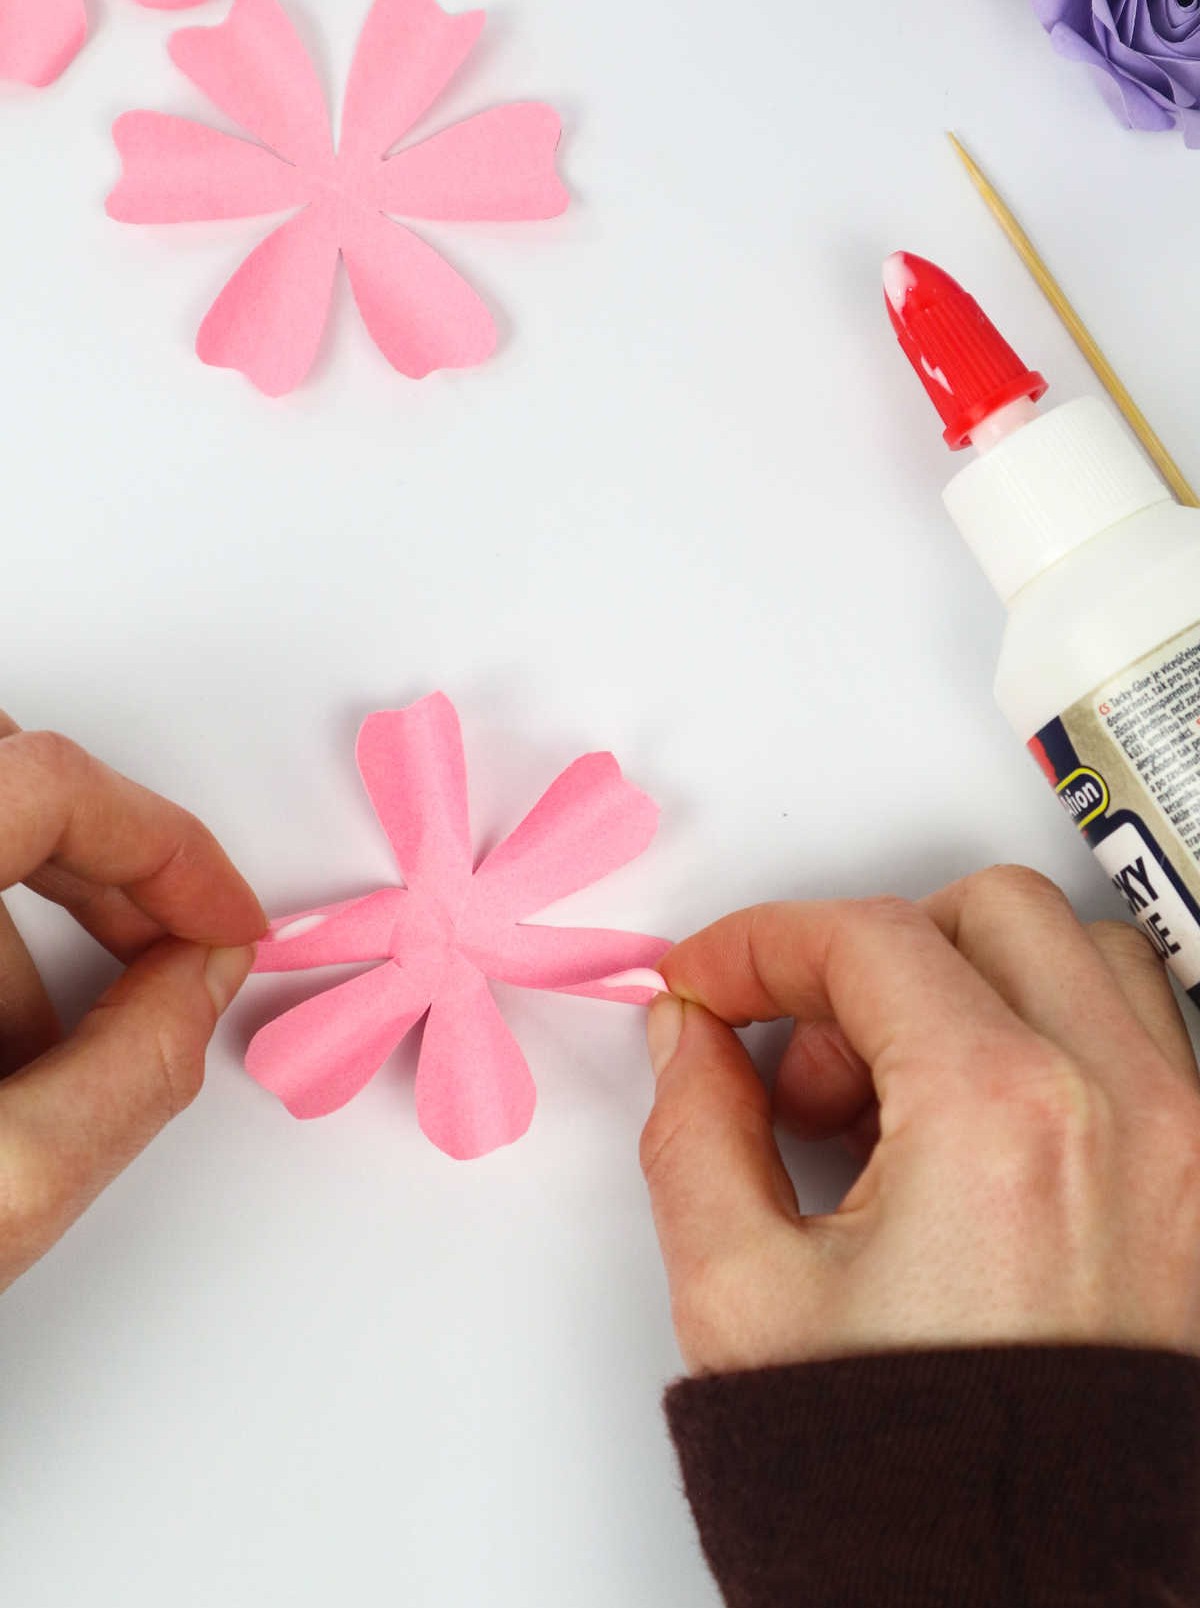
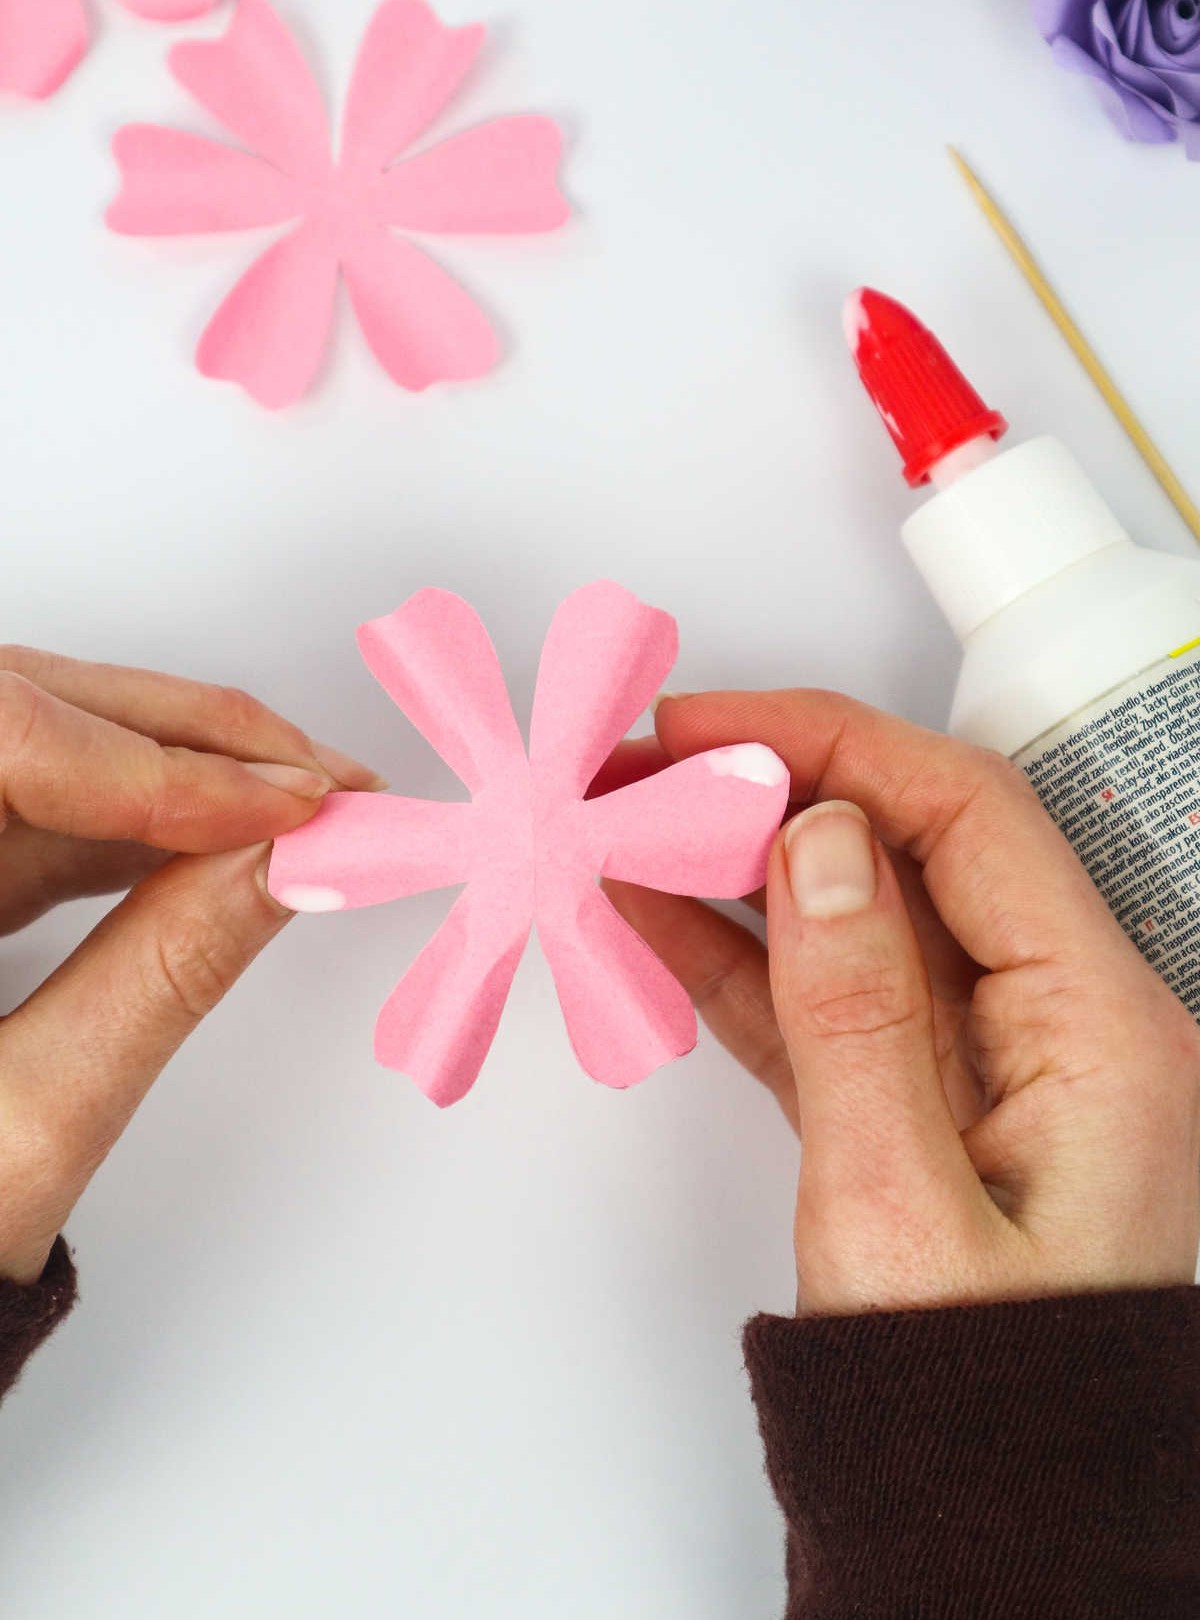
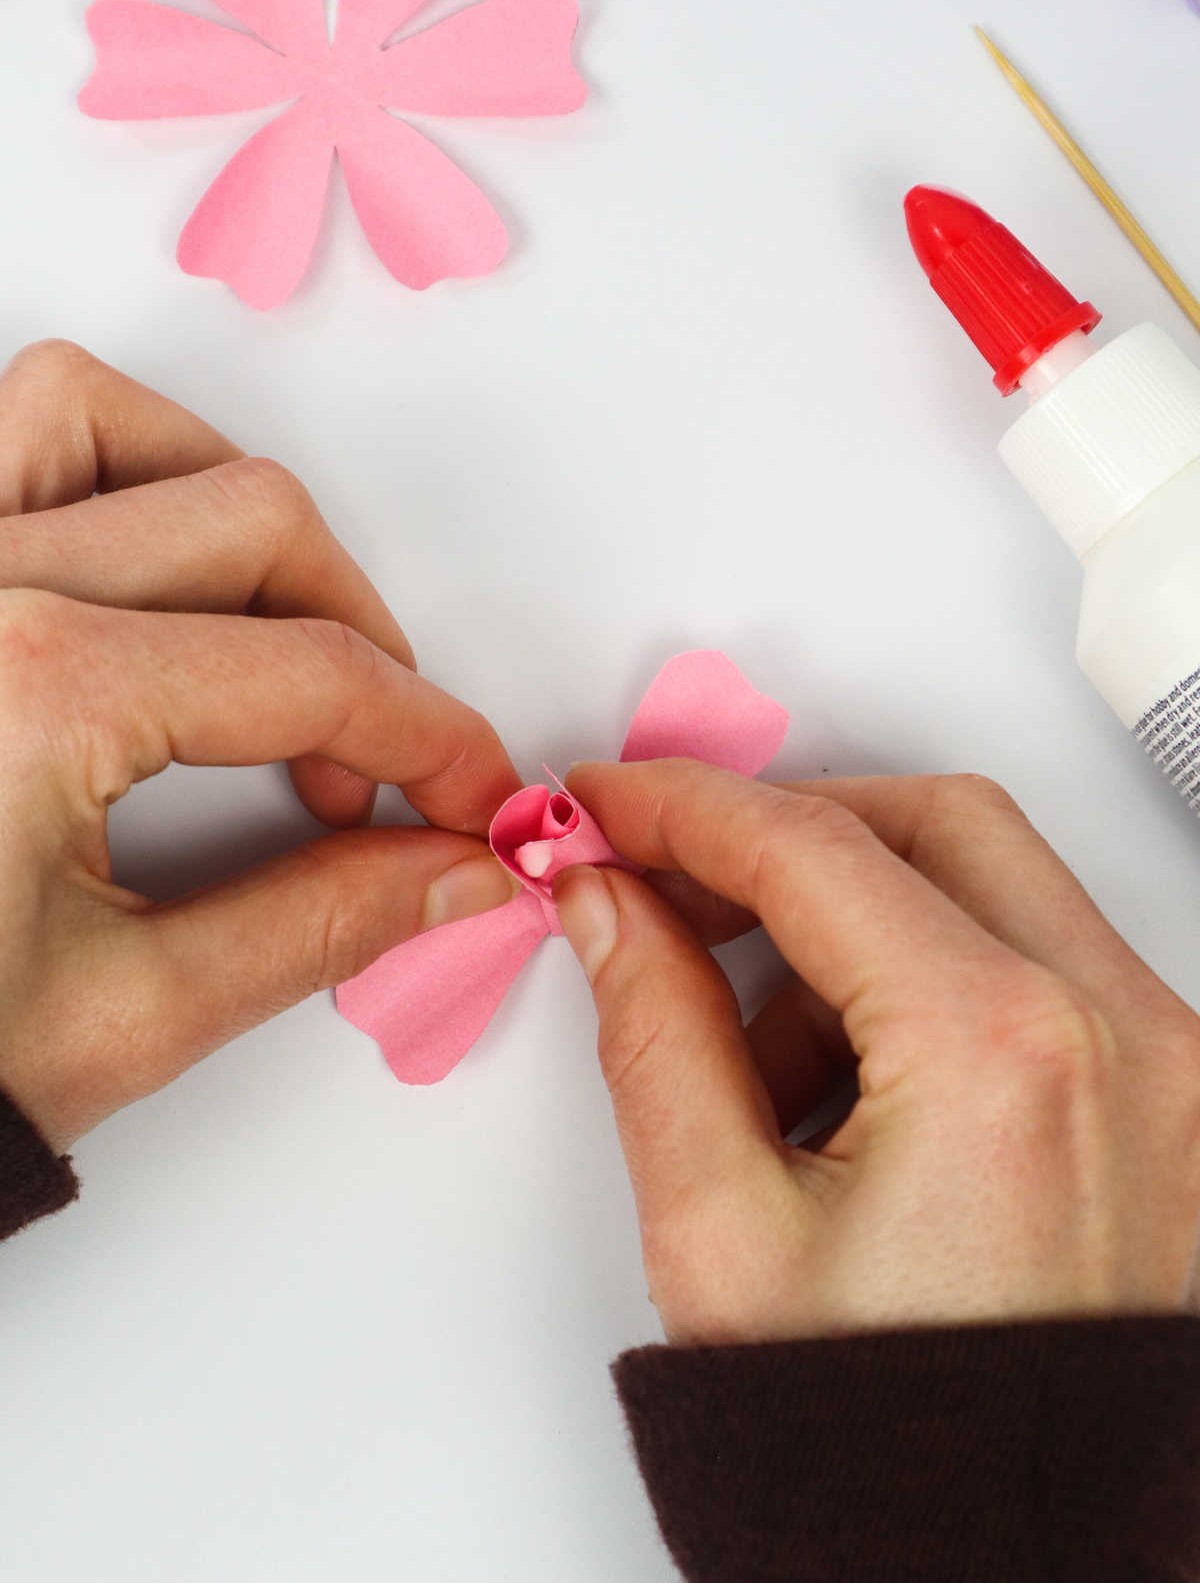


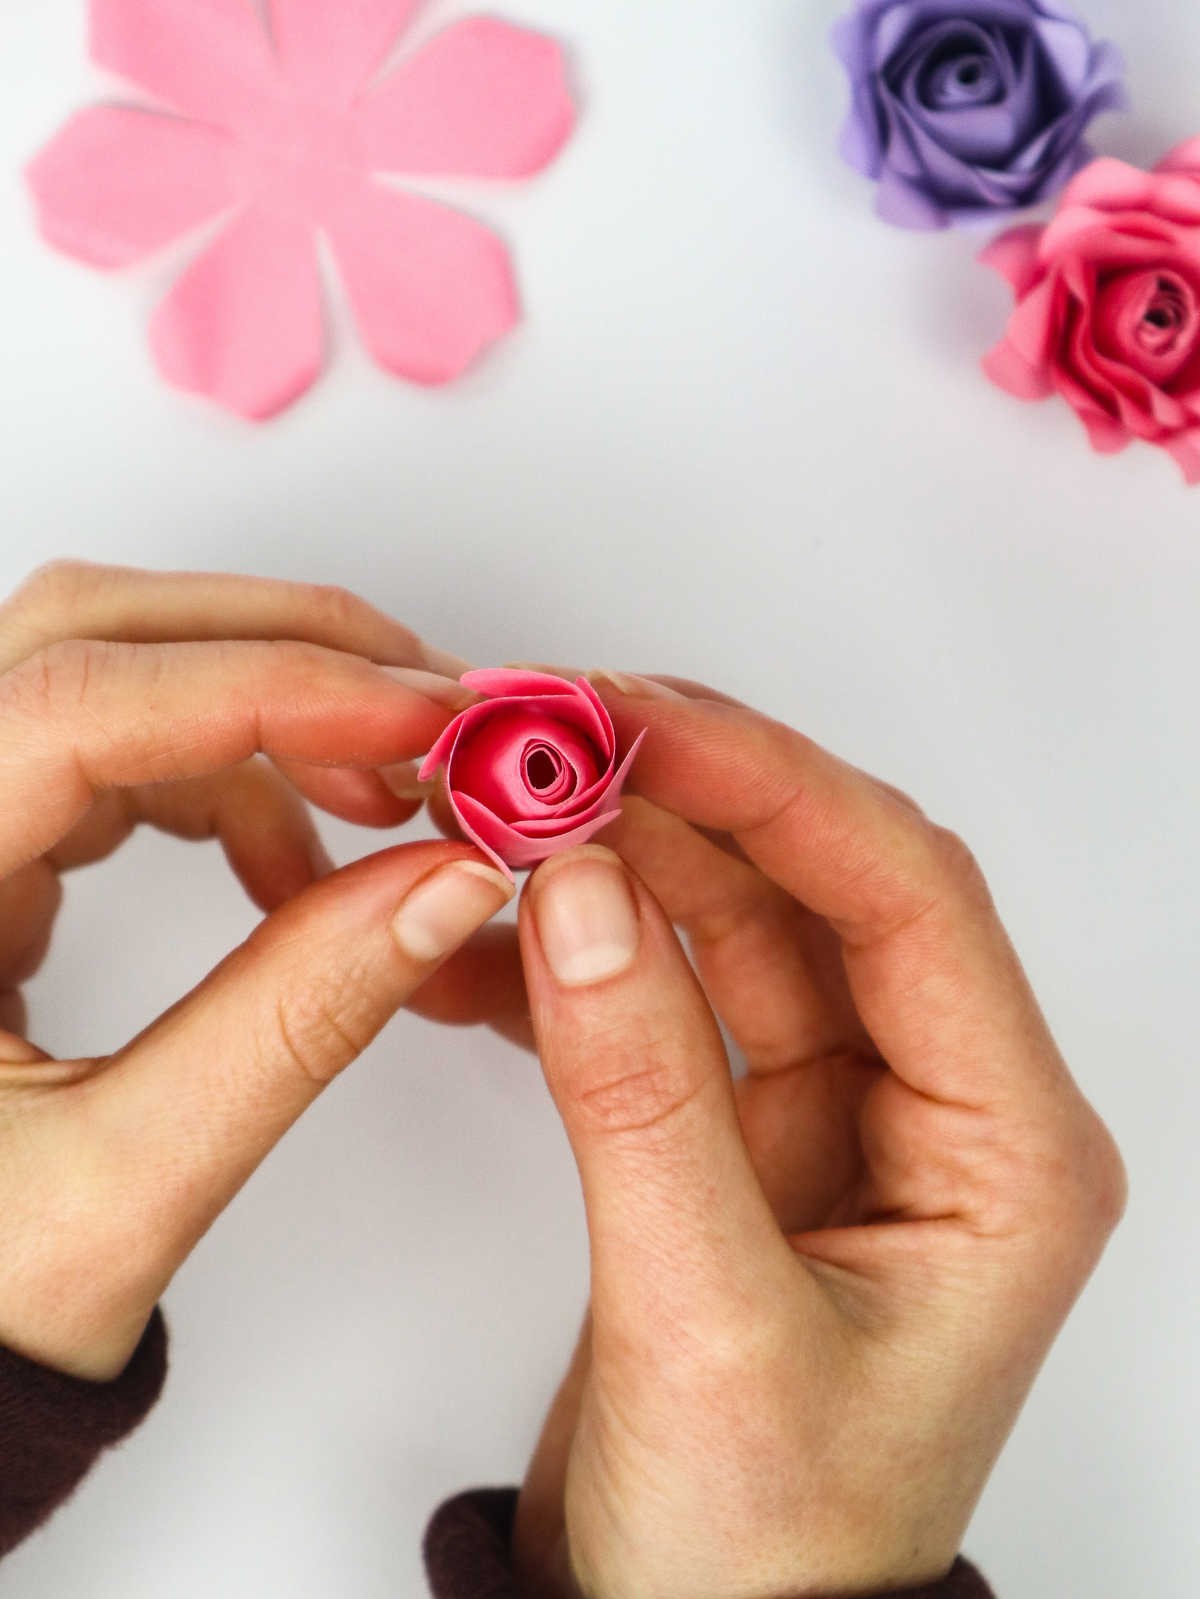
As you move forward with assembling the rose, be prepared to encounter a slightly challenging step. To begin, apply a small amount of glue to the tips of two opposite petals, taking care not to overdo it. This is crucial, as you’ll need to bring these petals together soon. Next, gently press the glued tips together, forming the center bud. Take note that this part should resemble the illustration below. The process isn’t complete just yet.
It’s time to add some more structure to your rose by dabbing glue on the tips of two other opposite petals and bringing them around the center bud. This will start to give your flower its shape. To finish, repeat the same process with the remaining two petals. With these added, you’ll have a well-formed bud at the heart of your rose.
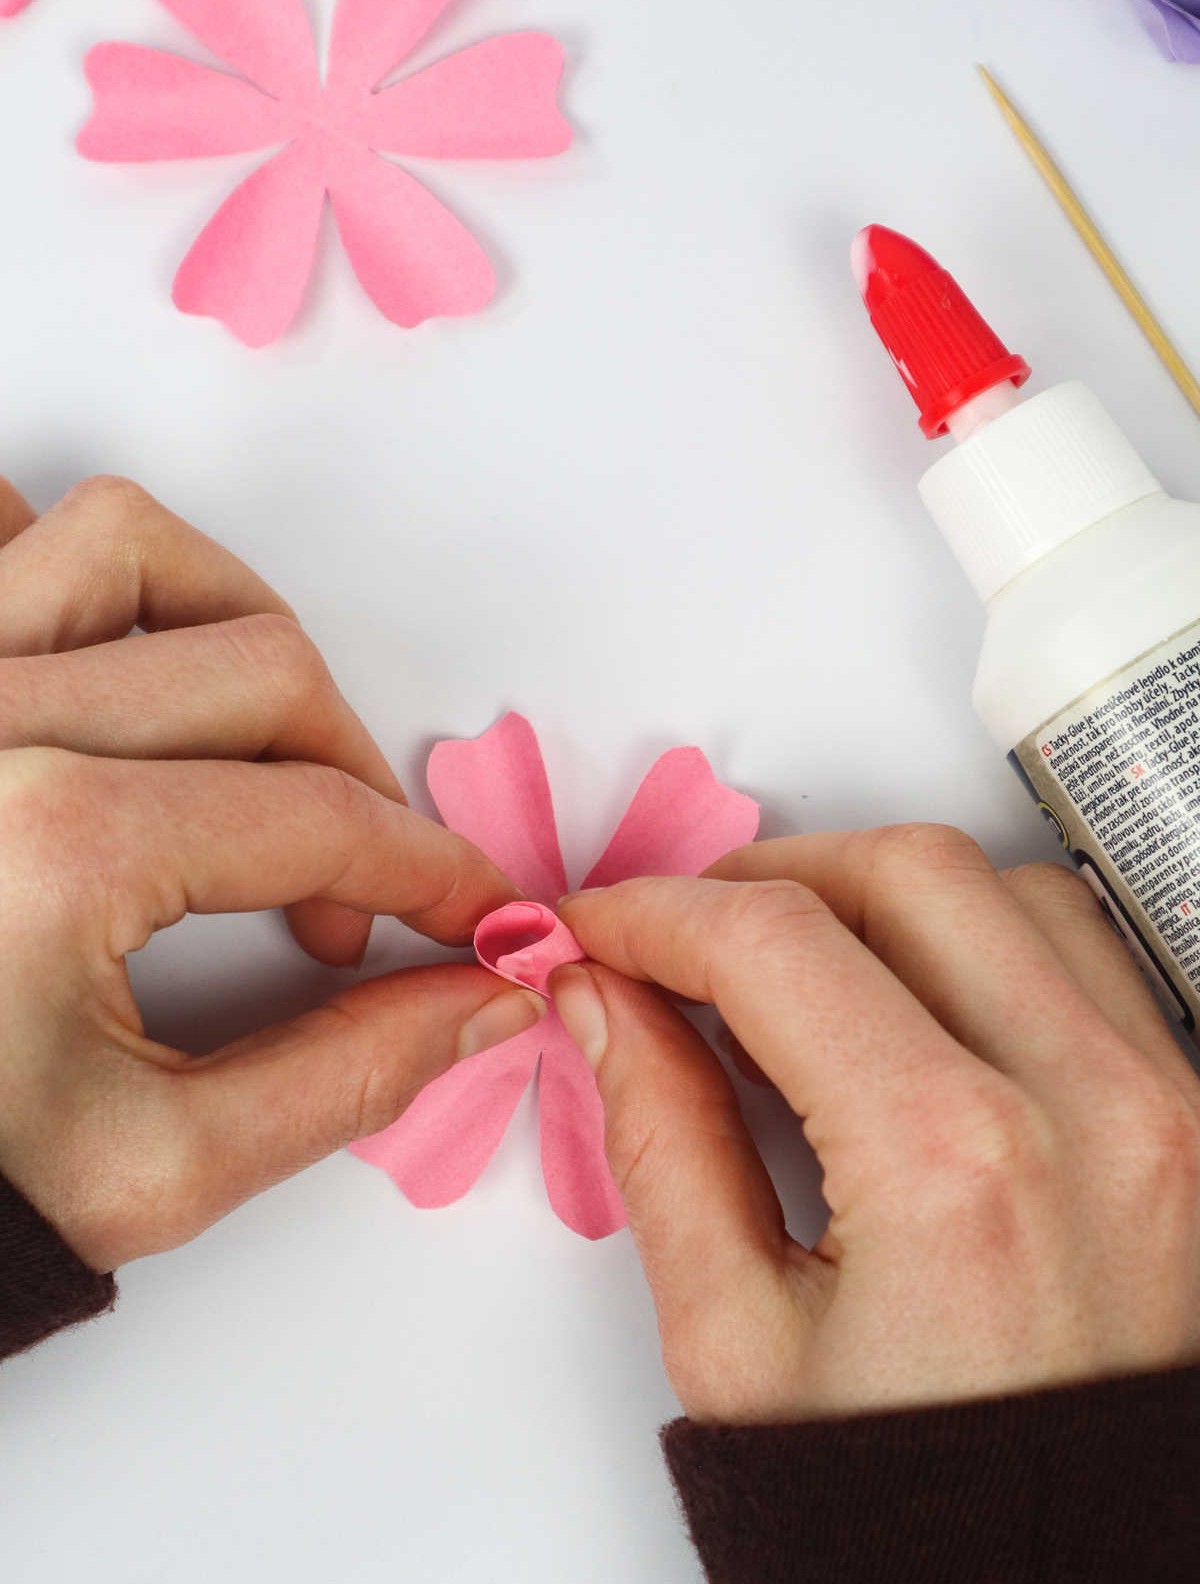
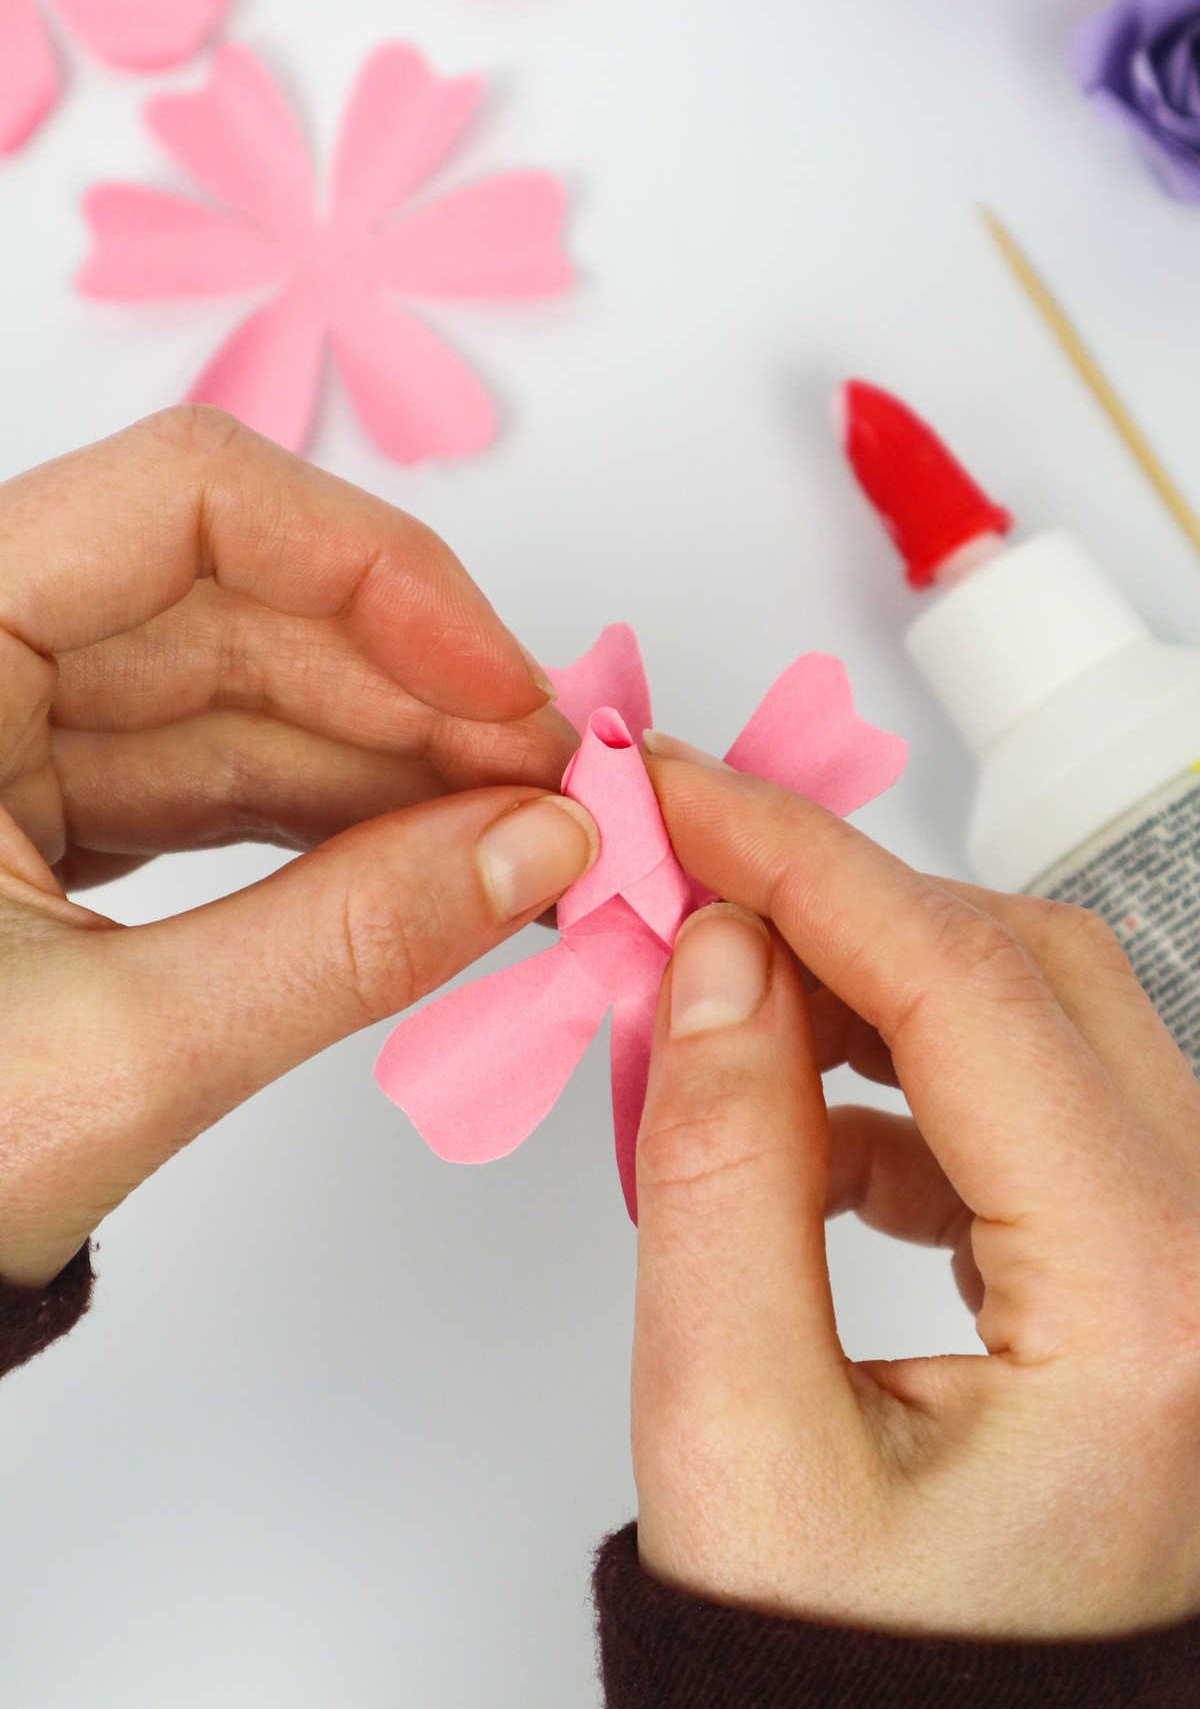
Step 9
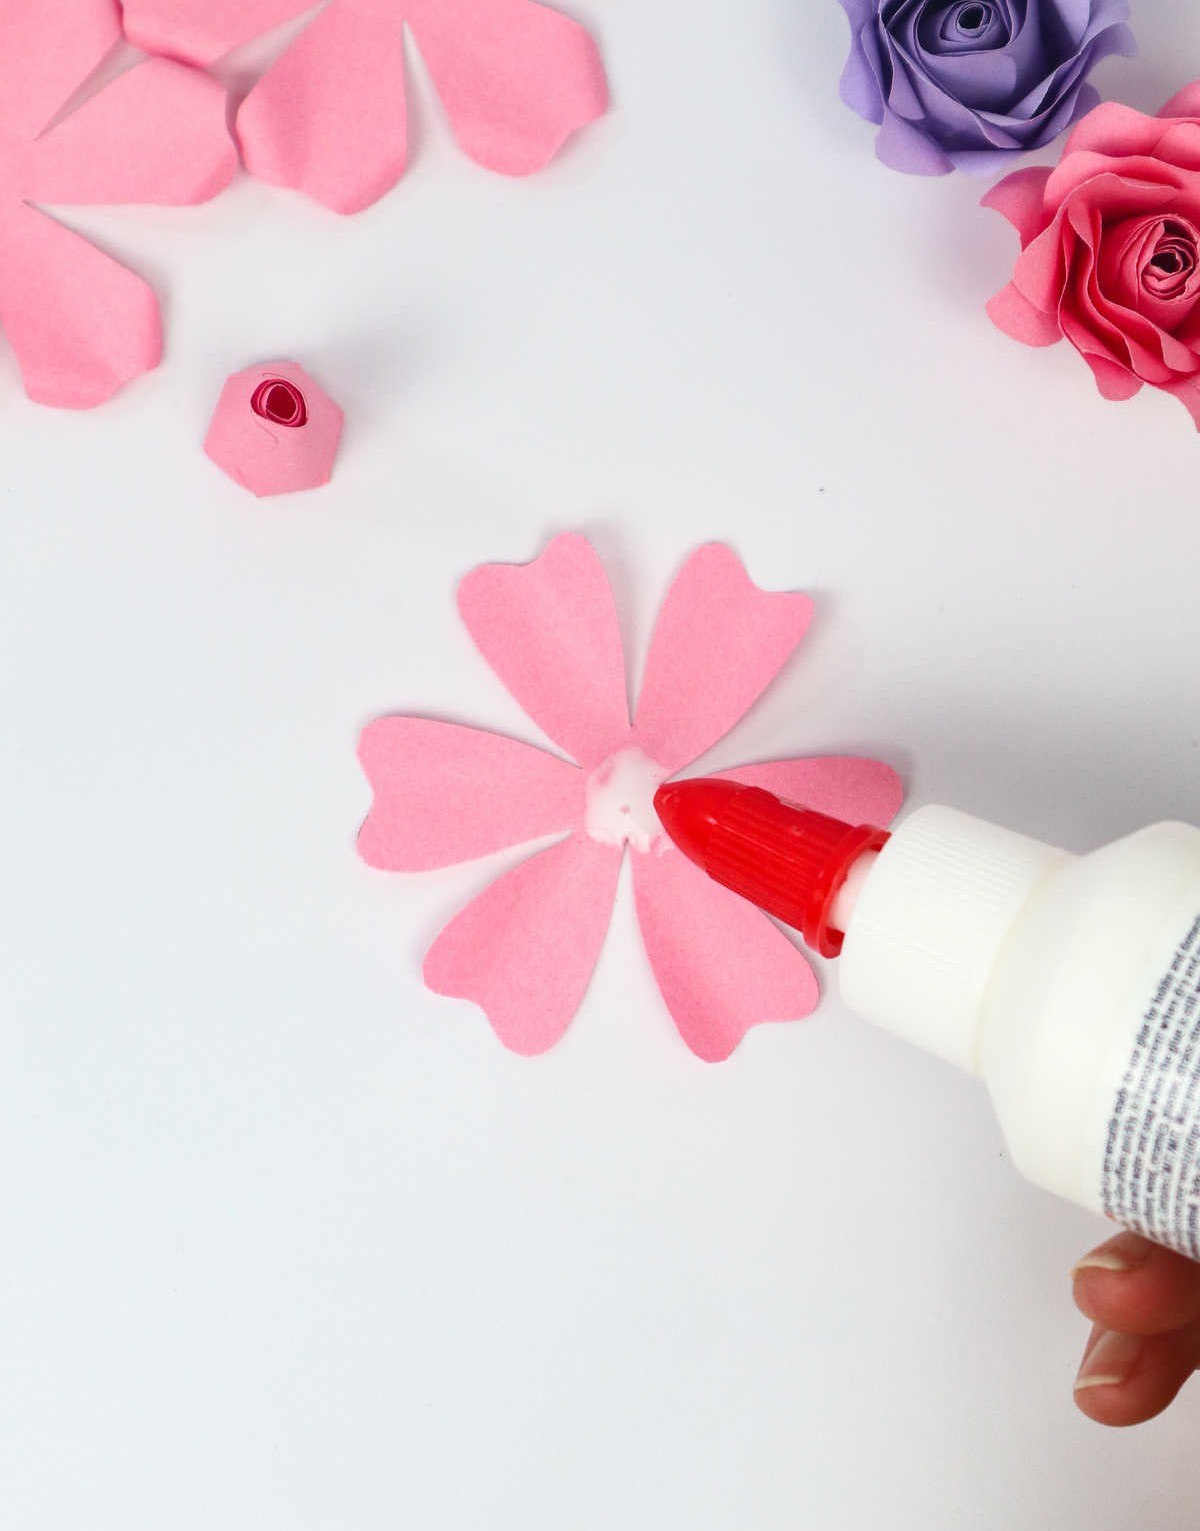
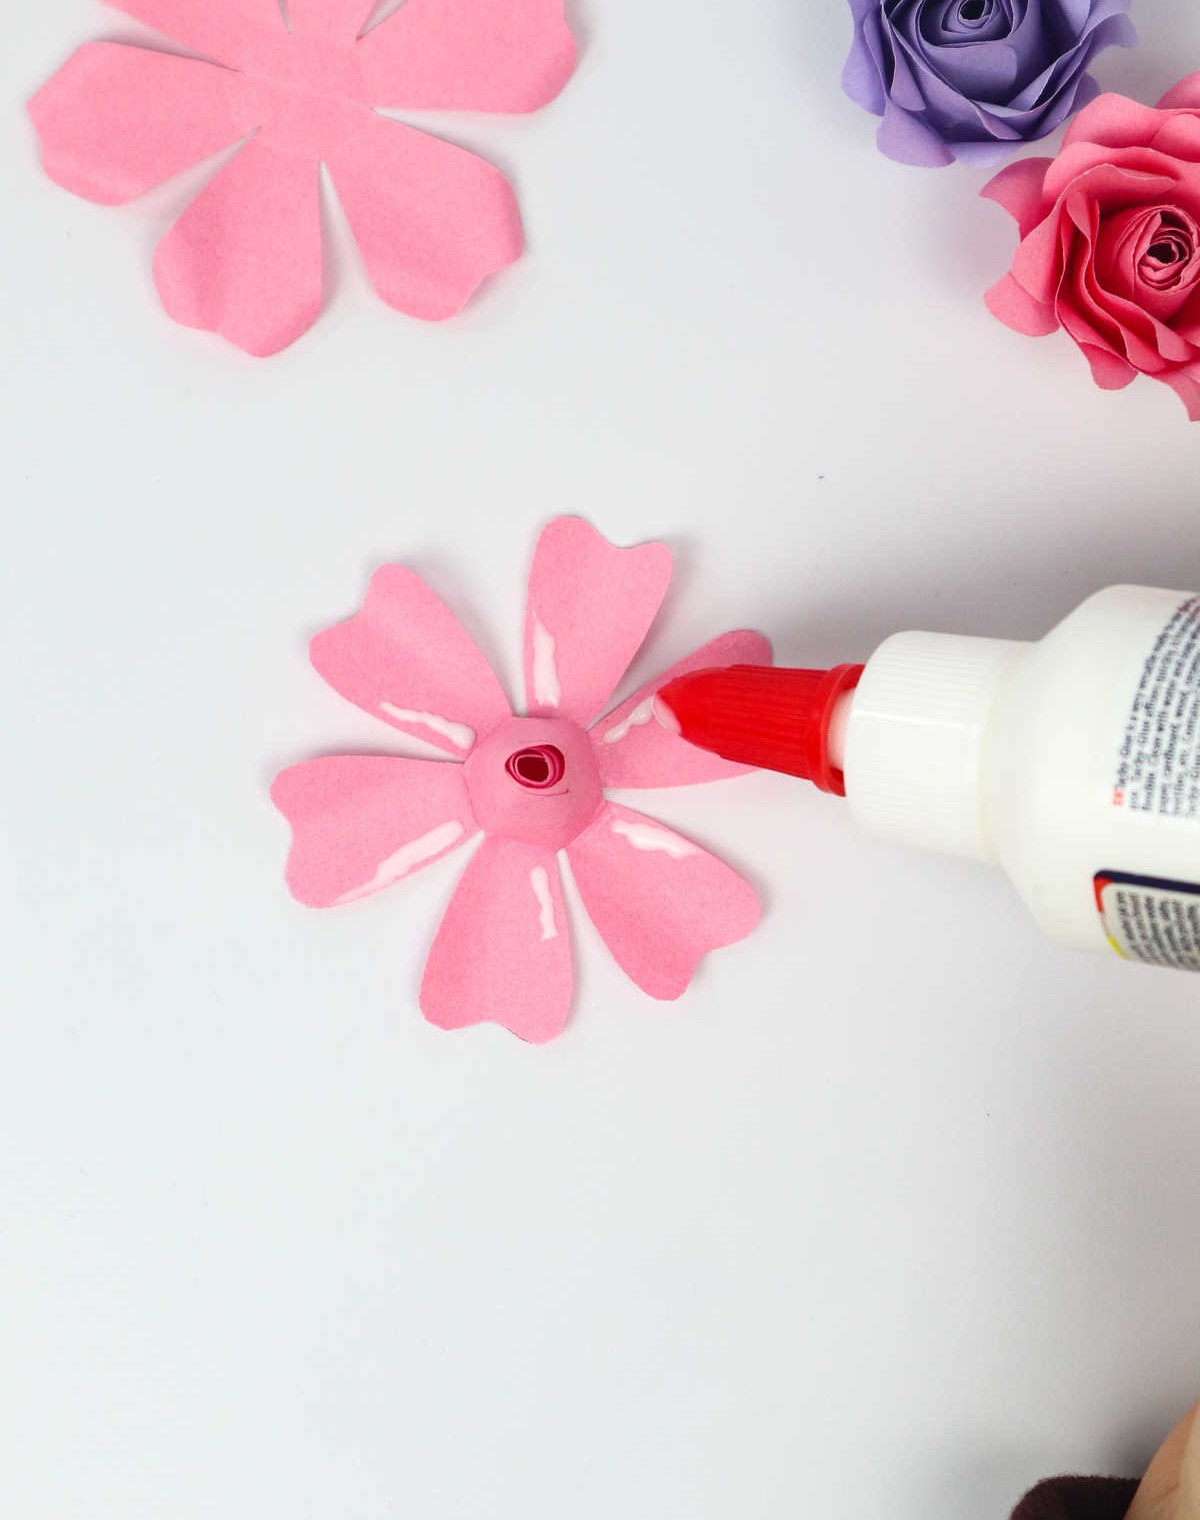
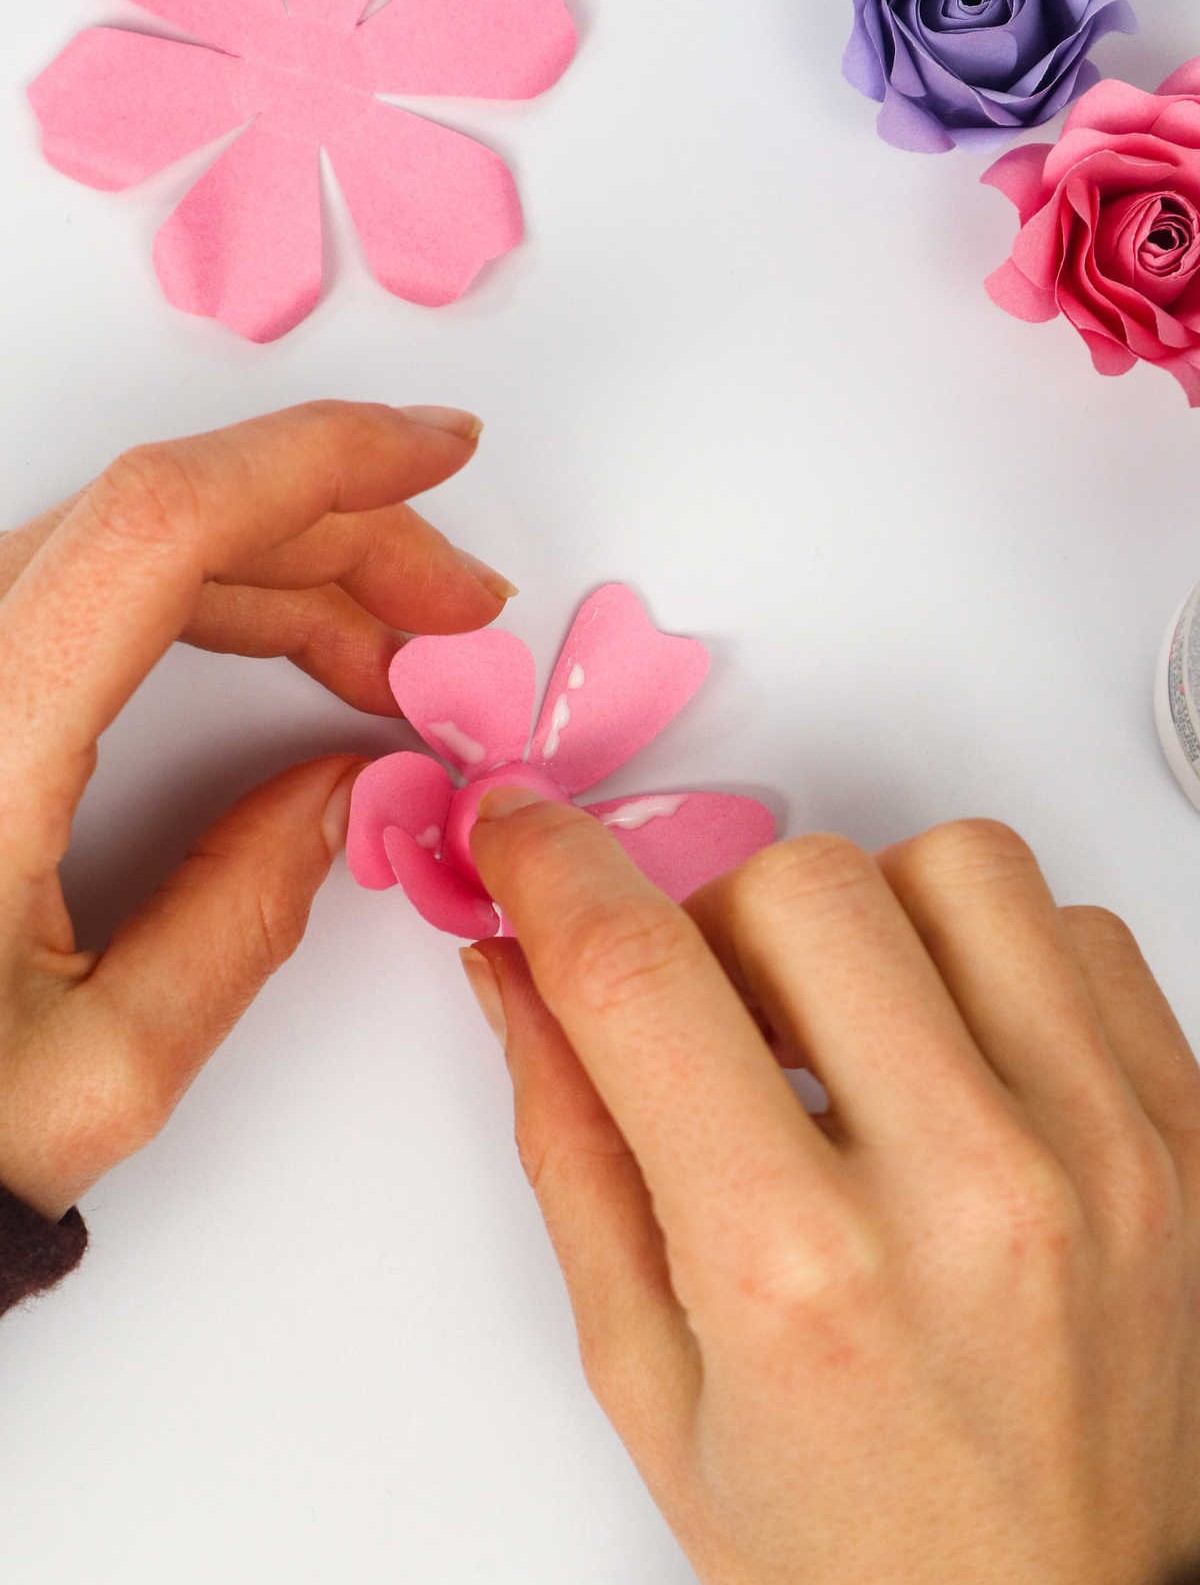
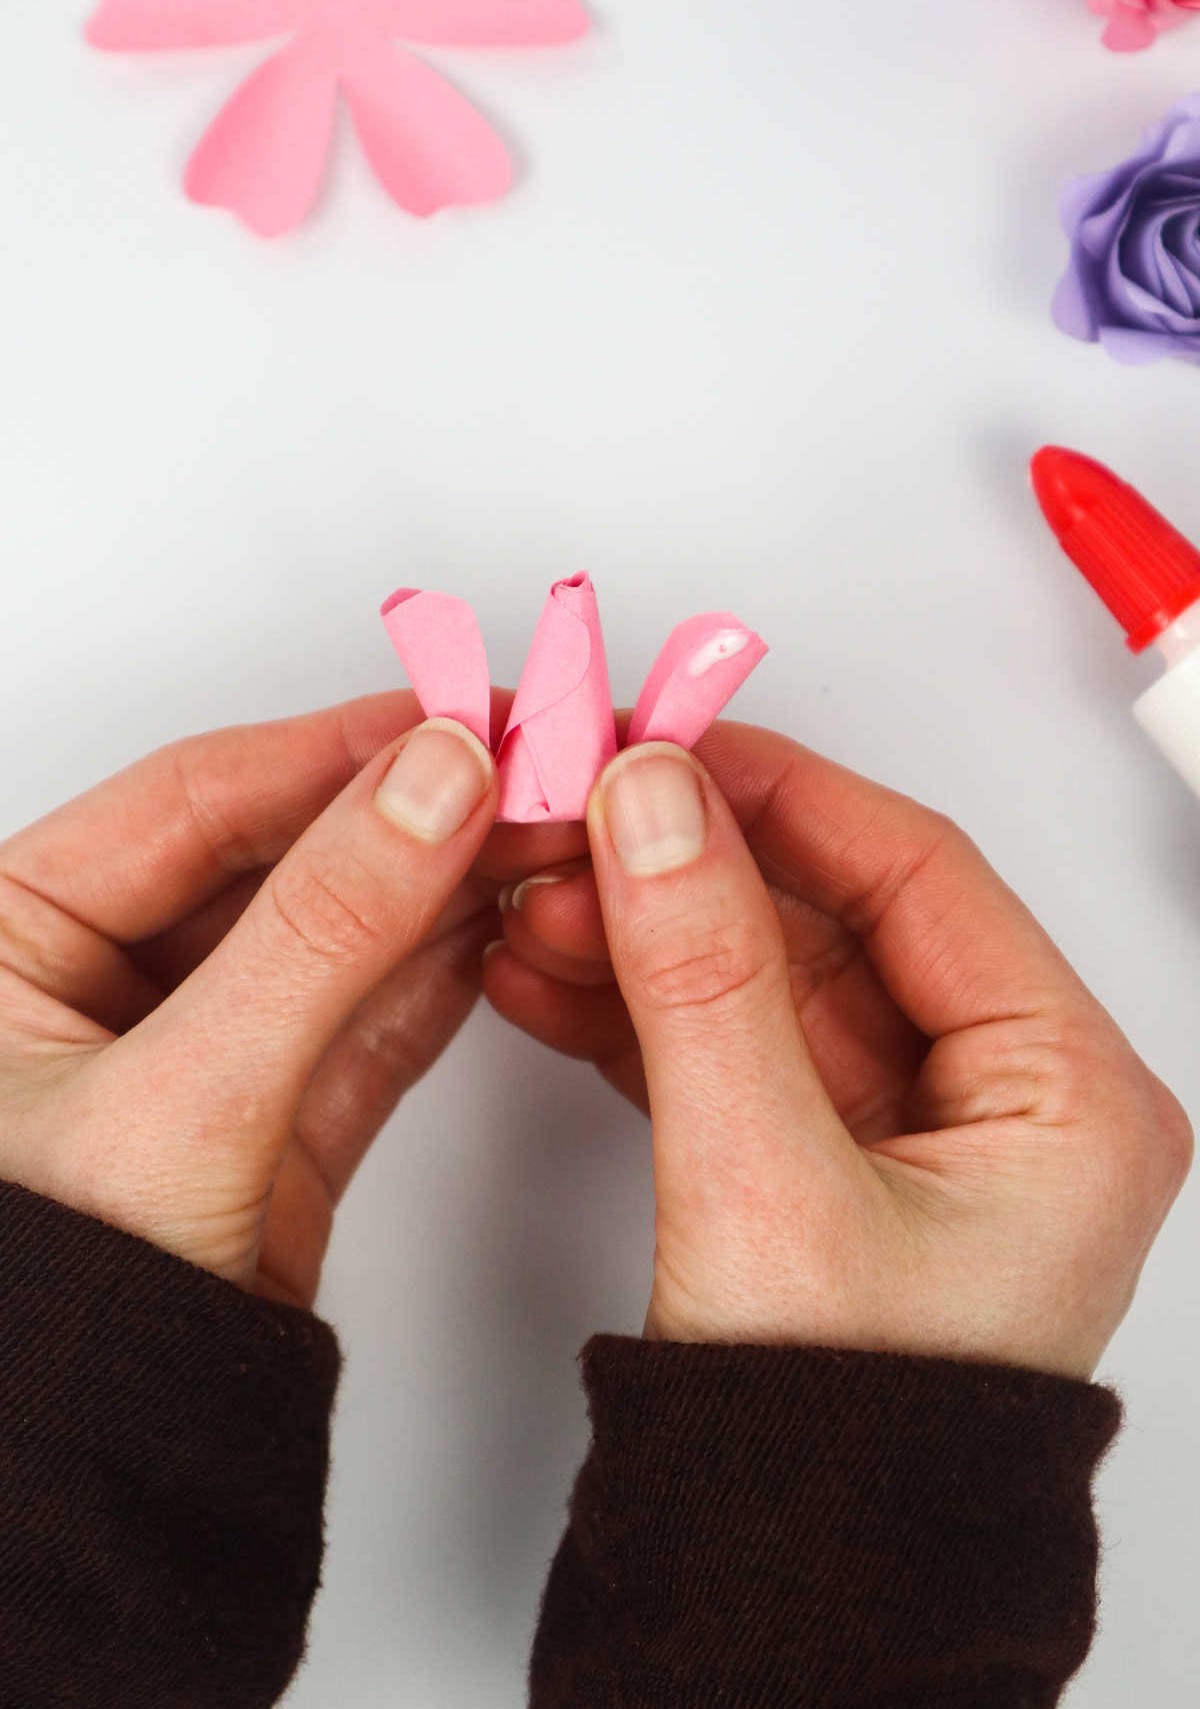
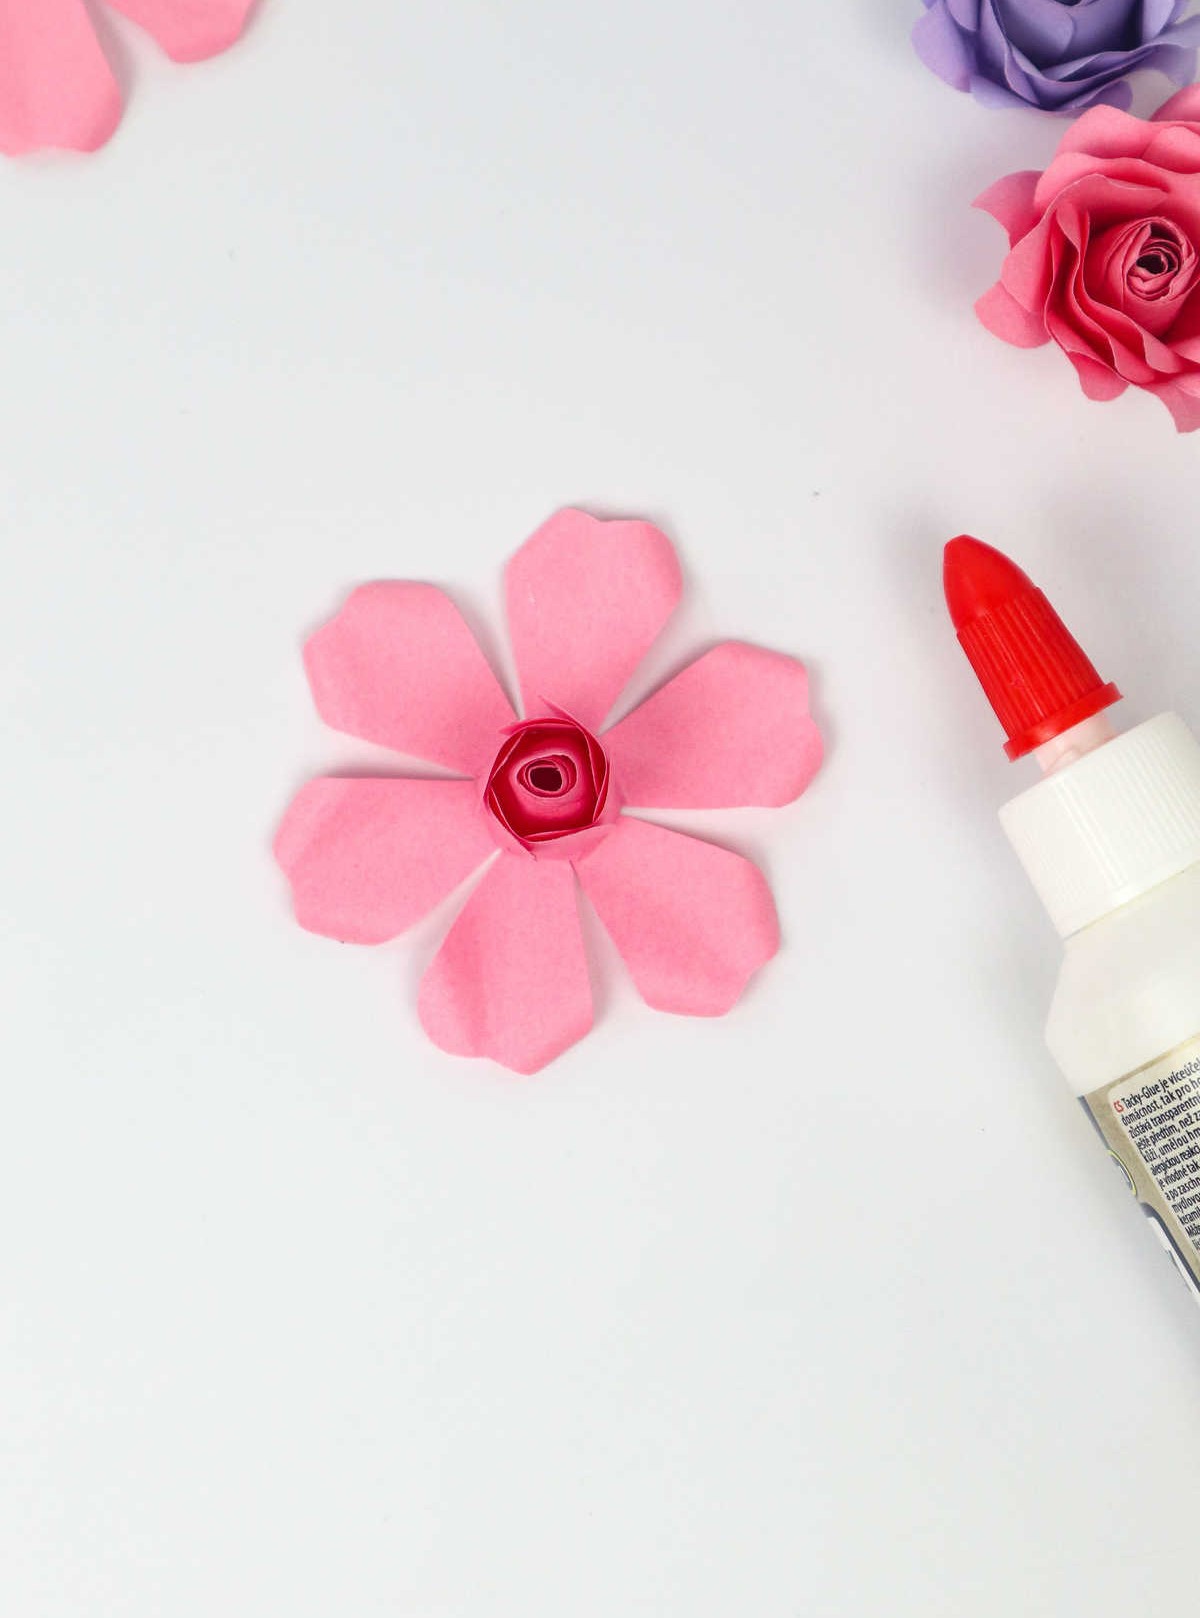
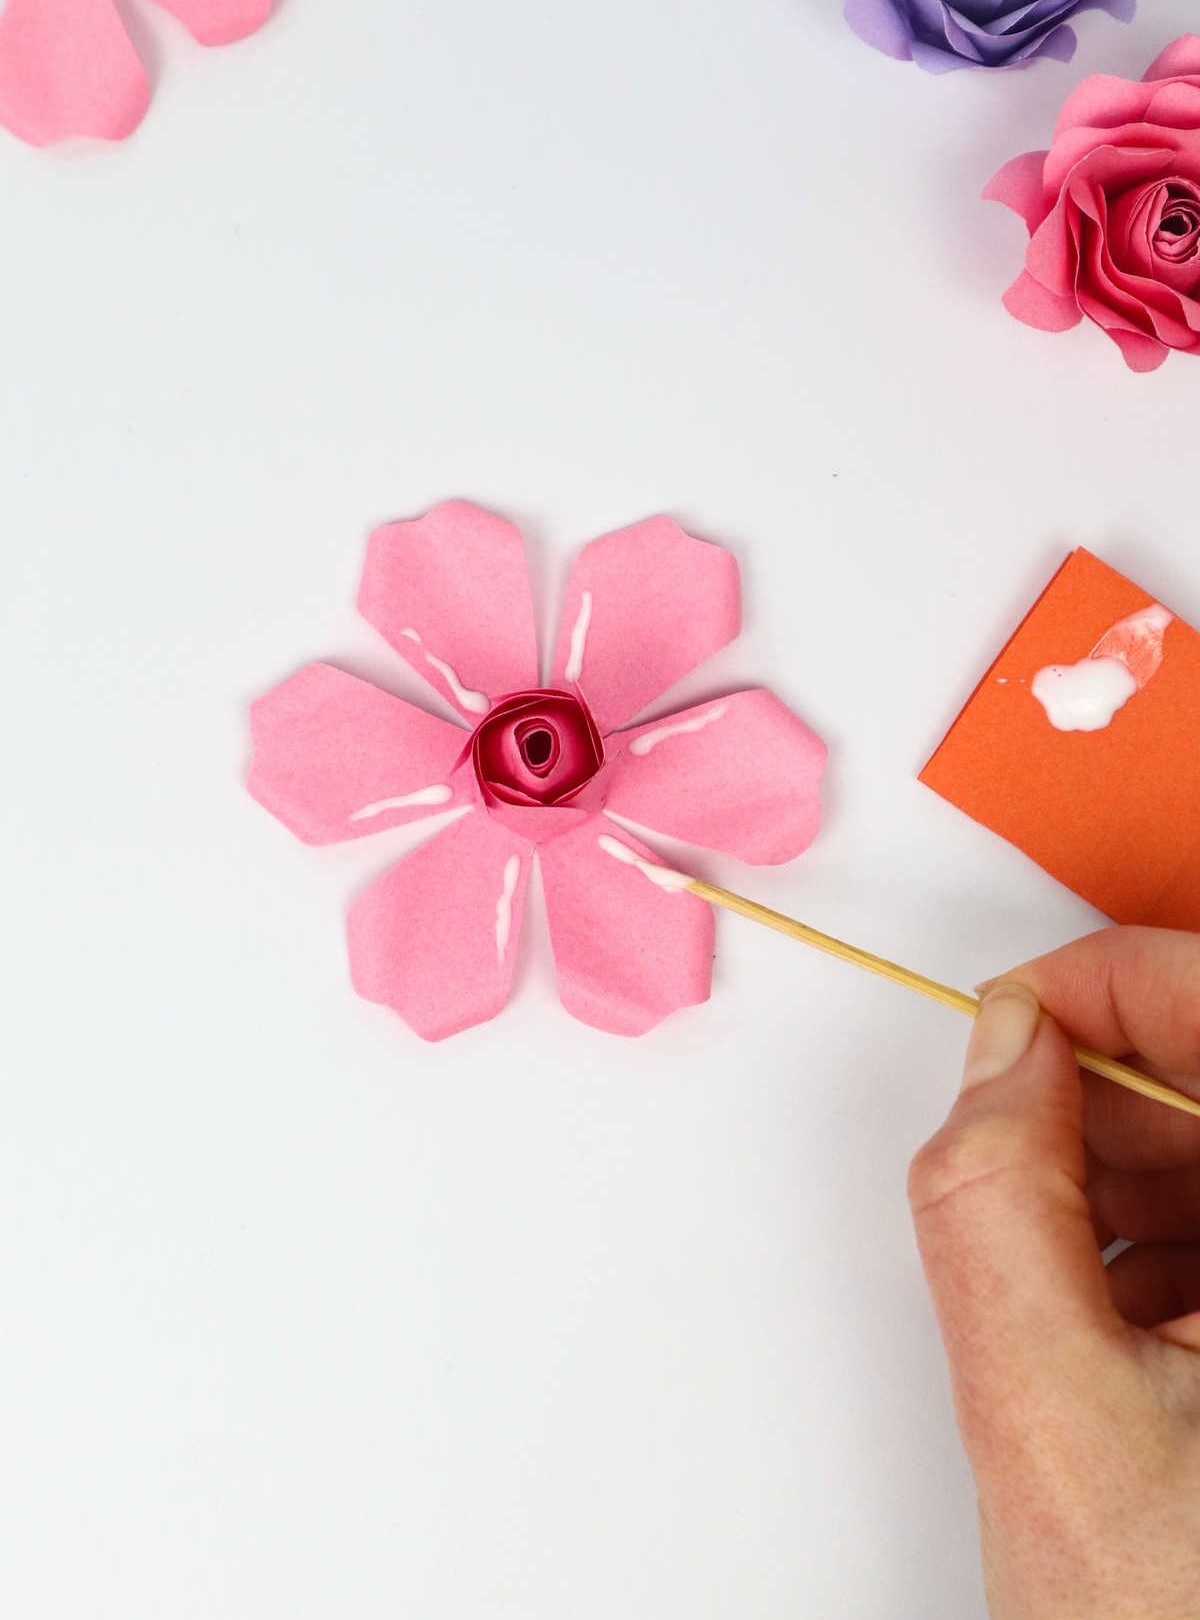
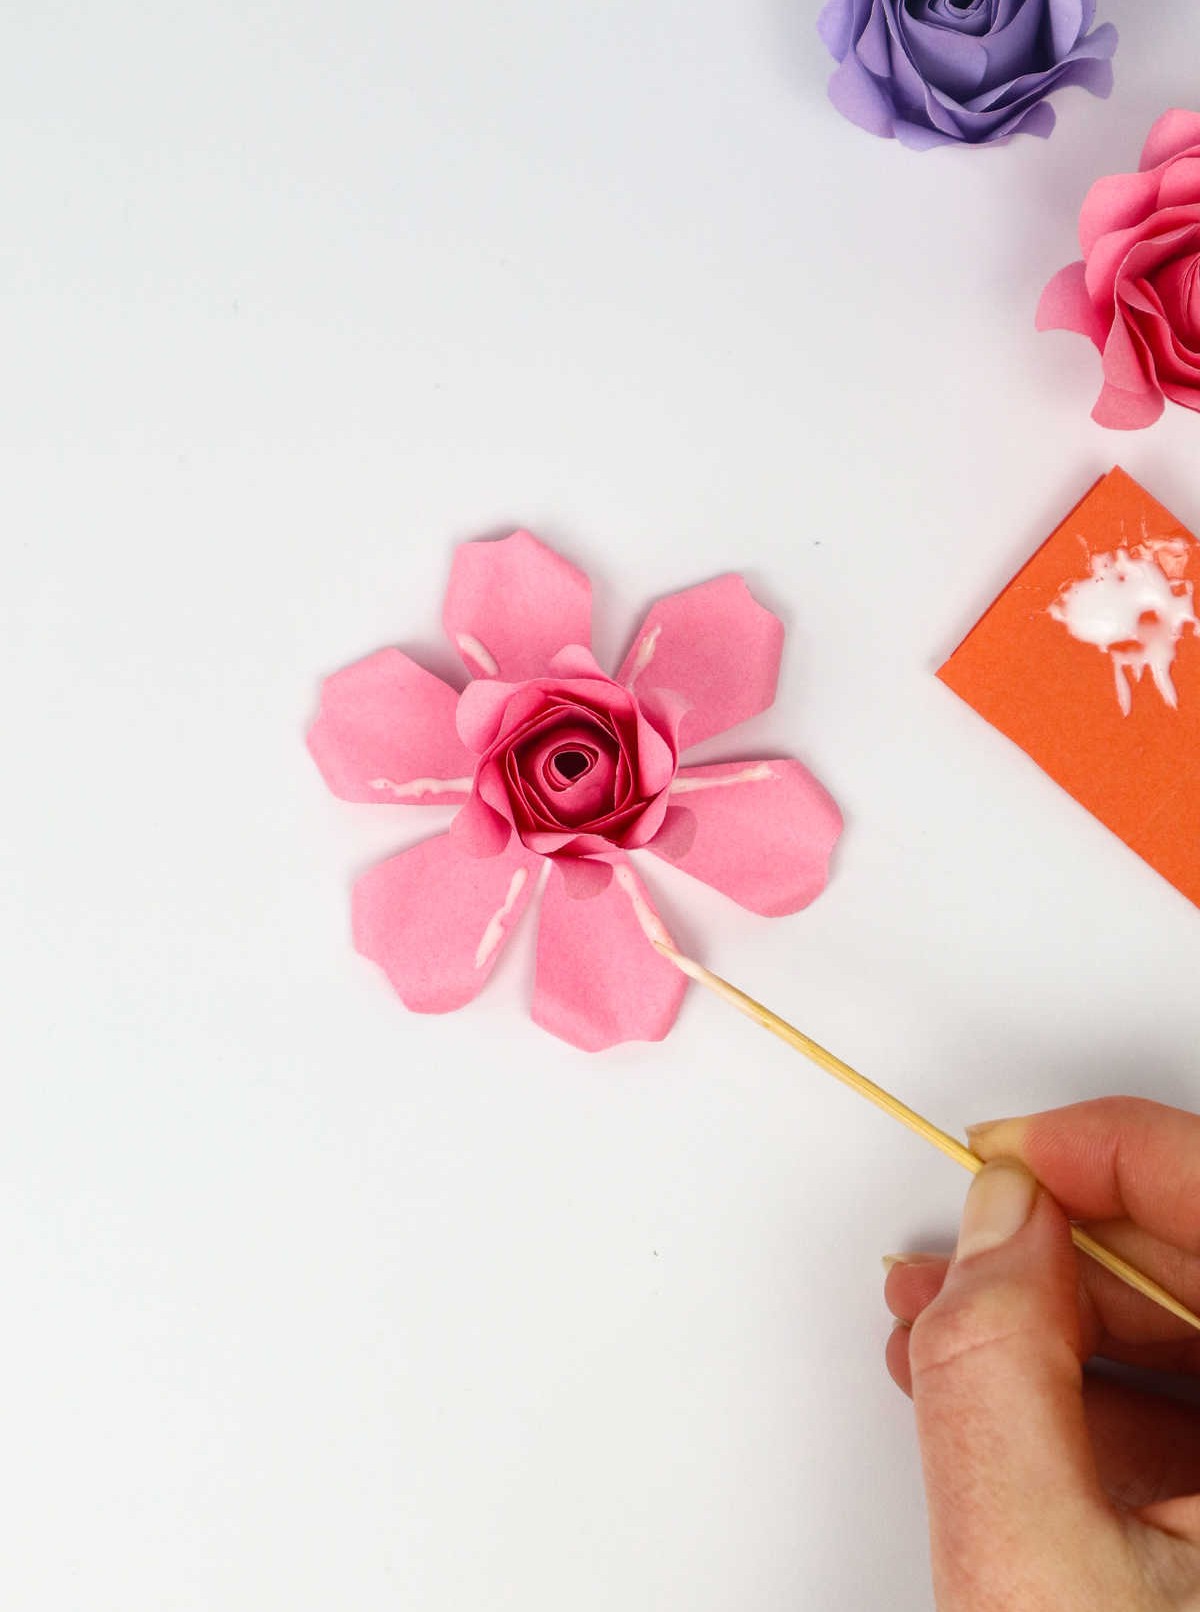
Take the inner layer sheet you set aside earlier. Apply a small amount of glue to the center of this sheet, being careful not to apply too much. Gently place the conical bud you created into the glue and hold it in place until the two pieces bond together. This will form the base of your flower. Next, use thin lines of glue to attach each petal to the central bud. Start at one end and work your way around, applying a small amount of glue to the edge of each petal as you go.
As you stick each petal in place, gently pull it towards the center of the flower, leaving a small gap between each one to create a natural, unfurling effect.
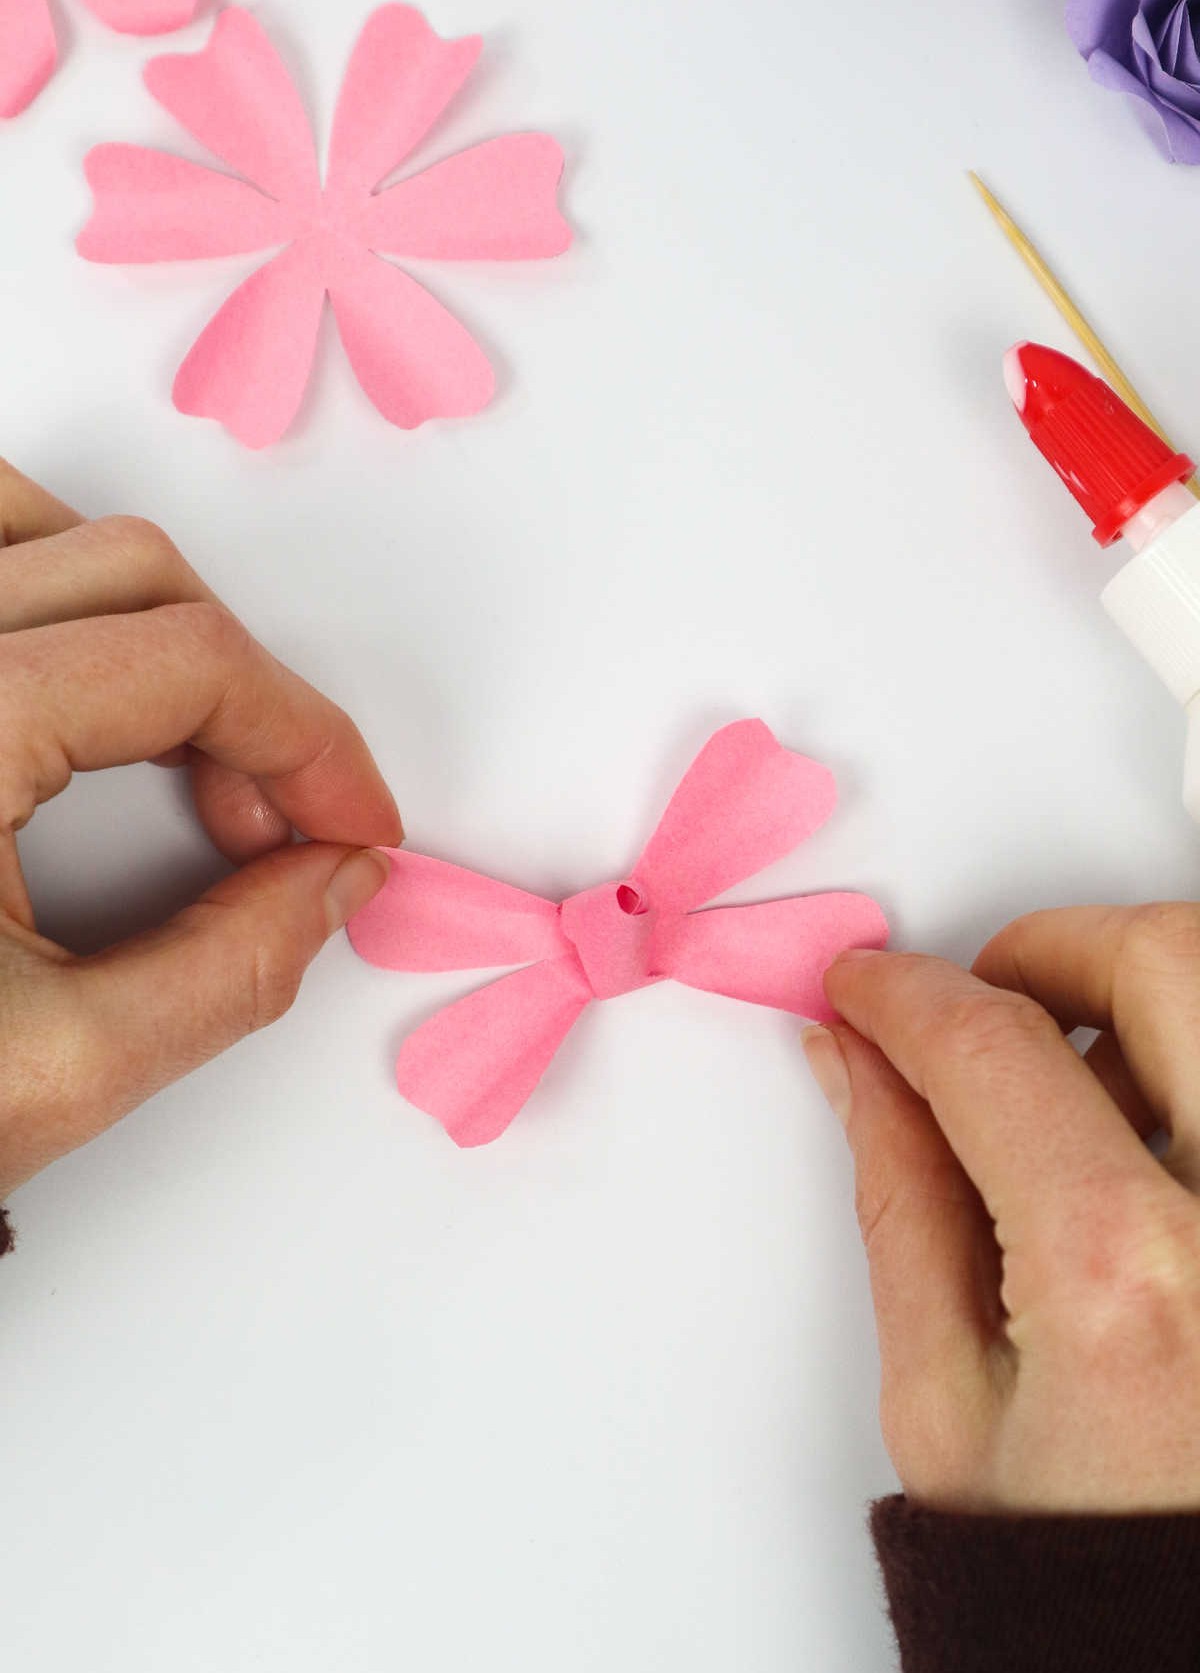
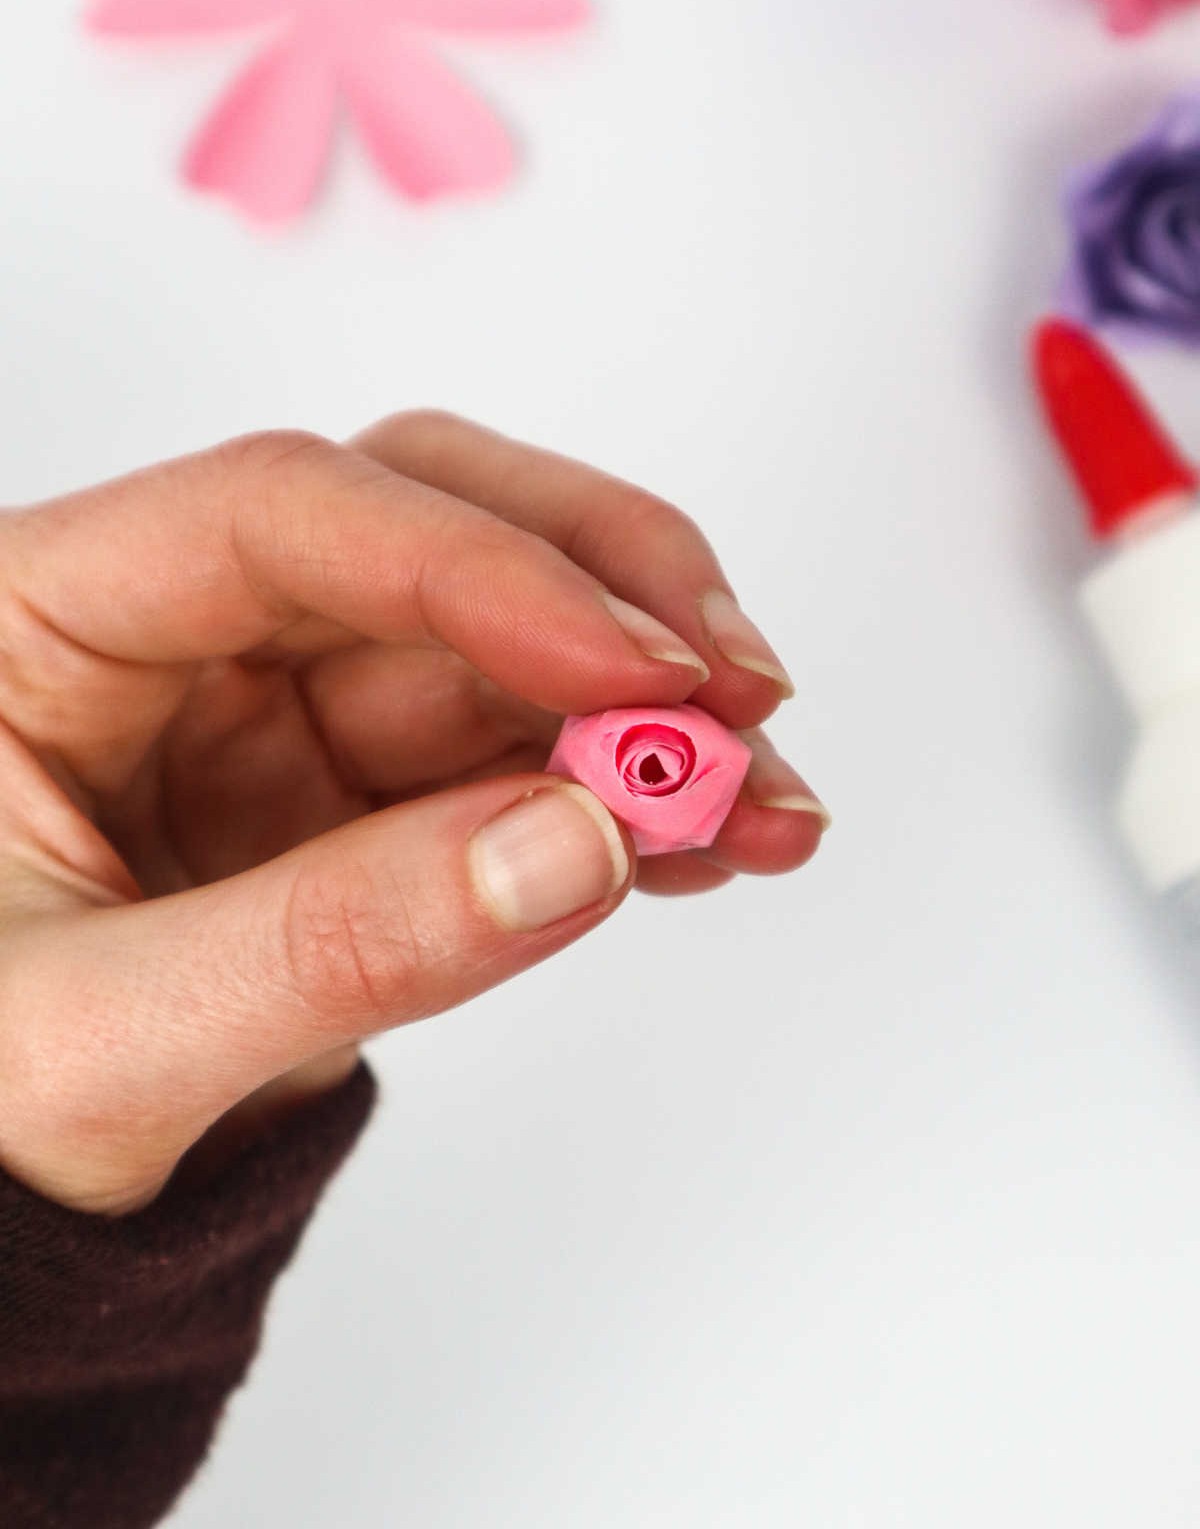
Step 10
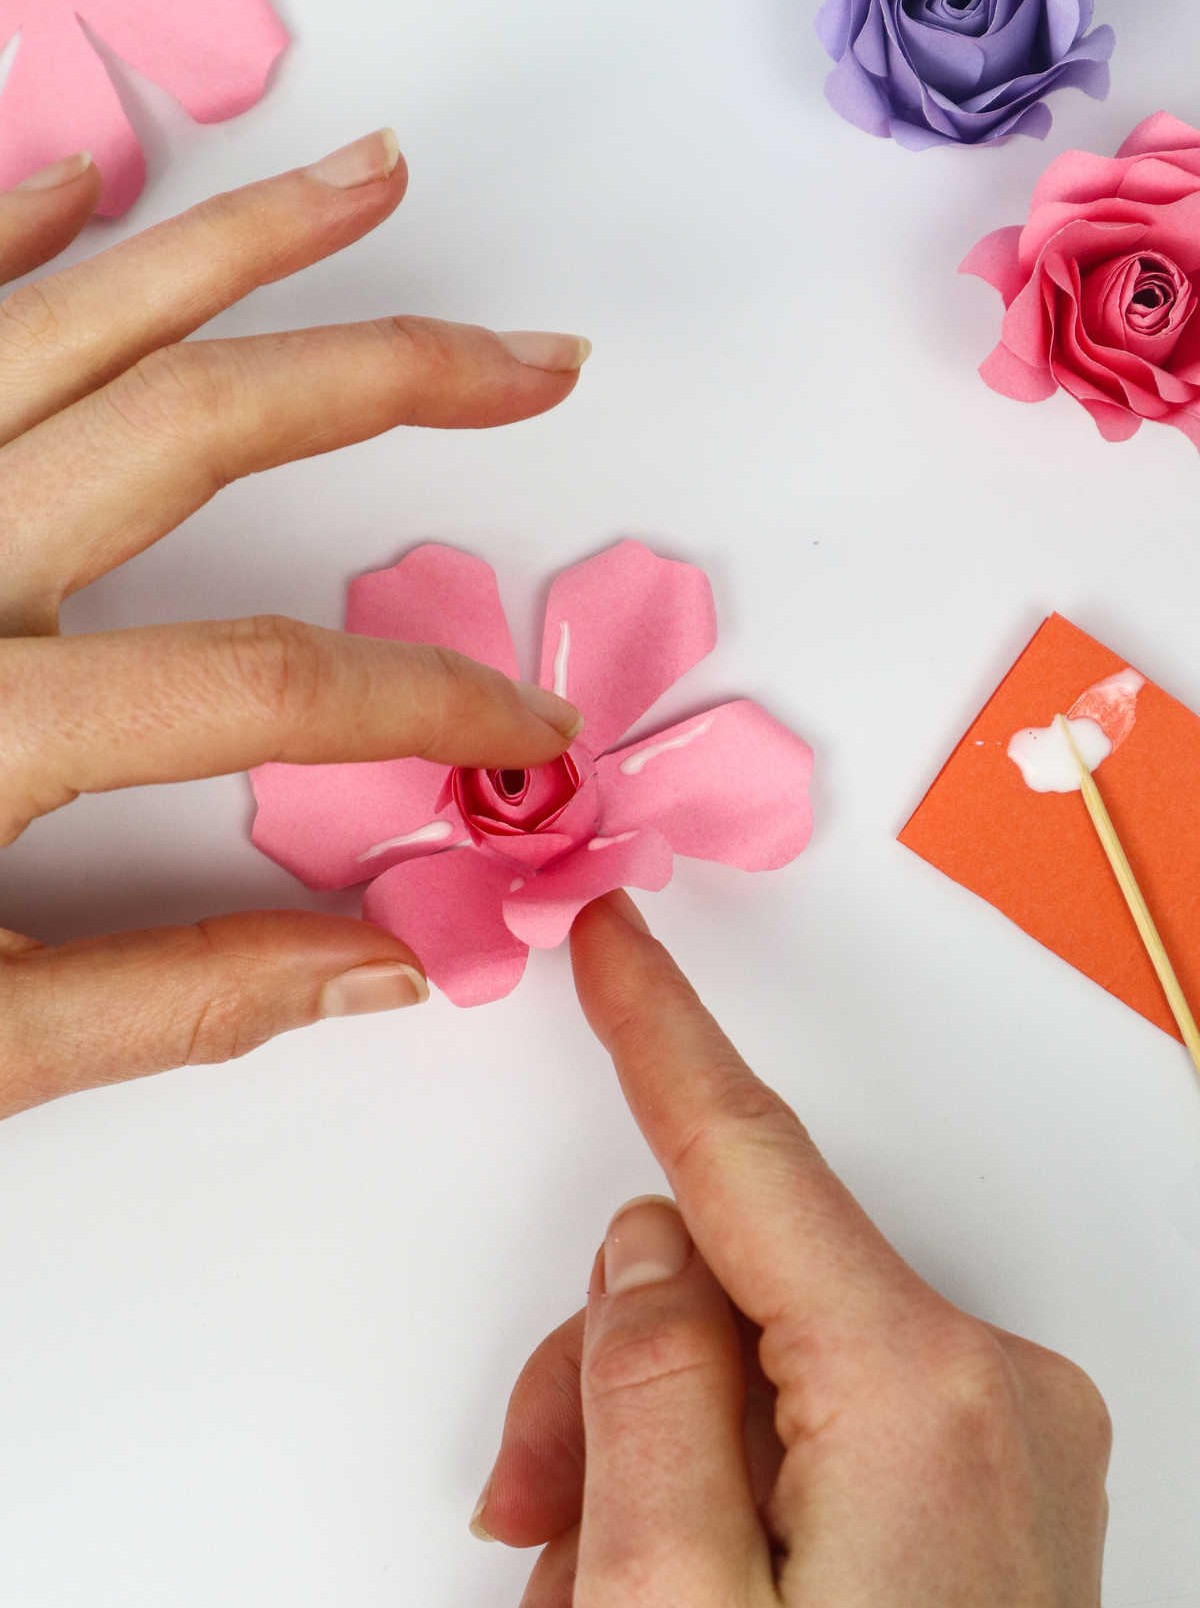
To complete the flower’s appearance, start by securing the central portion of the outermost sheet to the bud, just as depicted below. A thin layer of adhesive is all that’s needed to hold it in place.
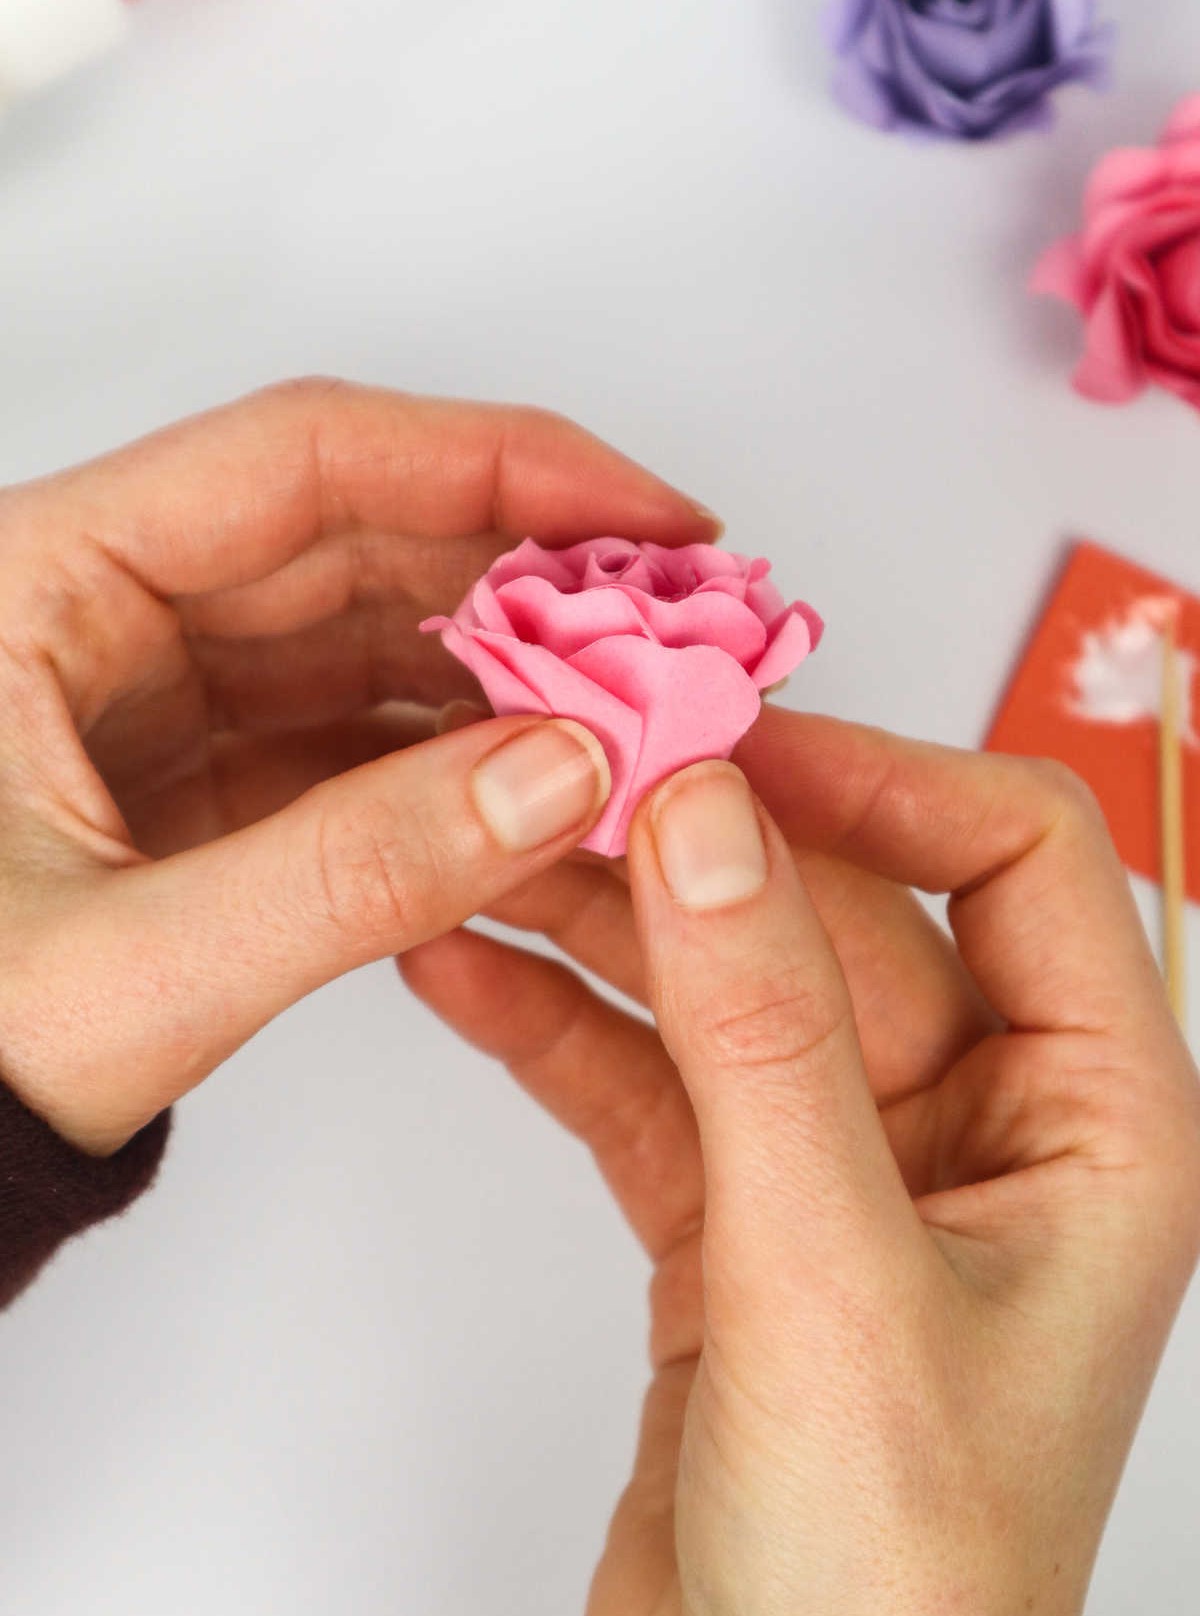
Next, apply a small amount of glue along the edges of the petals and gently bring them inward until they stick together.
This process needs to be repeated one final time for the outermost layer of petals.
Once you’ve secured the center to the bud, you can move on to attaching the petals themselves. As you do so, notice how the curled tips give the petals a fluffy and soft appearance.
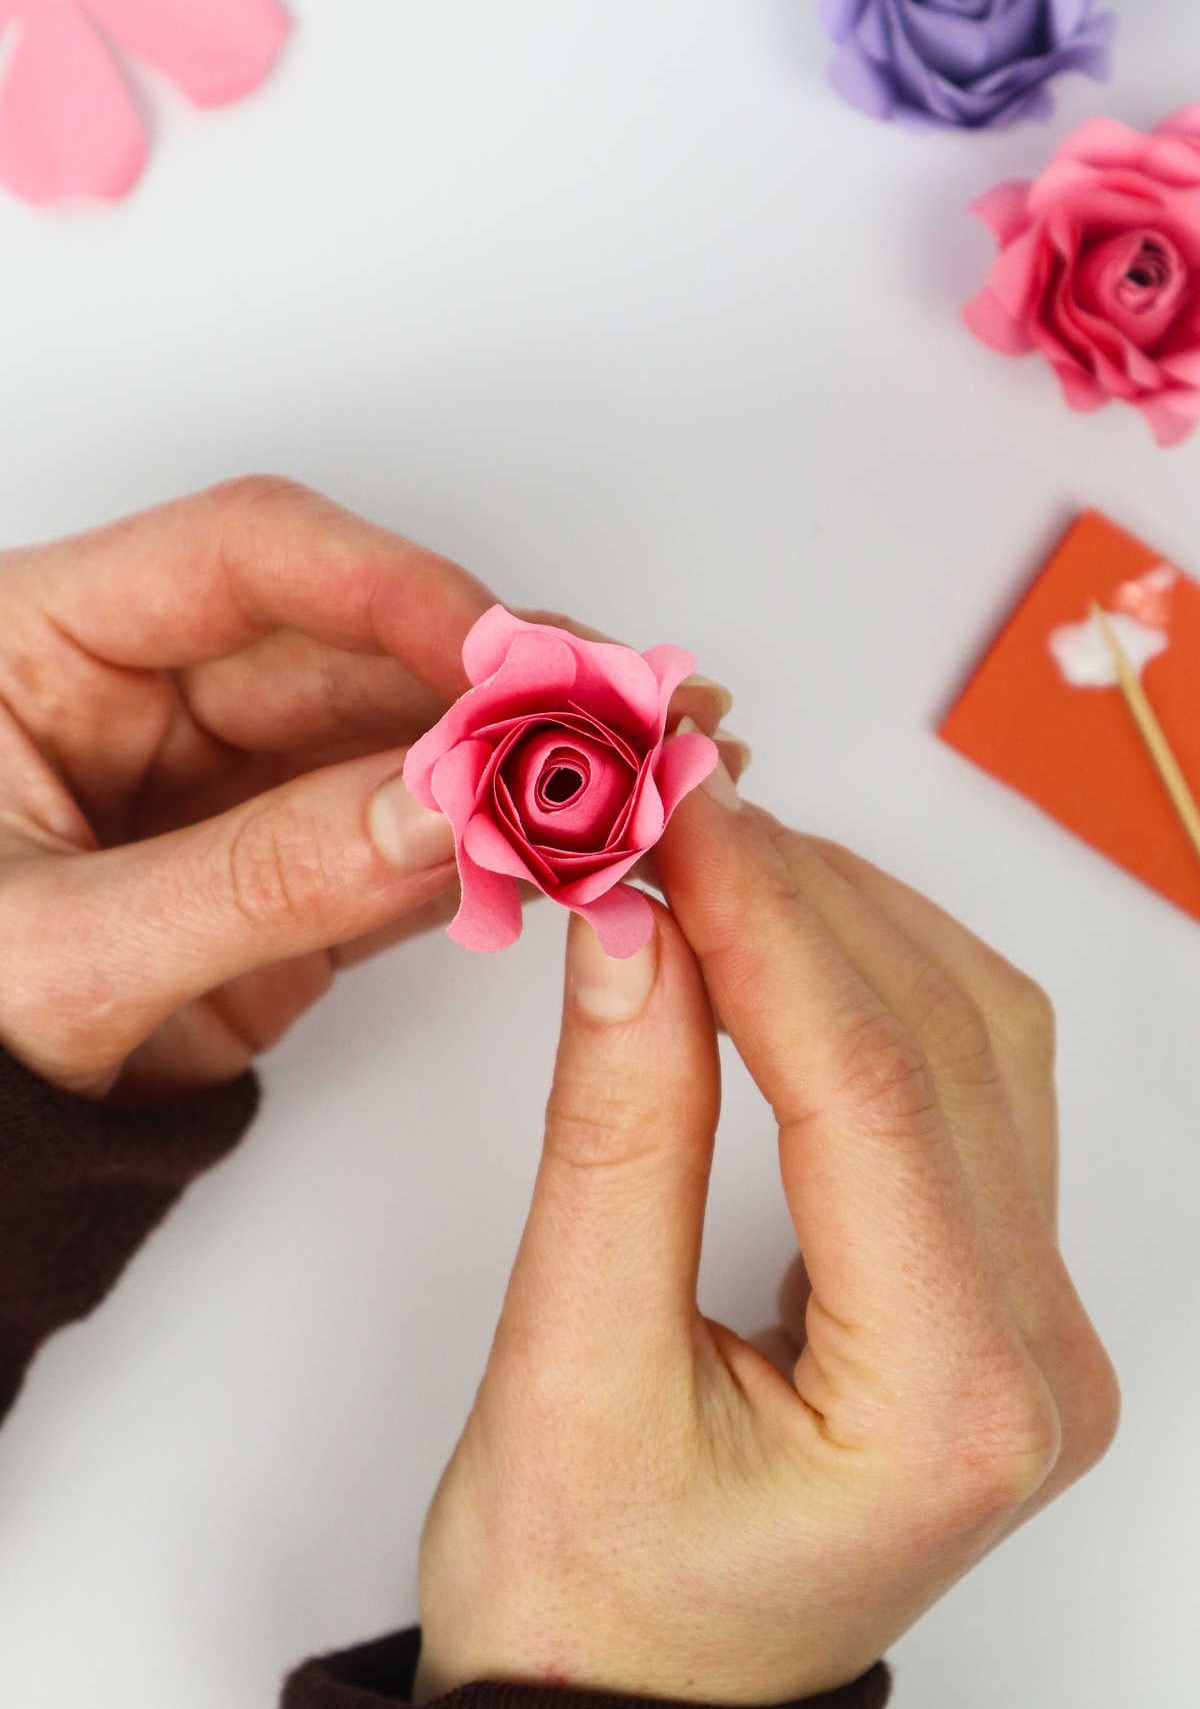
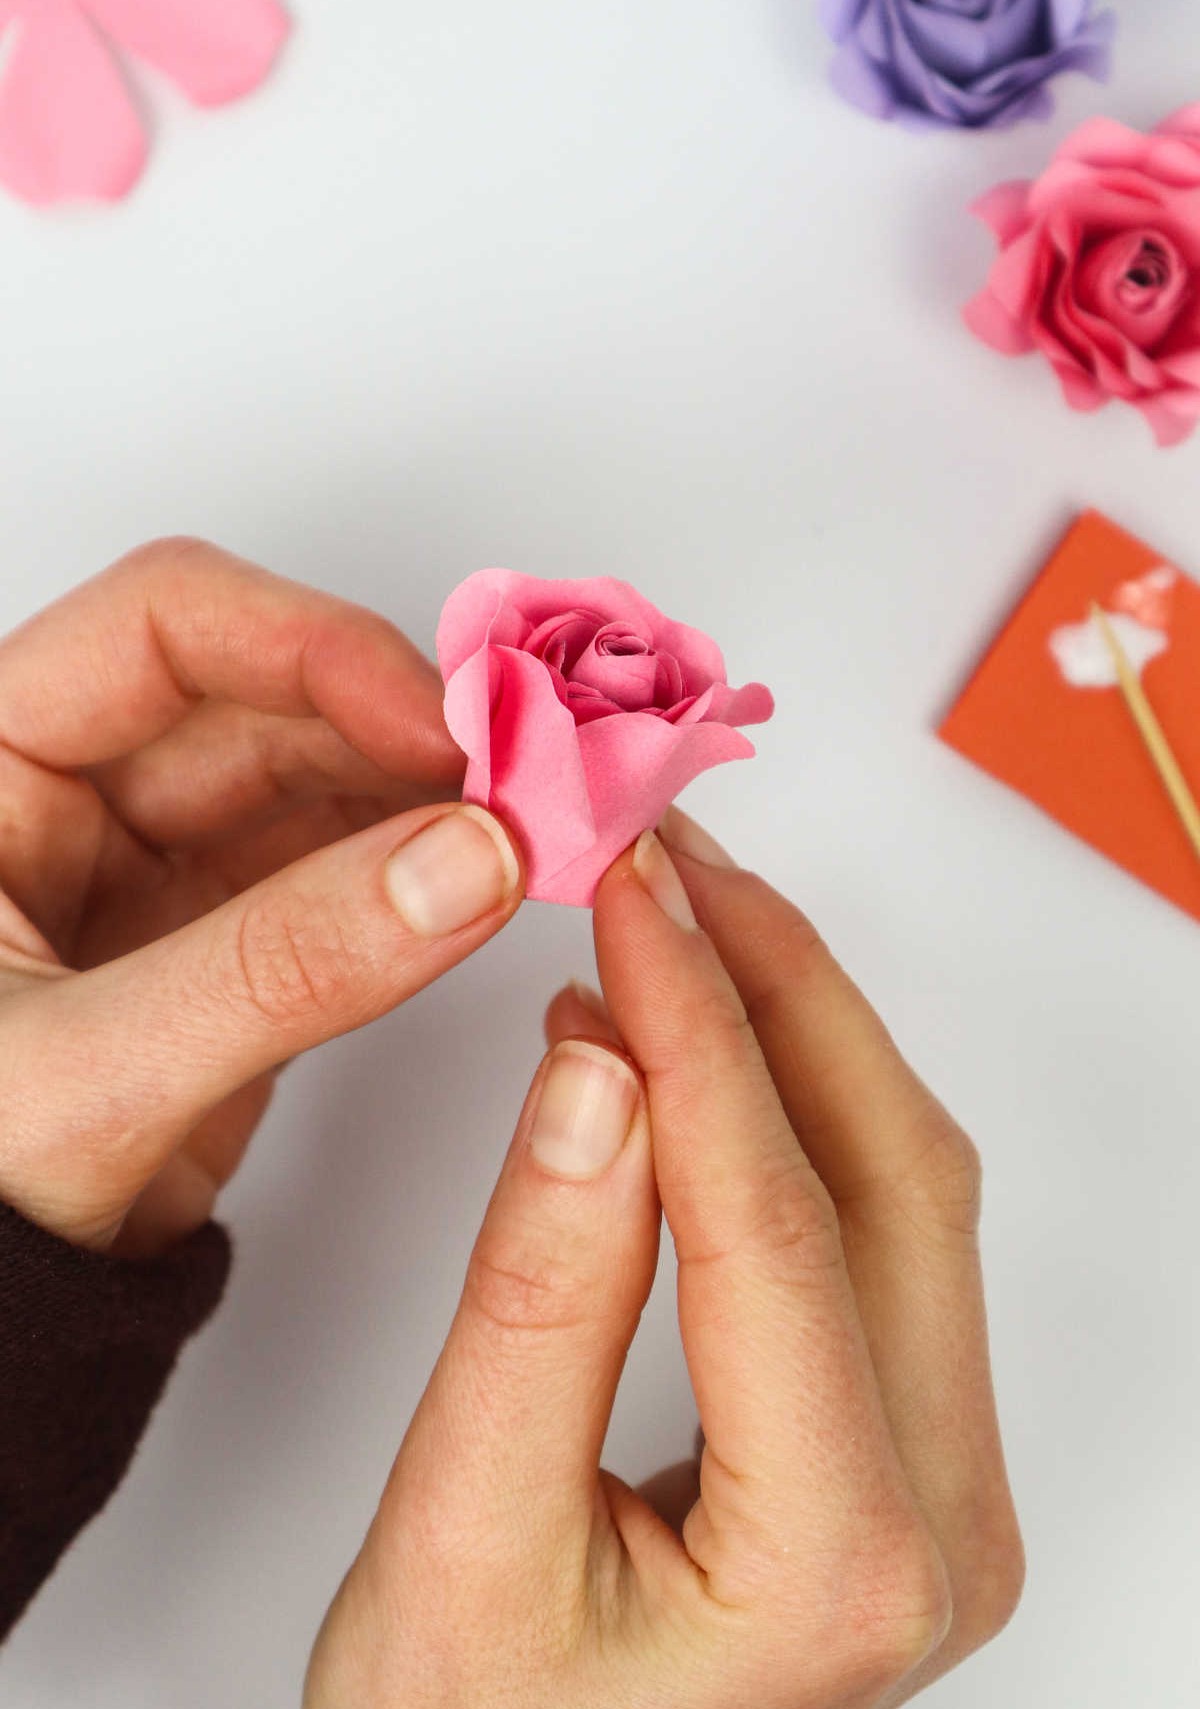
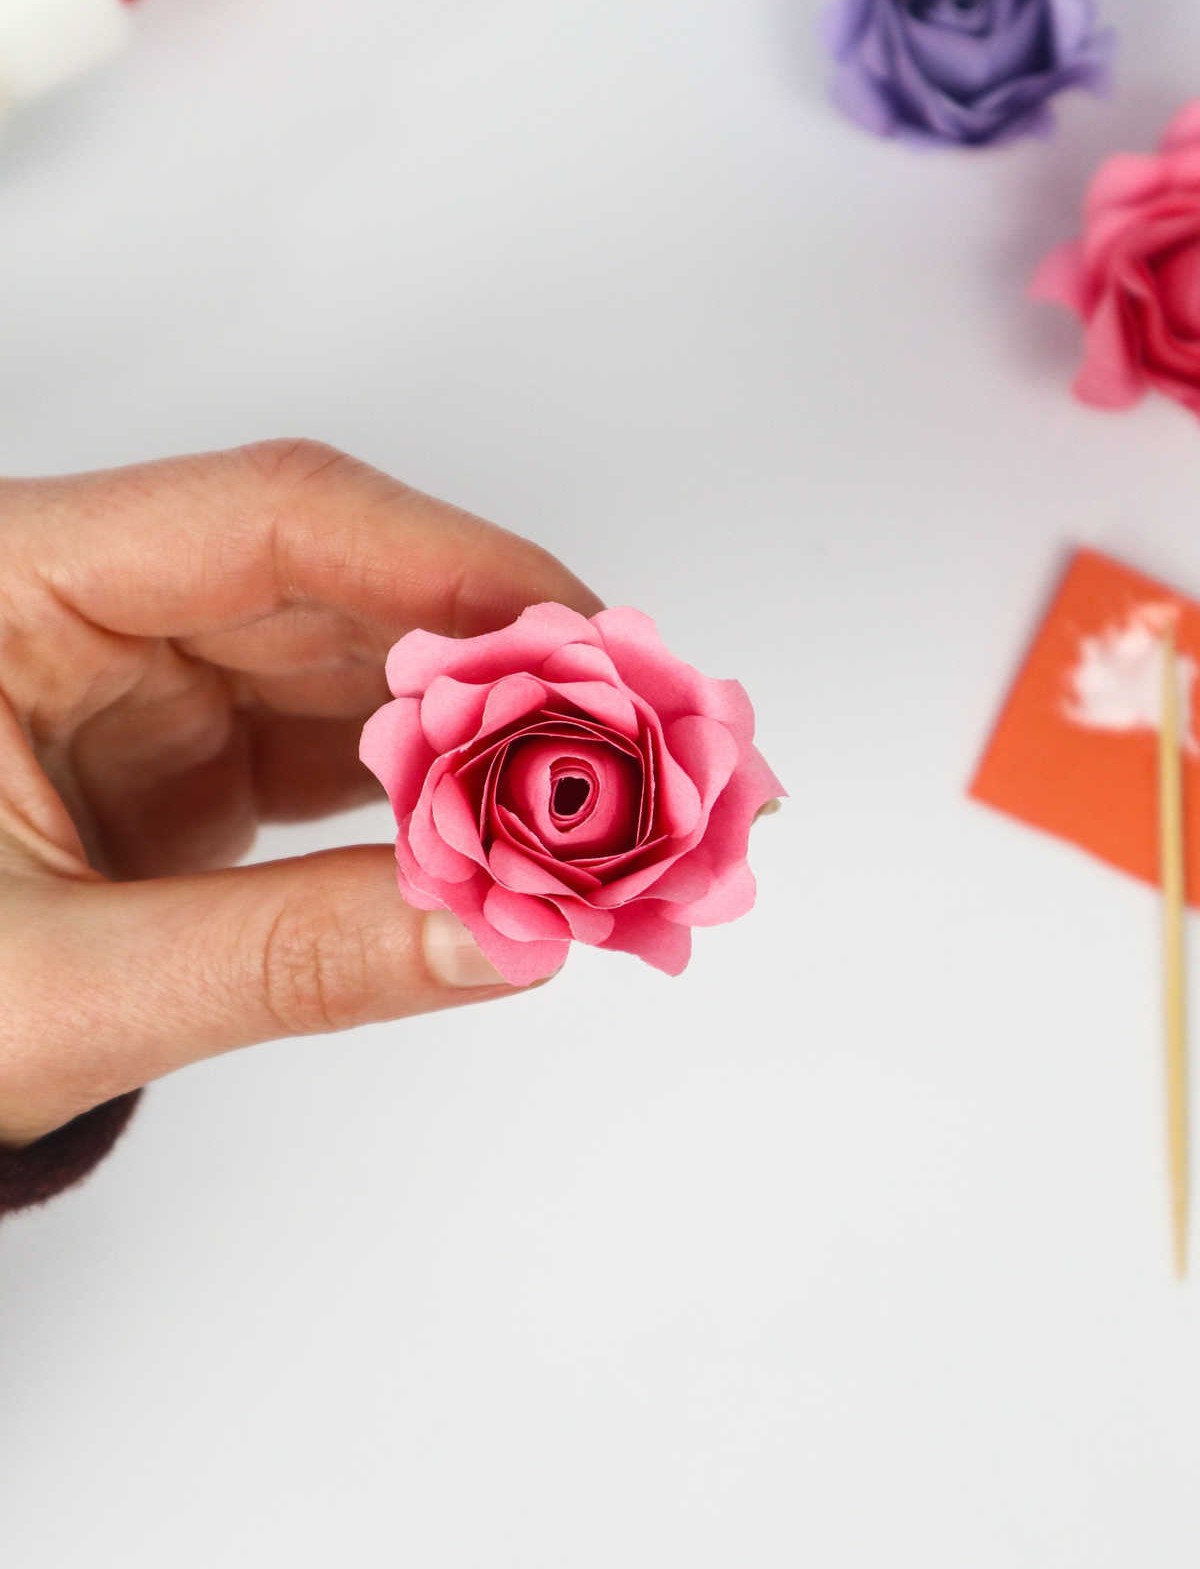
Step 11

To add a finishing flourish to your beautiful flowers, consider adding a delicate circle of washi tape around the base. This subtle touch will elevate their charm and make them seem even more exquisite. And there you have it – your lovely rose arrangements are now complete, a true masterpiece.
How to Make Paper Roses (Step-by-Step)
Create a delightful DIY experience with your friends and family by making a beautiful paper rose. This fun and easy craft is perfect for both teens and adults, requiring only 5 minutes of prep time and total time to complete. With a cost of just $1, you can indulge in this creative pursuit without breaking the bank. Get started today!
Equipment
Materials
For this craft project, you will need a few basic supplies to get started. Begin by gathering four square pieces of paper, each measuring 3.5 inches on all sides. You’ll also need some adhesive, in the form of paper glue, as well as a toothpick and a wooden skewer for added texture. Finally, a ruler will come in handy for measuring and aligning your design.
Instructions
To craft these charming paper roses, start by gathering your materials. Begin with one of the four square sheets of paper and fold it in half to form a triangle, then repeat this process to create a smaller triangle. Mark the center of the top edge 1.5 inches from the top and fold the opposite corner up towards the mark. Repeat this step on the other side. Use scissors to cut out the six-petal flower shape. Follow these steps with all four sheets.
Next, use a wooden skewer to curve each petal into a hexagonal cup shape. Then, take two of the petals and curl the tips using a toothpick to create the outer layer. Apply glue to the center of one of the inner petals and attach it to form a conical bud. Repeat this process with the remaining petals to create the central bud. Attach the next layer, applying glue to the center before placing it on top of the bud.
Hold until adhered, then use a toothpick to apply glue to each petal and gently bring them inward, overlapping them as you attach them to the back petals of the bud. Repeat this step with the outer layers. To complete the rose, allow it to dry completely before handling.
