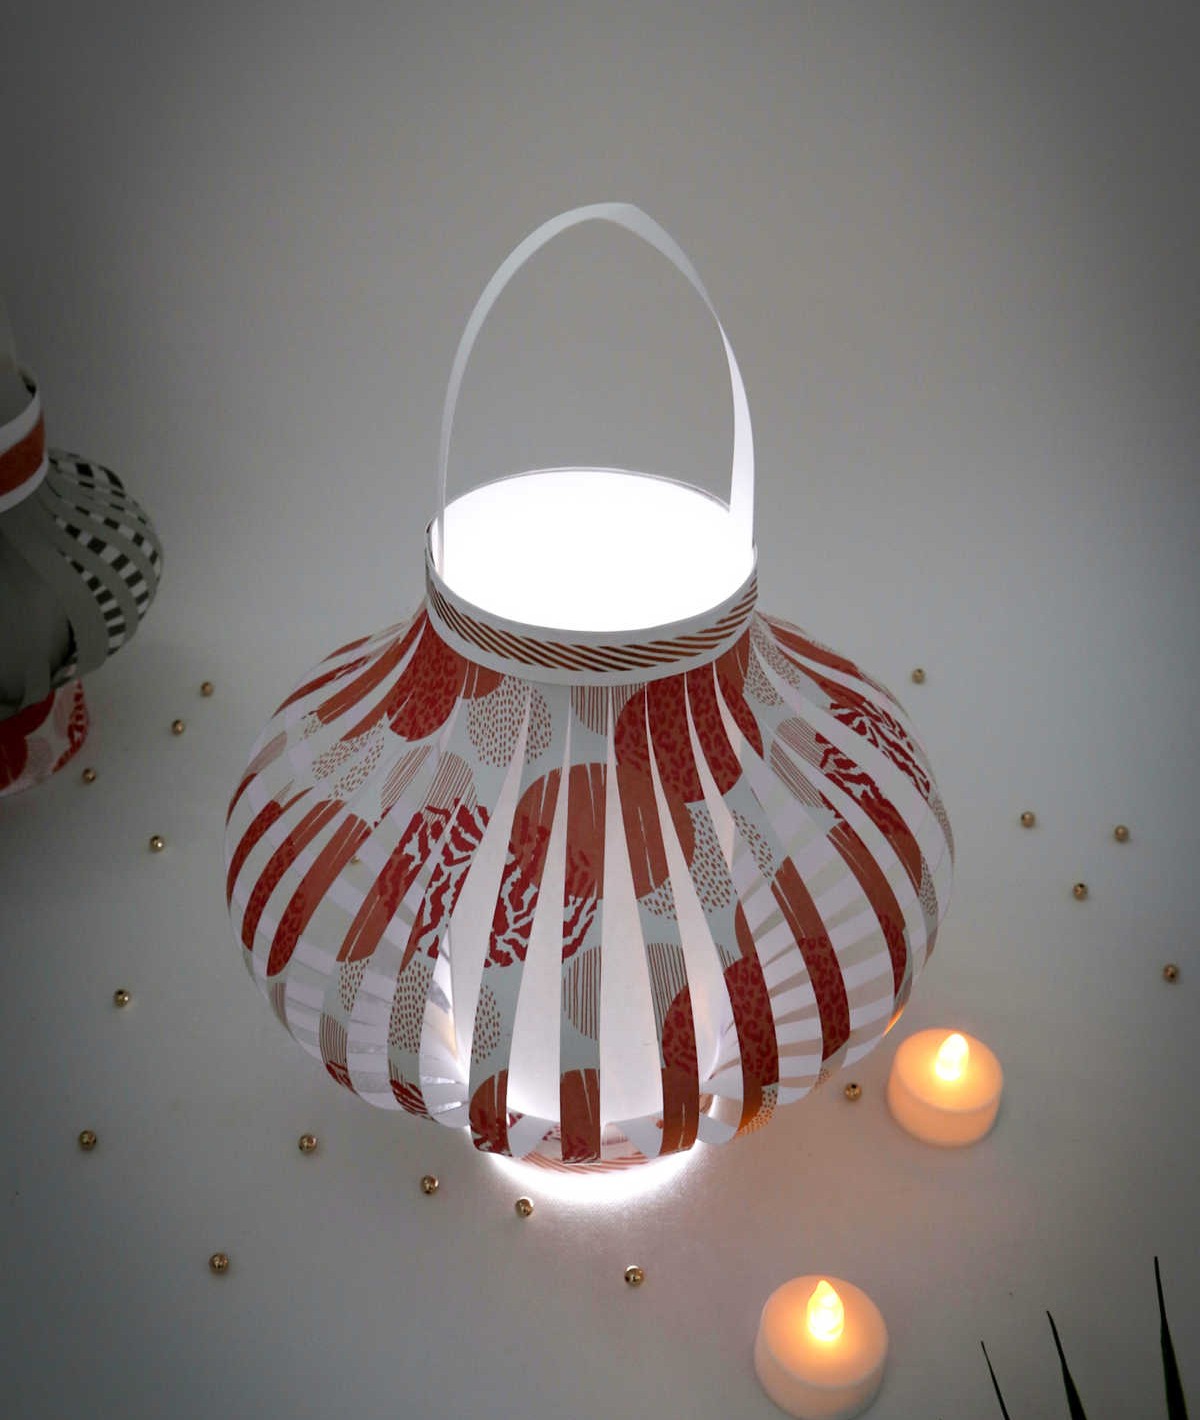
Paper lanterns are a delightful craft that can add a touch of warmth and coziness to any space. But did you know that these seemingly simple decorations hold different meanings and symbolism across cultures? Depending on the region, they might be crafted from paper, silk, bamboo, or wood, with candles or LED lights providing the perfect glow.
From festivals to celebrations, lanterns play a significant role in bringing people together.
With their versatility and charm, it’s no wonder why paper lantern-making has become a beloved activity worldwide. So, let’s dive into the world of paper craft and create our own stunning lantern at home!
Supplies and Tools You’ll Need
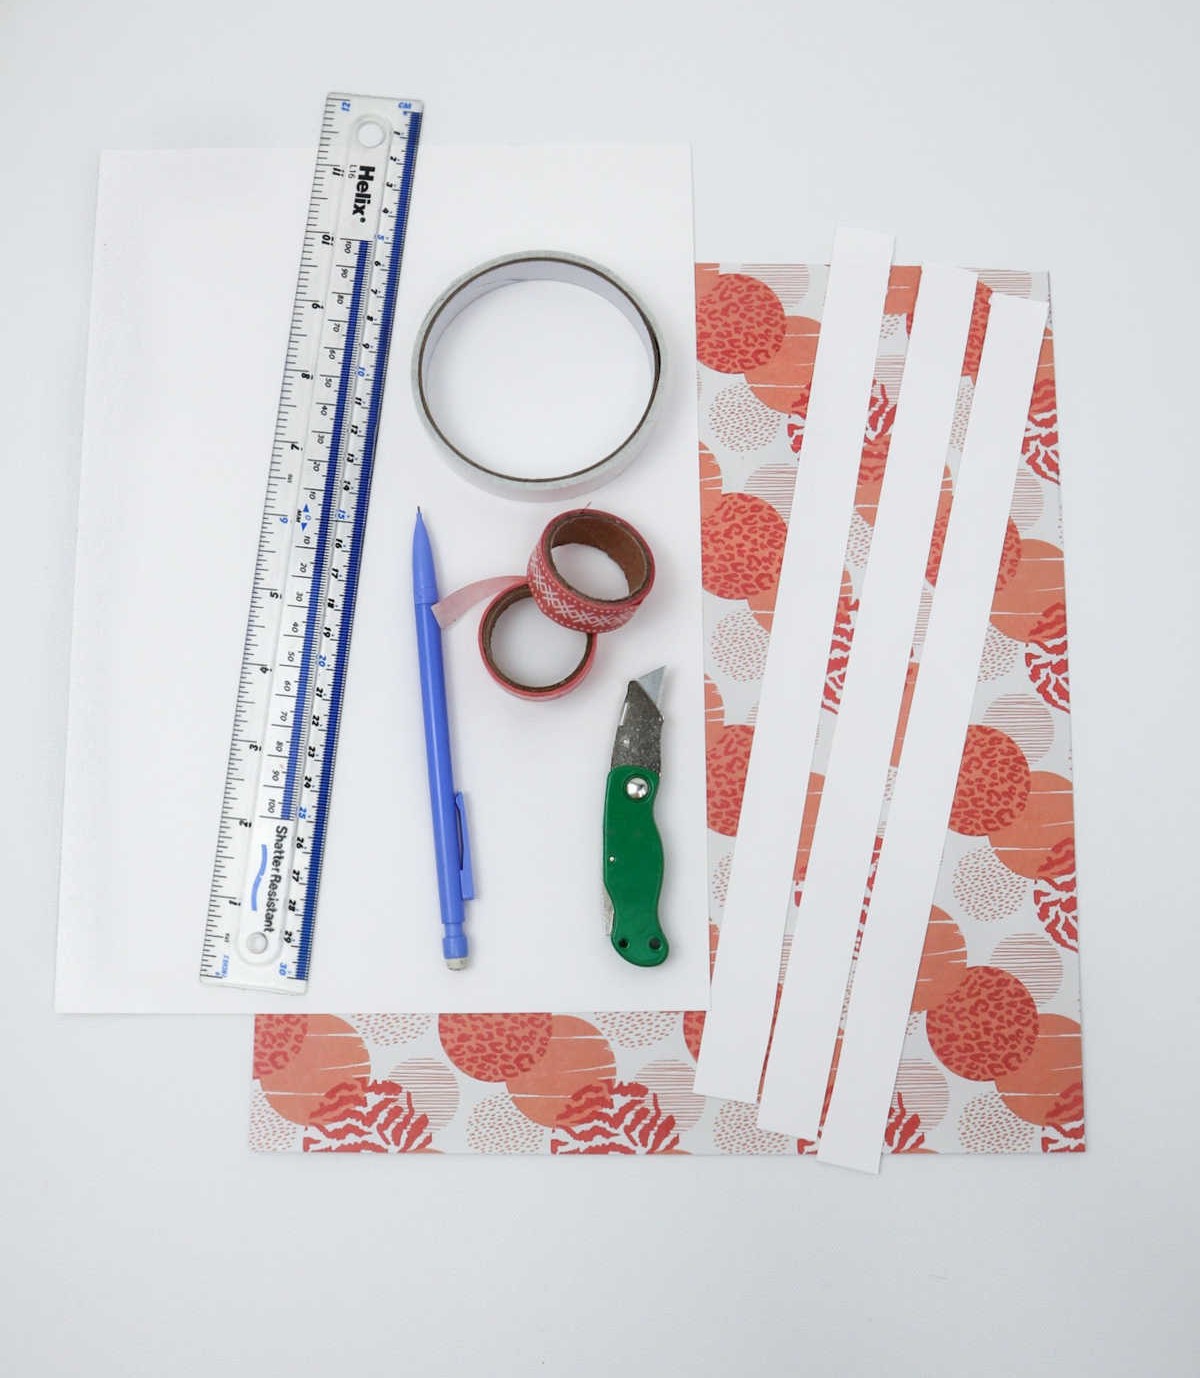
To embark on this creative project, you’ll need the following materials: a sheet of white paper measuring 10 inches by 12 inches, a piece of craft paper with the same dimensions, and a pencil for sketching. Additionally, you’ll require a ruler to ensure straight lines, decorative tape for adding visual flair, double-sided tape for secure bonding, and a retractable blade knife for making precise cuts.
Finally, three strips of paper, each measuring 12 inches by 1 inch, will be needed to complete the project.
Watch: DIY Paper Lanterns
Need inspiration or want to explore the process visually? Why not watch our comprehensive step-by-step guide on creating these amazing projects, brought to life through engaging video tutorials!
How to Make Paper Lanterns
Having collected all the necessary materials, it’s time to learn the steps involved in crafting your very own paper lanterns. The process is straightforward and requires minimal equipment, making it an accessible DIY project for anyone looking to add a touch of creativity to their space.
Step 1
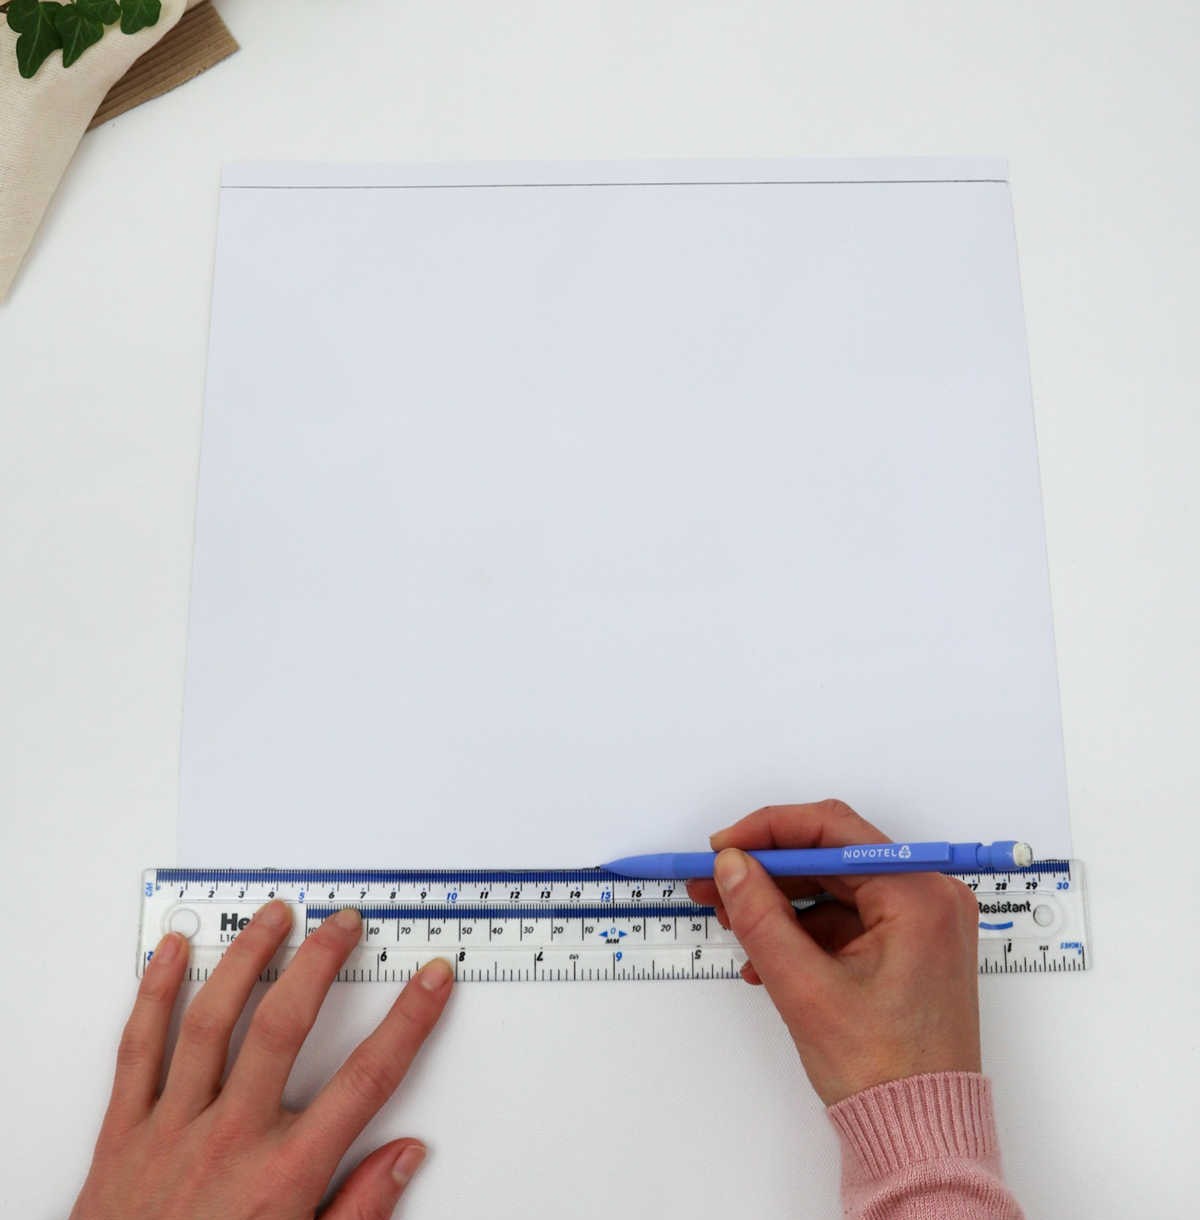
To begin with, select a craft paper that resonates with you. Don’t be limited by conventional options – opt for textured, colored, or printed papers that boast vibrant hues. As long as the chosen paper isn’t too opaque to allow natural light to seep through, you’re good to go. Once you’ve made your selection, place the paper face down on a work surface. Then, using a ruler and a pencil, draw two parallel lines, about half an inch (or 1 cm) away from both the bottom and top edges of the paper.
This initial step sets the stage for what’s to come.
Step 2
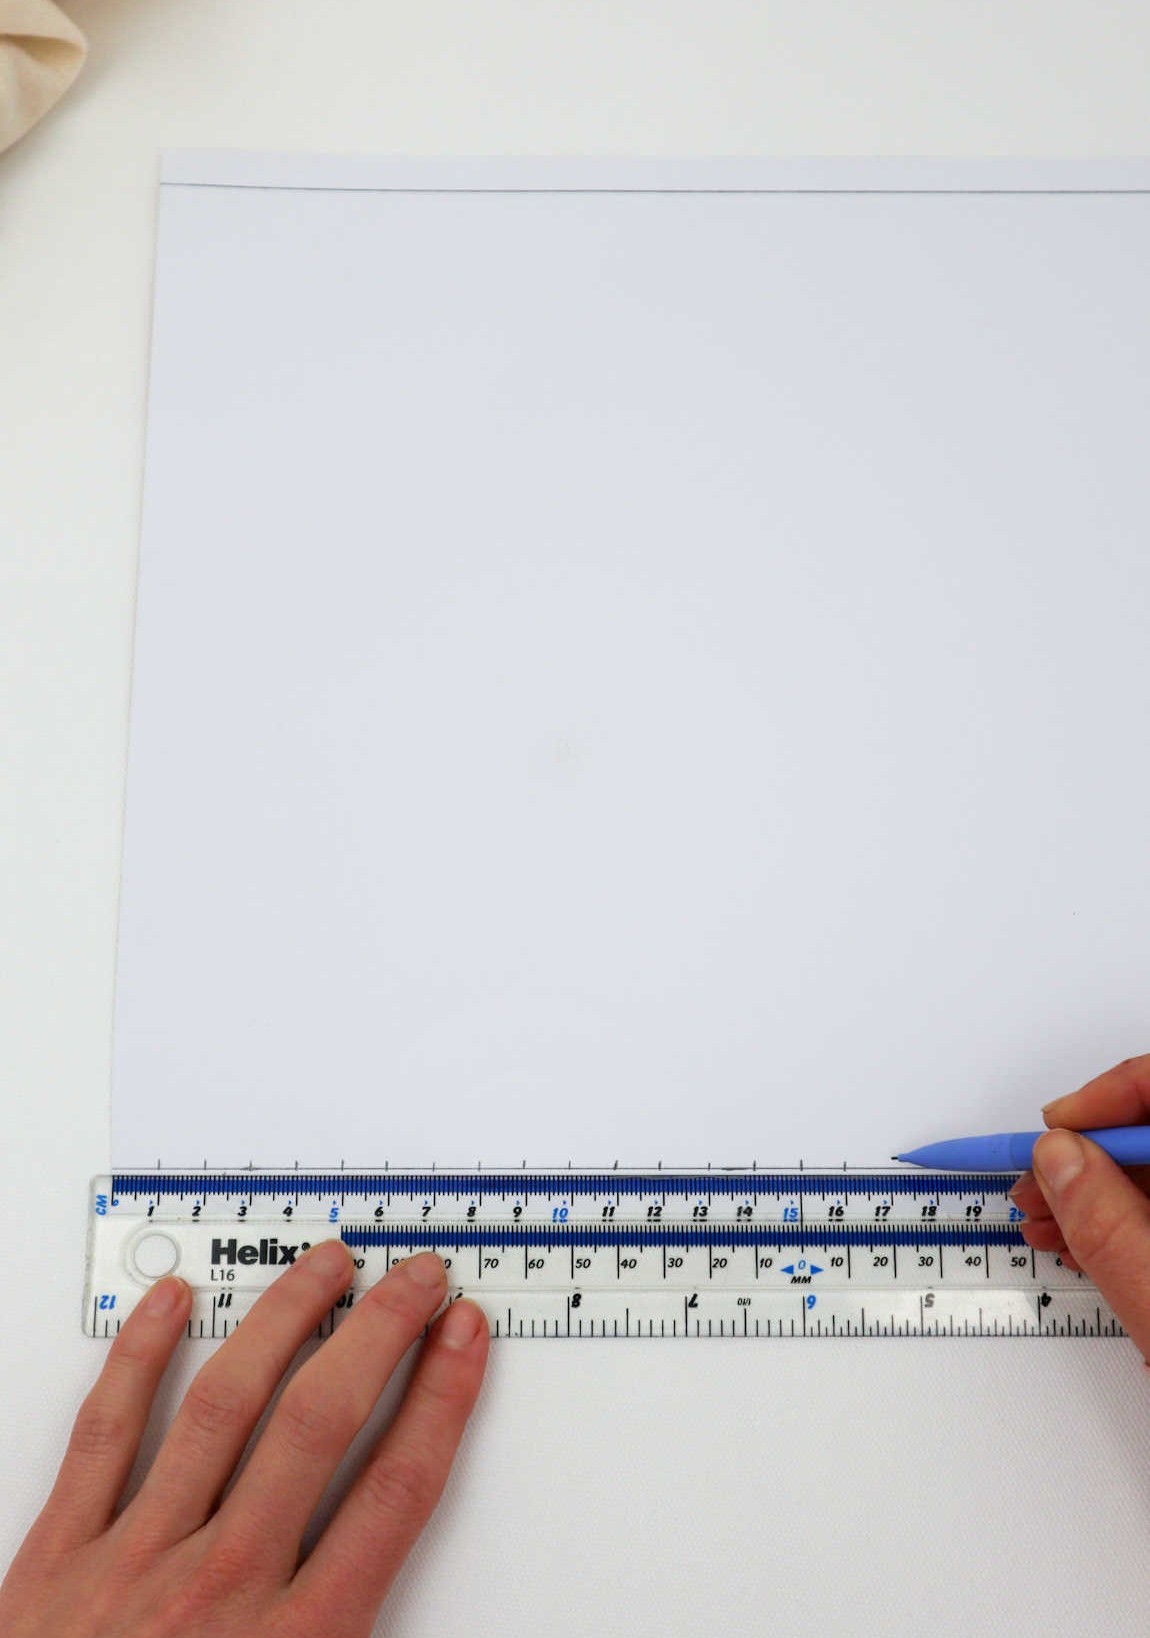
As you near the end of the tutorial, don’t put away your trusty drawing tools just yet! Instead, place the ruler precisely over the newly drawn lines and mark every centimeter interval with a deliberate stroke. This meticulous step will pay dividends as you work towards achieving accuracy and precision in your design. Repeat this process for the second line at the bottom of the sheet, applying equal attention to detail to ensure a flawless finish.
Step 3

To align your measuring tool, simply rotate it so that the top and bottom edges of the ruler are both in sync with the first markings on both lines. Then, create a horizontal line by drawing a continuous stroke from one edge to the other. Next, draw vertical lines that connect each marker on the top line to its corresponding subordinating mark, ensuring precise alignment.
Step 4
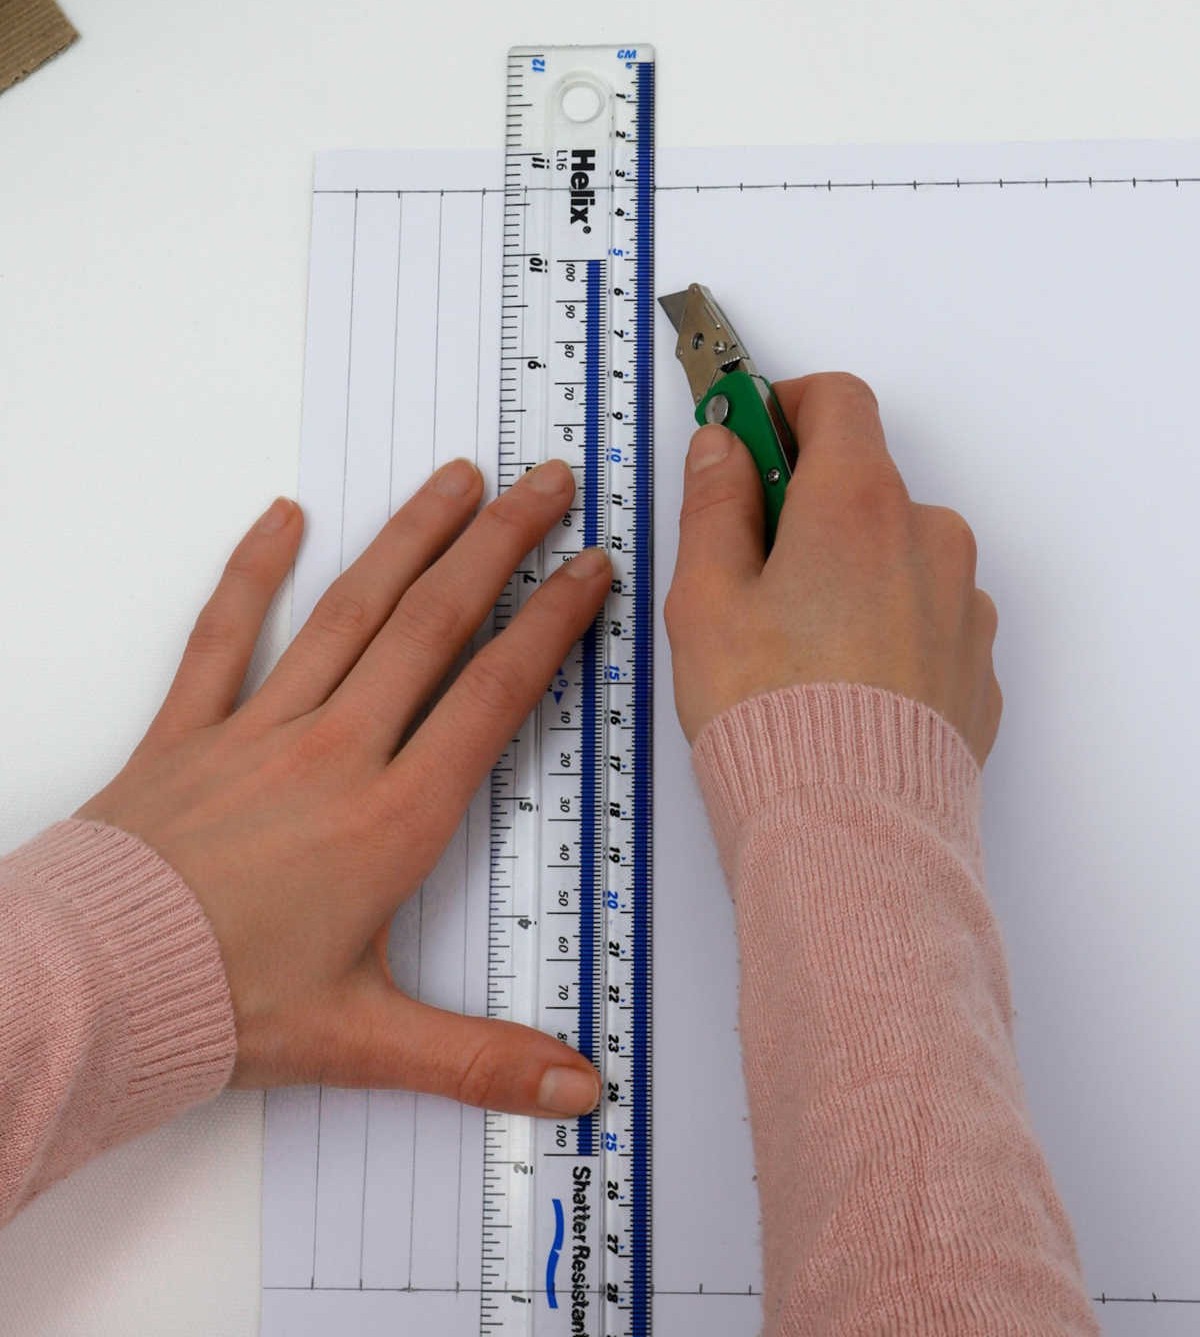
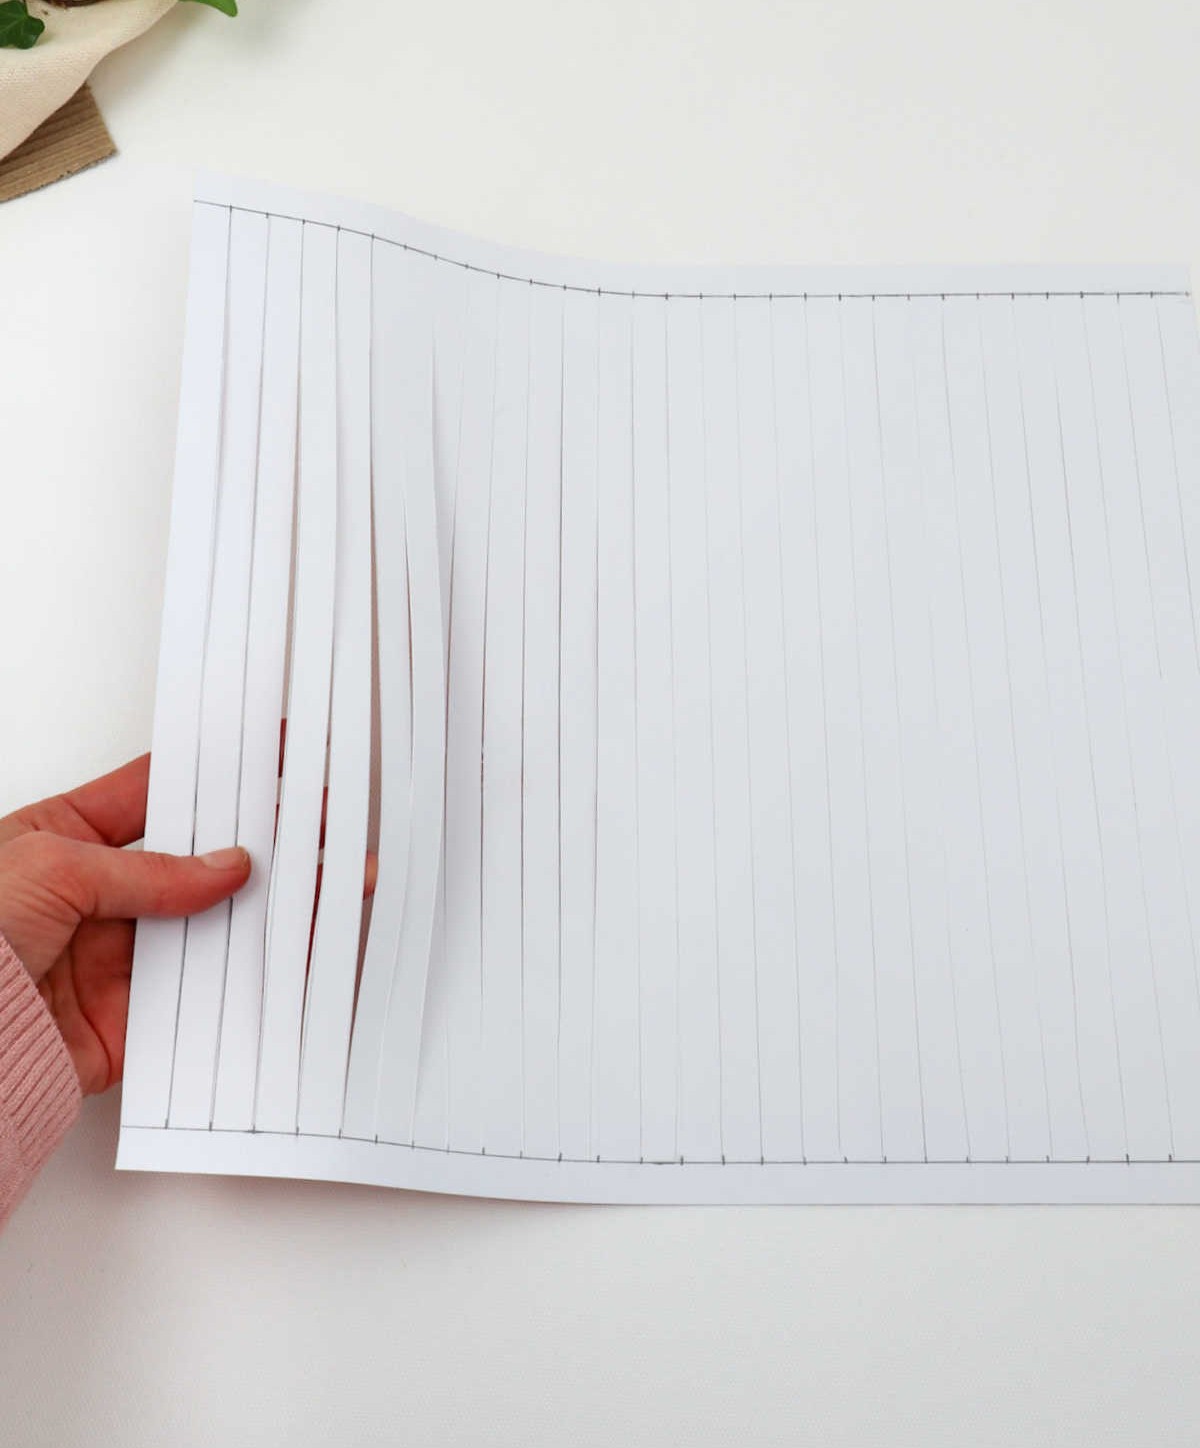
To begin crafting your lantern, take out your trusty craft cutter and ruler. With precision, cut along the lines on your paper using these tools, as depicted below. A vital reminder: be mindful of the top and bottom boundaries, ensuring you don’t exceed them, or your lantern may lose its structural integrity. Once you’ve completed cutting the strips, your craft paper should resemble this aesthetic.
Step 5
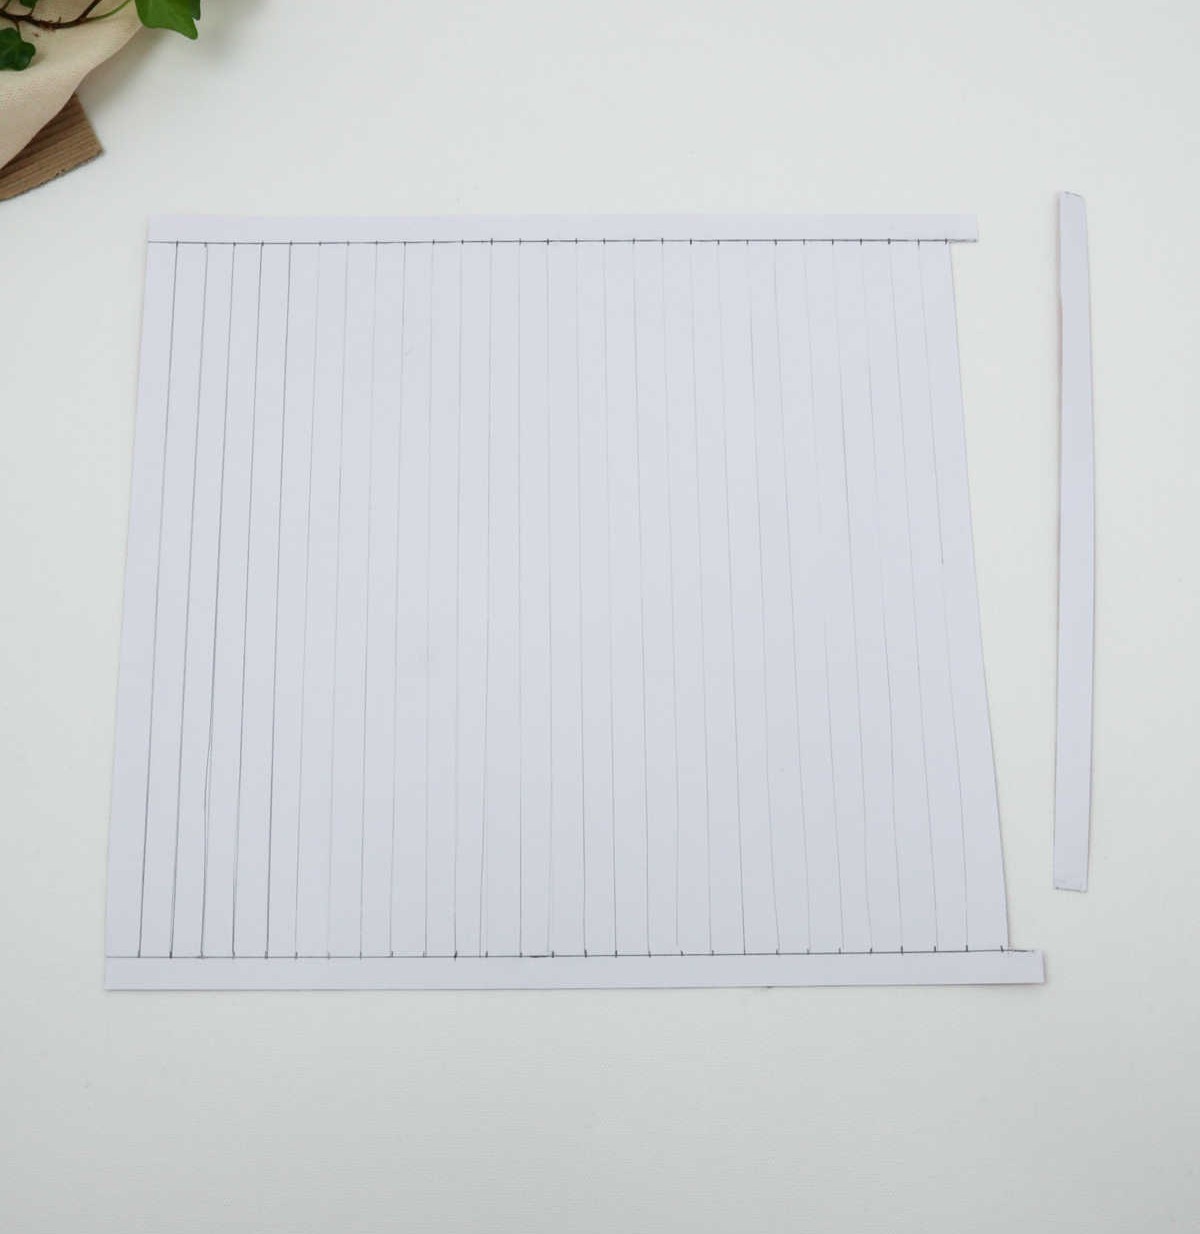
To create a gap, carefully cut a single strip from the end of the sheet, leaving a small opening. This will allow for easy alignment and connection with subsequent sheets.
Step 6
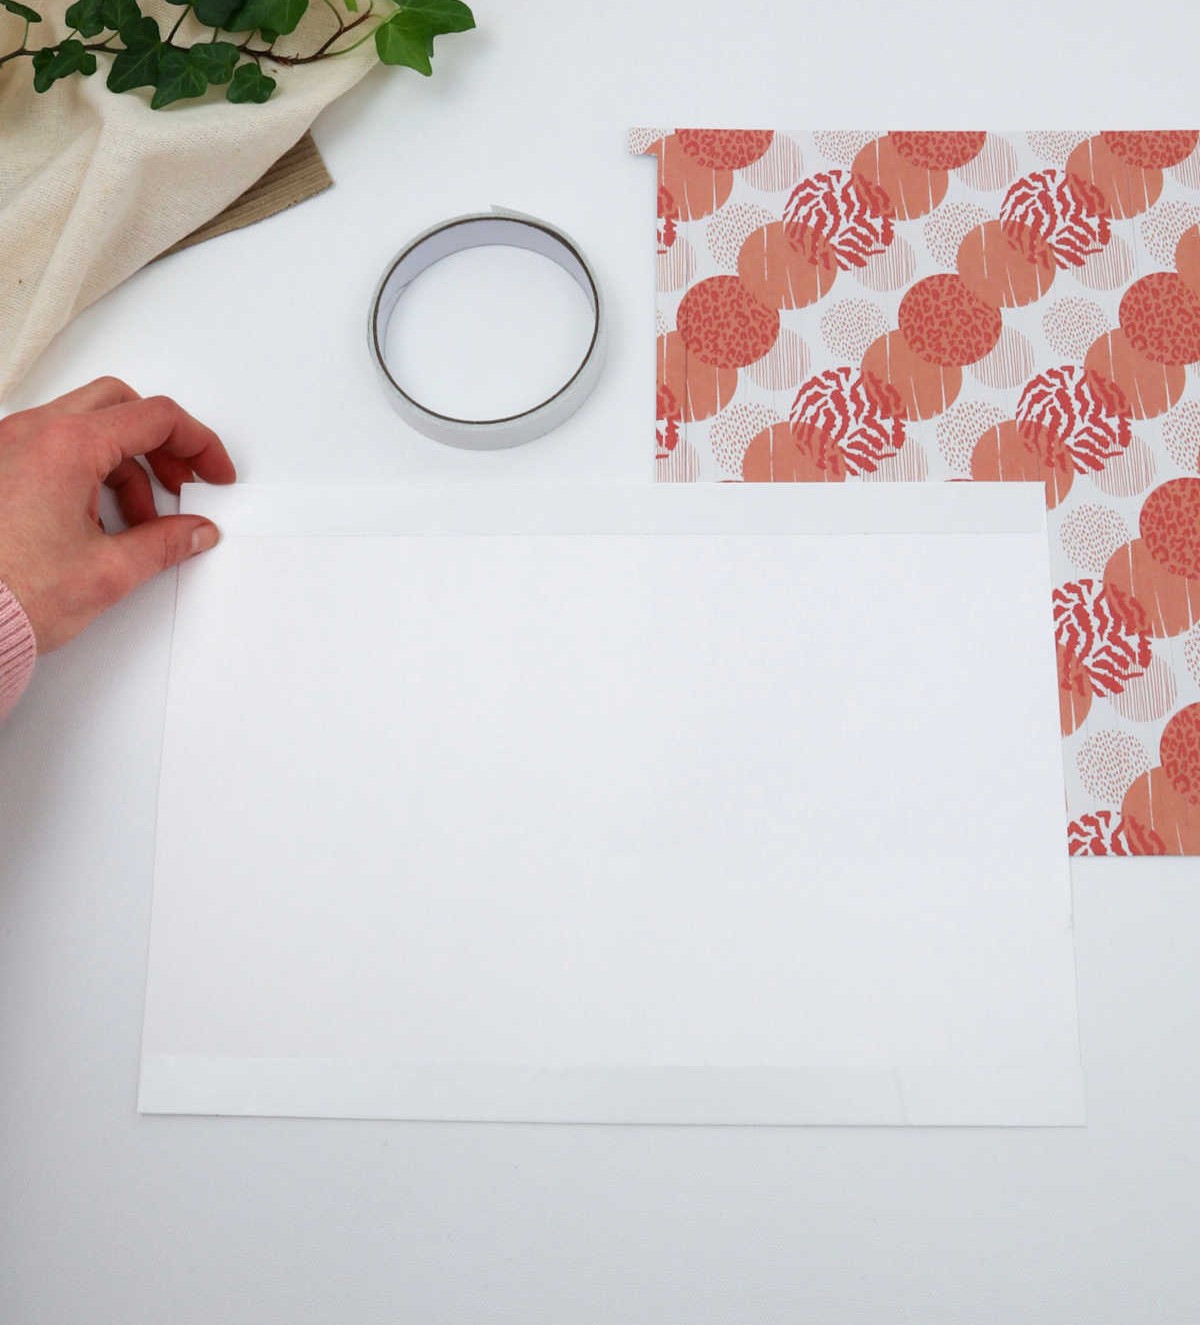
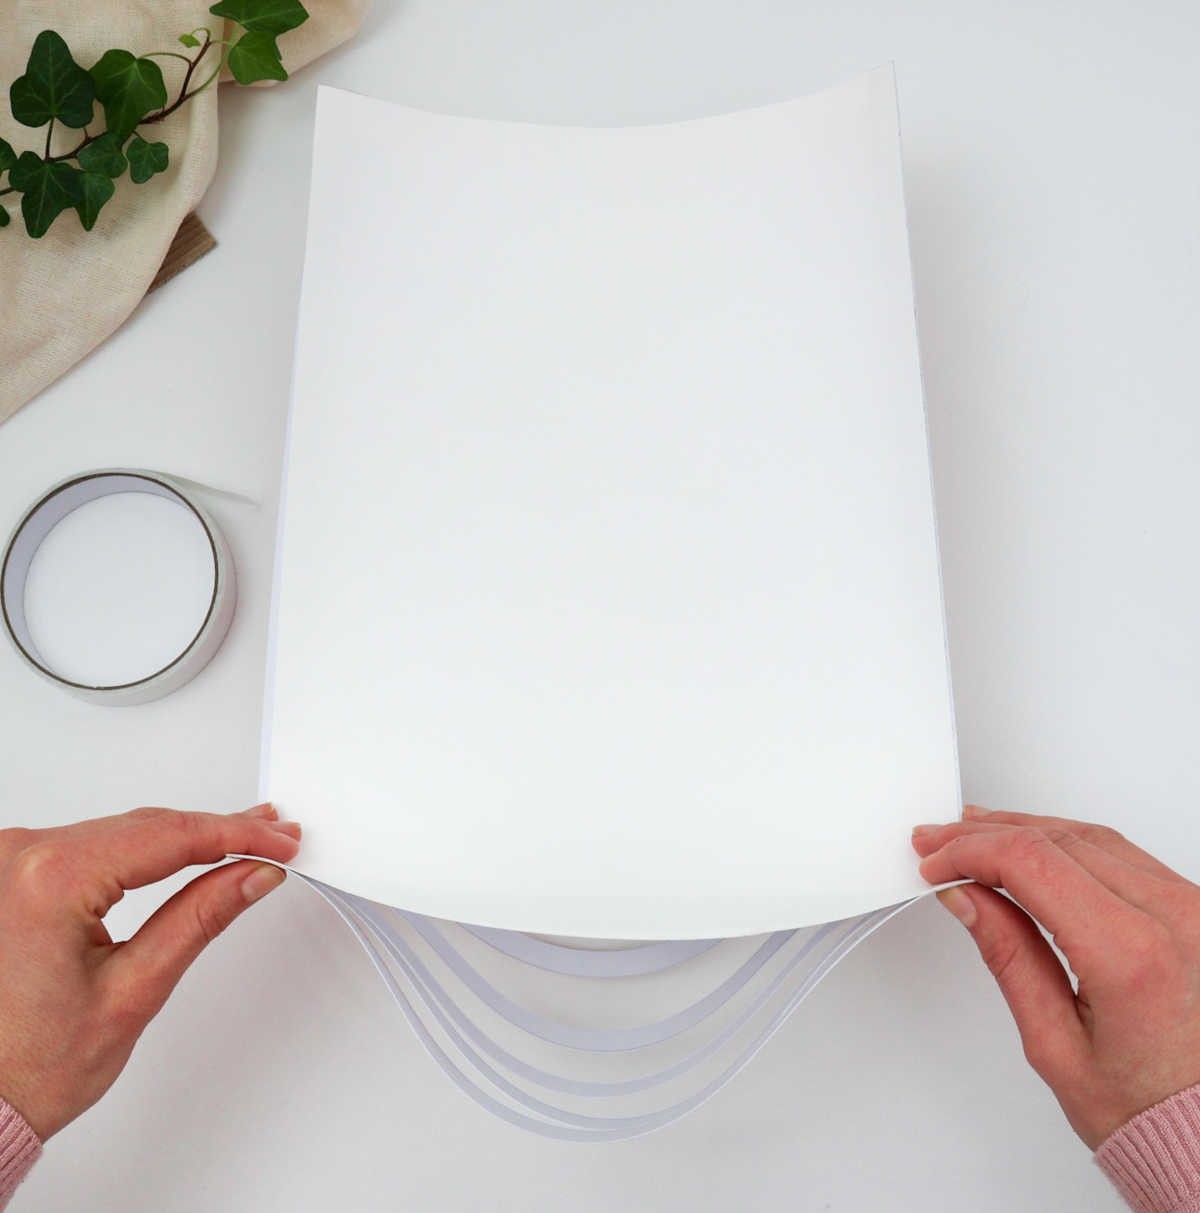
To create your DIY solar window film, start by preparing a plain white sheet of paper. You’ll also need a roll of double-sided tape. Apply two long strips of the adhesive to the top and bottom edges of the paper, ensuring they are evenly spaced and smooth.
Step 7
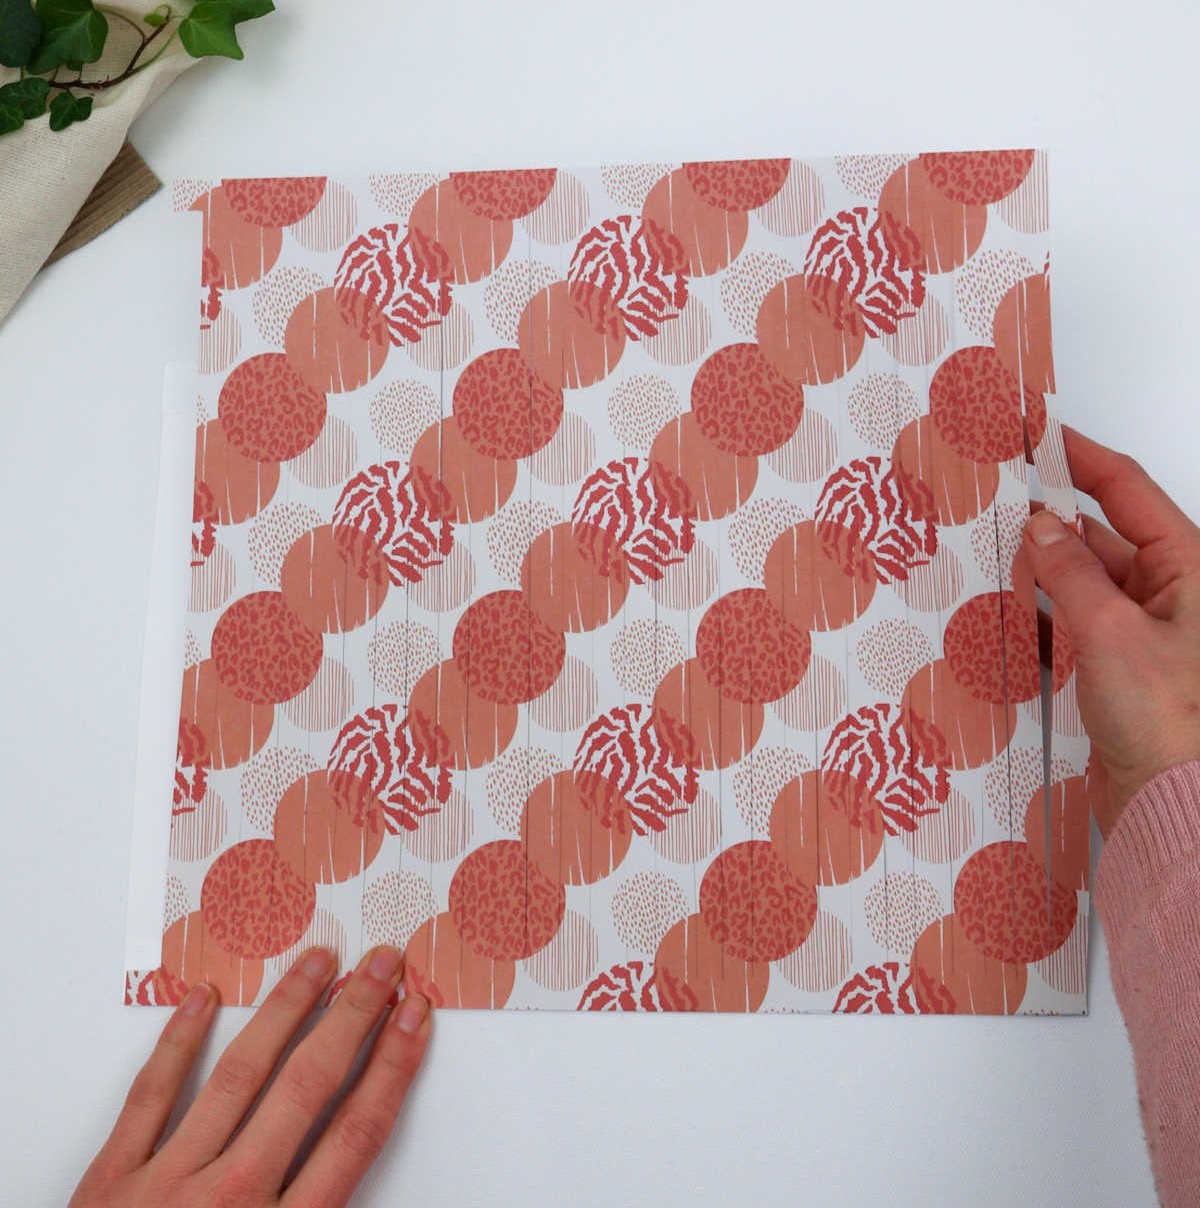
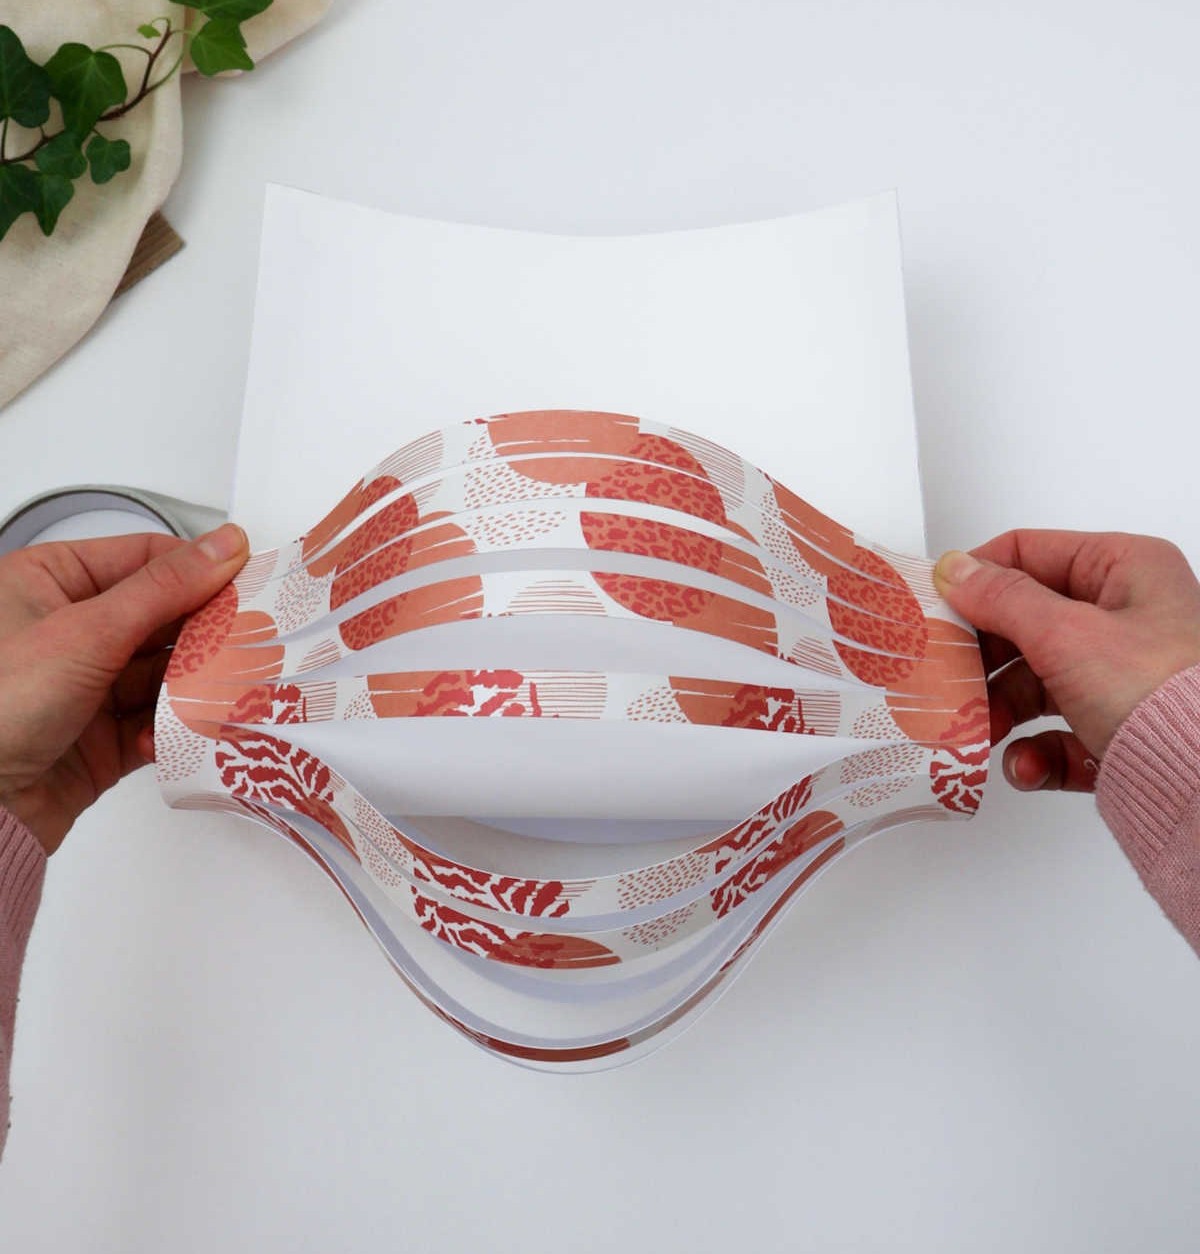
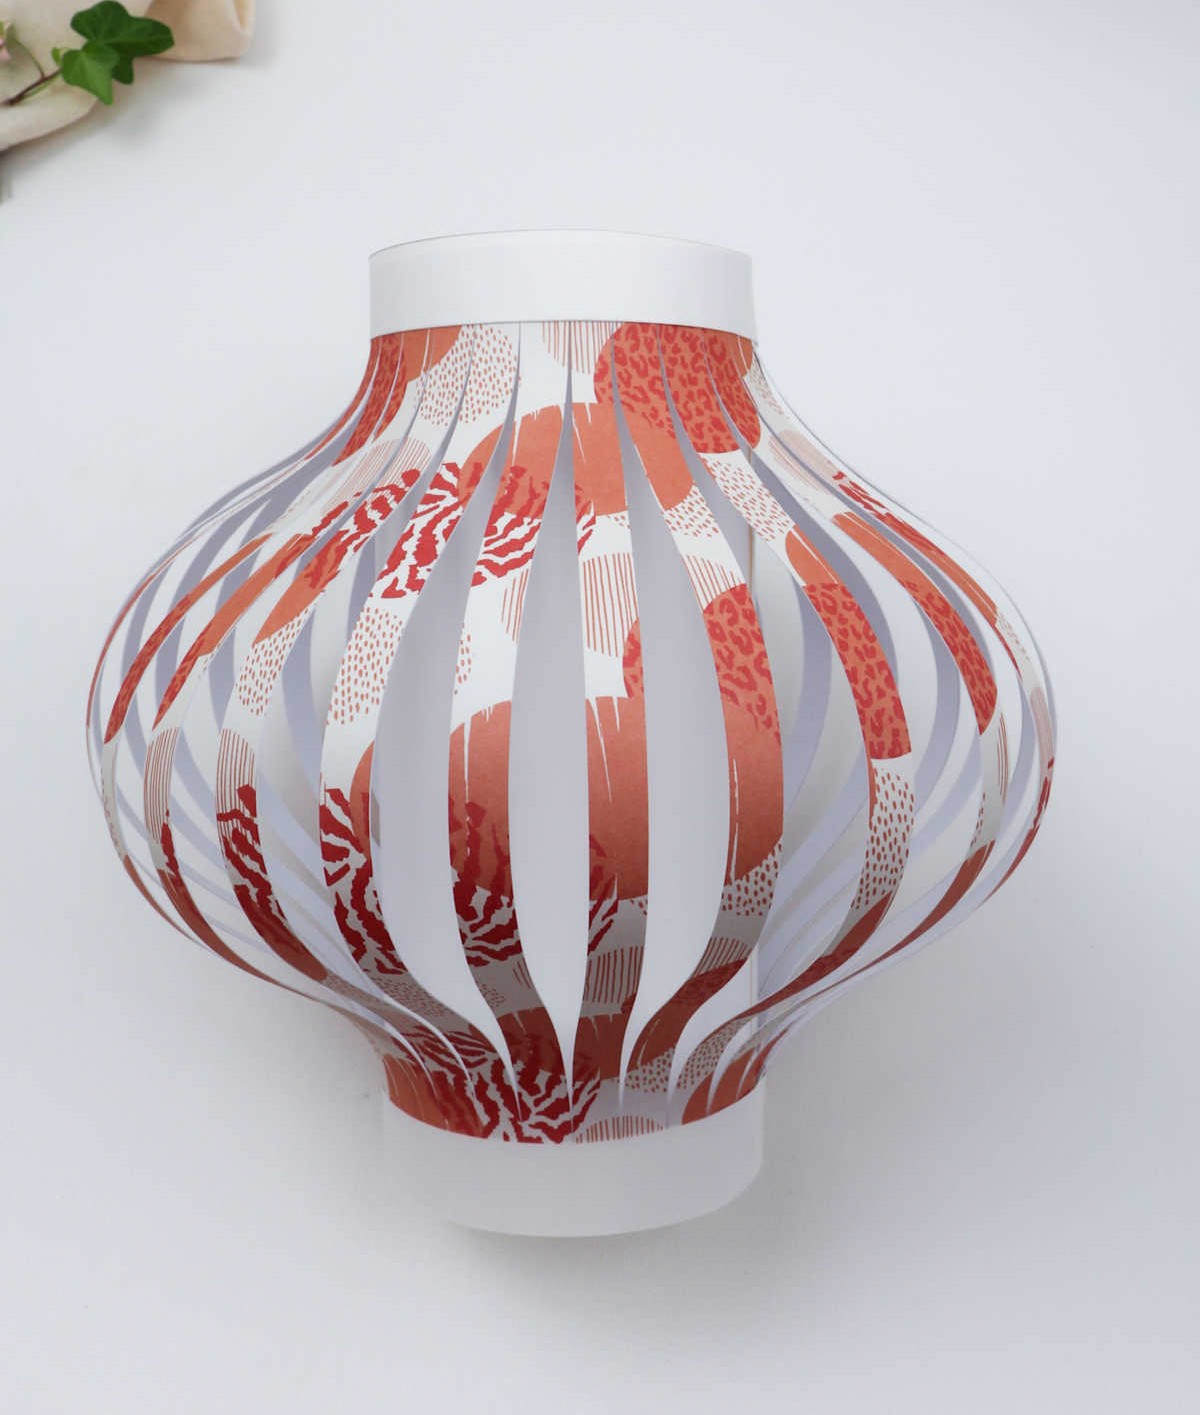
To secure the craft paper in place, apply adhesive to both the top and bottom edges of the paper, ensuring they bond evenly with the white sheet. As the paper is slightly larger than the sheet, you’ll notice that it creates a gentle curvature or tunnel shape down the center when pressed together.
Step 8

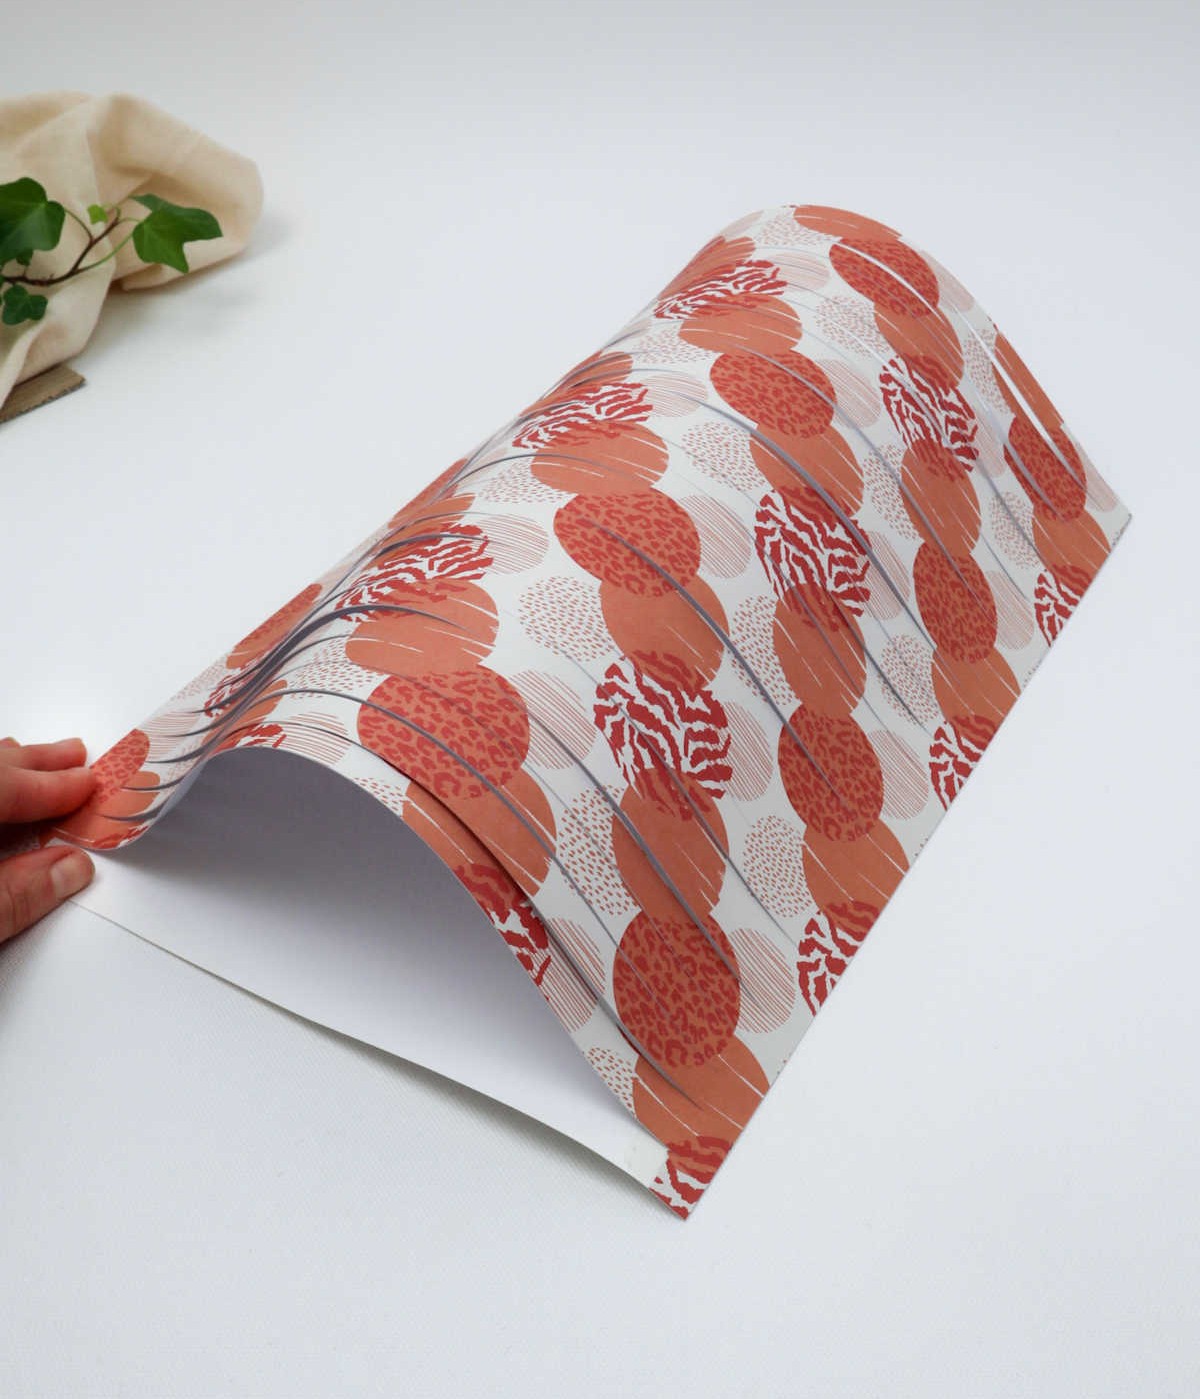
Flipping the paper over, attach a second strip of double-sided tape along its edge, much like the illustration demonstrates. Have faith in the method, as it’s crucial to achieving our desired outcome.
Step 9
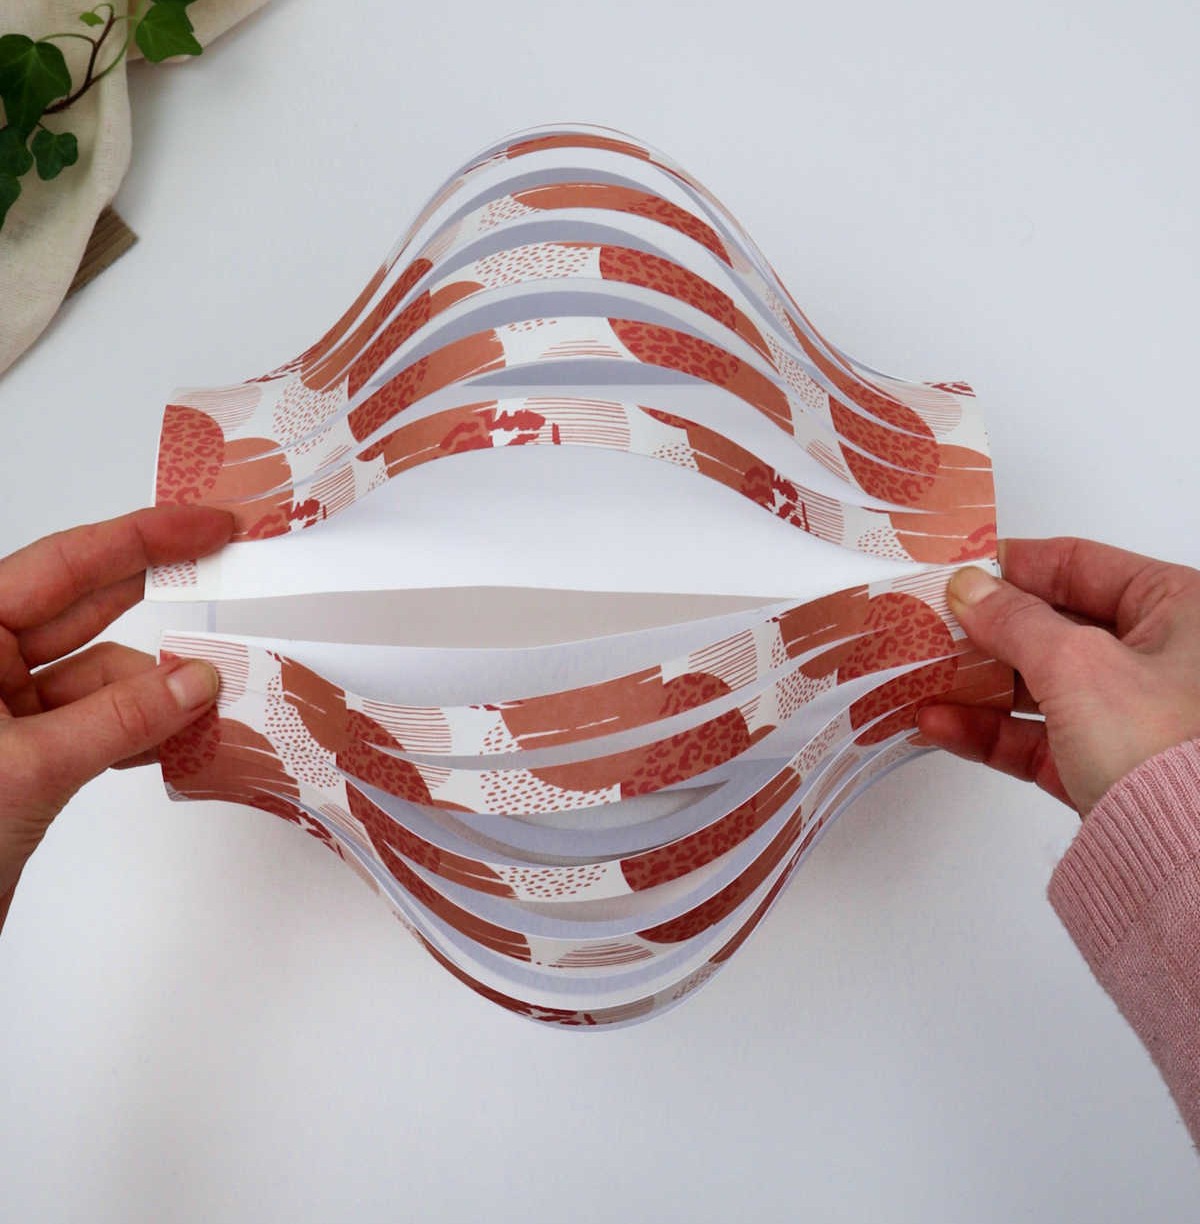

Fold the taped edge over to the opposite end, making sure to align it carefully. This is where that gap comes in handy – it provides a perfect crease for the tape to adhere to. As you press the edges together, notice how the layered strips of paper create a soft, accordion-like texture. The lantern begins to take shape, its dimensions slowly unfolding like a tiny, papier-mâché sculpture.
Step 10
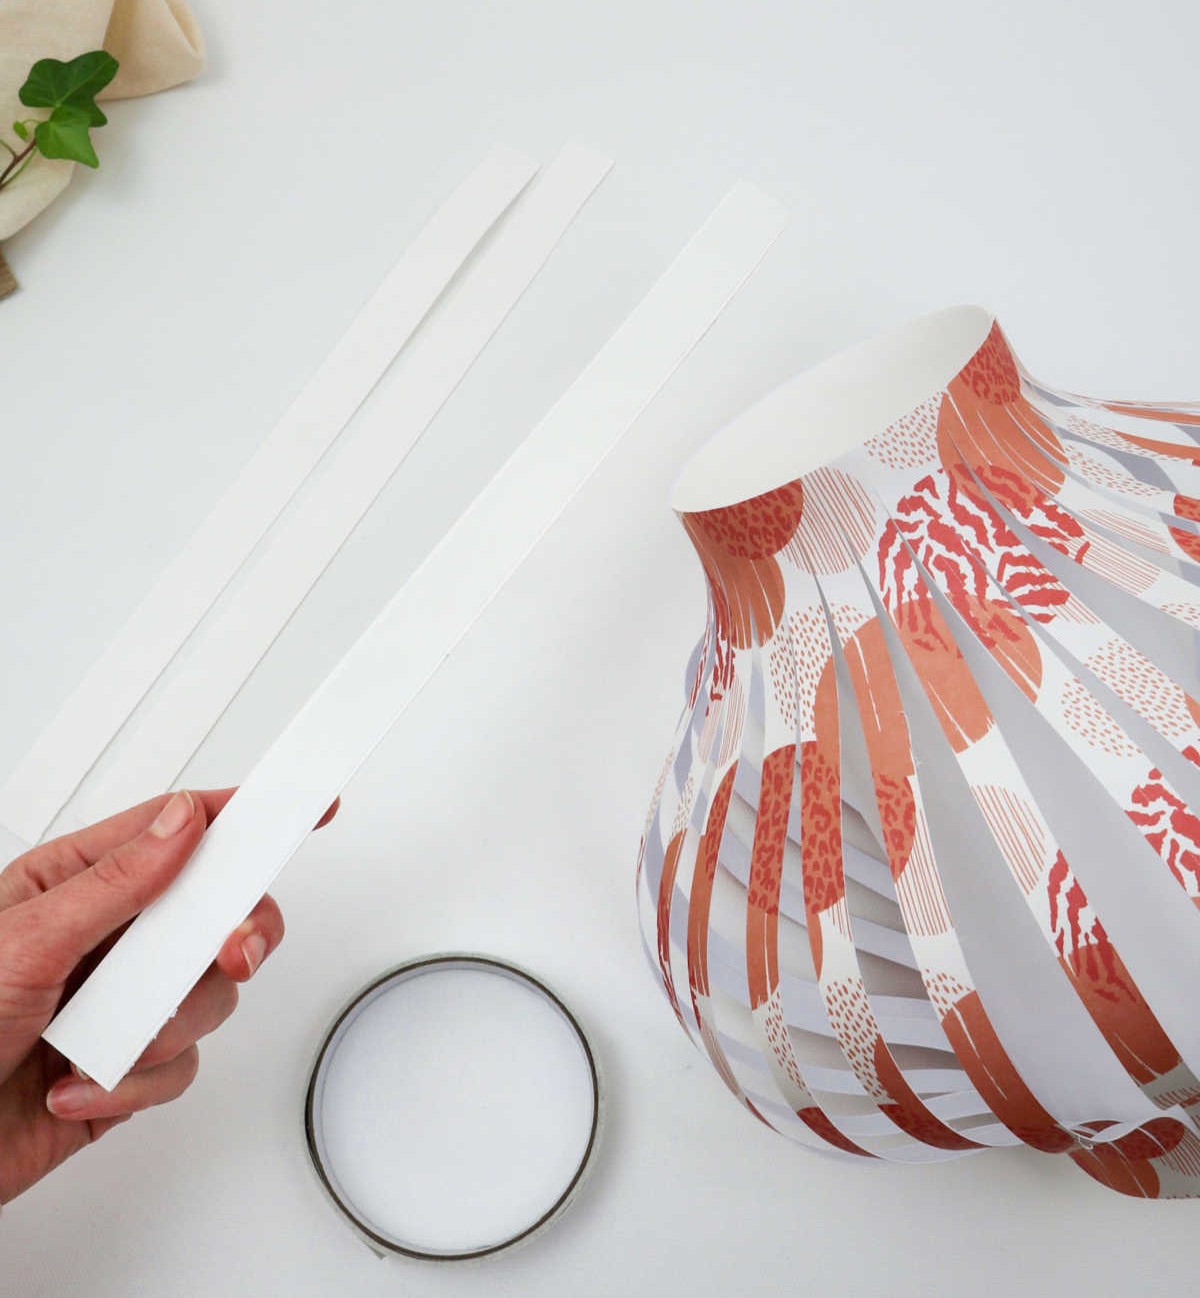
If you’re looking to add an extra layer of sophistication and elegance to your lantern project, consider starting with a simple yet effective embellishment: a decorative trim. To create this finishing touch, cut two or three strips of white paper, depending on whether you want a handle or not.
Step 11

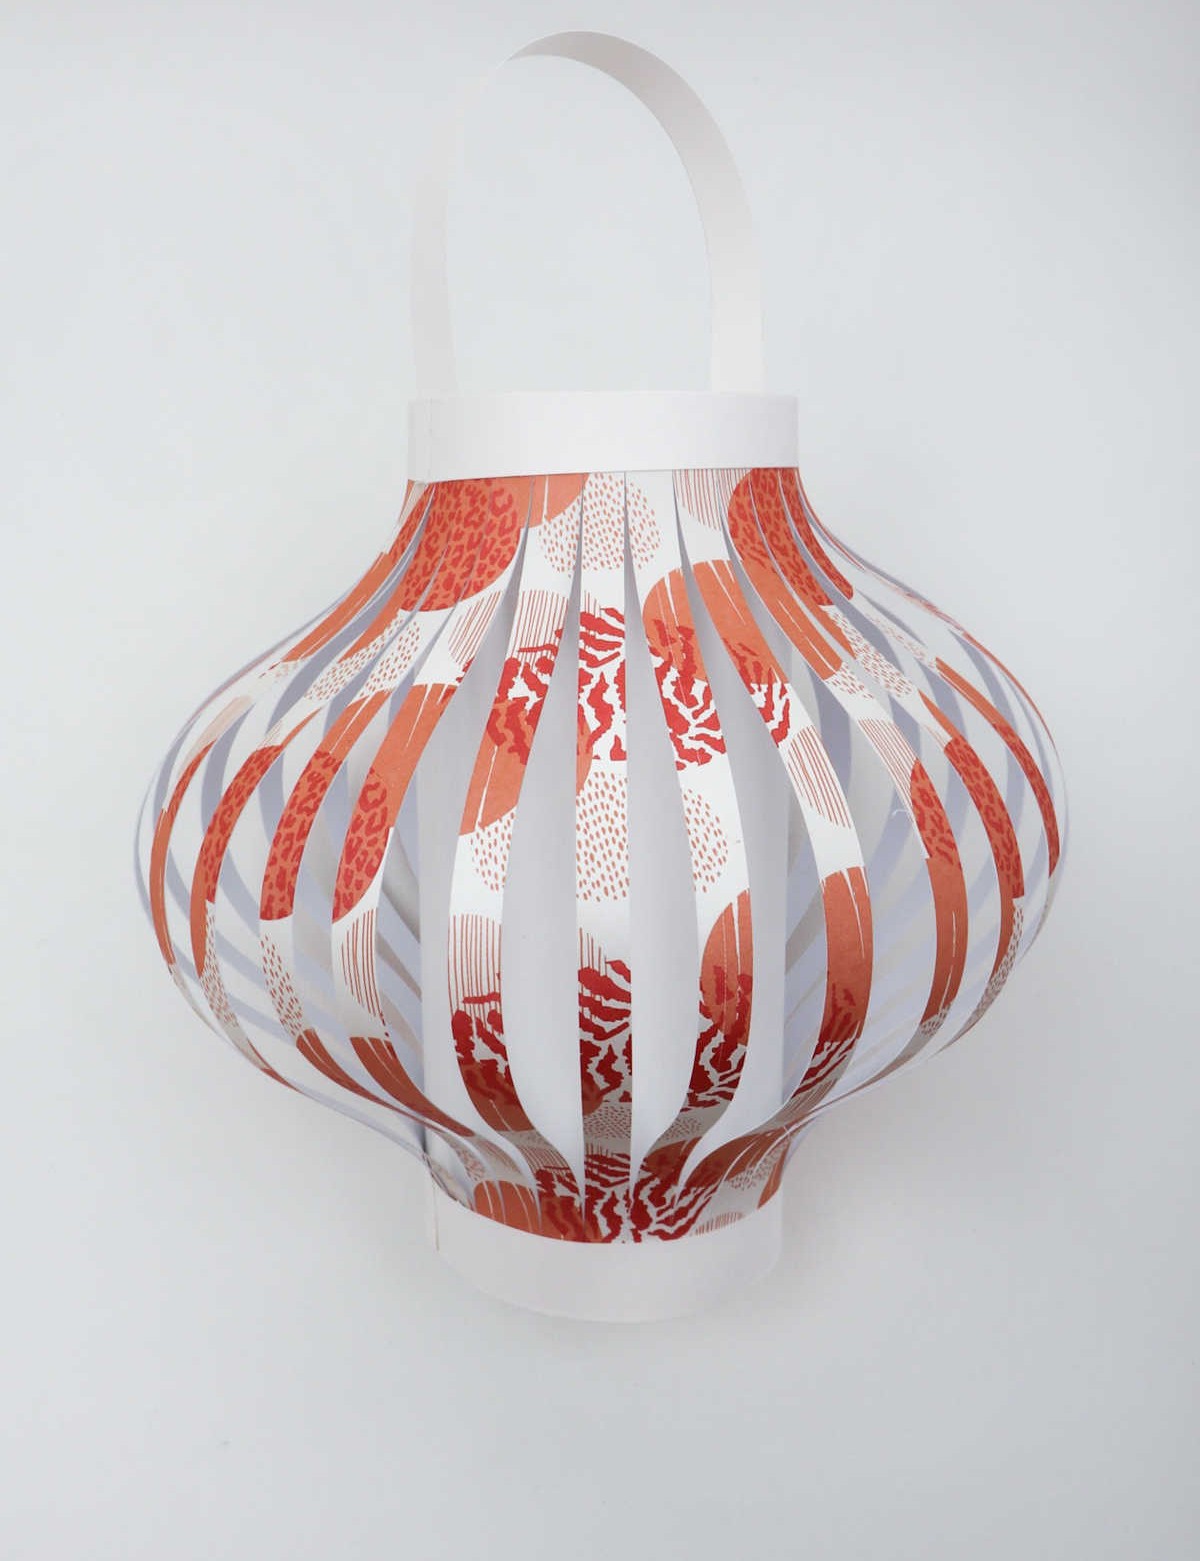
To secure the lantern’s structure, apply double-sided tape to two strips and attach them around the top and bottom edges. For the final strip, apply adhesive to both ends and shape it into a curved handle by folding it as you stick it in place at the top.
Step 12
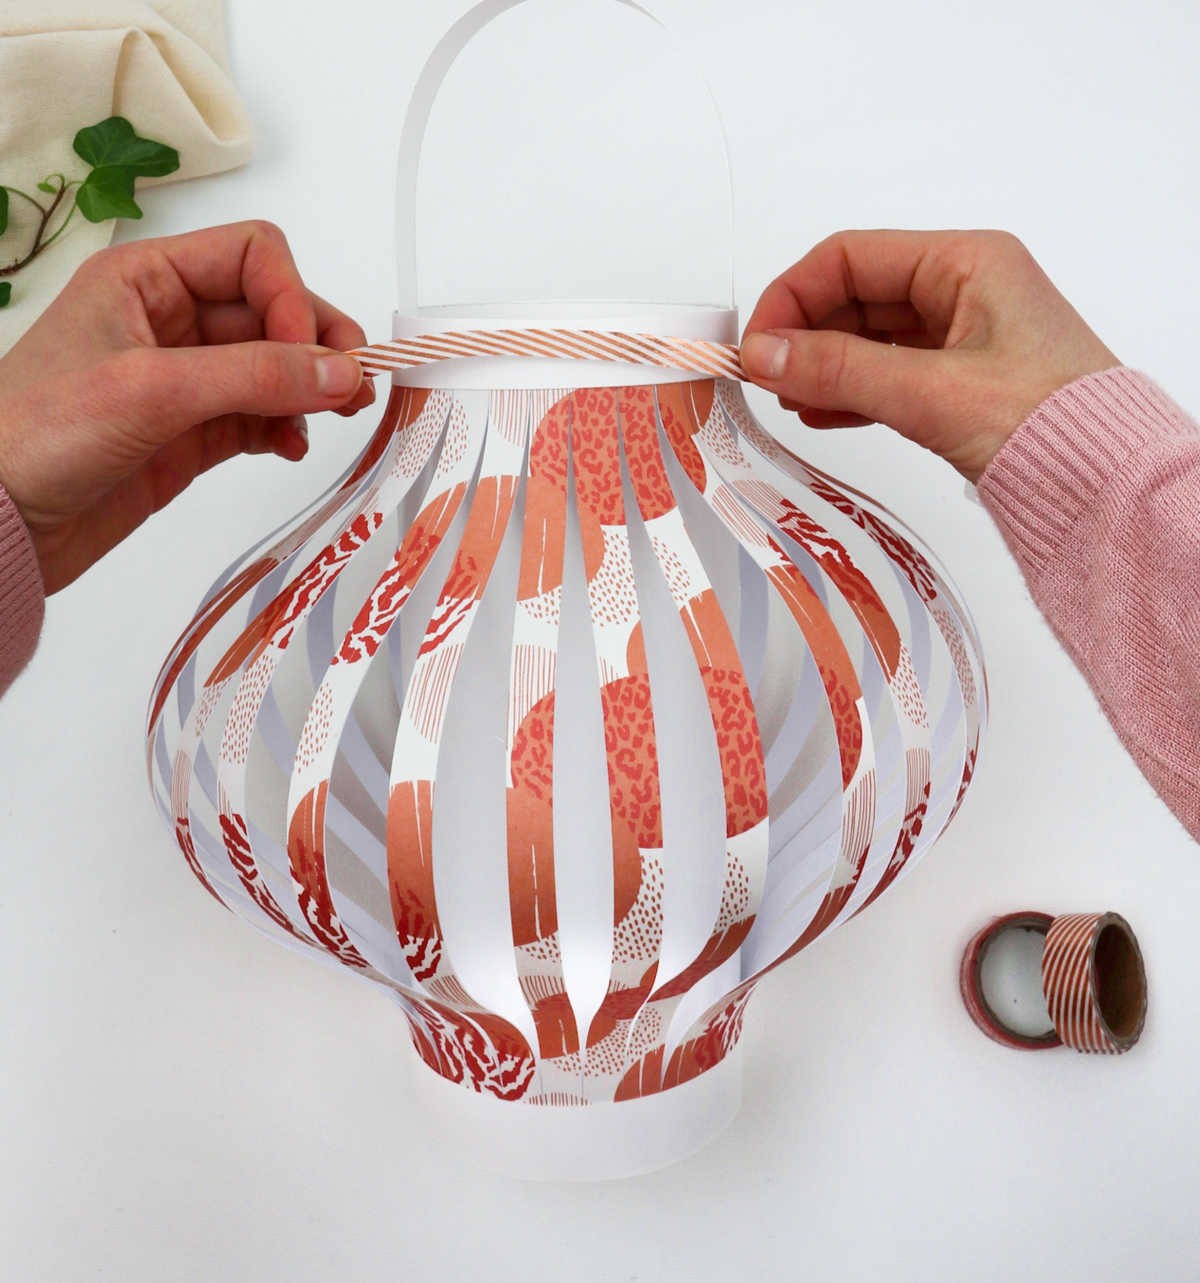

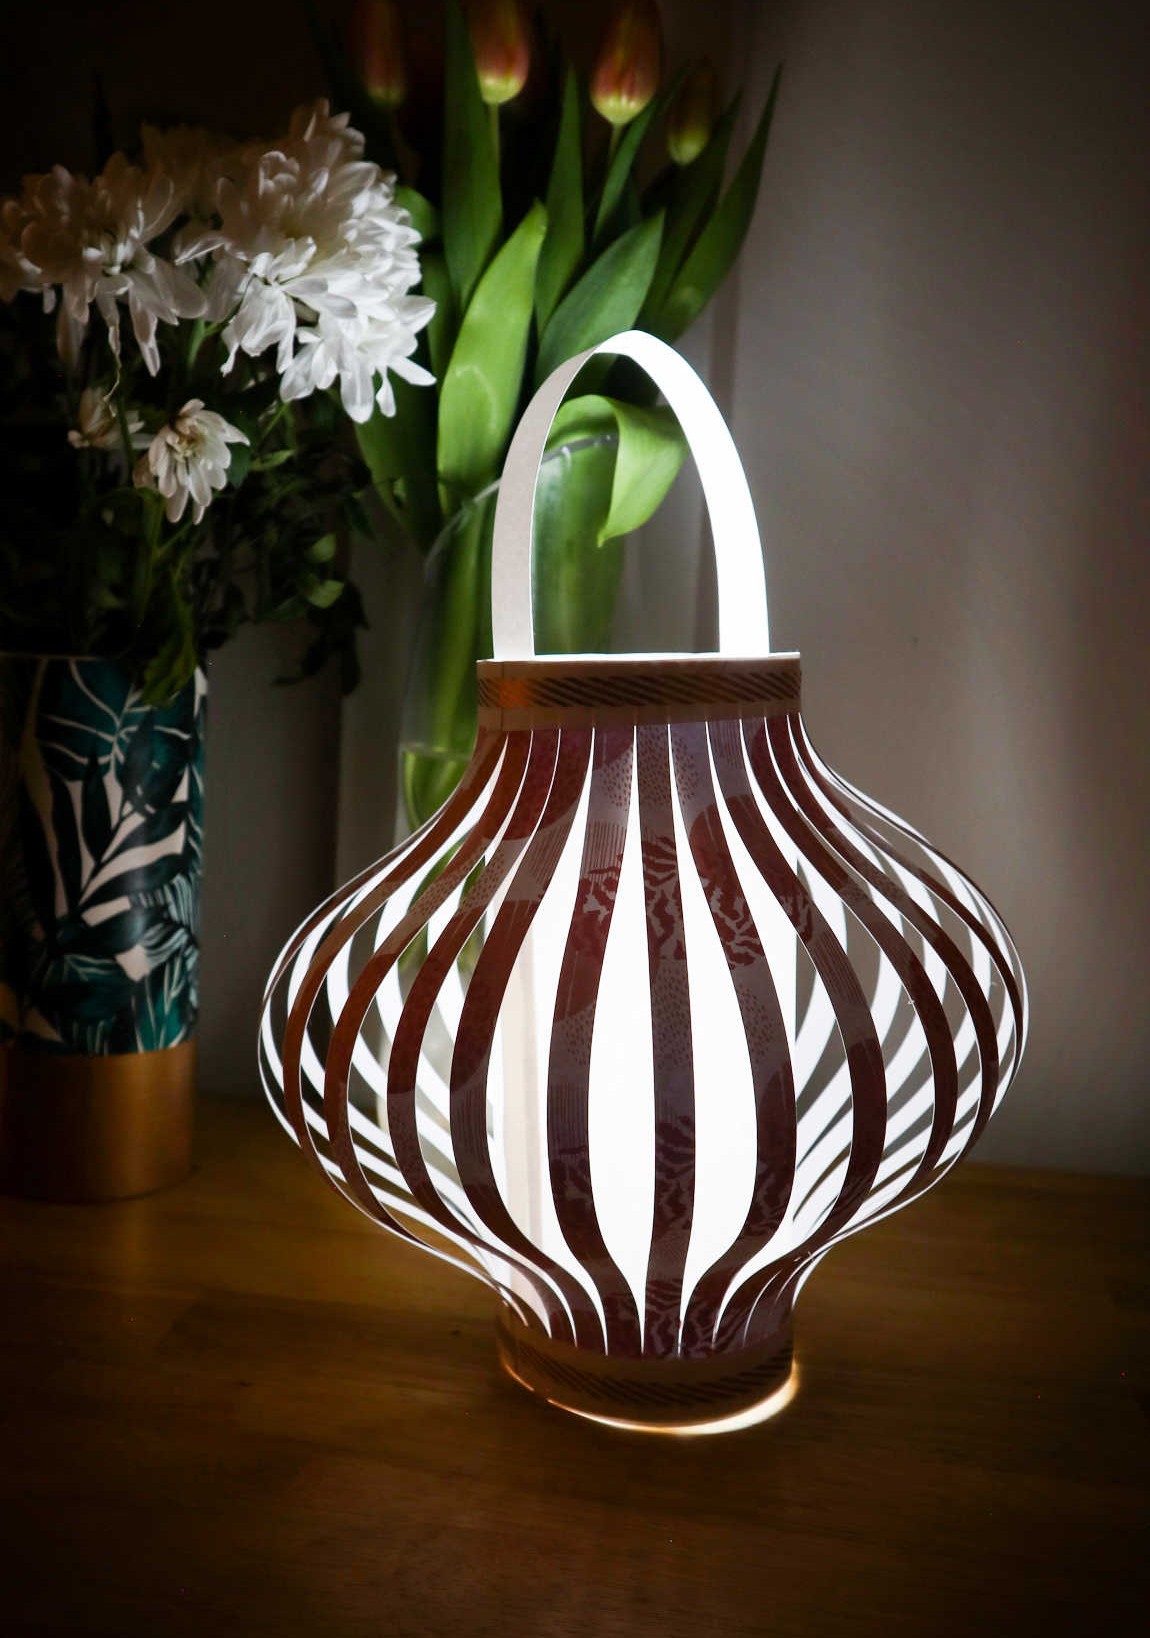
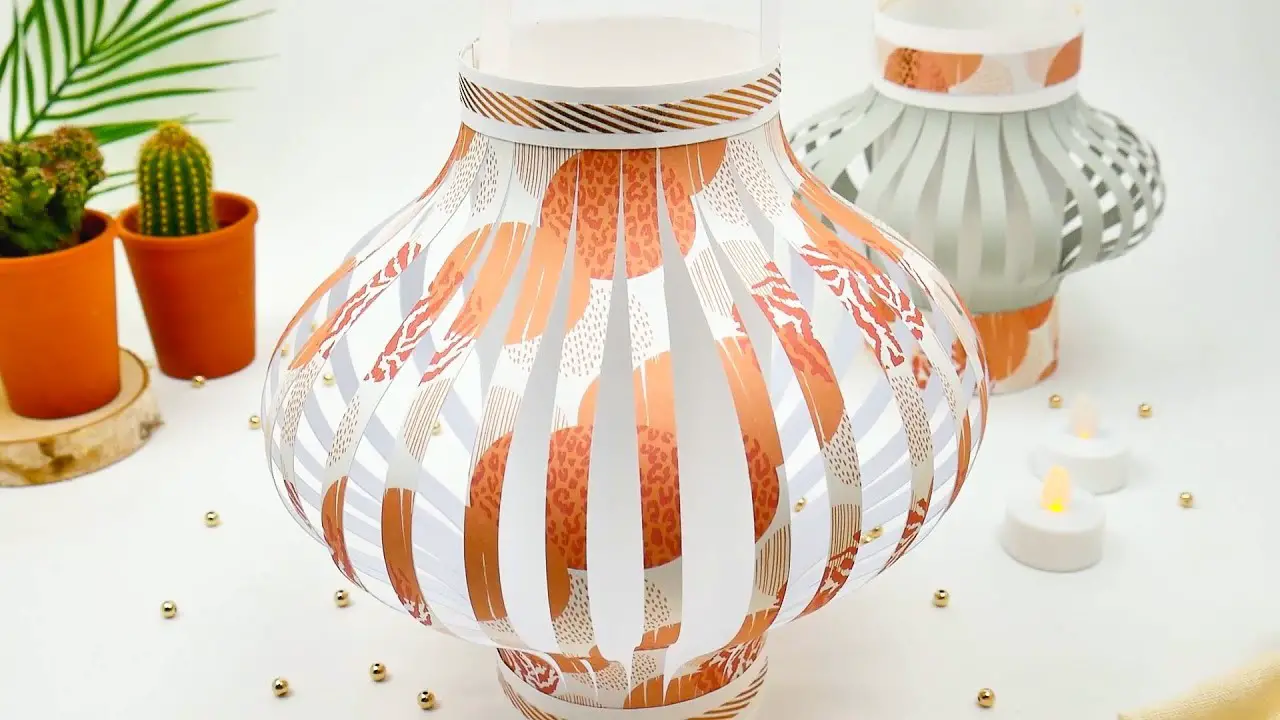
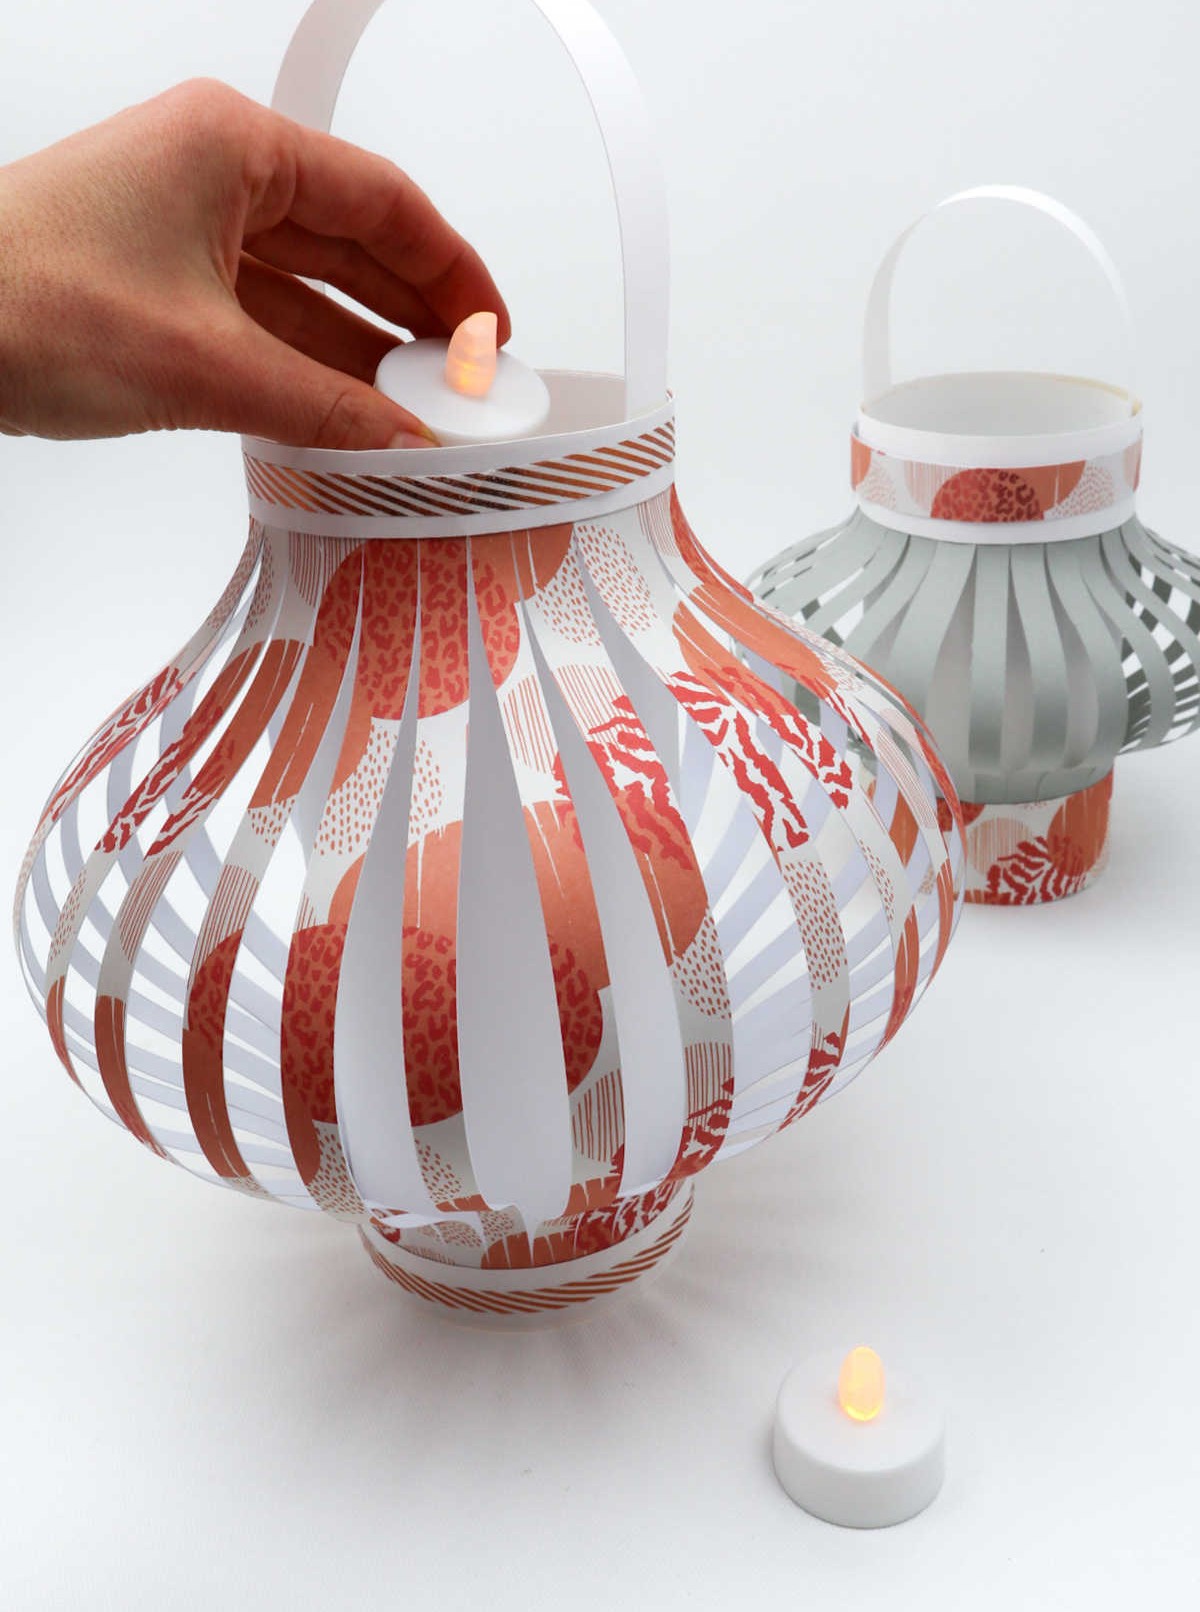
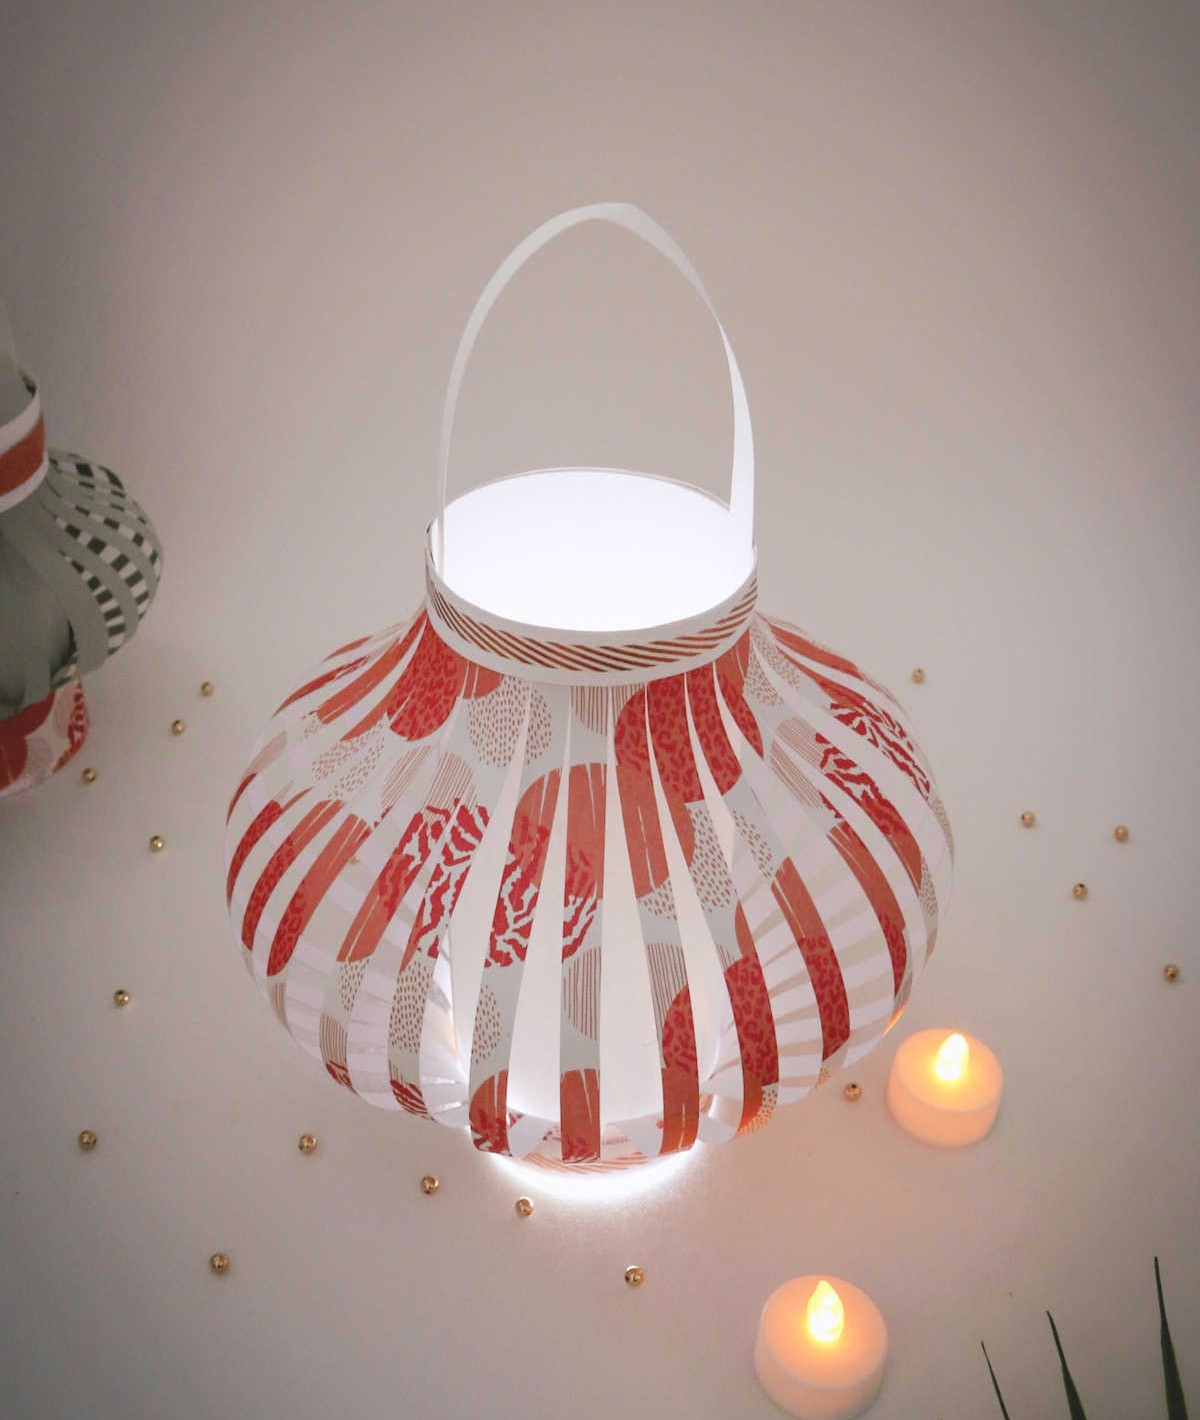
Transform your paper lantern into a stunning work of art by adding a personal touch through creative embellishments. Consider adorning it with washi tape, glitter, or any other decorative elements that catch your eye. To take it to the next level, insert an electric tea light candle and watch as it illuminates your design, casting a warm and cozy glow.
What Kind of Paper Do You Use to Make Lanterns?
When it comes to crafting your own paper lantern, the type of paper you choose is crucial. You’re spoiled for choice, with a variety of options available. Construction paper remains a popular favorite, thanks to its affordability and wide range of colors and prints. Card stock is also a great option, but do be aware that heavier varieties can result in an opaque finish.
If you’re looking for something a bit more delicate, tissue paper or copy paper might fit the bill, although they may not offer the same level of durability as their more popular counterparts.
How to Use these Chinese Paper Lanterns?
Paper lanterns are versatile decorative elements that can elevate the ambiance of various settings. Here’s how you can incorporate them into different scenarios: You can use paper lanterns as decorative pieces at parties, gatherings, festivals, and even rituals. Hang them from porches, decks, awnings, or rooftops to create a whimsical atmosphere. Alternatively, place them on mantels, side tables, or craft desks for a touch of elegance.
For a more dramatic effect, string the lanterns together with twine and hang them across backyards or over doorways, allowing their soft glow to illuminate the space.
How to Make Paper Lanterns (Step-by-Step)
Transform your space without breaking the bank with these delightful DIY paper lanterns. A fantastic, fun and engaging craft perfect for adults and teenagers alike. **Time:** To complete this project, set aside 30 minutes for preparation and 5 minutes for assembly. **Yield:** One beautiful paper lantern. **Author:** Karo @ CraftsyHacks.com. **Budget-friendly:** This project is an affordable way to add a personal touch to your home decor, with a total cost of just $1.
Equipment
Materials
To get started, you’ll need a few essential materials. For your base layer, grab one sheet of white paper measuring 10 inches by 12 inches. Next, gather one piece of craft paper that’s also 12 inches by 12 inches. You’ll also want some decorative tape and double-sided tape on hand. Finally, collect three strips of paper that are each 12 inches long but only 1 inch wide.
Instructions
To initiate this project, gather all necessary supplies and begin by flipping your craft paper over, ensuring the right side faces down. Utilize a pencil and ruler to draw two parallel lines, approximately one centimeter away from the edge, at the top and bottom of the paper. Next, mark every centimeter gap along both lines using the same tools. Then, connect these markers on either end by drawing a line from top to bottom, repeating this process across the entire paper.
Subsequently, employ a craft cutter to make incisions along each individual line, effectively dividing the paper into strips joined by the previously created strip. Cut out the final strip to create a gap, which will serve as a foundation for subsequent steps. Following this, secure double-sided tape along the top and bottom of white paper and carefully adhere the corresponding edges of the craft paper (with the printed side facing up) to the white paper.
As the white paper is smaller in size, the craft paper will billow out. Next, apply double-sided tape to the sides of the white paper and roll it inward to secure the ends together. Pay attention to the gap you created earlier; attach the rolled edge to this gap. To refine the appearance of your lantern, cut out three additional strips of white paper. Two of these strips can be lined with double-sided tape and attached around the top and bottom of the lantern.
The third strip can be folded into a handle and secured onto the top. Finally, feel free to embellish your lantern with washi tape, stickers, glitter, or other creative elements. You can also place an electric tea light candle inside to illuminate it.