Who says crafts have to be complicated? With some simple paper and a little creativity, you can create wonderful DIY paper hats that will bring a smile to anyone’s face. Whether you’re looking for a fun party favor or a quirky prop for a show, these hats are incredibly easy to make and offer endless customization options.
Nostalgia alert: who else remembers making their own paper hat as a kid? I sure do!
It was the perfect way to channel my inner pirate or superhero before embarking on an epic adventure. And now, you can share that same joy with your little ones.
The best part about these DIY hats is how versatile they are. Need something for a birthday party? Boom – instant party hat! Want to add some pirate flair to a costume? Easy peasy! It’s the perfect way to get the kids involved in a fun, creative activity that will keep them engaged for hours.
Supplies You’ll Need
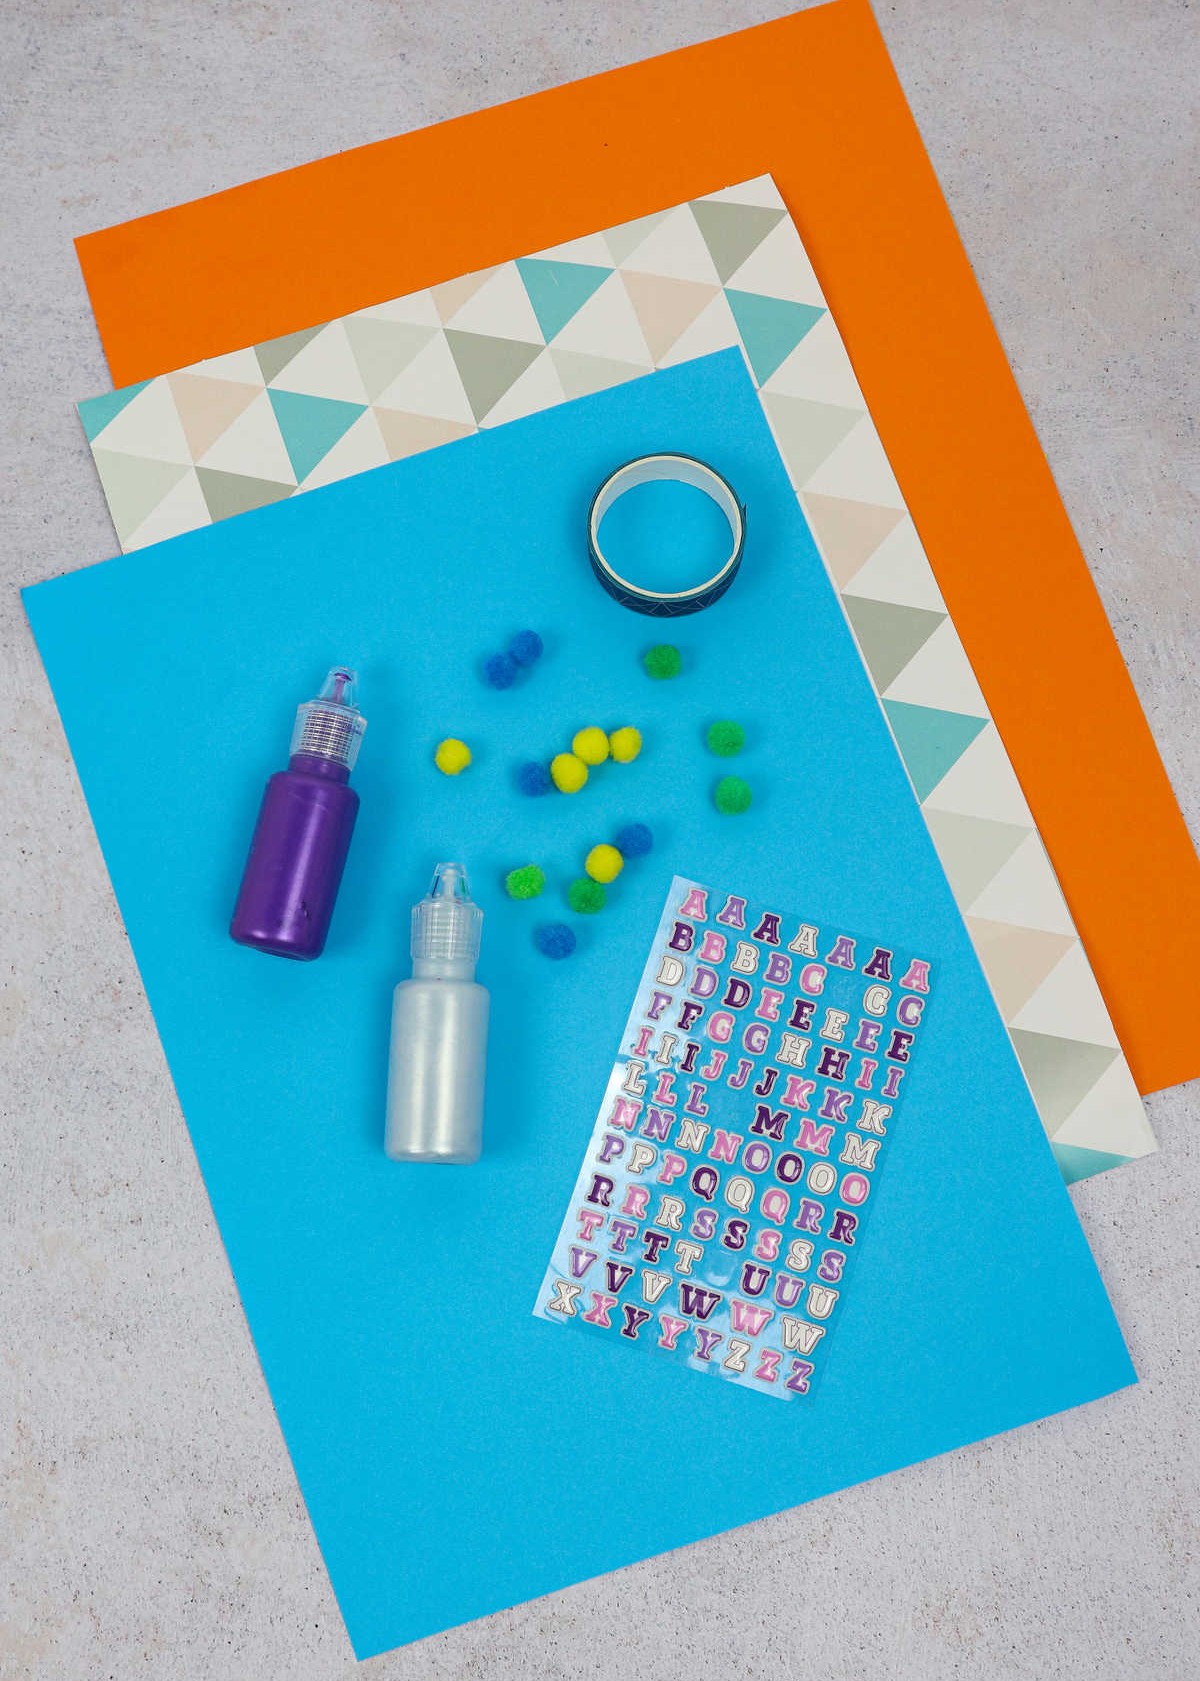
Before embarking on your creative journey, it’s essential to gather the necessary supplies. For a seamless crafting experience, you’ll need rectangular paper sheets in various sizes such as A4, A3 or A2. Additionally, consider having some decorative elements at hand like craft pom poms, washi tape, letter stickers, and decorative glue. Having these materials readily available will allow you to focus on the creative process without any interruptions.
How to Make Paper Hats
When selecting your colored paper for crafting, take a moment to browse through your options. Don’t be afraid to get creative and experiment with textured or patterned papers – just ensure they’re easy to fold. If you prefer a more dramatic look, consider opting for a larger sheet of paper. Keep in mind that the bigger the sheet, the larger your finished hat will be.
Step 1
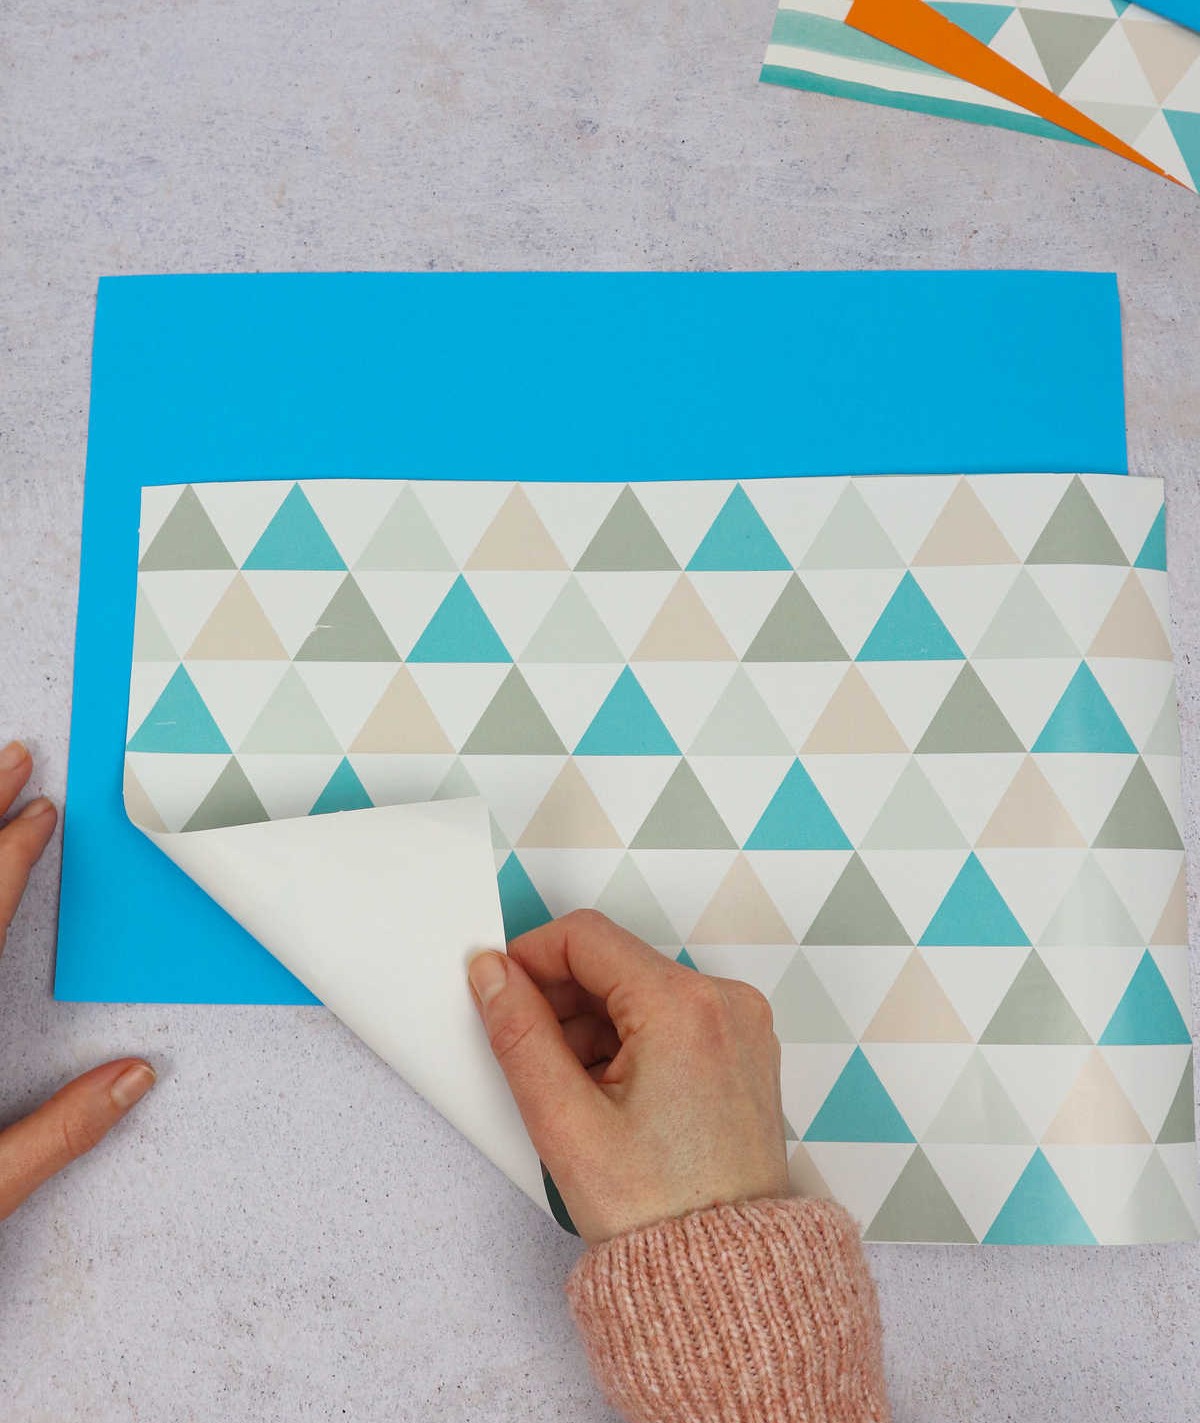
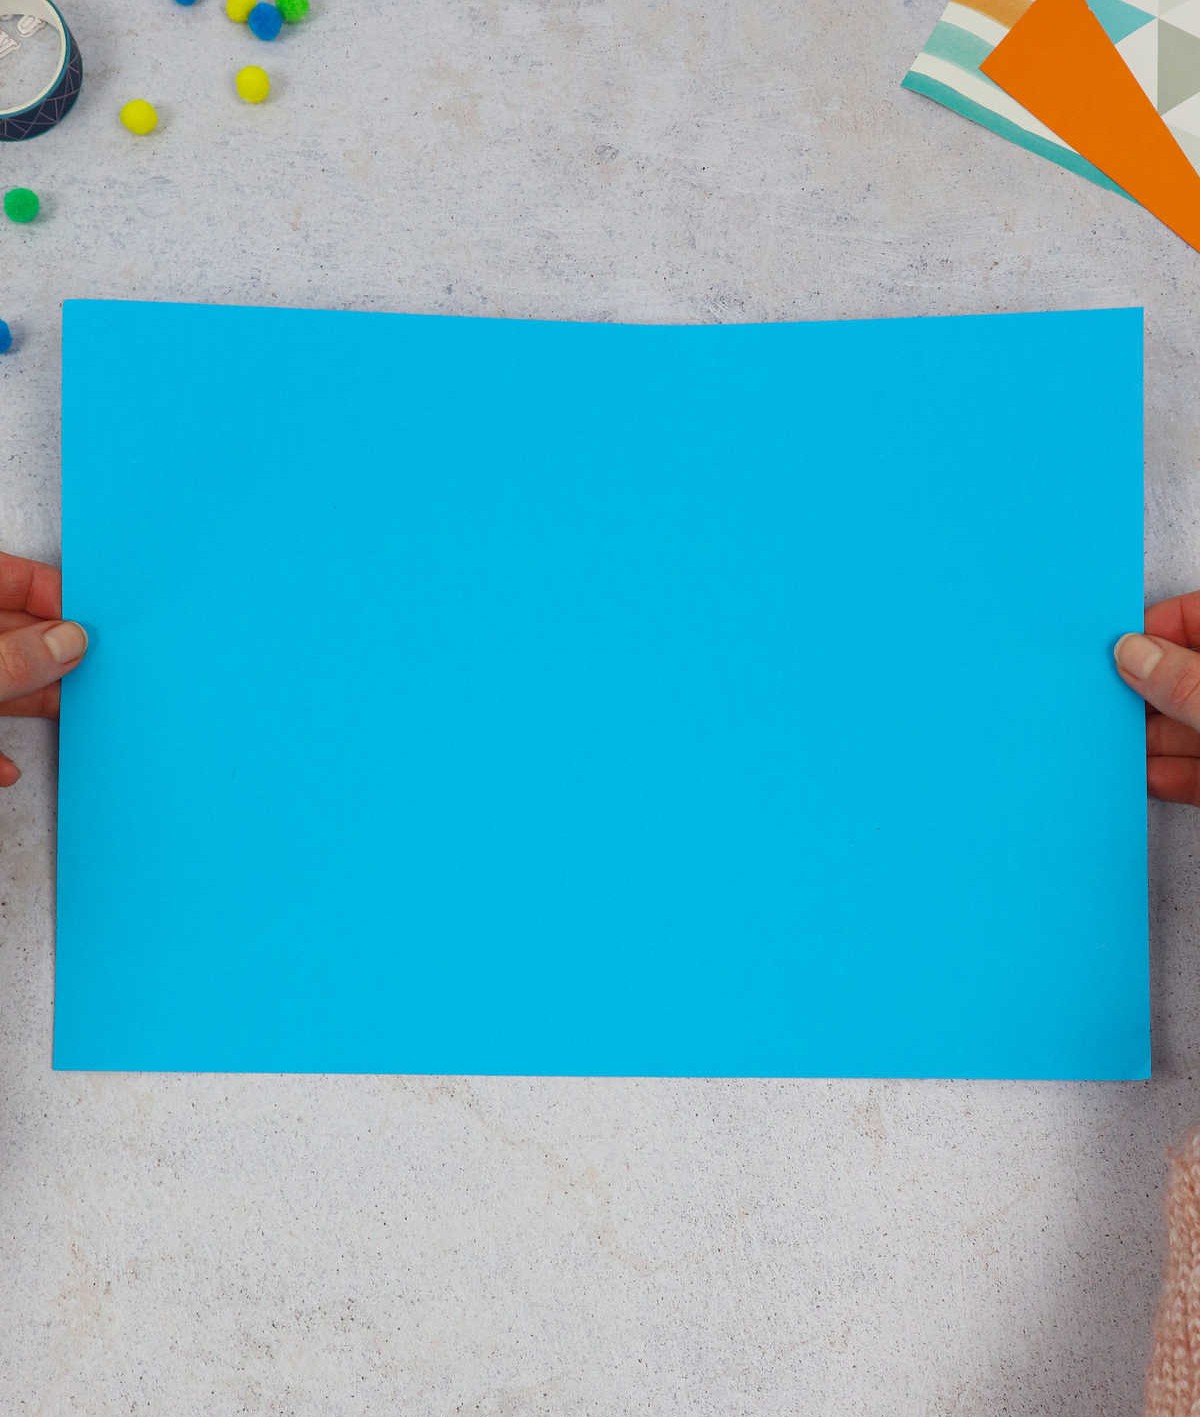
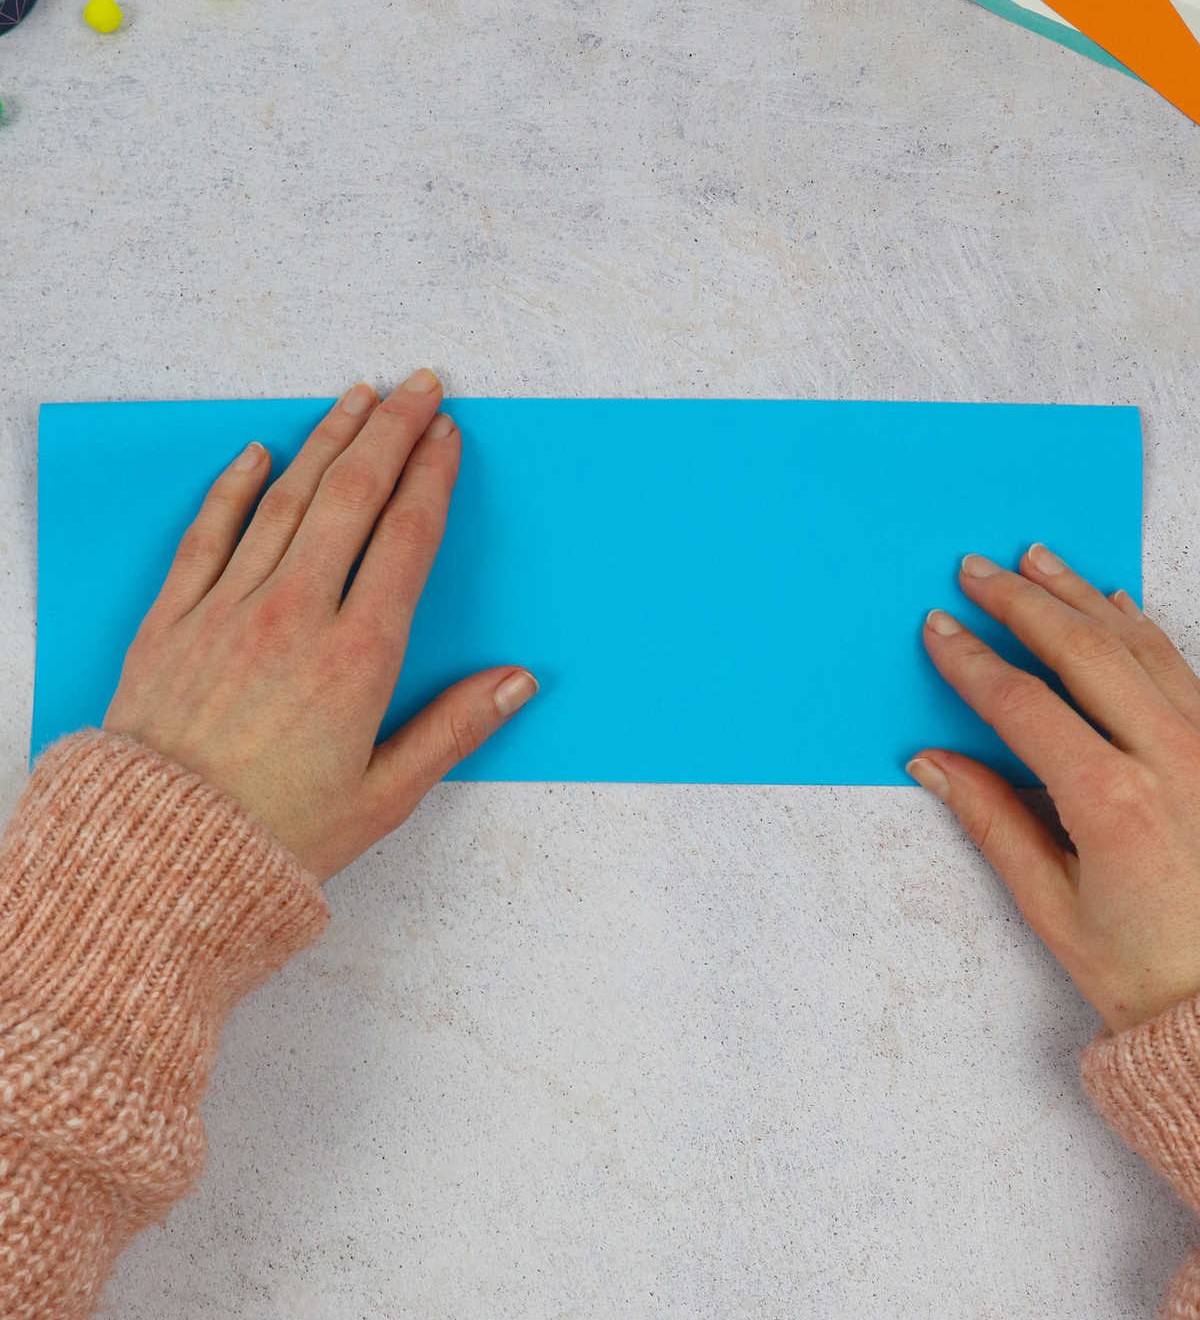
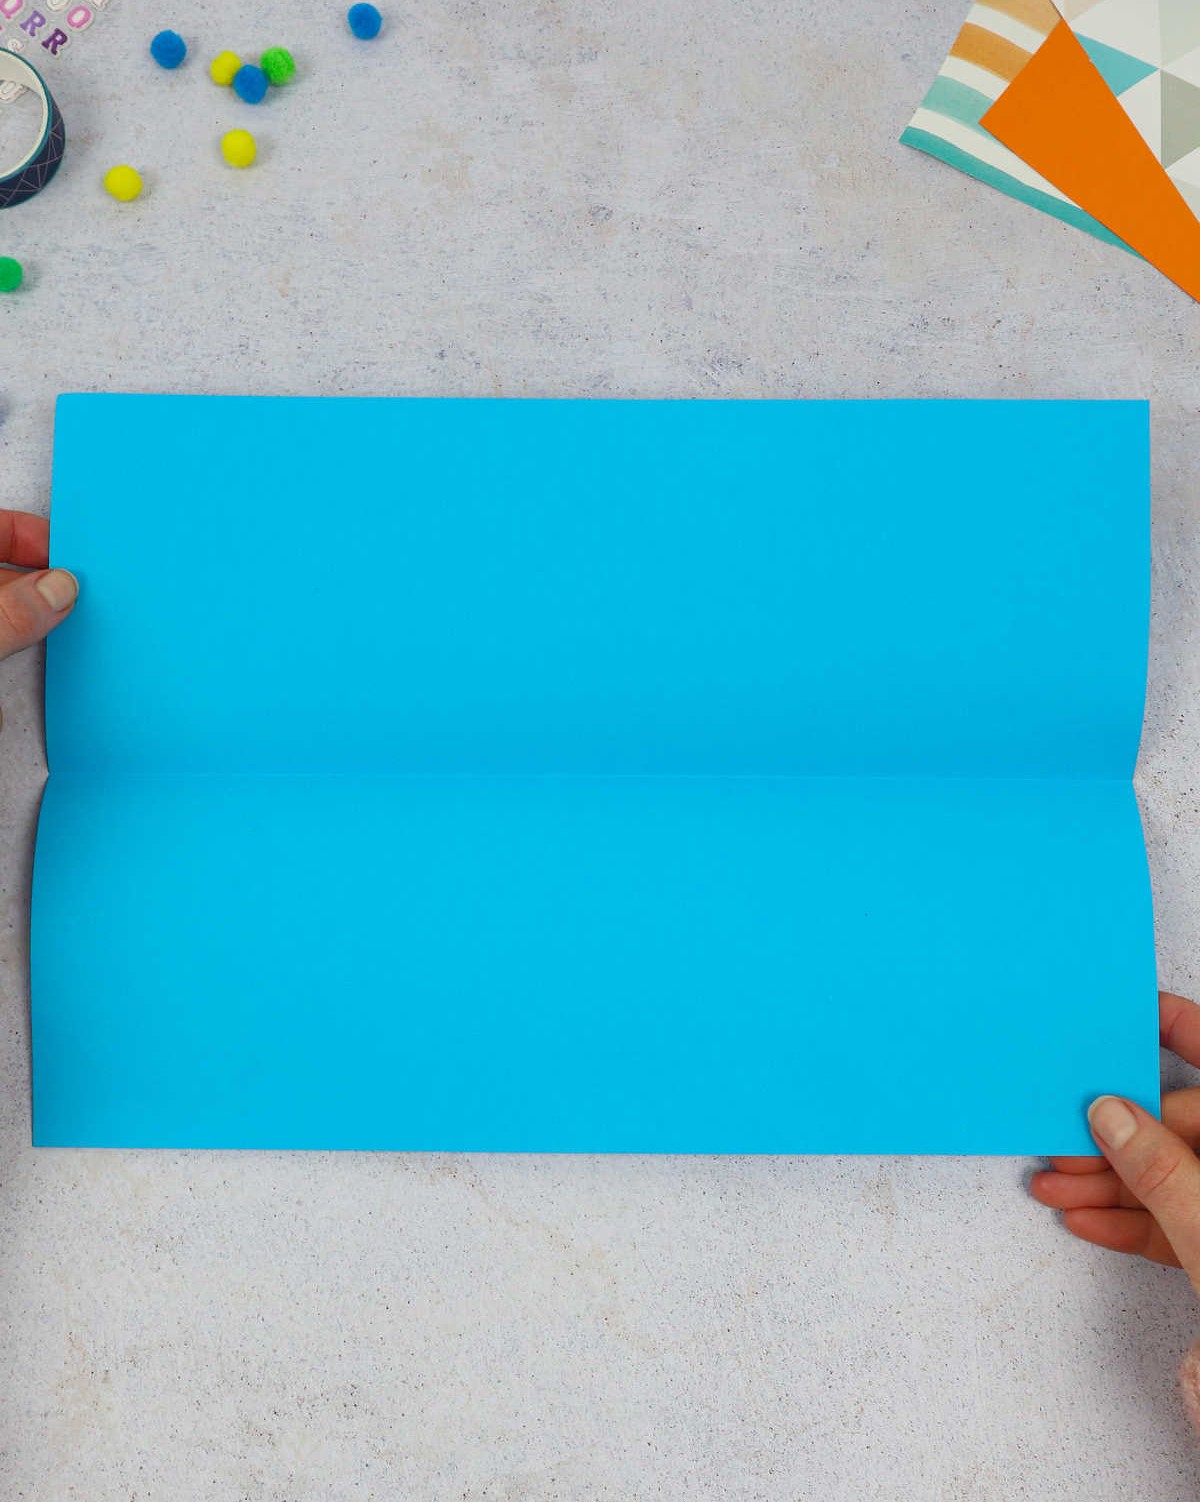
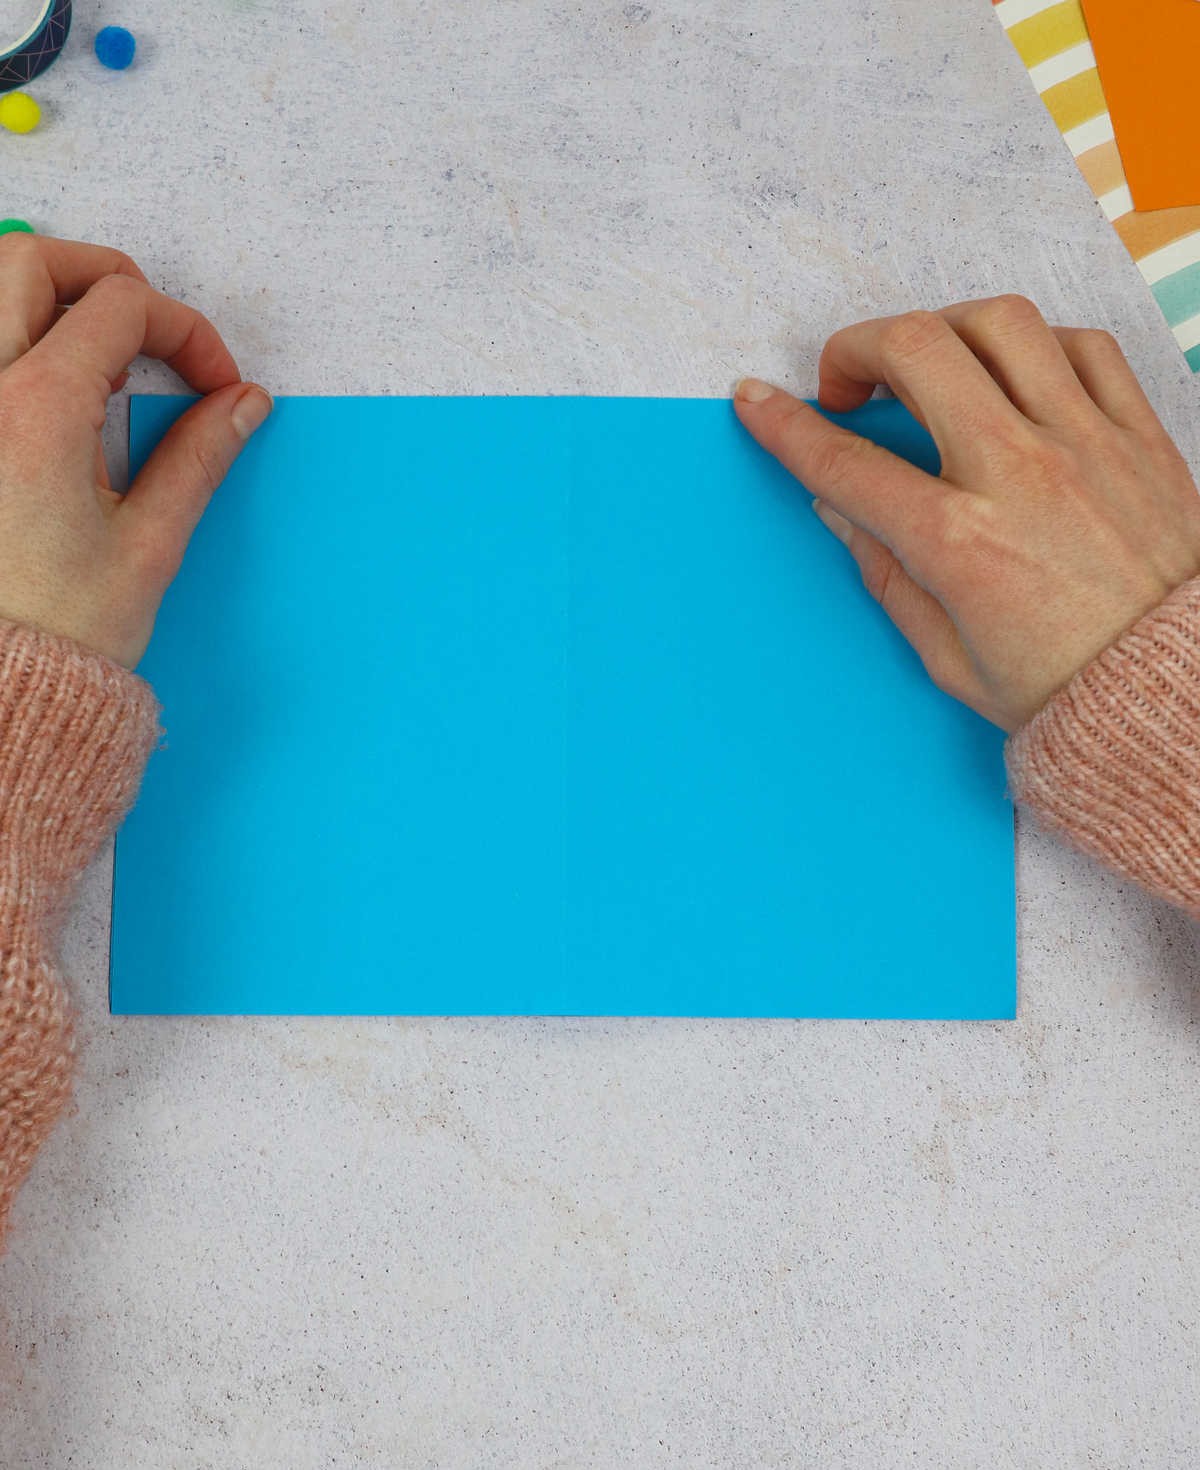
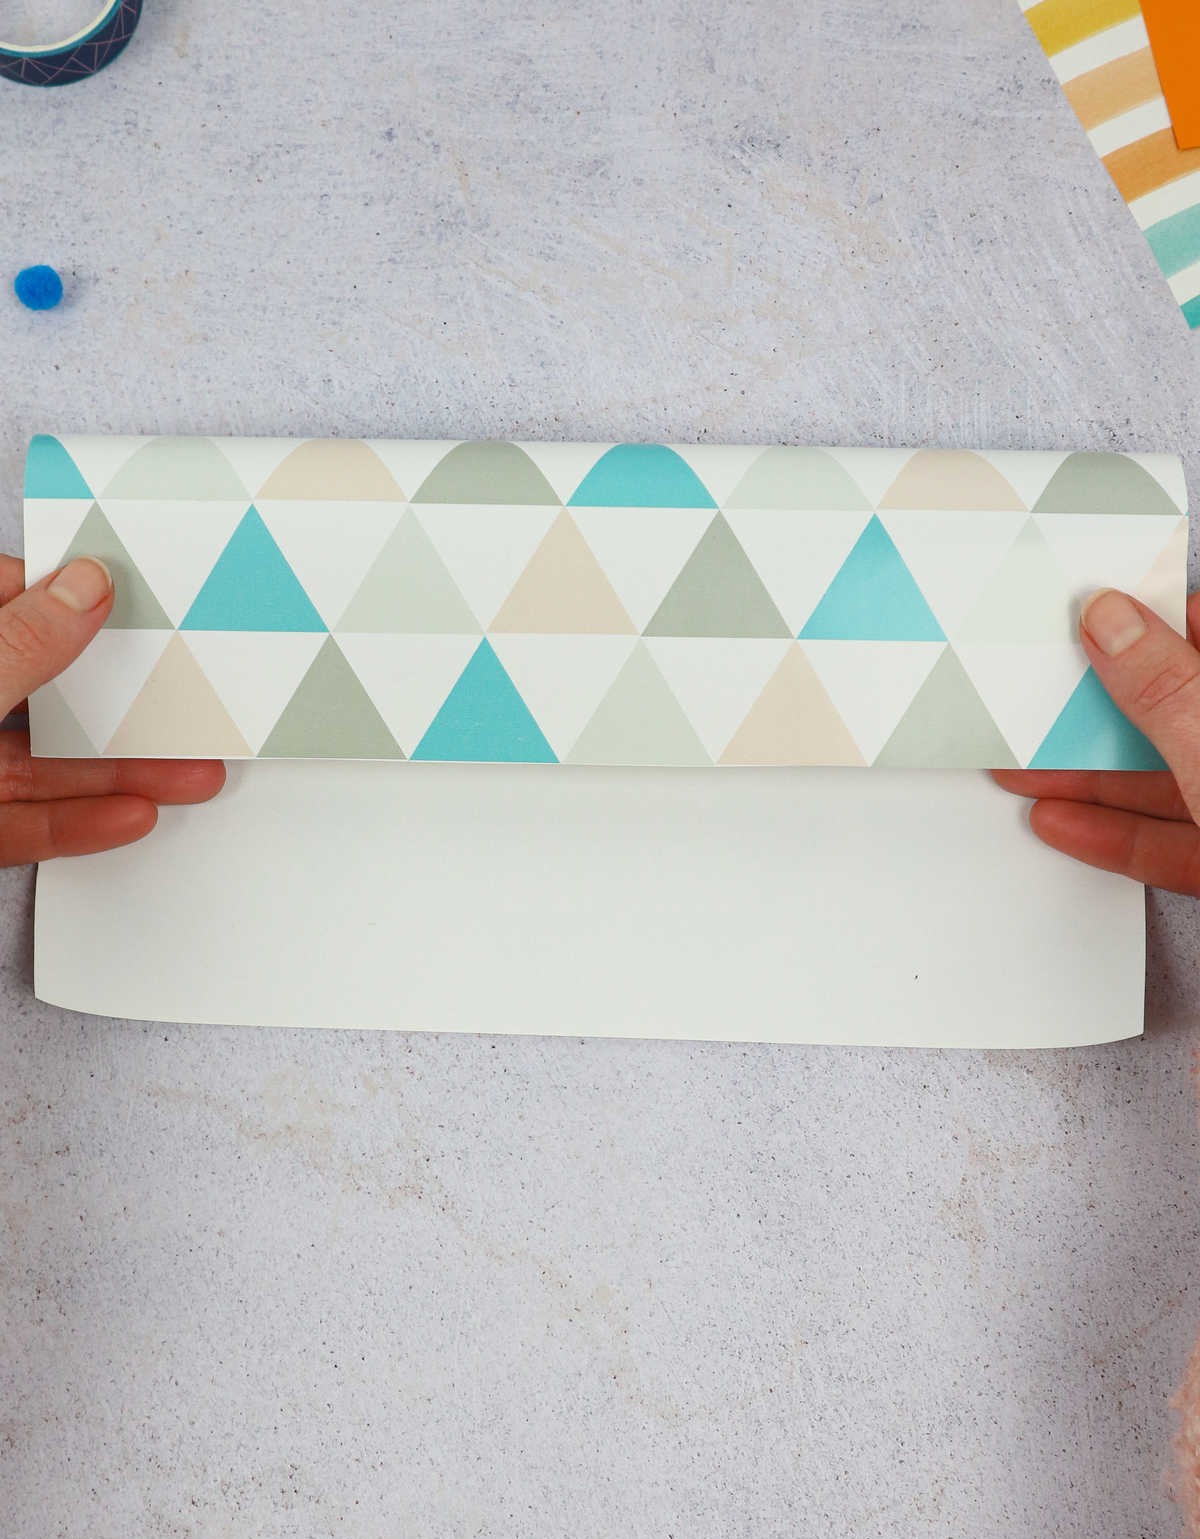
To begin, place your paper on a flat surface and identify its longer edge. Next, fold this edge over to meet the opposite side, creating a crease as you go. Once you’ve achieved this, unfold the paper and rotate it by 180 degrees. Then, repeat the process of folding the same edge over once more, ensuring that the edges align precisely.
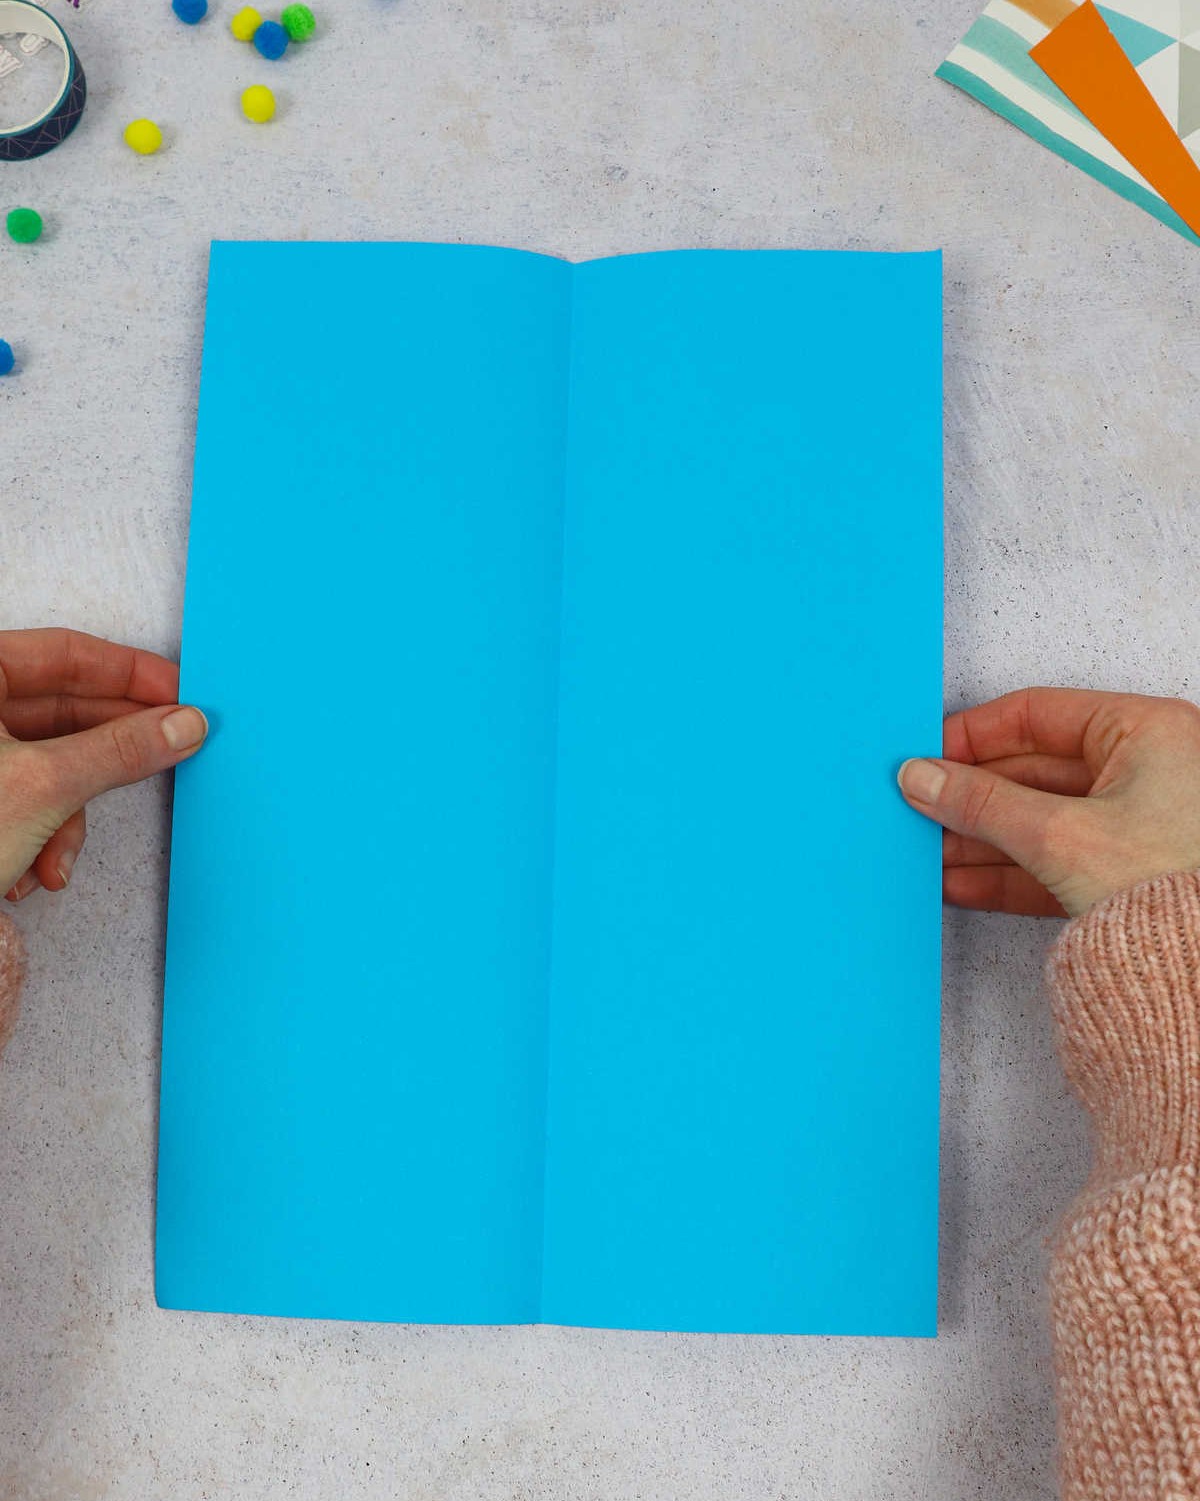
Step 2
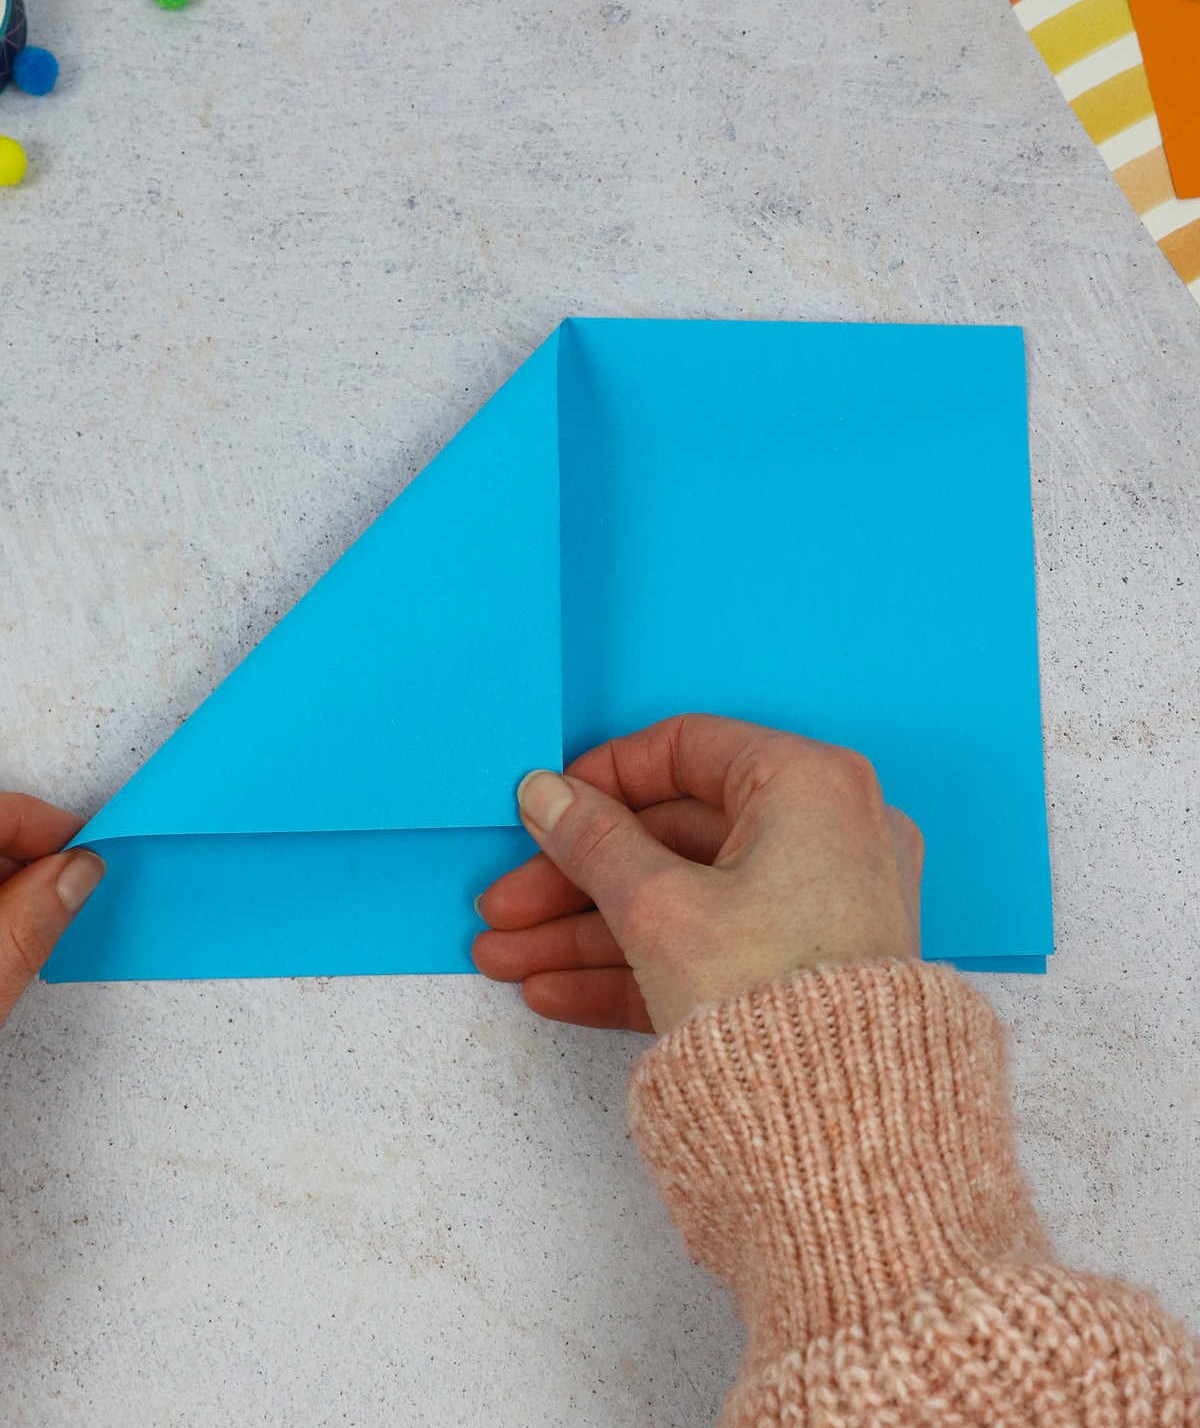
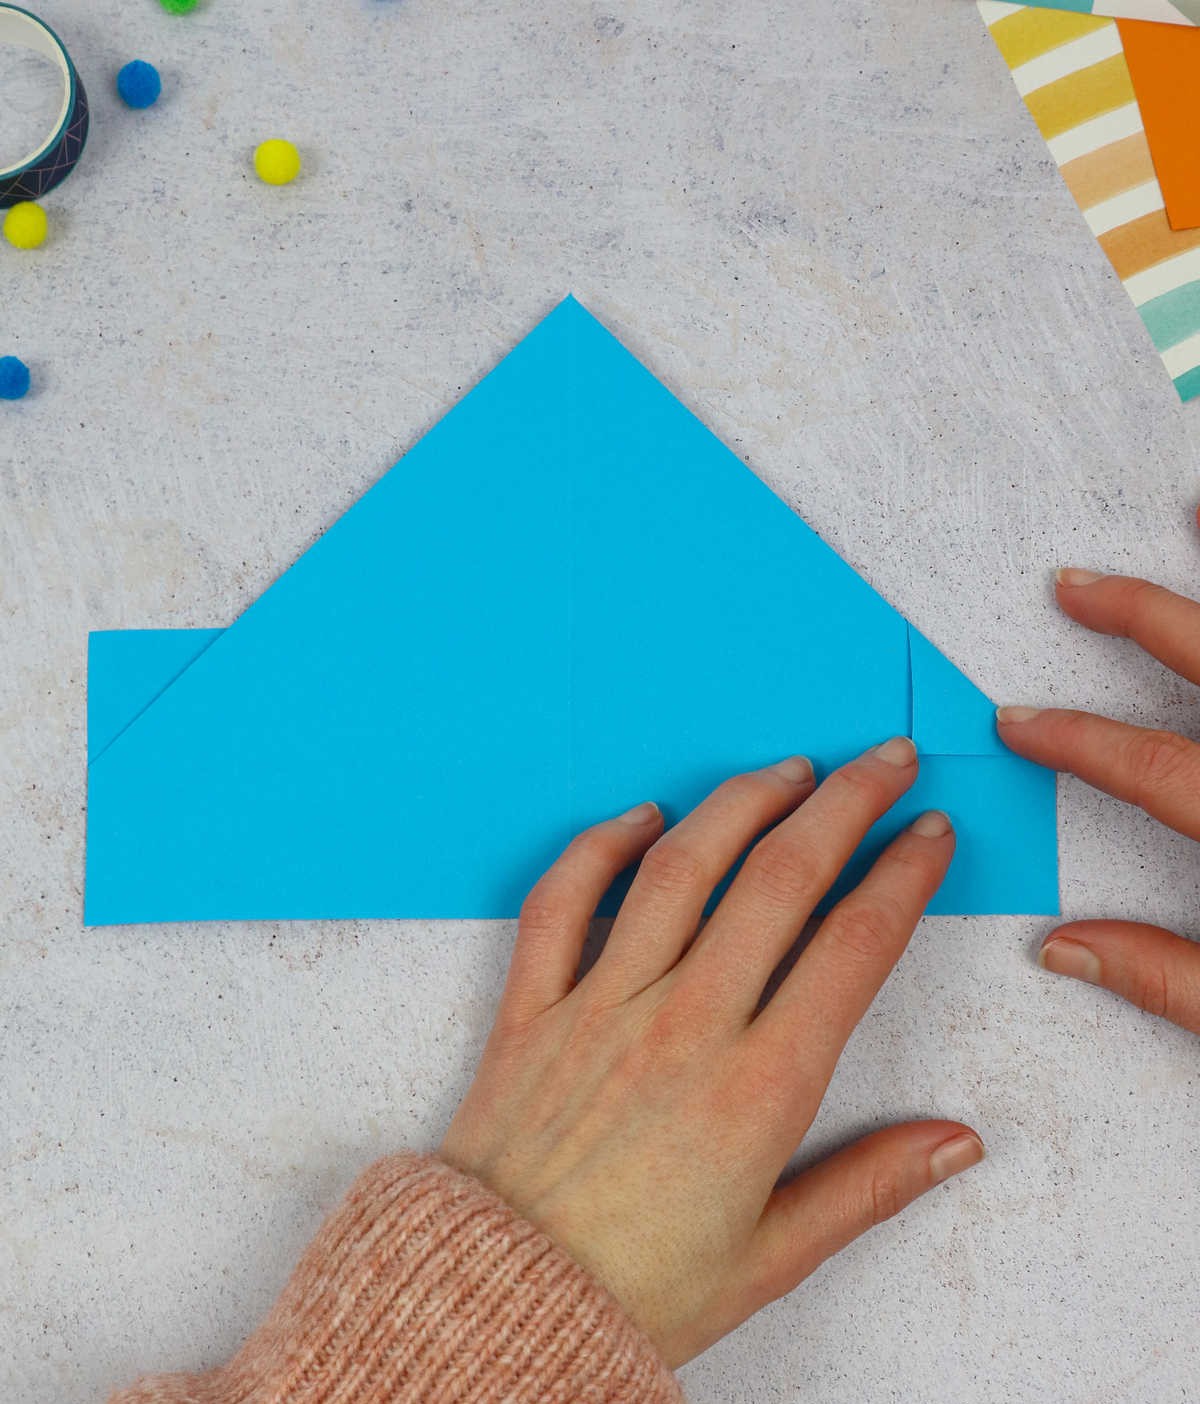
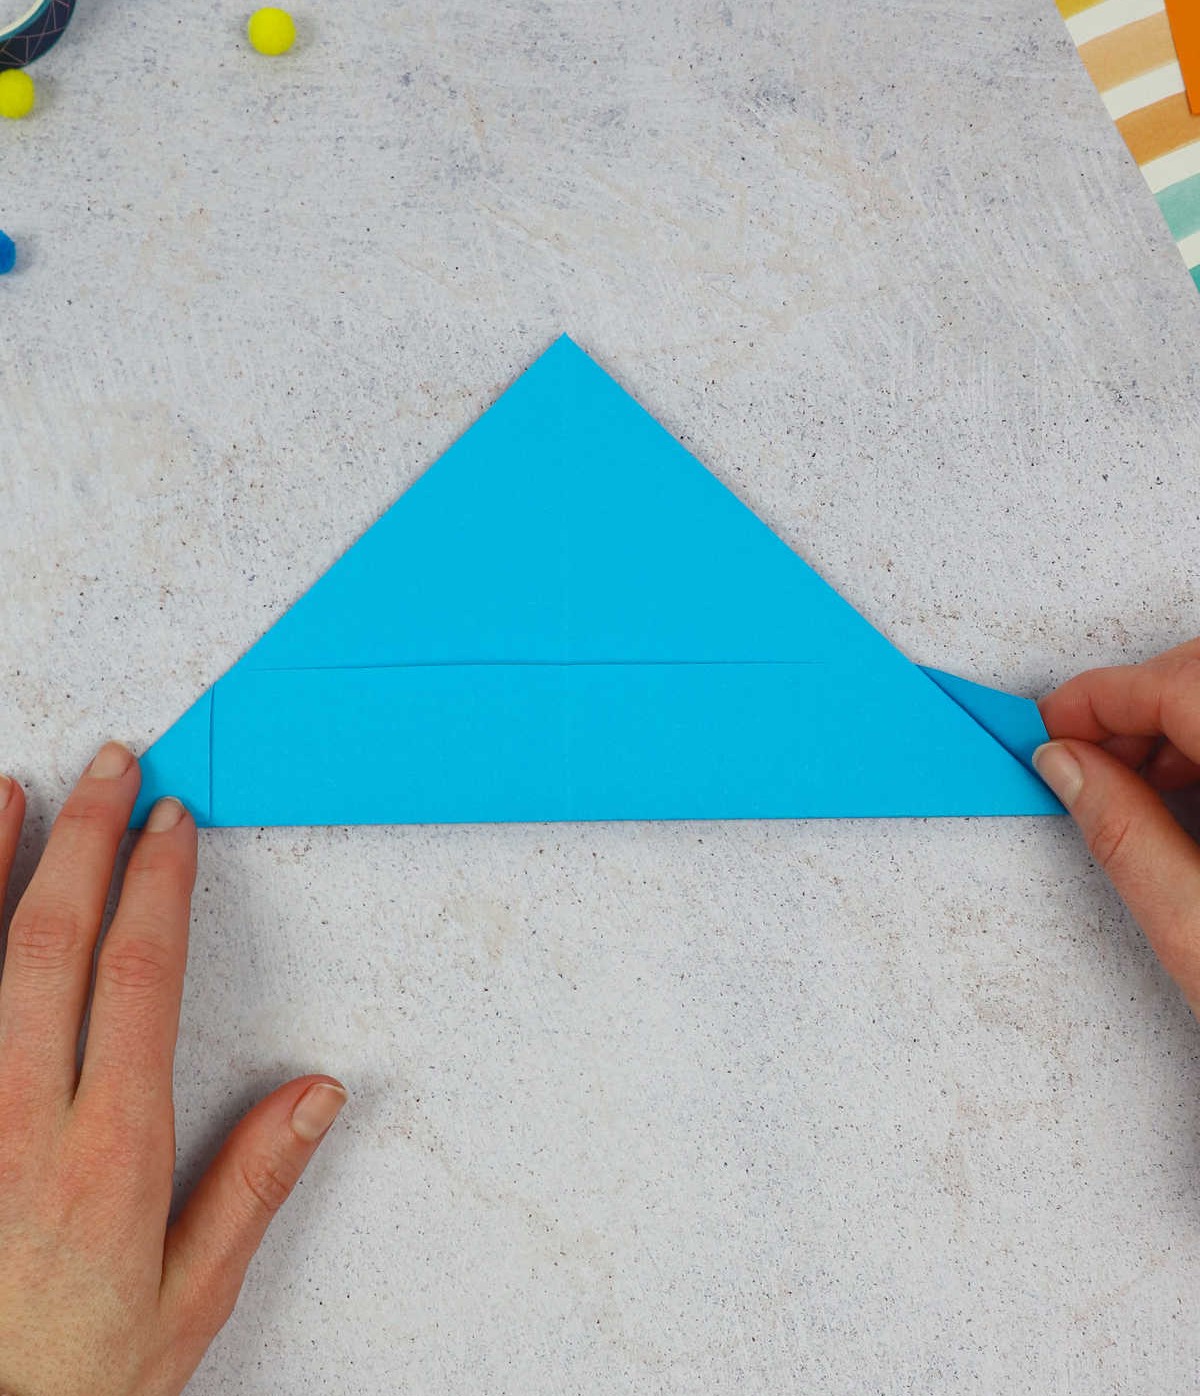
To complete the first stage of the folding process, begin by pulling down the top left corner of the paper to the center. Ensure the edge is aligned with the previously created crease. Next, proceed to grab the other top corner and bring it down towards the center, mirroring the same alignment as before, with both edges meeting at the central point.
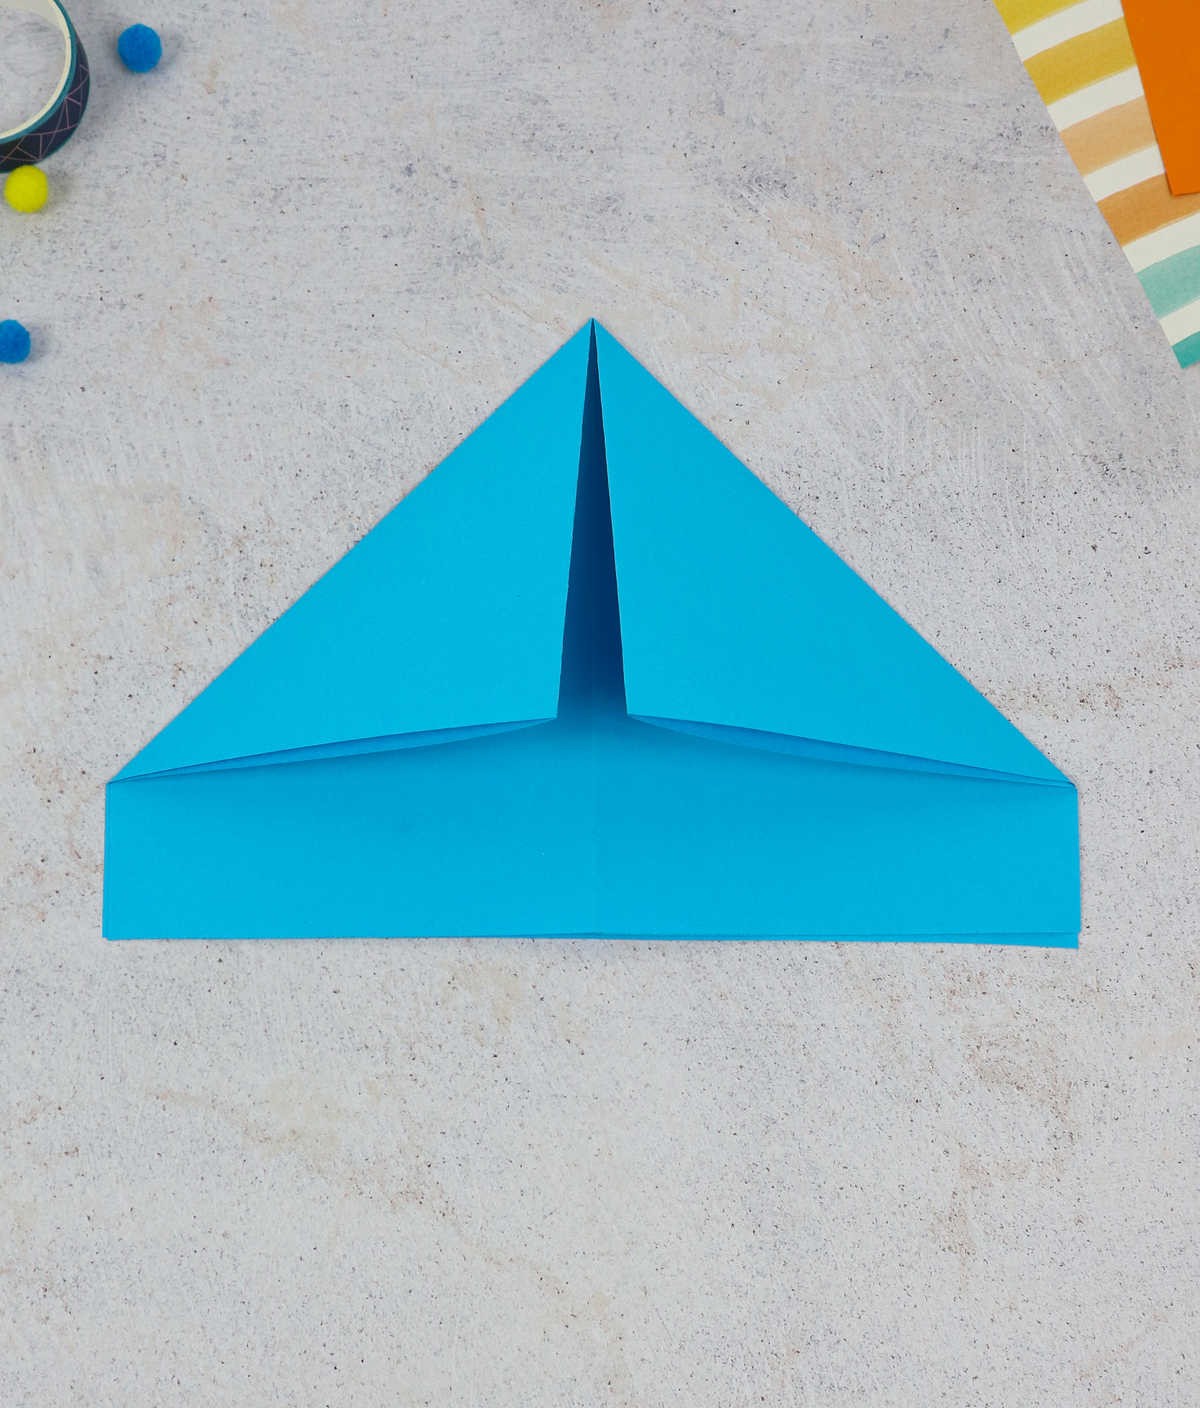
Step 3

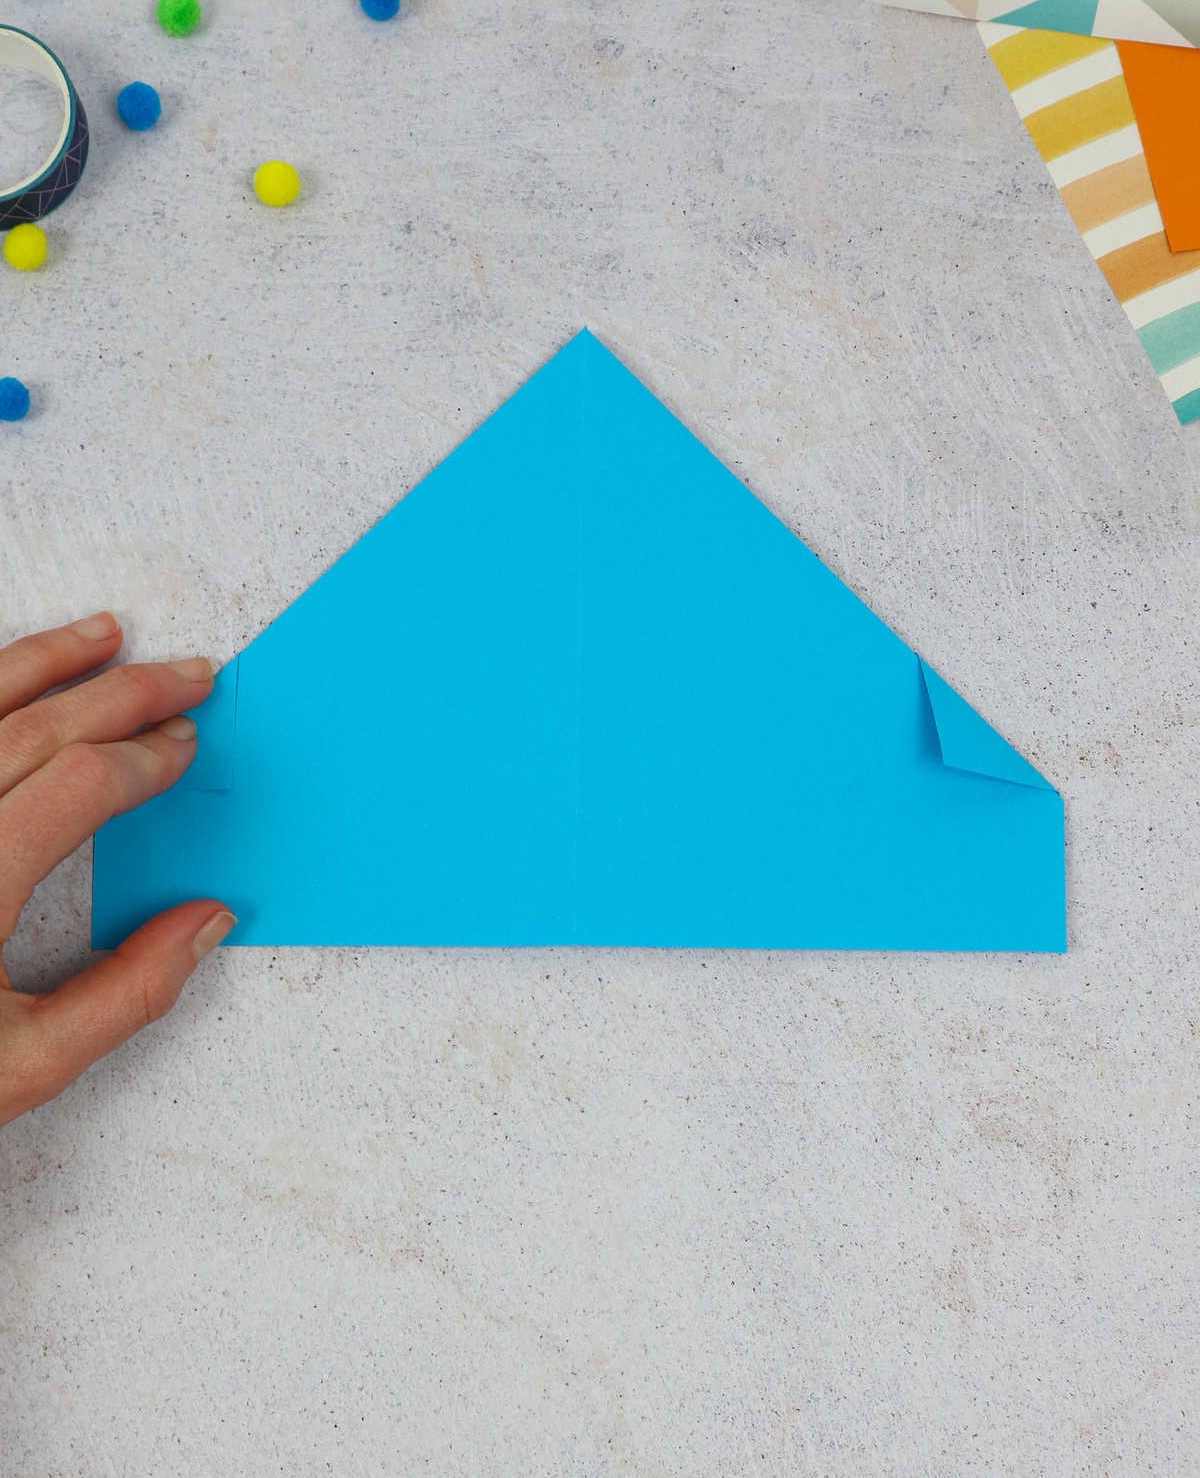
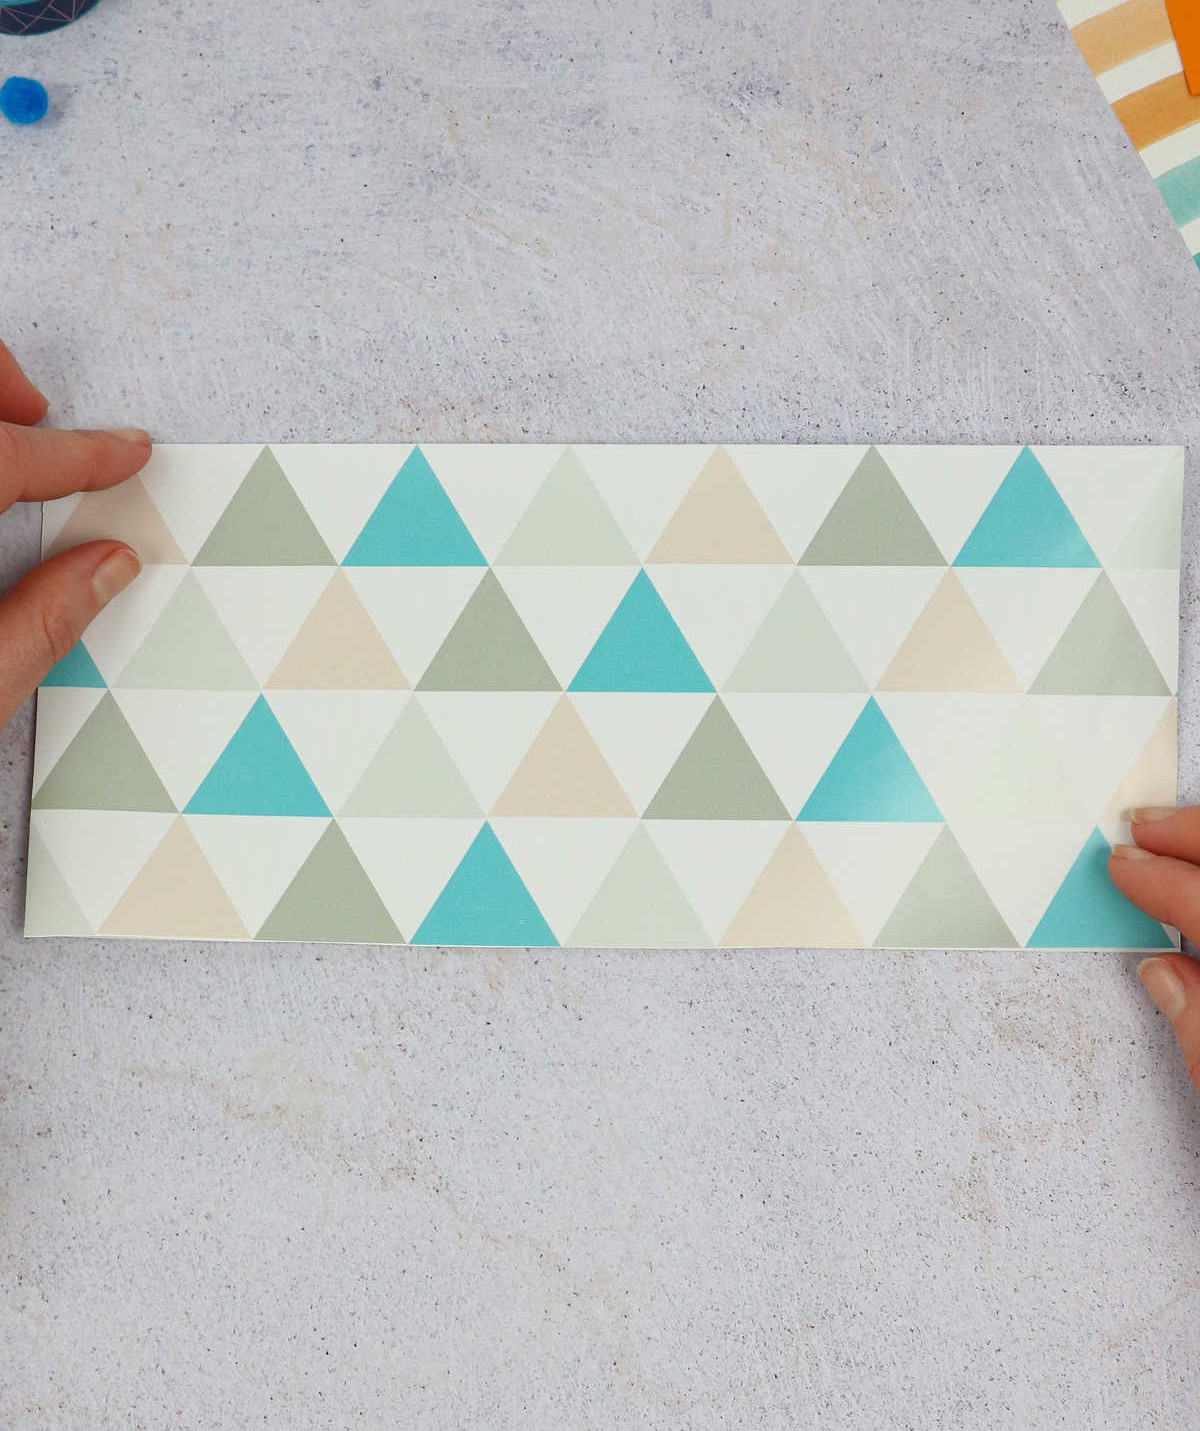
As you approach the final stage of your project, you’ll notice there are two sheets remaining. Take the uppermost sheet and carefully fold it along its edge, ensuring it meets the base of the triangular formation created by the corner creases. The illustration below will provide a clearer visual representation to guide your folding process.
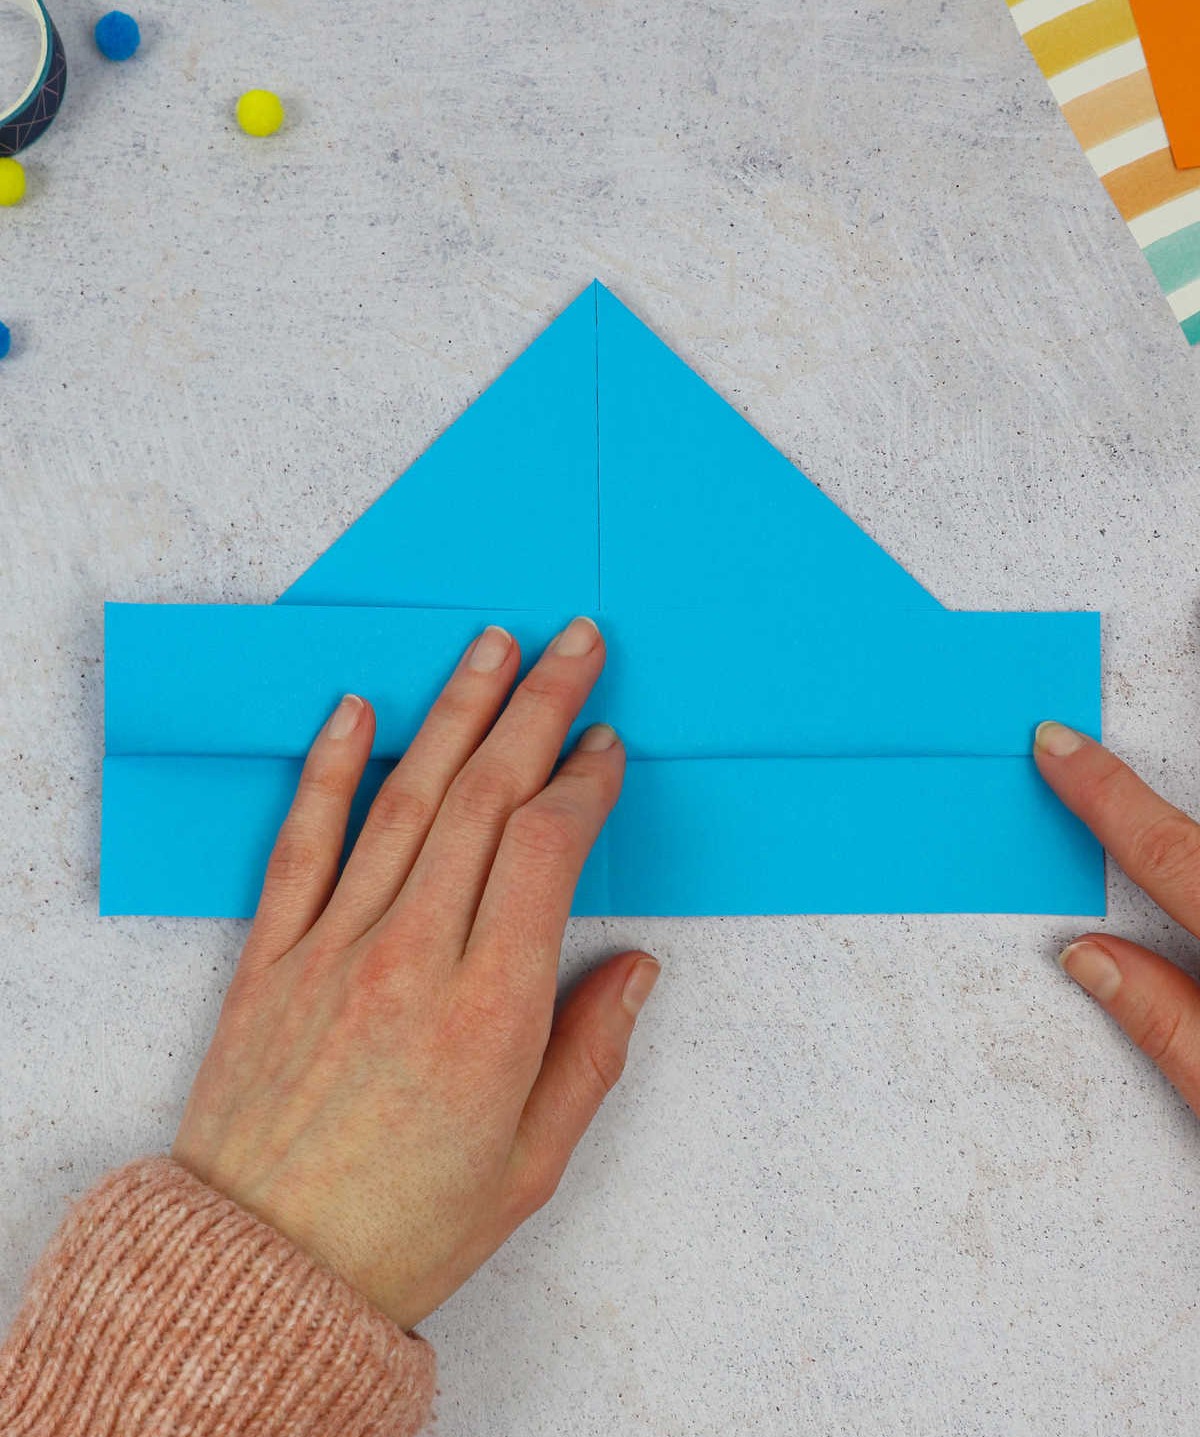
Step 4
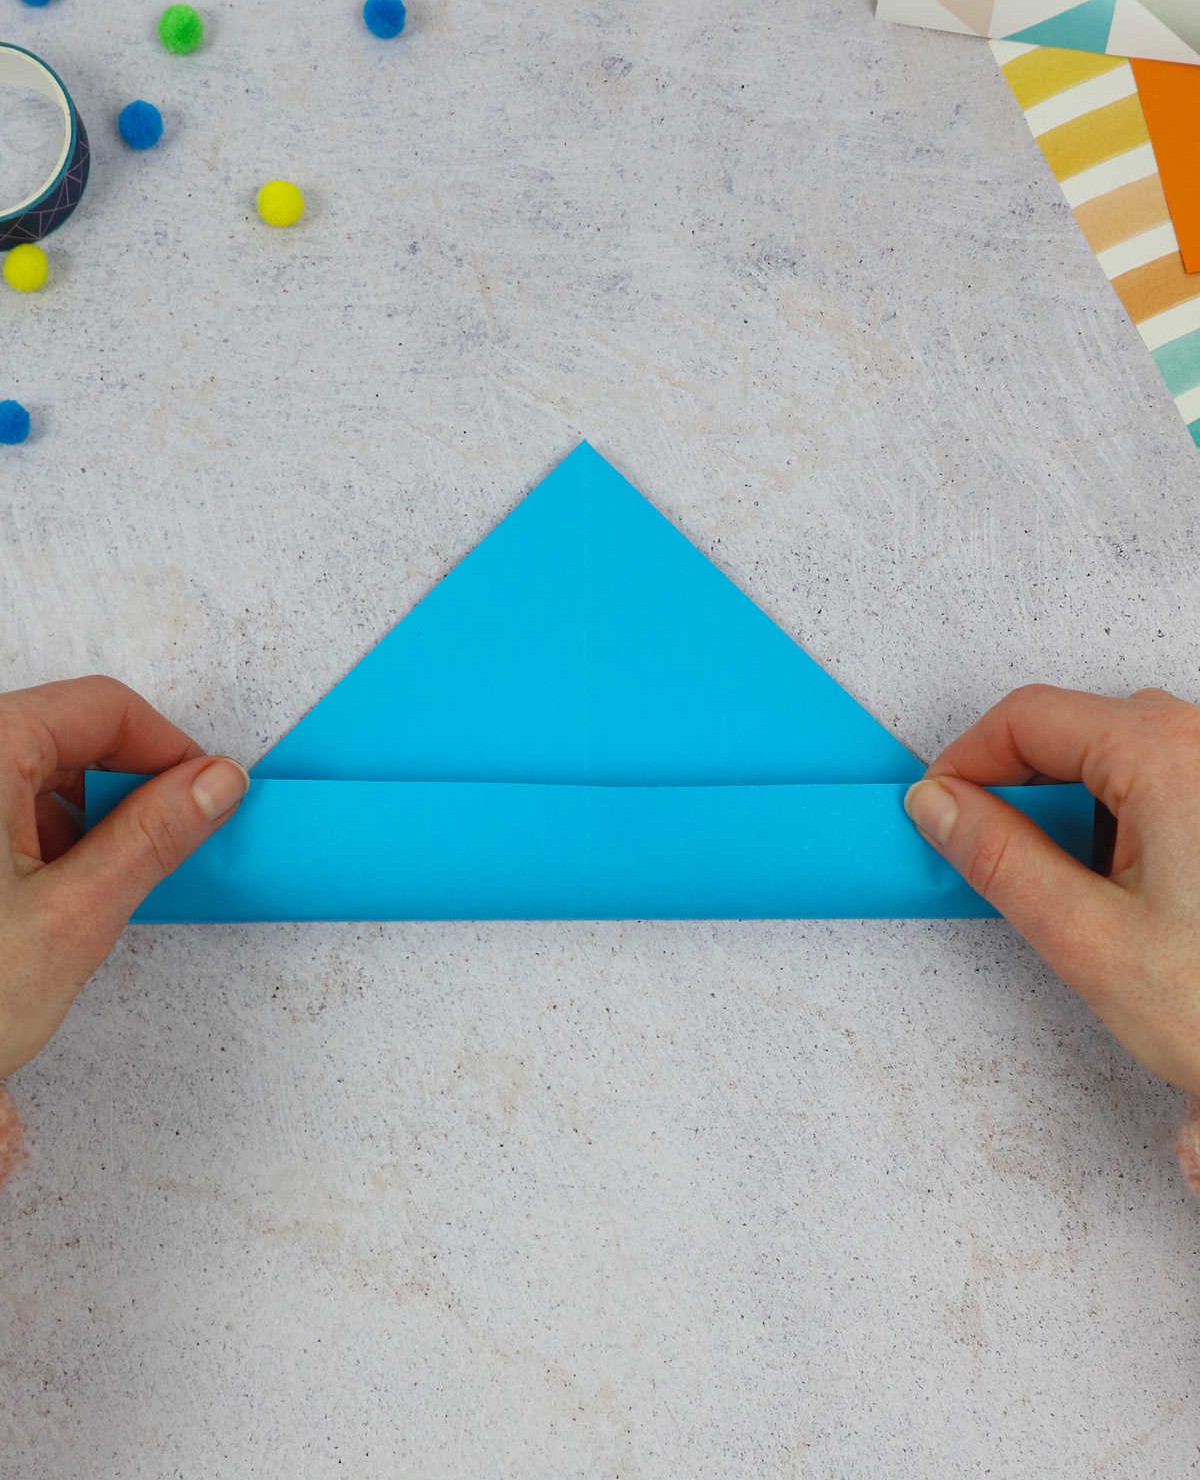
Folding the second half of the paper is the next step, allowing you to tuck the edges inward. Simply fold the paper in half and bring it up to align with the top edge, ensuring a crisp and clean finish.
Step 5
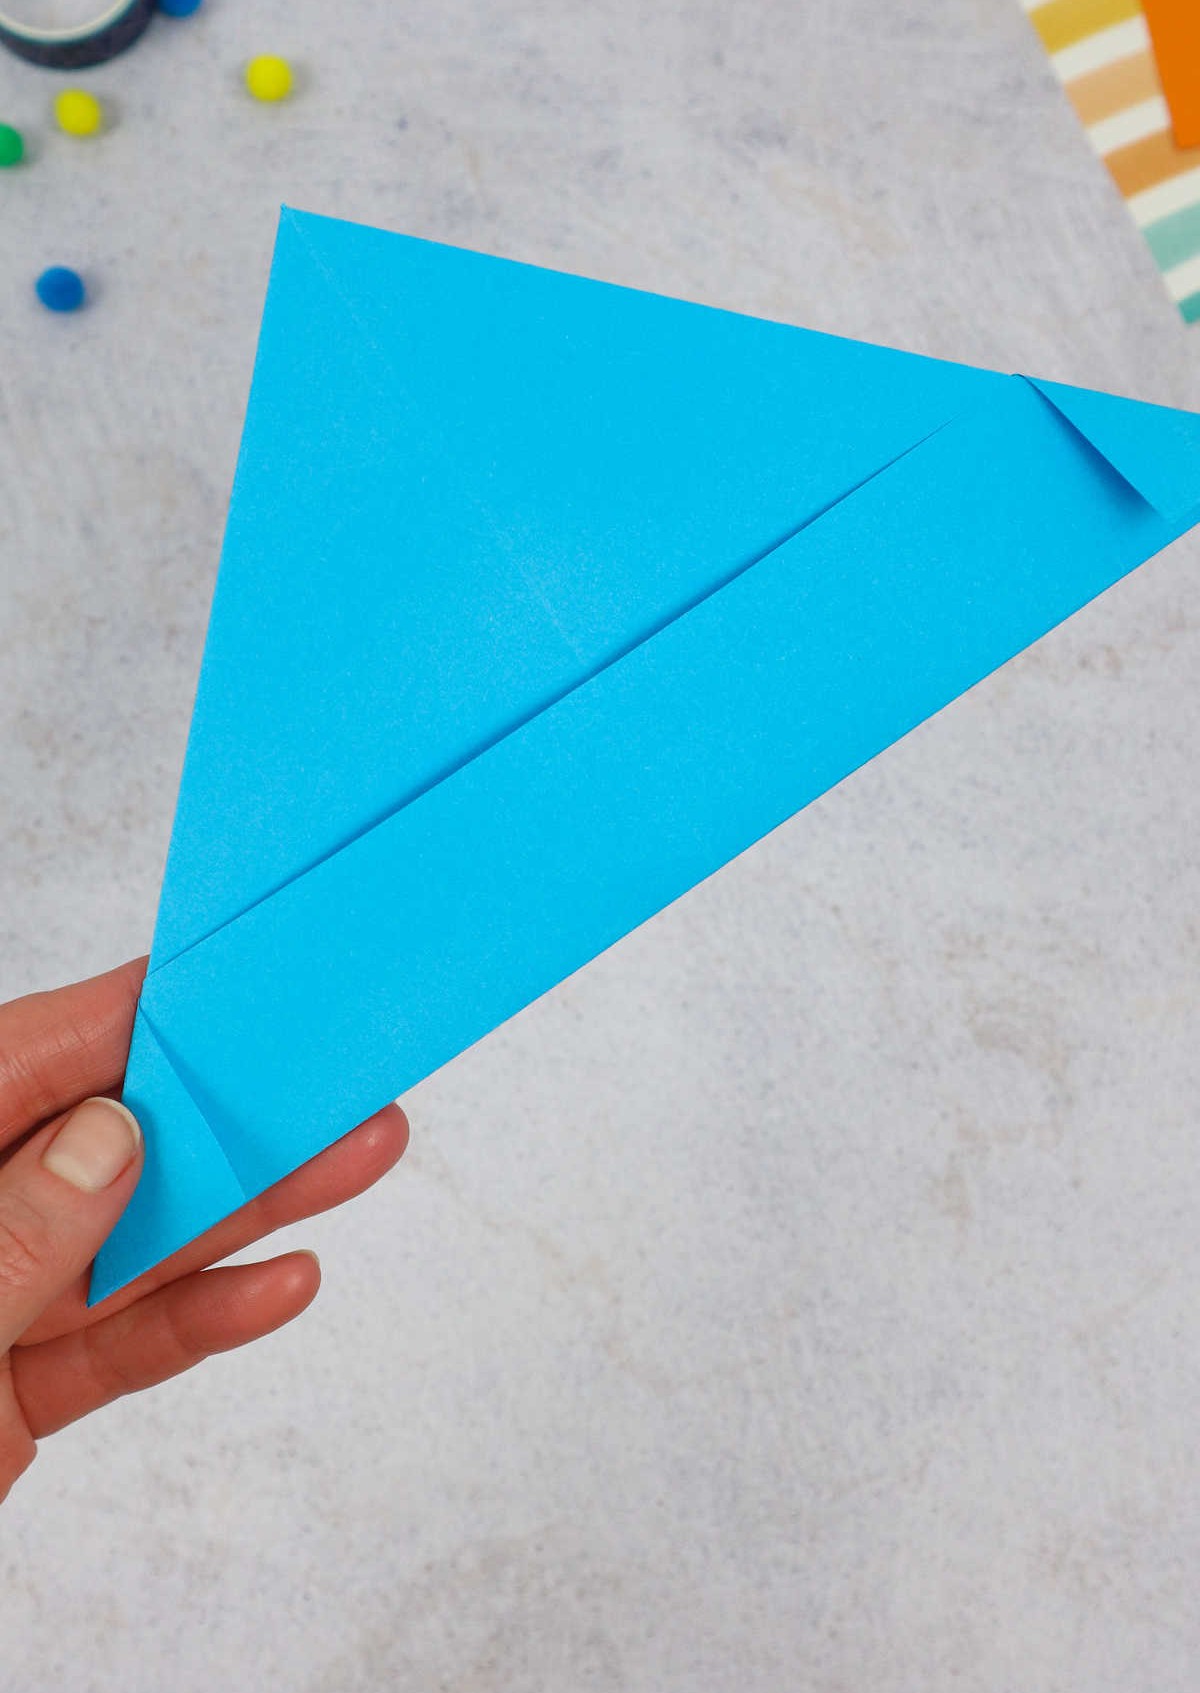
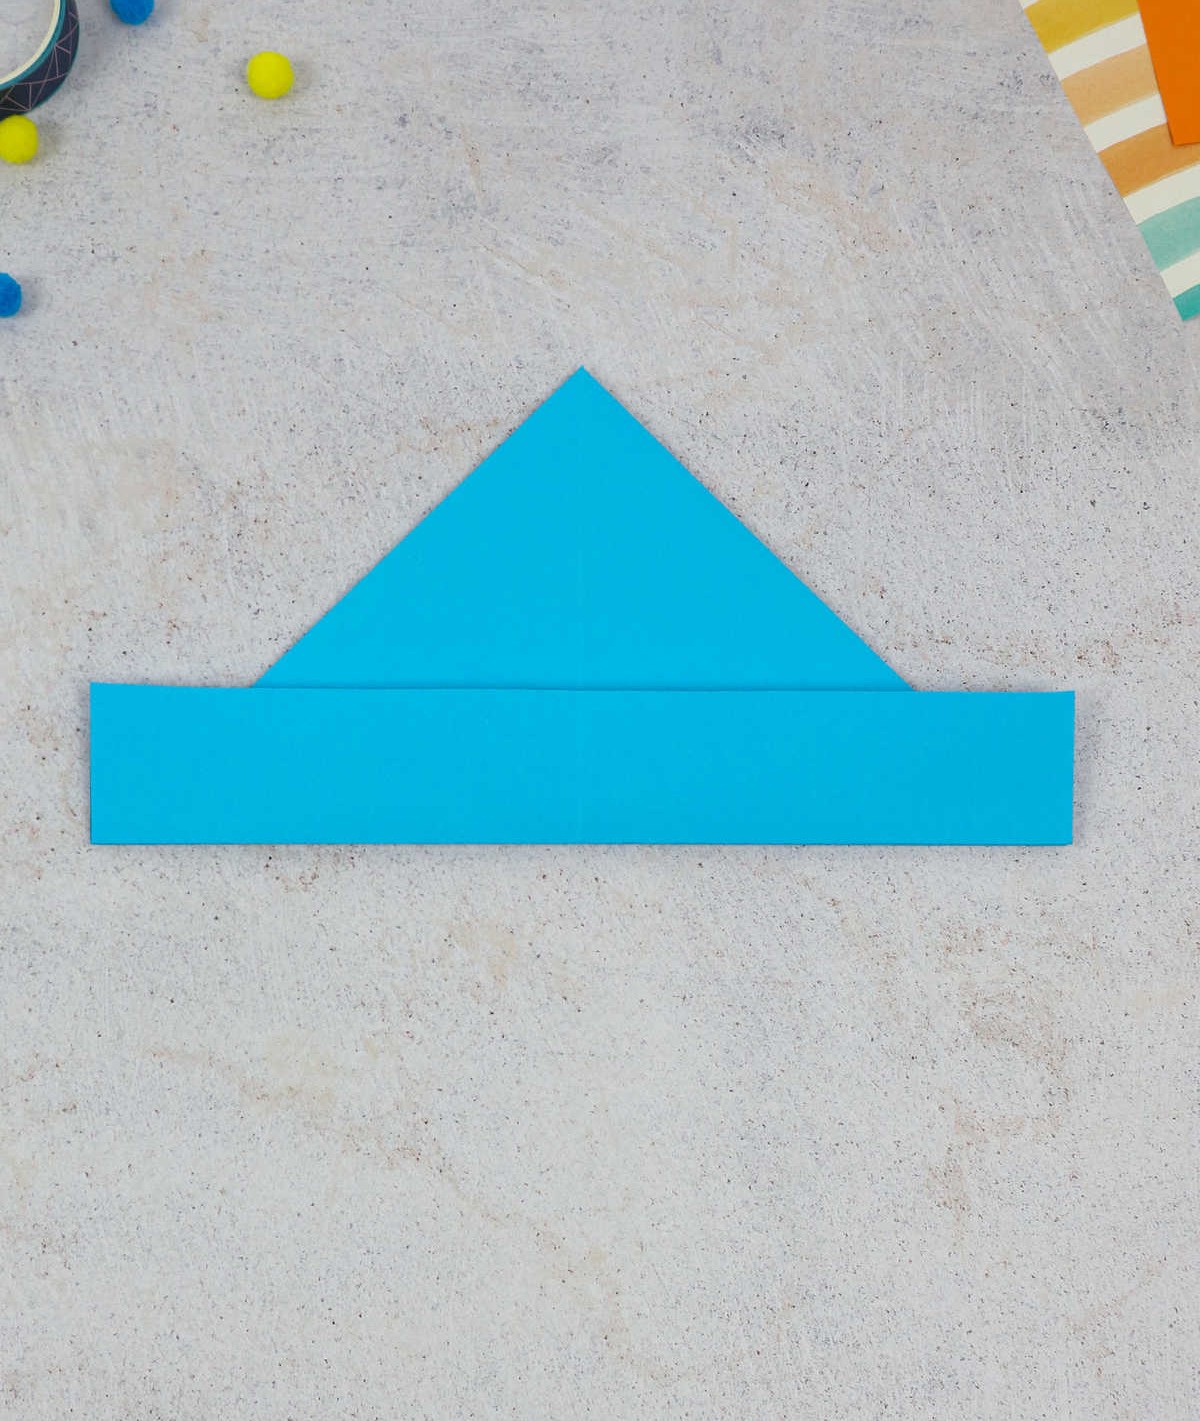
To ensure a seamless finish, take a moment to gently press the folded corners into place. A light tap will do the trick, ensuring they remain secure without compromising the overall appearance.
Step 6
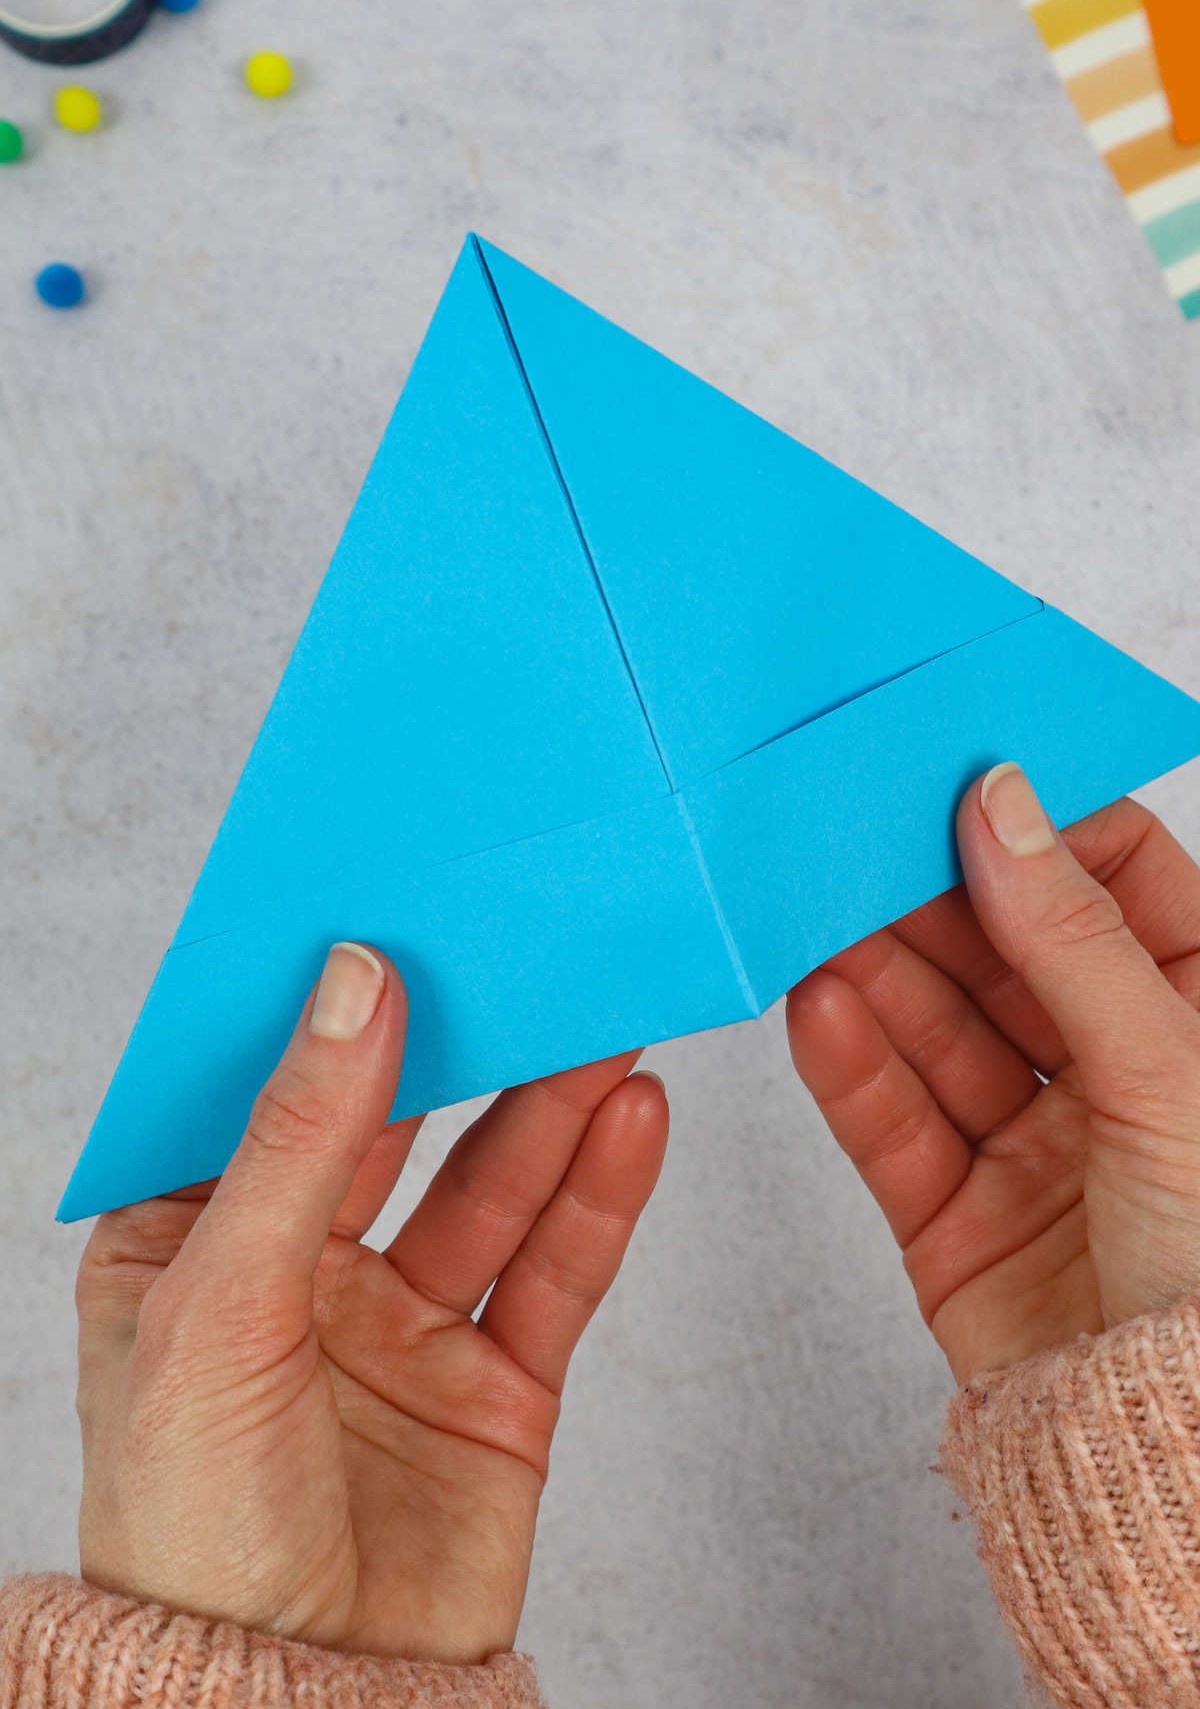
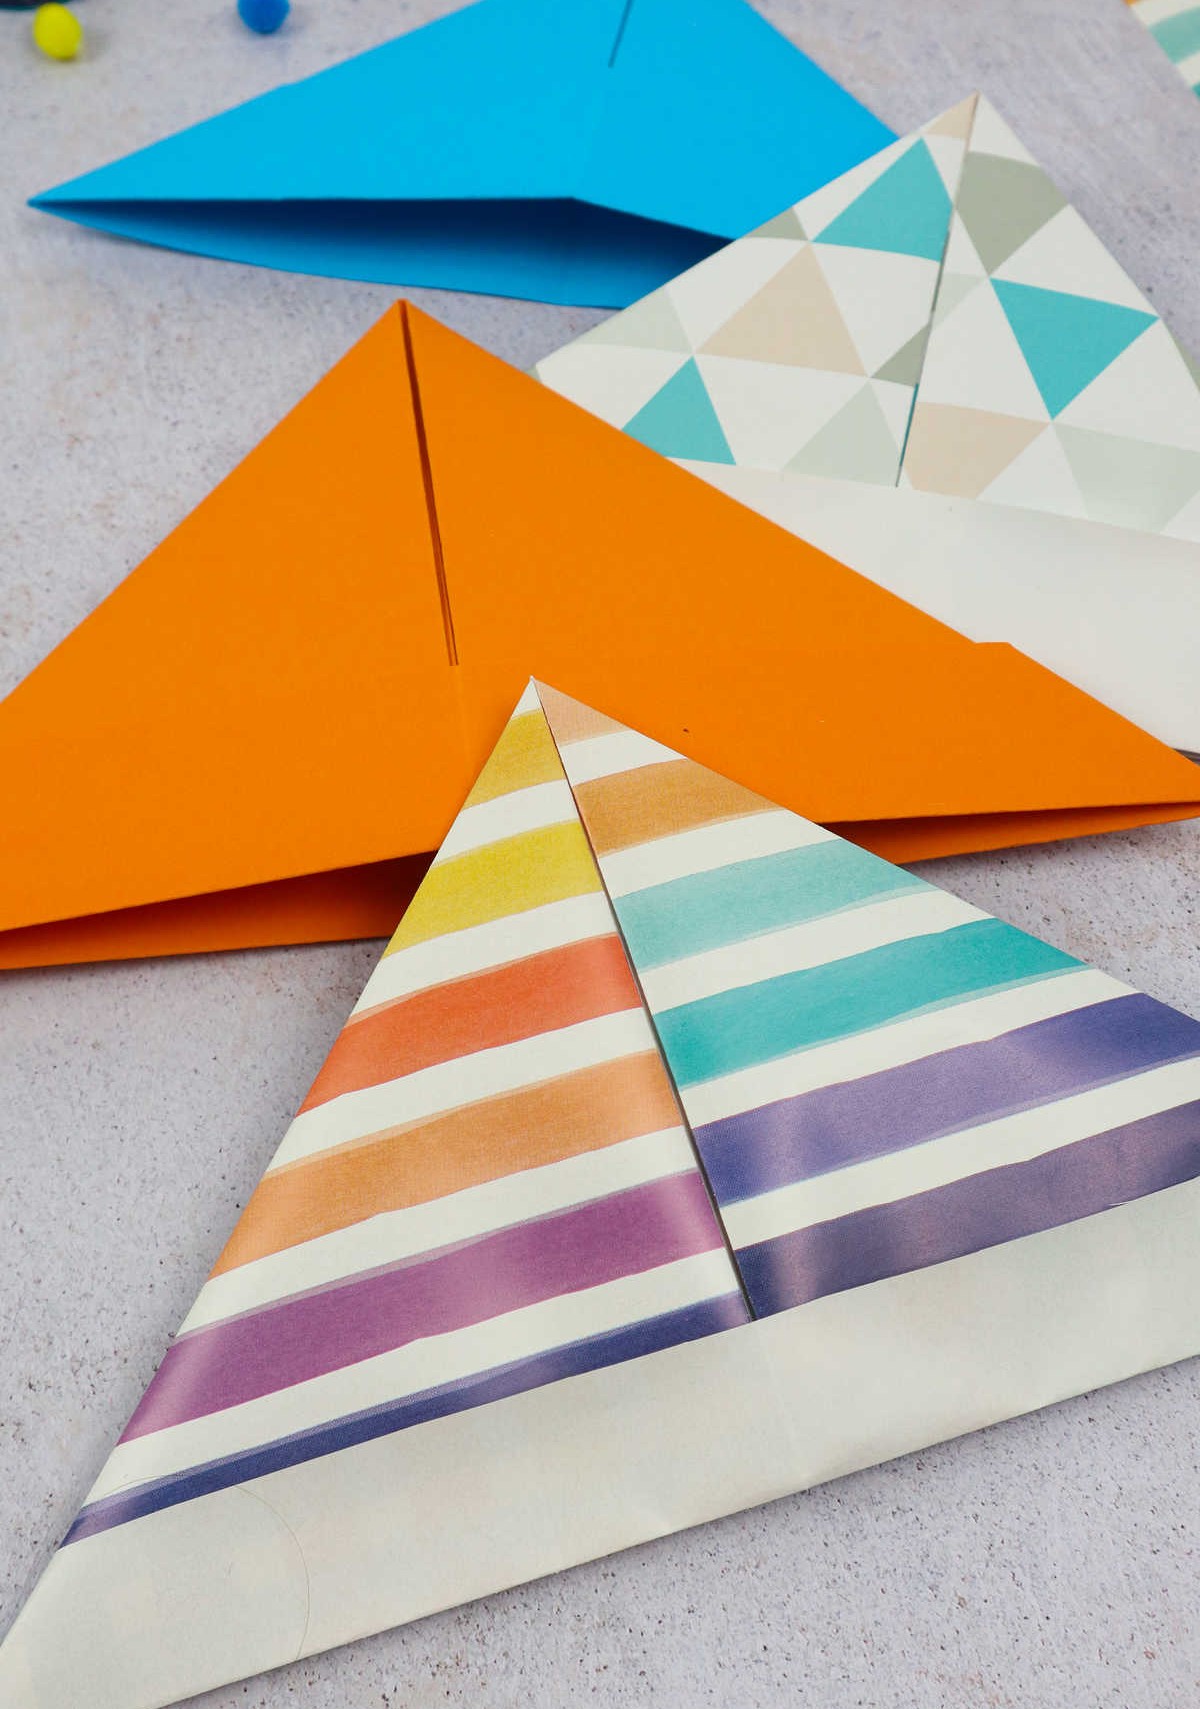
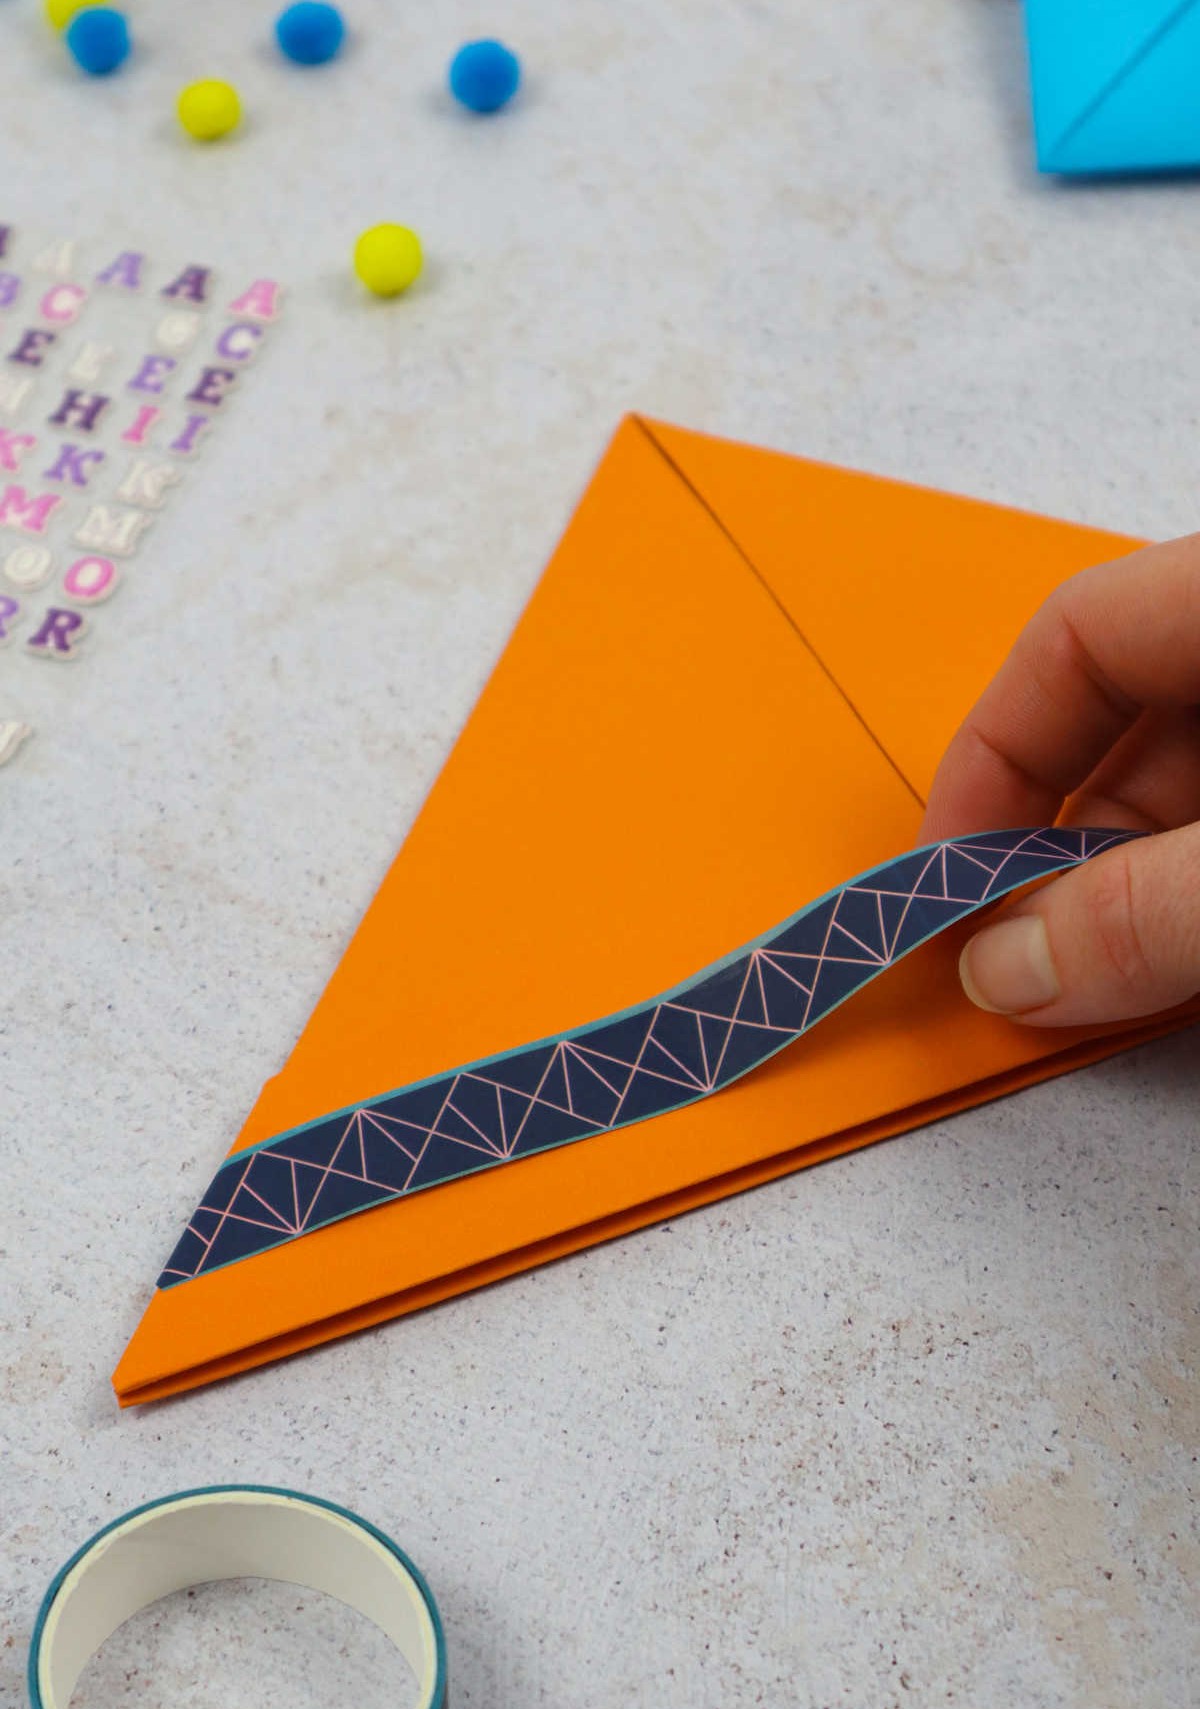

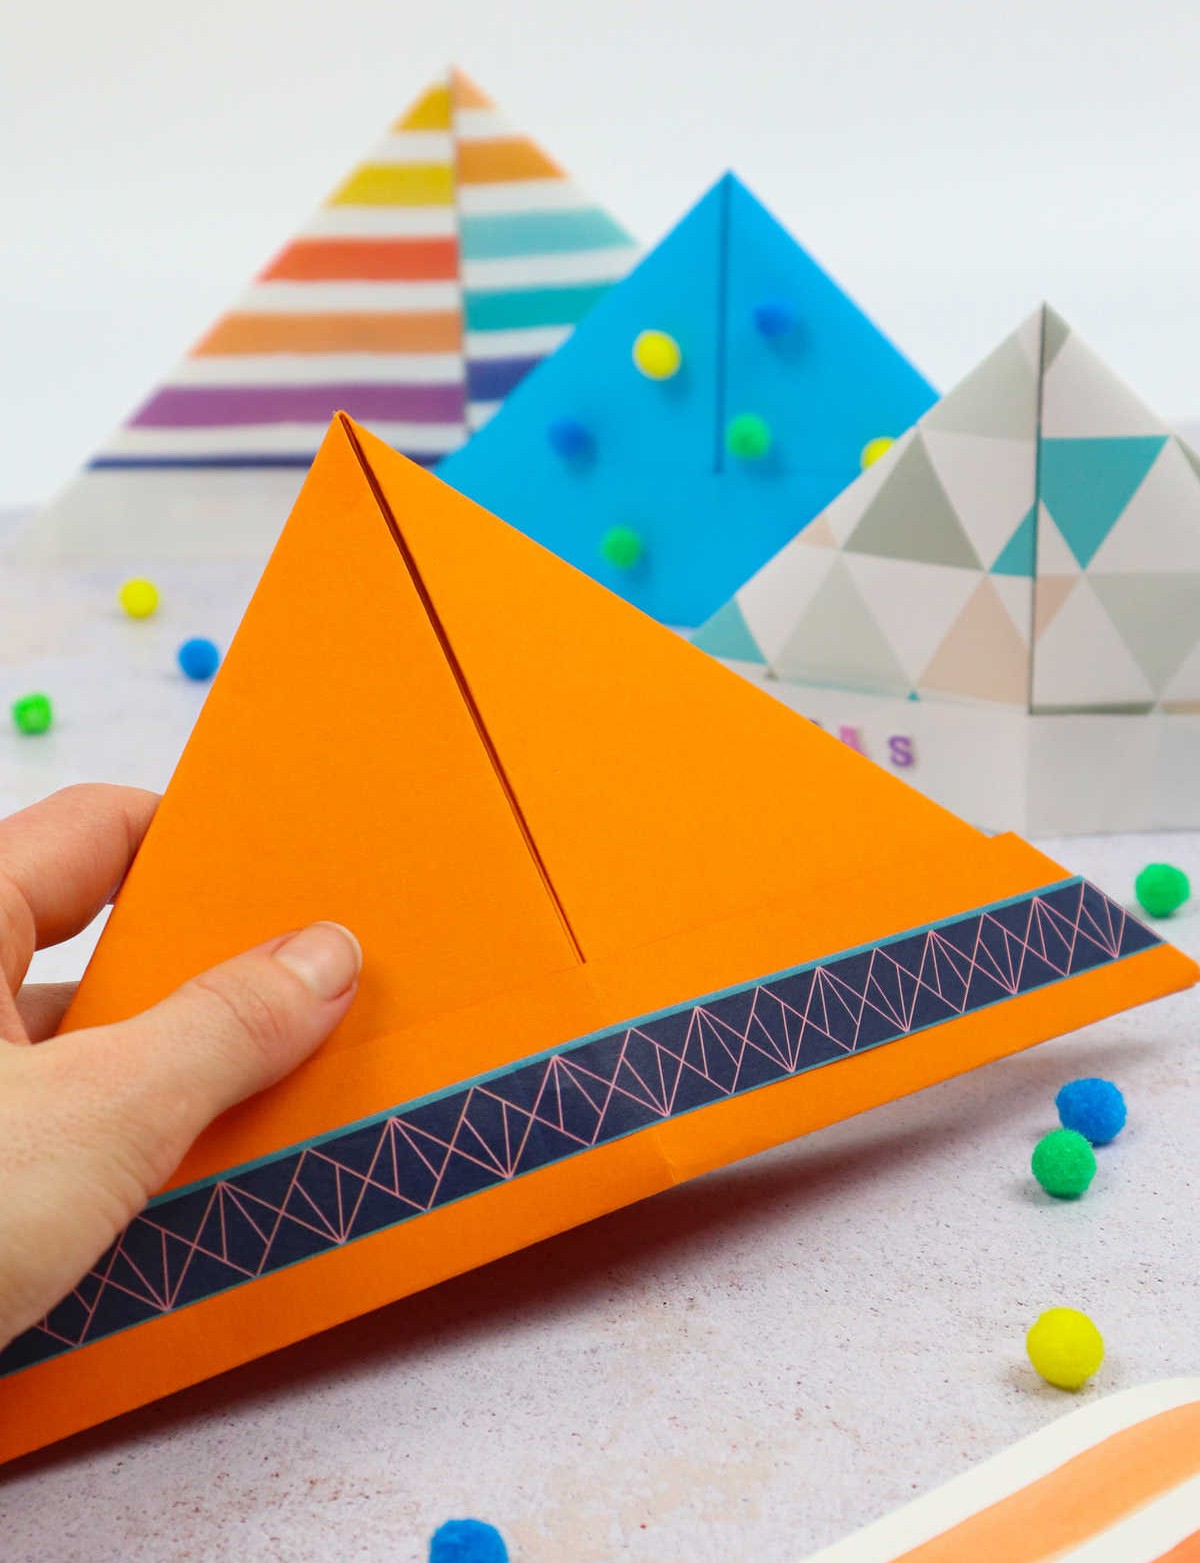
Now, when working with a single-sided sheet of paper, follow the same procedure. Simply keep the colored or patterned side facing upwards and outward, while keeping the plain side inward. This approach applies to any design you’re using. To further enhance your hats, consider adding decorative elements like washi tape along the edges and corners. You can also incorporate various embellishments such as glitter, beads, and more to give them a unique touch.
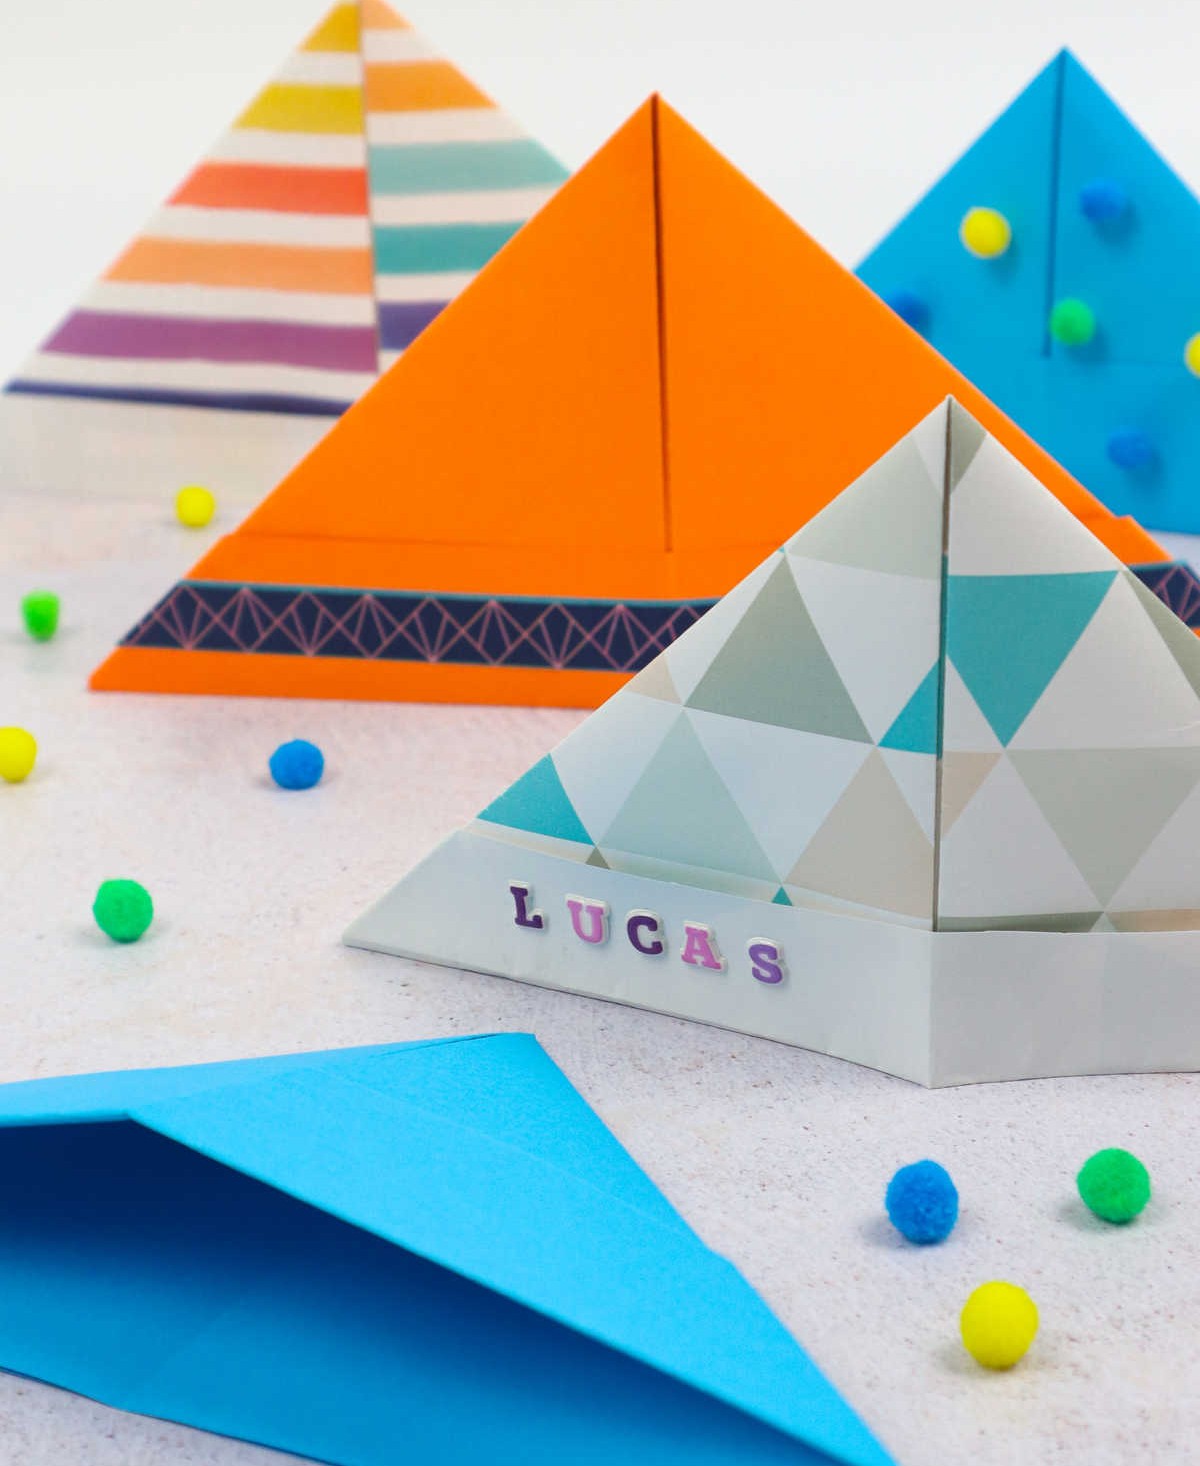
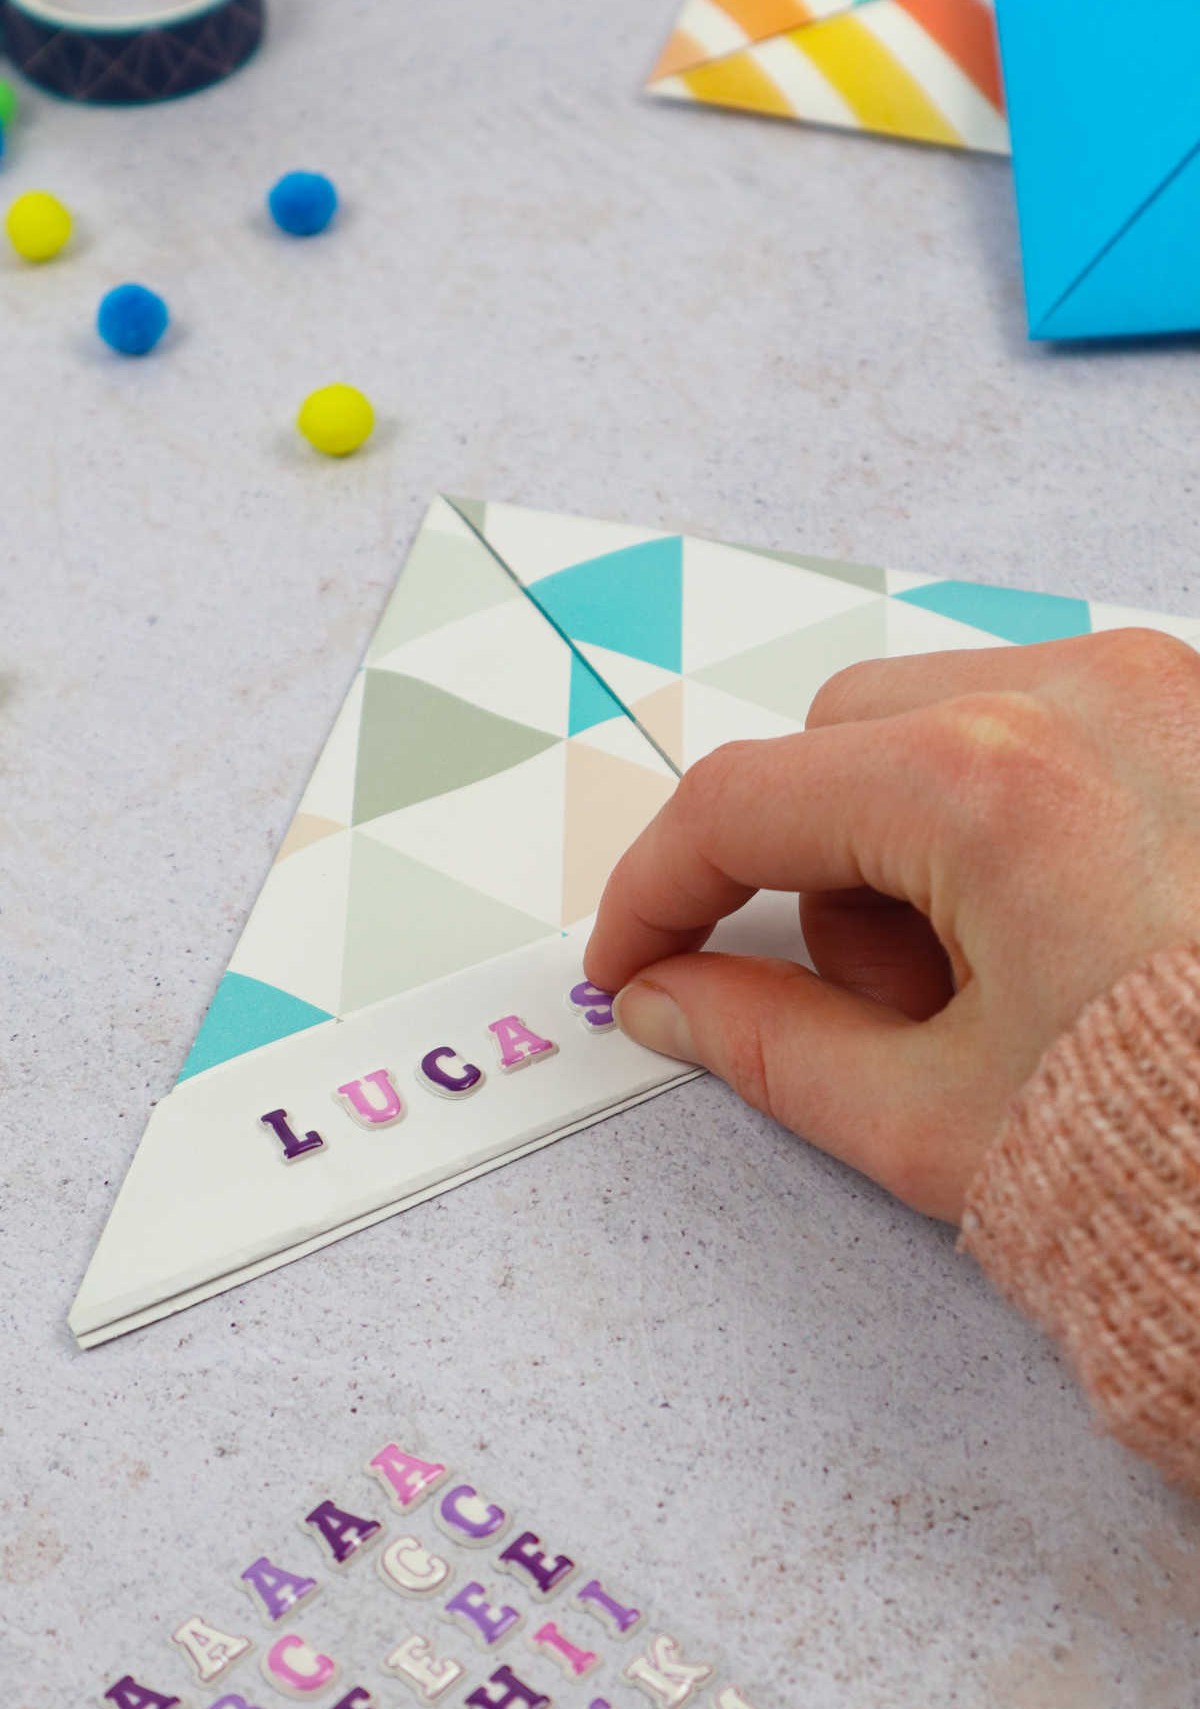
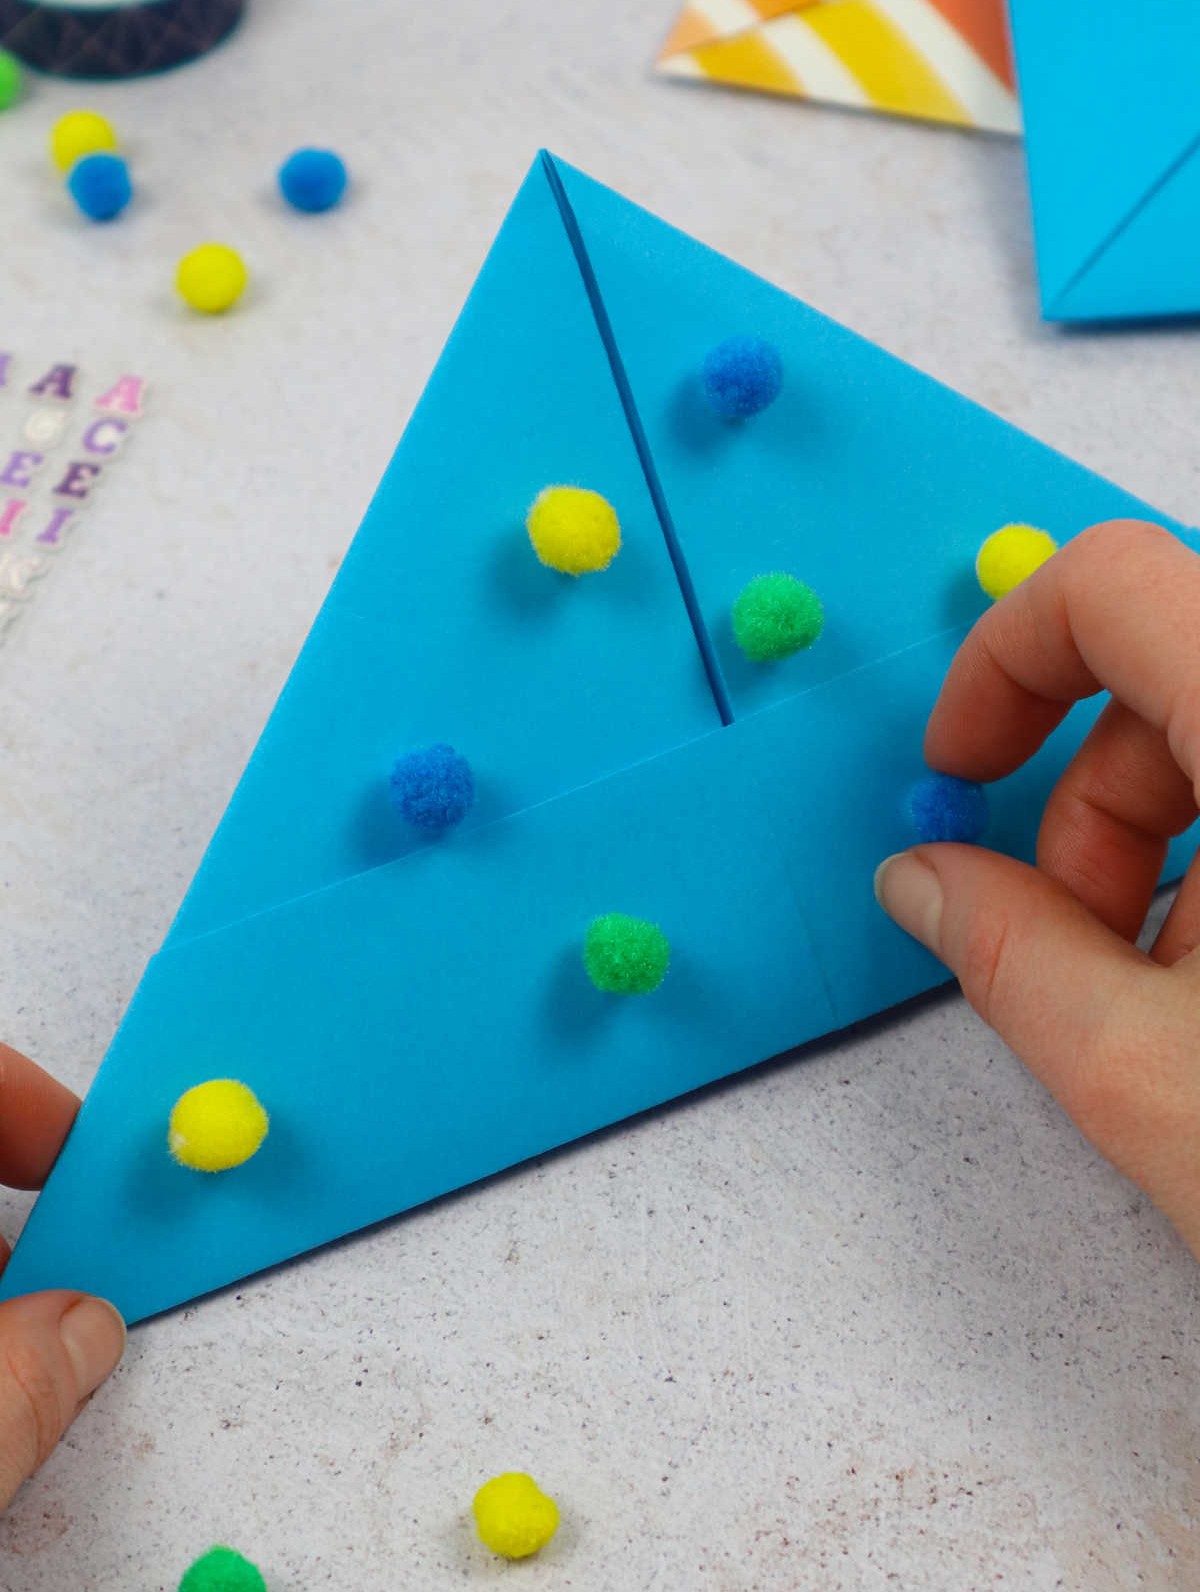
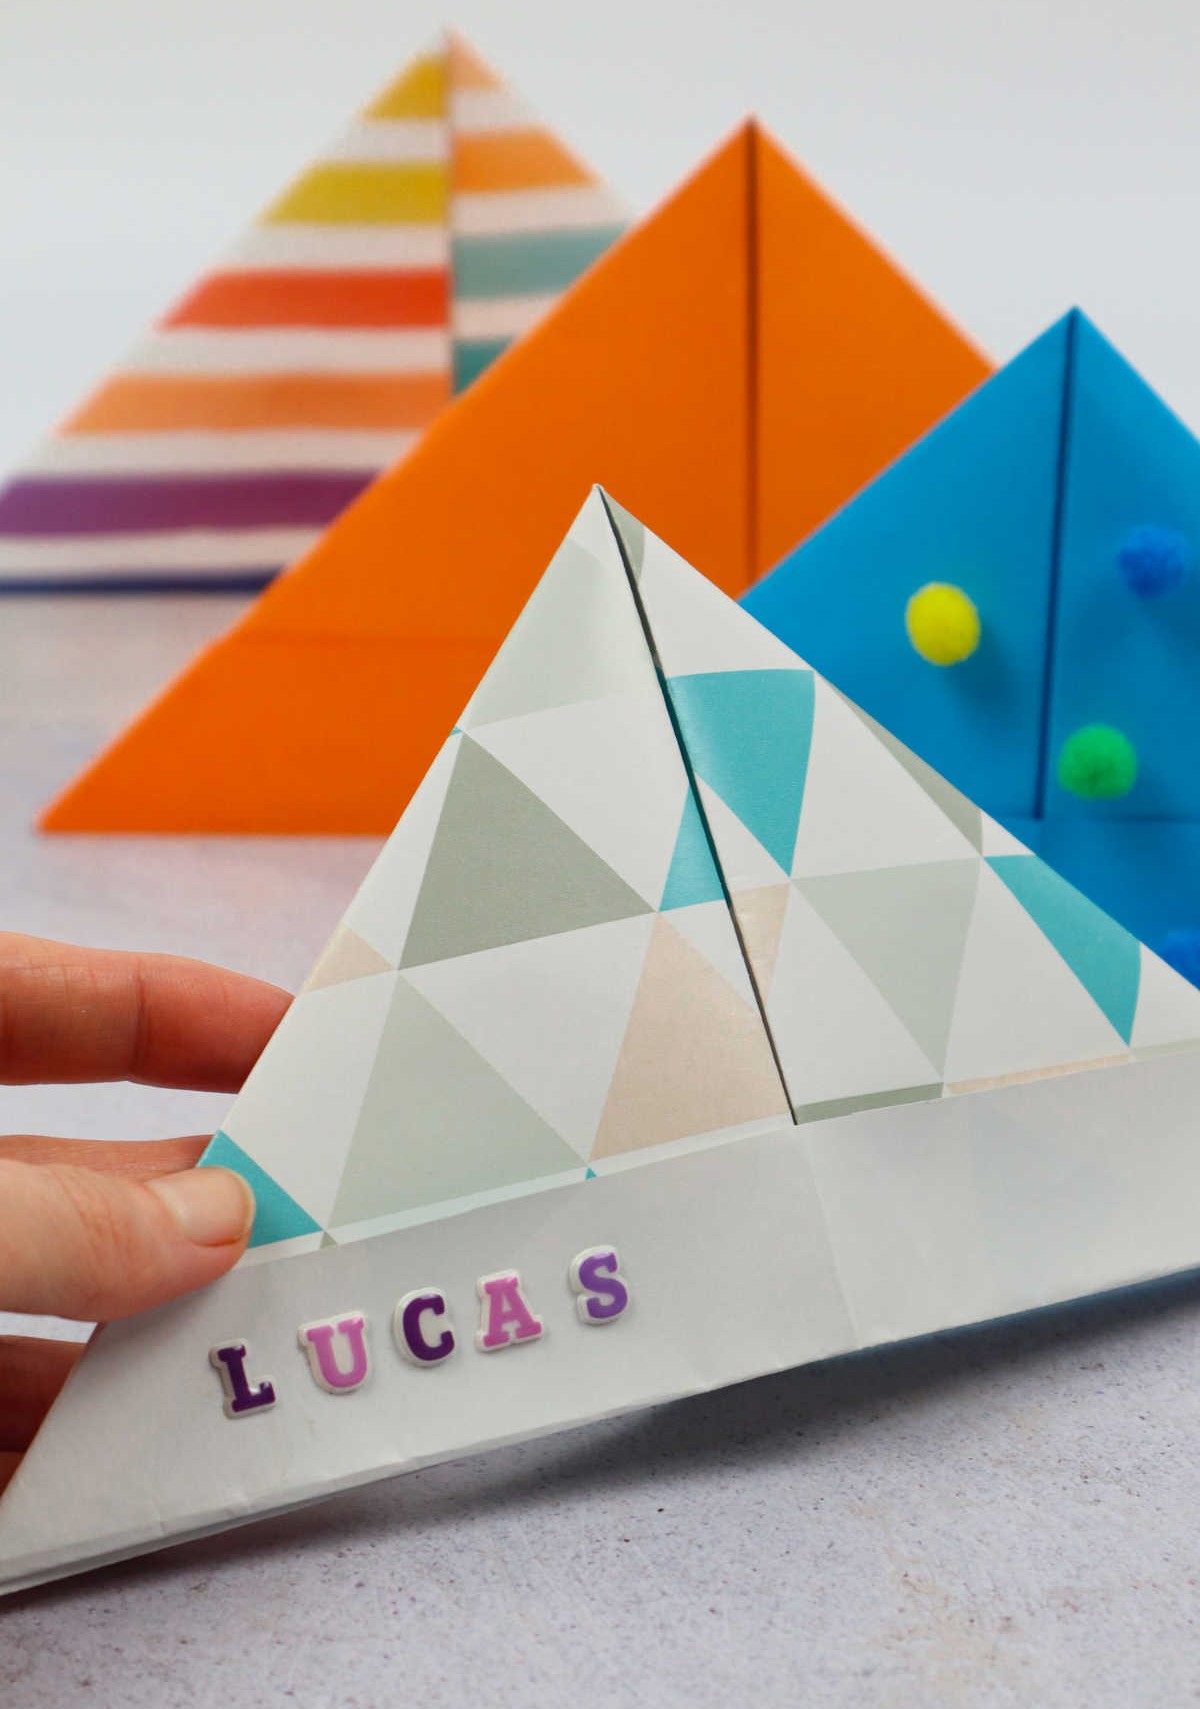
Feel free to take it up a notch by applying small dots of glue and attaching pom poms for added visual appeal. This design element is showcased in the provided example. For an extra personalized touch, feel free to add your kids’ names or initials using stickers or any other method you prefer.
How to Make a Paper Hat
Want to create a fun and interactive craft with your little ones? Look no further than these DIY paper hats, perfect for family bonding and celebrations alike! With just 5 minutes of prep time, 20 minutes of active crafting, and a total time of 25 minutes, this project is sure to delight both kids and adults. And the best part? It’s an affordable activity that won’t break the bank, with a cost of just $1.
So gather up your materials and get ready to create some unforgettable memories with your family!
Materials
When it comes to adding a touch of creativity to your journaling or scrapbooking project, having the right materials can make all the difference. In this case, you’ll need some essential supplies like rectangular paper sheets in various sizes such as A4, A3, or A2. These will serve as the foundation for your design. To add some whimsy and texture, consider incorporating craft pom poms into your project. For a more structured approach, washi tape can be used to create clean lines and borders.
If you want to add some personalized flair, letter stickers are a great way to incorporate names, dates, or quotes. Finally, decorative glue can help bring everything together and add an extra layer of dimensionality to your design.
Instructions
To embark on your DIY paper hat adventure, begin by gathering all the necessary supplies. You can opt for vibrant, patterned, or even simple double-sided sheets of paper. If you’re working with a single-colored side, just keep that facing up and outwards, while the plain side remains inward. Lay the paper flat, fold one long edge upwards, unfold it, and then fold it in half once more. Next, grasp the left corner and bring it down towards the center crease, ensuring the edges align as you go.
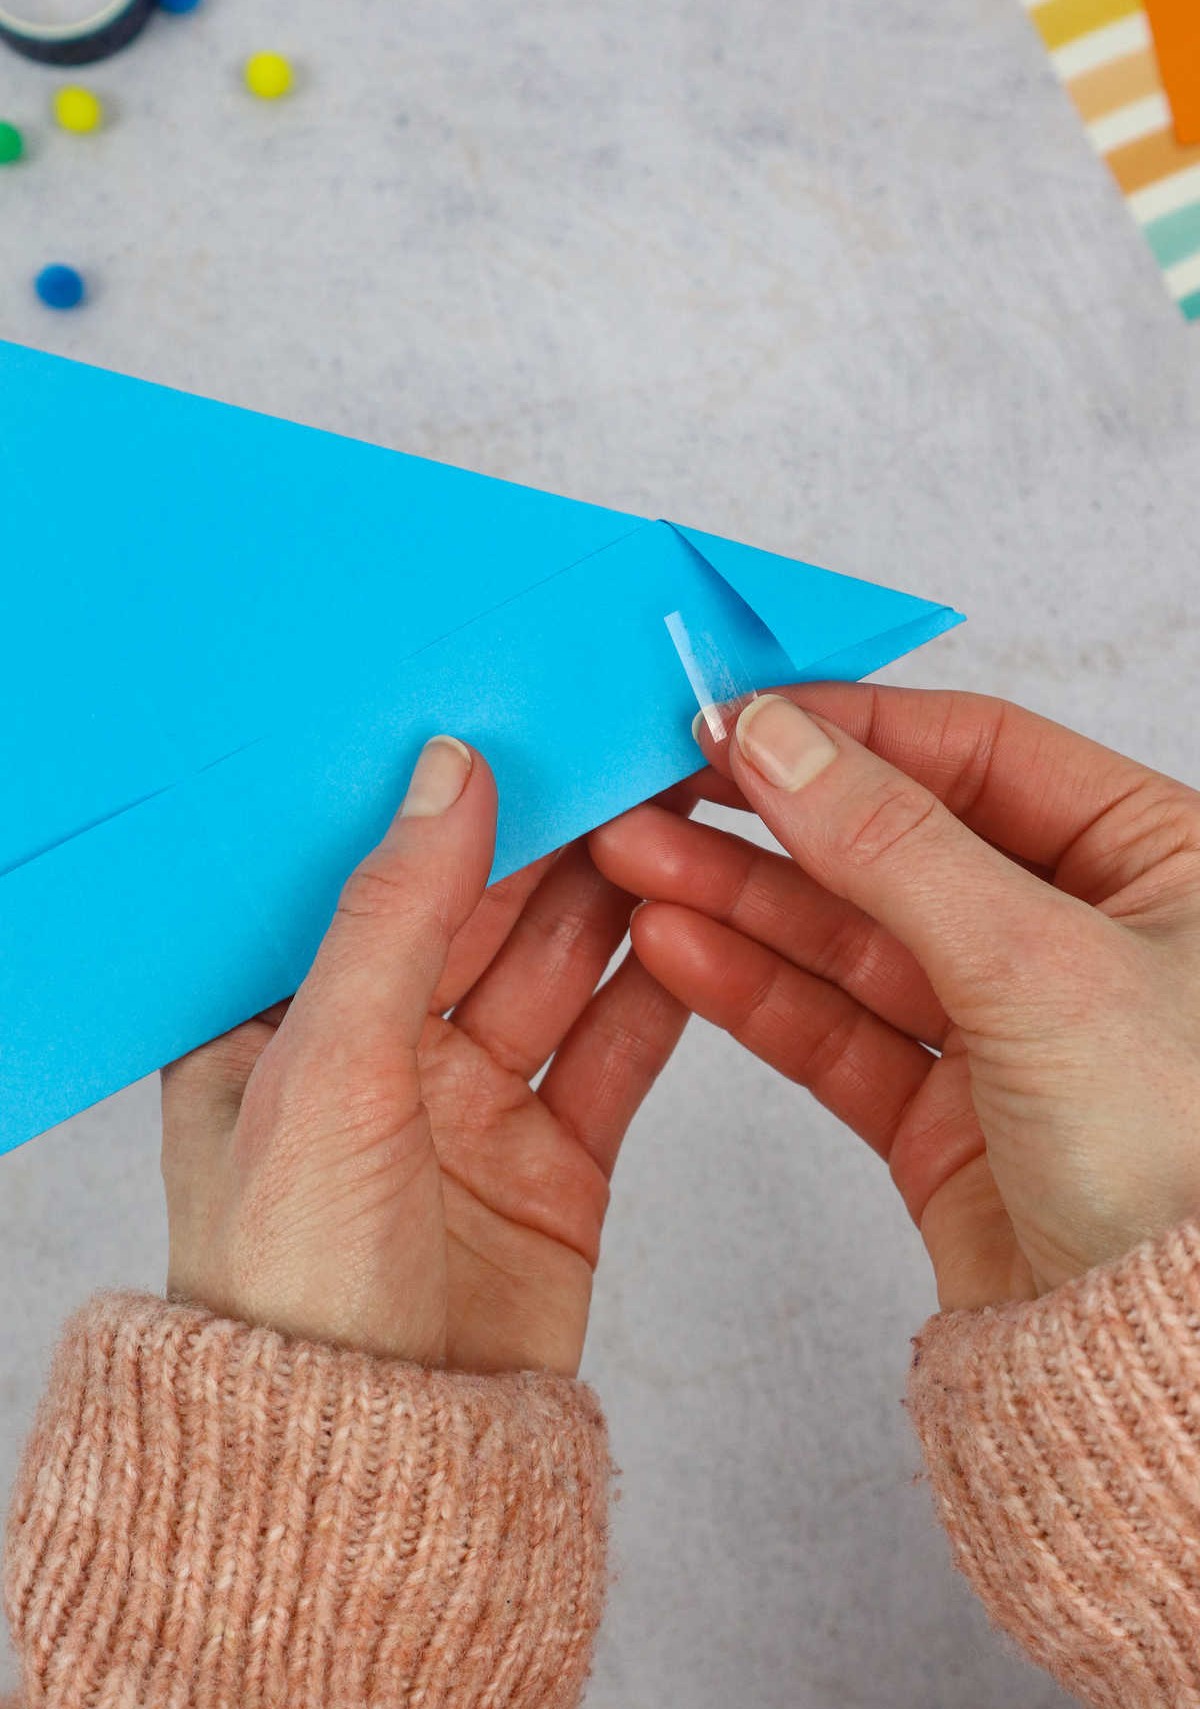
Repeat this process on the right side by folding it when the edges are aligned along the centerfold. As you reach the bottom, find two folded sheets, grab the bottom portion, and lift it up while folding it in place. Flip the paper over and fold the second sheet similarly. If desired, tuck the corners into the folds to conceal any protruding ends, securing them with small pieces of tape. Your DIY paper hat is now complete!
Simply decorate, personalize, or customize it as you like and you’re ready to show off your creative masterpiece.