
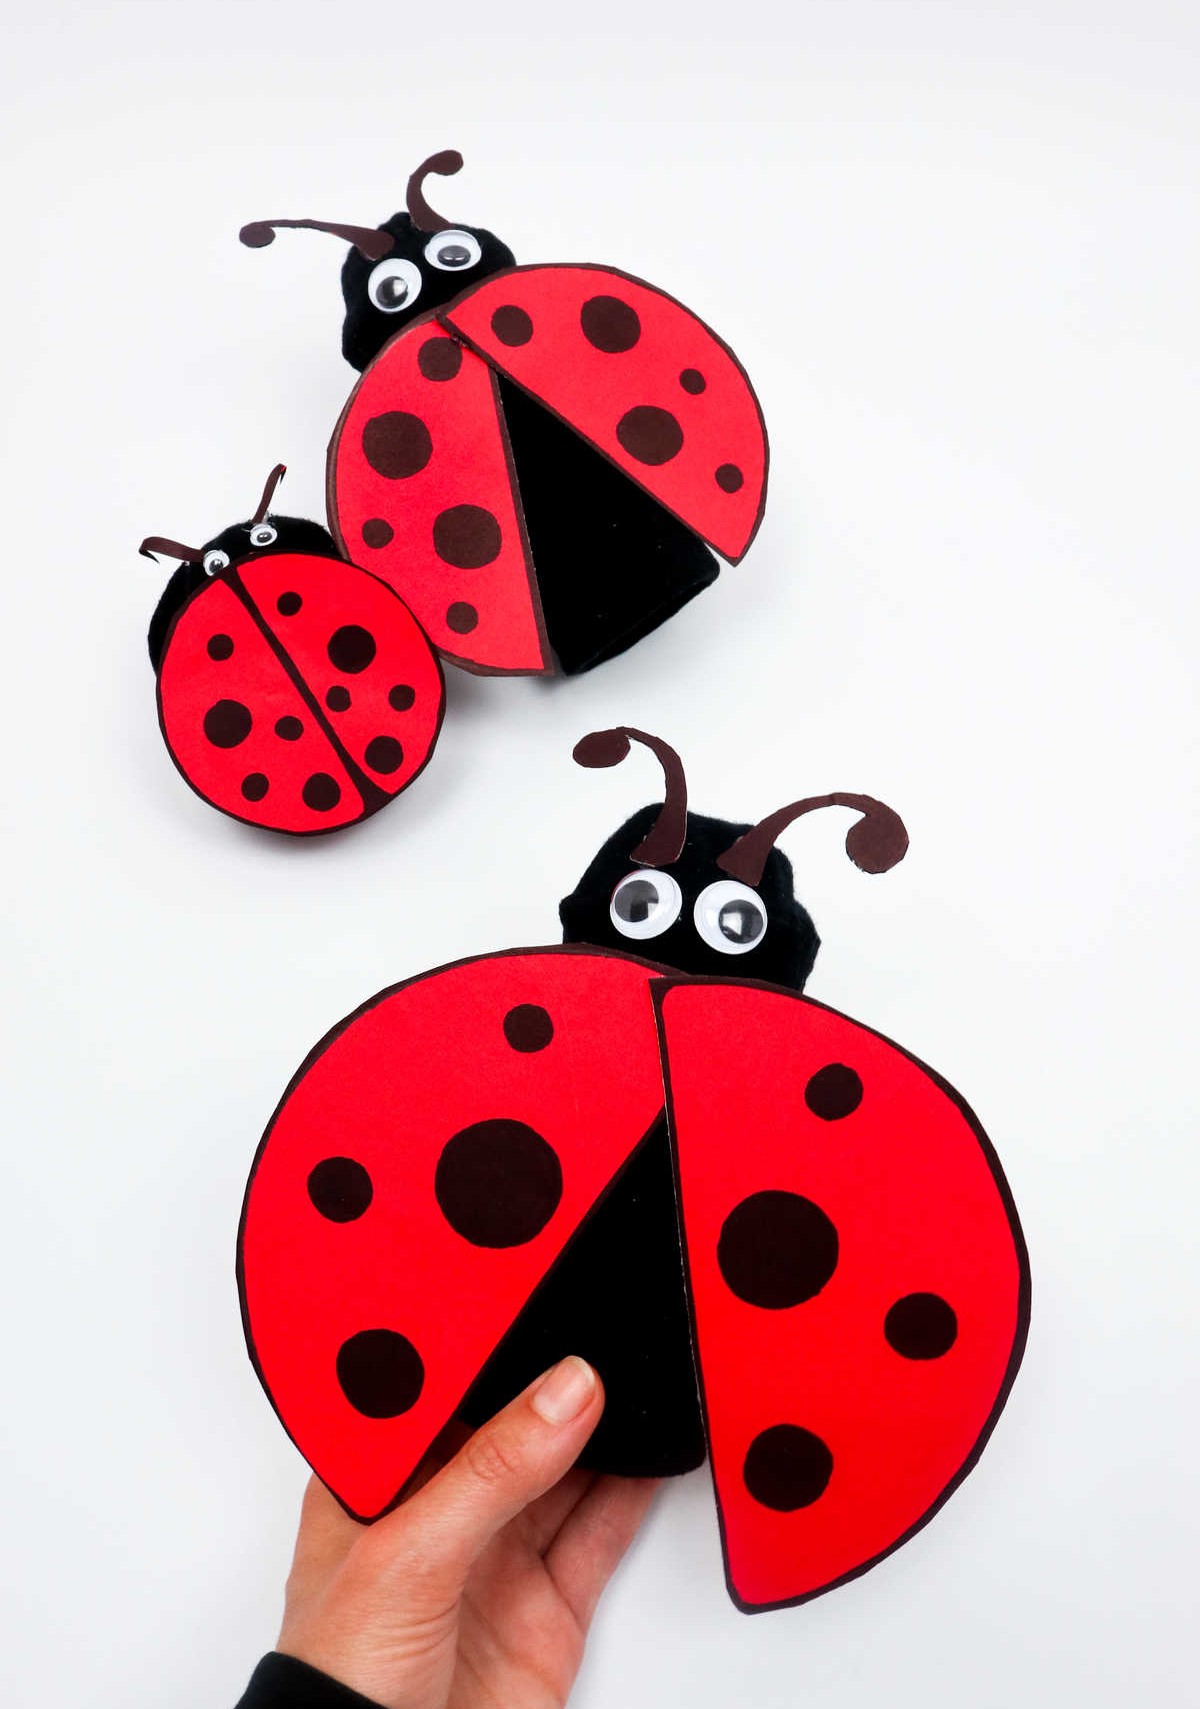
Combine creativity and playtime with a delightful ladybug craft project that’s perfect for kids of all ages. With minimal supervision from adults, young ones can get creative and have fun making their own ladybugs using toilet paper rolls, socks, colored paper, and other craft supplies. I must admit, I’ve always been fascinated by these charming insects, but my fear of creepy crawlies often gets in the way. Perhaps you can relate?
Whatever your feelings towards ladybugs may be, this project is sure to bring a smile to anyone’s face. Let’s take a closer look at what you’ll need to get started.
Supplies and Tools You Will Need
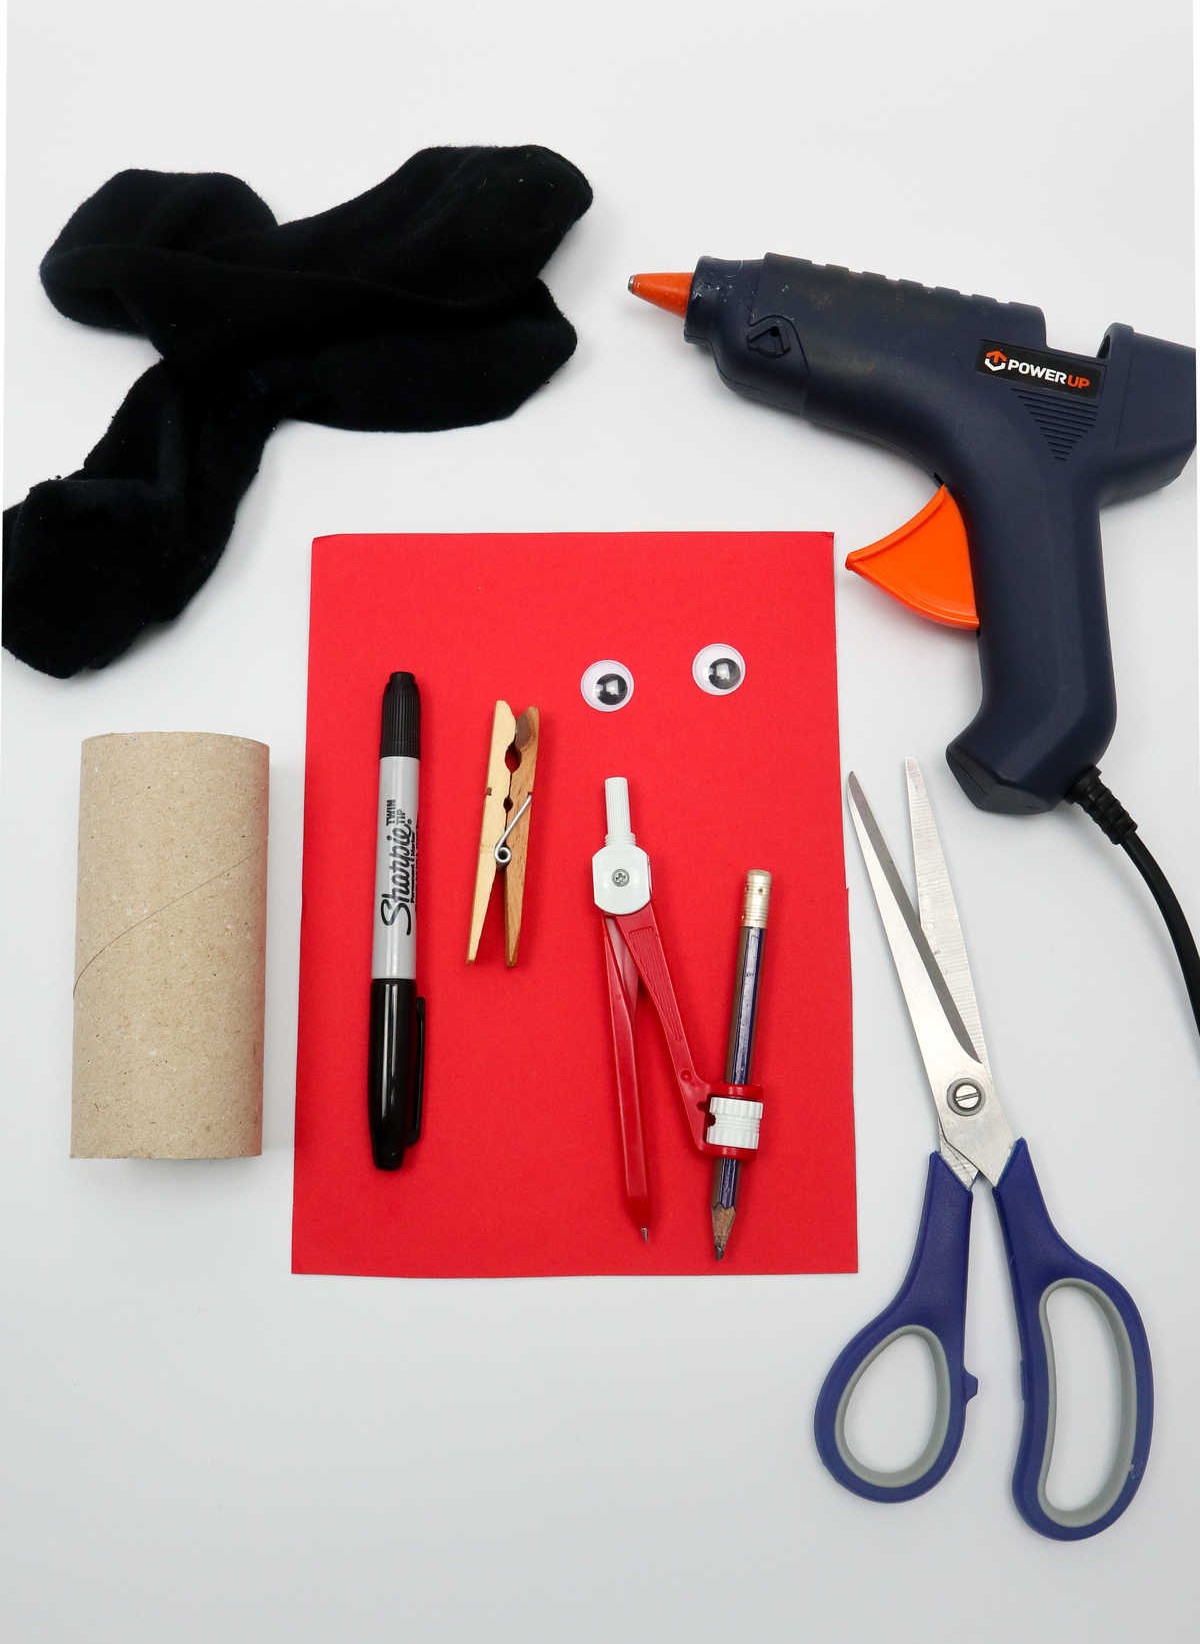
When preparing for the craft, having the right supplies is crucial. Here’s a comprehensive list of what you’ll need: a toilet roll, a thick red A5 sheet of paper, a pair of black socks, scissors, a black marker, a hot glue gun, wiggle googly eyes, and a compass with a pencil. If you want to take it up a notch, consider adding one clothes peg to your arsenal. Make sure to have all these essentials at the ready before starting your project.
How to Make a Ladybug Craft
To create these tiny, fascinating creatures, follow along with this straightforward, step-by-step guide. Start by gathering the necessary materials and supplies, as outlined below.
Step 1
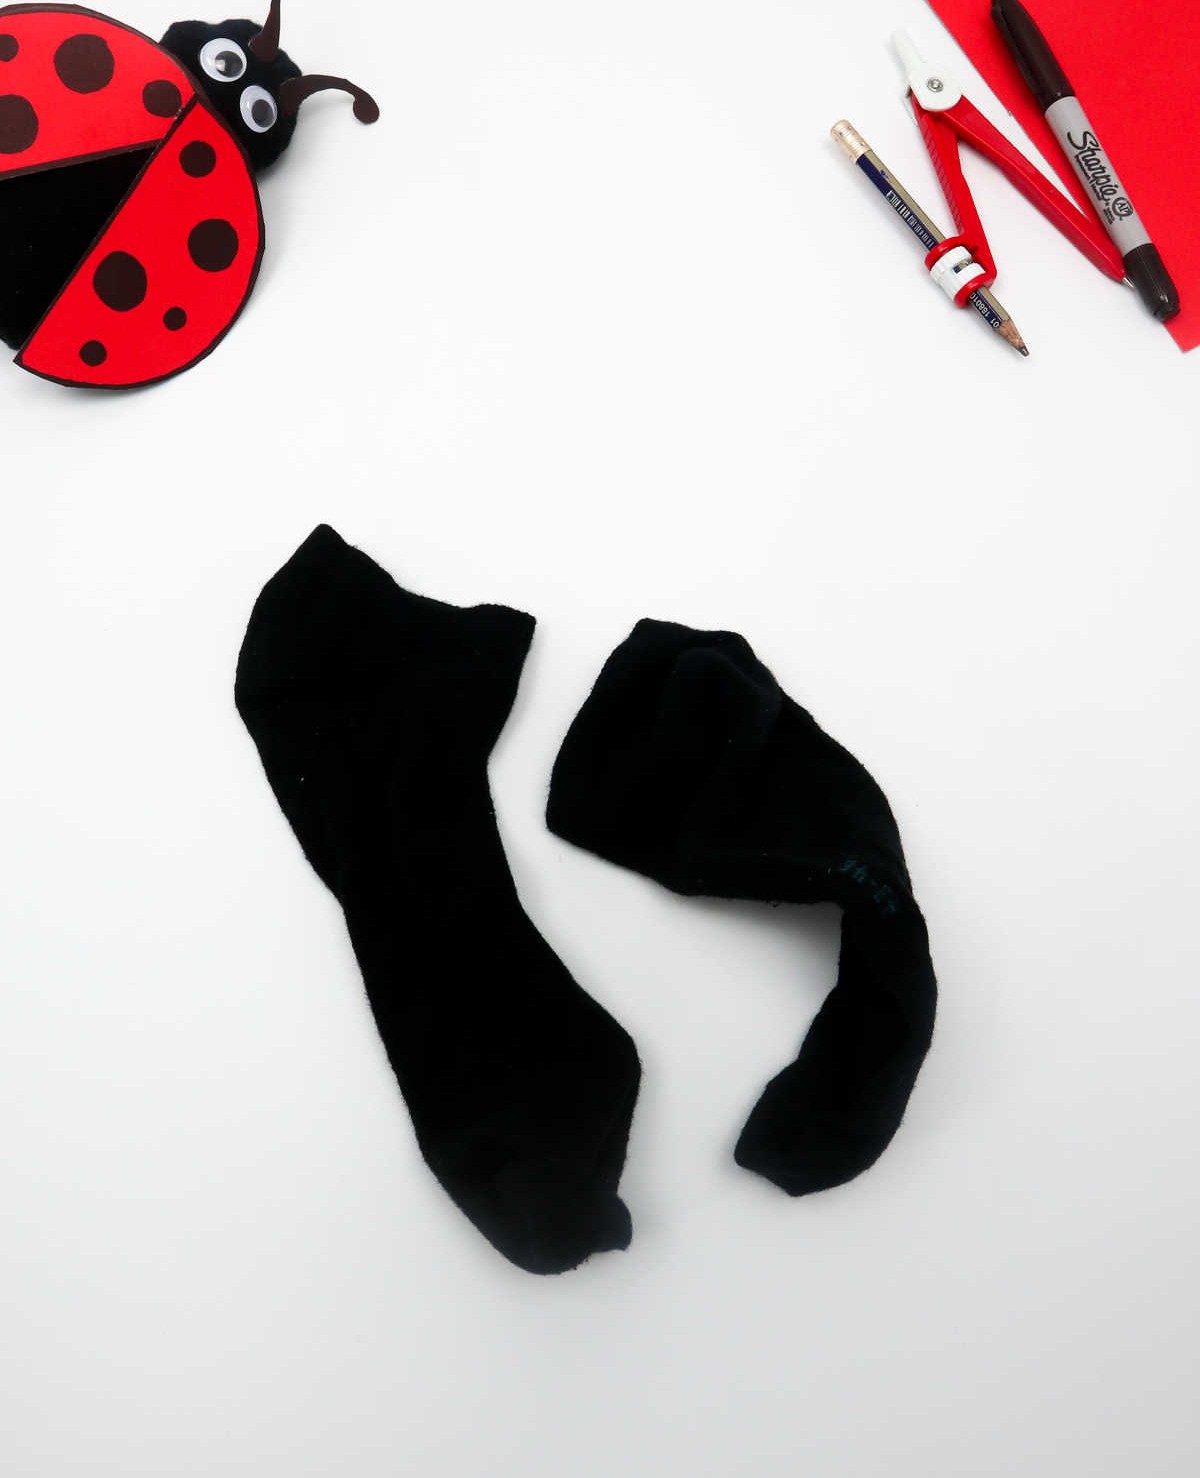
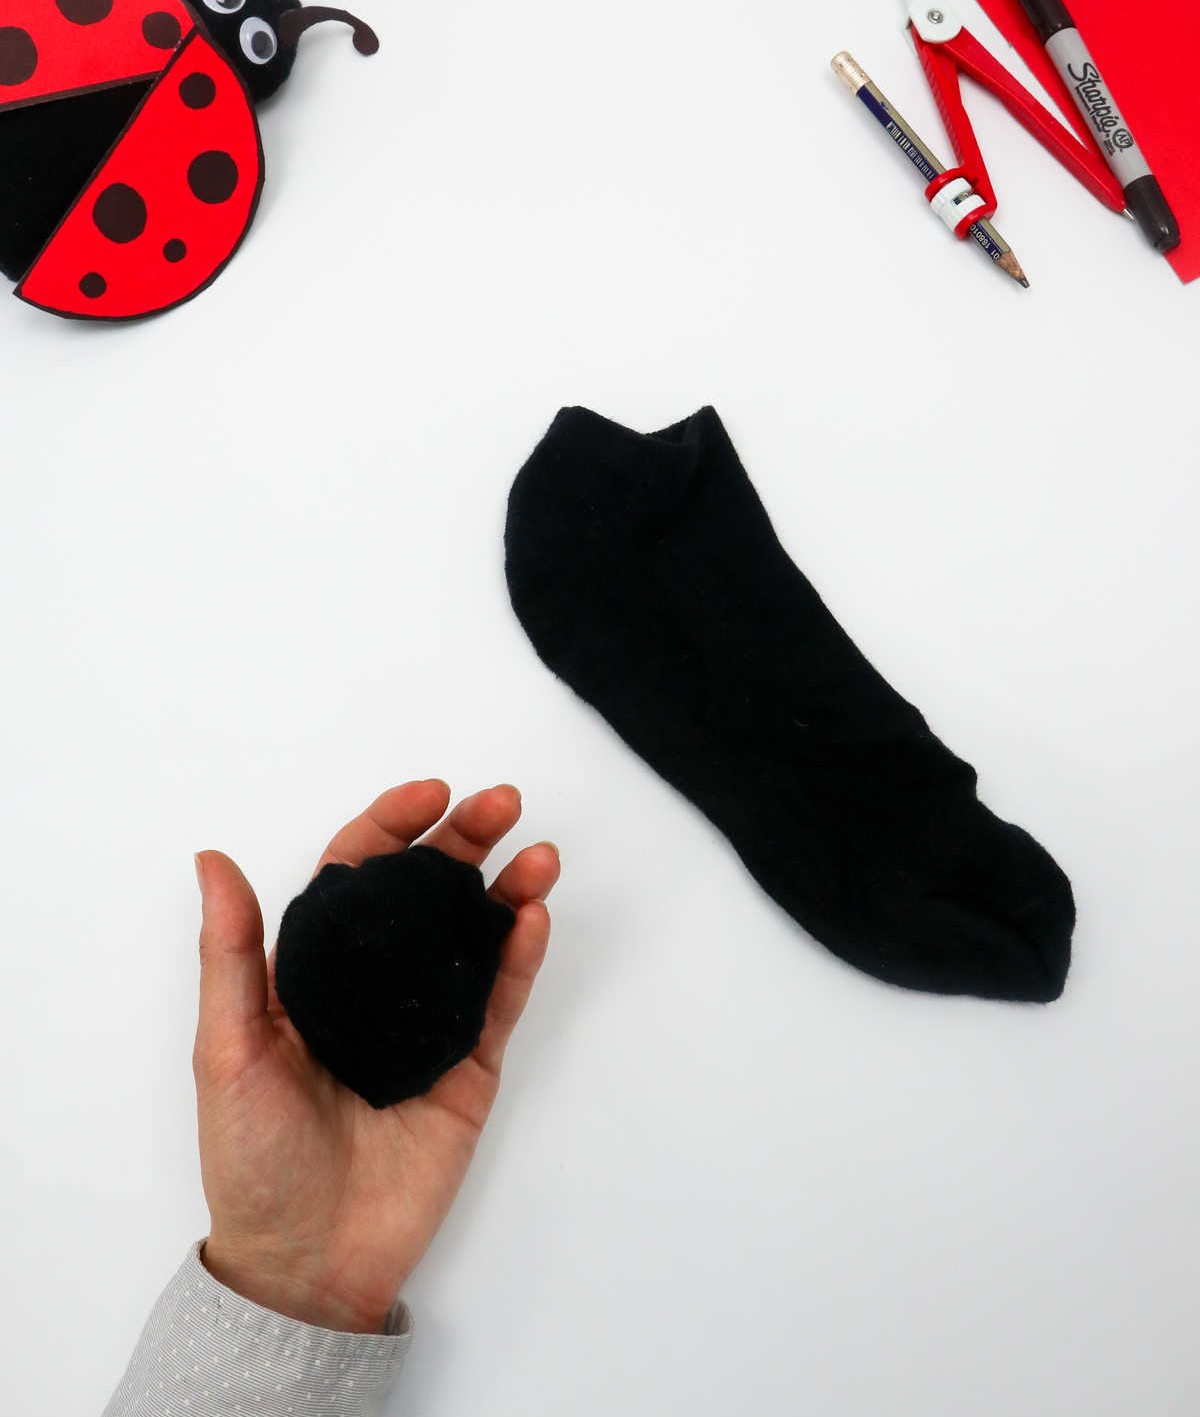
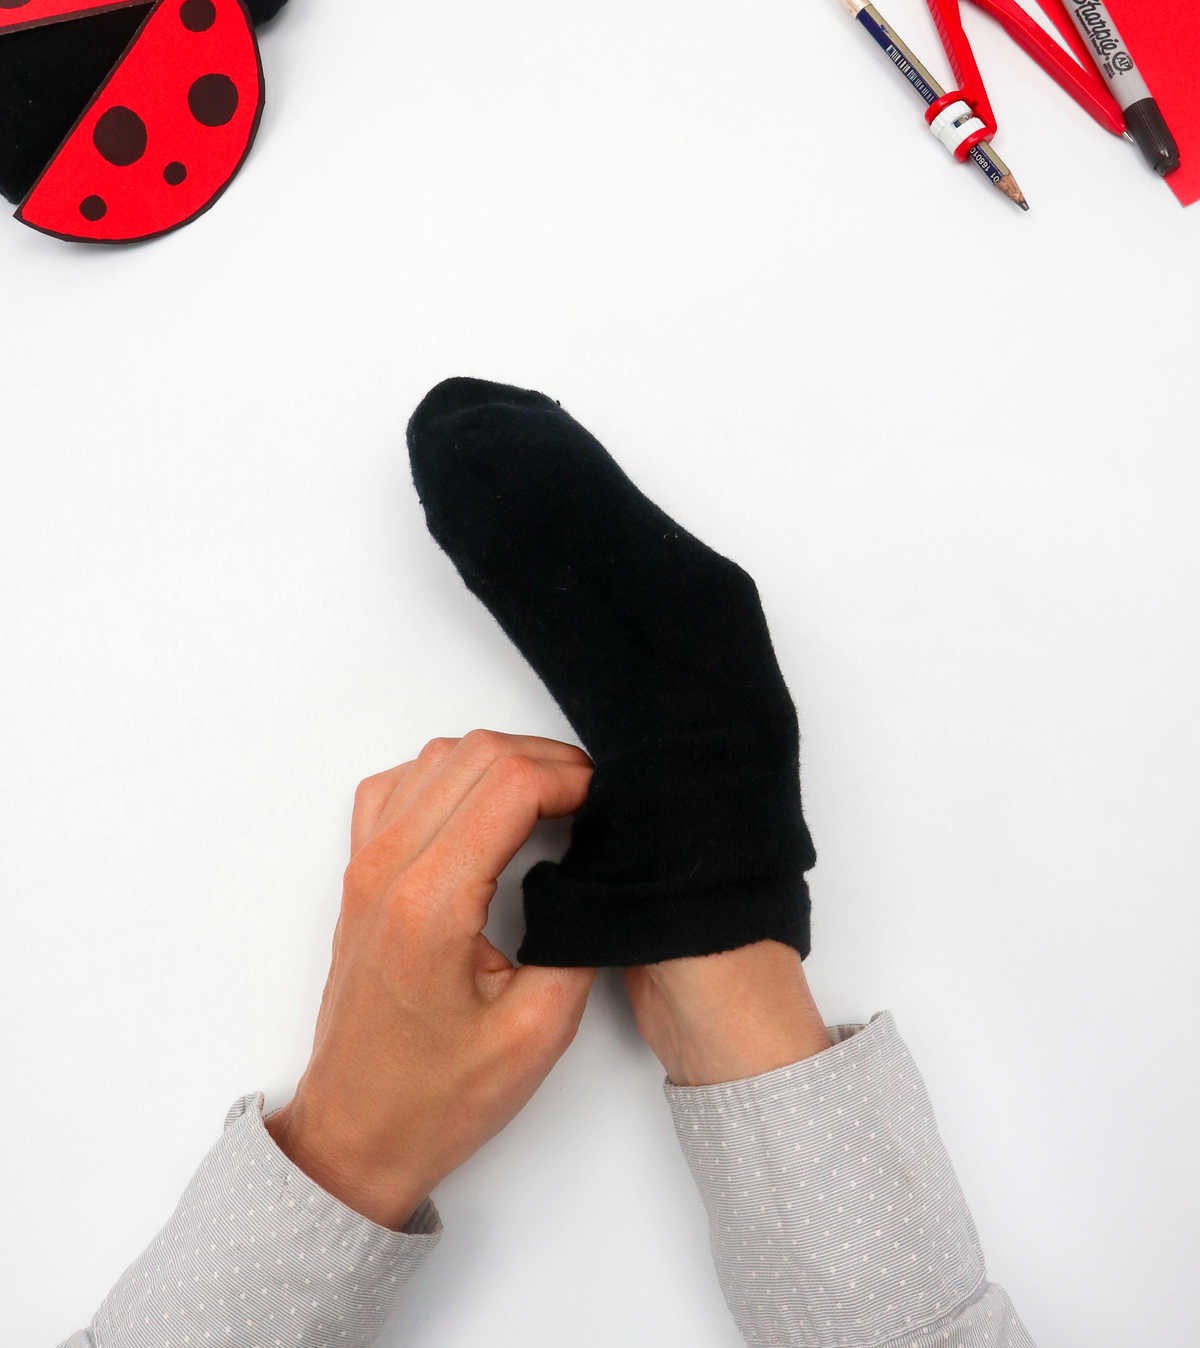
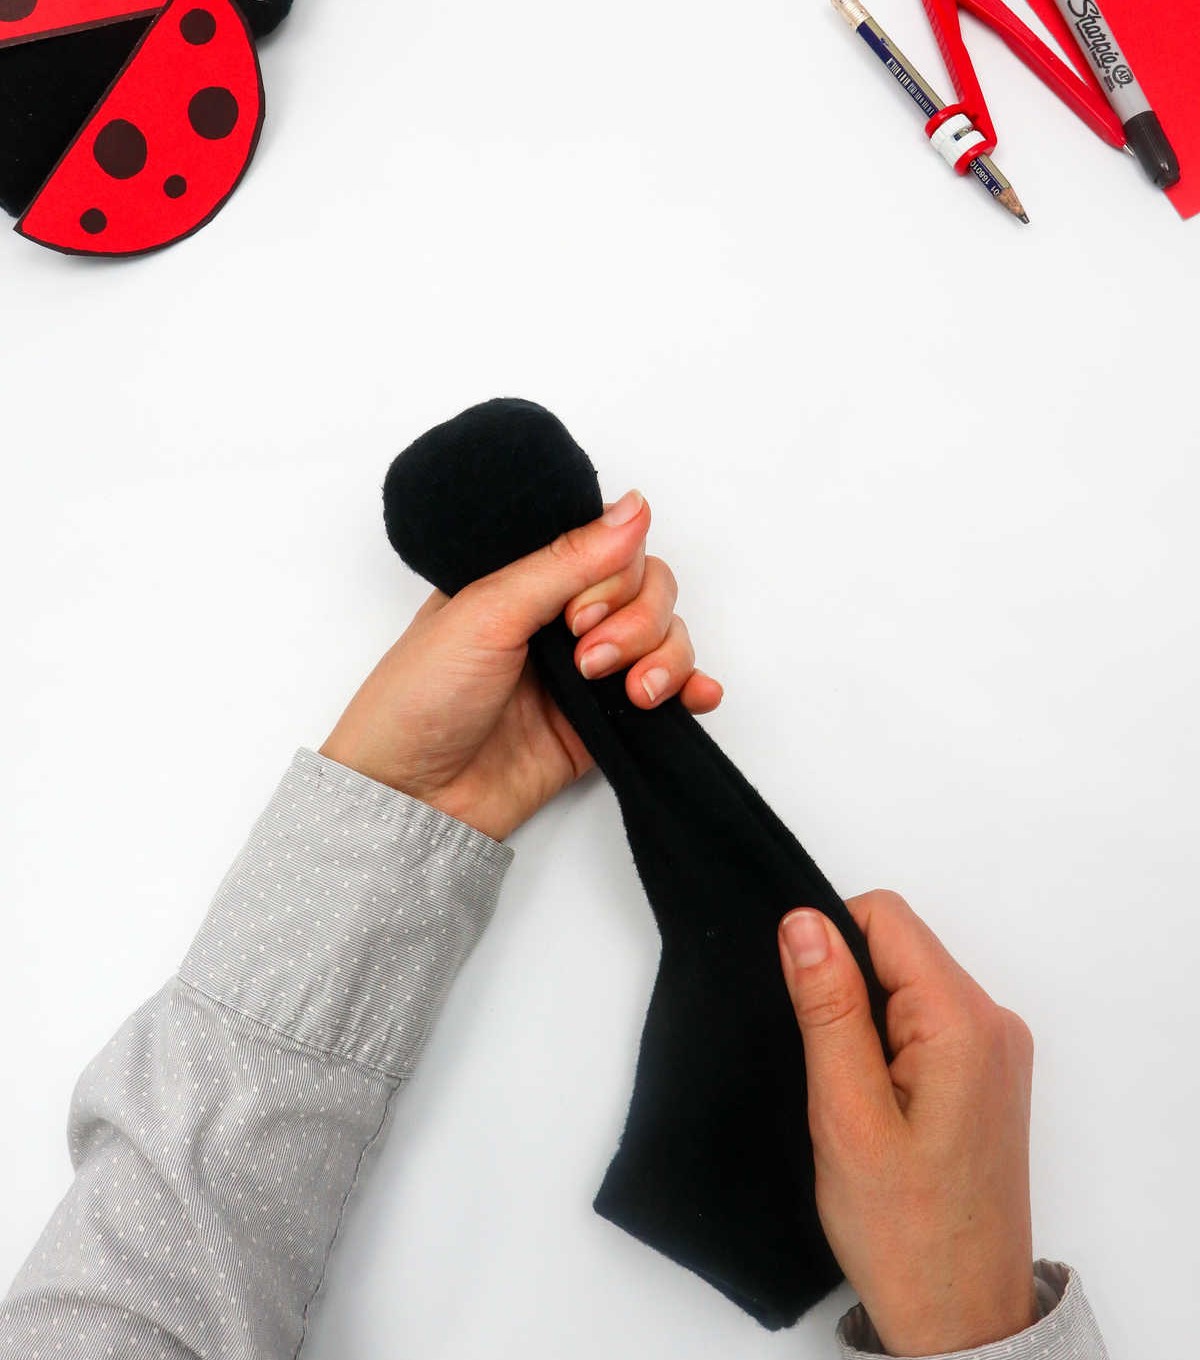
To begin, take one sock and transform it into a spherical shape by rolling it into a ball-like form. Next, acquire the second sock and insert the sock ball into its opening. Gently coax the sock ball through until it reaches the tip of the second sock, effectively creating a bundled pair.
Step 2
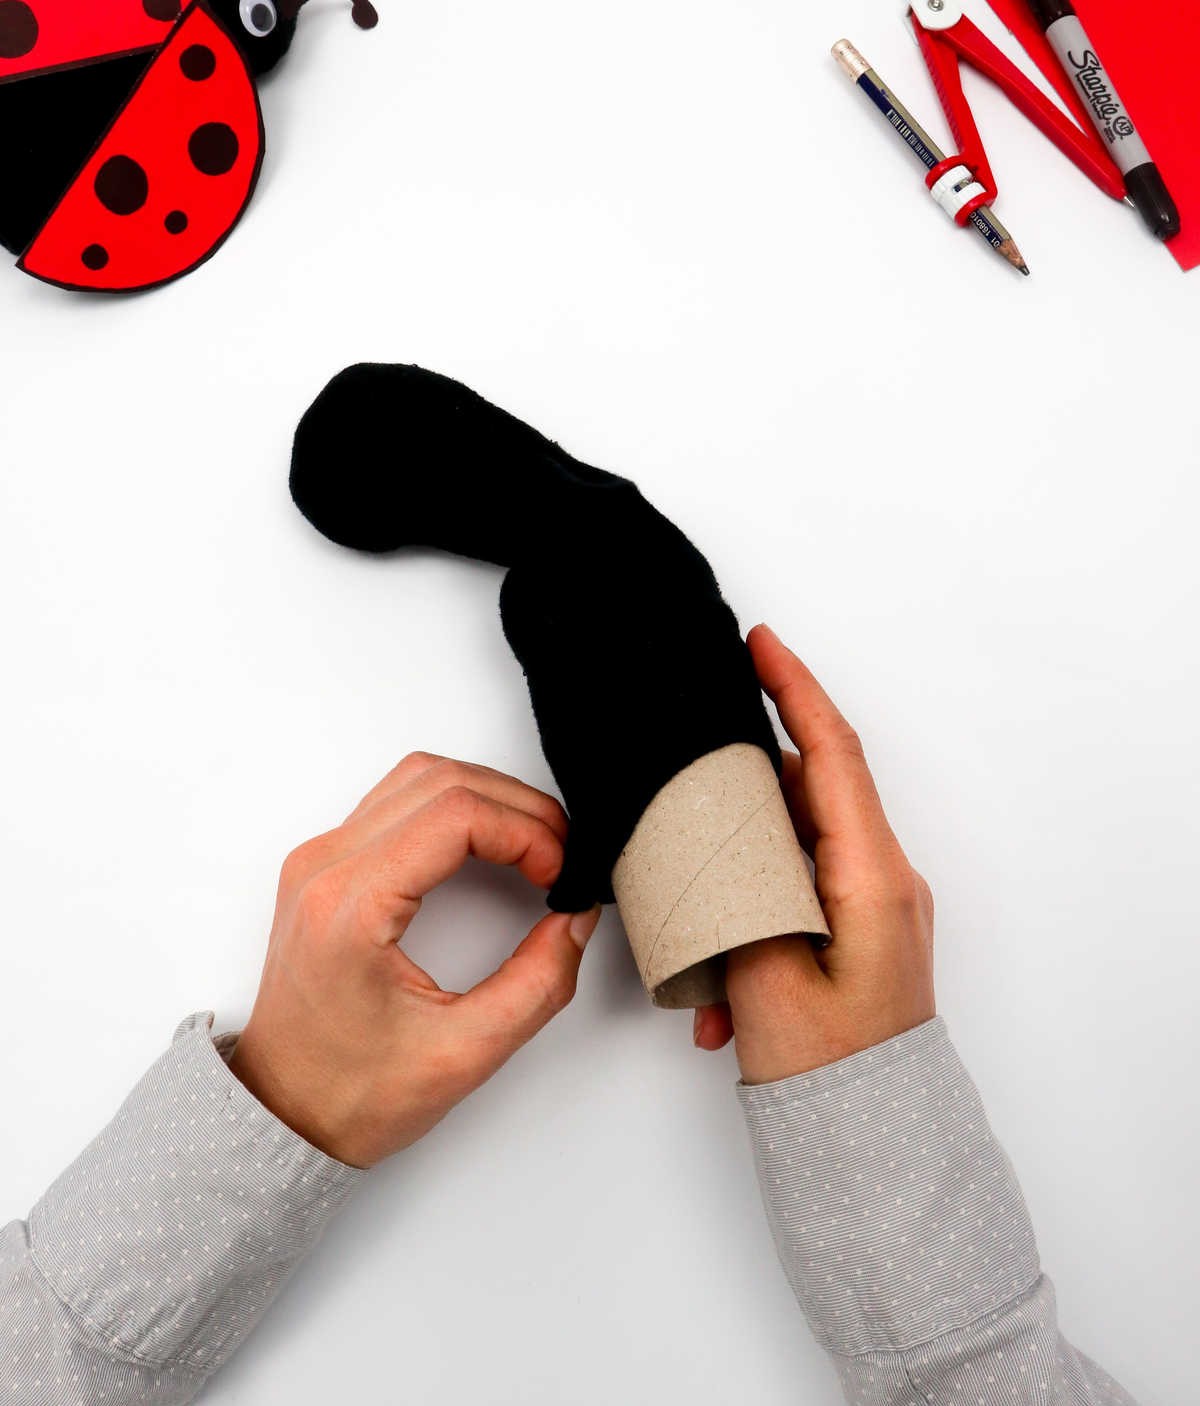
To move forward with the DIY project, start by preparing the humble toilet paper roll. Begin by stretching a sock over it, just as demonstrated here. As you select your socks for this endeavor, be sure to choose a pair that extends below the ankle bone, providing sufficient coverage and functionality.
Step 3
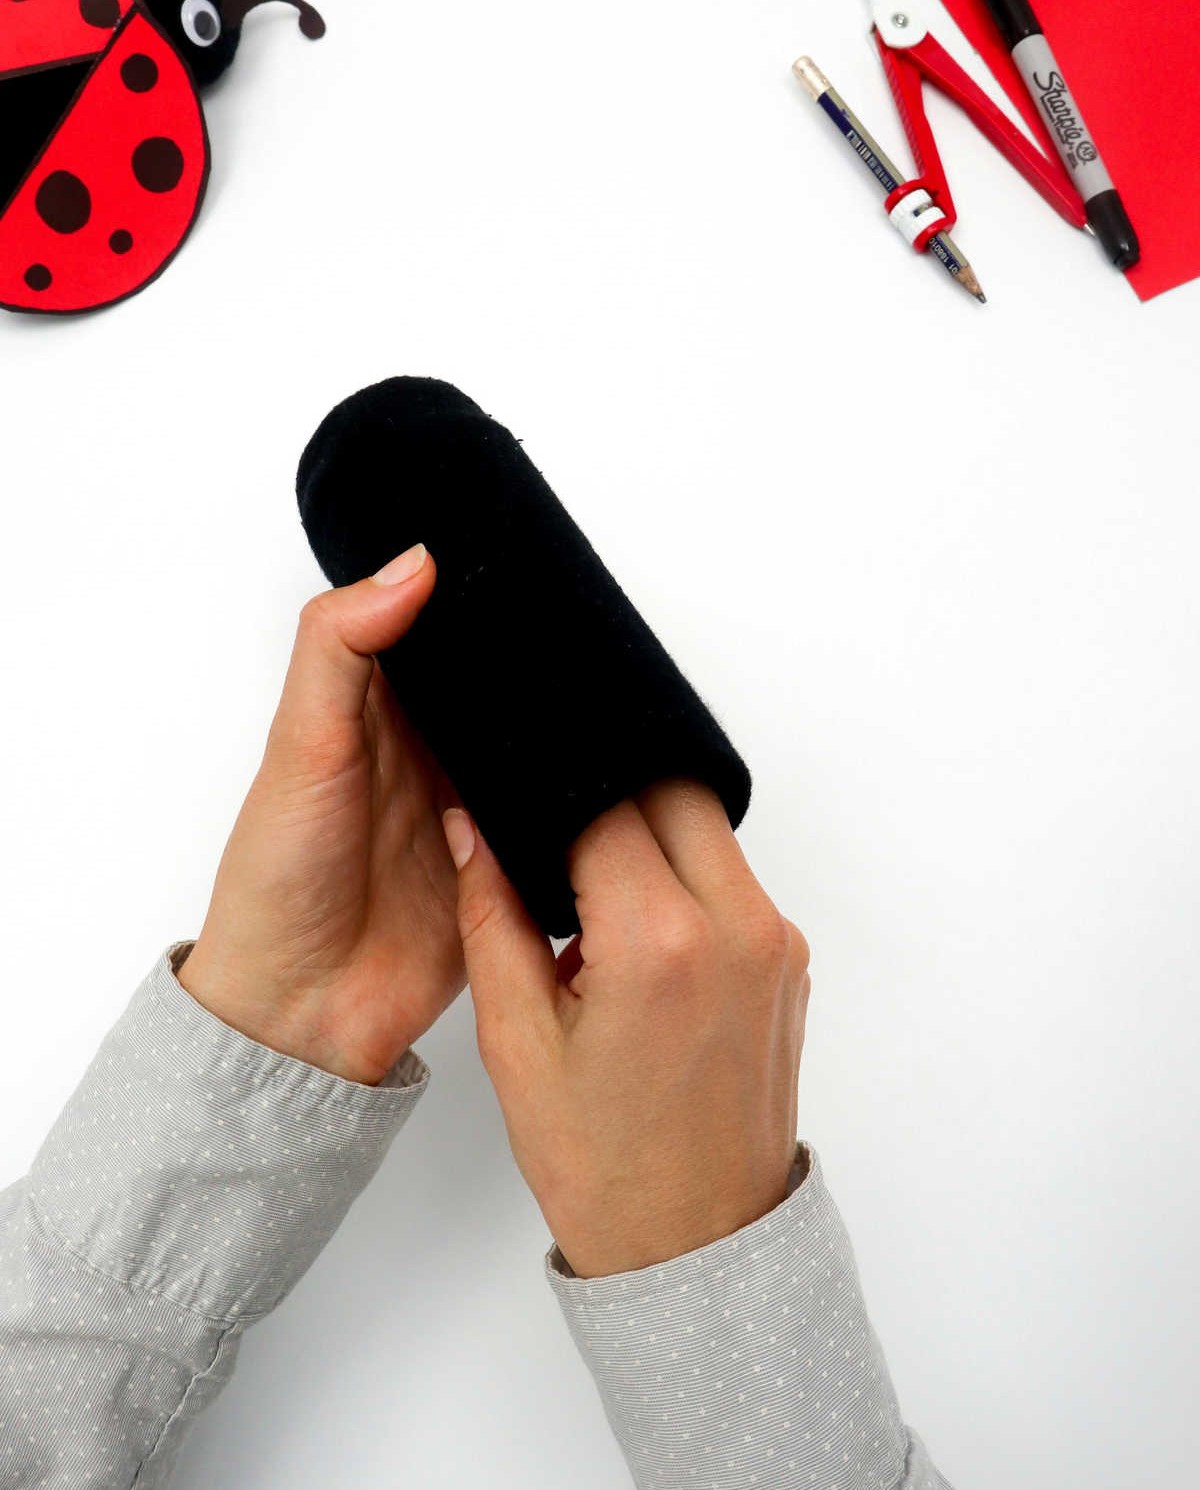
To achieve a neat and tidy roll, ensure the sock’s ends are carefully tucked into the core. The balled-up sock earlier should sit securely on the inner rim of the toilet paper. This means tucking the corners into the opposite end of the toilet roll. As you do so, take care to smooth out any wrinkles, ensuring a seamless finish.
Step 4
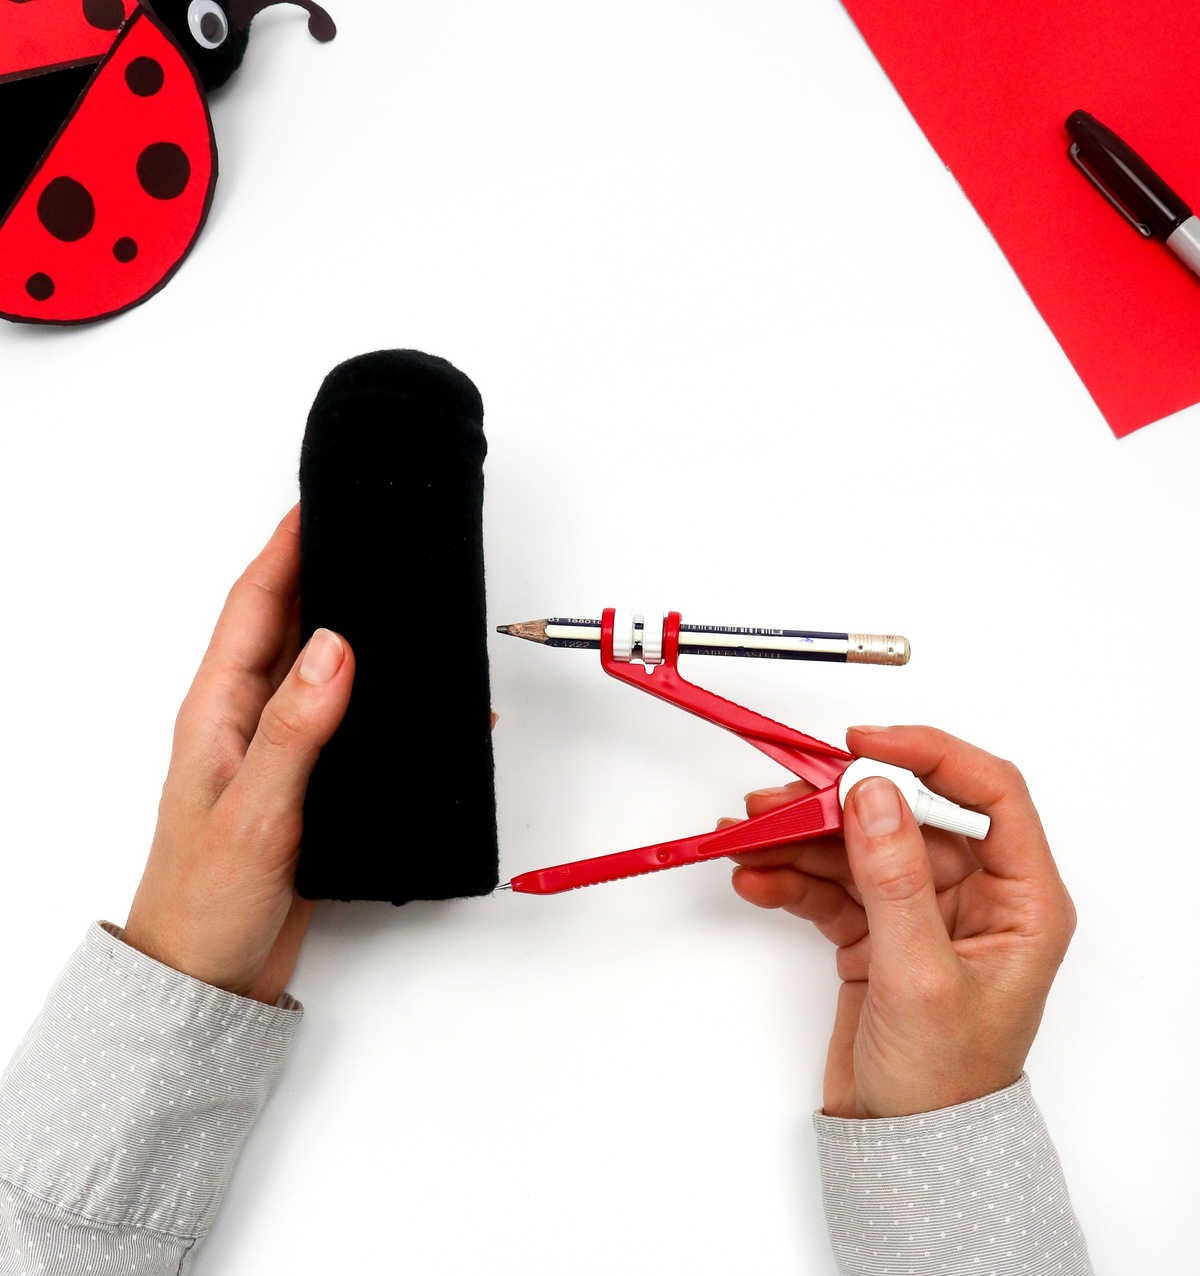
To begin crafting your toilet paper roll wings, start by identifying the central axis of the cylindrical material. You can use a compass to determine the midpoint, ensuring it’s evenly balanced. If you prefer a more compact design, a slightly smaller measurement is acceptable.
Watch: DIY Ladybug
For those interested in exploring the topic in more depth, we have prepared an in-depth video tutorial that covers every aspect of [topic]. To access it, simply click the link above and follow along with our expert instructors.
Step 5
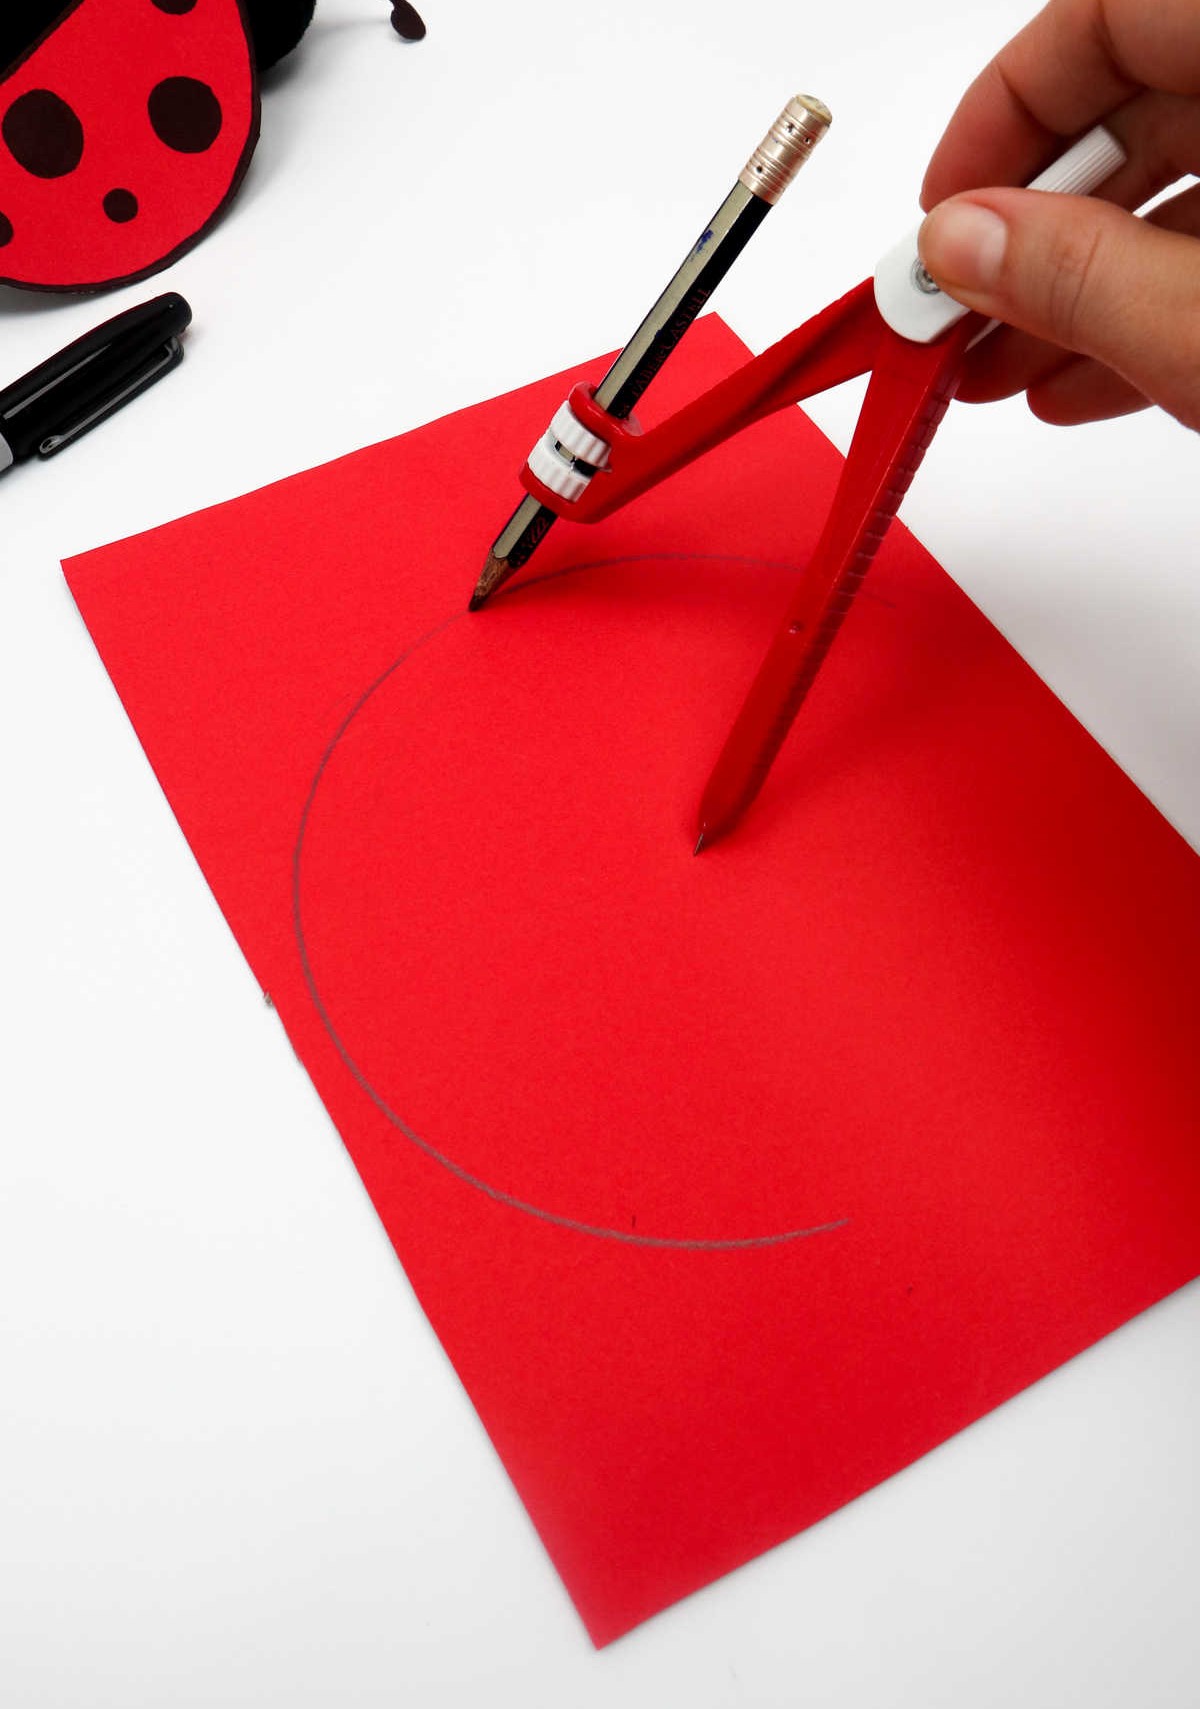
To begin, take out a piece of red paper and use the dimensions you’ve calculated earlier to sketch a circular shape. Remember that the radius of this circle will equal the length of half the toilet roll, which should give you a good starting point for your creative project.
Step 6
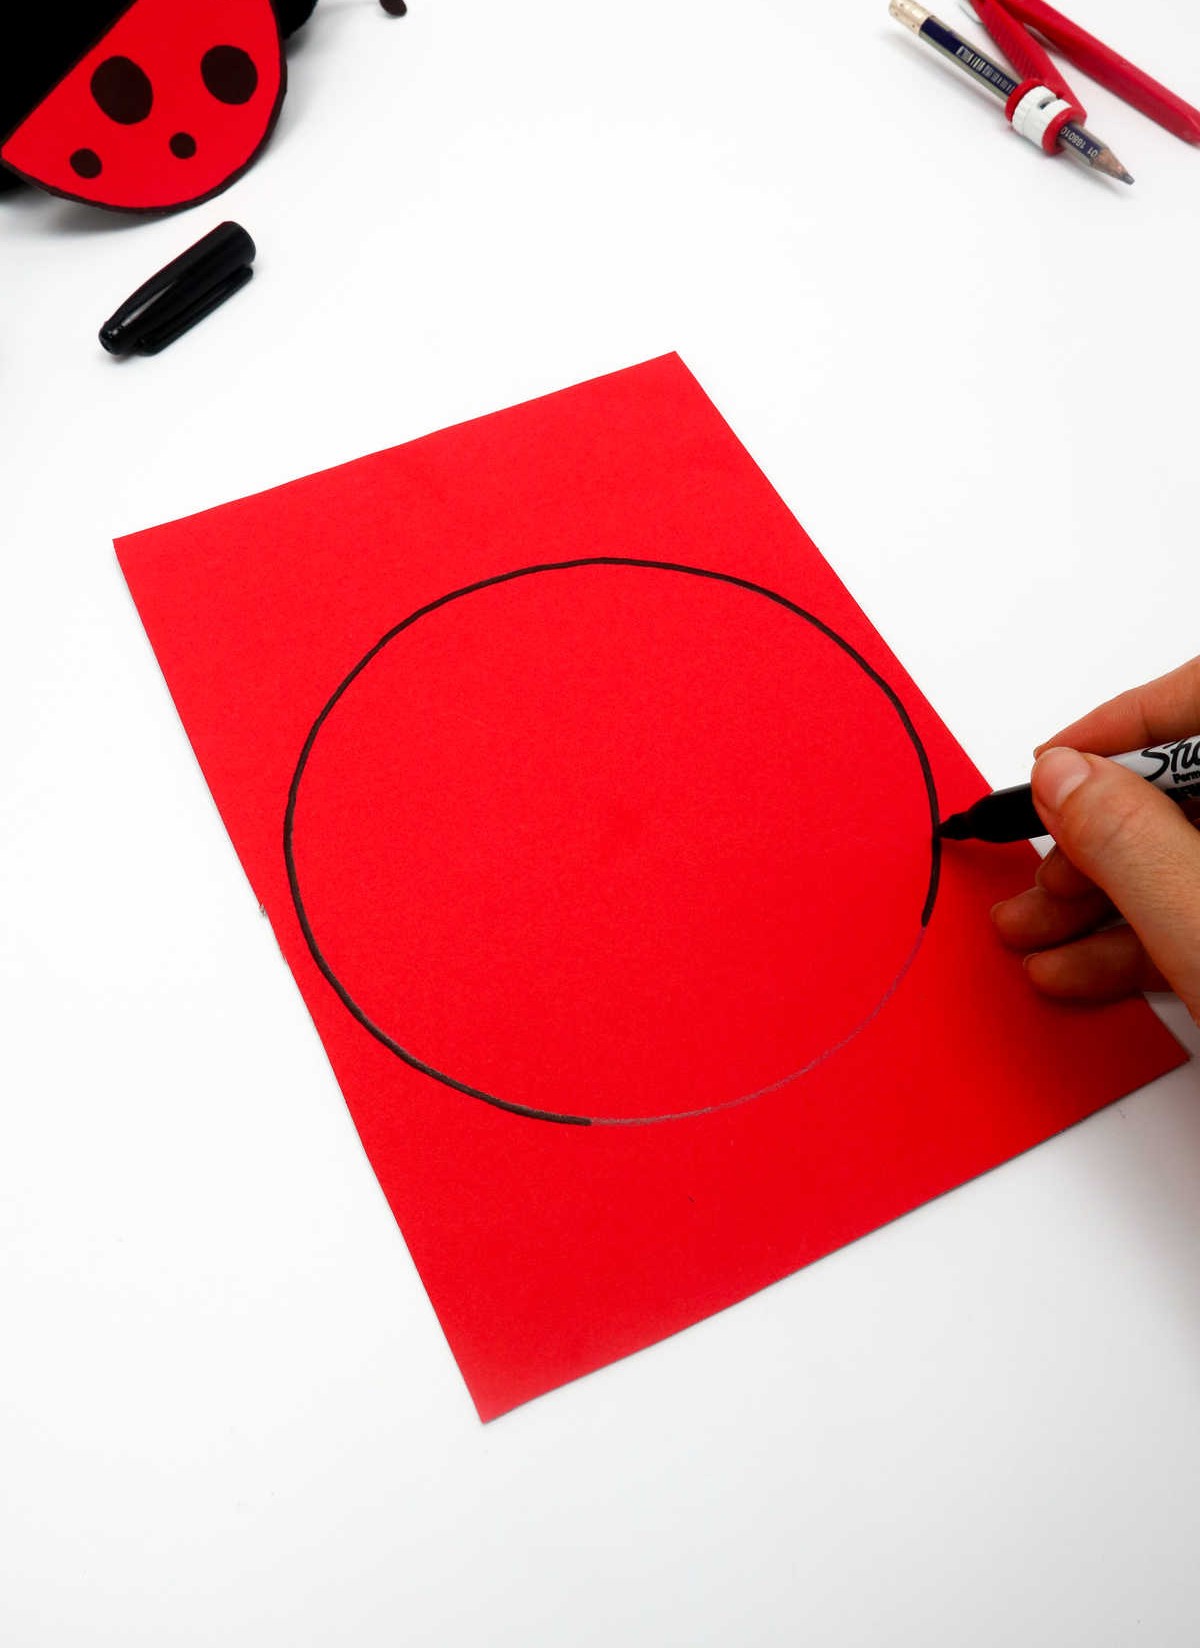
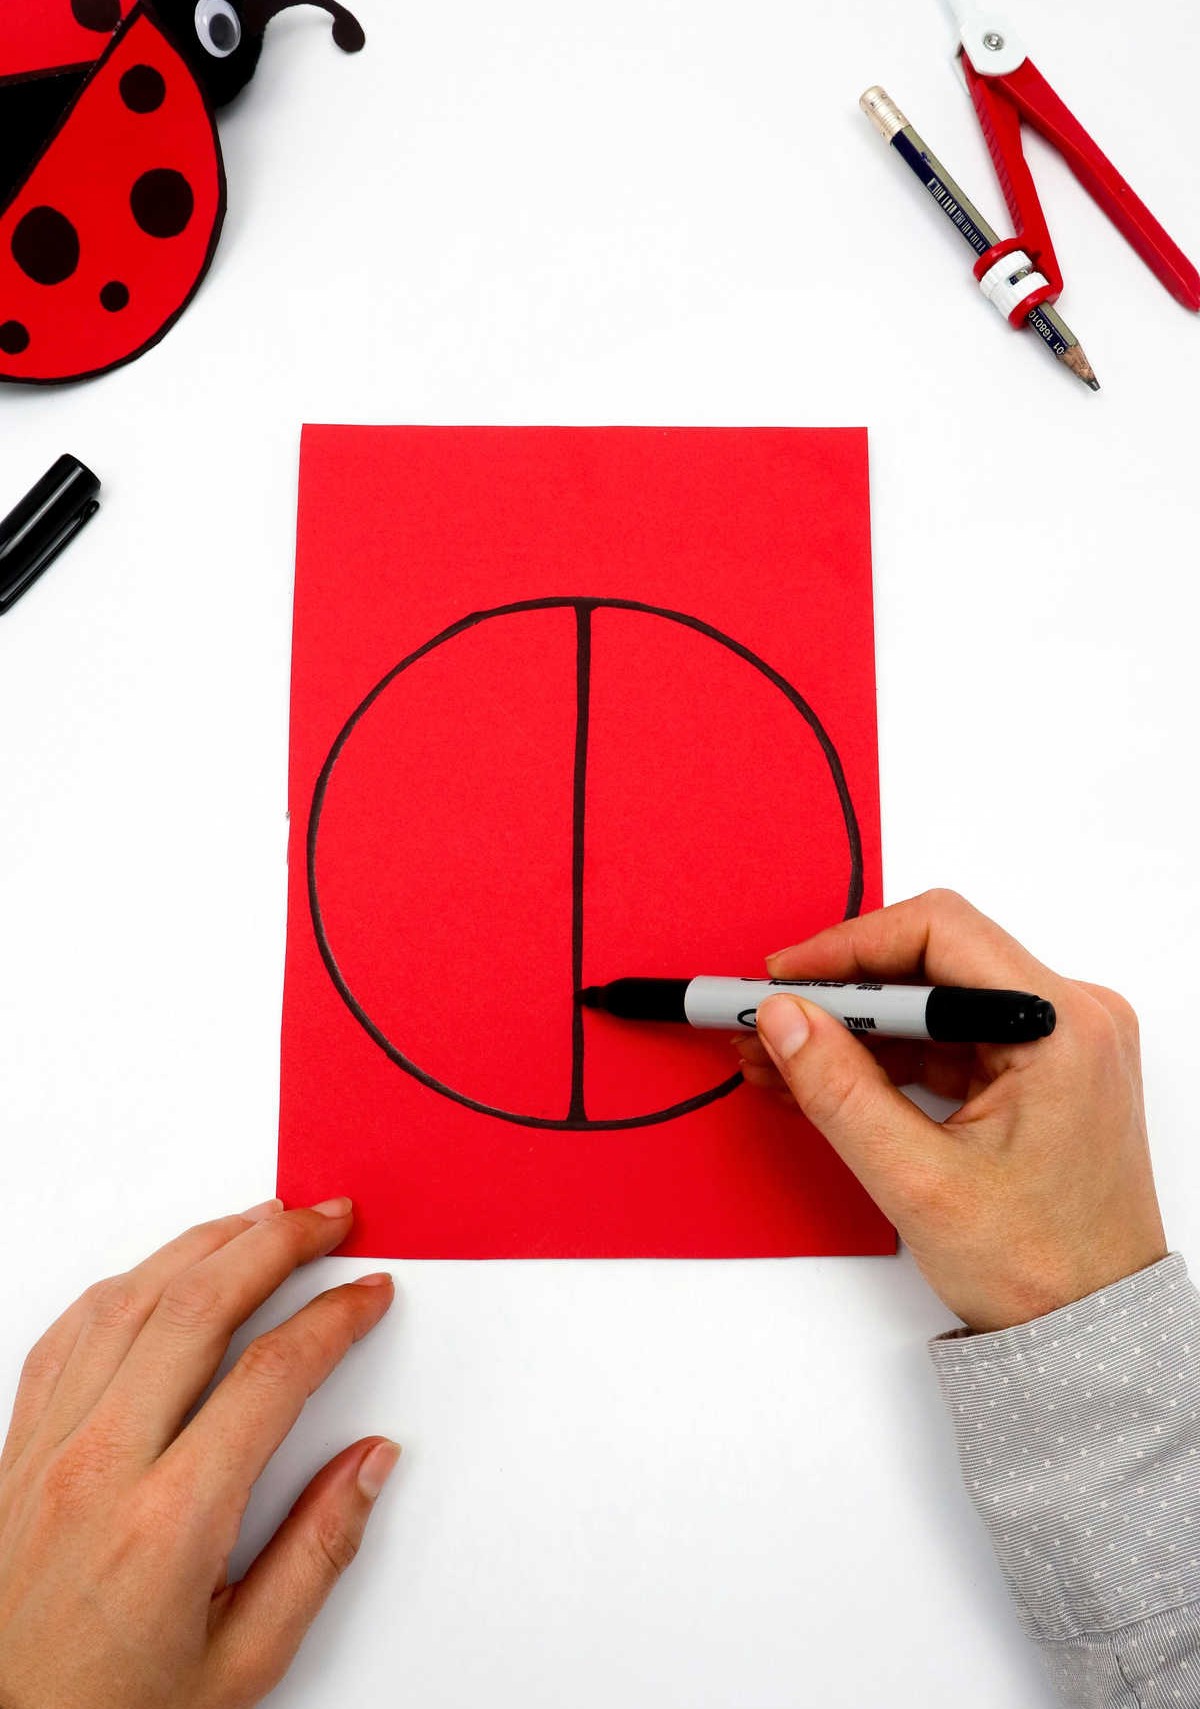
Start by outlining the circular shape with a black marker, using thicker paper for a more premium appearance. To maintain the delicate shape of the ladybug’s wings, it’s essential to be gentle during this process. If you’re concerned about creasing or bending the wings, consider attaching them temporarily to a small piece of cardboard before gluing them in place on the ladybug.
Once you’ve achieved a smooth outline, move on to dividing the circle into two equal halves by drawing a line down its center.
Step 7
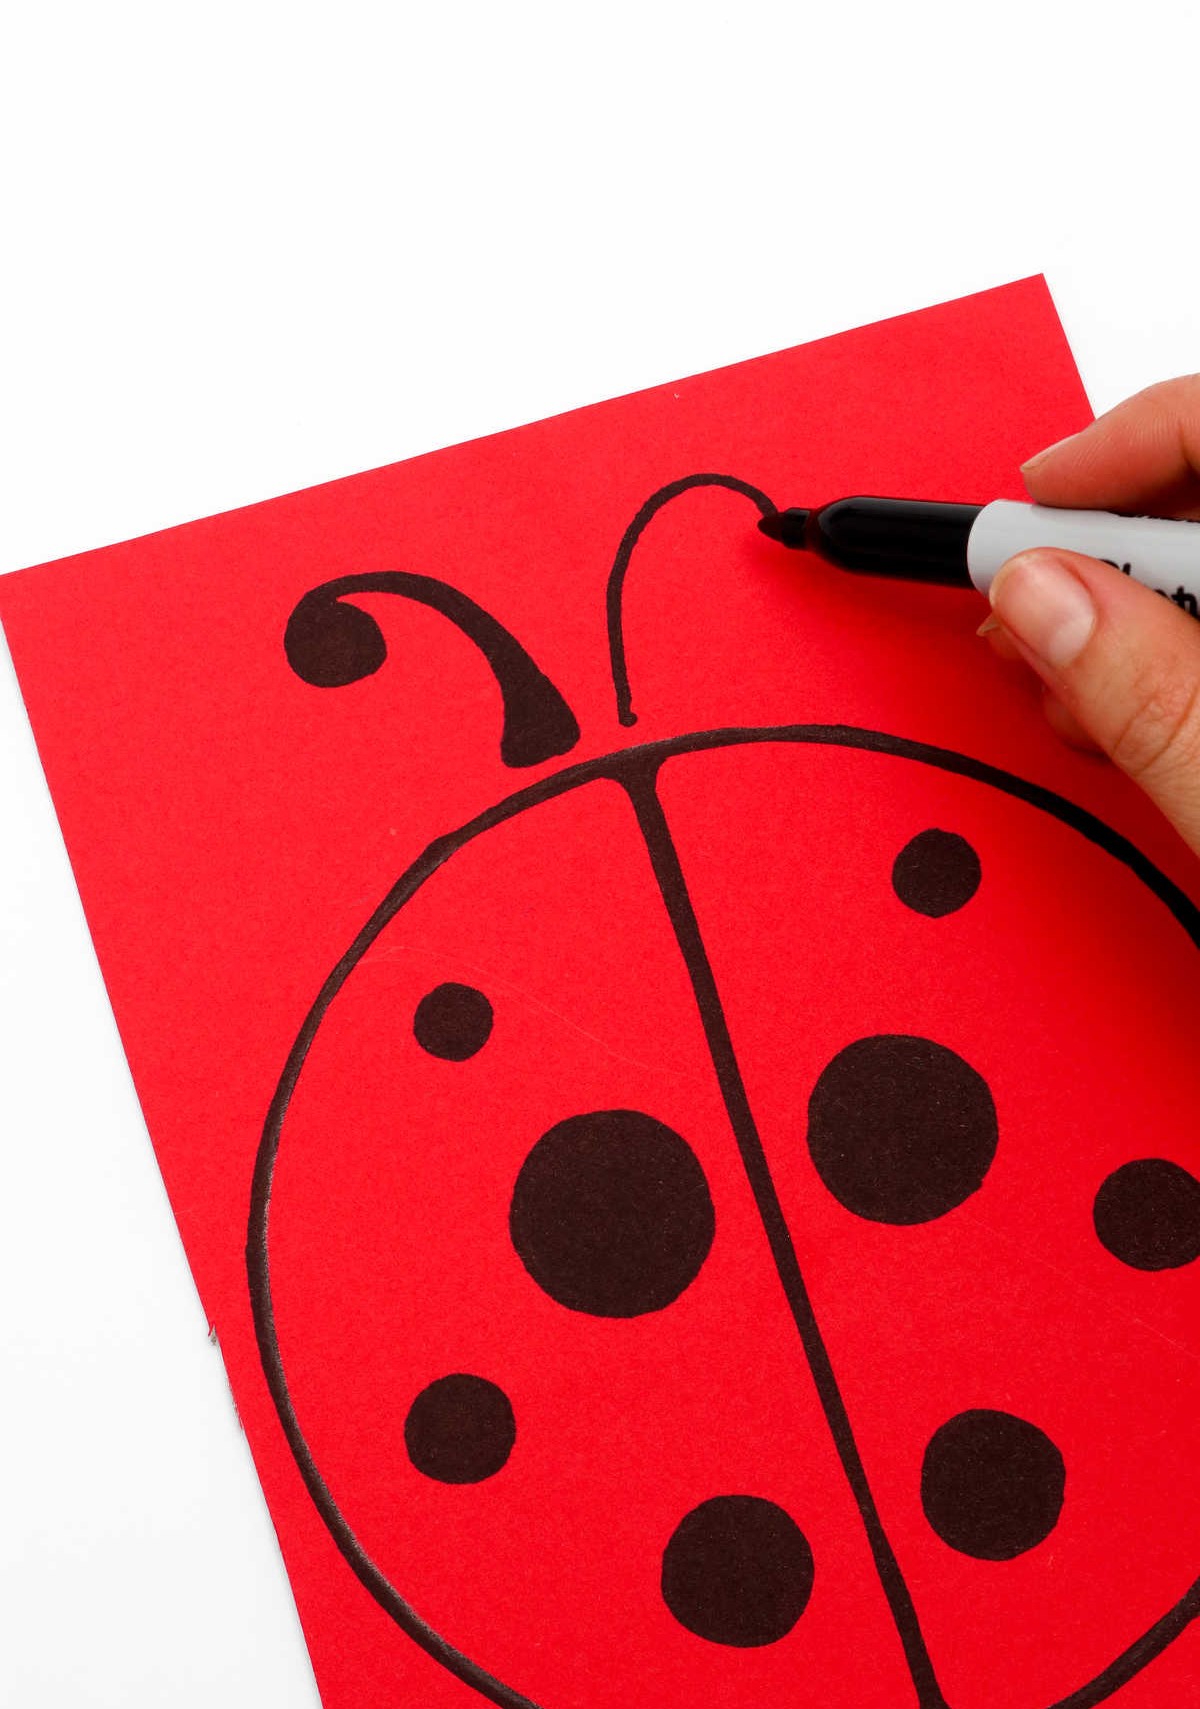
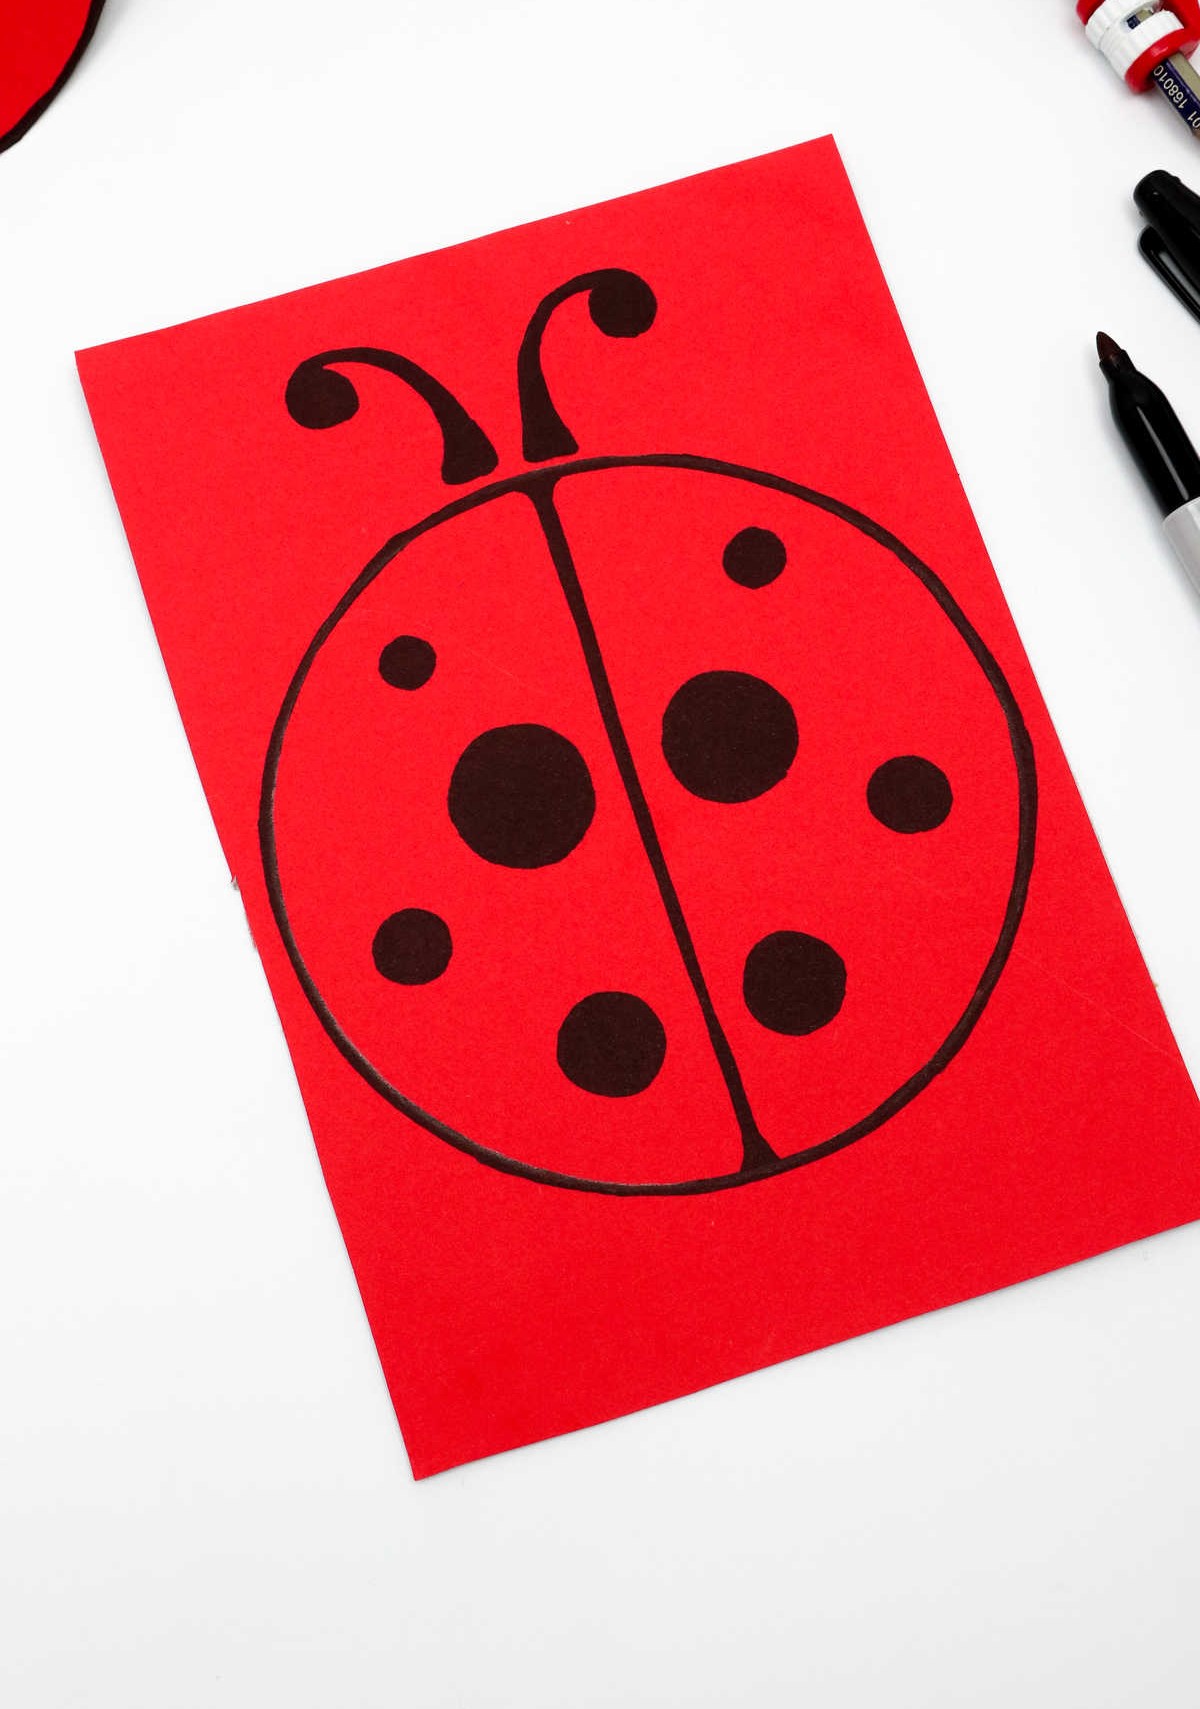
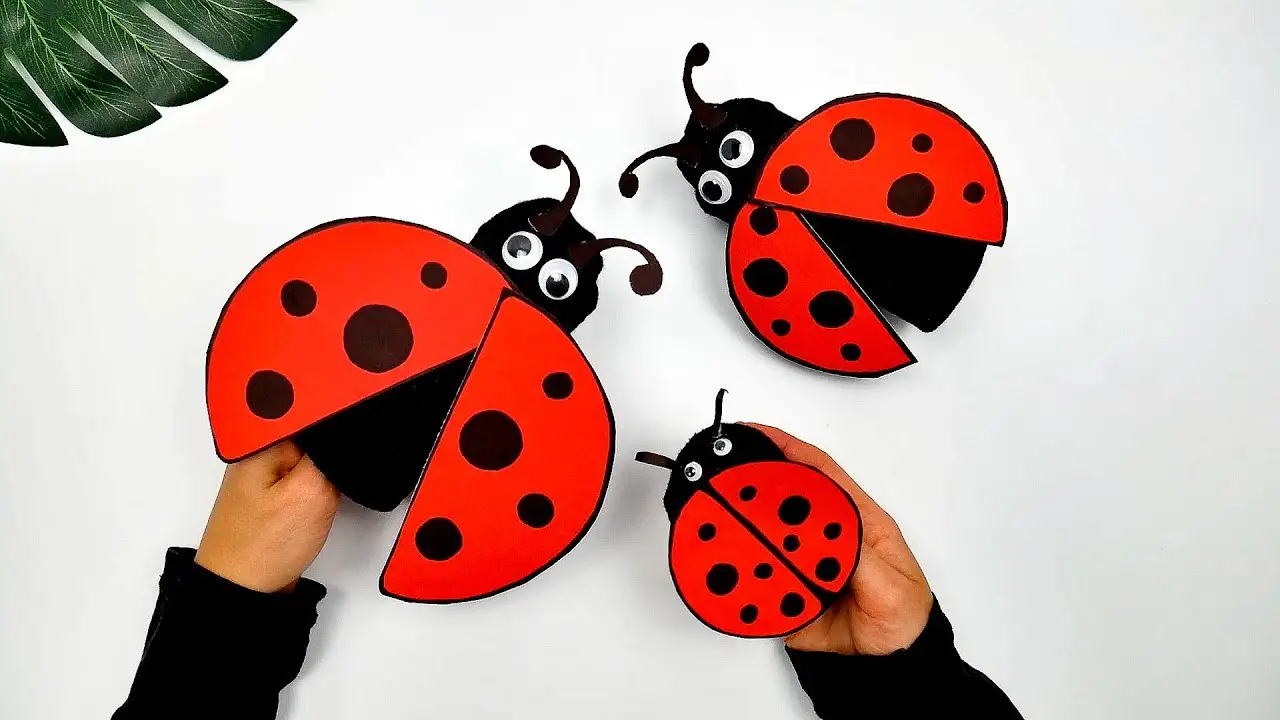
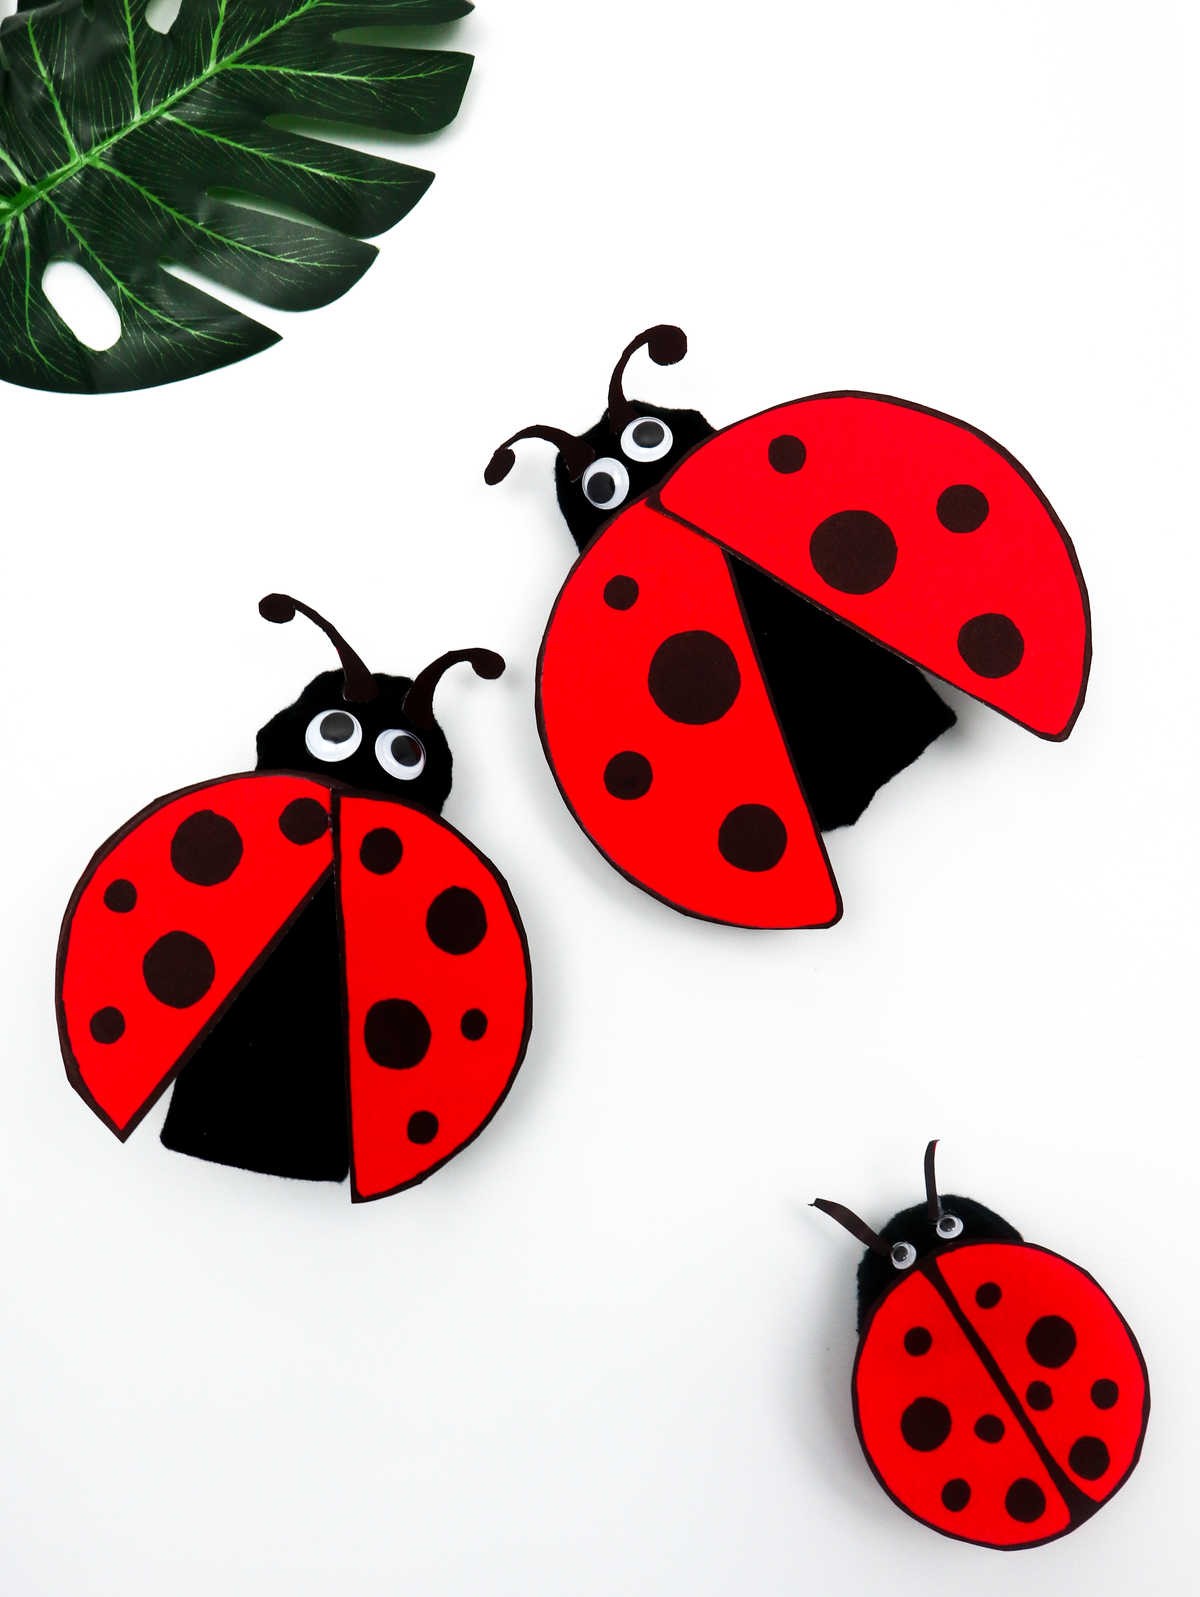
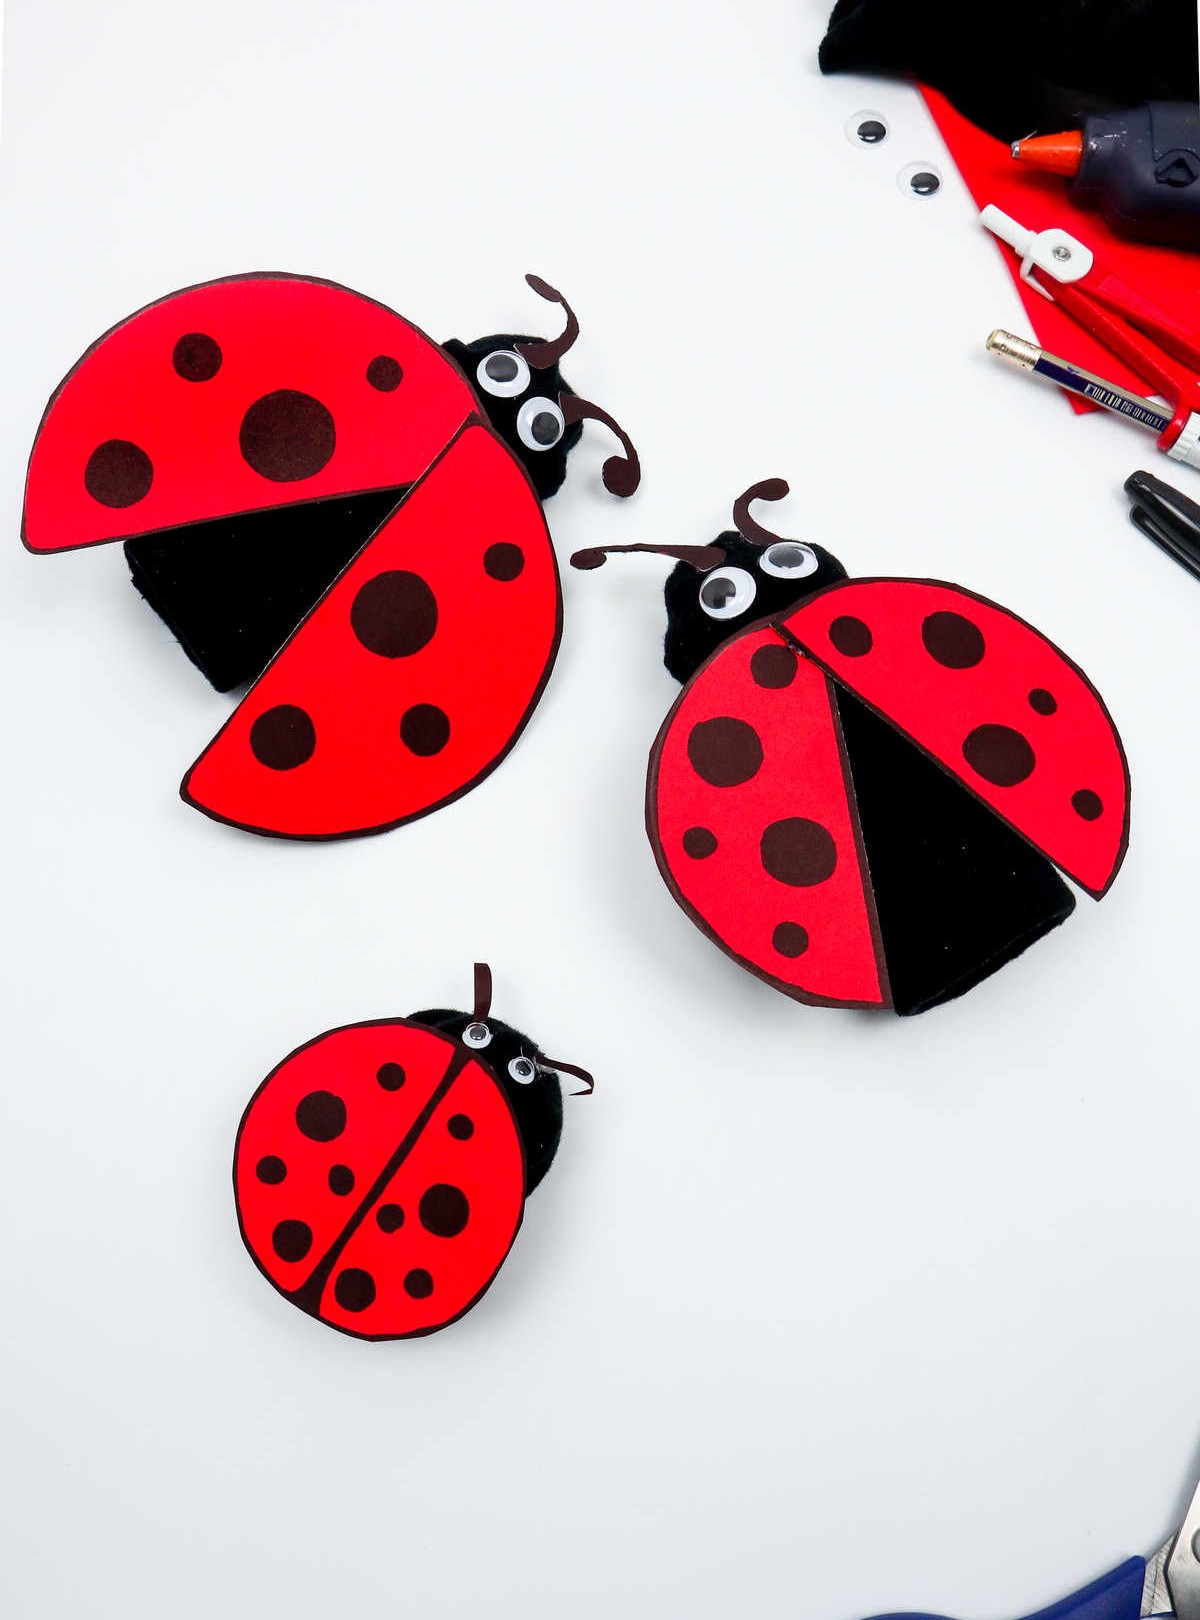
To complete the ladybug craft, it’s time to add the finishing touch: drawing her antennae. Once you’ve finished, your ladybug should resemble the one depicted below – a delightful project that’s sure to captivate young minds and inspire creative expression.
Step 8
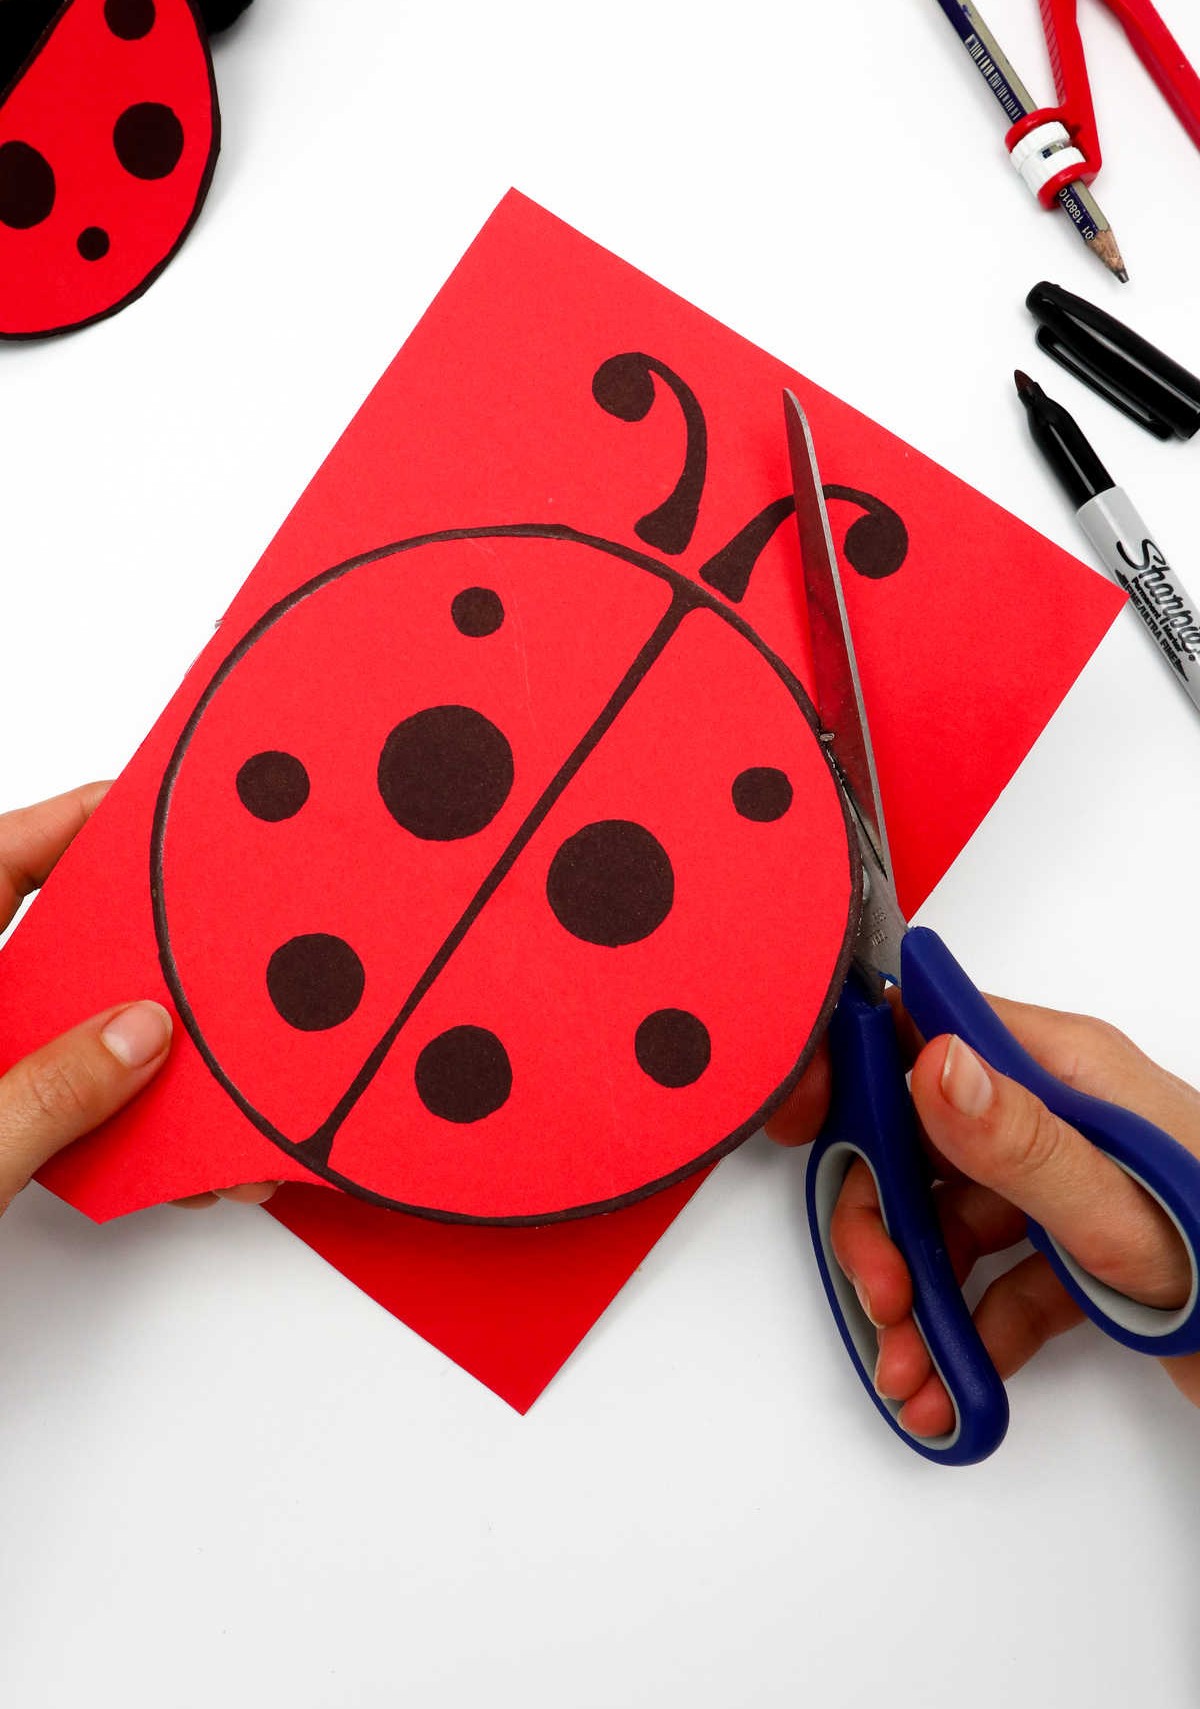
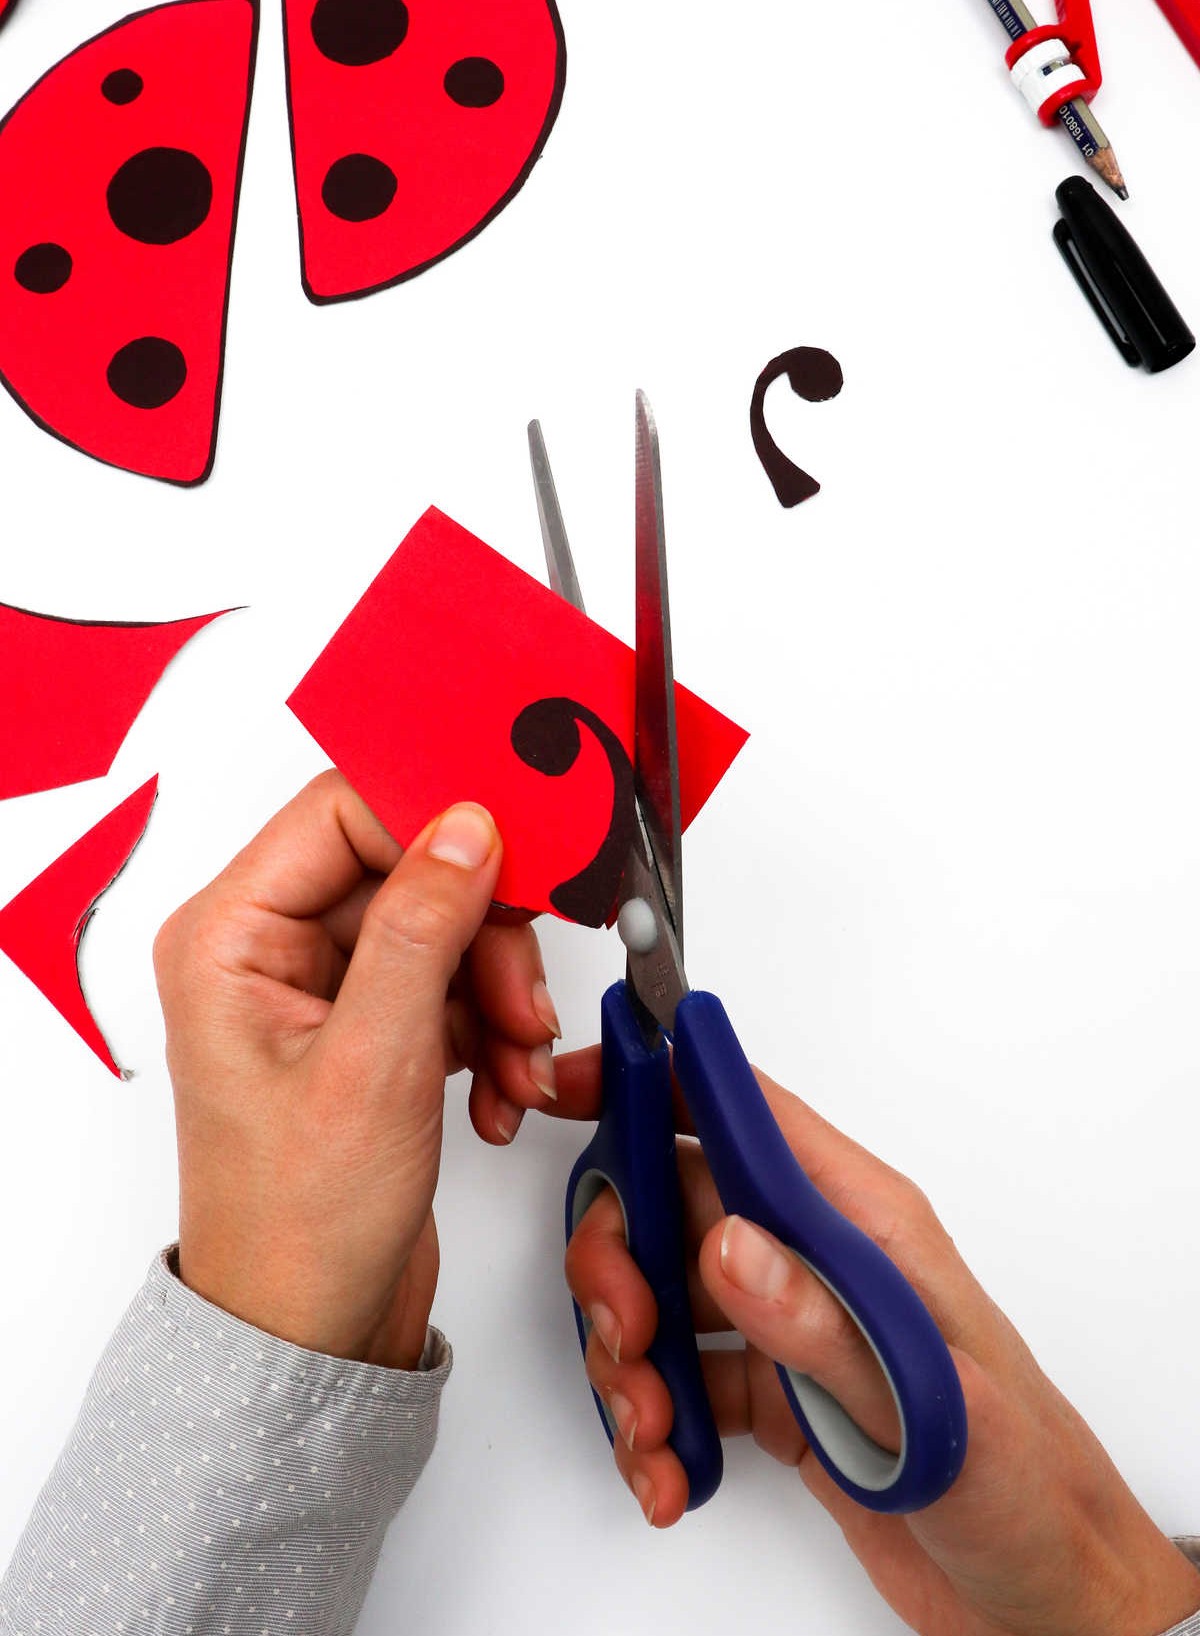
Now that your model has been carefully crafted with wings, it’s time to give it a precise shape by separating its various components. To do this, take hold of a pair of scissors and begin cutting along the outline, just as you drew it earlier. Be sure to divide the circle in half, creating two equal sections for each wing. Don’t forget to cut out the antennae as well, ensuring a clean and accurate separation.
Step 9
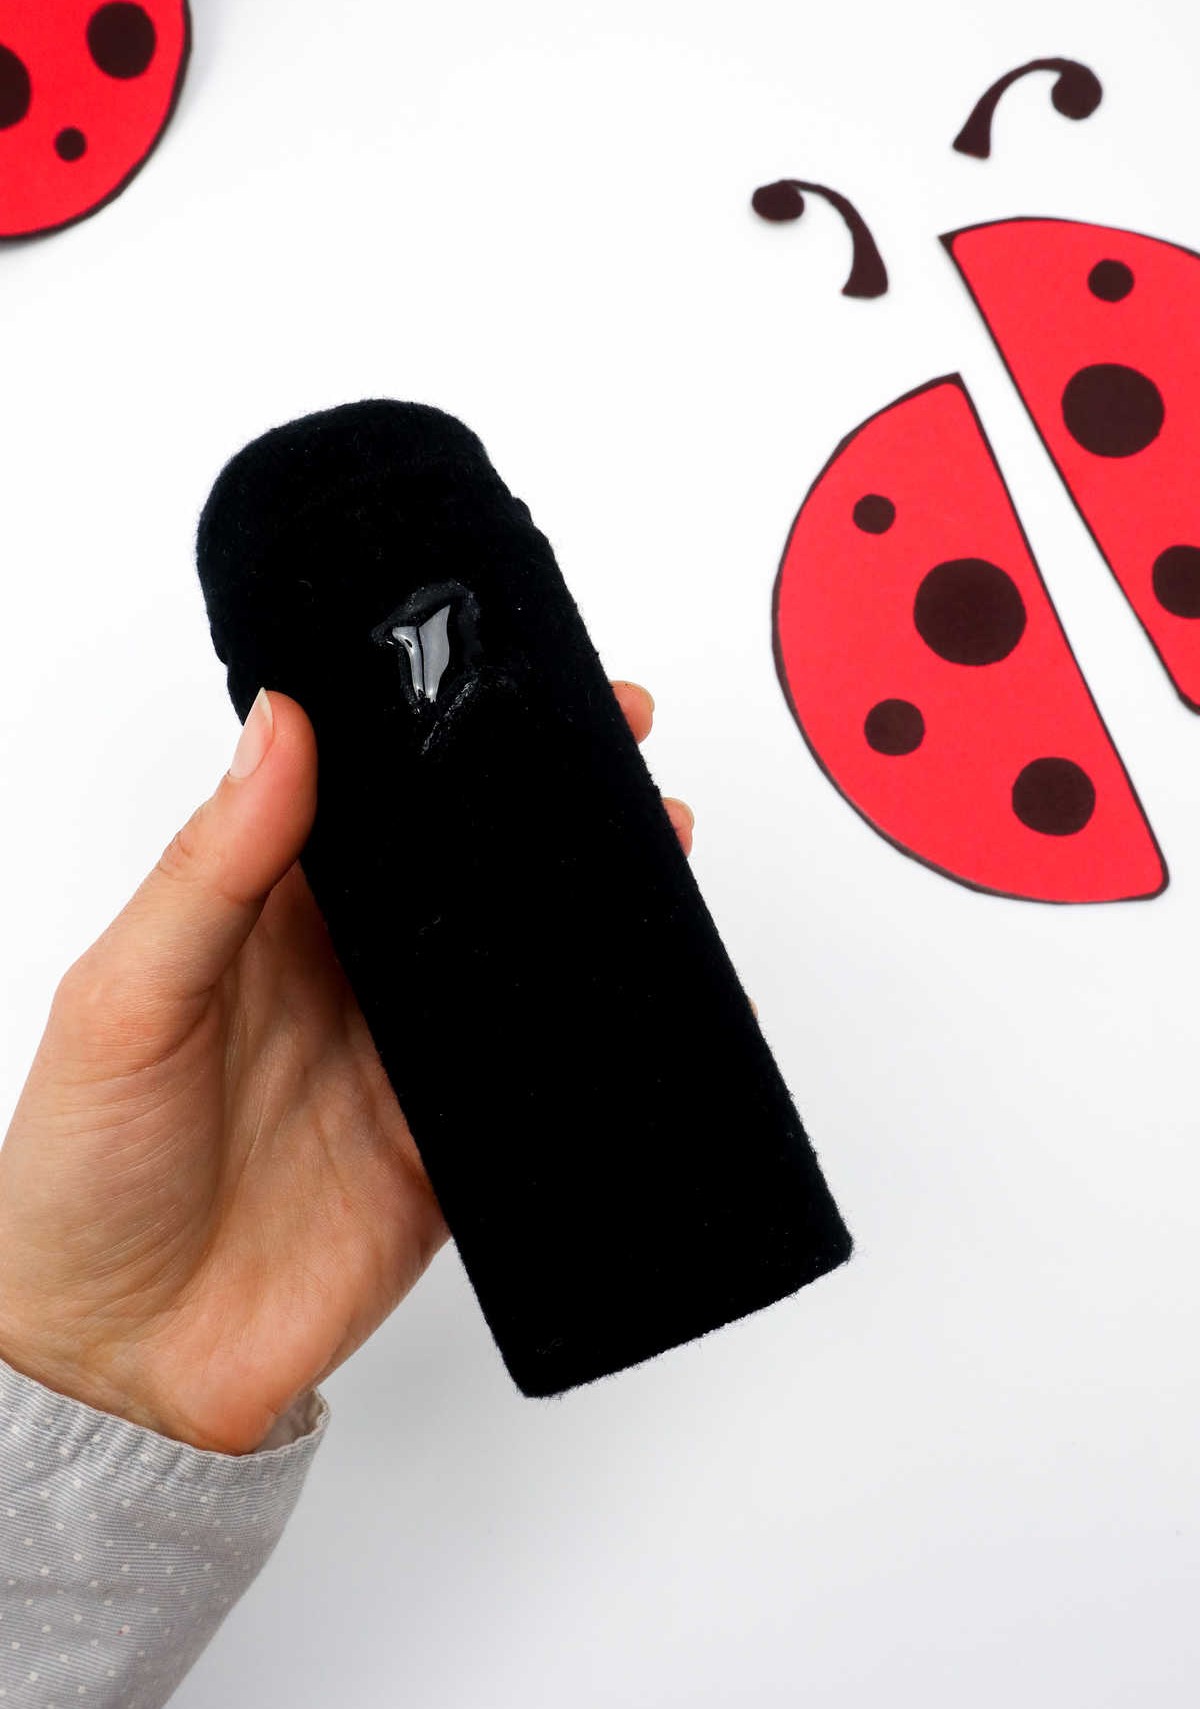


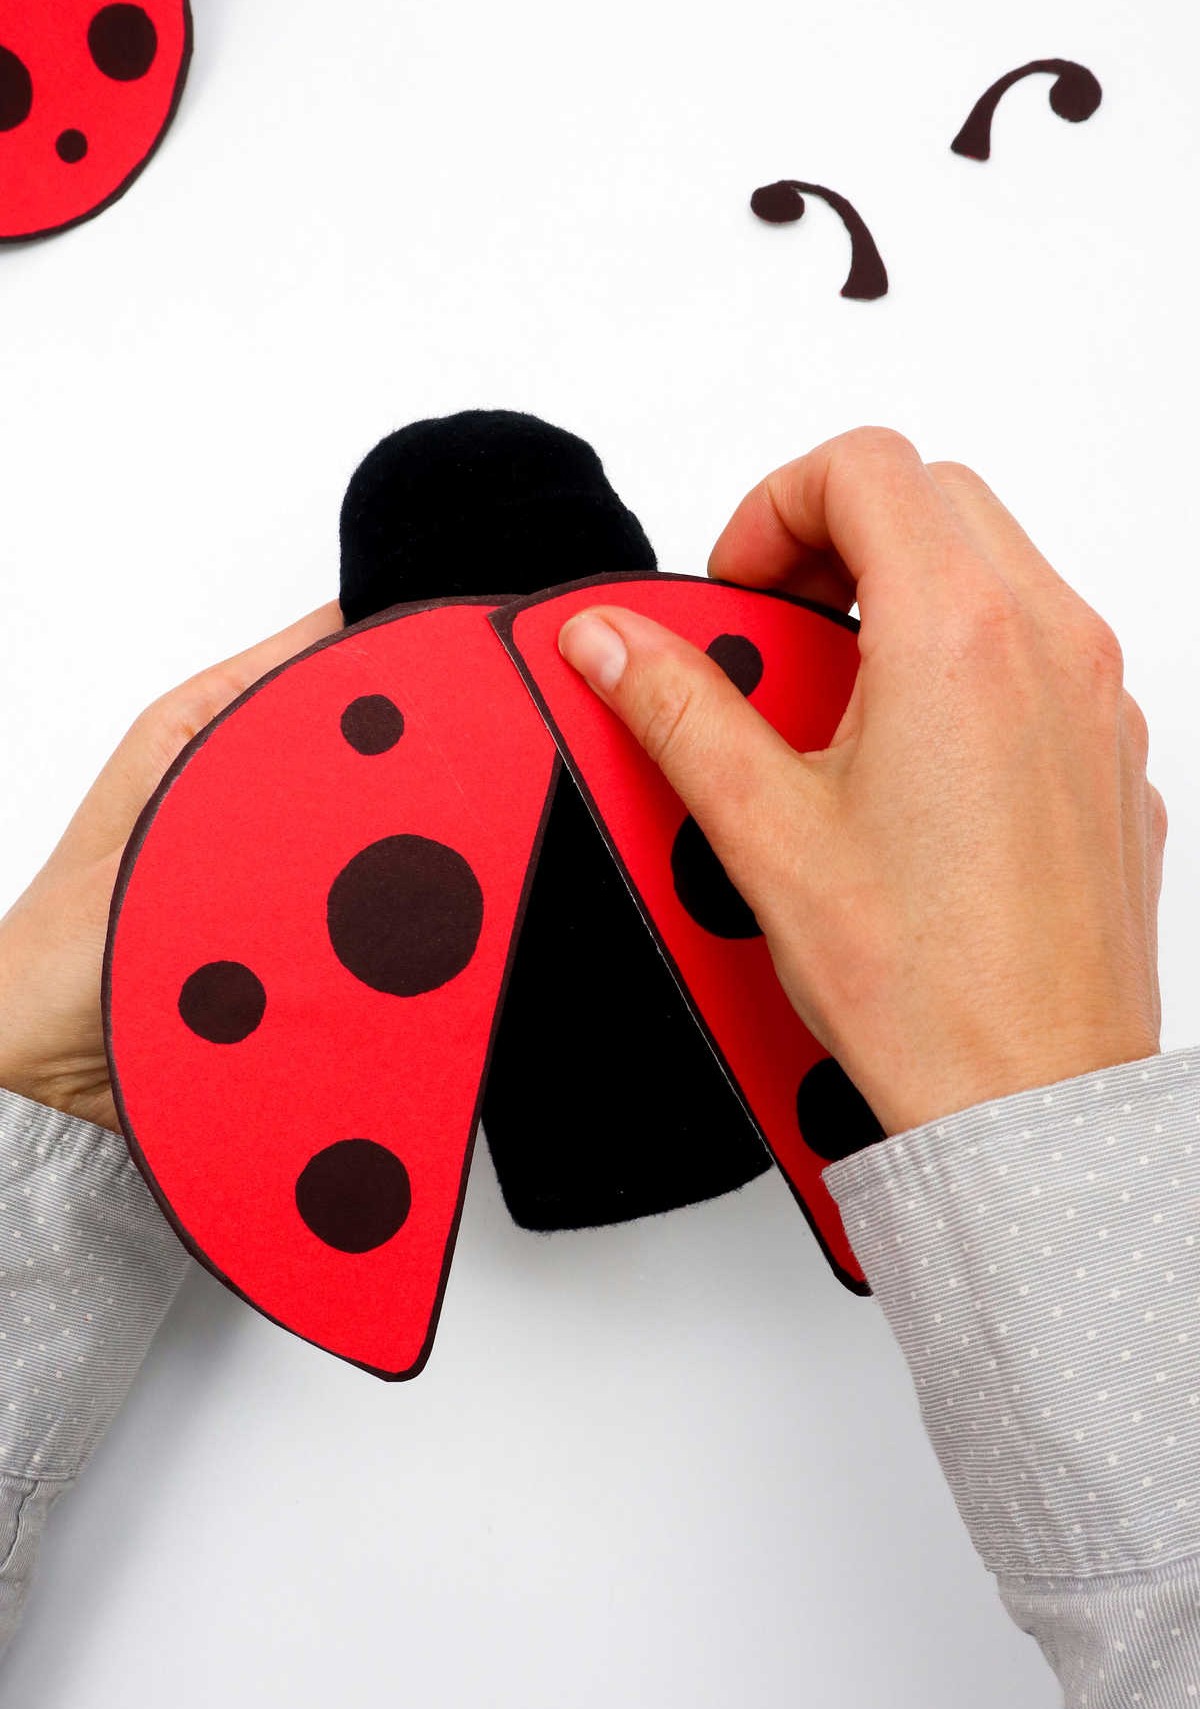
As you prepare to assemble the ladybug’s appendages, heat up your hot glue gun and apply a small amount of adhesive to the base of the wings. This is where you’ll connect the delicate structures to the main body. Make sure to hold the paper firmly in place for several moments to allow the glue to set and secure the wing effectively.
Following this step, replicate the process for the second wing, taking care not to apply too much glue.
Remember, you only want to attach the top of the wing to the toilet roll, leaving enough room for movement and flexibility.
Step 10
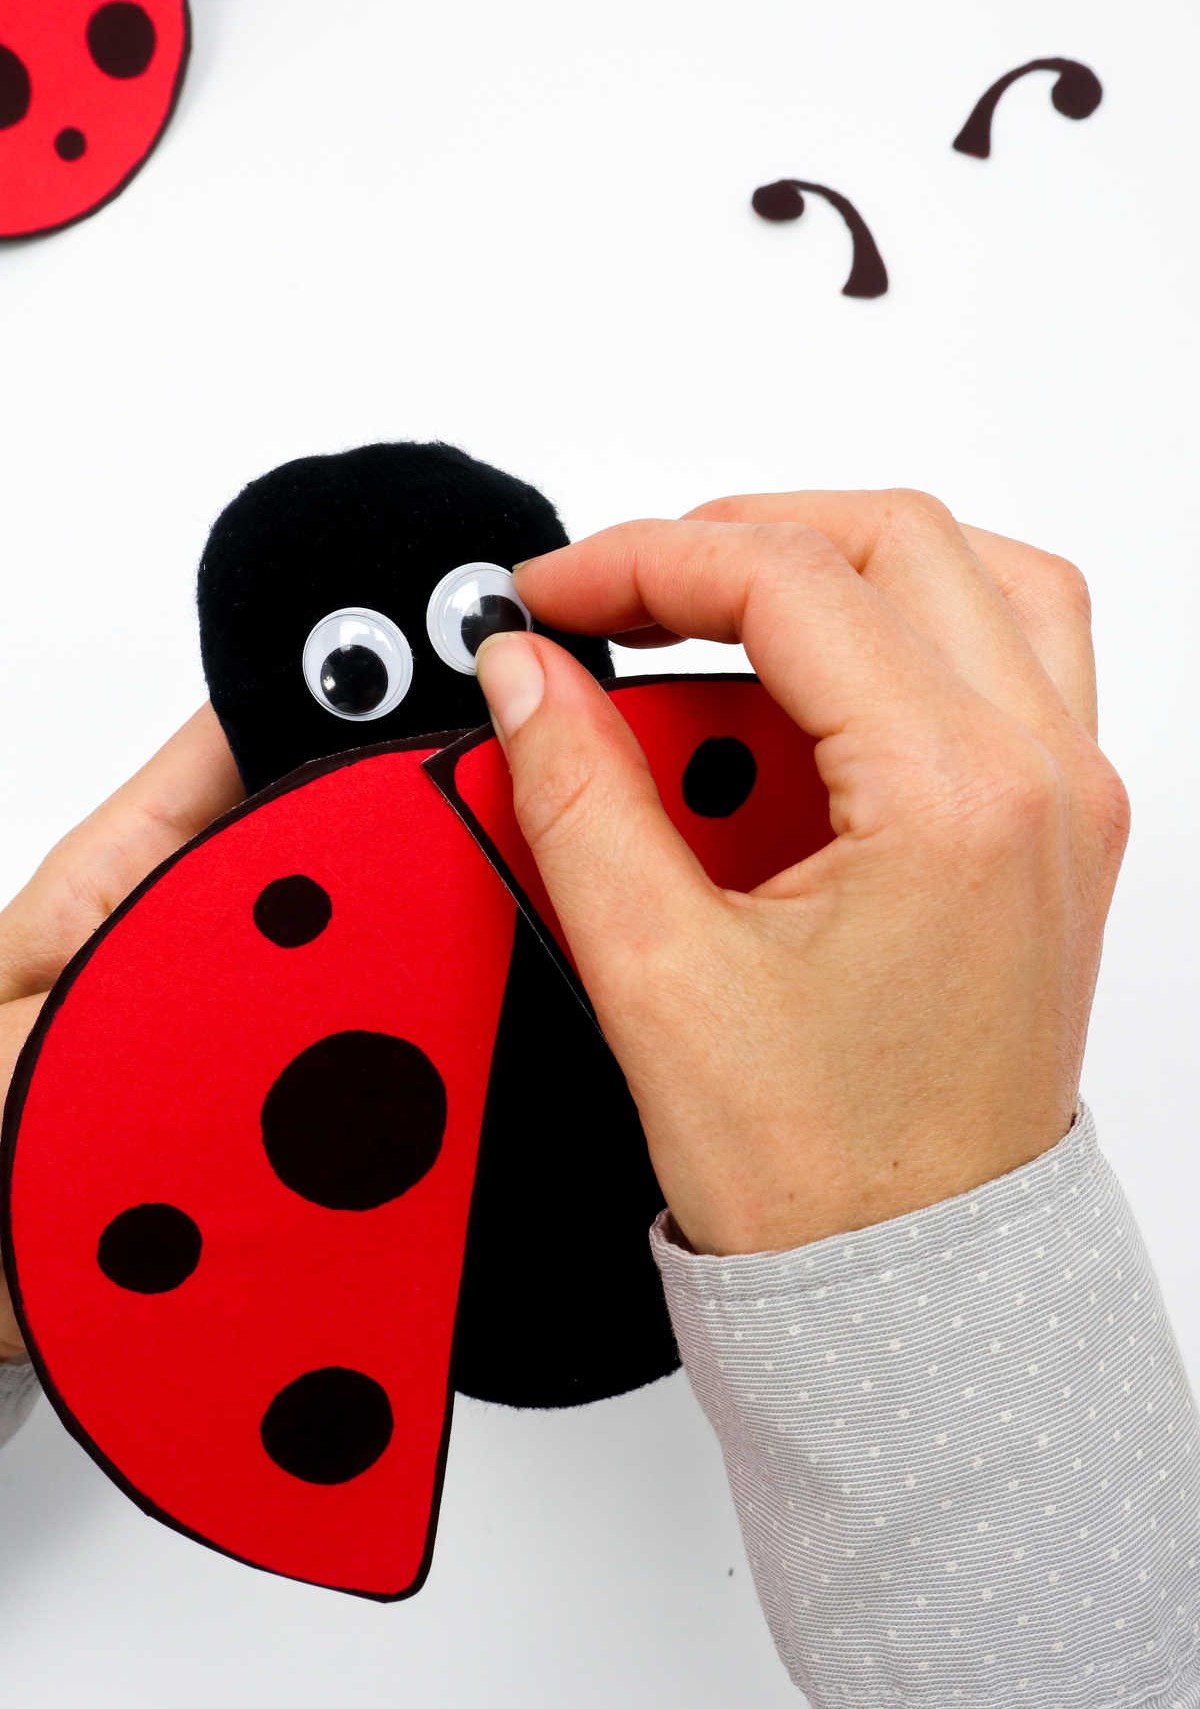
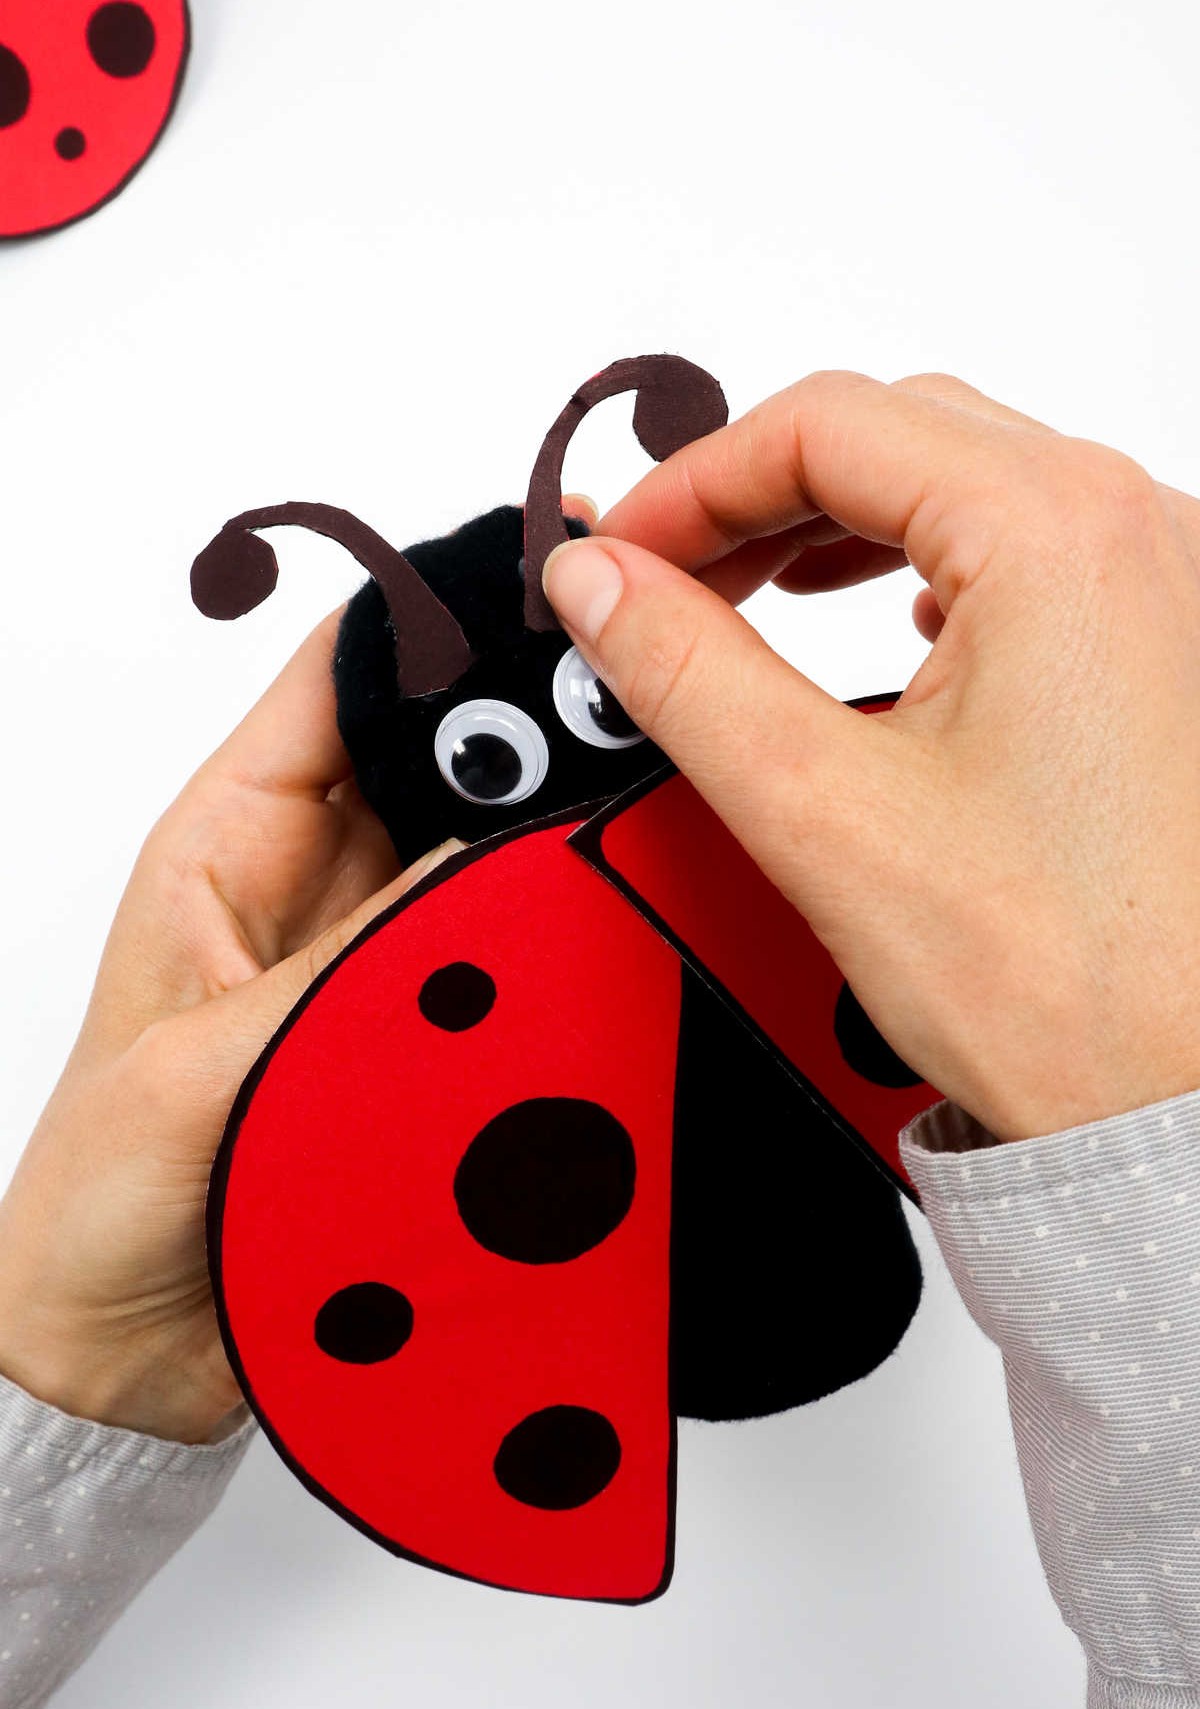
To give your ladybug a more whimsical appearance, it’s time to add some personality with a pair of googly eyes. Simply apply hot glue to the top of the ‘head’ and carefully attach the eyes, ensuring they’re securely in place. Next, move on to the antennae, which will help complete the insect’s features. Attach these using the same hot glue method, taking care not to get any excess glue on the surrounding area.
Step 11


While Step 11 may not be essential to the overall project, it’s an opportunity to add a creative touch to your finished ladybug. You can choose to leave it as is or take it to the next level by attaching a clothespin to its back. This modification allows you to transform your ladybug into a clip-on charm that can be used to embellish your craft area or even given as a unique gift. The versatility and whimsy of this optional step are sure to delight.
Who Can Make These Ladybugs?
While this project may particularly resonate with younger children, including toddlers and preschoolers, its versatility also makes it an excellent craft activity for older kids, tweens, teens, and even adults. This inclusive appeal is one of the many reasons why this DIY endeavor has the potential to be a hit across multiple age groups.
Where Can I Use These Ladybugs?
Envision these ladybugs adding a pop of personality to various surfaces throughout your home. Imagine them nestled among lush greenery on a windowsill, secured to curtains with a rustic clothespin, or perched atop a craft desk or children’s bedside table. They can also be incorporated into a themed decorative display, bringing a touch of whimsy and charm to any room.
Ladybug Craft Out of Toilet Paper Roll
Transform toilet paper rolls into adorable ladybugs with a fun DIY project that’s perfect for kids and teens! In just 30 minutes, you’ll have a delightful craft to show off your creative skills. Start by gathering the necessary materials and spending 25 minutes on the main activity. After that, take an extra 5 minutes to add any final touches. With a total cost of just $1, this upcycling project is an affordable way to get artsy.
Equipment
To begin crafting your unique gift, you’ll need a few essential tools. A pair of scissors is a must-have for cutting various materials to the desired shape and size. In addition to scissors, a black marker will allow you to add personalized touches to your project, such as decorative lines or intricate designs. If you’re working with fabric or other delicate materials, a hot glue gun can be used to securely attach embellishments without damaging the underlying material.
Finally, a compass with a pencil is useful for creating precise, symmetrical designs that require a steady hand and attention to detail.
Materials
When it comes to crafting a unique and quirky toilet roll holder, the key is to think outside the box (or in this case, the toilet paper roll). To create a one-of-a-kind masterpiece, you’ll need a few unconventional materials. Start by gathering a thick red sheet of A5-sized paper, perfect for adding a pop of color to your bathroom. Next, grab a pair of black socks – yes, you read that right! The humble sock can be transformed into a stylish and functional holder when used in the right way.
To give your creation some added personality, consider adding a set of wiggle googly eyes. And if you’re feeling extra crafty, throw in a clothes peg for an extra level of whimsy. With these unexpected ingredients, you’ll be well on your way to creating a toilet roll holder that’s sure to bring a smile to everyone’s face.
Instructions
To get started on this project, gather all the necessary supplies as listed out earlier. Begin by transforming one sock into a makeshift tube by stuffing it with another rolled-up sock. Ensure that the balled sock reaches the end of the other sock. Next, take your toilet paper roll and push it into the sock until it’s fully seated at the end where the balled sock meets the edge. Tuck the ends of the sock into the roll to create a secure fit, smoothing out any wrinkles as needed.
With your makeshift tube prepared, use your compass to measure half the height of the toilet paper roll (or adjust this measurement if you prefer smaller wings). On a sheet of red paper, draw a circle with a radius equal to half the height of the toilet paper roll. Use a black marker to draw over the pencil outline of the circle, creating a precise boundary. Then, divide the circle into two equal hemispheres by drawing a line down the center.
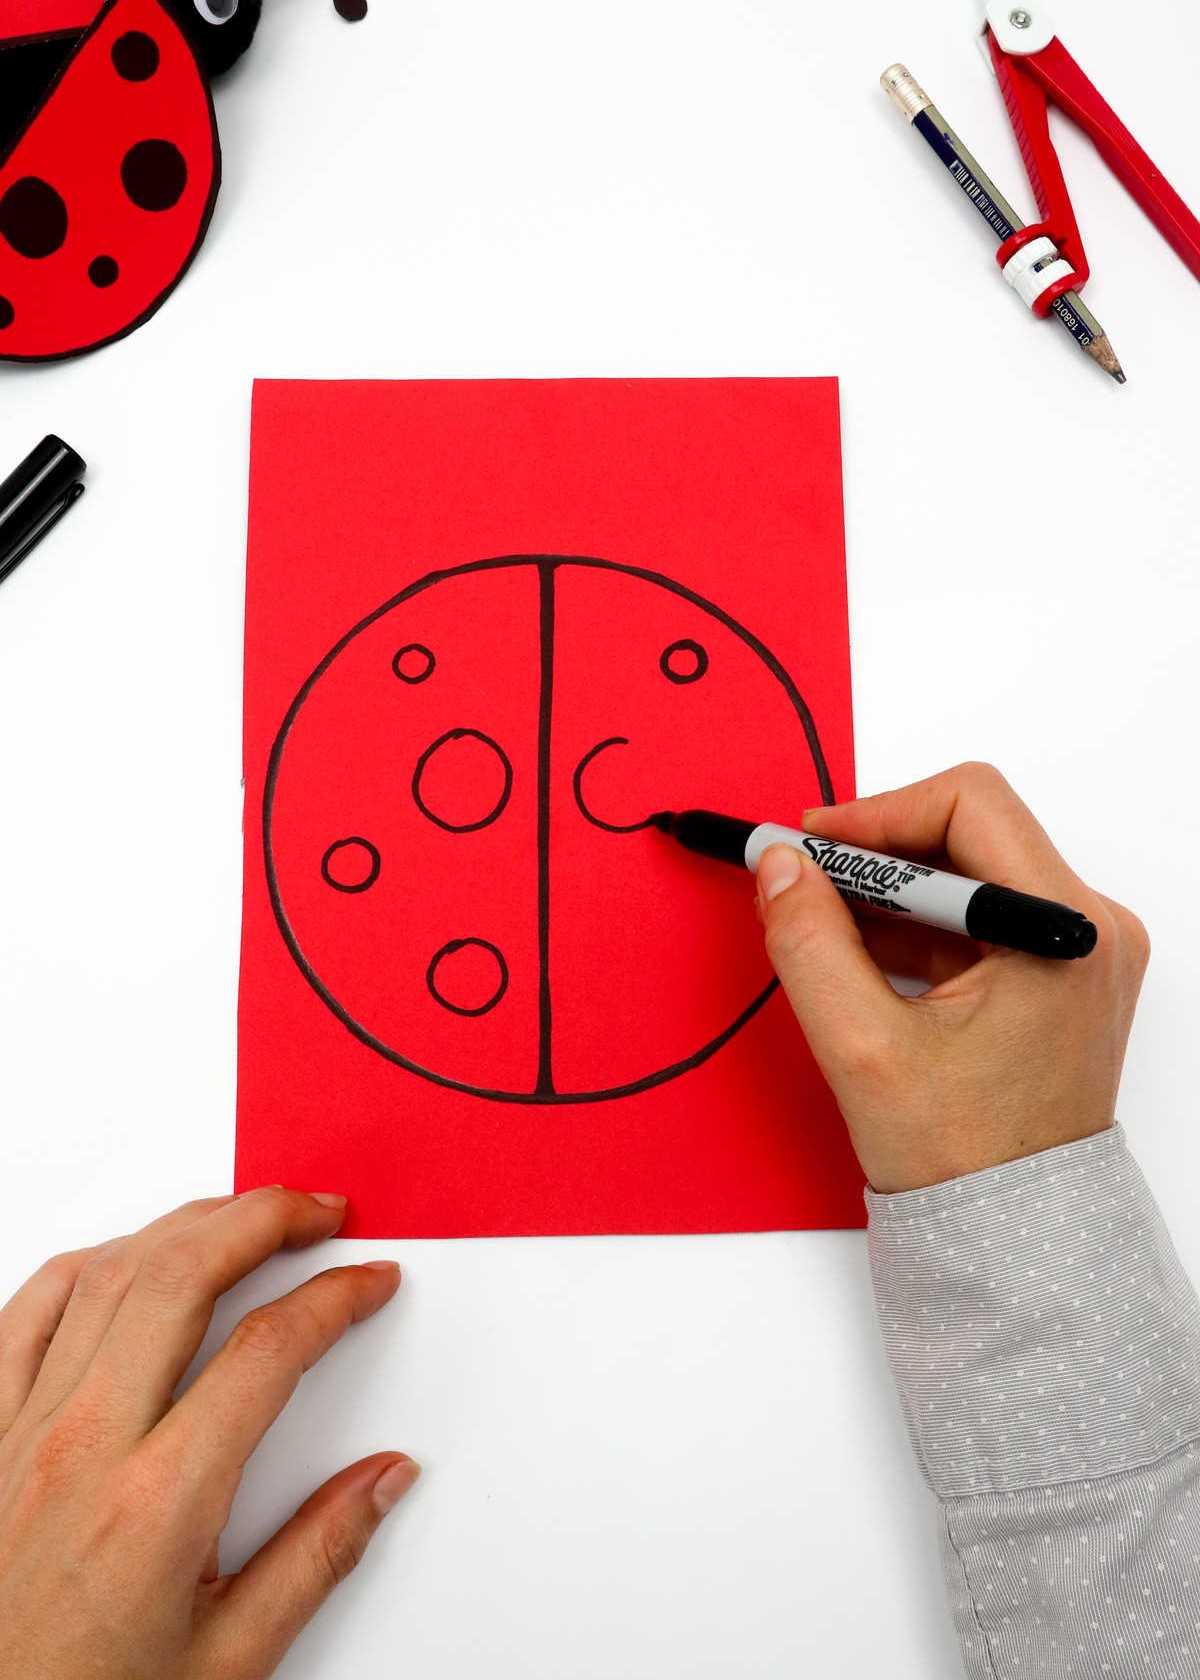
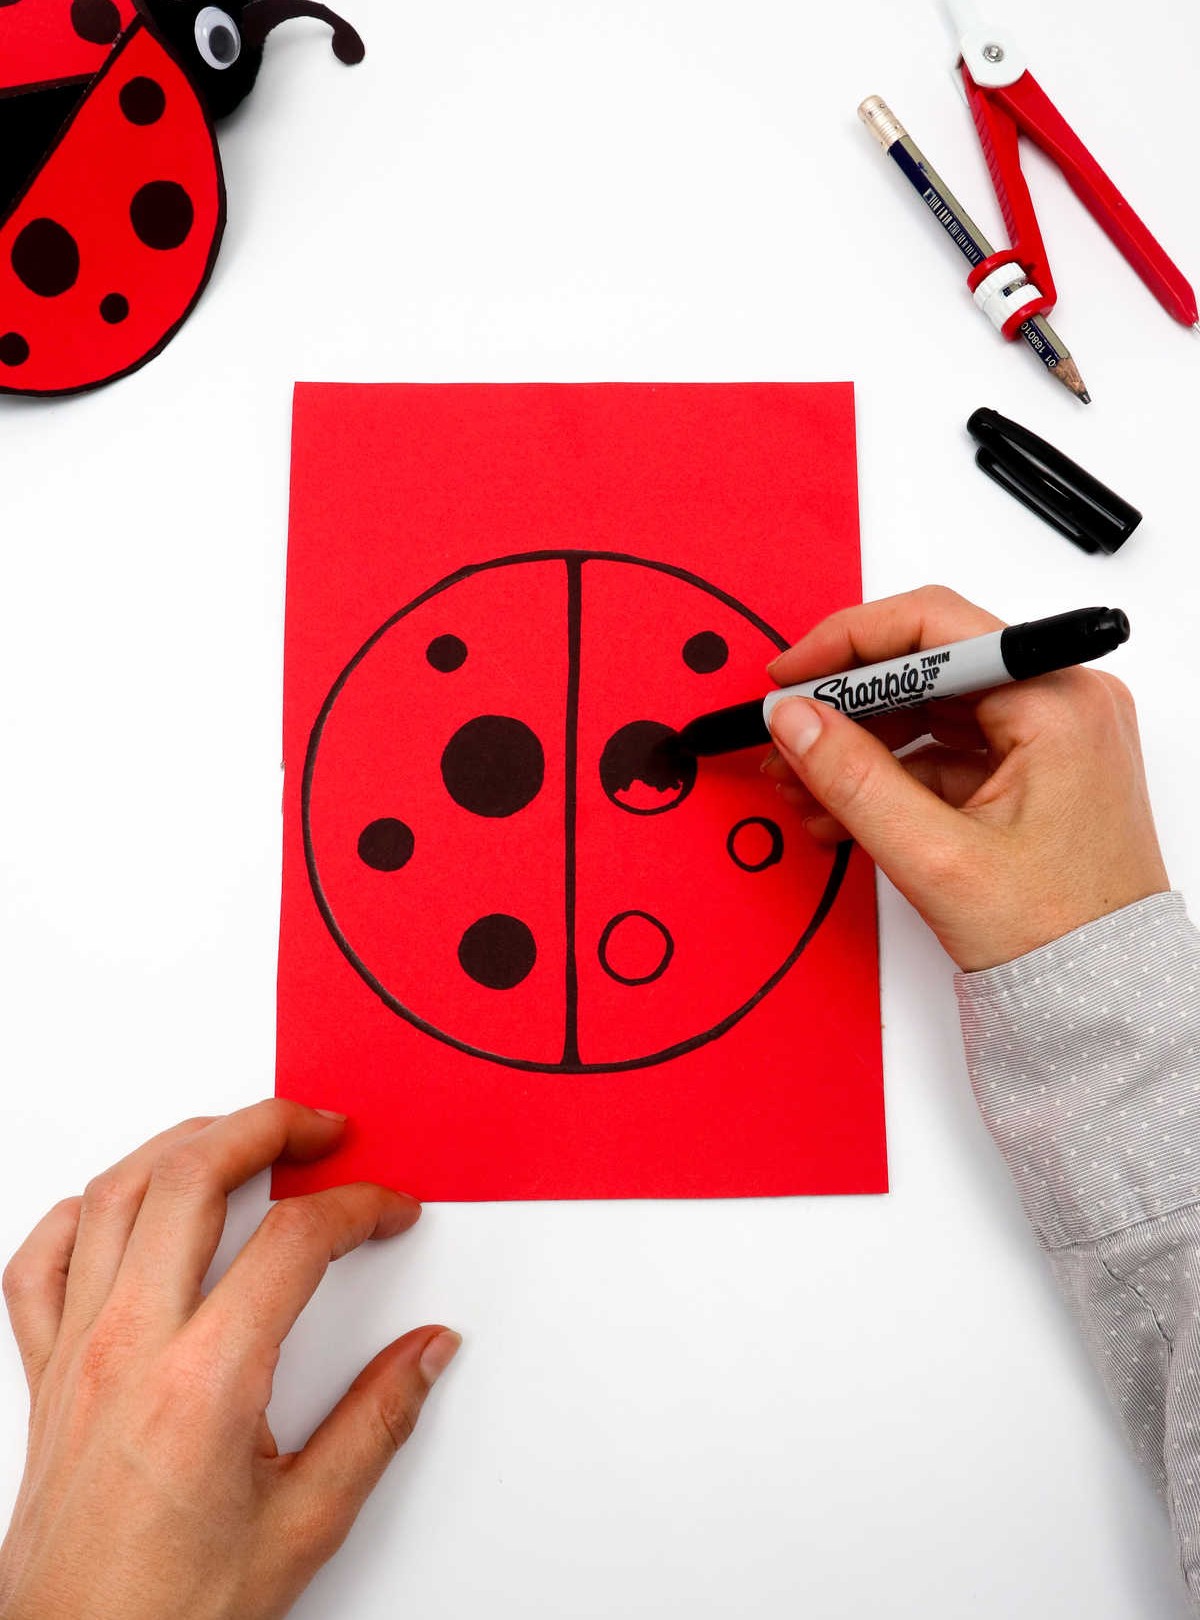
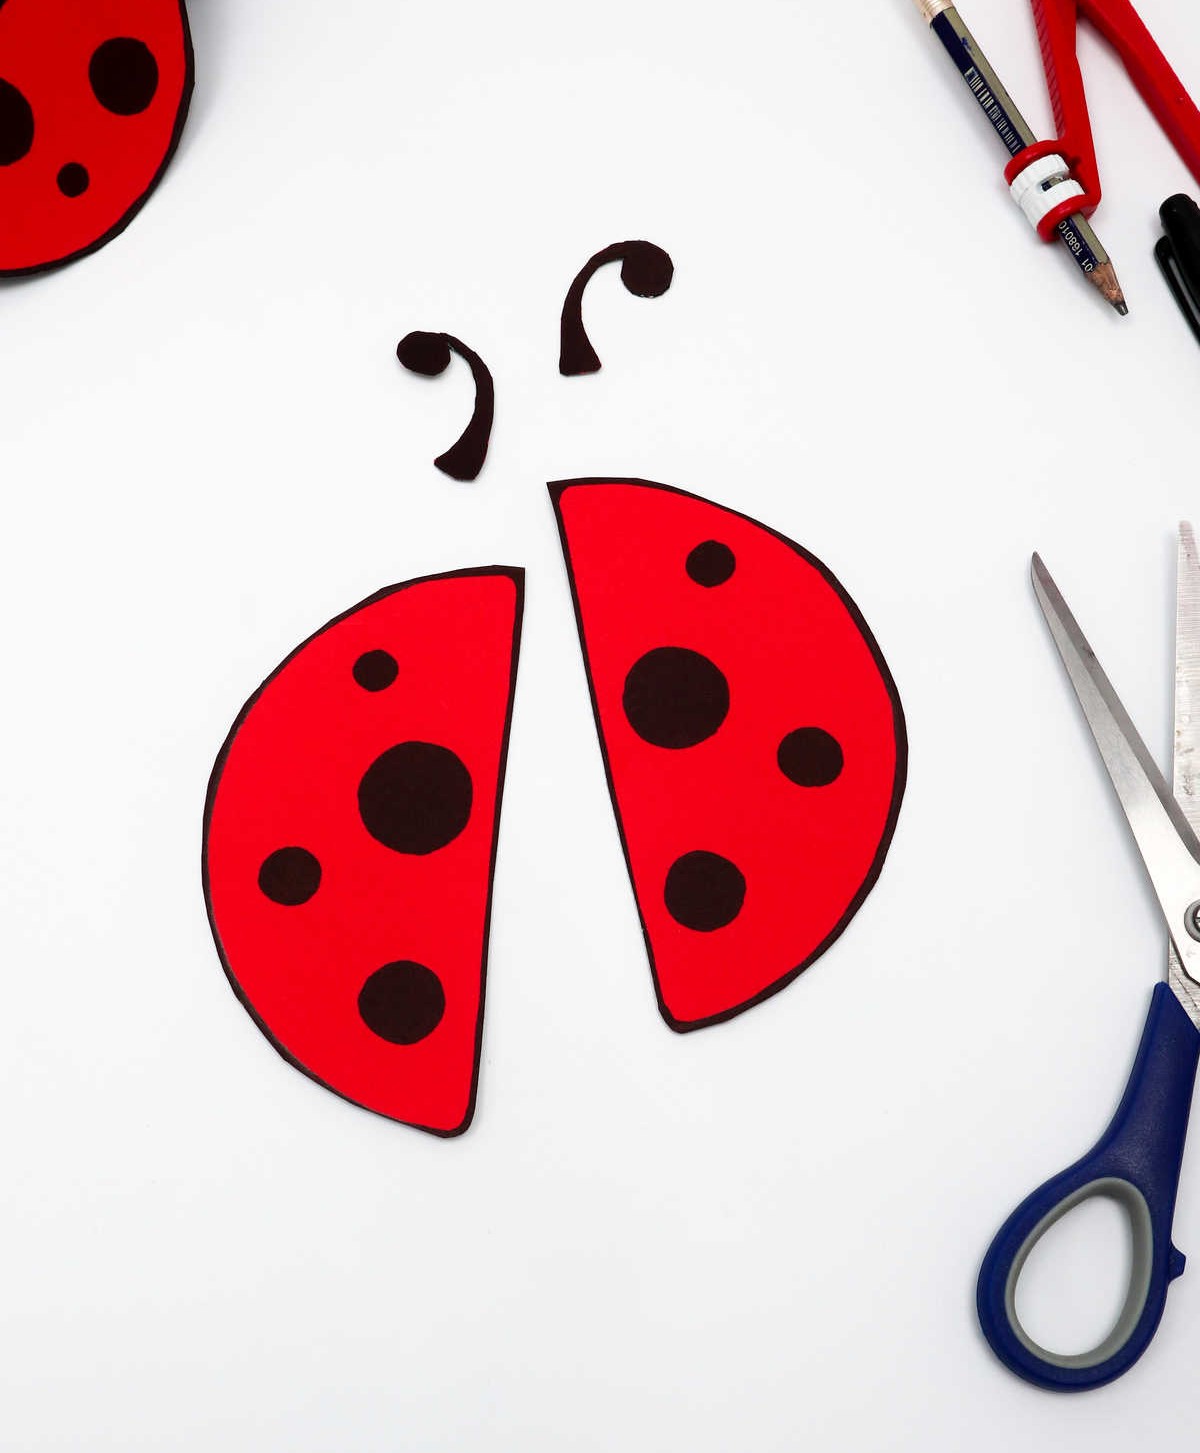
Next, create circular shapes within each hemisphere and fill them in completely. Don’t forget to add antennae to your design. Once you’ve drawn out all the components, cut them out using scissors. This will give you two separate hemispheres and a pair of antenna cutouts. To assemble your ladybug, adhere the top of one wing to the toilet paper roll, holding it in place until it sticks securely. Repeat this step with the other wing.
Finally, add googly eyes and antennae to complete your ladybug’s appearance. If desired, attach a clothespin to the bottom of the roll to enable you to clip your creation onto various surfaces.