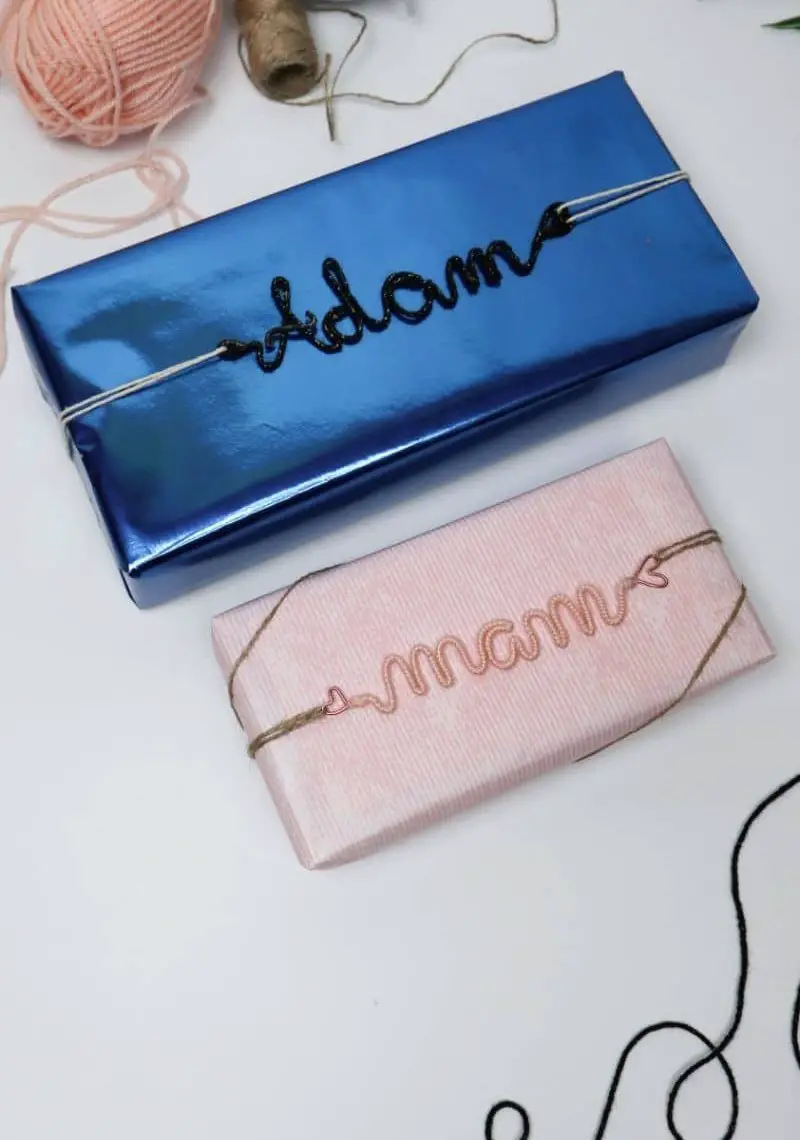
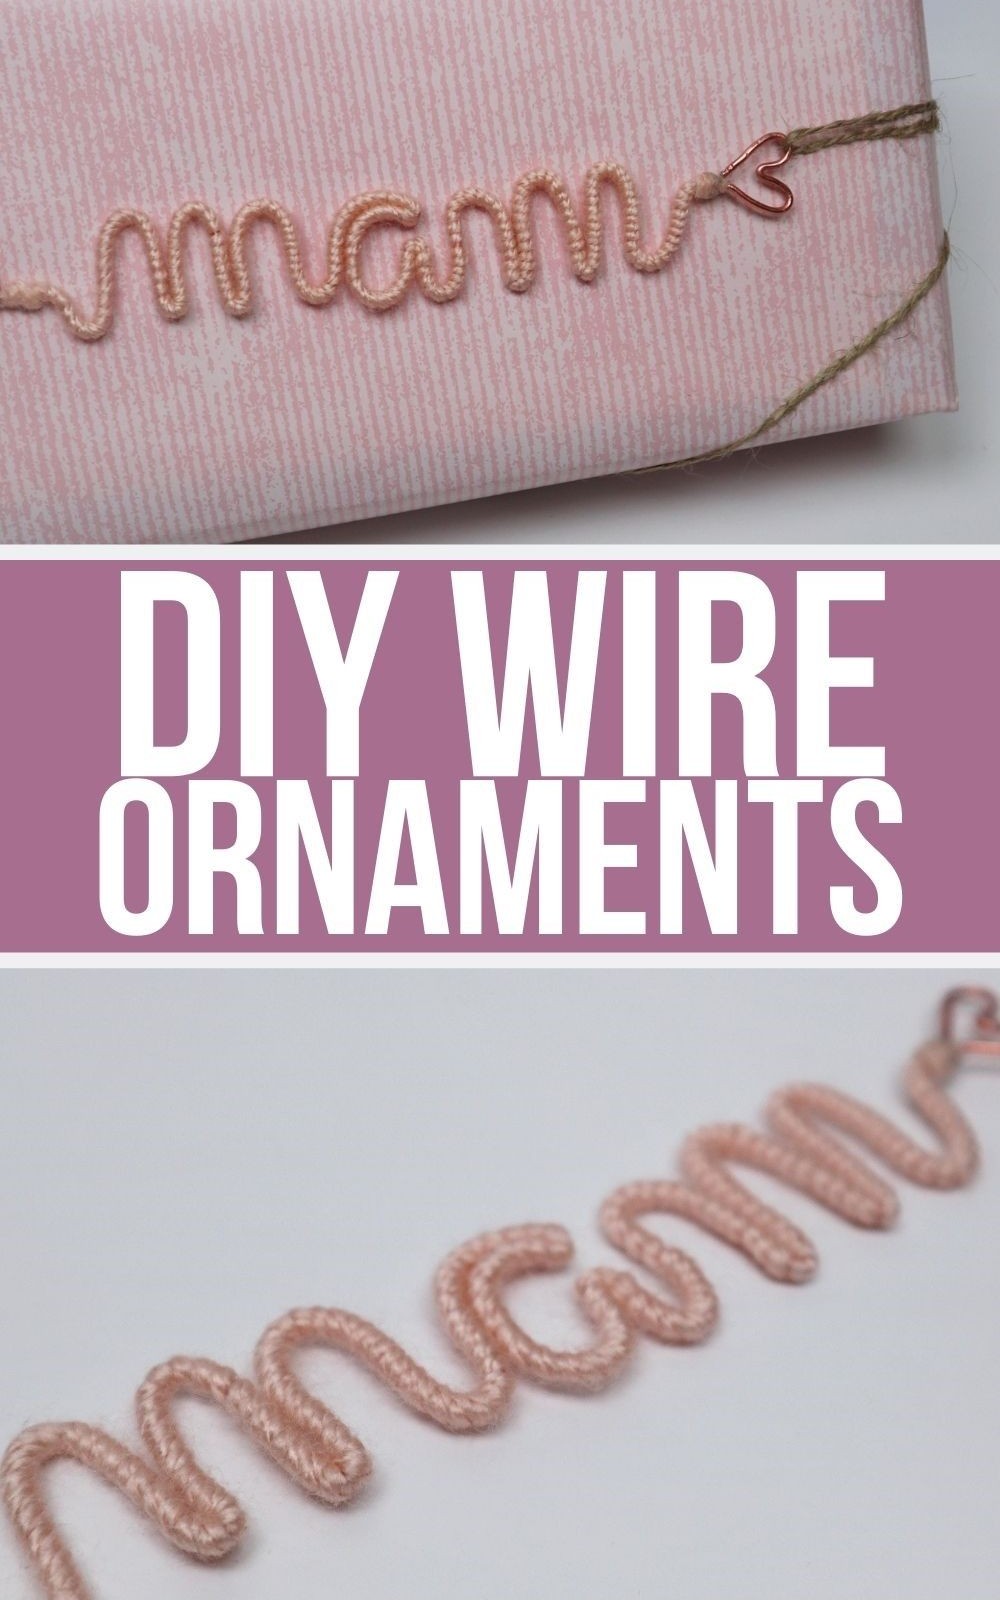
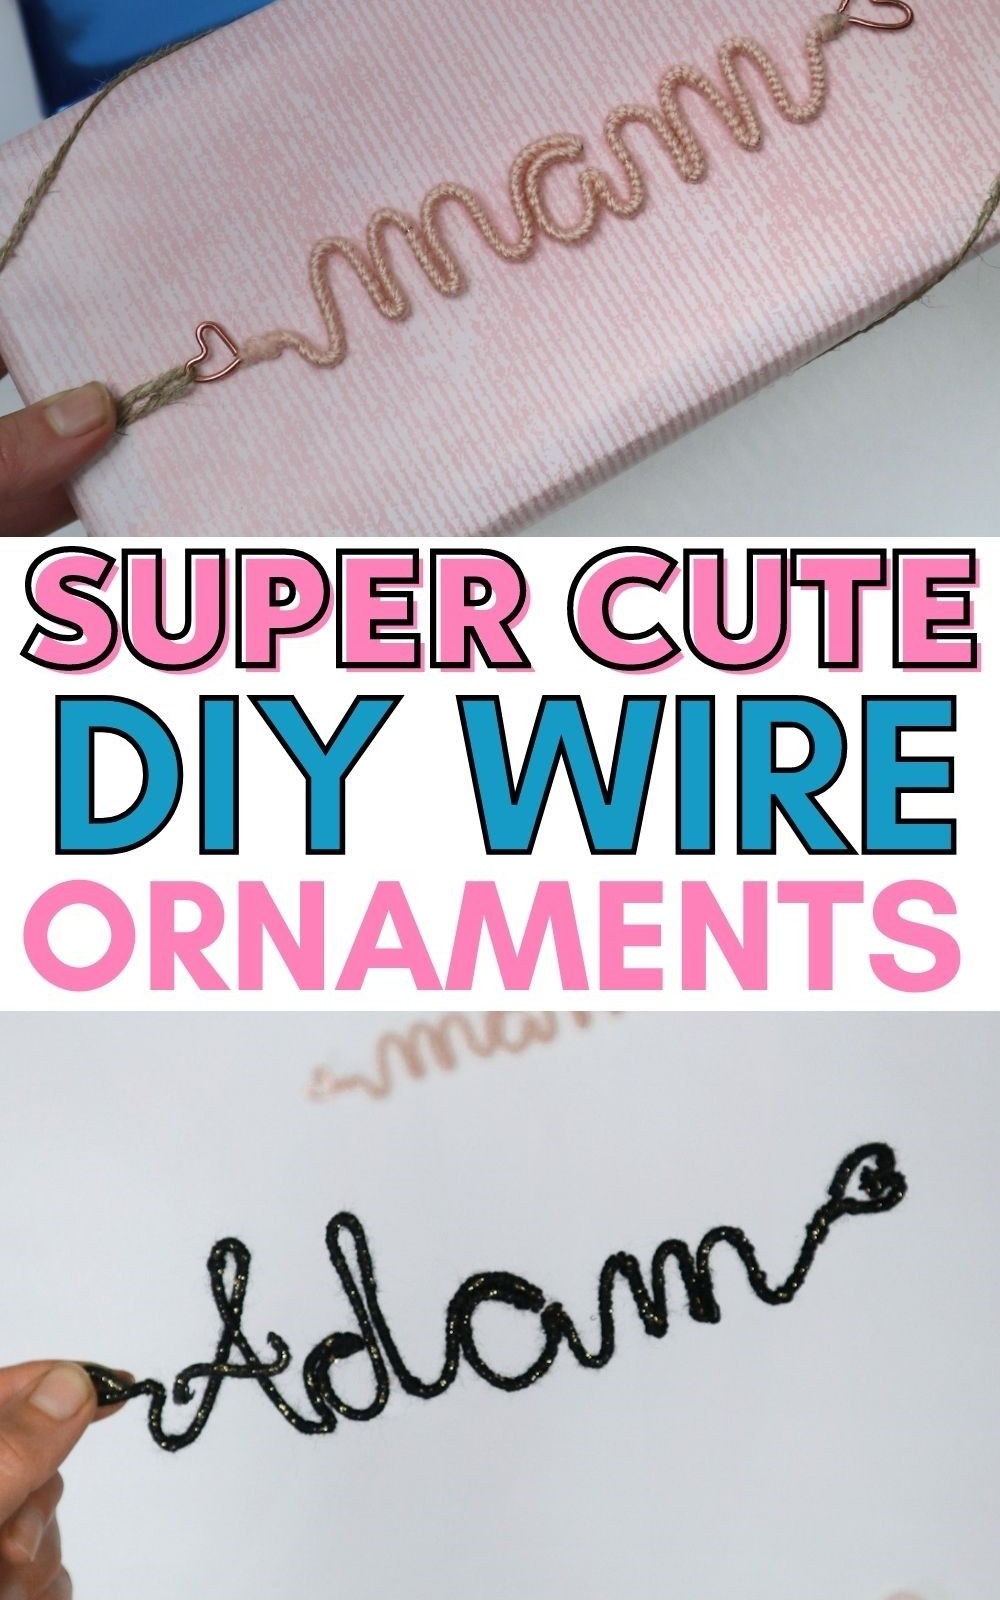
Elevate your gift-giving game by crafting unique wire ornaments that showcase personal touches. For many DIY enthusiasts, there’s no greater thrill than presenting a beautifully wrapped gift that exudes thoughtfulness and creativity. One surefire way to take your gift-wrapping skills to the next level is by incorporating DIY wire ornaments featuring your recipient’s name or initials.
This clever technique combines wire manipulation with soft textile, allowing you to create custom designs that are both elegant and meaningful.
What makes these ornaments truly special is their versatility – you can craft any shape or design you like, from simple monograms to intricate patterns. And while they may be particularly suited for teens and adults, the end result is sure to delight givers of all ages. So why settle for a generic gift when you can make it truly unforgettable?
With these DIY wire ornaments, you’ll be able to add that extra special touch to your gifts, making them truly one-of-a-kind.
Supplies/Tools You’ll Need
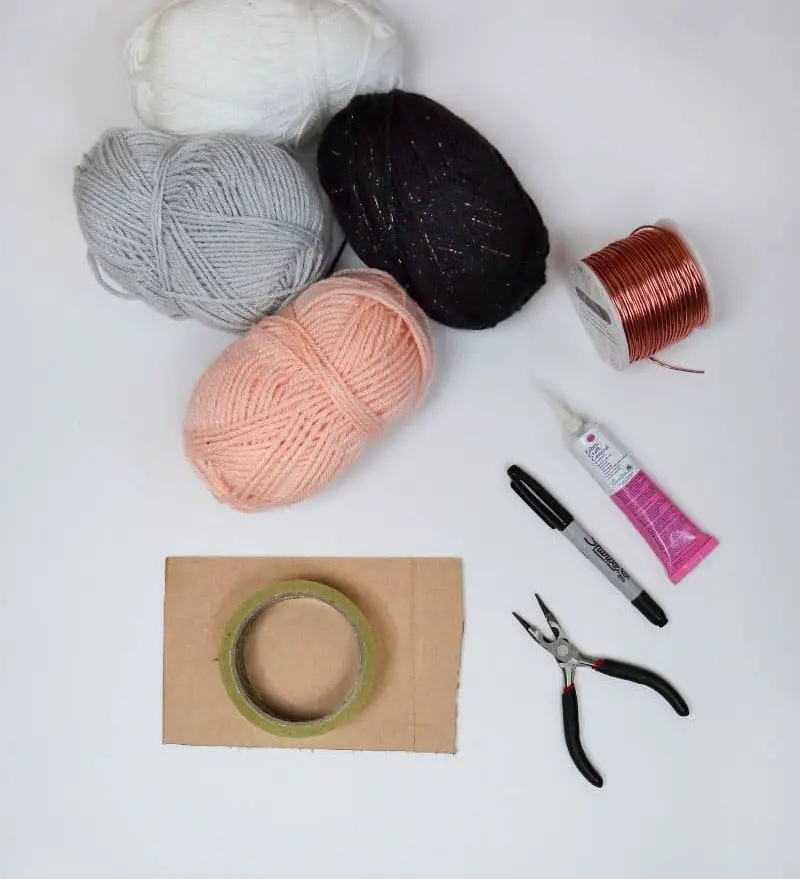
To create a unique and eye-catching DIY project, you’ll need a few essential materials. First, you’ll require some colored yarns to add a pop of color to your design. Next, you’ll need a strong adhesive like super glue to hold everything together. For the framework of your project, I recommend using BENECREAT 15 Gauge Aluminum wire, which provides a sturdy base for your creation. To mark and shape your materials, a marker and pliers will come in handy.
You may also want to use some Scotch tape to secure any loose ends or add an extra layer of stability. Finally, you’ll need a piece of cardboard as the foundation for your project, providing a flat surface to work on.
How to Make Wire Ornaments
Curiosity piqued? Let’s dive into the detailed process of creating those captivating wire ornaments. Follow along for a step-by-step guide that will walk you through the transformation of mere wire into stunning decorations.
Step 1
To start creating your bespoke piece of jewelry, begin by collecting the essential materials and considering the recipient’s personal aesthetic. Alongside the easy-bend wire, you’ll need a pair of needle-nose pliers and a suitable textile to complement their unique style. This could be yarn, thread, or even twine – the choice is yours! As for the wire itself, aim for a gauge size that falls between twelve and fourteen; this will provide a sturdy yet malleable foundation for your design.
Step 2
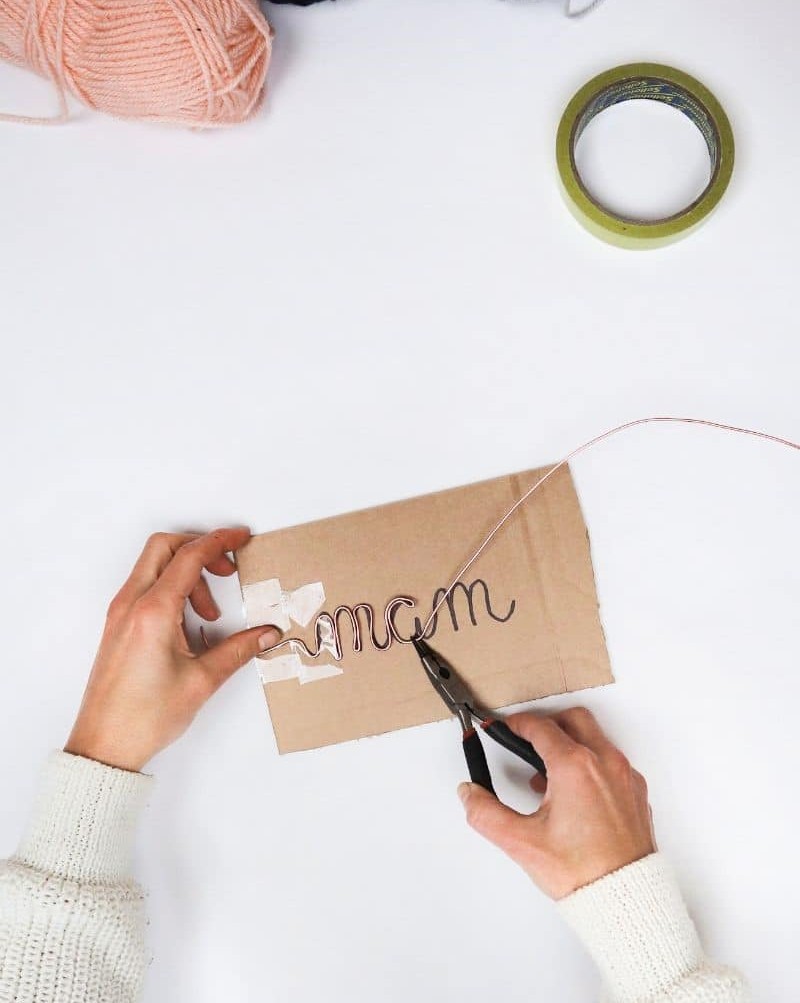
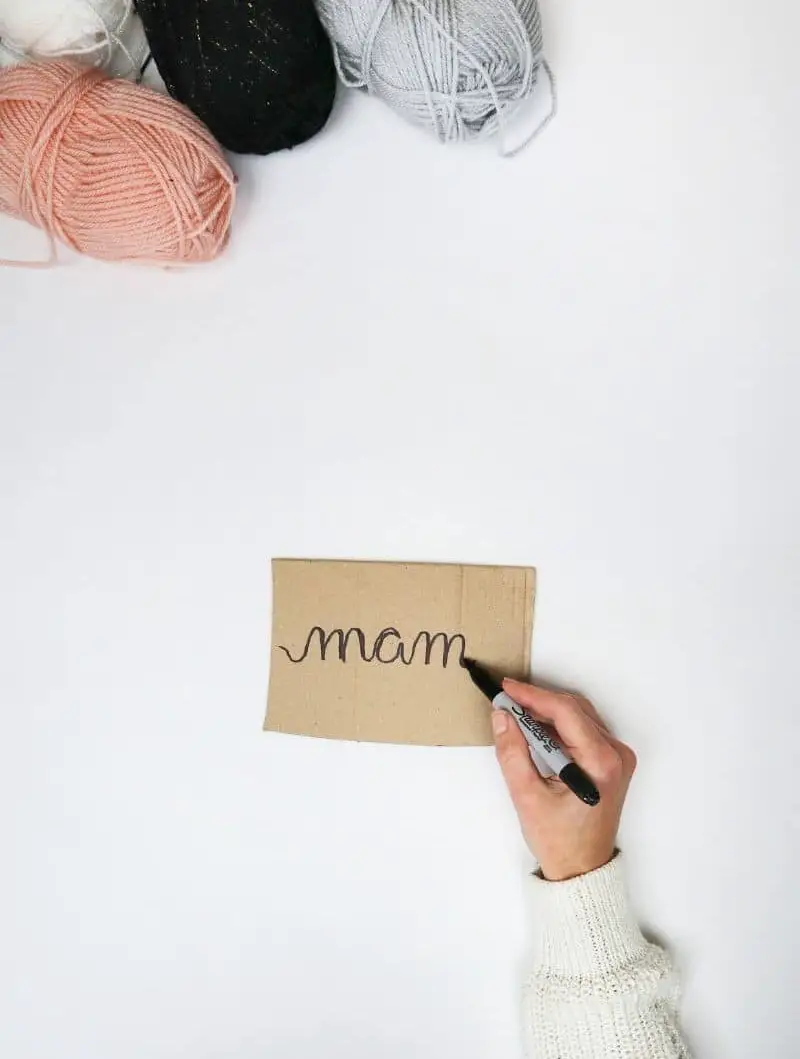
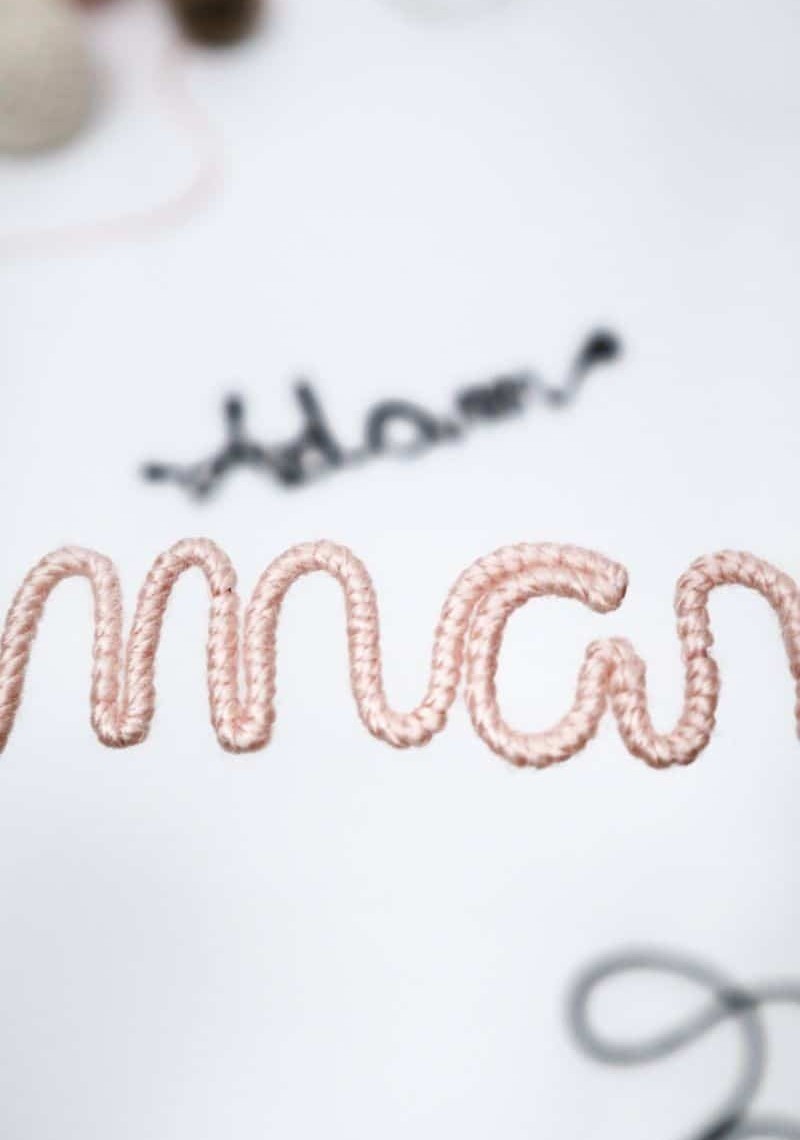
To begin, we’ll focus on crafting a unique name design using a single continuous line. The key is to keep your pen in motion, never lifting it off the cardboard, as this mimics how the wire will sit on the material. When it comes to executing the design, I recommend opting for cursive script. Not only does it simplify the process, but it also yields a visually striking result that adds an extra layer of sophistication.
Step 3
When crafting with wire, a crucial step is preparing the foundation – literally! Begin by securing your wire to one end of a piece of cardboard using tape. This sturdy base will serve as the anchor for your project. A wise approach is to err on the side of caution and leave some excess wire hanging over each edge, ensuring you have ample room to work with and avoiding any last-minute stress.
Step 4
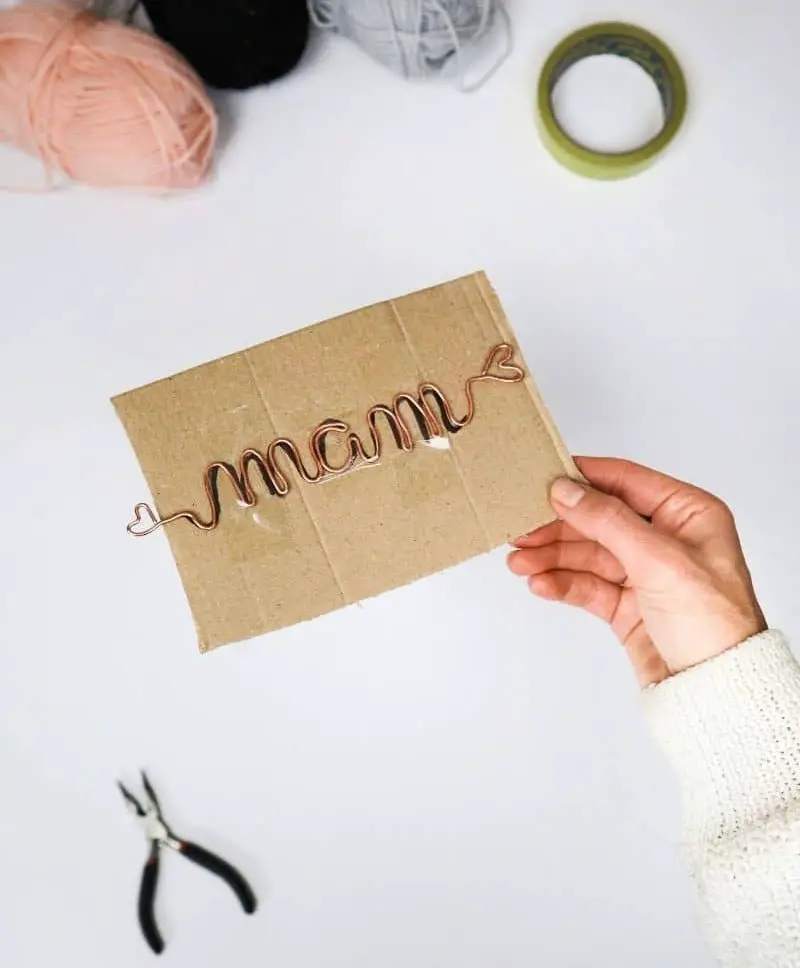
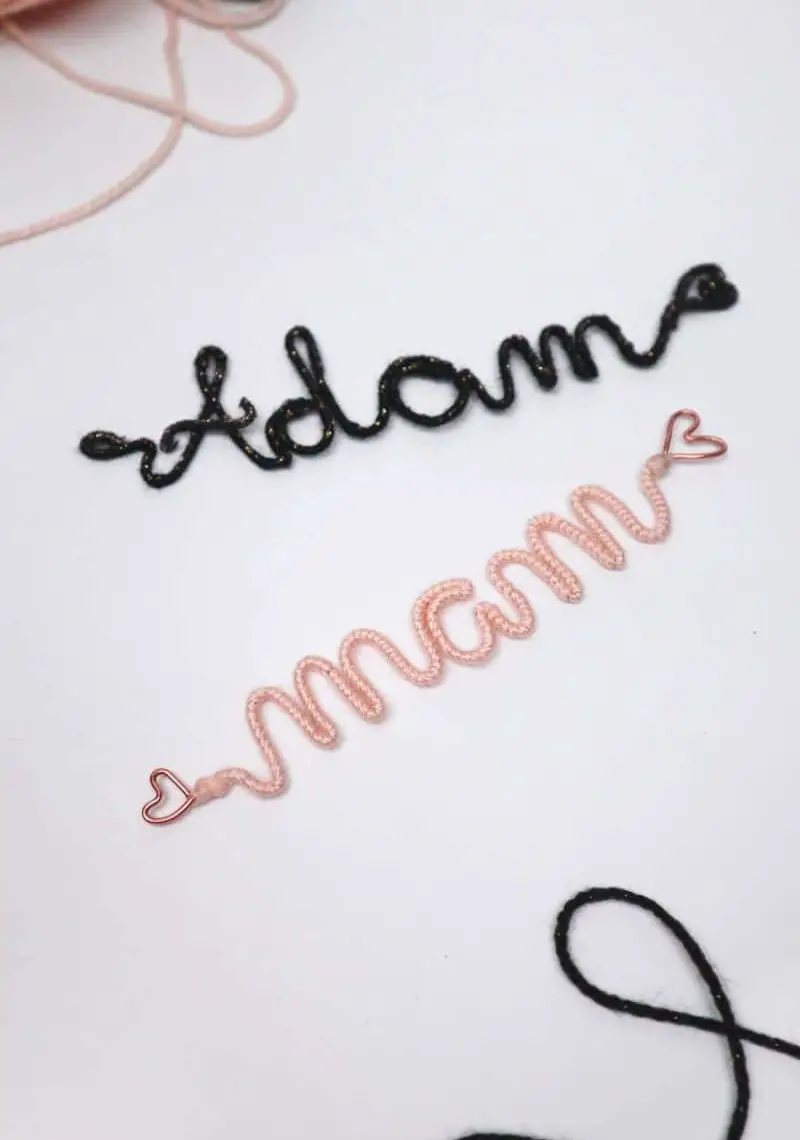
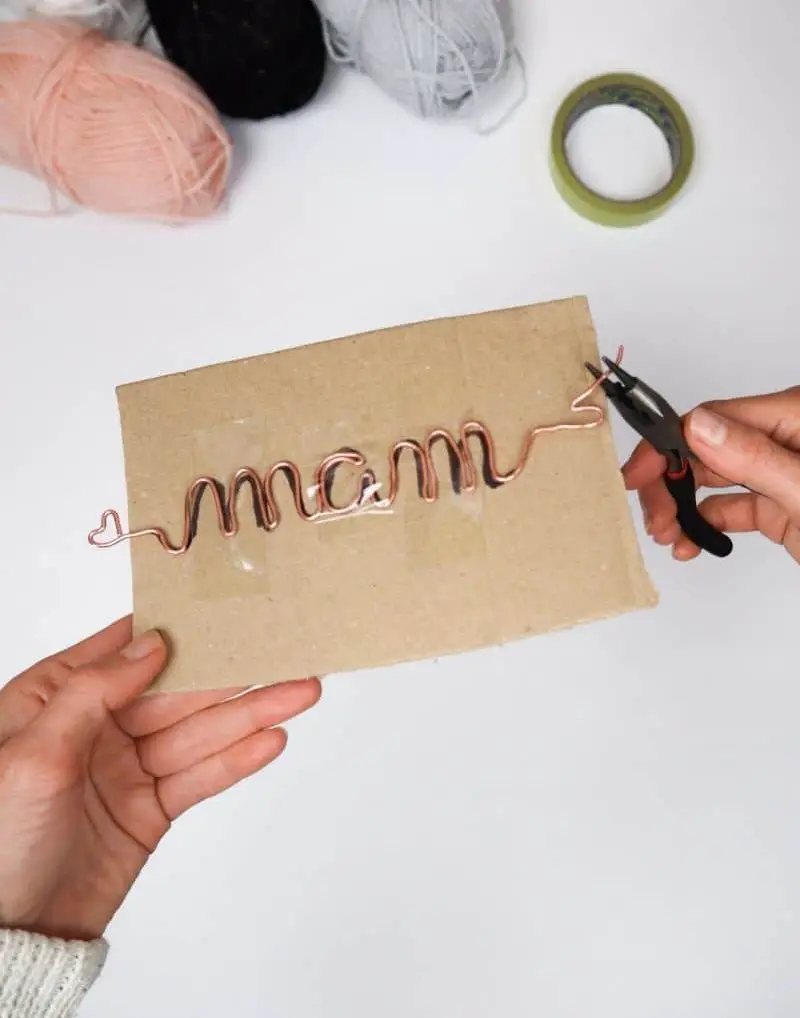
Shape the wire to match your design by bending it gradually. Patience is key at this stage, as rushing can result in misshapen forms or illegible text. Take your time to avoid these issues and ensure a smooth process. Once you’ve achieved the desired shape, it’s essential to secure the ends with small loops that will serve as hooks for attaching the ornament to its final resting place – in this case, a gift.
To add a finishing touch, I opted for twisting the wire ends into hearts, but a circular shape can be just as effective if that suits your style.
Step 5
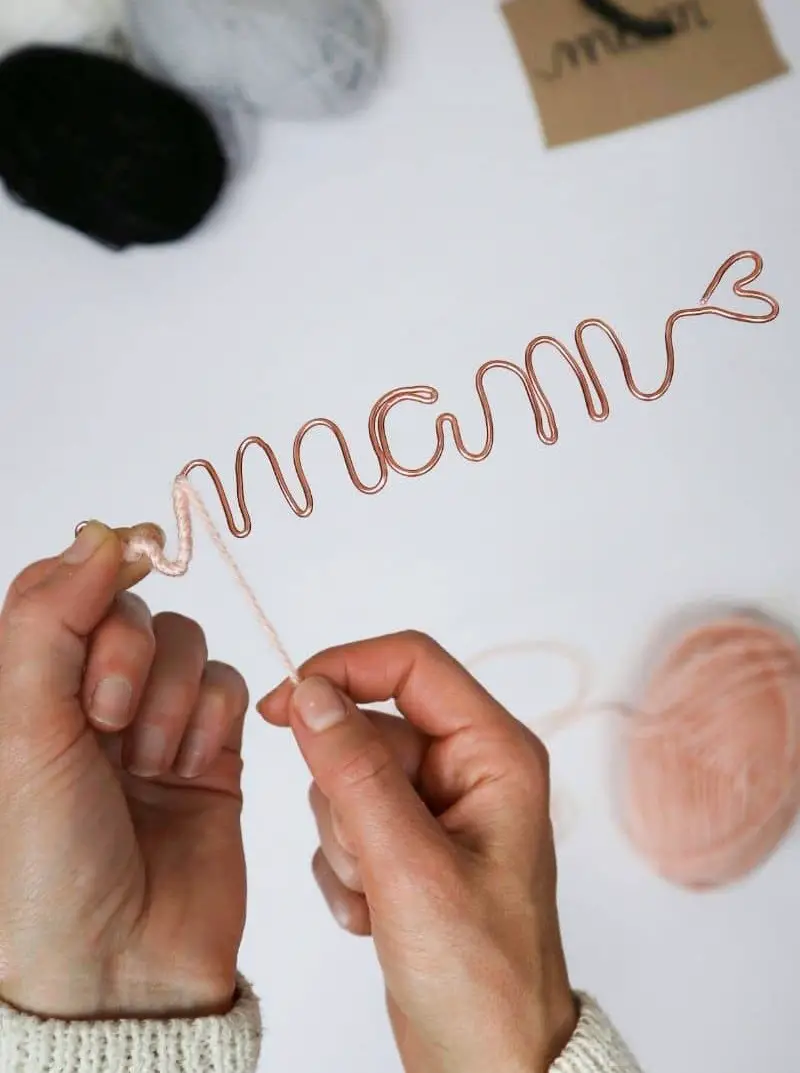
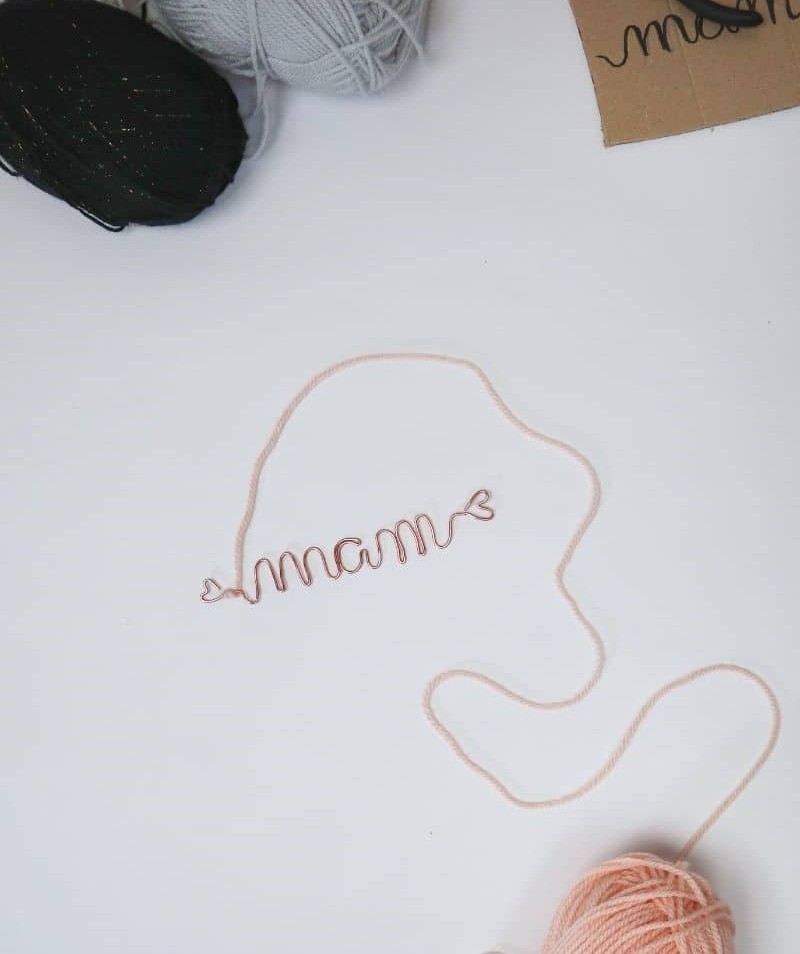
The next step is to prepare the wrapping material. Choose your preferred twine, yarn, or thread and attach it to one end of the metal piece, ensuring that a small loop remains exposed for easy manipulation.
Step 6
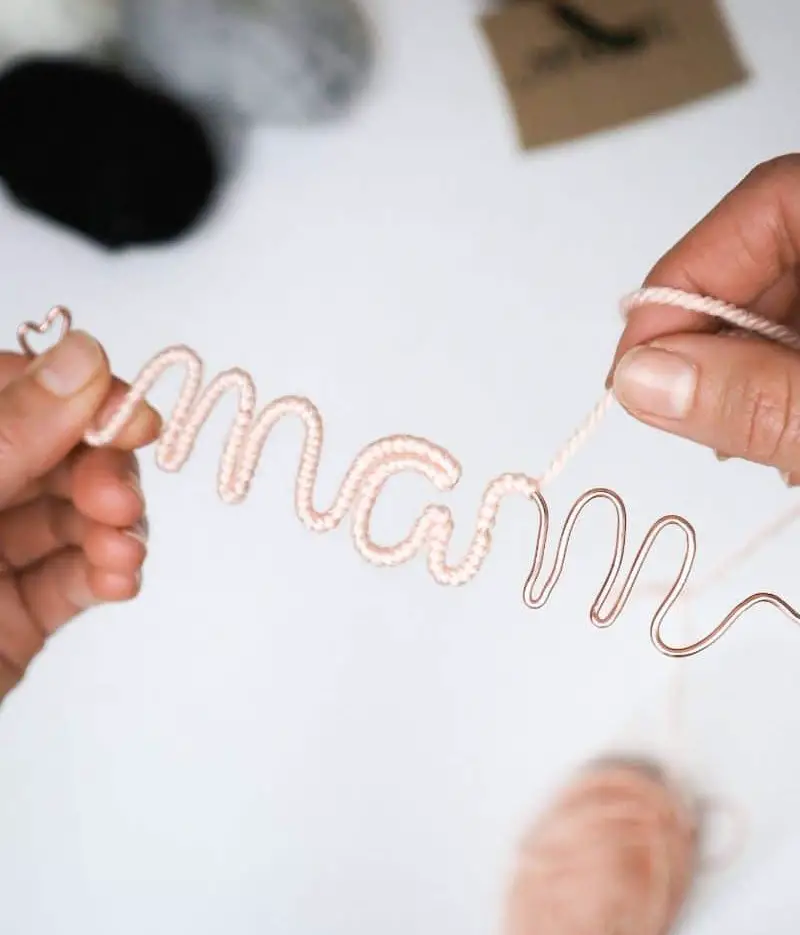
To achieve a secure hold, wind the yarn around the metal tightly, ensuring that the corners are pulled extra tight. This crucial step prevents the ornament from coming loose over time, allowing you to fully appreciate its unique charm. With patience and attention to detail, you can successfully bring your metal ornament to life.
Step 7
As you complete the final step, take a moment to secure the yarn’s tail with a dab of superglue. Apply a small amount to the end of the yarn and firmly press it onto the back of the ornament. This crucial step ensures the loose end is neatly tucked away, creating a polished and professional-looking finish.
Step 8
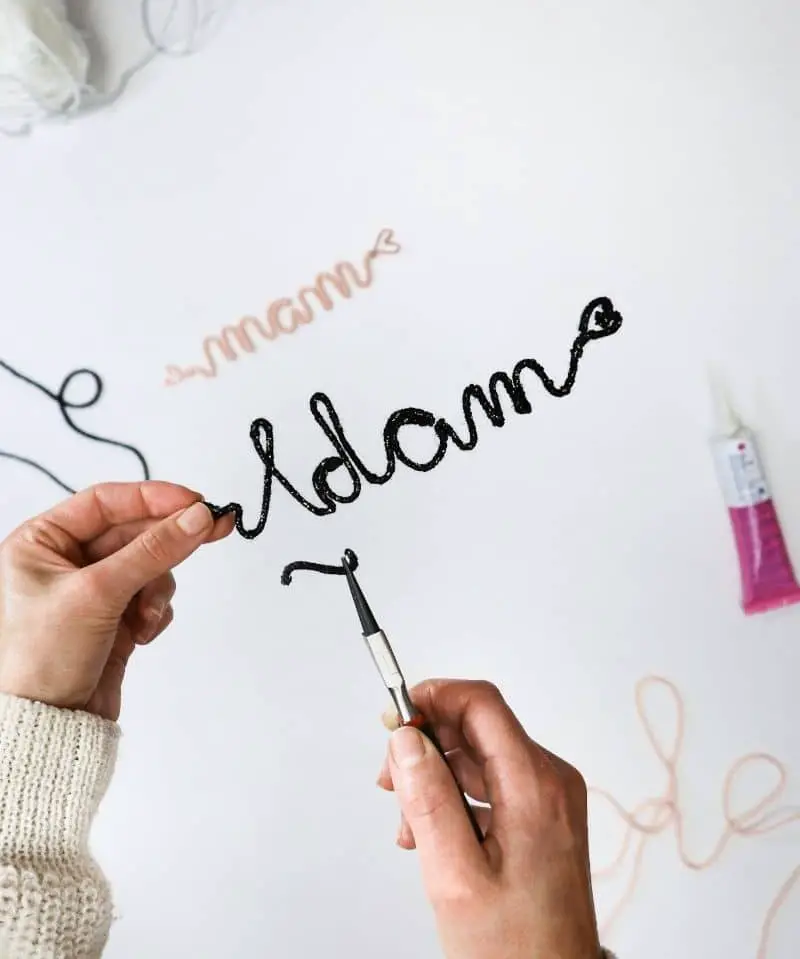
When crafting custom letters from wire, some characters may present a challenge due to their complex design. For instance, the letter ‘x’, capital ‘T’, or capital ‘A’ require separate components that can’t be formed directly from the wire. Fear not! This minor hurdle is easily overcome.
To tackle this issue, simply cut the missing shape from the wire and create it separately, wrapping it with your chosen textile material.
Once prepared, carefully apply super glue to secure the piece in place, ensuring a strong bond with the rest of the letter. You can observe this process by watching me assemble a large ‘A’ ornament.
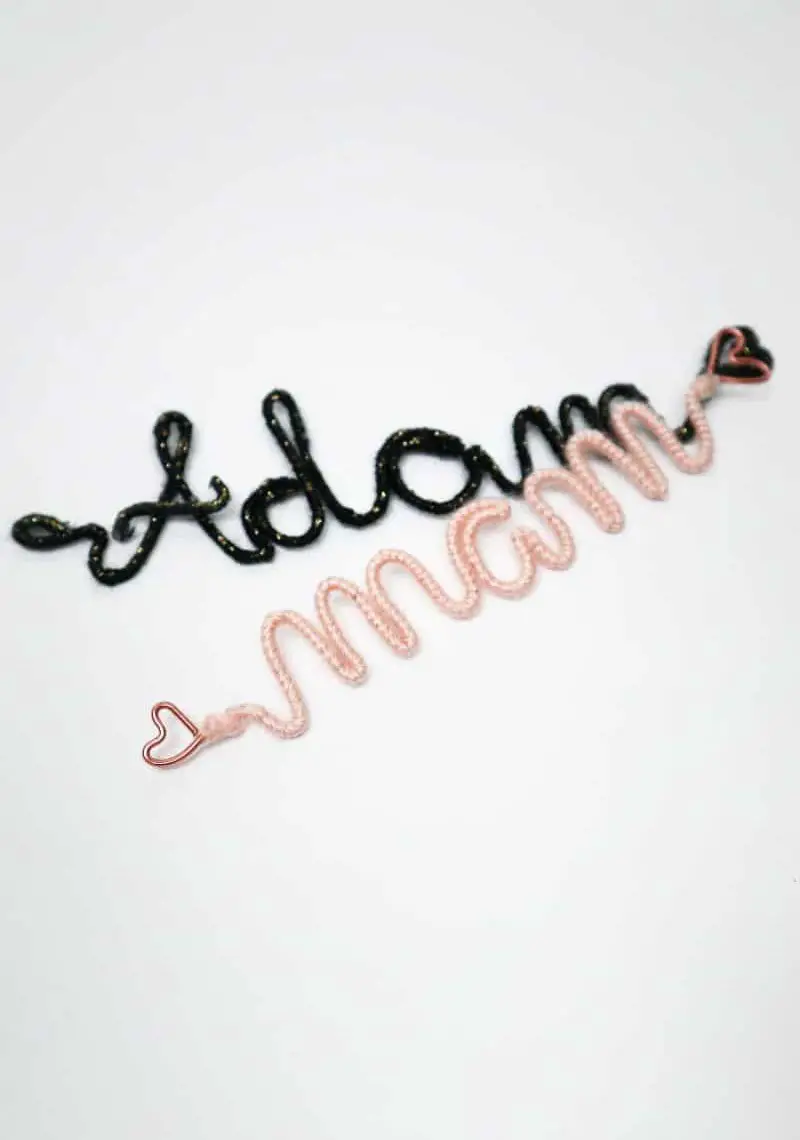
With these custom ornaments, you’ll be thrilled with the stunning result that perfectly captures your recipient’s name.
Where Can You Use These Ornaments?

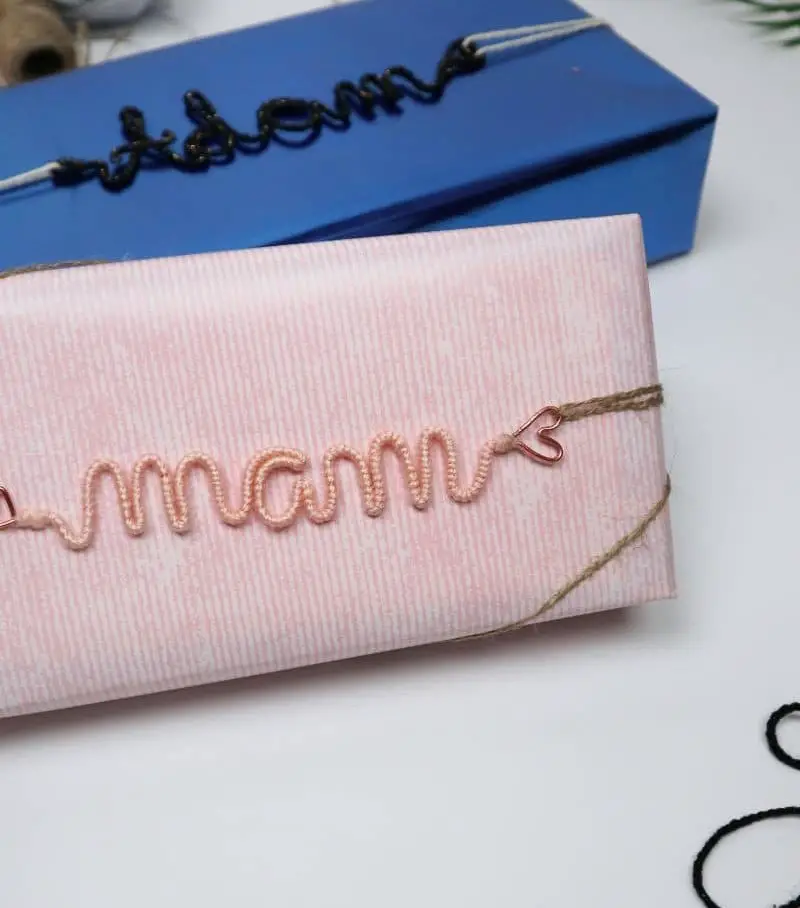
While gift-related uses have dominated my examples so far, the versatility of metal ornaments knows no bounds. With a little creativity, they can elevate everyday items like pantry labels or add a touch of whimsy to Christmas decorations. Consider creating larger versions to adorn your child’s bedroom door, journal, or even using them as unique necklaces. You could also utilize them as place cards for special occasions, allowing guests to take a memento home.
The only limitations lie in the boundaries of your imagination – if you can envision it, you can make it a reality. I’d love to hear about the innovative ways you plan to use this DIY project in the comments below!
How to Make Wire Ornaments
These versatile wire ornaments are a true crafting gem. Not only do they require minimal effort and no budget, but they also boast a million-dollar aesthetic appeal. Perfect for teenagers looking to dabble in DIY projects or as a thoughtful addition to gifts, these ornaments offer endless possibilities. With just 20 minutes of active crafting time and an additional 5 minutes of preparation, you’ll be delighted with the end result.
Equipment
In a world where crafting and DIY projects are increasingly popular, having the right tools at your disposal can make all the difference. Among the many essential items to have in your toolkit, there are a few that stand out for their versatility and usefulness. Take, for instance, pliers – those clever little devices that allow you to grip and bend objects with ease. Or consider Scotch tape, which may seem simple, but is actually an incredibly powerful adhesive solution.
And then, of course, there’s cardboard – humble as it may be, this material has countless uses in crafting and DIY projects. Finally, no toolkit would be complete without a reliable source of adhesive power, such as super glue.
Materials
Instructions
Start by collecting your supplies while keeping your desired color scheme in mind. For instance, light-colored yarns pair beautifully with copper wire. Write the name you’ve chosen on a piece of cardboard in cursive, ensuring that your pen doesn’t leave the page to allow for smooth wire tracing (if necessary, I’ll share a technique later). Next, cut a length of wire slightly longer than expected and secure it to the left side of the cardboard, leaving excess wire hanging.
Twist and shape the wire to follow the name’s curves, then use your pliers to close the ends by creating tie-on loops. Attach your chosen textile (I used yarn) to one side of the metal name, wrapping the yarn tightly around the name while being cautious at corners. Secure the yarn’s end with glue. If a letter requires an additional piece, such as a capital A or T, simply create this part separately and attach it to the finished product using glue. And that’s it!
These ornaments are versatile, so feel free to get creative and use them for anything you can think of.