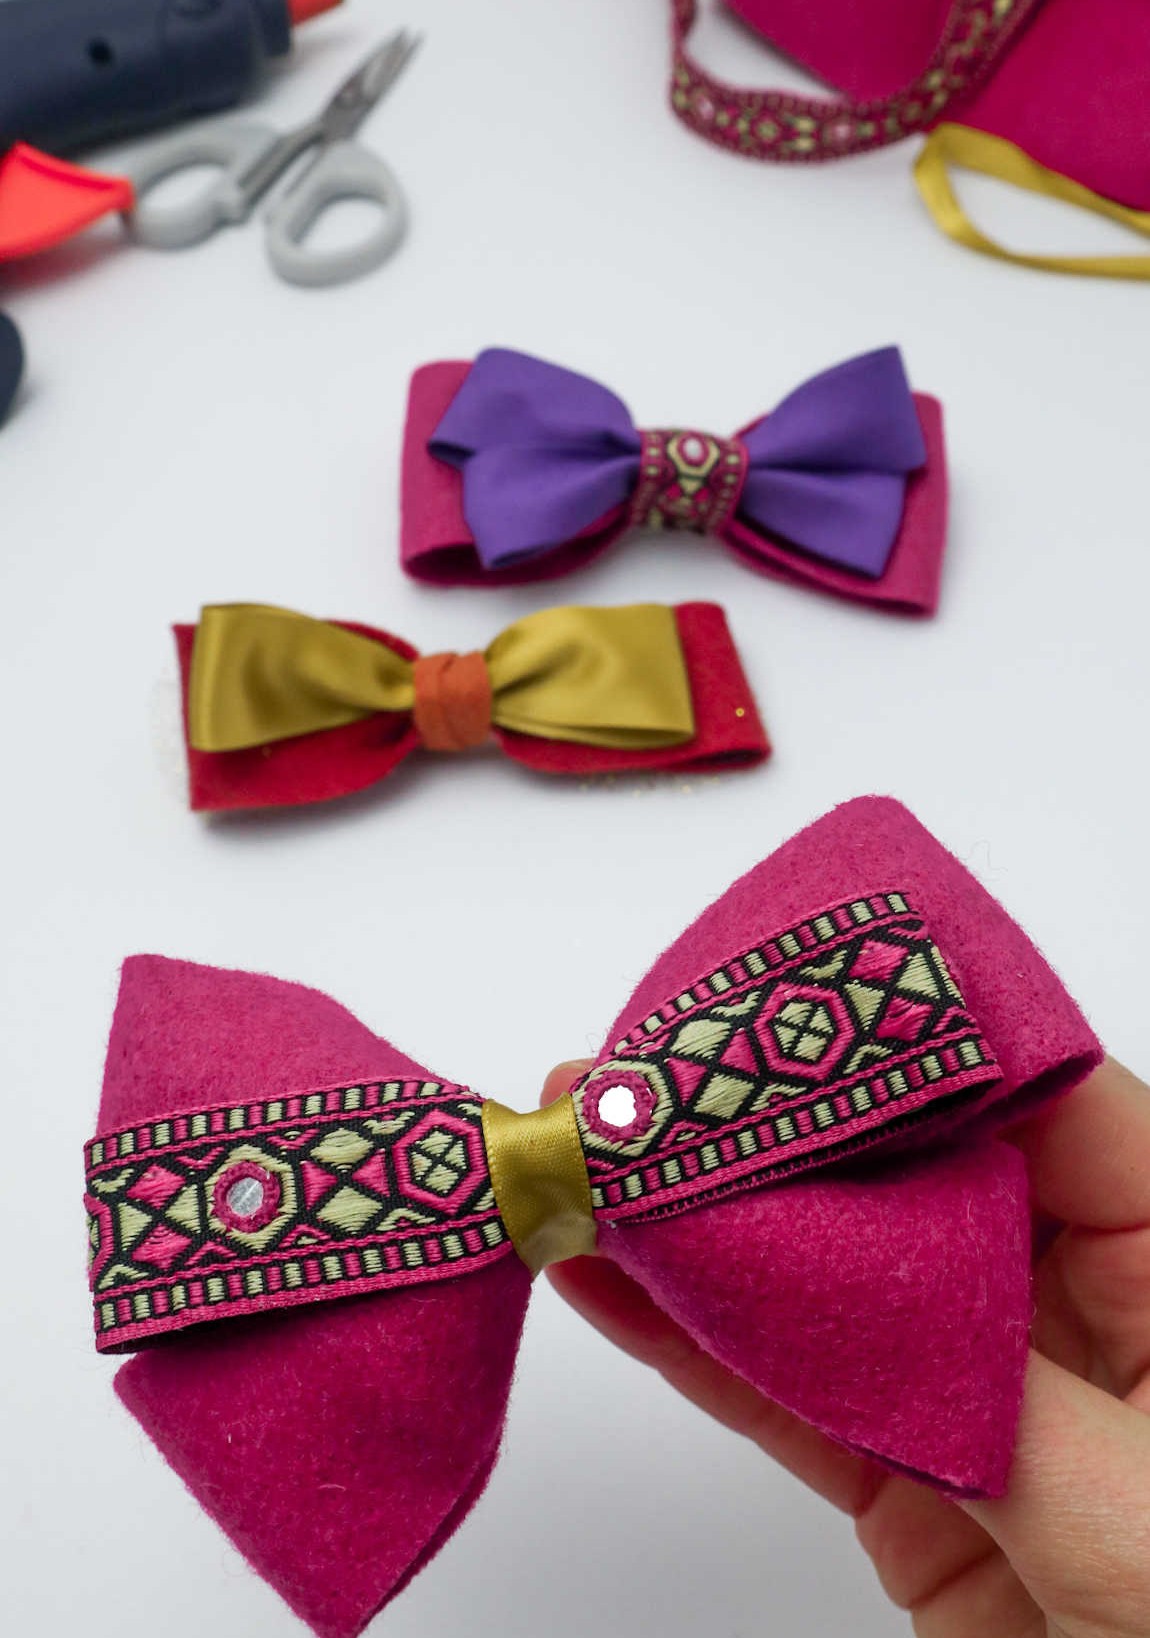
Imagine completing your look with a perfectly crafted DIY accessory – a hair bow that adds a touch of elegance to any outfit. With just a few simple steps, you can create your own stunning hair bows at home, perfect for teens and adults alike.
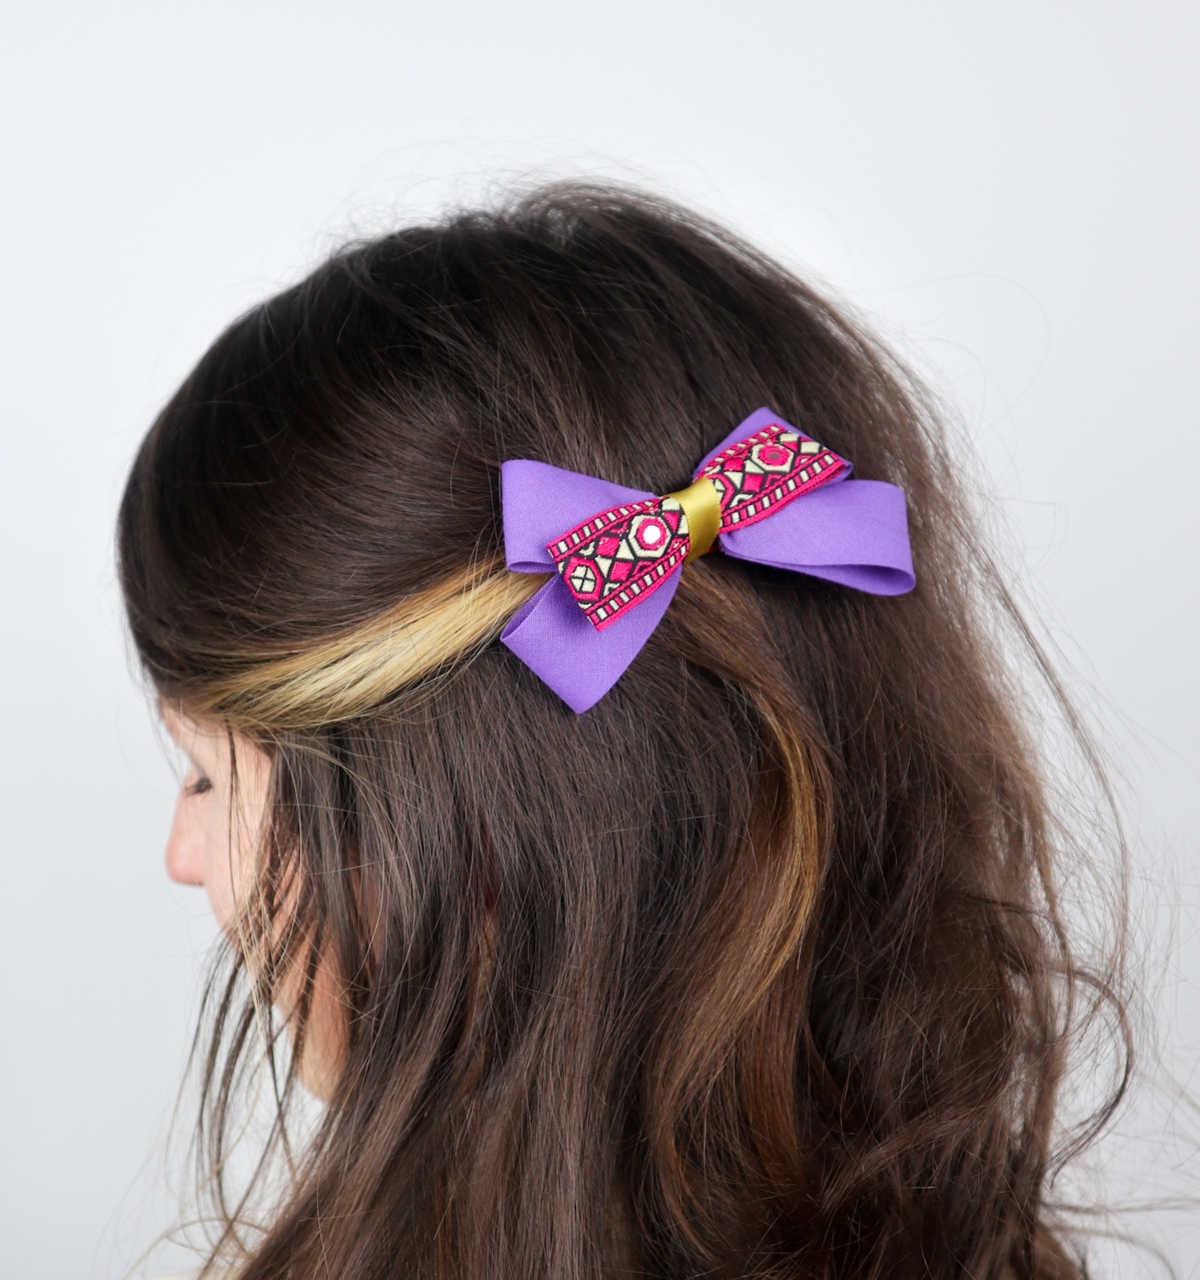
As you get ready, you’ve got your favorite outfit on, the shoes and accessories in place, and your makeup looking flawless. But there’s one final detail to take it to the next level: a beautiful hair bow to keep your locks in check.
The idea of having a cute hair bow for every single outfit can be overwhelming, especially when searching for the perfect match. The solution is surprisingly simple – make your own hair bows at home! By following this step-by-step guide, you’ll be whipping up a dozen bows in no time, giving you endless options to elevate your style.
What You’ll Need for Hair Bows
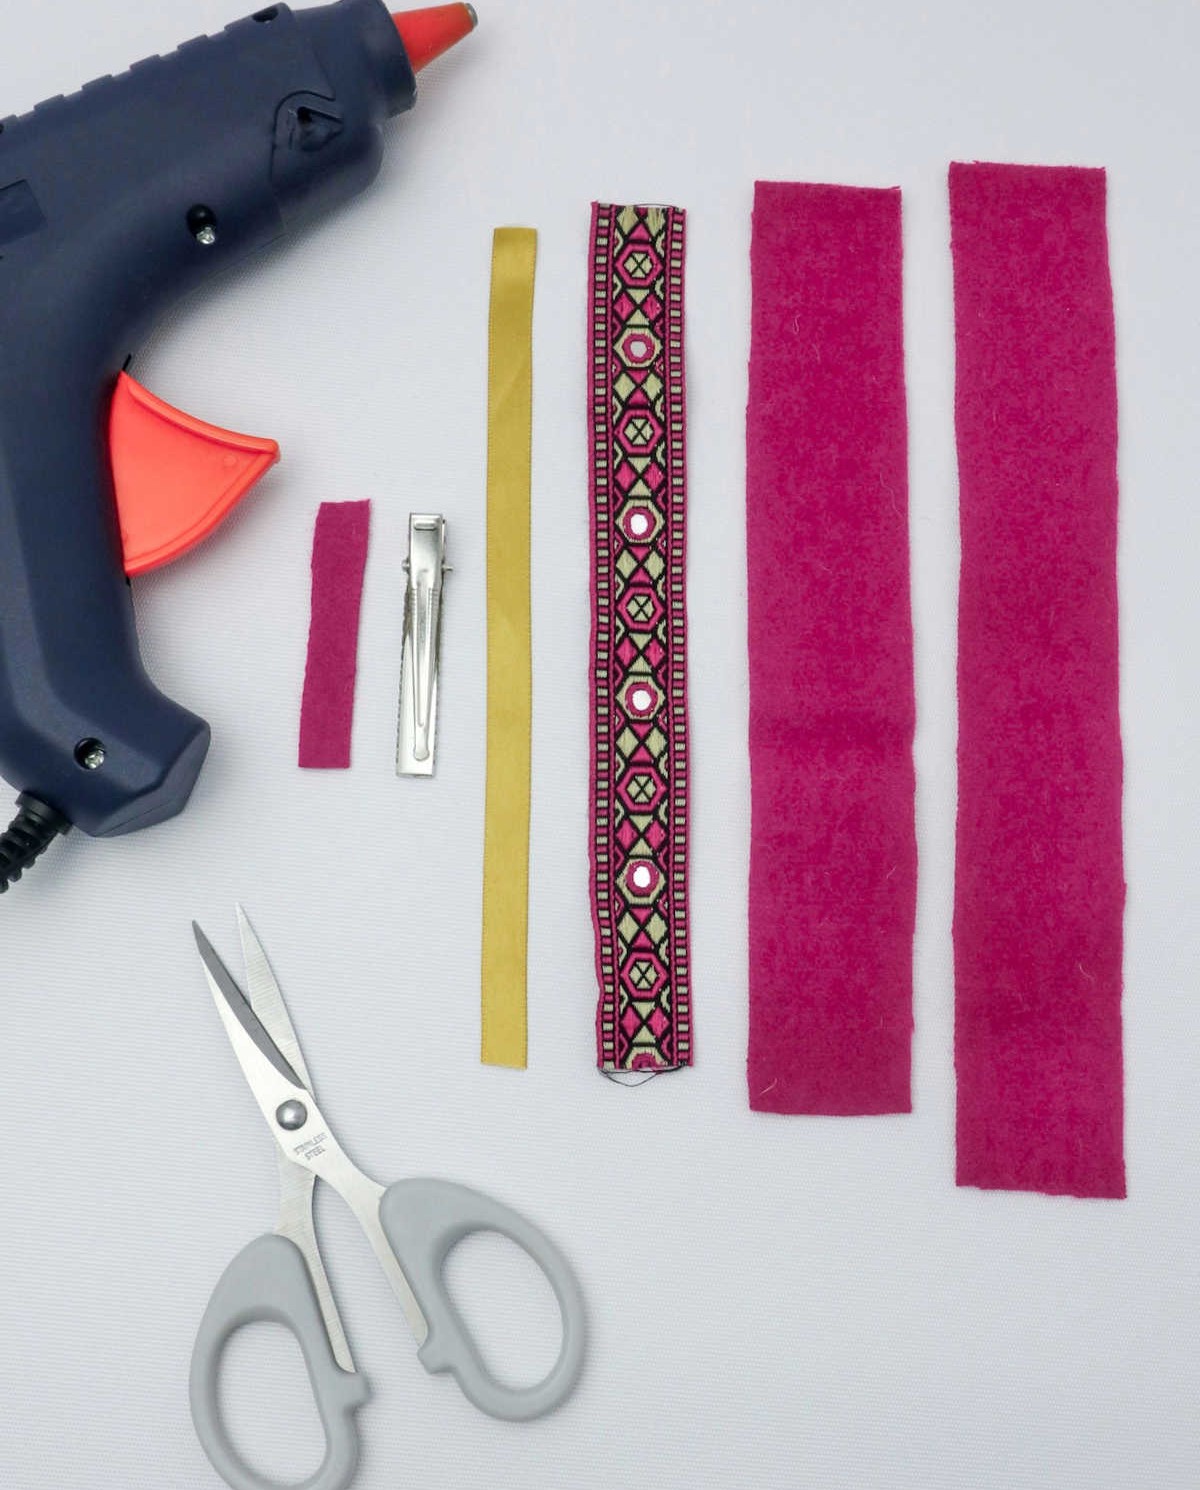
To get started with this DIY hair bow project, gather the following essential materials: two identical felt stripes measuring 8.2 inches by 1.6 inches in width, which can be replaced with a textile or ribbon alternative if preferred. Additionally, you’ll need a wider ribbon that’s approximately 7 inches long, as well as a narrower ribbon for further embellishments.
The project also calls for a crocodile hair clip to secure the bow, a small piece of felt for shaping and adhering the design, hot glue for bonding, and scissors to cut the various components to size.
How to Make Hair Bows
When it comes to creating durable and long-lasting hair bows, the type of material used is crucial. While you may have scraps lying around, using high-quality materials will yield a more impressive result. In fact, you can repurpose your fabric scraps for a multitude of creative projects. With over 47 DIY scrap fabric ideas at your fingertips, there’s no excuse not to give them a go. But let’s get back to the task at hand – crafting those stunning hair bows.
By focusing on the right materials and techniques, you’ll be able to create pieces that will impress for a long time.
Step 1
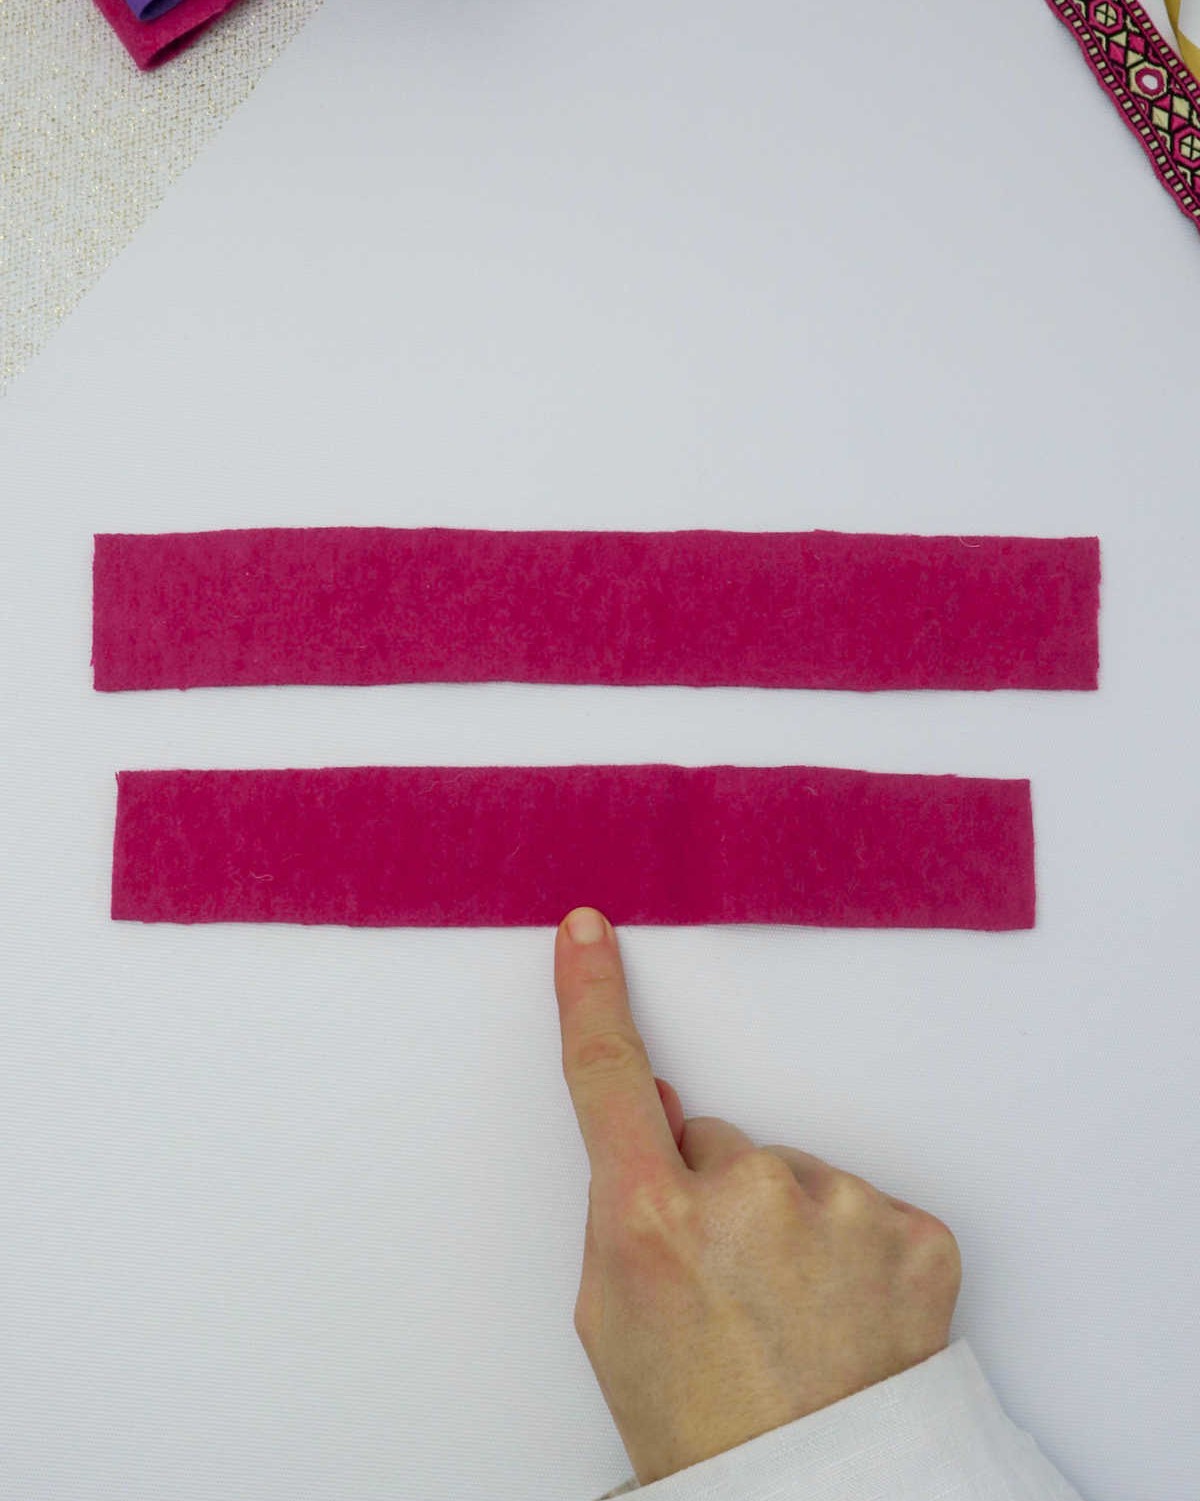
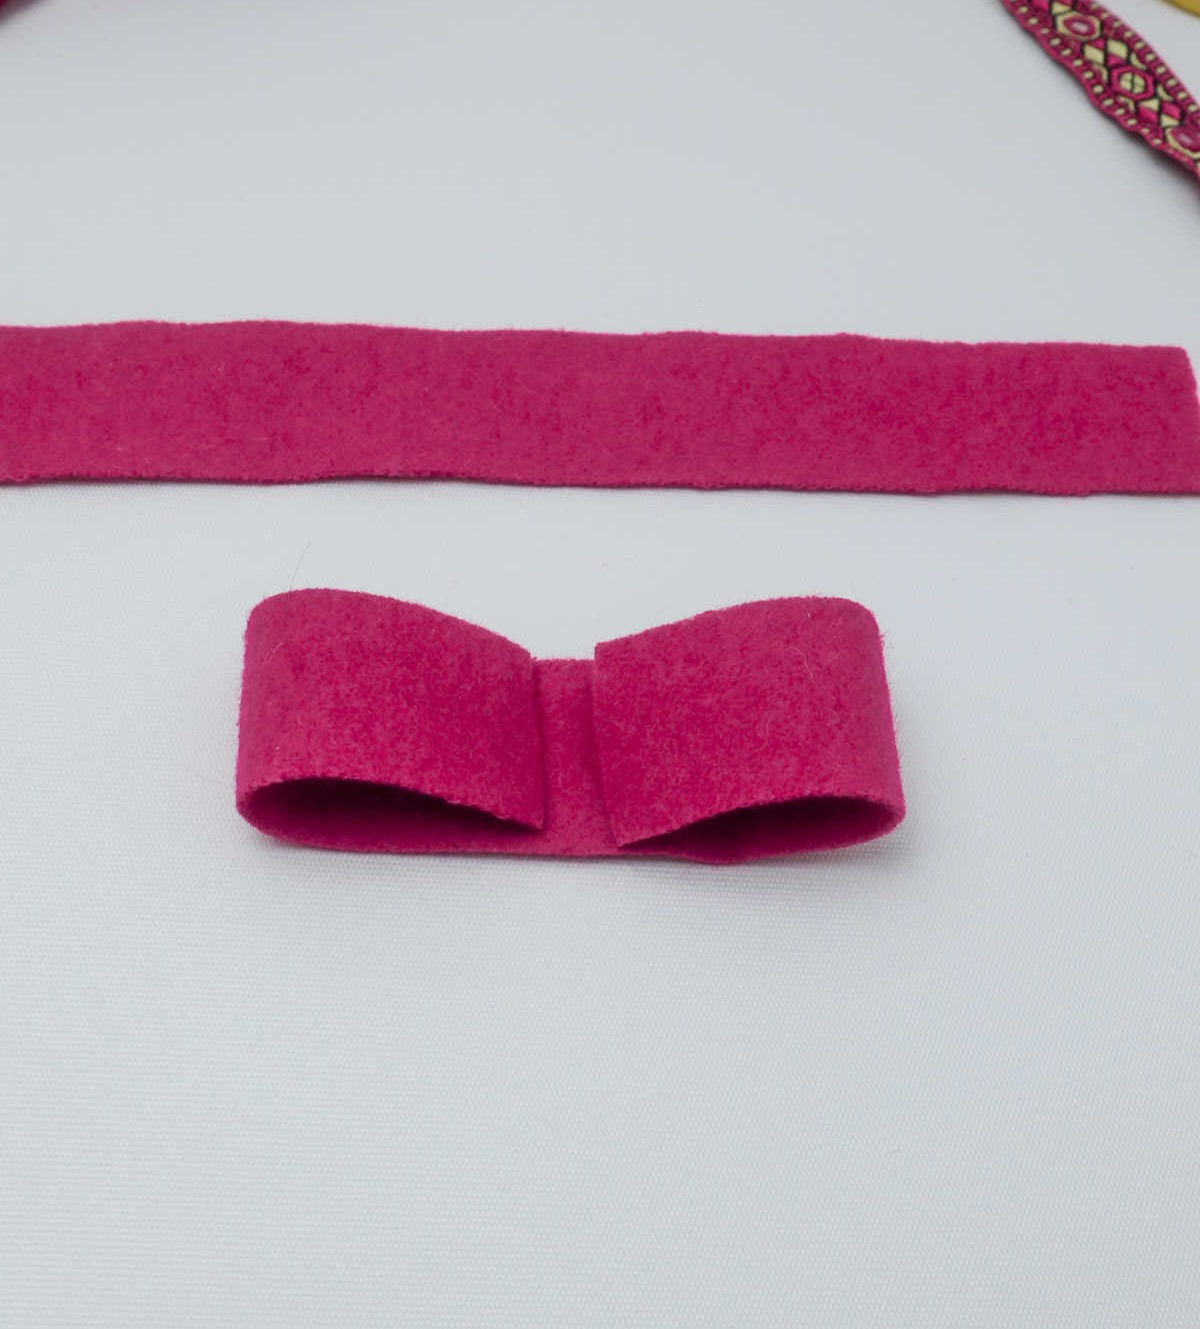
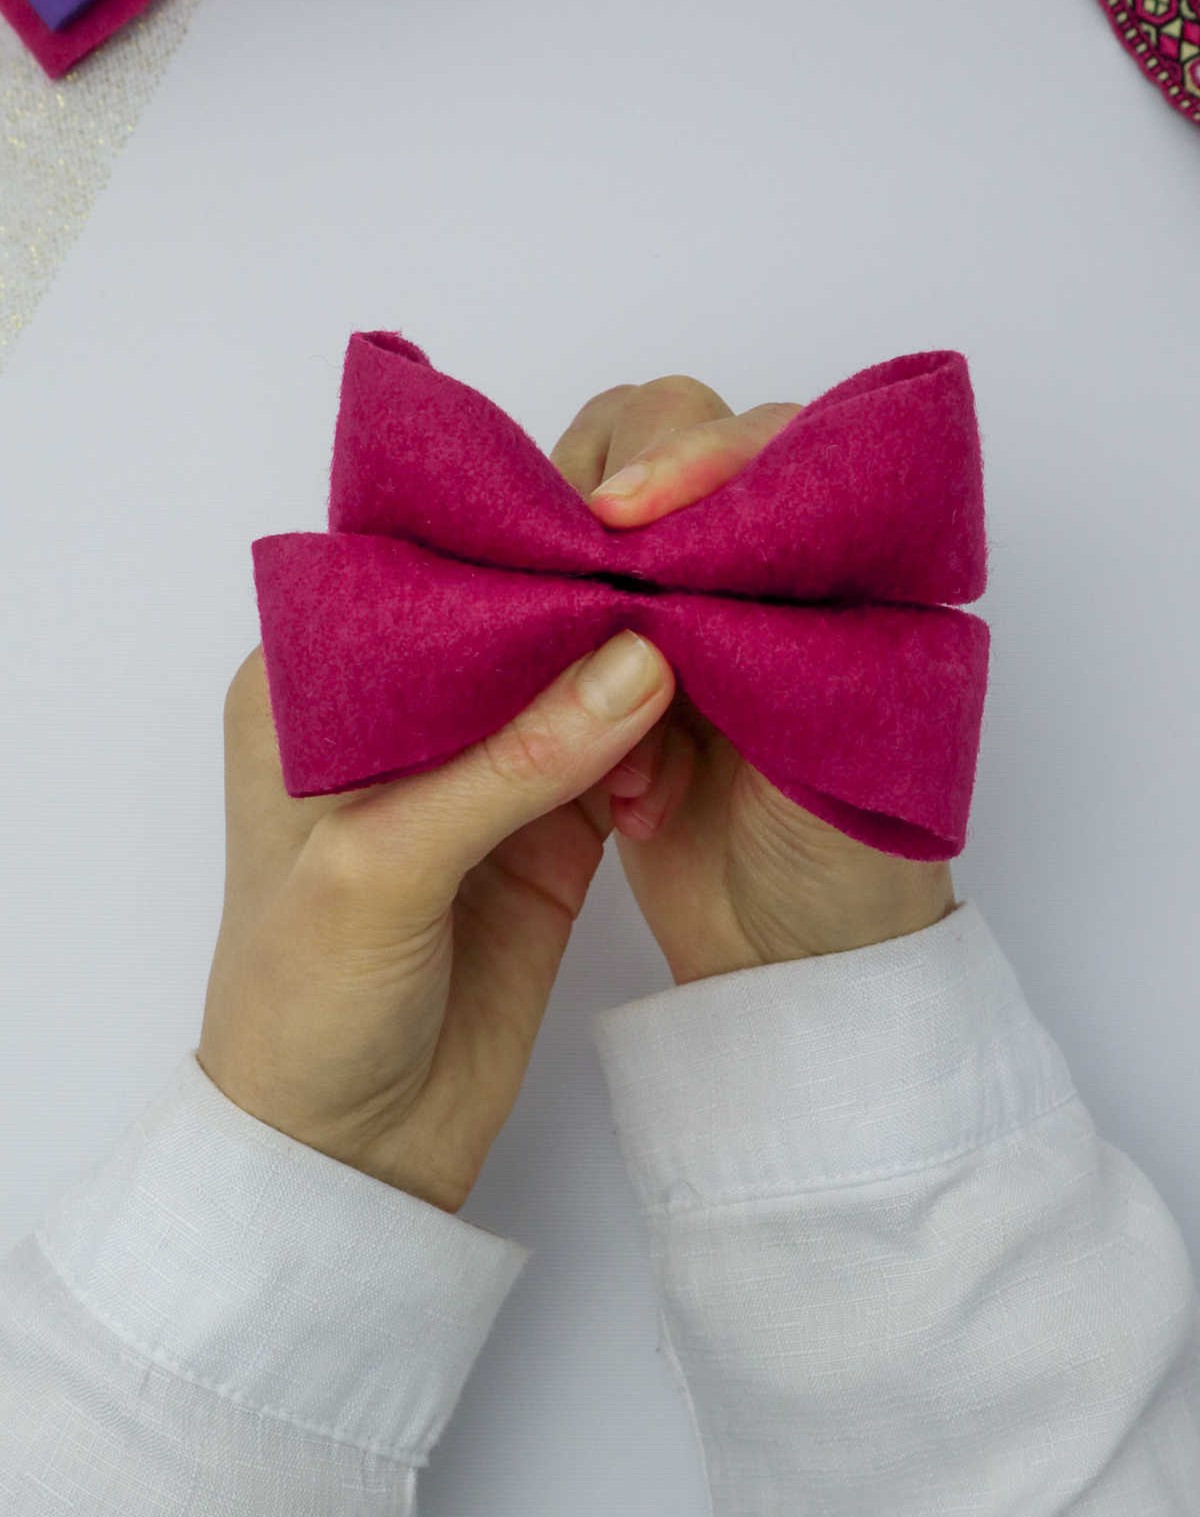
To begin with, place your two strips of felt scraps side by side on a stable surface. This initial step sets the foundation for the rest of the process. Next, grasp both ends of the fabric pieces simultaneously and gently draw them towards each other, allowing the fibers to naturally align and start forming a bond.
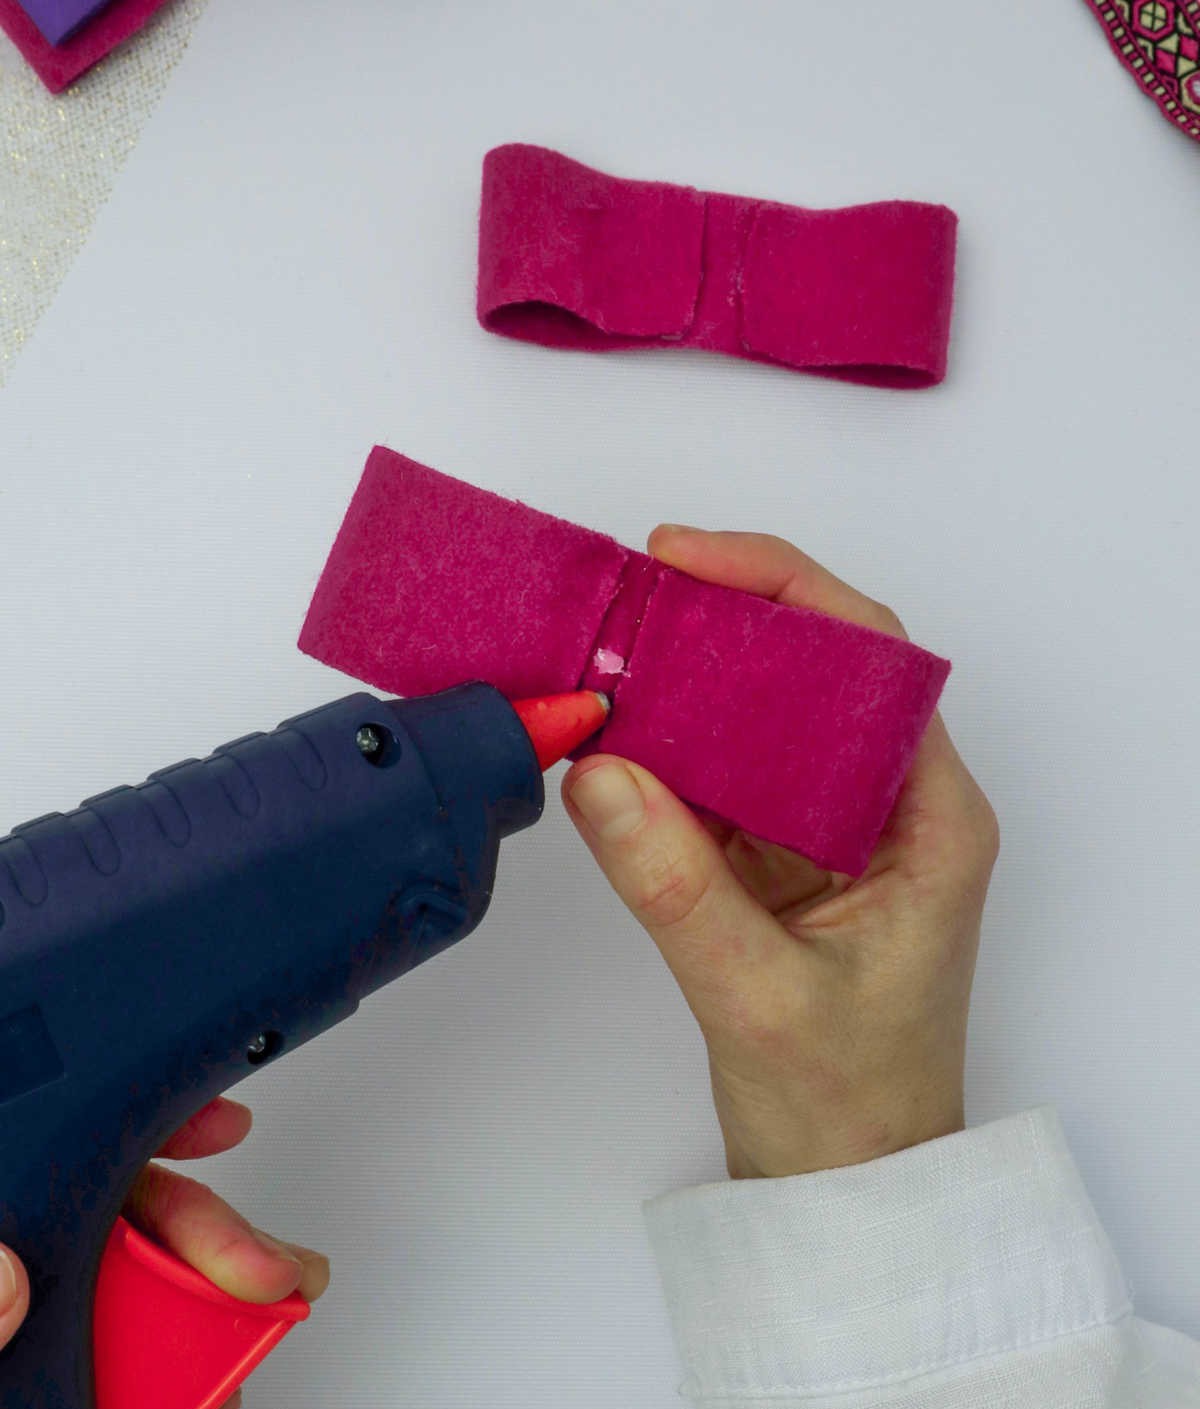
Step 2
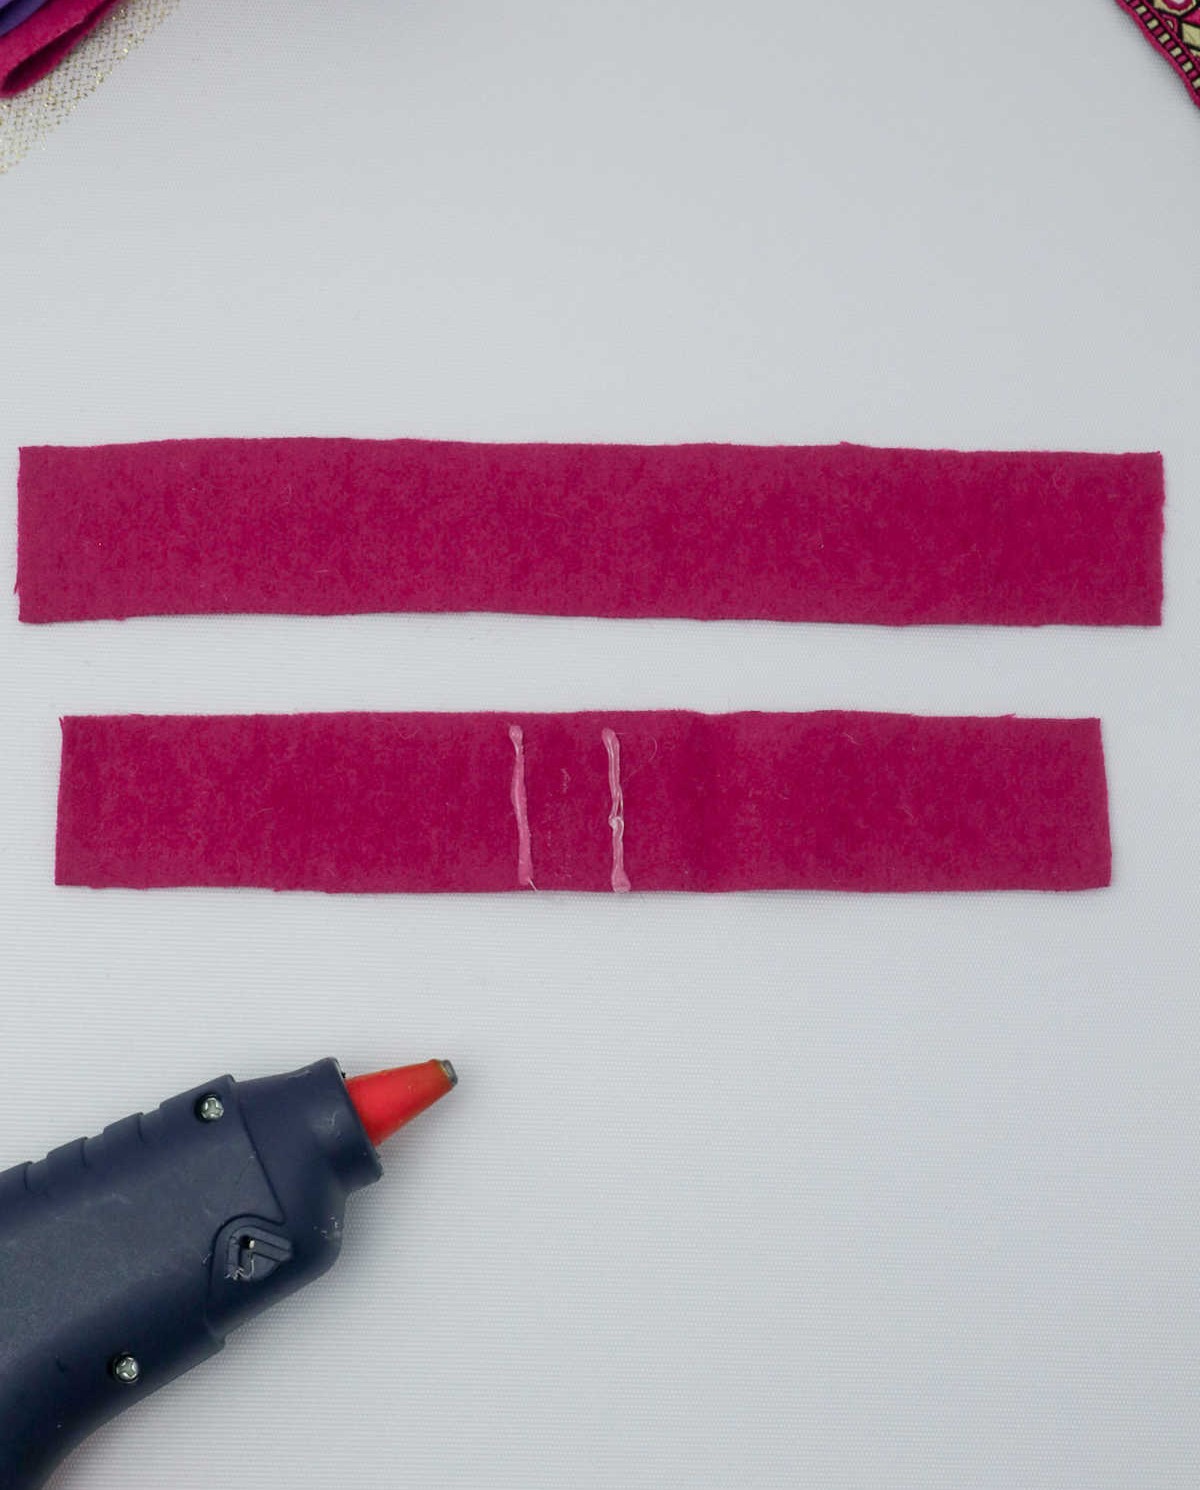
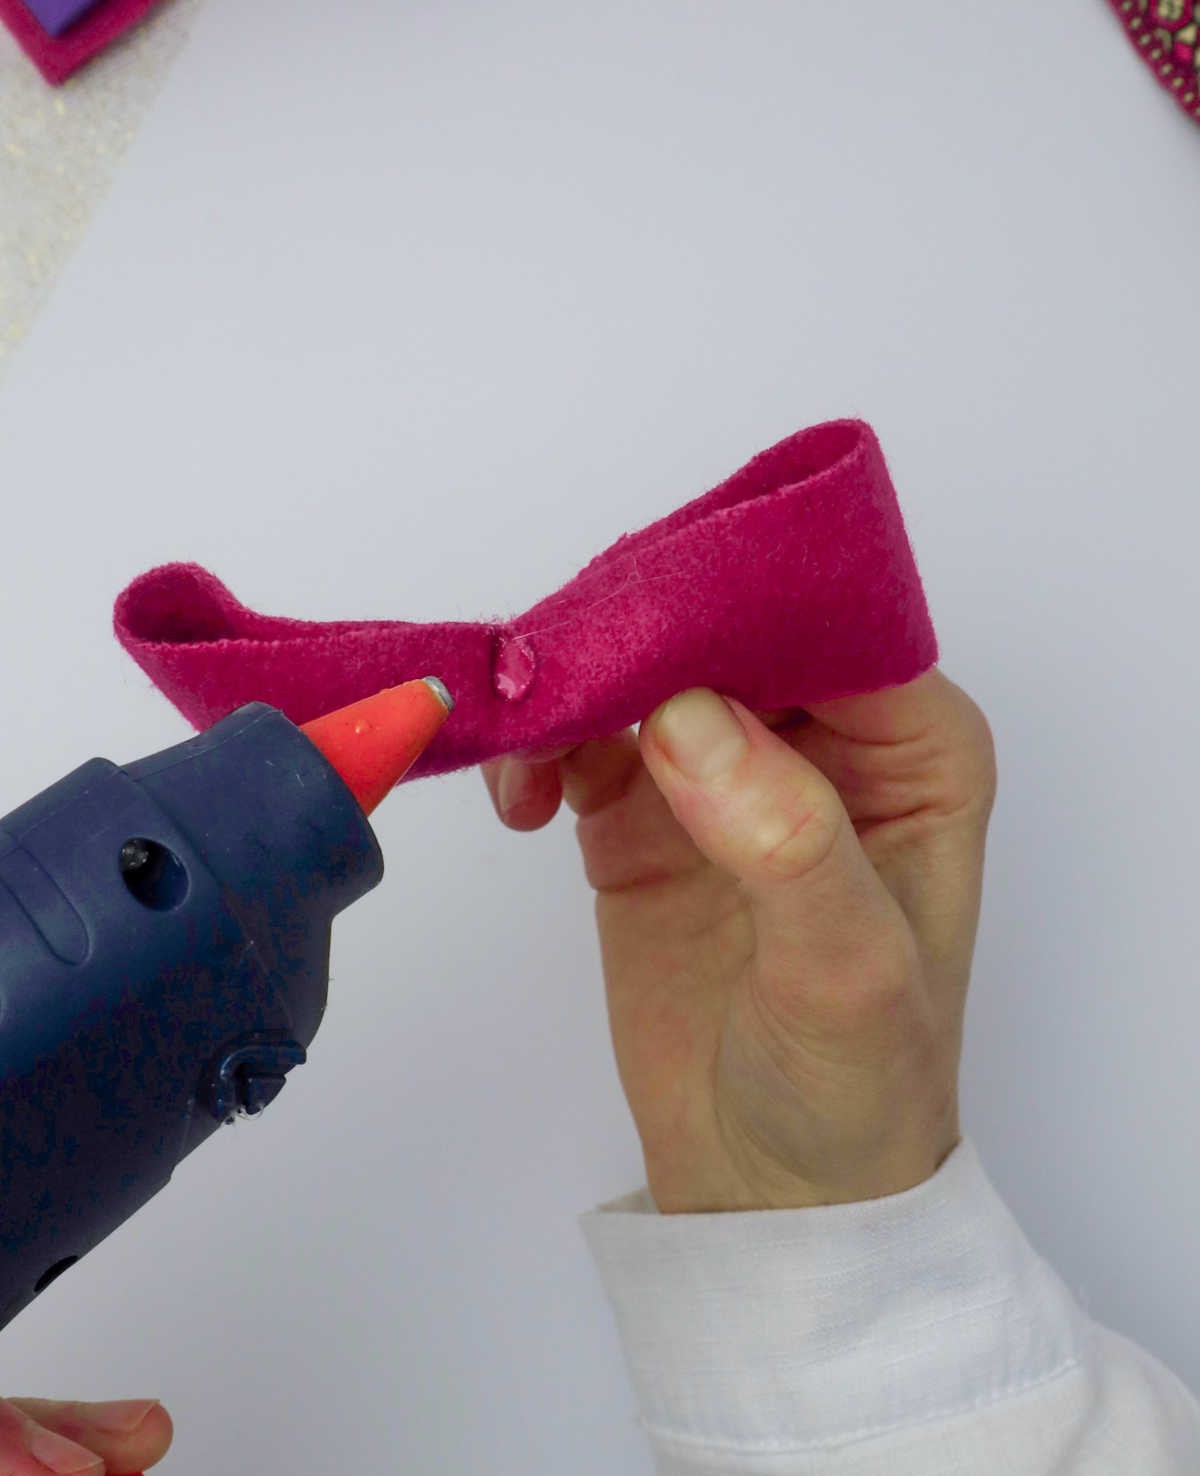
To effectively secure the loose ends, begin by applying a thin layer of adhesive to the affected zone. Then, gently but firmly press the ends into their correct positions. It’s essential to exercise caution here, as excessive pressure can inadvertently distort the curved shape of the bow. Be mindful of this and work slowly to ensure a precise fit.
Step 3
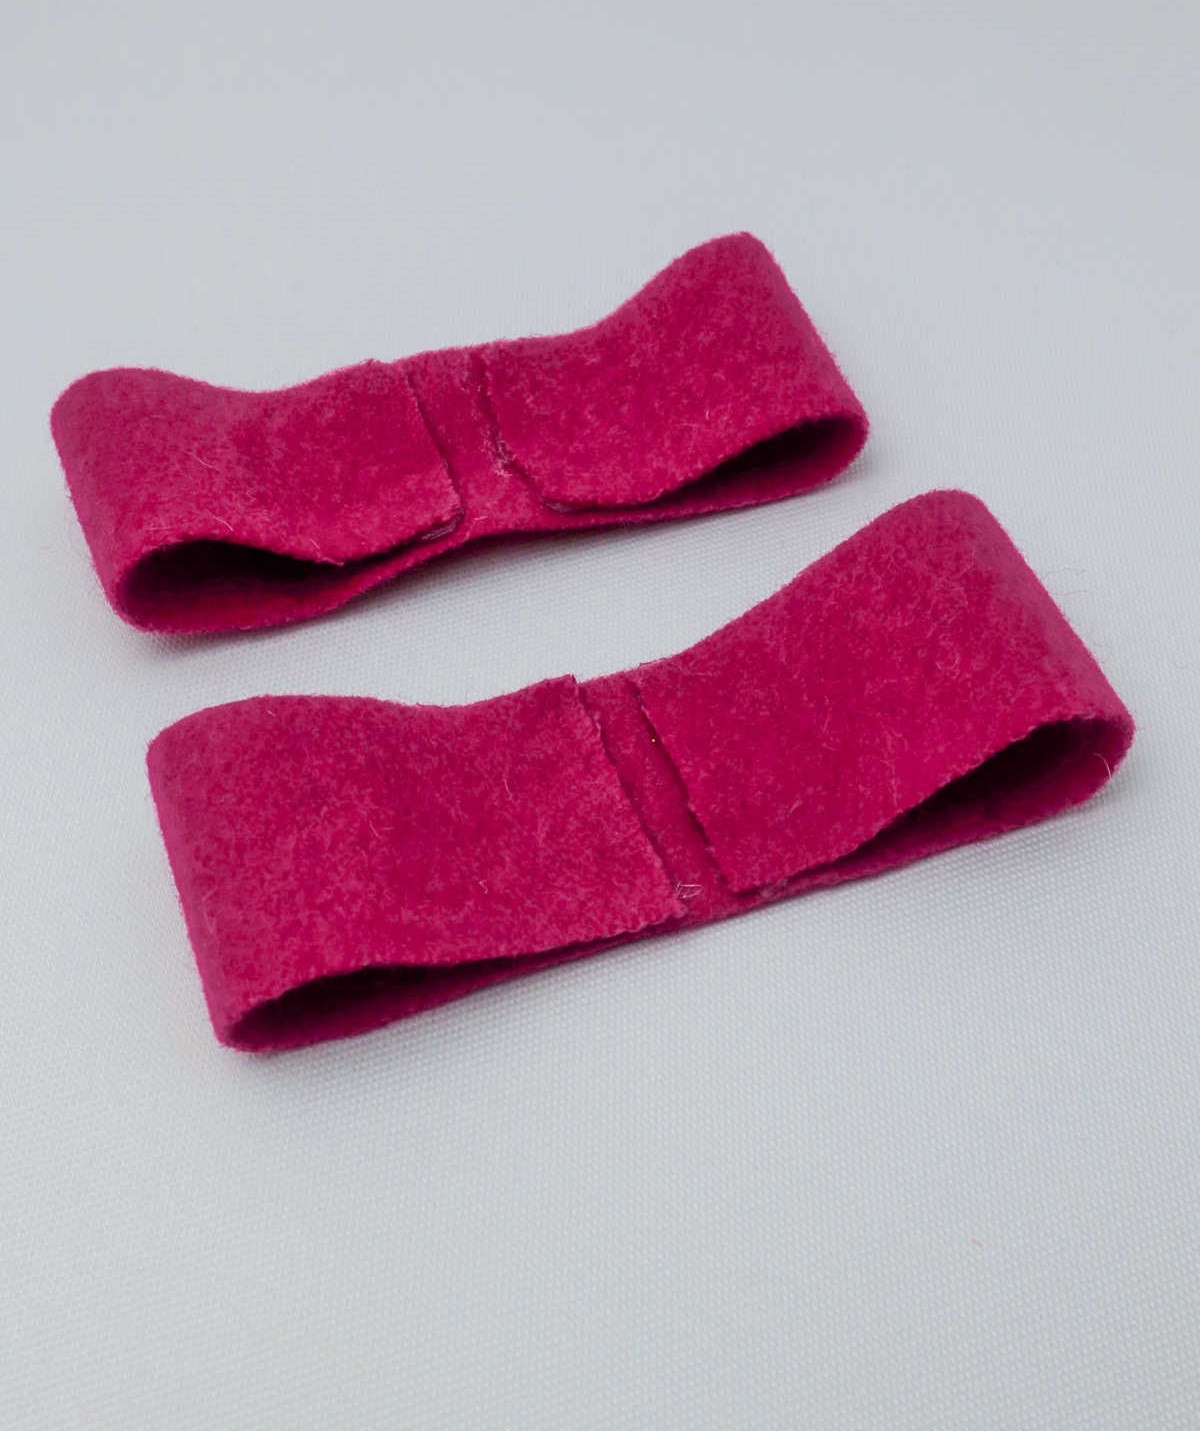
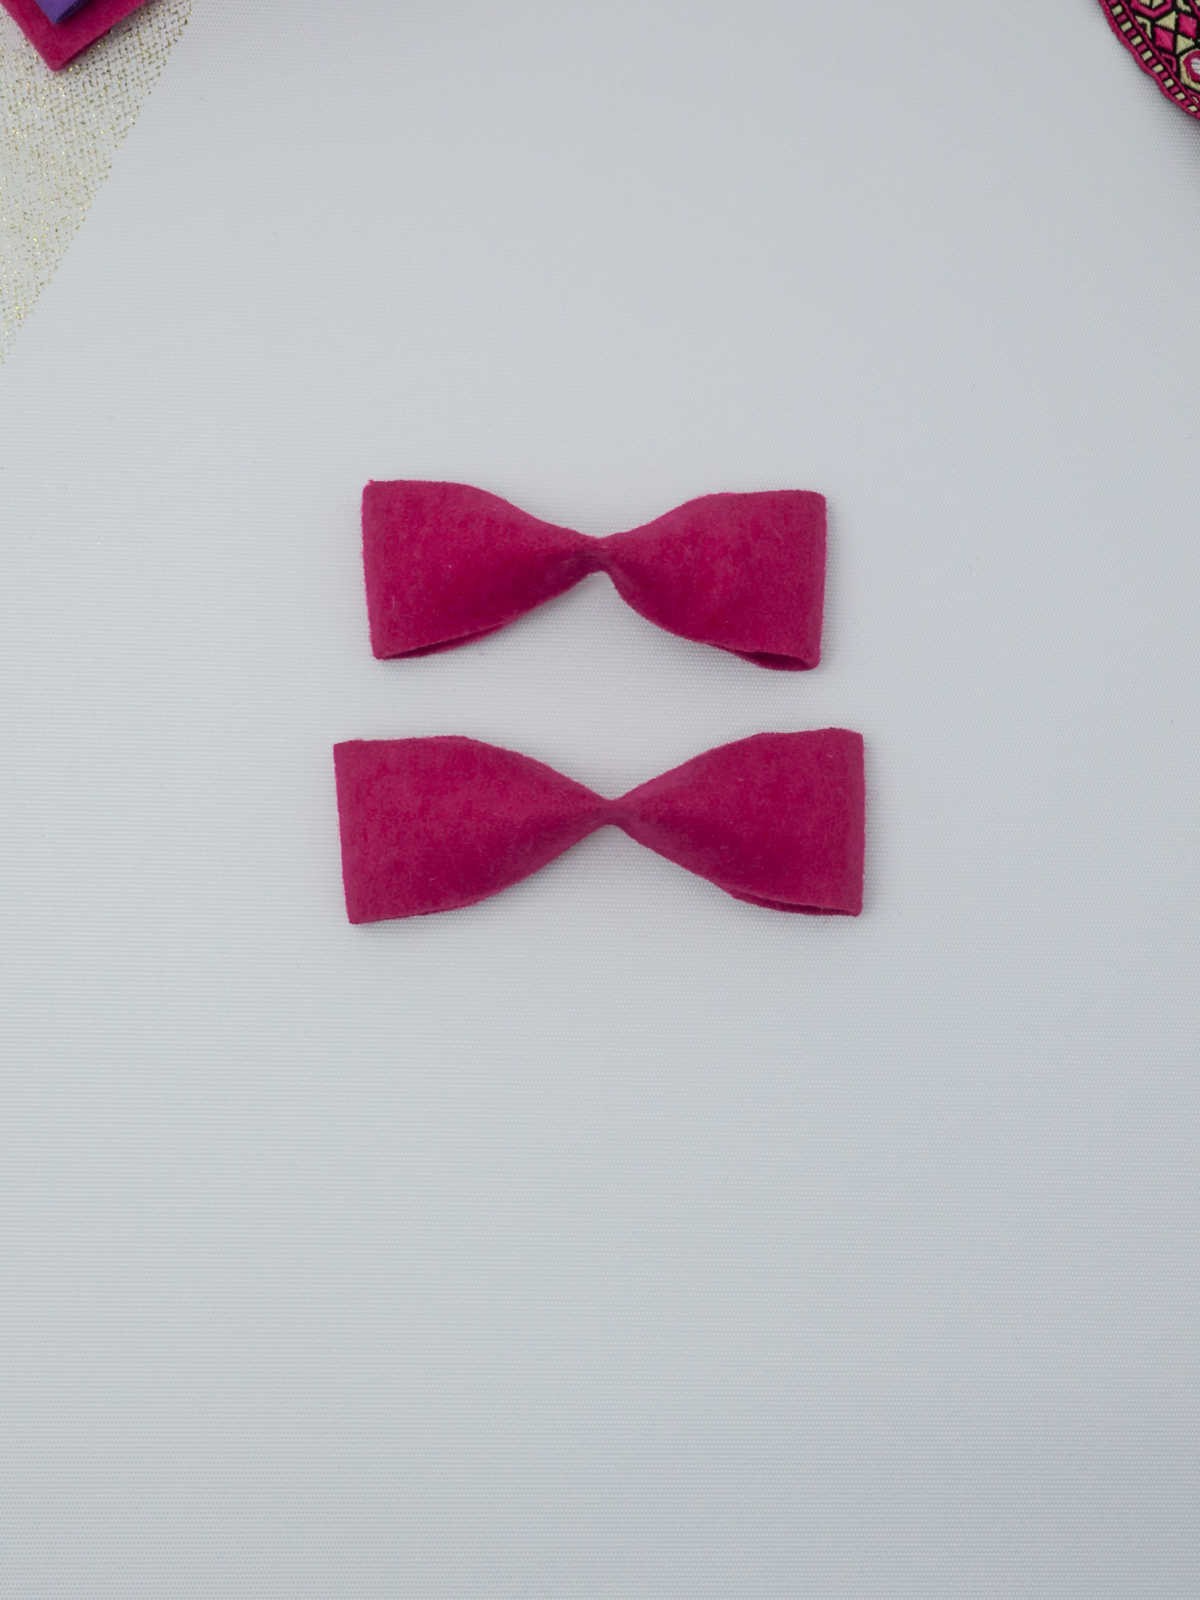
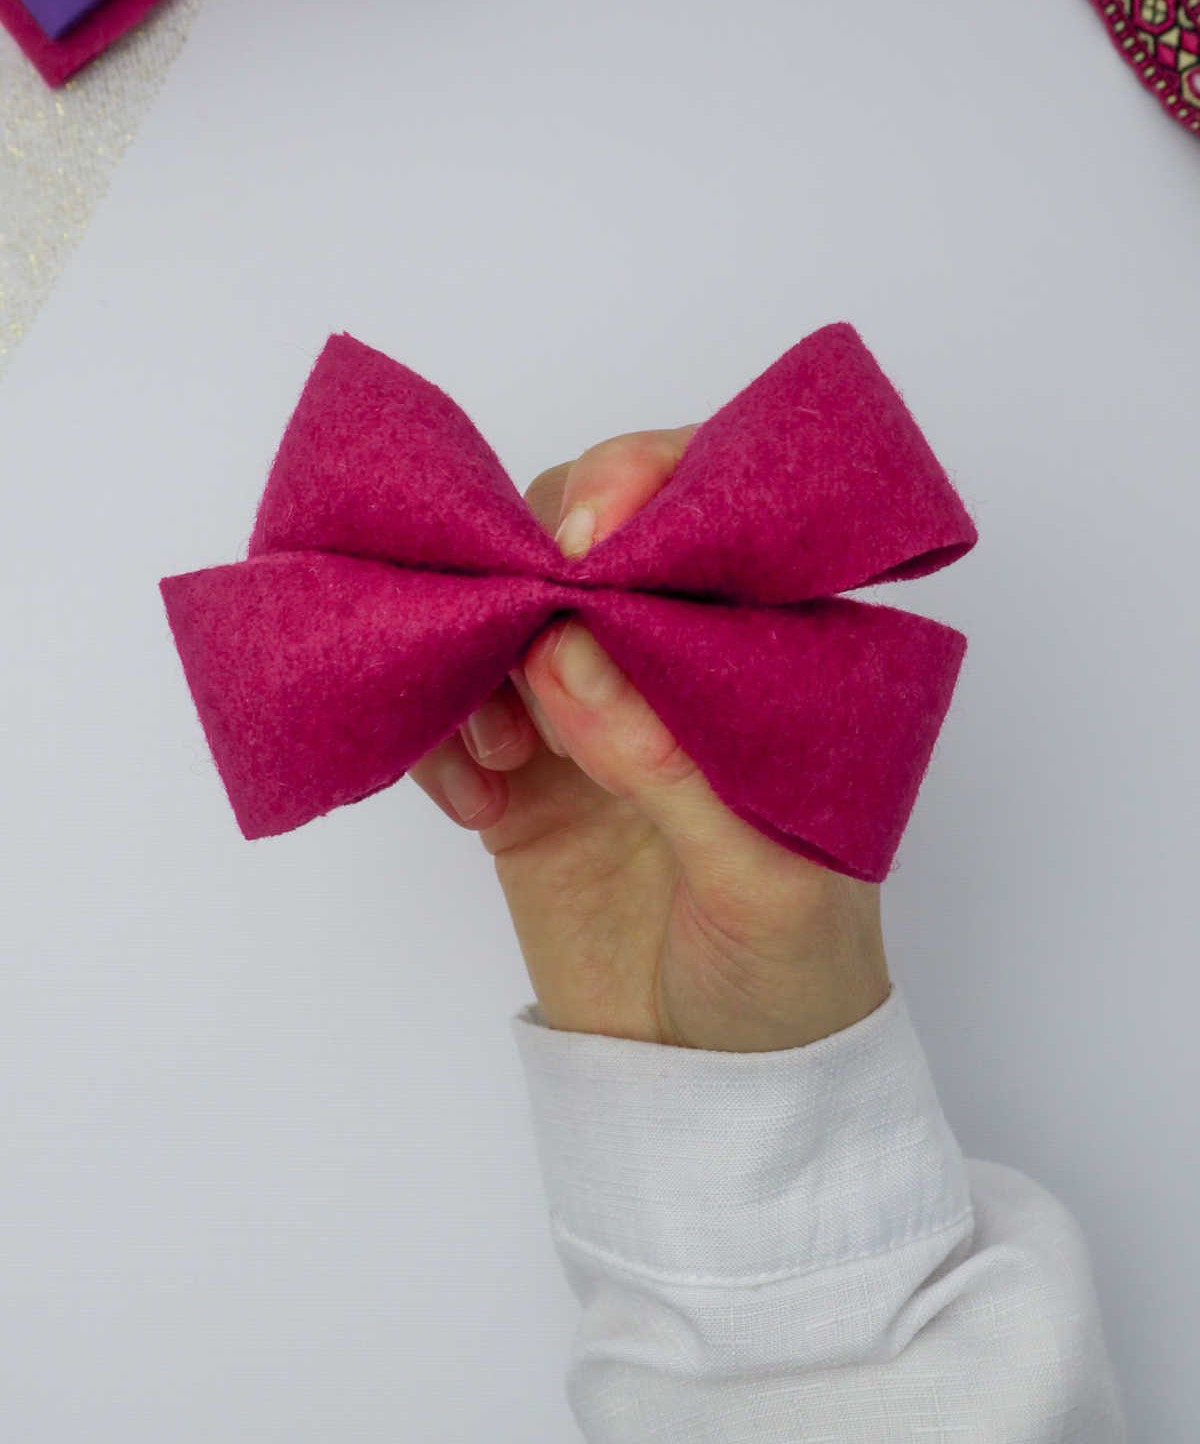
As you complete the second strip, carefully inspect the resulting bows. You should notice a beautifully curved arch forming where the fold was made earlier. This subtle detail will actually enhance the overall look and functionality of your hair accessory, providing an extra boost of lift that will keep your style securely in place.
Step 4
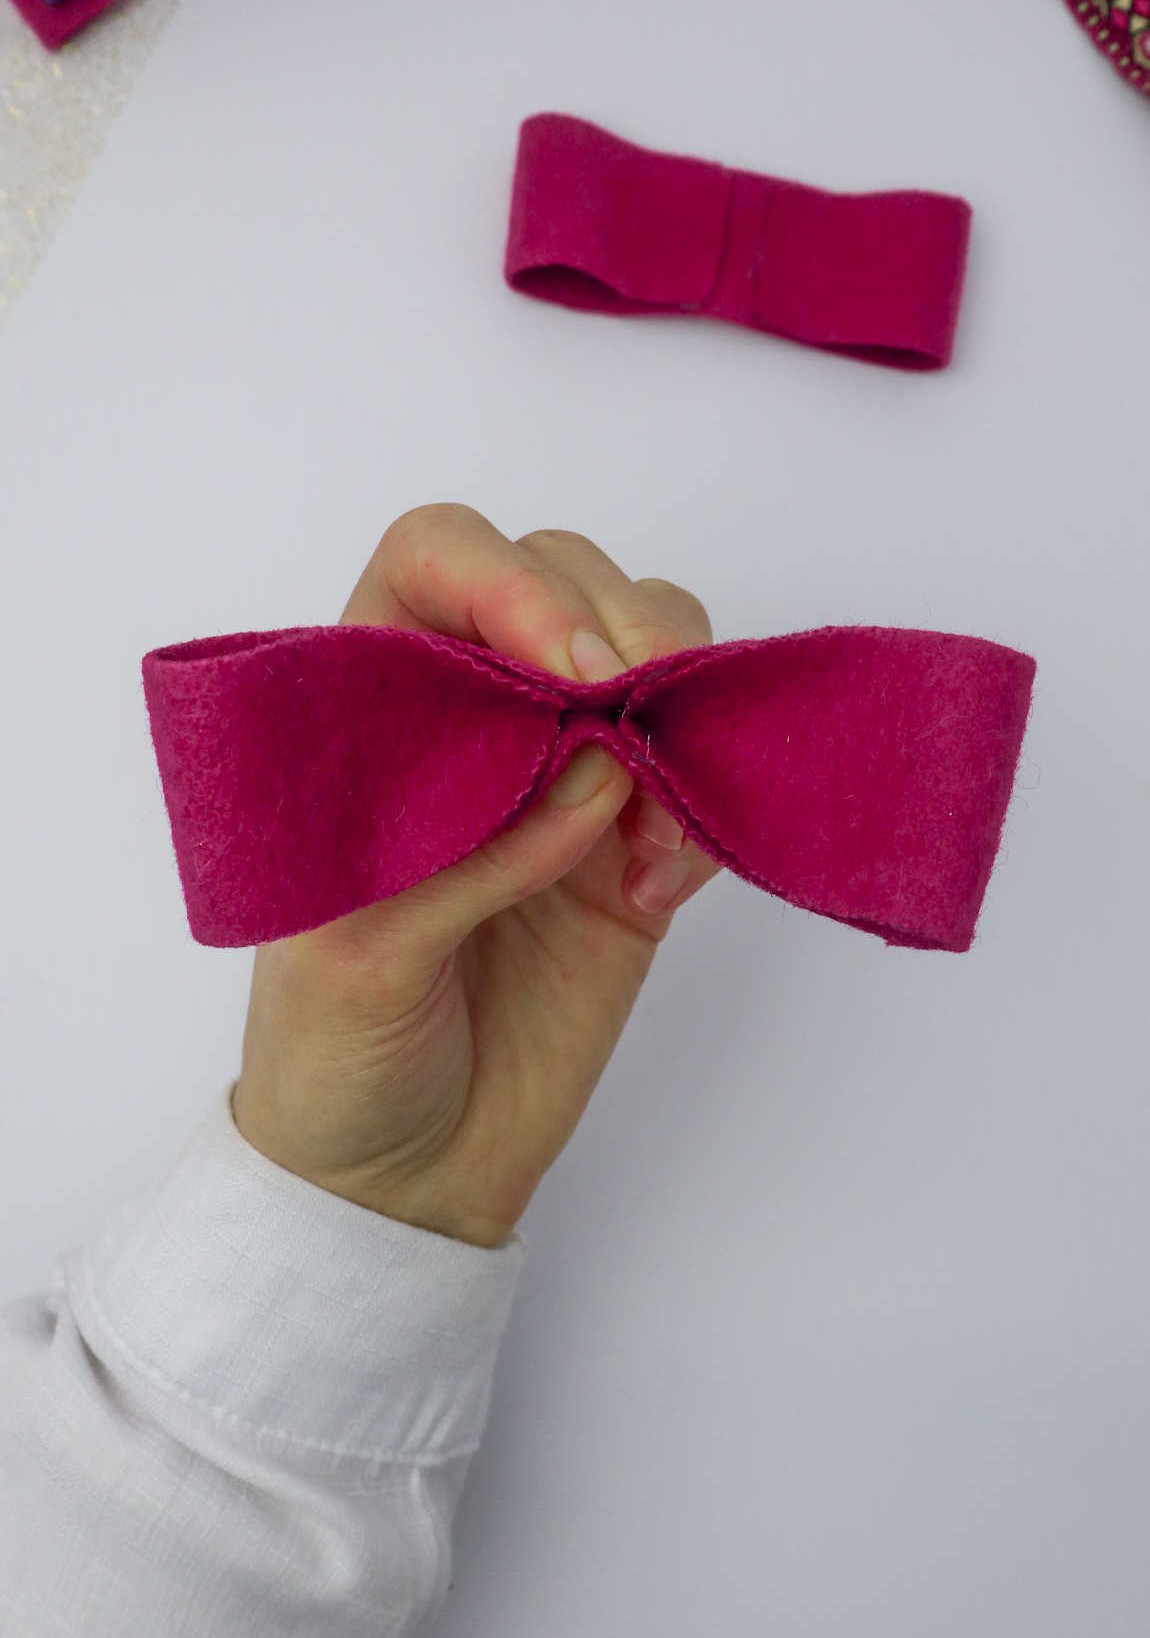
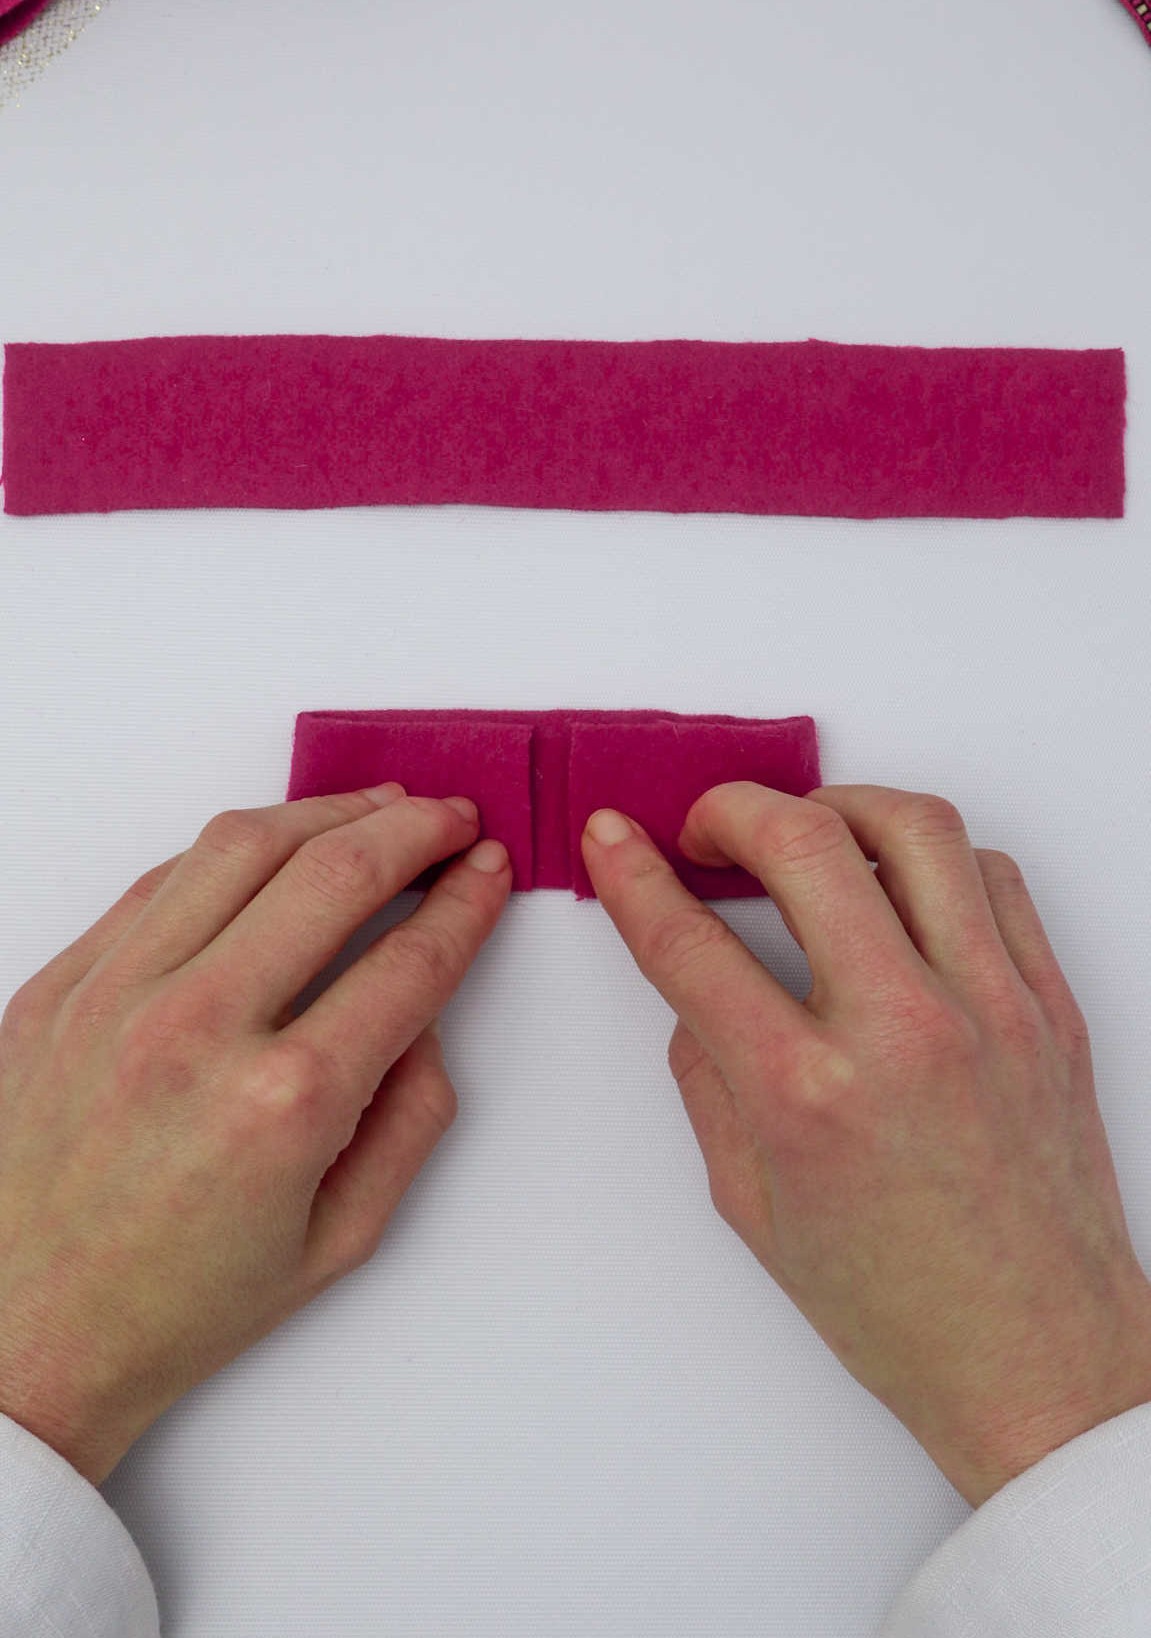
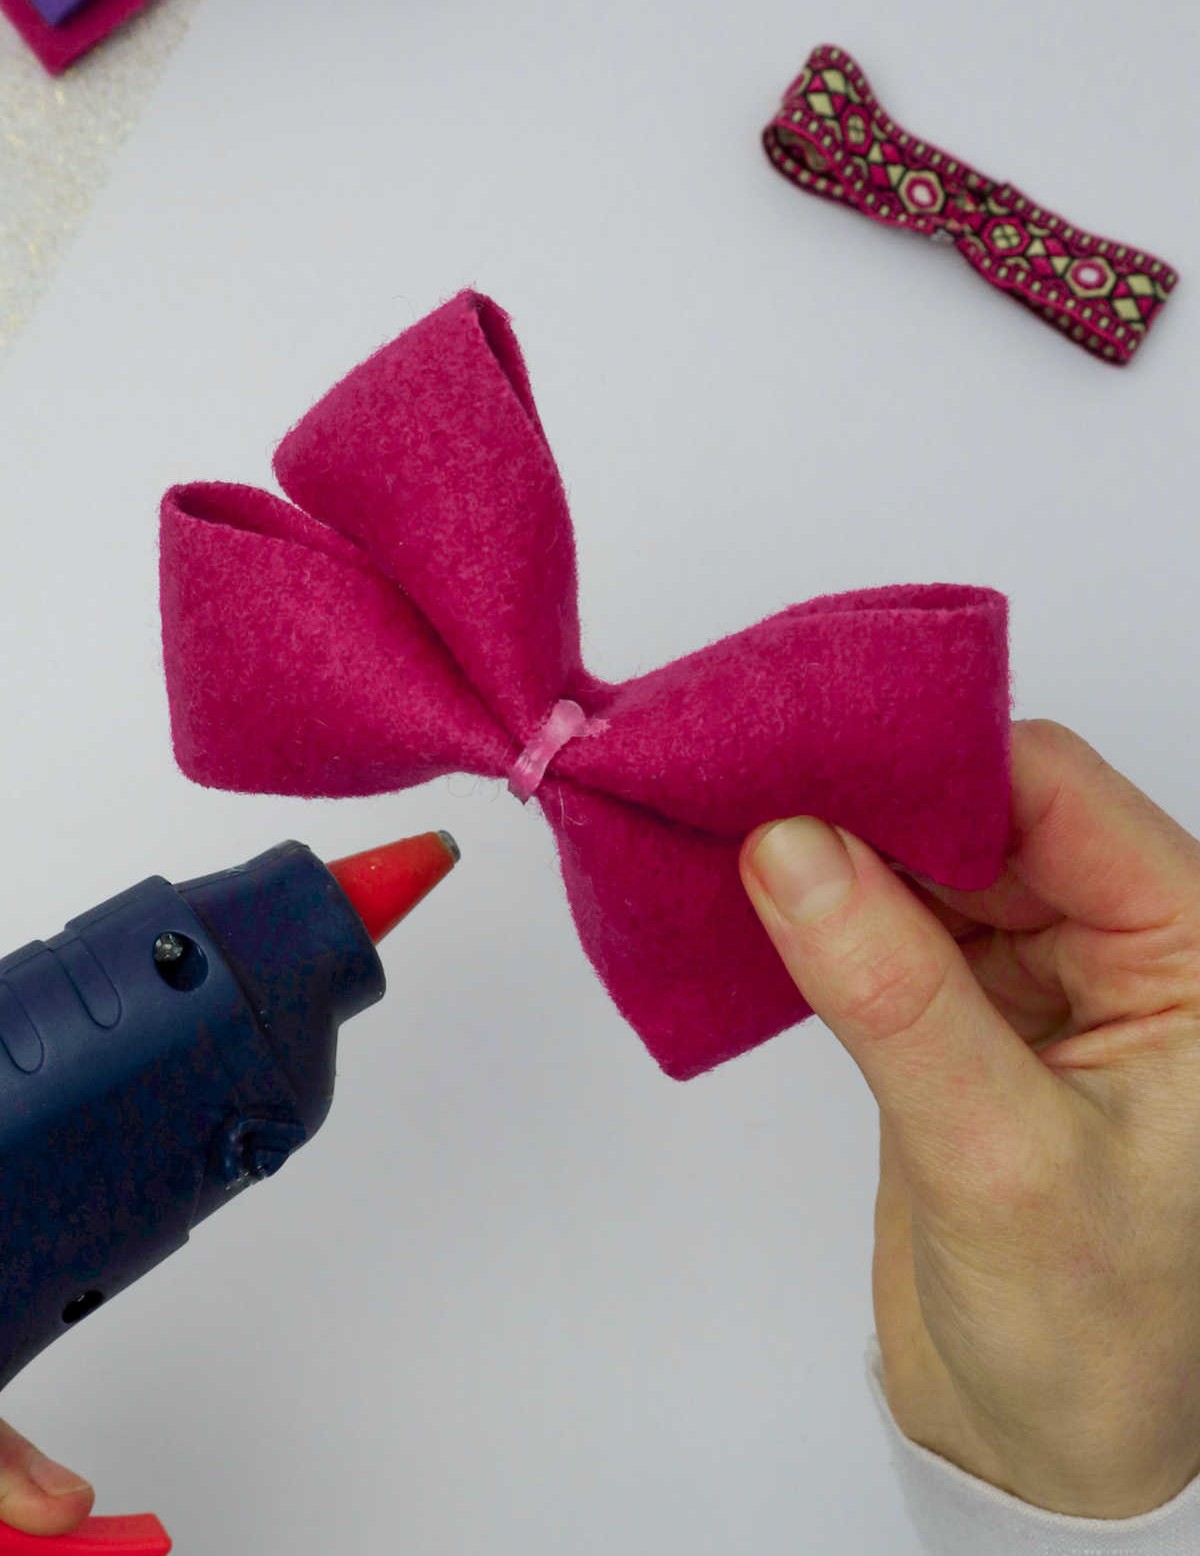
To bring the two components together and shape them into a bow-like form, start by applying a small amount of glue to the center of each piece. Next, use your fingers or a tool to gently pinch the middle of each component inward, as illustrated below. This is where things start to take shape! Repeat this process with both pieces, carefully aligning and molding them into their final bow-like form.
Step 5
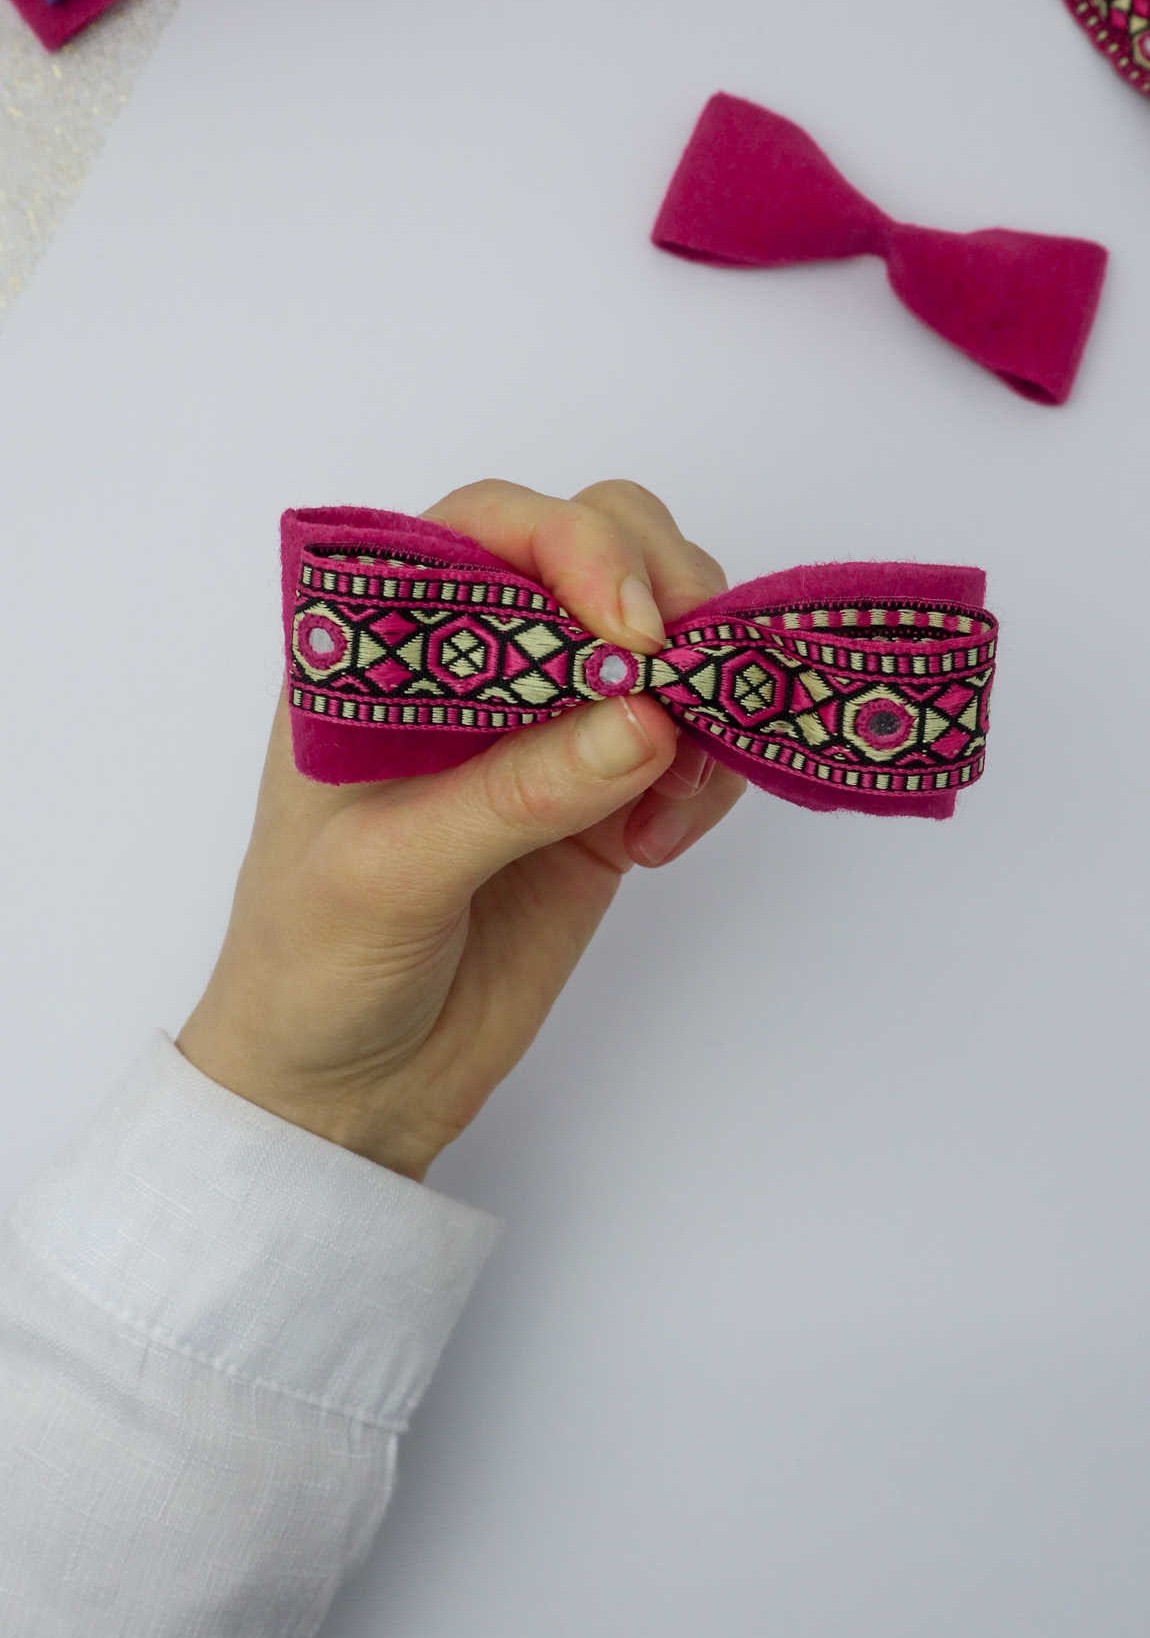
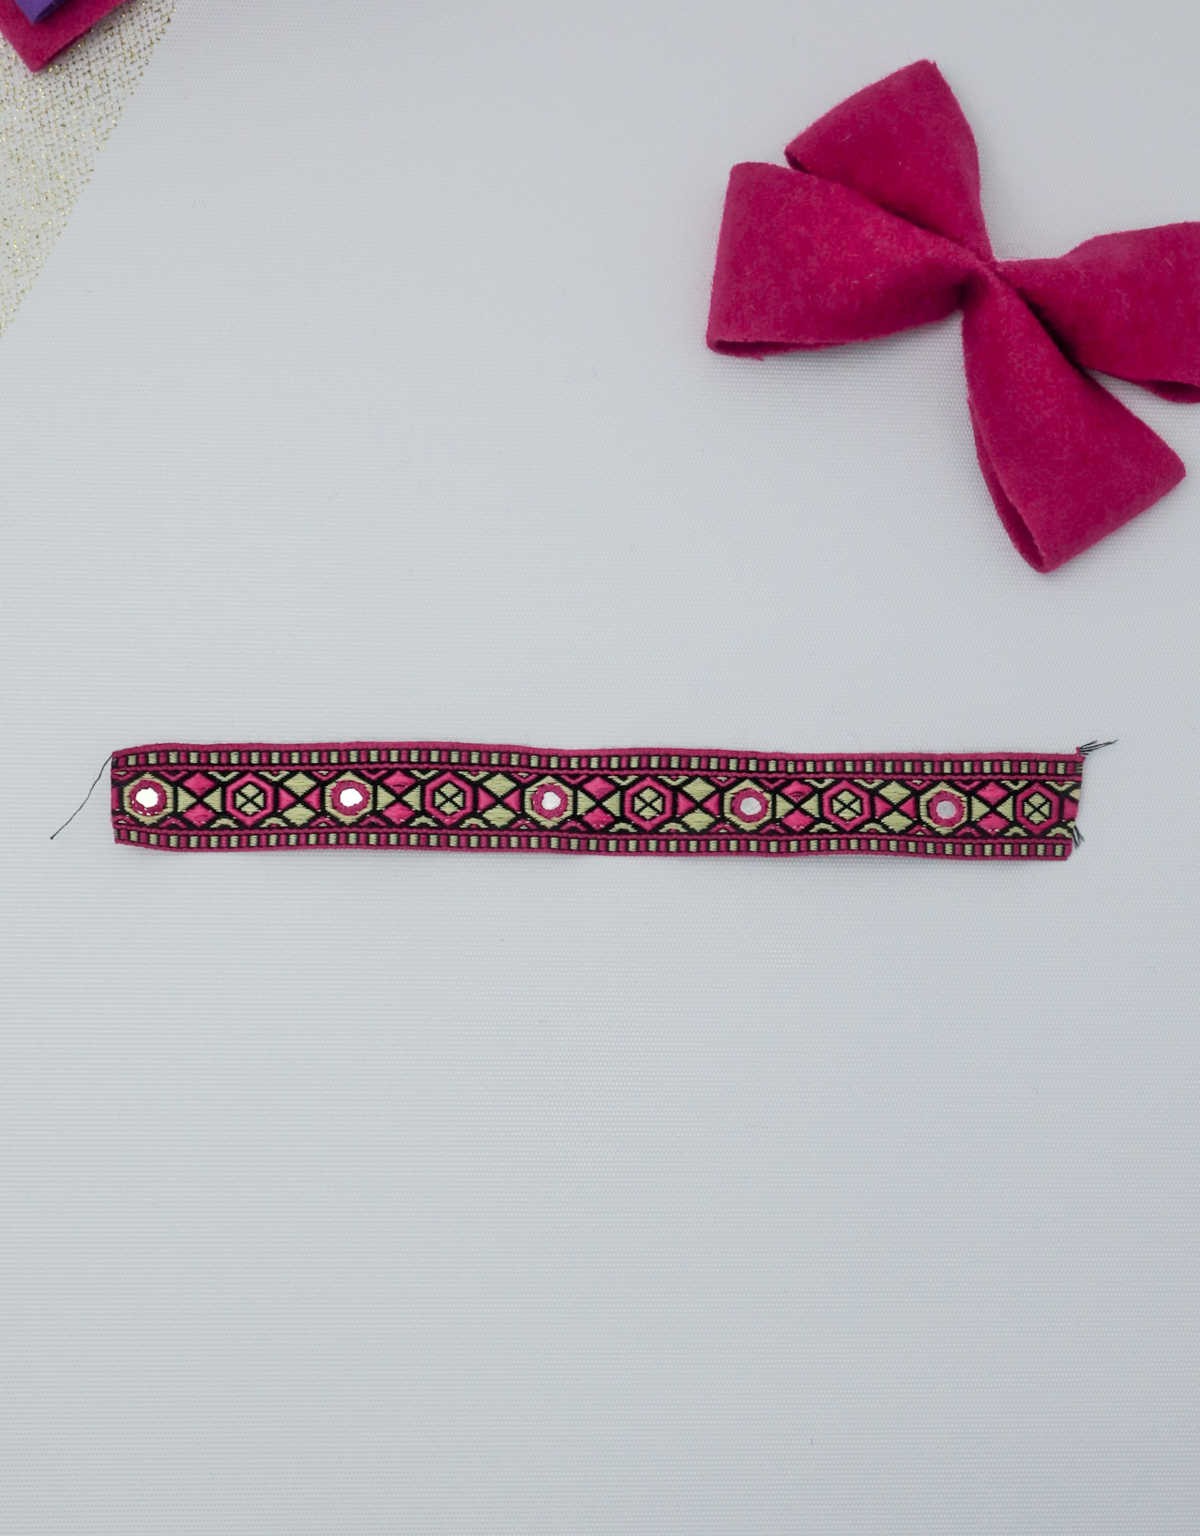
I find the process of embellishing a hair bow to be particularly delightful. A small yet striking piece of fabric, such as that showcased below, can elevate your humble hair accessory into a more sophisticated style. To achieve this look, simply select a decorative fabric that catches your eye and get creative with your embellishments.
Step 6
Now it’s time to integrate all the elements and complete your decorative bow. To assemble the bows, first hold the two fabric strips in place, as depicted in the following steps.
Begin by applying a small amount of hot glue to one end of each strip. Then, carefully align the smaller piece on top of the larger one, creating a layered effect that adds depth and visual interest to your bow.
Make sure the edges are securely attached before moving forward with any further decorations or embellishments.
Step 7
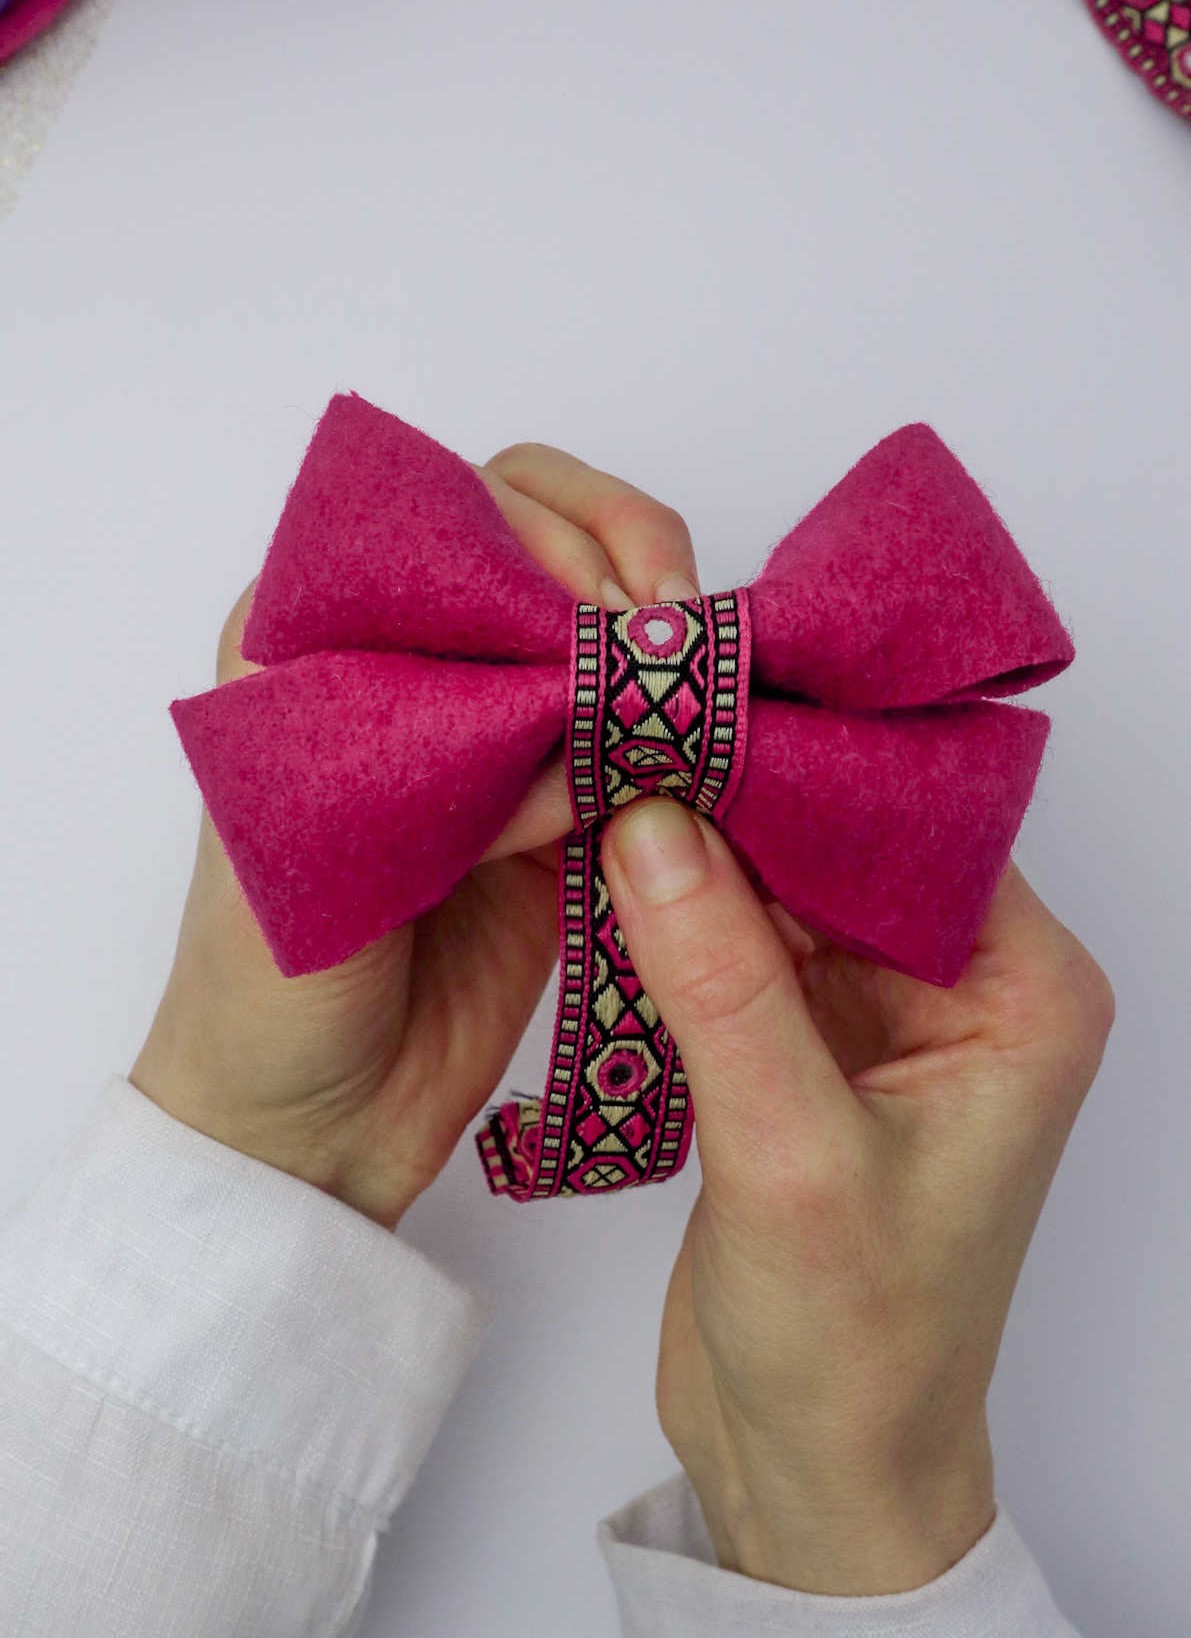
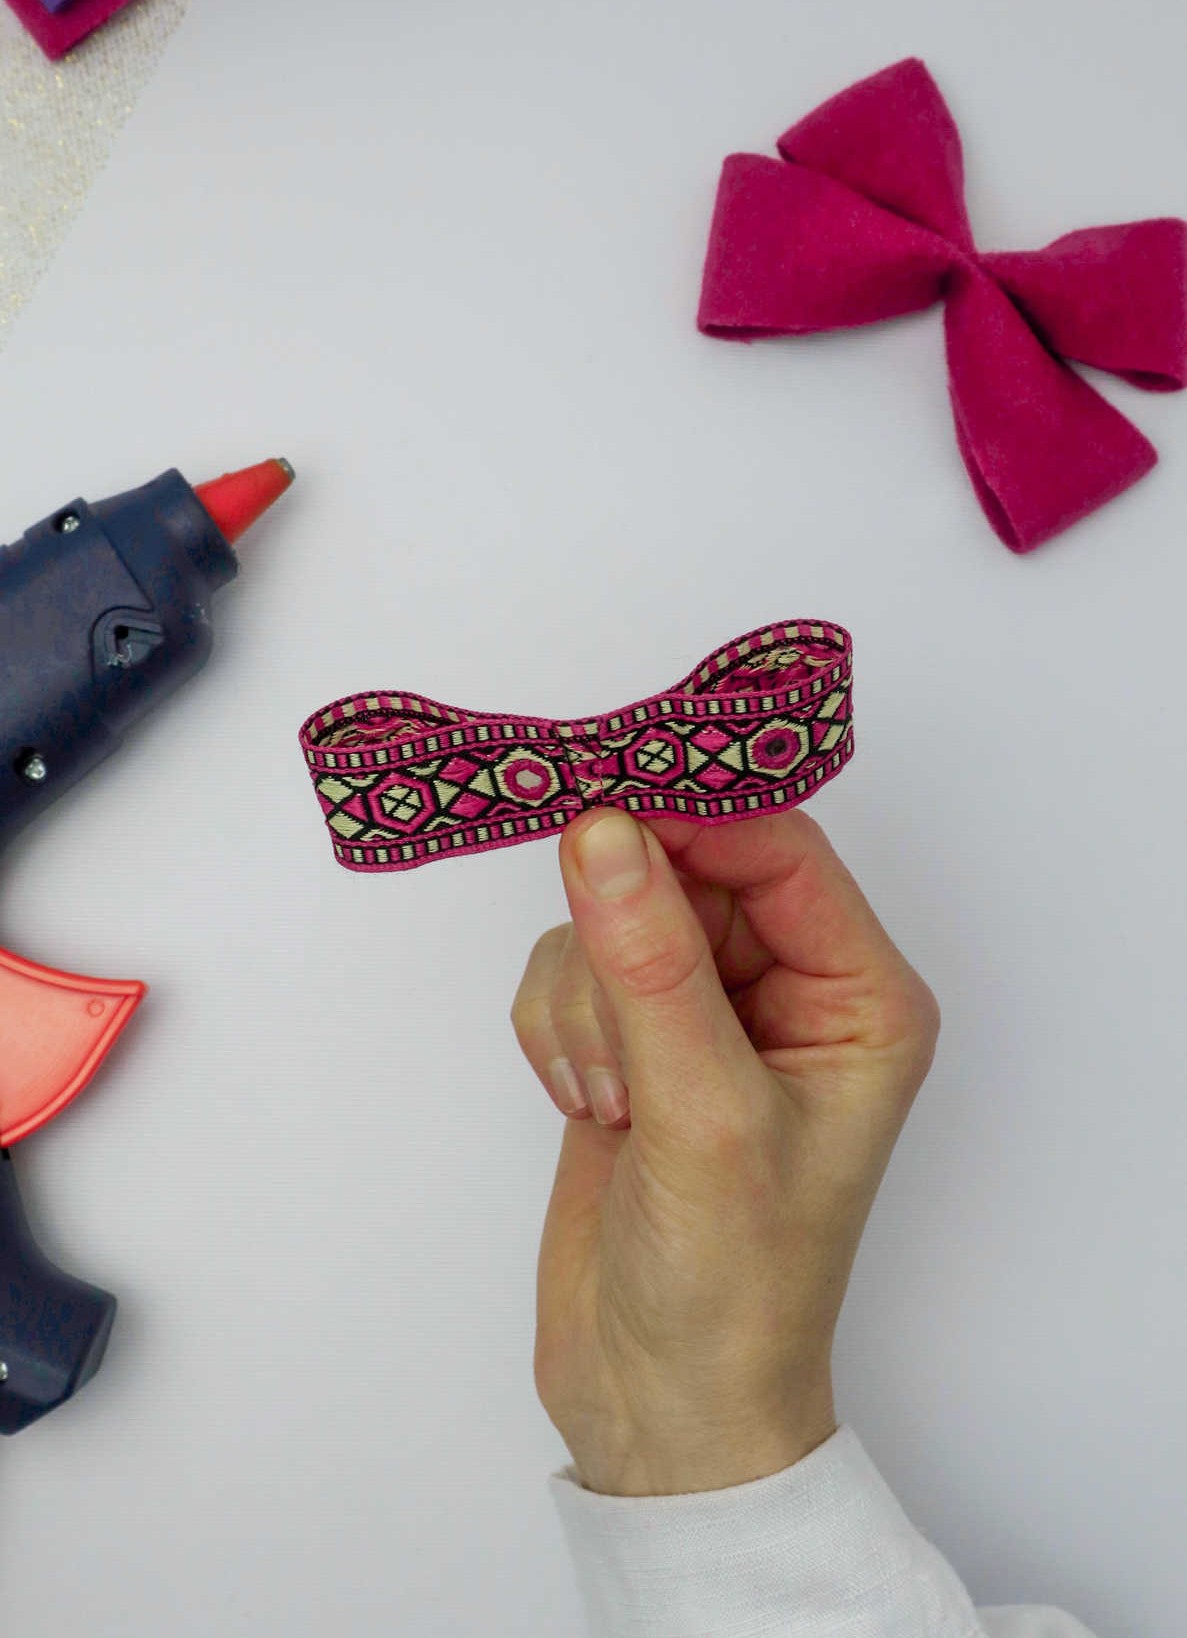
As the adhesive sets, proceed to the following stage. Hold the embellished fabric strip against the project’s framework, folding it gently as you would with the initial two elements, ensuring a snug fit.
Step 8
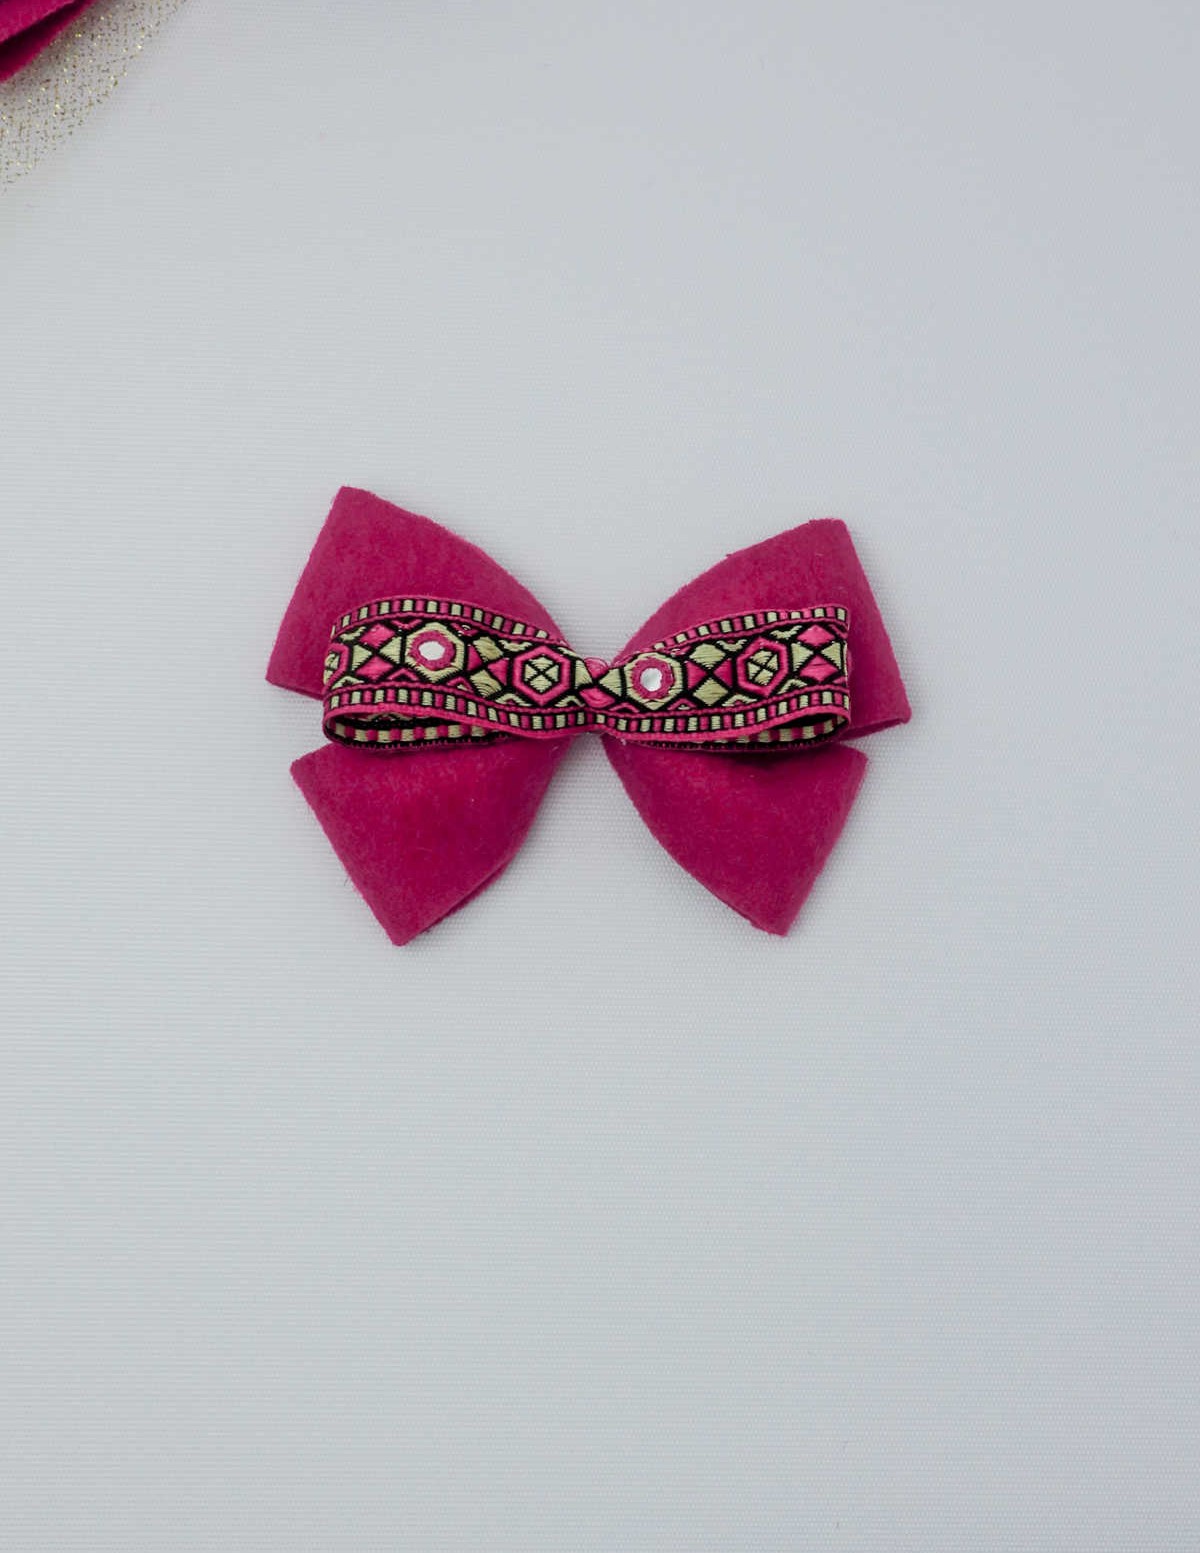
To secure the decorated fabric bow, apply an adequate amount of adhesive to the primary structure and meticulously fasten it in place between the two components, ensuring a seamless connection.
Step 9
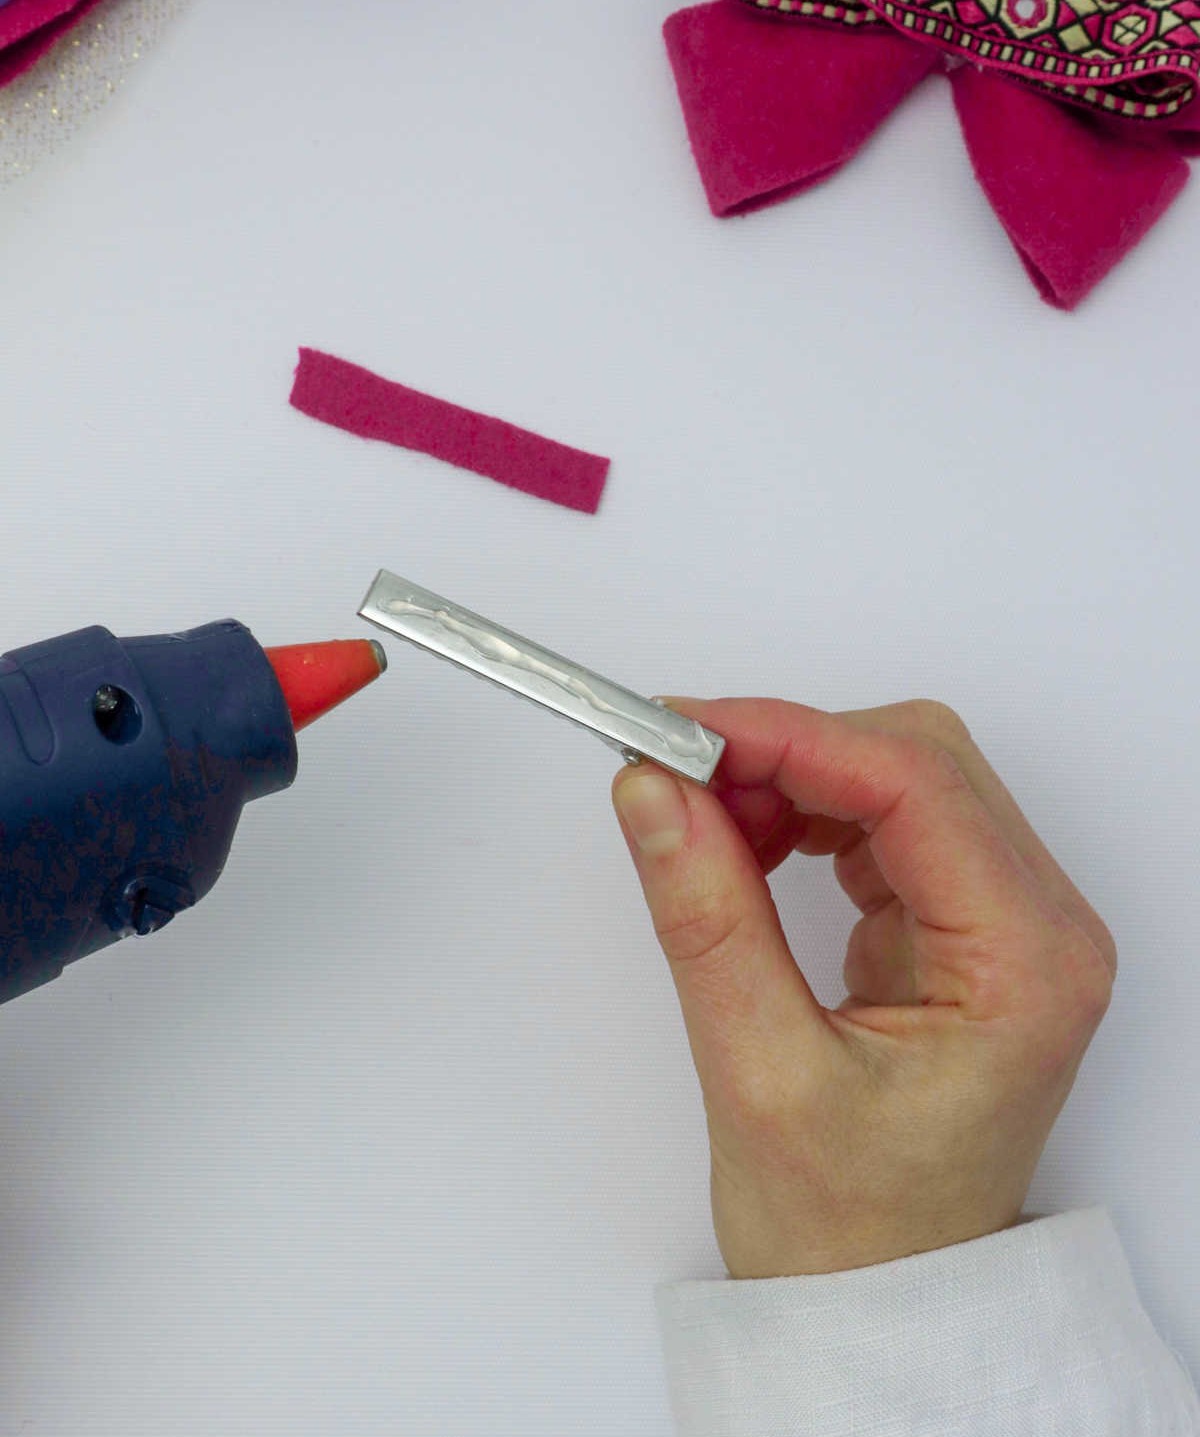
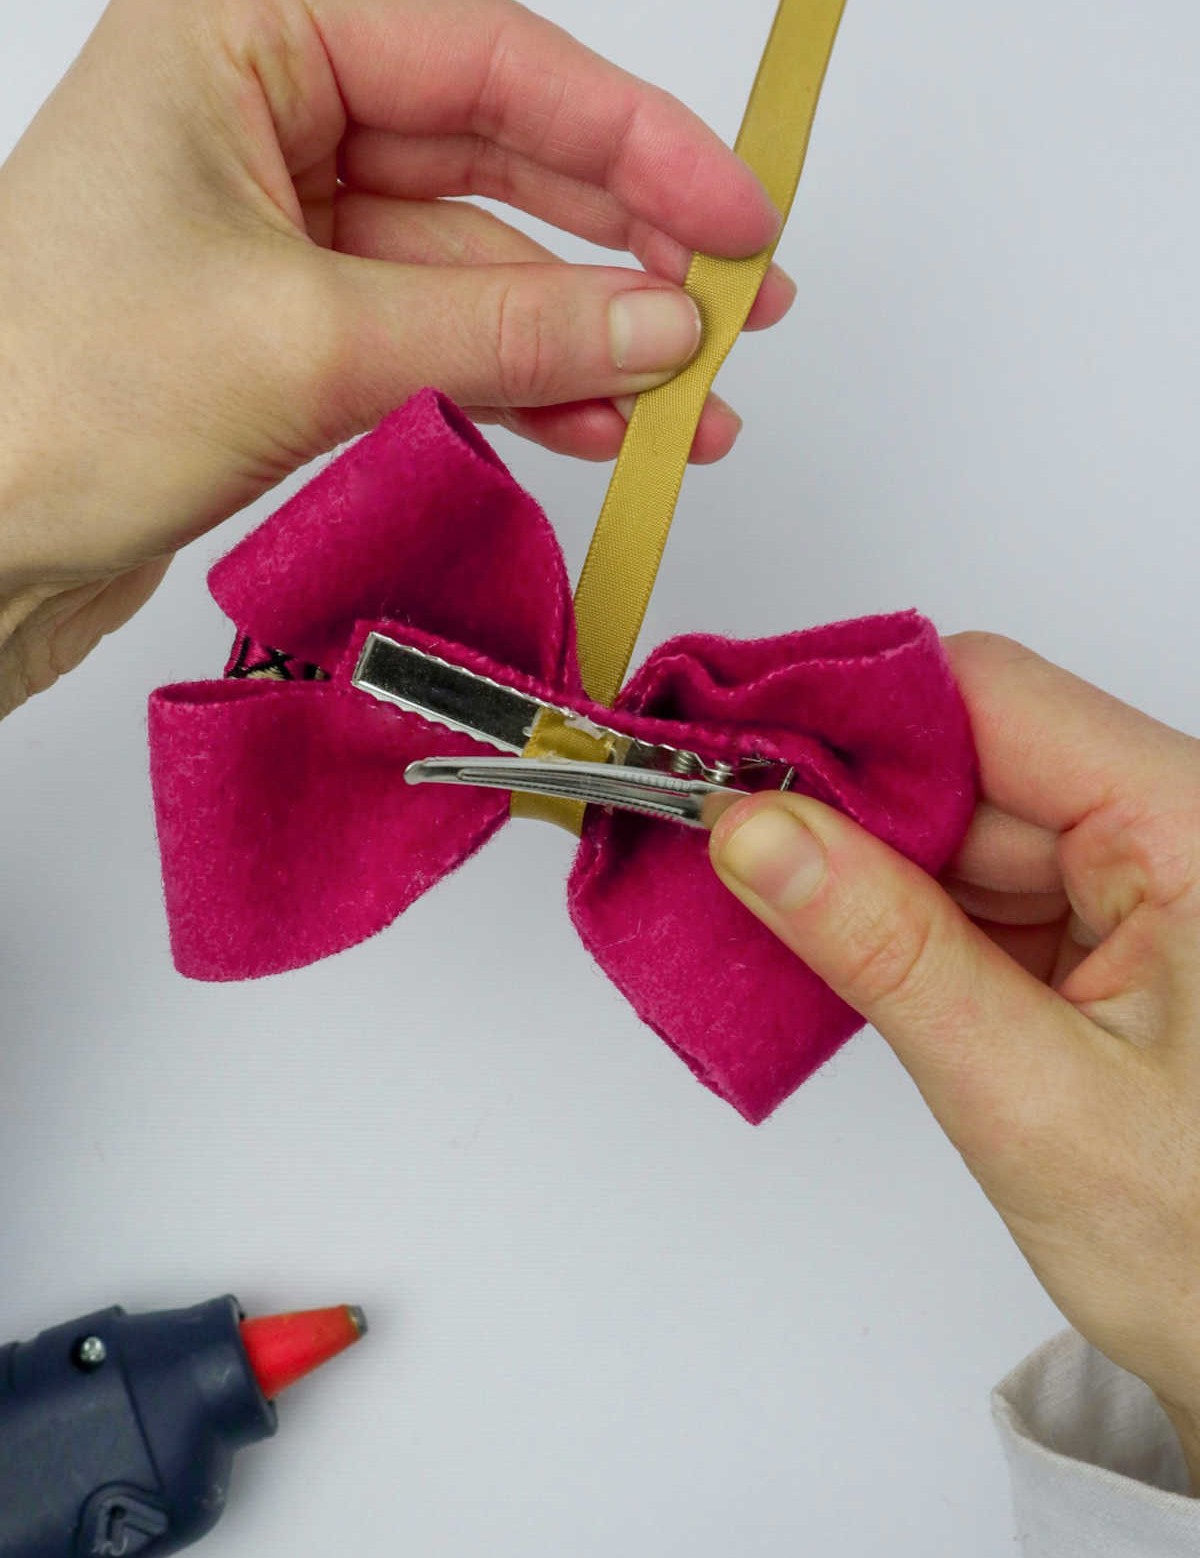
As the final step in crafting your unique crocodile hair clip, attach the back of the clip using hot glue. To conceal the metal component, apply a small strip of the same fabric used for the bow and secure it firmly to the back of the clip. Ensure the adhesive is completely dry before handling the finished piece.
Step 10
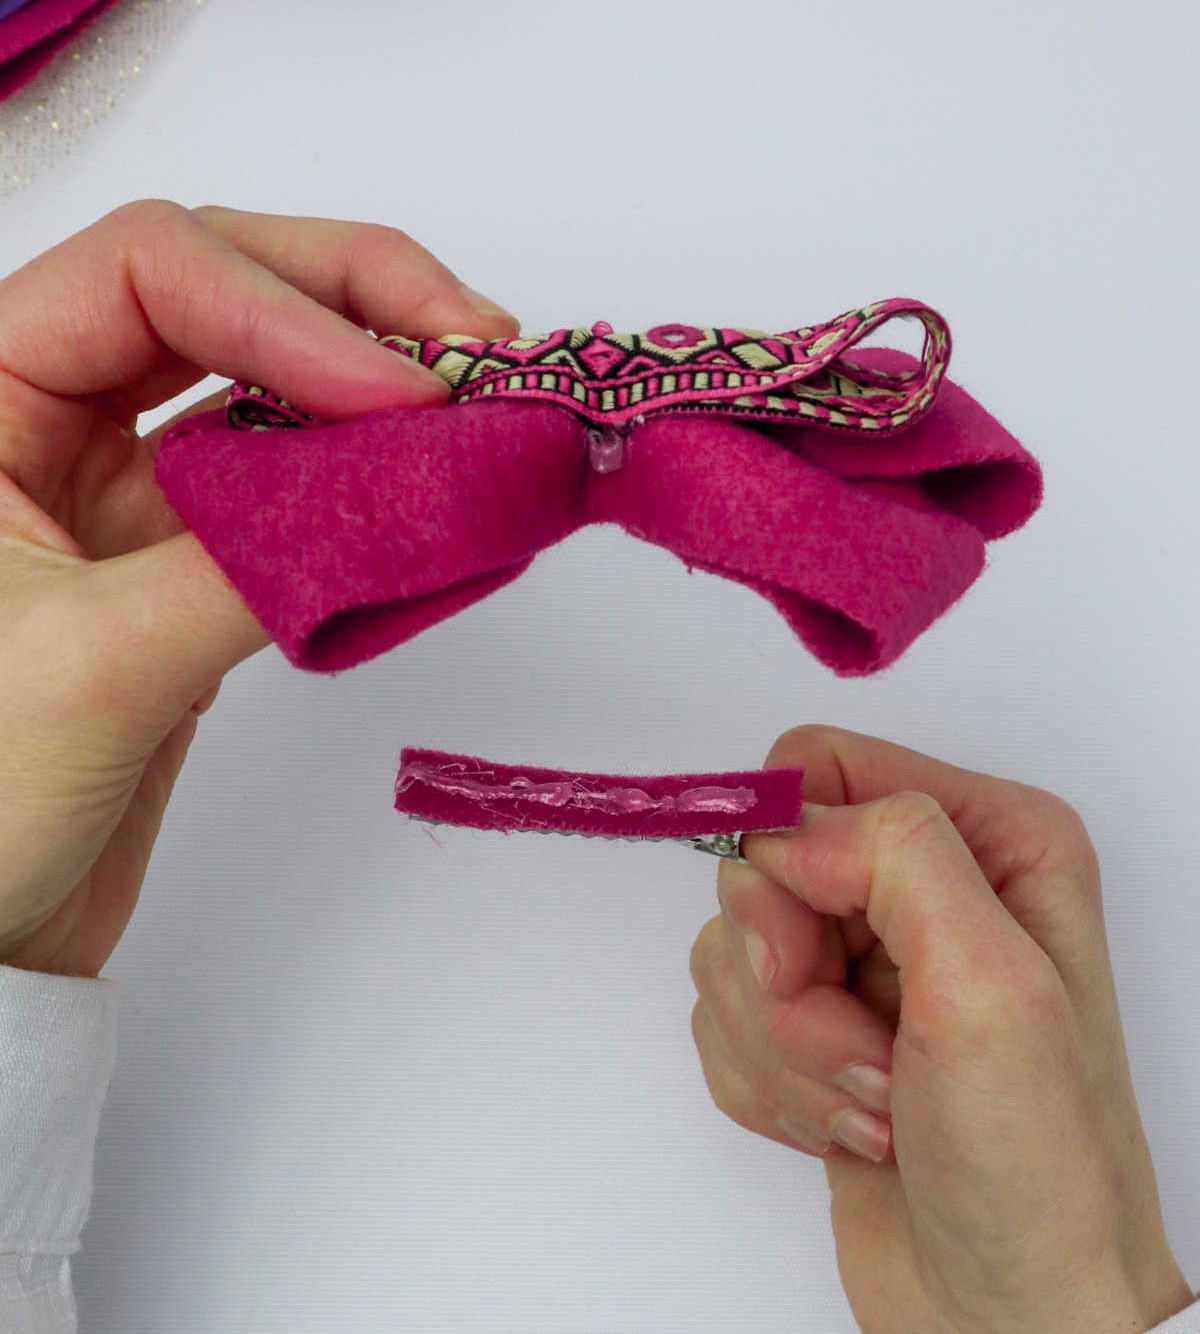
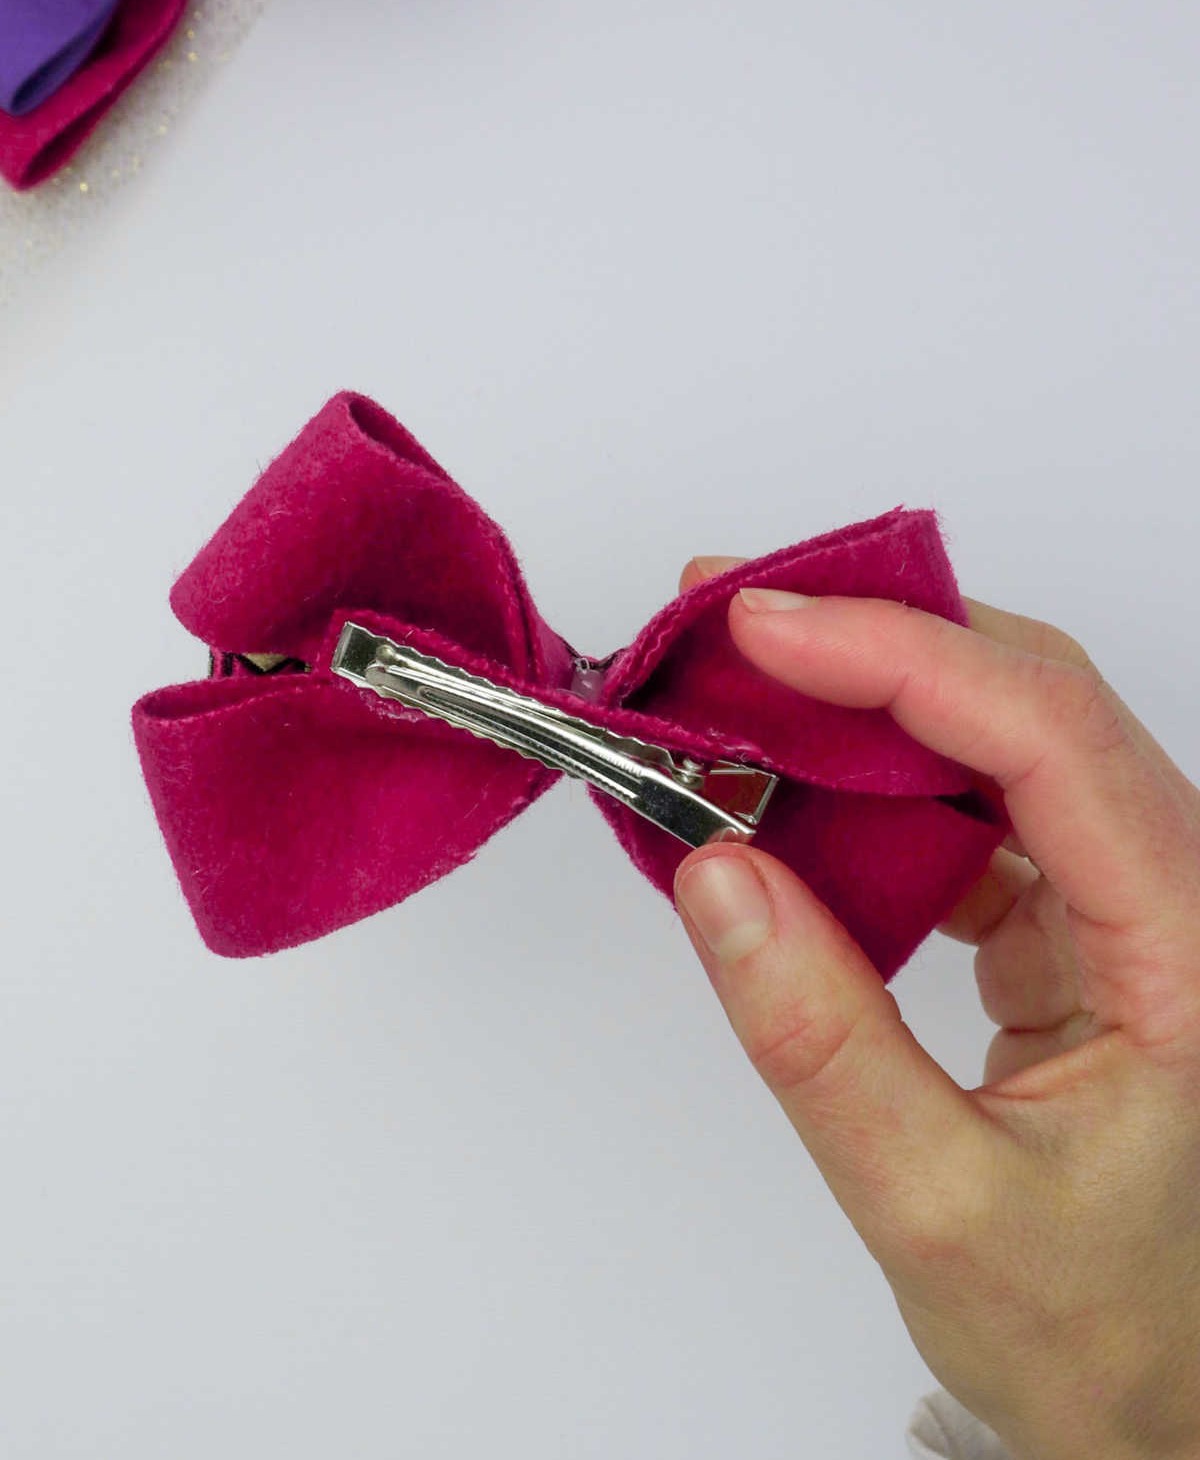
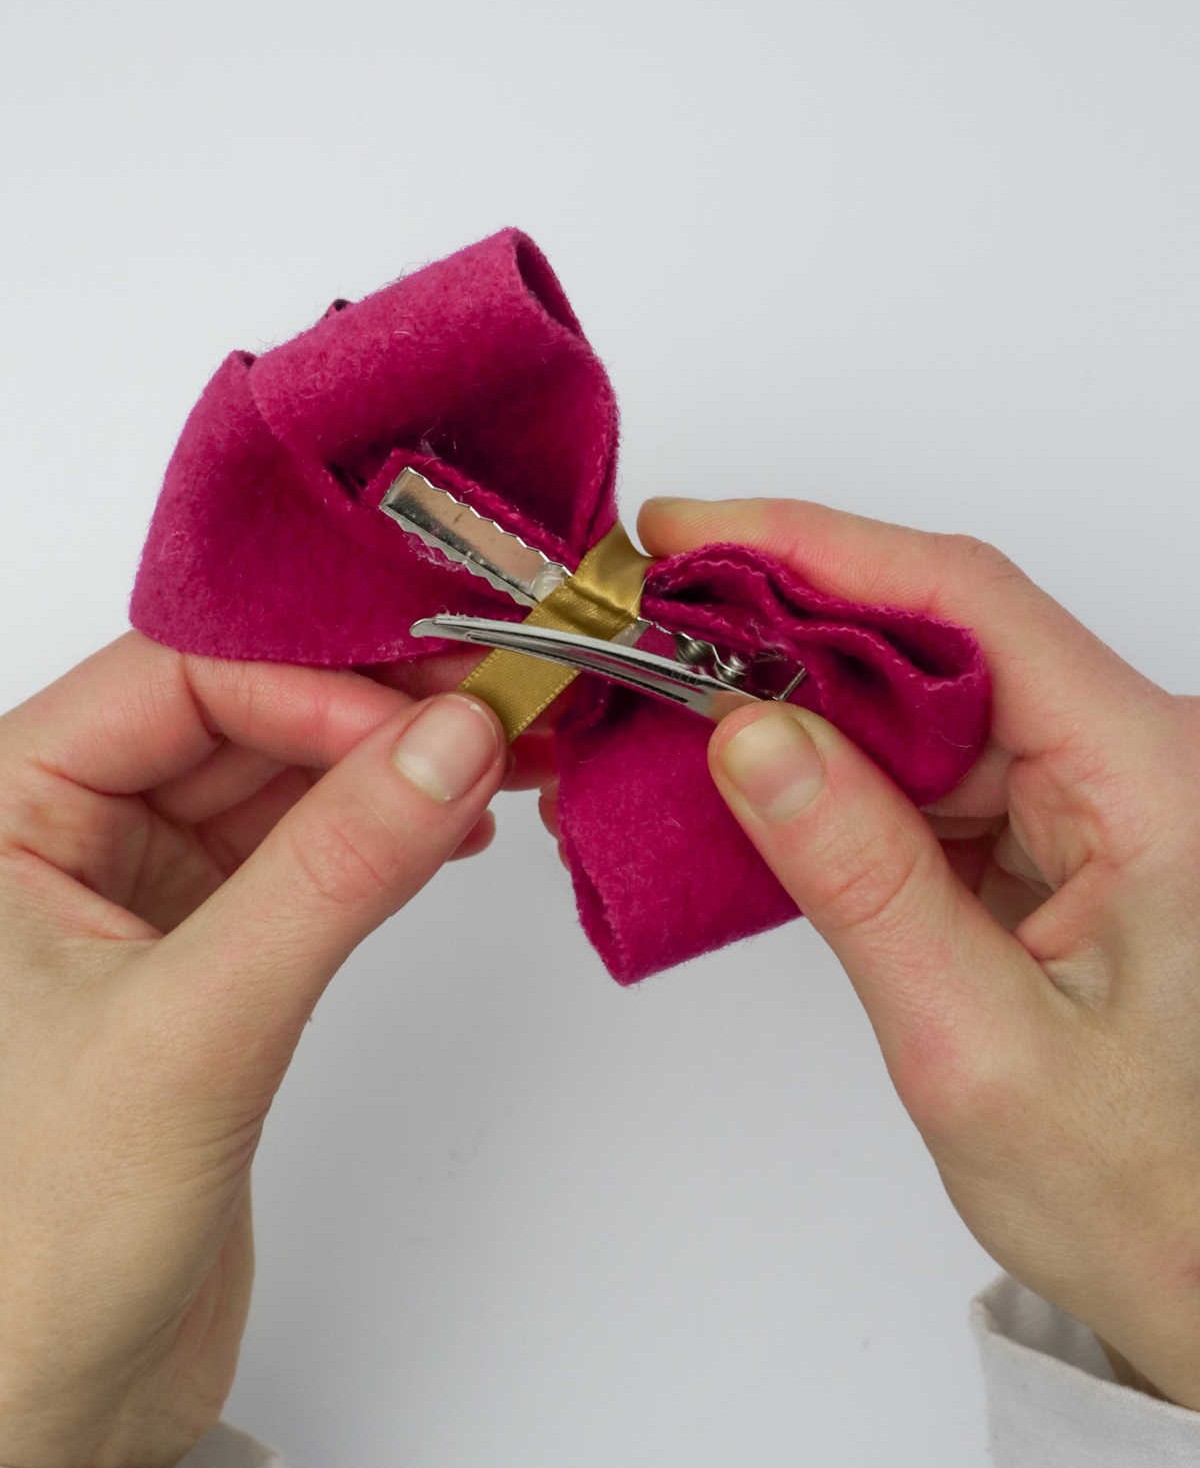
Take a moment to reapply the adhesive to the felt strip on the hair clip. Next, delicately attach the hair bow to the clip, ensuring it’s oriented correctly with the right side facing forward. Hold the combination together for a brief period, roughly one to two minutes, allowing the adhesive to bond effectively.
As you wait for the bond to set, be mindful of your patience and allow the hair bow to dry completely before attempting to wear it.
Reflecting on sticky fingers might make you appreciate the importance of waiting, as trying to apply hot glue to your hair would indeed be a far more unpleasant experience.
Step 11
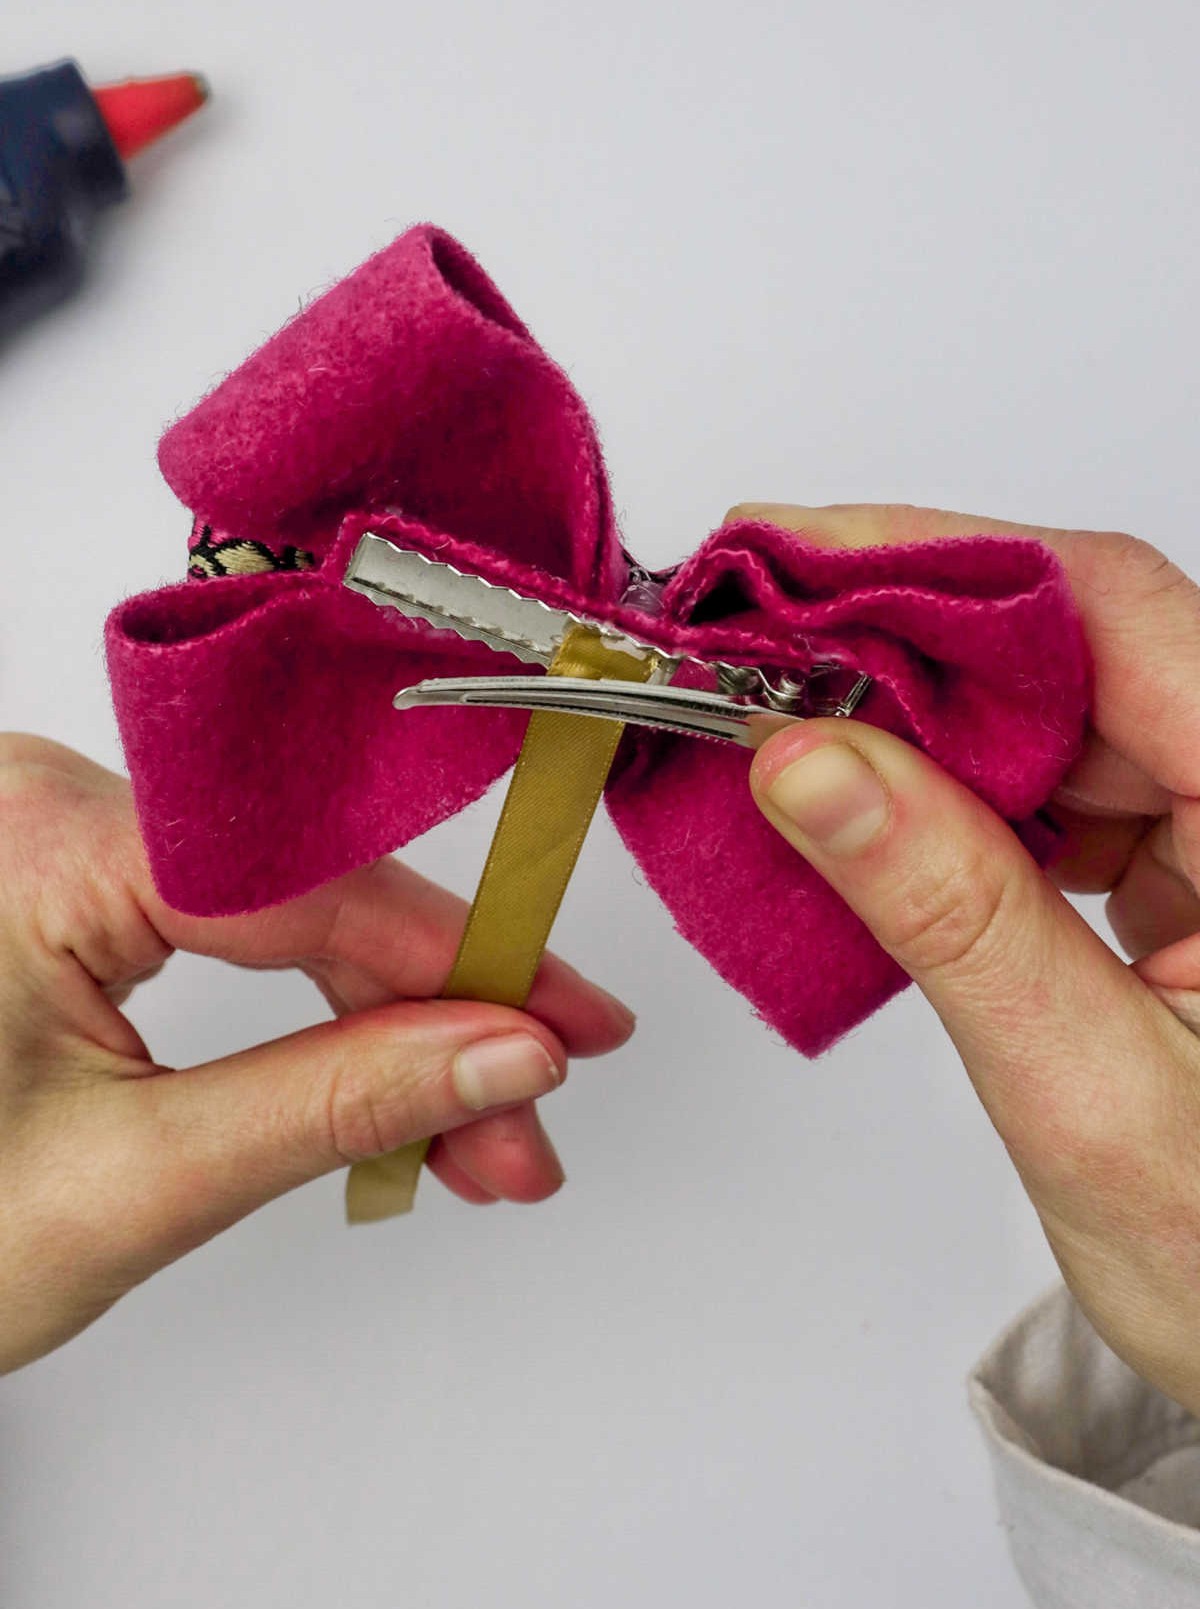
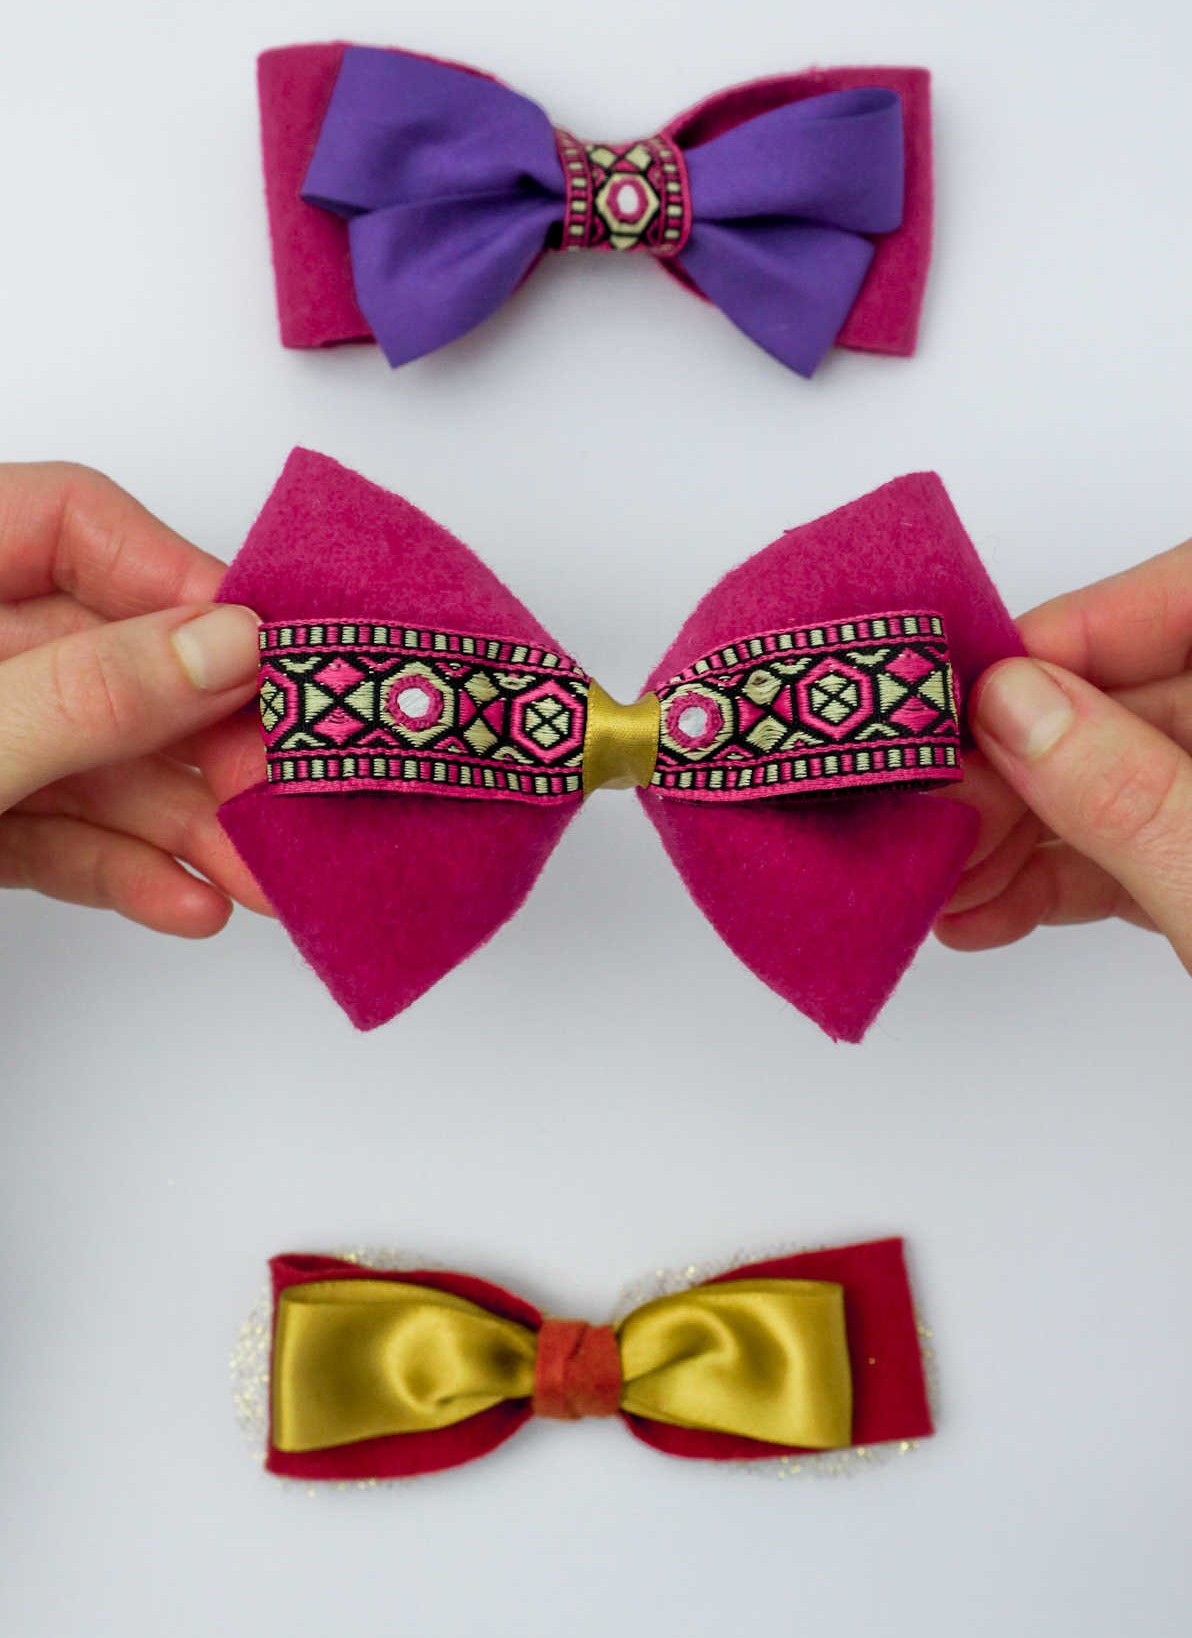
To create a charming hair bow, begin by threading a narrow strip of ribbon through the crocodile clip. Then, bring it up and over the bow, wrapping it around the center to form the foundation. Next, loop the ribbon back down and under, repeating the process to securely fasten the bow in place. With this simple technique, you can create multiple bows in various sizes, designs, and patterns to match your personal style or outfit.
What Fabric is Best for Hair Bows?
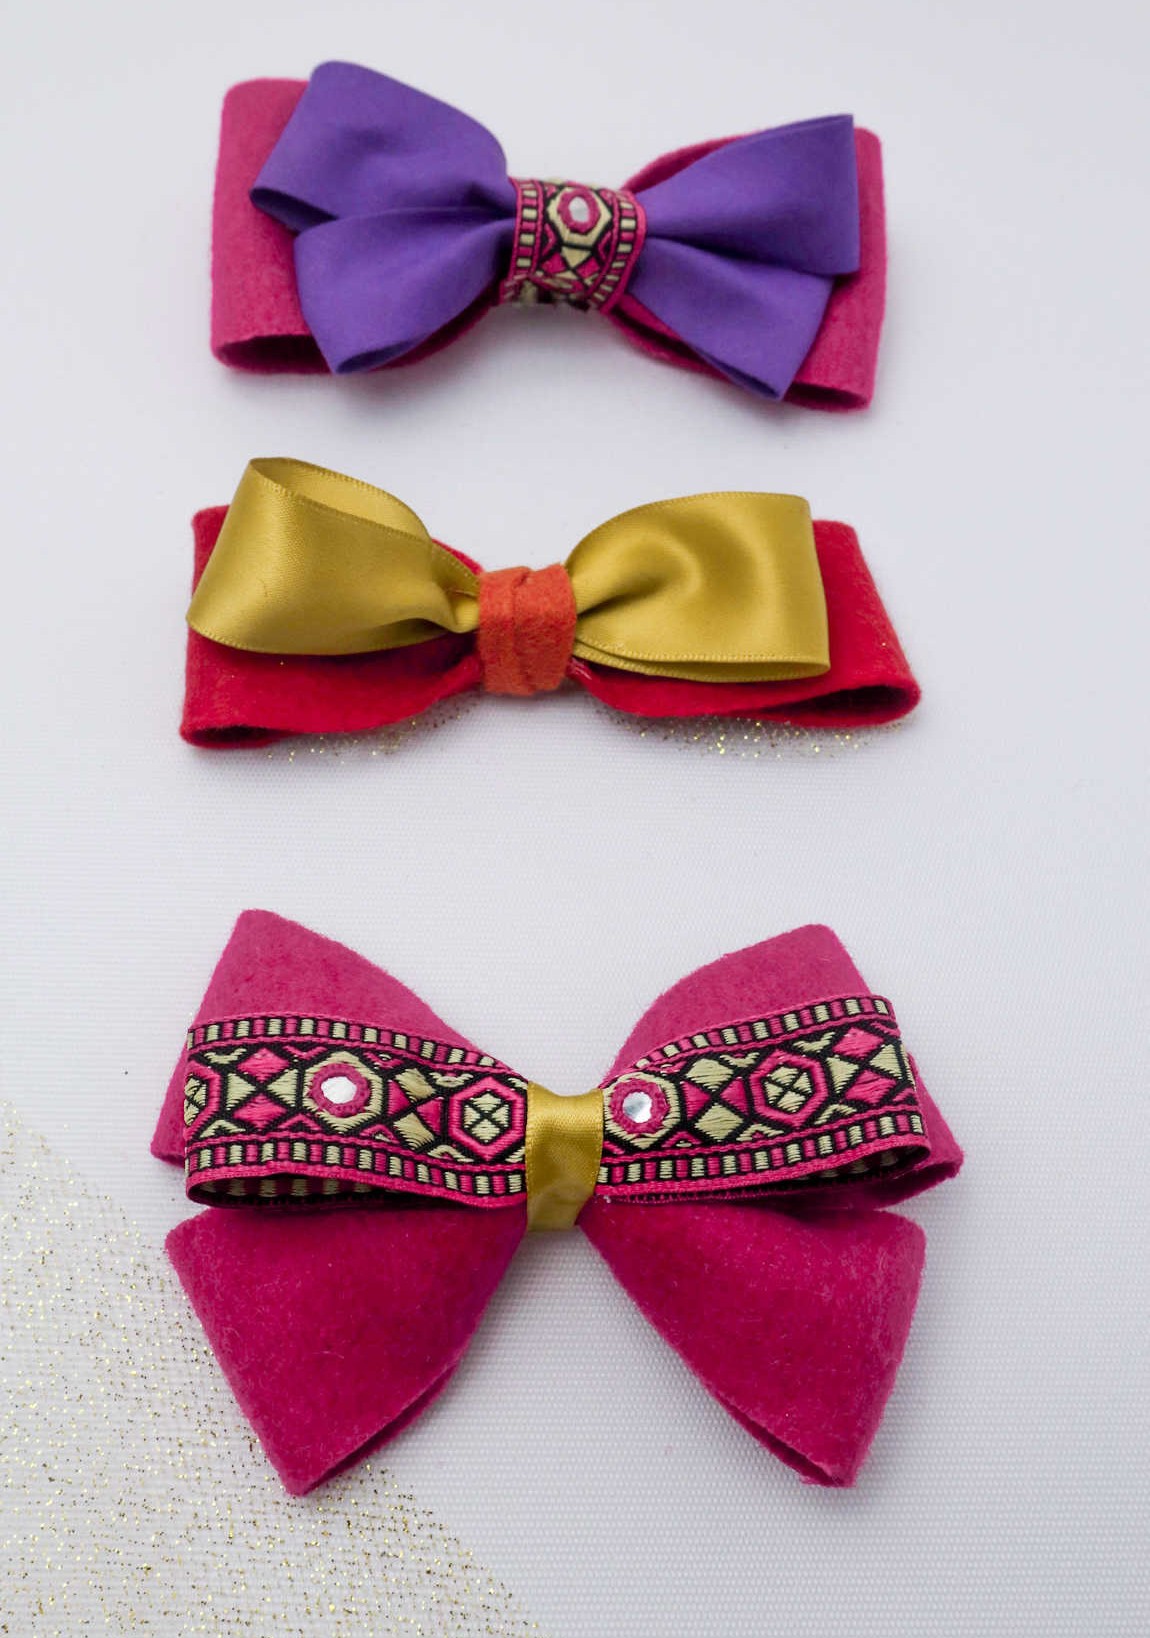
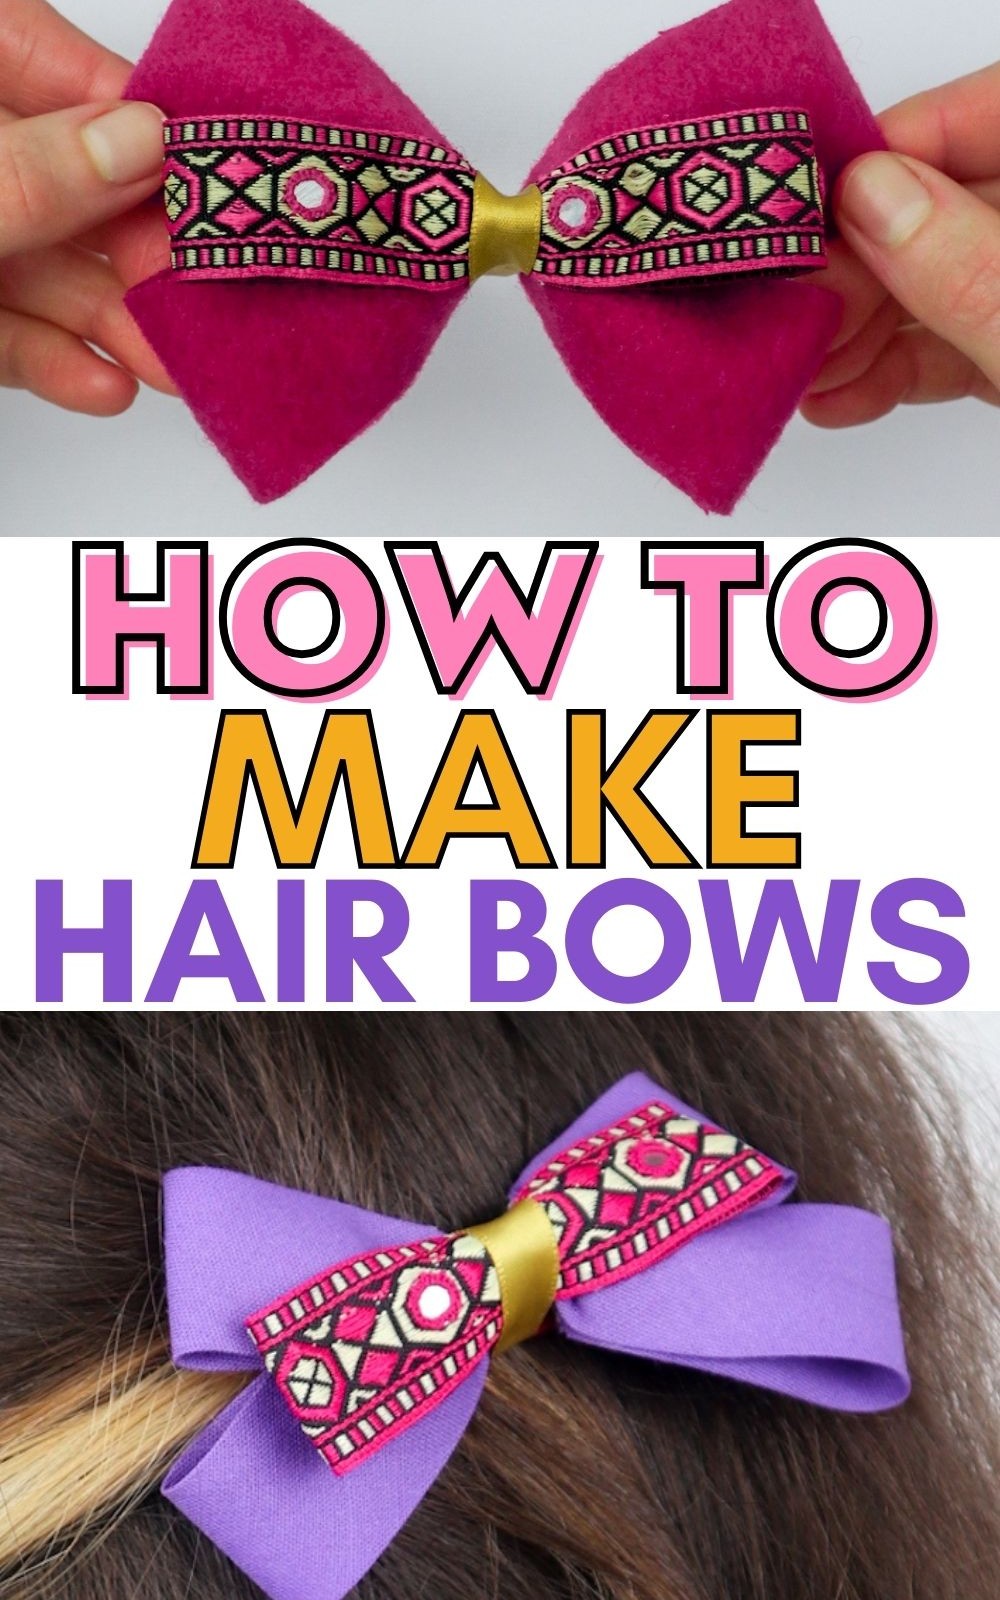
When crafting hair bows, I suggest opting for felt or satin as your primary material. These fabrics have a natural tendency to fold smoothly and yield more defined bow shapes compared to other materials. Once you’ve chosen the fabric, it’s time to add some decorative flair. You can use any type of strip-like fabric to do so, such as embroidered designs, metallic mesh, or even plain old ribbon.
The possibilities are endless, allowing you to customize your bows to fit your personal style and preferences.
How to Make Hair Bows
In just 45 minutes, you can create a fun and personalized DIY accessory that’s perfect for anyone who loves fabric crafts. With this easy-to-follow tutorial, making hair bows has never been more accessible! To get started, simply allow 15 minutes for preparation, followed by 20 minutes of active crafting time. You’ll also need to account for an additional 10 minutes for any finishing touches. The end result? A beautiful, one-of-a-kind hair bow that’s sure to delight. And the best part?
This project won’t break the bank, with a total cost of just $2. Get creative and make your own hair bows today!
Equipment
Materials
To craft a unique and eye-catching accessory, you’ll need the following materials: two strips of felt measuring 8.2 inches in length and 1.6 inches in width. You can use textile or ribbon for this purpose. Additionally, you’ll require a wide ribbon that’s approximately 7 inches long, as well as a narrow ribbon. For added texture and visual interest, consider incorporating a small crocodile hair clip into your design.
Finally, a small piece of felt will provide the foundation for your creative project.
Instructions
Begin by preparing your workspace with all necessary supplies within arm’s reach. Select your fabric and cut it into strips, then fold each strip in half to create two identical pieces. Apply a small amount of adhesive to the folded end of each piece and press together to form two distinct bows of varying lengths. Next, apply a minimal amount of glue to the center of one bow, carefully pinching to accentuate its shape. Repeat this process with the second piece.
Meanwhile, prepare another strip of decorated fabric by following the same steps to create an additional bow-like component. Allow all components to dry before proceeding.
To assemble the clip, start by attaching the two larger bows together, positioning the longer end facing downwards to create a prominent arch. Secure the bows using adhesive. Next, apply hot glue to the decorated fabric strip and attach it across the middle of the bow, creating the main component.
Allow this to dry completely.
While the main component dries, secure a small piece of felt fabric to the back of the crocodile clip. This will cover any exposed metal on the clip. Apply adhesive to the felt and attach the hair bow to the clip. You may need to hold the components in place for a short period to allow them to bond.
Finally, take a length of ribbon and form it into loops, securing each end within the crocodile clip, over the center of the bow.
Bring the ribbon back down and re-enter the clip, securing its ends in place.