Gift giving just got a whole lot more exciting! Who says you need to break the bank on fancy gift boxes when you can create your own unique masterpiece at home? It’s time to take matters into our own hands and craft a special keepsake for loved ones. The best part? This DIY project is ridiculously easy, budget-friendly, and utterly customizable. So, grab those basic craft supplies and let’s get creative!
Supplies for a Gift Box
How to Make a Gift Box
To craft a unique and thoughtful DIY gift box, it’s essential to establish a solid foundation – starting with precise measurements. Begin by determining the desired size of your gift box. This will serve as the blueprint for your project. With these dimensions in mind, you can then move forward with creating a personalized gift box that reflects the recipient’s style and preferences.
Step 1
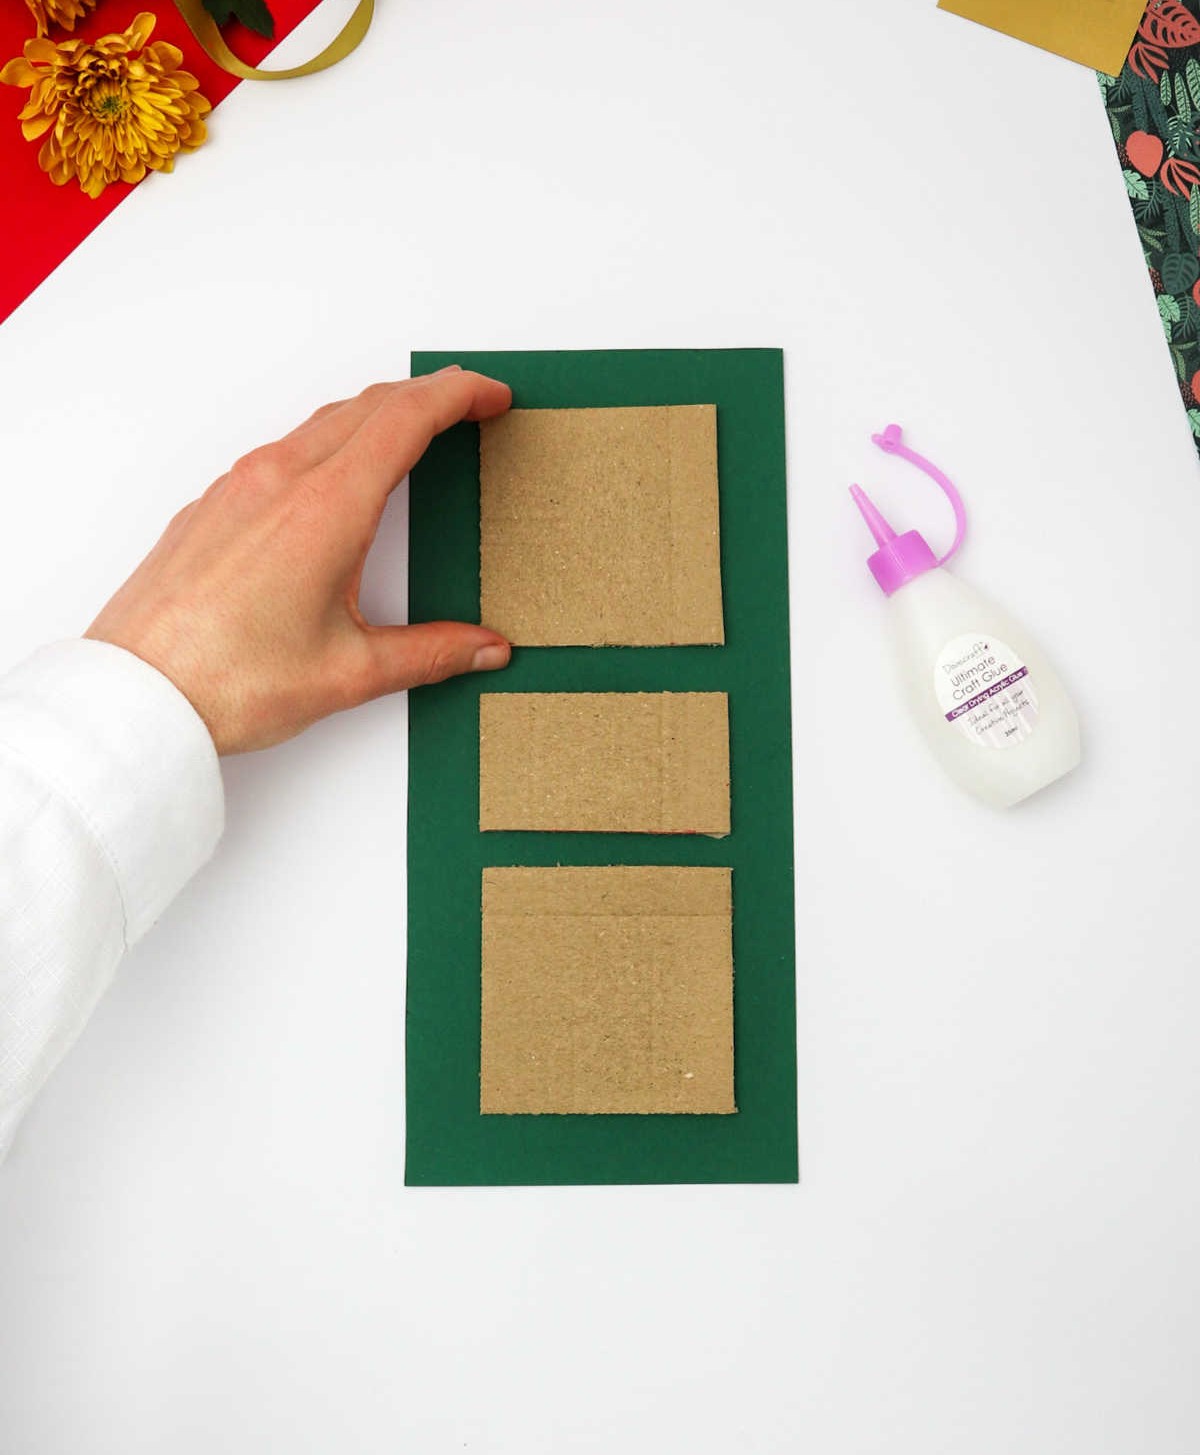
Carefully place each cardboard piece onto the green craft paper, starting with the larger ones and working your way down to the smaller one. The two larger pieces should envelop the small piece, leaving at least a 2-centimeter gap around their edges. Additionally, strive for an even gap between each of the cardboard pieces, ensuring a uniform and balanced arrangement.
Step 2
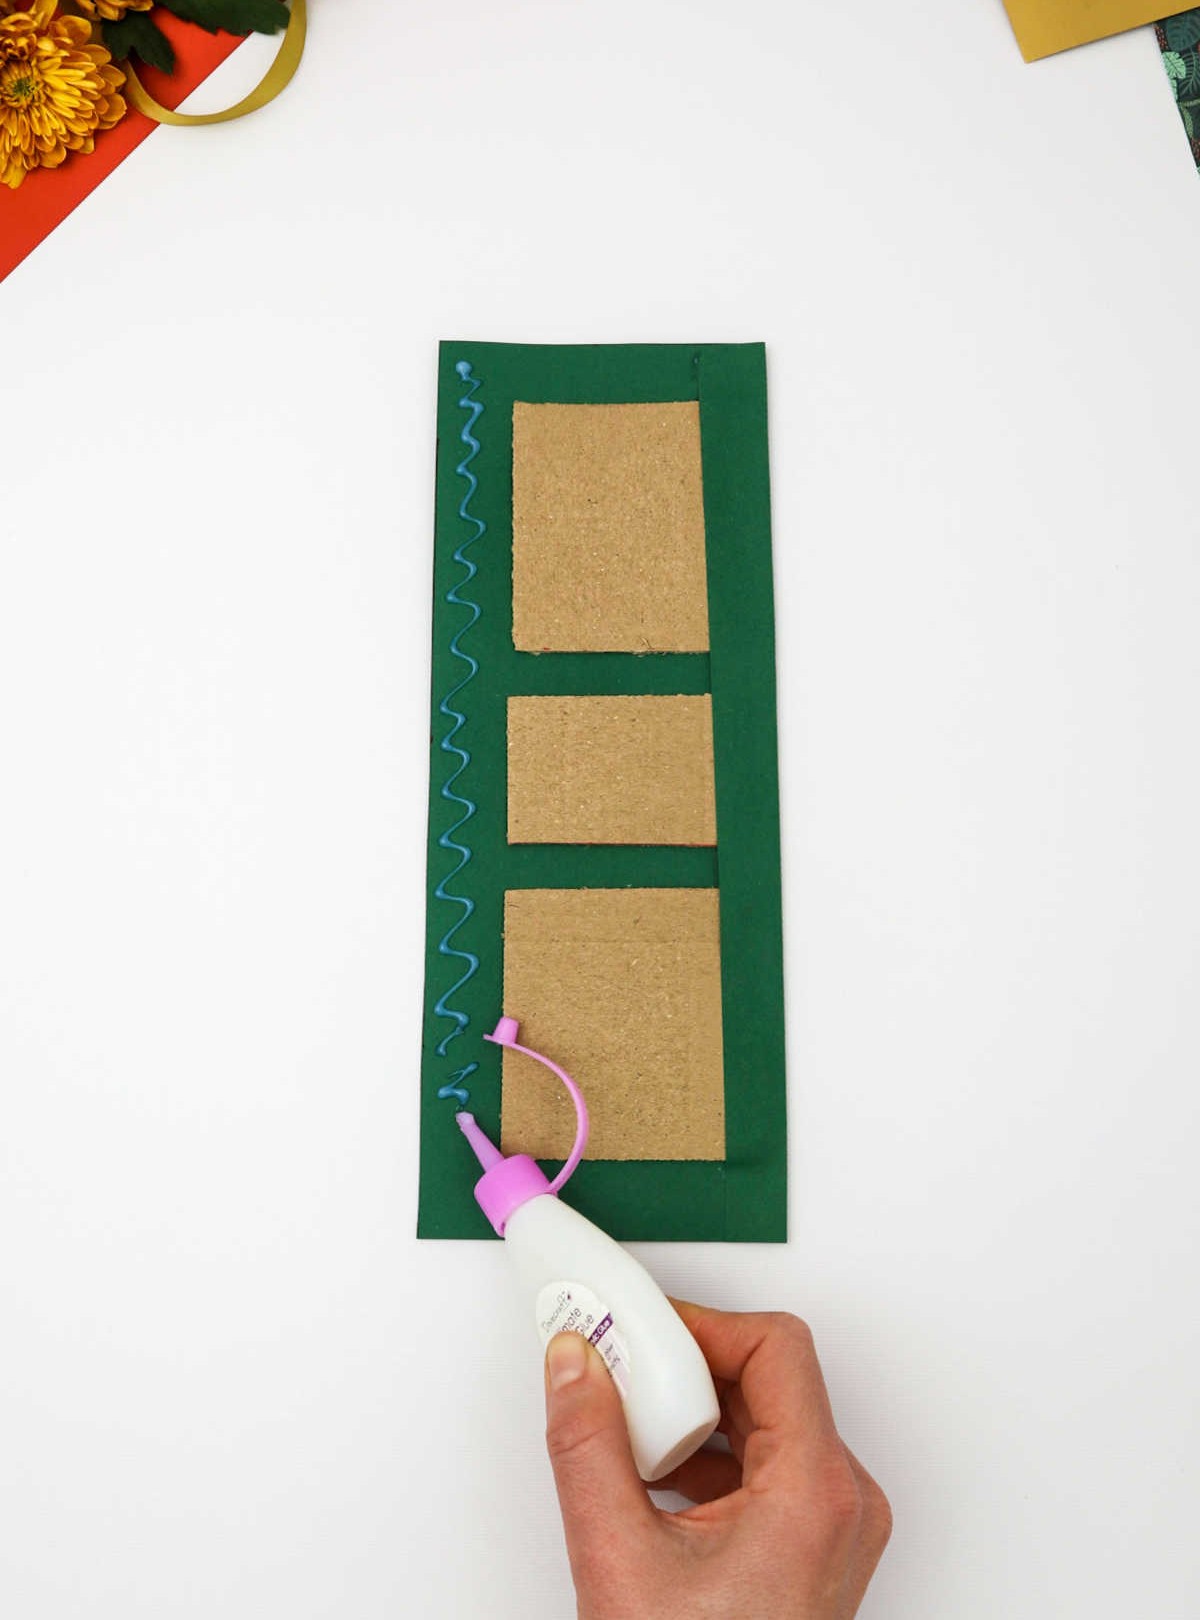
Secure the craft adhesive along the perimeter by applying a continuous strip, ensuring a strong bond from start to finish.
Step 3
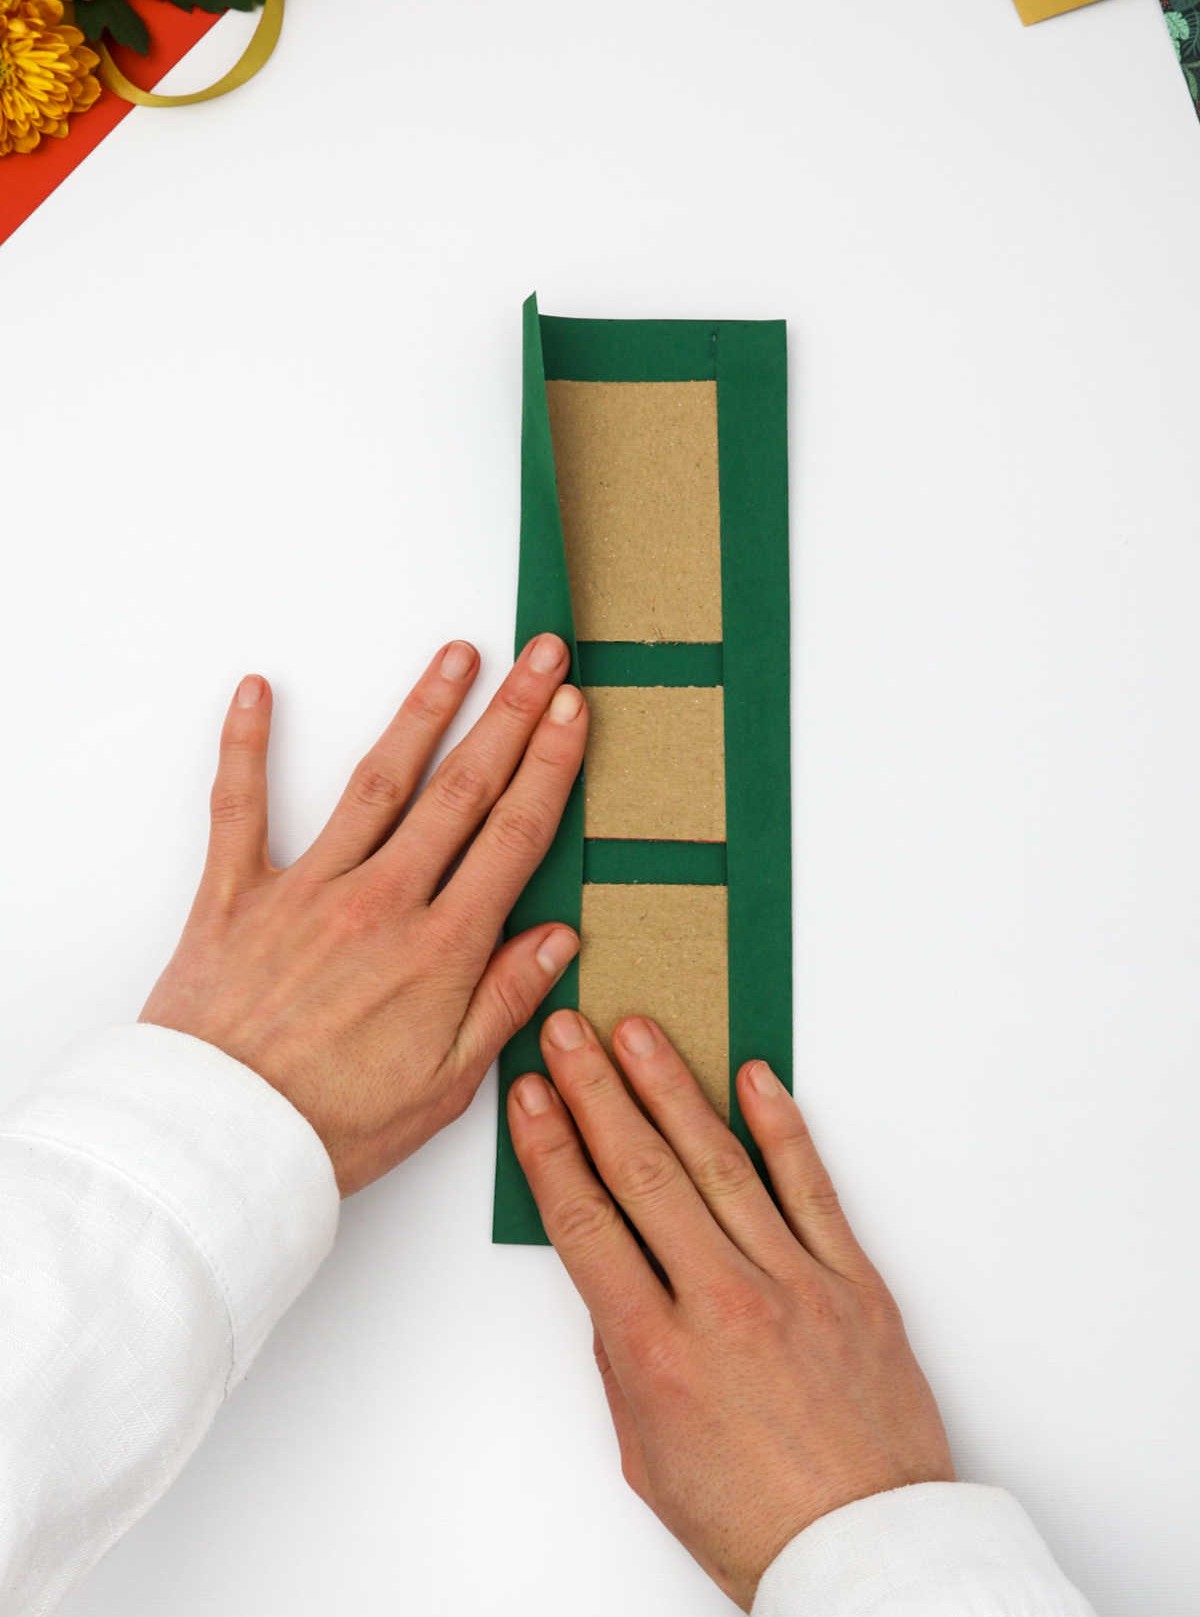
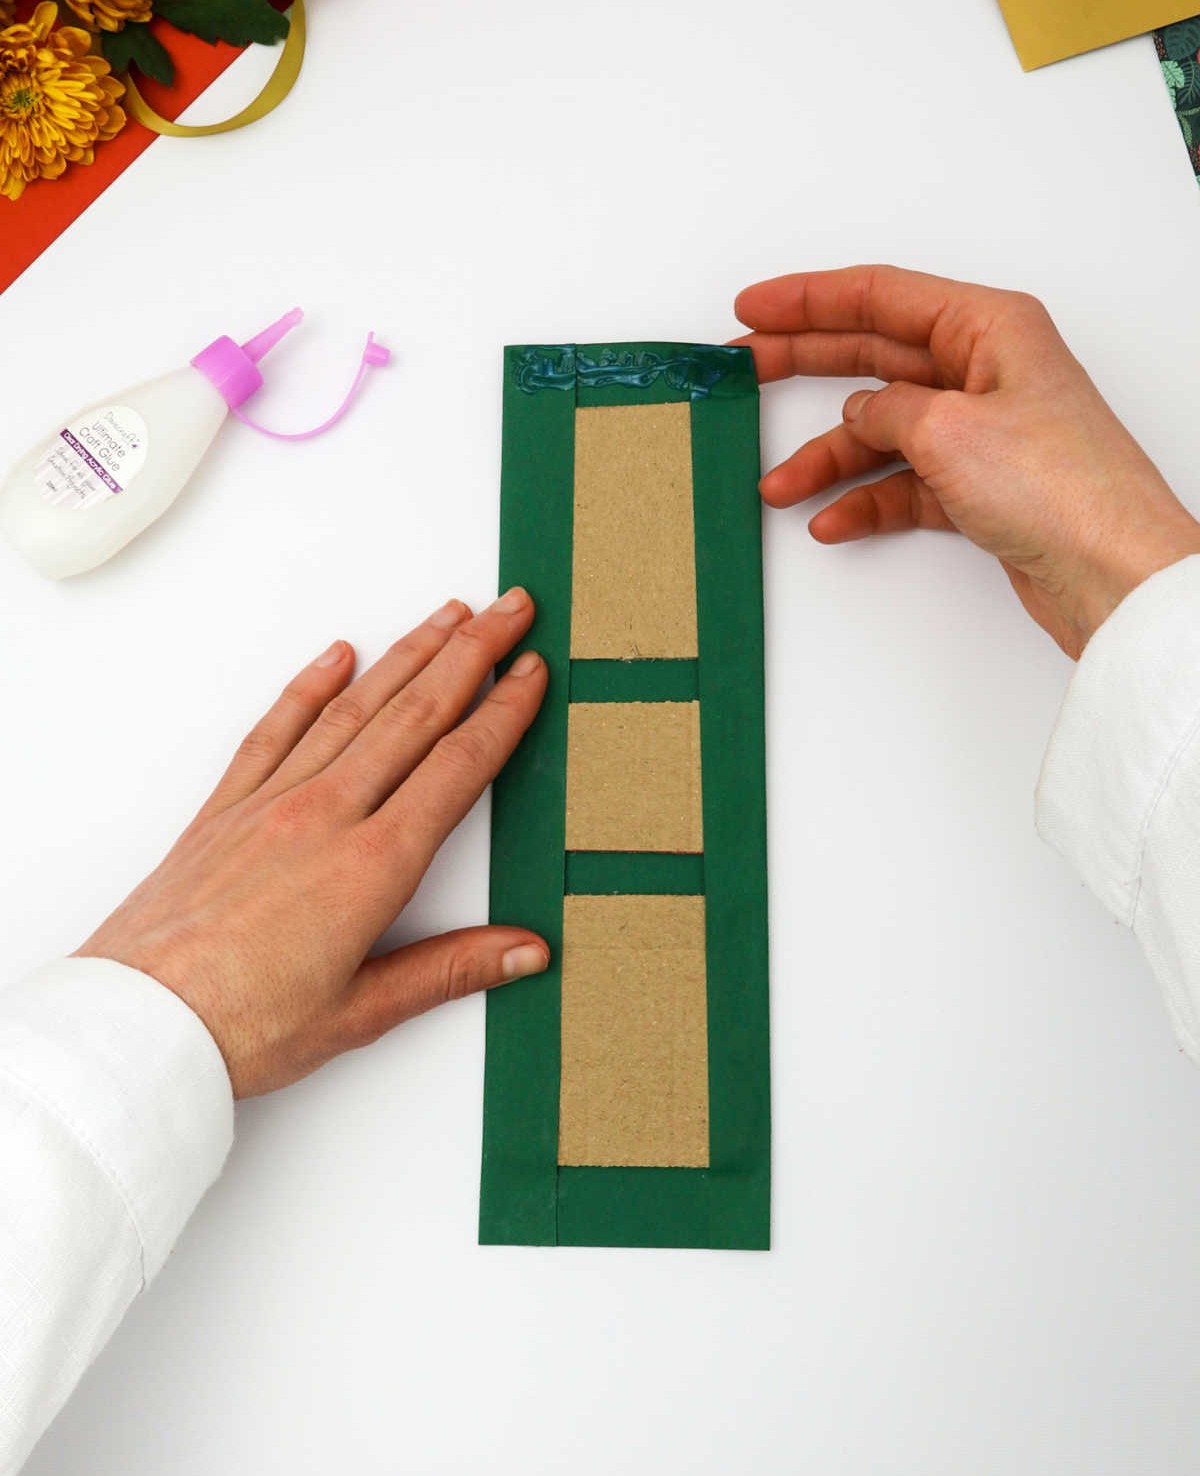

To complete the next step, take hold of the left side of the paper and fold it inward, ensuring it aligns with the cardboard pieces. Secure the folded edge by applying glue to the corresponding area. Following this process, fold the opposite edges inward over the cardboard, relying on the visual guidance provided in the accompanying images for optimal results. The finished product should resemble a seamless, compact unit.
Step 4
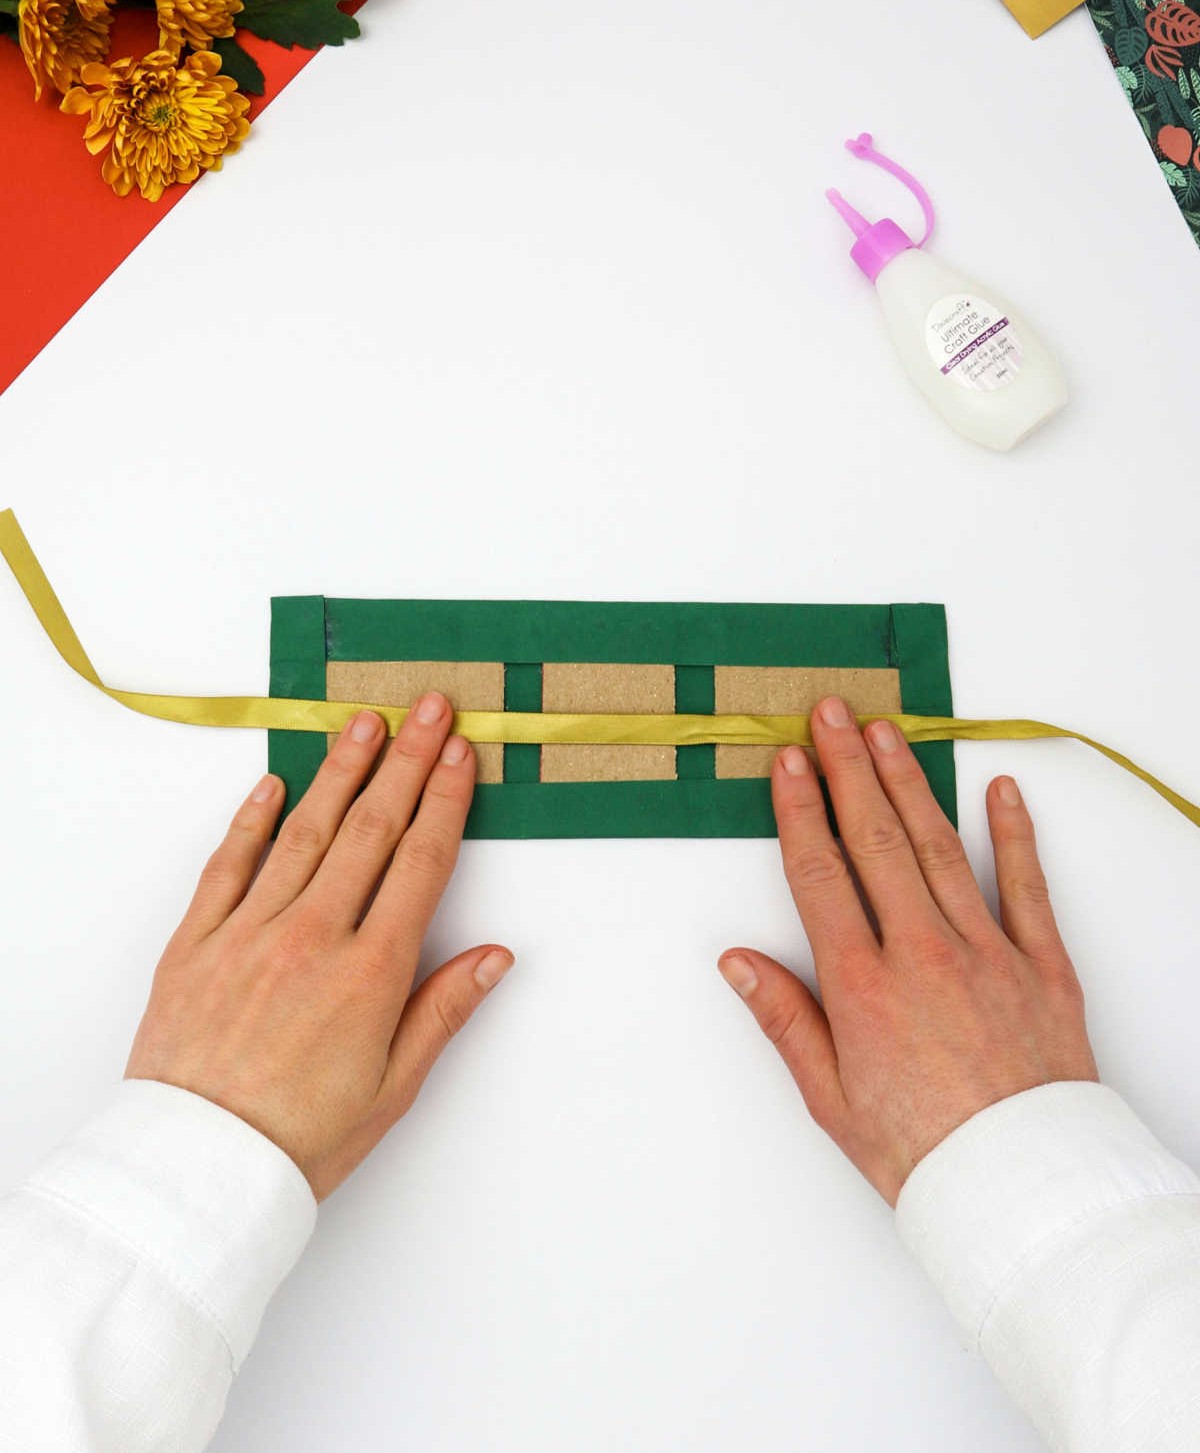
With precision, unfold a length of ribbon and deliberately position it parallel to the cardboard’s central axis. Secure the ribbon using your preferred adhesive, ensuring the ends remain accessible beyond the cardboard’s edges.
Step 5
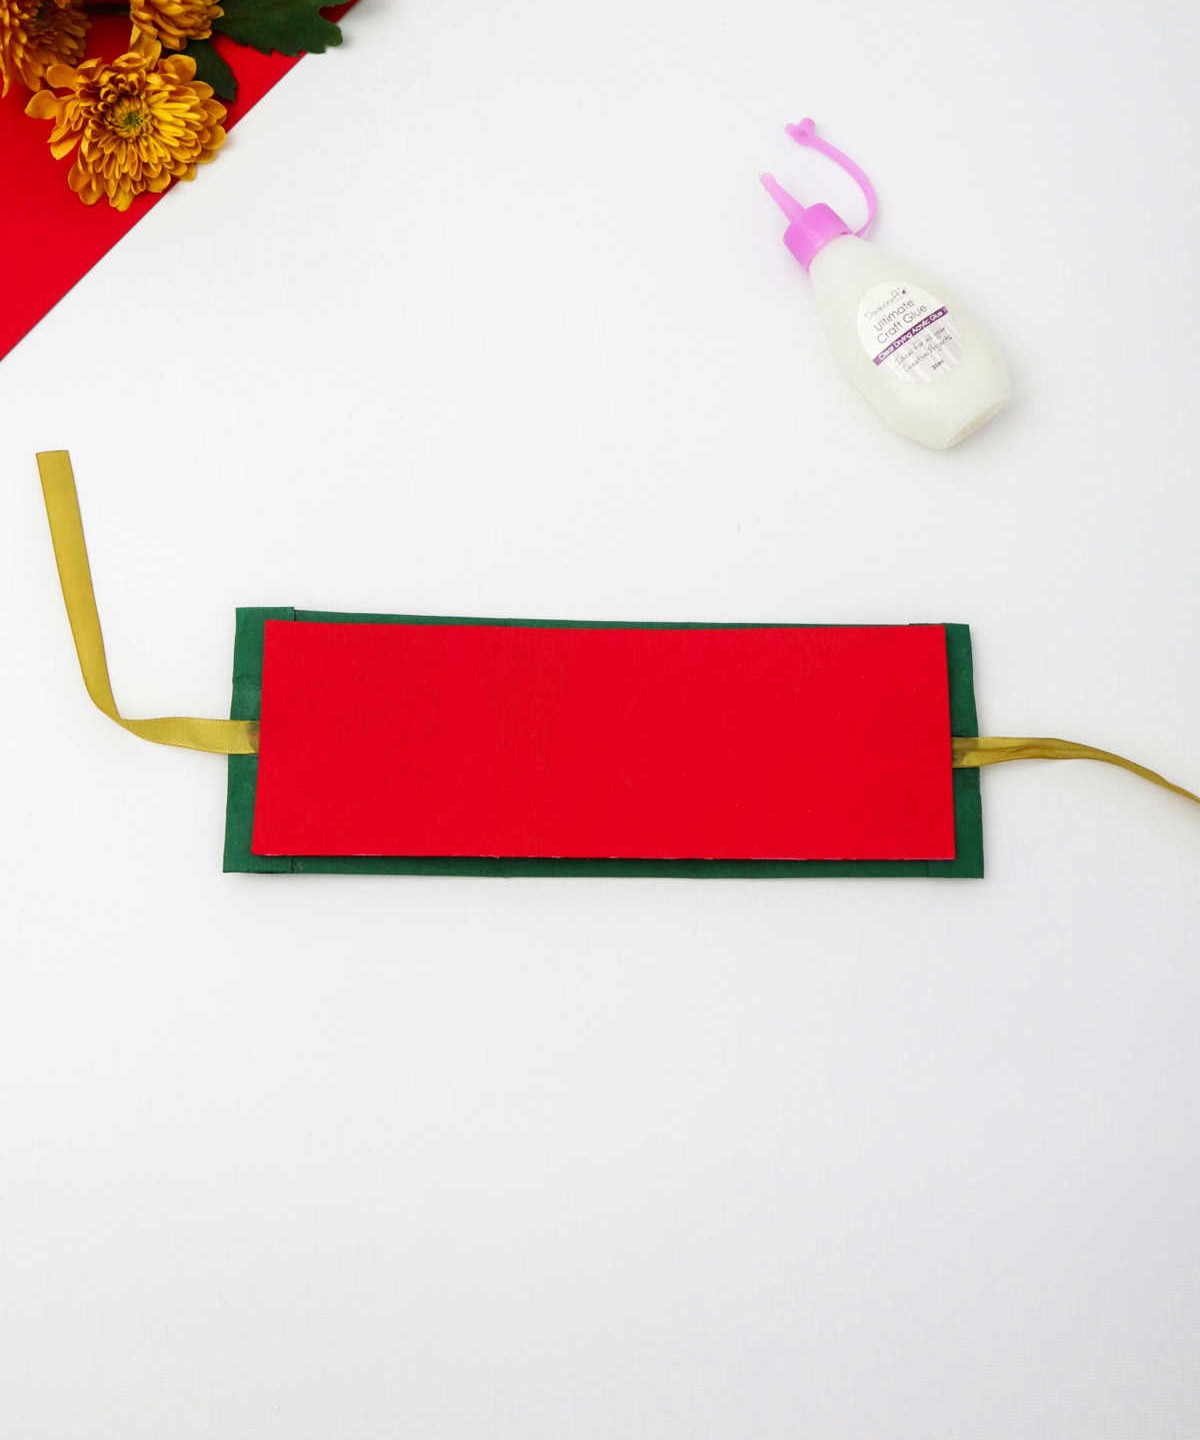
To ensure a seamless transition, carefully measure and apply a new layer of craft paper on top of the existing ribbon and cardboard combination. This will provide additional support and stability for your project while maintaining its visual appeal.
Step 6
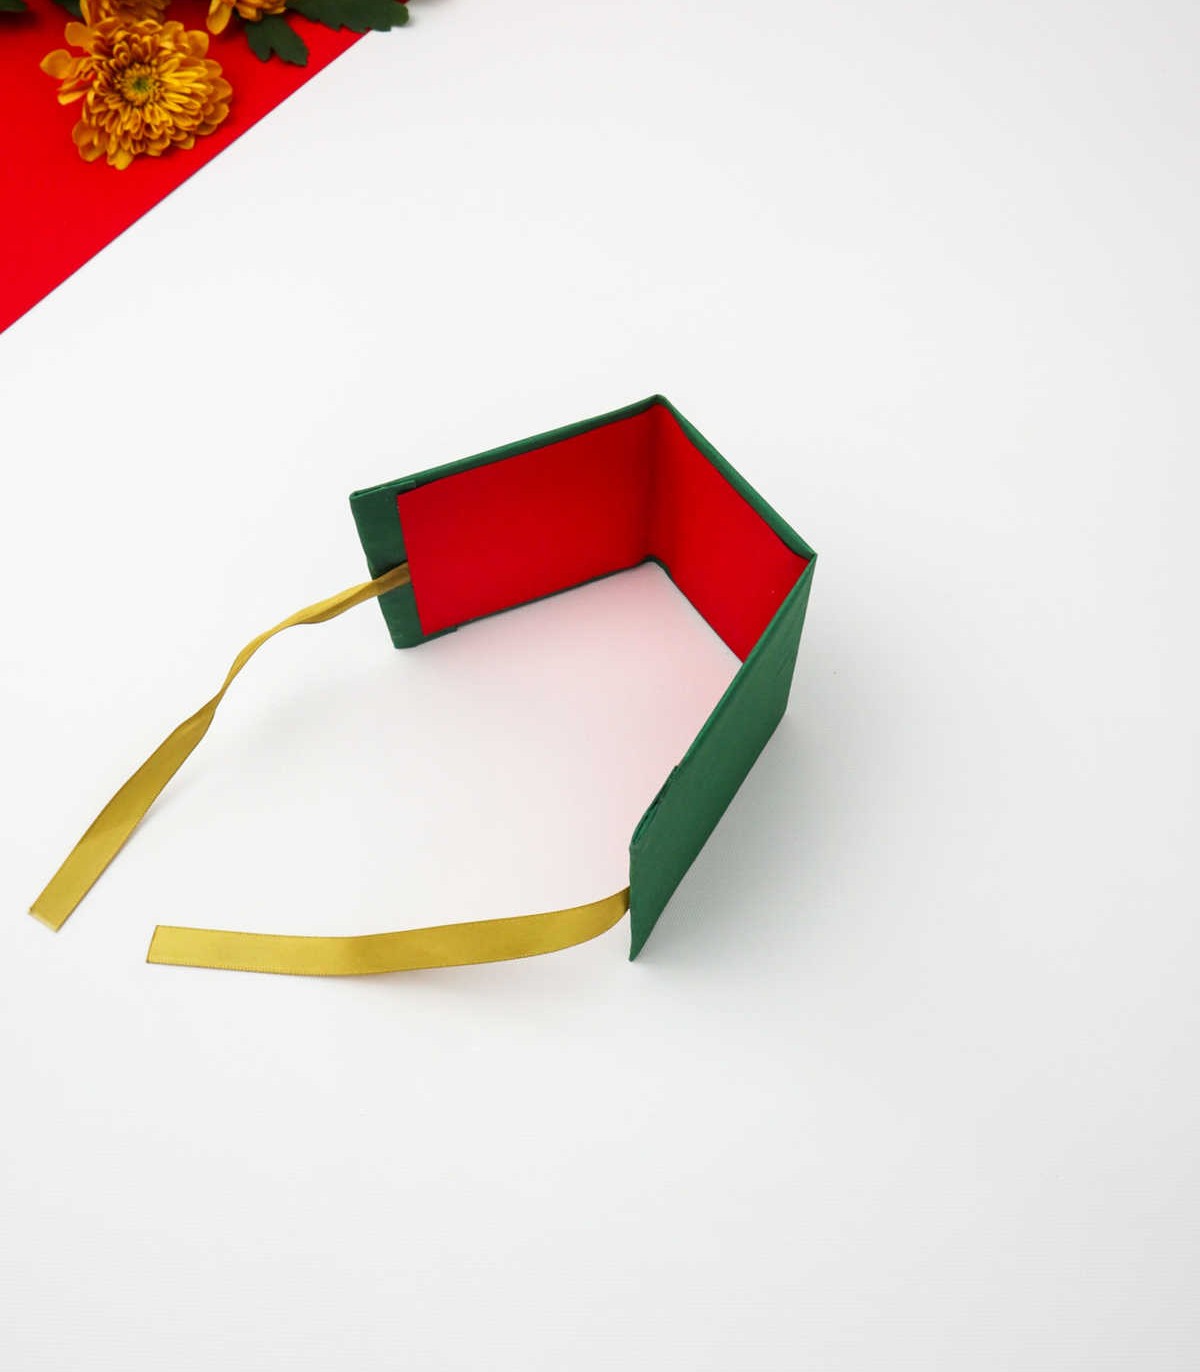
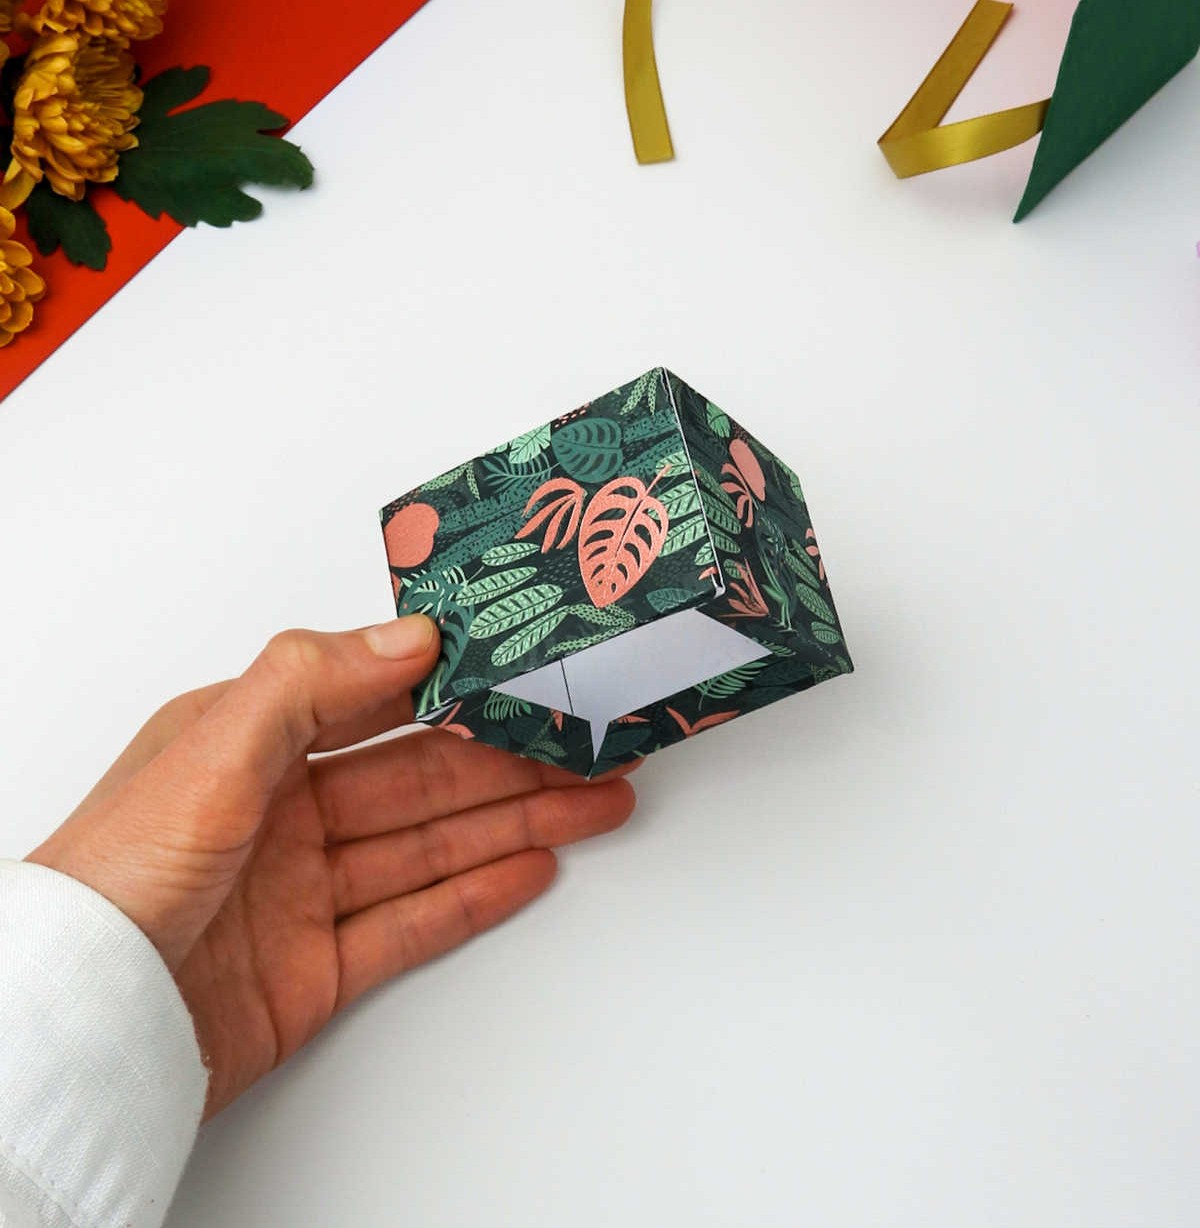
The next step may require some finesse, but with a little patience, you can successfully complete it. The key is to identify the location of the cardboard folds. Gently run your fingers along the ridges and fold them inward, as demonstrated below. This will give you a three-dimensional structure resembling an open box. Set it aside for further manipulation.
Step 7
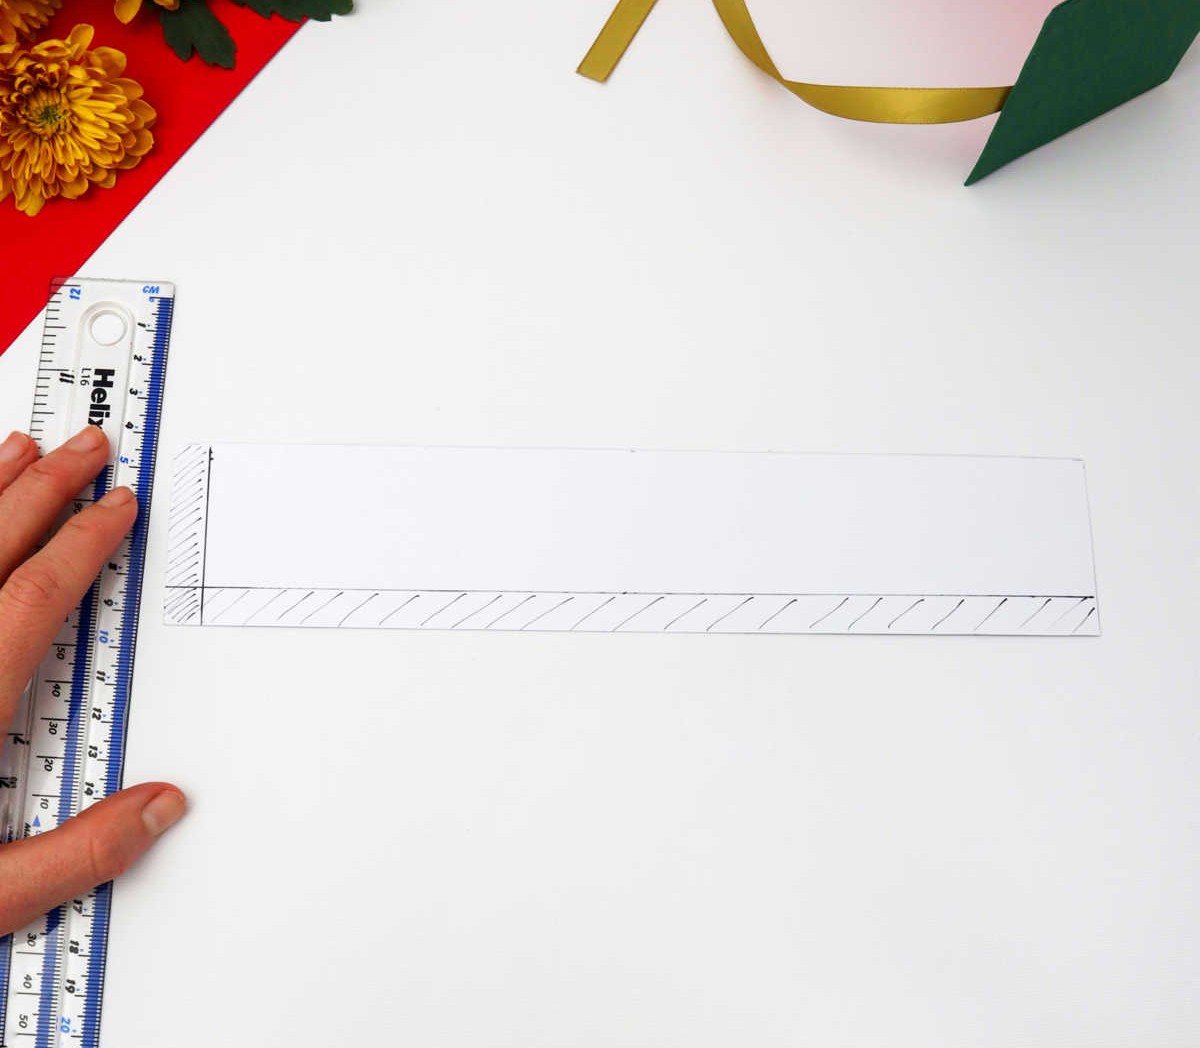
To create the overlap, grab a separate piece of paper and sketch out the design using the same measurements as before. This time, focus on creating two identical flaps that will meet in the middle. The horizontal flap should be approximately 1 centimeter wide, while the vertical flap should also measure around 1 centimeter. Don’t worry too much about precision – just aim for a rough outline that gives you an idea of how the pieces will fit together.
Step 8
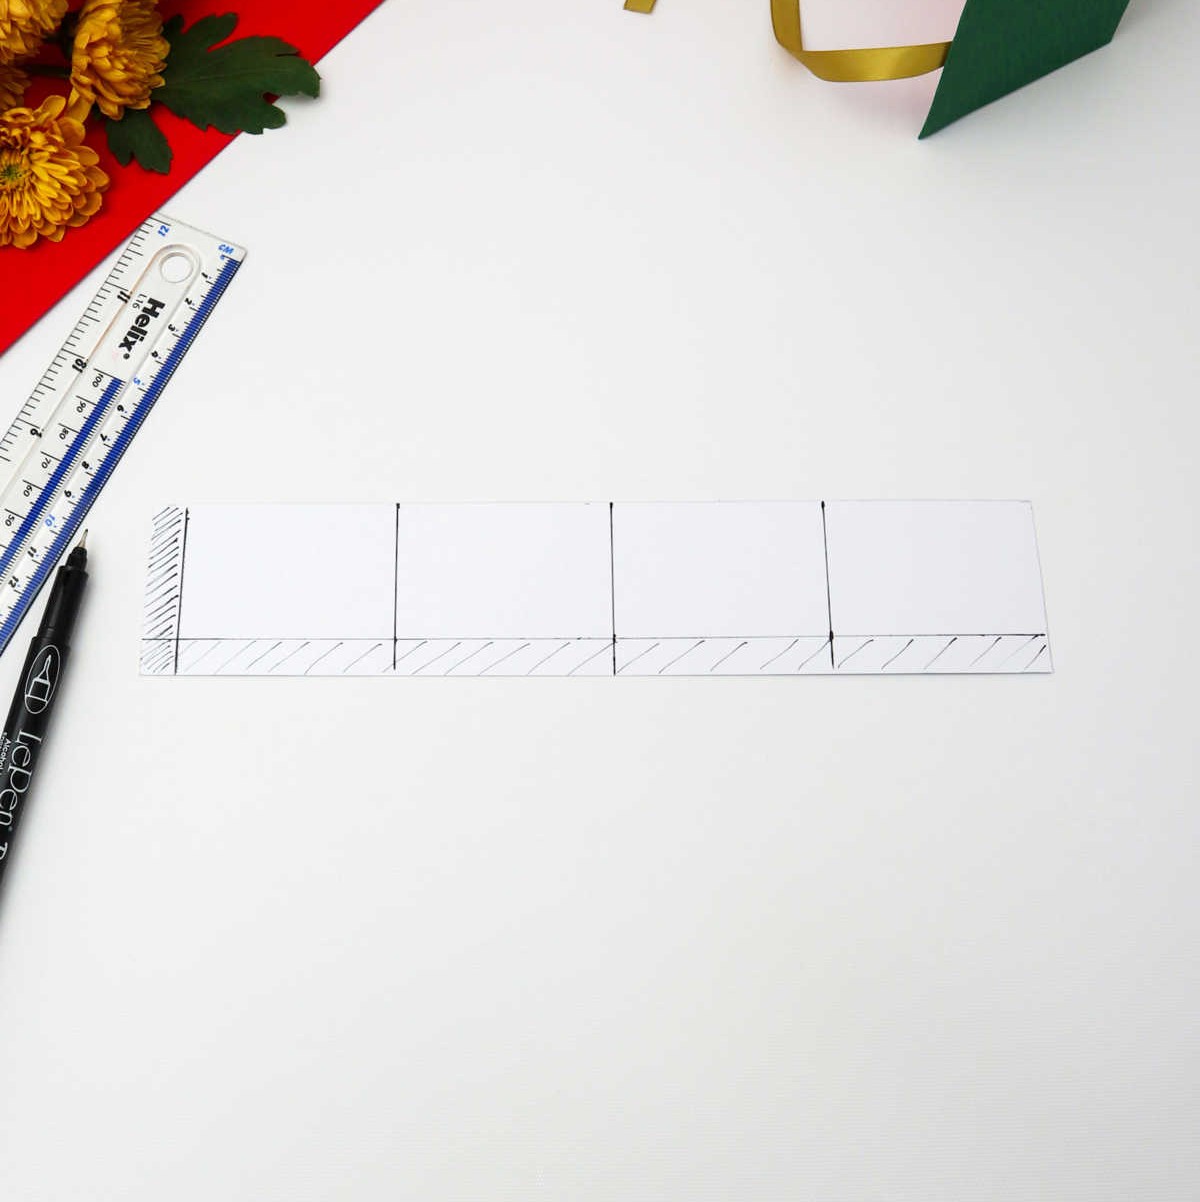
To effectively manage the overlap, simply divide it into four equal sections by creating vertical lines spaced evenly apart. Start by marking a line every 6 centimeters along the overlap’s length, and voilà! You’ll have a neatly divided outline that resembles the diagram shown below.
Step 9
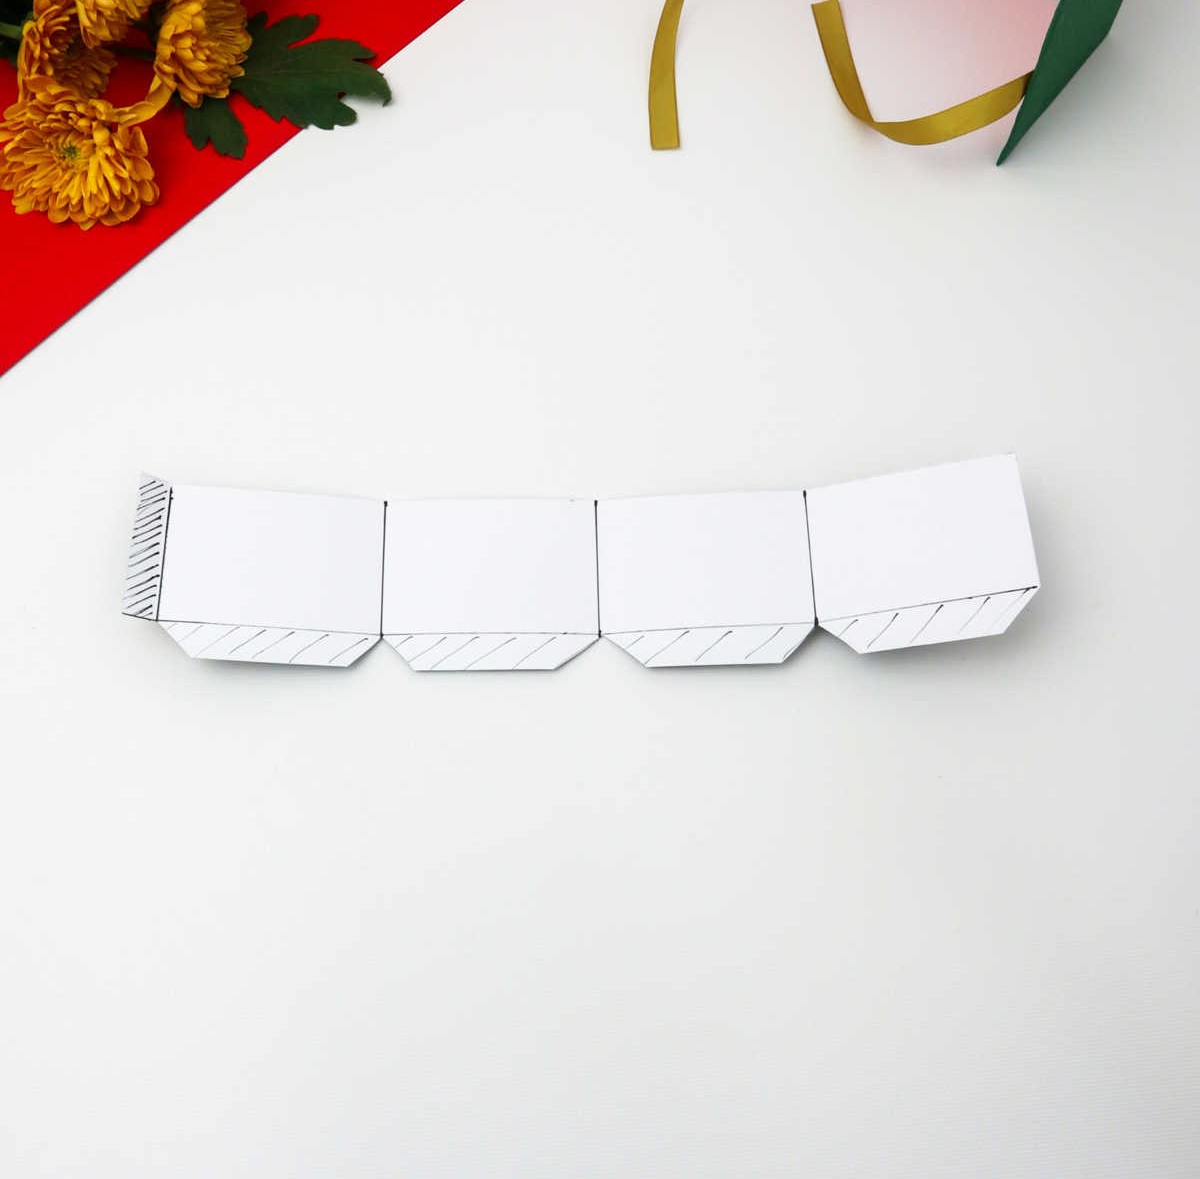
To precision-cut the paper design, employ a pair of craft cutters or scissors. Following the illustrated example, carefully trim the edges of the paper along the designated lines. Pay attention to the angled flaps, which feature slanted edges. To replicate this aesthetic, use your cutting tool to remove any excess material that might be obstructing the intended look.
Step 10
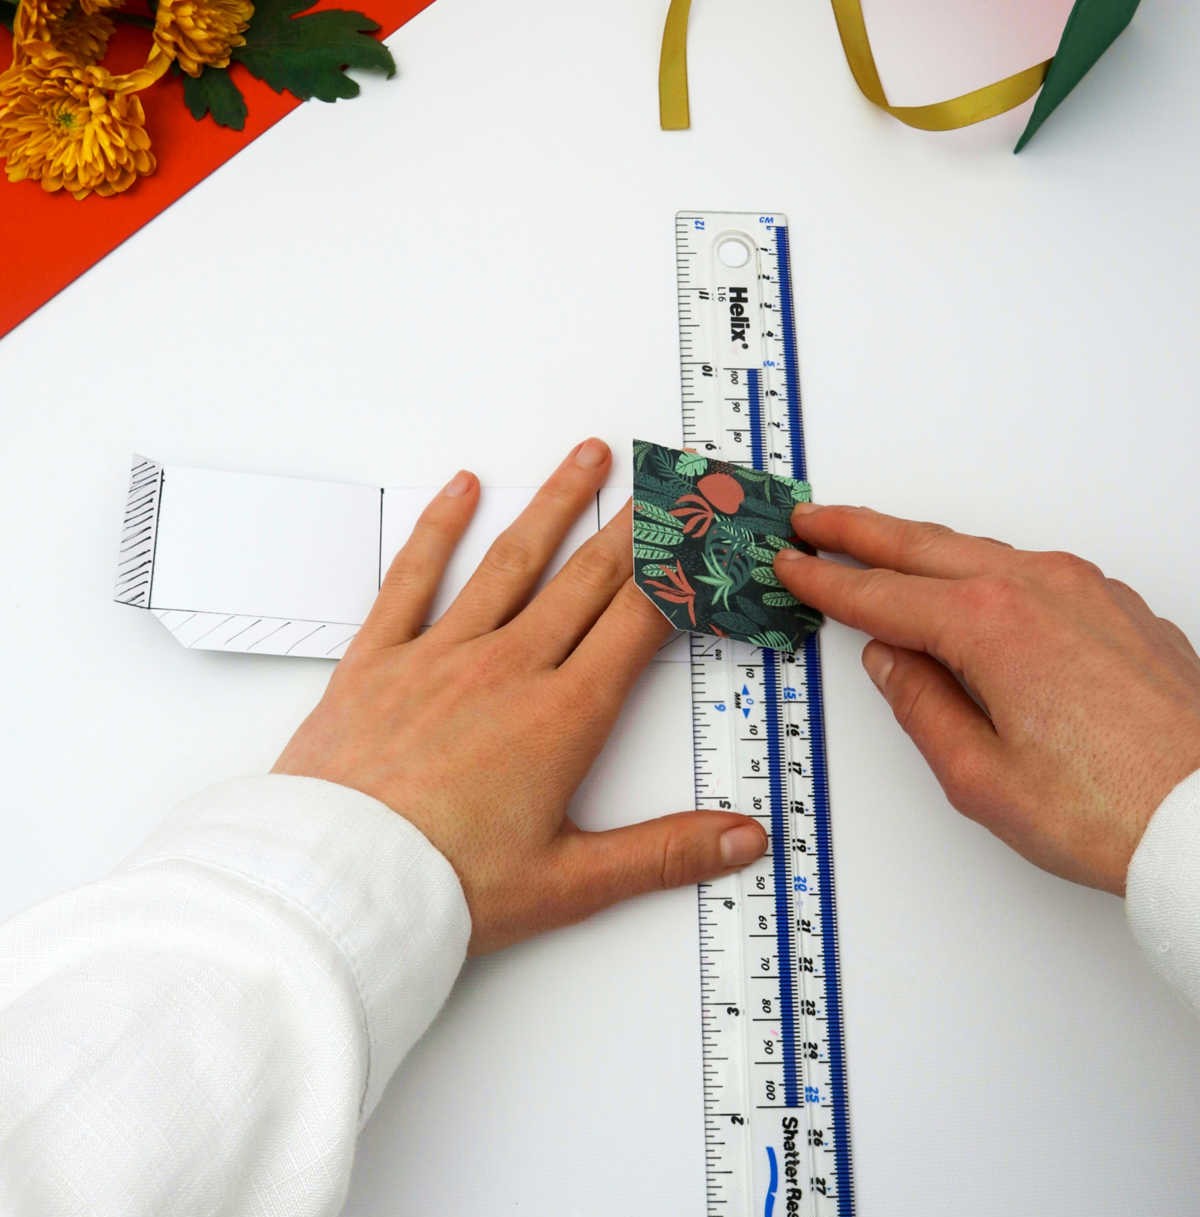
To ensure precise alignment, use a ruler to carefully bend the overlapping edges along each vertical line. Additionally, don’t forget to fold in the flapping overhanging corners, as demonstrated below, to achieve a crisp and tidy finish.
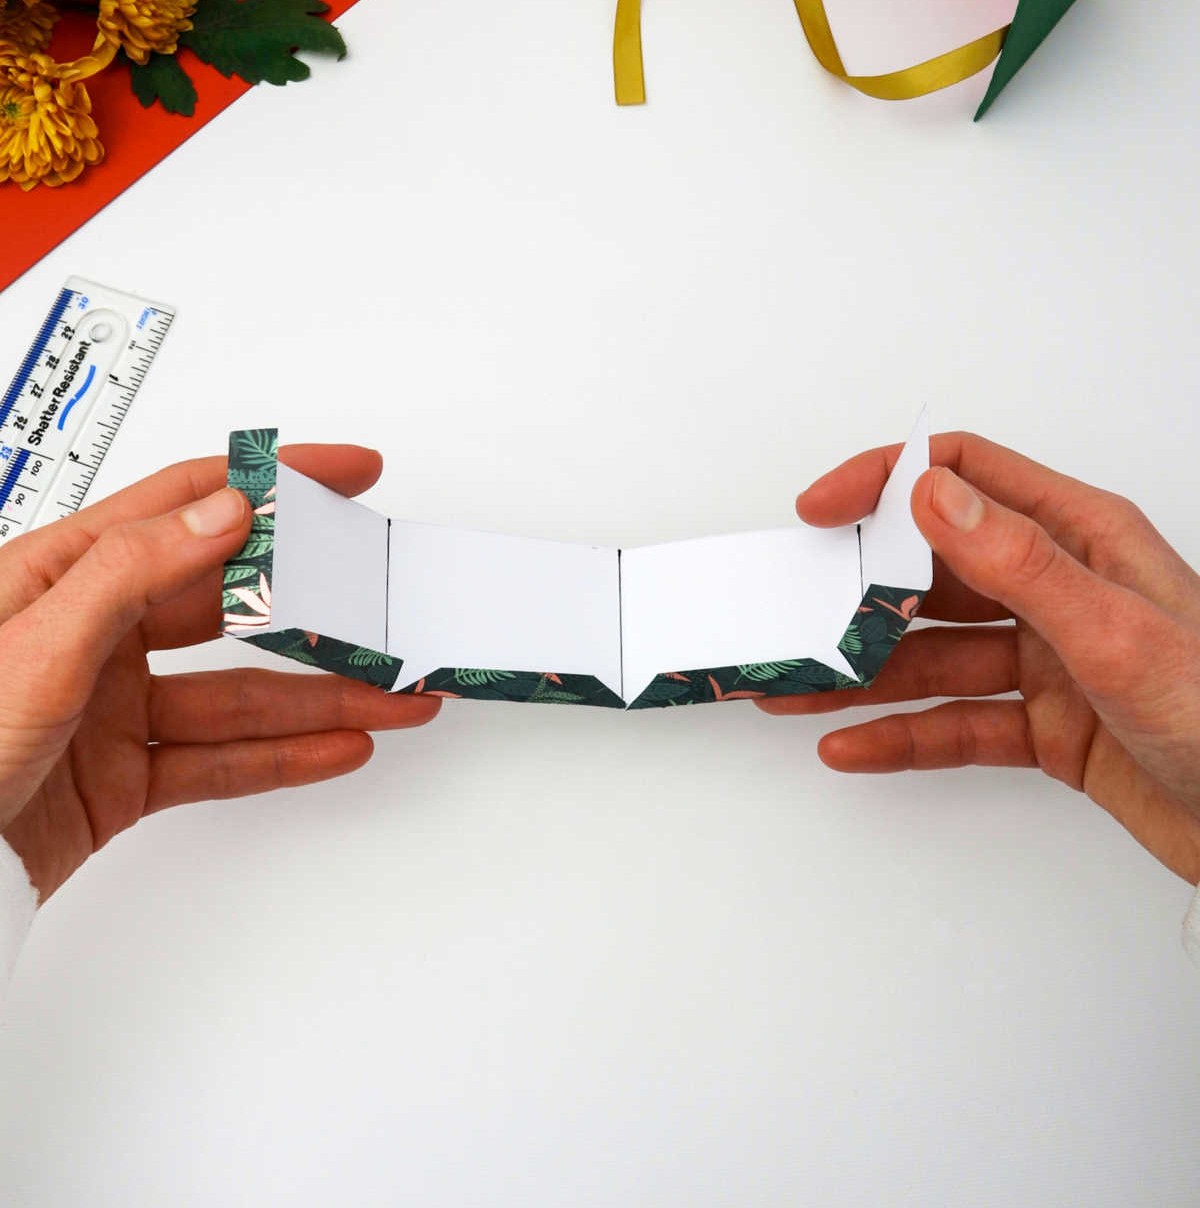
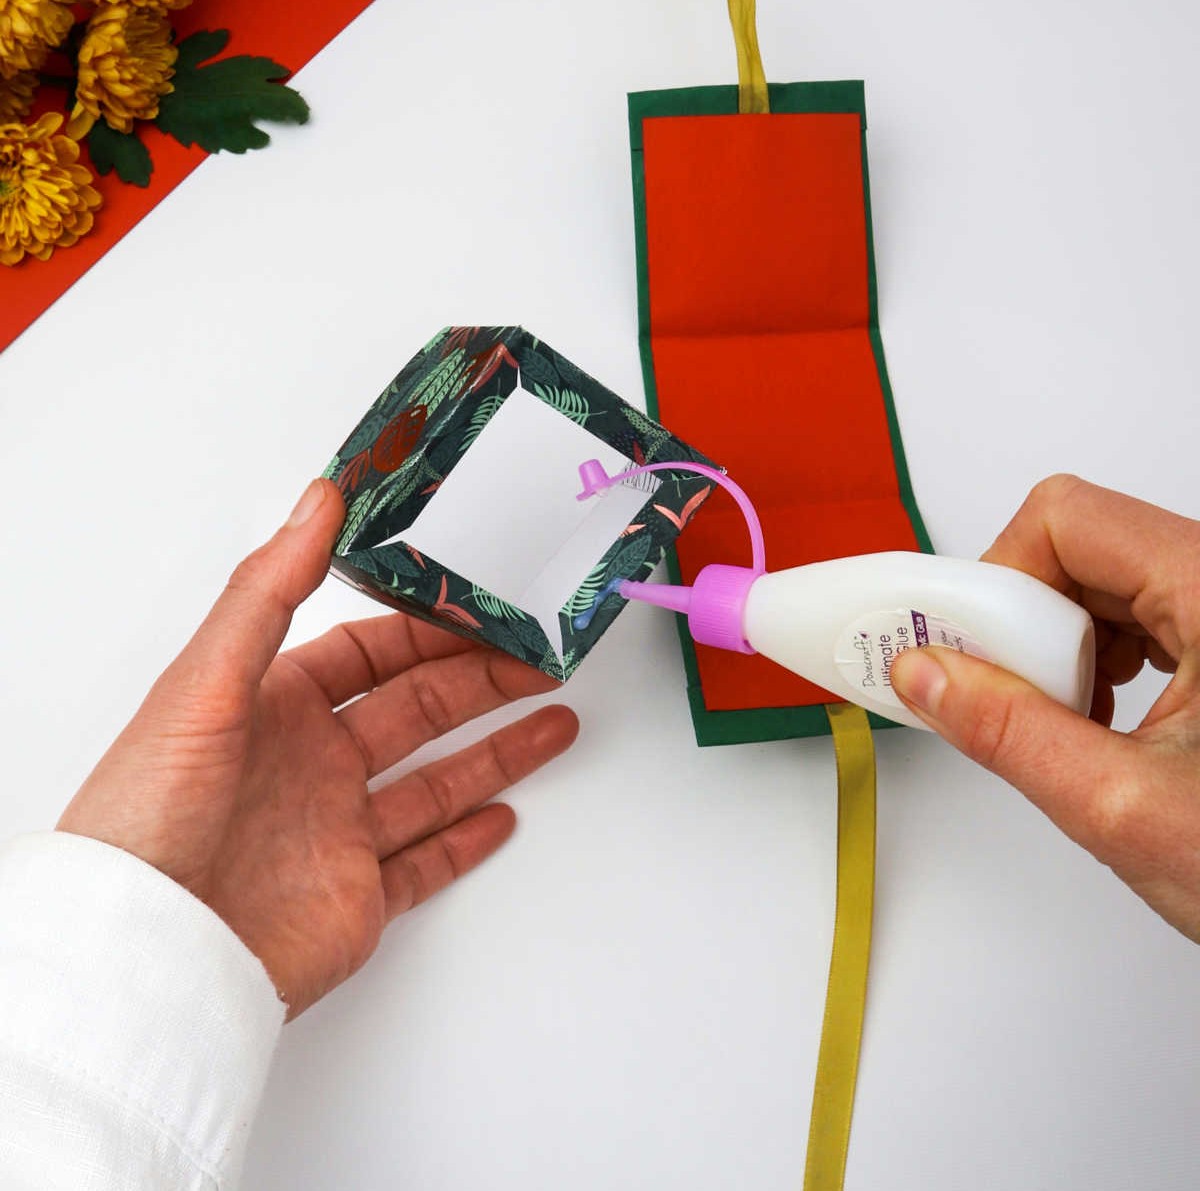
Step 11
When it comes to preparing your craft paper for the next step, precision is key. To achieve a strong and durable bond, apply a small but strategic amount of glue around the edges of your paper. Be cautious not to overdo it, as excessive glue can lead to a soggy mess and compromise the integrity of your project. By using just the right amount of adhesive, you’ll be able to create a seamless connection that will withstand the test of time.
Step 12

To construct the desired shape, delicately crease the paper inward, forming a three-dimensional framework resembling a square with four distinct walls. As the moisture evaporates, permit the paper to fully dry, ensuring it reaches a stable state before progressing to the subsequent phase of your creative endeavor.
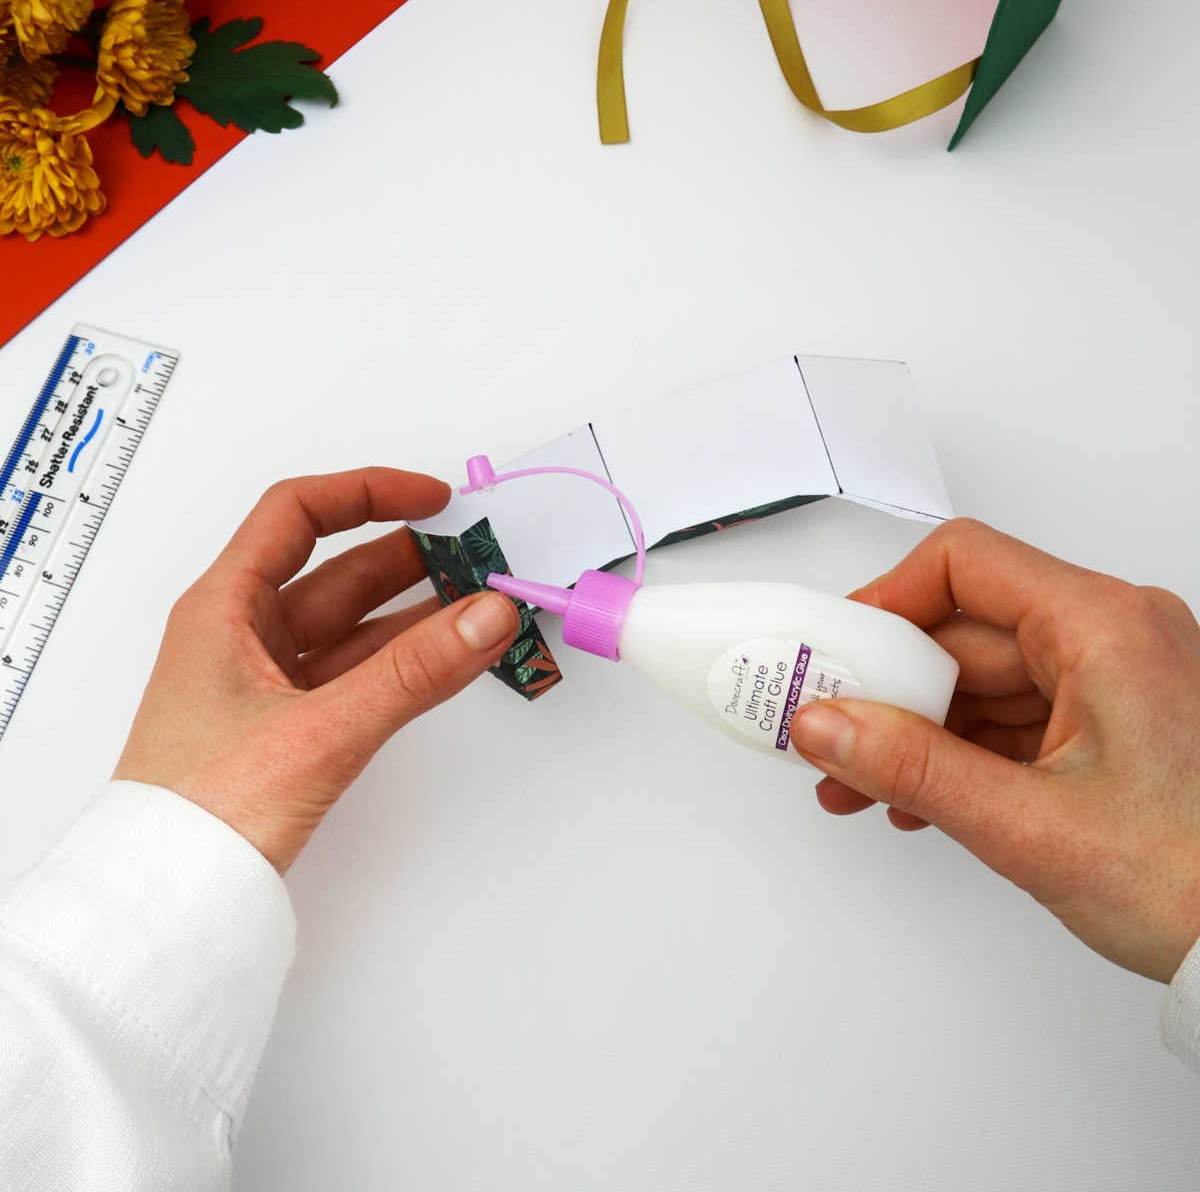
Step 13
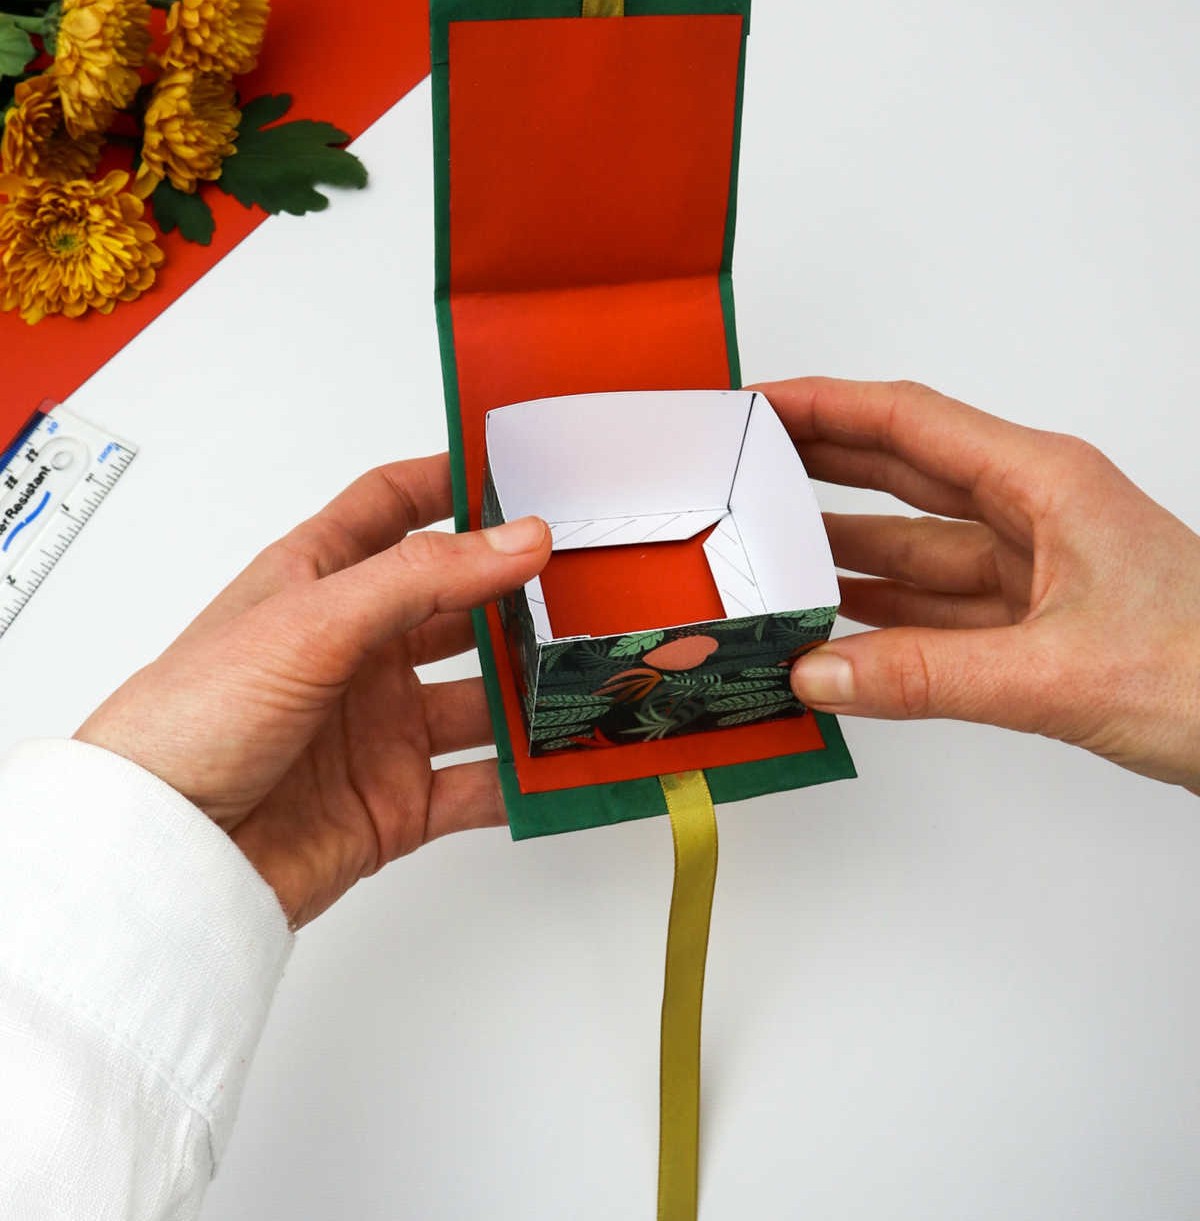
Retrieve your craft glue once again and apply a moderate layer of adhesive to the bottom flaps, taking care not to overdo it. Next, carefully place the cube onto the surface of the first component set aside earlier, ensuring that the paper walls remain intact by applying gentle pressure.
Step 14
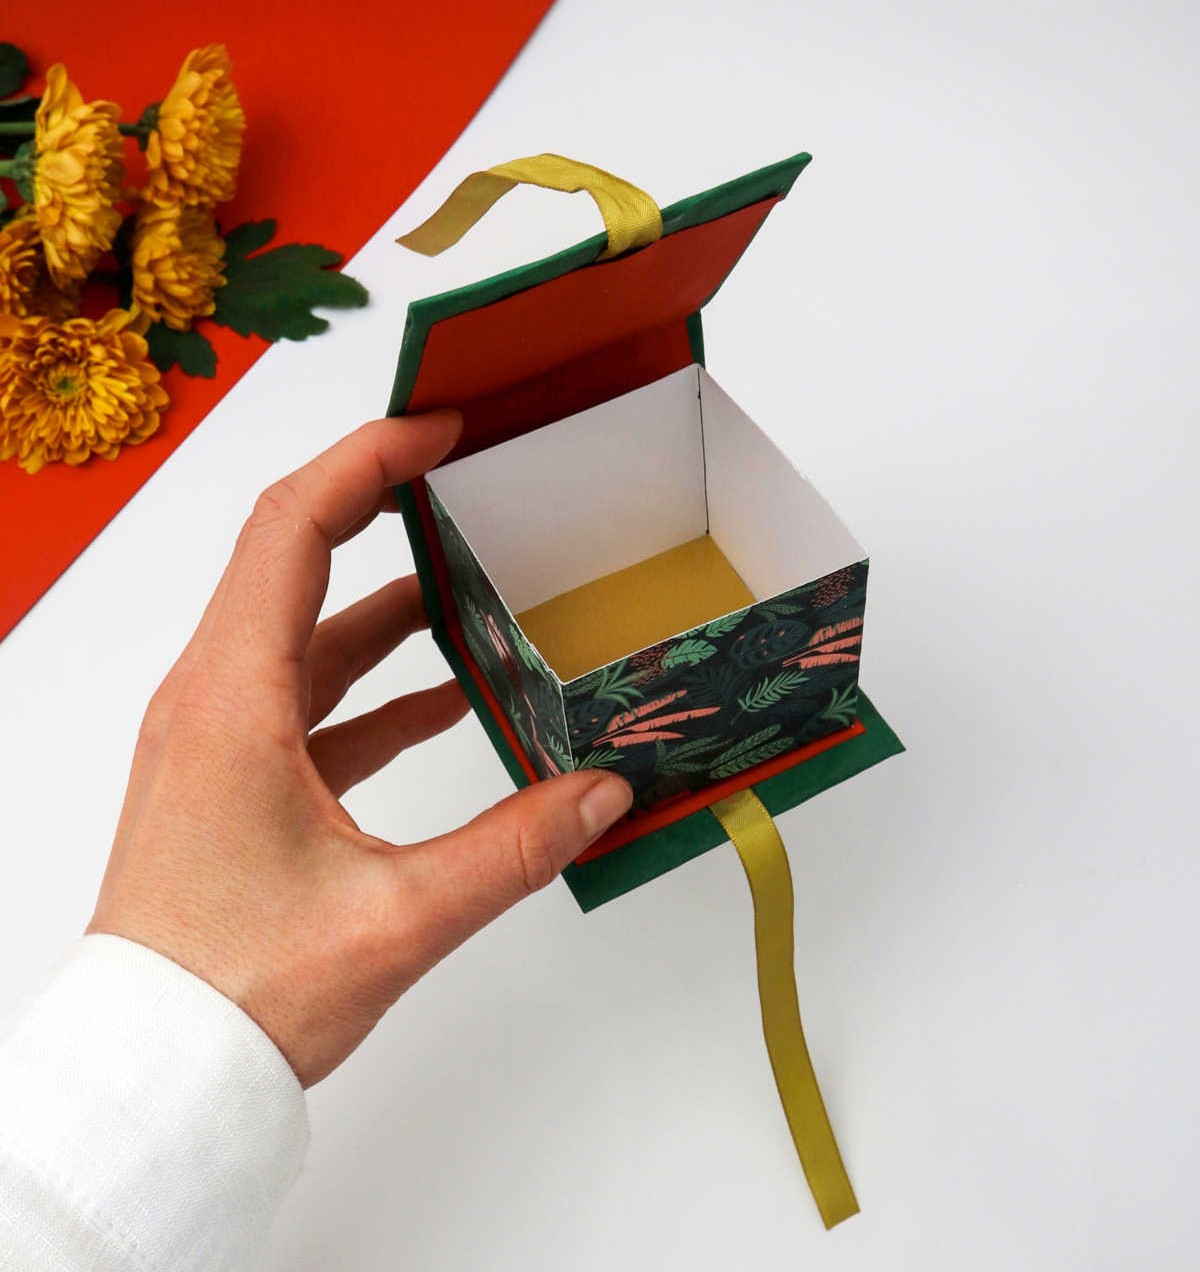
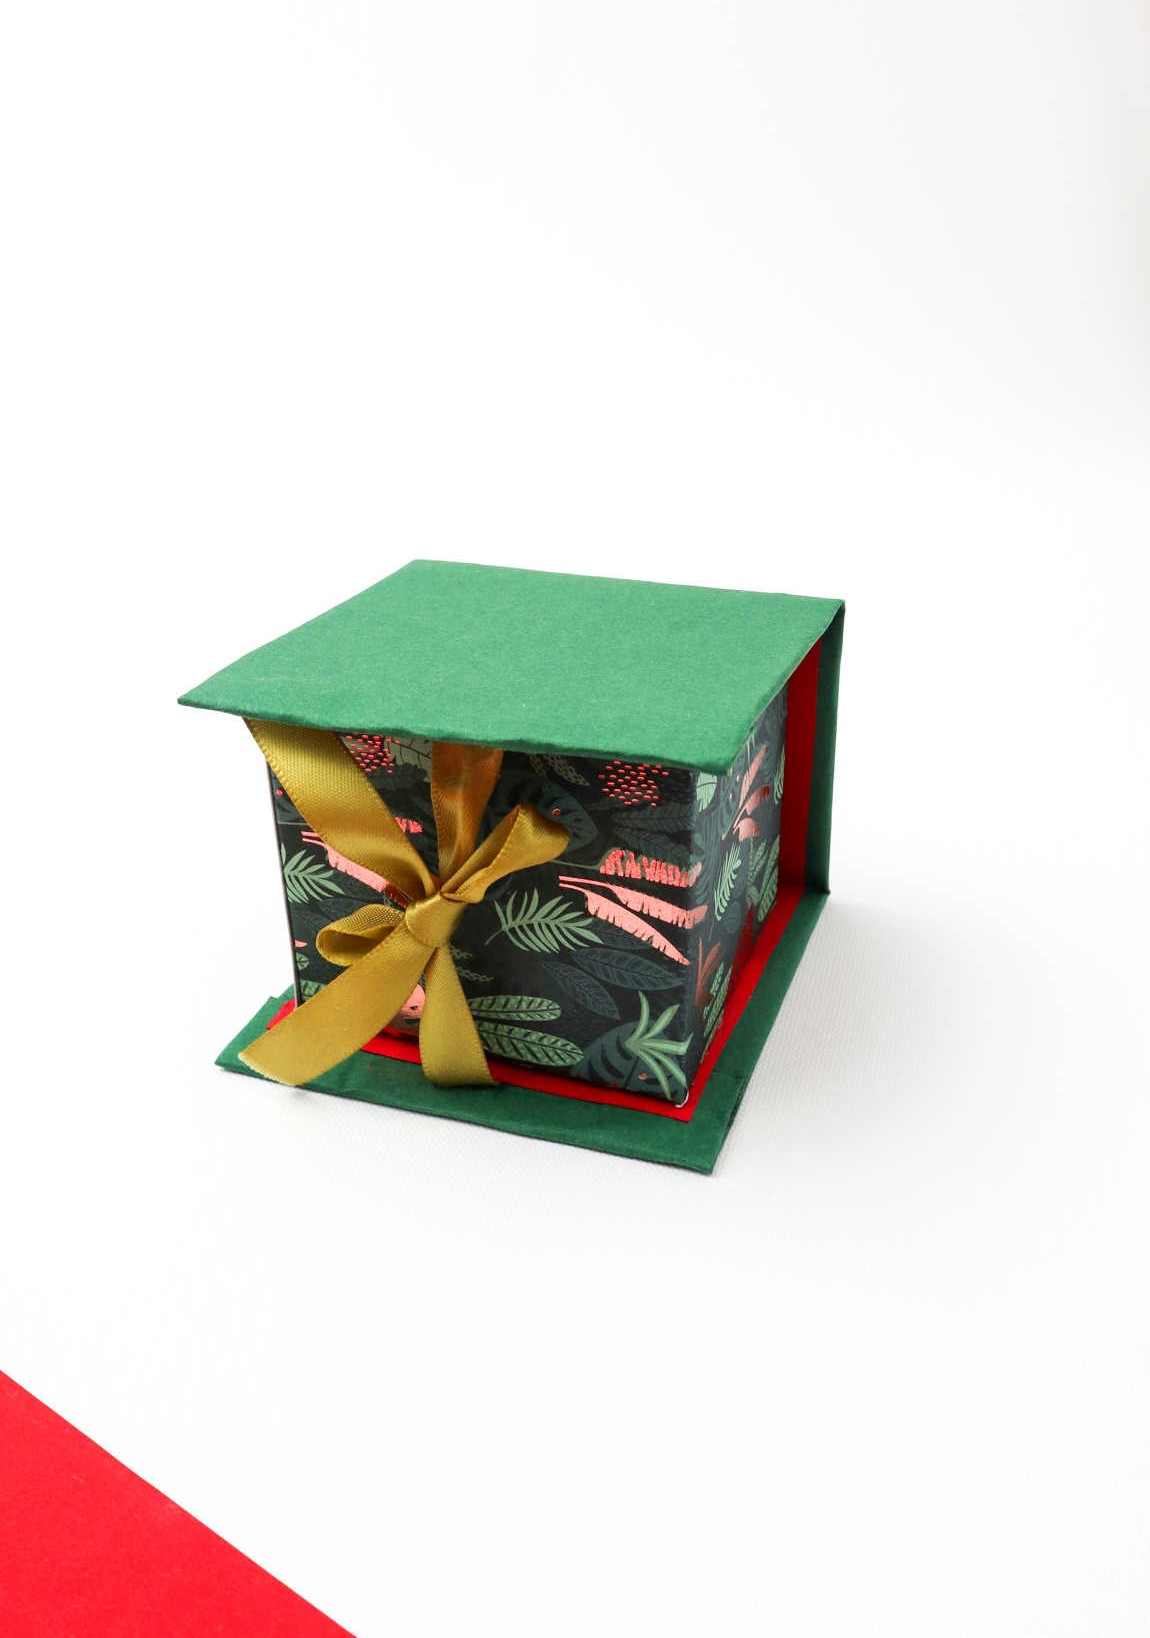
When creating your cube structure, recall that you initially divided it into four equal parts. Using these measurements, prepare a small scrap of paper for the base of your gift box by cutting out a piece to the required size. For this specific project, the base should measure 6cm x 6cm. Once completed, secure the base in place and you’ll have successfully made a gift box from scratch. The process is simple enough that you can easily replicate it to create multiple boxes for various occasions.
What Can You Use This Gift Box For?
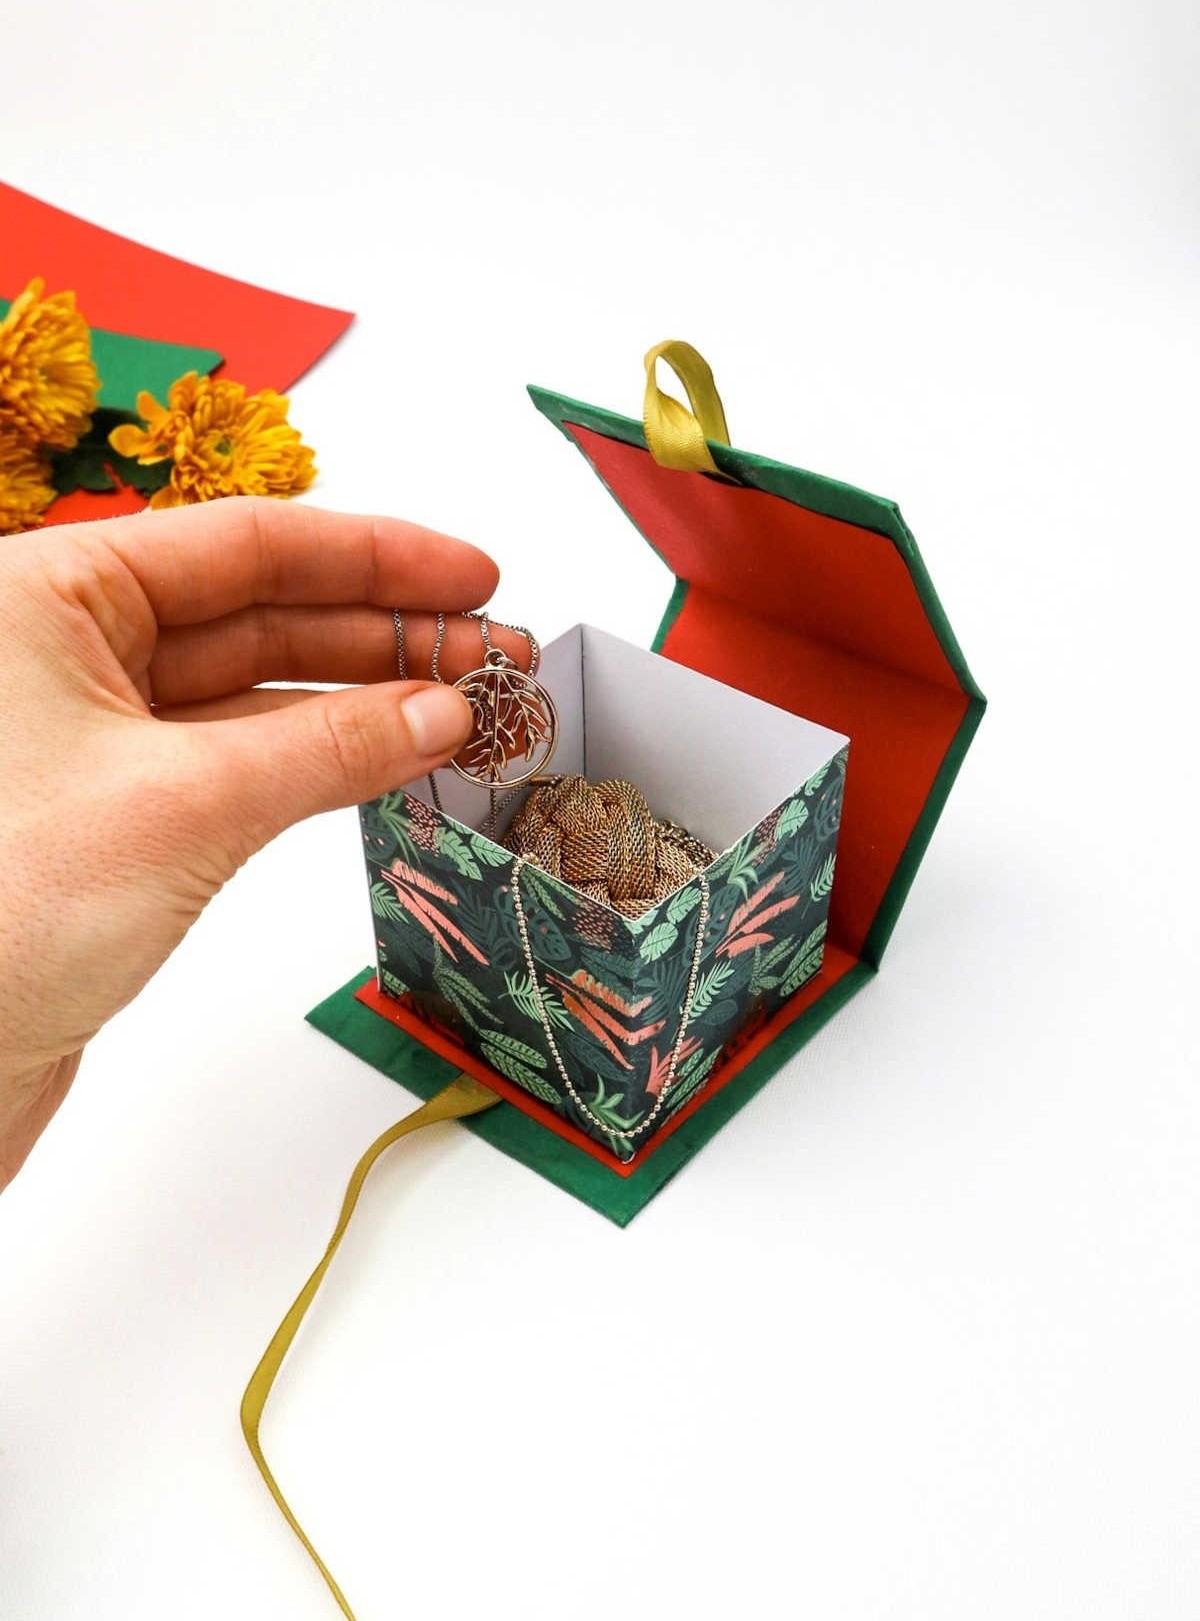
The versatility of this gift box is truly impressive. Not only can it be filled with an assortment of small items such as party favors, confetti, or even candies, but it’s also an excellent choice for gifting friends, family members, including mothers and sisters. In fact, a jewelry box is another fantastic way to utilize its space, perfect for storing rings, earrings, and other precious trinkets.
How to Make a Gift Box
Create a unique and thoughtful gift by crafting your own customized gift box using craft paper and cardboard. This DIY project is perfect for teens and adults looking to add a personal touch to their presents. With just 30 minutes of total time invested, you can create a one-of-a-kind gift box that showcases your creativity and thoughtfulness.
To get started, set aside about 20 minutes for the main crafting process, followed by an additional 10 minutes for any final touches or decorations.
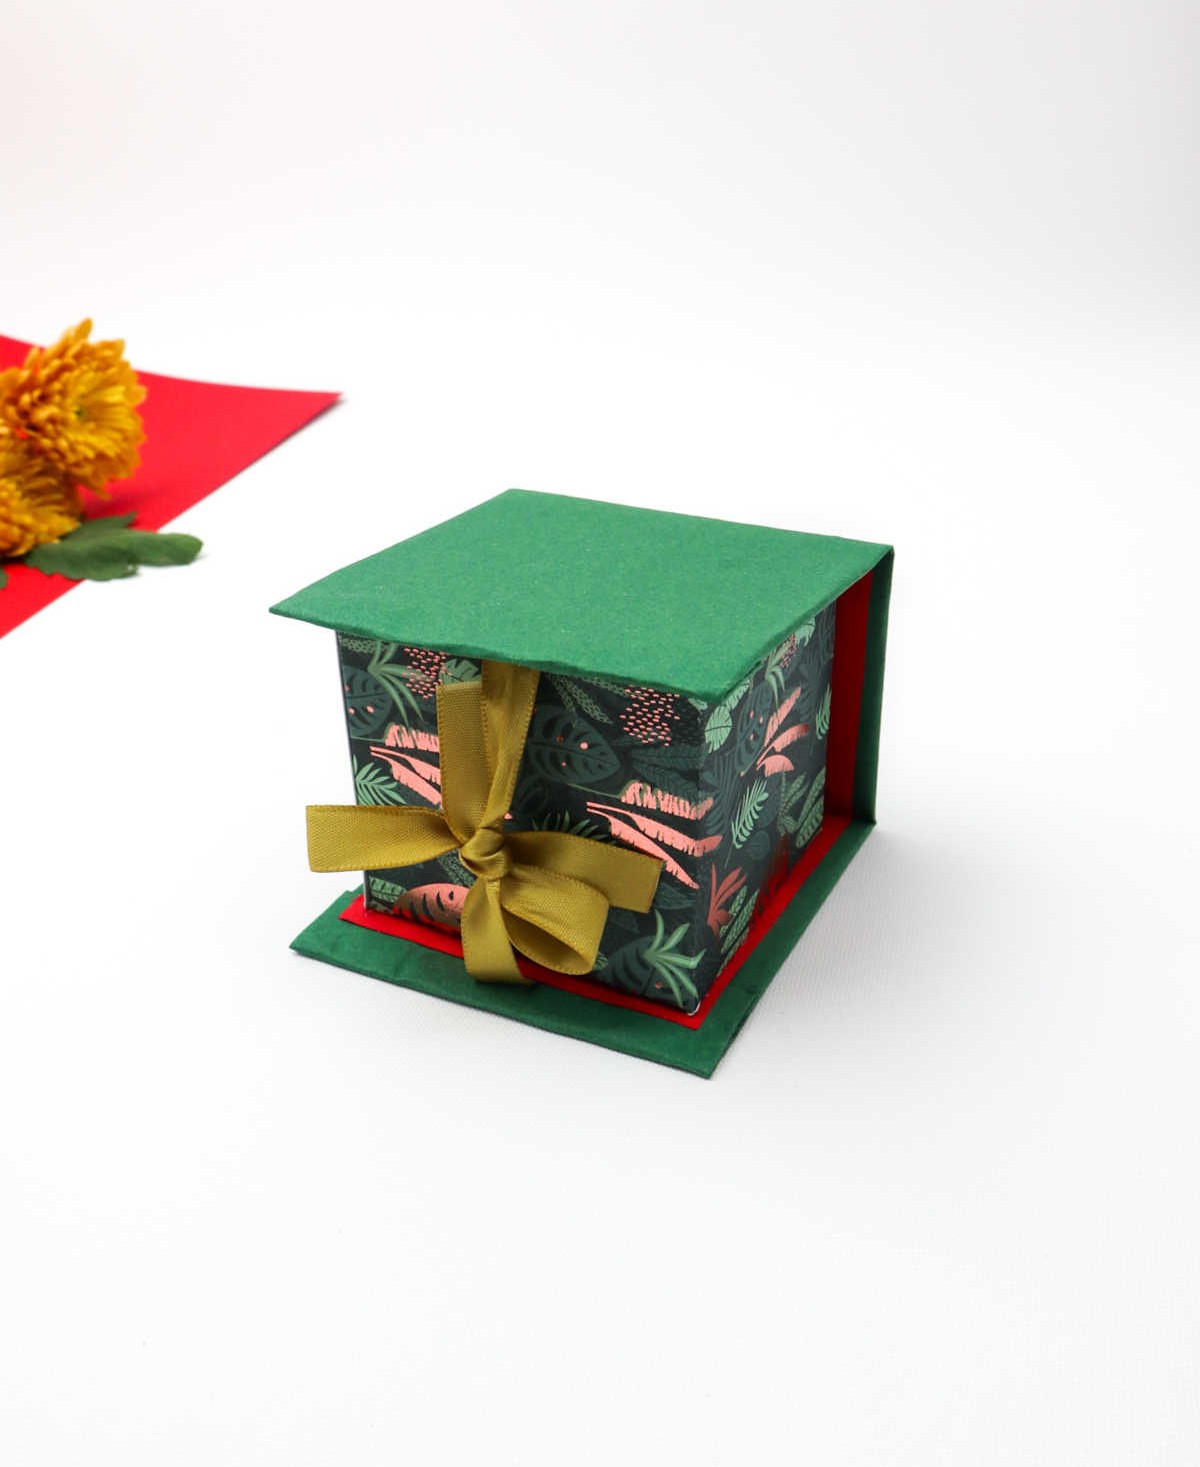
The end result is a beautifully crafted gift box that will make any present feel more special and meaningful.
Equipment
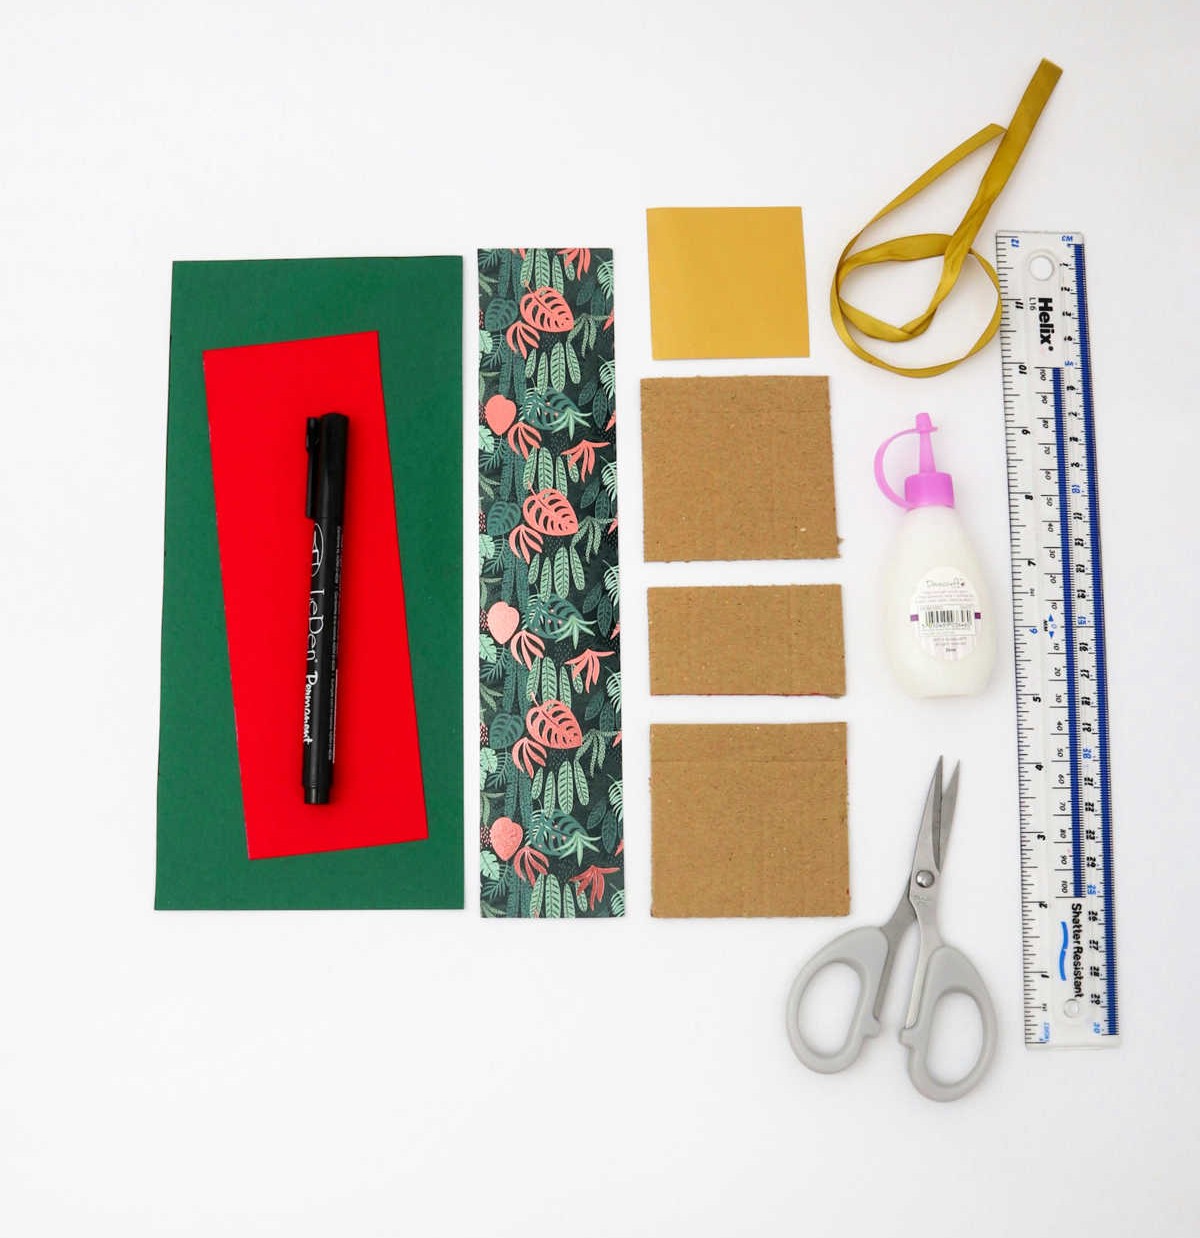
Materials
To create this festive holiday display, you’ll need a few basic materials. Start by gathering two cardboard squares, each measuring 3 inches by 3 inches. You’ll also require one longer cardboard piece, measuring 3 inches by 1.5 inches. In terms of decorative papers, you’ll need green craft paper that’s 9.5 inches by 4 inches, red craft paper that’s 8 inches by 2.5 inches, ornamented craft paper that’s 10.5 inches by 2.5 inches, and yellow craft paper that’s 2.5 inches by 2.5 inches.
To hold everything together, you’ll need some craft glue. Finally, add a length of ribbon measuring 20 inches to complete the look.
Instructions
Get ready to unleash your creativity! Begin by laying out the green craft paper on a flat surface. Next, arrange three cardboard pieces side-by-side, with the smaller one nestled between the larger ones. Ensure there’s enough space around and between them. Secure the green paper to the cardboard by gluing its sides and folding the edges inward. Cut a length of ribbon and attach it along the cardboard, leaving the ends exposed.
Cover the ribbon and cardboard with red craft paper, allowing it to dry completely before moving on. Bend the cardboard pieces to form a sturdy three-walled structure. Draw the outline of the overlaps on another sheet of paper and cut it out carefully. Then, fold and bend the overlaps into four equal parts along the vertical lines. Use adhesive to attach the ends together, forming a cube shape. Place the overlaps onto the cardboard base, securing them with glue.
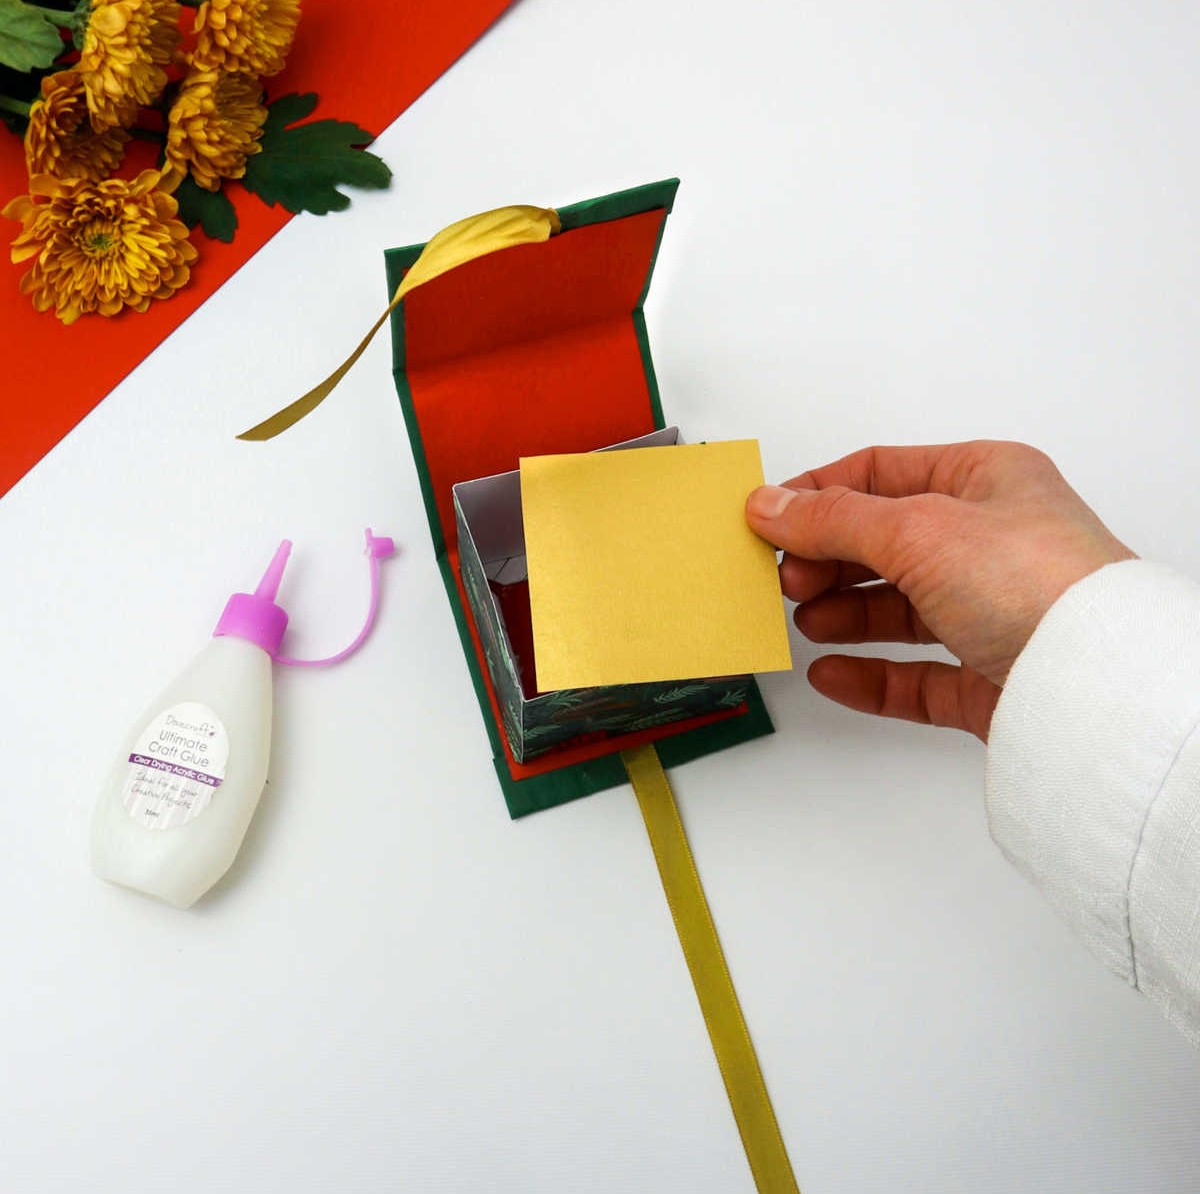
To complete the box, cut a square of craft paper and adhere it inside as the base. Allow all the glue to dry before filling your newly crafted cube with baubles and party favors!