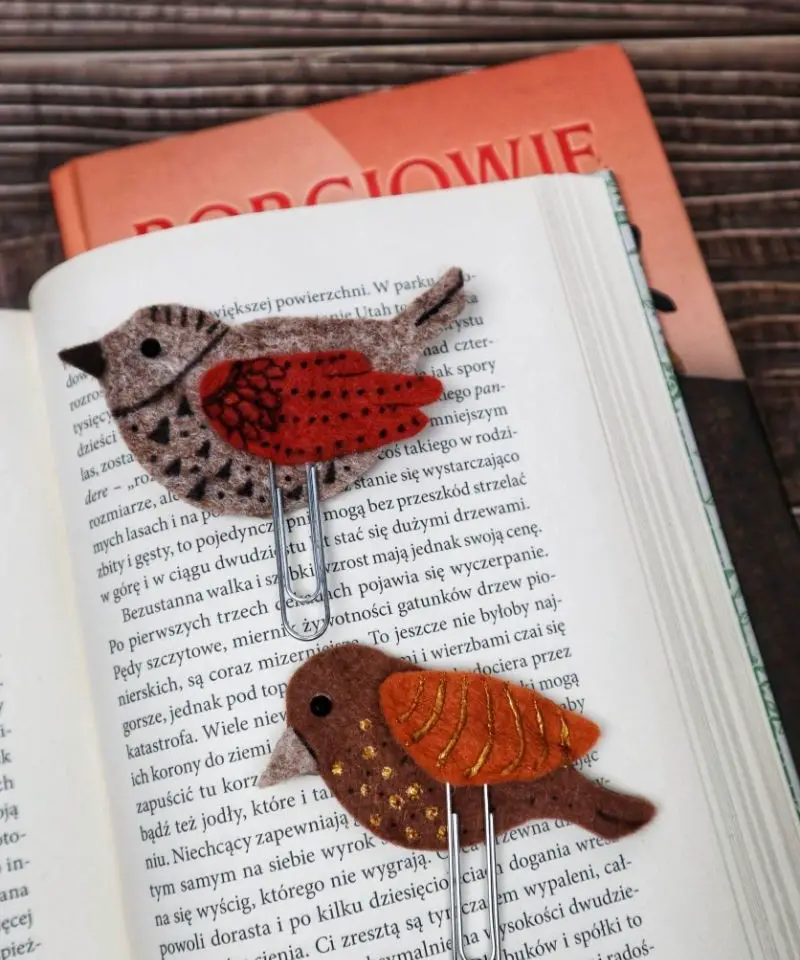
Make the ordinary, extraordinary! Who says bookmarks have to be plain and boring? We’re going to shake things up by creating a nature-inspired bookmark that’s sure to delight kids, teens, and even adults. This charming little project brings a touch of whimsy to your reading experience, literally bringing a tiny songbird to nest on the pages. Forget traditional bookmarks made of paper – we’re going to get creative and make something truly unique.
With this step-by-step tutorial, you’ll learn how to craft a bookmark that’s identical to the one featured here or use it as inspiration for your own masterpiece. So, grab your materials and let’s get started!
Supplies for Bookmarks
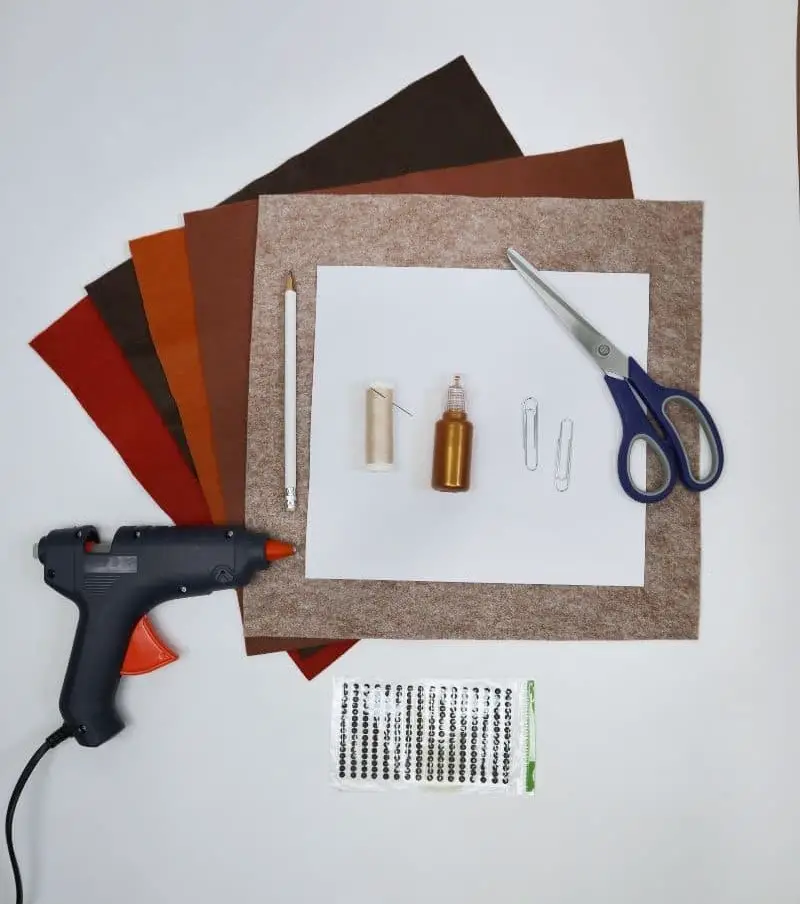
To get creative with your DIY craft project, you’ll need some basic materials. These include colored felt sheets for adding a pop of color, scissors for cutting and shaping your design, and a pencil for sketching out your ideas on a piece of paper. To add some extra dimension to your project, consider using hot glue guns, jumbo paper clips, or even needle and thread for more intricate details.
Finally, don’t forget about the fun embellishments like glitter glue and black markers that can help bring your design to life.
How to Make a Bird Bookmark
For those eager to create their own, a comprehensive guide is just what’s needed. To get started, follow this step-by-step process.
Step One
To embark on this crafting adventure, begin by assembling your materials and selecting a comfortable workspace. I find that having an audiobook playing in the background enhances my creative experience. And what better pairing than crafting and an engaging story? To ensure your bookmark remains securely in place, you’ll need a sturdy large paperclip. These can typically be found at local craft stores or online marketplaces.
Jumbo paperclips are particularly well-suited for this project, as they provide a secure hold even with the added embellishment of a felt bird on top.
Step Two
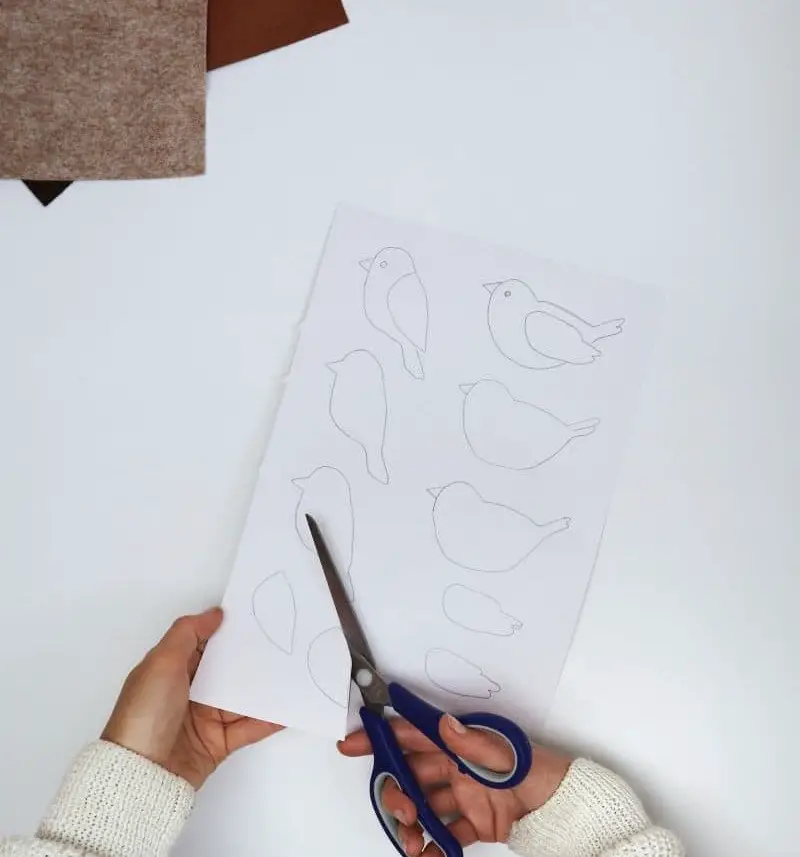
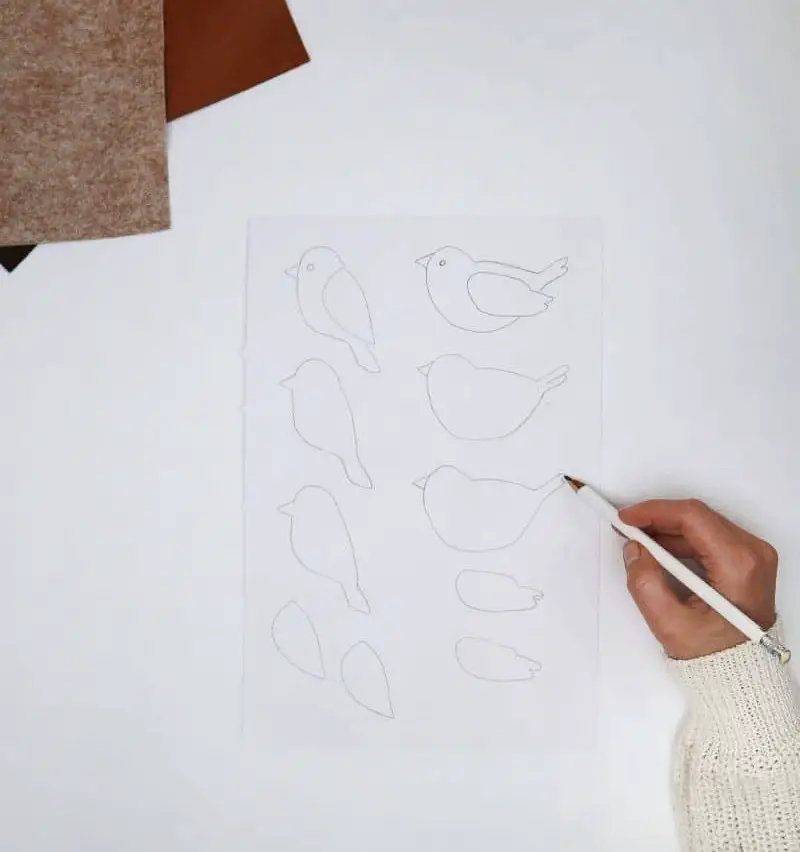
To begin, craft a template for your felt bird creations by drawing two distinct designs: one featuring a plumper, more compact bird shape, and another representing a perching sparrow. As you draw, separate out different colored spots on each template to make the cutting process smoother. For added convenience, I’ve illustrated multiple bodies and wings for each design, allowing you to easily cut out the various components.
Step Three
Ditch the excess templates and keep only what you need. While having multiple templates of each shape can be helpful for cutting out felt designs, having to cut through multiple layers of template material can slow down your crafting process. By keeping only one template per design, you’ll streamline your workflow and make it easier to get started on your next project.
Step Four
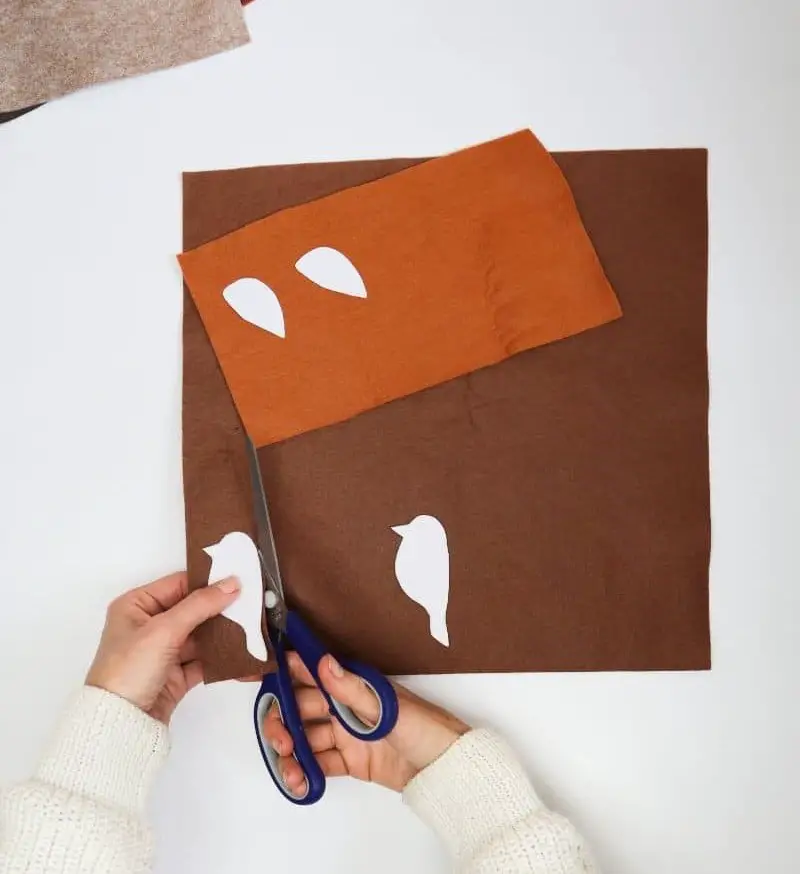
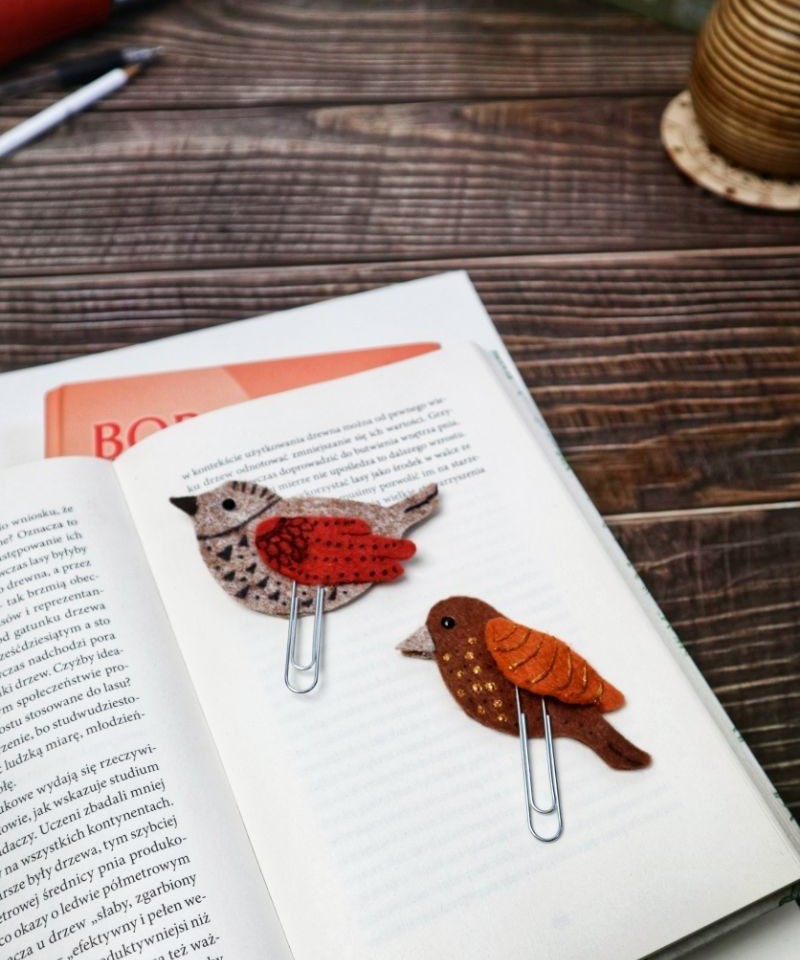
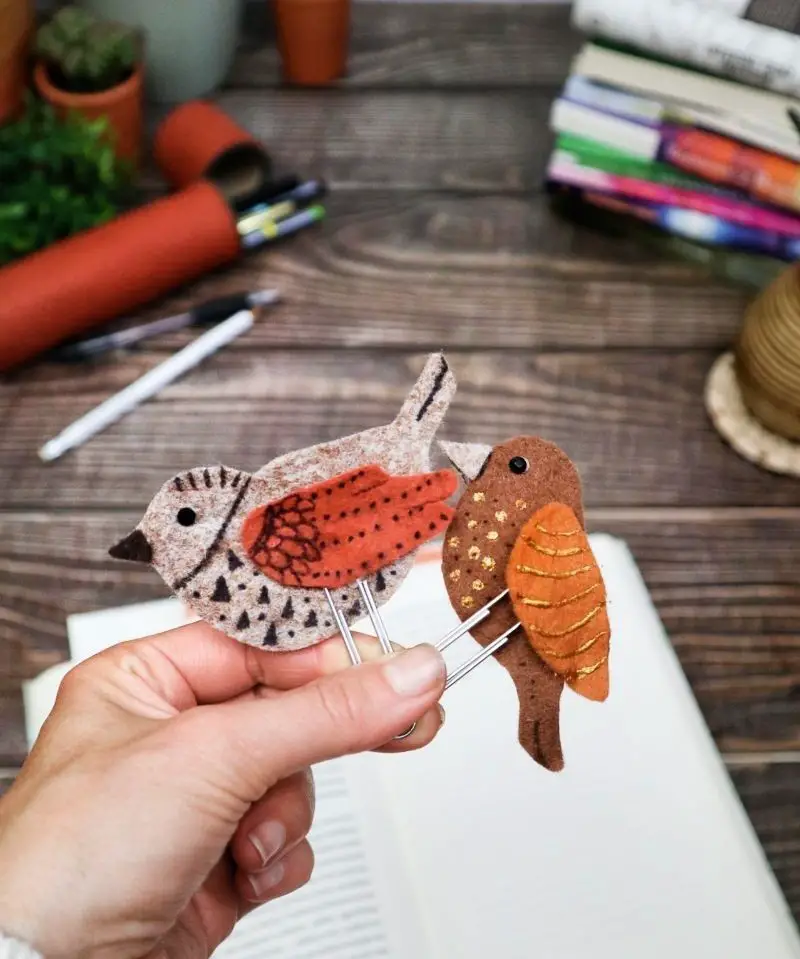
As we embark on crafting these avian friends, it’s time to liberate them from their felt encasements. Begin by carefully outlining the template and cutting along the edges with precision. Since we won’t be requiring a seam allowance, aim for a snug fit, leaving minimal excess fabric behind. Cut two wing pieces and two body pieces, making sure the wings are crafted in a contrasting felt hue to add visual interest.
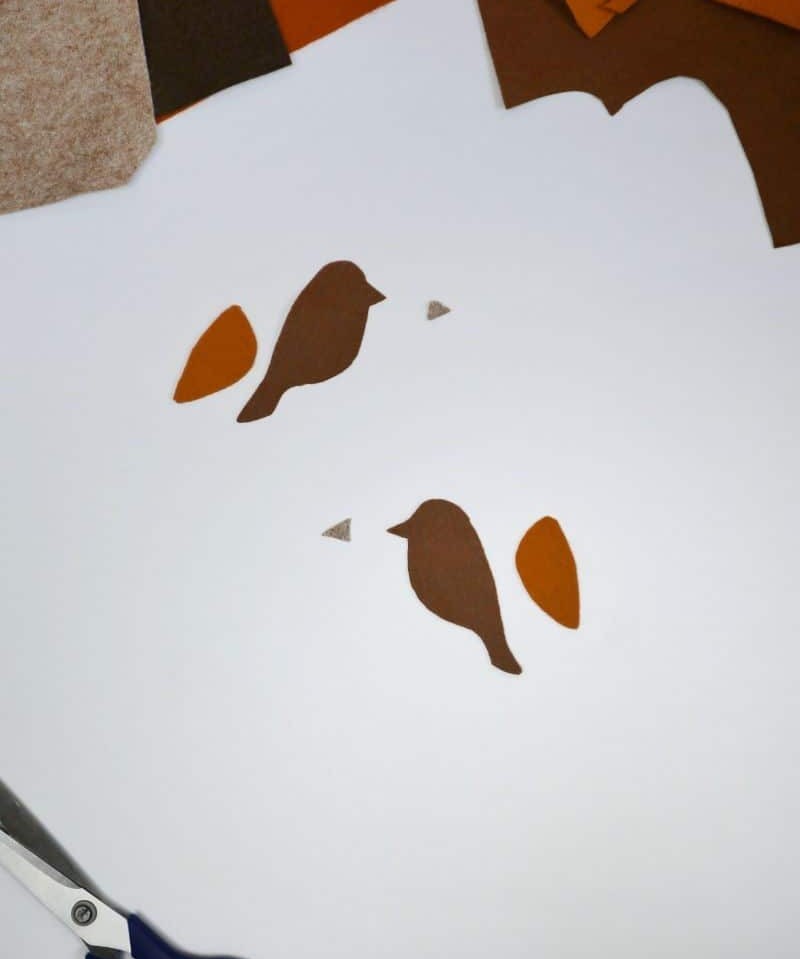
Additionally, fashion a small triangular piece from another color to serve as the bird’s distinctive beak. Upon completion, you should have six distinct components at your disposal.
Step Five
It’s time to put the finishing touches on our bird friends. If you’re feeling crafty, grab your trusty hot glue gun and get ready to bring them all together. Alternatively, opt for a cold adhesive if you’re working with little ones or prefer a more controlled approach.
Step Six
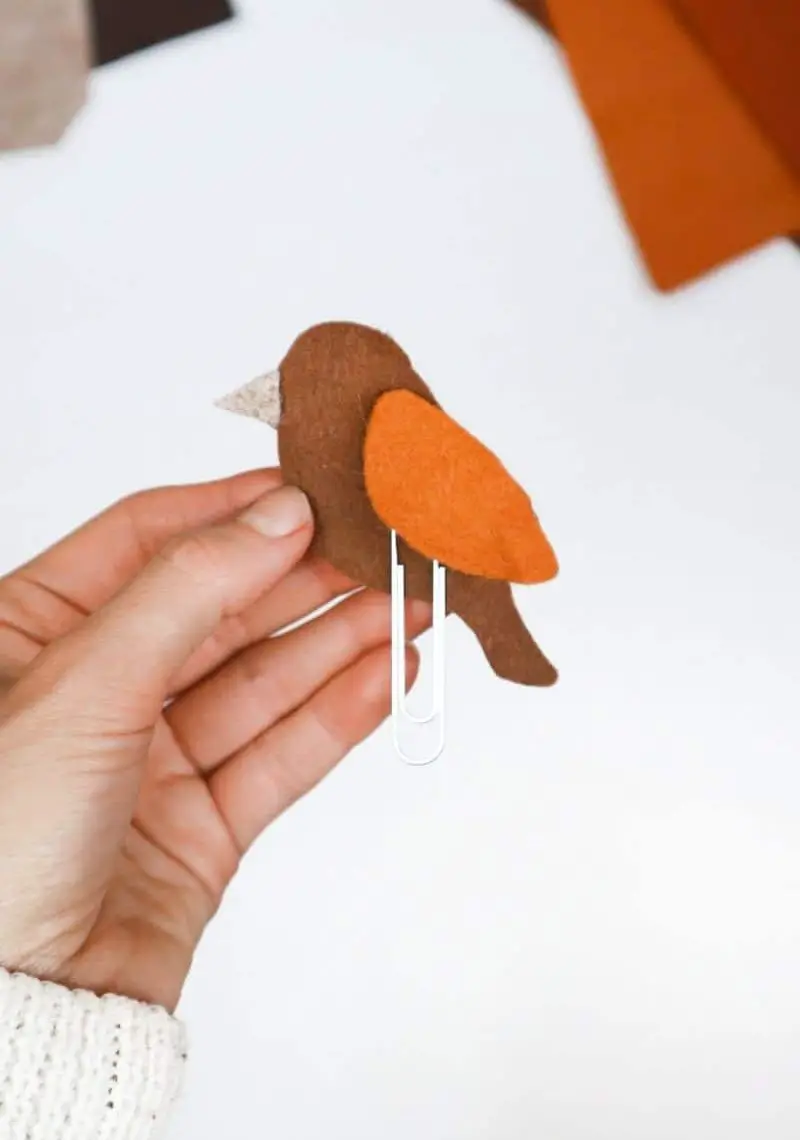
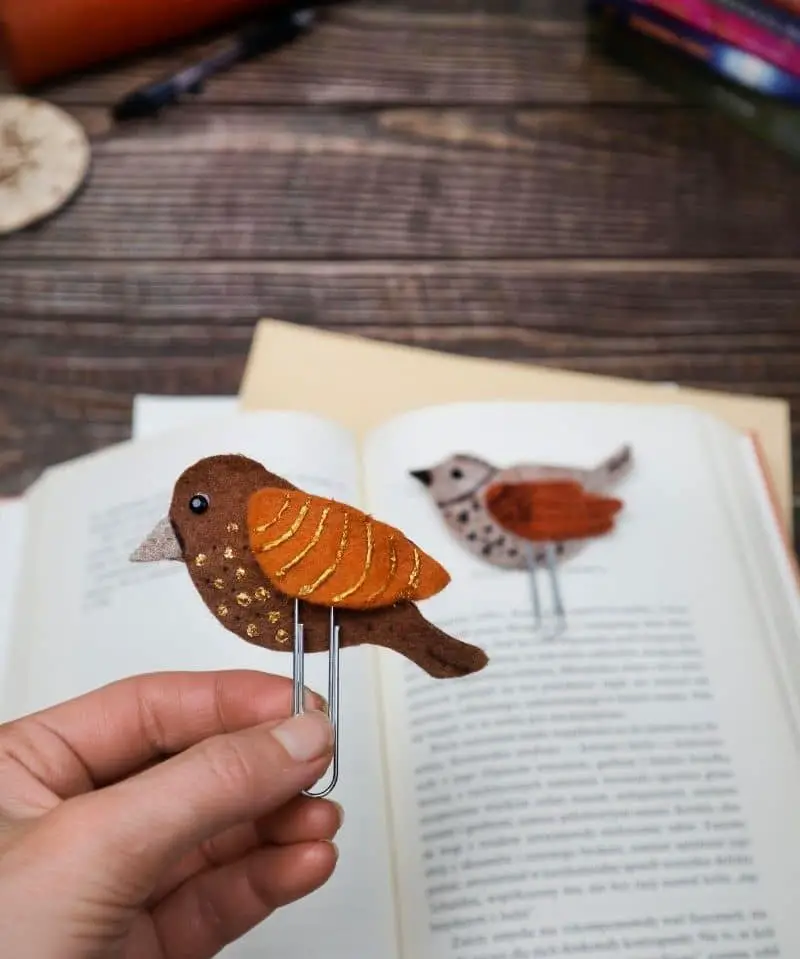
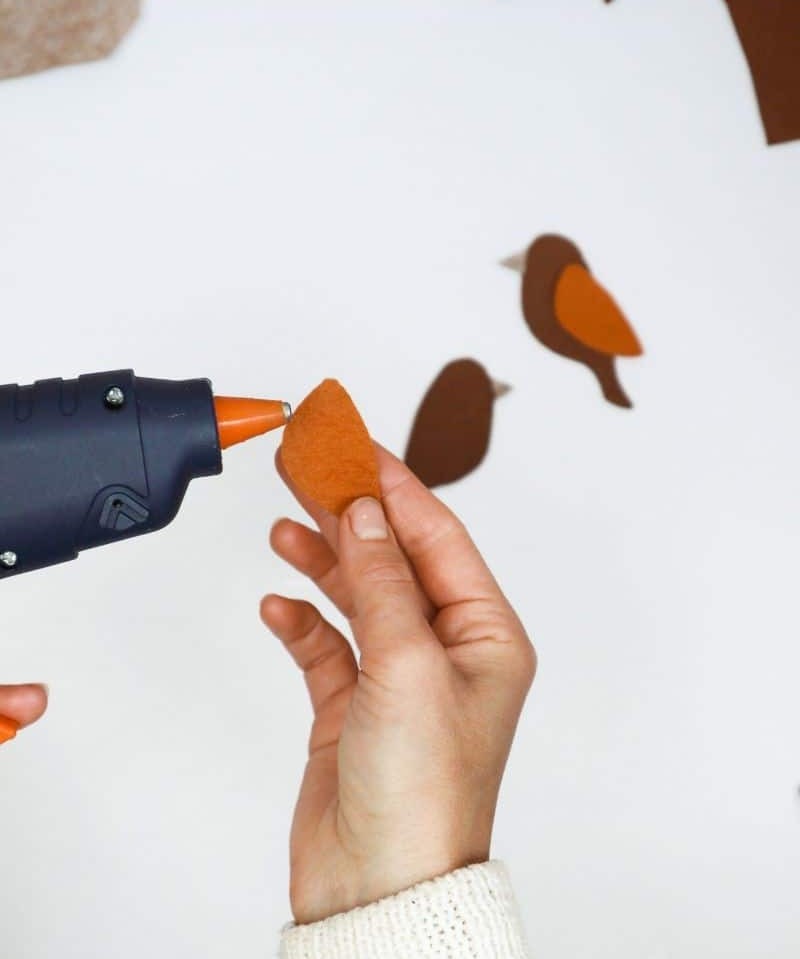
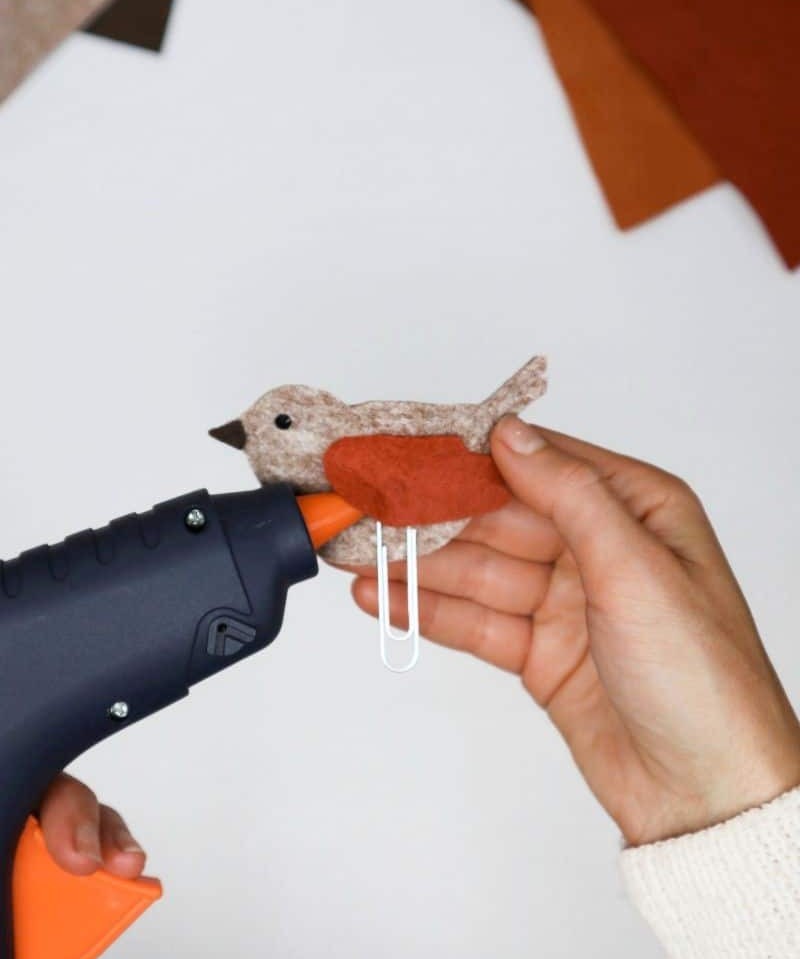
To complete the bird figurine, start by attaching the beak to the main body. Once secure, reassemble the two main body pieces, positioning them back-to-back for added stability. With your base established, move on to attaching the wings to either side of the bird, taking care not to obstruct the space reserved for the paper clip.
As you glue the wings in place, ensure there’s enough clearance for the jumbo paperclip to fit snugly underneath, with a small portion protruding to serve as a bookmark.
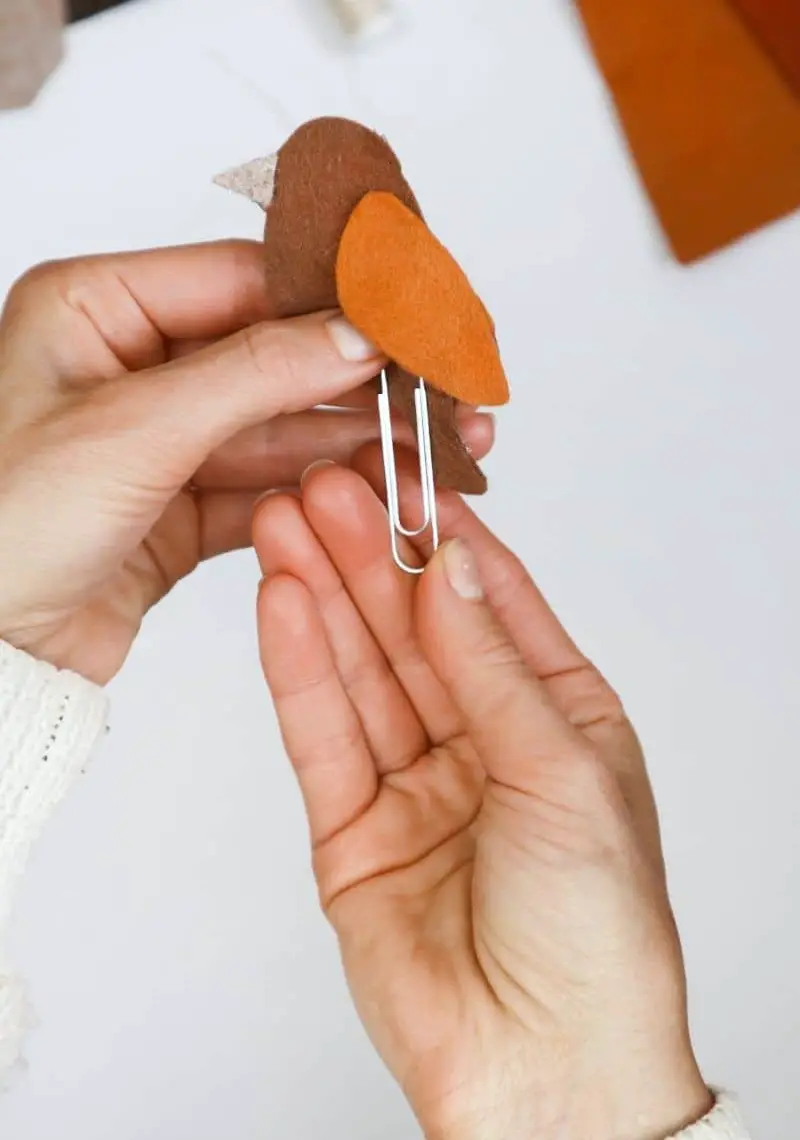
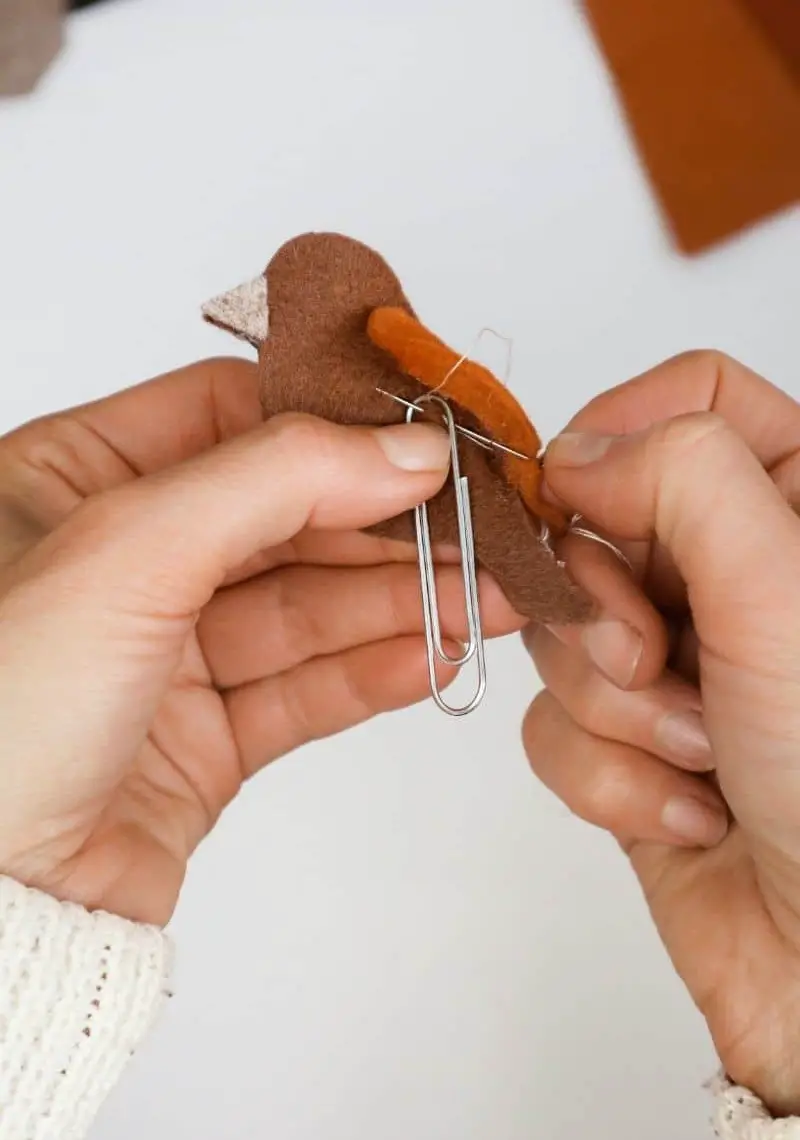
Step Seven
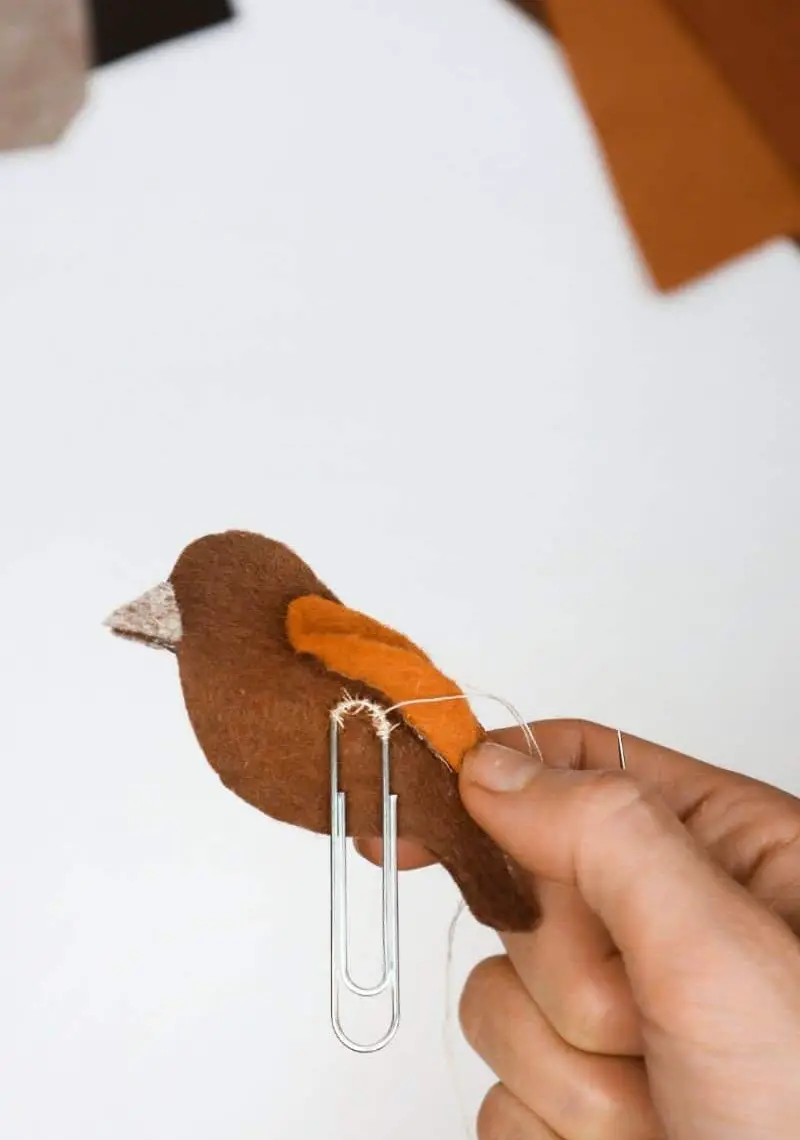
Sewing the paperclip to your felted finch is a straightforward process that requires minimal time and effort. You can opt for glue or a needle and thread; I personally chose the latter as it provides a more secure attachment.
To attach the paperclip, use a single strand of thread and sew an arch shape at the top of the clip, securing it to your bird. This design allows for minimal movement, preventing the paperclip from shifting around unnecessarily if you were to simply sew it in one spot.
Step Eight (Optional)
When securing a paperclip to its designated spot, begin by applying a small amount of adhesive to the tip of the clip. Then, gently press the clipped end onto the wing, allowing the glue to set and bond with the material before handling or moving the object.
Step Nine
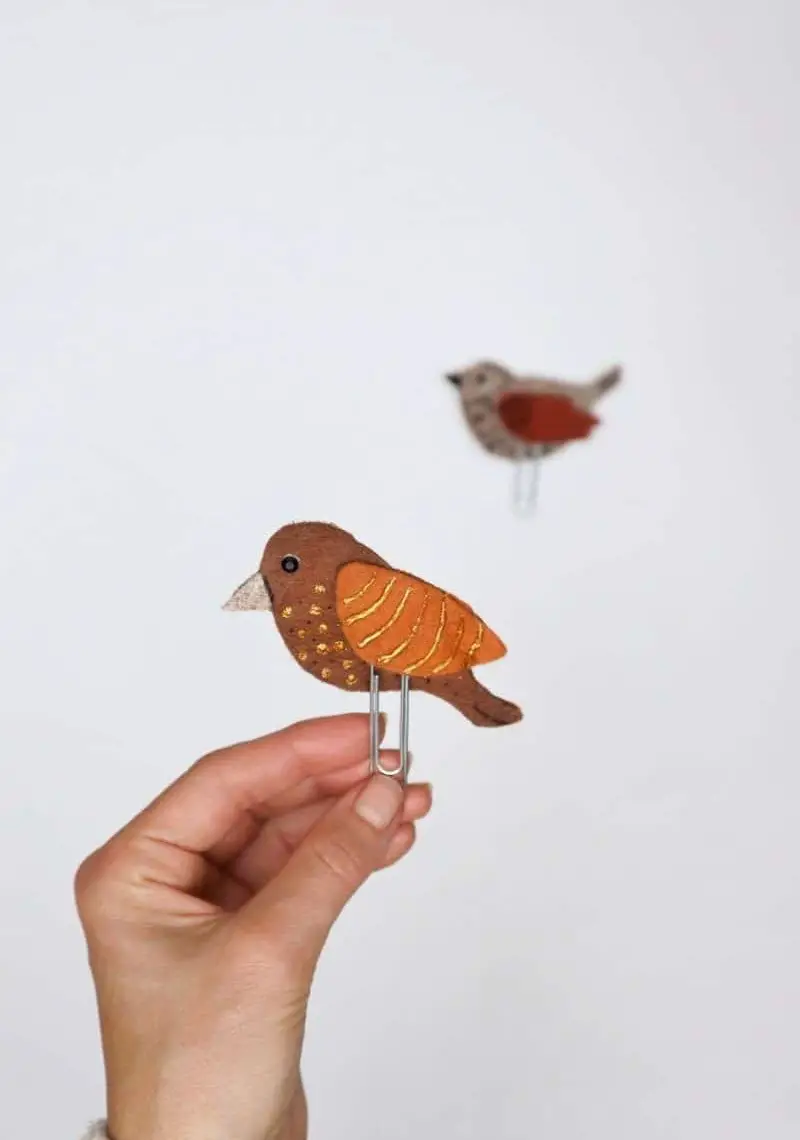
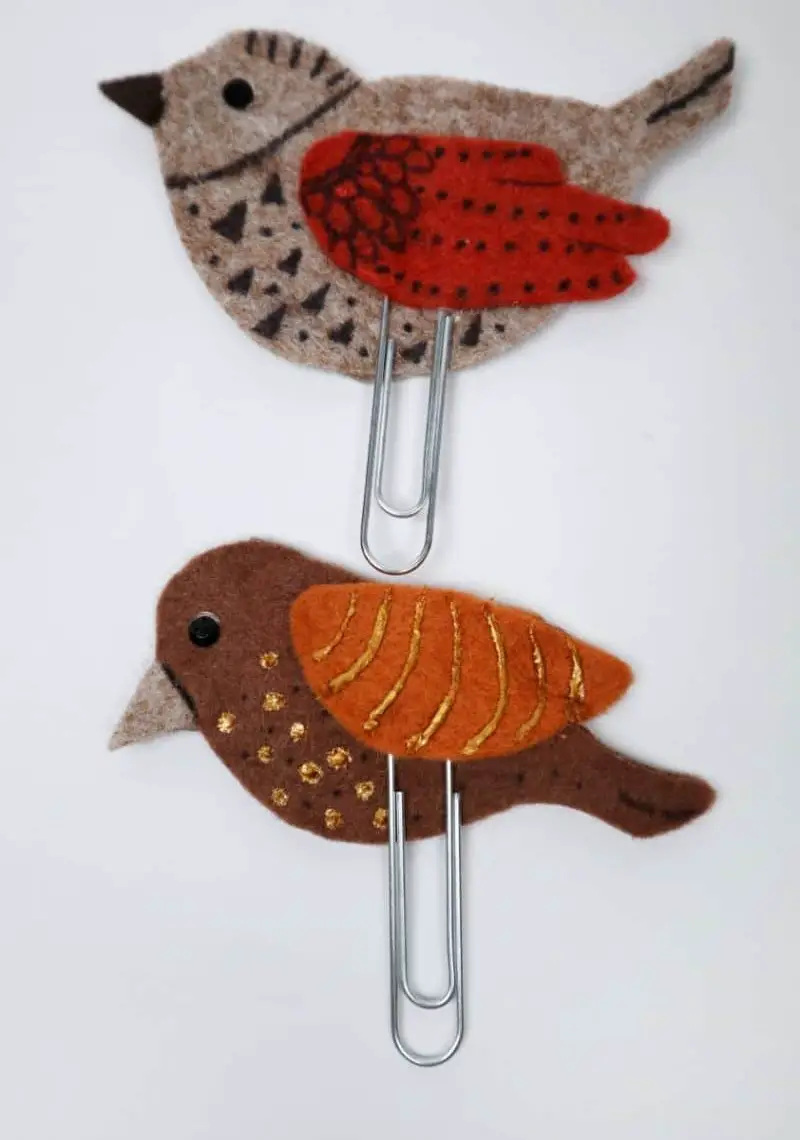
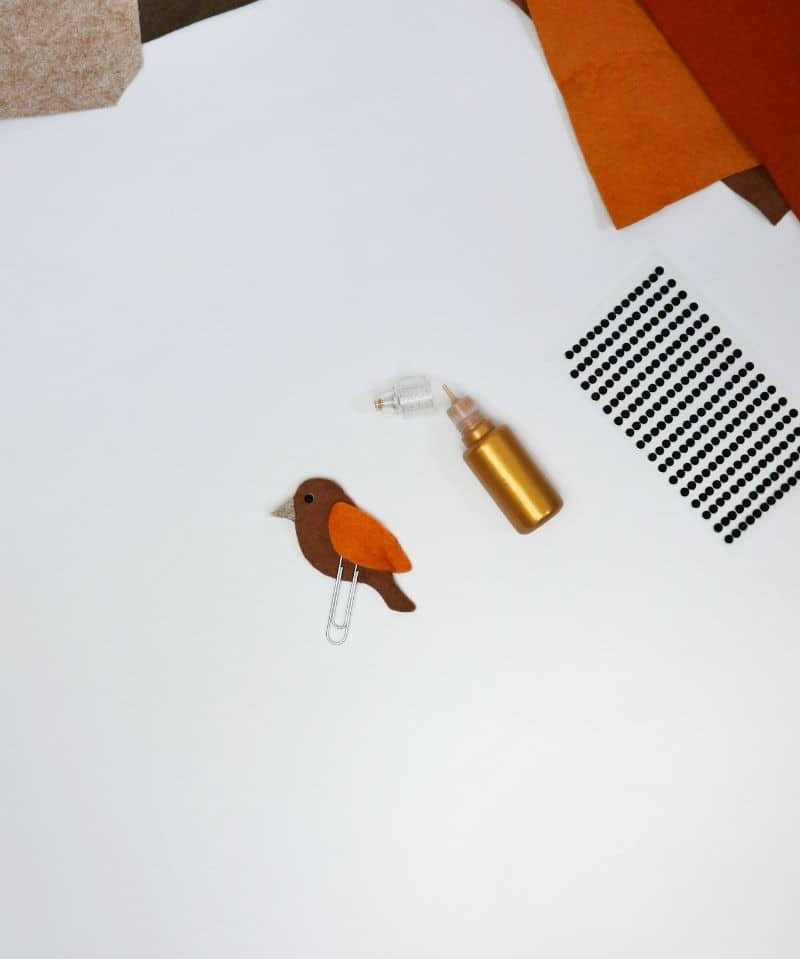
As the foundation of your handmade bookmark is established with a sturdy base bird, it’s now time to unleash your creativity and add some personal flair through decorations. The possibilities are endless, and I’m excited to share my approach with you. For my bookmark, I opted for a touch of glamour using glitter glue and a small black bead, but feel free to experiment with different materials that resonate with your unique style.
Consider adding sewn sequins for an air of sophistication, utilizing markers to add a pop of color, or keeping it simple and understated if you prefer a more subtle look. The beauty of this DIY project lies in its versatility, allowing you to tailor the bookmark to your personal taste and aesthetic preferences.
Before long, you’ll be holding your one-of-a-kind custom bookmark, guaranteed to spark interest and admiration from fellow book lovers.
To ensure you’re prepared for the demand that’s sure to arise, make sure you have an ample supply of felt on hand. Happy crafting, and happy reading to all you beautiful bookworms!
How Much Will These Bookmarks Cost in Total?
One of the most appealing aspects of these adornments is not only their aesthetic appeal but also their affordability. In fact, I find that making them is an excellent way to repurpose leftover felt scraps and declutter my workspace. Moreover, even if you’re starting from scratch, you can achieve a fantastic result without breaking the bank. Depending on your location, the total cost of materials shouldn’t exceed $10, making it an accessible craft for enthusiasts of all levels.
How to Make a Bookmark
Transform any bookworm’s day with a thoughtful gift that showcases their love for birds! Create a personalized bookmark that can be customized to fit the unique interests of the recipient. With this project, you’ll learn how to craft a one-of-a-kind keepsake that combines artistry and avian enthusiasm. Simply set aside 15 minutes for active crafting time, 10 minutes for any additional preparations, and enjoy a total of 25 minutes spent on this delightful project.
Equipment
Materials
To craft a visually appealing and engaging DIY project, you’ll need a few simple materials. Start by gathering some colored felt sheets, which can be used to create unique textures and designs. You’ll also need a standard piece of paper for backing or adding additional layers. Jumbo paper clips will come in handy for creating three-dimensional structures or adding visual interest. Finally, glitter glue will add a touch of sparkle and whimsy to your creation.
Instructions
Before diving into the craft, ensure you have all necessary supplies at hand. Specifically, procure paperclips that are substantial enough to serve as bookmarks, as smaller ones may get lost among the pages. Next, create your bird designs by sketching two identical templates or using the same design twice, as this will allow for a symmetrical appearance. To bring these avian friends to life, you’ll need body shapes, wing forms, and tiny beaks.
Once you have these components in place, it’s time to rummage through your felt stash to uncover the necessary pieces. Utilize contrasting colors – a dark body tone paired with vibrant wings – to make your creations truly pop. Now that all the individual parts are ready, let’s assemble our birds! Begin by attaching the beak to the base using a glue gun, then bond both bases together to form a sturdy, double-sided foundation.
For the wings, apply adhesive to secure one wing on one side and the second wing on the other, leaving sufficient space to accommodate your paperclip bookmark. Finally, attach the clip – either with glue or by sewing it in place using a needle and thread – beneath the bird’s wing, and your delightful creatures are complete!