Discover the joy of crafting friendship bracelets in two unique methods, perfect for teens and adults alike. The nostalgia-inducing art of DIY jewelry-making never goes out of style, and the possibilities are endless. From classic embroidery floss designs to modern twists with charms and medallions, get ready to create meaningful accessories that capture the essence of special friendships.
Watch on Youtube: How to Make Friendship Bracelets
Supplies and Tools You’ll Need
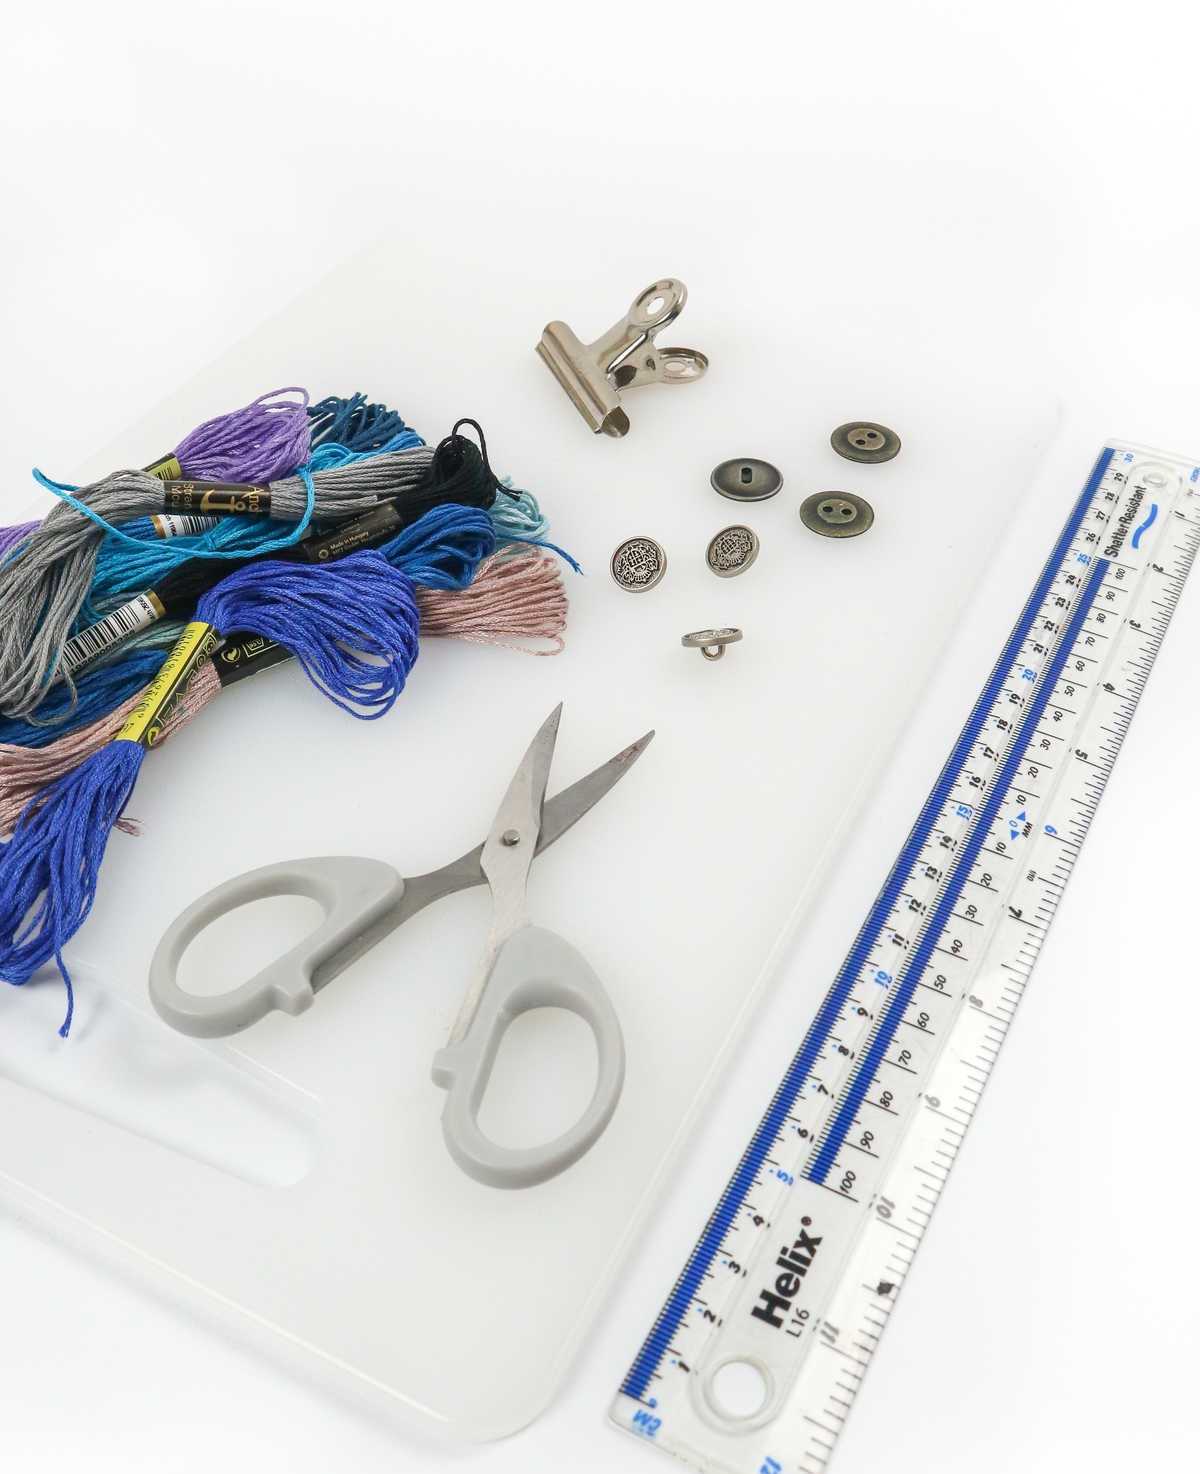
To get started on your creative project, you’ll need the following essential supplies: a trusty chopping board to keep your workspace organized, an array of embroidery threads in various colors and textures, sharp scissors for cutting and trimming, a ruler to ensure precise measurements, a sturdy bulldog clip to hold everything together, and some decorative buttons to add that finishing touch.
With these fundamental tools at your disposal, you’ll be well on your way to bringing your imaginative vision to life.
How to Make Friendship Bracelets
Both approaches to crafting these stylish accessories involve distinct methods. The primary method involves creating a three-strand or three-string bracelet, whereas the alternative approach yields a four-strand design.
How to Make a 3 String Friendship Bracelet?
Step 1

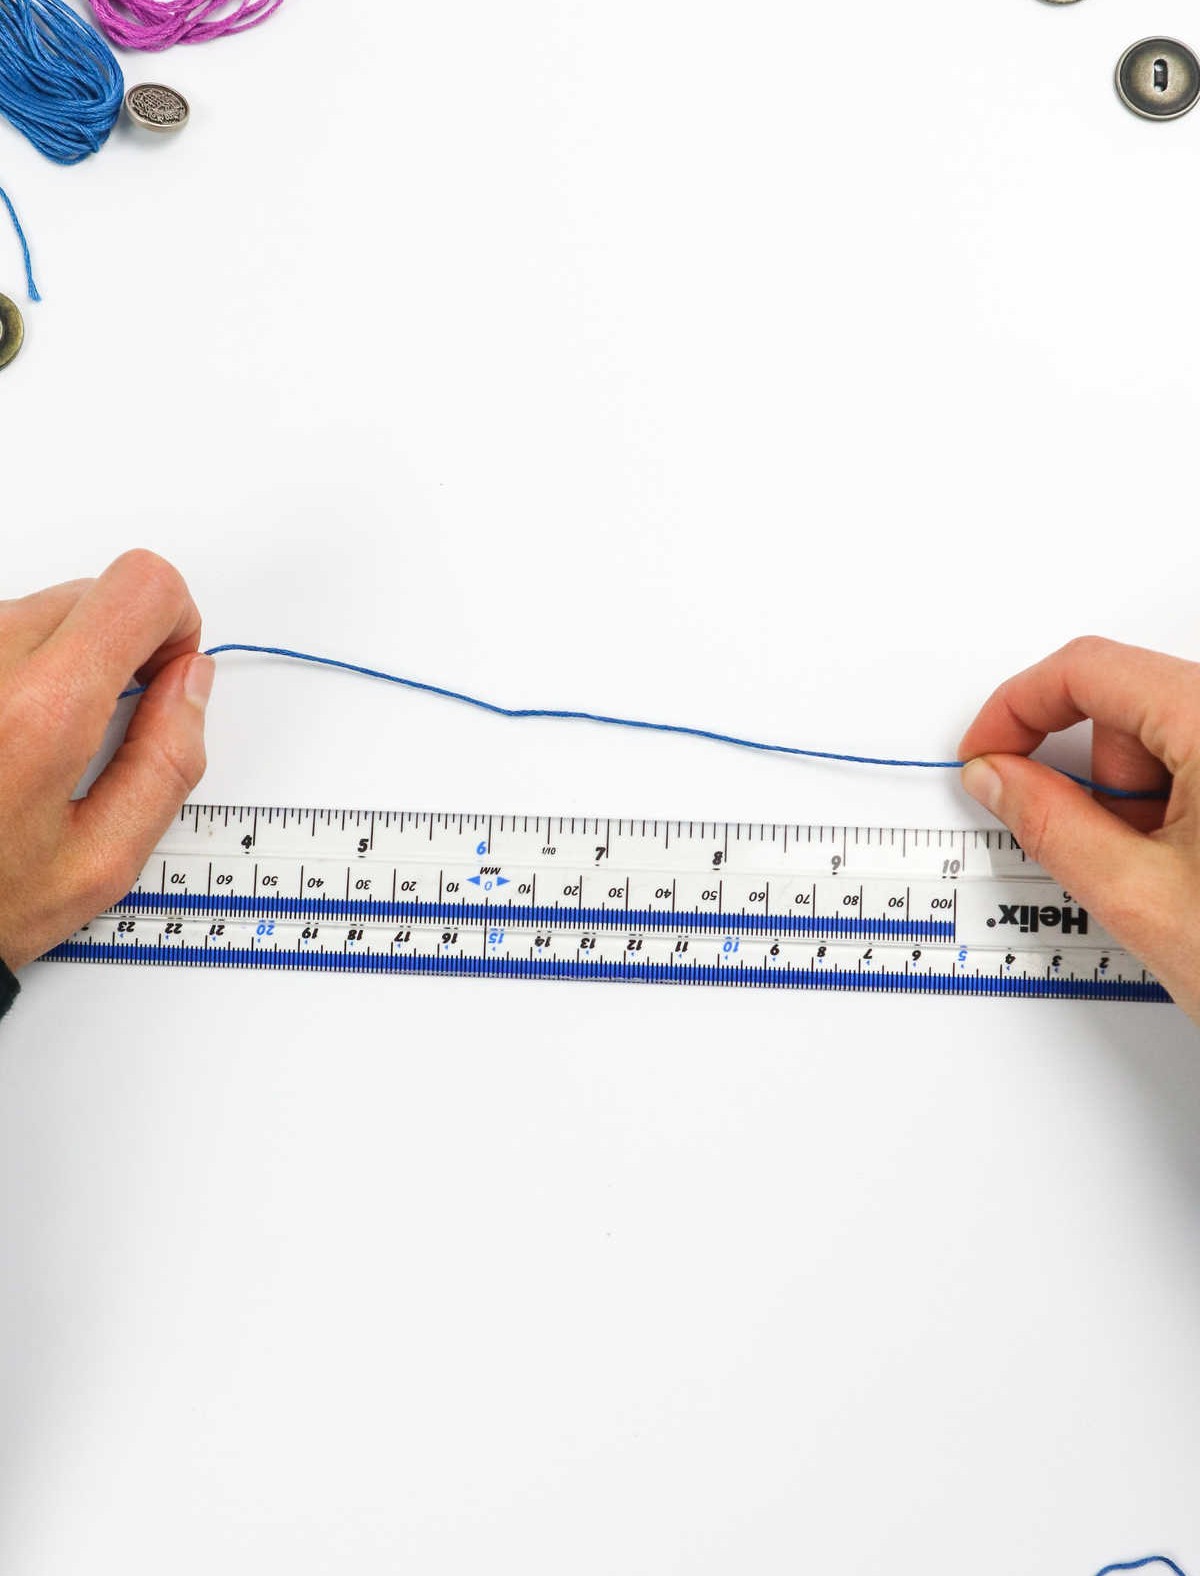
To initiate the embroidery process, begin by measuring out three lengths of cord, each precisely 45 inches. The versatility of this step lies in its allowance for experimentation with various colors or a single hue, as you see fit.
Step 2
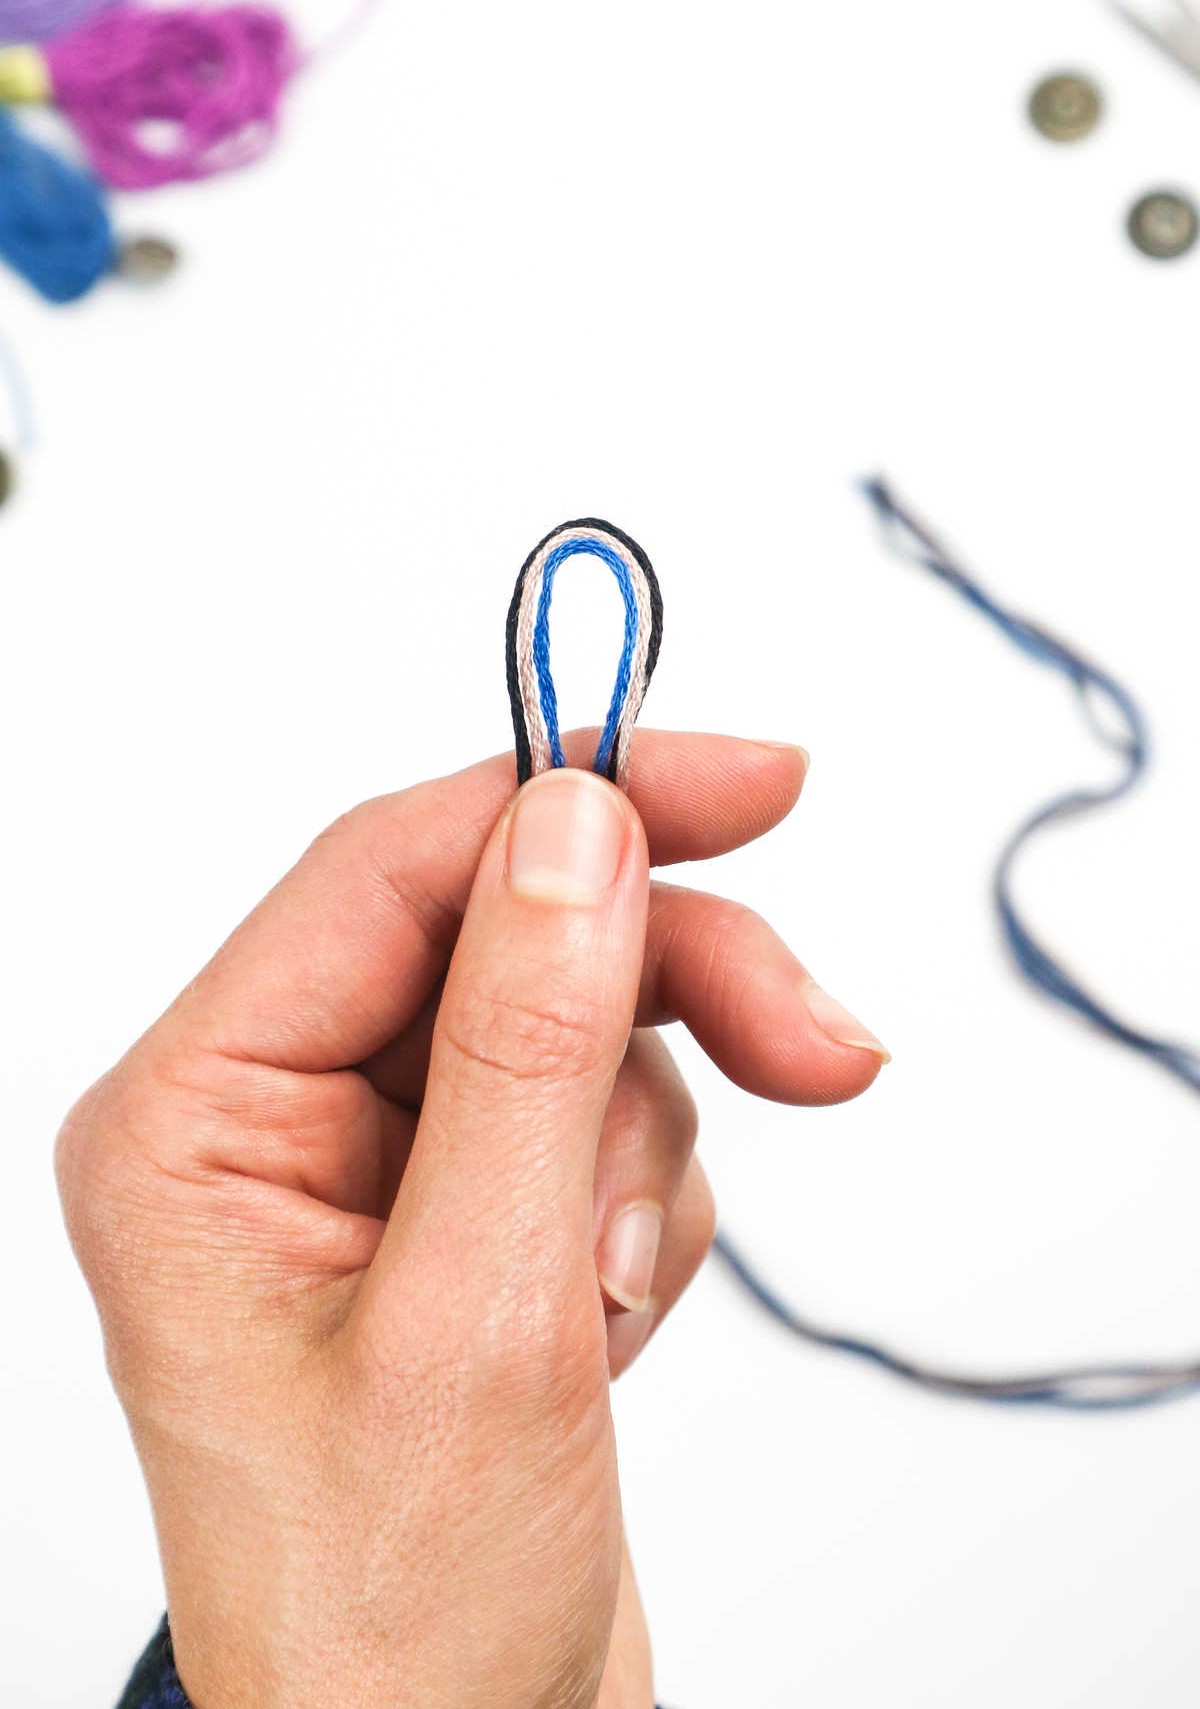
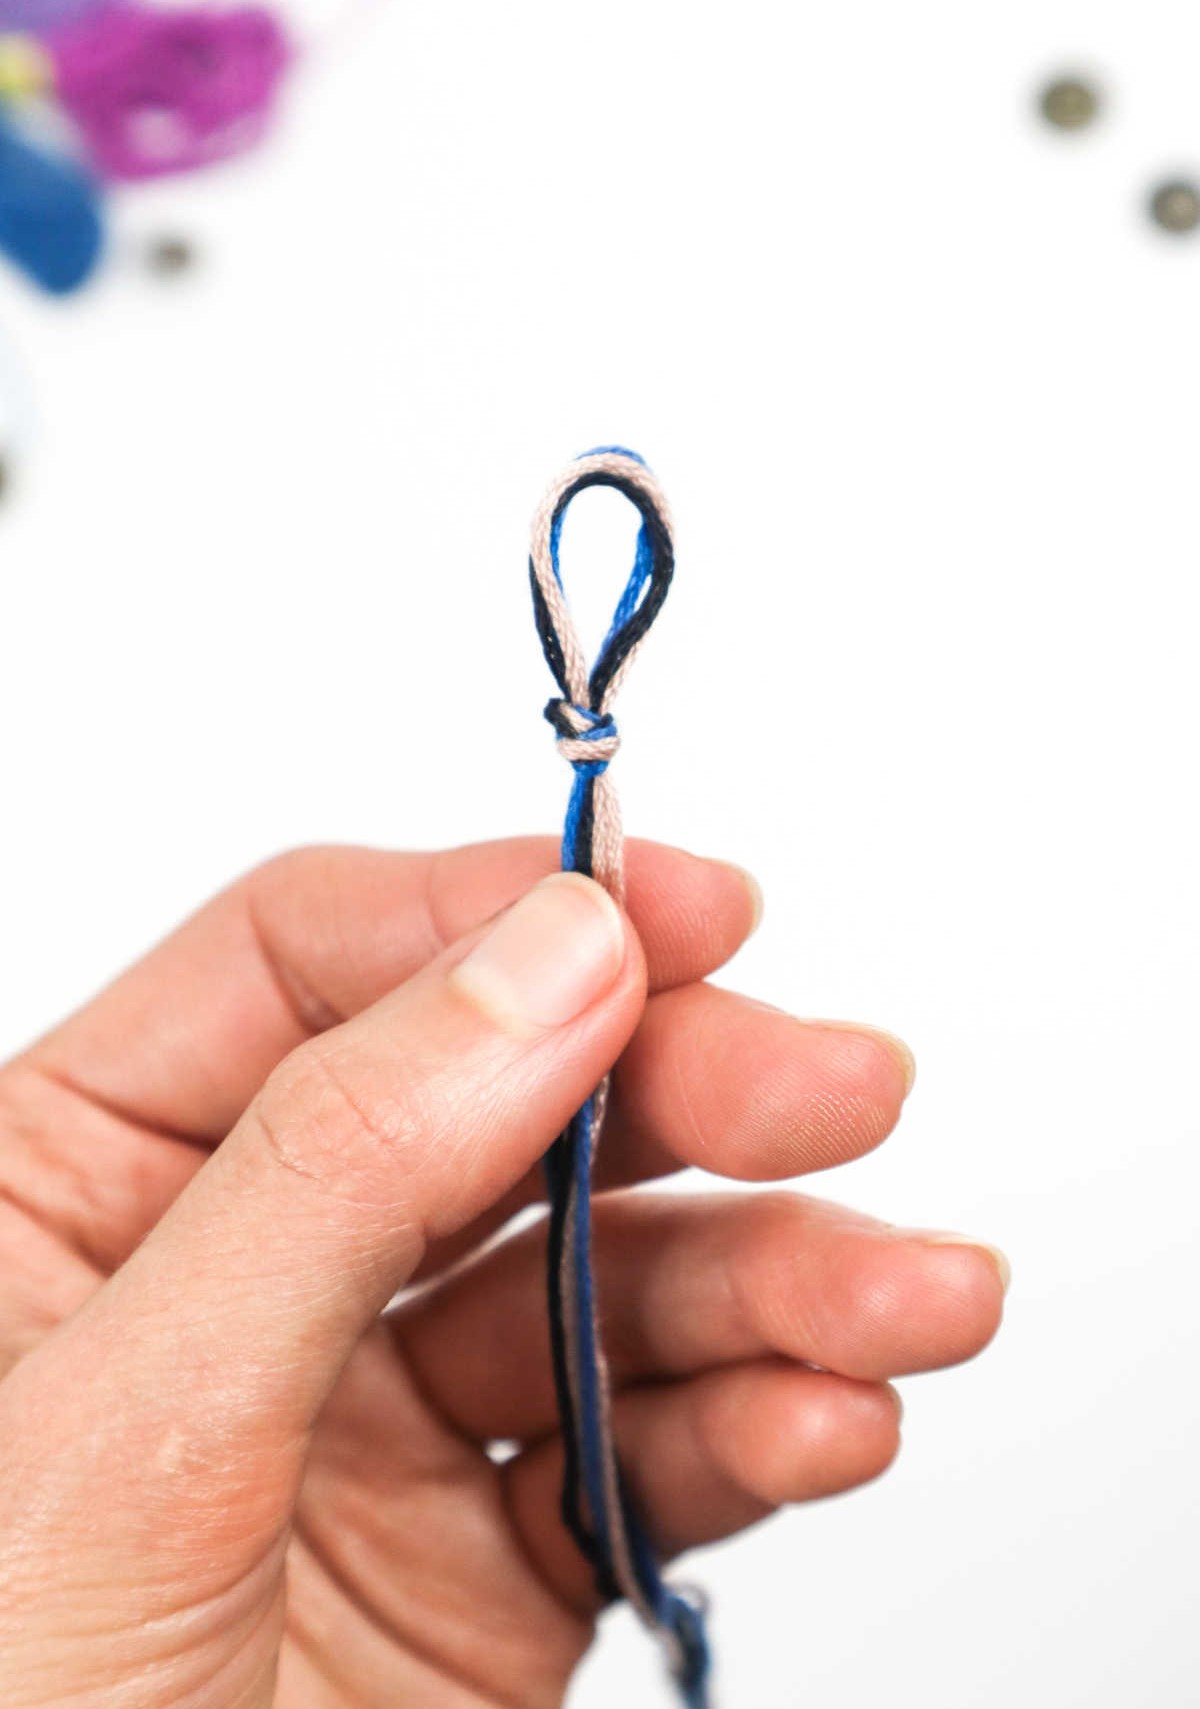
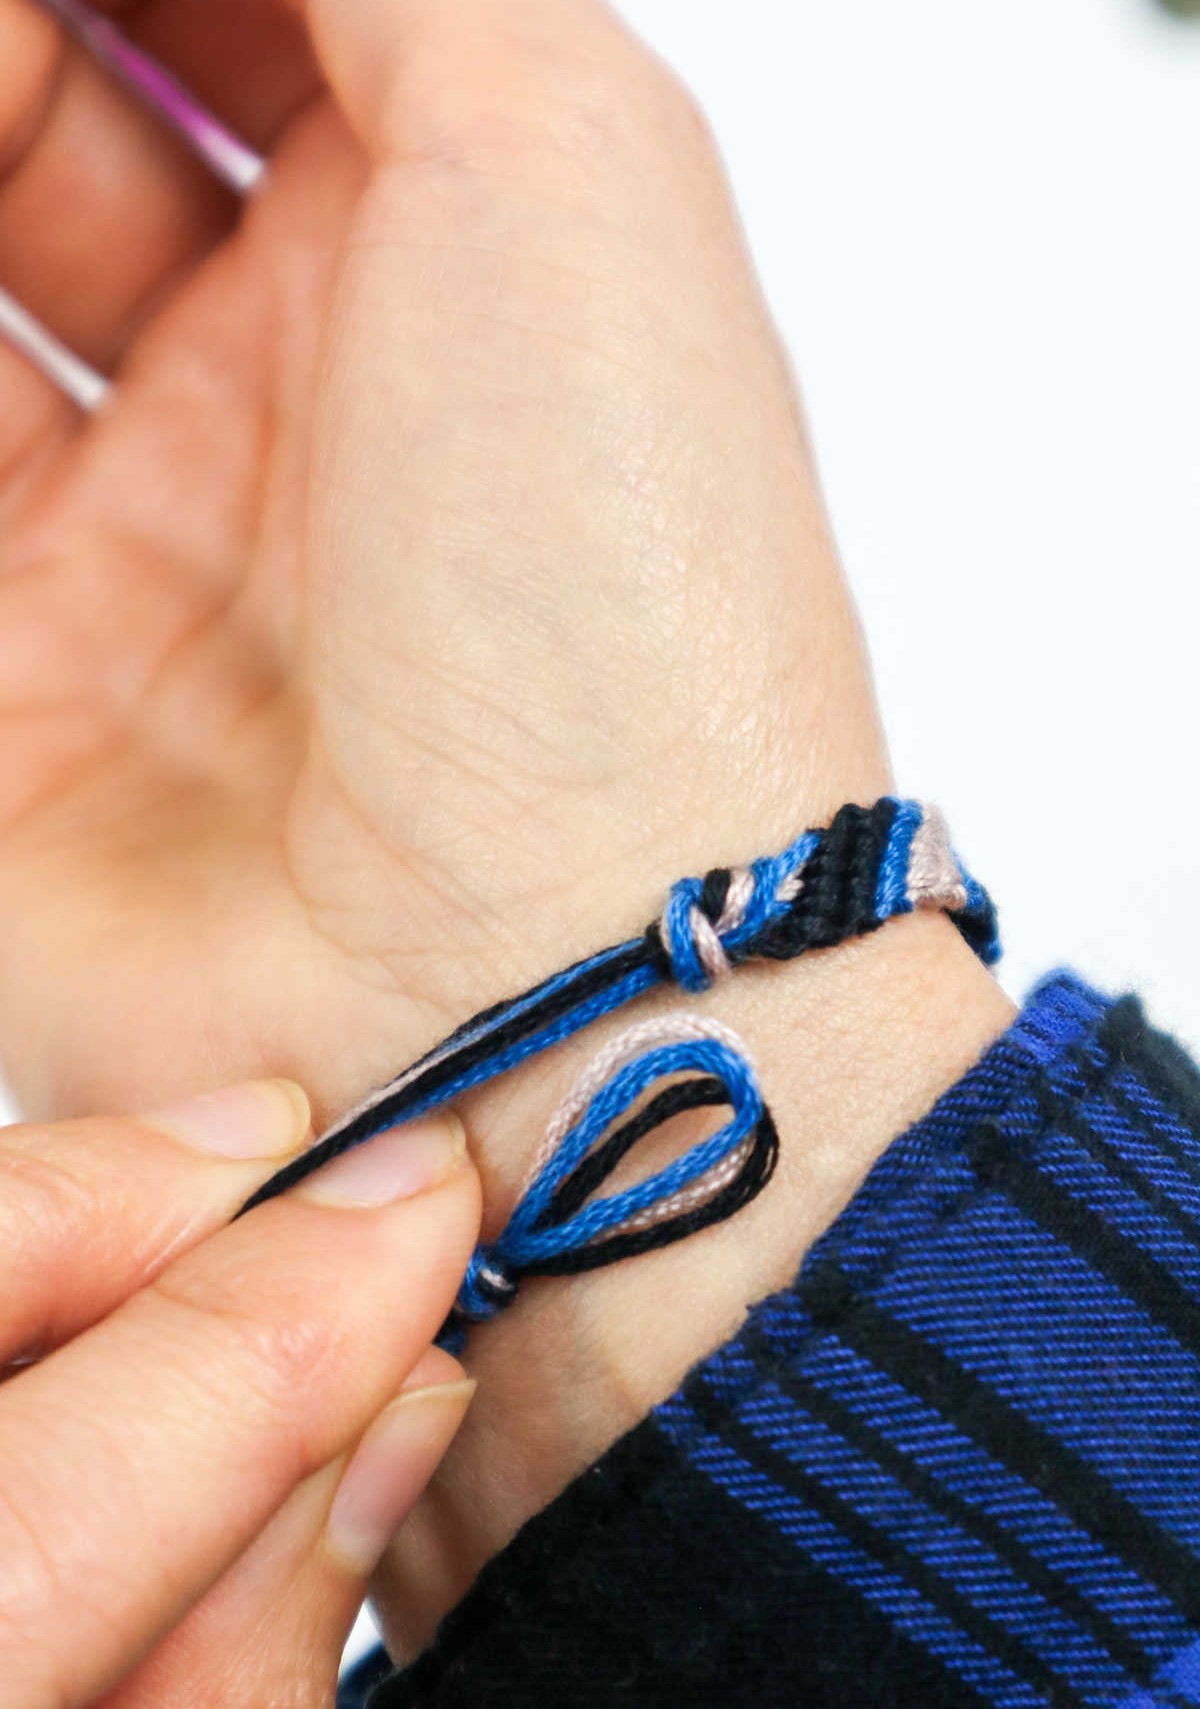
To create the foundation for your final product, begin by folding the three cords in half and forming a loop at the top. This initial step sets the stage for the rest of the process. Next, tie a regular knot at the top, approximately halfway between the fold and the end of the cord. The resulting knotted loop should resemble a small, circular structure that will serve as the base for your finished design.
Step 3
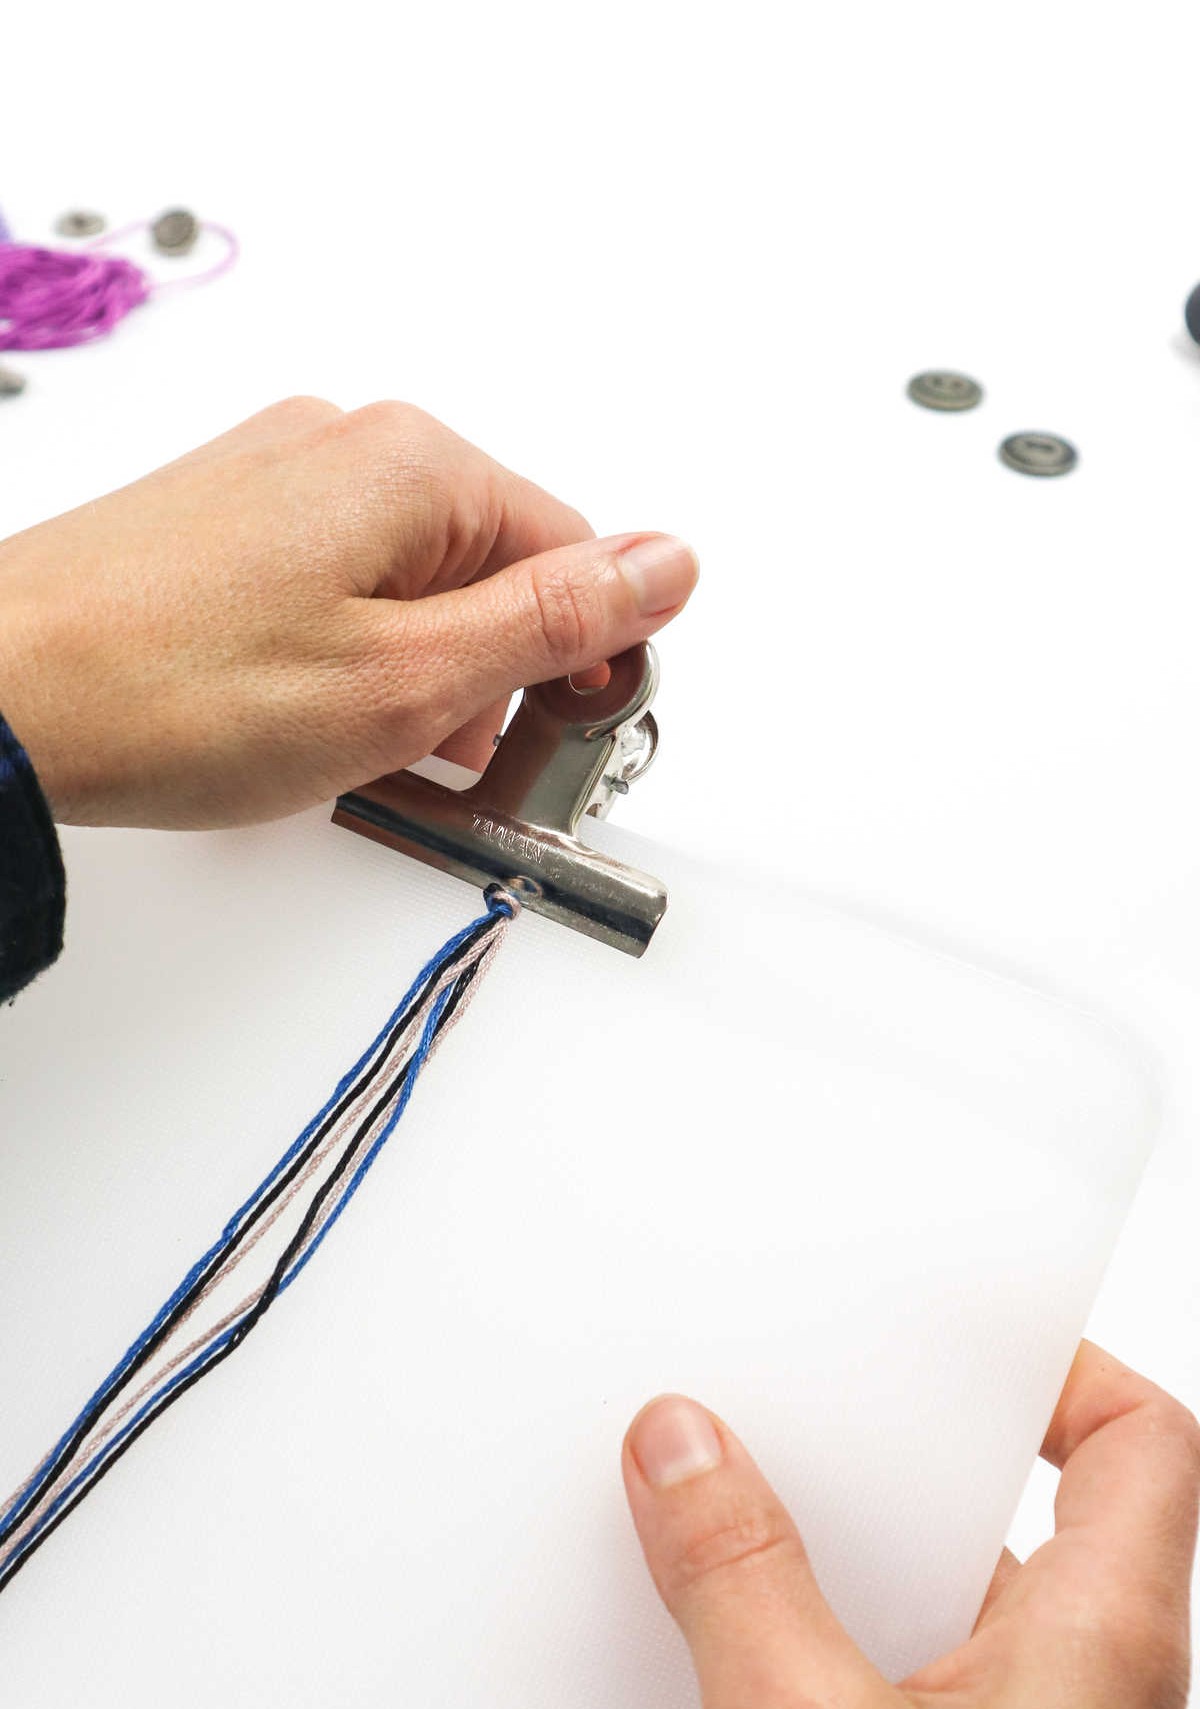
As you might recall, traditional exam pads were once a staple in classrooms everywhere. For this task, you’ll need to obtain an old-fashioned exam pad and secure it with a clip at the top. Next, take your time to carefully manipulate the threads, ensuring they’re properly positioned just above the knot.
Step 4
Unravel and organize the six cords by color-coded groups, if applicable. To create a harmonious layout, arrange the cords in an alternating pattern: left side (3-2-1), followed by the right side (1-2-3). This visual symmetry will make it easier to work with your cables moving forward.
Step 5

Start by grasping the initial cord on the left, which will serve as the leading cord for this row. Next, draw it over the adjacent cord and form a 4-shaped loop, mirroring the illustration provided. To proceed, pull the initial cord beneath the second cord and through the newly formed loop. Utilize your index finger to maintain the loop’s shape while guiding the cord through its path. Subsequently, tighten the initial cord, resulting in a secure knot.
Then, gently tug the cord – and the accompanying knot – upwards towards the primary knot situated at the top. Observe that the leading cord has now taken the position previously occupied by the second cord. To complete the process, repeat this same procedure using the leading cord for each of the remaining five cords.
Step 6

To continue, revisit the initial loop on the left side. You may recall that it was previously the second cord from the left. This time, treat it as the leading cord and create a new set of knots moving from right to left, directly under the previous row you established.
As before, form a loop using the leading cord. Next, employ your index finger to secure the loop while pulling the remaining portion over the second cord, underneath it, and then through the newly formed loop.
Gently tug the knot upwards until it’s snug.
Follow this same process with each subsequent cord, moving from right to left, to complete the desired pattern.
Step 7
To proceed with the next step, revisit the original configuration and retrieve the cord situated on the left side of the third row. This is the same cord that was previously part of the third group. Next, create a series of interconnected knots spanning across each of the five available cords.
Step 8
Continue creating knots, aiming for 6 per row. You can also opt to create two rows by repeating a color. Don’t be afraid to experiment as you work your way down the bracelet. To determine the correct length, simply wrap it around your wrist. Once you’ve reached the desired length, secure the end with a single knot that incorporates all six cords. Gently tug the cords until the knot sits snugly beneath the last row.
Step 9
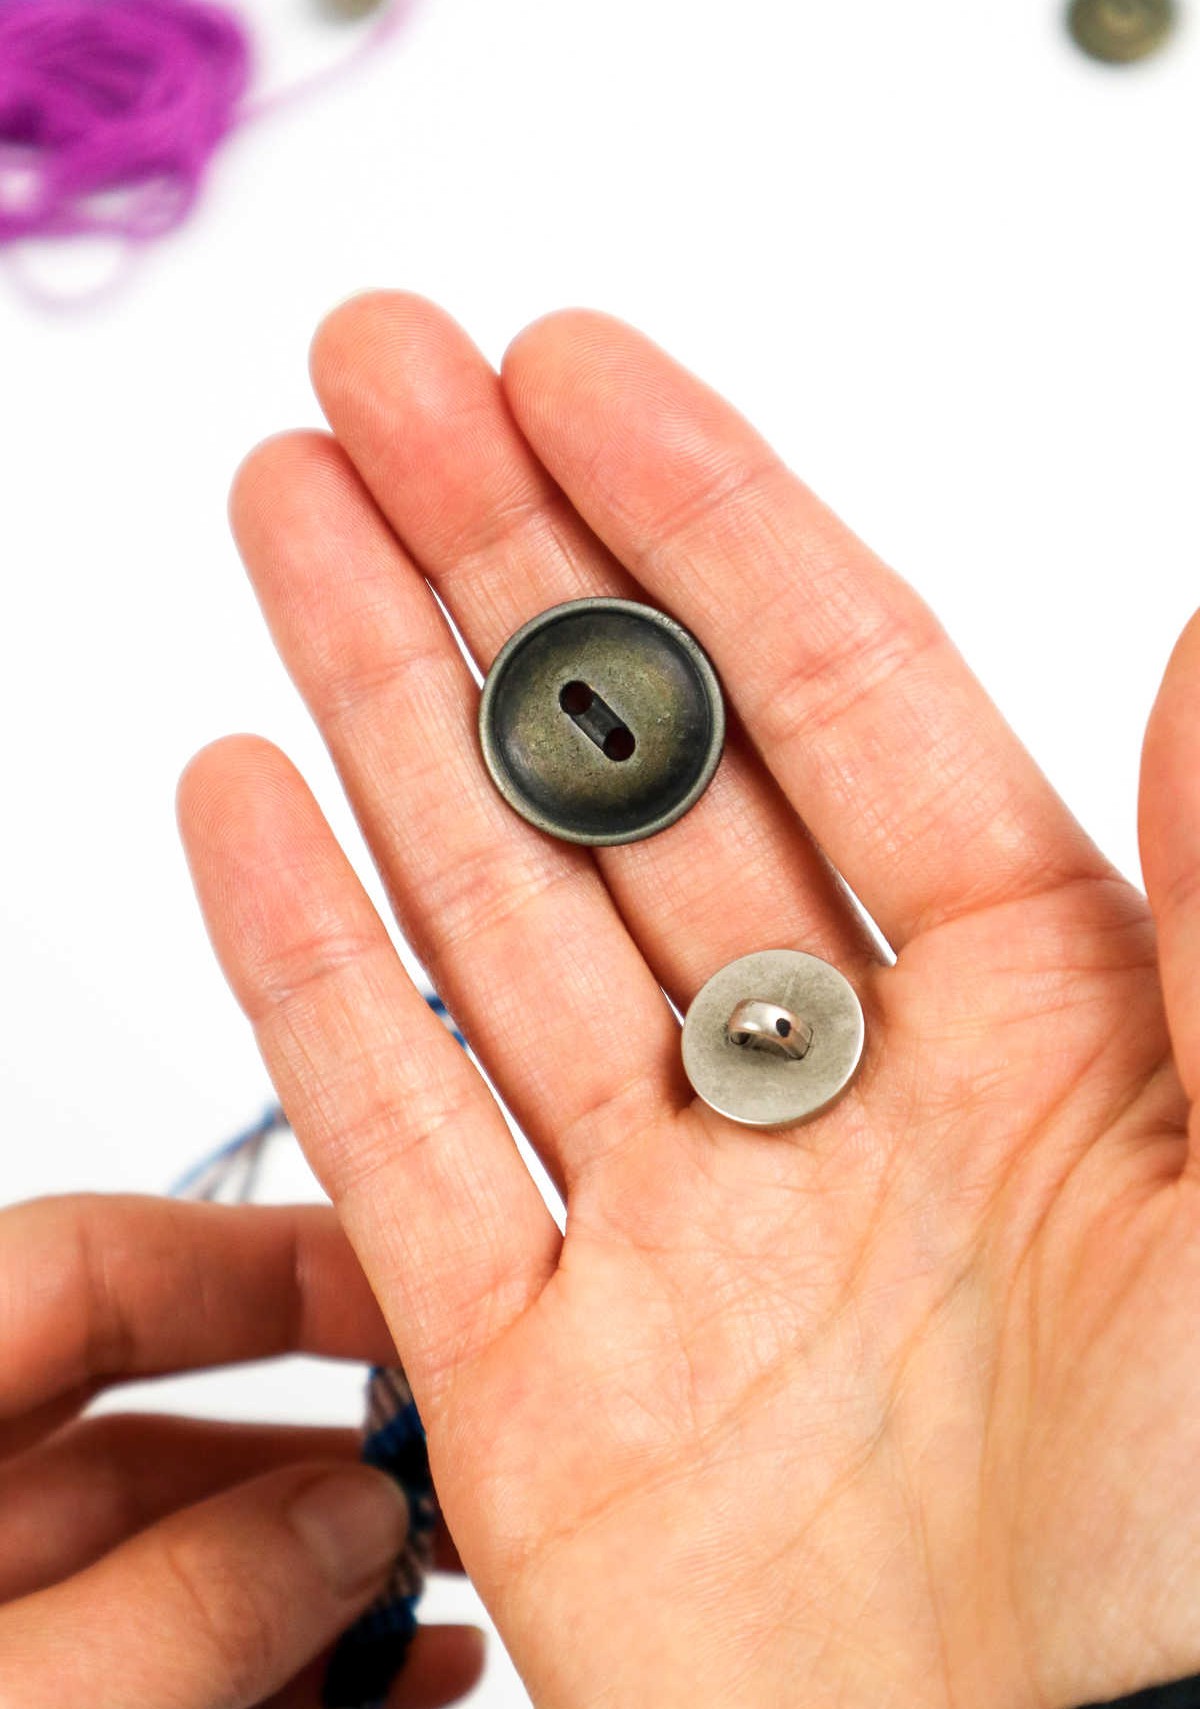
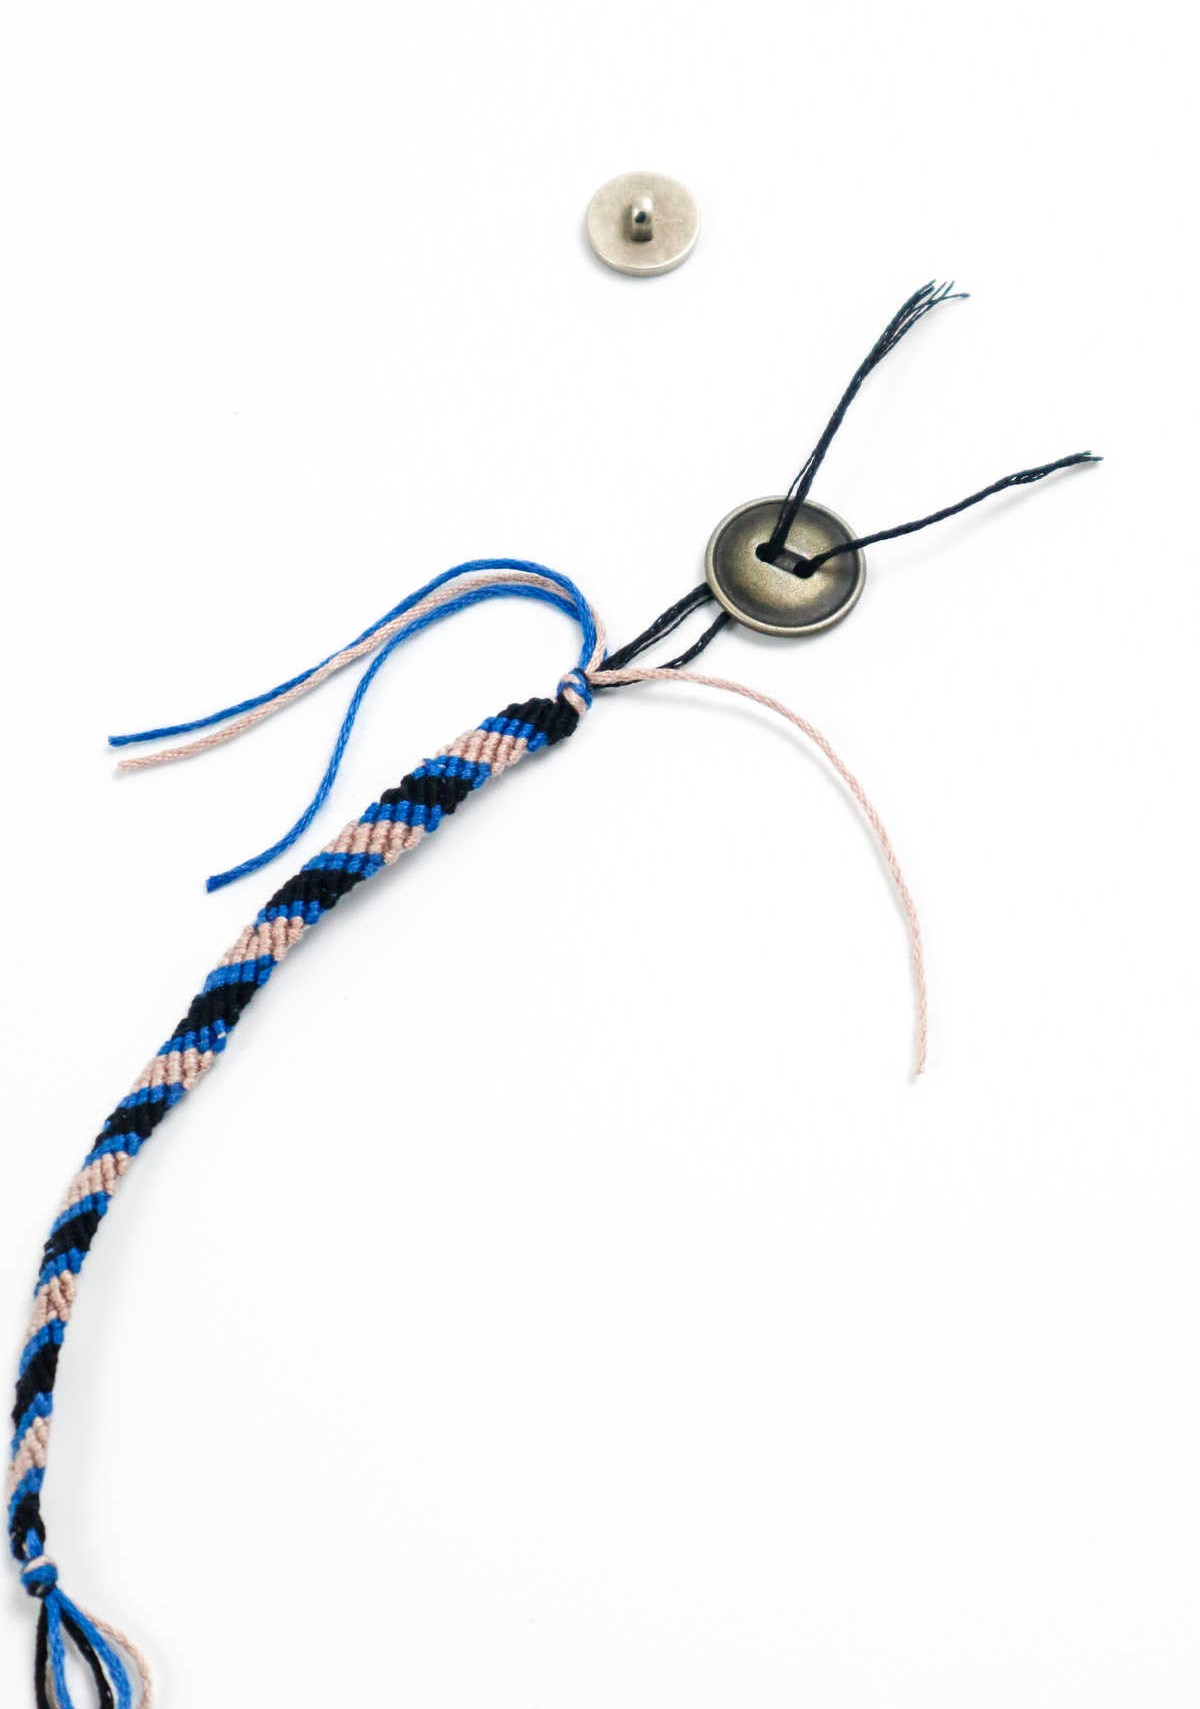
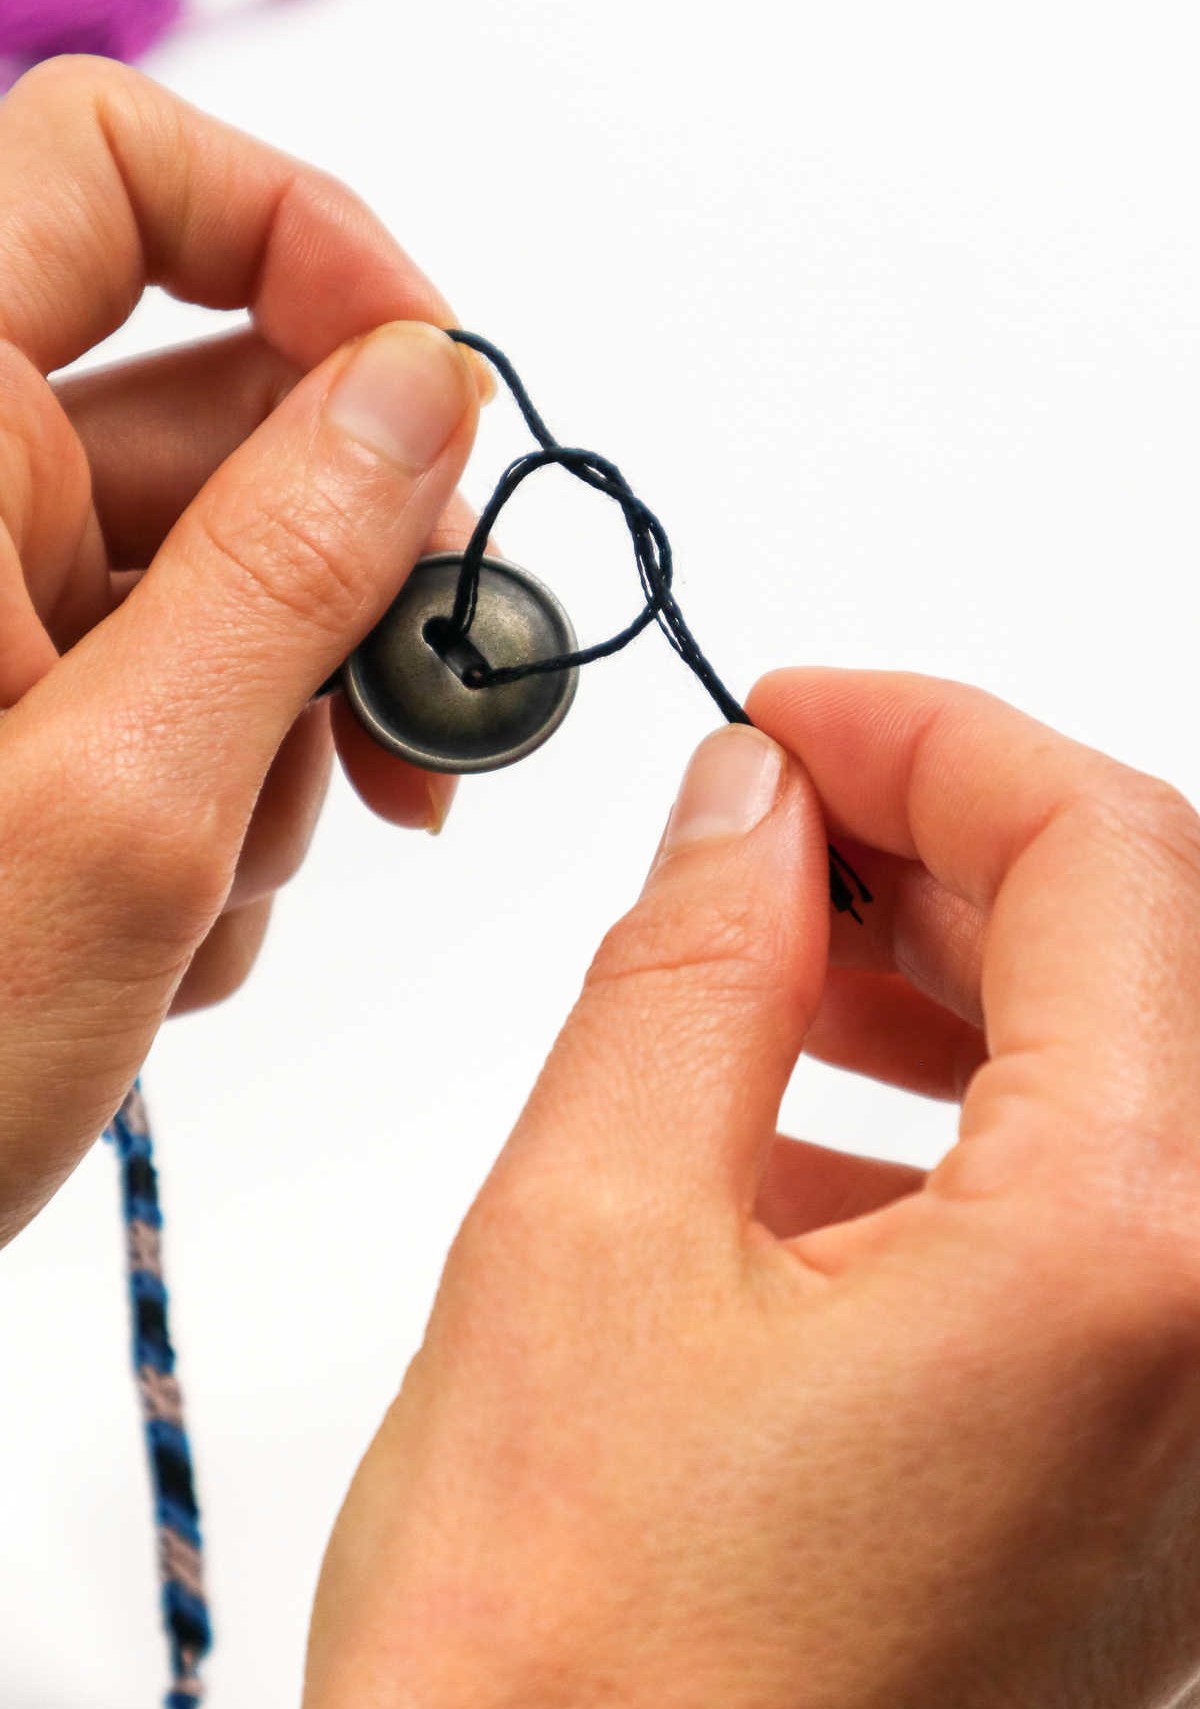
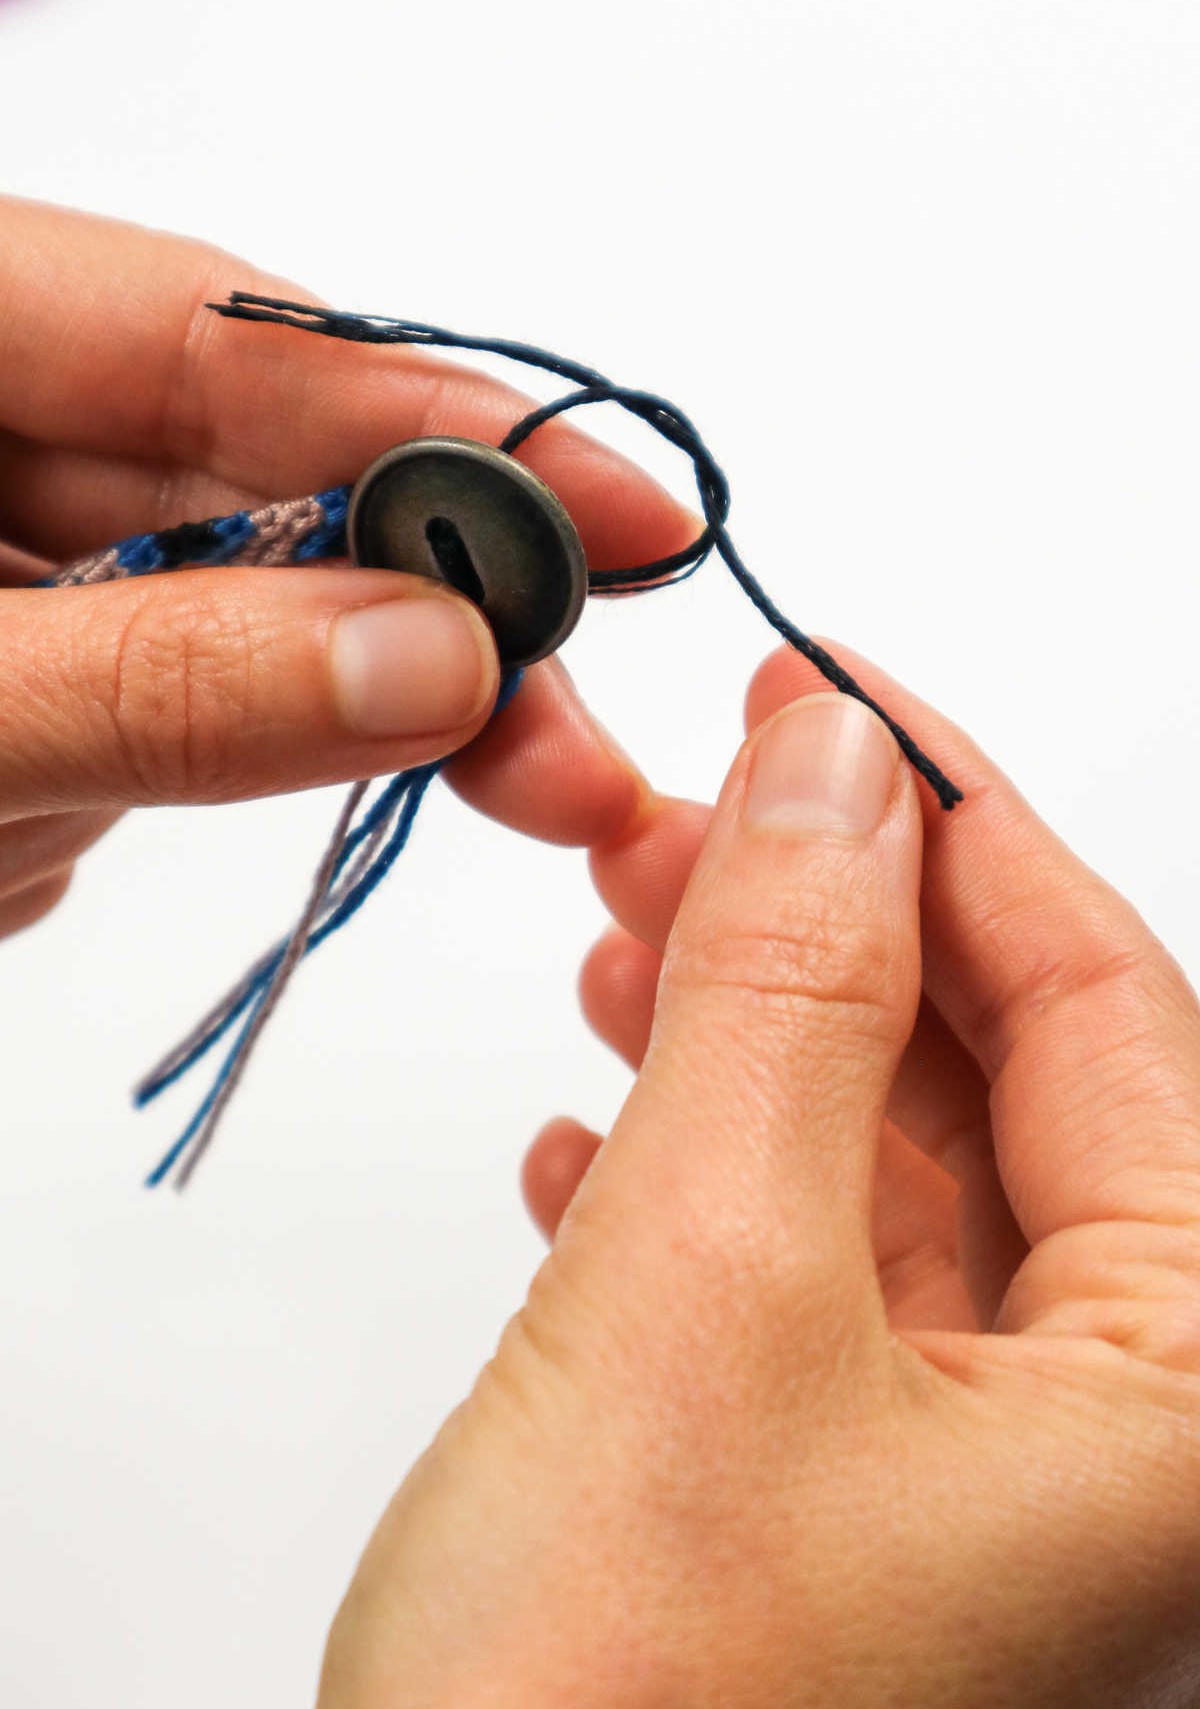
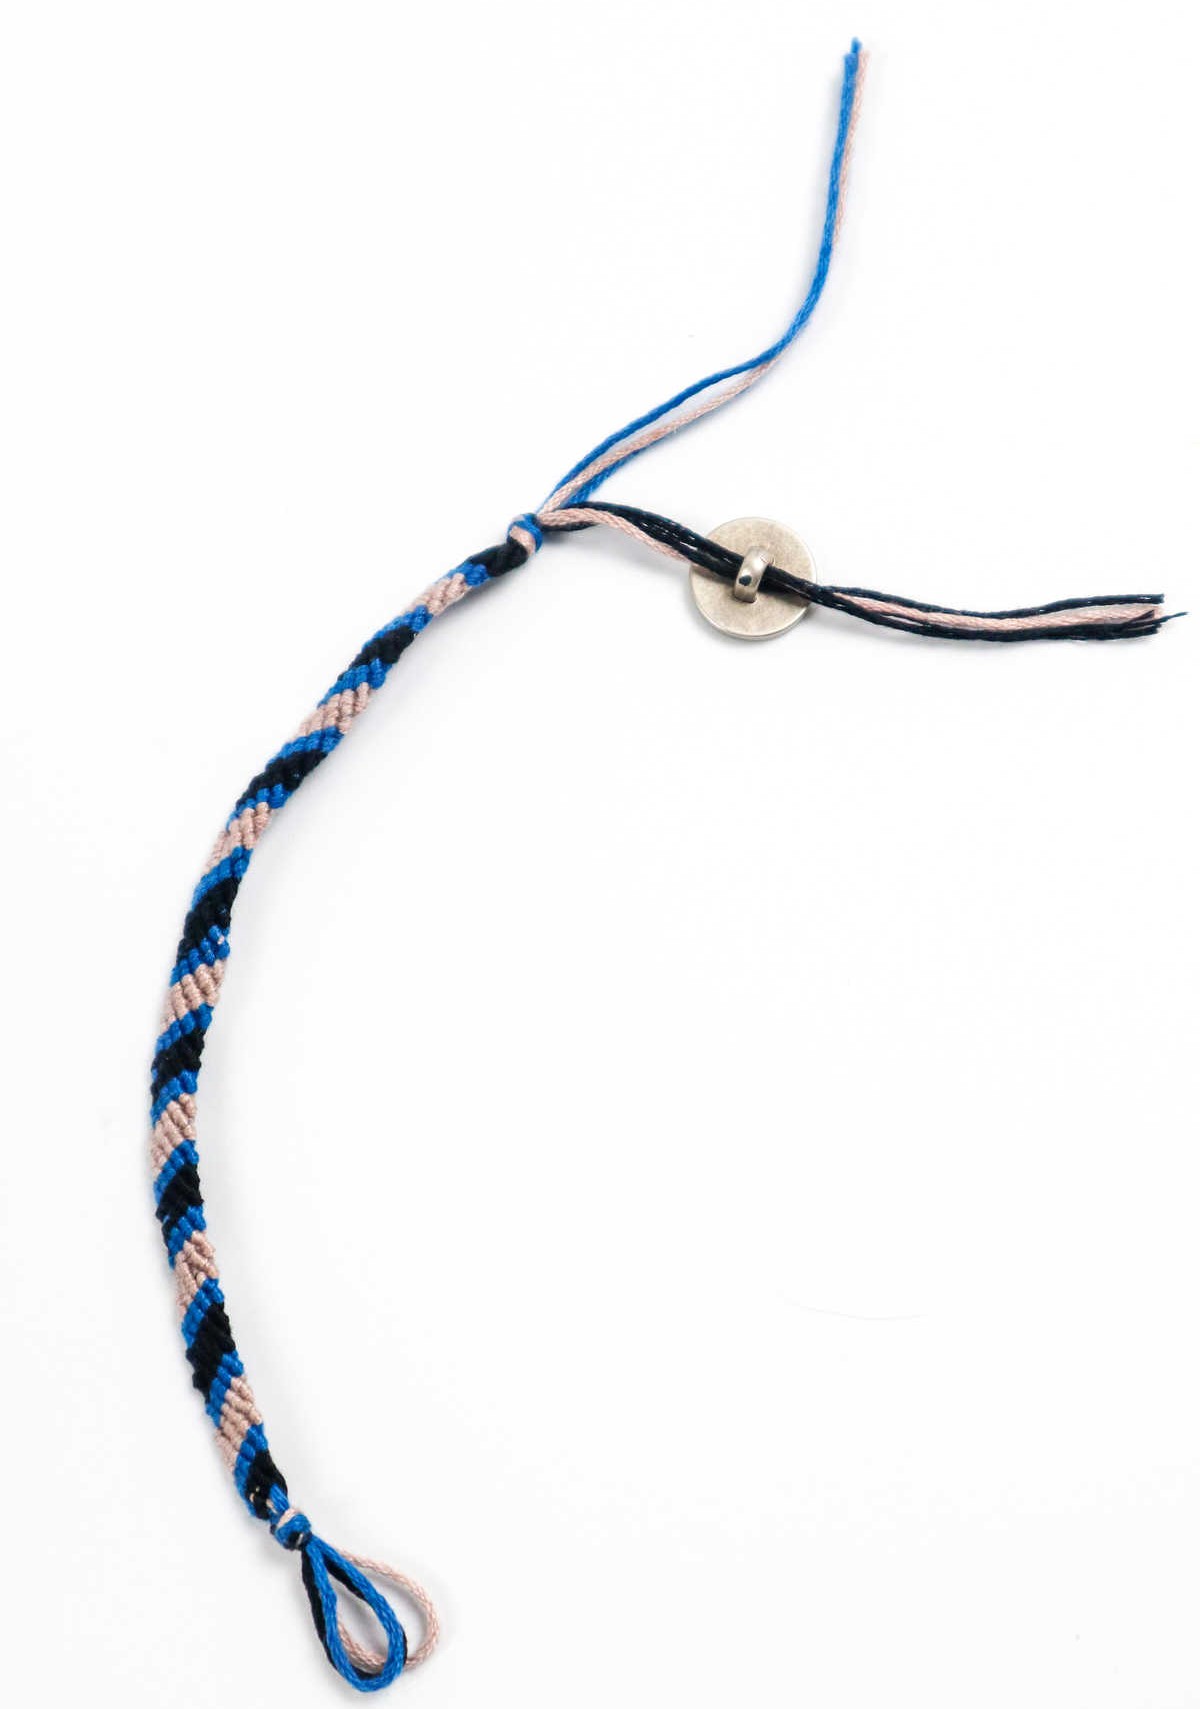

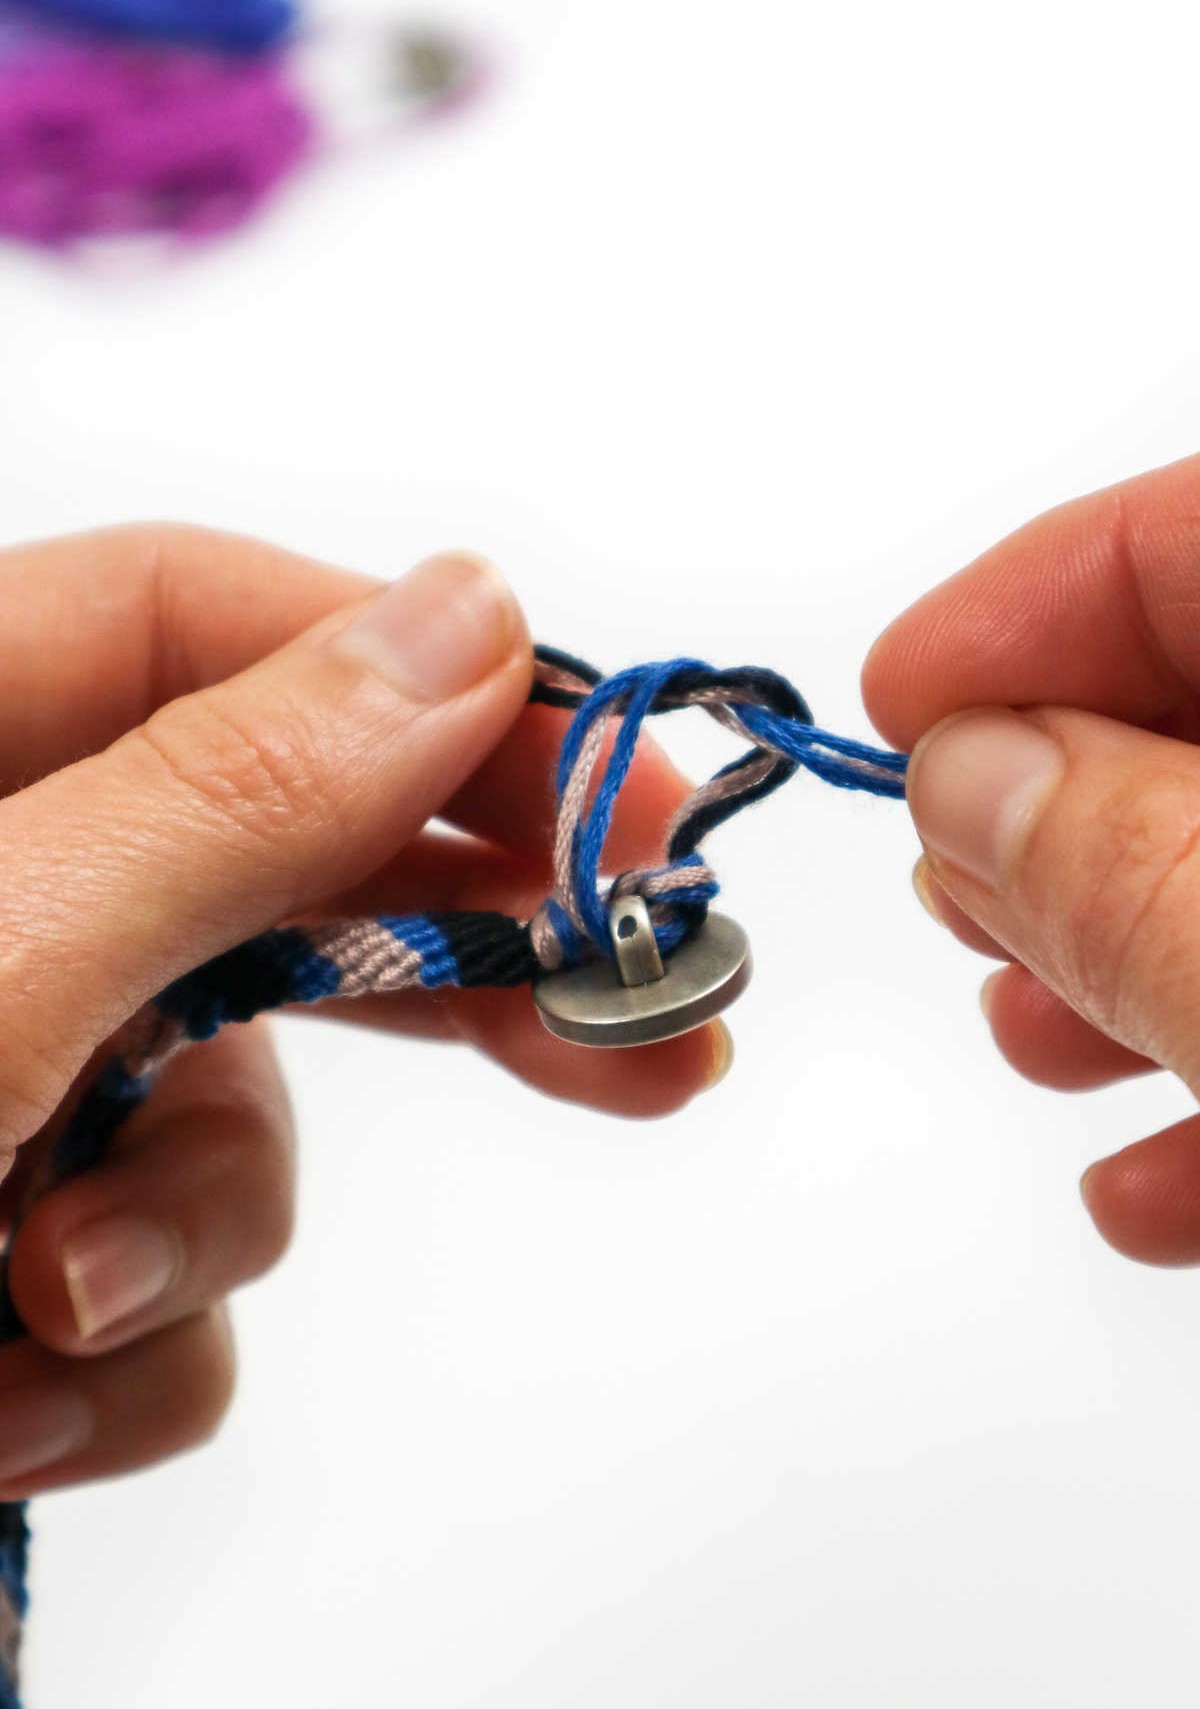
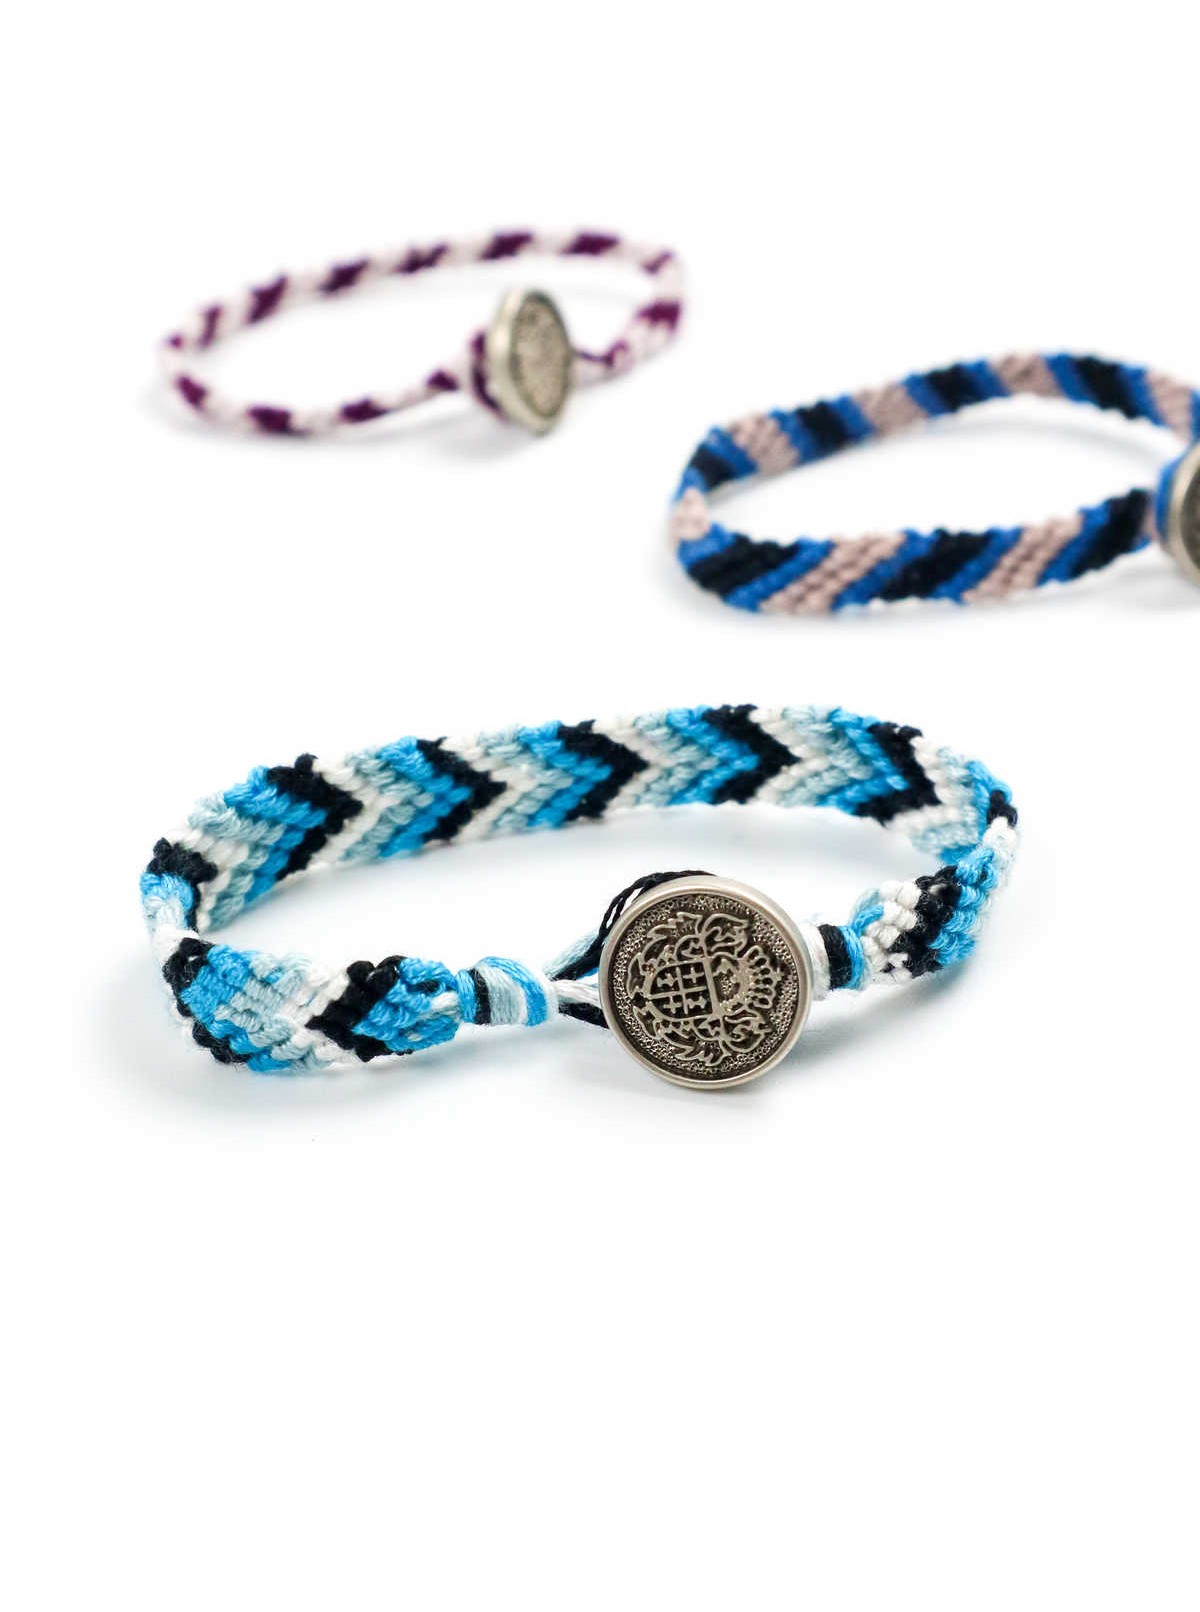
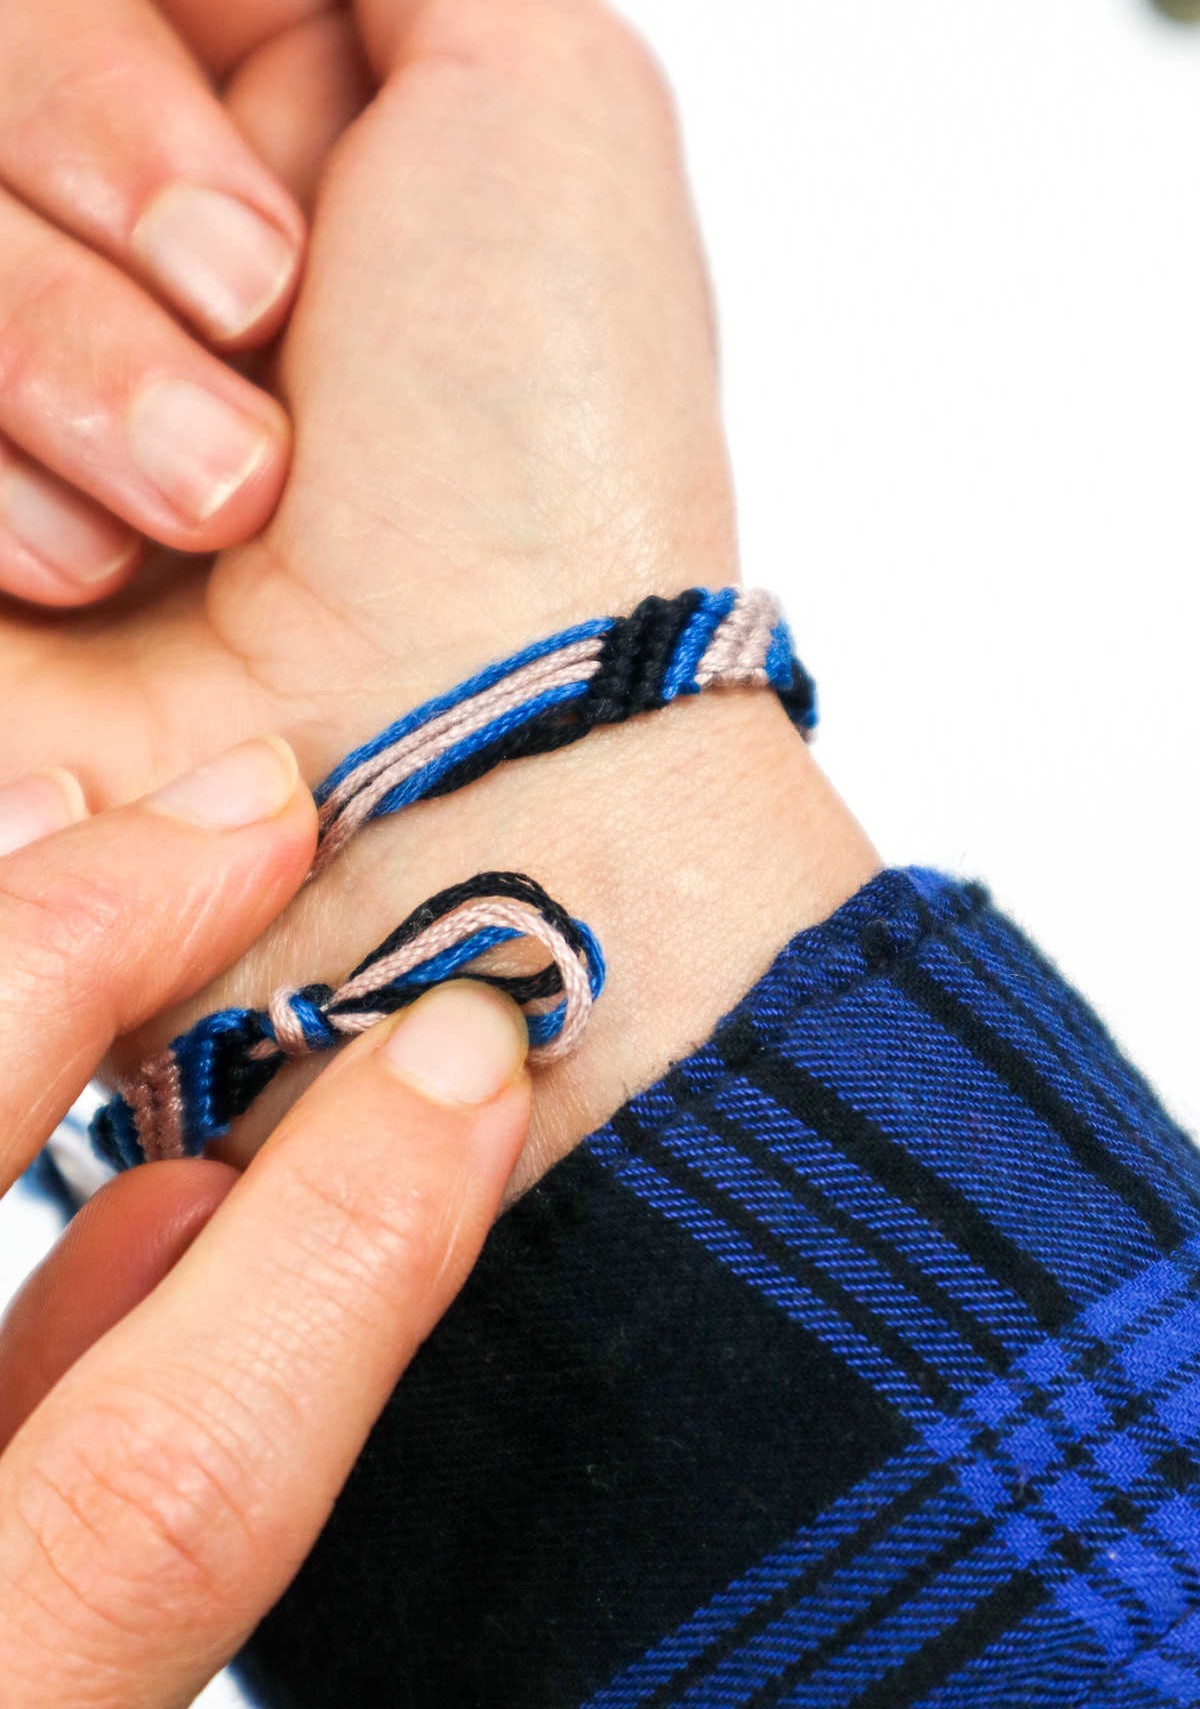
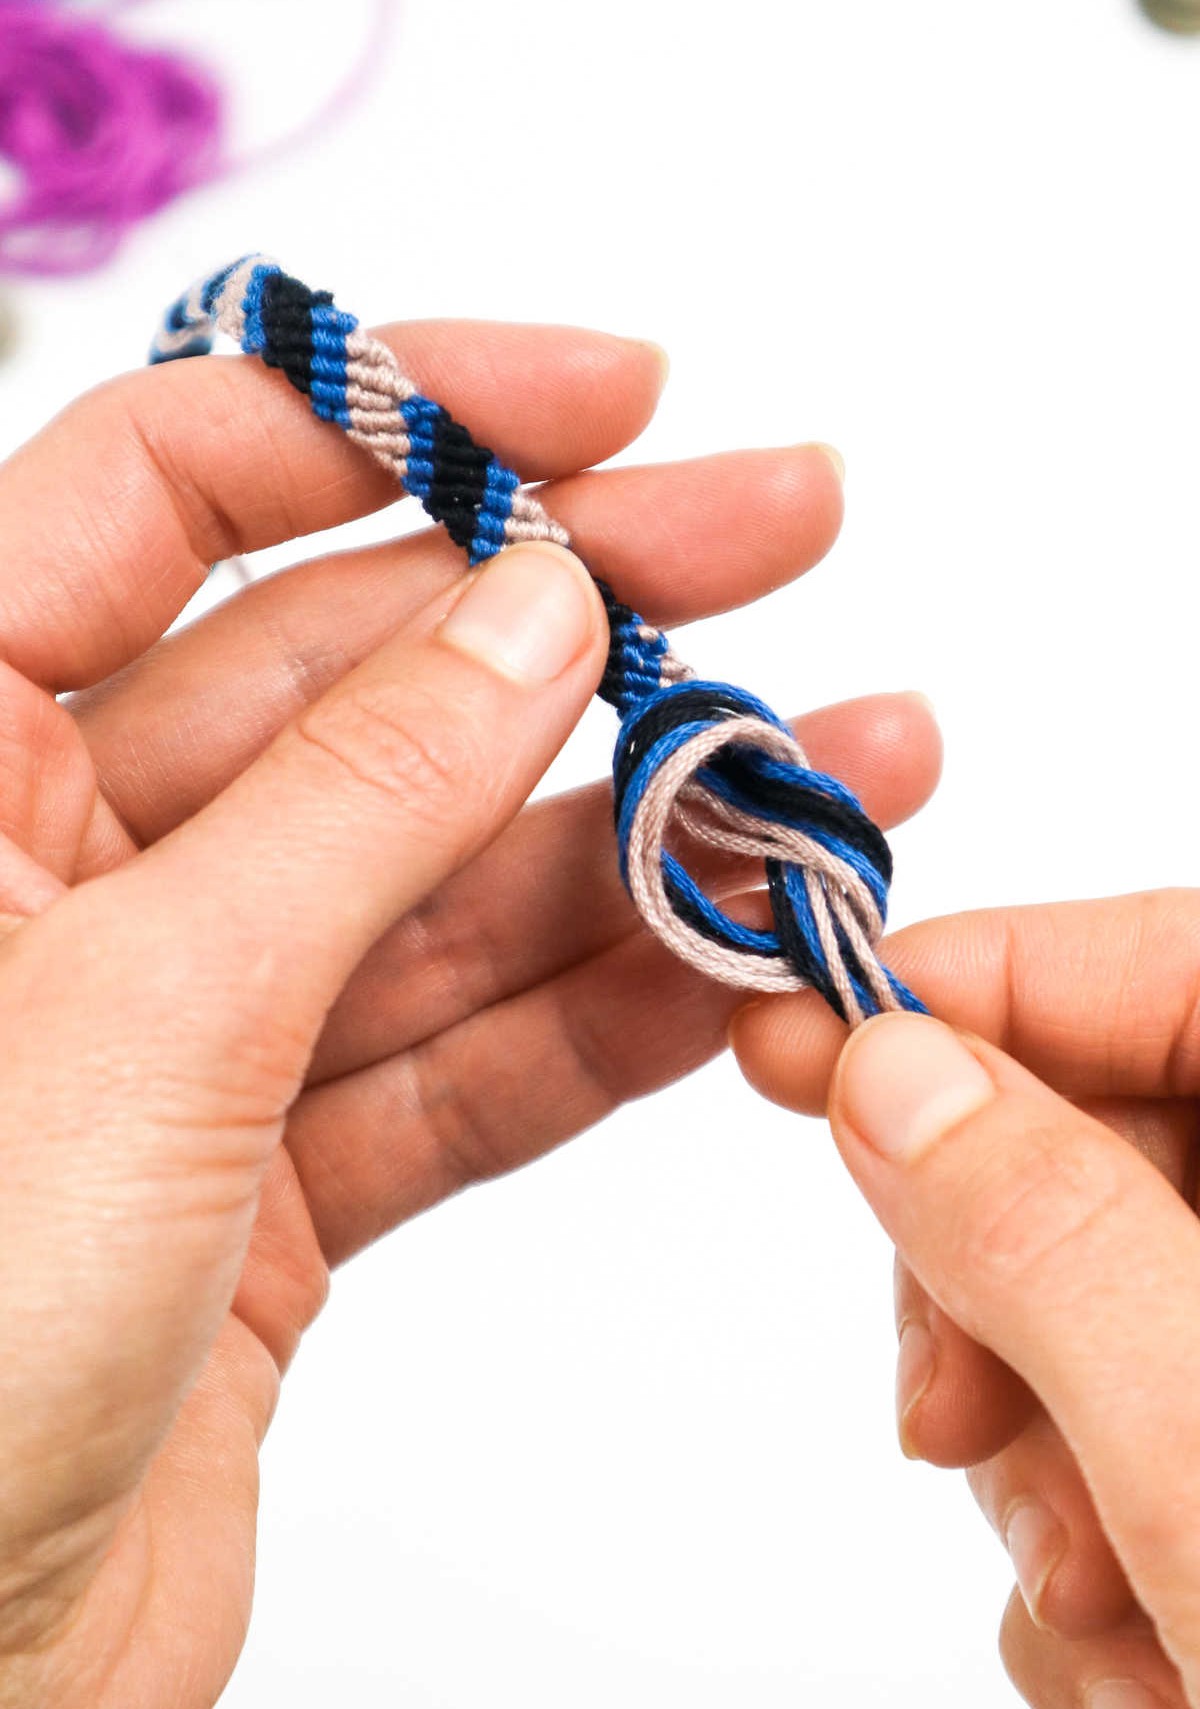
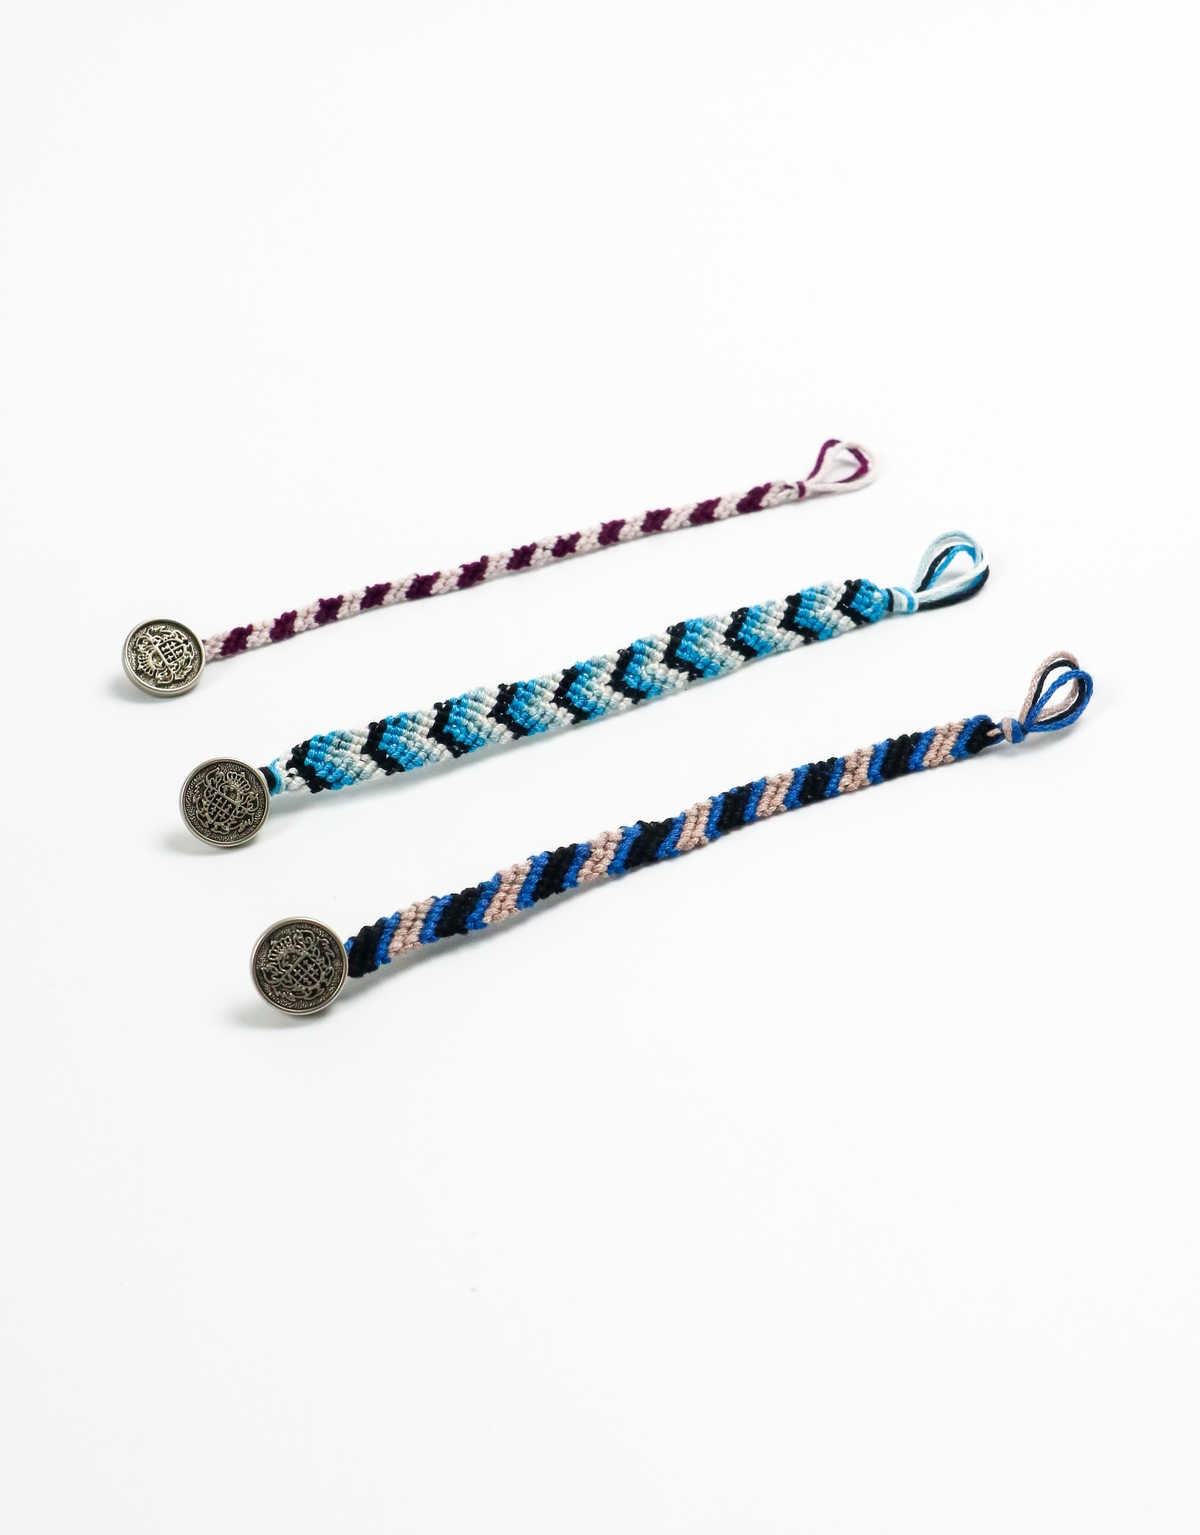
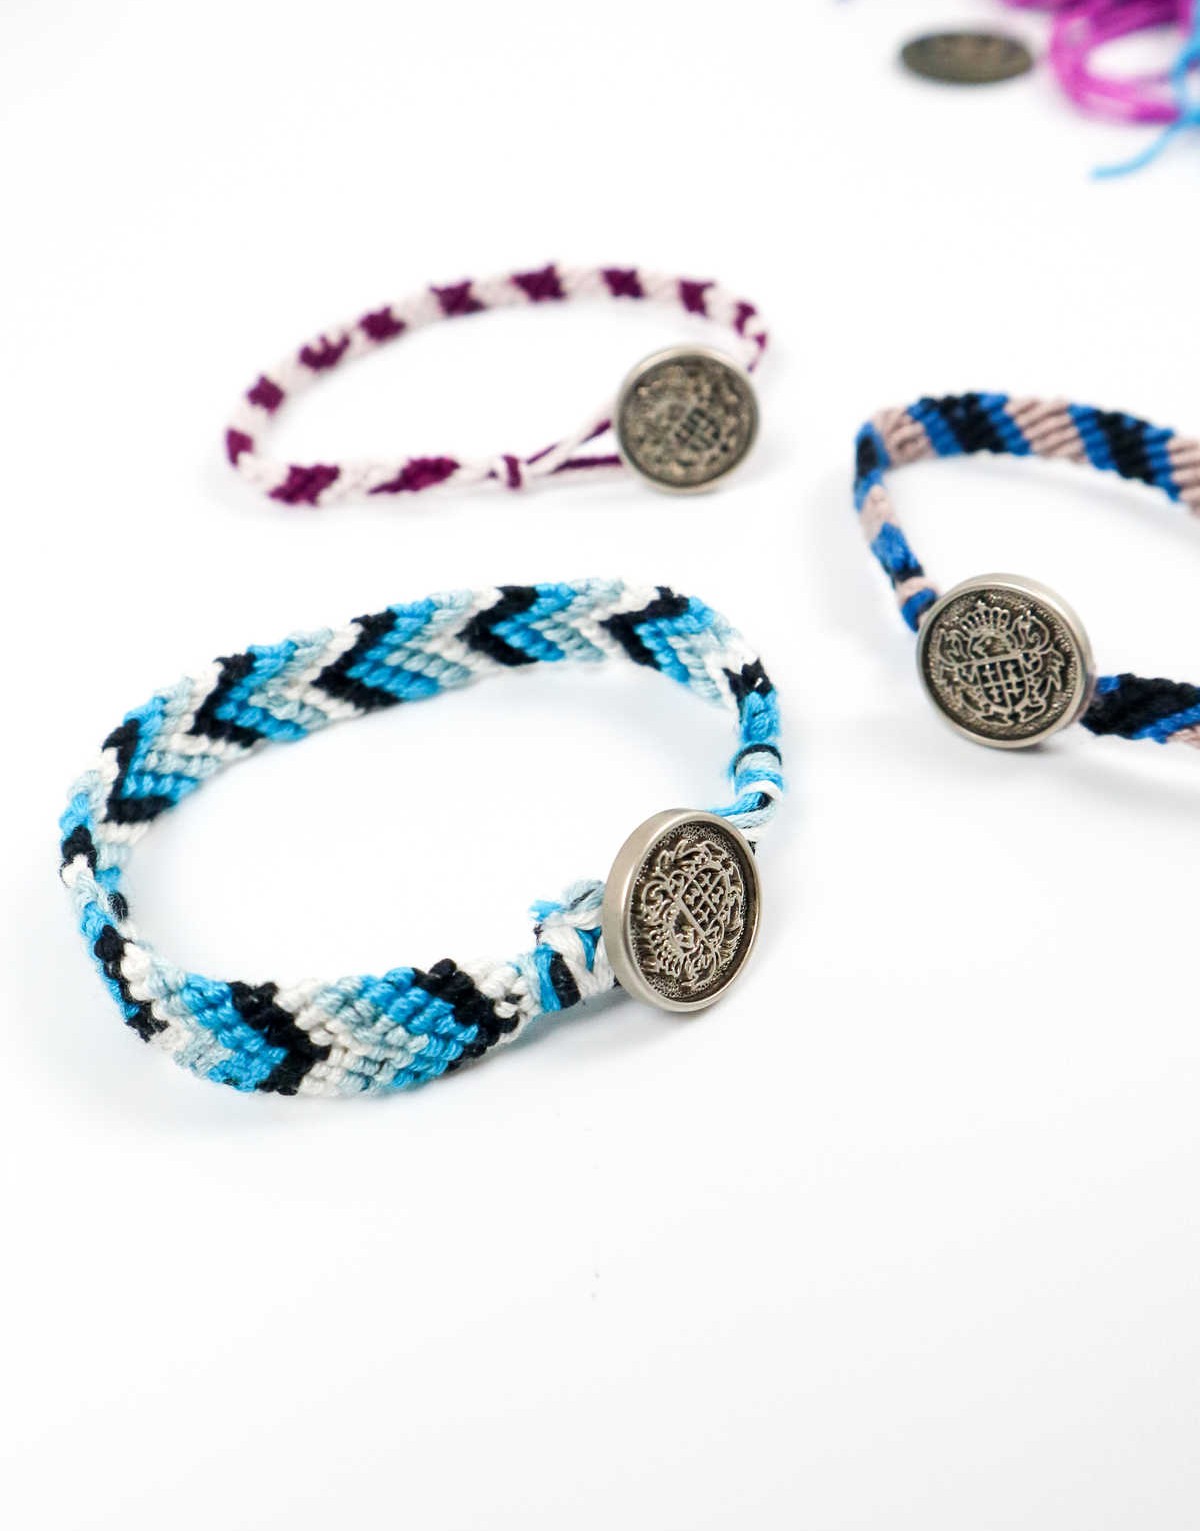
When it comes to customizing your bracelet, one of the most creative ways to do so is by adding charms, beads, and buttons. To incorporate a button, start by pulling the button through two cords, following the same steps outlined here. Once you’ve done that, make a knot to secure the button in place.
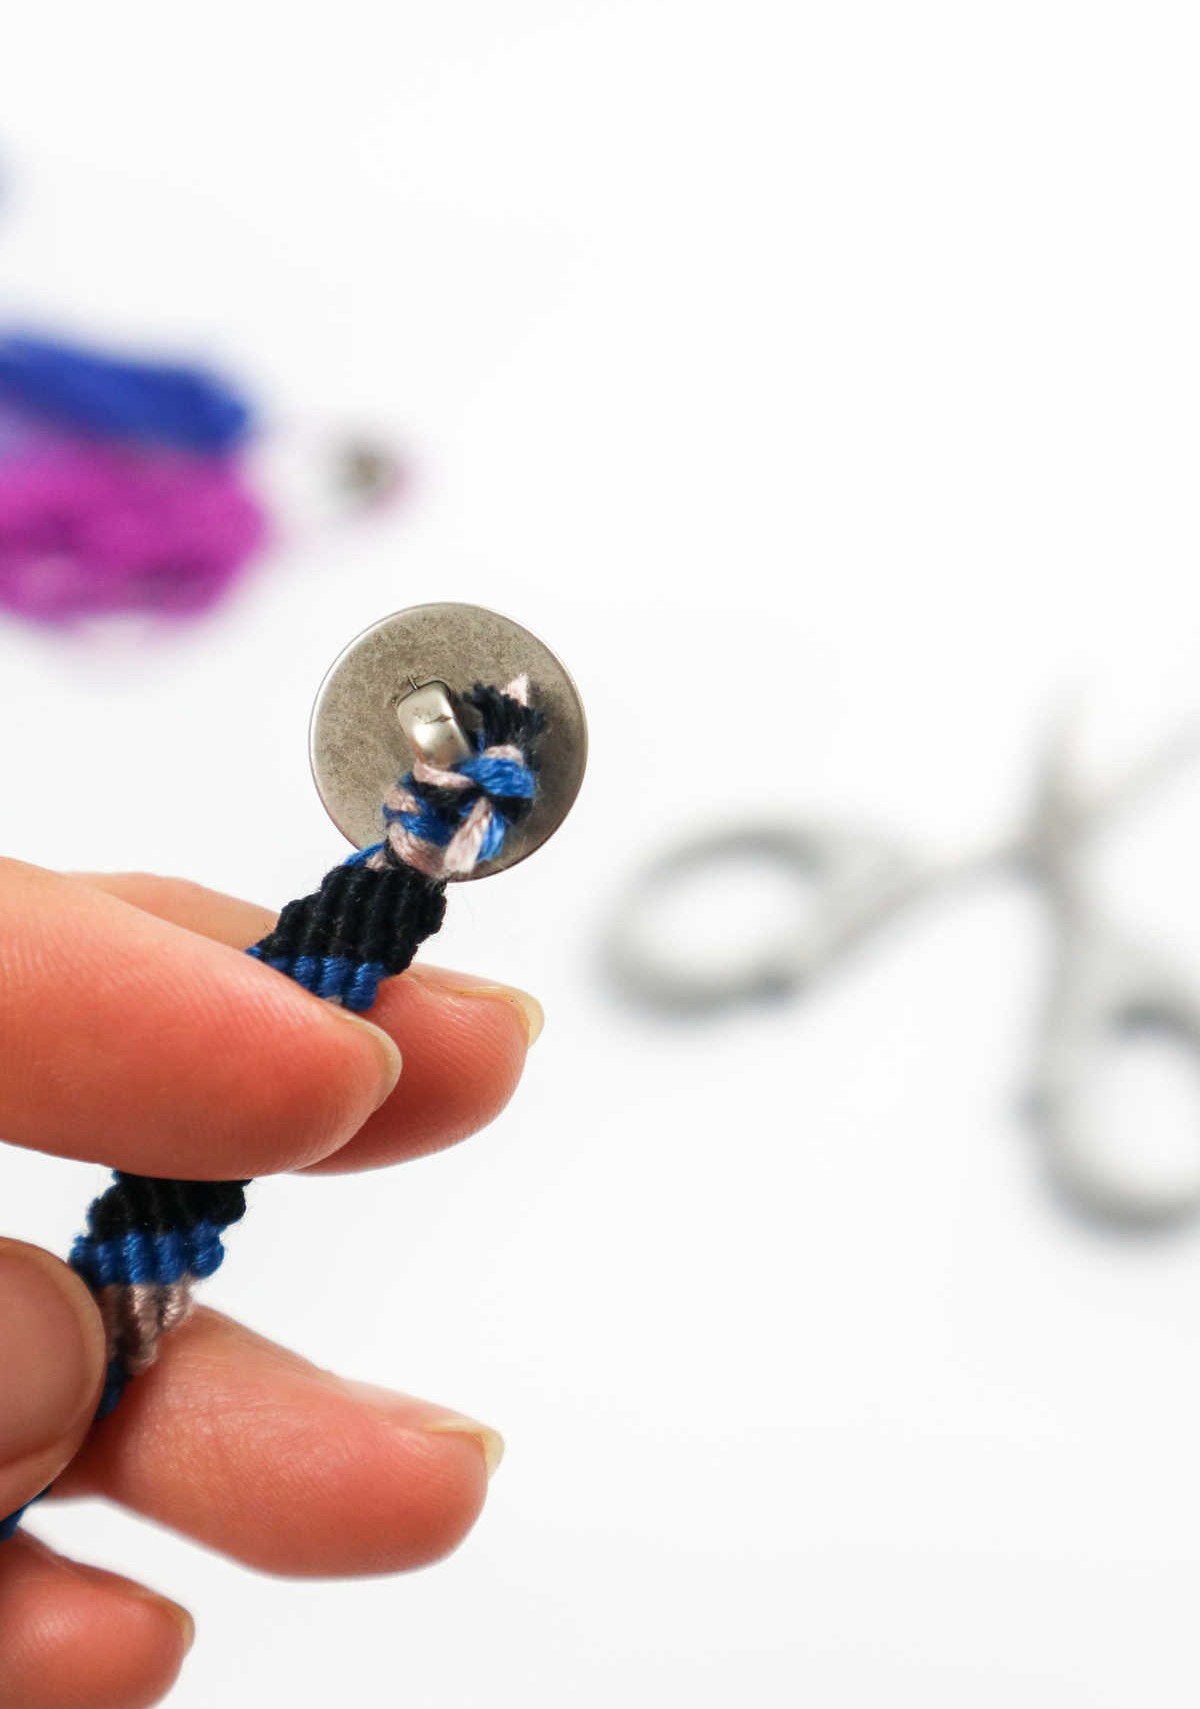
If the button has a small handle attached, such as the one depicted here, insert three strands of cord through the handle and tie another knot to keep everything secure.
Finally, pass the three strands back into the loop and tie yet another knot to ensure the button remains firmly in place.
How to Make a 4 String Bracelet

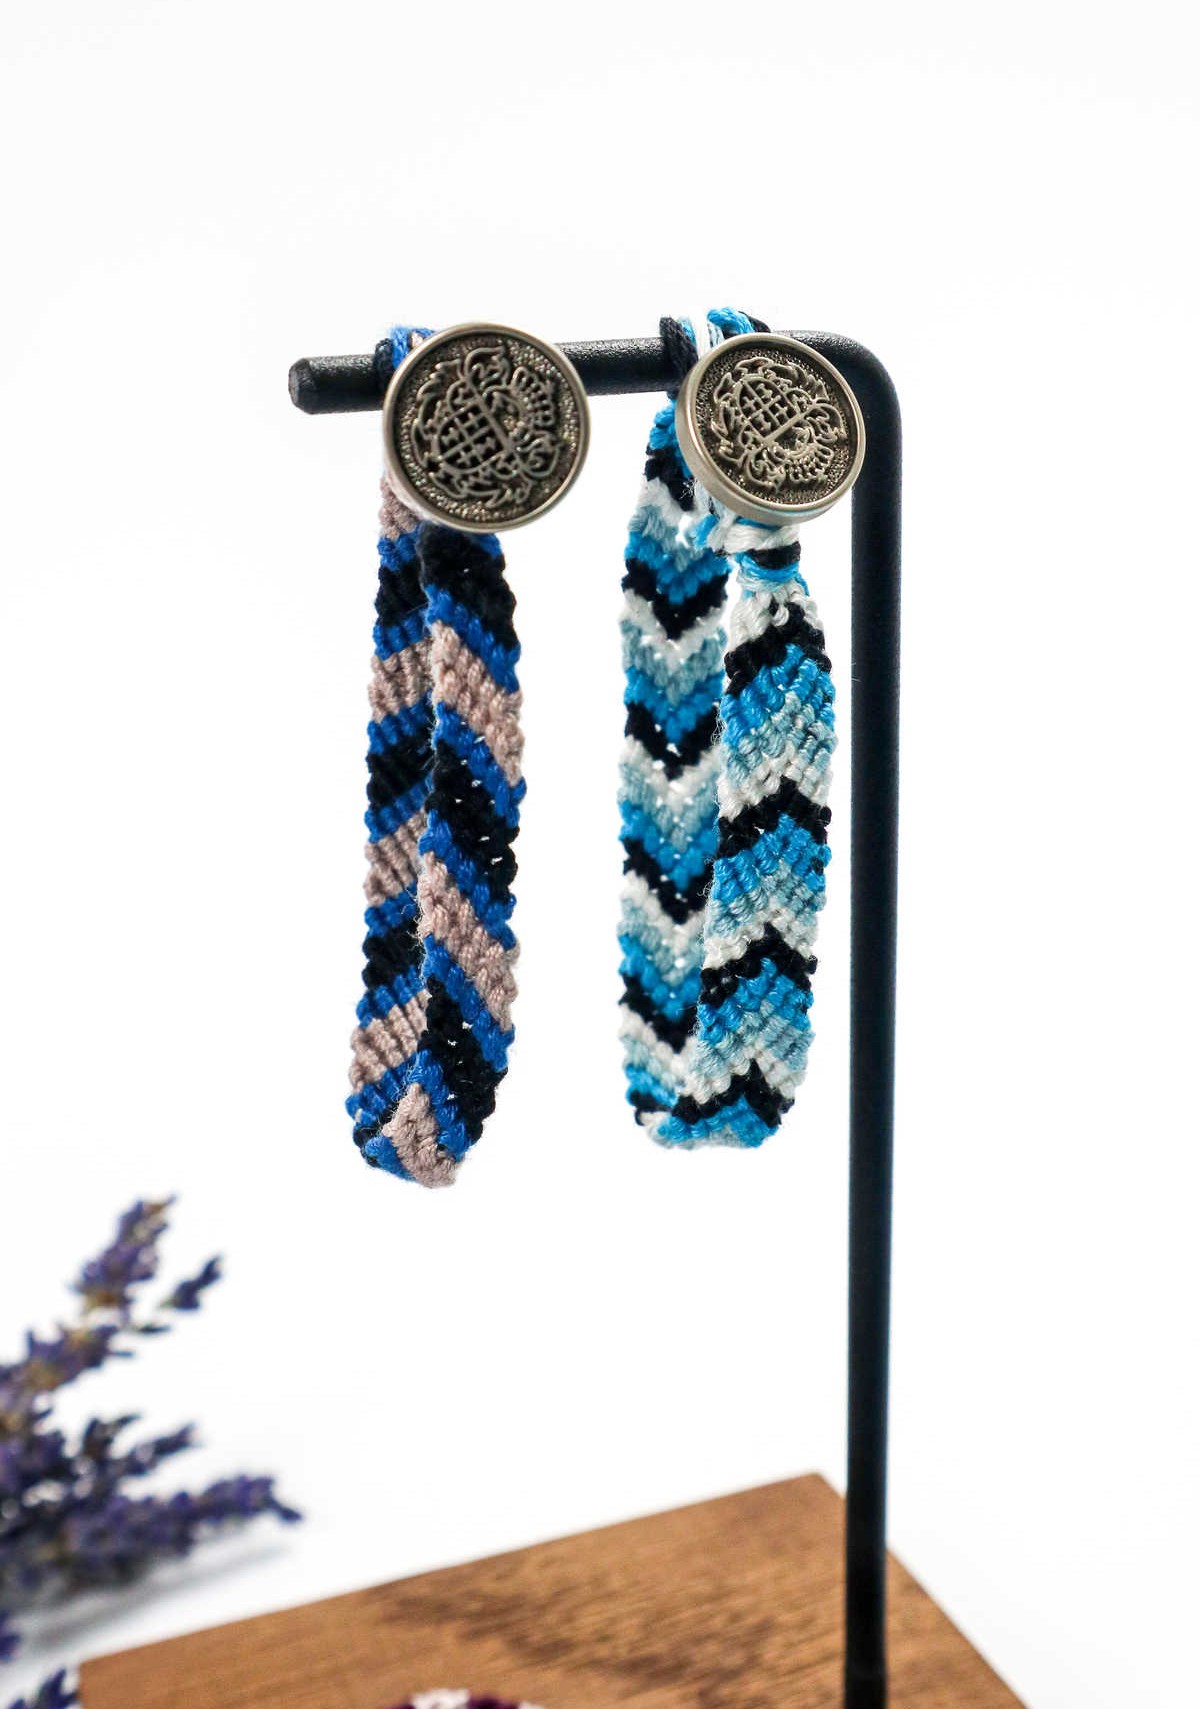
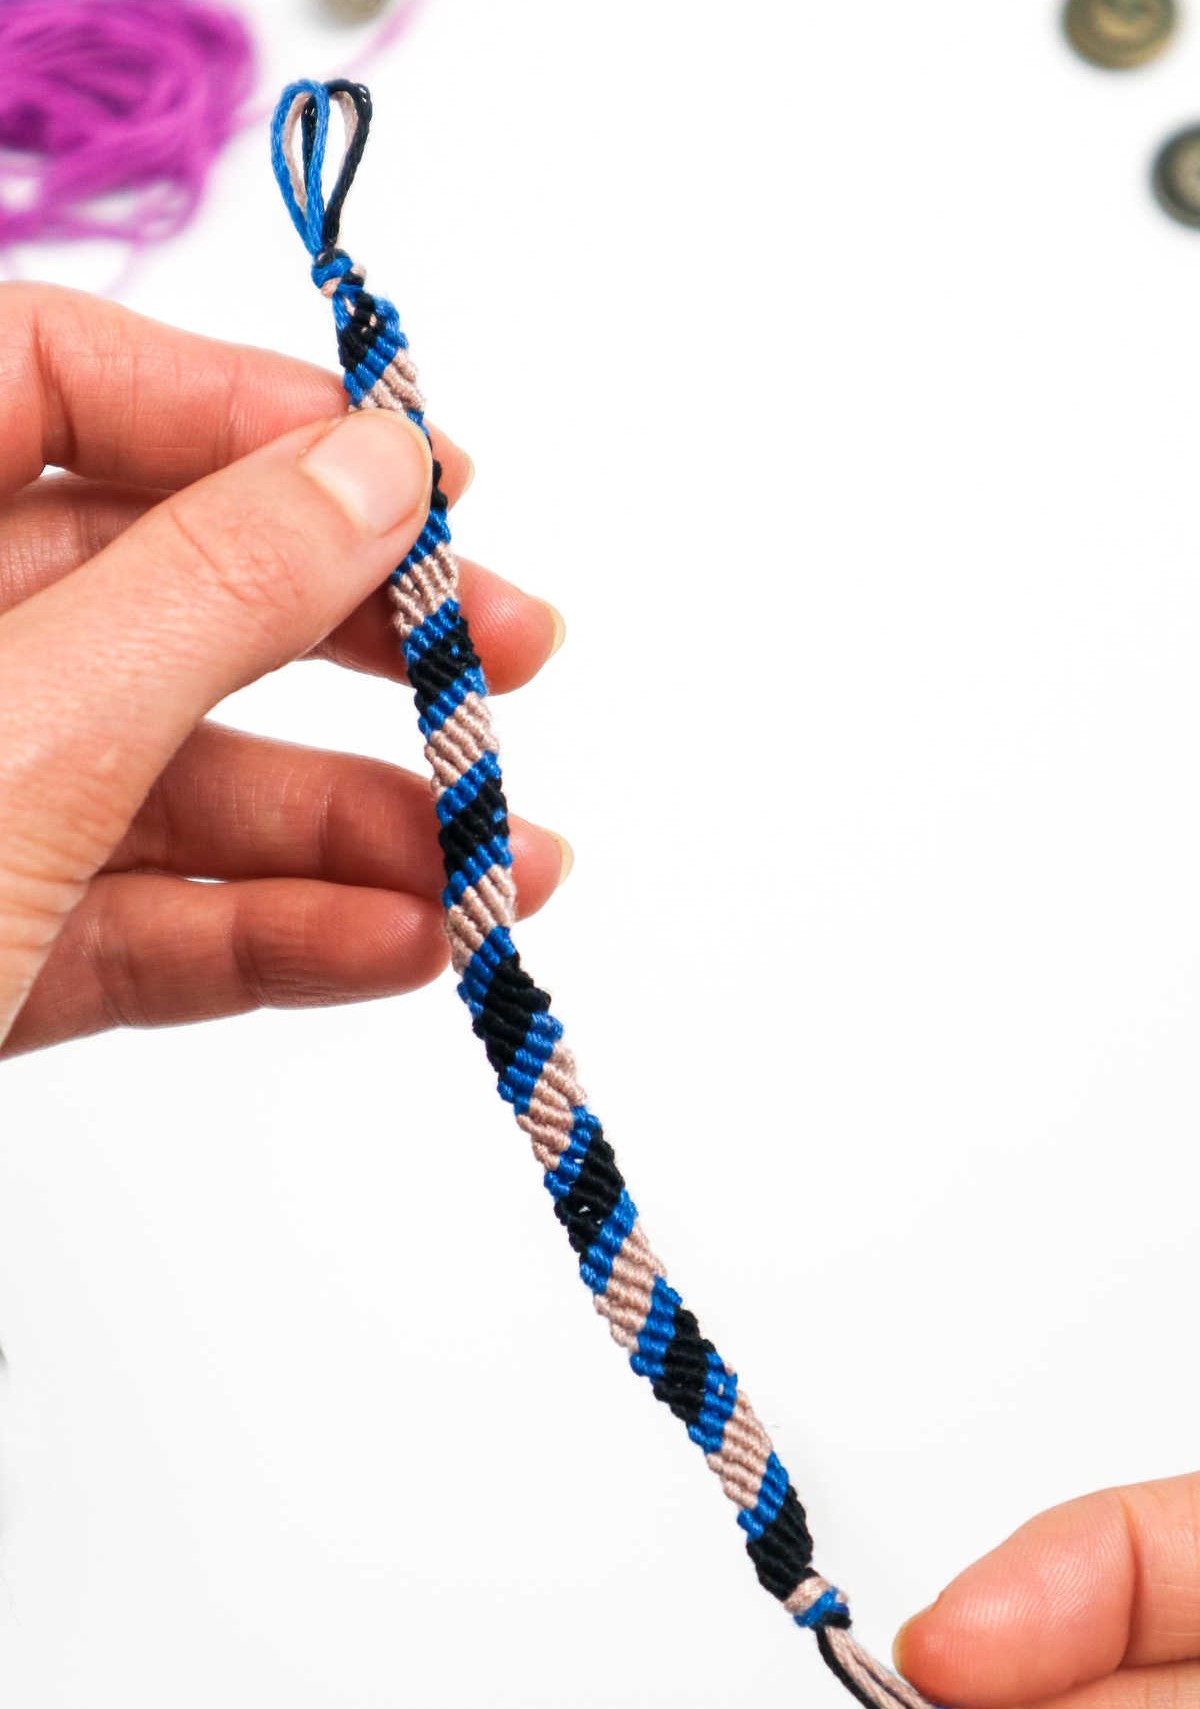
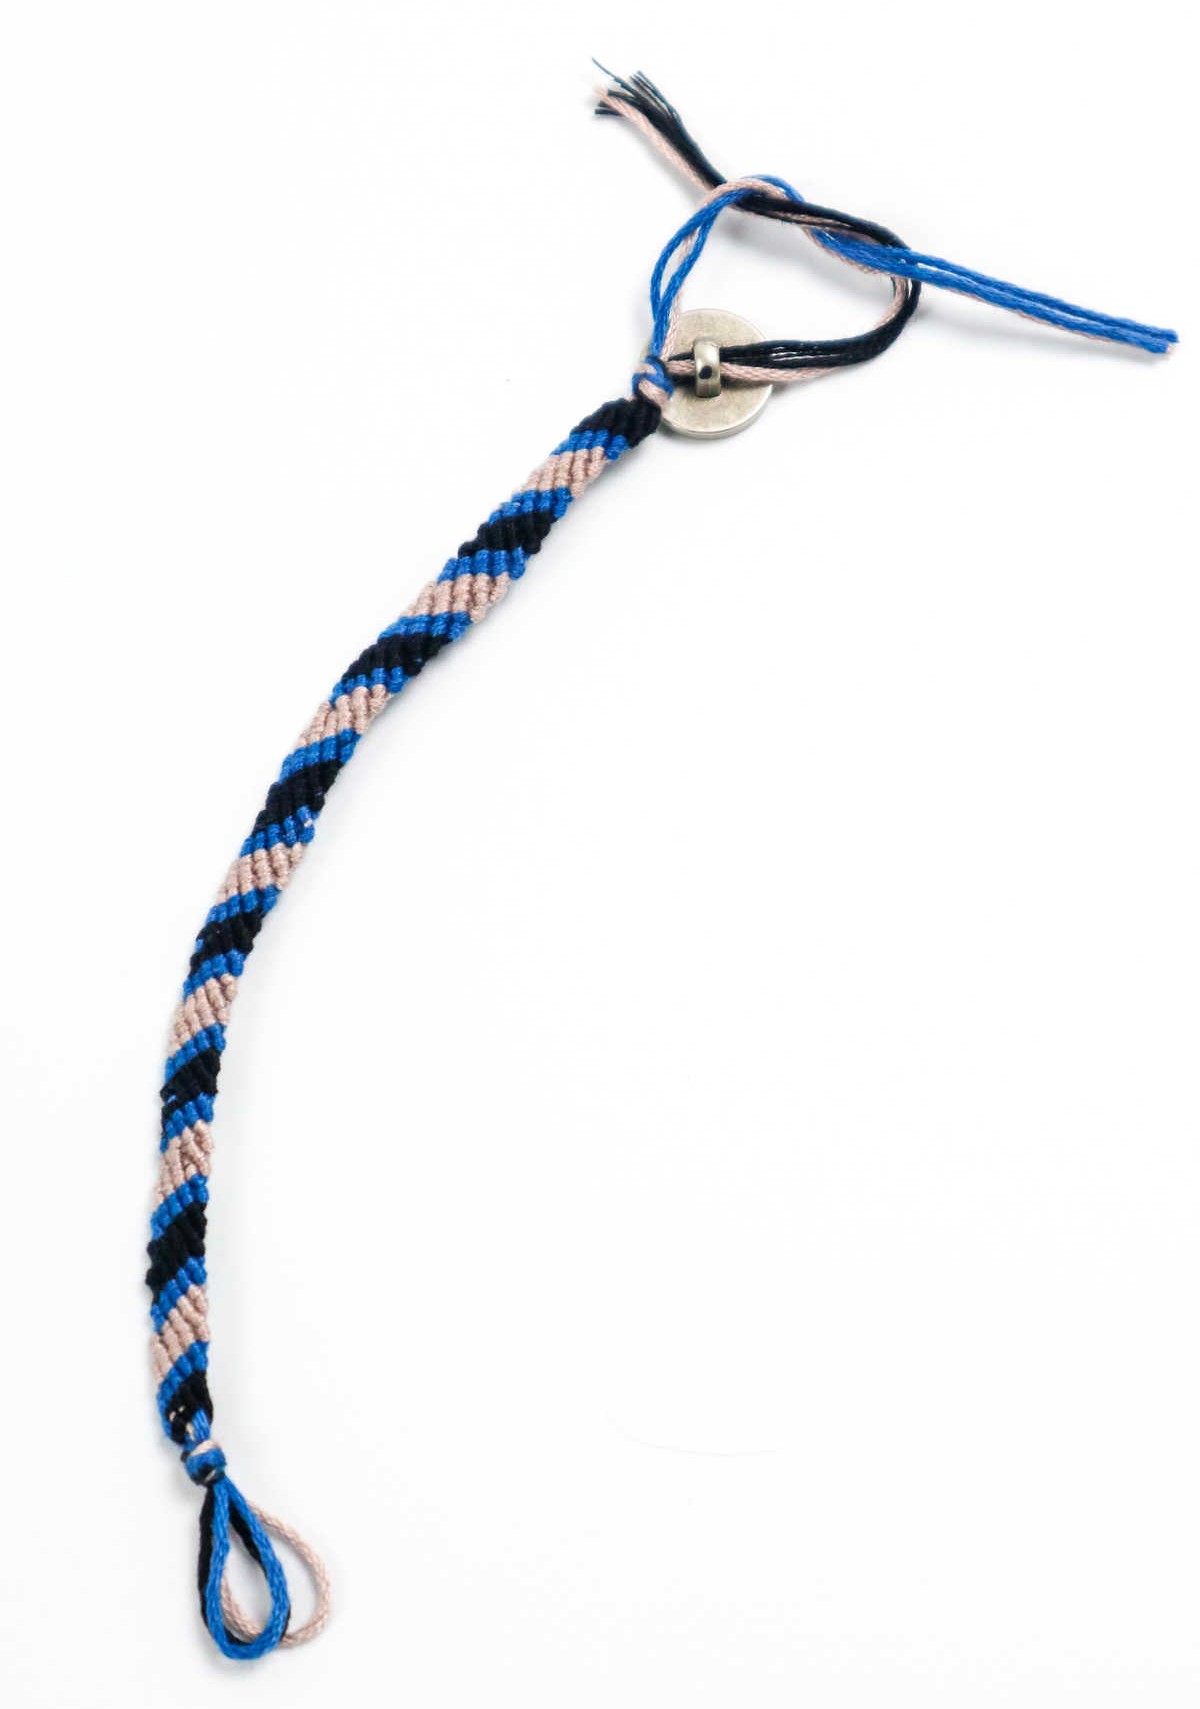
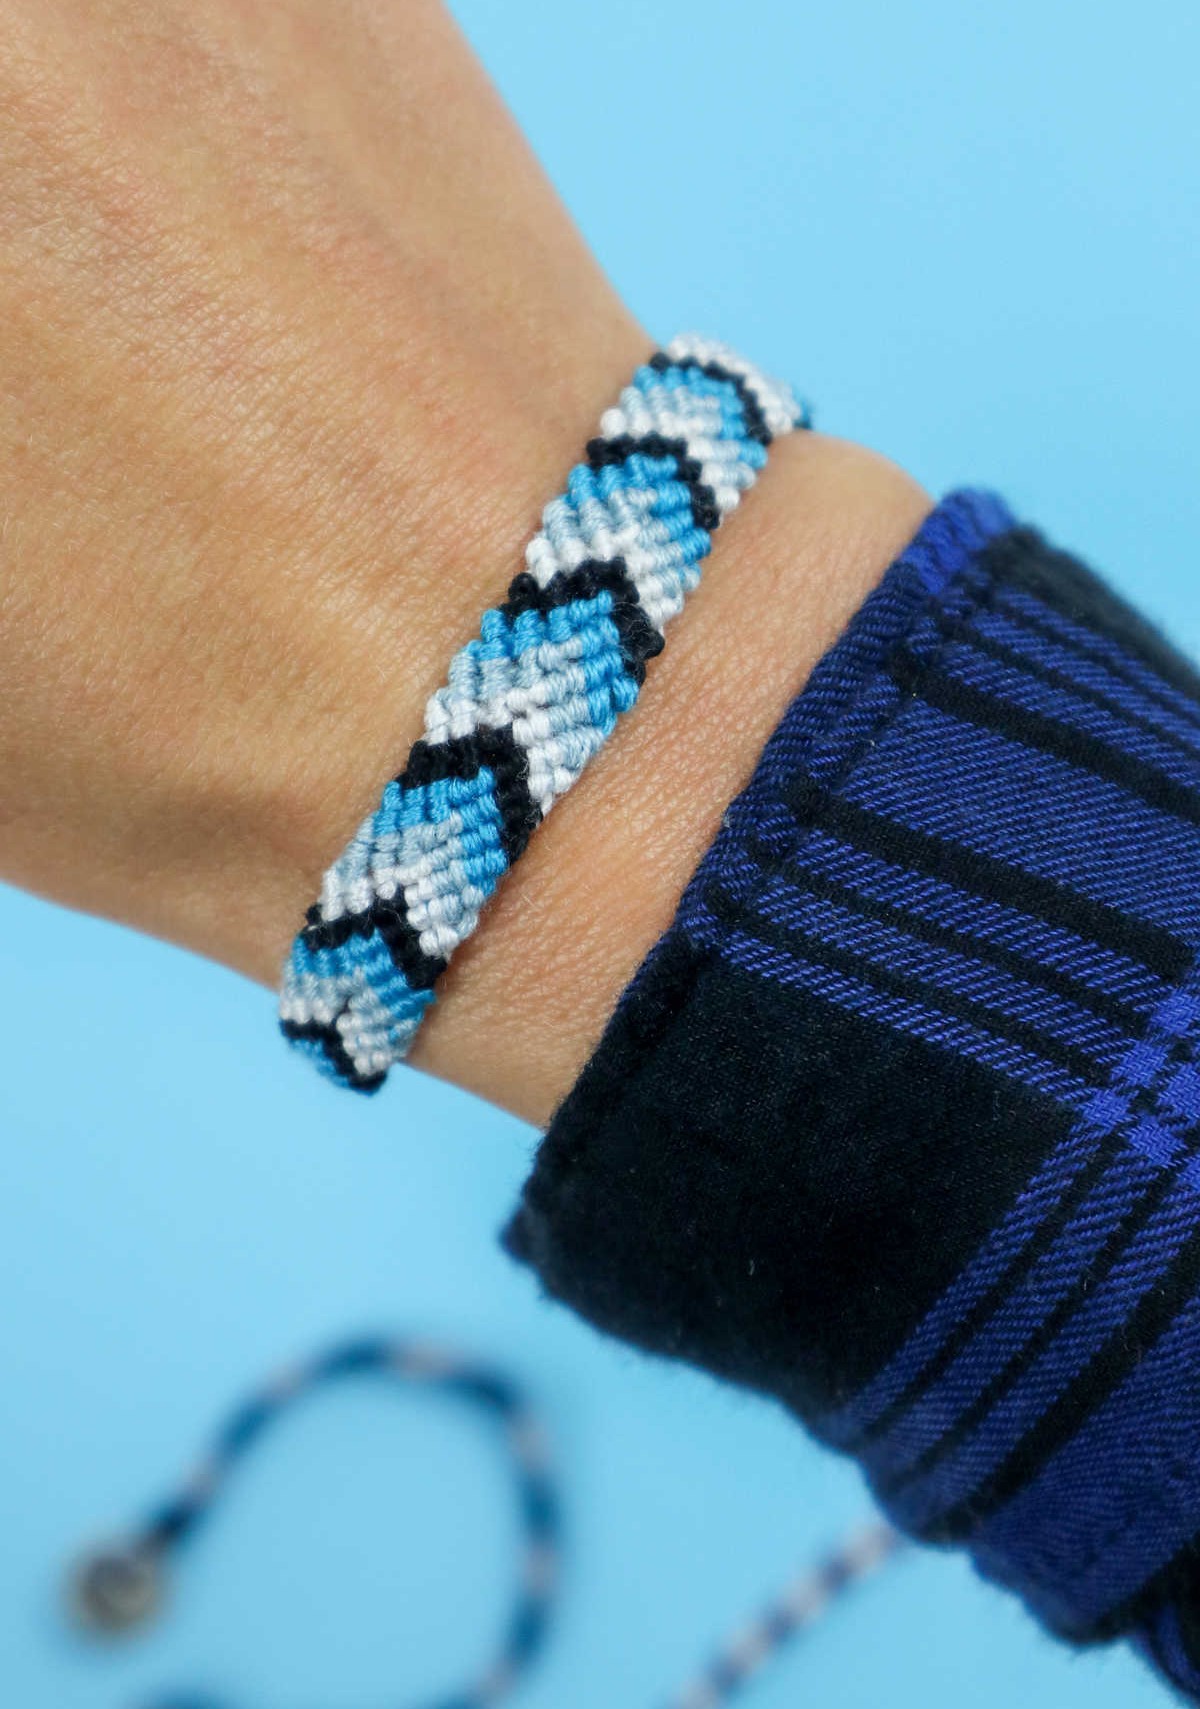
Building upon your newfound skills in creating a three-strand knot, you’re now ready to tackle the next level of complexity – the 4-strand knot. As you examine this bracelet’s unique design, you’ll notice the v-shaped pattern that runs along its length. With this in mind, let’s take a closer look at how to replicate this stunning feature and elevate your knot-tying abilities.
Step 1
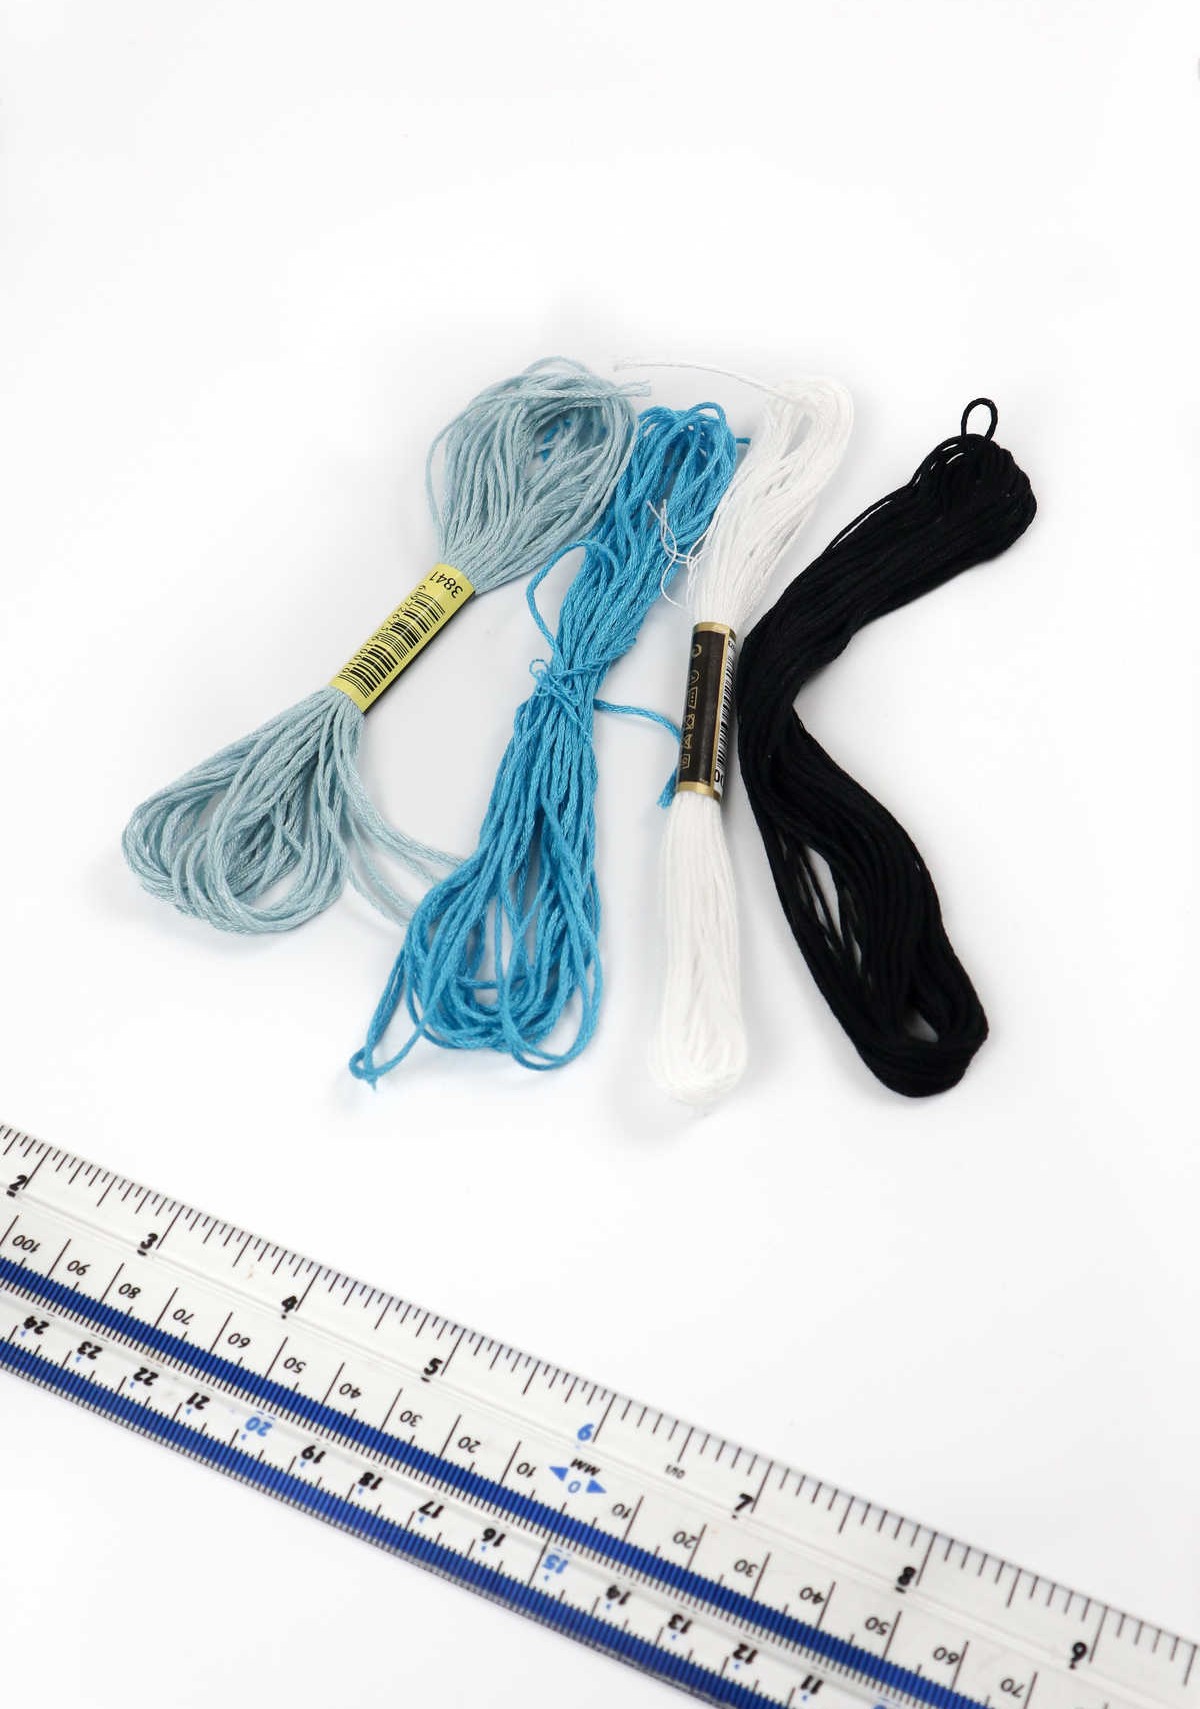
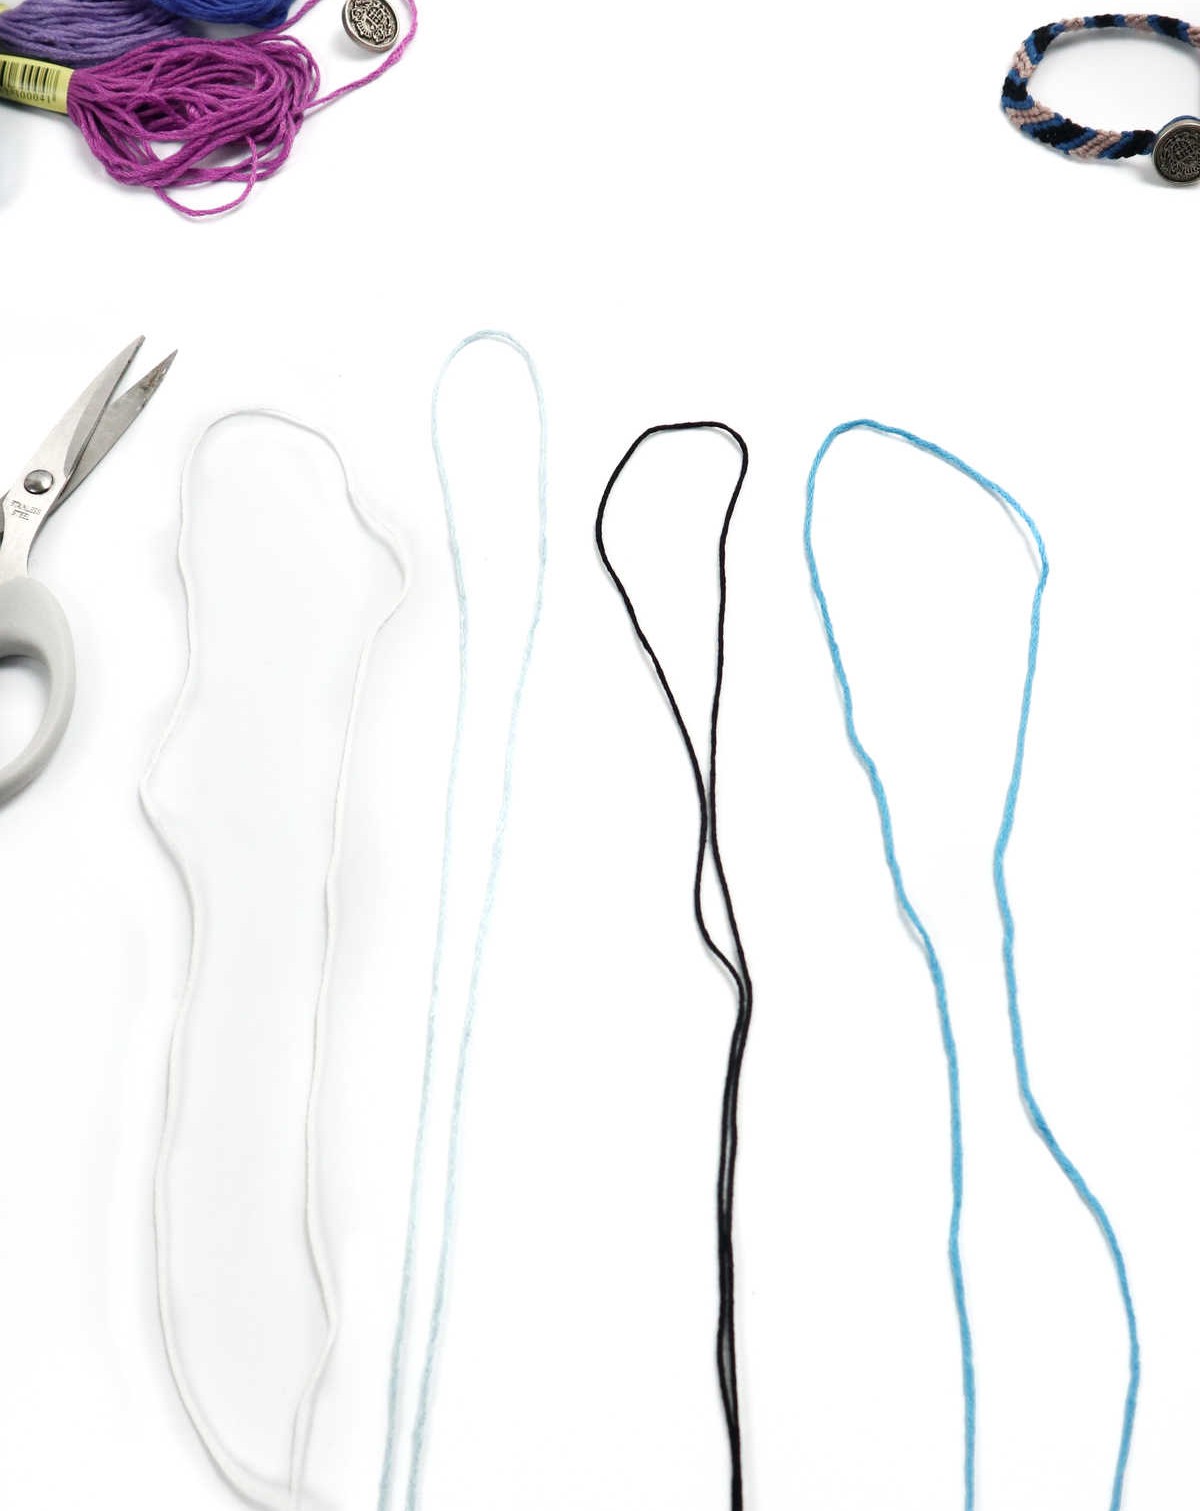
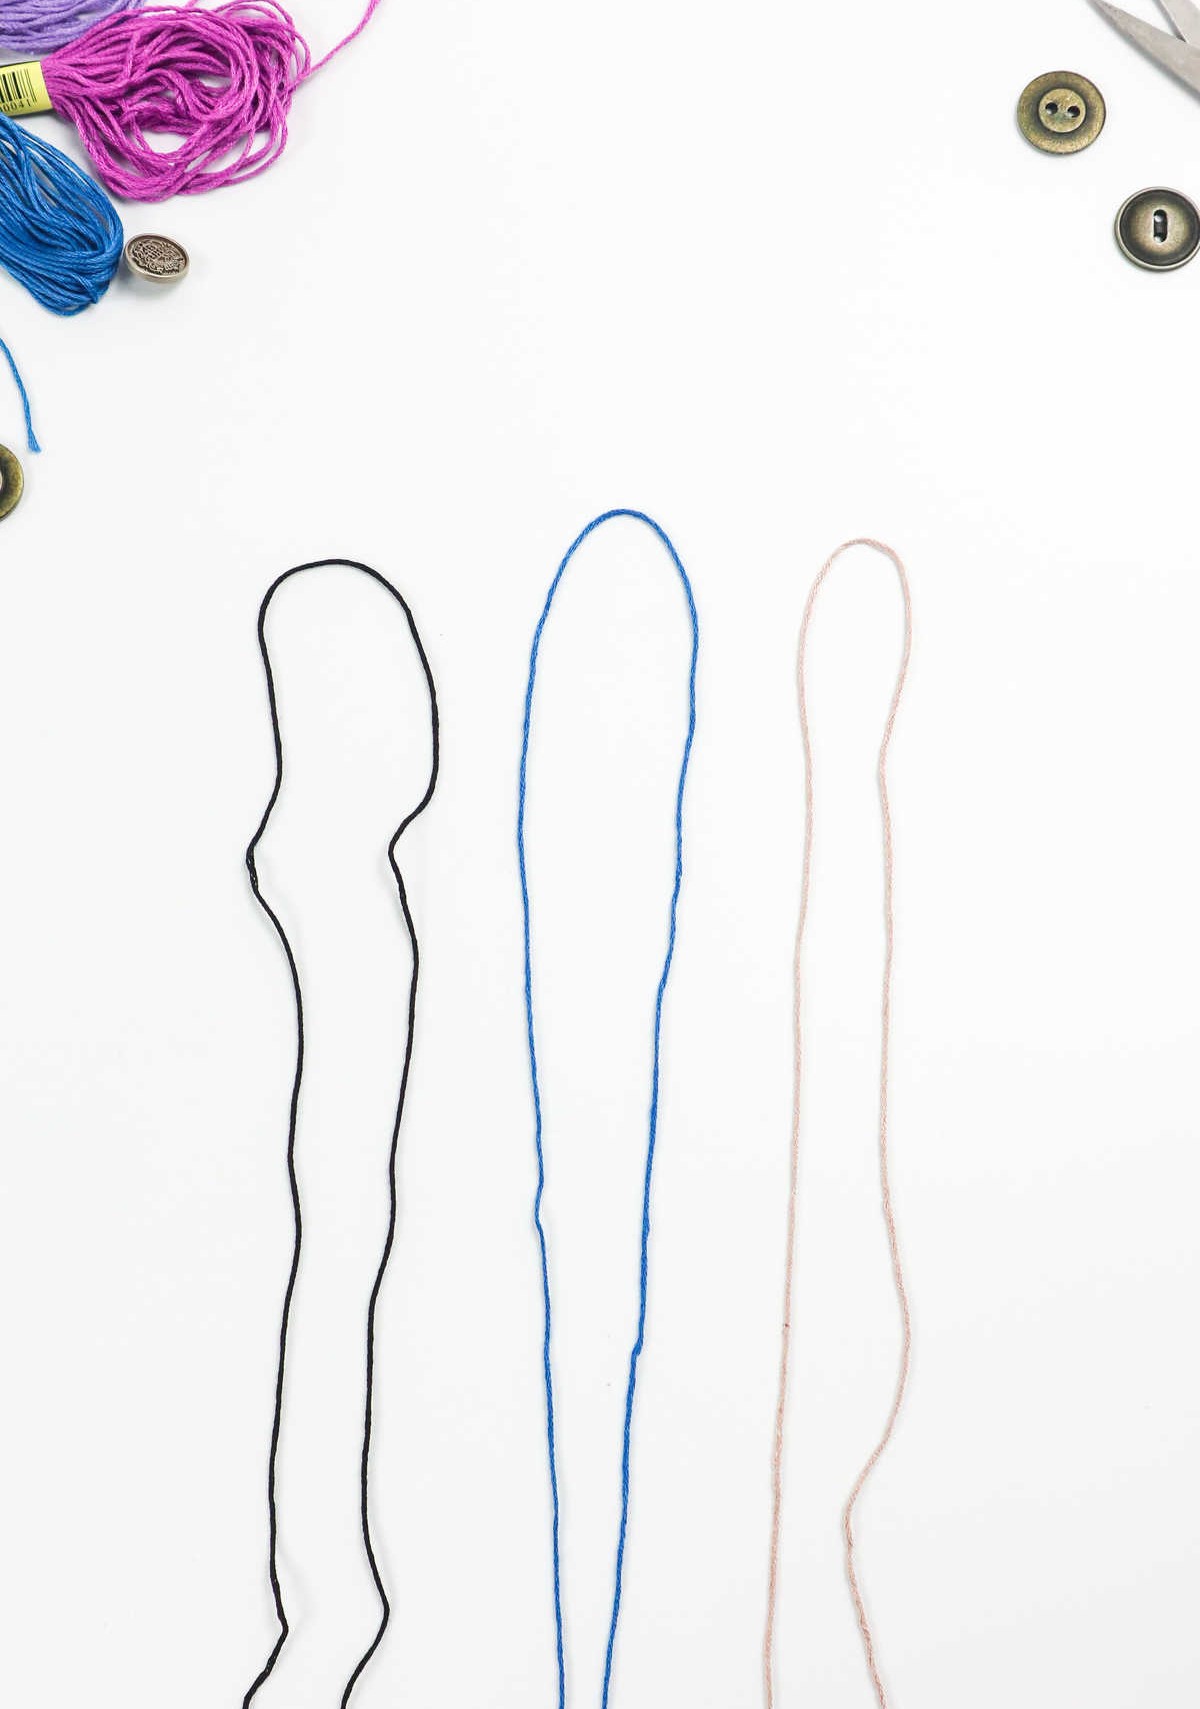
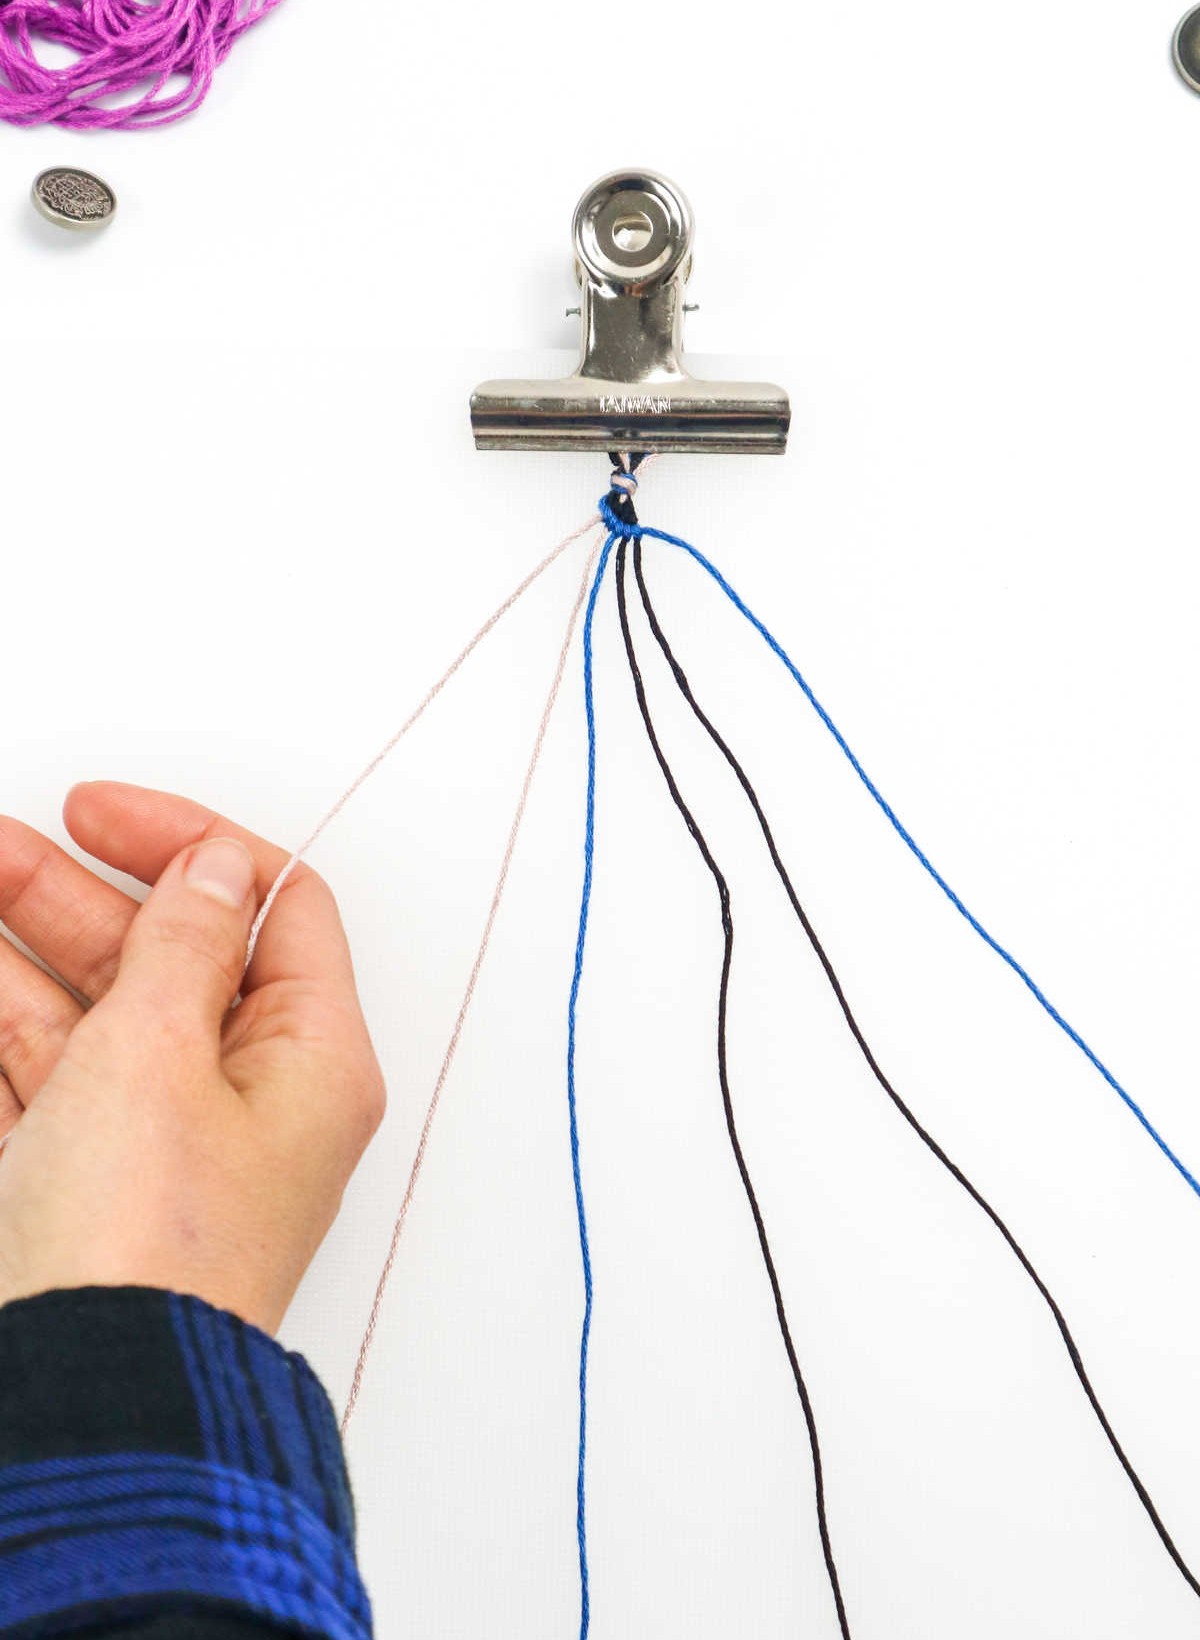
Gather your embroidery floss collection featuring various hues such as black, blue, grey, and white. Visualize the assortment depicted below. Next, take each cord and trim it to a uniform length of 60 inches.
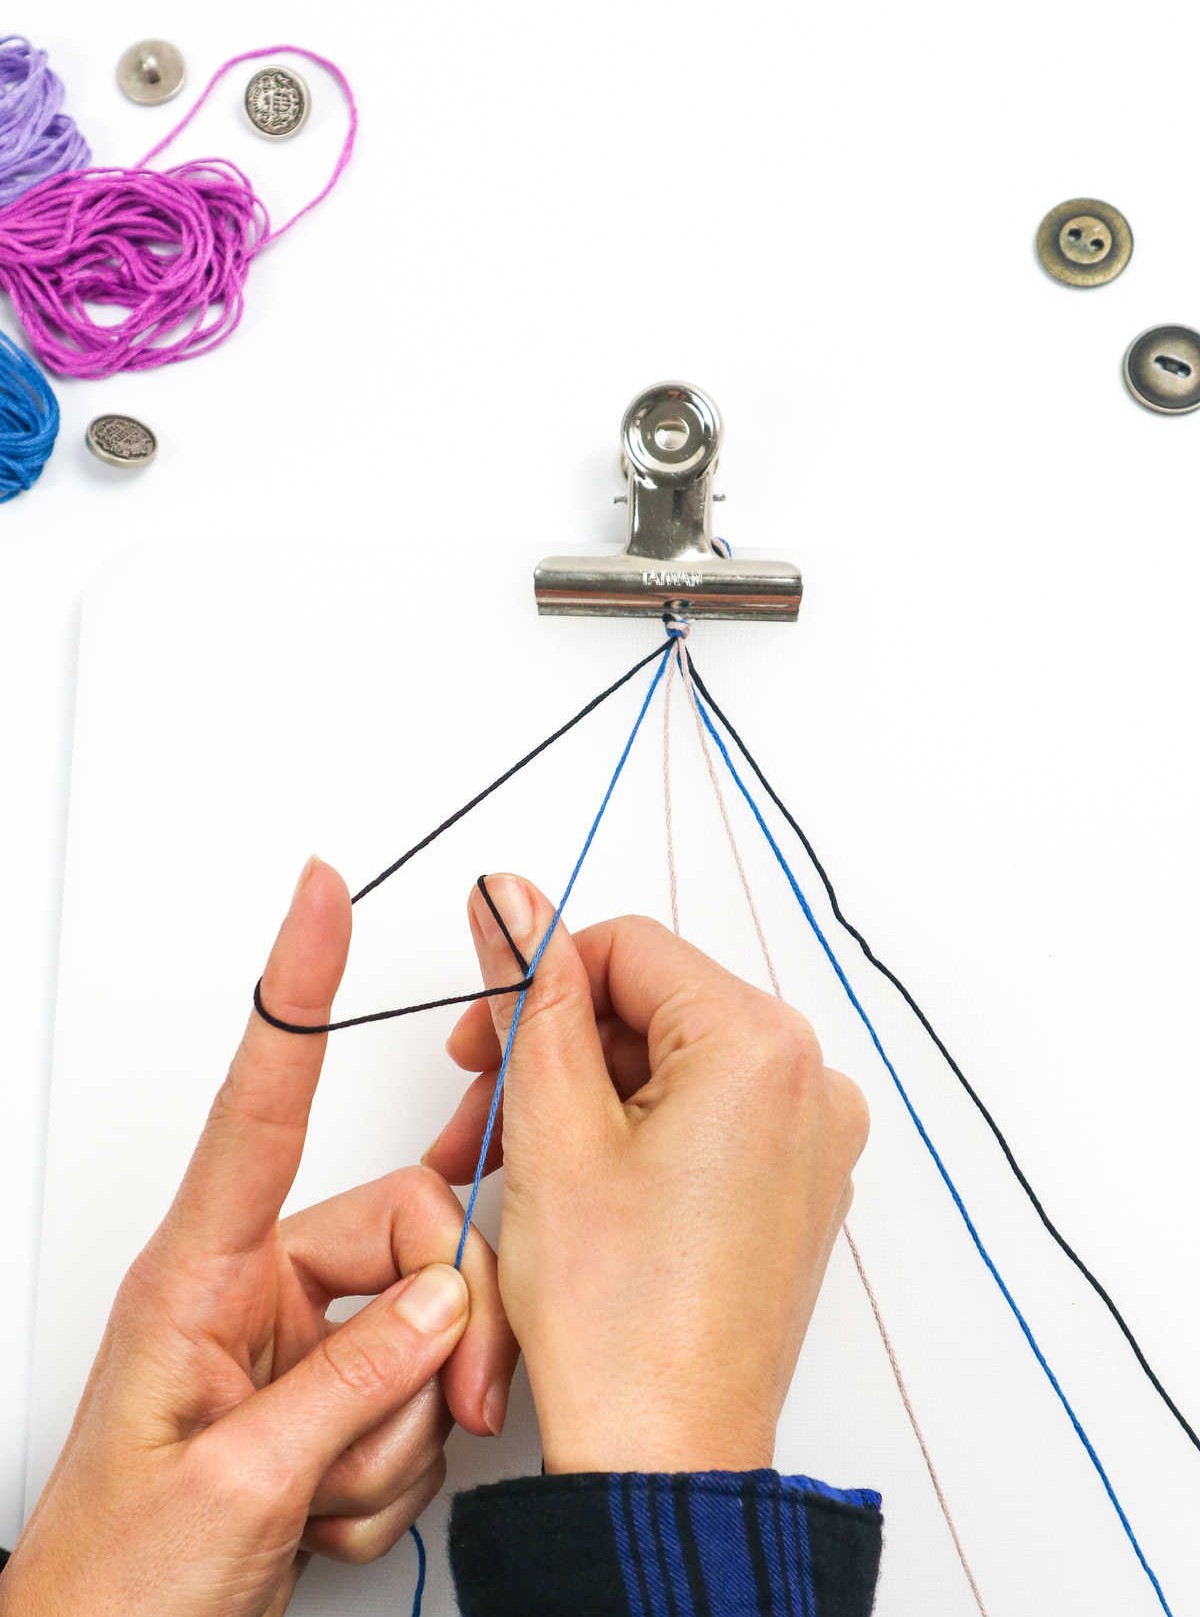
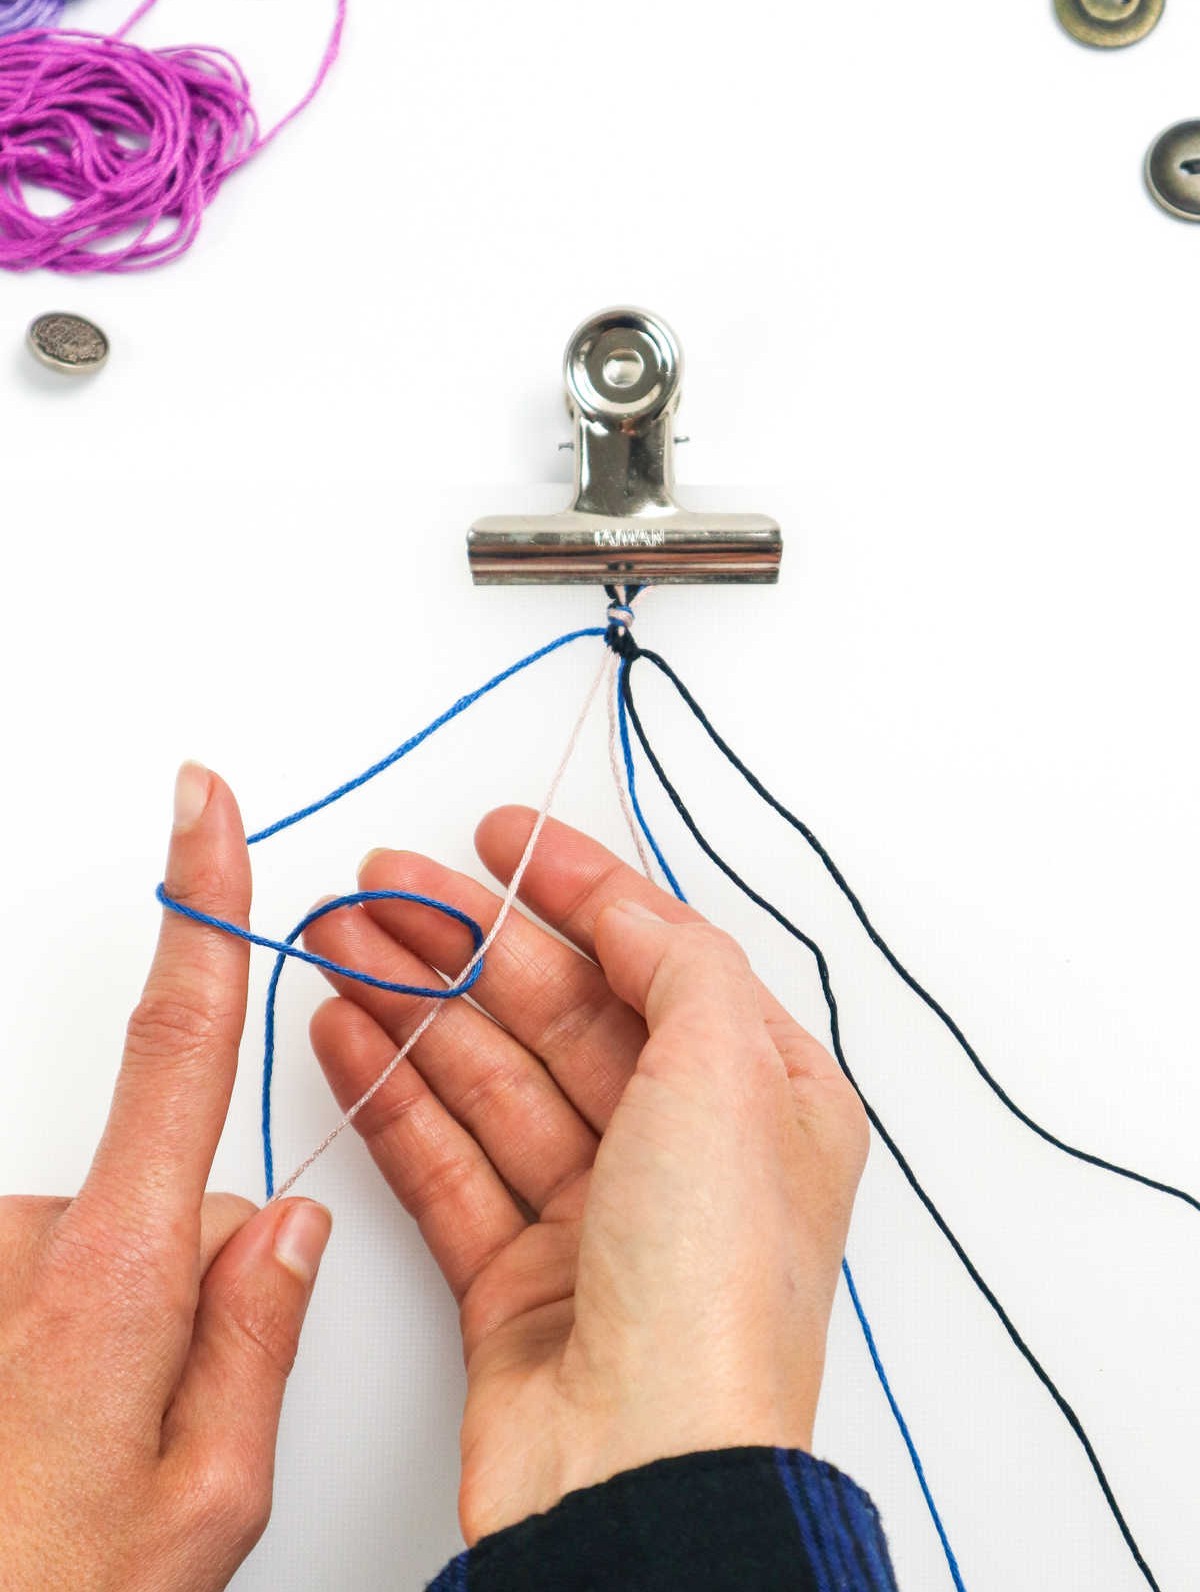
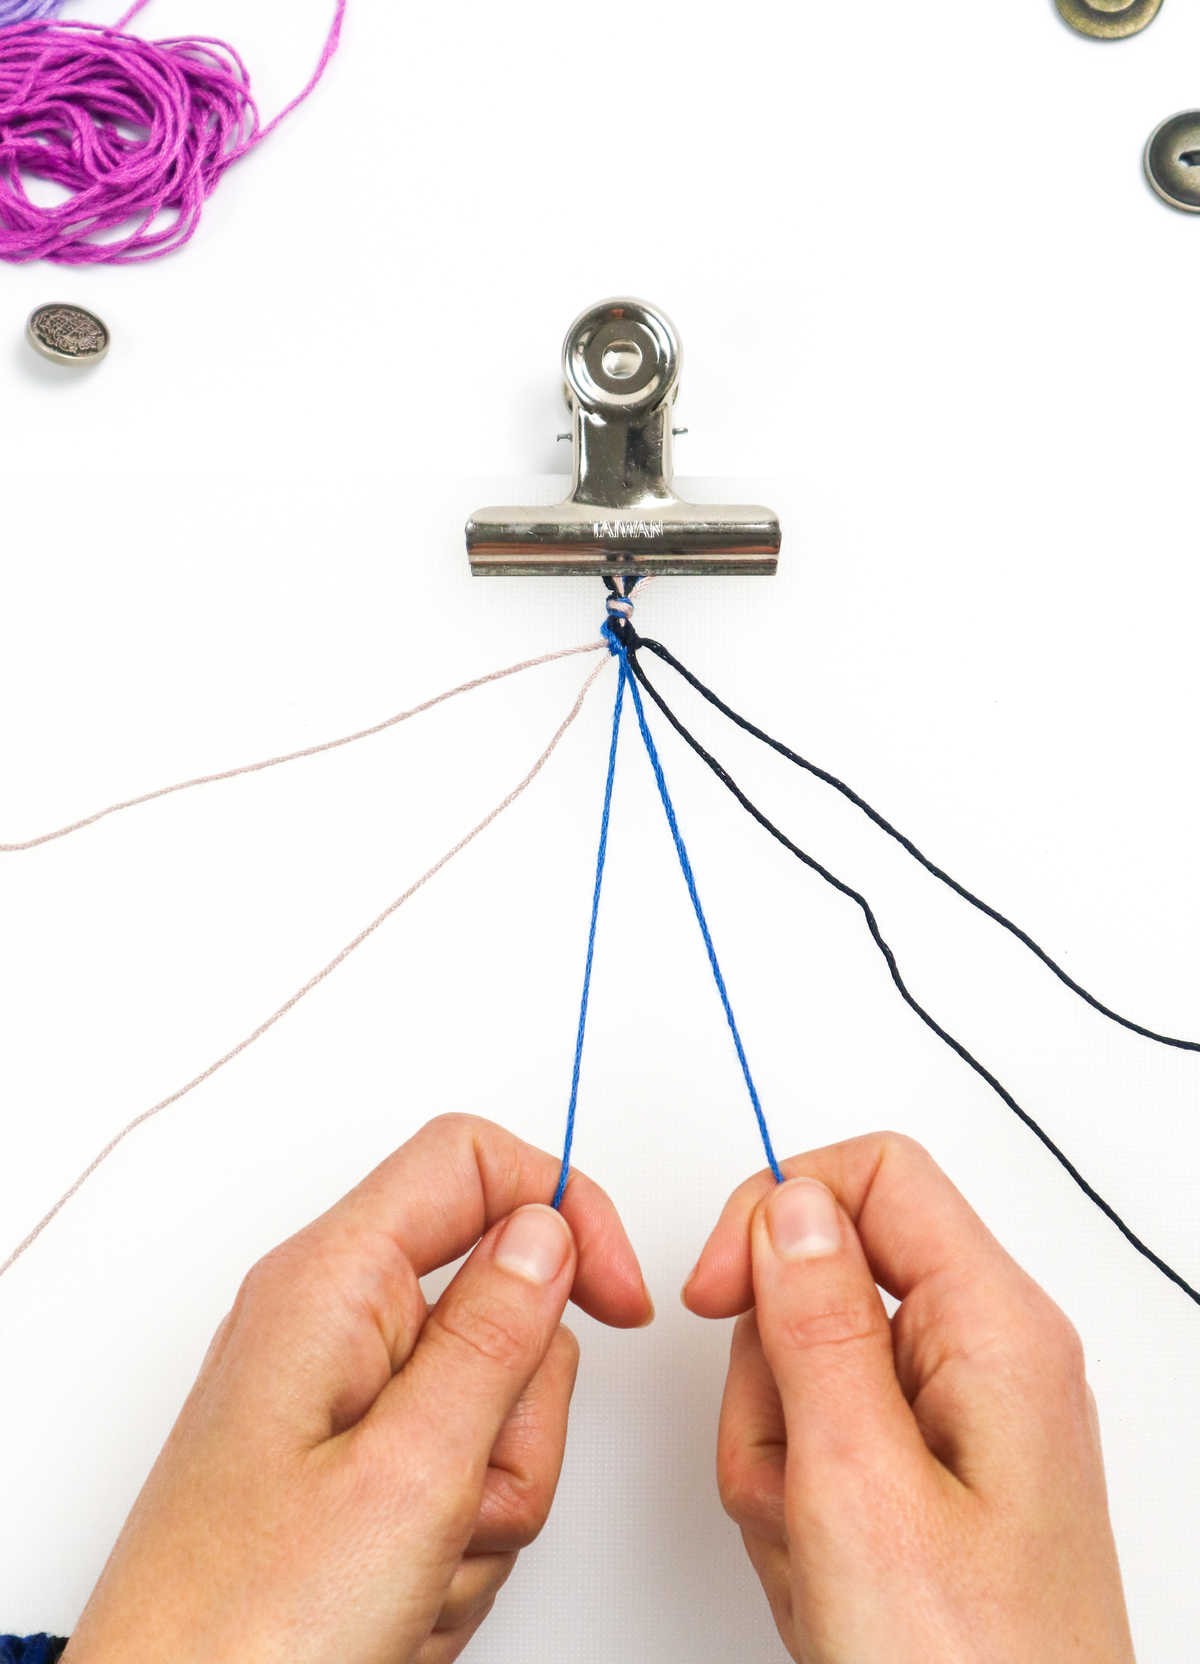
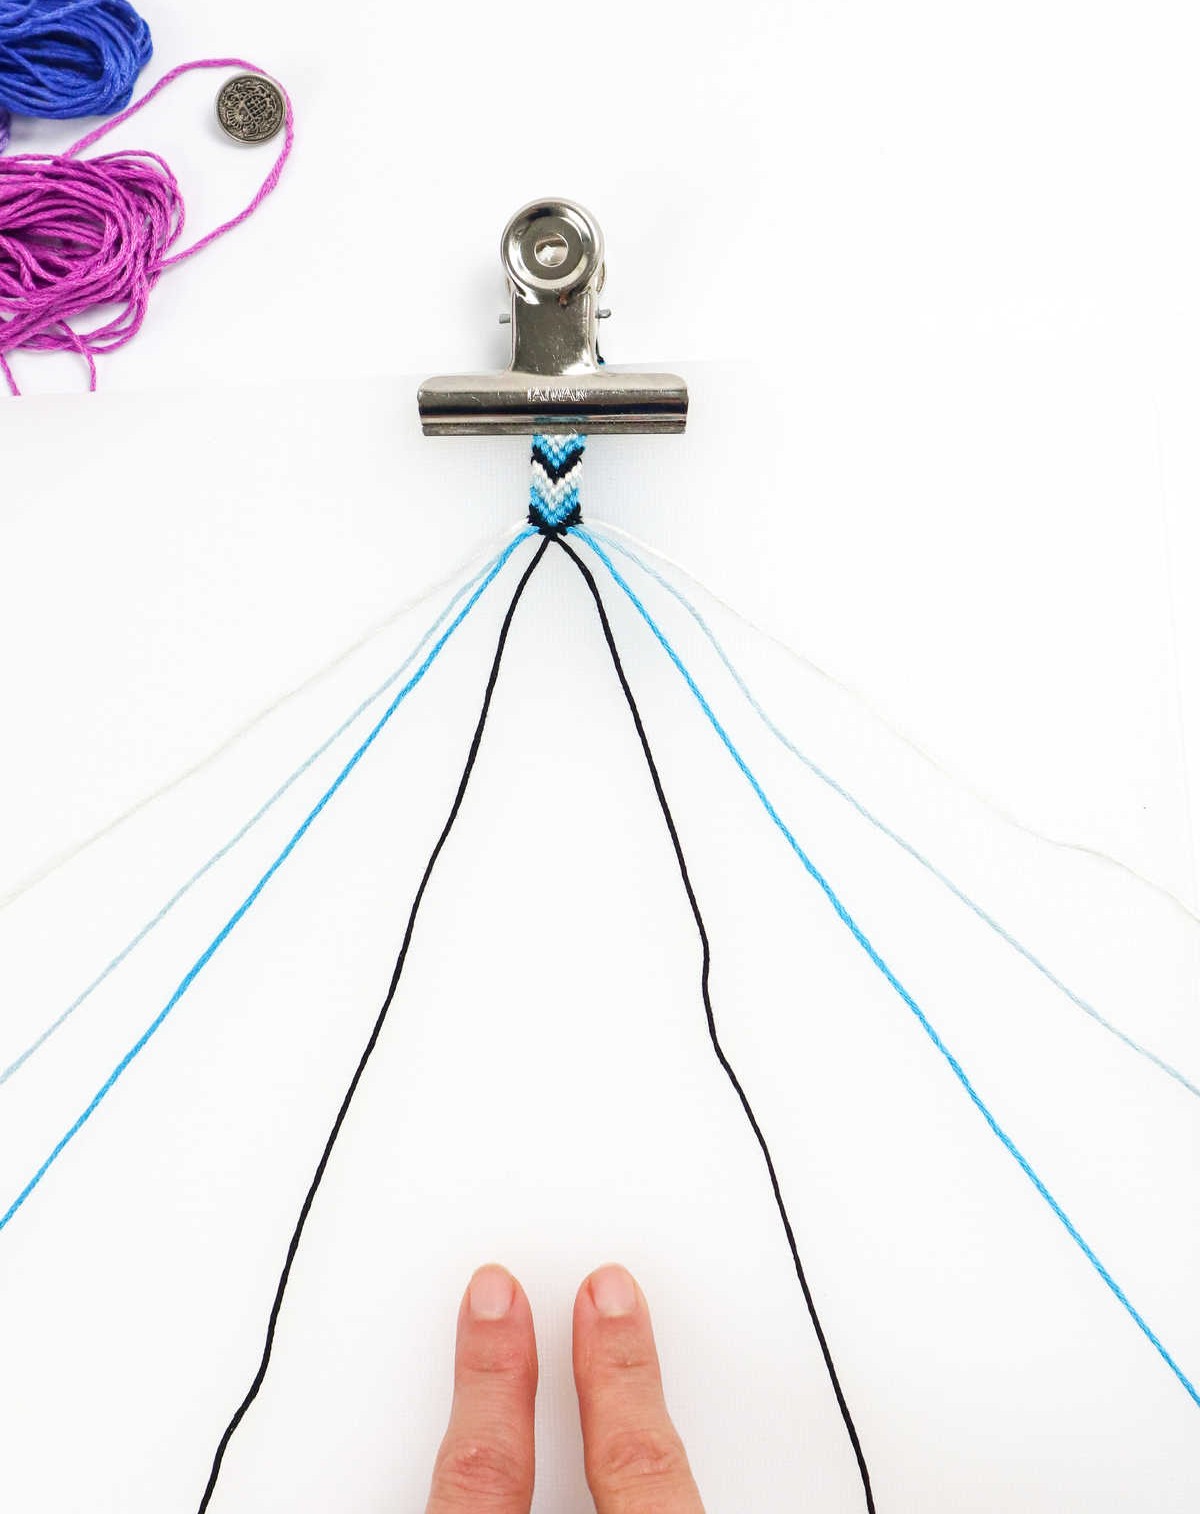
Step 2
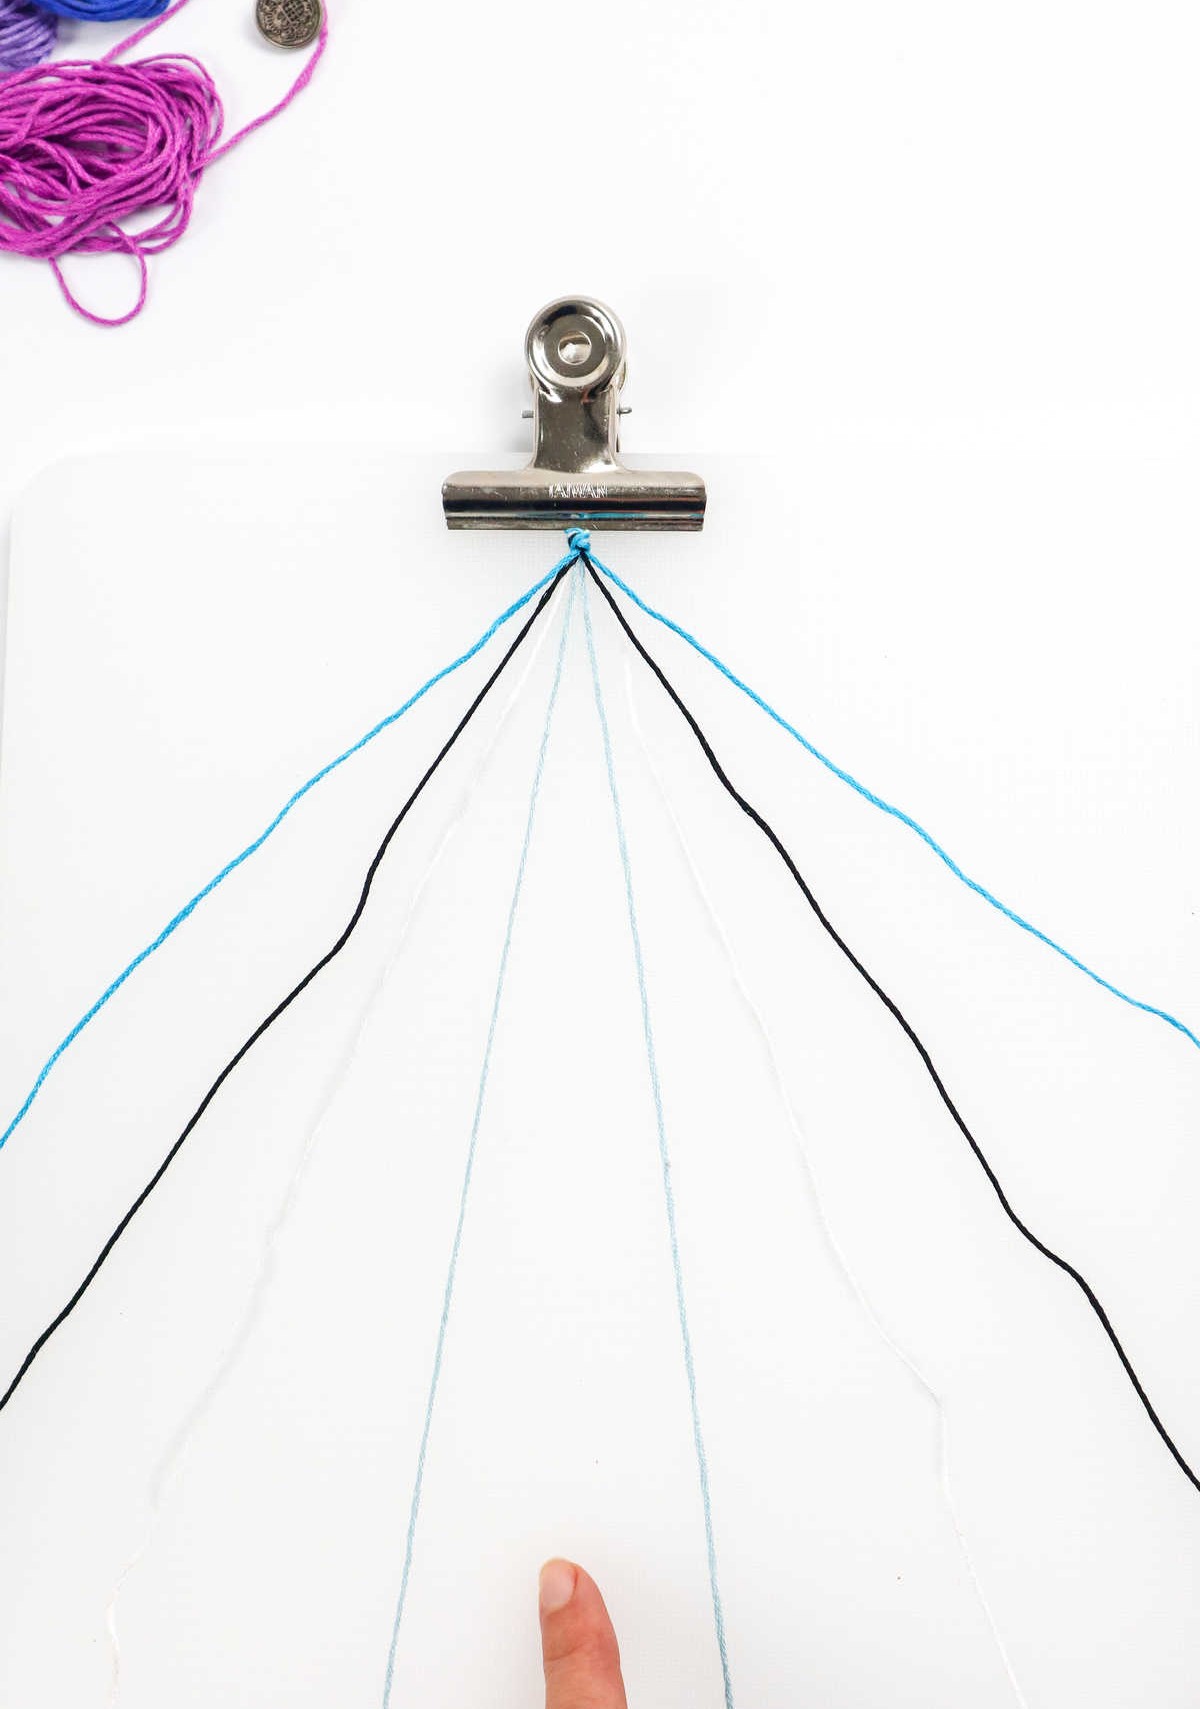
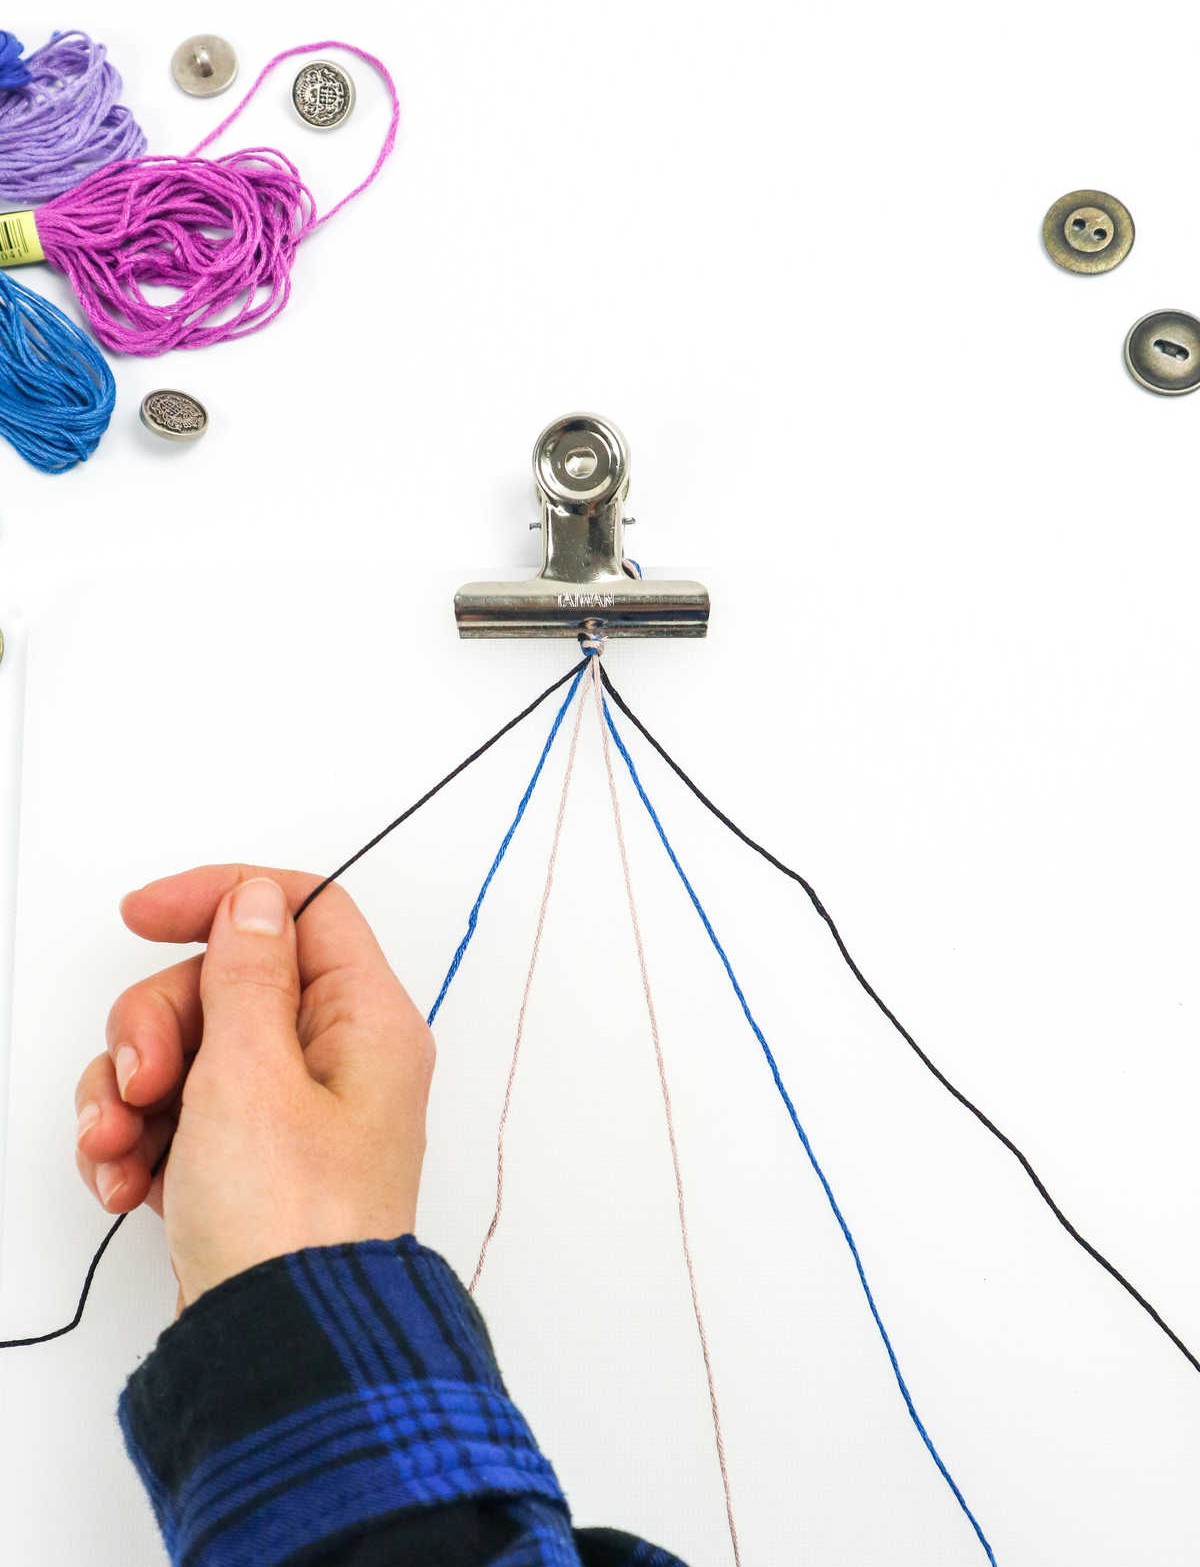
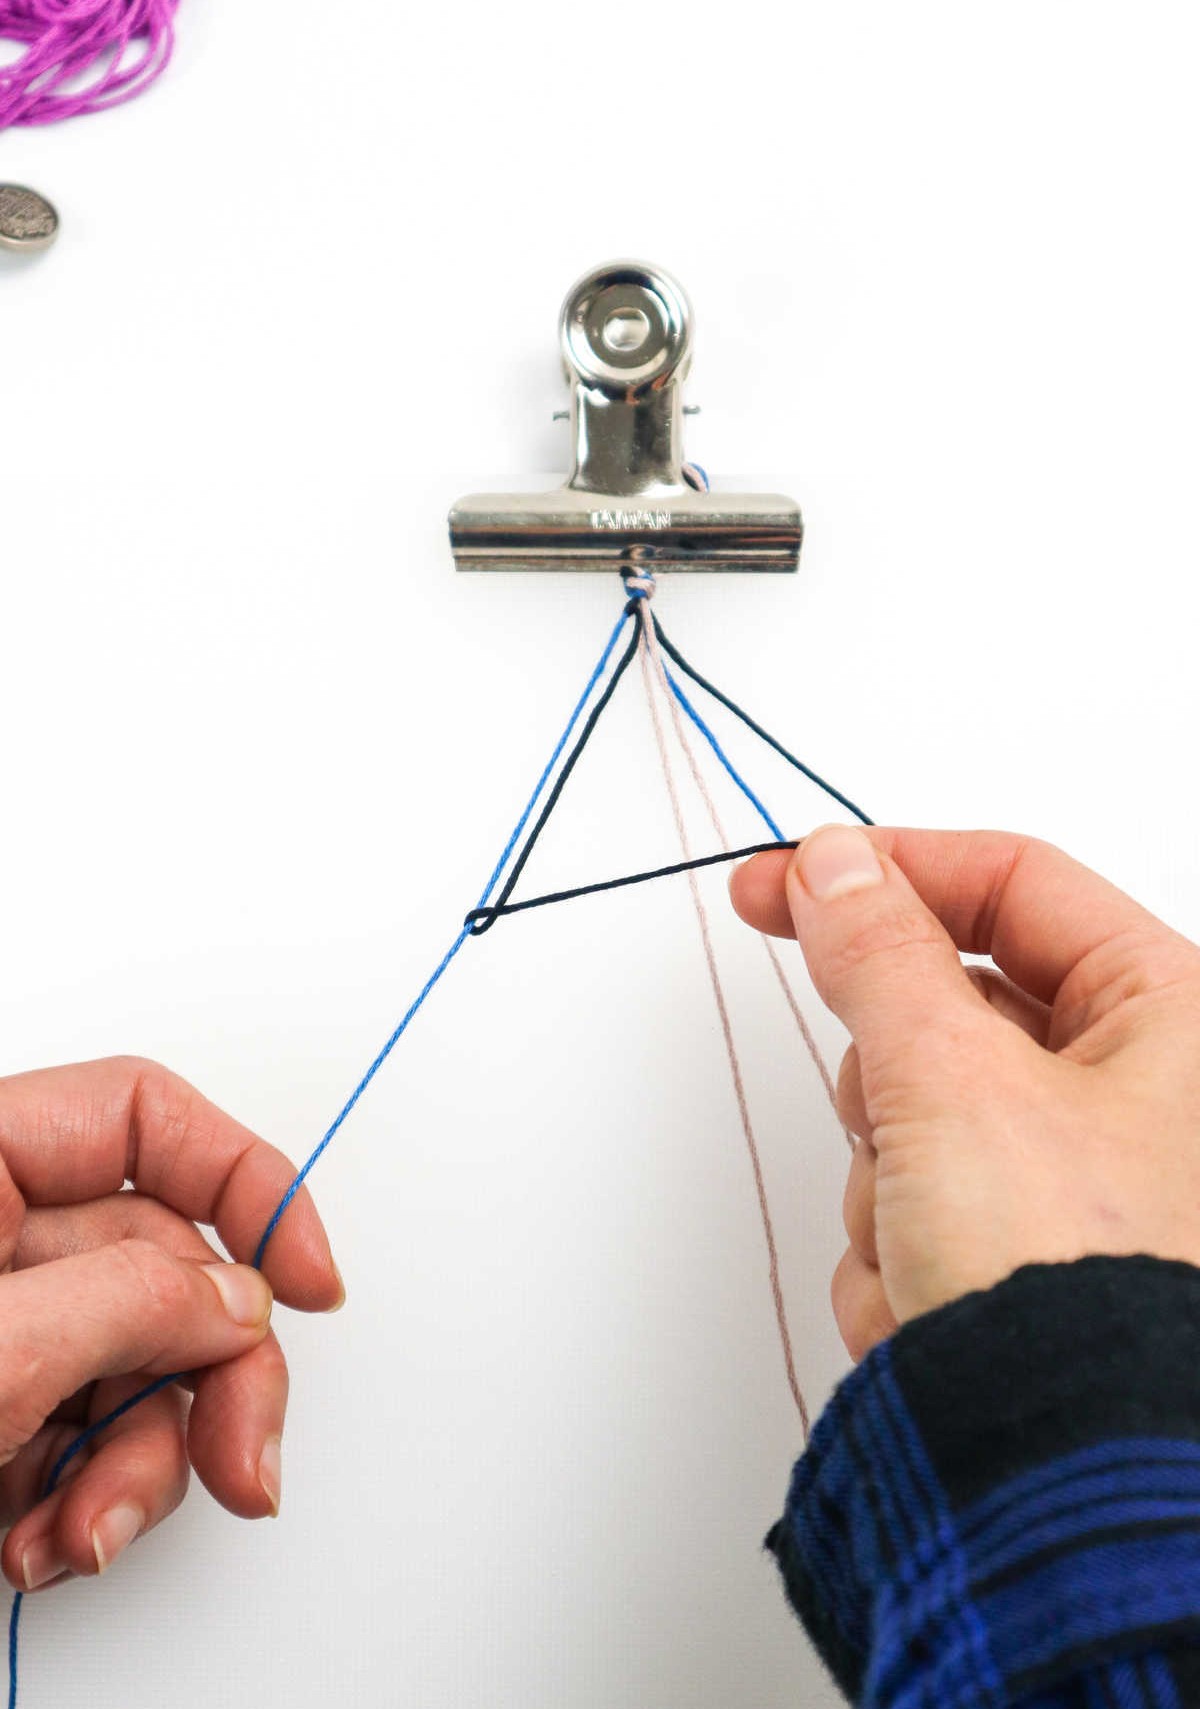
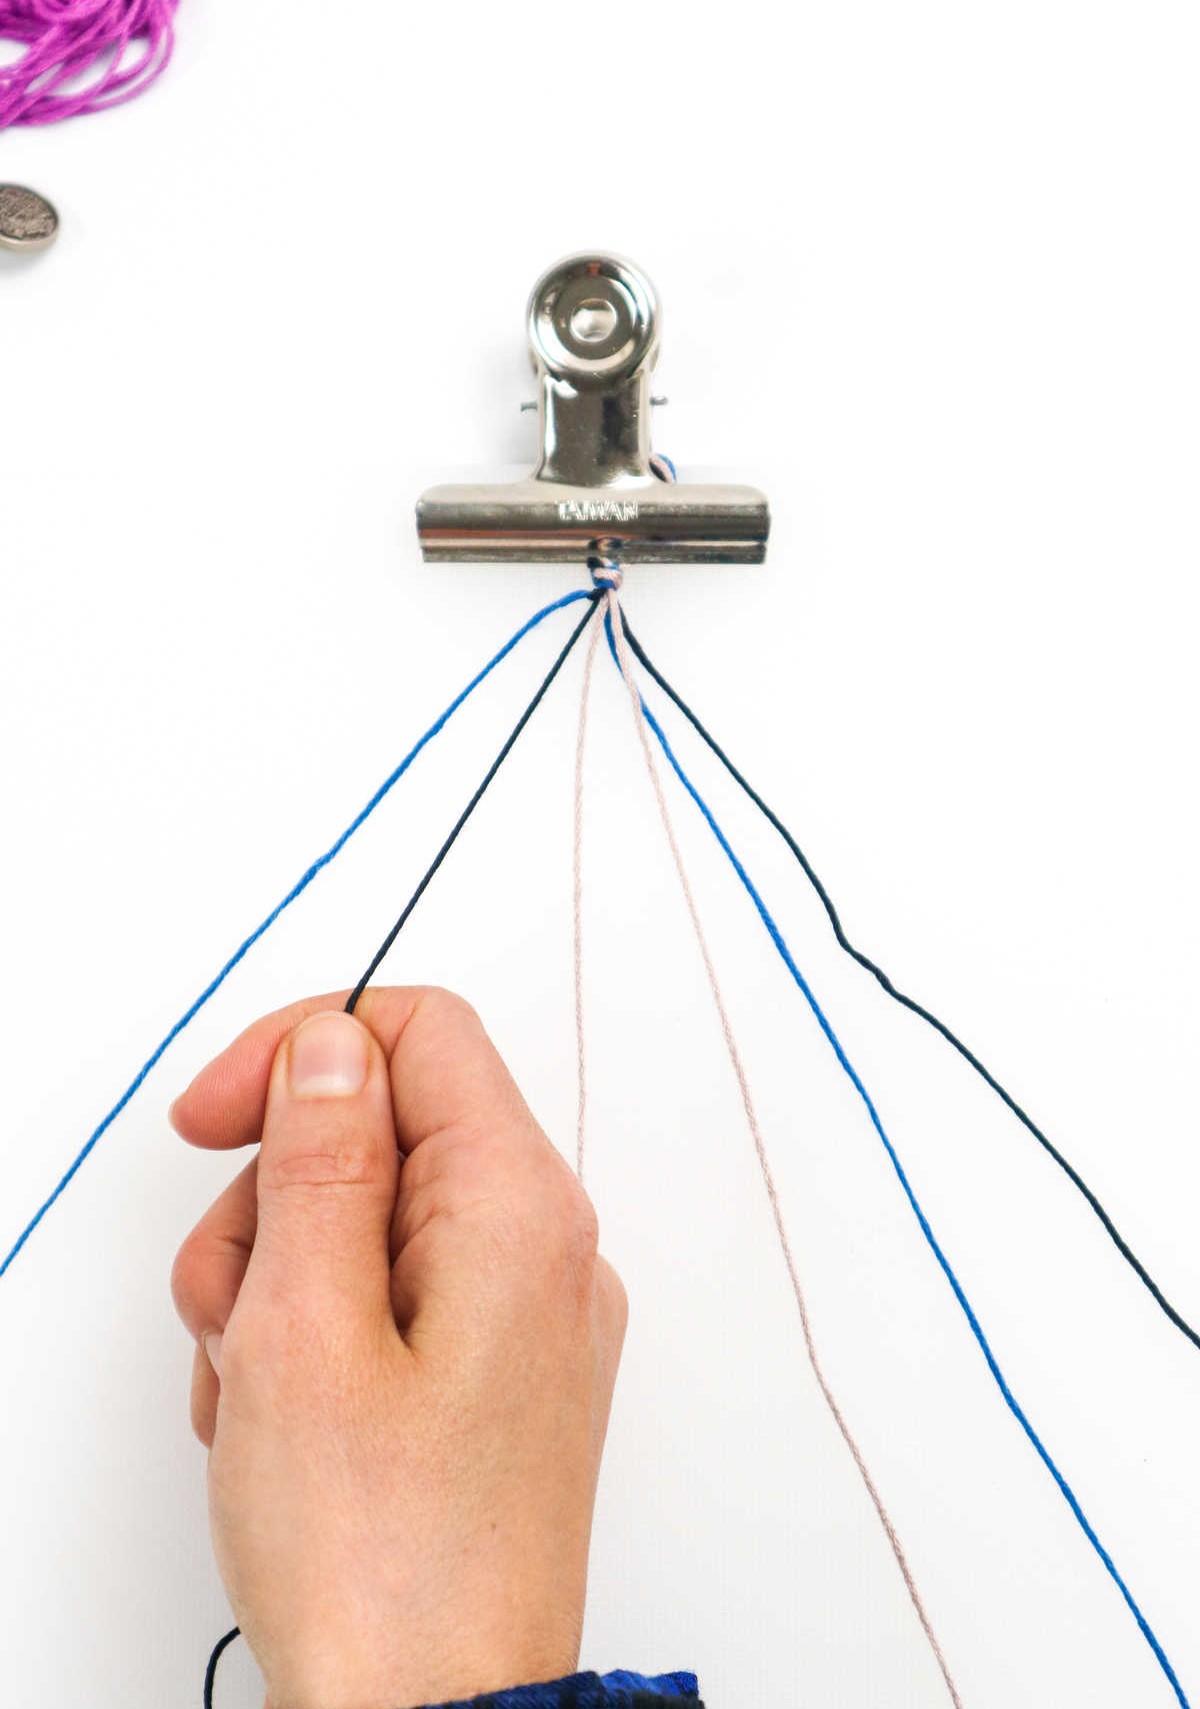
To recap, you’ve successfully created the looped knot and secured it with clipped threads on your work surface. Now, focus on harmonizing the eight cords into a balanced arrangement. To achieve this symmetry, divide the cords into two mirrored halves, with four cords on each side. Ensure that the blue, black, grey, and white colors are evenly distributed, following the order: blue-black-grey-white-white-grey-blue-black.
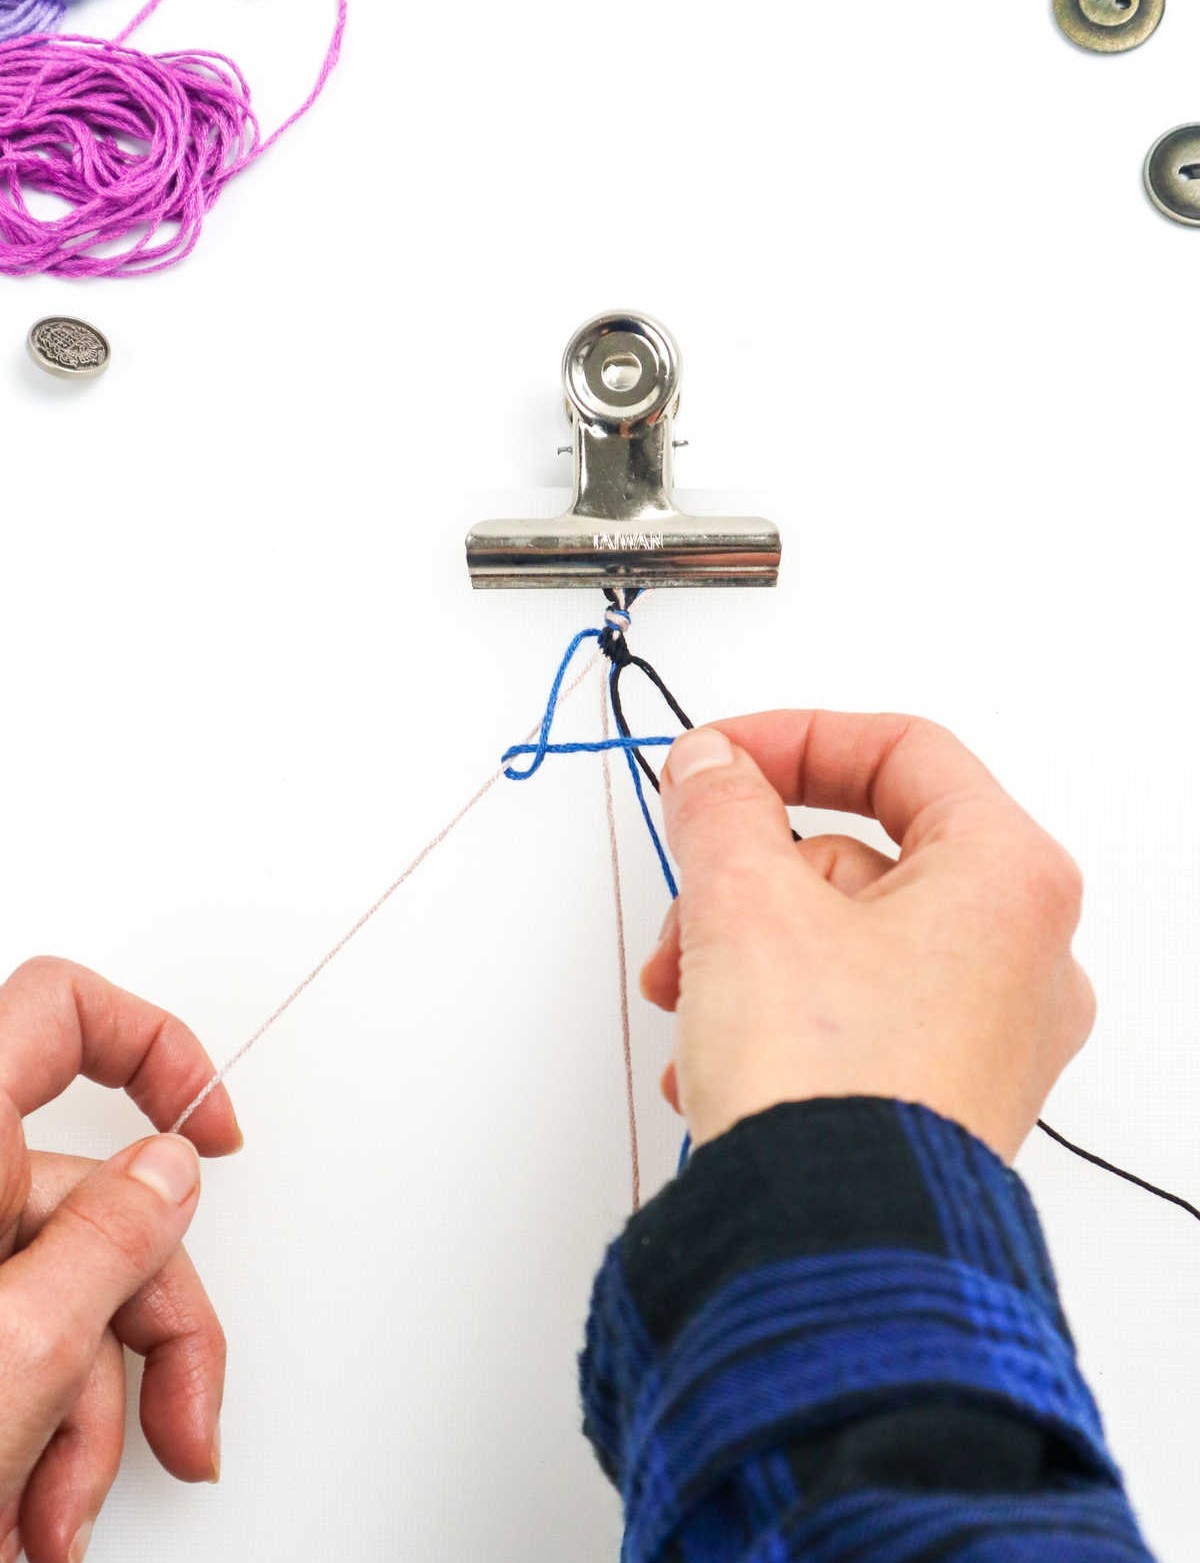
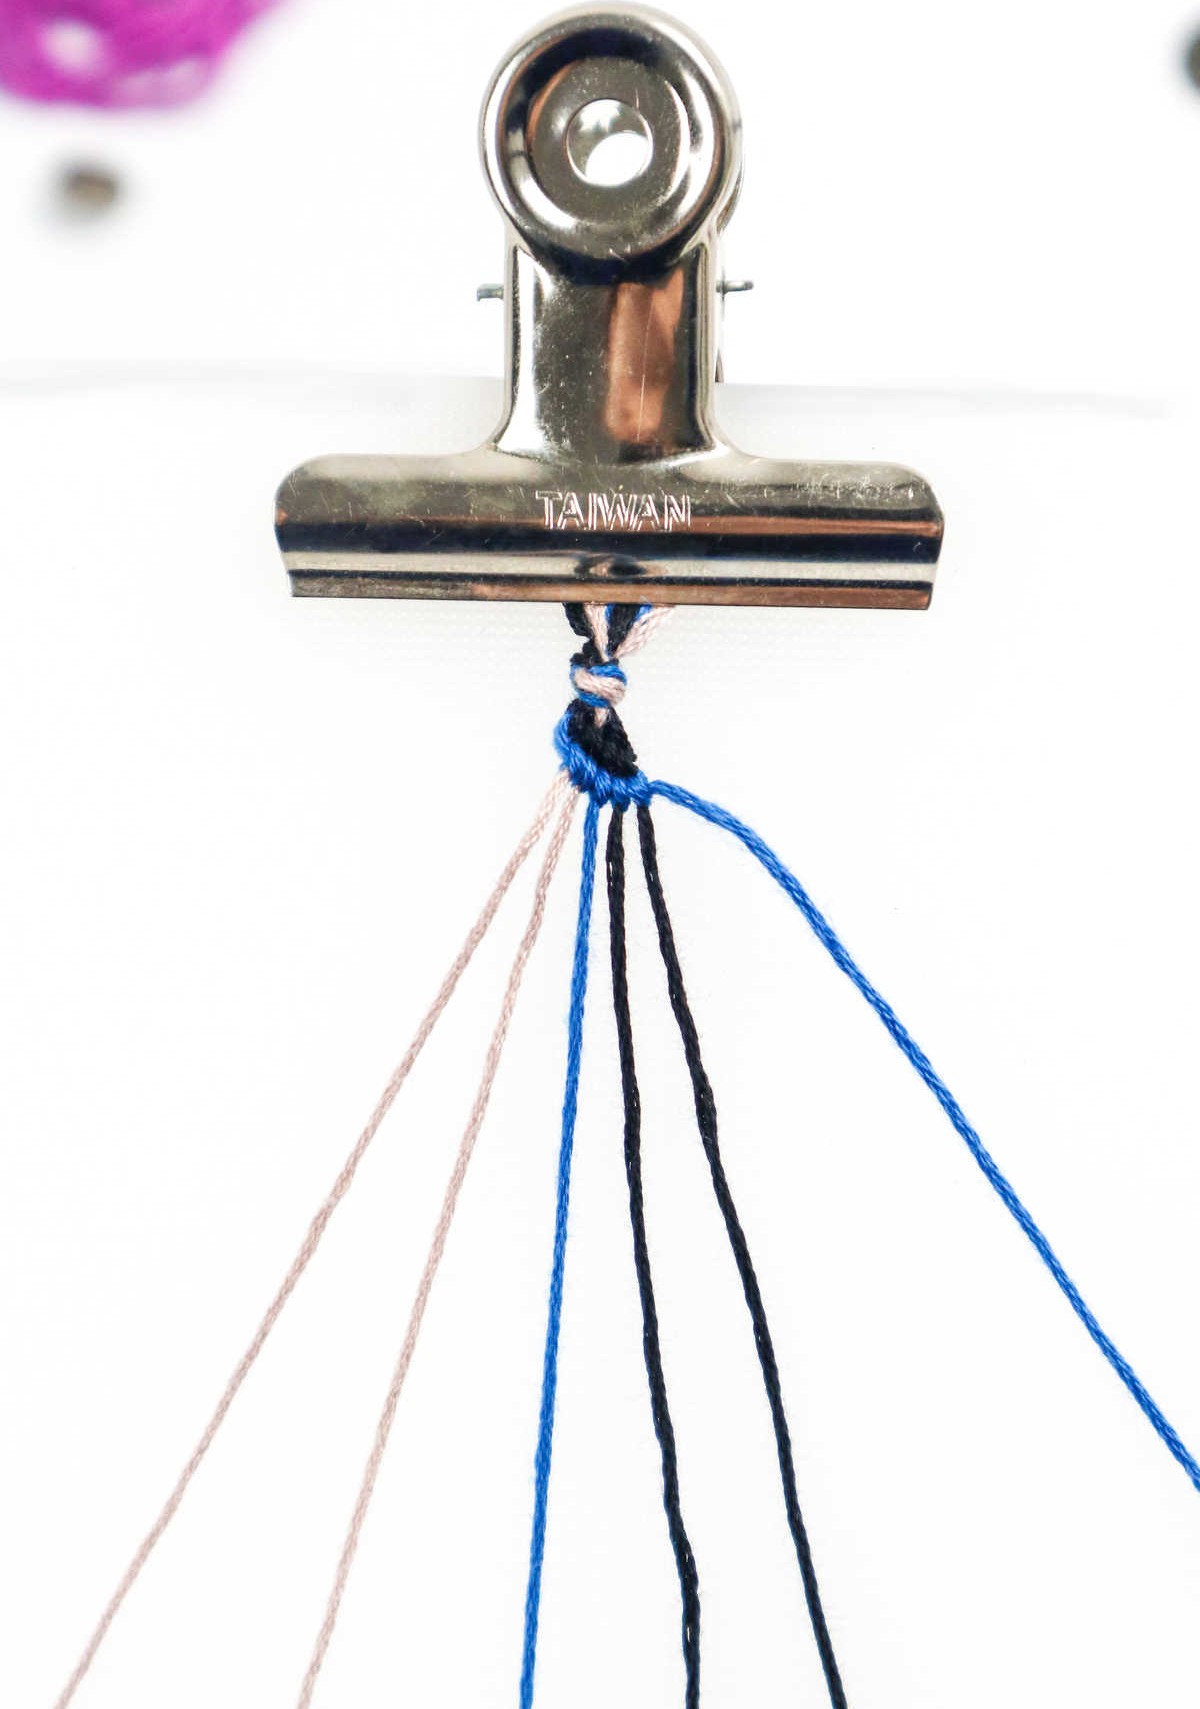
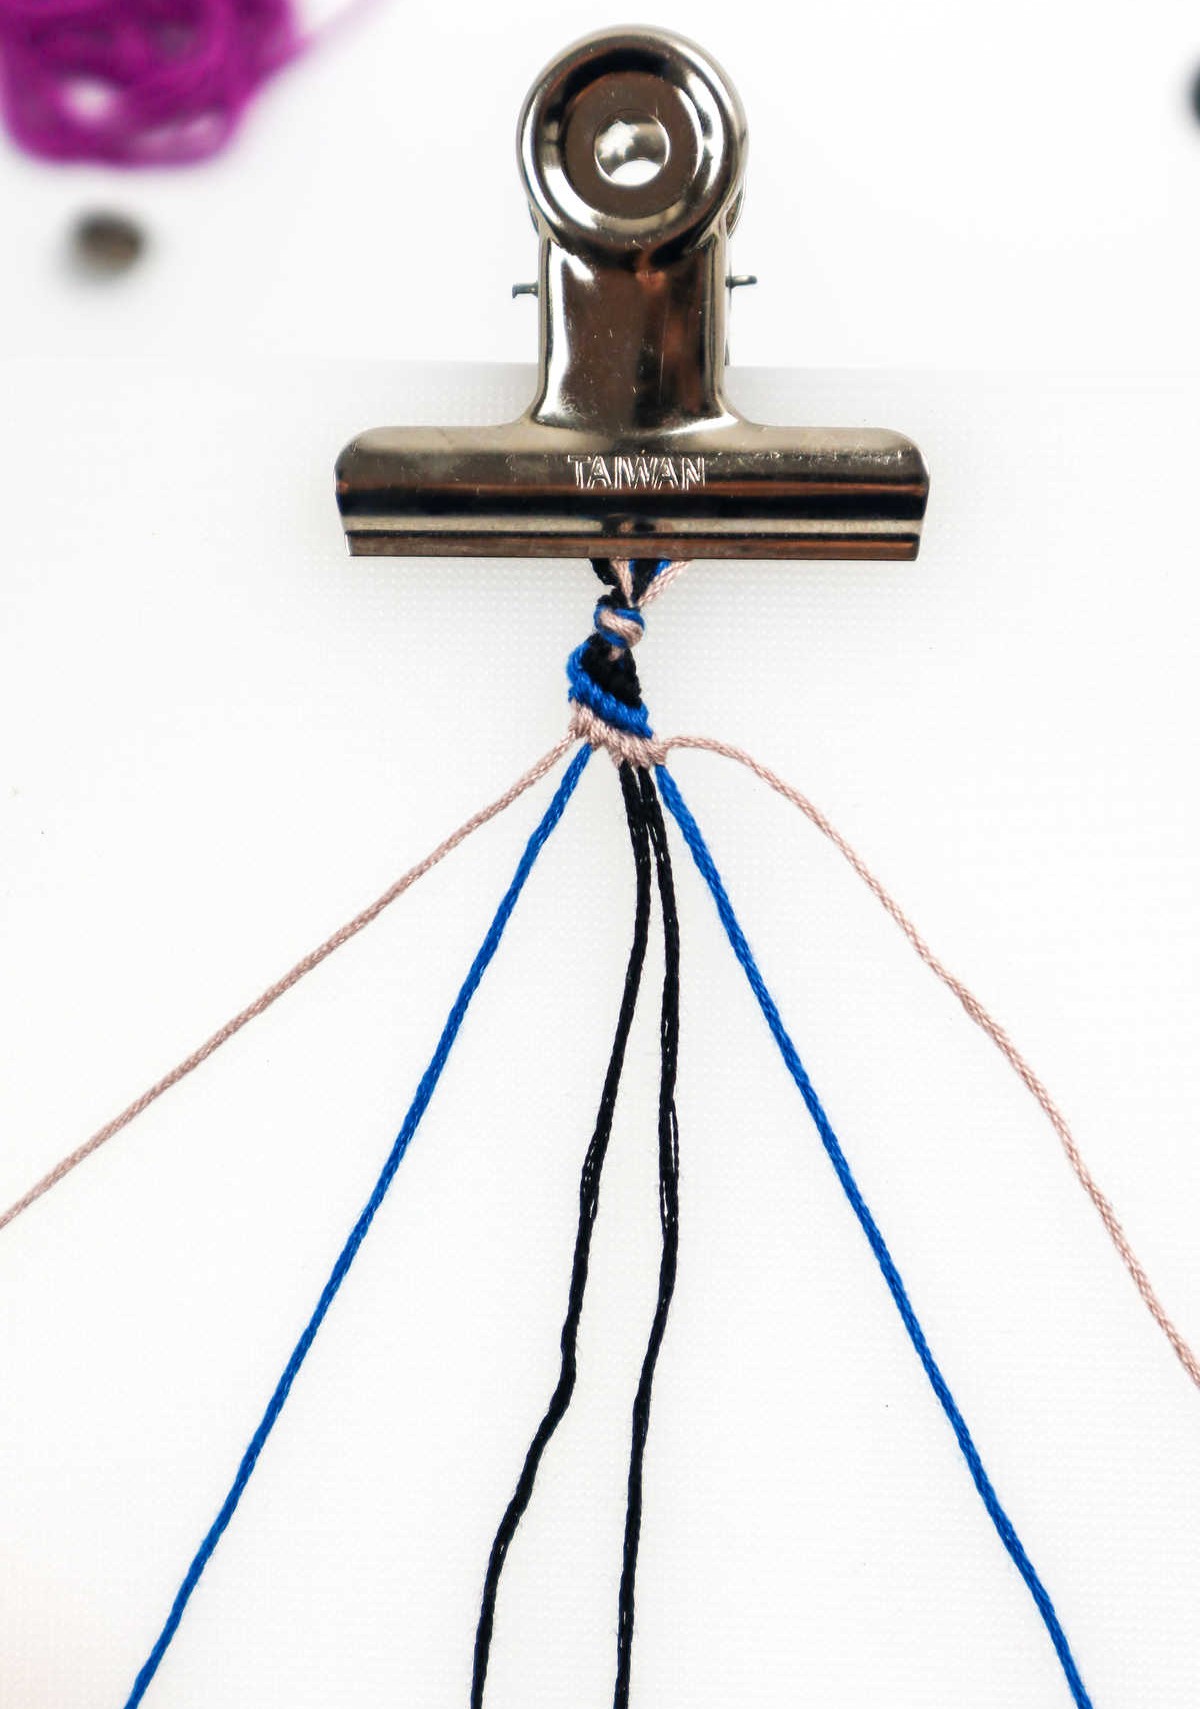
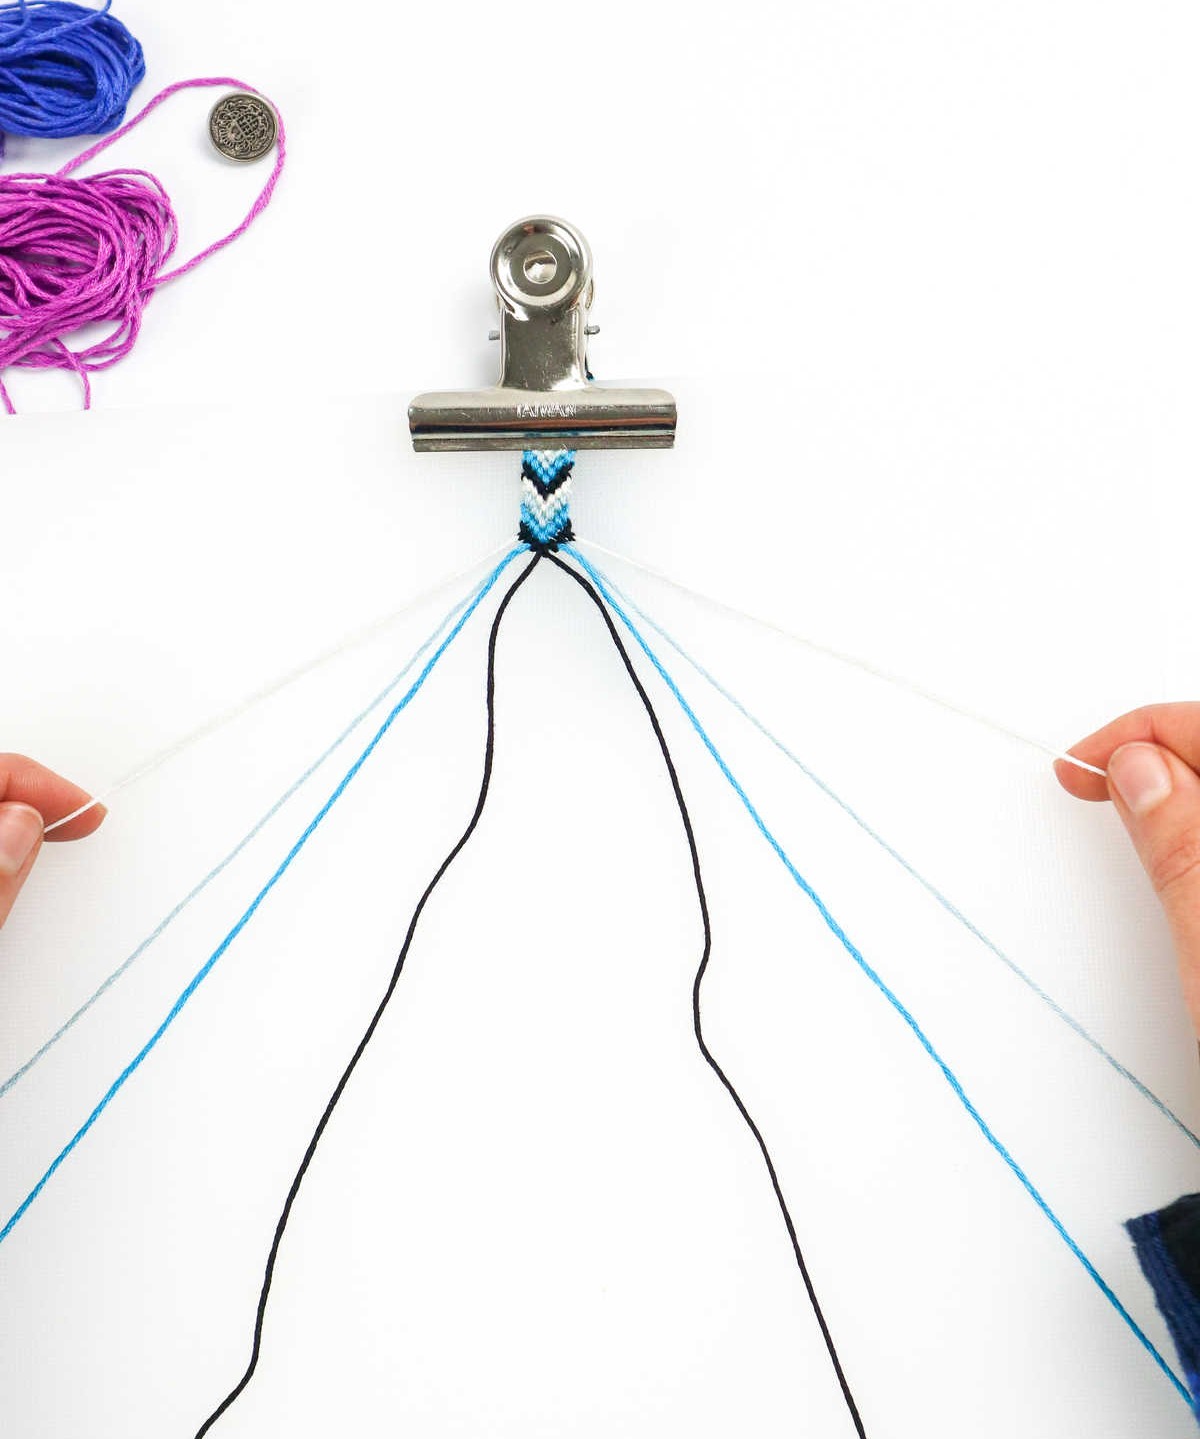
Step 3
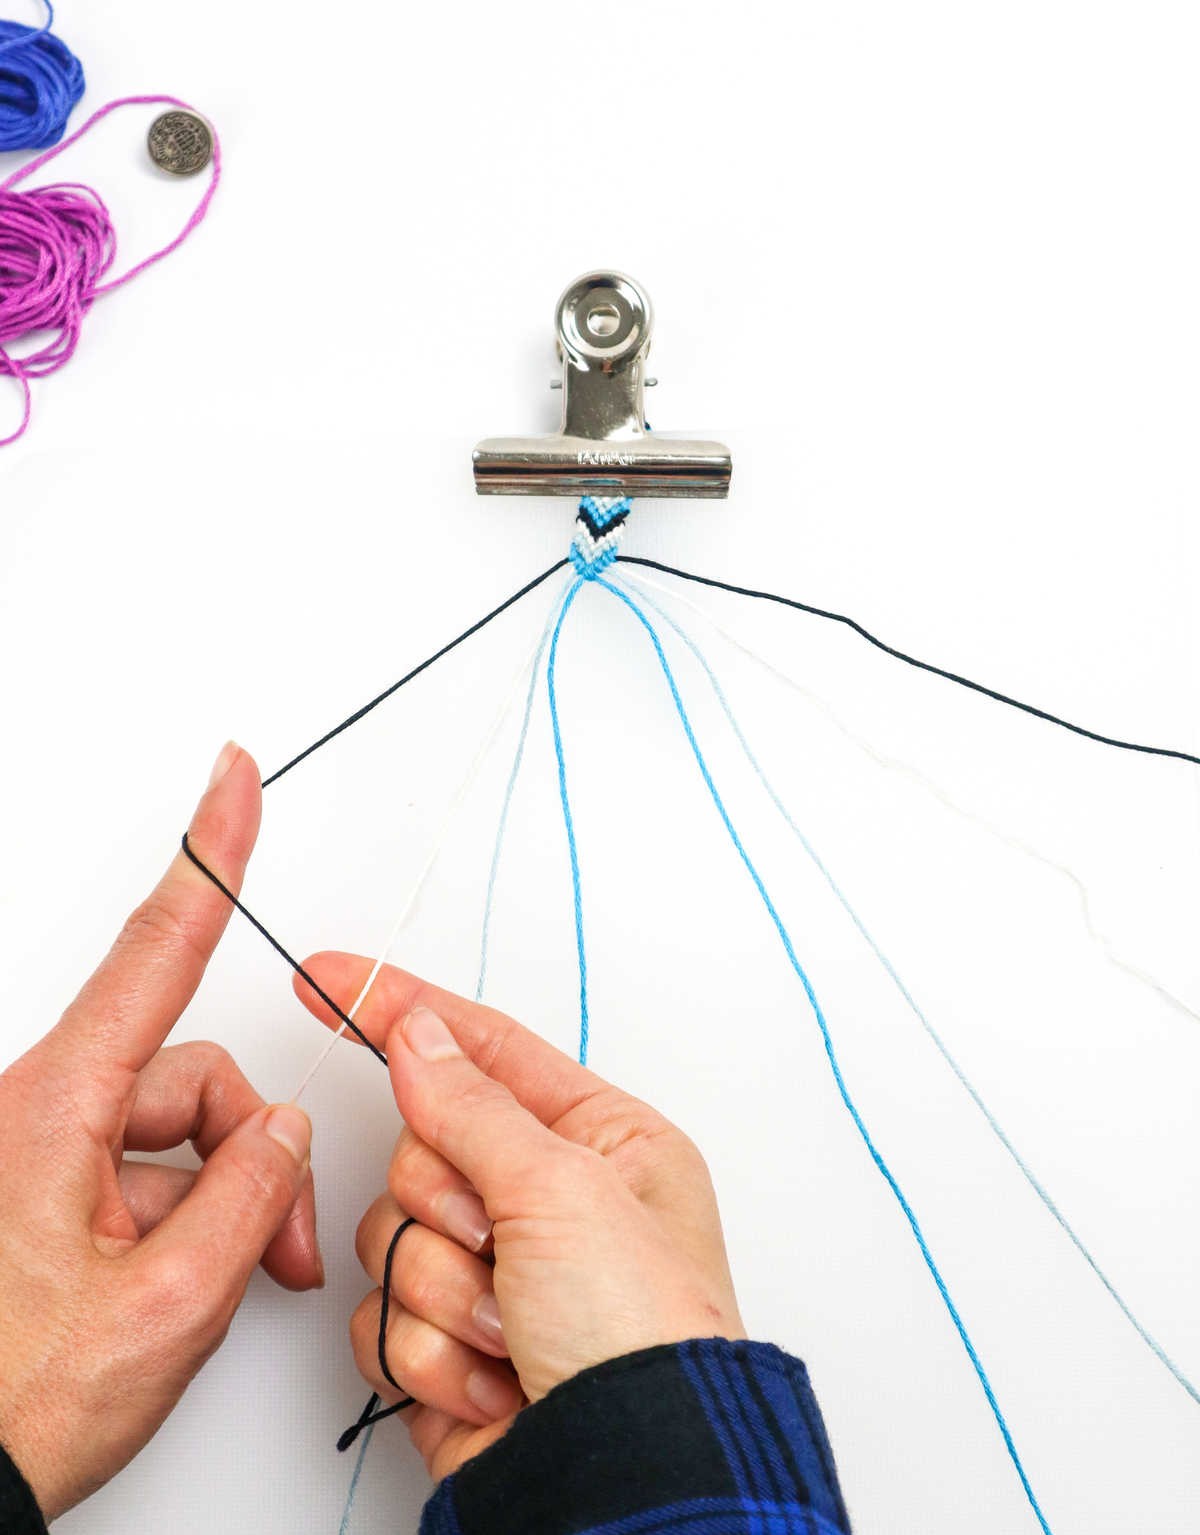
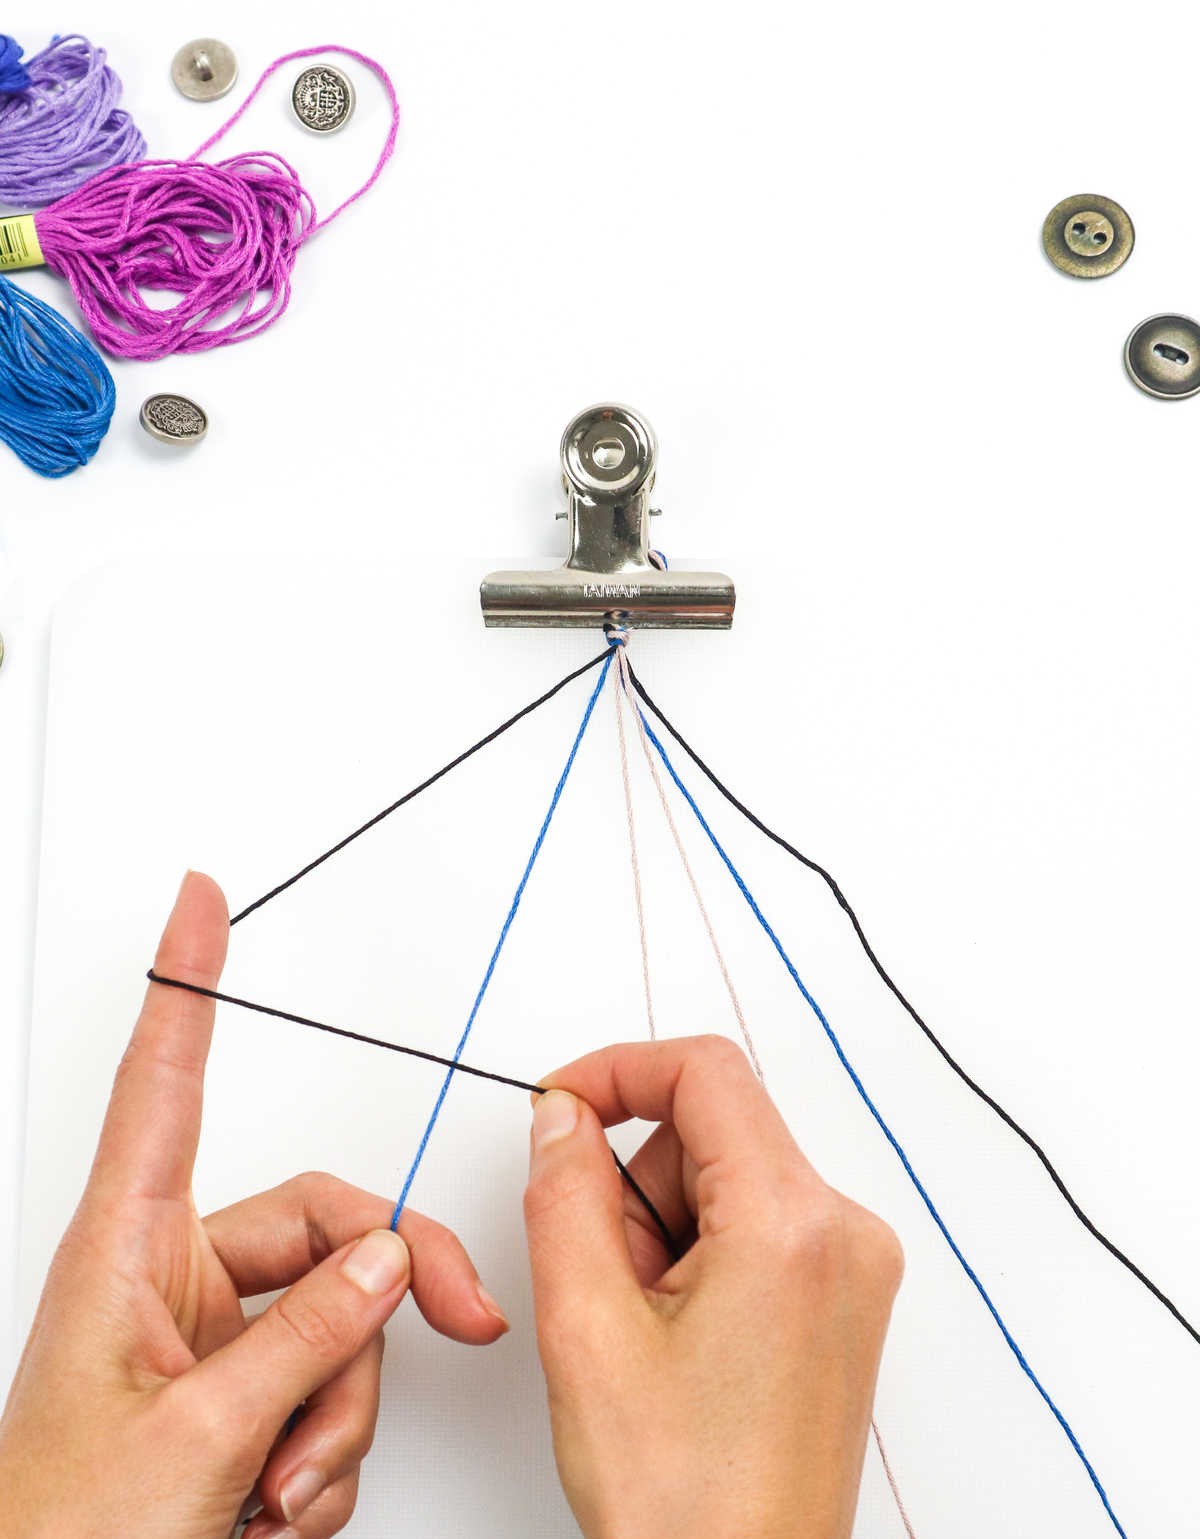
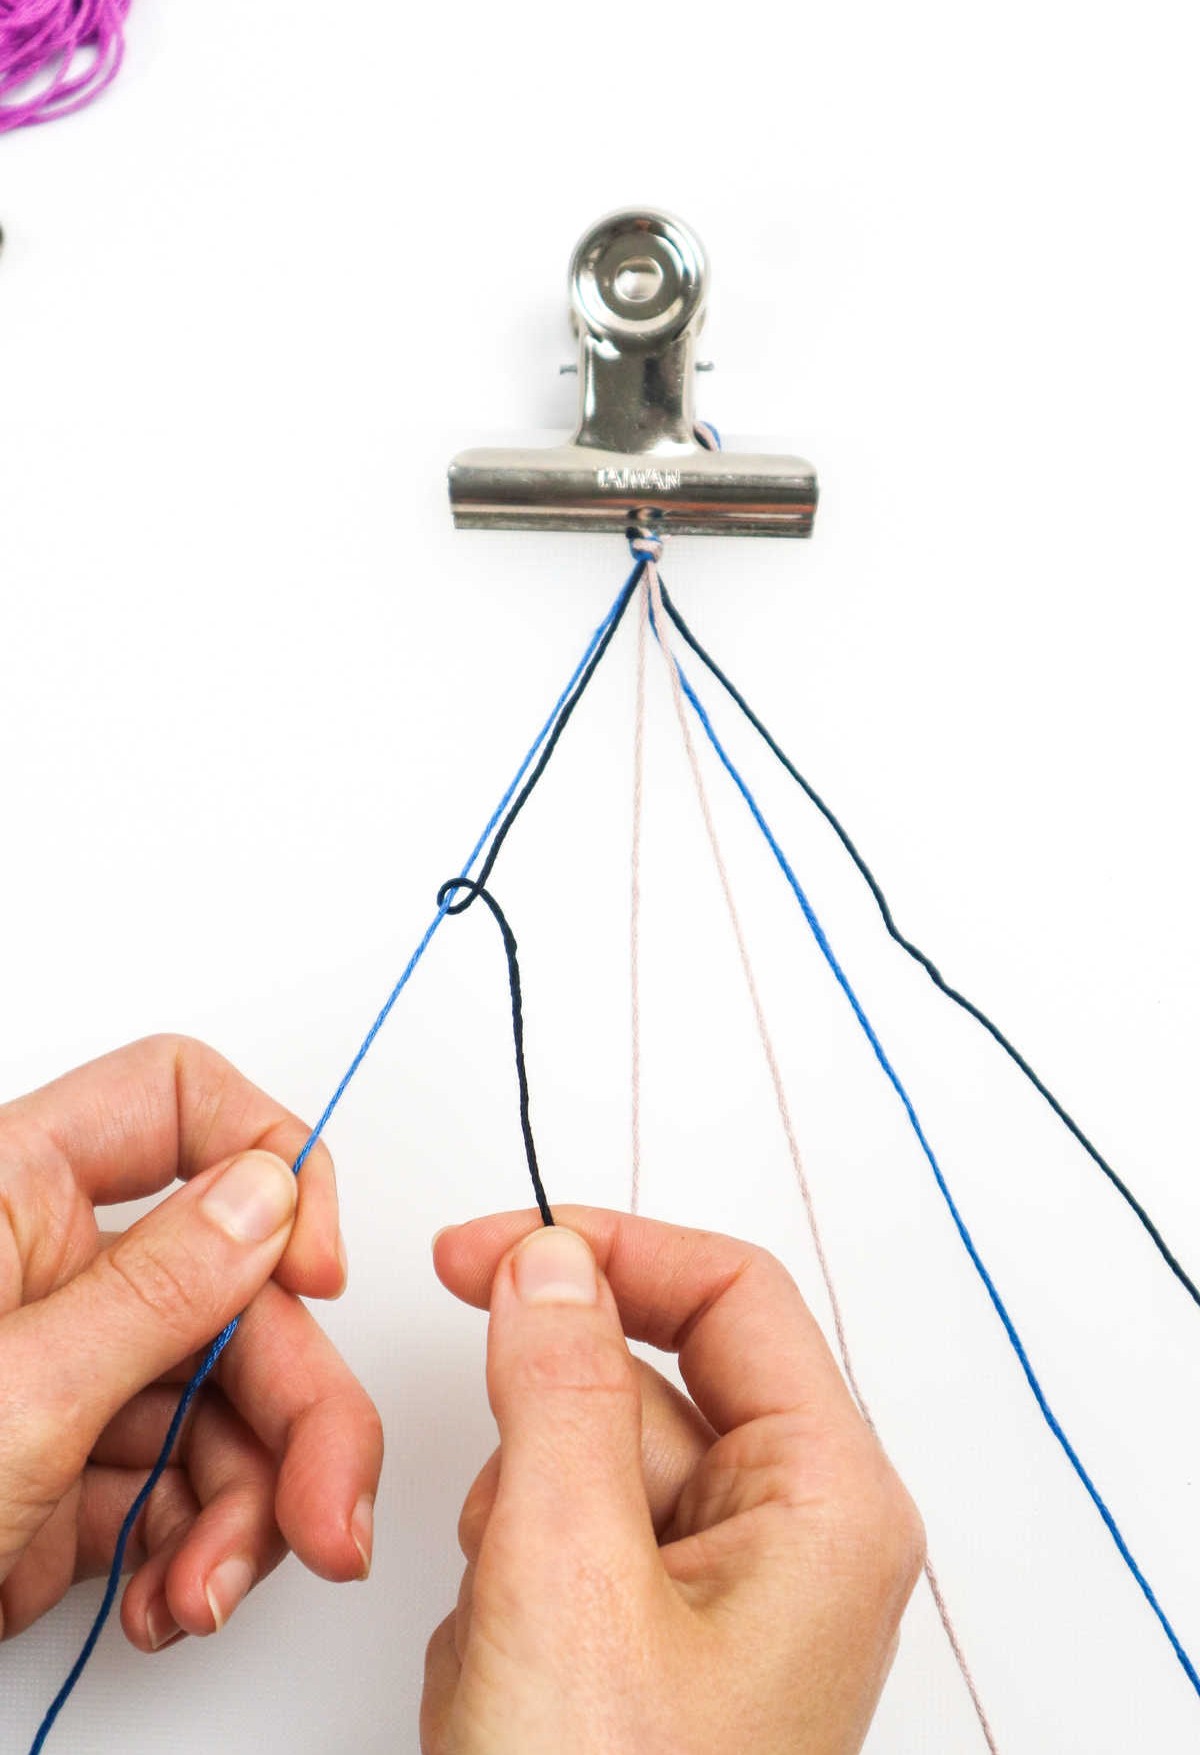
To replicate the process, start by grasping the outermost knot on the left side of the rope. Then, create a series of three knots along this row, working your way towards the center. This technique is identical to the one used earlier for creating rows of knots.
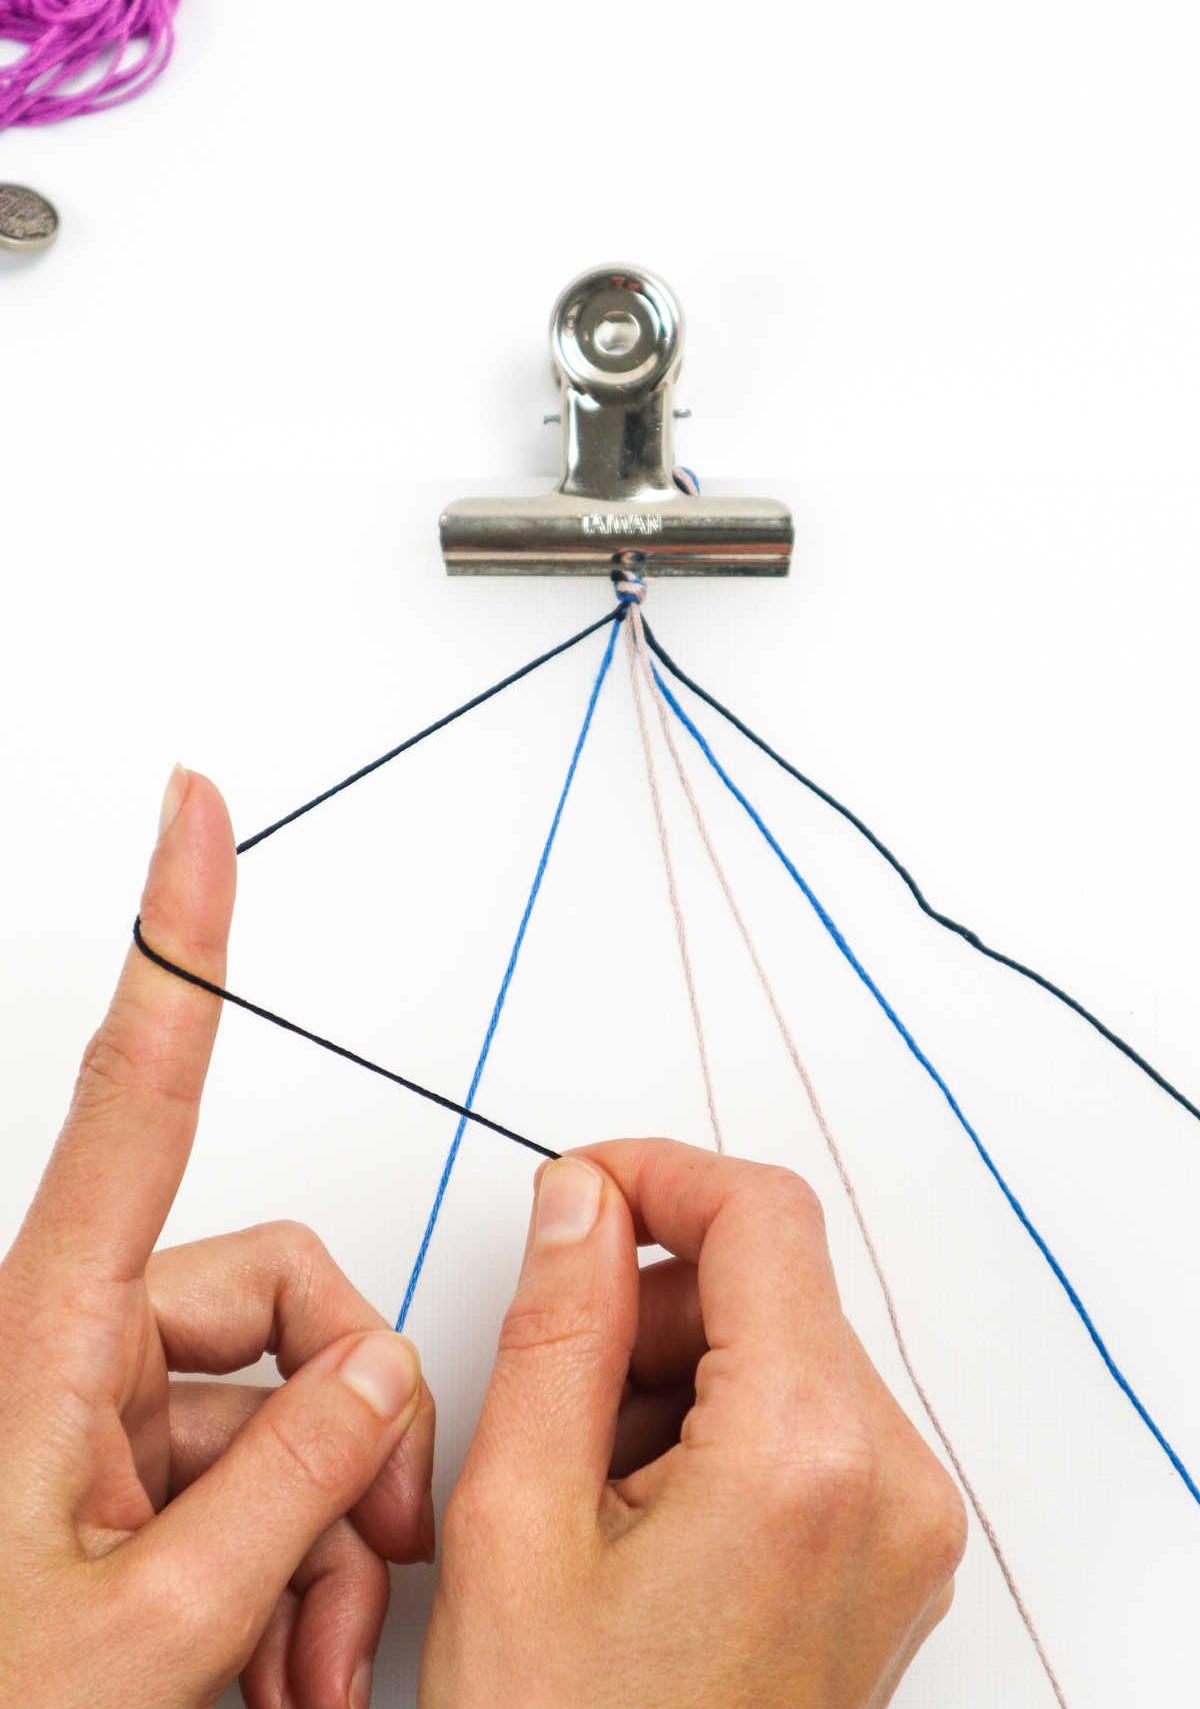
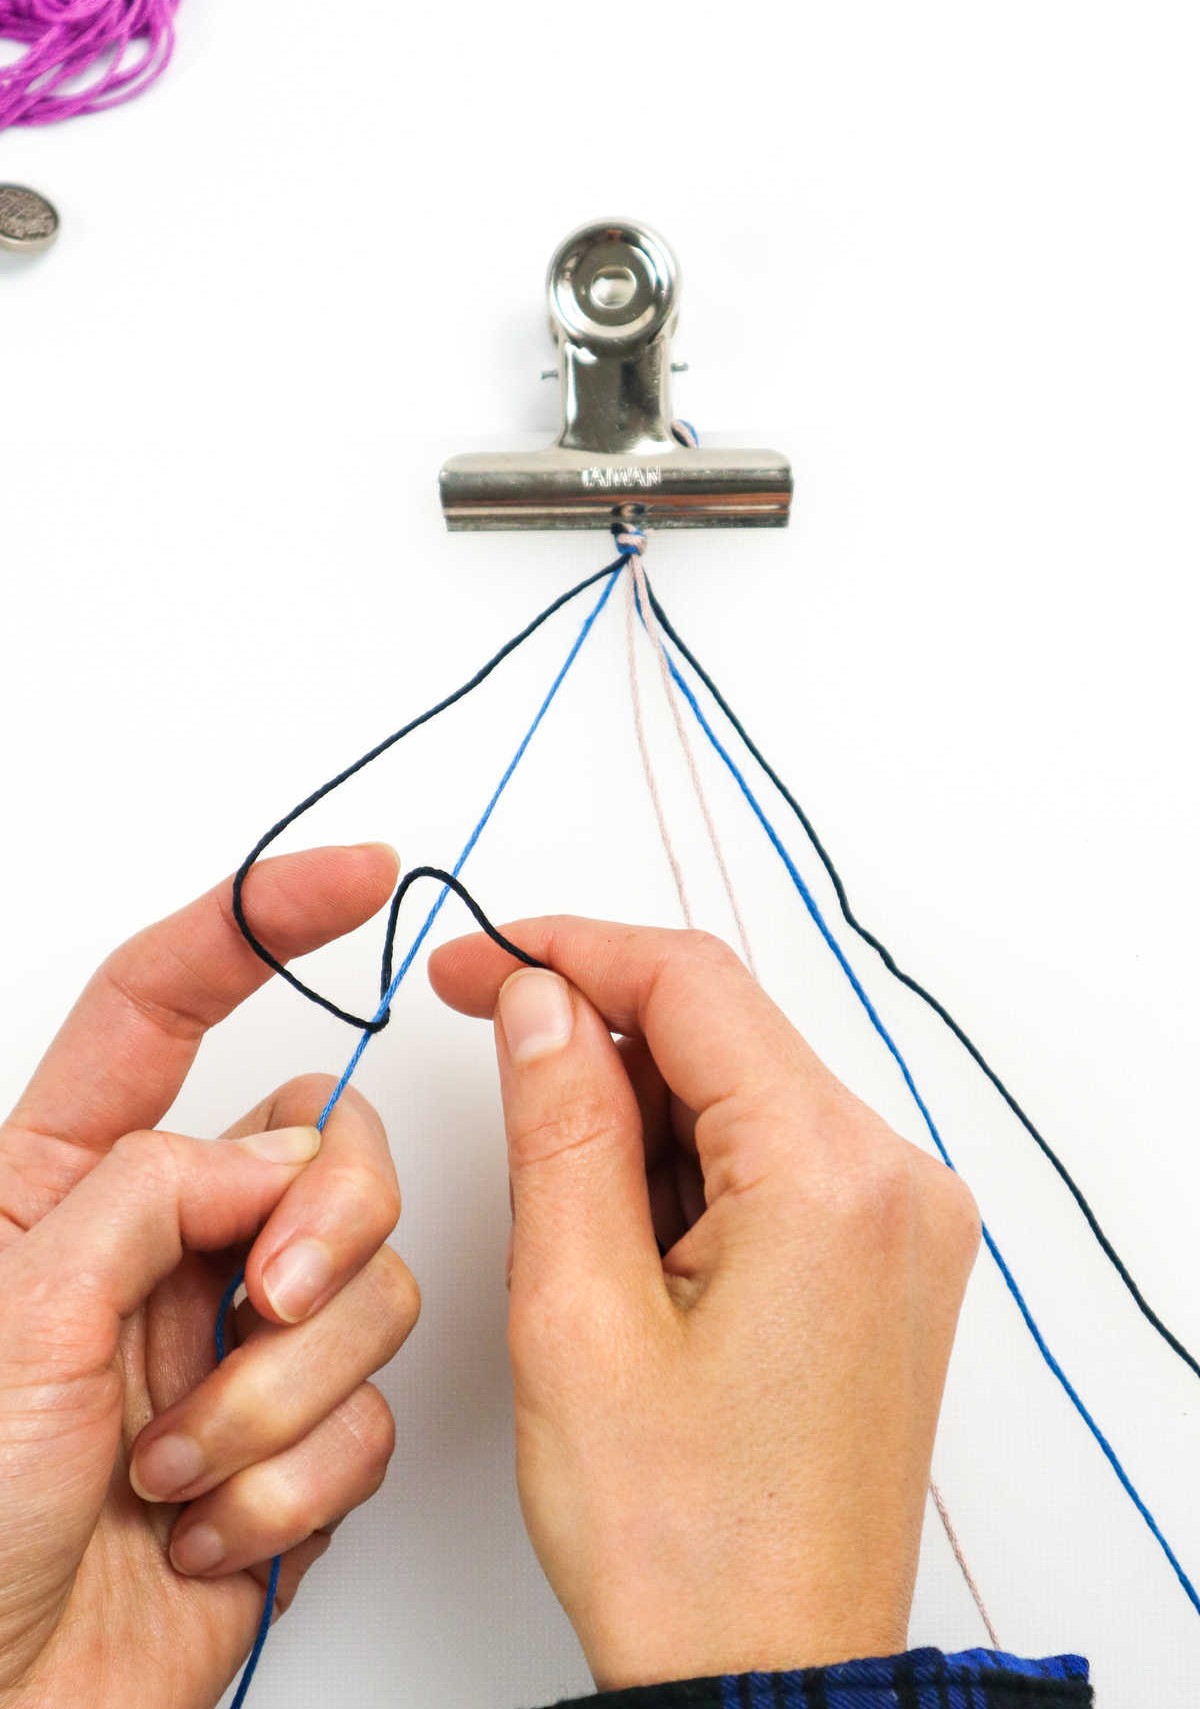
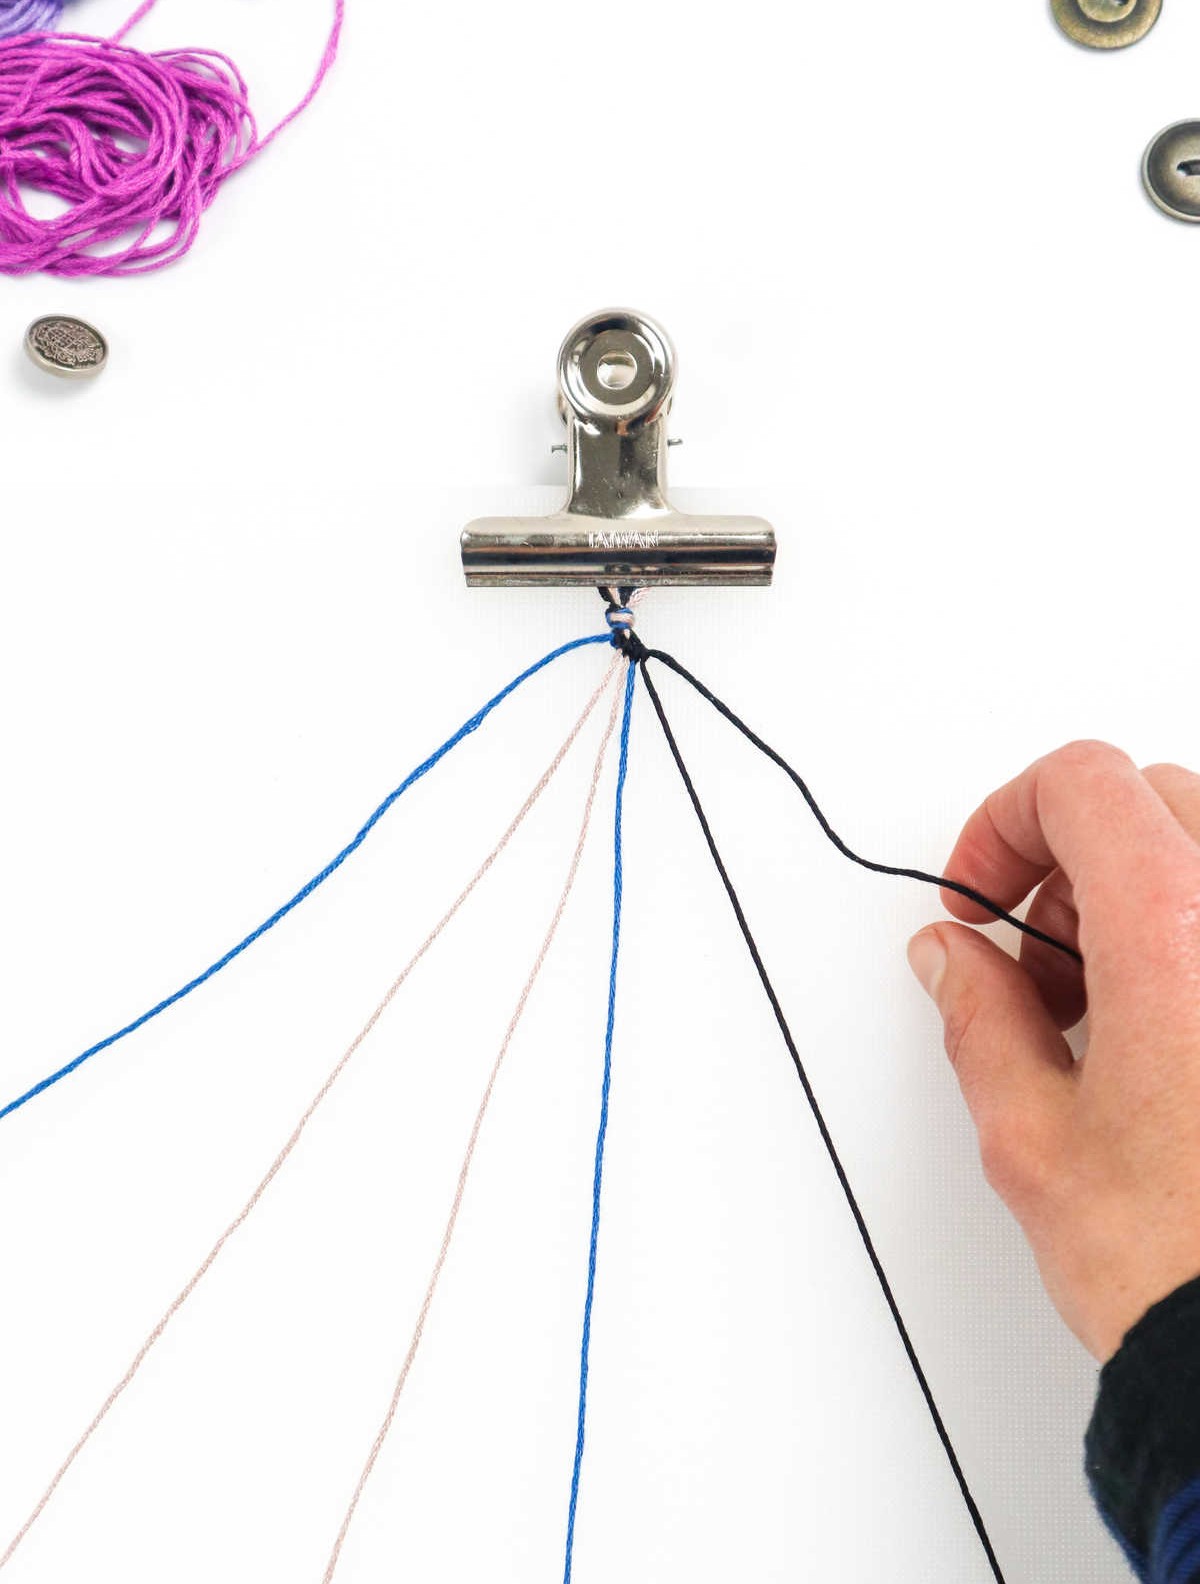
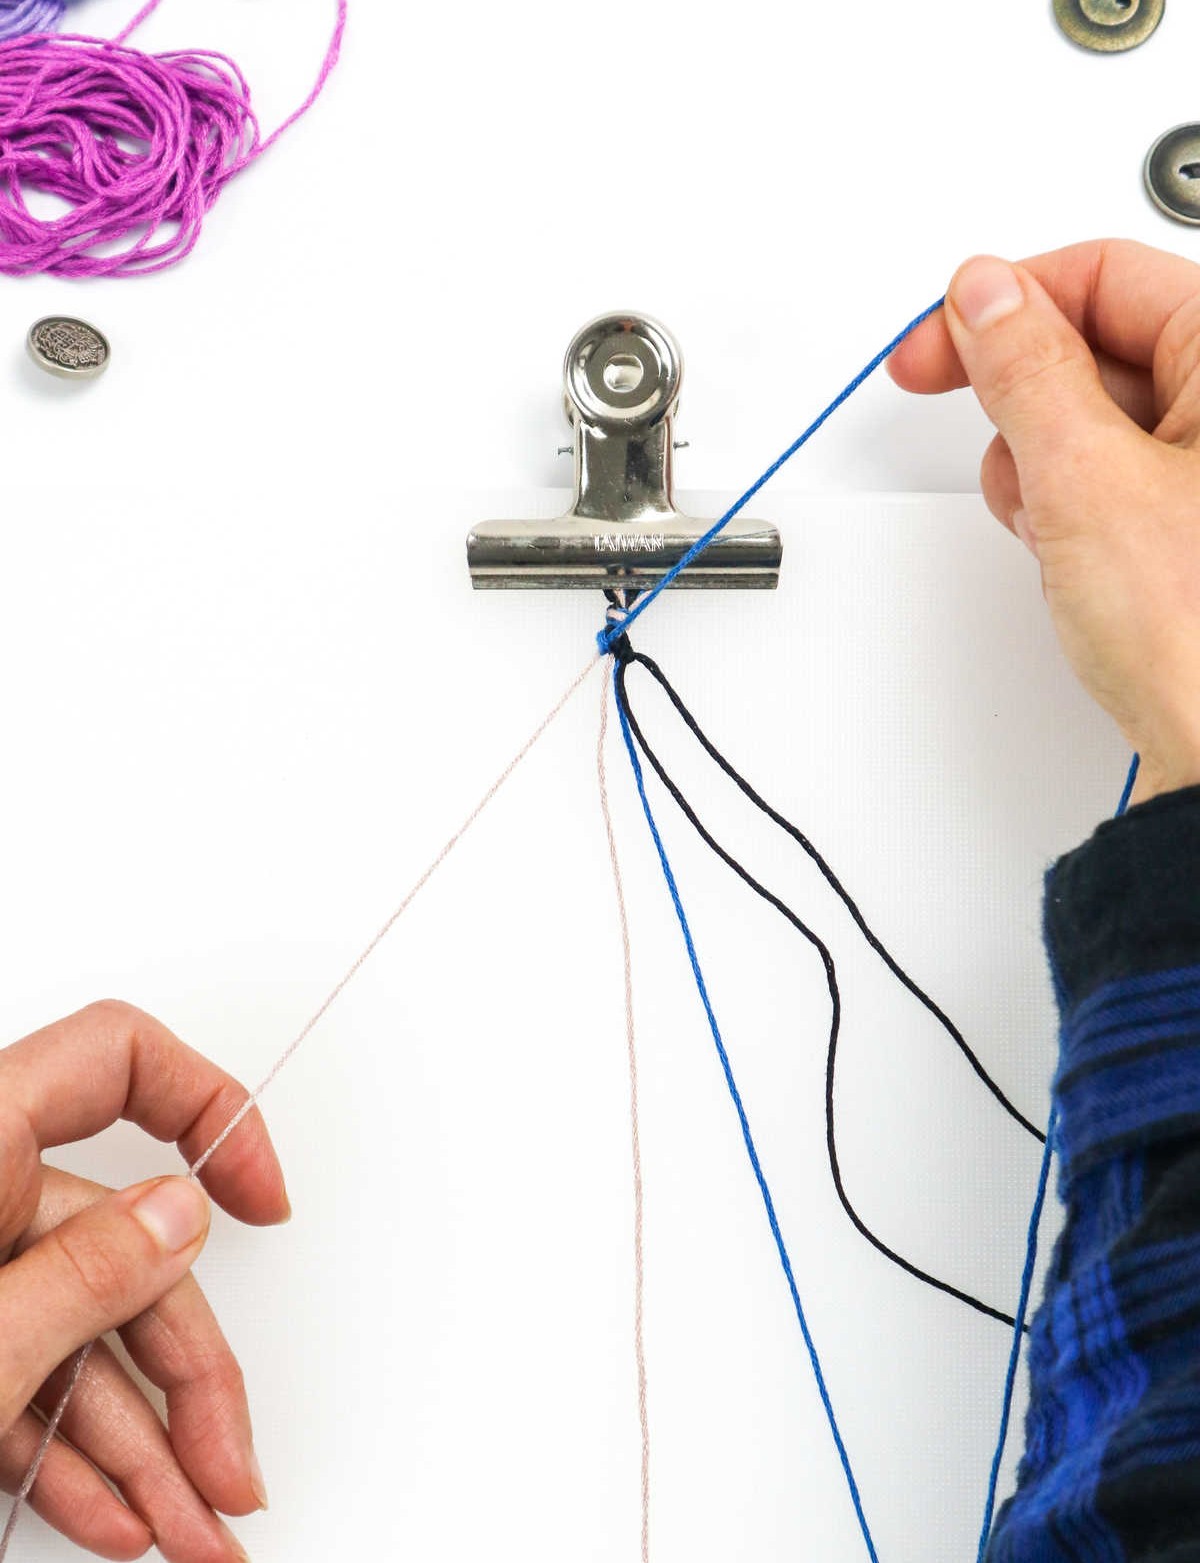
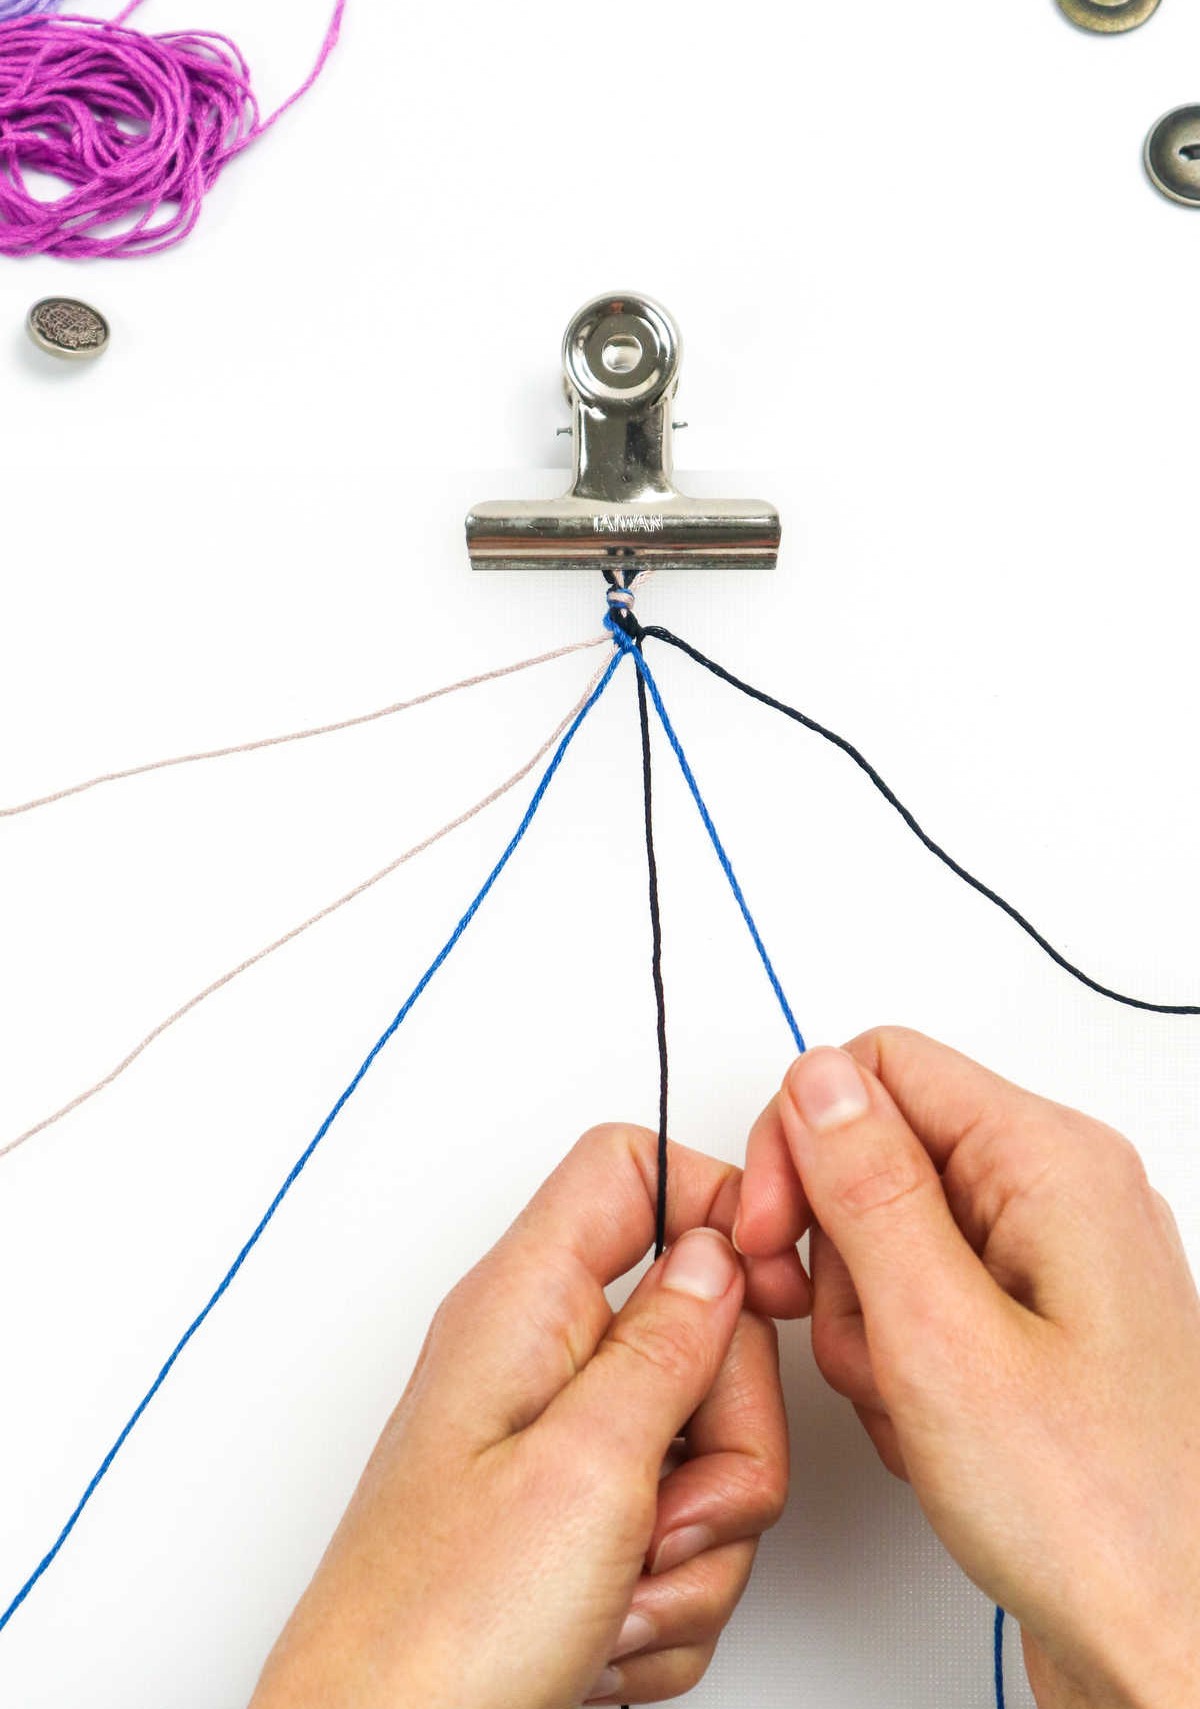
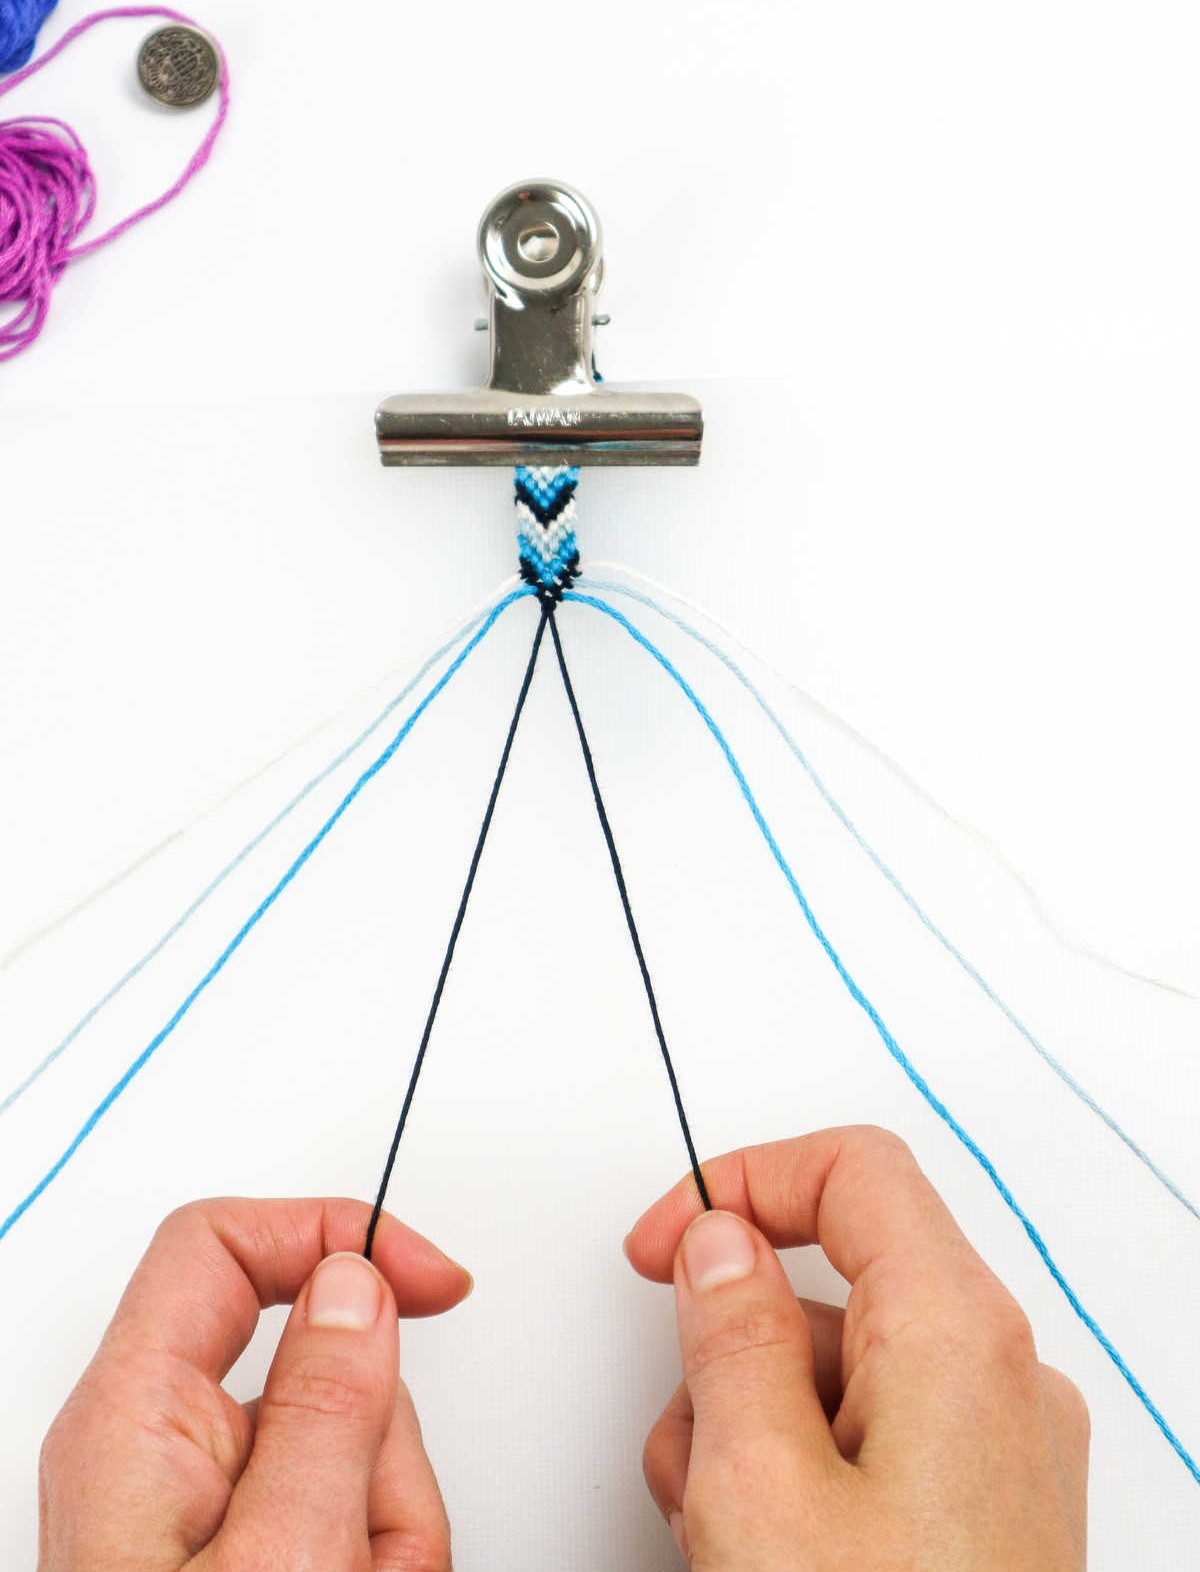
Step 4

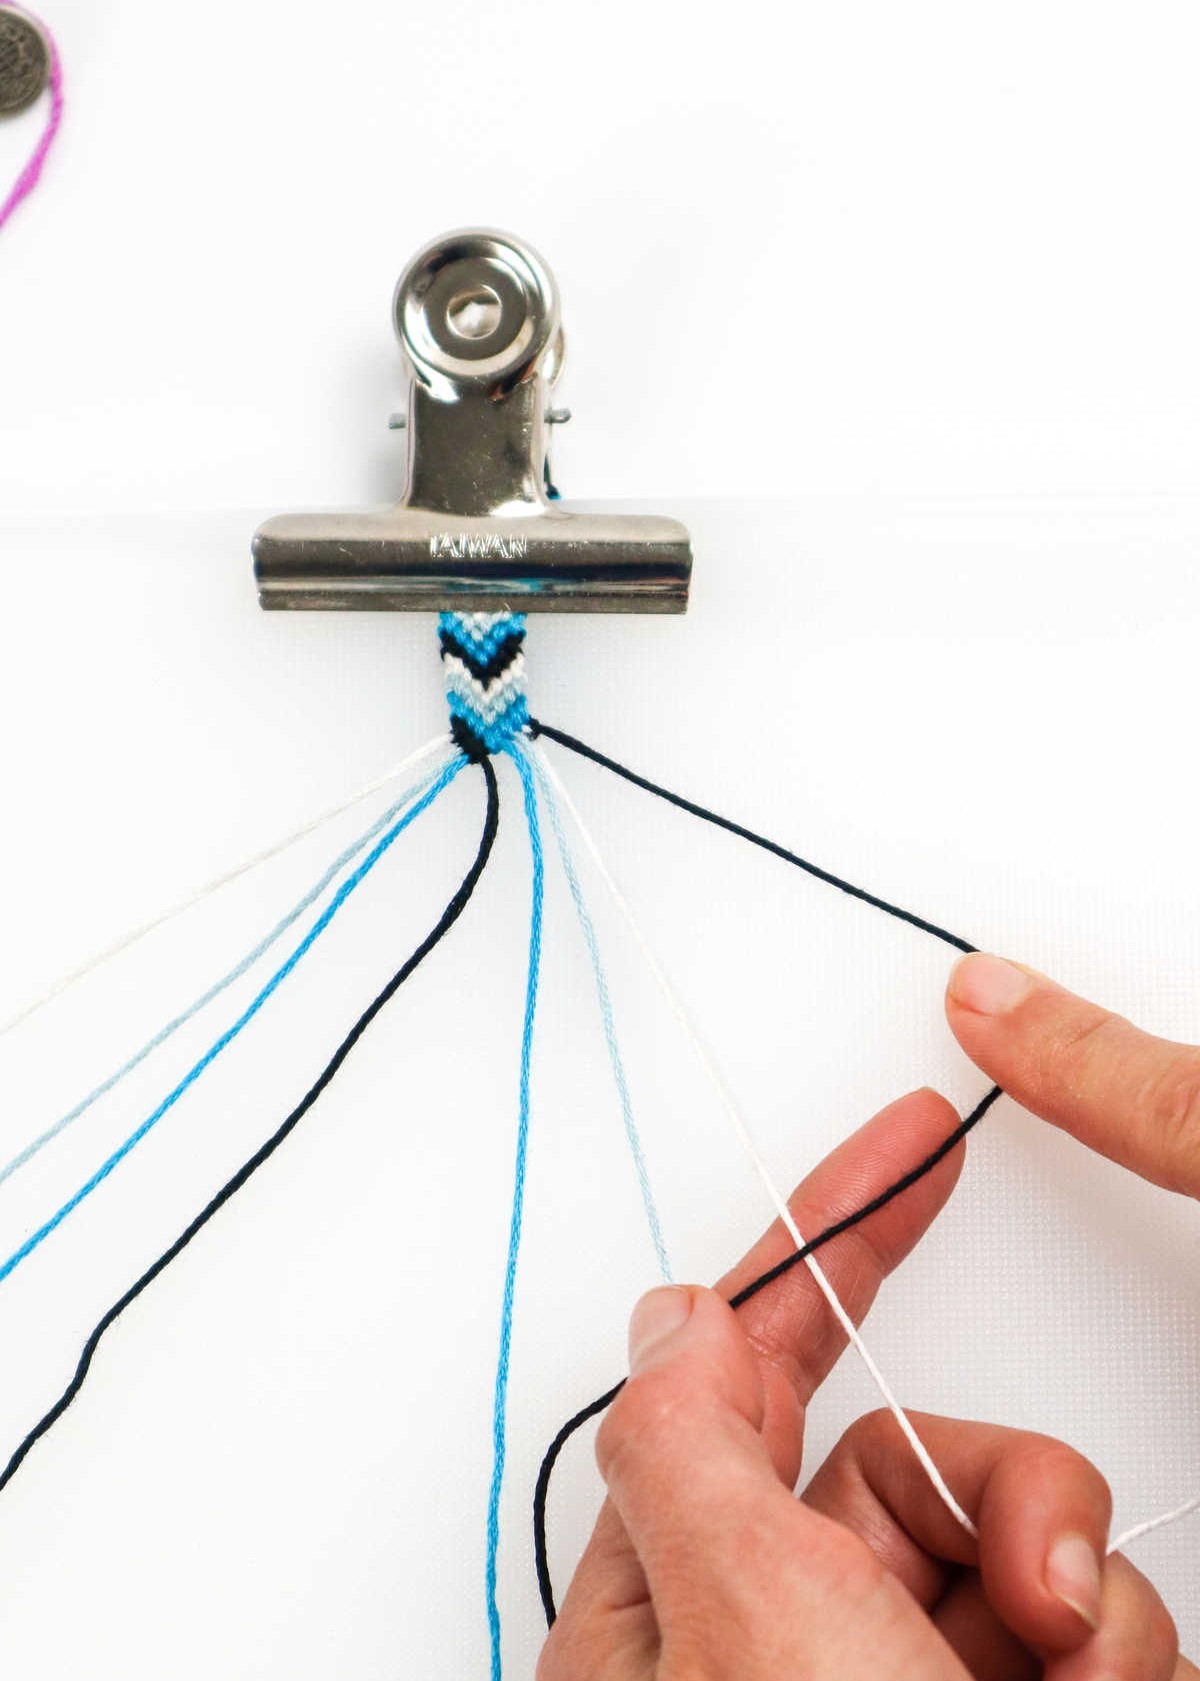
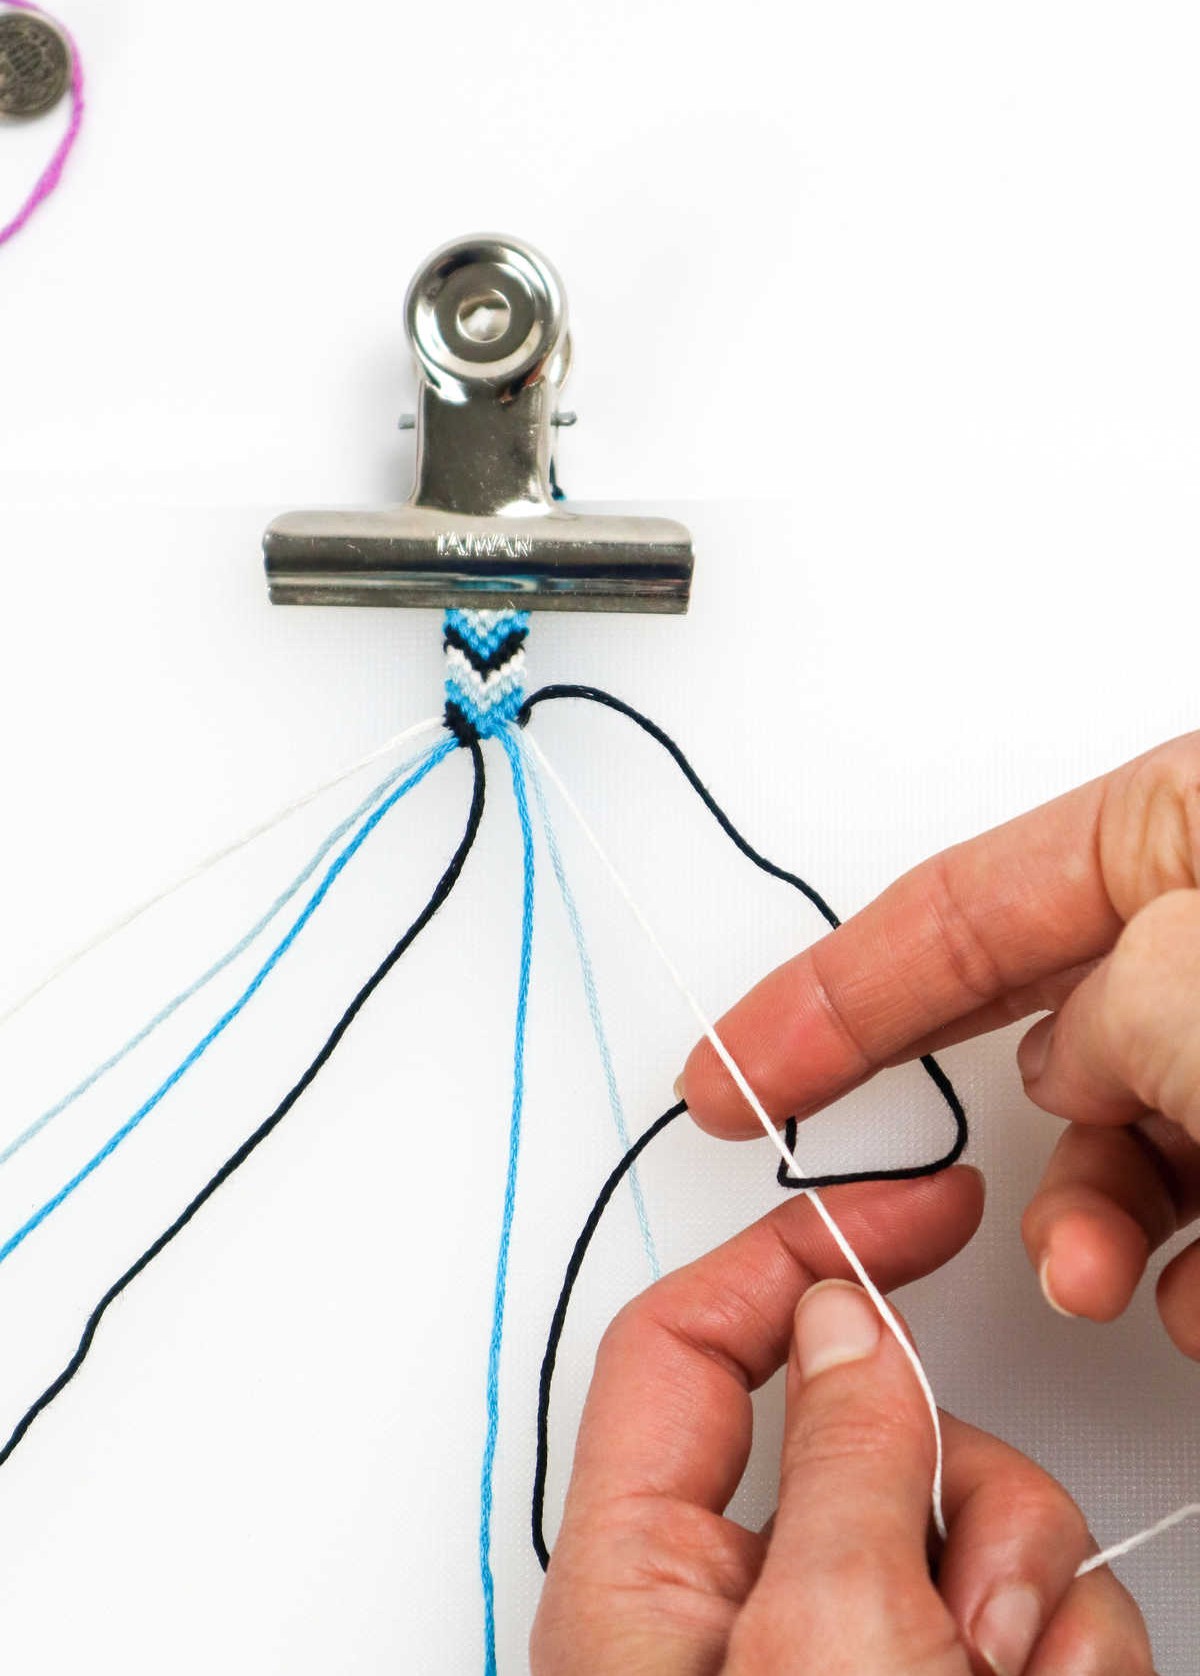

As you complete the cording process on the left side, transition to the right and select the initial cord. To begin forming a knot, bring this leading cord over the second one, creating a loop. Hold the loop in place using your finger while pulling the cord under the latter and through the loop. This foundation sets the stage for the next steps. Moving down to the middle section, mirror the process used on the left side. If desired, you can repeat the looping process to create two rows of knots.
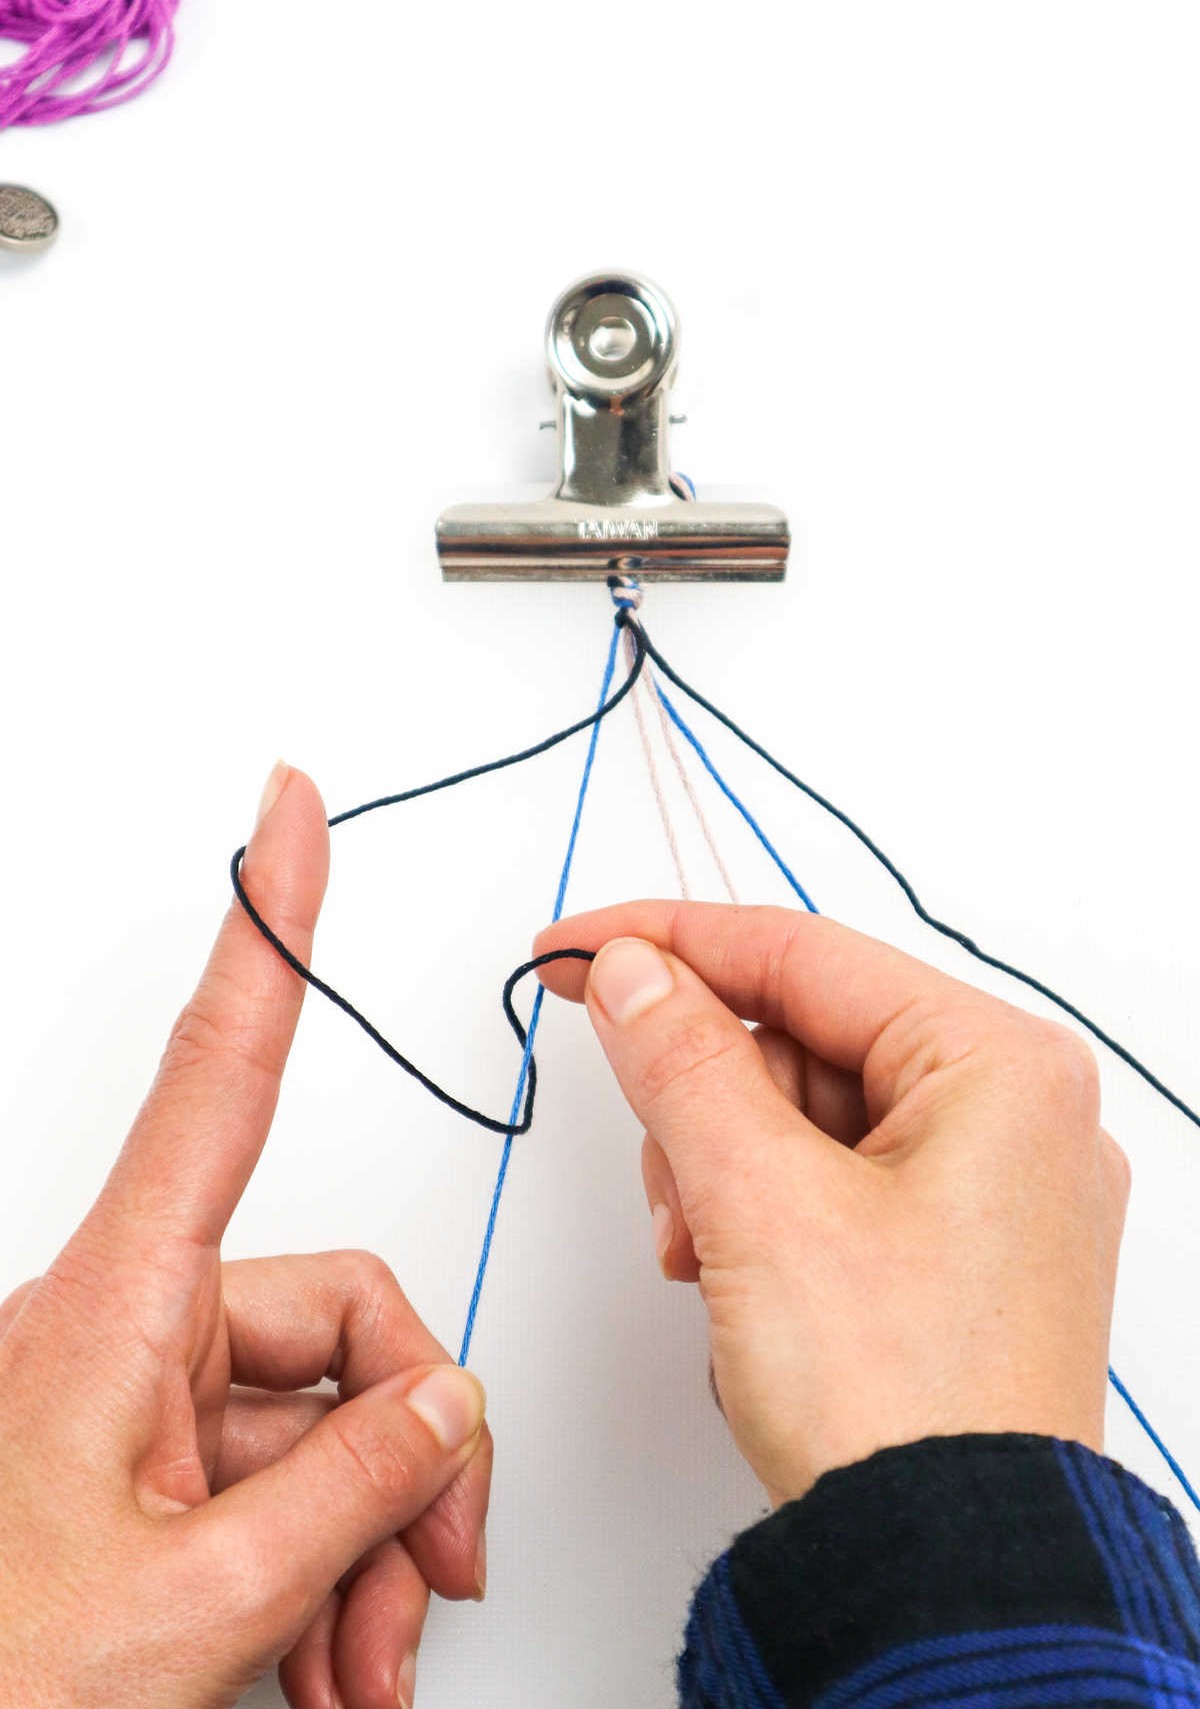
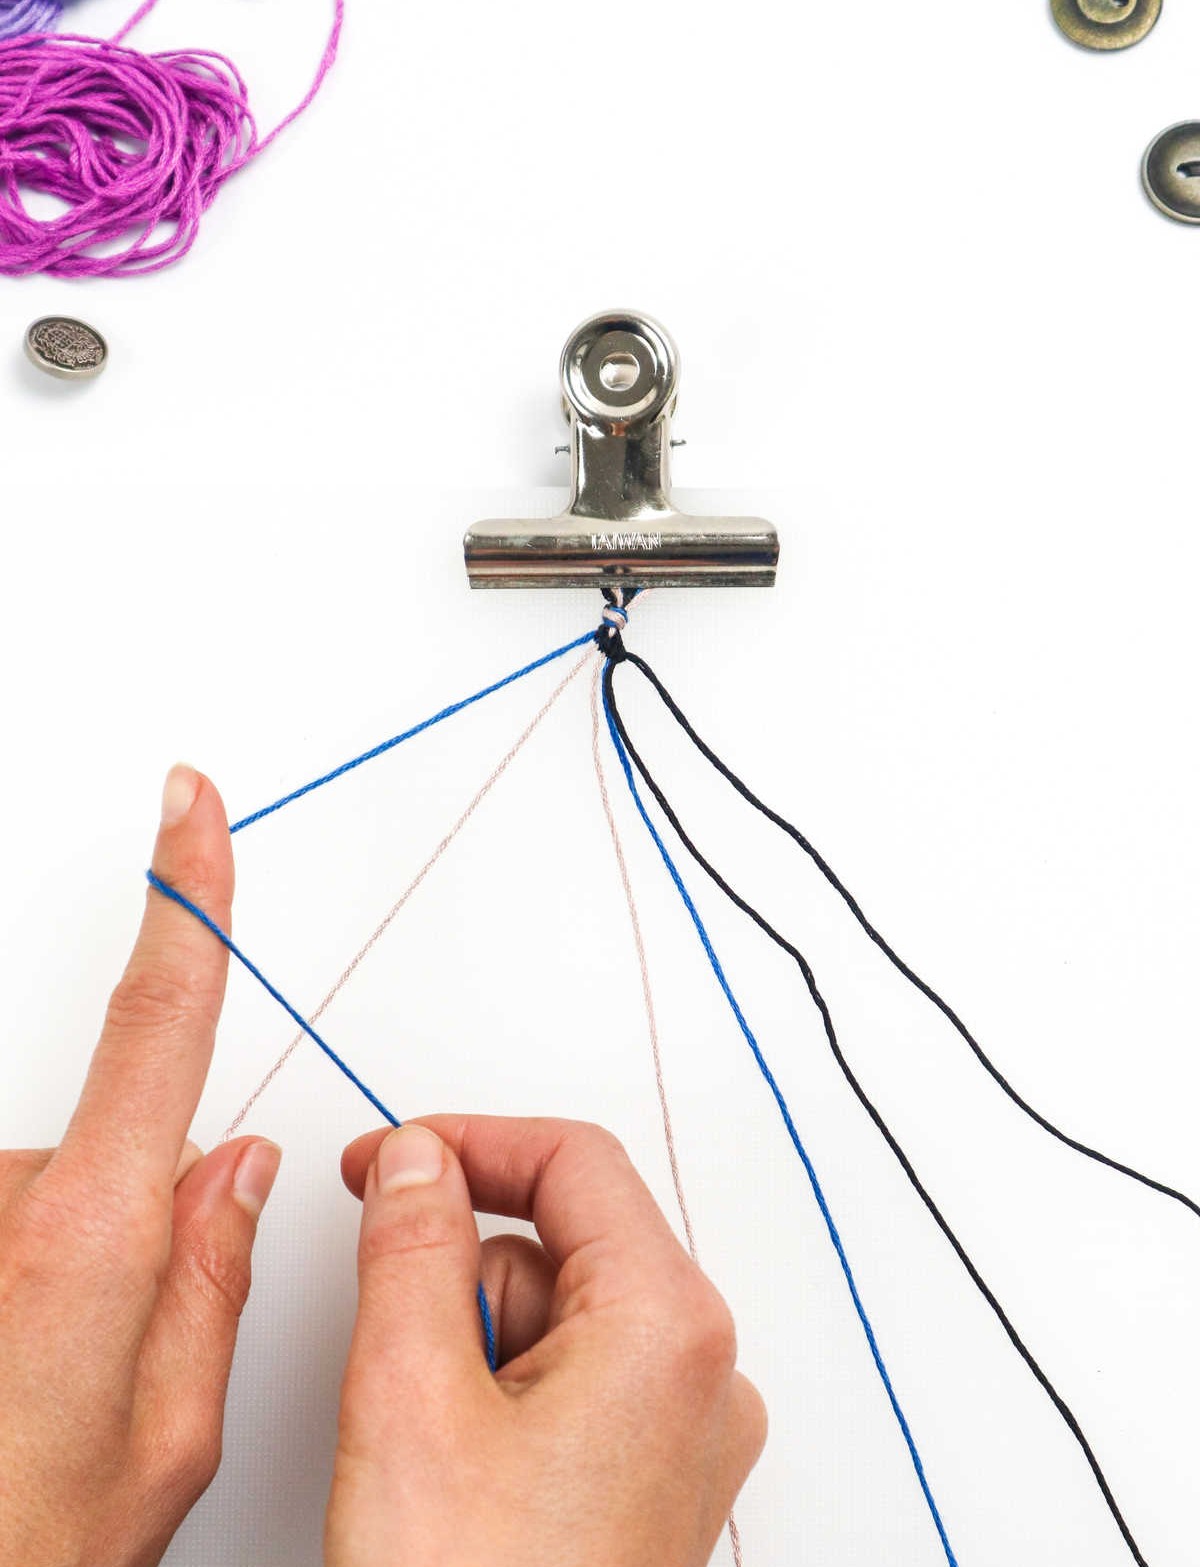
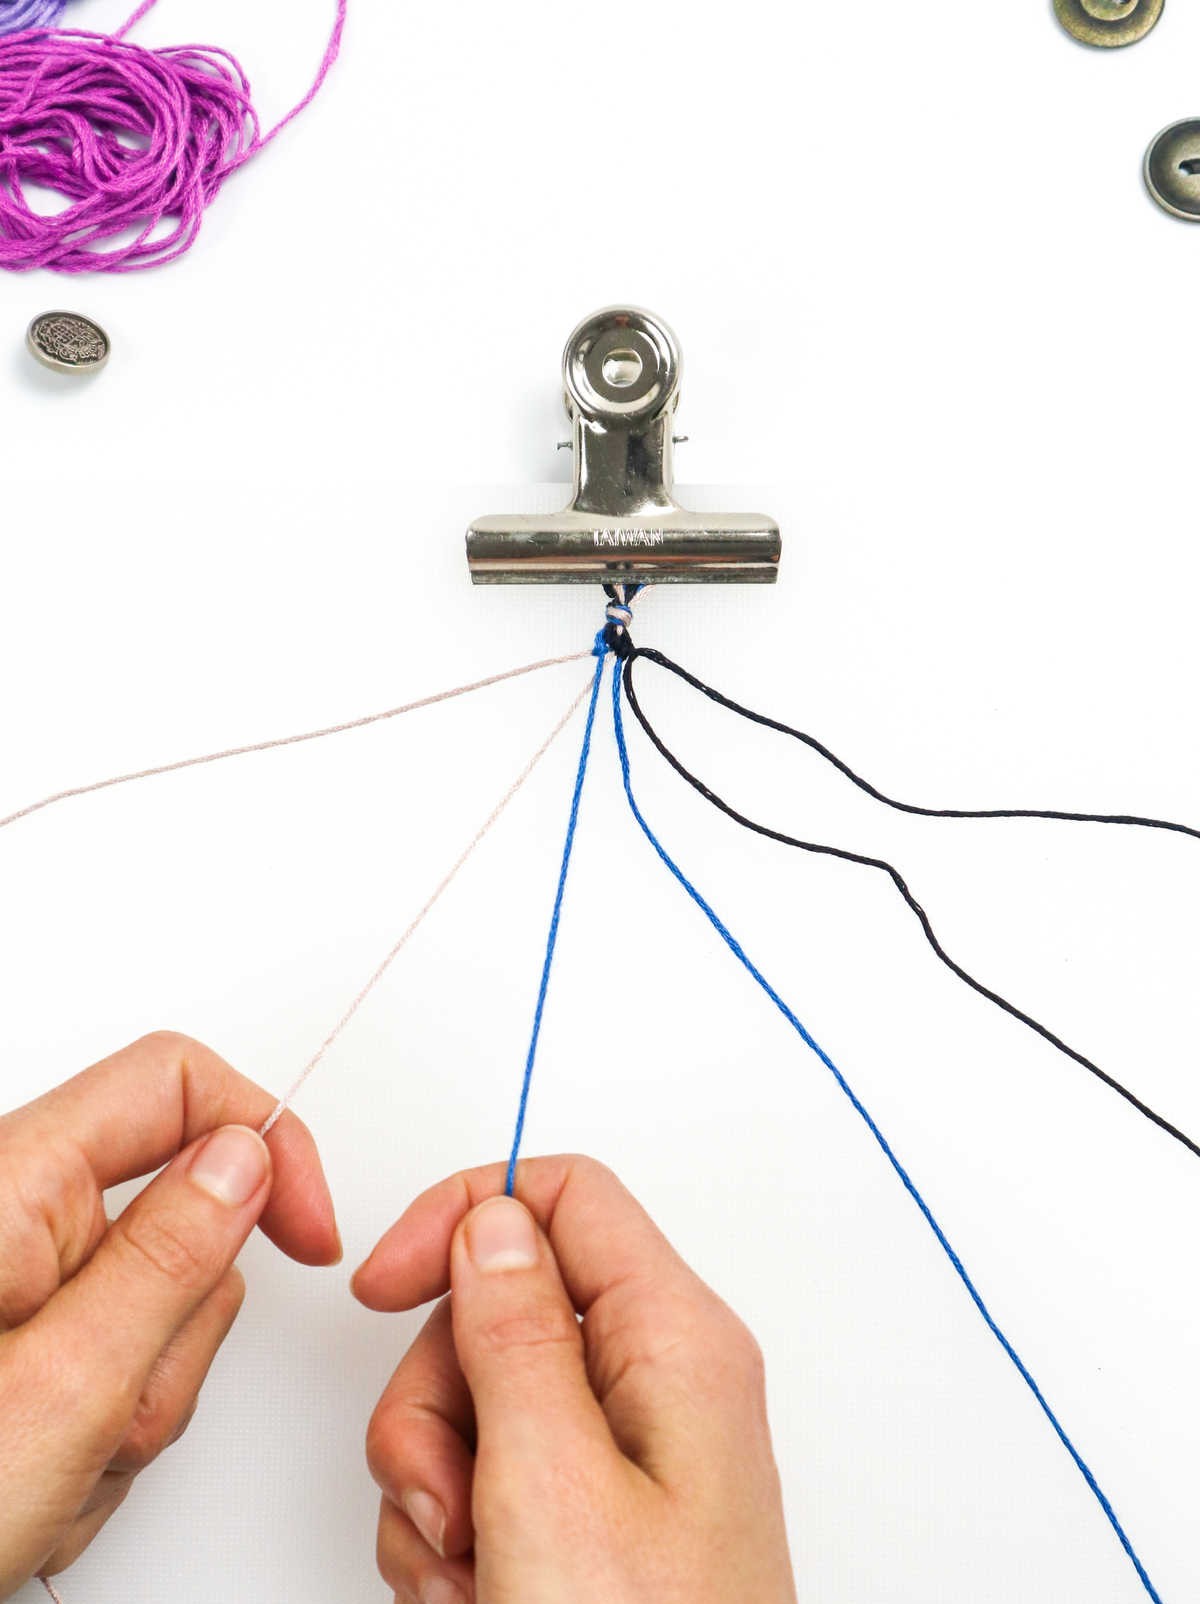
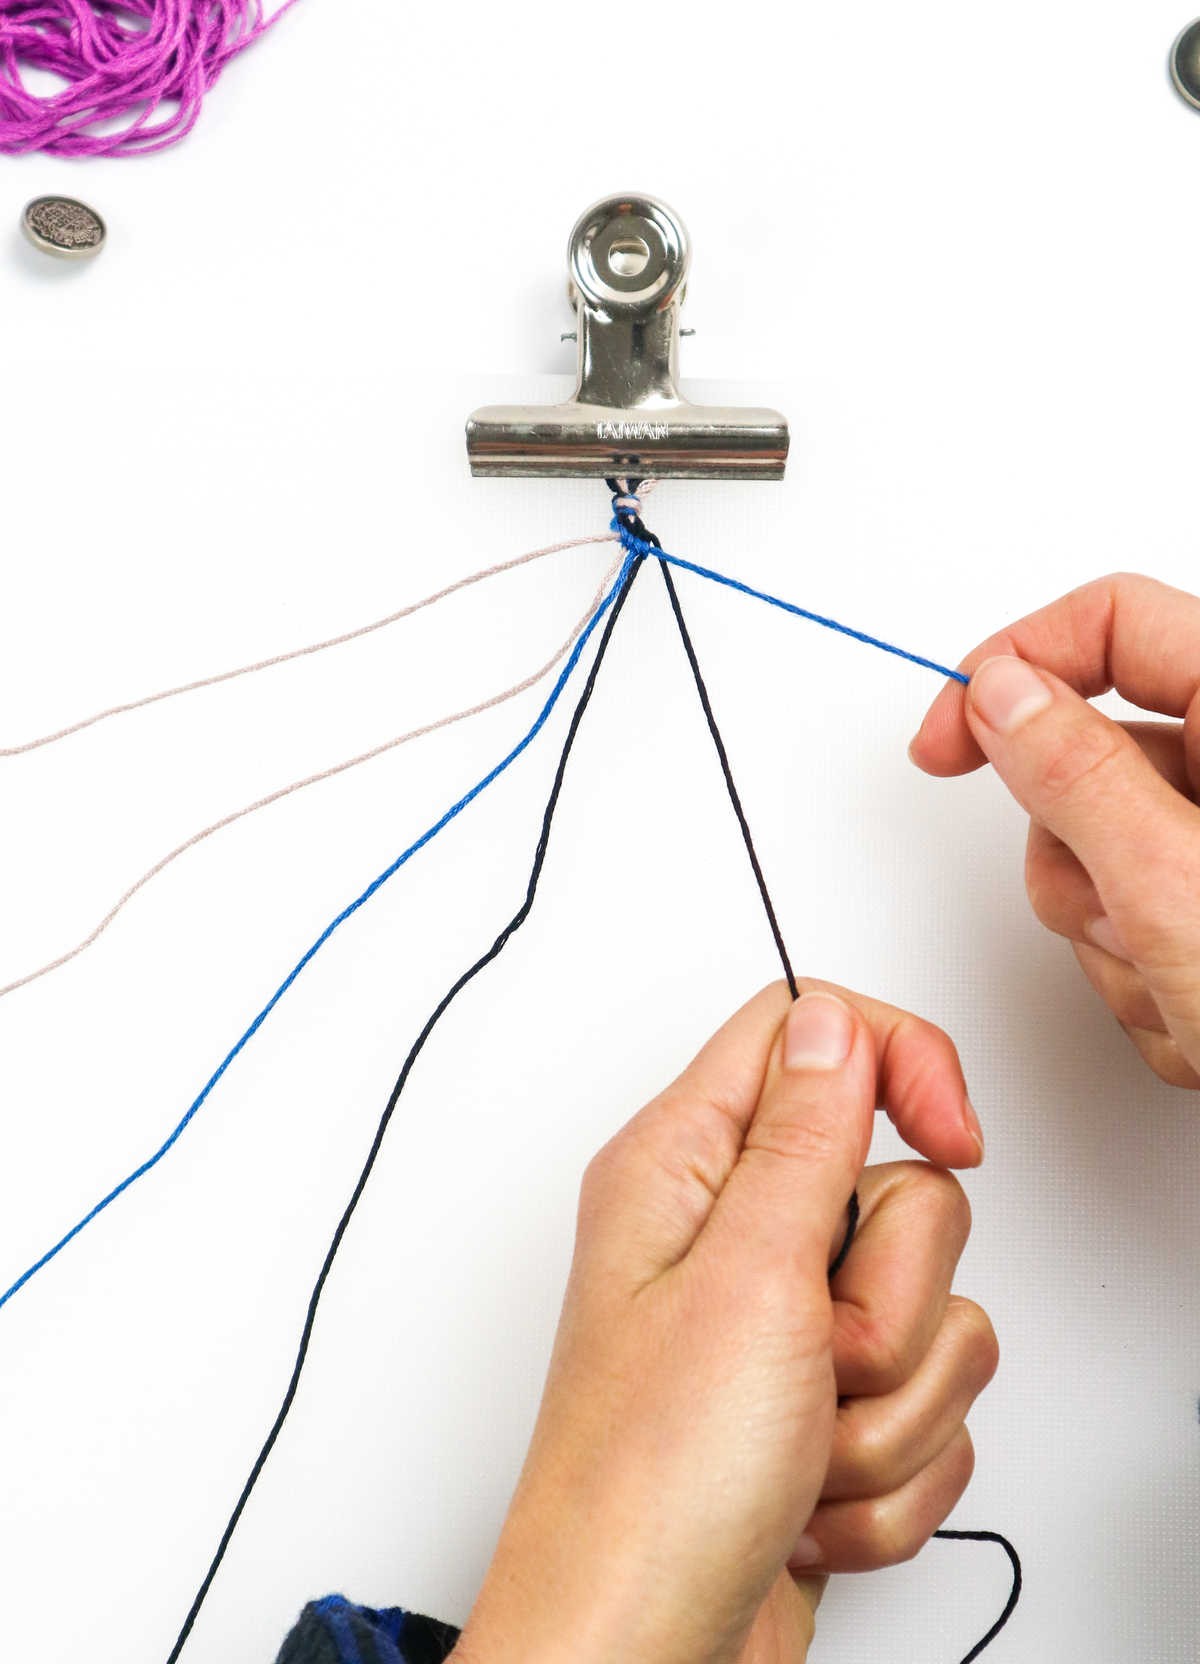
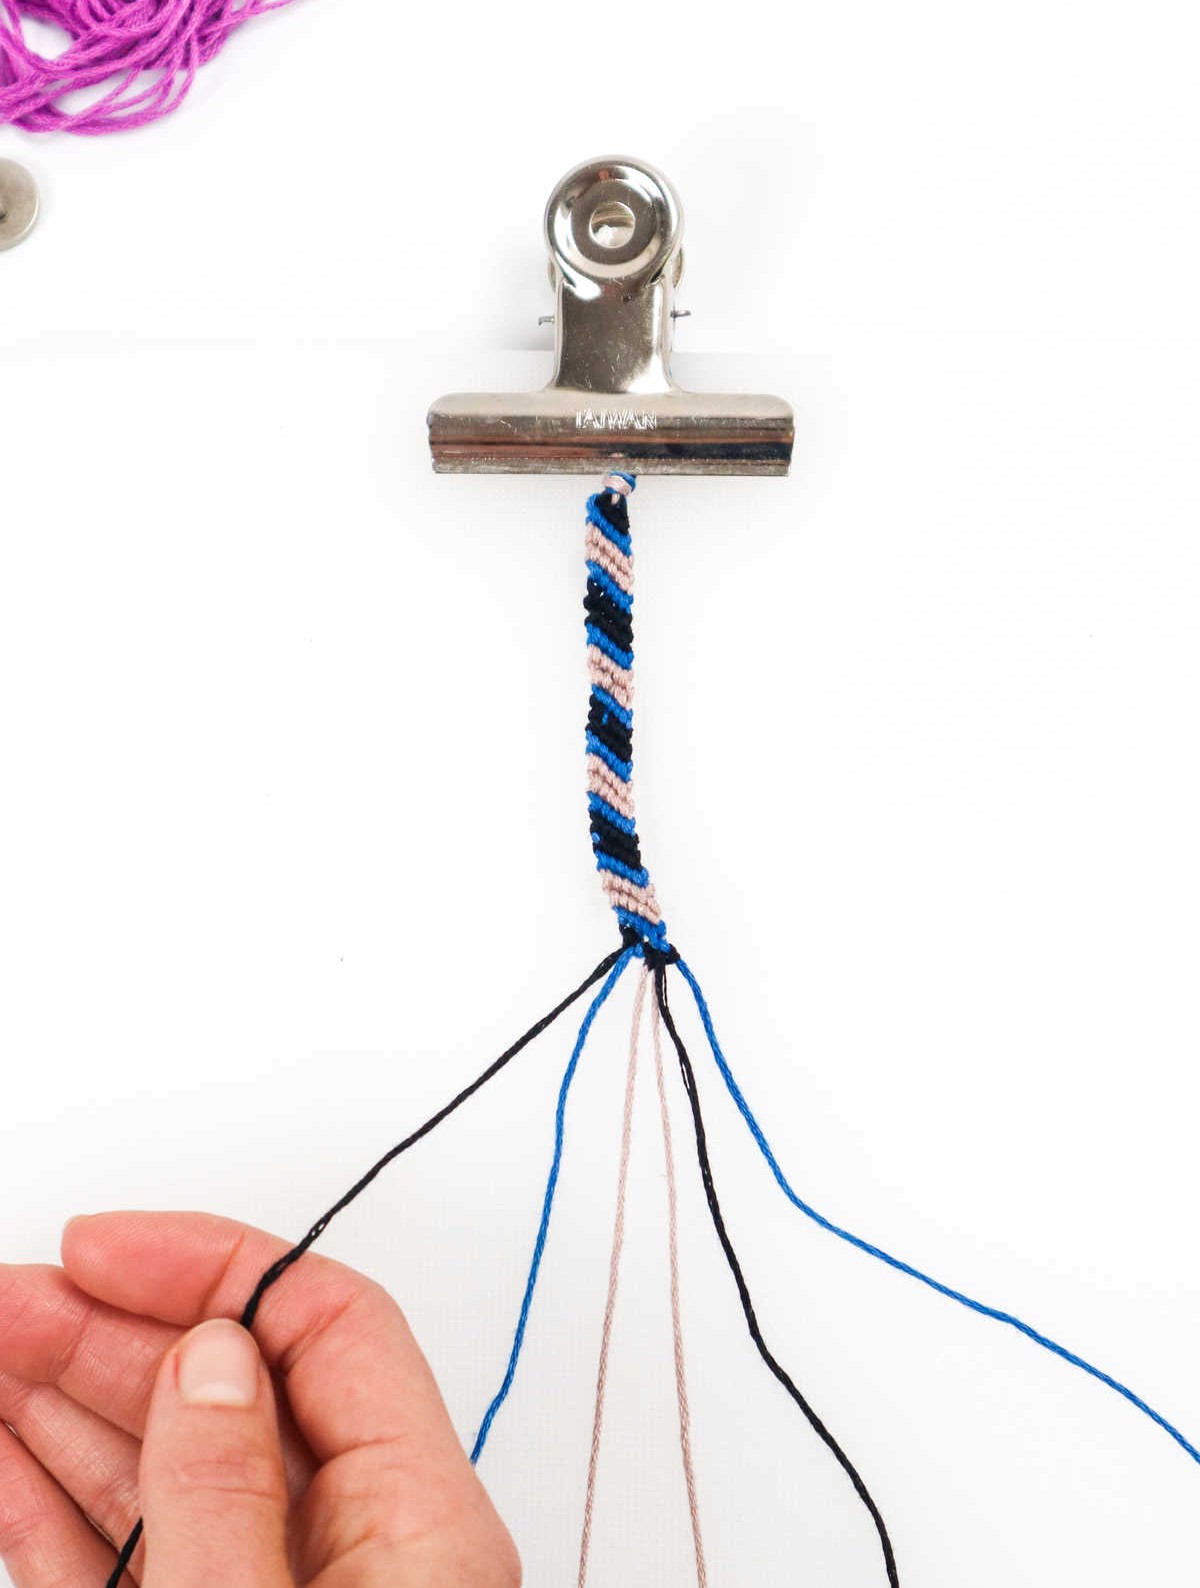
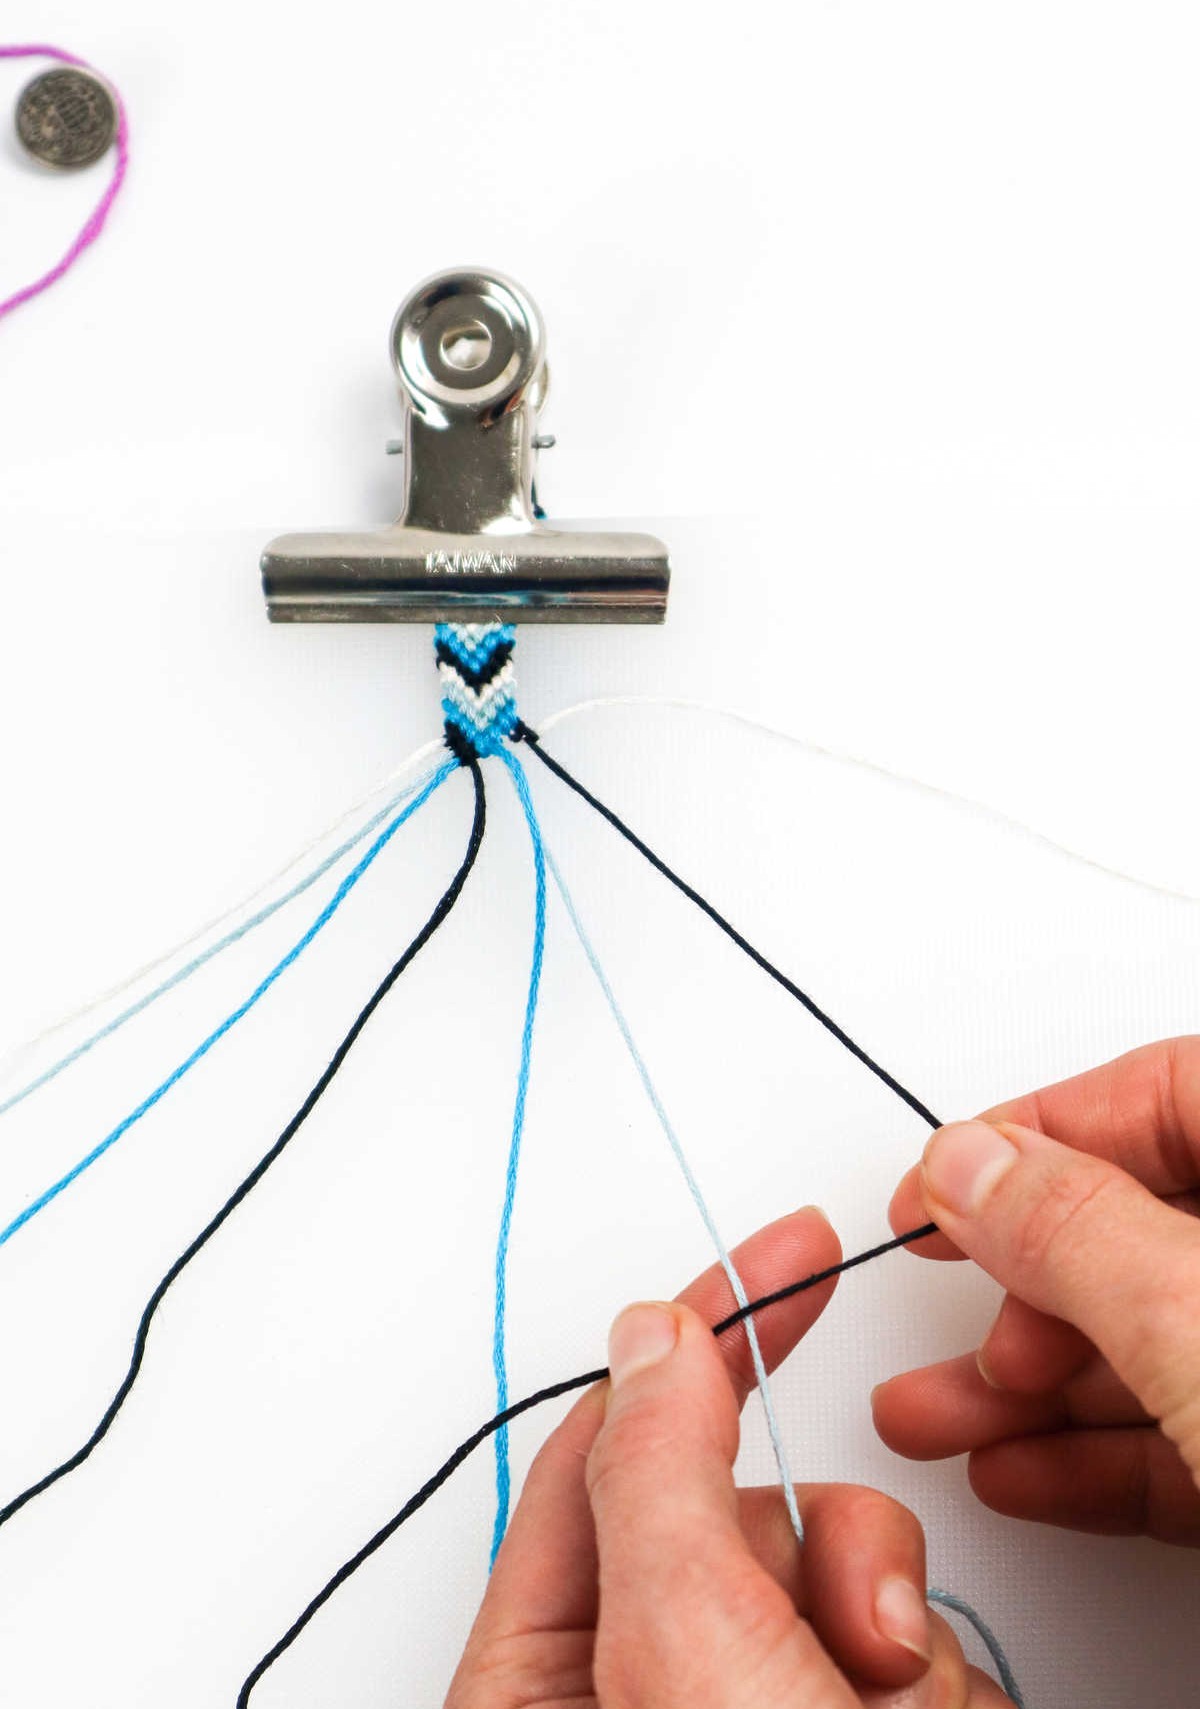
Step 5
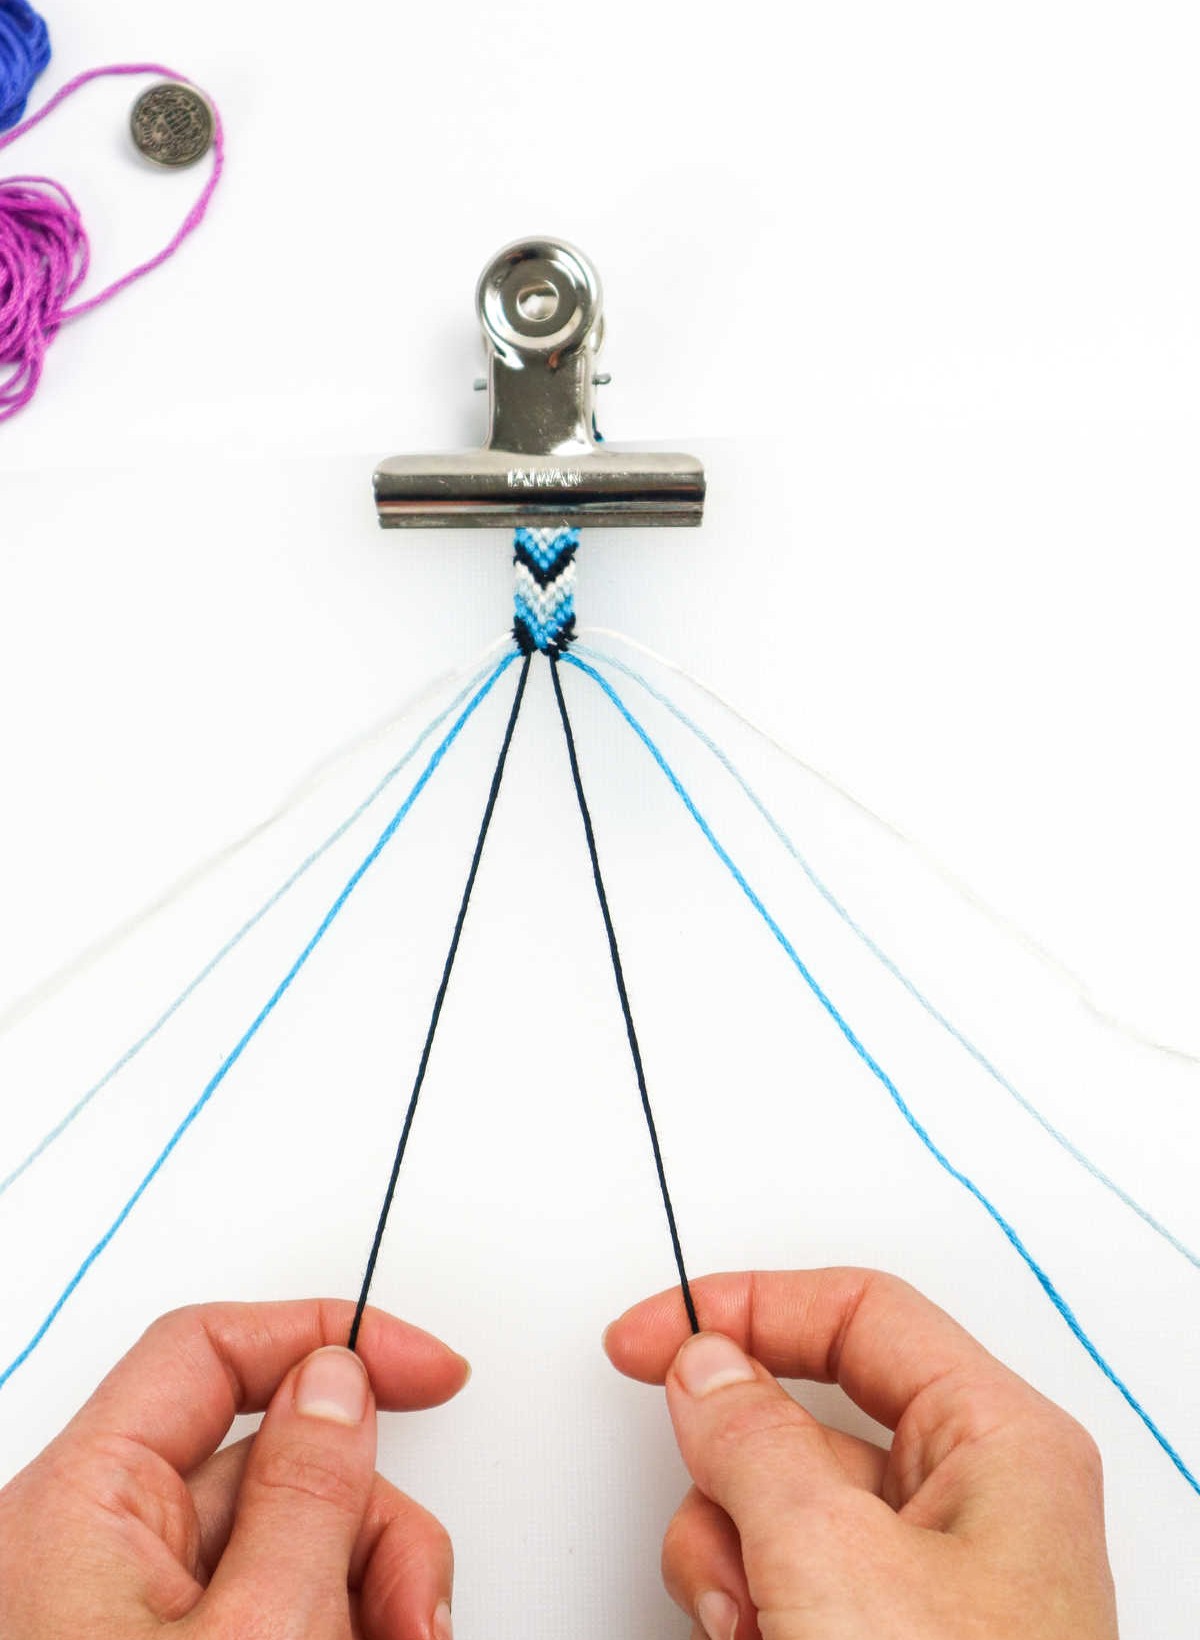

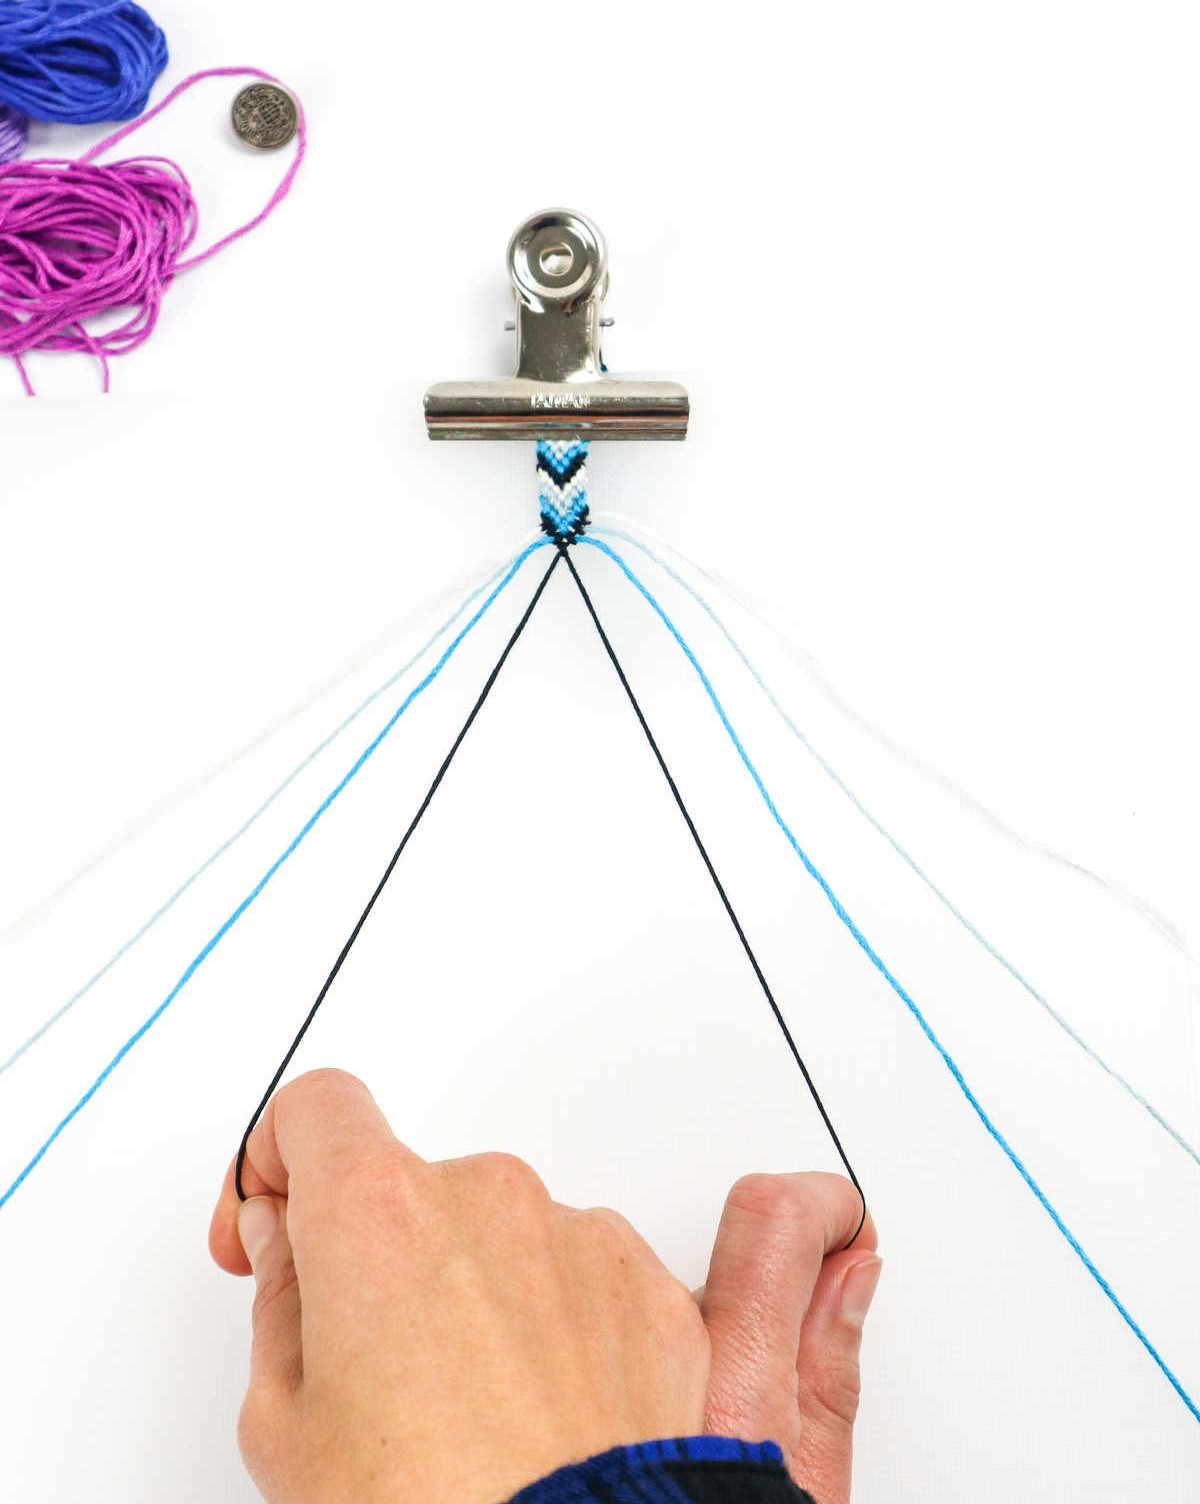
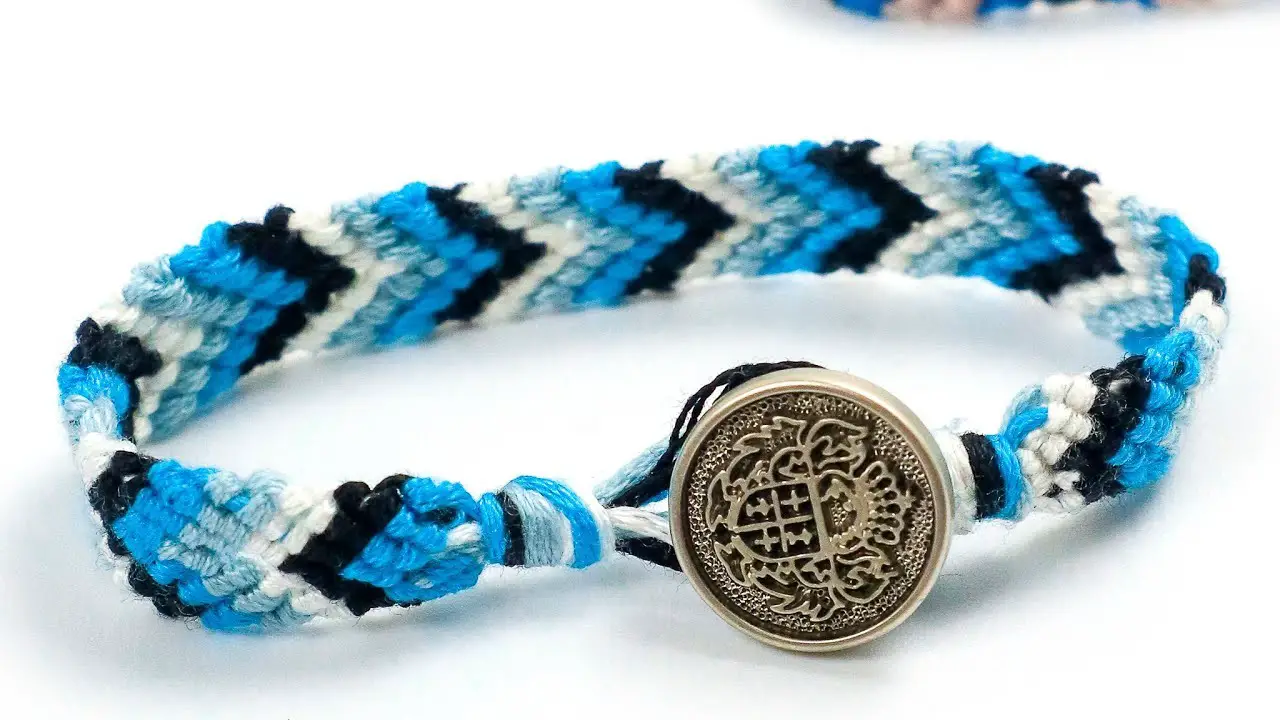
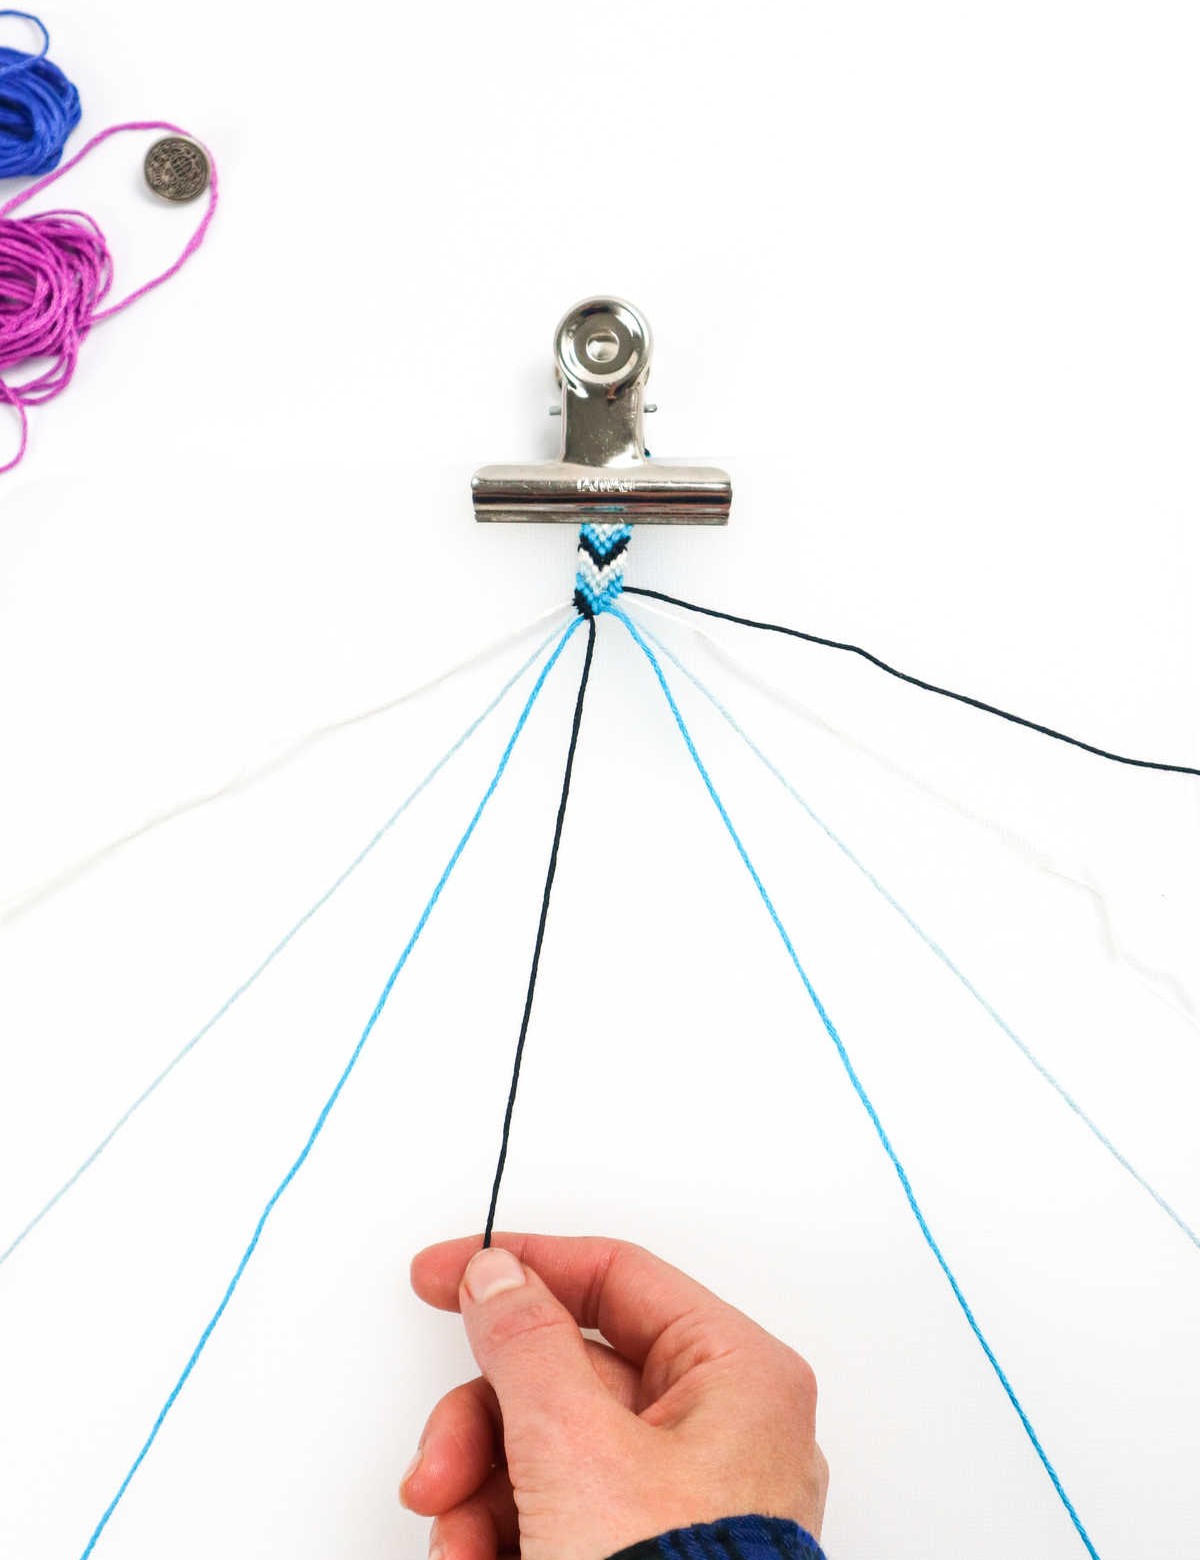
As the two leading cords converge in the middle, you’ll notice the formation of a distinctive V-shape. To complete this row, simply loop the right cord around the left one twice. The mirrored pattern on both sides will become evident once more, resulting in a stunning V-shaped arrangement of knots. With your bracelet now taking shape, feel free to add any final touches and accessorize as desired. And there you have it – a truly fabulous friendship bracelet that’s sure to make a statement!
How to Flatten Curled Friendship Bracelets?
When your friendship bracelets begin to curl up due to their narrow width and limited row count, fear not! You can easily straighten them out. One effective method involves using water as a block. Simply dampen your fingertips and gently pat the bracelet with the droplets. Next, place the wetted bracelet between two paper towels and weigh it down with a heavy book as it air dries. For an alternative approach, you can utilize a flat iron or straightener to smooth out the bracelets.
However, be cautious not to scorch the threads. To prevent this, lay a thin towel over the bracelet before applying heat from the iron.
What to Do if I Run Out of String?
When encountering a mid-project thread shortage, a simple solution is to seamlessly integrate a fresh cord. Select a matching string color to ensure a harmonious blend. Rather than knotting with the existing short length, simply slide the new cord into place and proceed with your usual knot-tying technique.
If needed, you can also choose to gradually incorporate the short cord into your project as you progress or trim it off once completed, eliminating any visual disruption.
How to Make Friendship Bracelets
Transform a leisurely 40-minute session into a creative outlet by crafting your own friendship bracelets. Join Karo from CraftsyHacks.com as she shares the simple yet enjoyable DIY process, requiring minimal investment of just $1. With this straightforward guide, you’ll be able to create unique and personalized accessories that will bring joy not only to yourself but also to your friends.
Equipment
Materials
Instructions
Before diving into the world of handmade bracelets, gather all necessary supplies and materials. The two methods outlined below provide a solid foundation for creating unique and personalized accessories. The first method involves working with three strands of cord, each measuring 45 inches in length. To begin, fold each cord in half to form a loop, then gather all six loops together and secure them with a knot approximately 0.5 inches from the top.
Fasten the cords to a clipboard, followed by sorting the strands so that those on the left mirror those on the right. Select the first strand on the left (the leading cord) and use it to form a loop over the second strand. Hold the loop in place with your forefinger and bring the leading cord under the second strand before threading it through the loop. Pull the knot up and secure it below the loop, then repeat this process four more times across the row.
To create subsequent rows, you can loop the leading cord around the strands twice. To measure the length of the bracelet, simply wrap it around your wrist. Once satisfied with the length, pull all six strands together to form a single knot and tighten it to secure the ends. You may also choose to add a button at this point by separating the strands into two sets of three each, then threading three strands through the button loop before securing the remaining three with a double knot.
The second method involves working with four strands of cord, each measuring 60 inches in length. Follow the same steps as before: fold each cord in half to form a loop, gather all eight loops together and secure them with a knot, then fasten the cords to a clipboard and sort them so that those on the left mirror those on the right. Begin by selecting the first strand on the left (the leading cord) and using it to create three knots down to the middle.
Next, choose the first strand on the right and use it to form a reverse 4-shaped loop before knotting the cords from the right down to the middle. You will find that both leading cords are now in the middle, leaving you with only one step left to complete the first row: connecting them by using the right cord as the leading cord and making a knot. As with the three-strand method, you can create consecutive rows of the same color by looping and knotting the leading cord twice.
Once satisfied with the length of the bracelet, fasten it off with a single knot. Feel free to add buttons or charms to accessorize your unique creation.