

Zipper pouches are one of those DIY projects that’s hard to overdo – the more, the merrier! These versatile creations are perfect for storing small items, making thoughtful gifts, or even serving as a mini travel bag. The best part? They’re incredibly easy to make from fabric, making them an accessible and fun project for adults and teens alike.
The uses for these pouches are endless – fill one with makeup essentials, another with office supplies, or use them to carry travel-sized toiletries.
You can even create a themed set, like a set of colorful pouches for storing art supplies. The possibilities are truly limitless.
To get started, simply gather the necessary materials and let your creativity shine. With just a few simple steps, you’ll have a stash of adorable zipper pouches that will make all your friends jealous!
Supplies and Tools You’ll Need
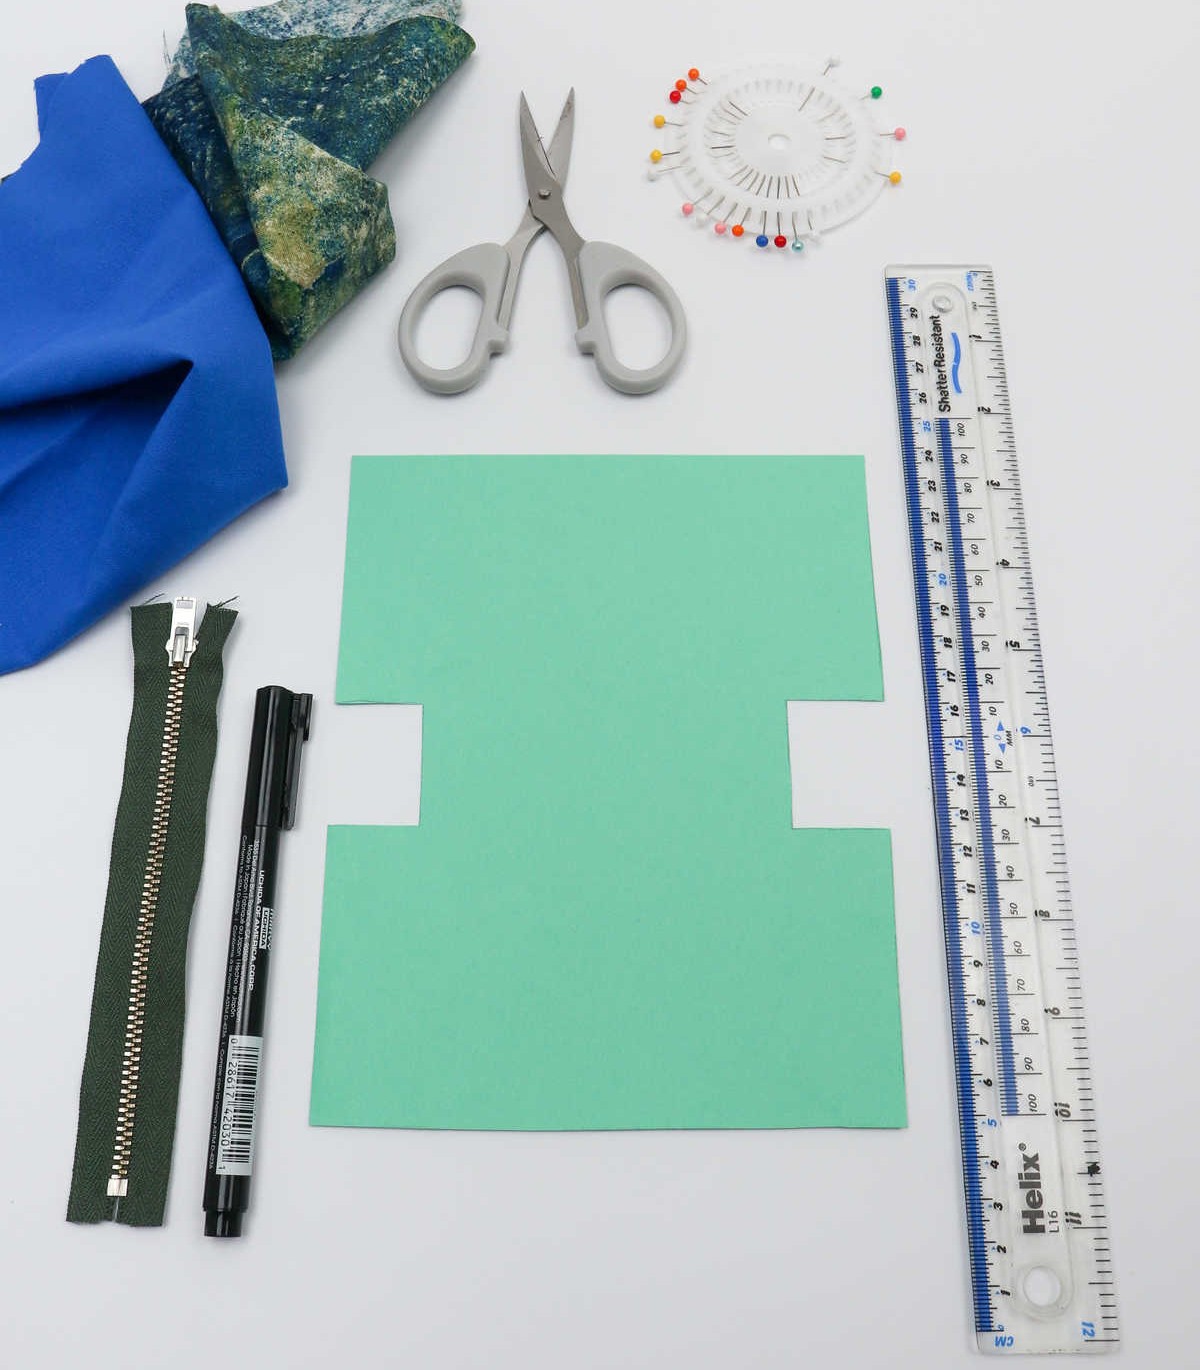
To create your project, gather the following essential materials:
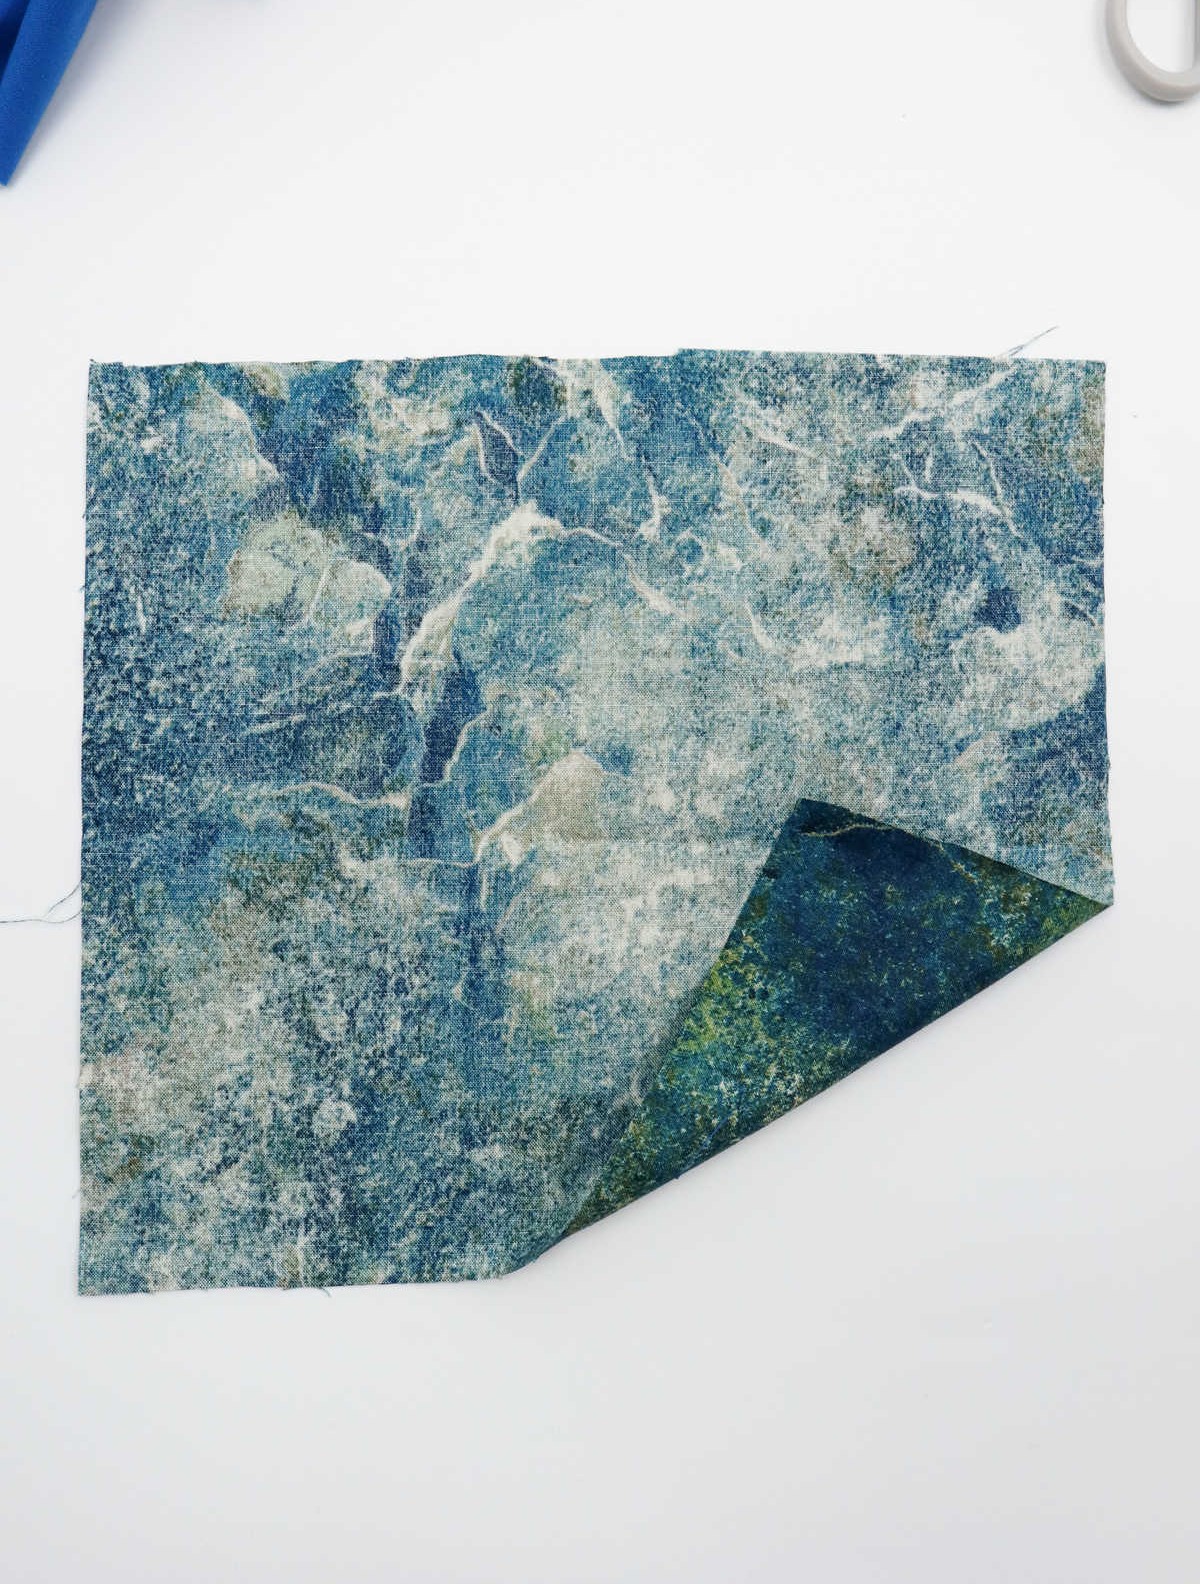
* Two pieces of cotton fabric, each measuring 10 inches by 10 inches
* A zipper that is 6 inches long
* The paper pattern provided in Step 1
* Scissors
* Ruler
* Marker
* Sewing pins
Make sure to have all these items within reach as you begin your project.
How to Sew a Zipper Pouch
When crafting a custom zipper from start to finish, it’s essential to properly prepare your sewing machine. While using a needle and thread is an option, it’s crucial to ensure that your stitches are secure, particularly when attaching the zipper, to prevent any unwanted detaching or distortion.
Step 1
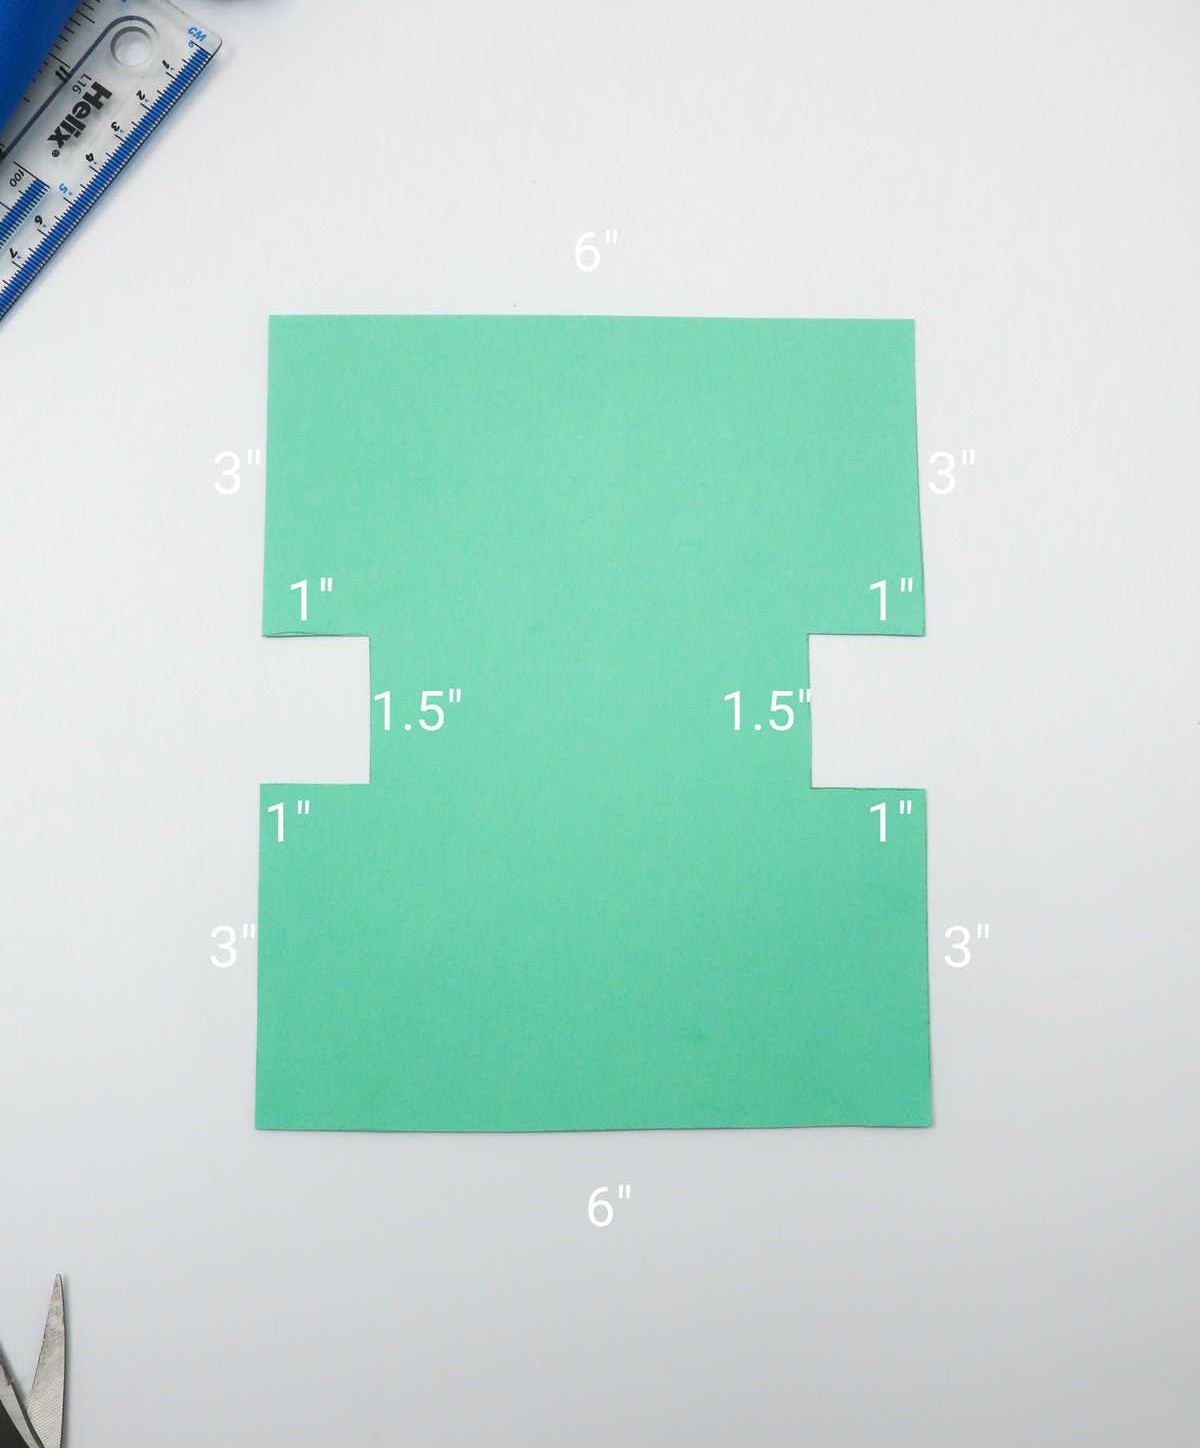
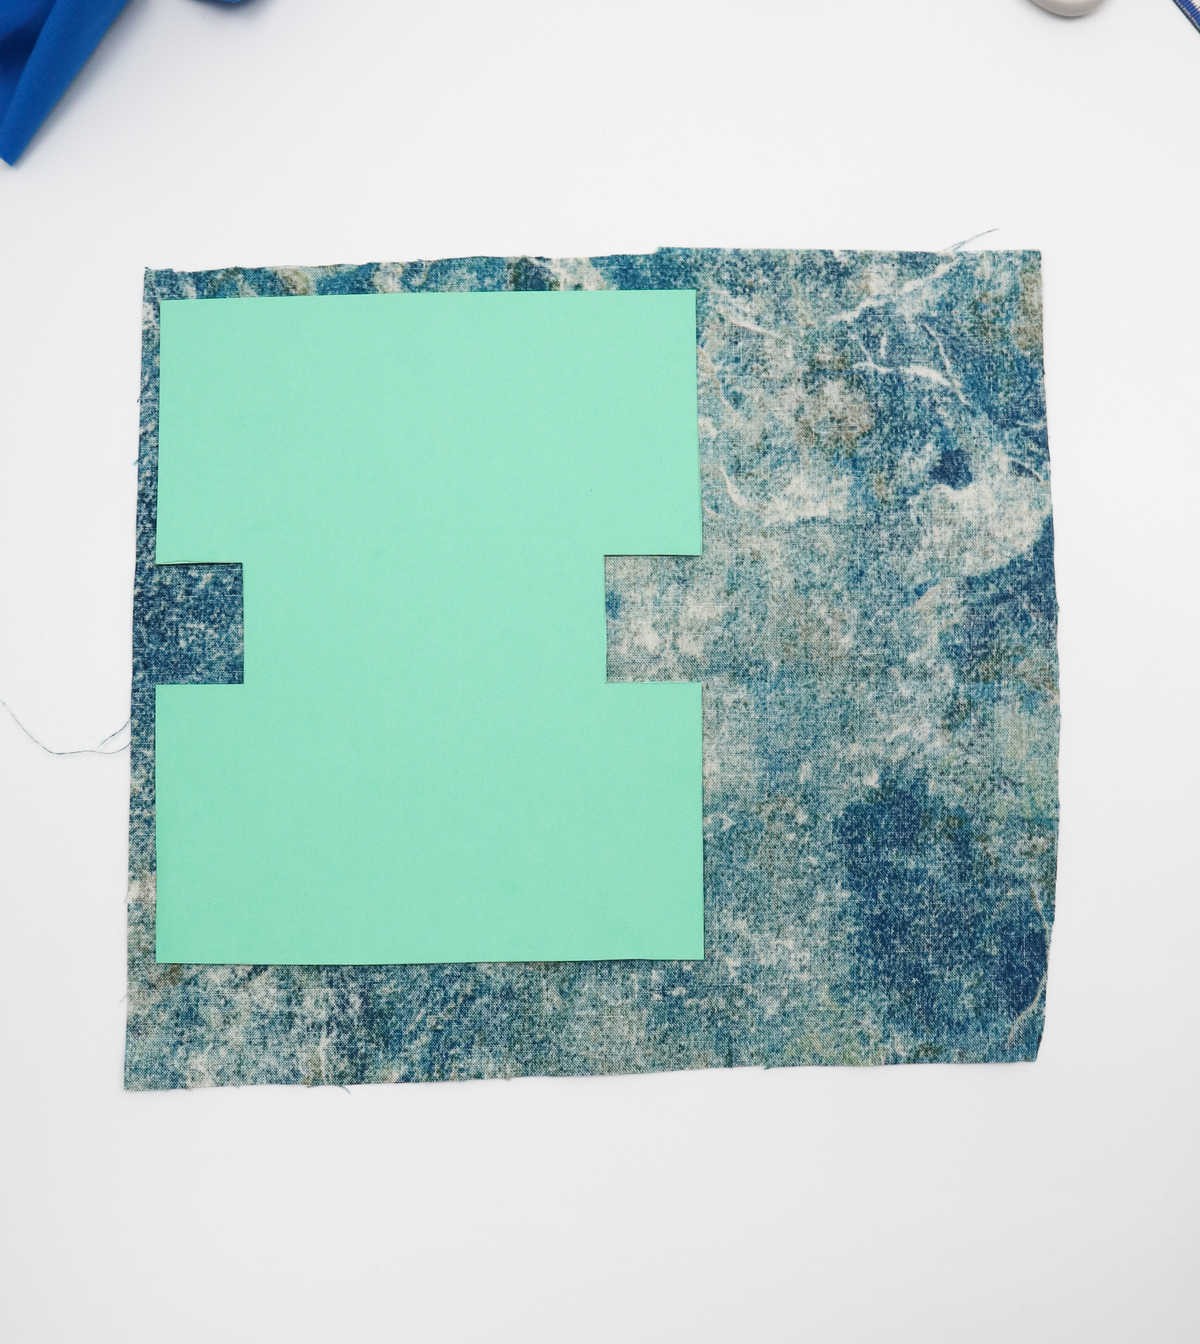
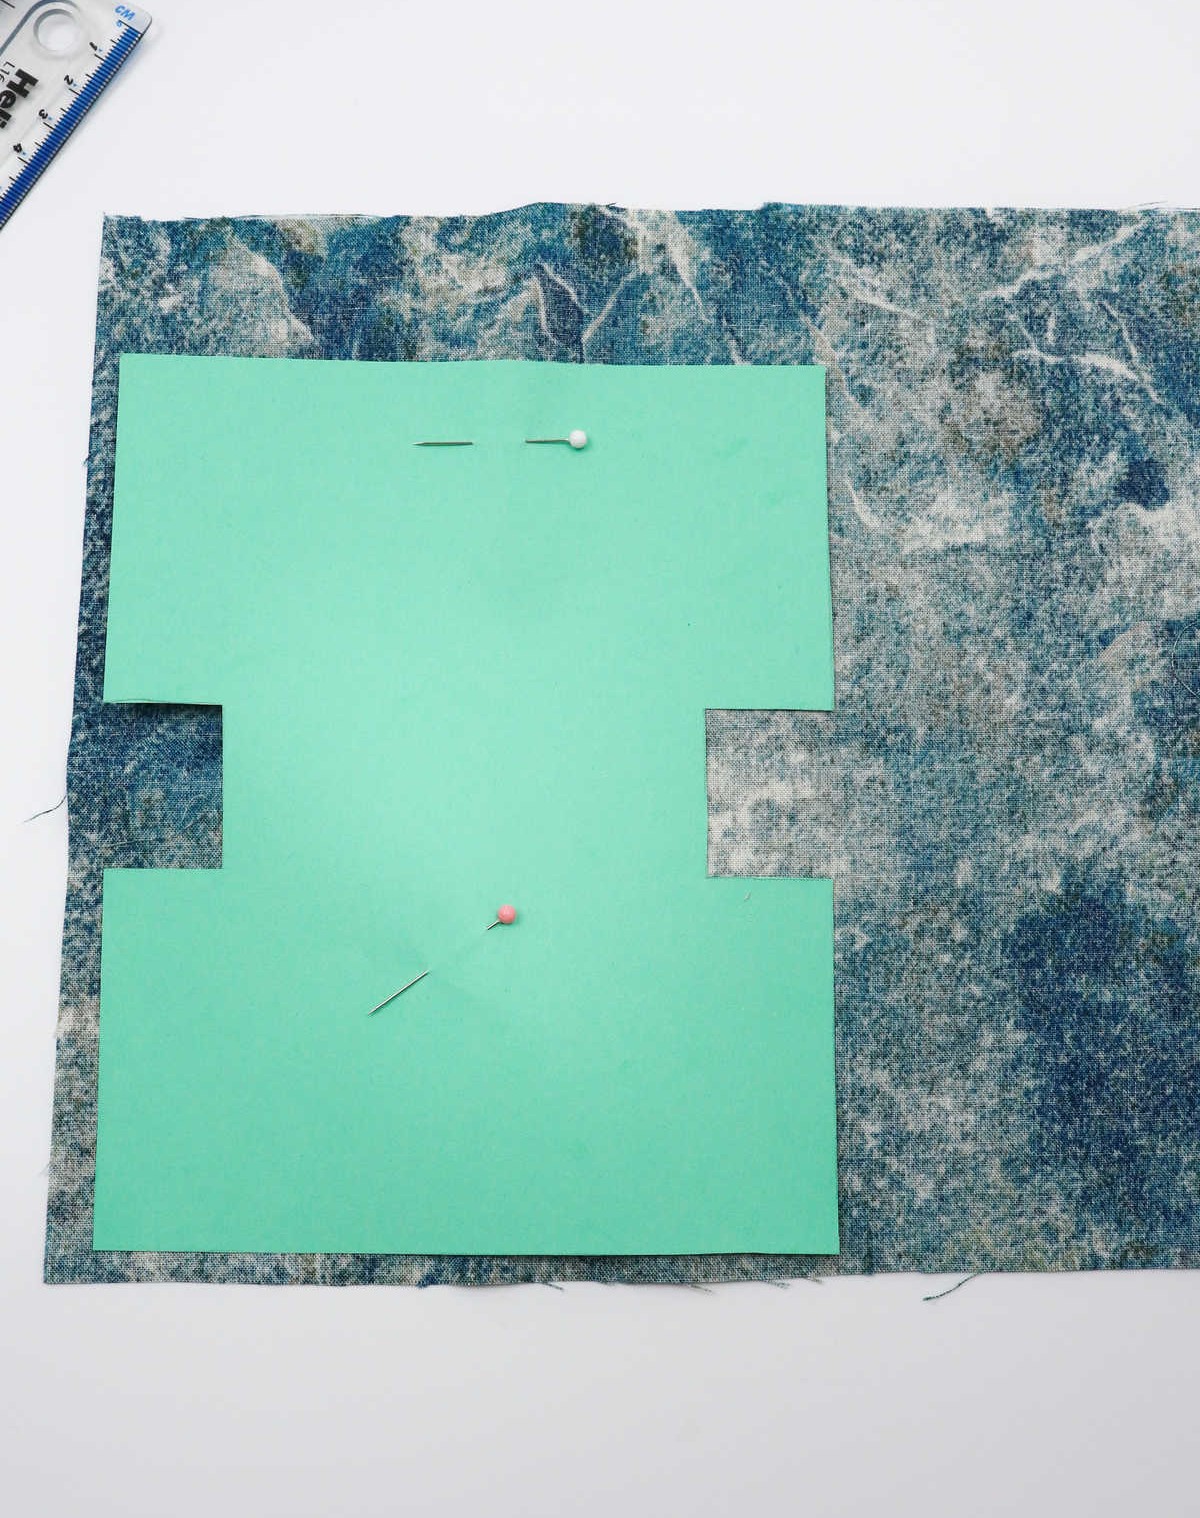
When tackling sewing projects, precision is key, especially when it comes to cutting fabric. To ensure accurate cuts and save time, I recommend using a paper pattern specifically designed for this purpose.
Begin by laying your fabric flat on your workspace with the wrong side facing up. Next, place the paper pattern over the fabric, aligning it carefully before securing it in place with a few well-placed sewing pins.
This simple yet effective technique will help you achieve professional-looking results and reduce the risk of errors.
Step 2
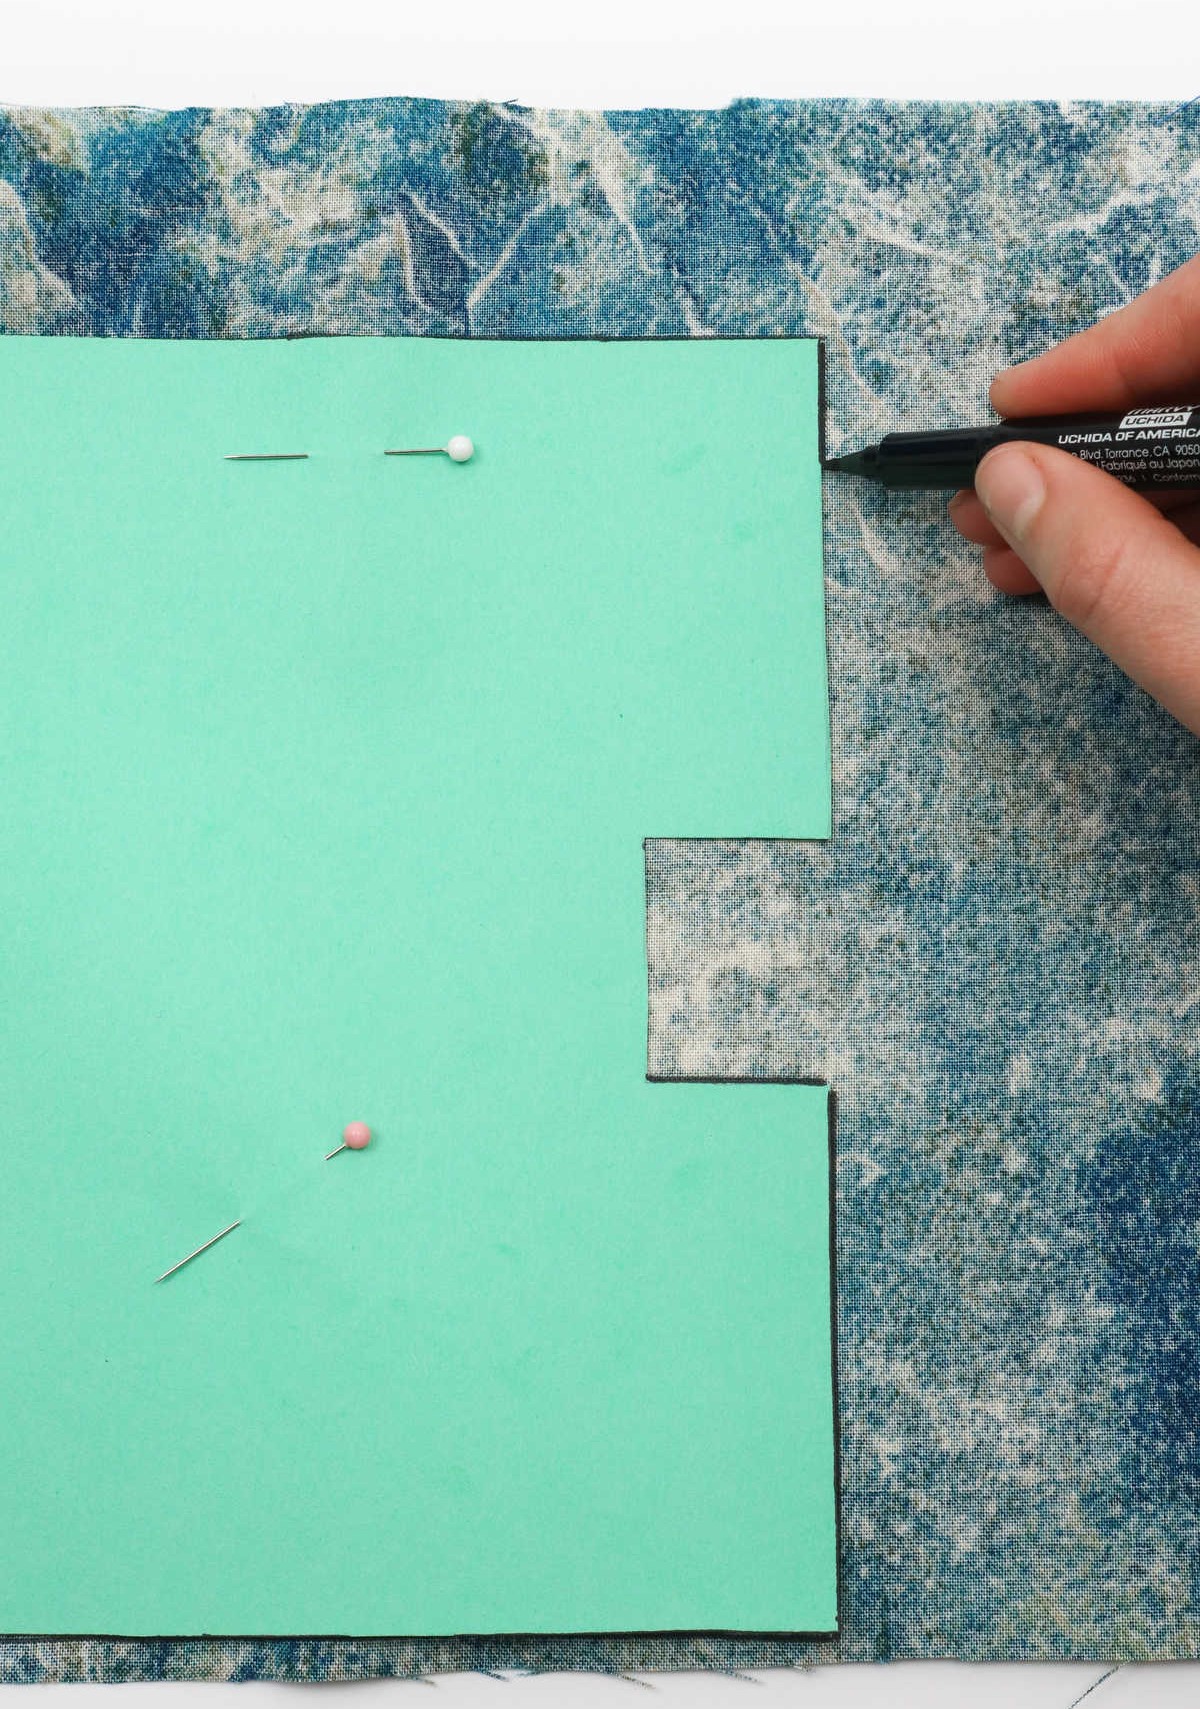

To begin, take a black marker and carefully trace the outline of the paper pattern onto the fabric. For precision, consider using a ruler to create straight lines. As you draw, make sure to pay attention to getting the edges just right.
Once you’ve completed the tracing, lift the paper pattern up to double-check that your edges are accurately marked.
Step 3
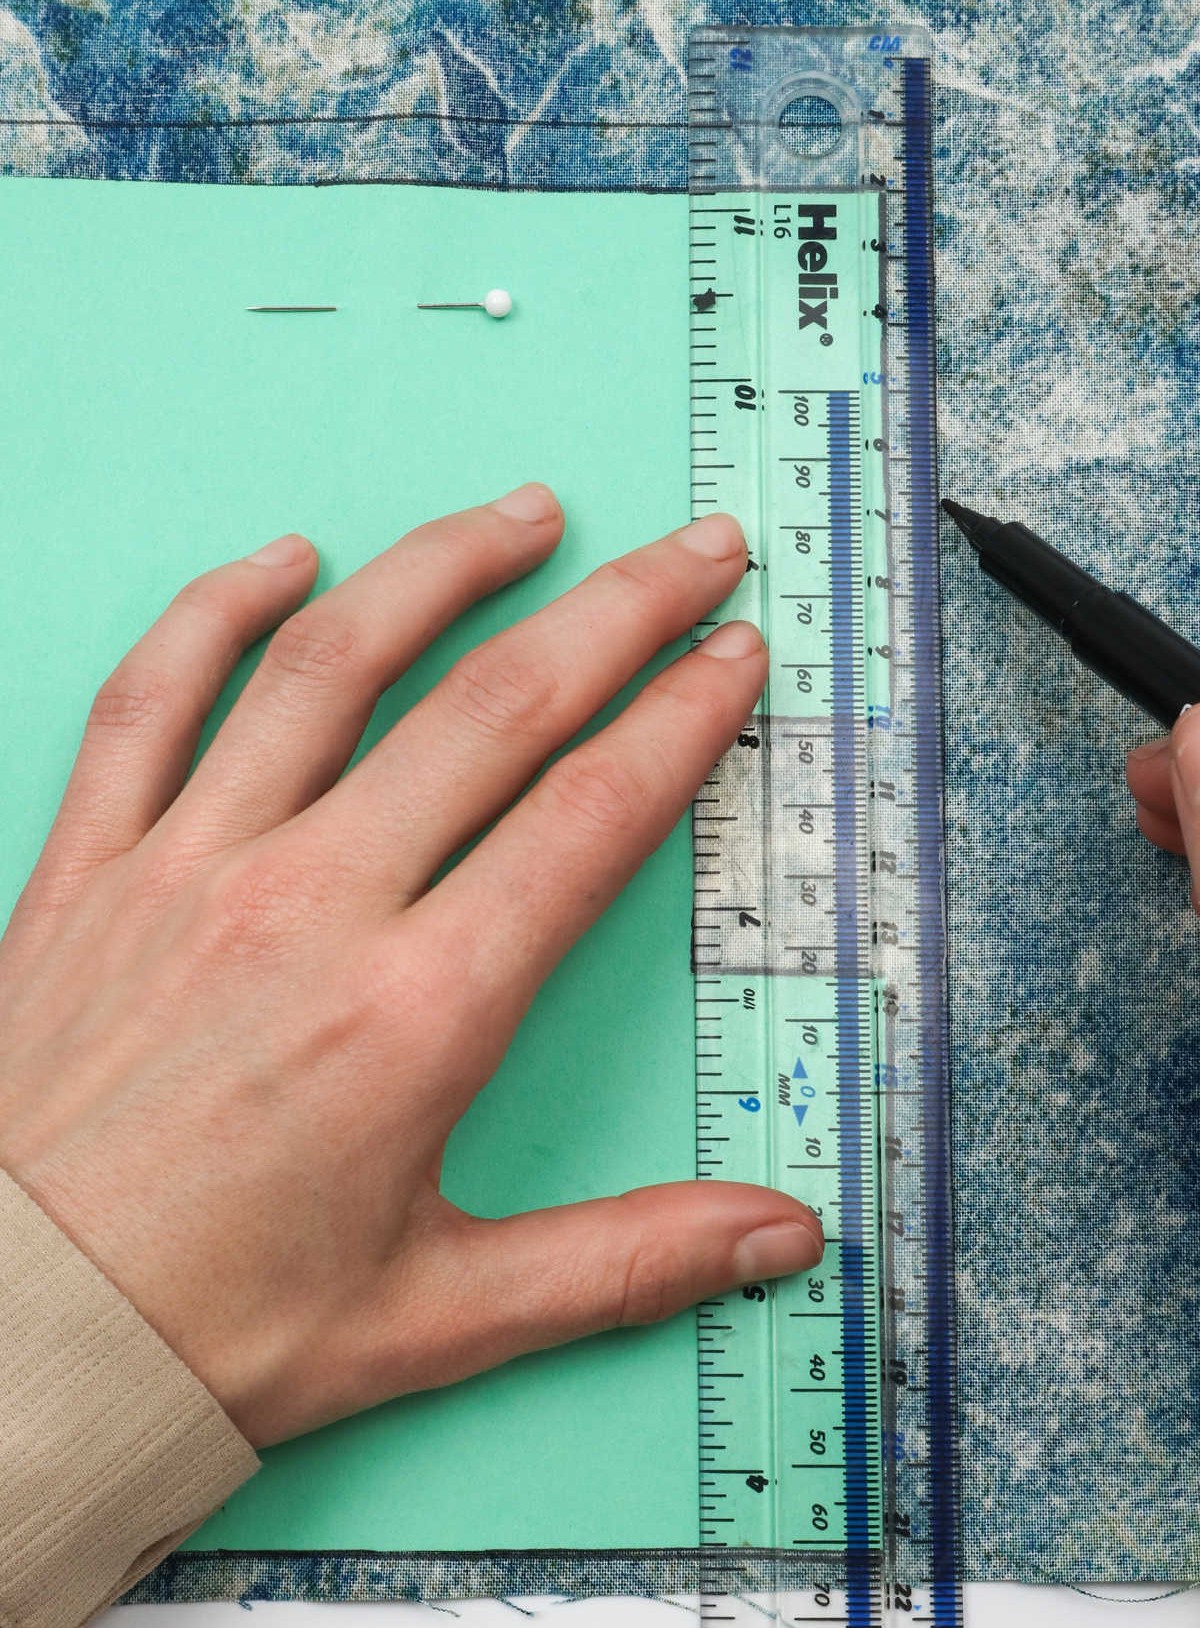
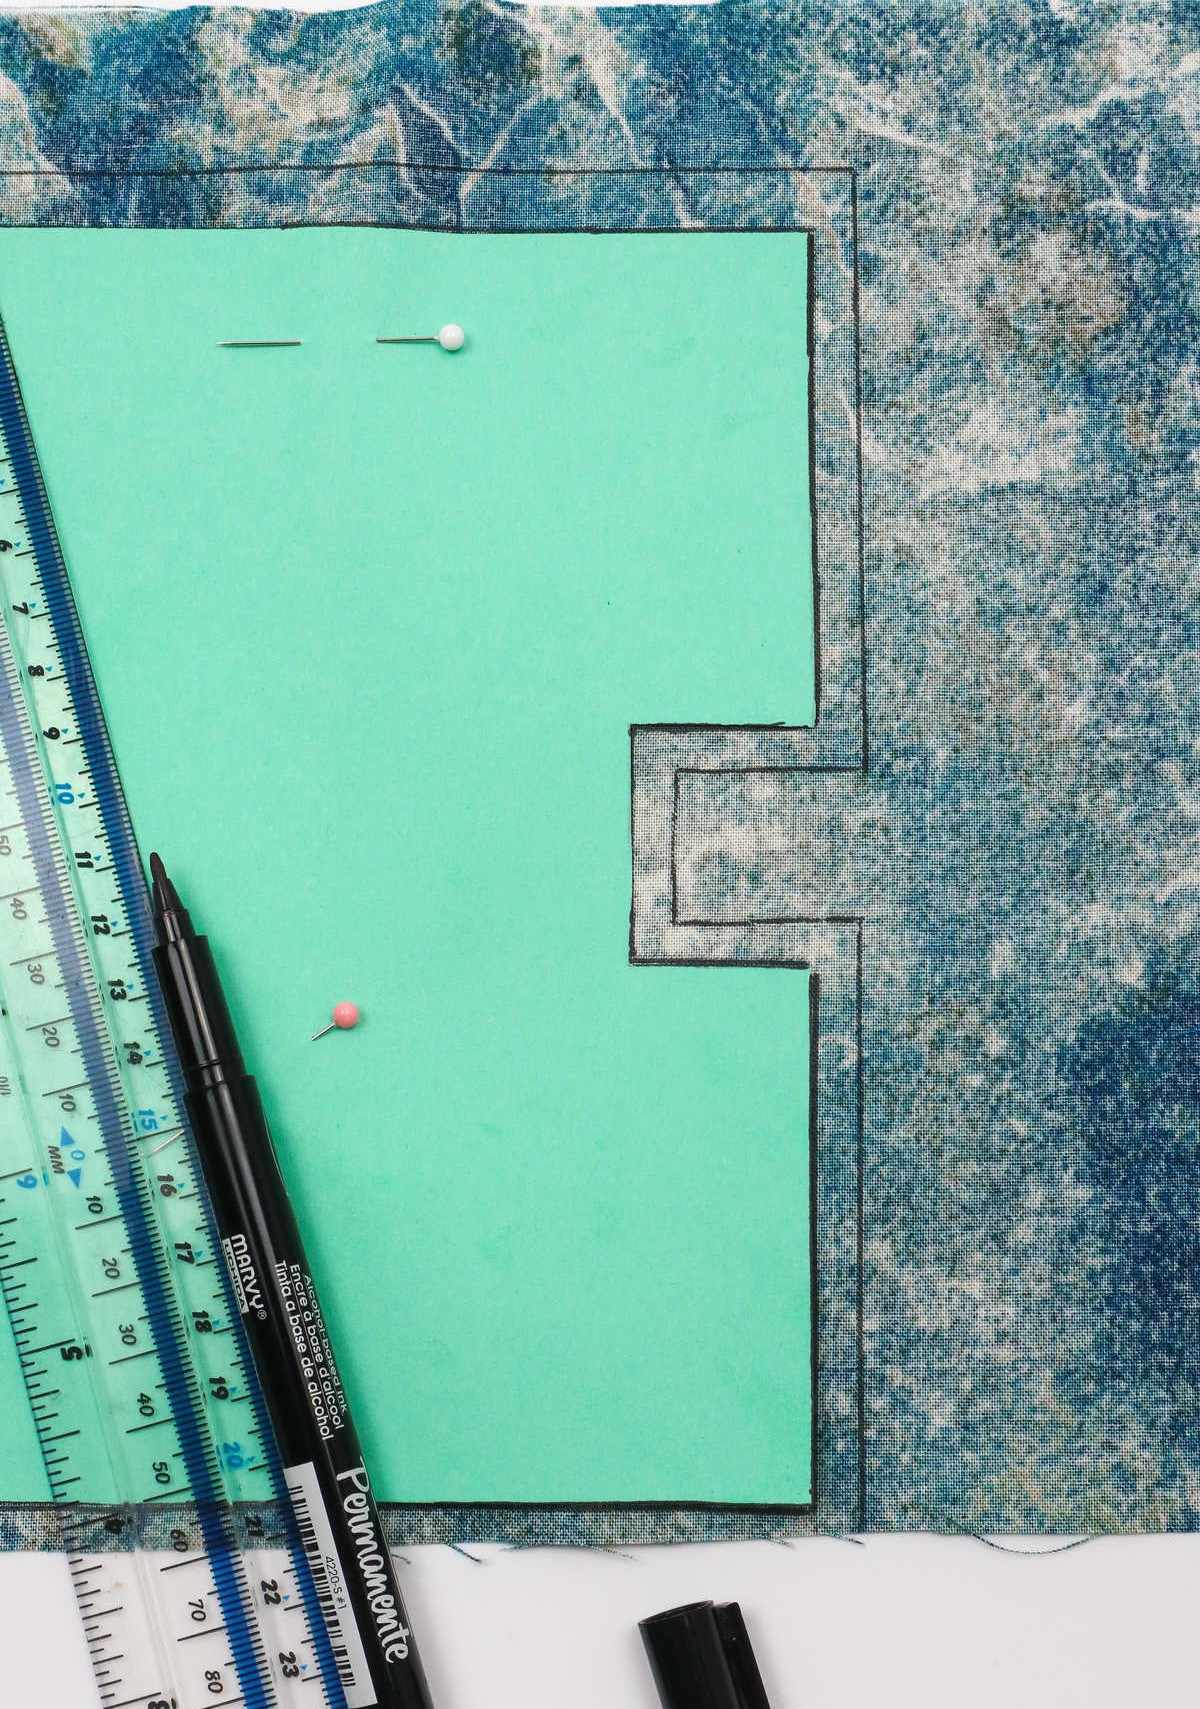
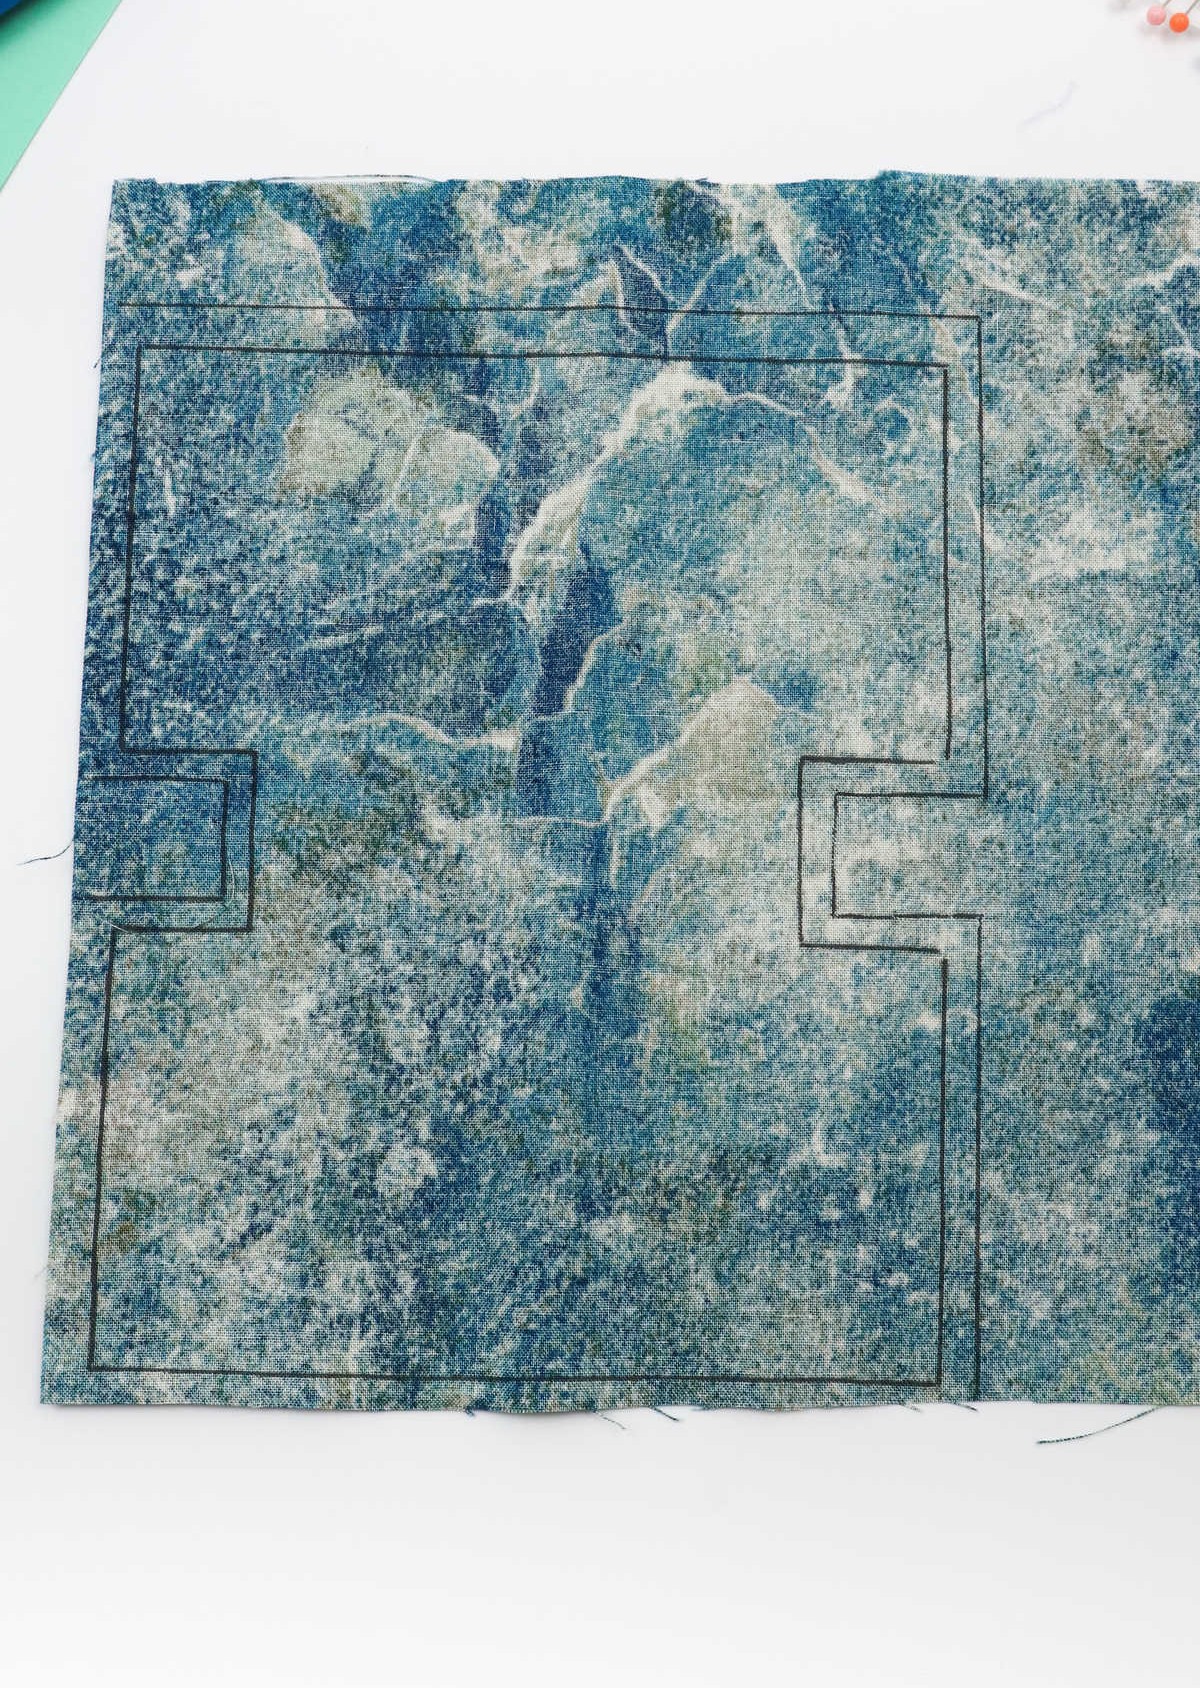
To complete this step, create a new outline that follows the same shape as your initial pattern, but draw it a quarter of an inch away from the original edge. This deliberate gap is known as your seam allowance, which plays a crucial role in joining your fabric seamlessly and concealing any raw edges. Once you’ve completed the edging, carefully remove any pins or clips holding it in place and set the outline aside.
Your marked fabric should now resemble a series of connected curves, with the faint outline serving as a guide for future construction.
Step 4
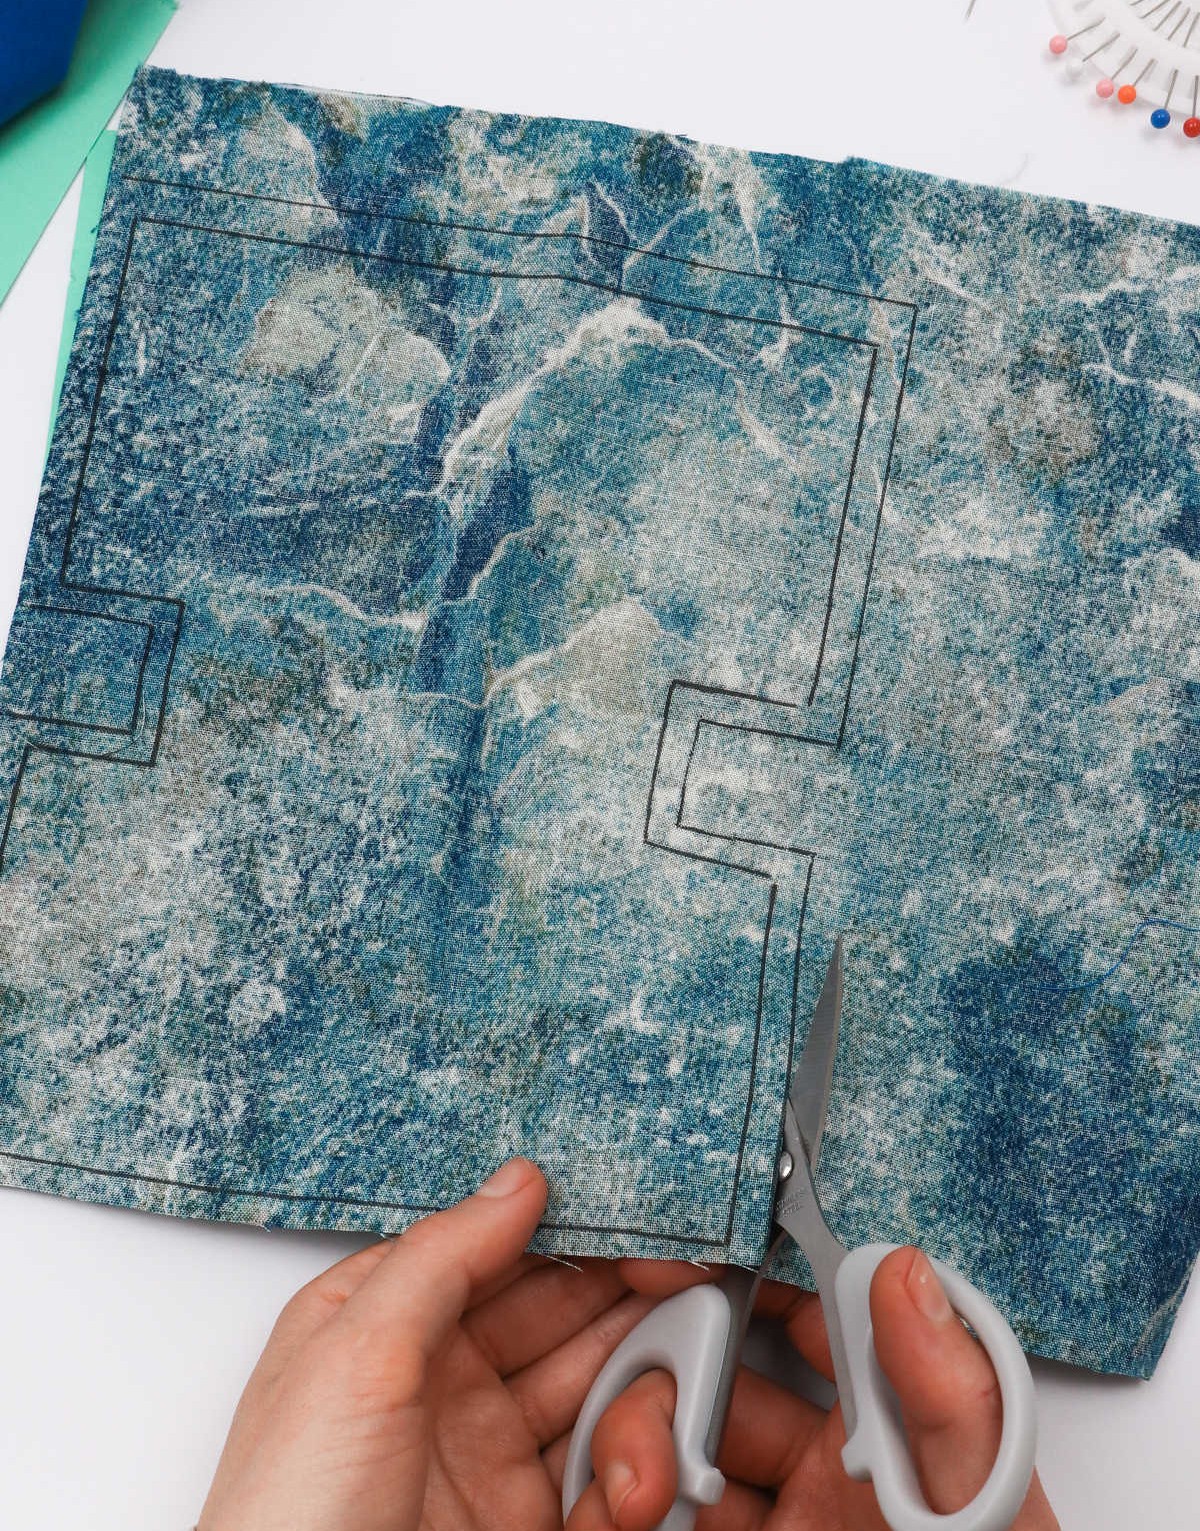
To achieve precise cuts and avoid fraying, it’s essential to use a suitable tool for the task. For this process, cloth scissors are ideal as they will provide clean edges. Begin by carefully tracing the outline of the design on your fabric with the pencil or marker. Once you’re satisfied with the accuracy of the drawing, grab your pair of cloth scissors and begin cutting along the outer edge, following the lines you’ve drawn.
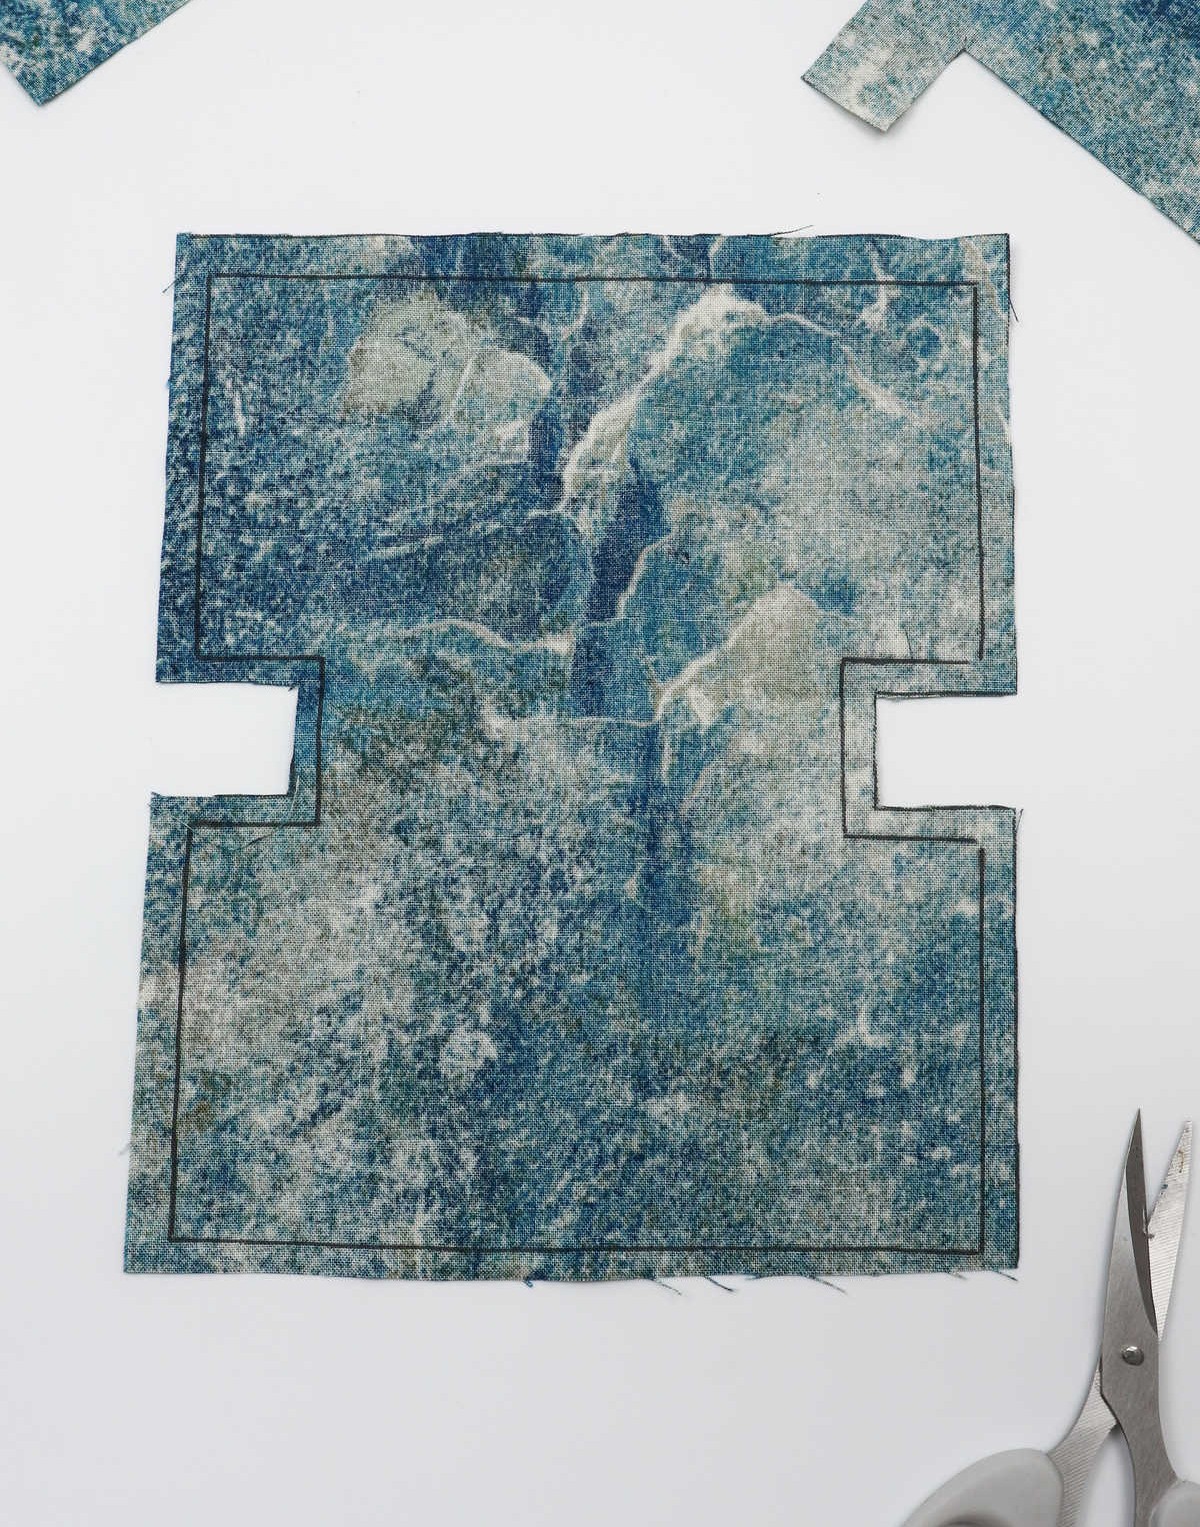
Step 5
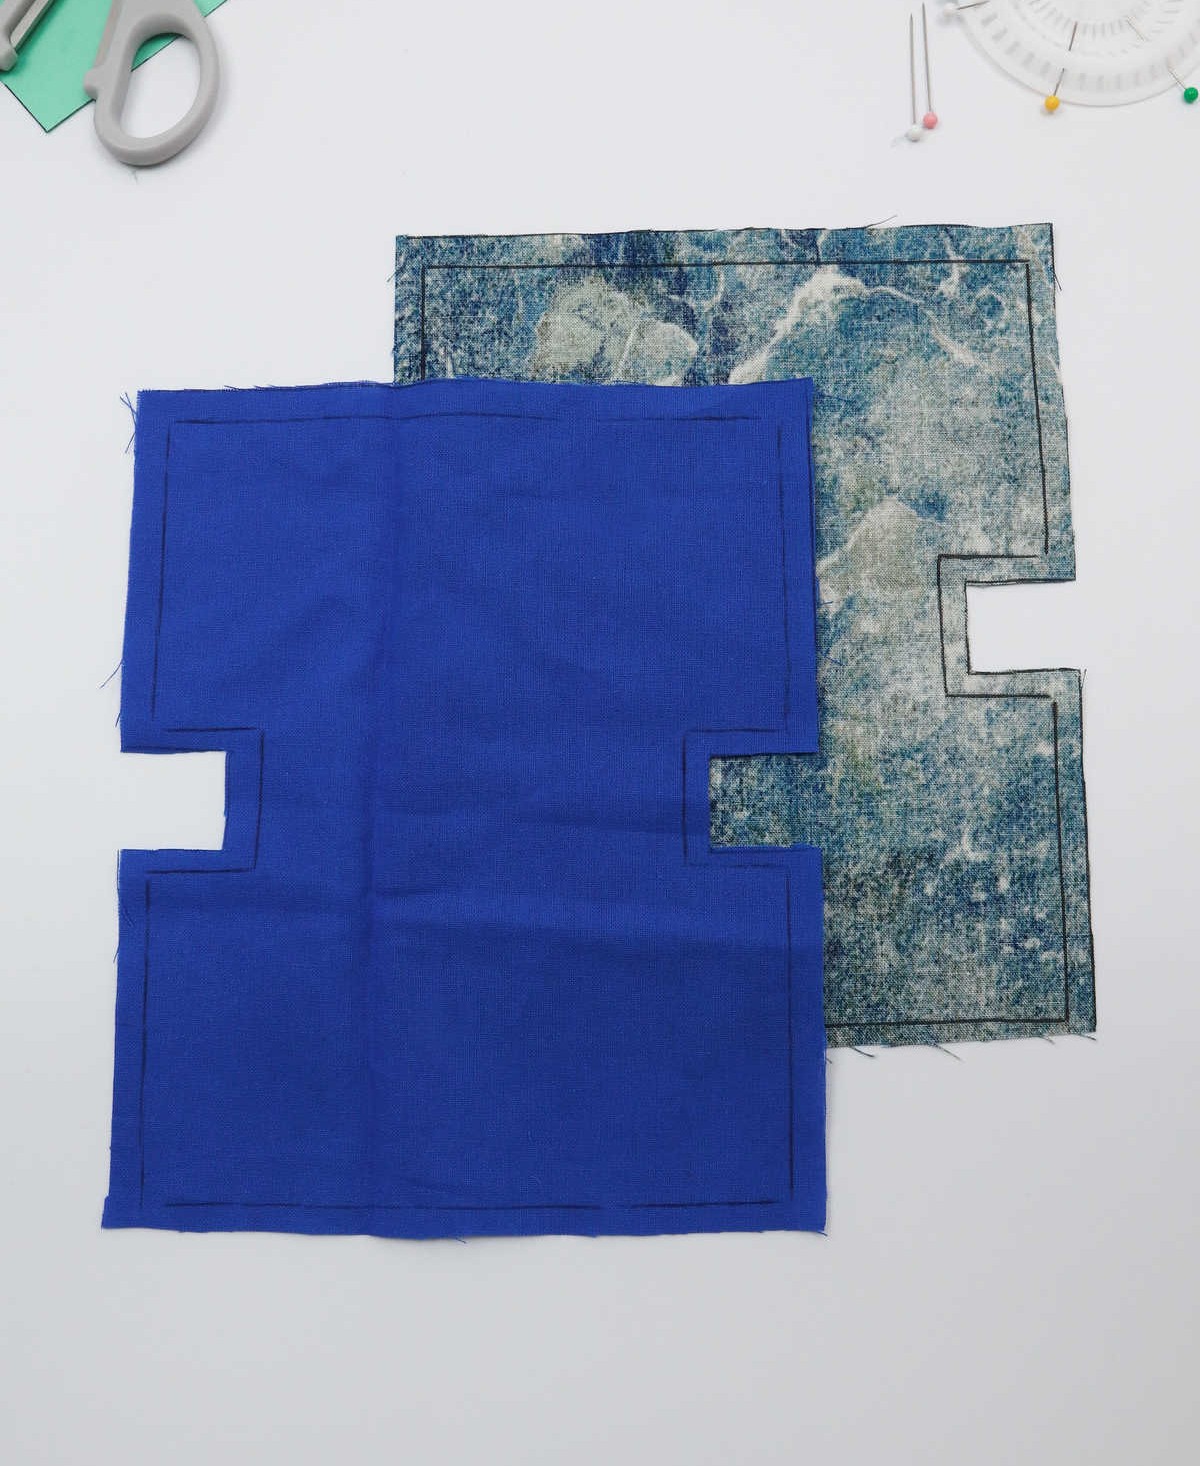
To achieve a cohesive look, it’s essential to apply the same techniques and attention to detail to each piece of fabric you’re working with. This means meticulously repeating the process from steps one to four for every swatch, ensuring that each one is treated equally well. By adopting this consistent approach, you’ll be able to create a harmonious visual flow throughout your project.
Step 6
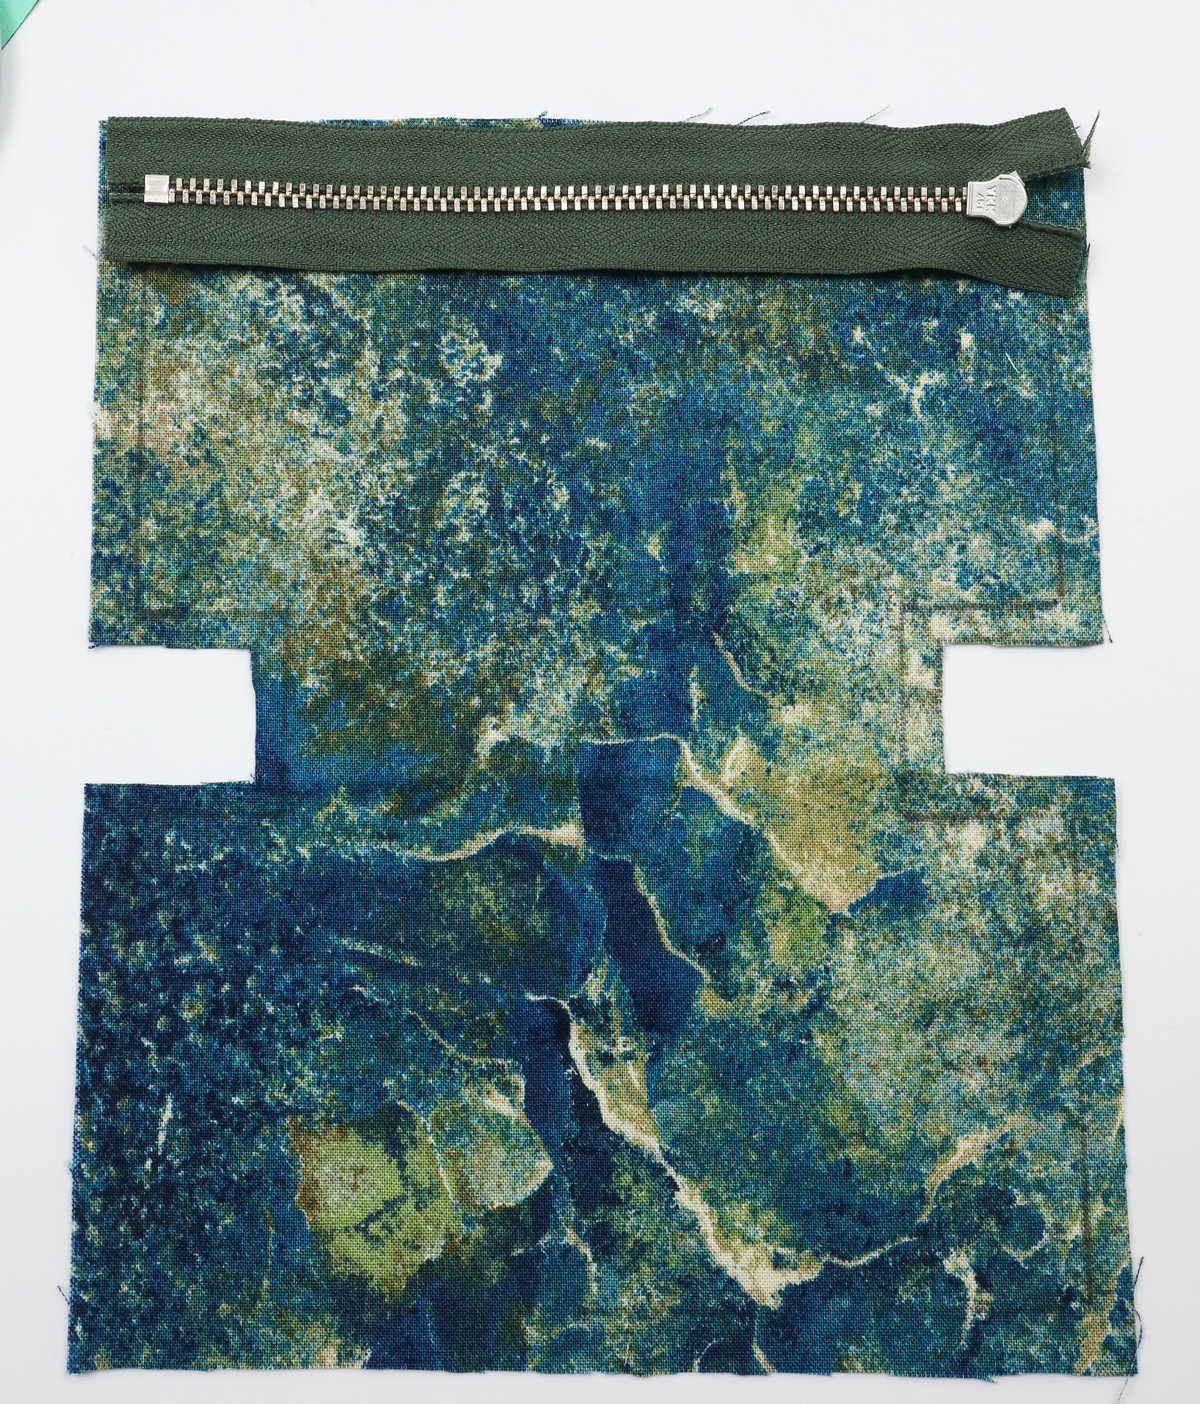

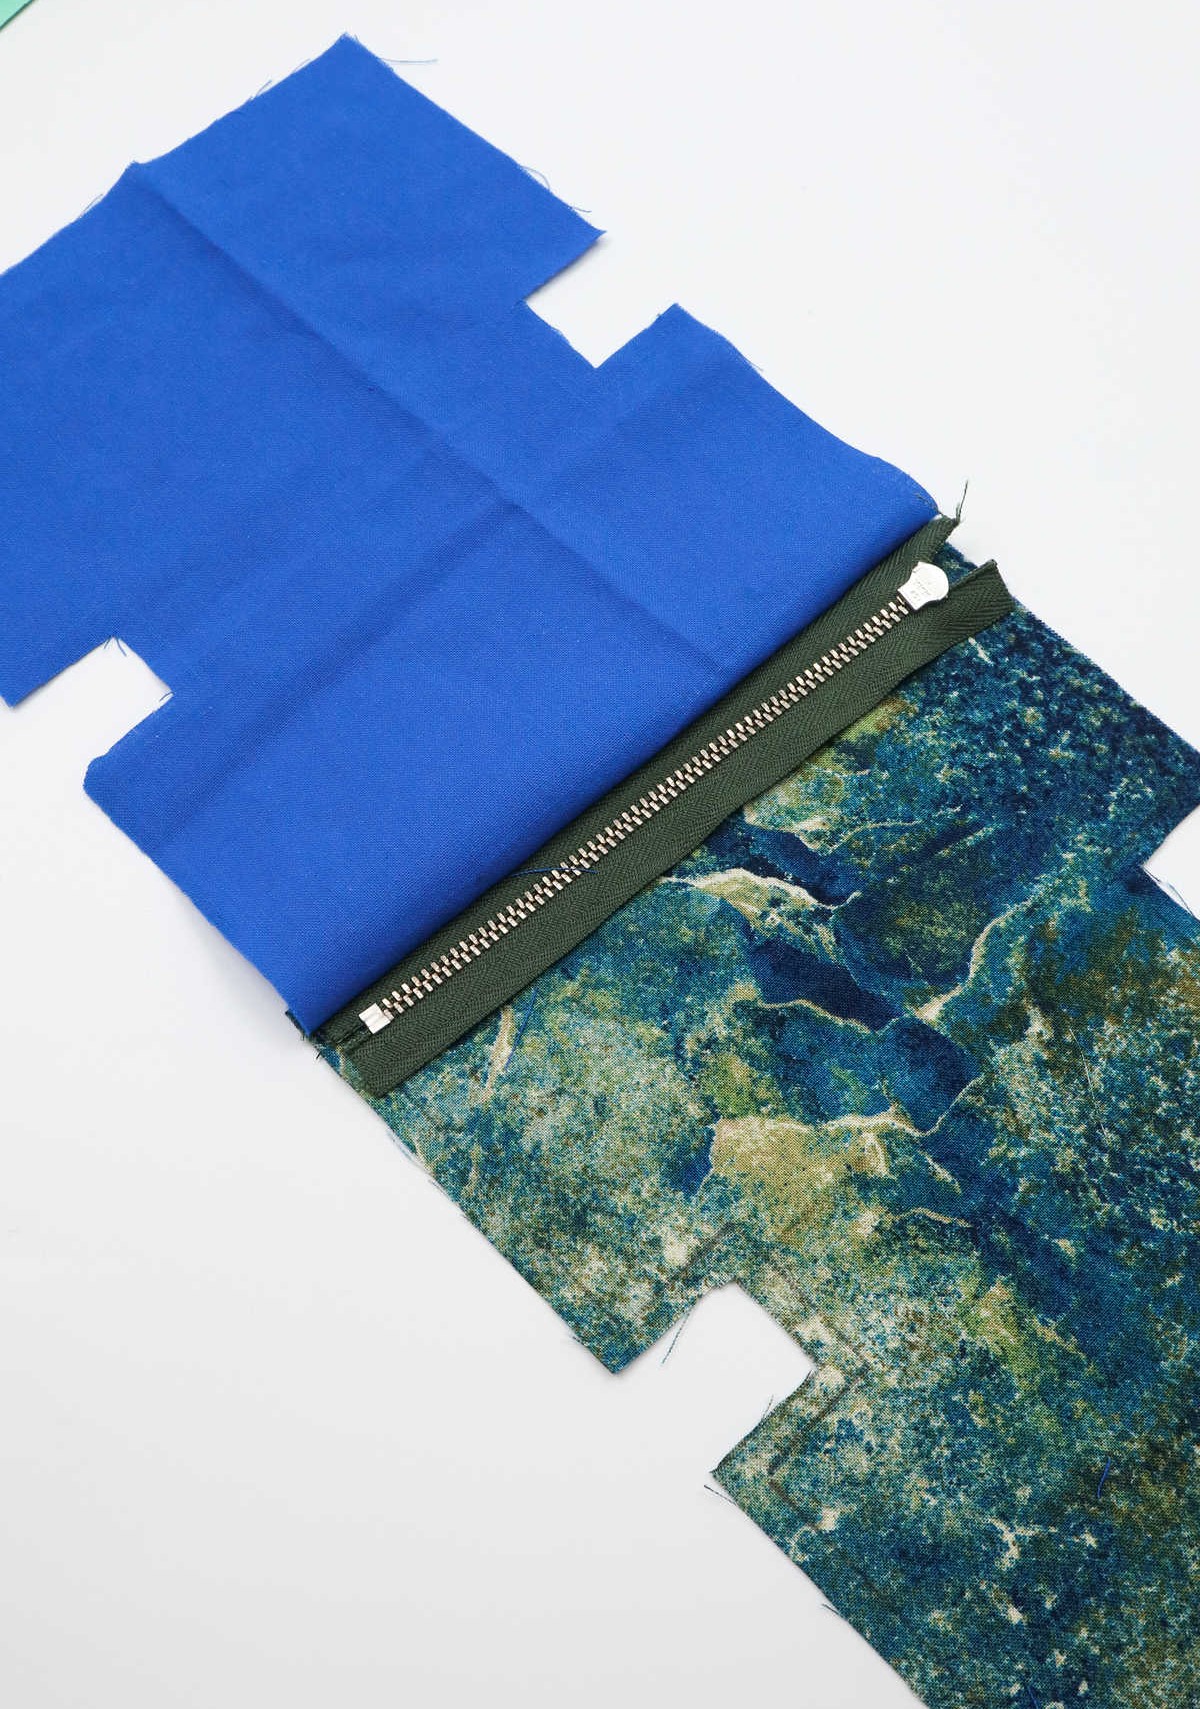
As your project takes shape, it’s time to combine its various components. Begin by laying out the outer fabric on your work surface with the right side facing up. Next, position the zipper along the top of the fabric, ensuring it’s aligned correctly and the zipper is facing downwards.
Once the zipper is in place, add the second fabric cutout, positioning it over the zipper so that the edging you outlined earlier remains visible.
This means that both fabric swatches should have their right sides facing inward towards each other.
Before moving on to the sewing process, double-check that all edges are properly aligned and smooth out any wrinkles in the fabric as needed.
Step 7
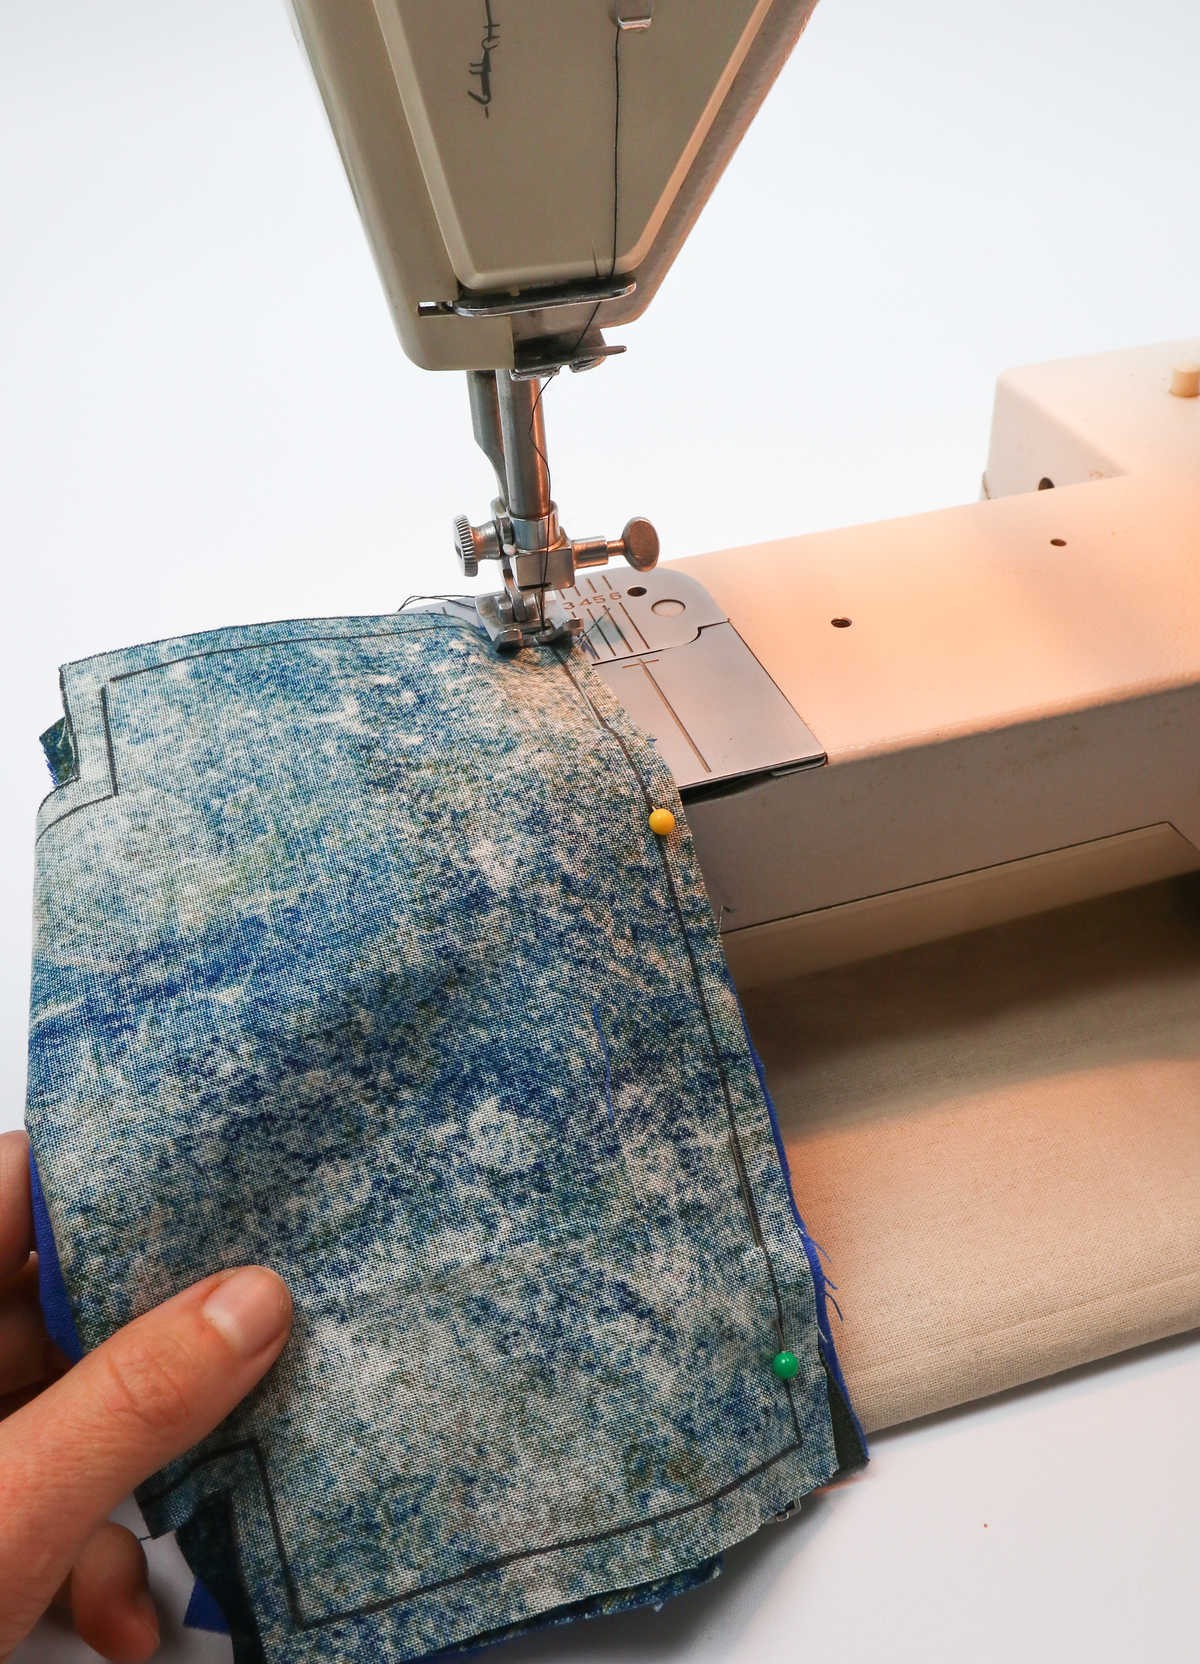
As the edges of your fabric are aligned, secure them with pins to maintain their position. Next, recall the initial inner outline you drew and use it as a guide for sewing along the teeth of the zipper. For now, focus on sewing only one side, allowing you to easily lift the opposite side into place. Once complete, lift the upper fabric over the zipper and smooth it out, laying it flat as demonstrated.
Step 8
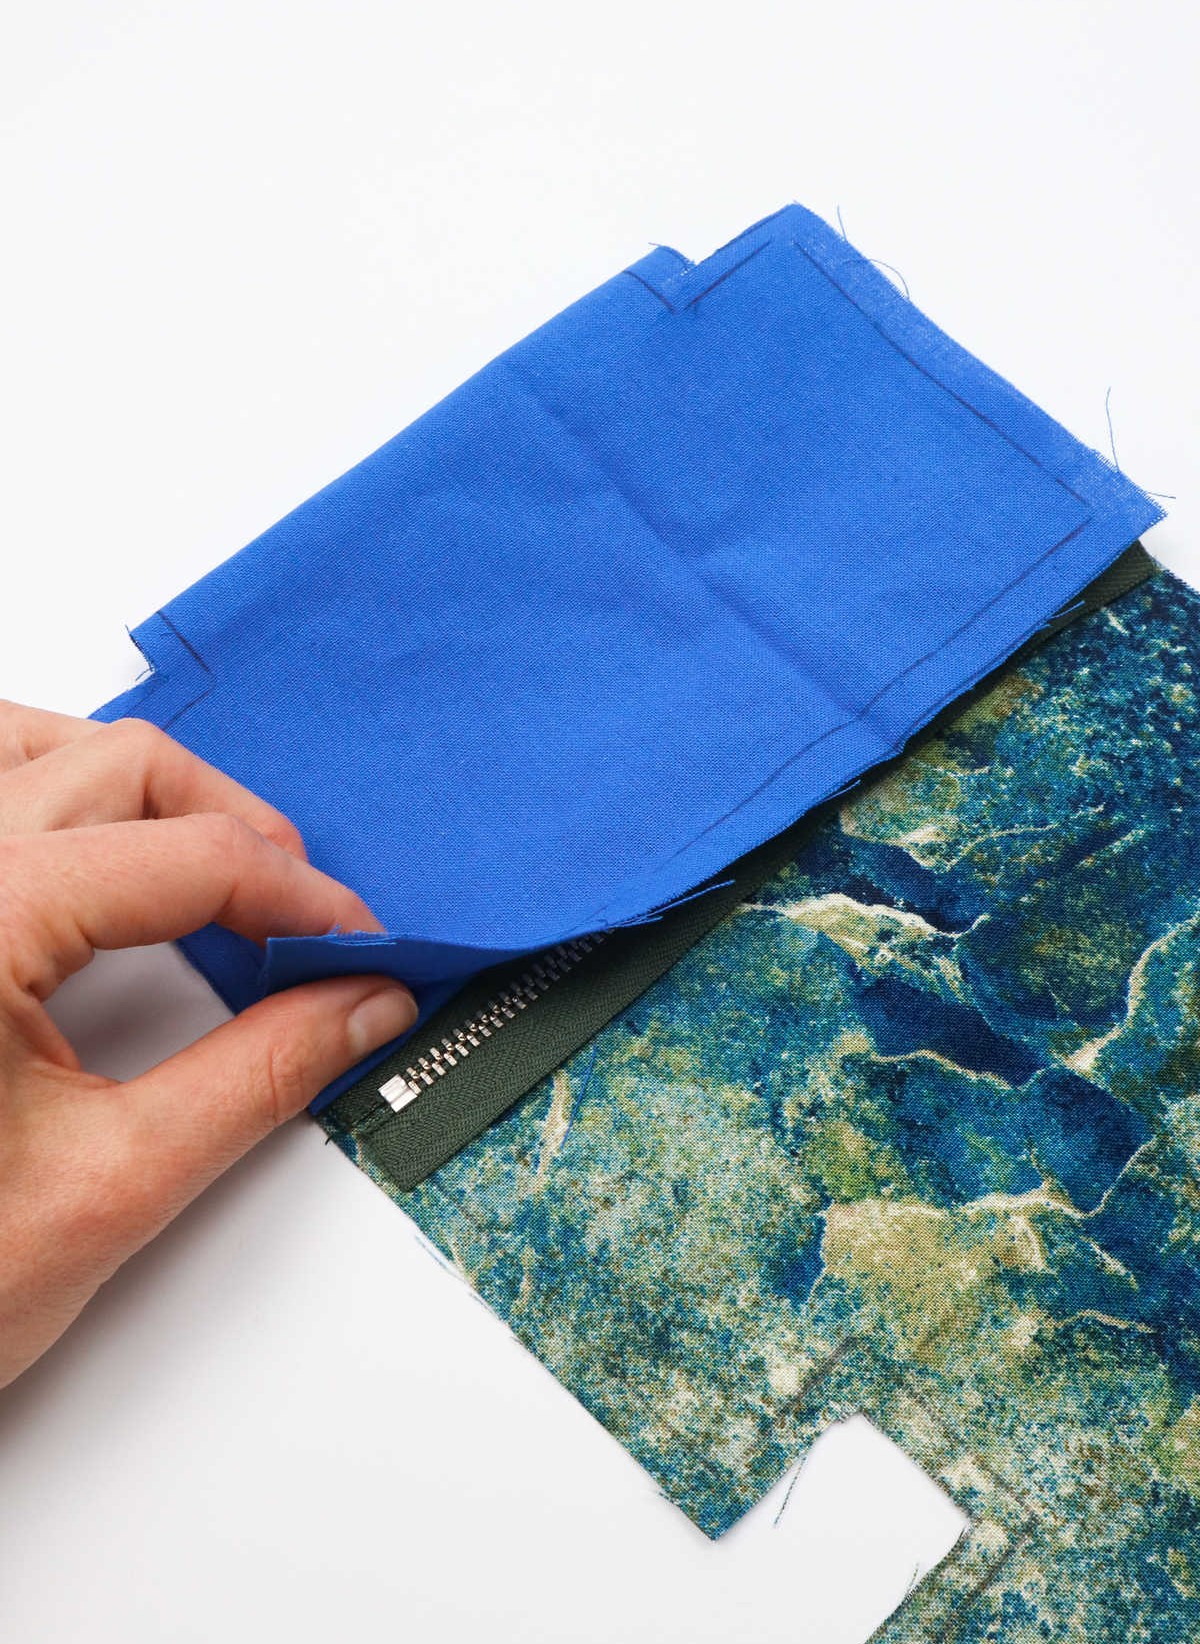

To complete the zipper insertion, start by grasping the opposite end of the fabric on one side of the zipper and draw it over. Align the edges and create a fold by bringing them together. Secure this position using a few sewing pins.
Step 9
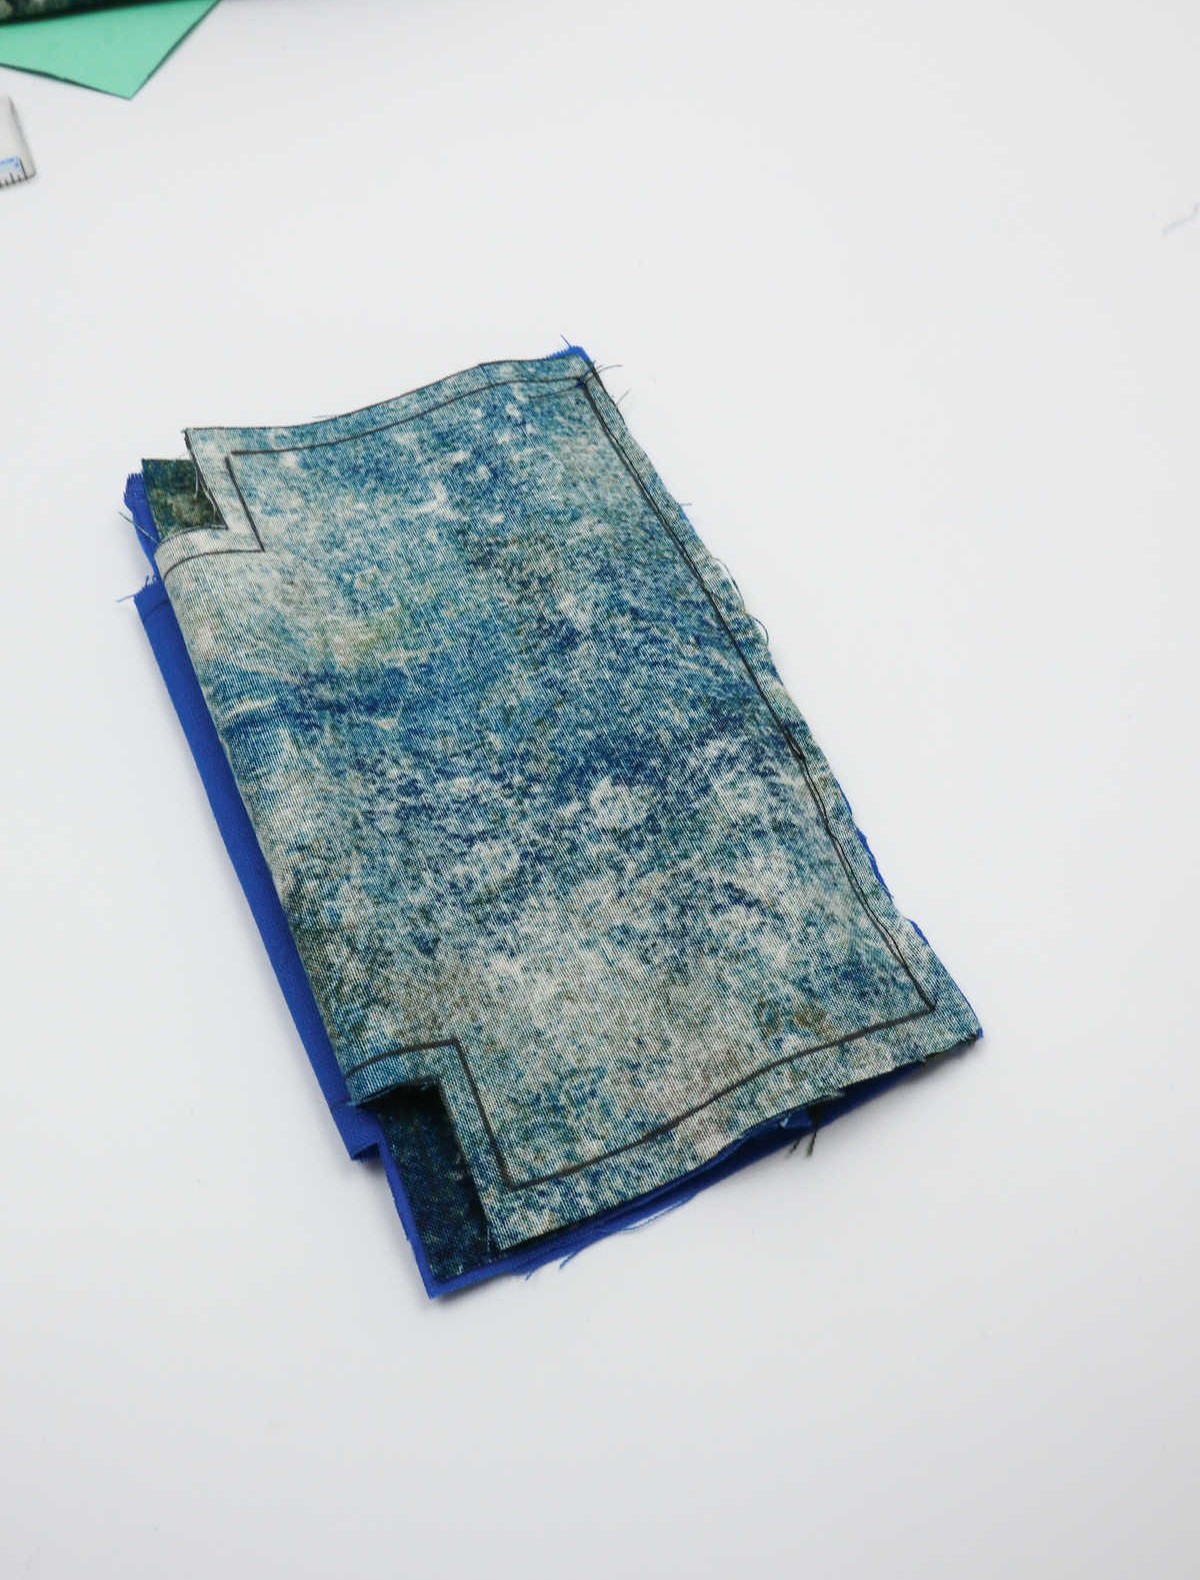
As you’ve reached this point in the sewing process, it’s time to secure the edges of your pouch by stitching them together. Start by aligning the pinned sections along the outline you previously drew and then sew through the zipper’s teeth, carefully maintaining a consistent pace to ensure a professional-looking finish. Your pouch should now be taking shape, with its edges neatly sewn and ready for further embellishments.
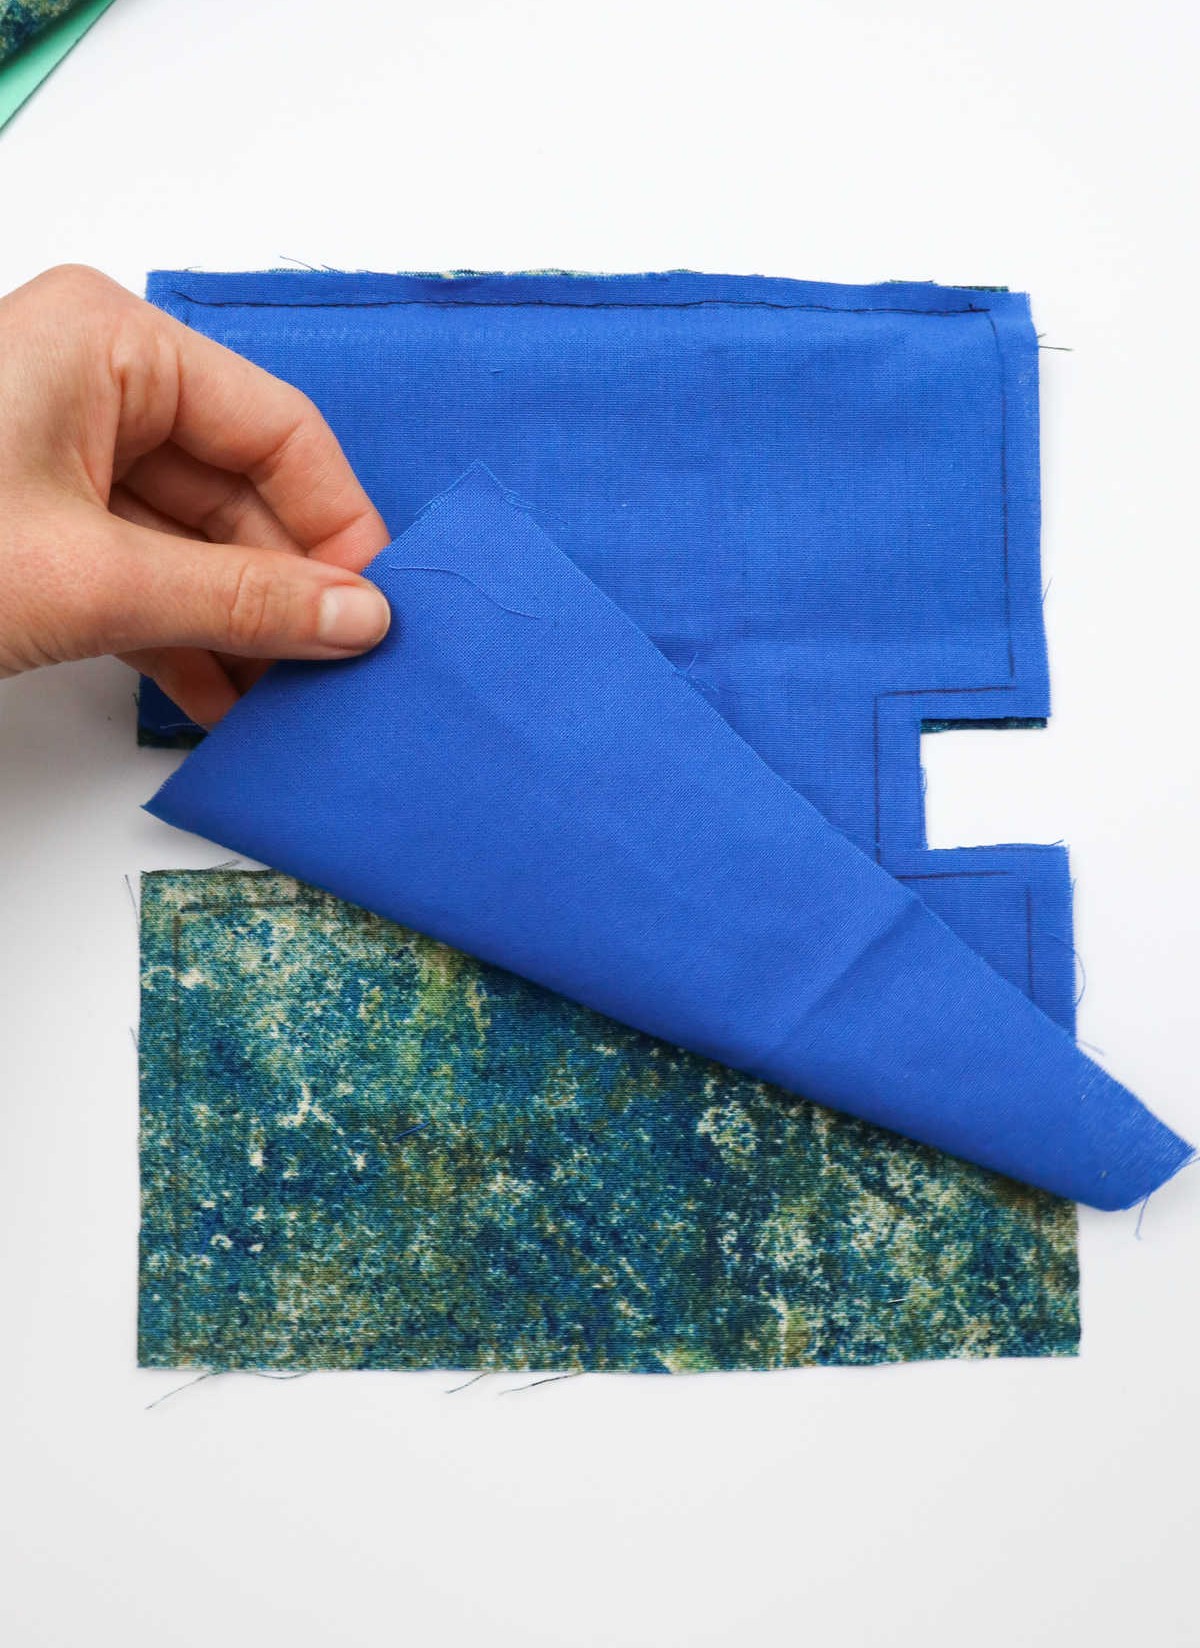
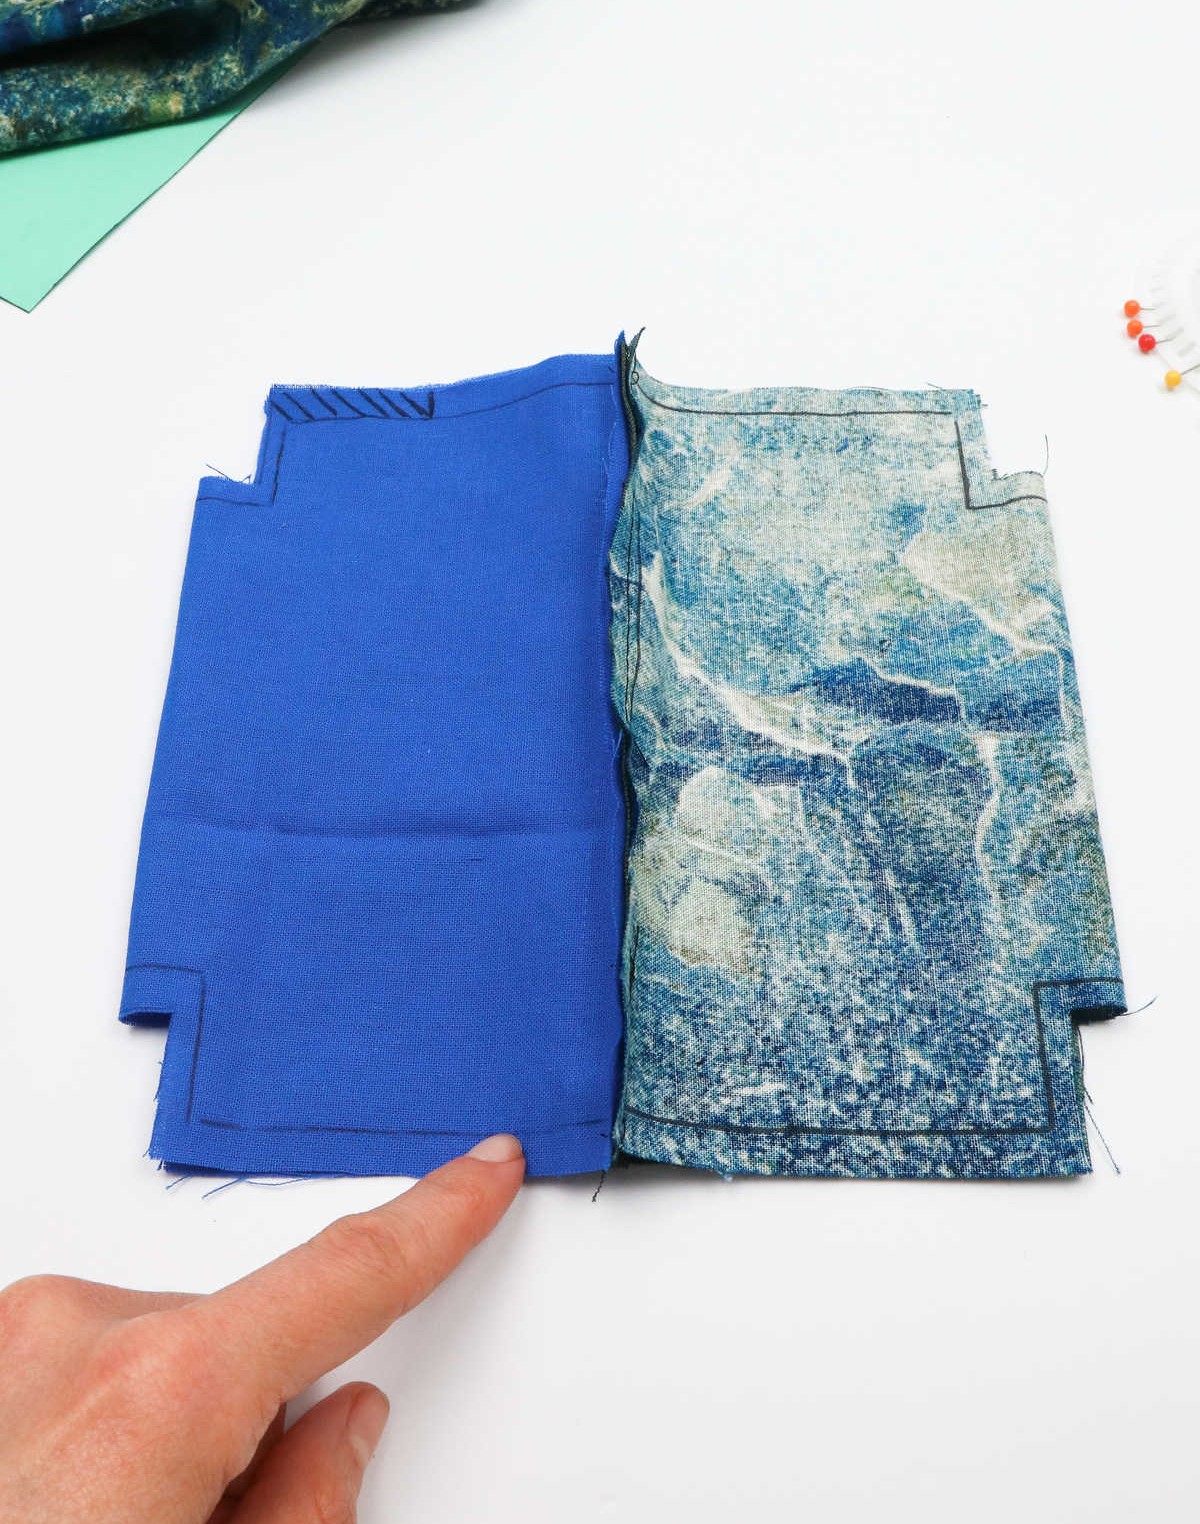
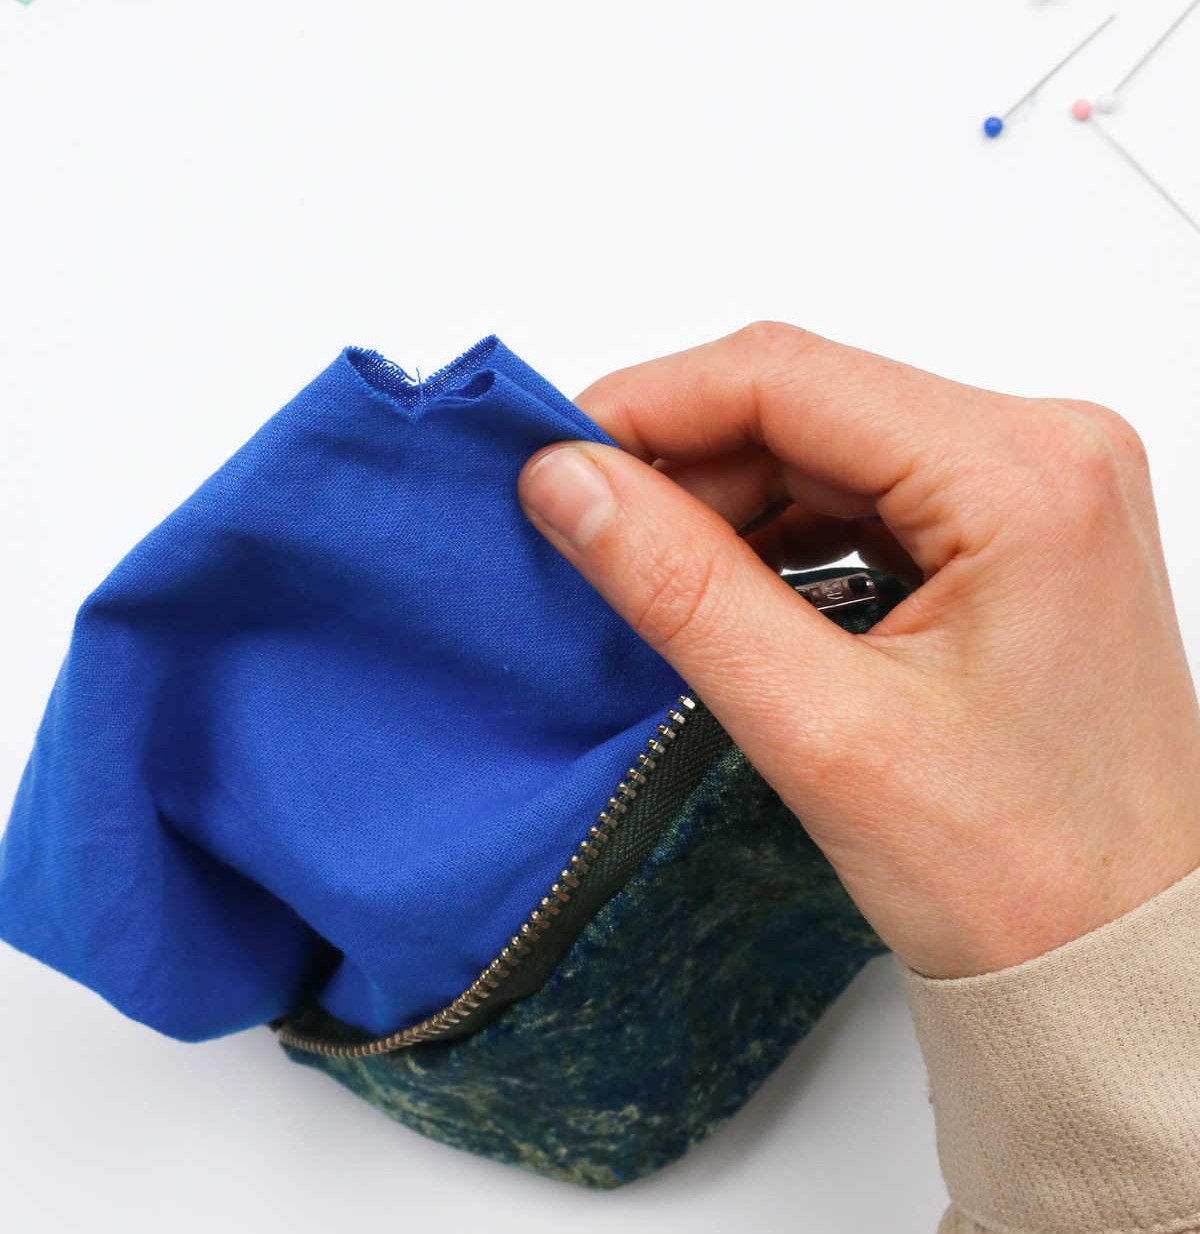
Step 10
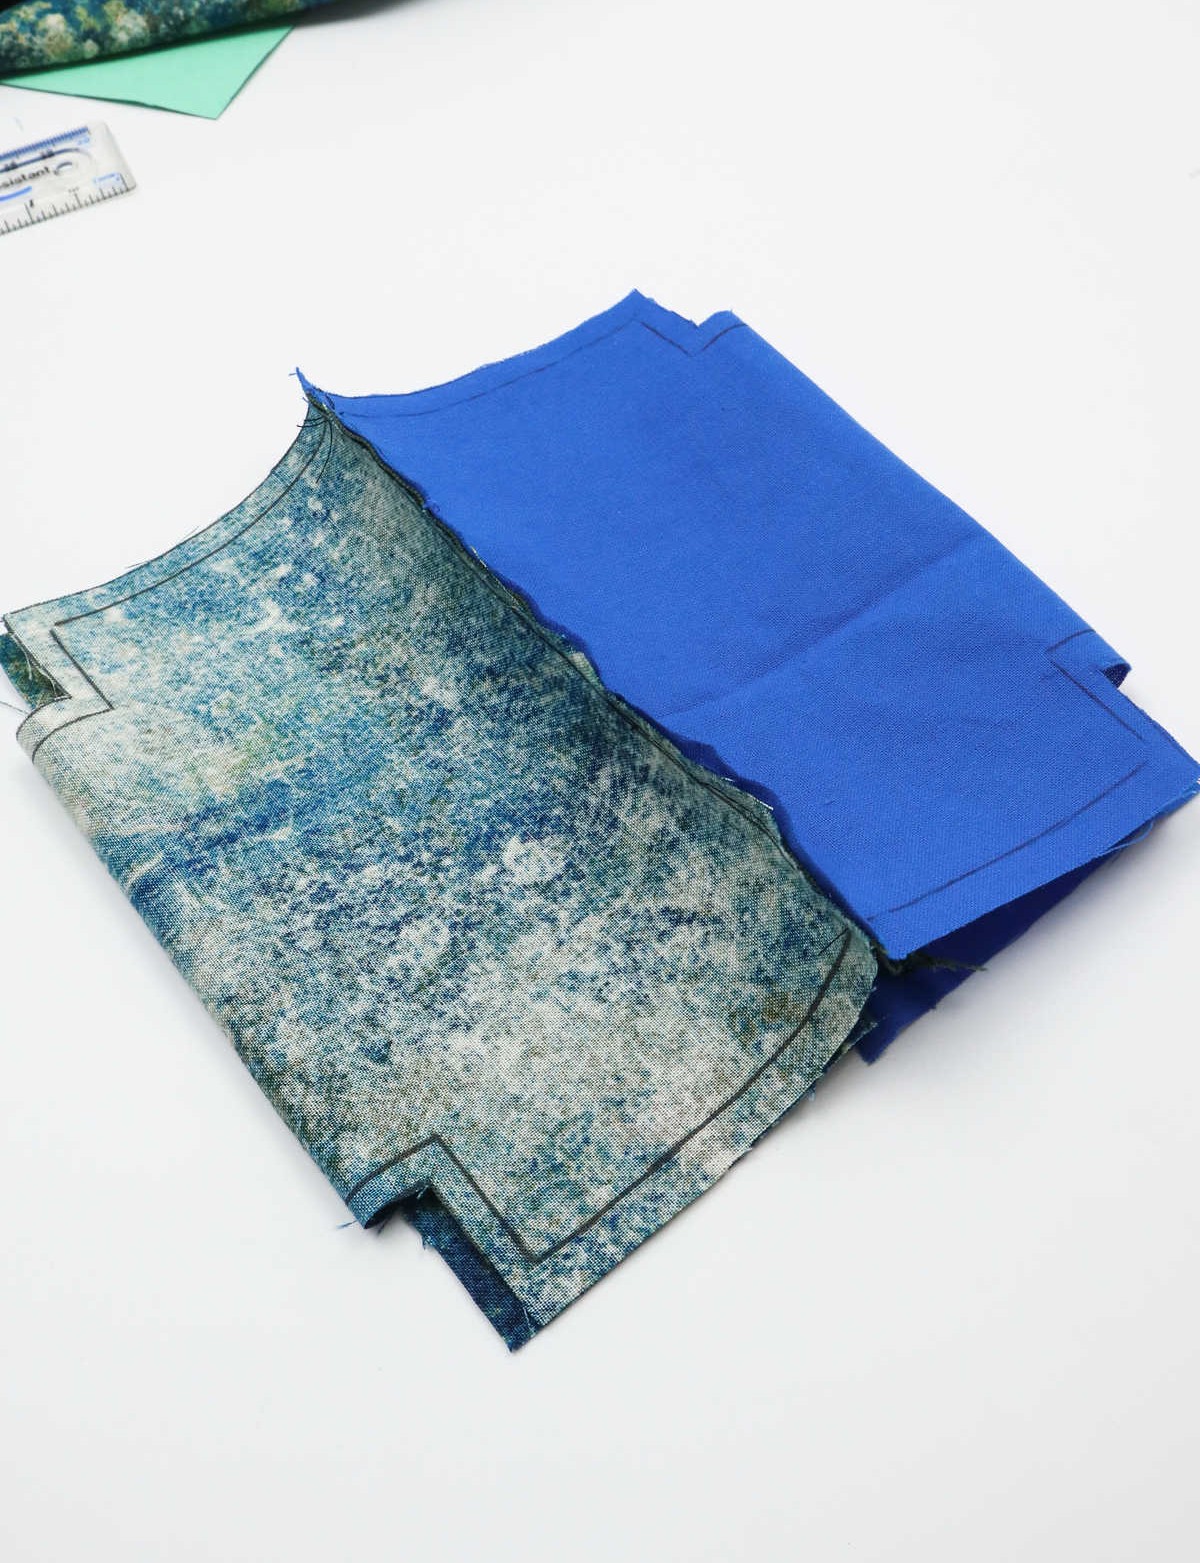
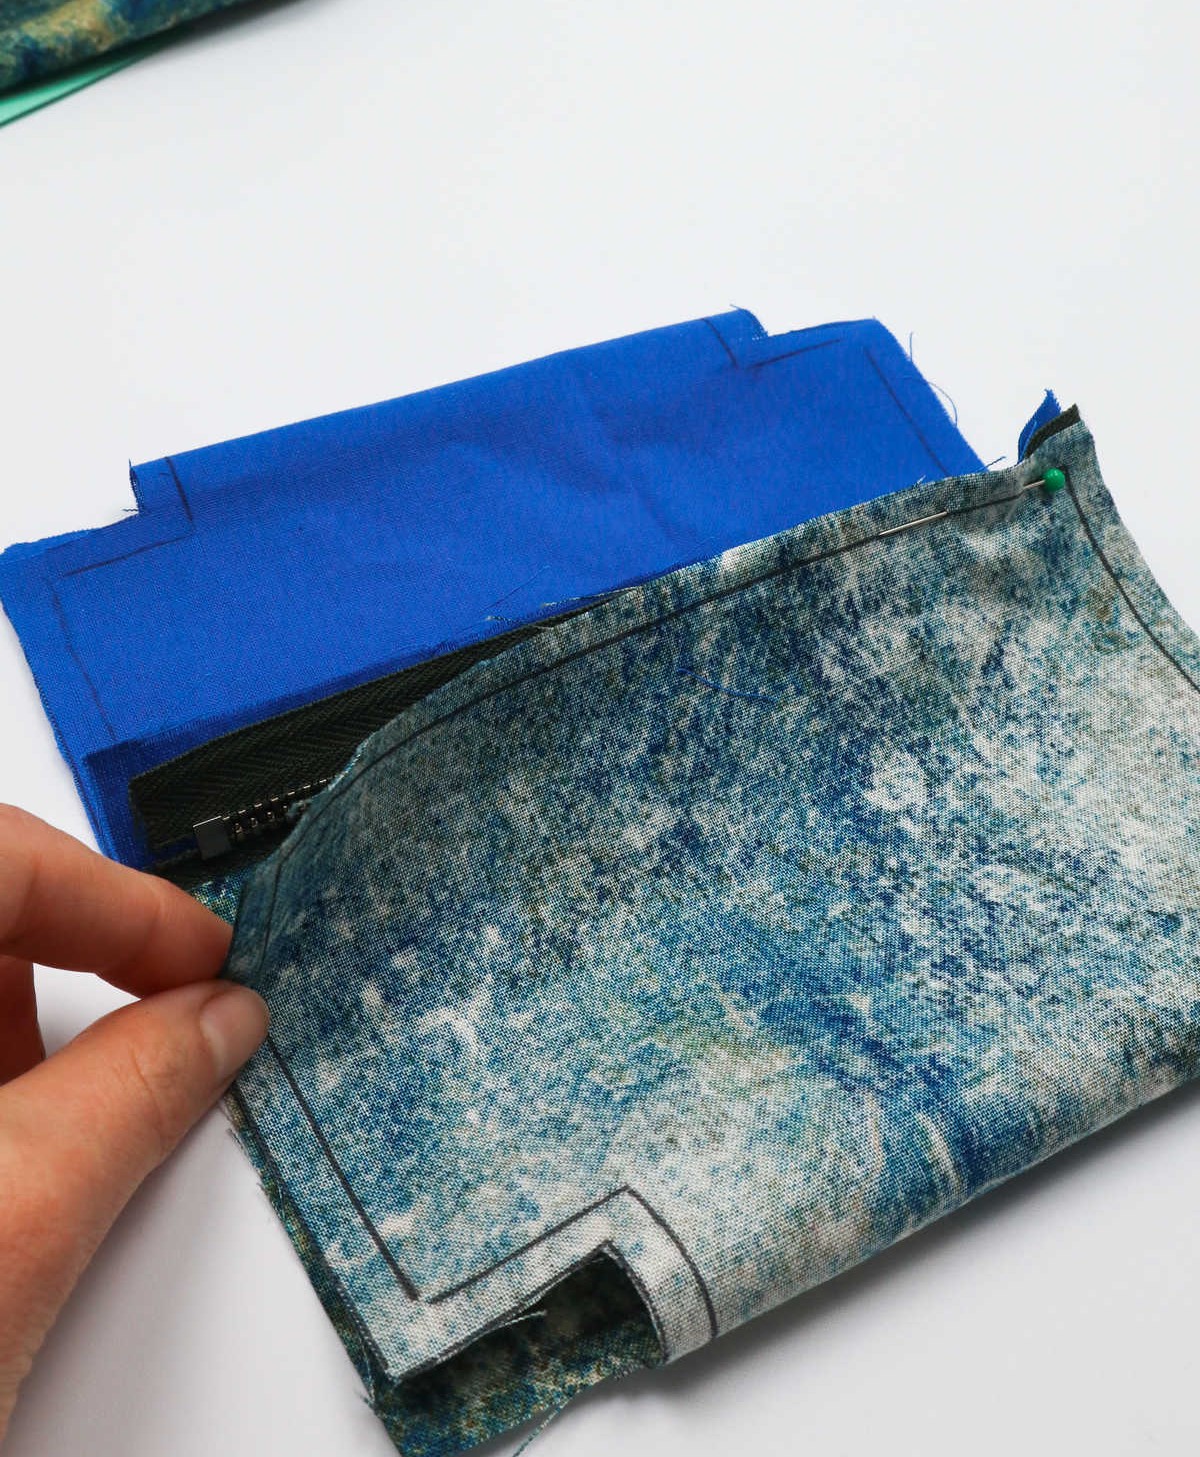
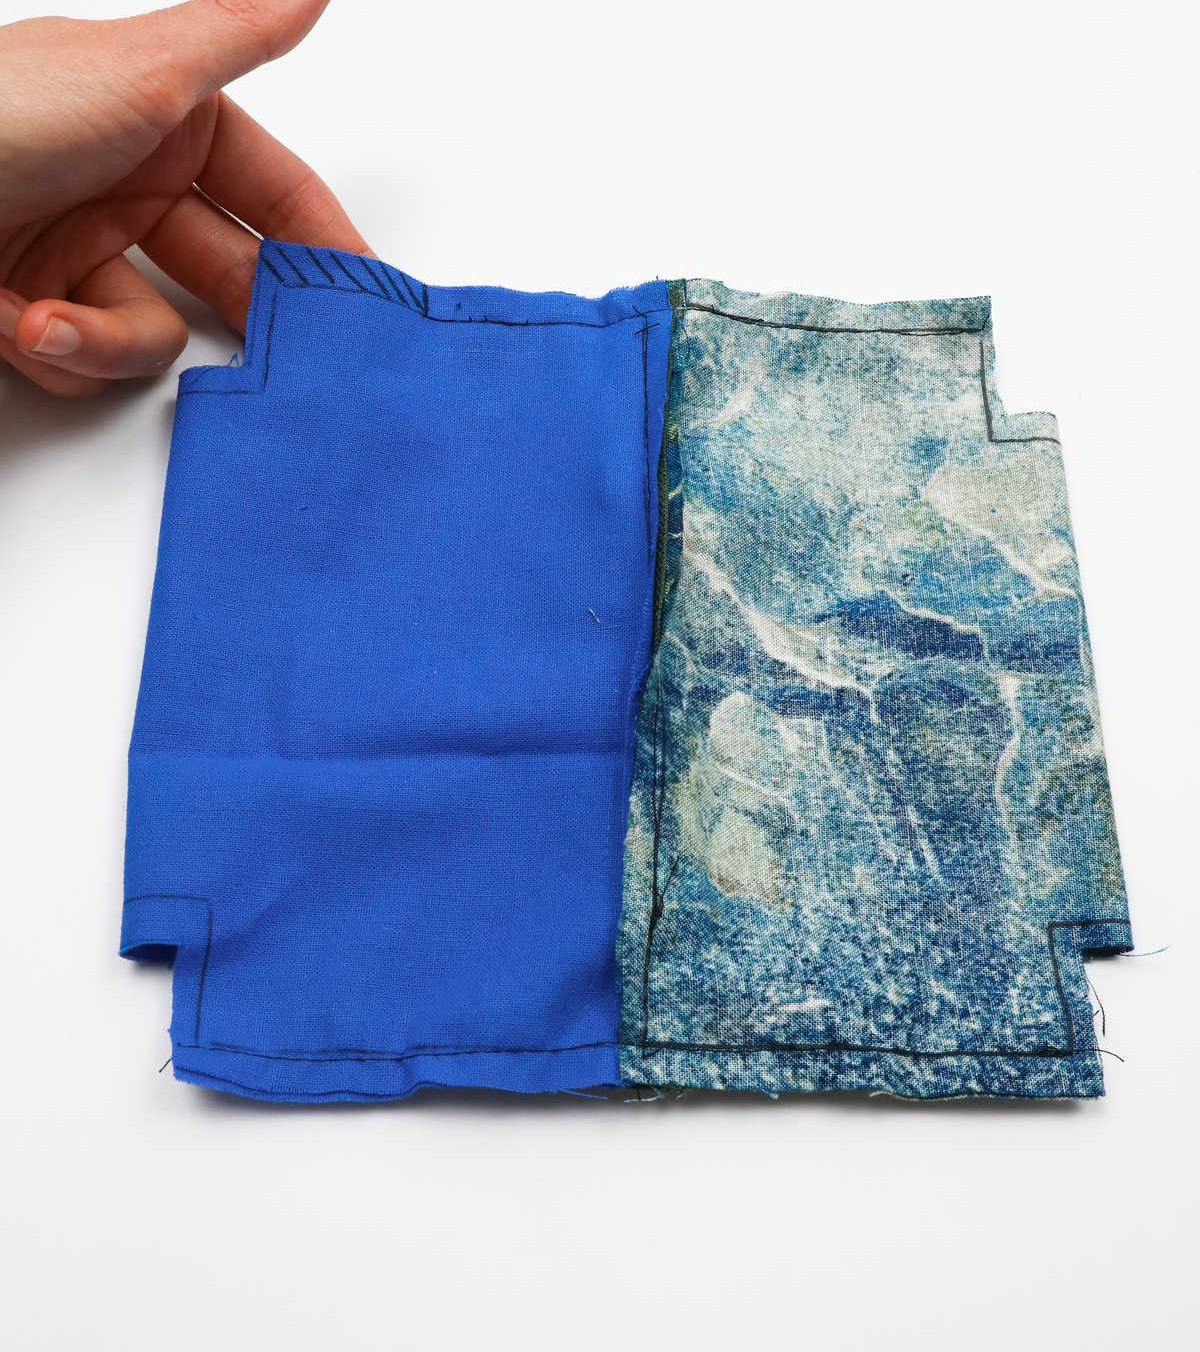
Gently unfold the garment, separating the outer fabric from the lining. Place the fabric cutout on one side and the corresponding lining fabric on the other, ensuring a symmetrical alignment of the corners and edges. As you do this, take care to maintain a precise fold at each seam, allowing the two layers to nestle together like puzzle pieces.
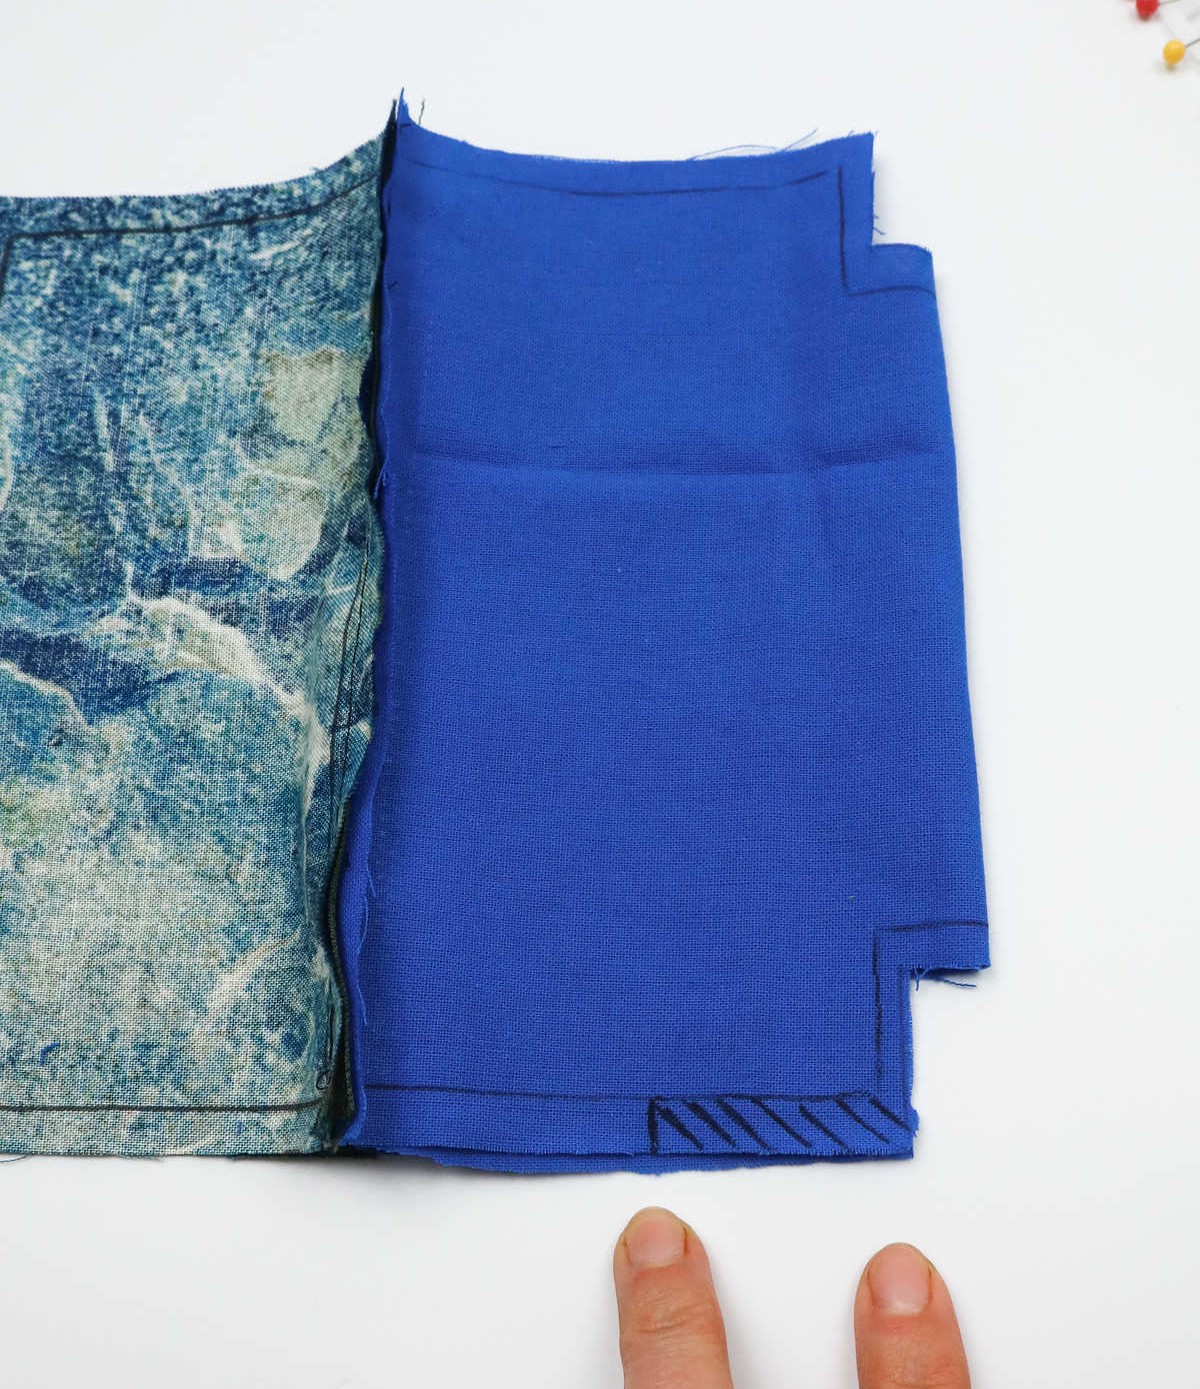
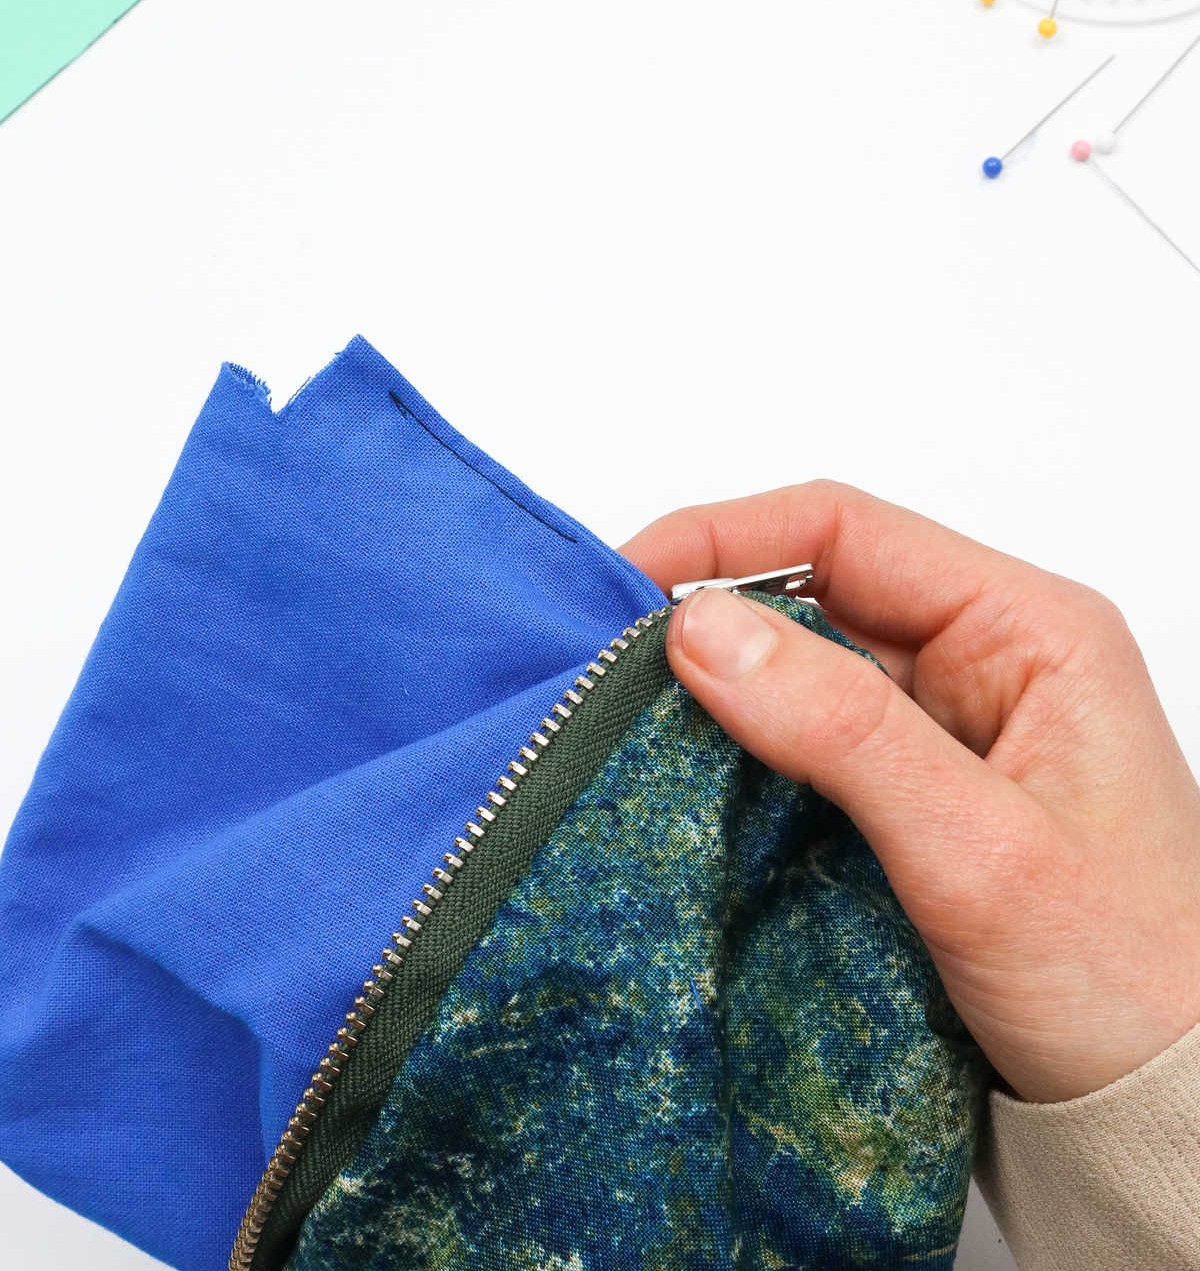
Step 11
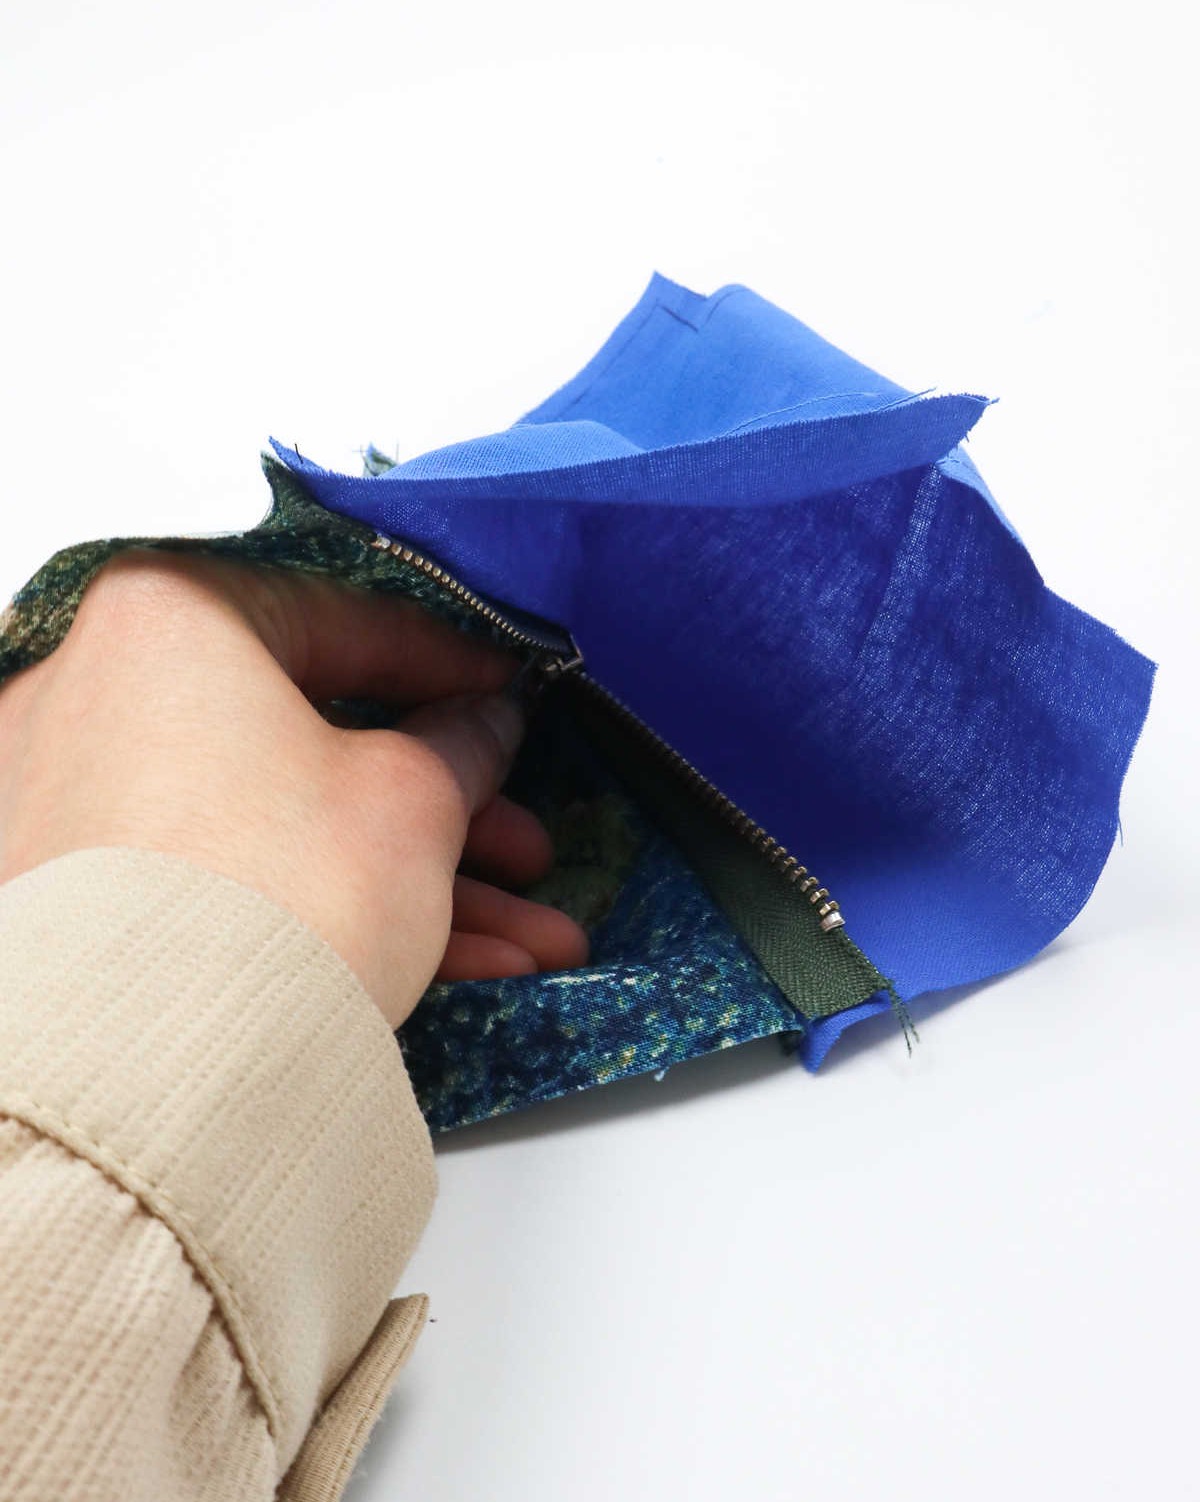
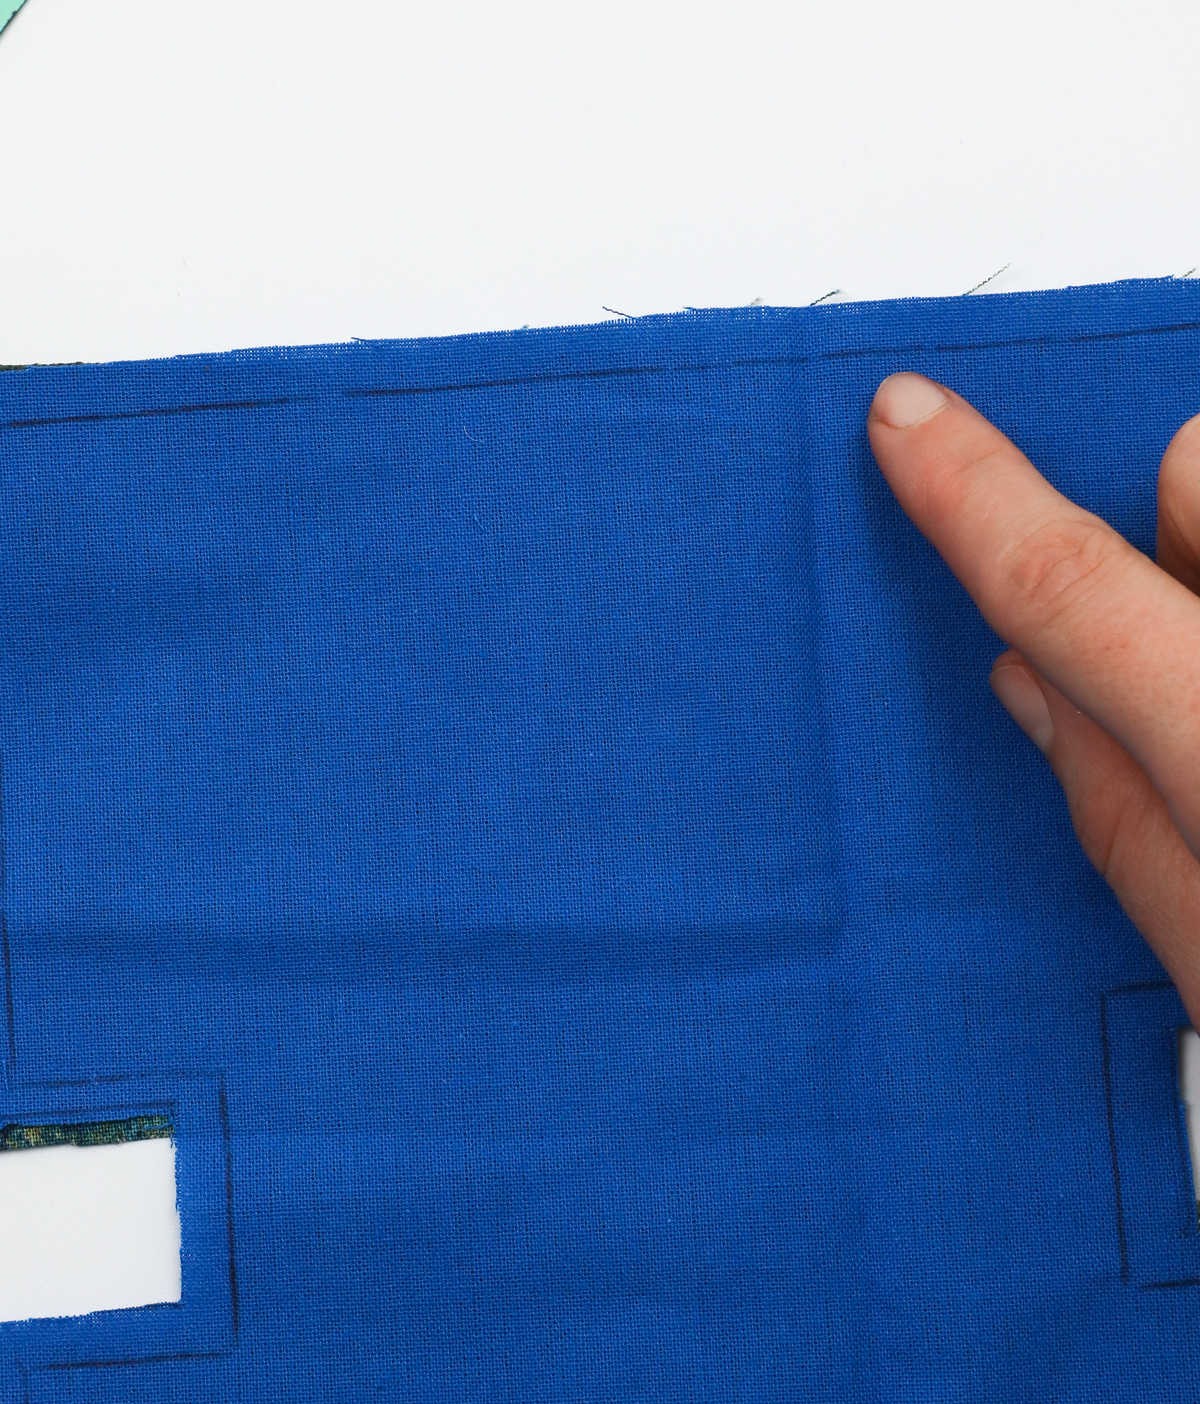
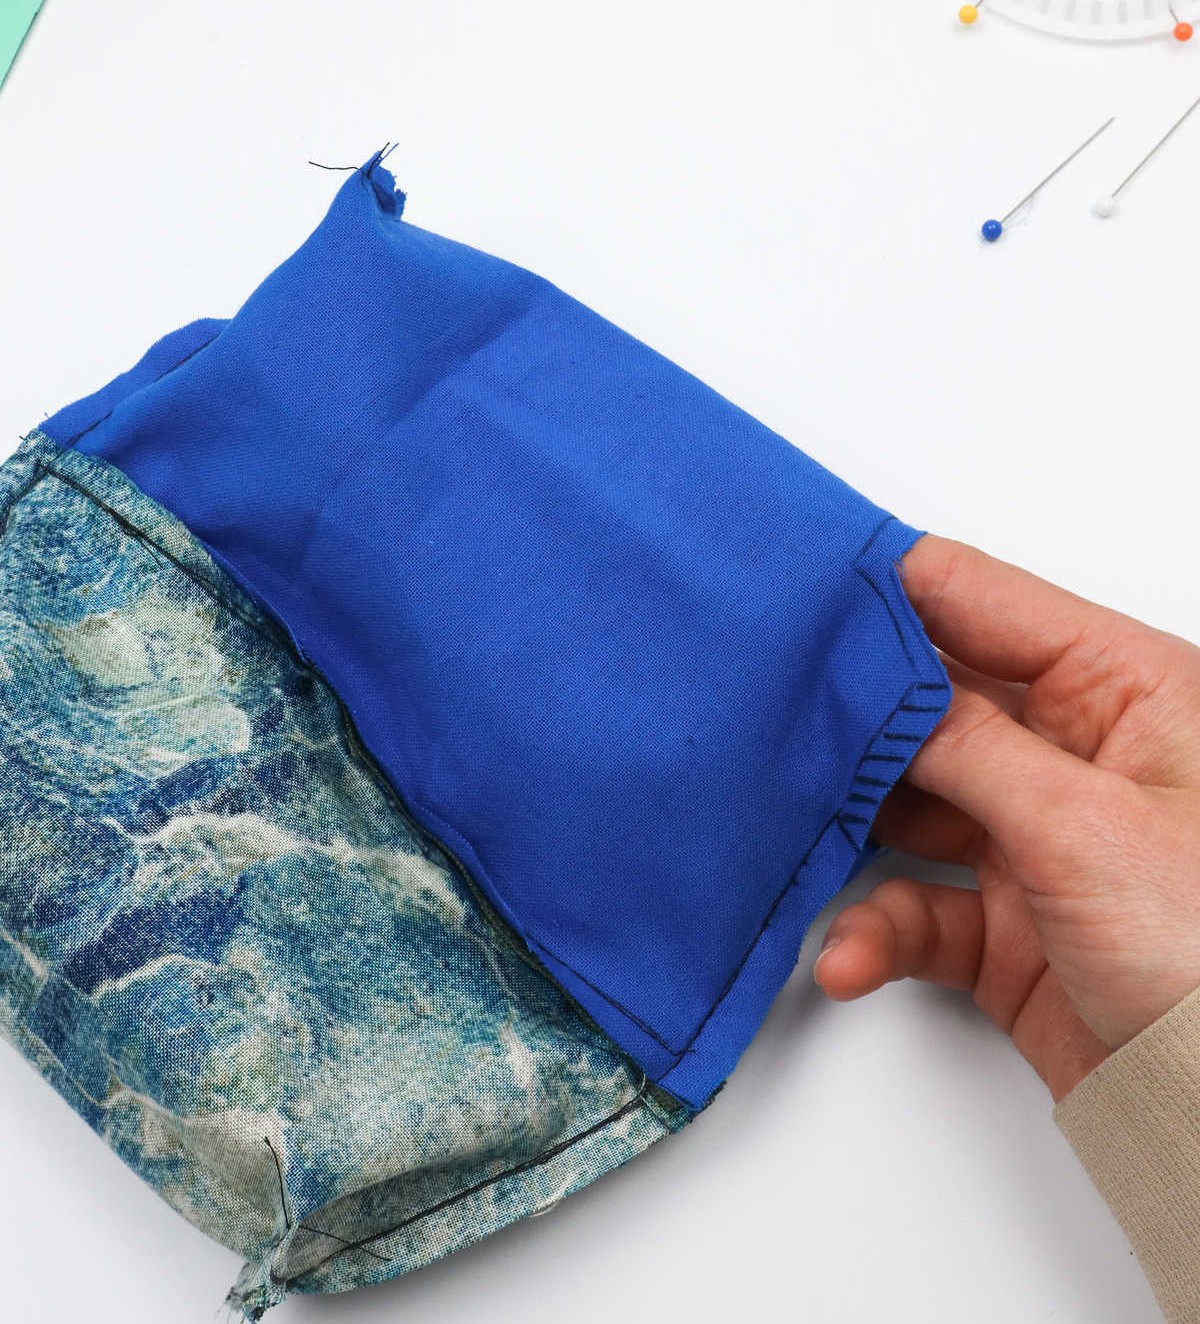
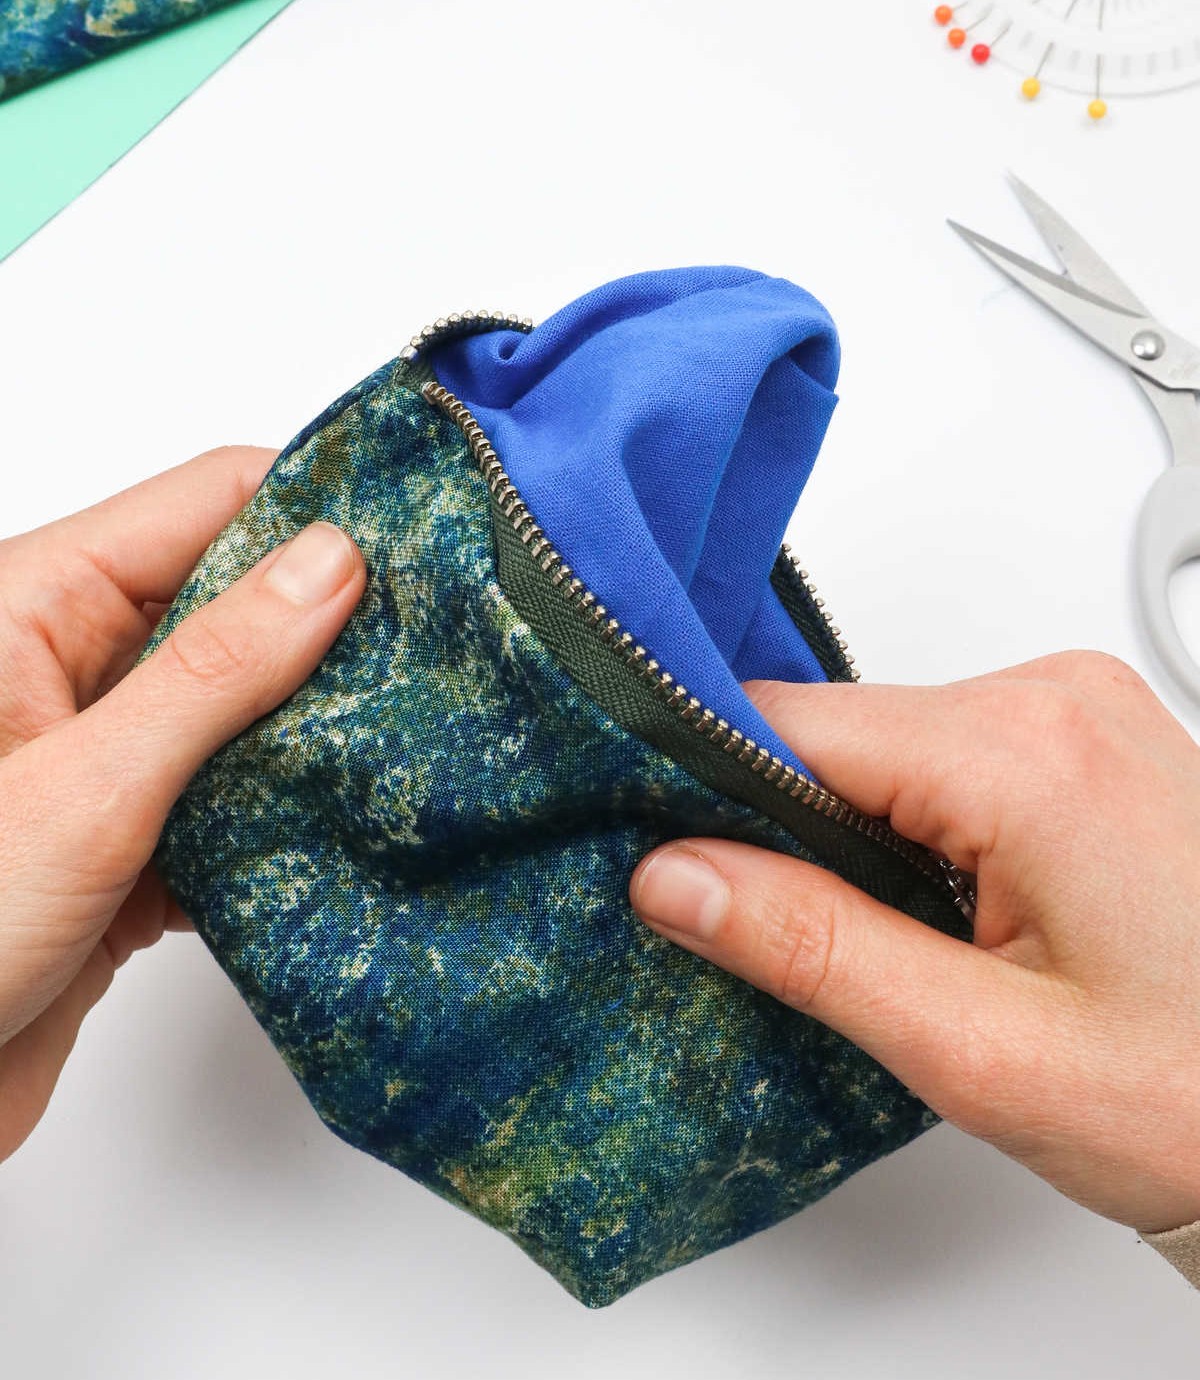
To initiate the next step, insert your hand between the fabric layers and locate the zipper. Gently draw it open to a point roughly halfway along its length. As you do so, take note that two corner pieces will be revealed on both the exterior fabric and the lining. This marks a significant milestone in the process, as you’re now poised to uncover essential components.
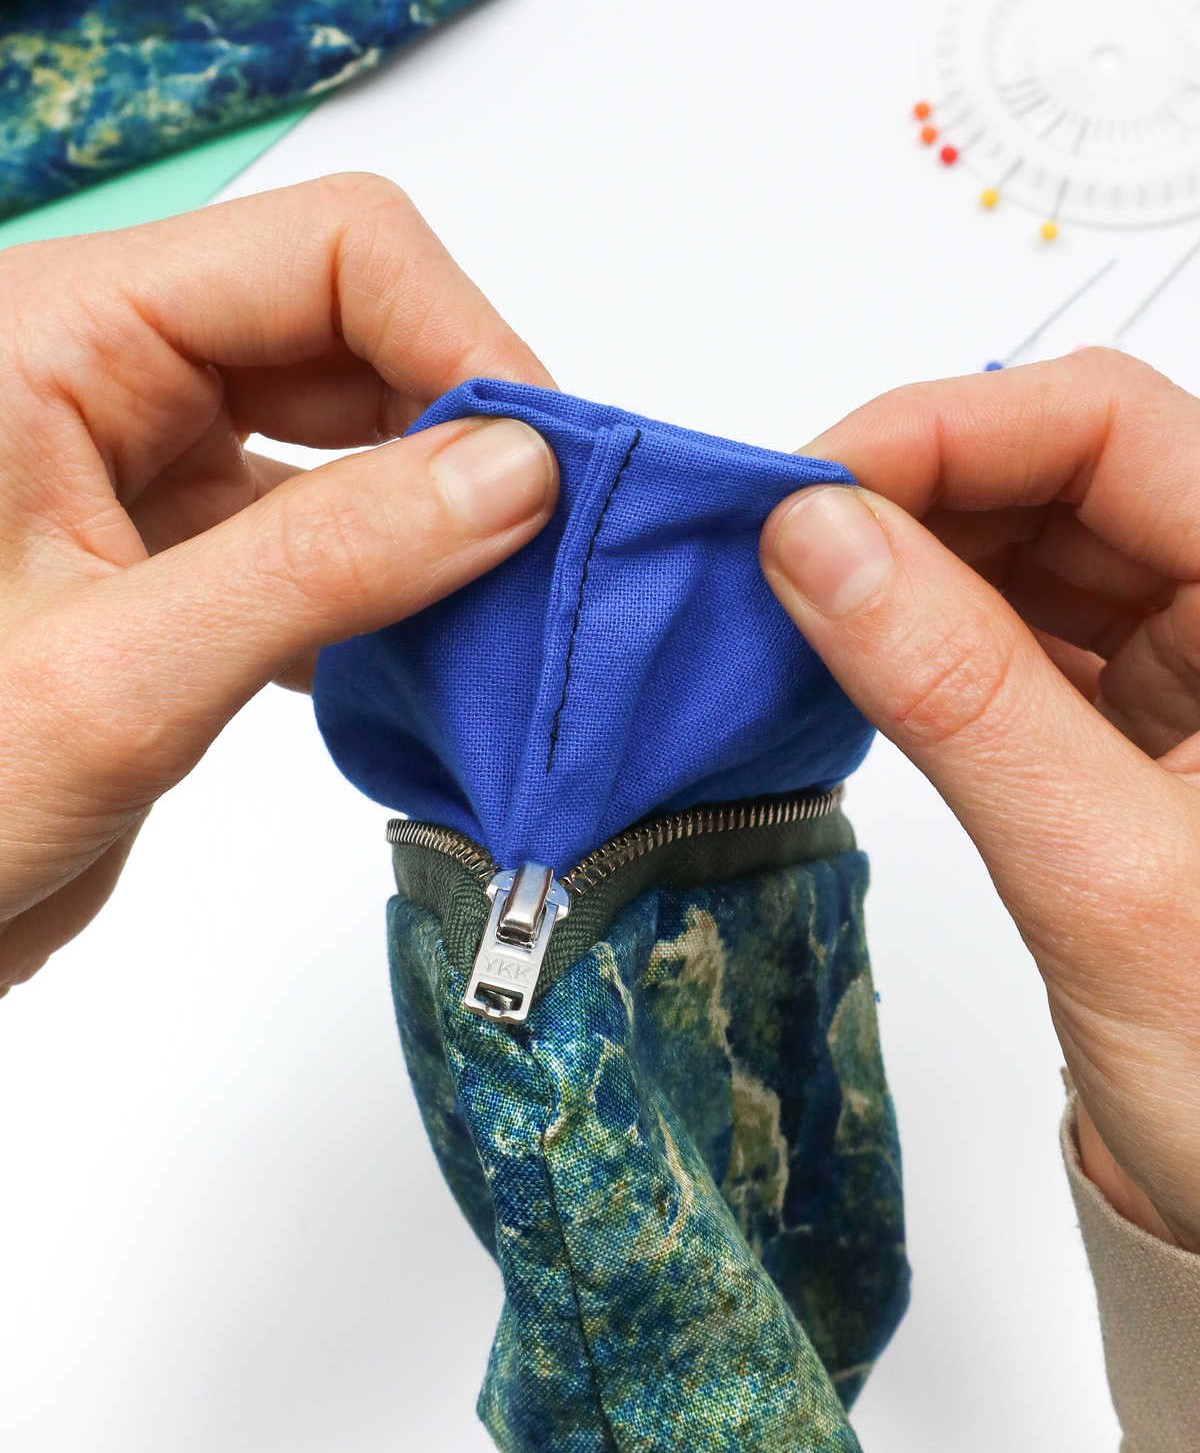
Step 12
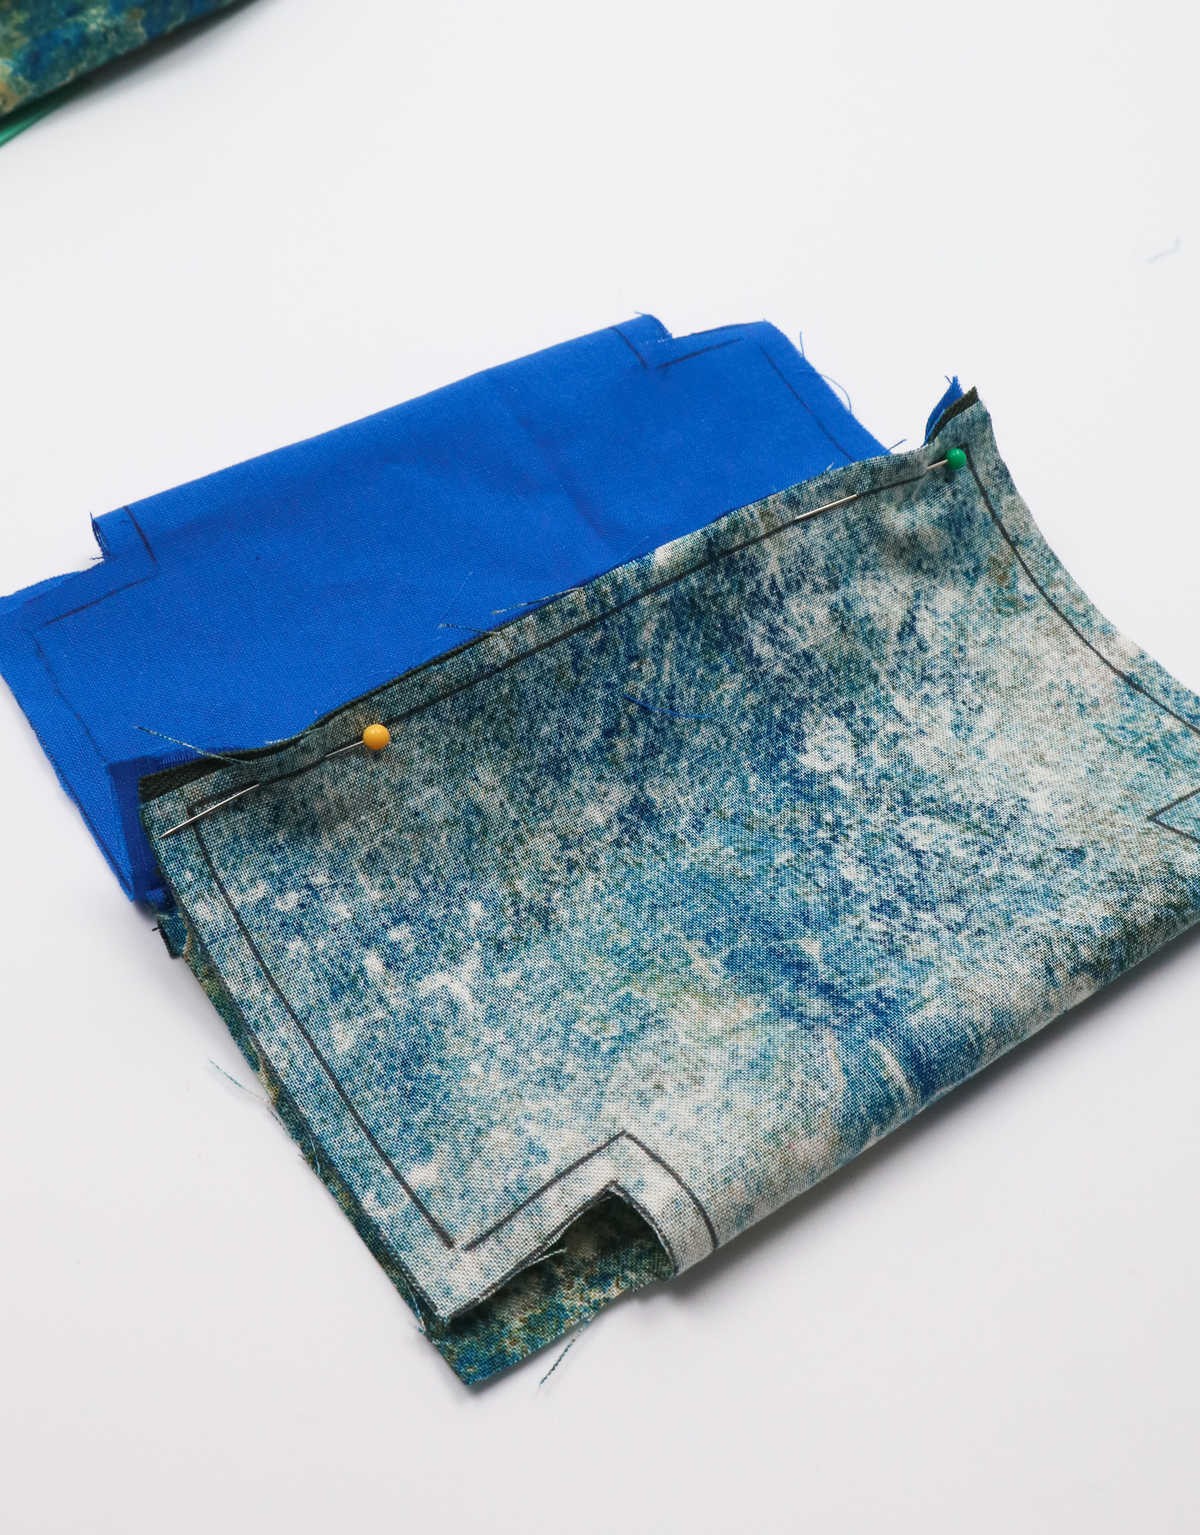
As you near the final stages of your project, prepare for the next step by gathering a fabric pen or tailor’s chalk. Next, identify the top left corner along the lining fabric and section off an approximately one-inch gap. It’s essential to note that this specific gap will not be closed during the sewing process, so keep this in mind as you work around the edges.
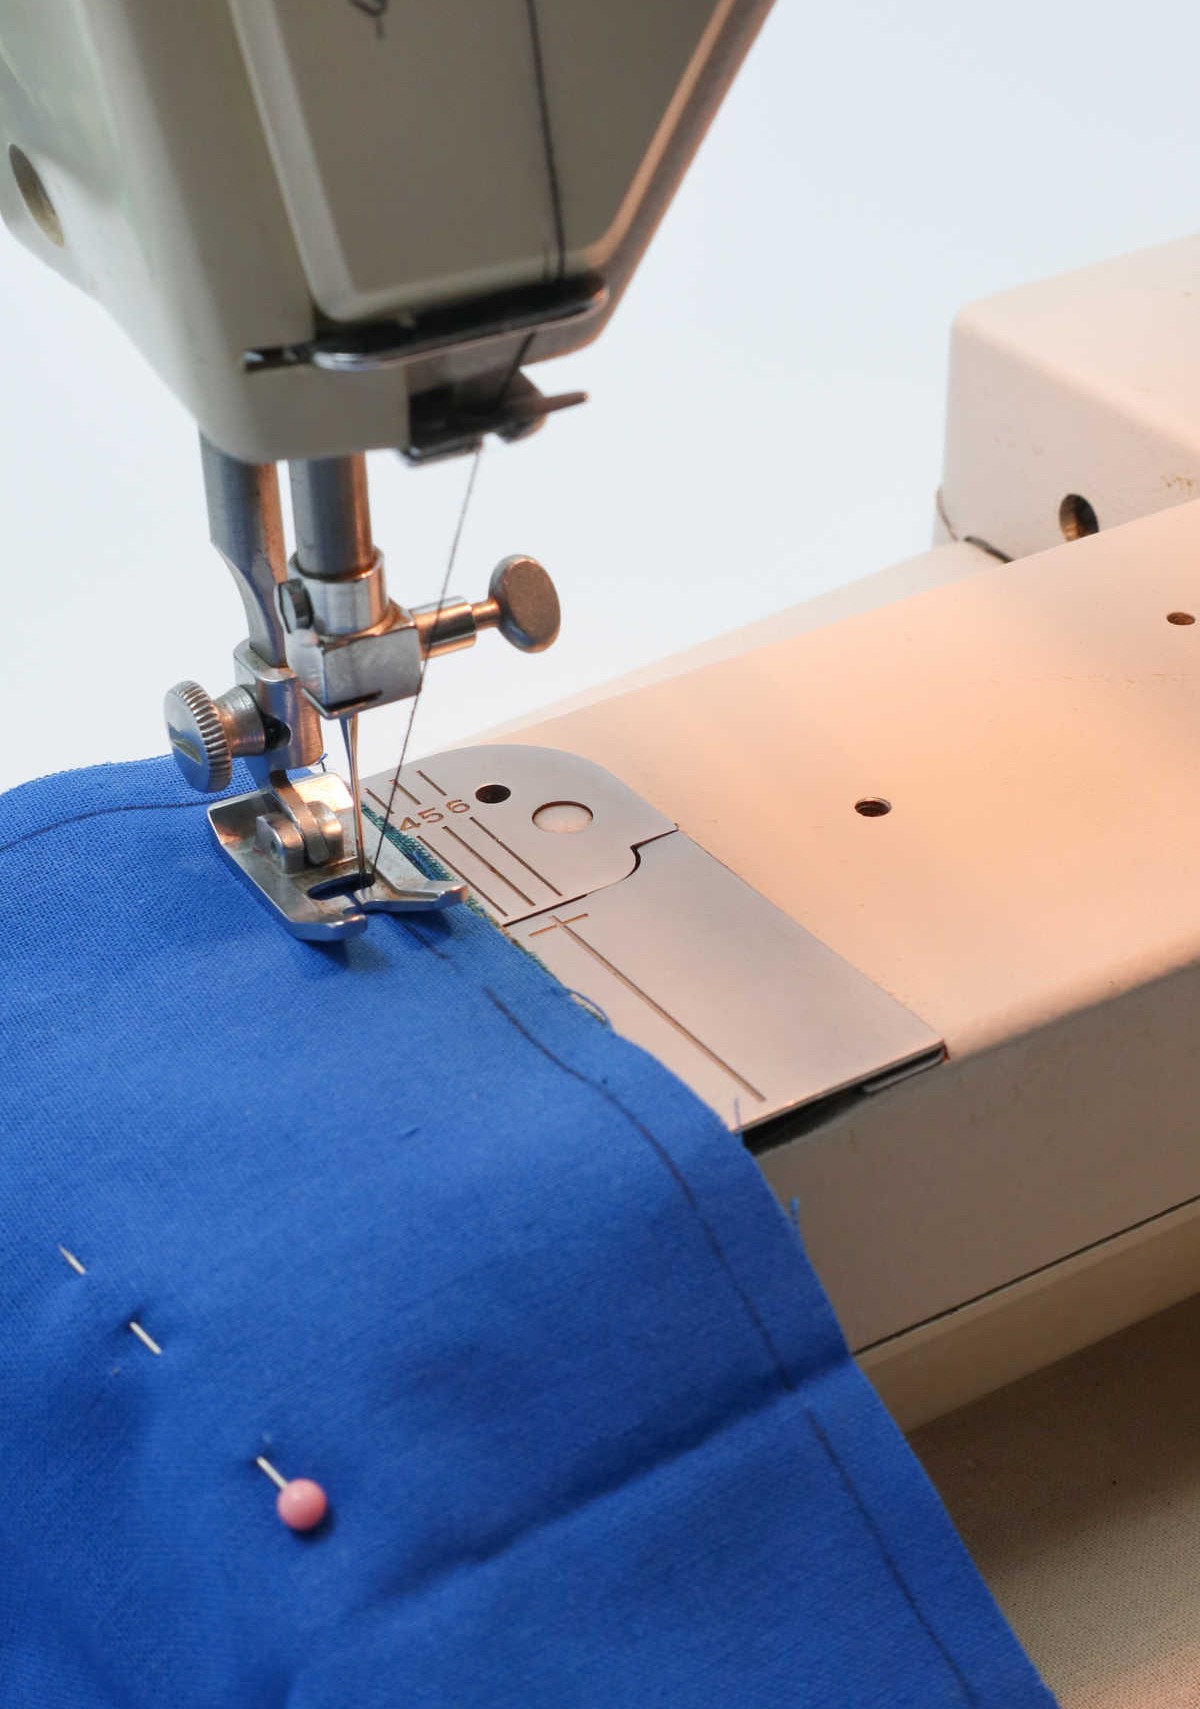
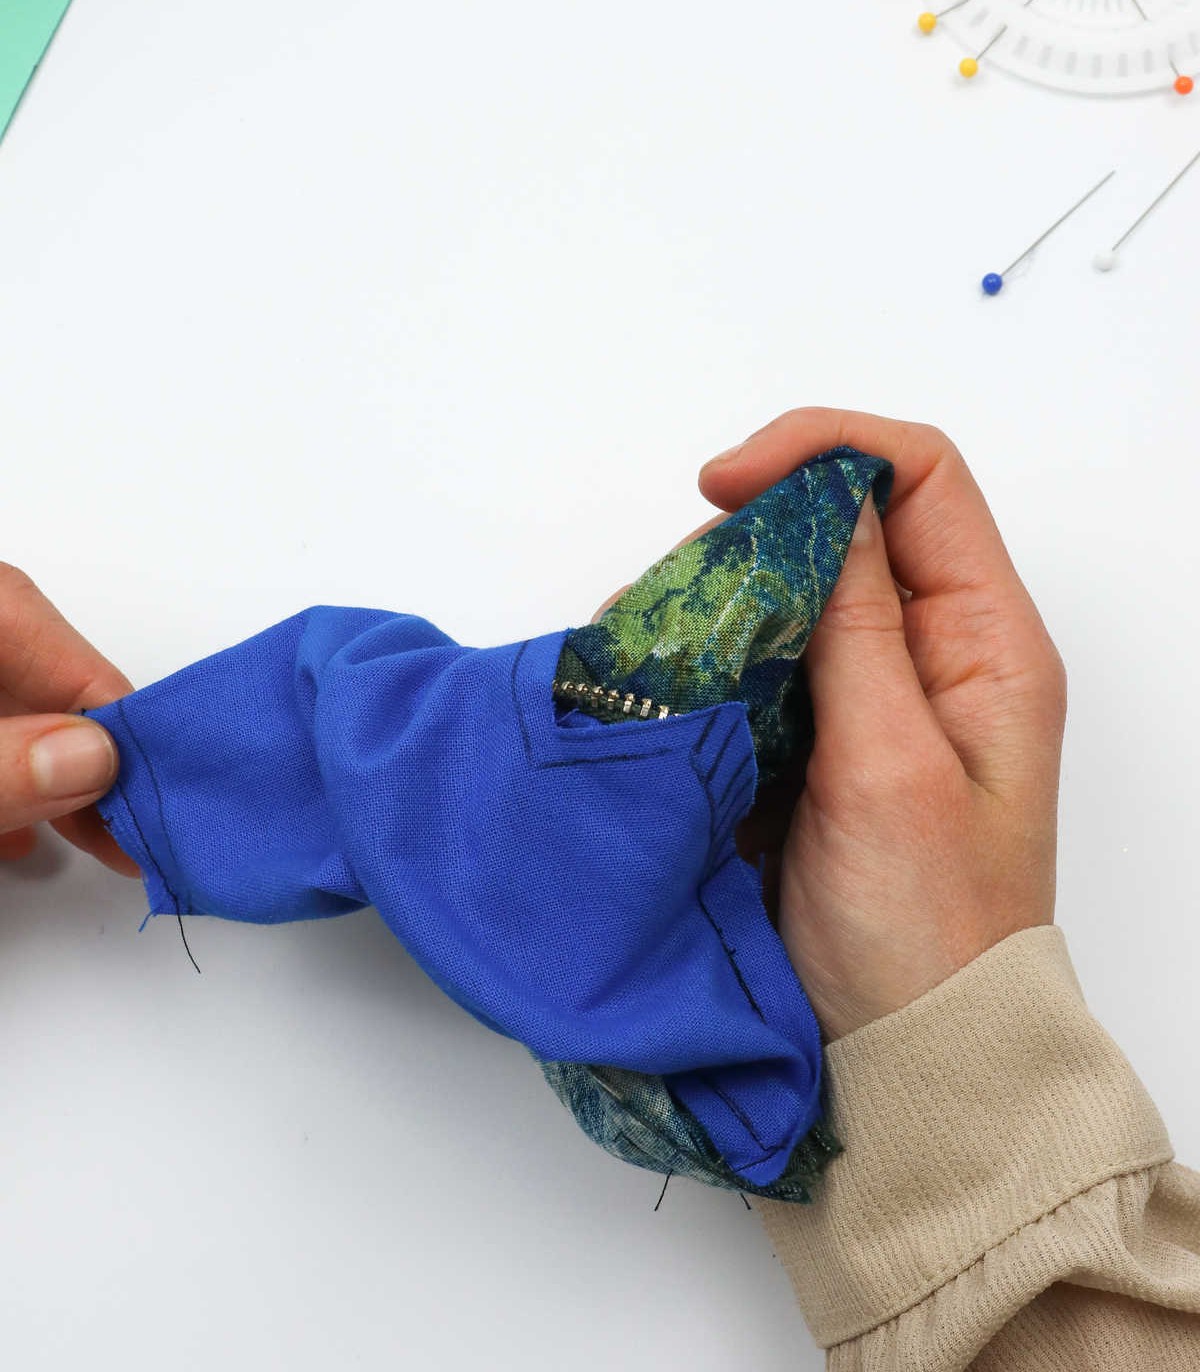
Step 13
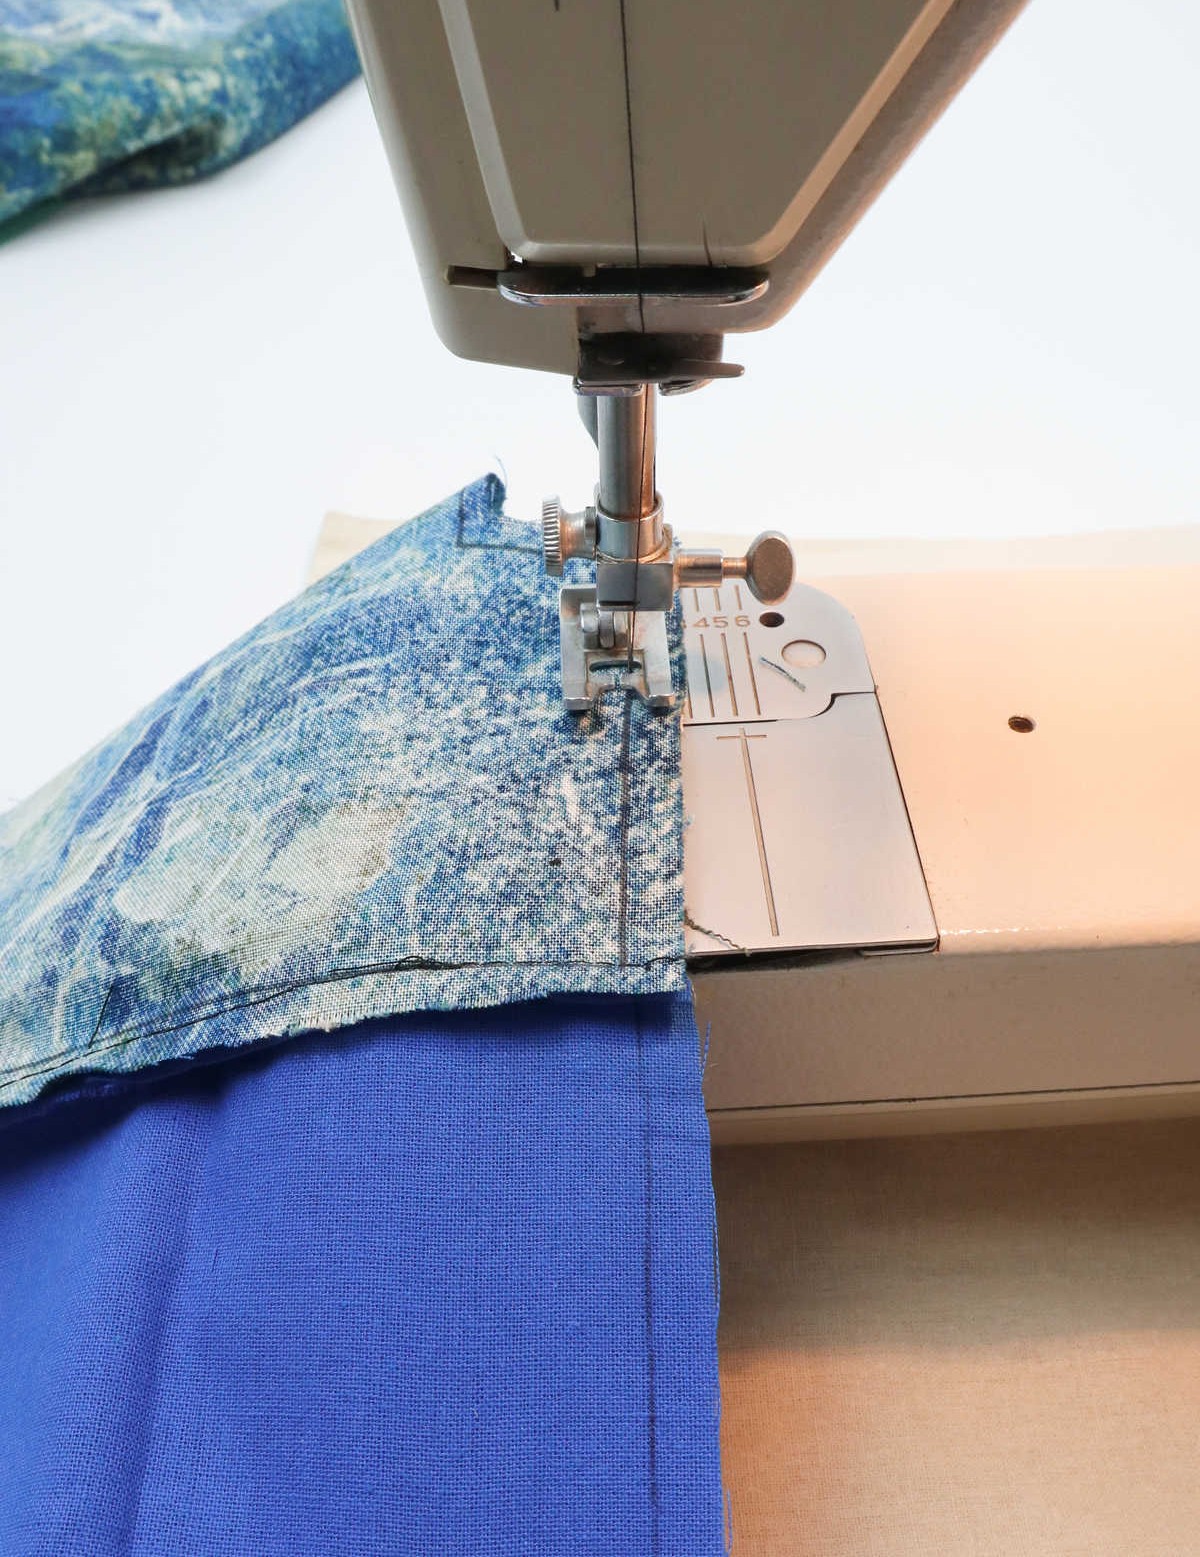
Now that we’ve made great progress on our pouch, it’s time to put the finishing touches on it. Take your sewing machine and sew along the outline you drew earlier, making sure to go around all three corners of the pouch. The only exception is the fourth corner where we left a one-inch gap. As you complete this step, your pouch should start to take shape and look like the finished product.
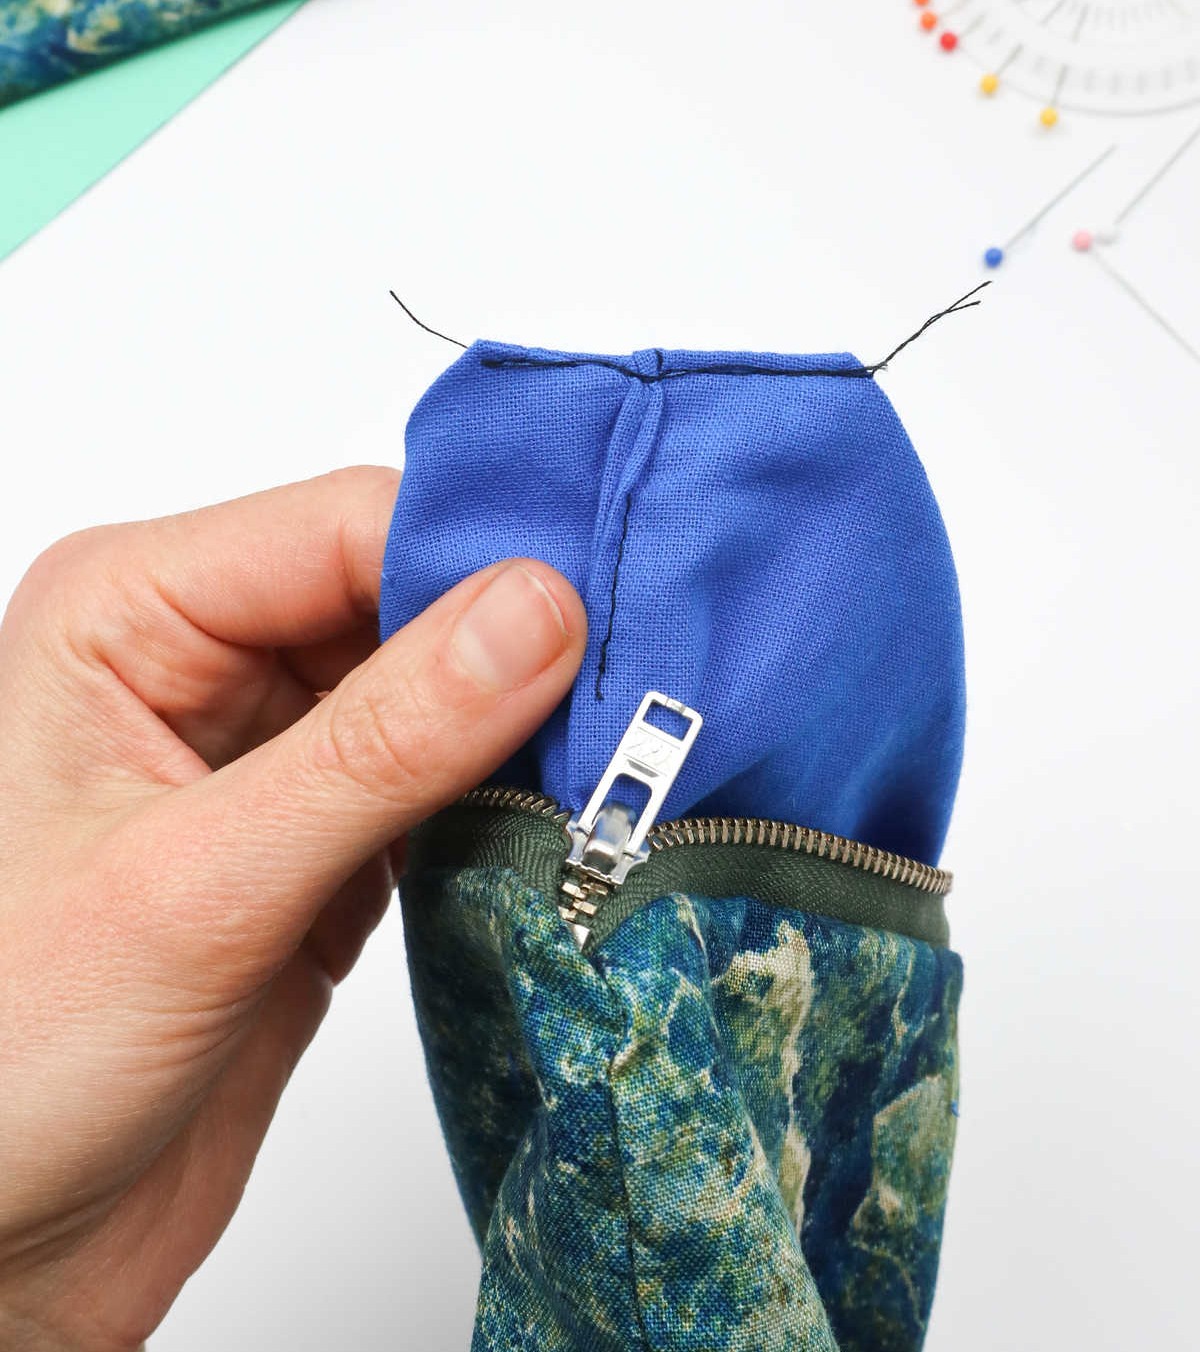
Step 14

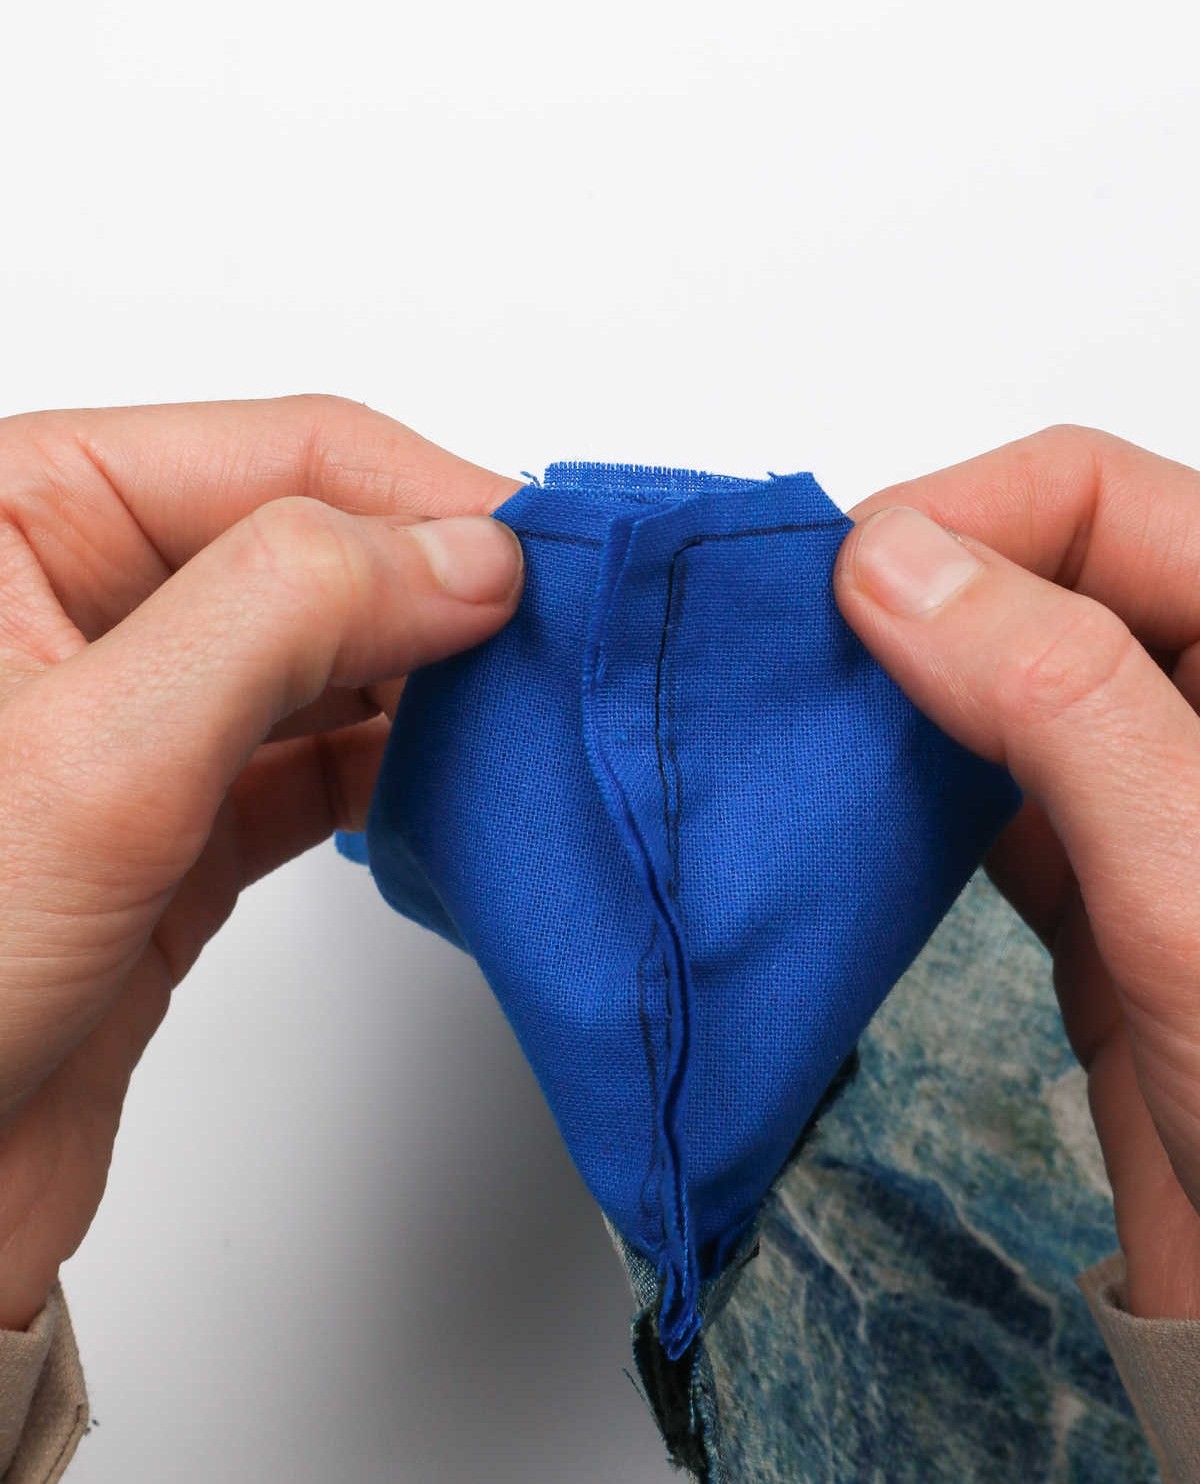
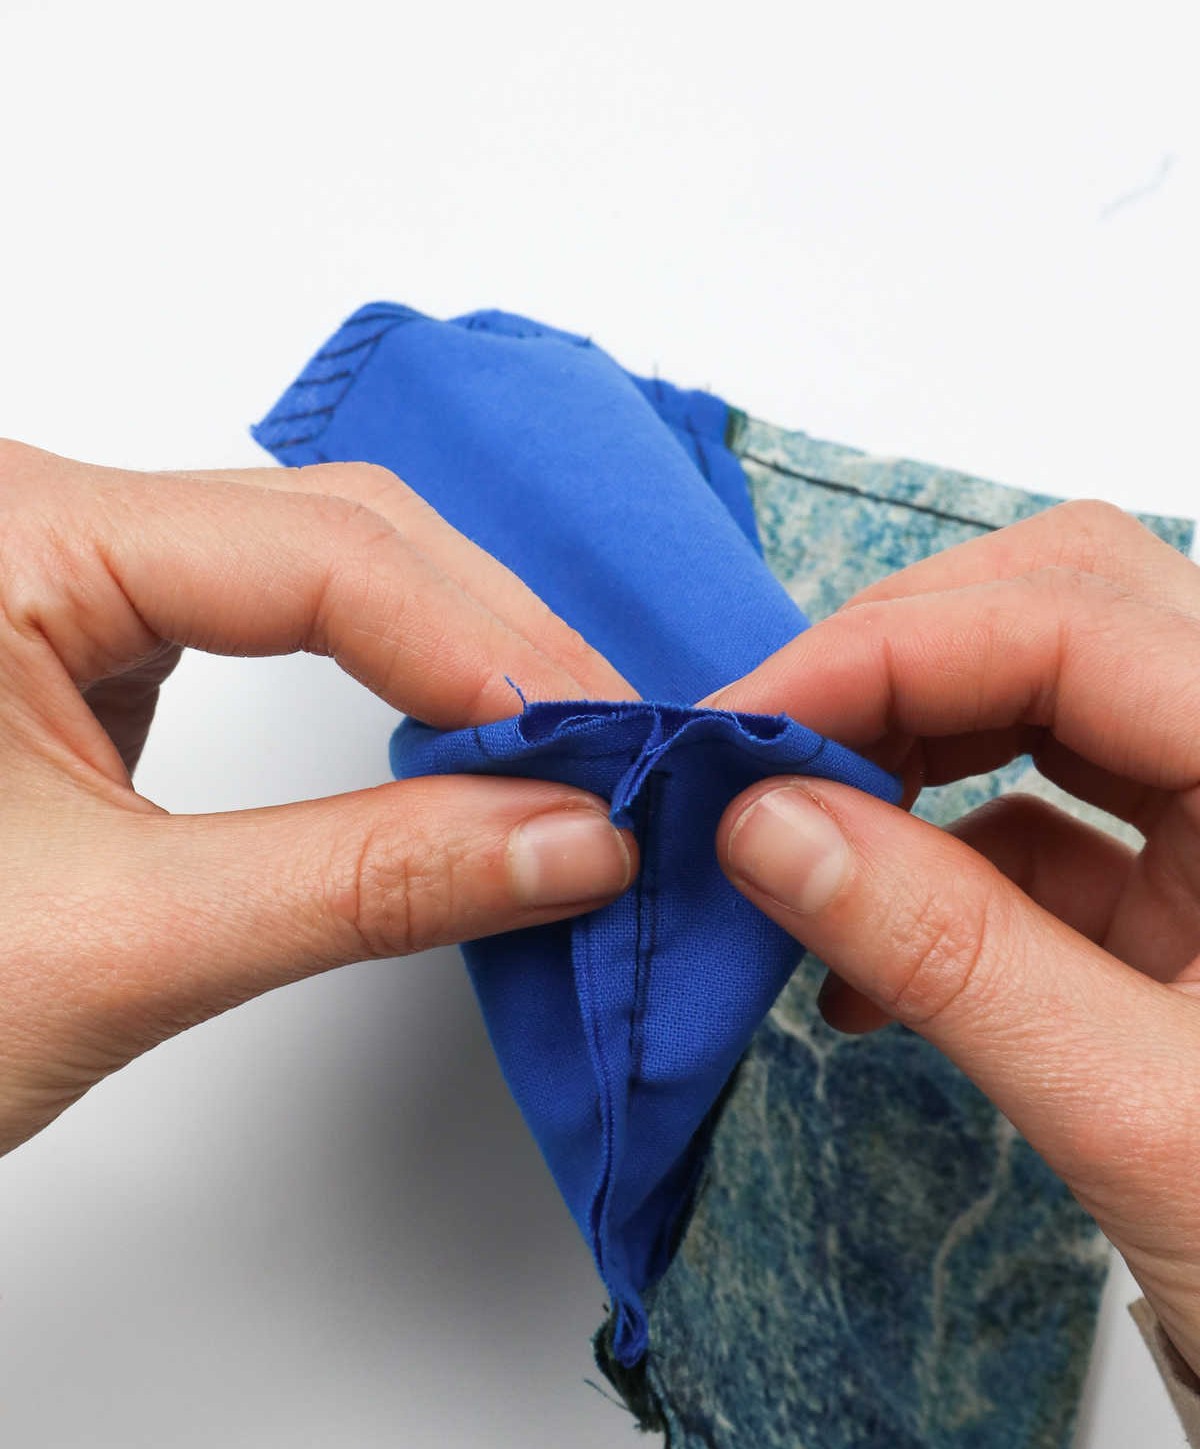

To complete the boxing of edges, start by targeting the indented ends on one corner. Carefully pull these ends apart and flatten them out to ensure a smooth surface before securing them in place. Follow this same process with the remaining three corners, being mindful not to include the fourth corner where you left a one-inch gap for the handle.
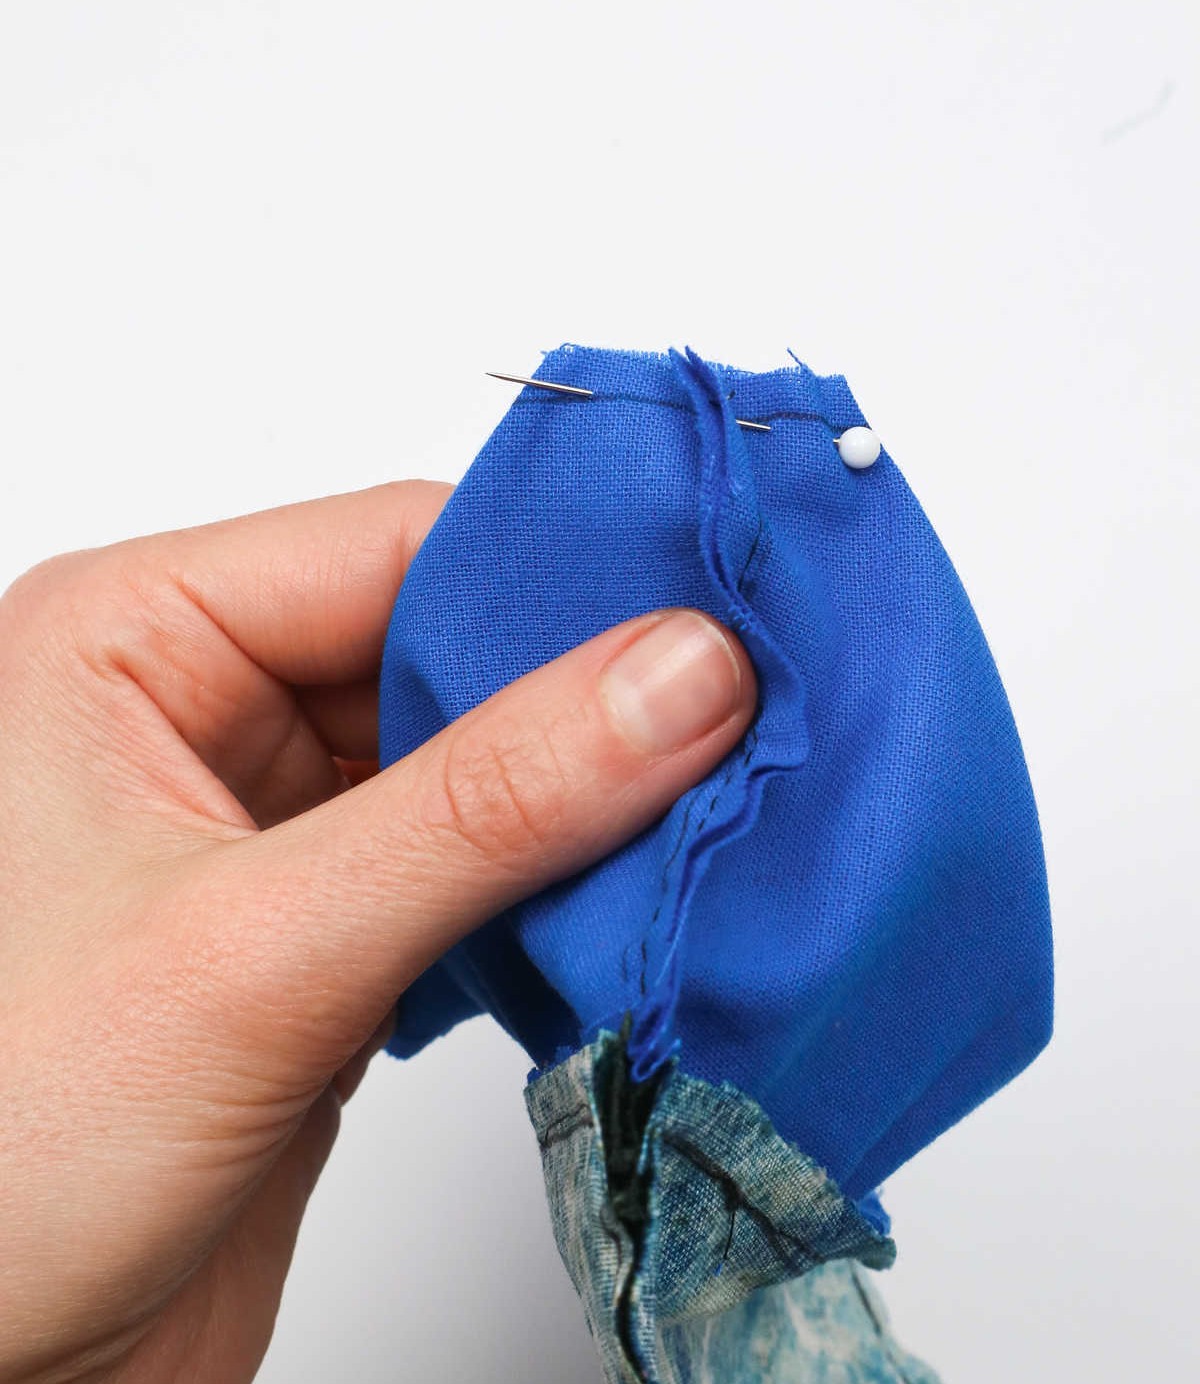
Step 15
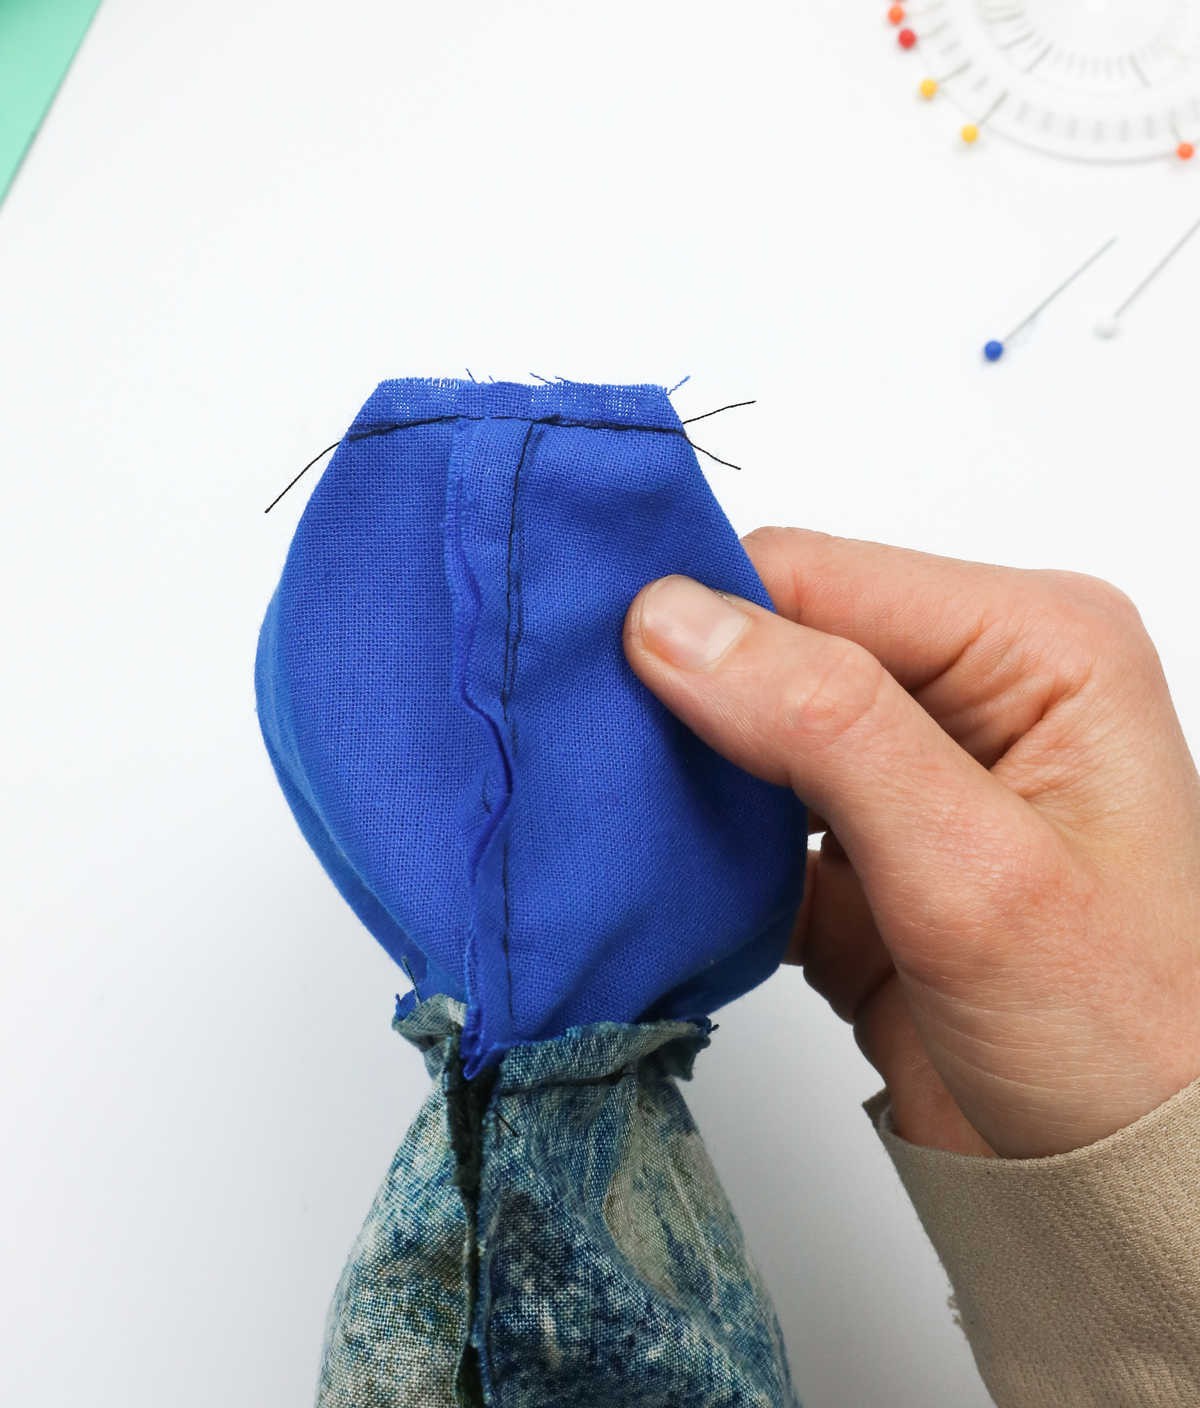
Make your way to your sewing machine and secure the indented edges with a few stitches, as illustrated above. You might be curious about the purpose of this step – it’s actually quite essential.
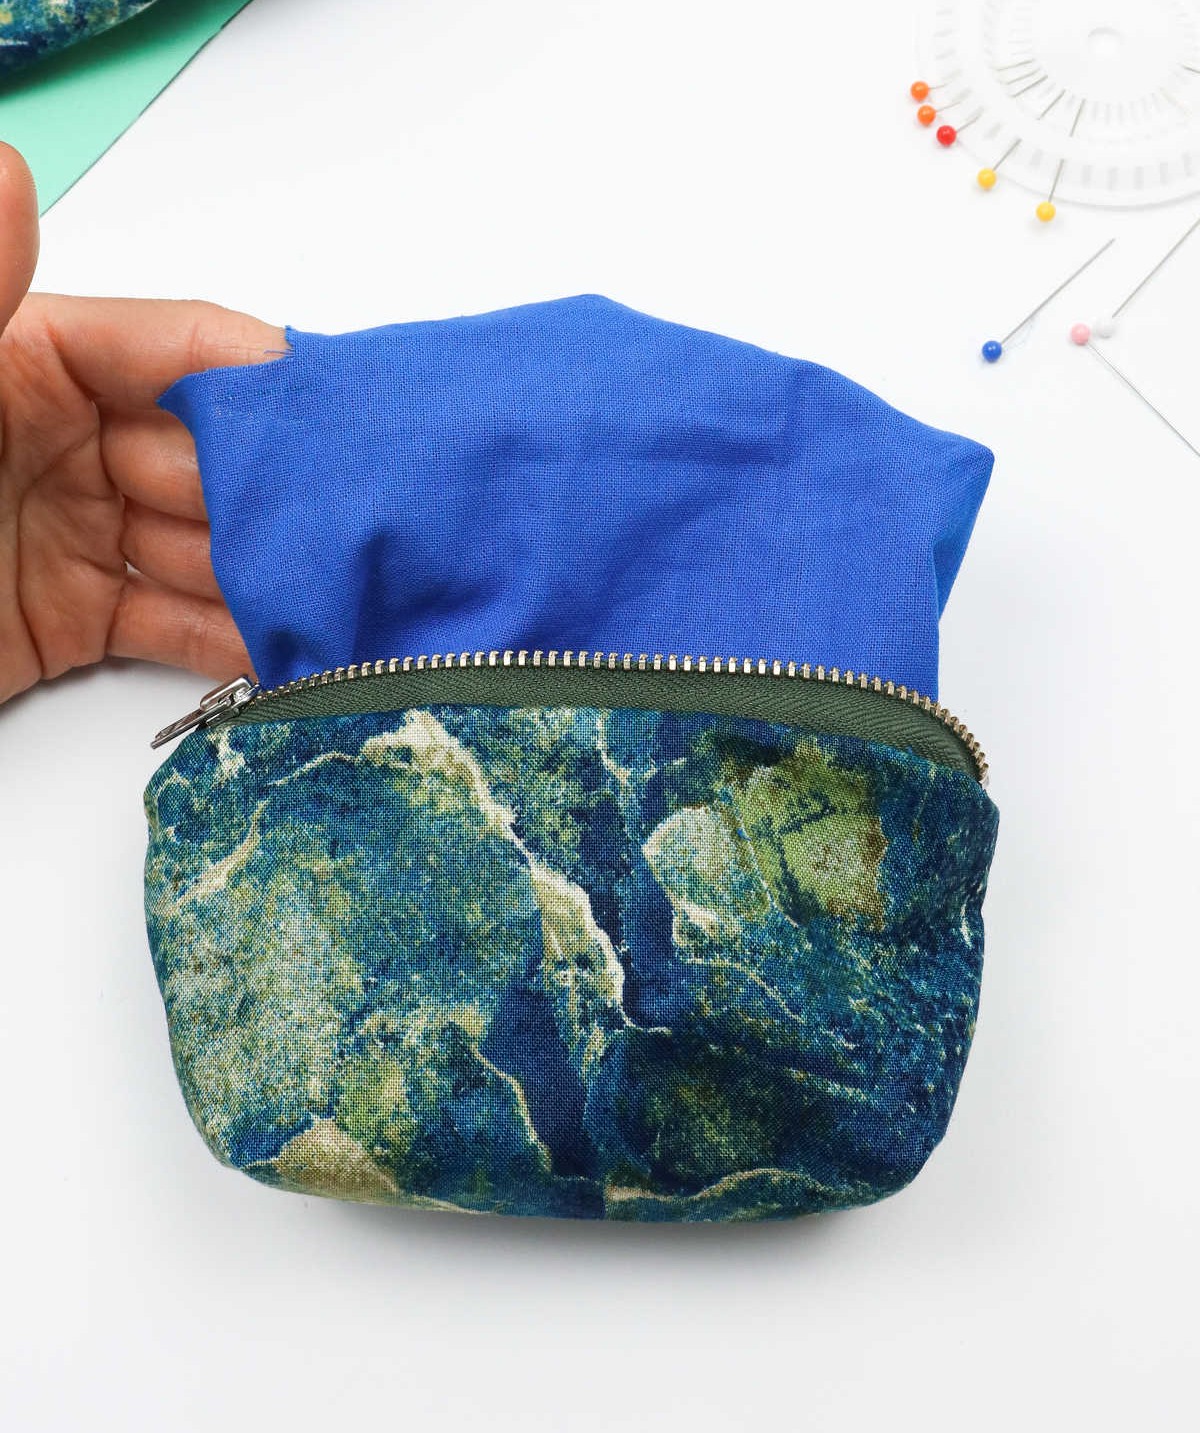
Step 16
As you work with this sewing project, you may have noticed the small inch gap created on one corner of the pouch. This seemingly insignificant detail actually plays a crucial role in the construction process. By leaving this gap open, you’ll be able to turn the pouch inside out by pulling all the fabric through it, making it easier to complete the project and achieve a professional finish.
Step 17
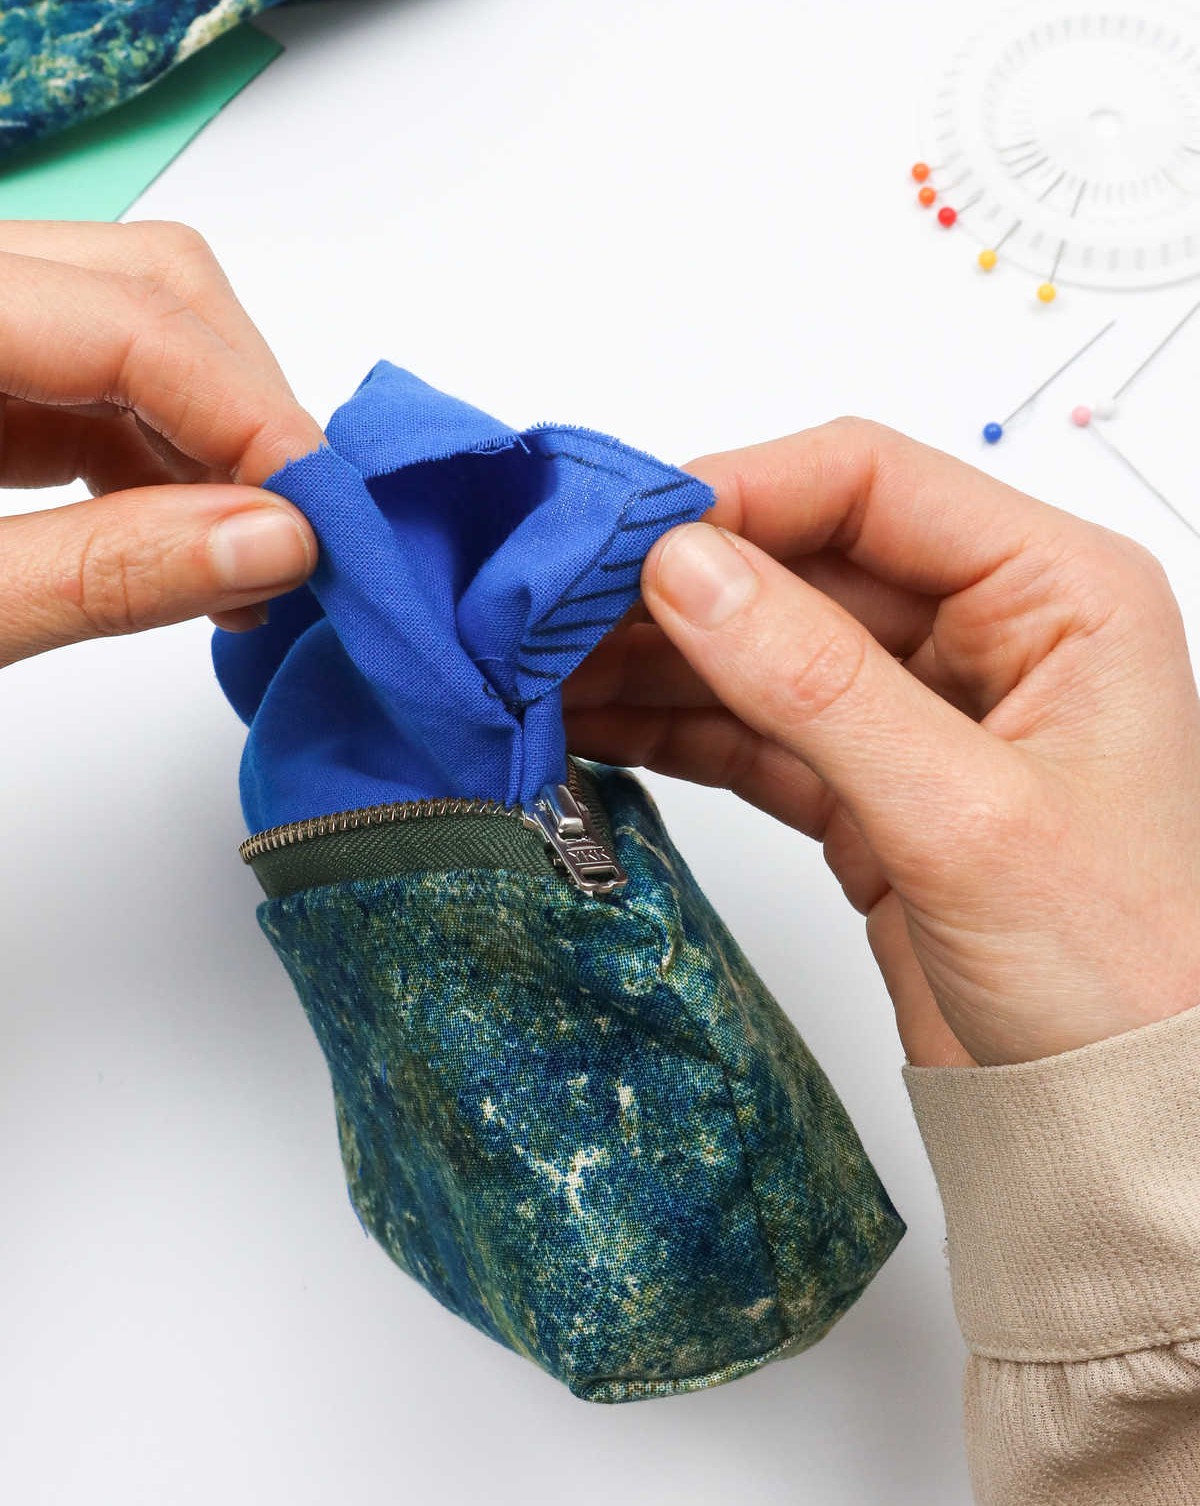
Once the fabric is turned outwards and facing the correct direction, you’ll notice that the gap remains open. To close this gap, start by folding the flaps of the fabric inward, ensuring they line up against each other. Press the folds firmly and secure them with pins to hold their position.
Next, sew a neat and even line across the pinned folds to effectively close the gap. With this step complete, you’ll be just one fold away from finishing the corner.
To box up the indented edge, simply fold the fabric once more, aligning the edges evenly, before sewing across the top to secure everything in place.
Step 18
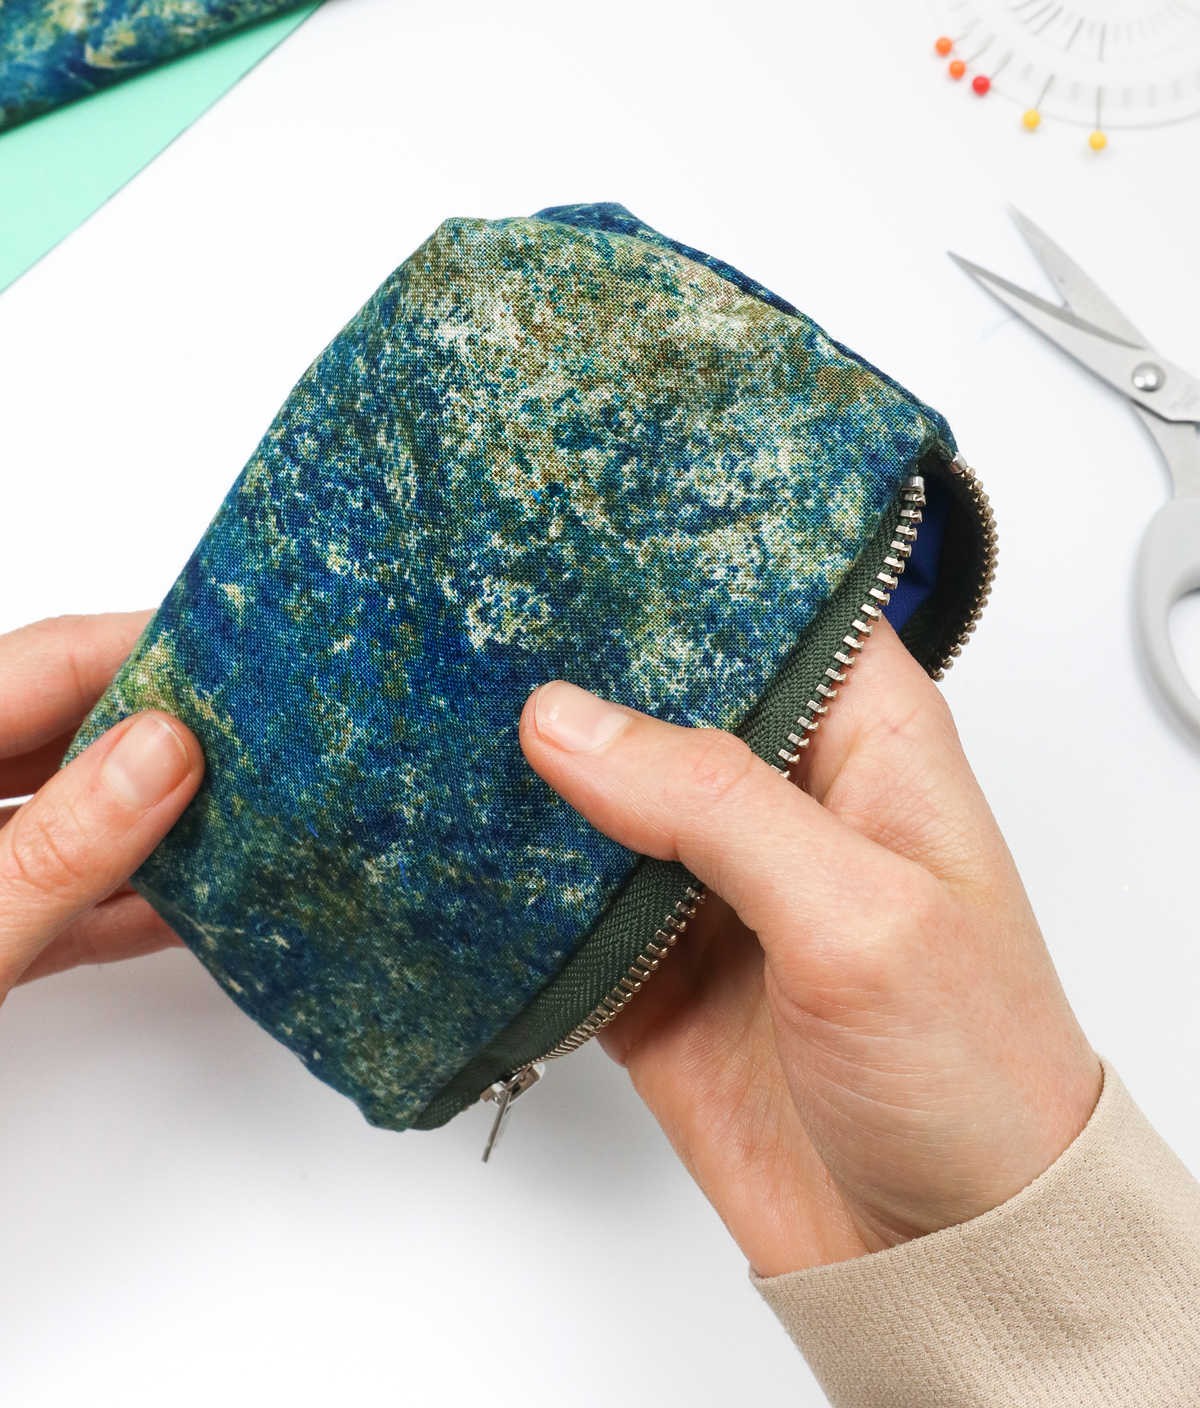

To complete the pouch, slide the lining fabric into place and gently guide it along the interior edge of the pouch using your fingers. Next, adjust the boxed ends by tweaking them ever so slightly until they’re perfectly aligned. With these final touches in place, your DIY zipper pouch is now ready for use – a fun and rewarding craft perfect for adults to enjoy.
Watch Full Tutorial

While visual learners may find the tutorial more engaging and easier to comprehend when presented through a video, it’s essential to acknowledge that this format is not the only effective means of learning. In fact, many individuals may prefer a more interactive approach, where they can pause, rewind, or replay specific sections as needed.
What Can You Store in This Zipper Pouch?

These versatile pouches can store a wide range of items, leaving only a few exceptions. While their capacity may vary depending on the size, they can comfortably accommodate everything from makeup essentials to writing utensils.
In fact, you can keep a multitude of items within these pouches, including but not limited to: personal identification documents such as keys, wallet, phone, cards, and cash; travel-related papers like passports and other important documents; beauty products and toiletries; hair accessories and styling tools; electronic chargers and audio equipment like headphones. Additionally, they can also hold stationery supplies, school materials, and even craft items.
Who Can Make This Pouch?

Whether you’re just starting out with sewing or a seasoned pro, this zipper pouch project is an excellent choice for honing your skills. For beginners, it’s a fantastic mini-project to practice cutting and sewing techniques, while still being easy enough to complete quickly. Meanwhile, experienced seamstresses can easily create multiple pouches in no time at all.
DIY Zipper Pouch (Step-by-step Tutorial)
For those new to sewing, this DIY zipper pouch is an excellent beginner-friendly project that can be completed in just under an hour. With a mere 10 minutes spent on prep and 30 minutes dedicated to active sewing time, you’ll be holding your finished pouch in no time. This project requires minimal investment, with a total cost of $7 making it accessible to crafty enthusiasts on a budget.
CraftsyHacks’ own Karo has shared this delightful pattern, offering inspiration for those looking to take their sewing skills to the next level.
Equipment
Materials
To create this adorable project, you’ll need two pieces of cotton fabric measuring 10 inches by 10 inches. Additionally, you’ll require a zipper that’s approximately 6 inches long. You may also want to have a paper pattern on hand, which was introduced in Step 1.
Instructions
To begin this project, start by gathering all your necessary supplies. Next, create a paper pattern to guide you in cutting out the fabric. Place the pattern on top of both the outer and lining fabrics, then draw an outline around each side, ensuring they align properly. Use sewing pins to secure the pattern in place. Once complete, remove the pattern and set it aside. Now, use scissors to cut along the outer edge of the fabric, leaving a quarter-inch gap for your seam allowance.
Next, position the outer fabric with the right side facing upwards, then lay the zipper across the top, ensuring it’s facing downwards. Place the lining fabric on top with the right side facing inward, effectively creating a sandwich with the two fabrics and the zipper in between. Sew along the inner edge of the fabric where the zipper is located. Once complete, pull the lining fabric over the zipper and smooth out any wrinkles.
Then, pull both fabrics taut, ensuring they’re evenly aligned at the zipper’s edges. Sew this side shut, again along the inner outline. Open up the fabric to reveal the pouch, then reach in and open the zipper halfway. You should see two corners of both the outer and lining fabrics. Mark an inch-wide section on one corner of the lining fabric, leaving that one corner aside. Sew all other corners shut, except for the marked one.
To box the indented corners, pinch the fabric, flatten it with your thumb, and pin in place before sewing across each corner. Repeat this process for the remaining three indented corners. Pull the fabric through the gap to turn the pouch right side up, then sew the gap shut. Finally, push the lining fabric back into the pouch, and your DIY zipper pouch is complete.