Planning a wedding on a budget can be overwhelming, especially when it comes to the little details that add up quickly. While it’s exciting to think about the big-ticket items like cake, dress, and flowers, it’s the smaller expenses that can sneak up on you. Take centerpieces for example – deciding on the perfect arrangement can be a challenge in itself, let alone the cost.
That’s why we’re sharing this creative solution: transform old bottles into stunning DIY wedding centerpieces, saving you both time and money. Not only is it an eco-friendly way to reuse materials, but the end result is a beautifully elegant display that will impress your guests without breaking the bank.
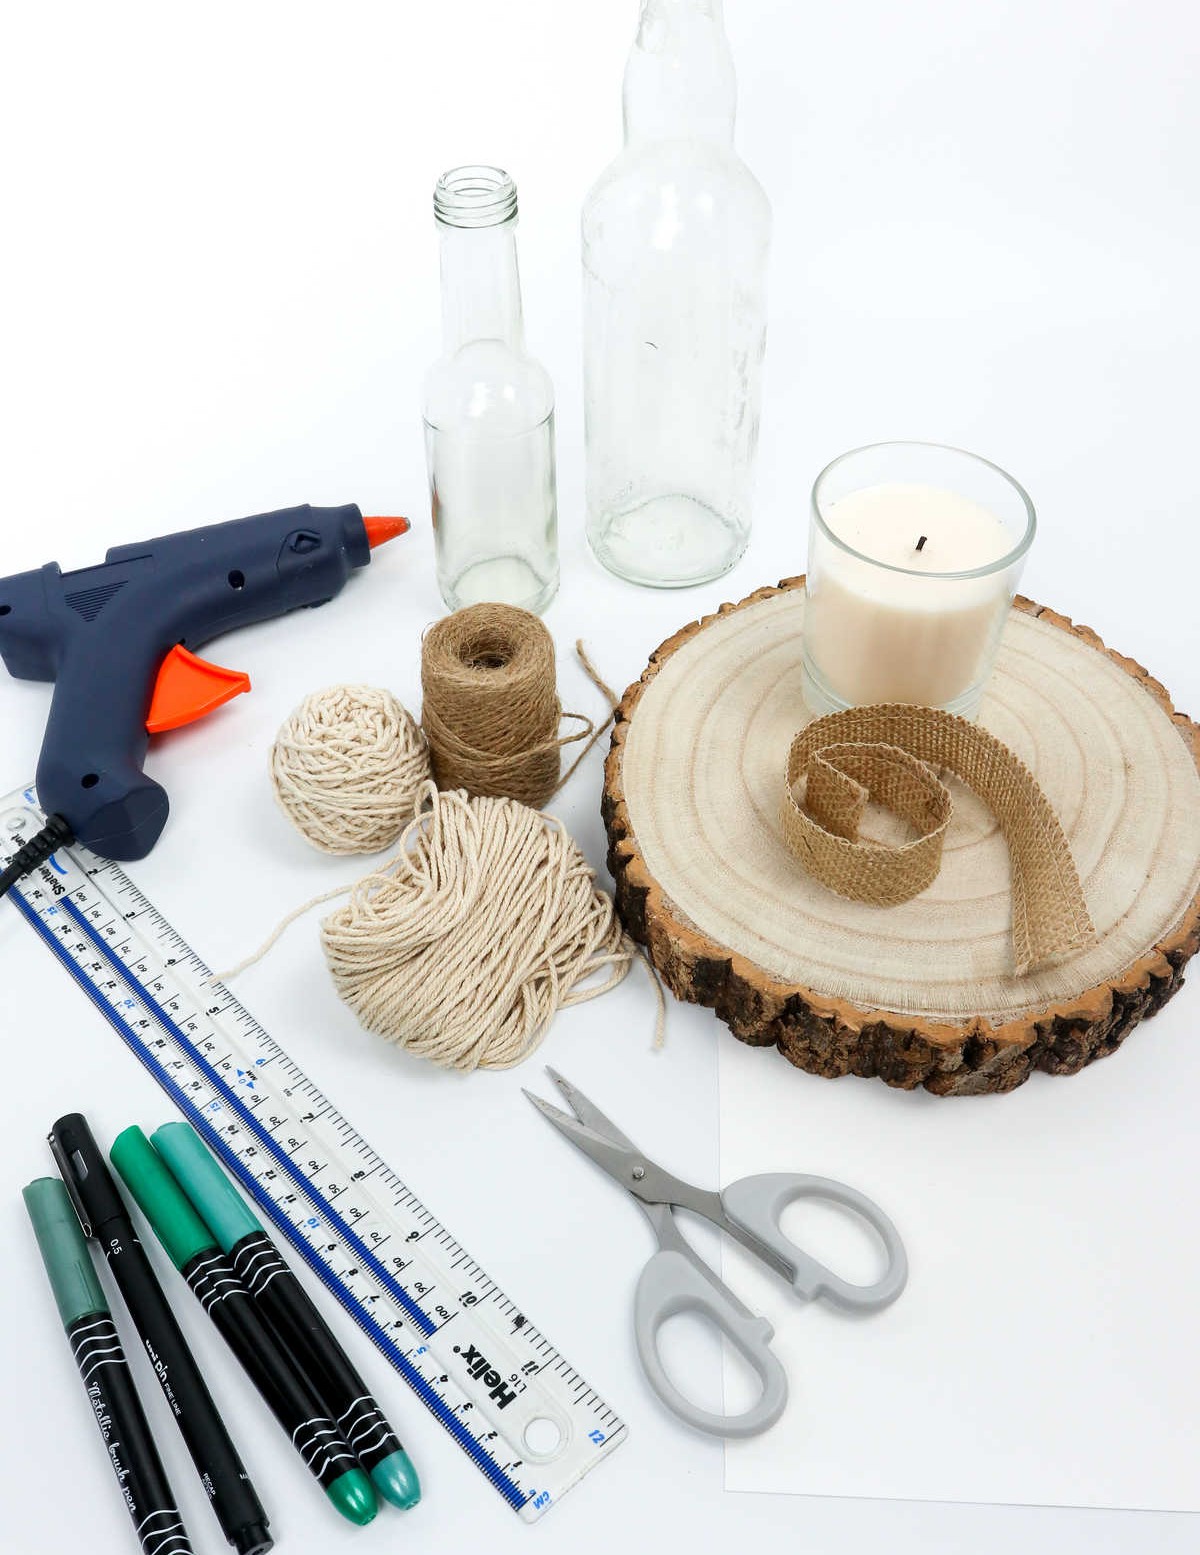
Supplies and Tools You’ll Need
How to Make Your Own Wedding Centerpiece
Before commencing your DIY project, it’s crucial to thoroughly clean all the bottles you’ll be utilizing. This involves a comprehensive cleaning process followed by meticulous scrubbing, rinsing, and finally allowing the containers to dry completely before putting them into use. Neglecting this step can have disastrous consequences – if your bottles are harbouring dirt or grease, it will irreparably compromise their aesthetic appeal.
Step 1
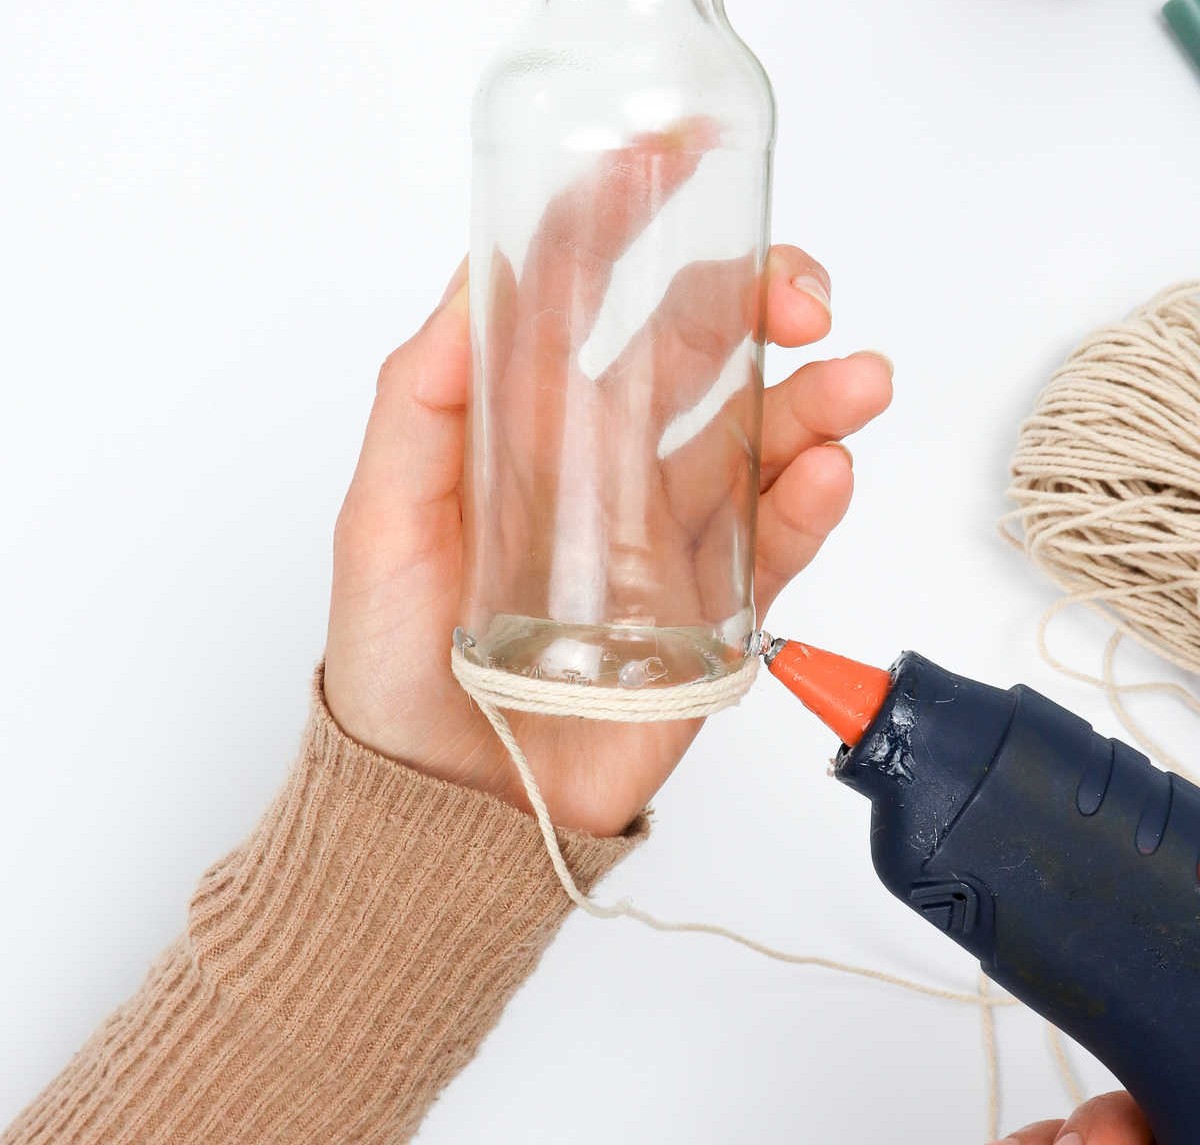
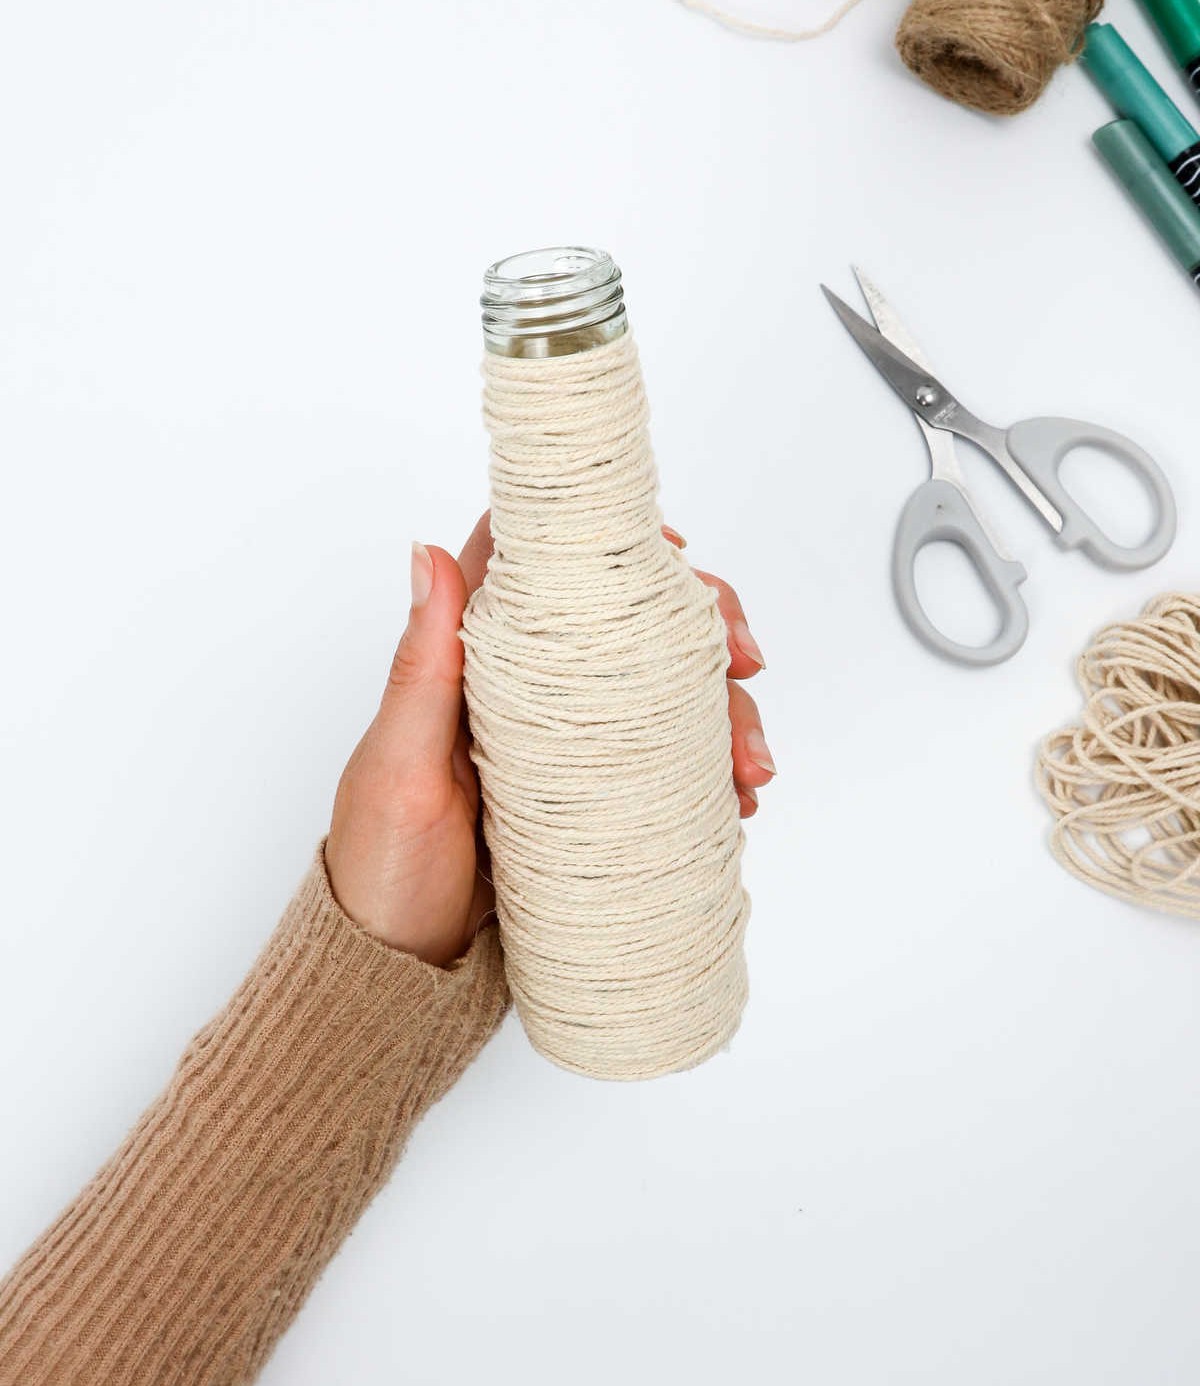
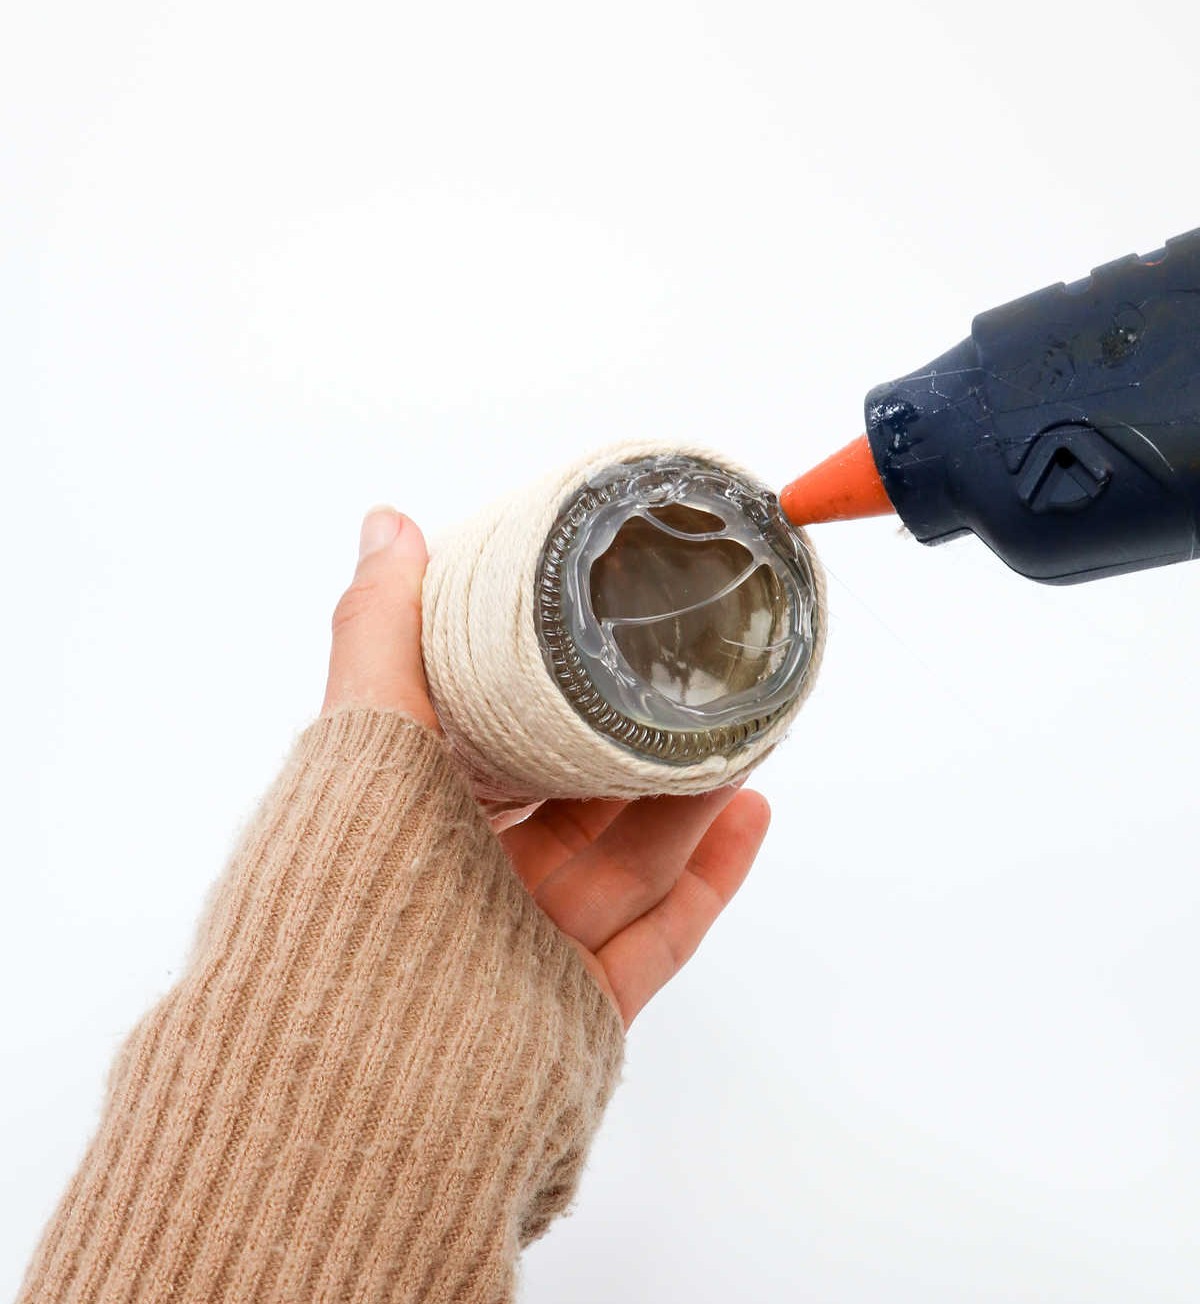
To initiate the process, begin by carefully unwinding the cotton cord. The thickness of the cord can vary to your preference, although a more substantial or thinner cord may affect the ease of attachment. For optimal results, choose a cord that’s not too thin or too thick.
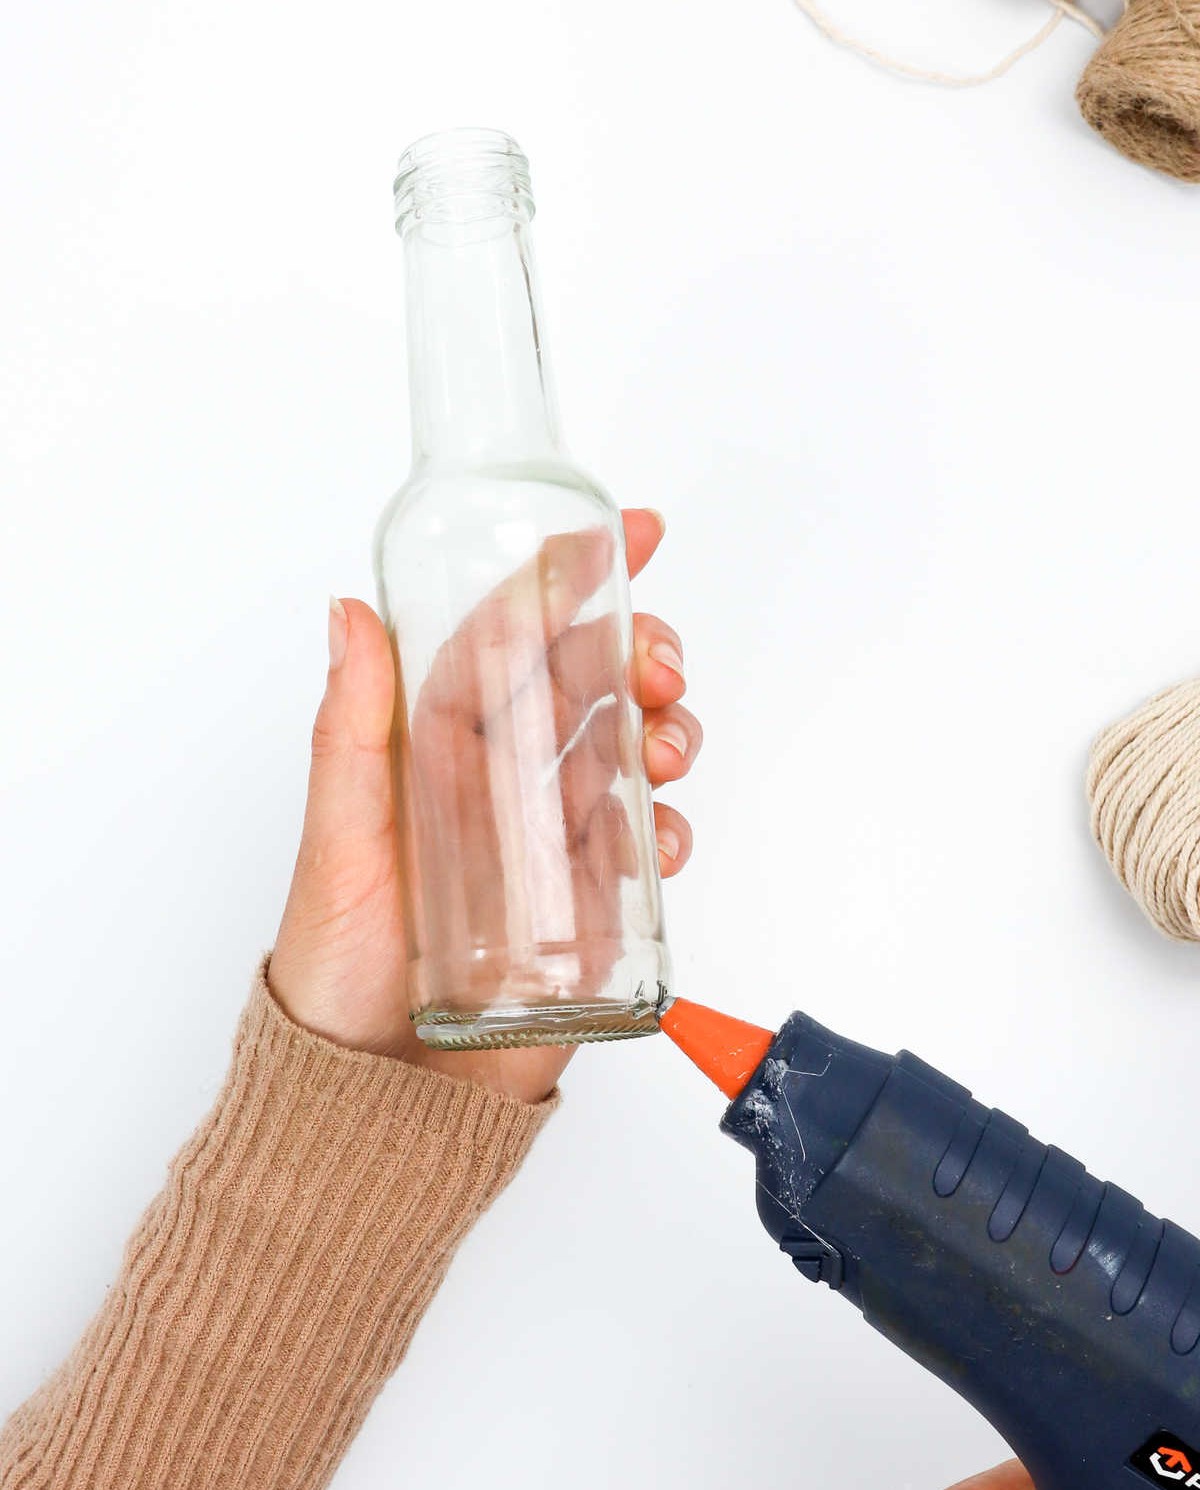
Next, obtain your hot glue gun and adhesive bottle. Apply a small amount of glue to the base of the bottle. Subsequently, secure the cord to the glue by gently pressing it into place.
Hold the cord firmly for a short duration to ensure it adheres properly.
As you’re just starting out with this project, it’s crucial that the initial attachment is done correctly, as any misalignment may cause the cord to unravel later on.
Step 2
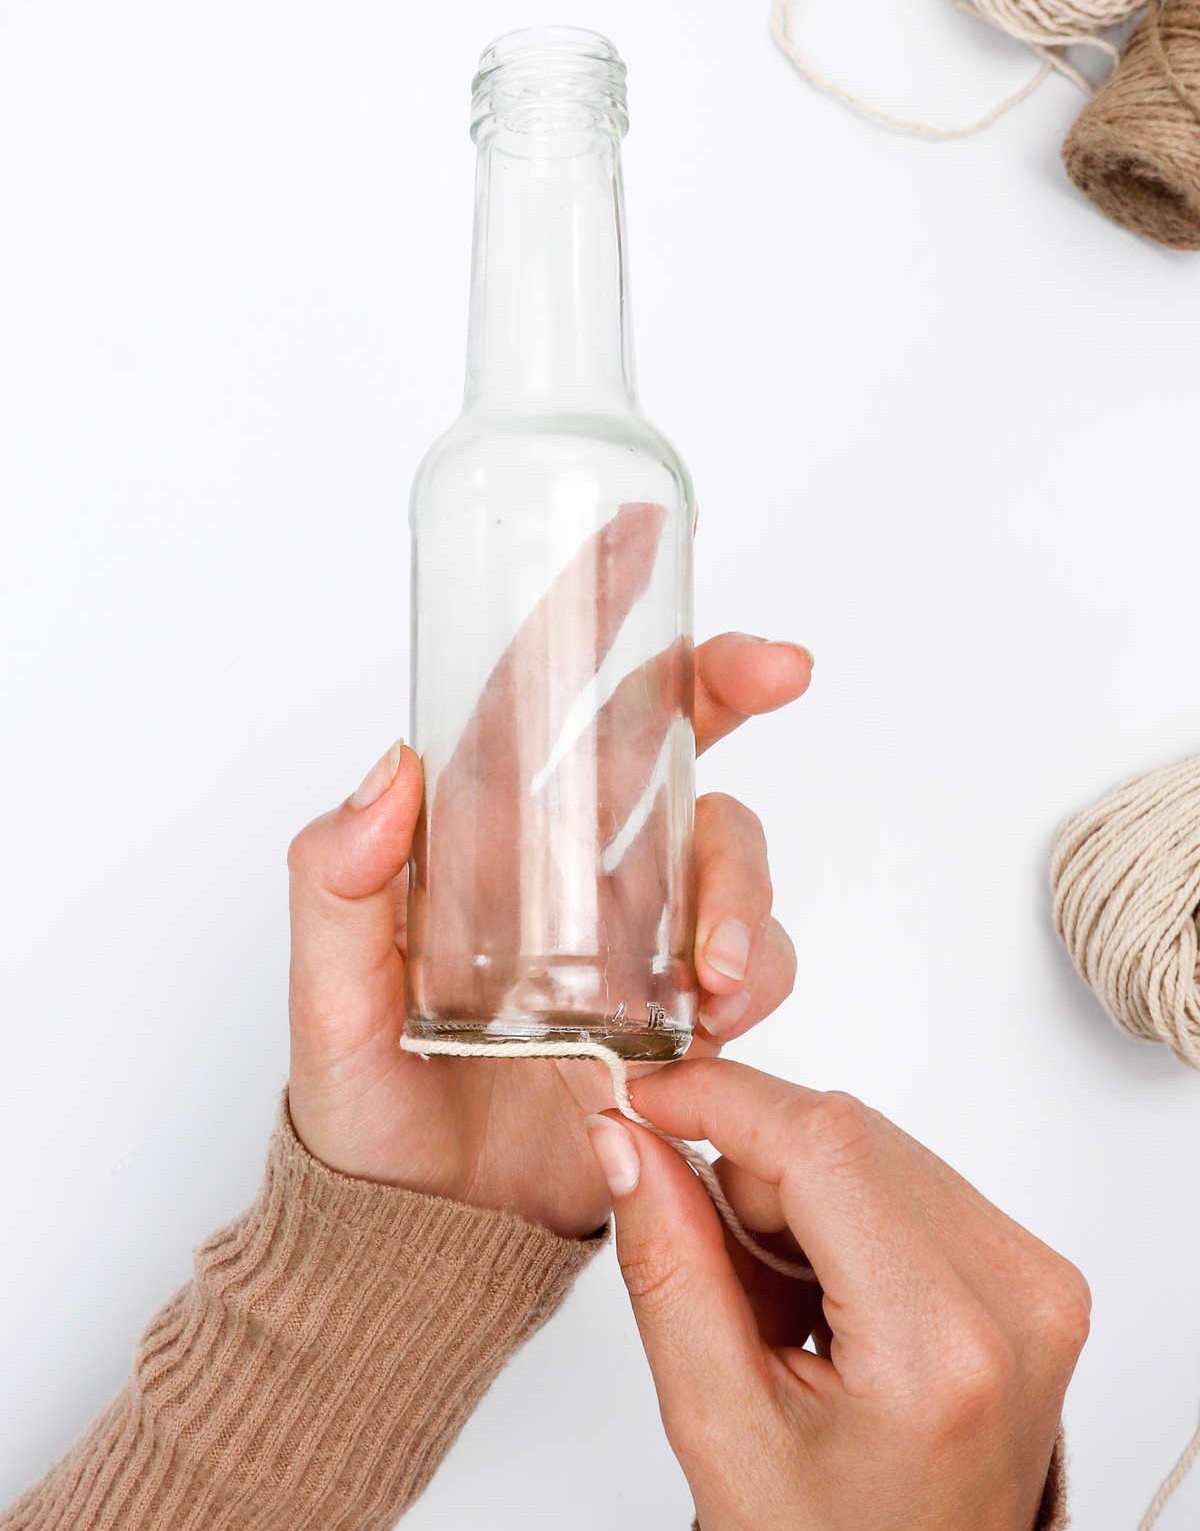
To complete the wrapping process, revisit the starting point of the cord and carefully apply a thin layer of glue using your trusty glue gun. As you work, ensure the cord remains snug around the base, gradually building upon the initial layer. Consistently add subsequent layers of glue, allowing each one to set before proceeding, until you’ve achieved the desired coverage.
Step 3

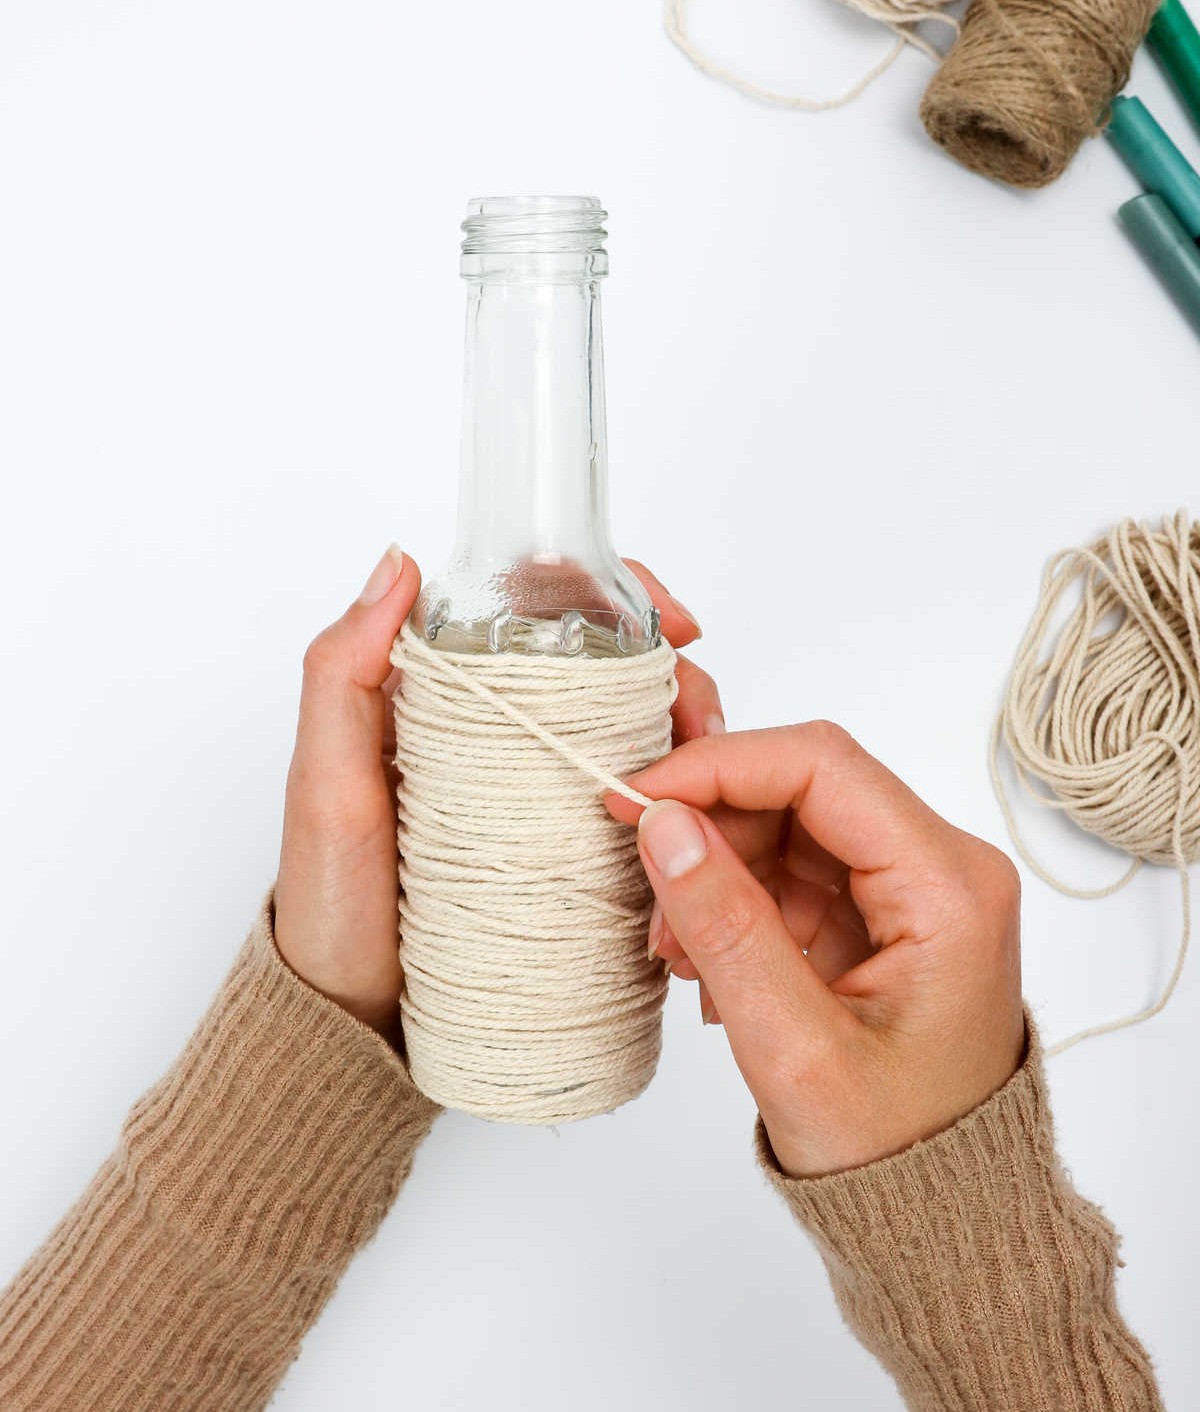
As you continue to wrap the cord around the bottle, focus on maintaining a steady pace rather than striving for precision. In fact, embracing imperfection can add to the charm of your creation. Feel free to intentionally overlap the cords, allowing them to bulge and bunch up in a rustic, chunky manner. The unevenness will only add character to your finished piece.
Step 4
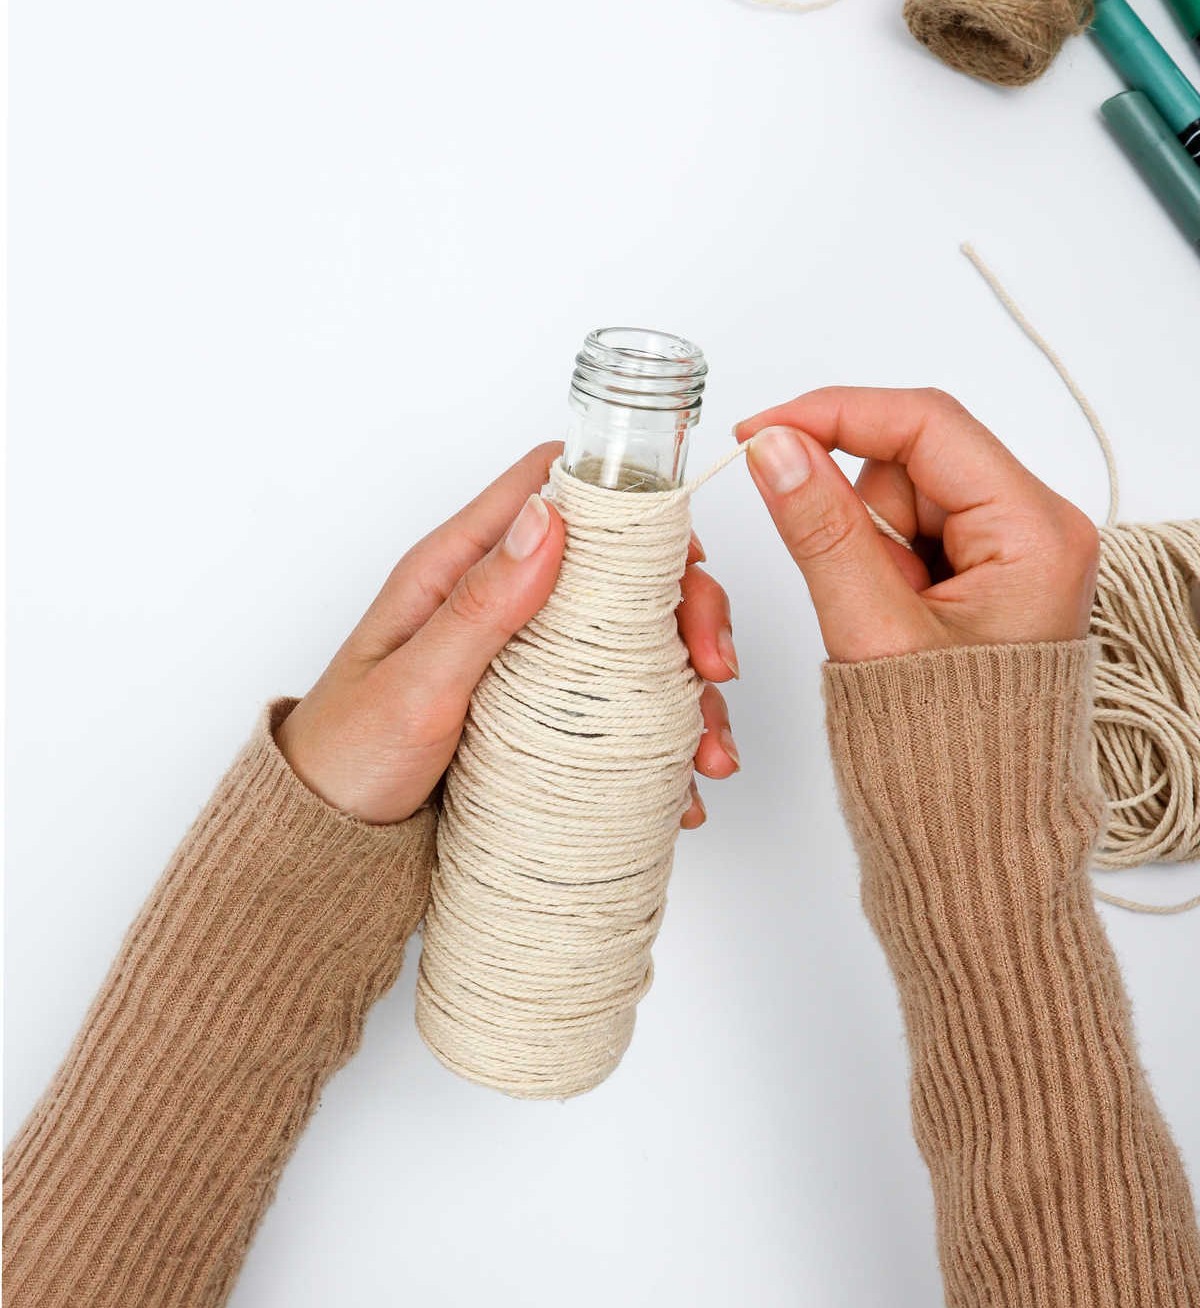
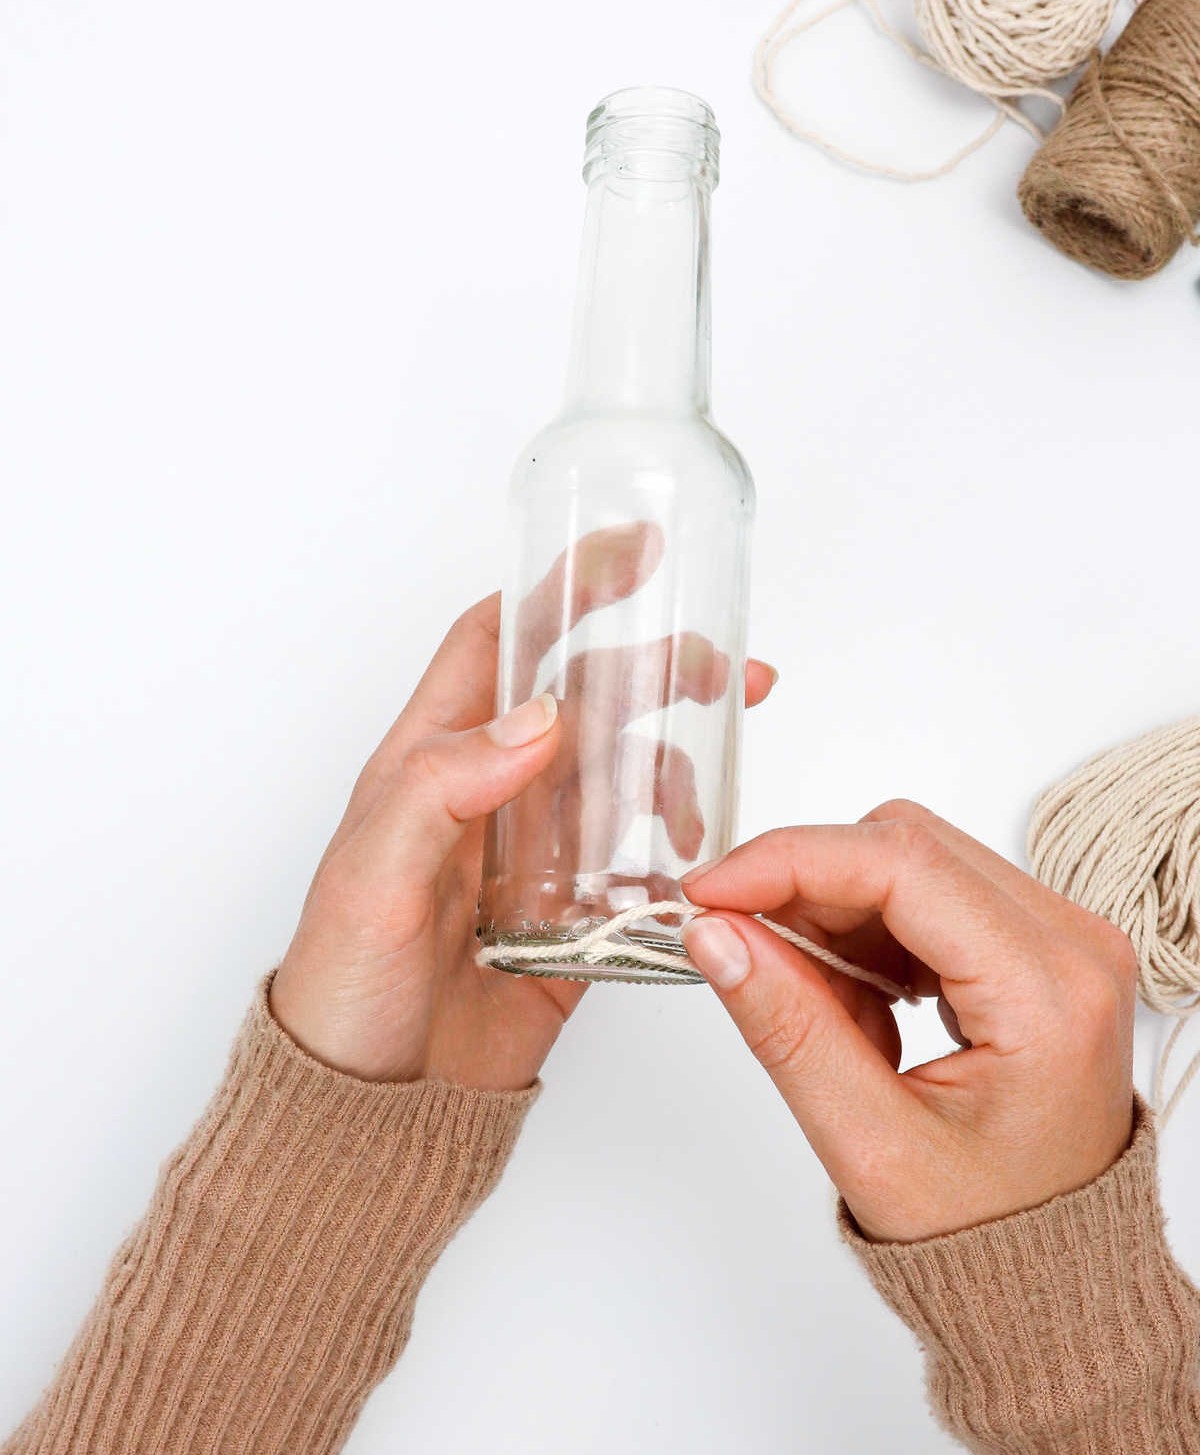
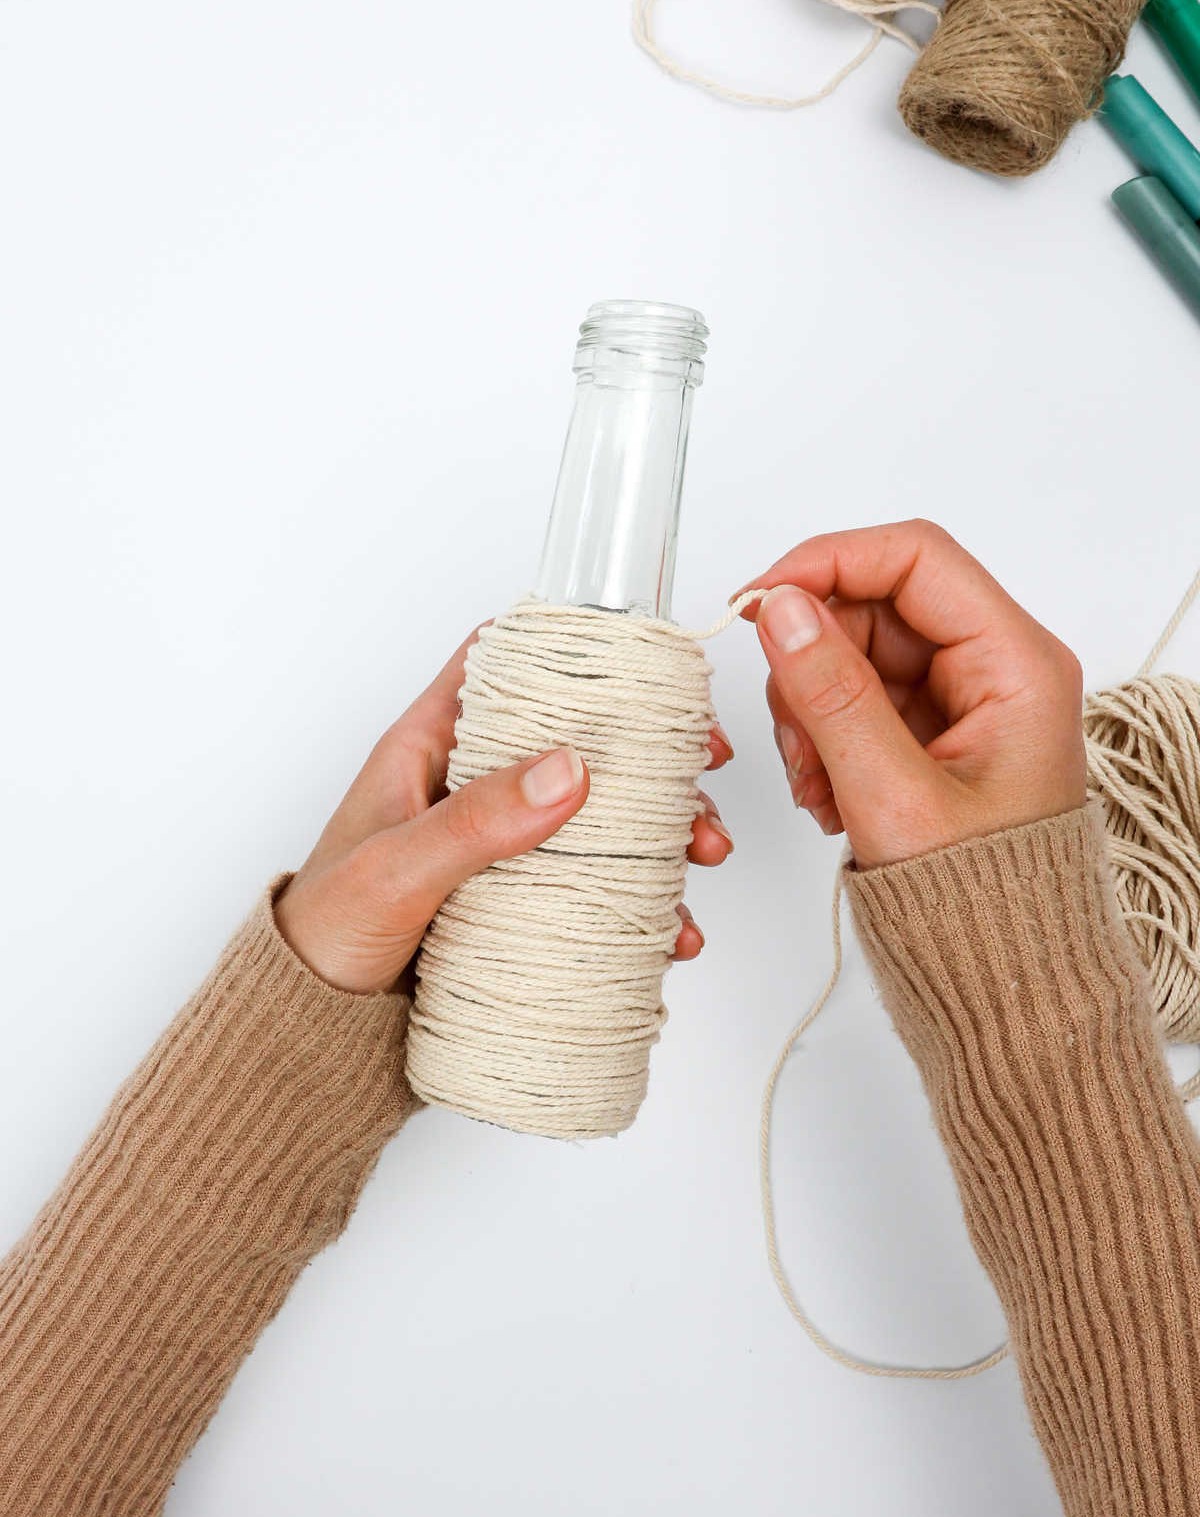
Reach the very edge of the bottle’s contents, where the liquid meets the rim. Next, secure the string by fastening it off. Cut away the excess cord and apply a small amount of hot glue to the end. Gently press this newly glued area into the preceding layer, ensuring a seamless blend.
Step 5
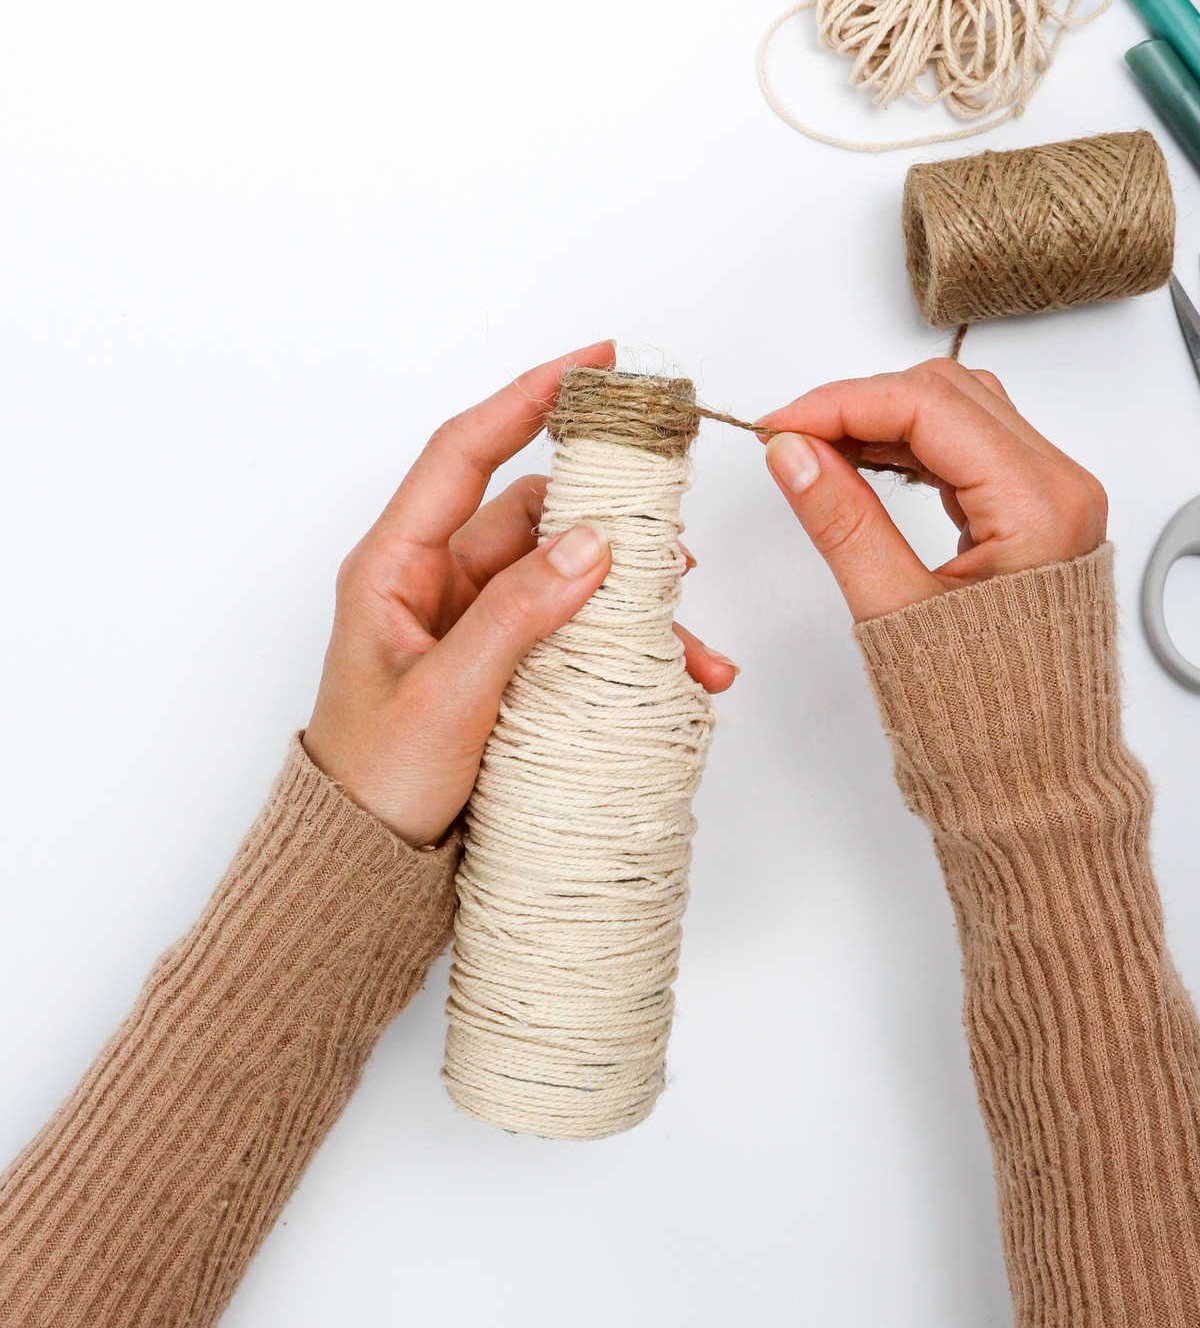
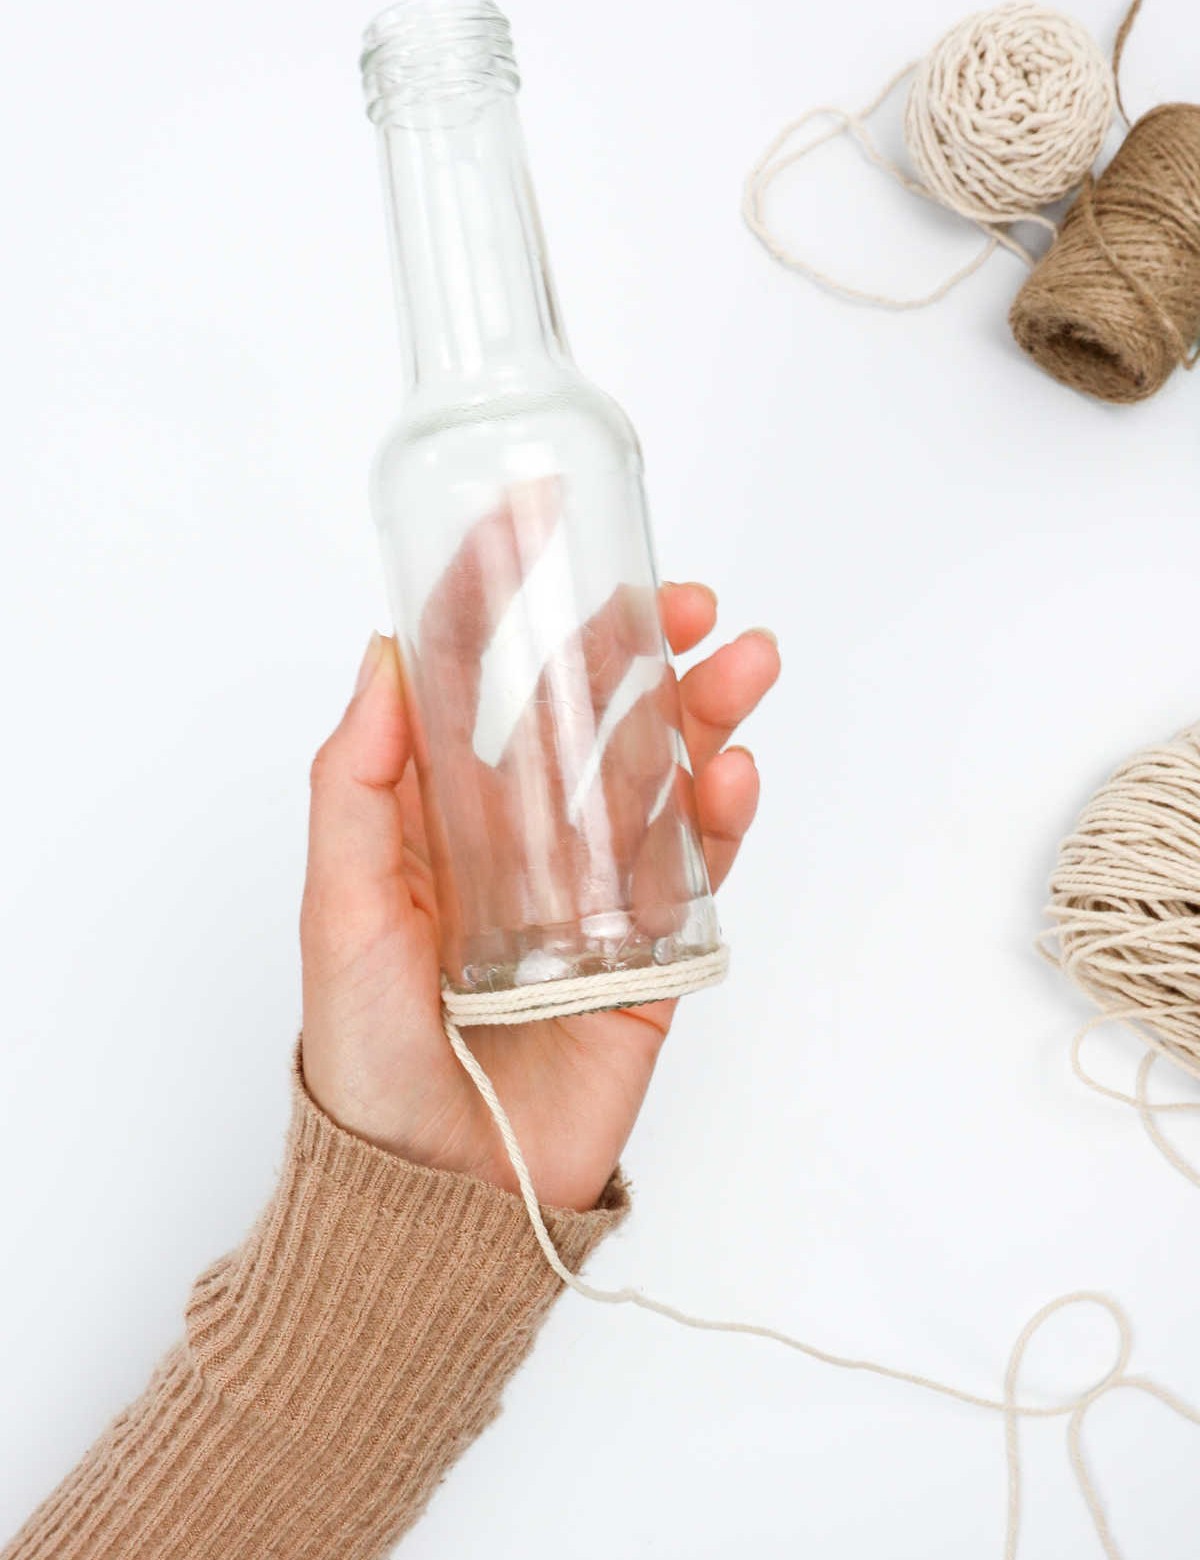
For a rustic look, consider replacing the traditional cotton cord with durable jute twine. Then, wrap it neatly around the mouth and rim of the glass bottle, creating a charming and earthy aesthetic.
Step 6
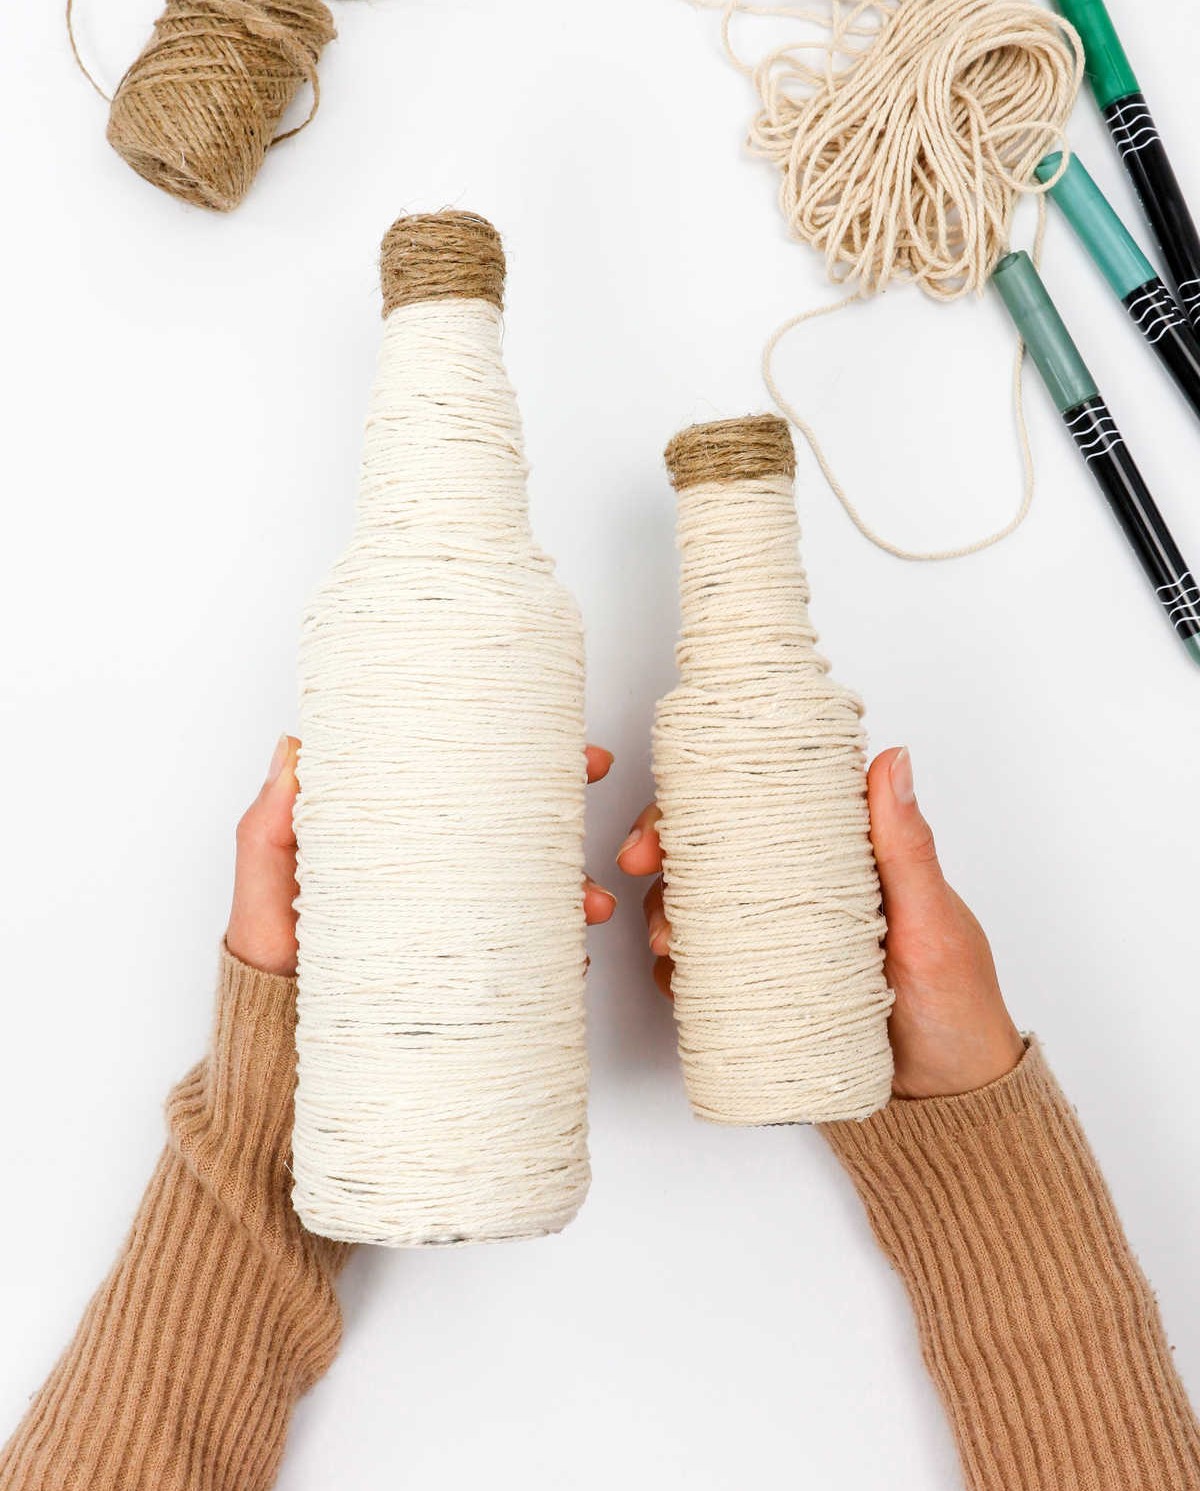
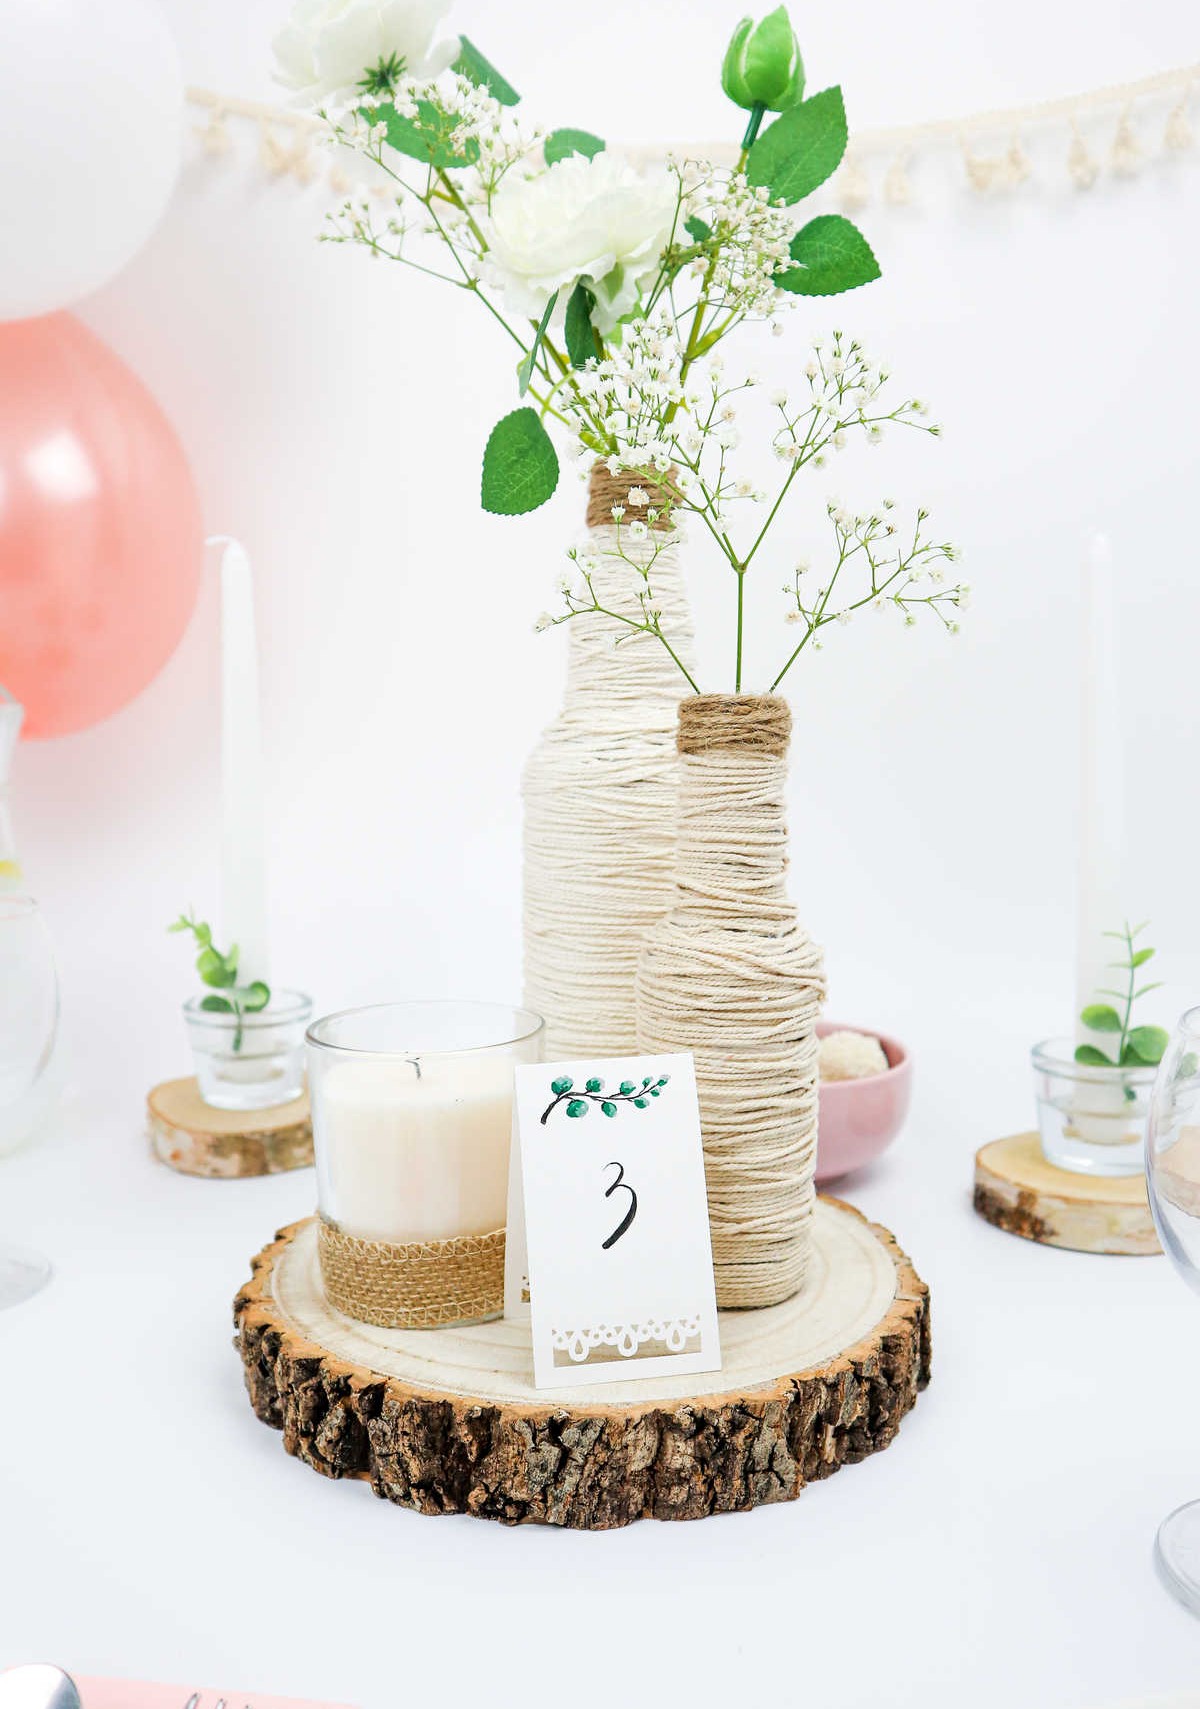
As you’ve now successfully wrapped your first bottle in a charming bohemian-inspired design, it’s time to create a matching companion piece. To achieve the same aesthetic for your second bottle, simply replicate the process of wrapping and embellishing the initial one. With these two stunning bottles now part of your collection, you’ll be able to enjoy the fruits of your creativity while admiring their unique charm.
Step 7

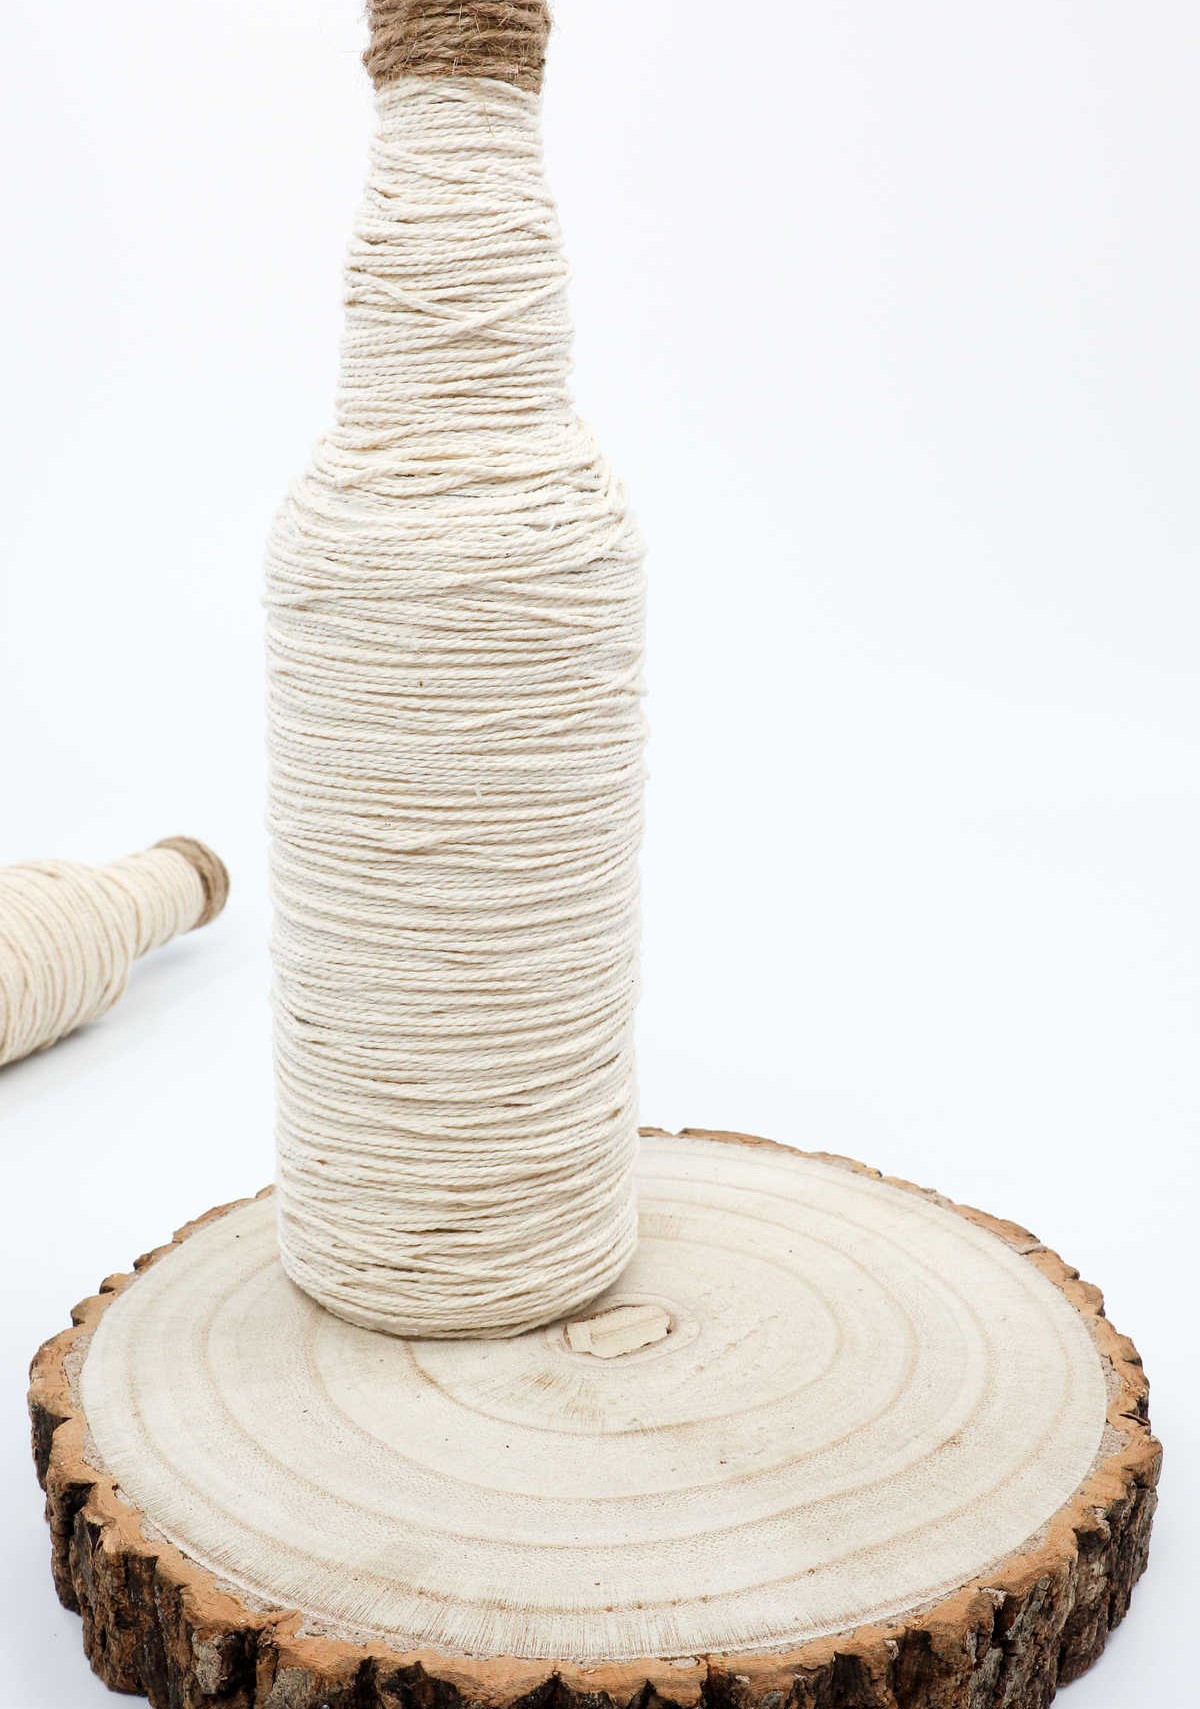

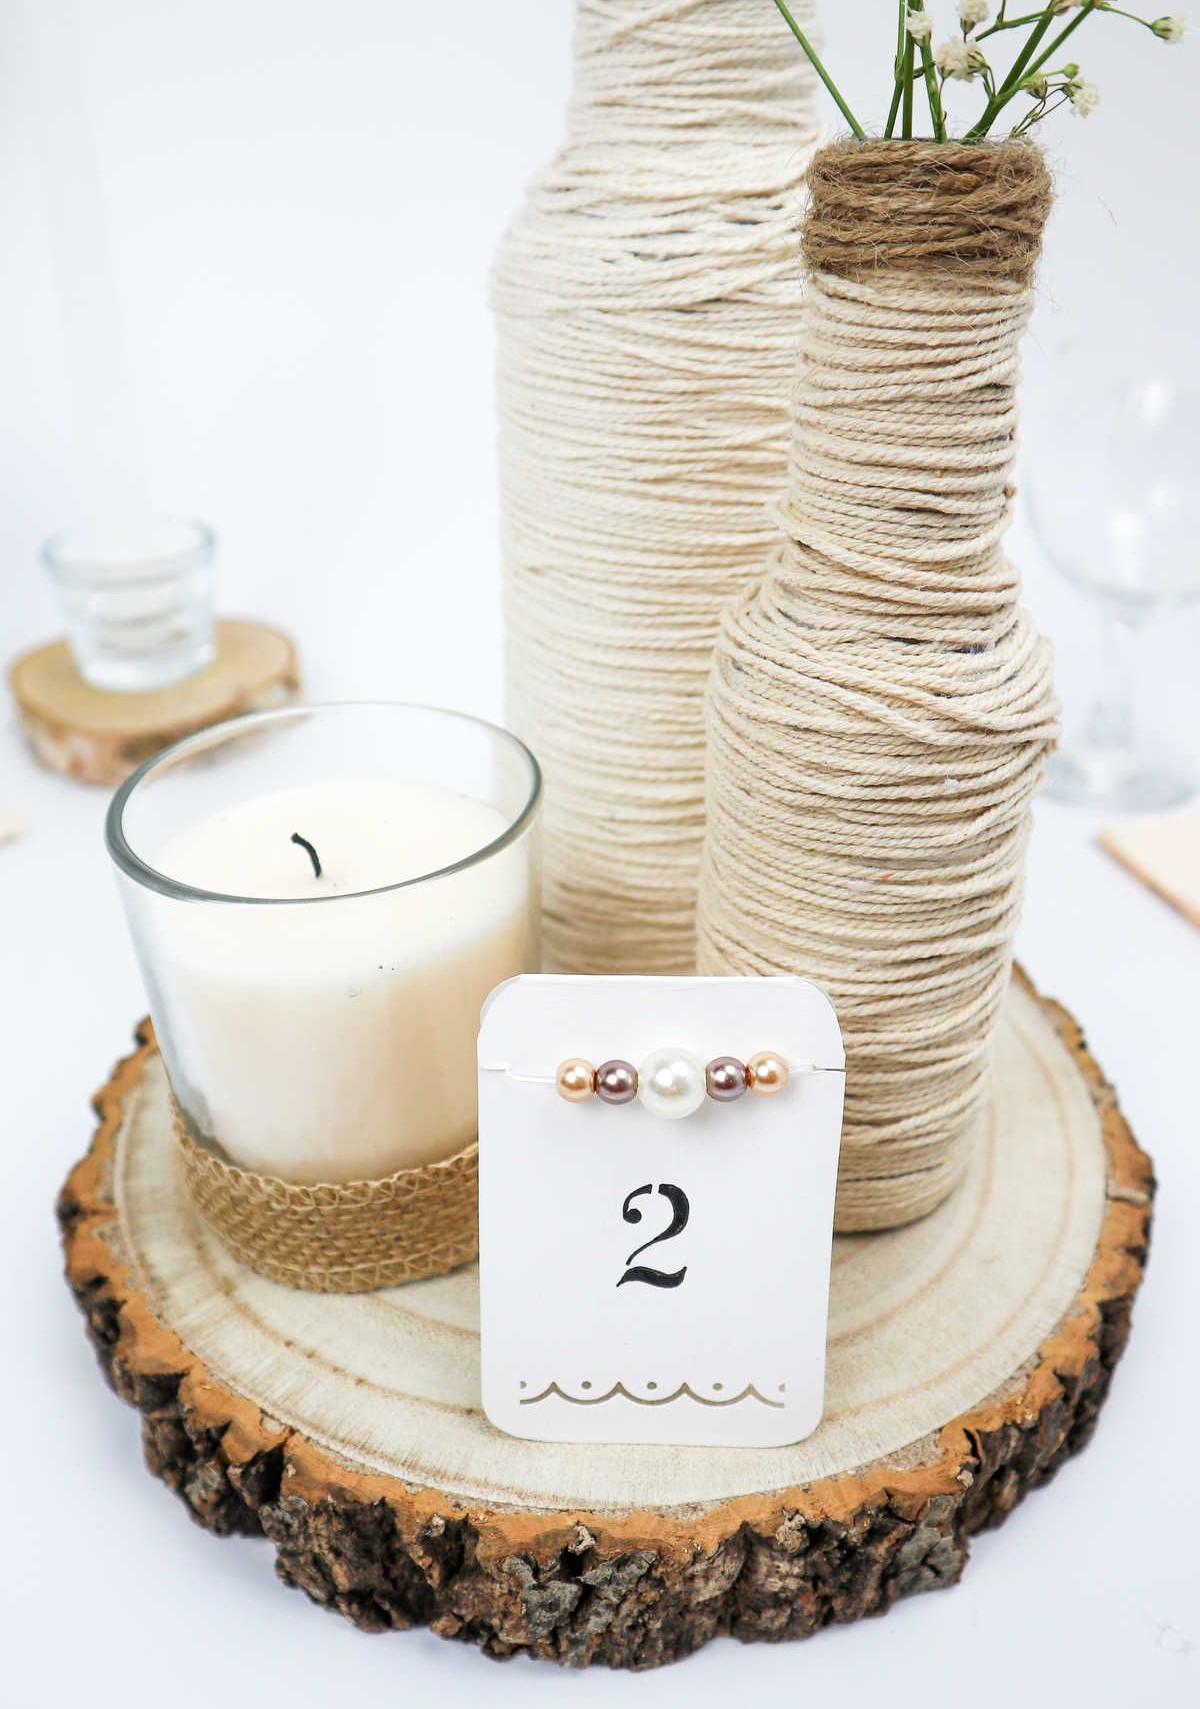
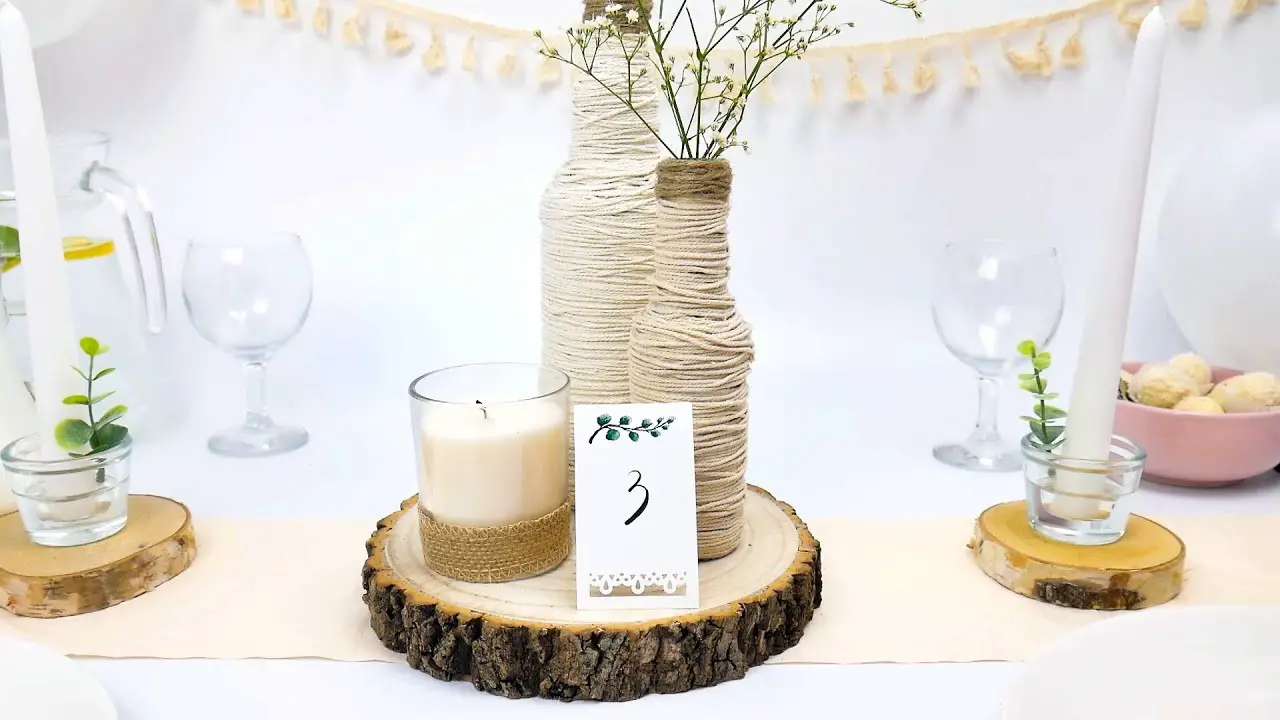
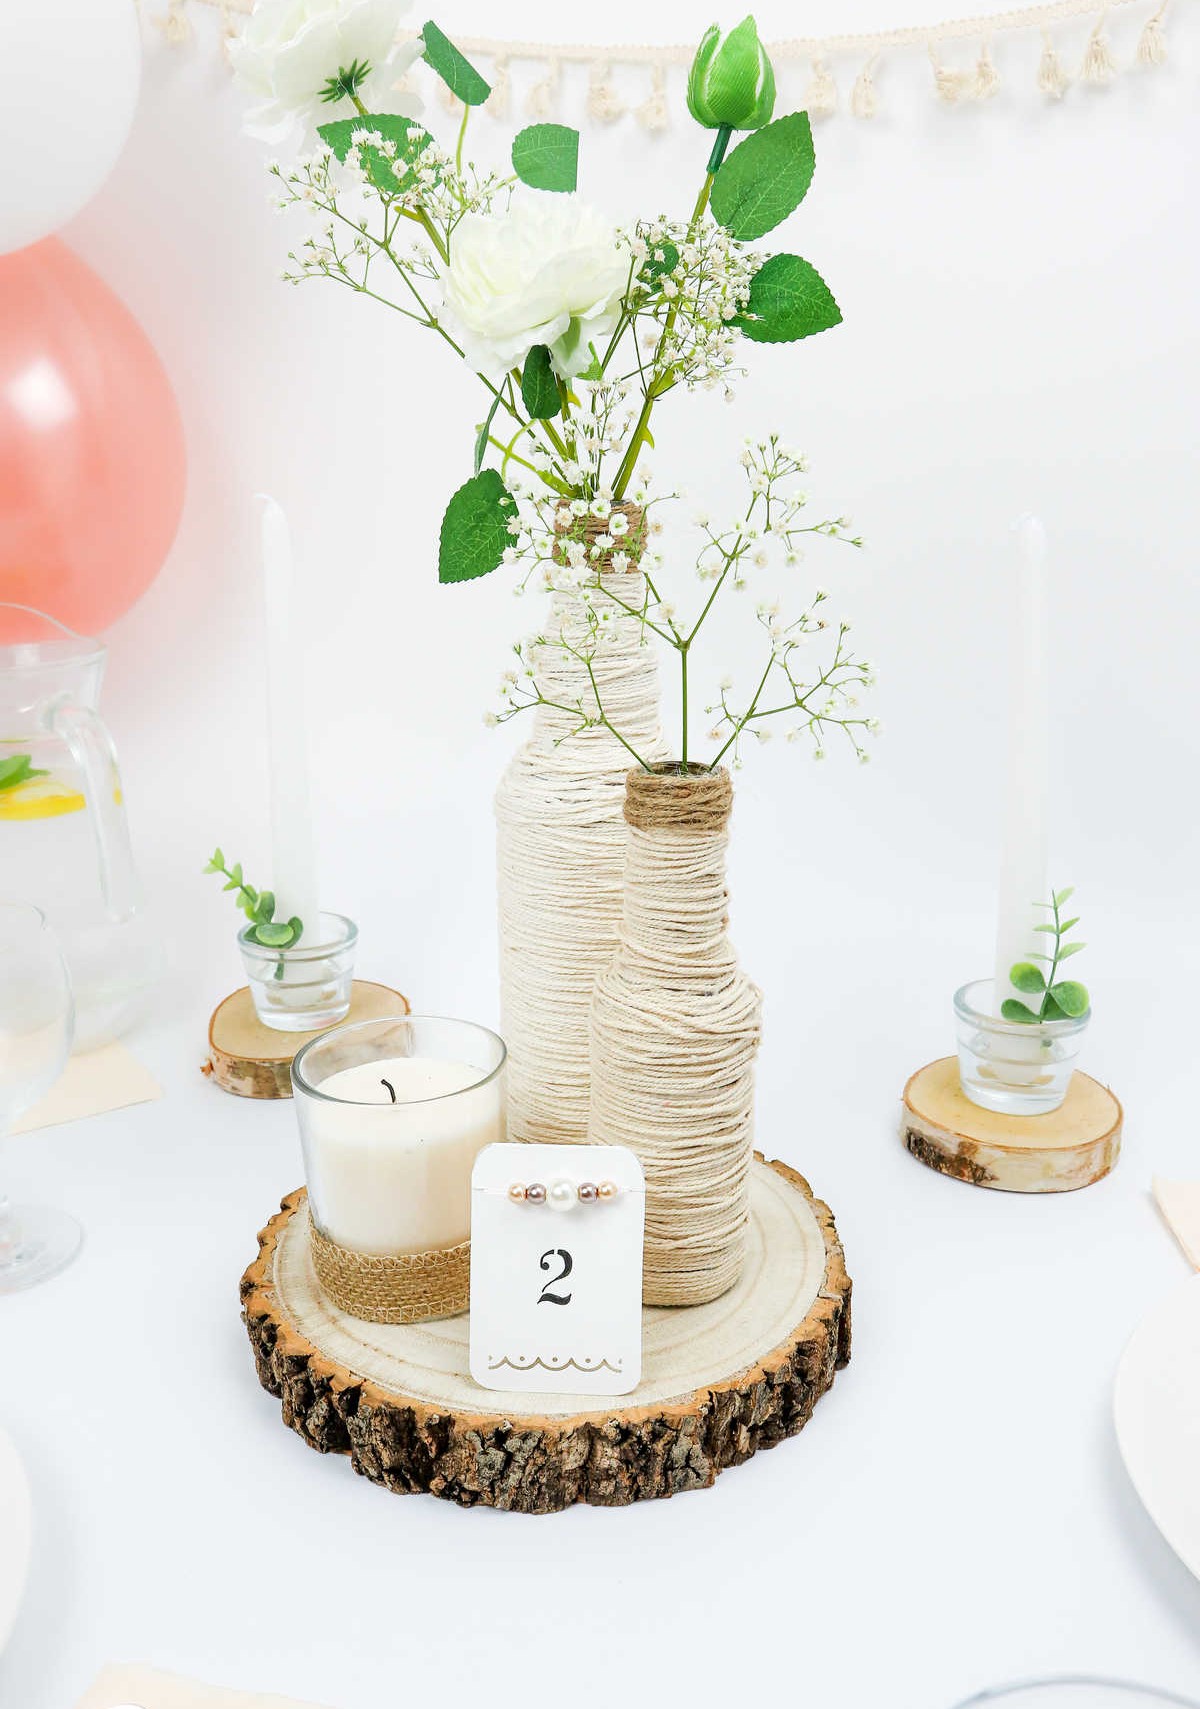
The centrepiece is a crucial element in completing the look. It’s not just about adding a few vases; you need to create an inviting atmosphere. Start by preparing the foundation with your wooden slice base. Next, thoughtfully arrange the bottles on top of the stand, allowing their shapes and hues to harmonize. To add an extra layer of stability and visual interest, consider hot gluing the bottoms of the glass vessels to the base. This will also help secure the second bottle in place.
Step 8
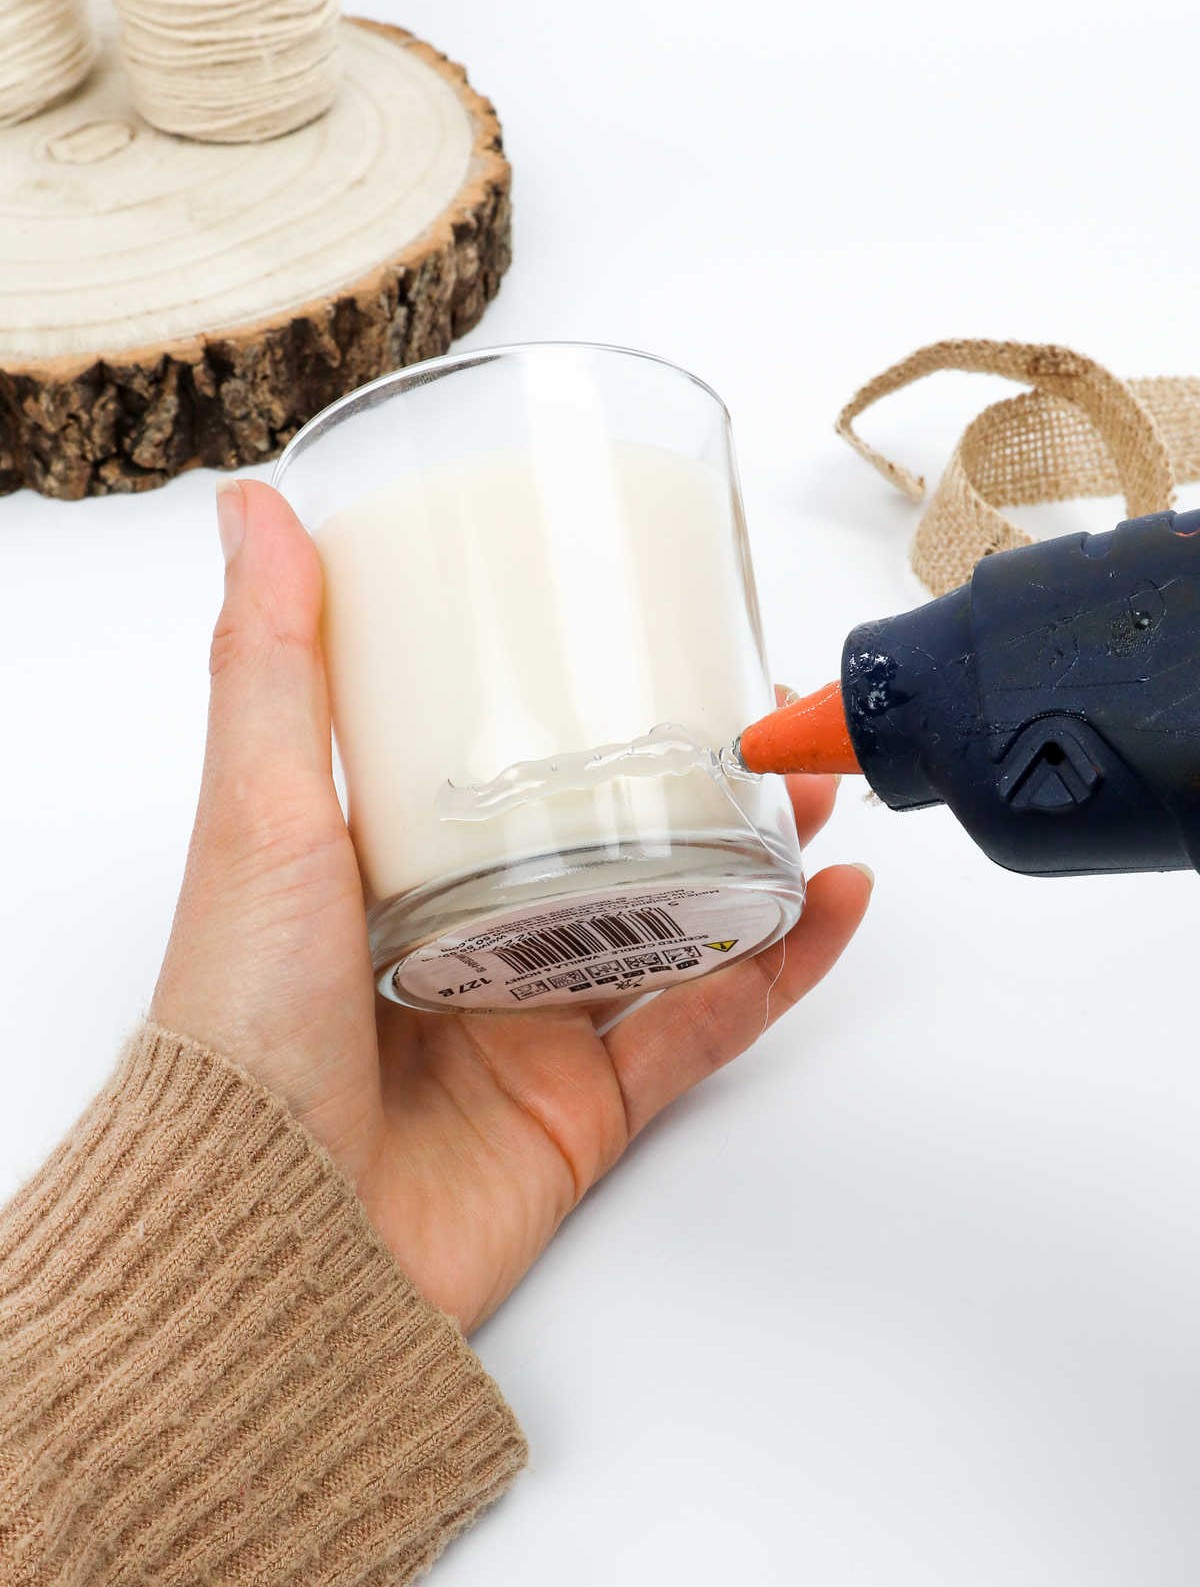
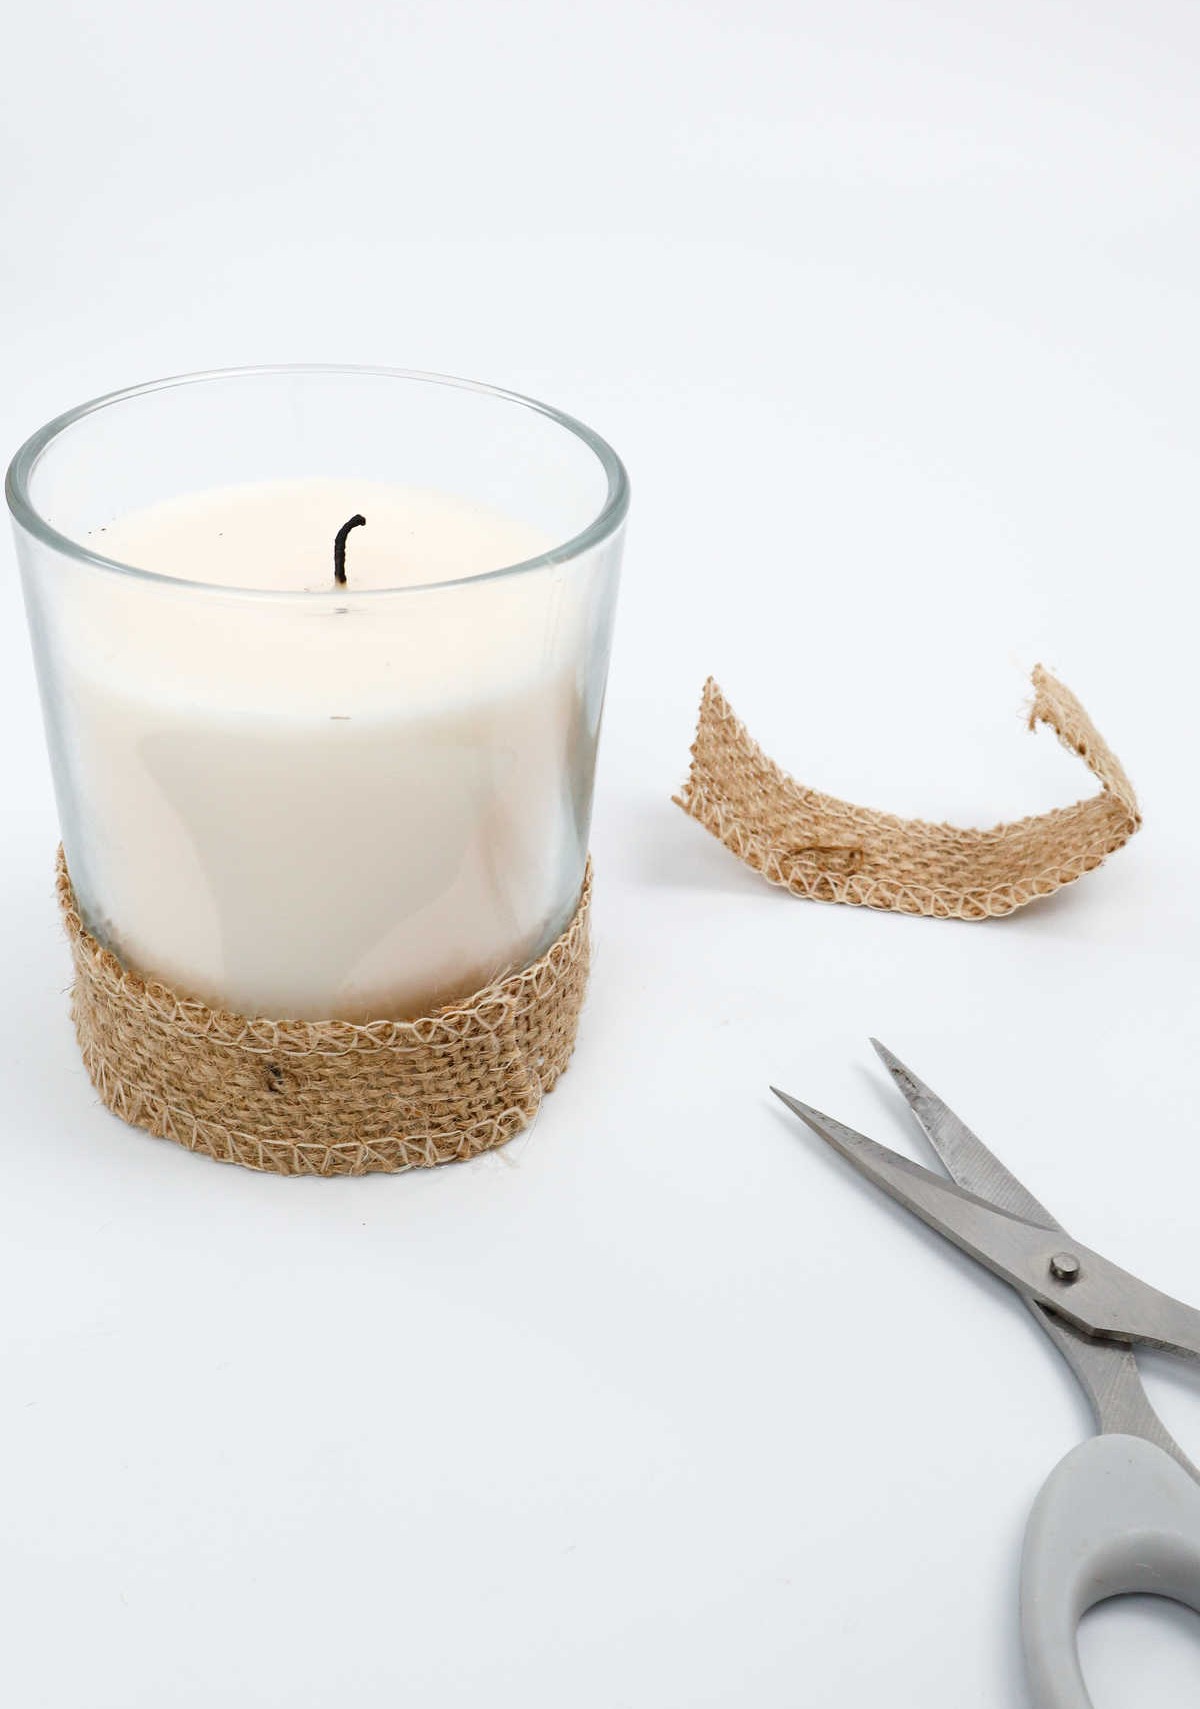
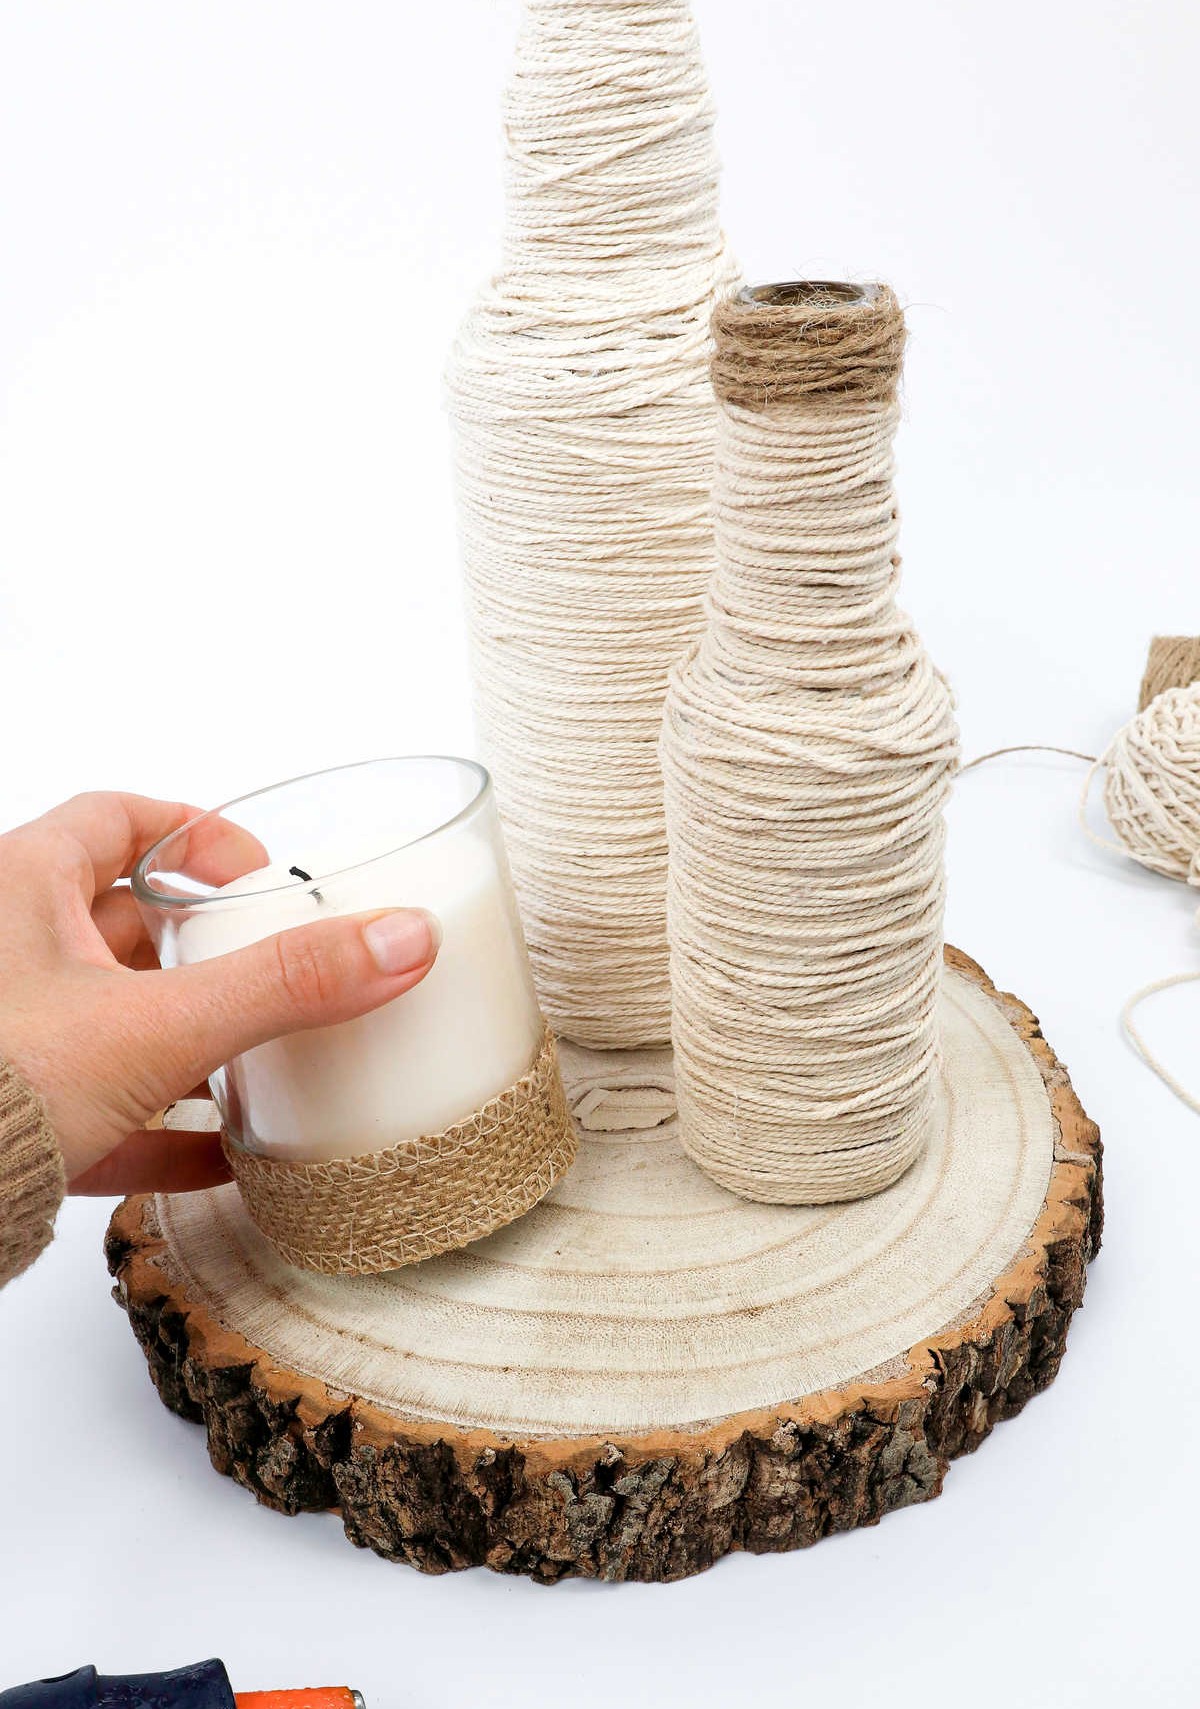
To add a rustic touch to your centerpiece, start by preparing a simple glass-jarred candle. Begin by applying a thin border of hot glue around the base of the jar. Next, carefully wrap jute ribbon around the jar, securing it with the dried glue. Once complete, you can then attach the candle to the wooden base beside the bottles. While this adds a cozy ambiance, there’s still one essential element missing – the number cards for the table.
Don’t worry, I’ve got a solution that will bring everything together.
Step 9
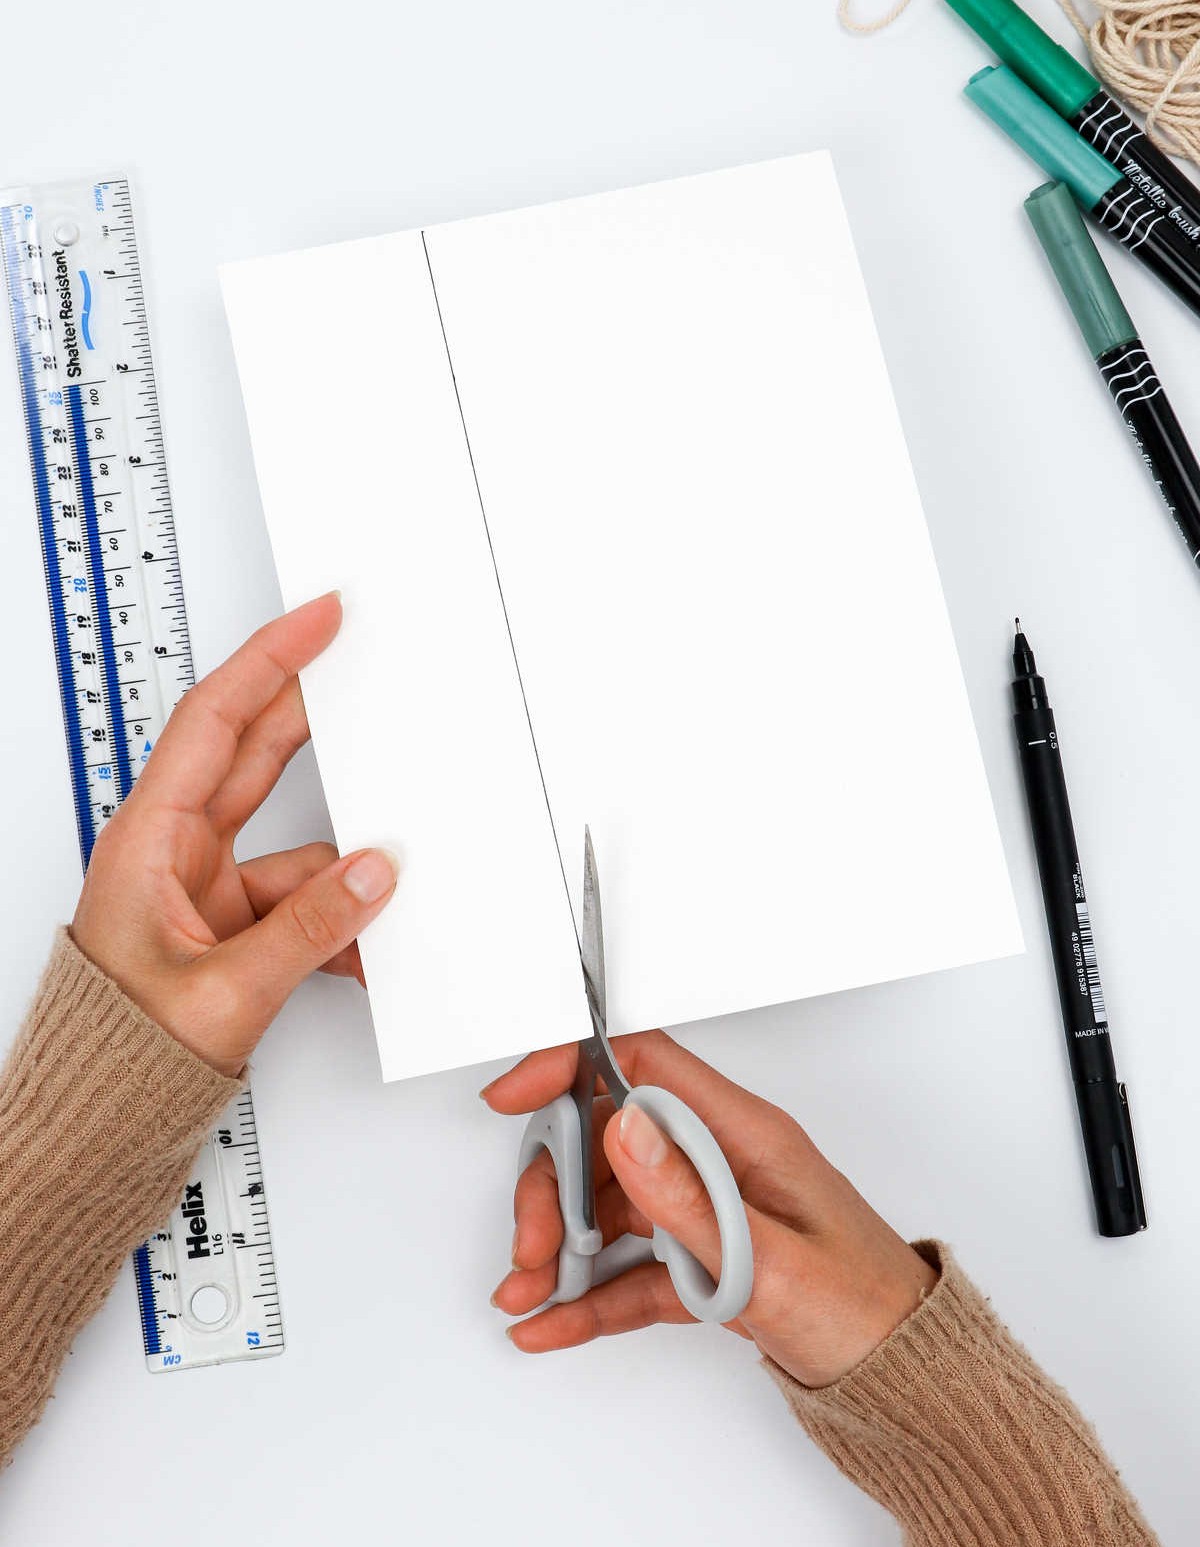
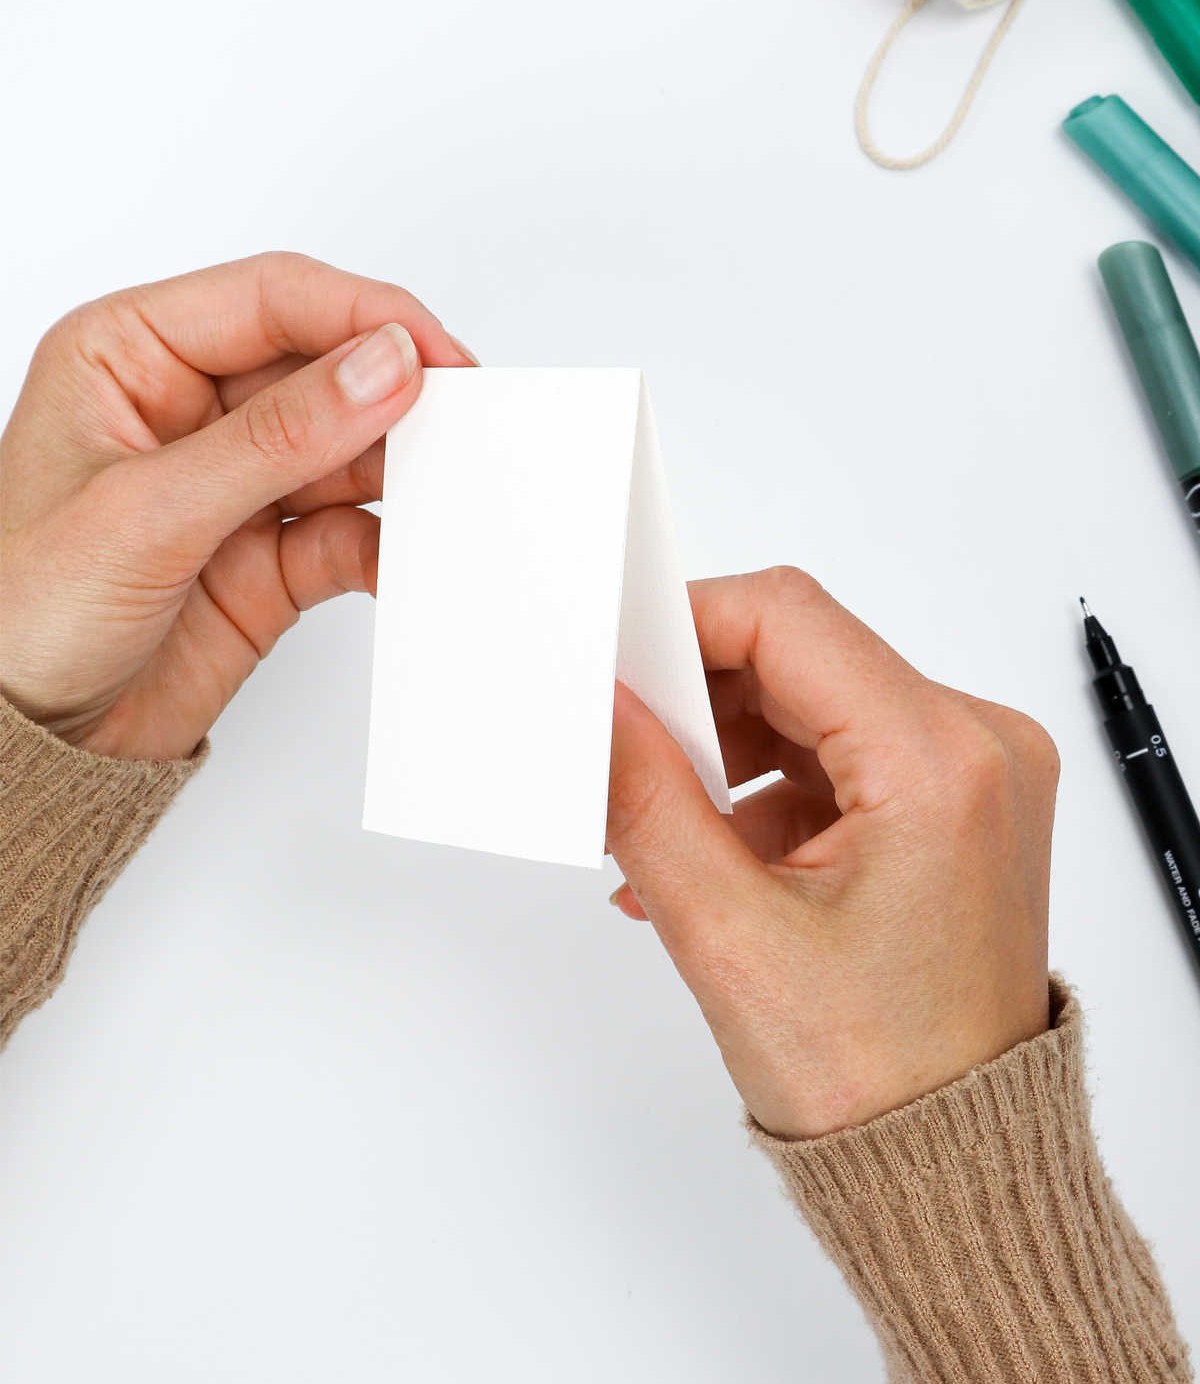
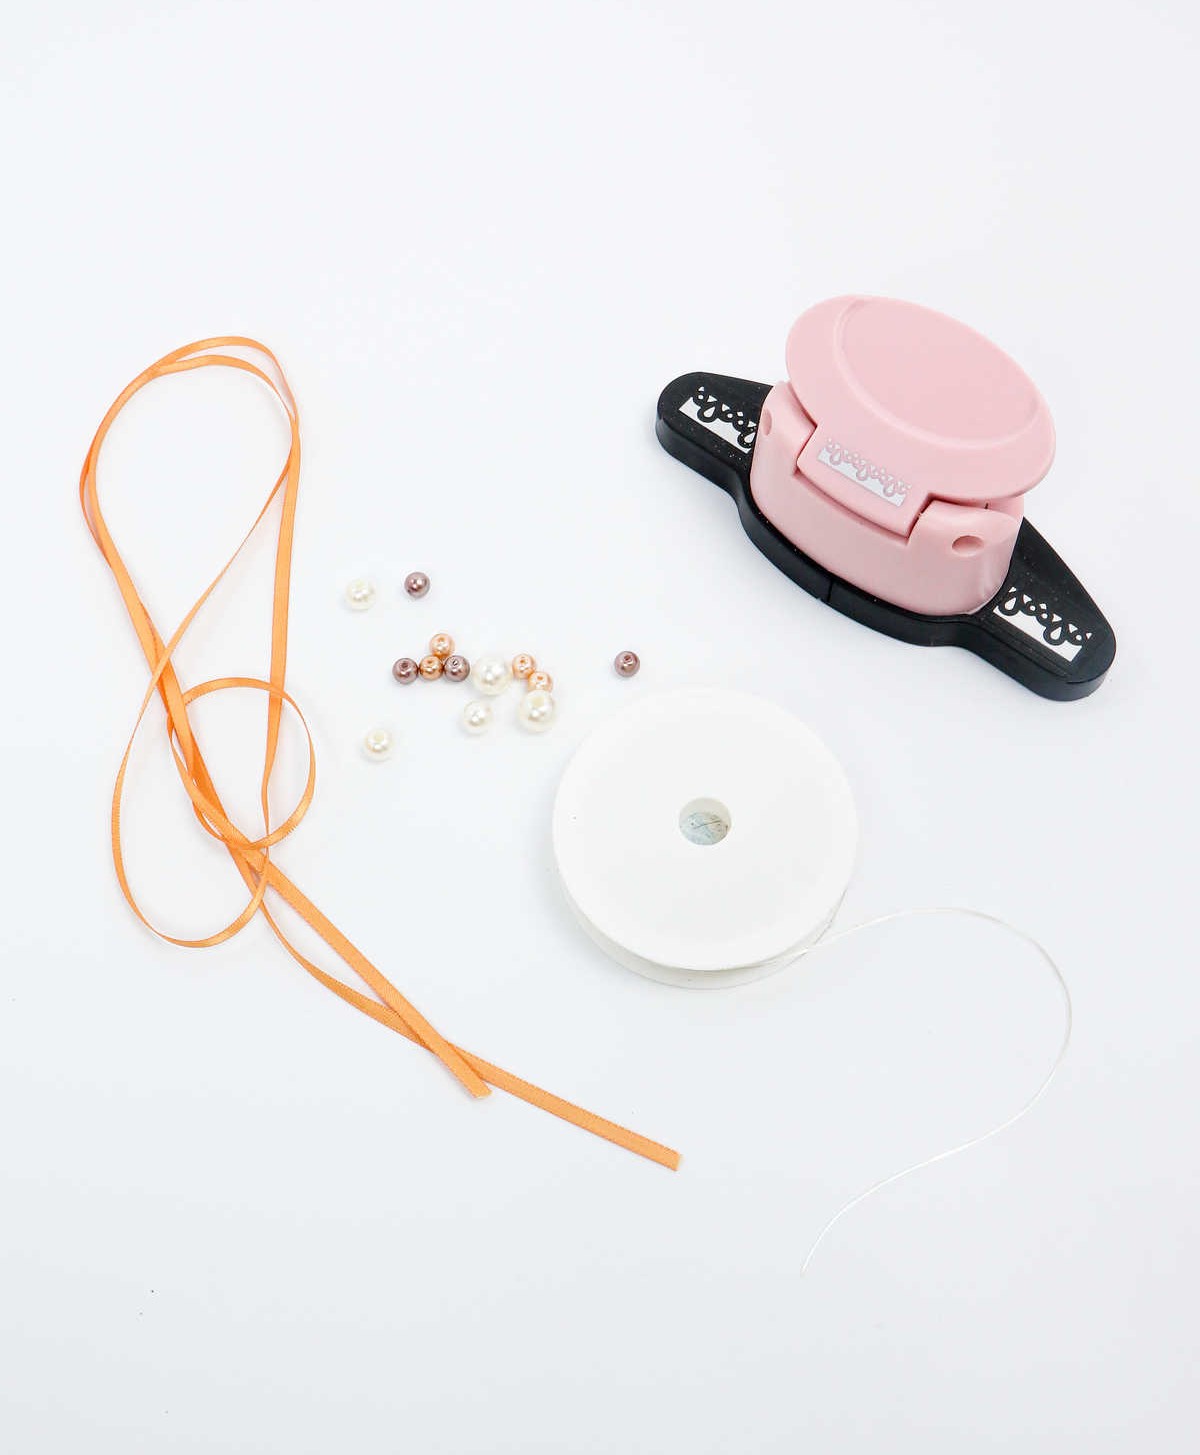
To create the foundation for your custom place cards, start by obtaining a piece of thick card stock in a neutral color such as cream or white. Cut out a rectangular strip measuring two inches wide and seven inches long. Once you have your strip prepared, fold it in half to form a crease that will serve as the basis for your place card design.
Step 10
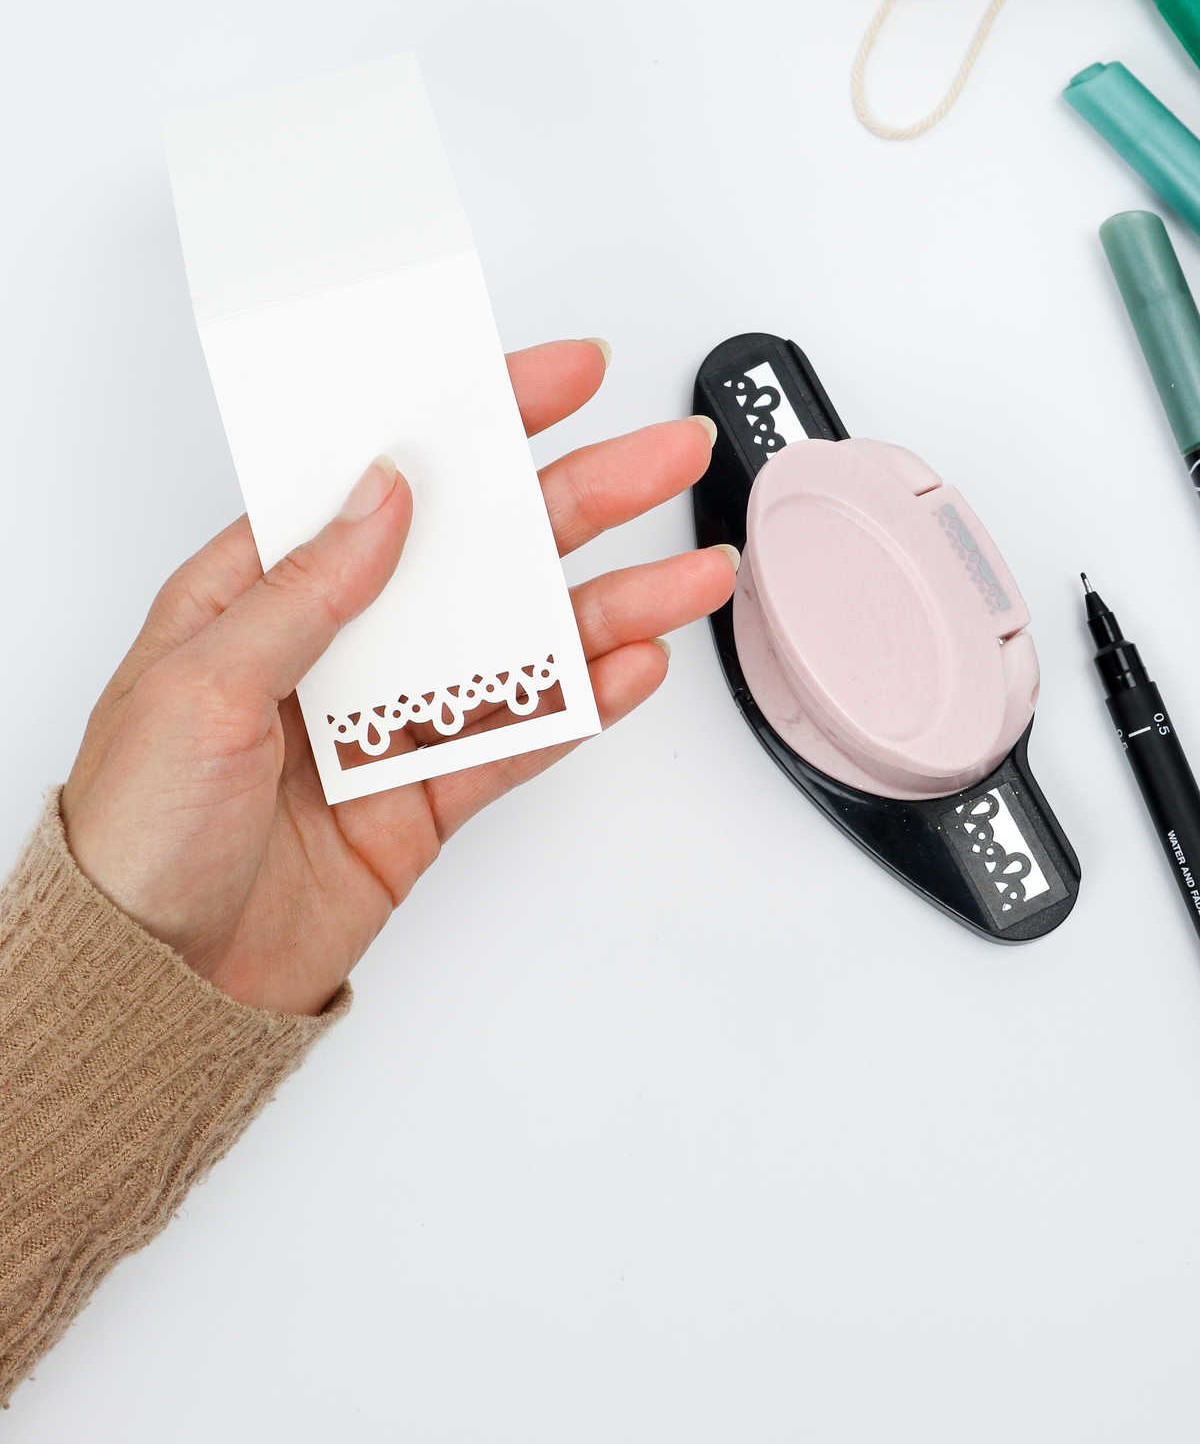
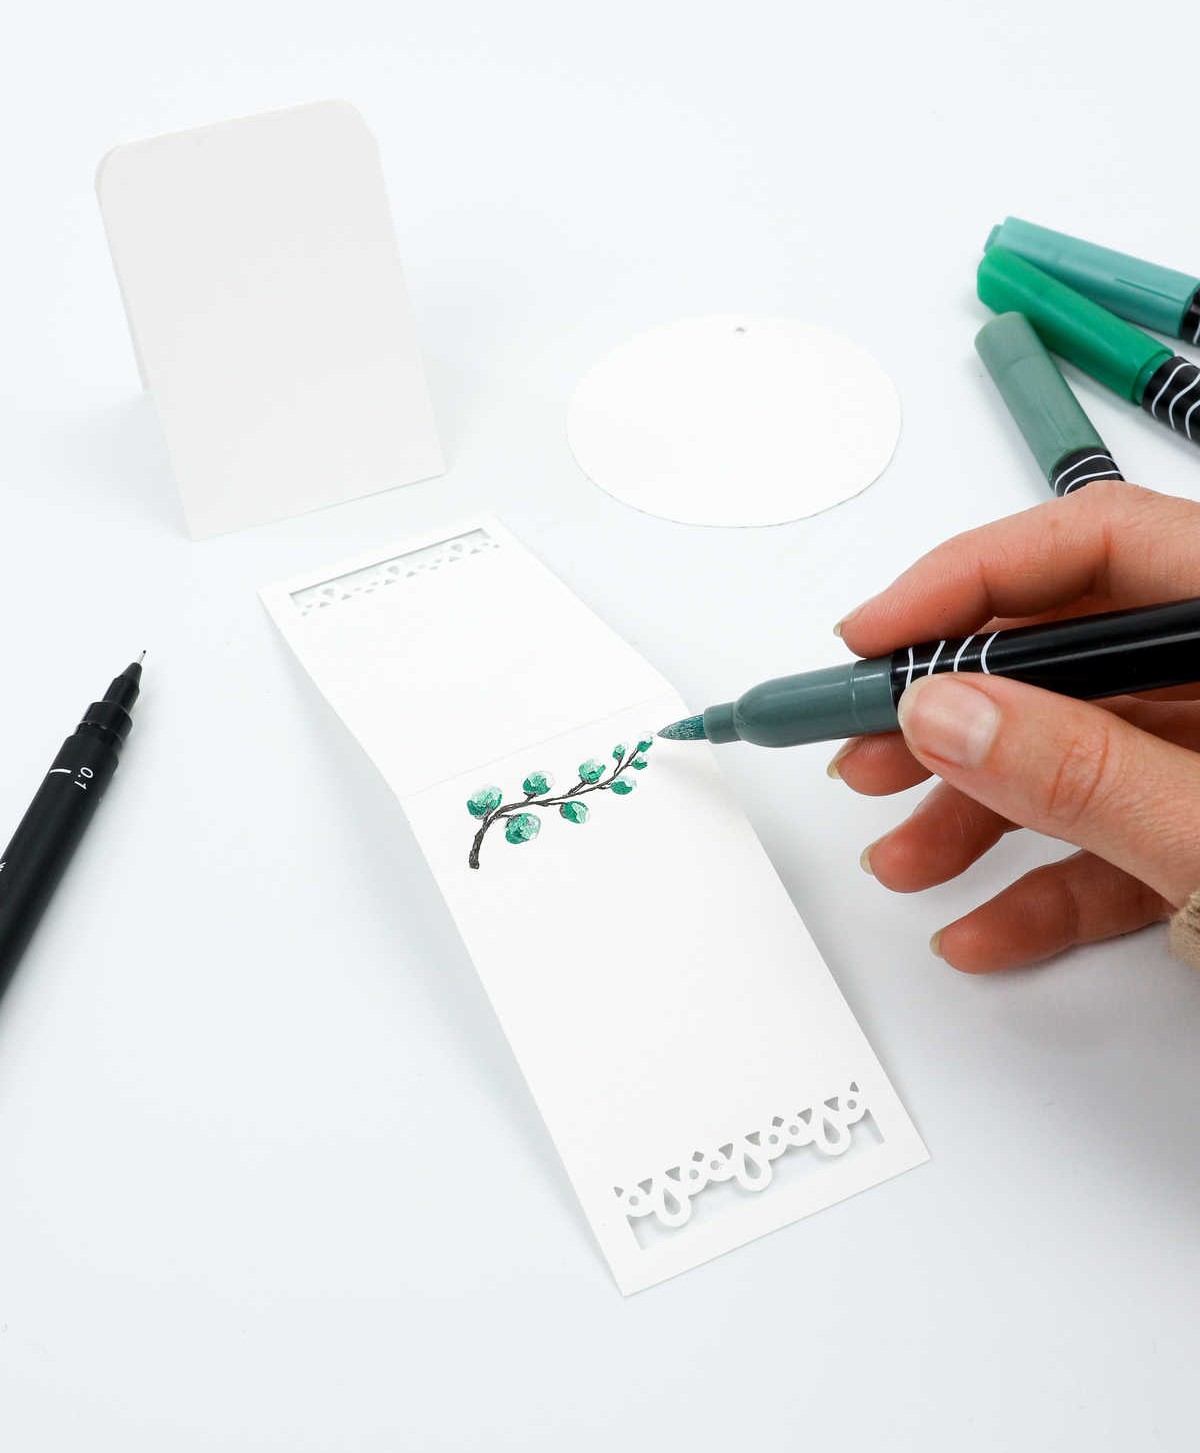
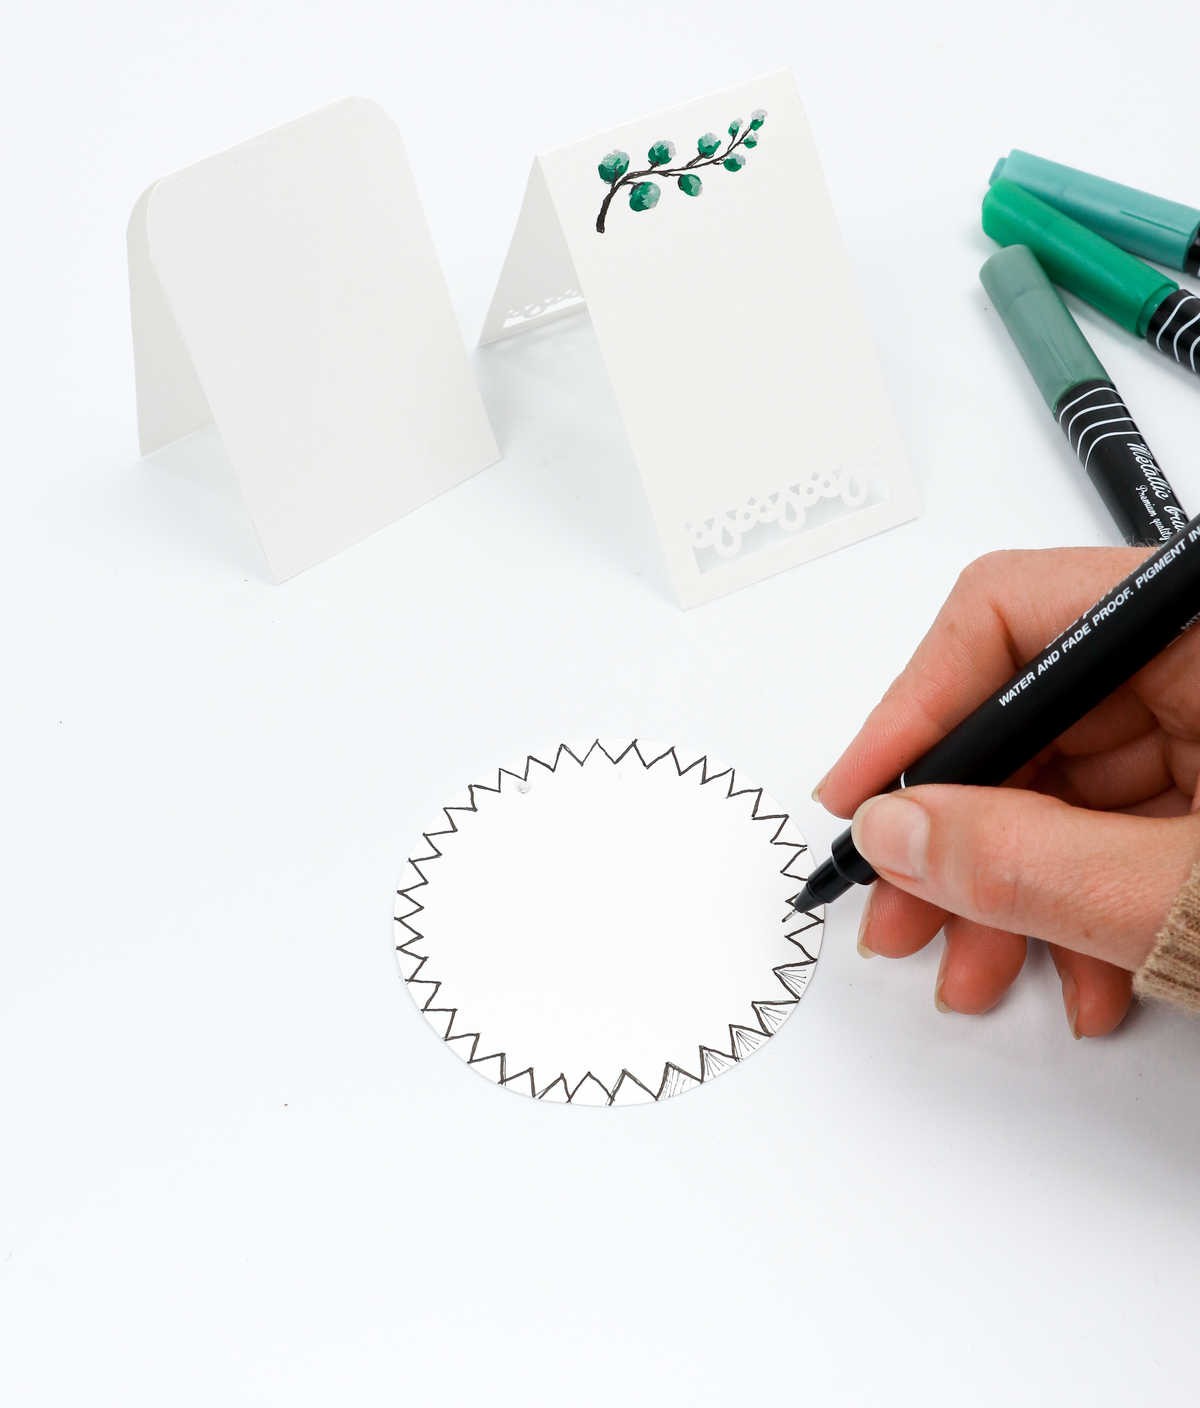
Unleash your creativity and make your card truly unique by adding a personal touch. One way to do this is to use decorative border punches or die-cut machines to create intricate filigree designs that add an extra layer of elegance to your card. If you’re feeling artistic, you can also take out your favorite markers or colored pencils and get creative with some freehand drawing.
Whether you’re a seasoned crafter or just looking for a fun way to personalize your cards, there’s no limit to what you can create!
Step 11
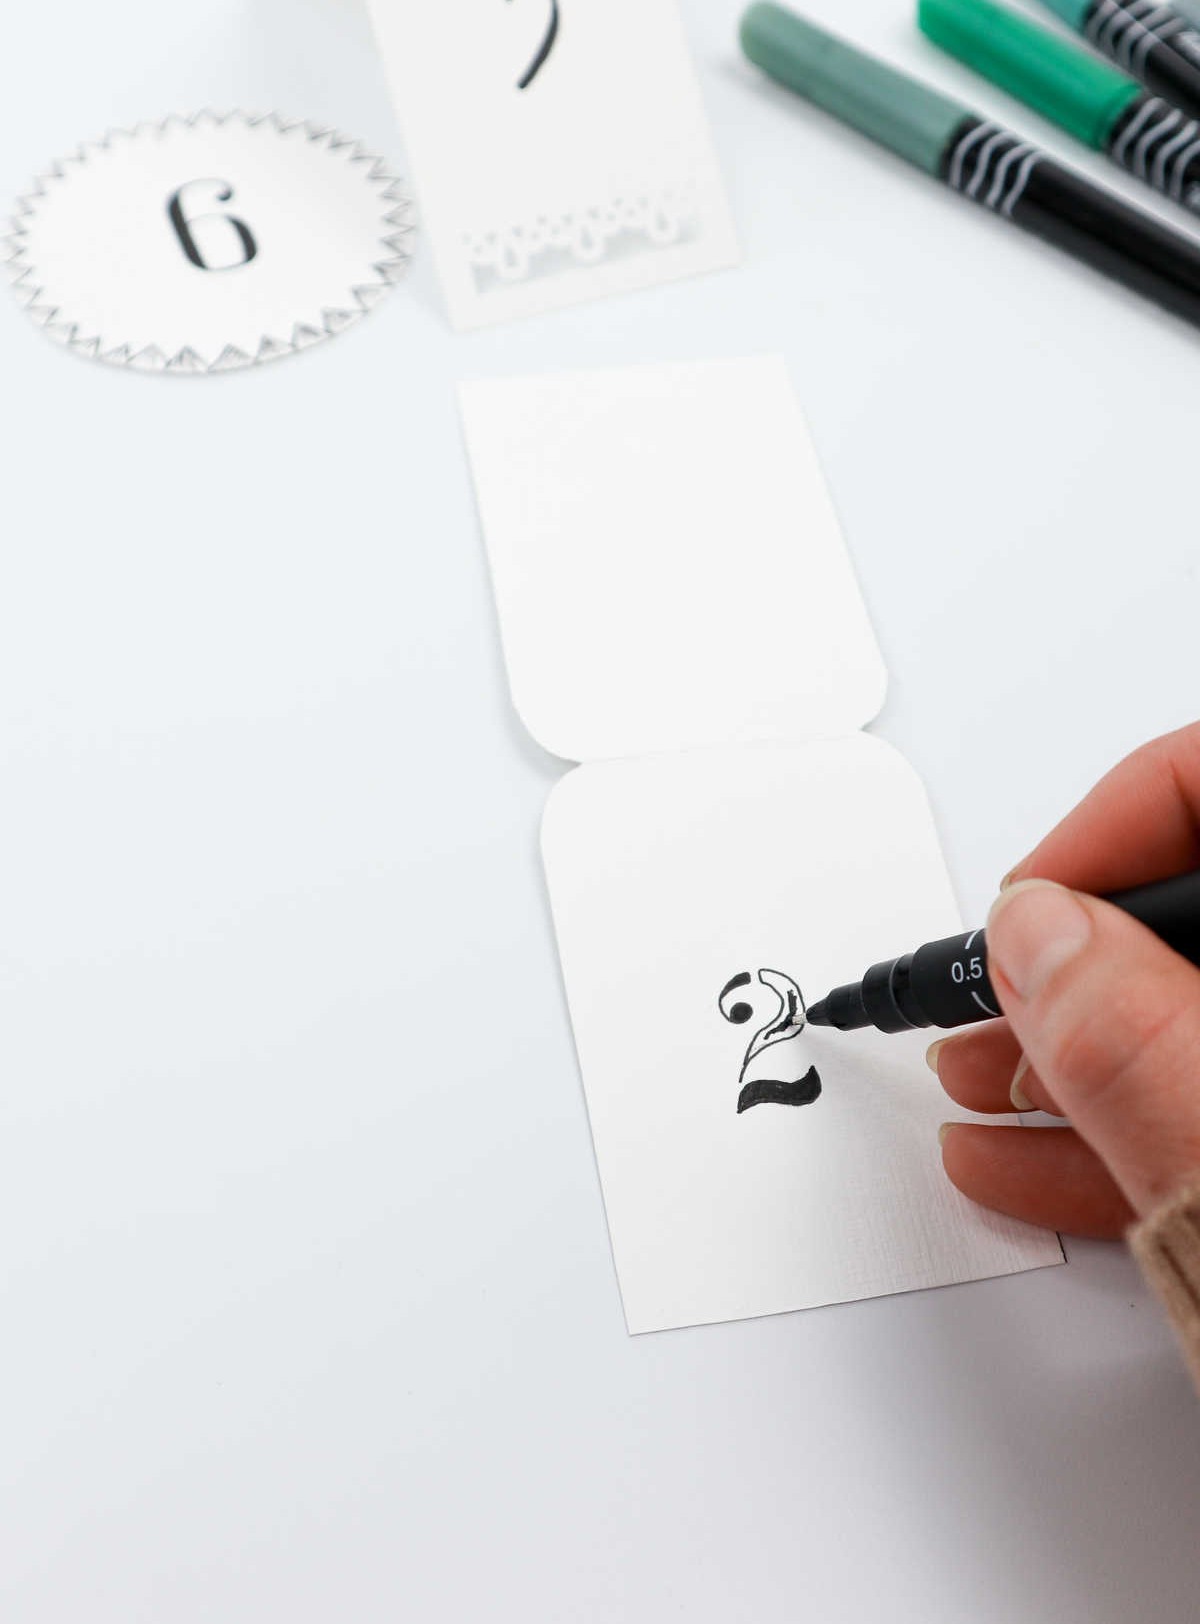
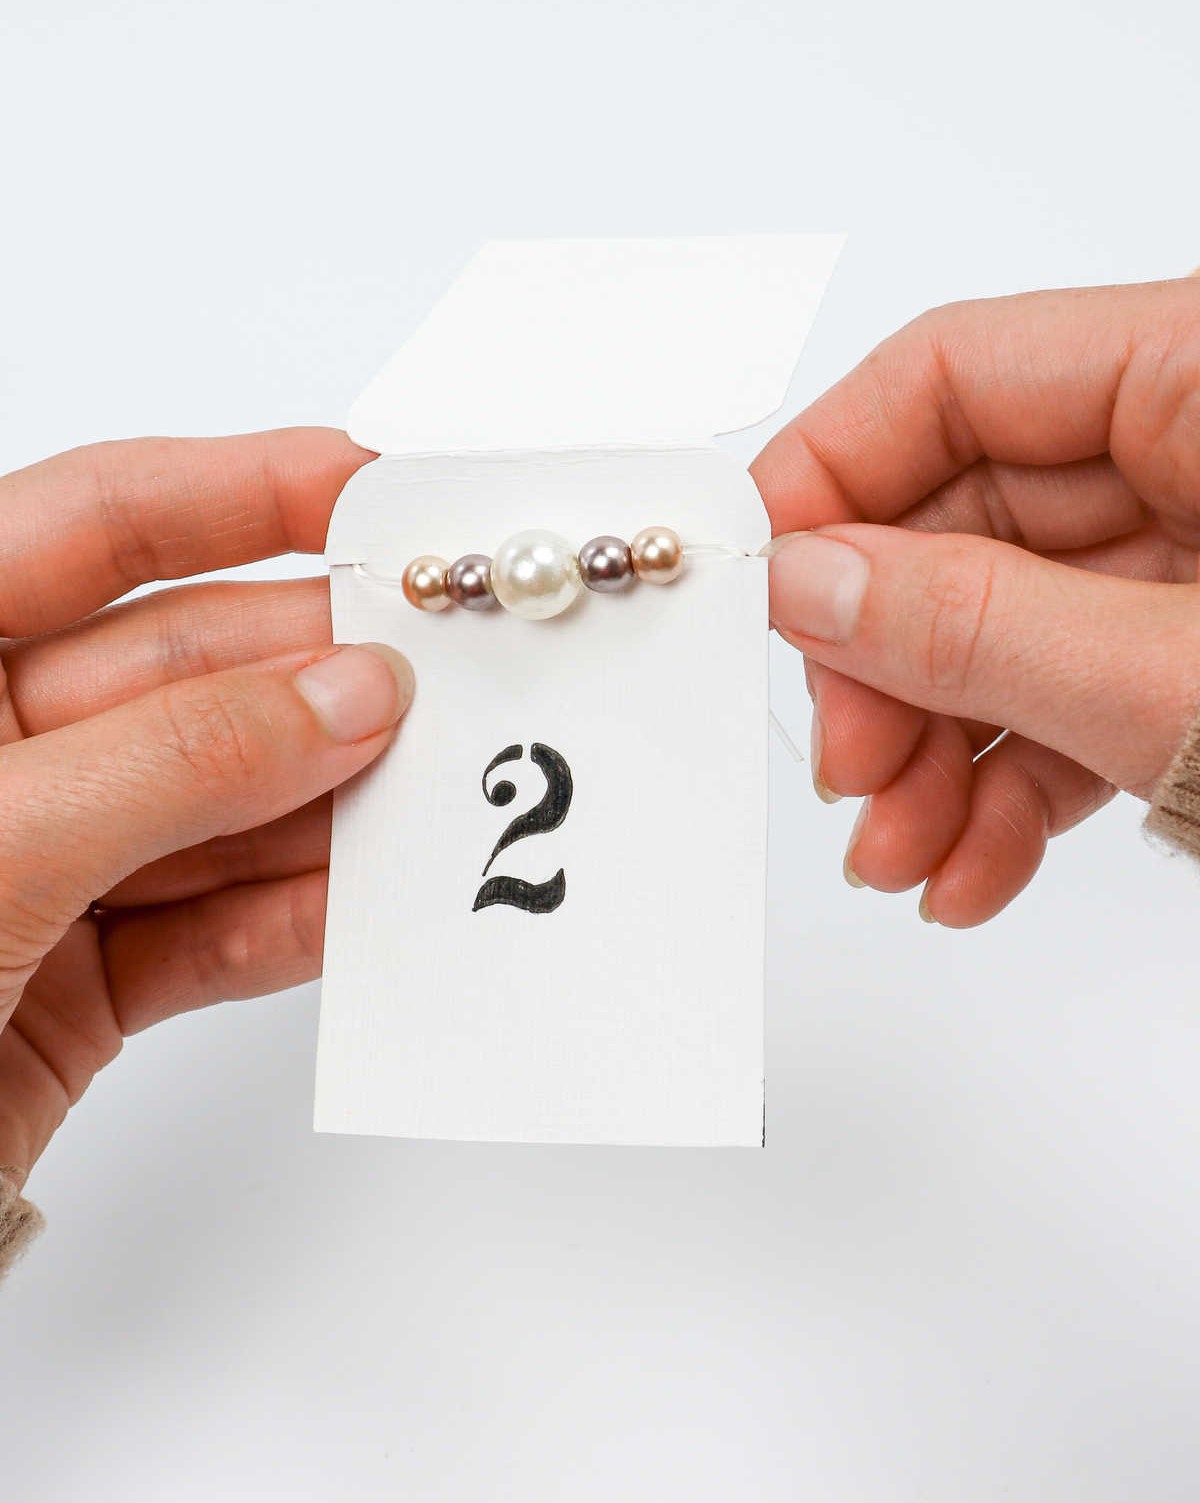
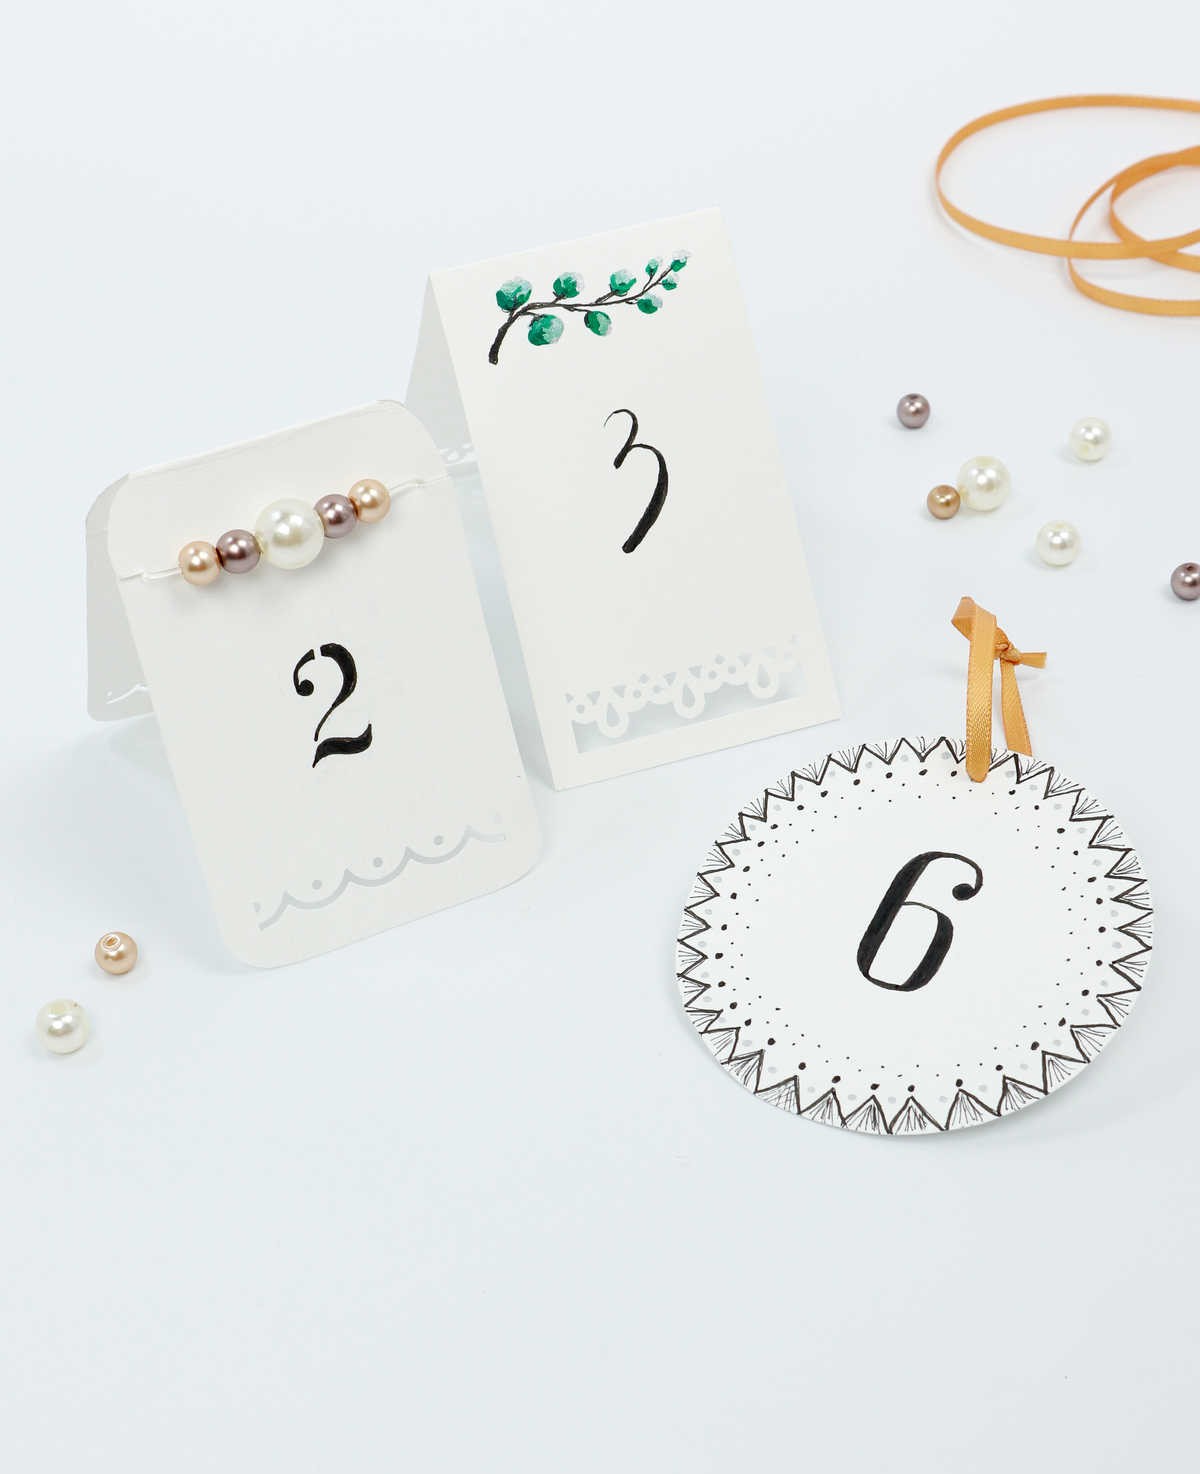
To take your card-making to the next level, start by assigning a unique number to each of the cards you’ve created. As you can see from these examples, there’s no one ‘right’ way to do this – simply stencil on the numbers in bold font and fill them in with a marker.
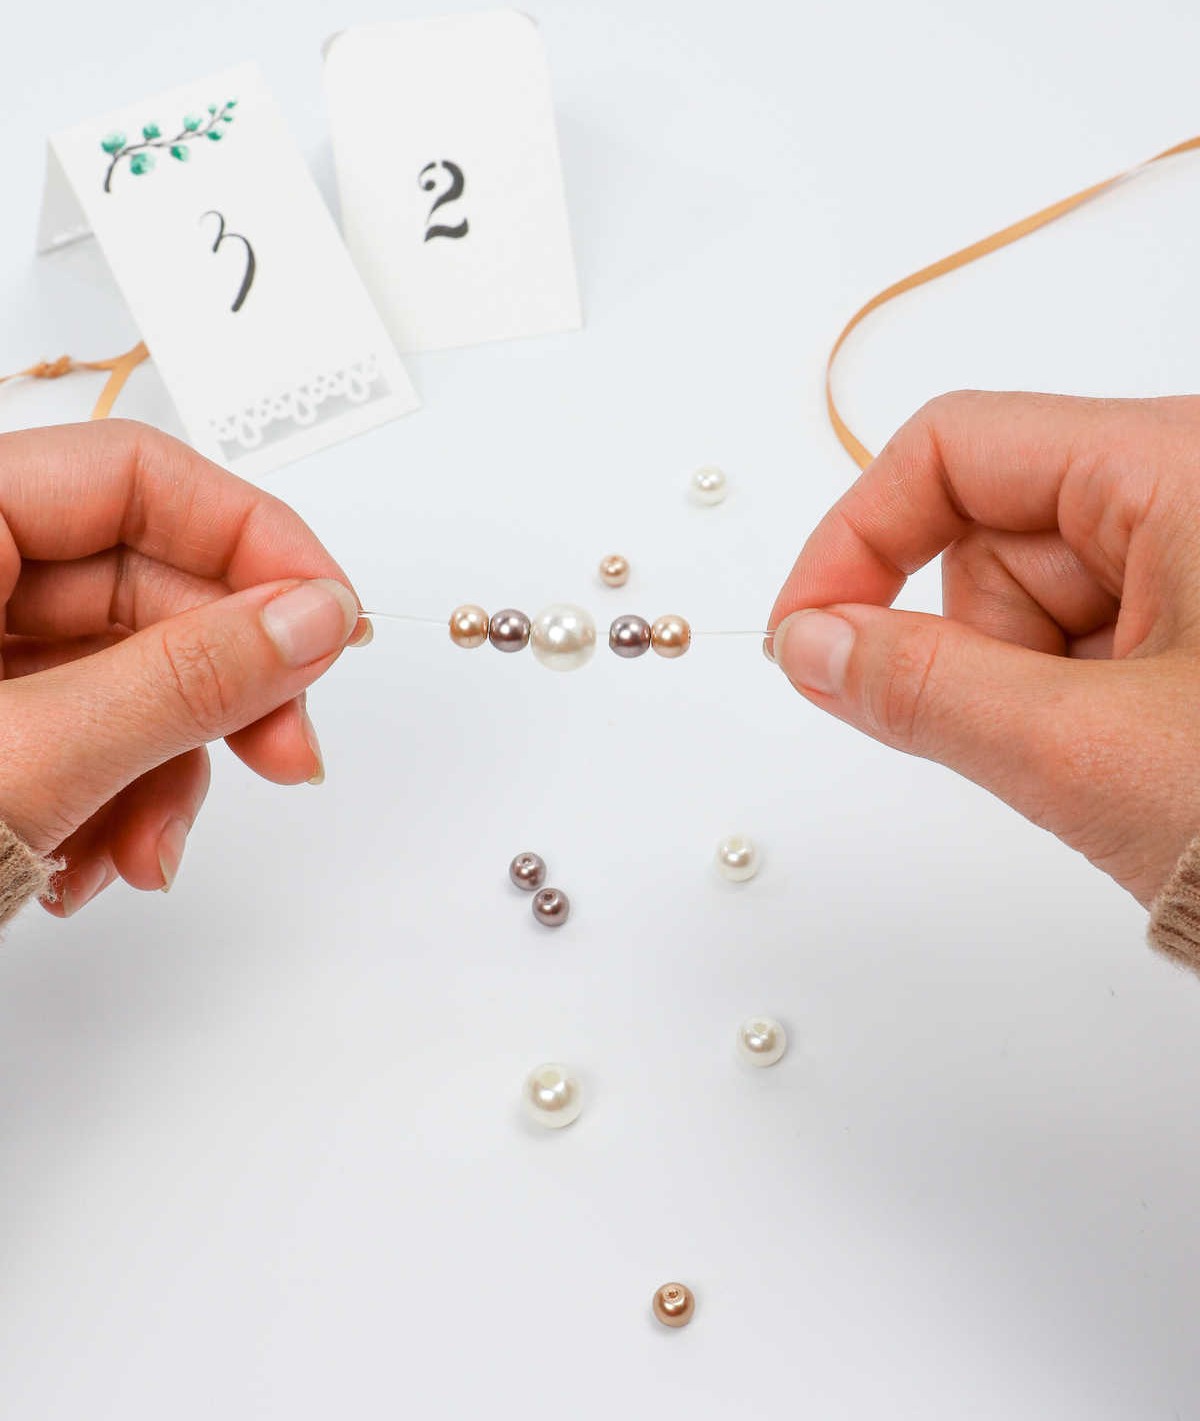
Once you’ve got your cards numbered, it’s time to add some extra embellishments. Begin by threading a few pearly beads onto the card, creating a delicate yet eye-catching design.
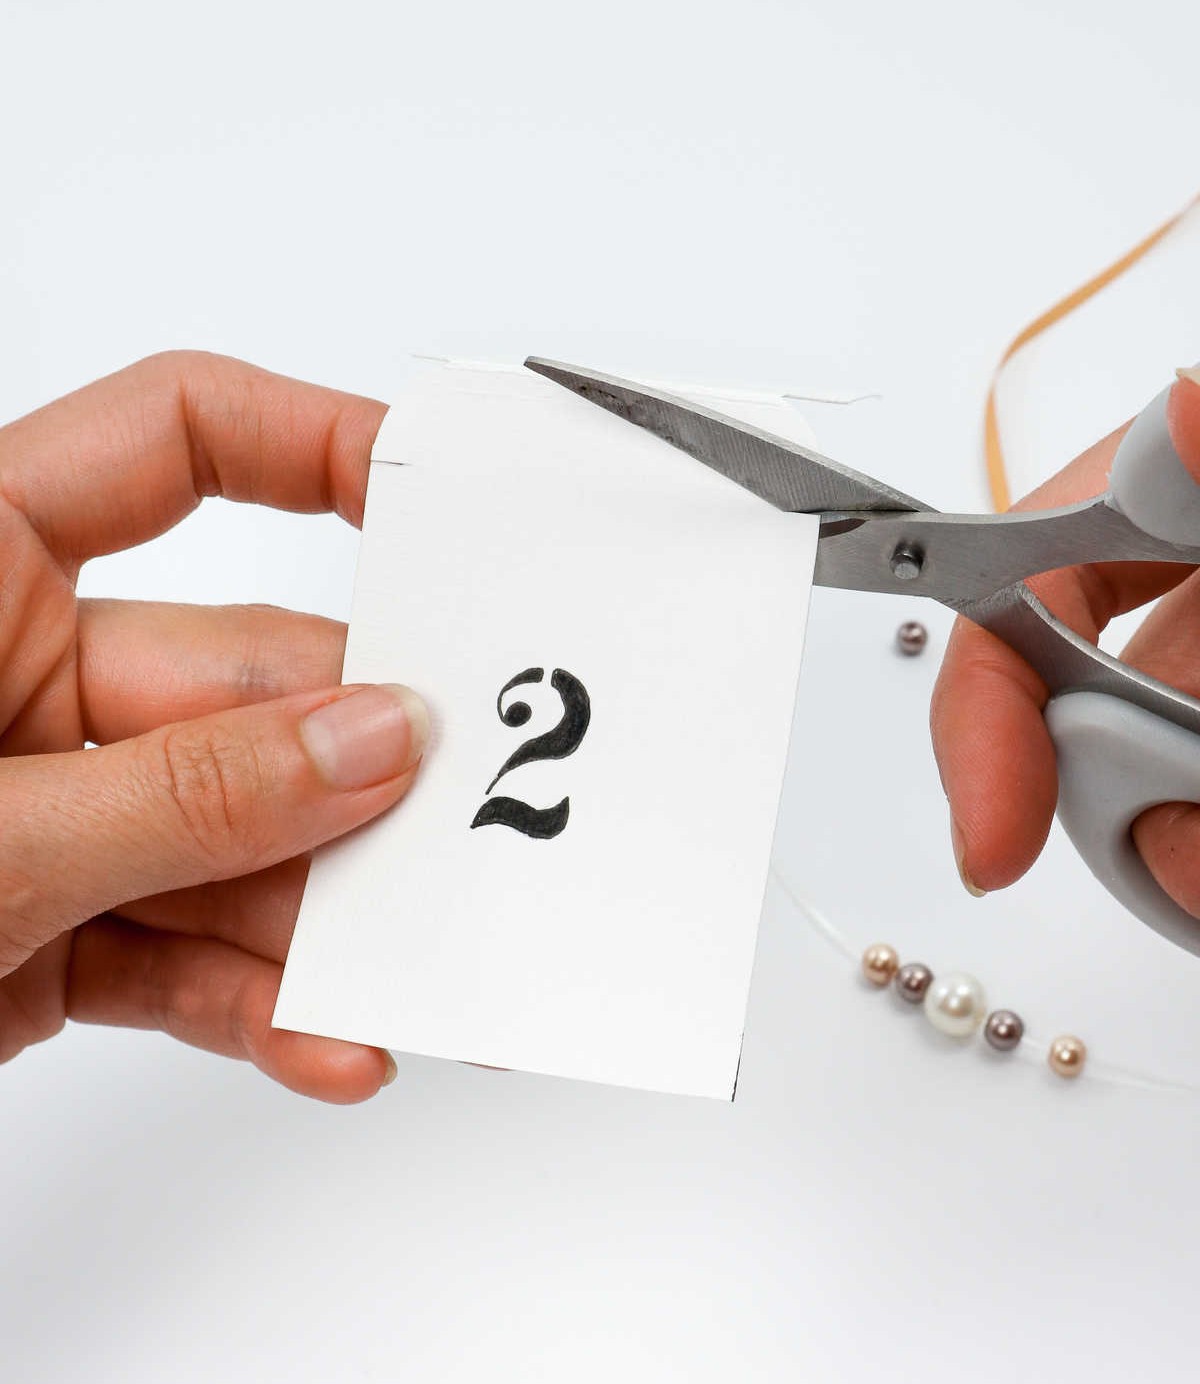
To achieve this look, make tiny incisions on either side of the card at the top and string the beads through them.
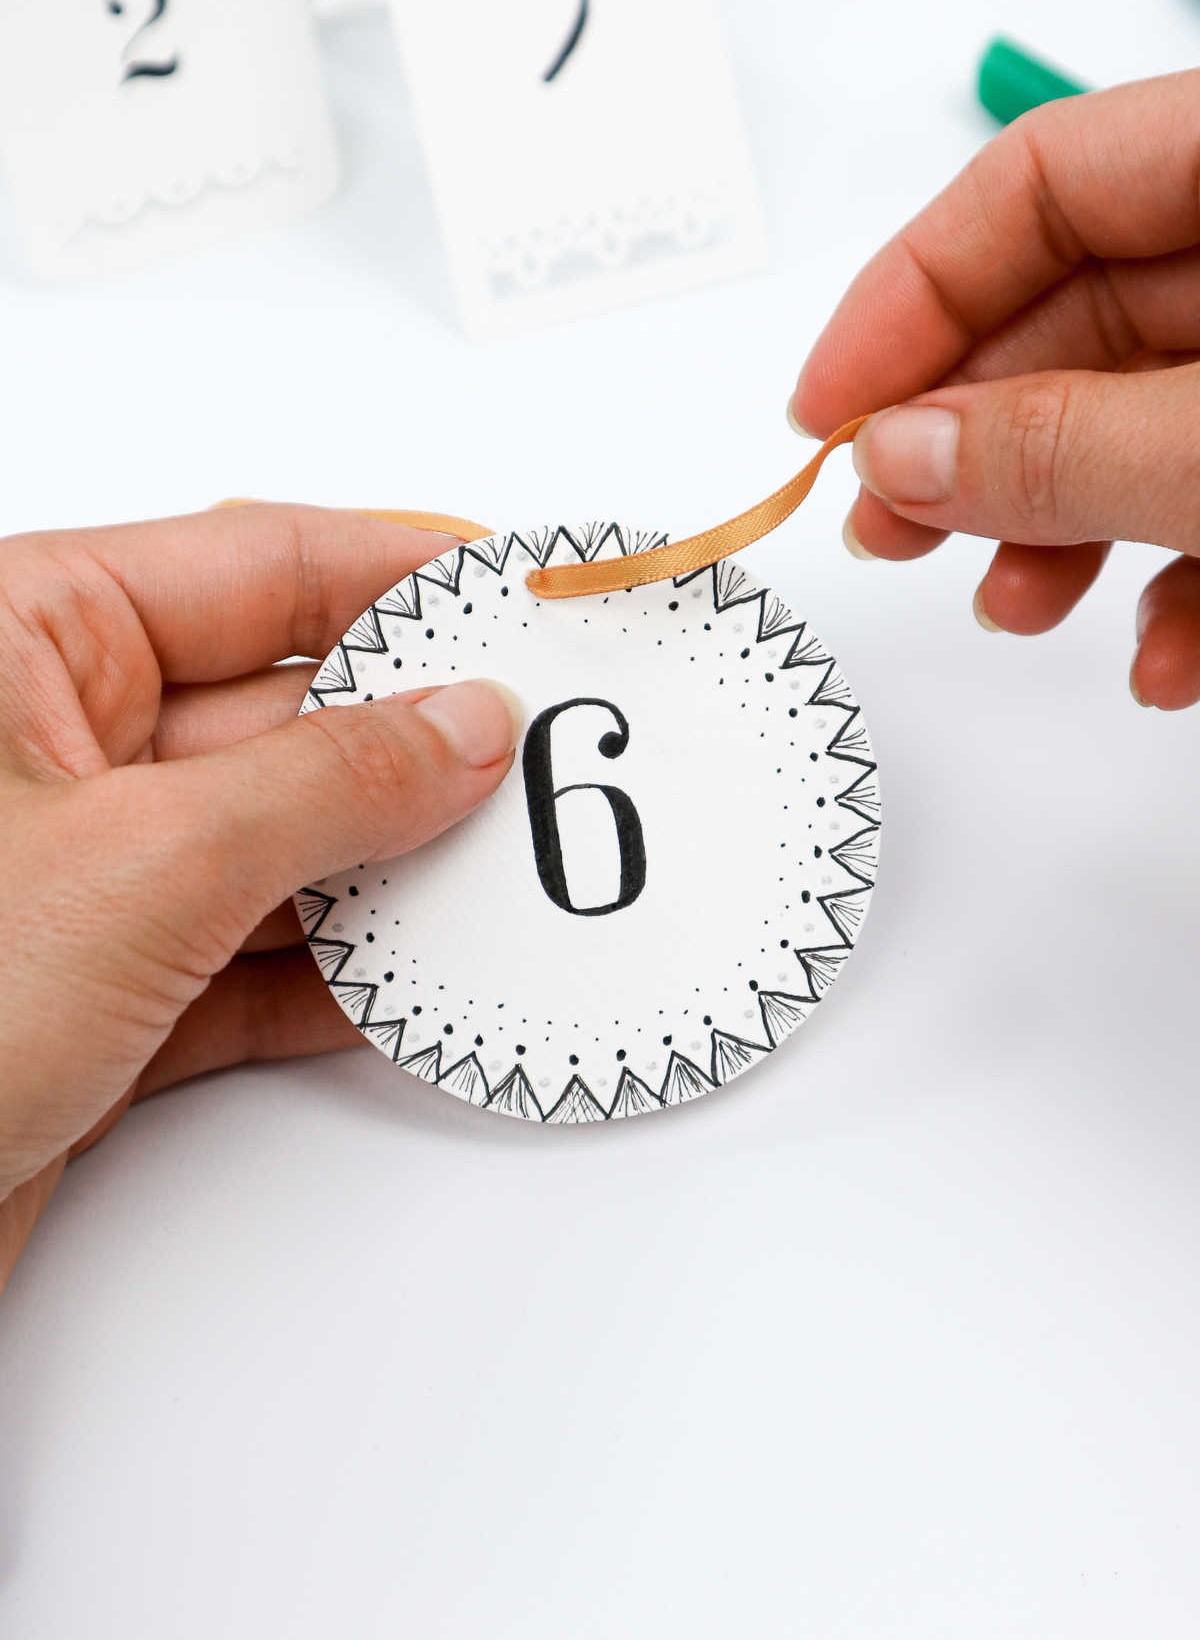
If you’re looking for an alternative approach, try cutting out your cardstock into a circular shape and decorating it with simple yet elegant designs. Then, simply thread some ribbon through the circle to complete the look.
Step 12
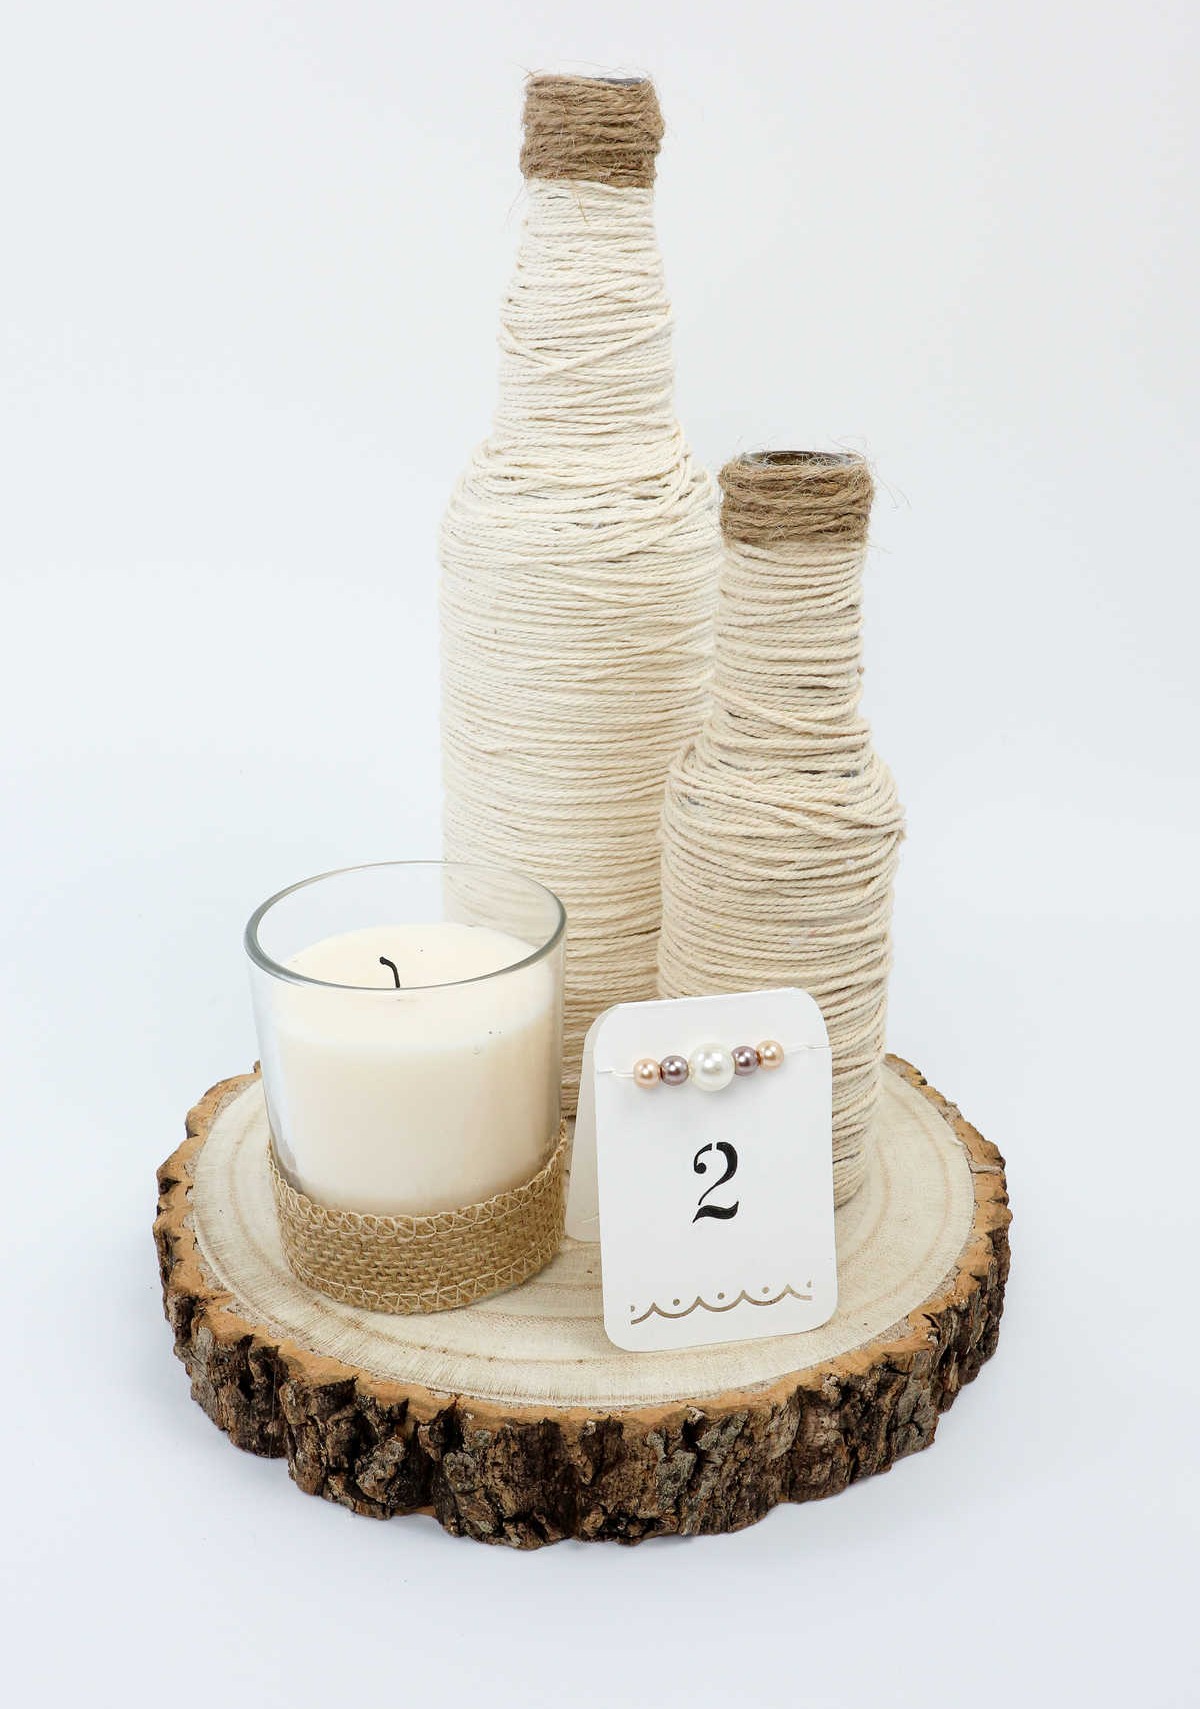
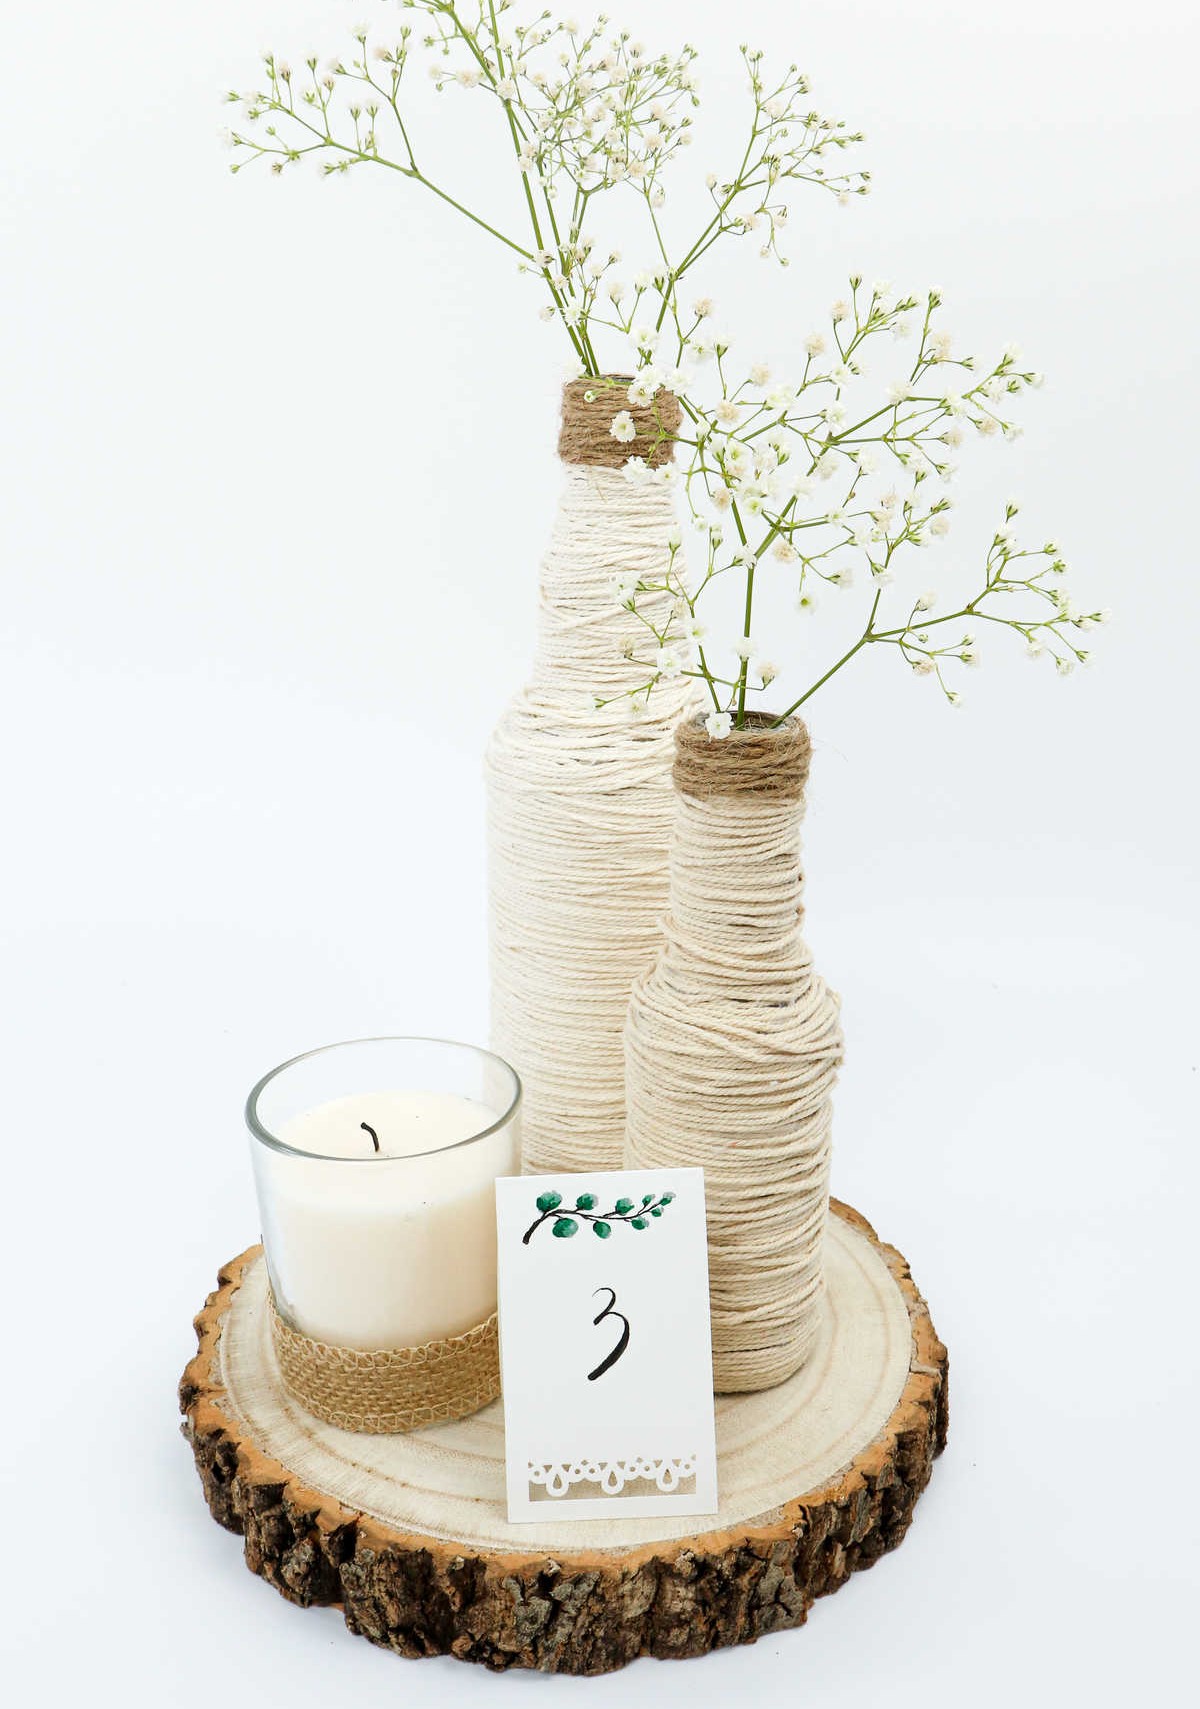
As you near the final touches on your beautiful centerpiece, it’s time to incorporate the table number cards onto the wooden baseboard. This simple step brings everything together! To add a touch of whimsy and complete the look, consider sprinkling in a few sprigs of baby’s breath, reed, or pampas grass. These delicate accents will tie the entire arrangement together, showcasing your creativity and flair.
Watch: DIY Wedding Centerpiece
How Much Do Wedding Centerpieces Usually Cost?
When it comes to wedding centerpieces, the cost can add up quickly – anywhere from $100 to $450, depending on the arrangement and number of tables. Floral arrangements alone can run you around this range, with any additional elements like candles or knick-knacks adding extra expense. However, by taking a DIY approach and creating your own centerpieces, you can significantly reduce your costs.
In fact, upcycling allows you to bring down the cost per table to just $5-$7 – talk about a budget-friendly solution!
DIY Wedding Centerpiece Out of Upcycled Bottles
Transform your wedding celebration into a stunning and affordable affair with this DIY wedding centerpiece, a creative project that’s easy to make and contributes to the special day of your life. This crafty endeavour requires minimal effort upfront, but yields maximum visual impact.Preparation Time: 5 minutesActive Crafting Time: 50 minutesAdditional Preparation Time: 15 minutesTotal Time Needed: 1 hour and 10 minutesBy Karo @ CraftsyHacks.com
Equipment
Materials
When it comes to crafting a unique and personalized gift, attention to detail is key. The right combination of materials can elevate the overall aesthetic and create a truly special token. In this case, a thoughtful assembly includes a wood plaque as the foundation, accompanied by two bottles in different sizes to add visual interest. To complete the look, a selection of cotton cords or thicker jute ribbon provides an earthy, rustic touch.
Meanwhile, a sheet of thick white A5 paper adds a clean and minimalist element to balance out the arrangement. Finally, a 1.5 mm cotton cord or even wider jute ribbon serves as a unifying thread that ties everything together.
Instructions
To begin crafting your DIY centerpieces, start by gathering all necessary supplies. Before moving forward, ensure that your bottles are thoroughly cleaned by scrubbing, rinsing, and drying them to remove any dust, grease, or grime. Next, add a splash of hot blue to the bottom of each bottle. Then, unwind the cord and secure it to the bottle with a small amount of glue, holding it in place until the adhesive sets.
Repeat this process by applying additional layers of hot glue and wrapping the cord around the bottle, working your way up to the mouth. Once complete, fasten off any excess glue and ensure that the end is securely attached. Switch out the cotton cord for jute twine and wrap it around the mouth of each bottle, allowing the materials to overlap as needed since perfection is not required. Repeat this process with a second bottle.
For the final assembly, secure both wrapped bottles to a wooden baseboard using hot glue. Next, prepare a plain white candle in a glass jar by applying hot glue around the bottom and then attaching a length of ribbon to the candle’s base. Place the candle on the board alongside the bottles. To create table cards indicating the table number, decorate these cards as desired with doodles, sketches, decorative borders, beaded wire strung across them, or bold font for the numbers.
Finally, add some finishing touches by incorporating sprigs of baby’s breath, faux florals, and other embellishments to bring the entire centerpiece arrangement together.