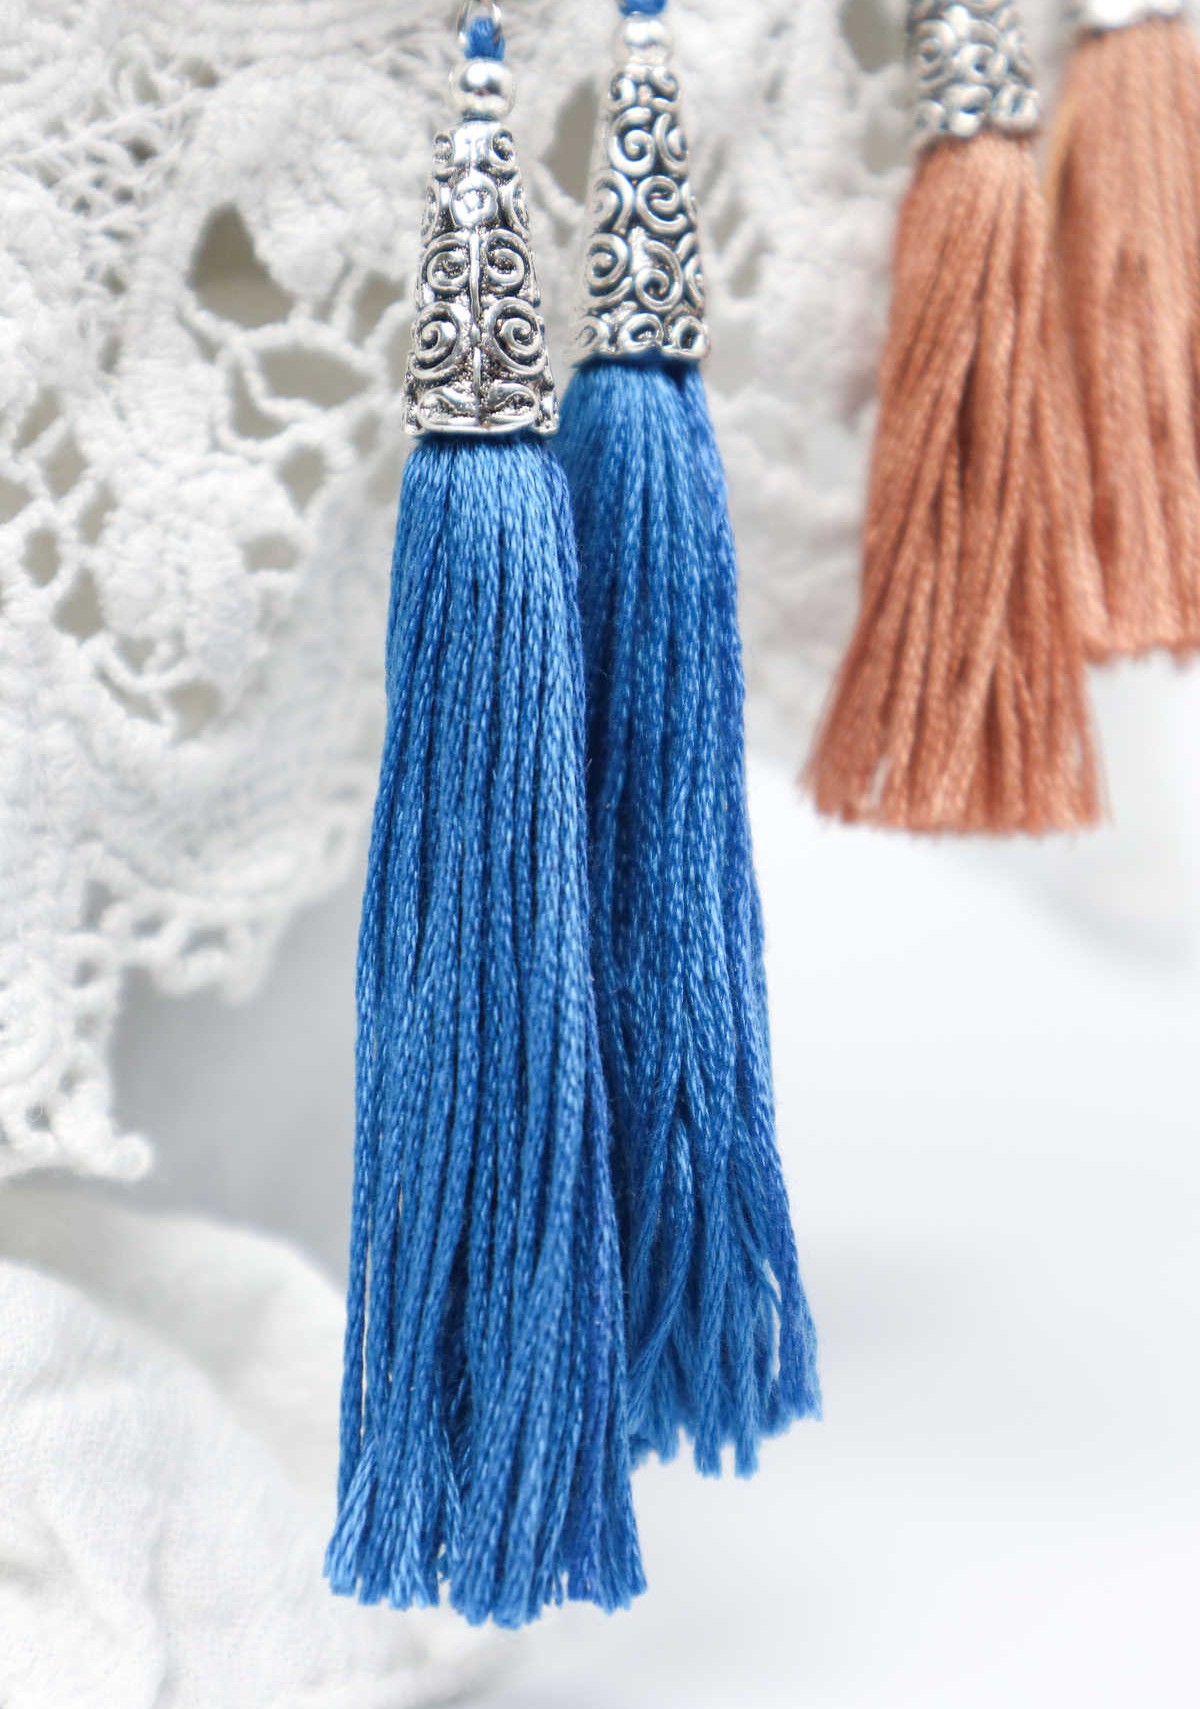

Tassel earrings offer a delightful alternative to traditional accessories, transforming any outfit into a stylish statement. This fun and creative project allows anyone to craft beautiful pieces that double as thoughtful gifts for special occasions. While tassels are often used in home decor, they can also be repurposed into unique jewelry pieces like these earrings. With their vibrant colors and playful texture, they add a touch of whimsy to any ensemble.
What’s even more impressive is how quickly you can create these tassel earrings. Once you master the process, you can produce half a dozen pairs in just an hour! This makes them ideal for last-minute gifts or party favors. Simply make them ahead of time and store them until you need them.
Supplies and Tools You’ll Need
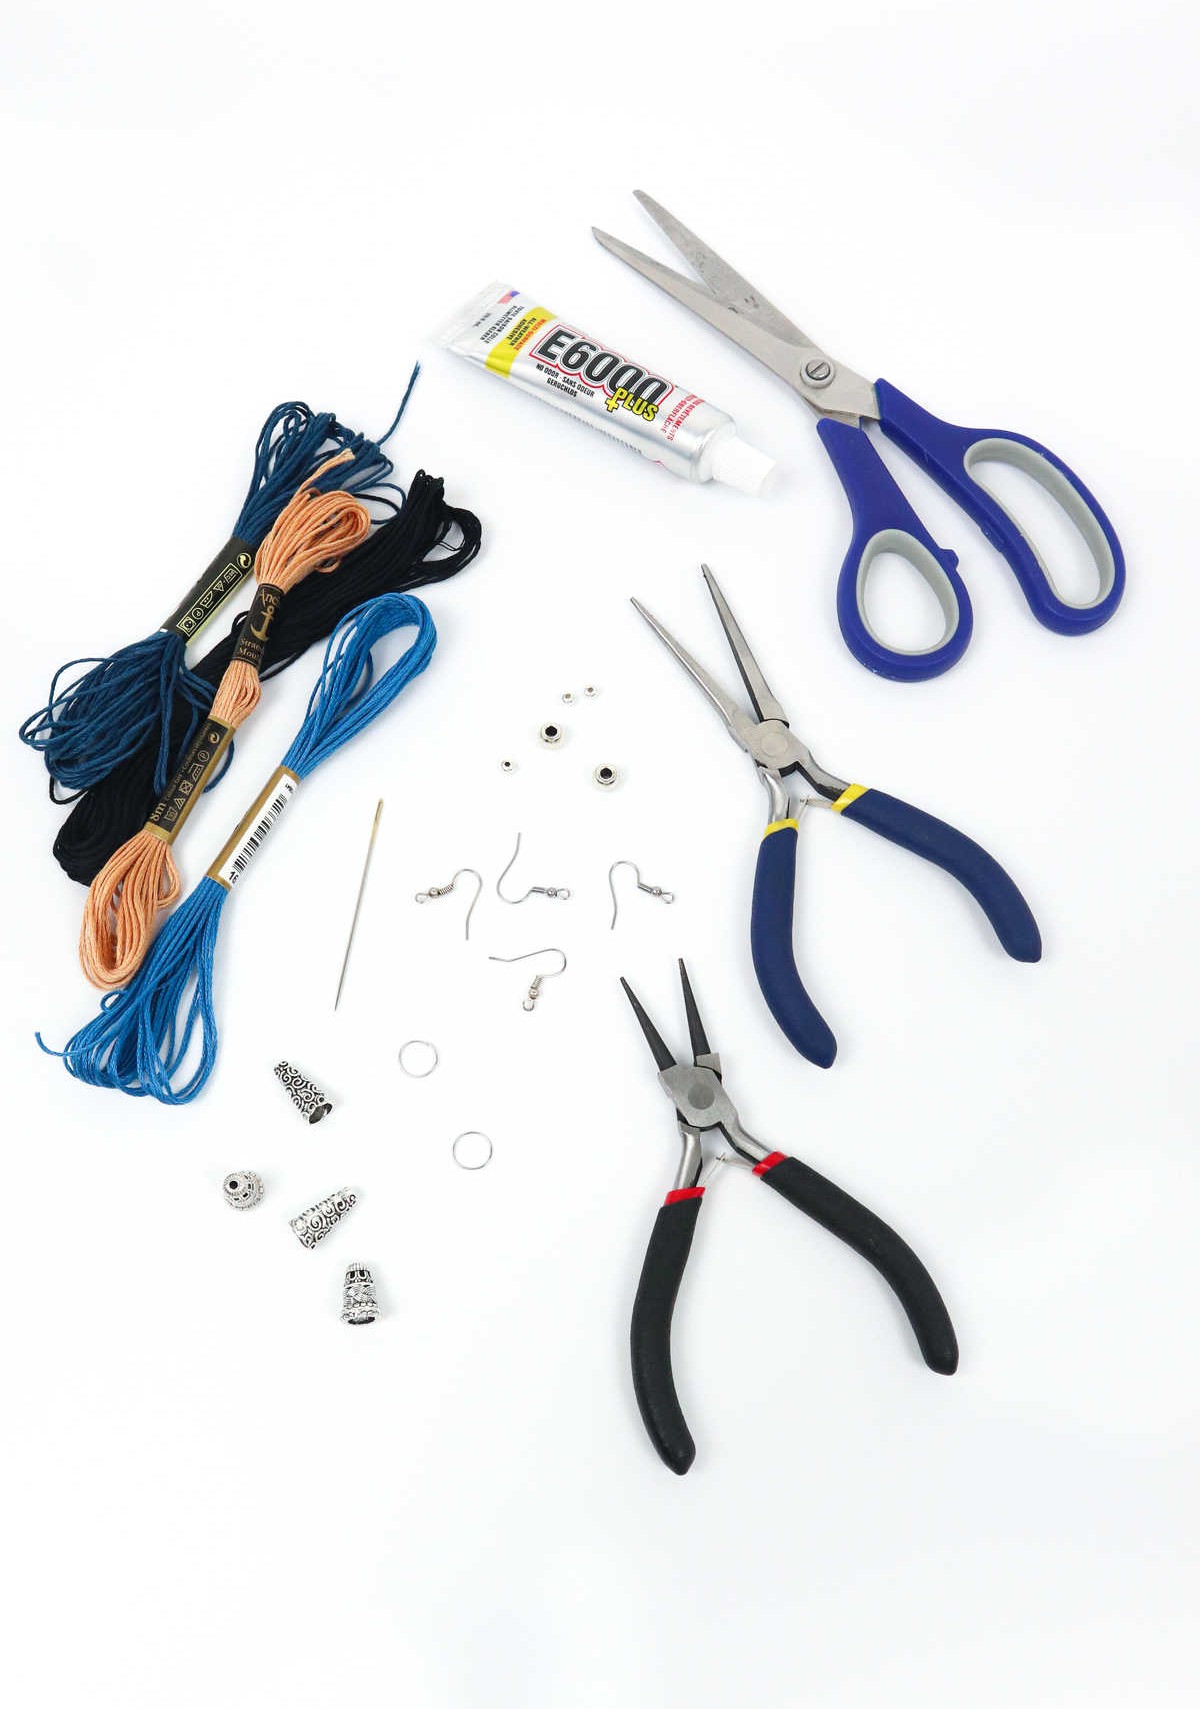
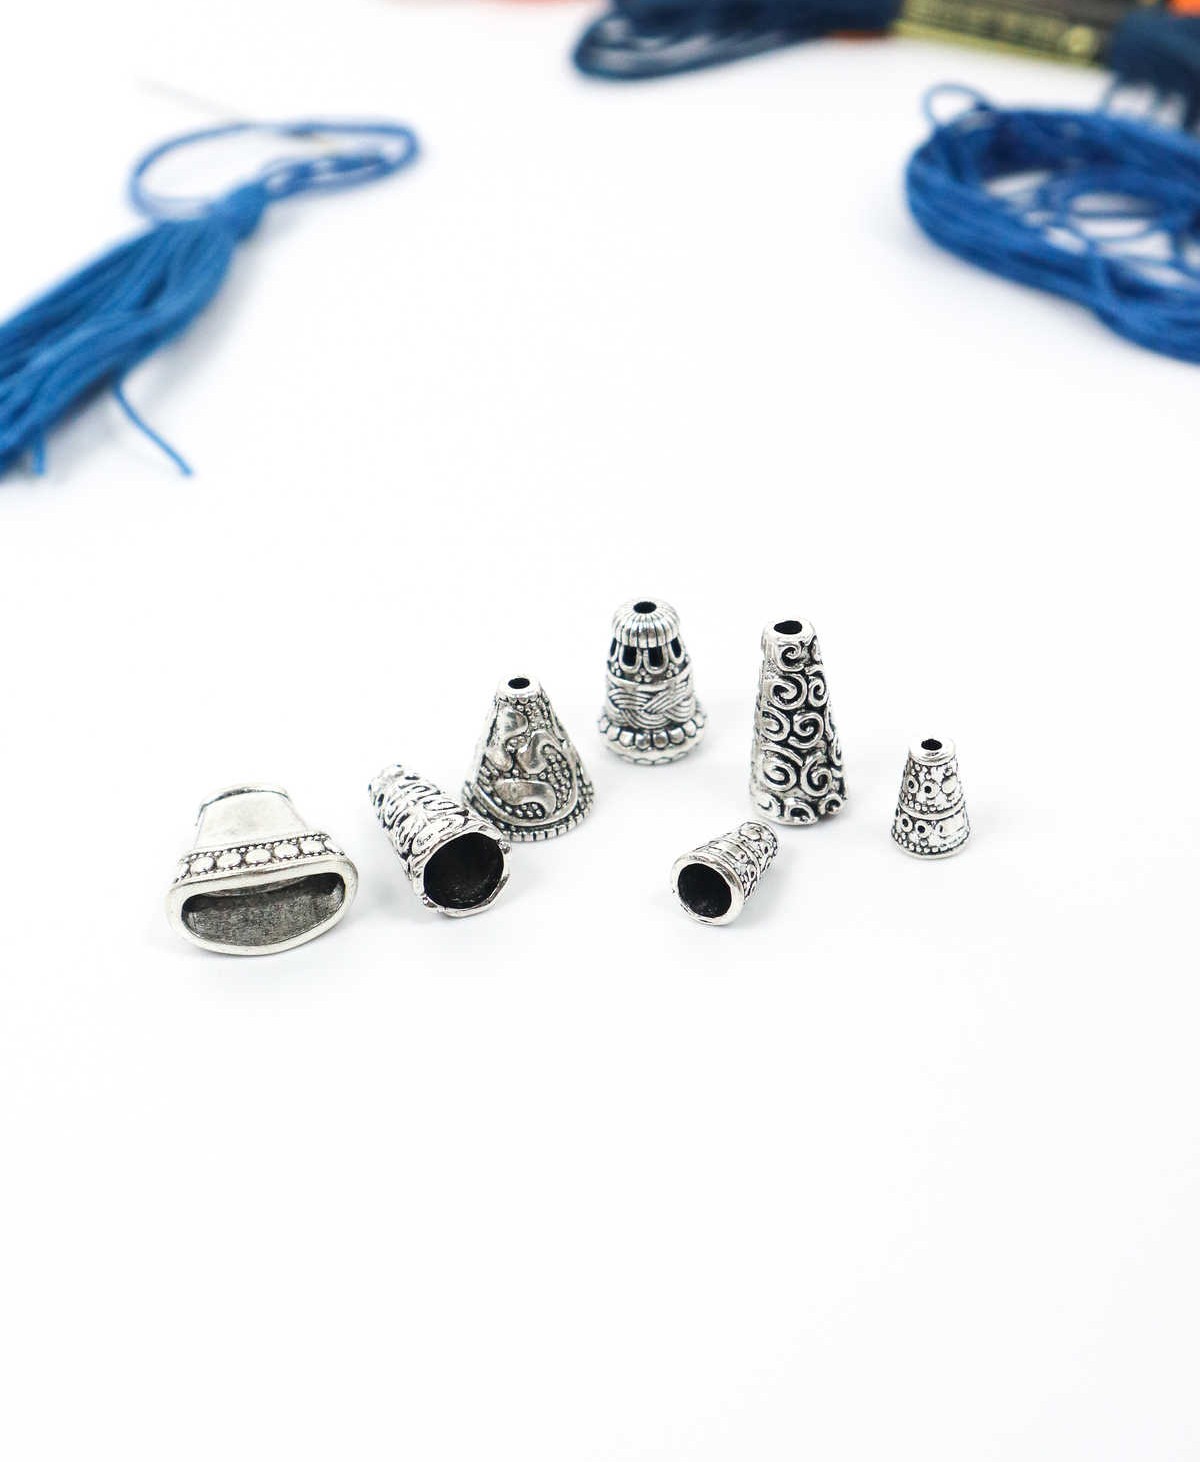
To craft your own tassel earrings, you’ll require a few essential tools and materials. Start by gathering the following supplies: sharp scissors, sturdy pliers, fine embroidery thread, a pony eye needle for precision, earring hooks to secure the design, jump rings to connect the various components, E6000 adhesive for bonding, and an assortment of beads and cone bead caps to add visual interest and dimension.
How to Make Tassel Earrings
When it comes to choosing the perfect thread for your earring design, consider selecting your favorite hue or experimenting with a unique combination of two colors. This will add an extra layer of creativity and personalization to your project.
Step 1
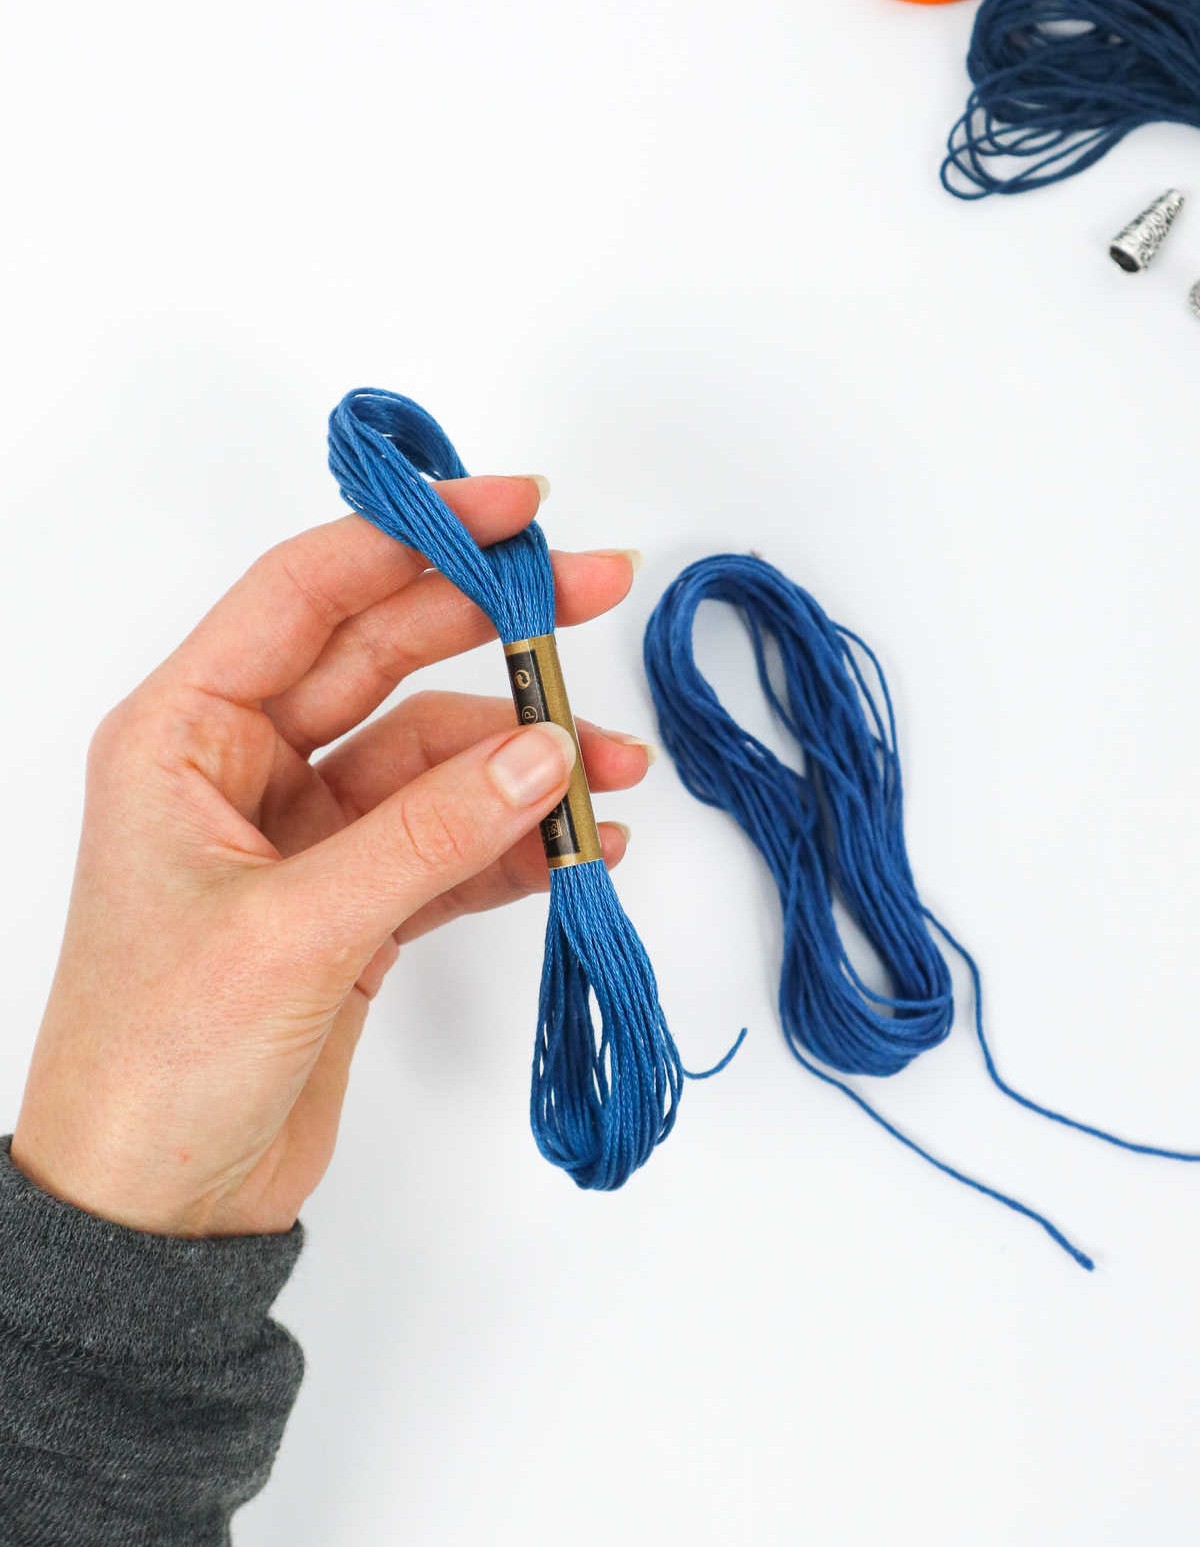

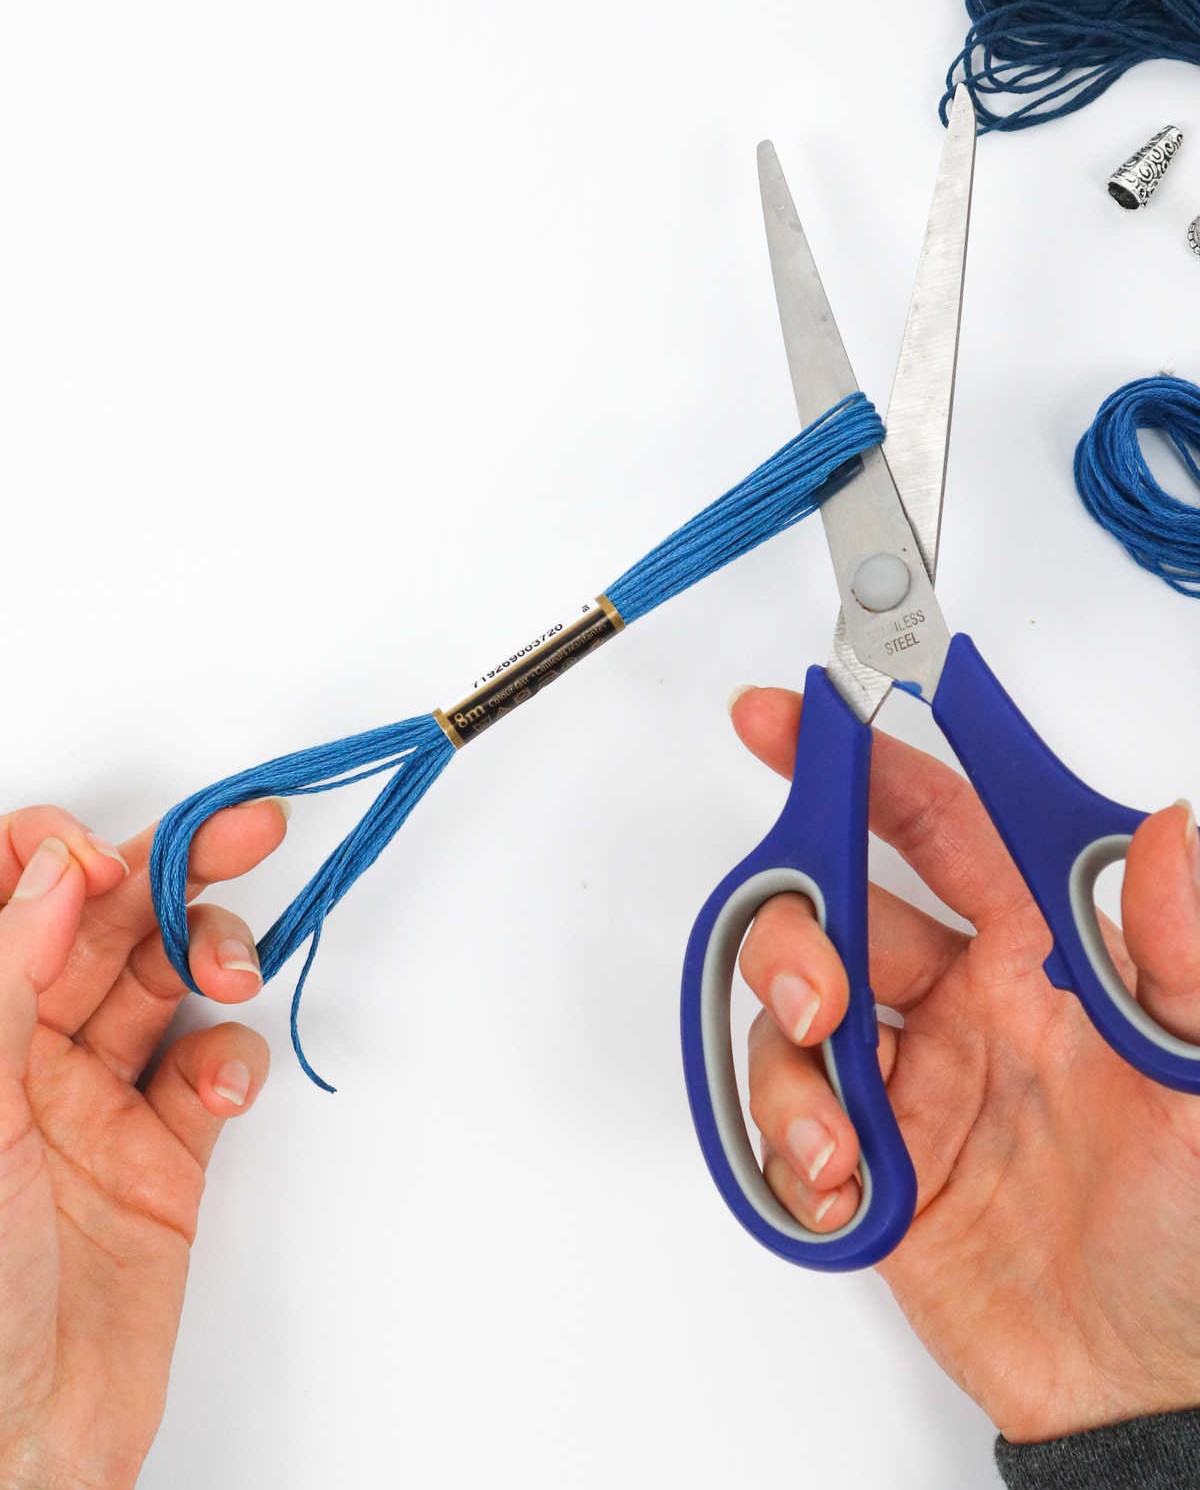
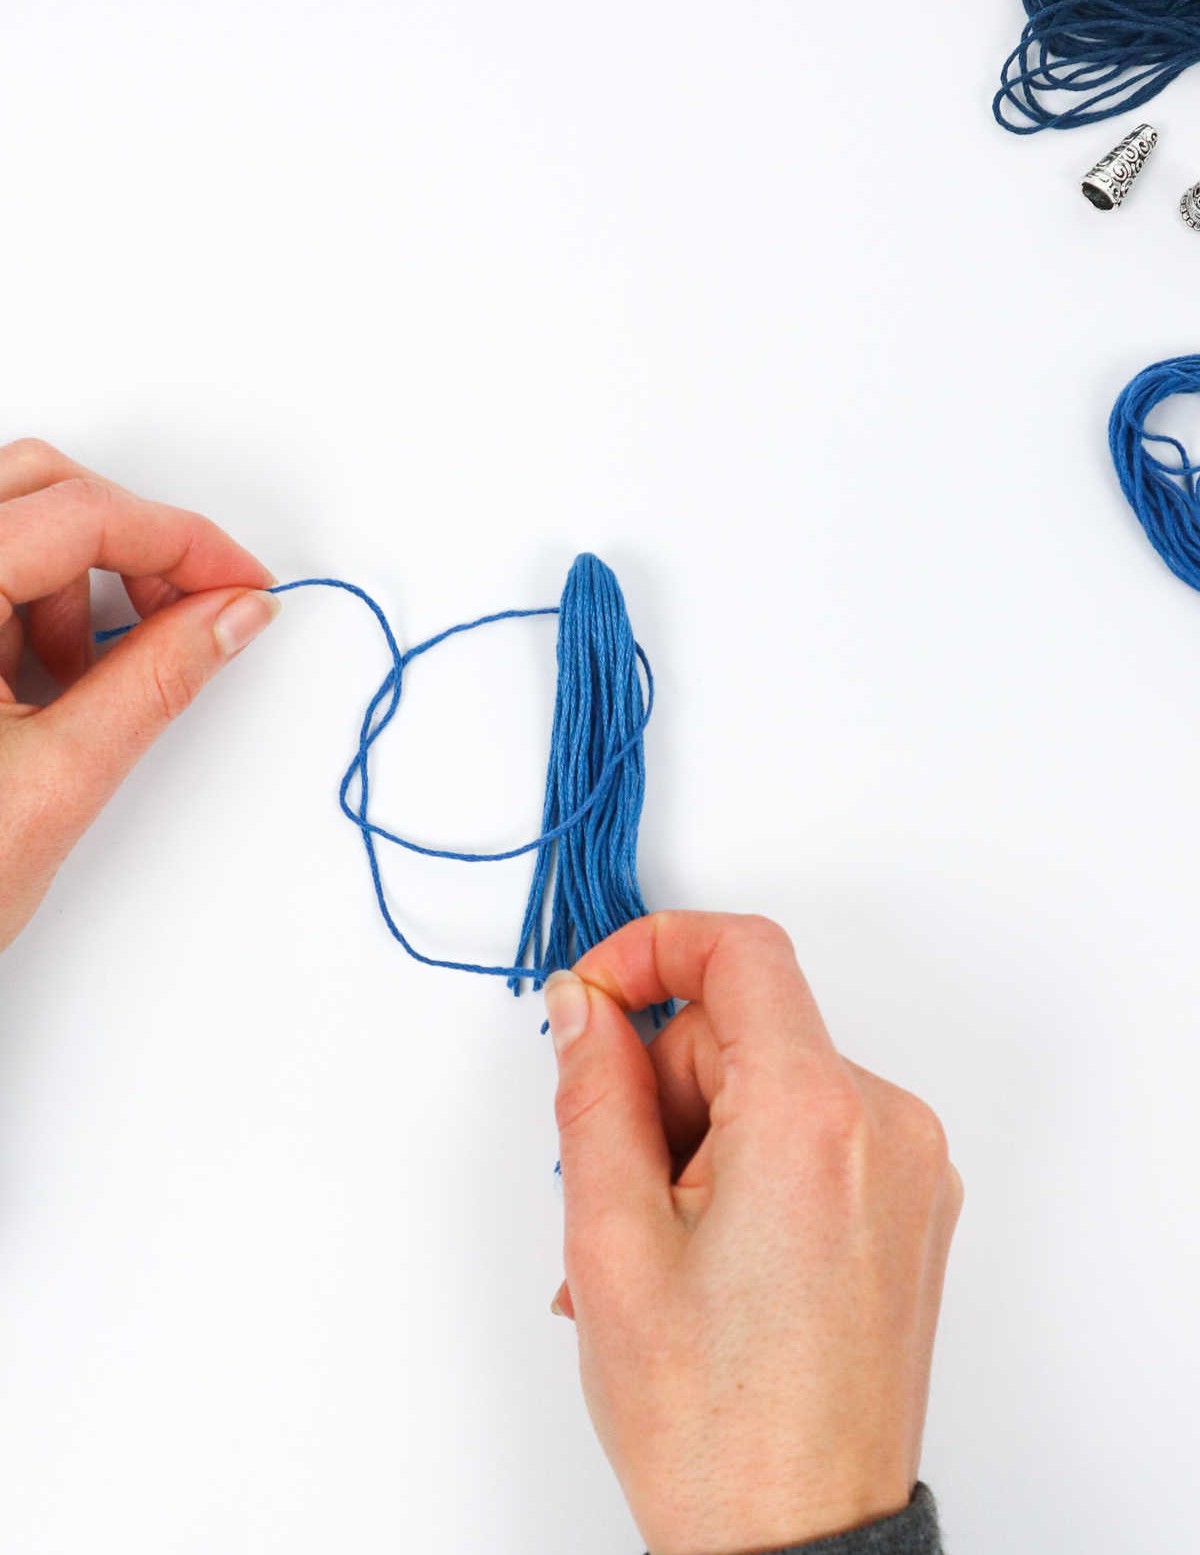
To begin, carefully locate the central loop at one end of the thread or yarn, ensuring that the small plastic wrapper remains intact. Next, take a pair of scissors and precisely cut both ends, severing the individual strands surrounding the center loop with gentle, controlled snips.
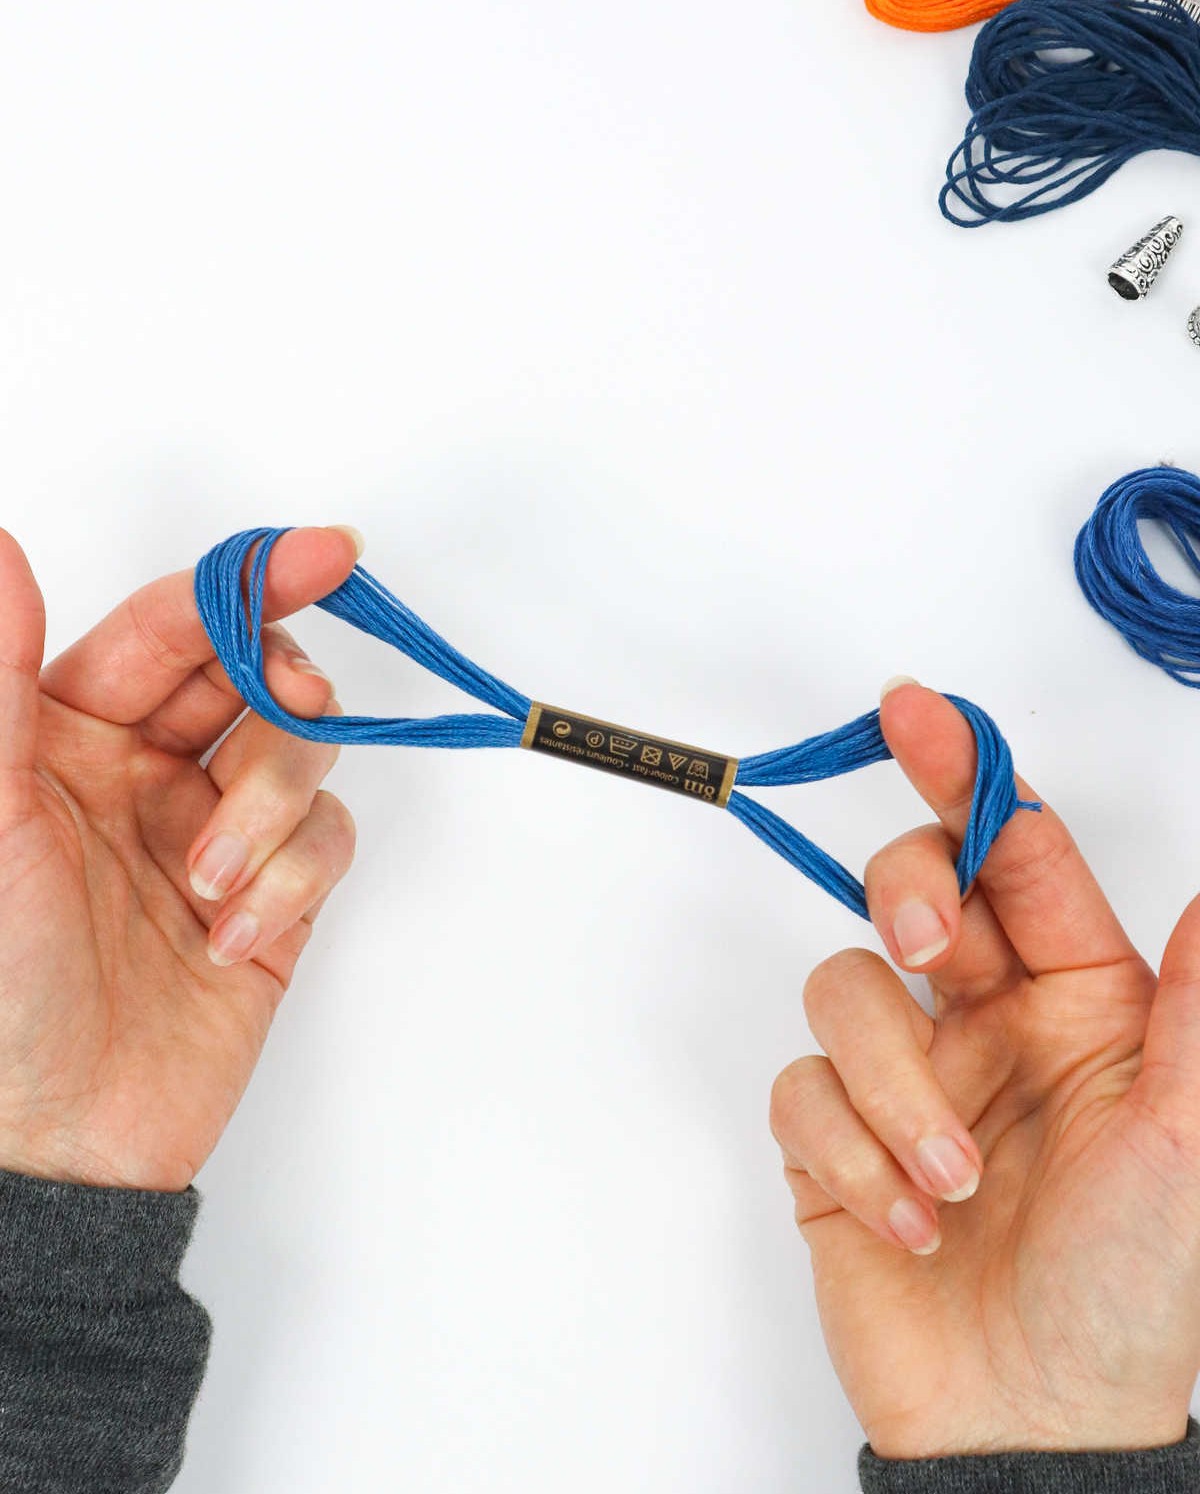
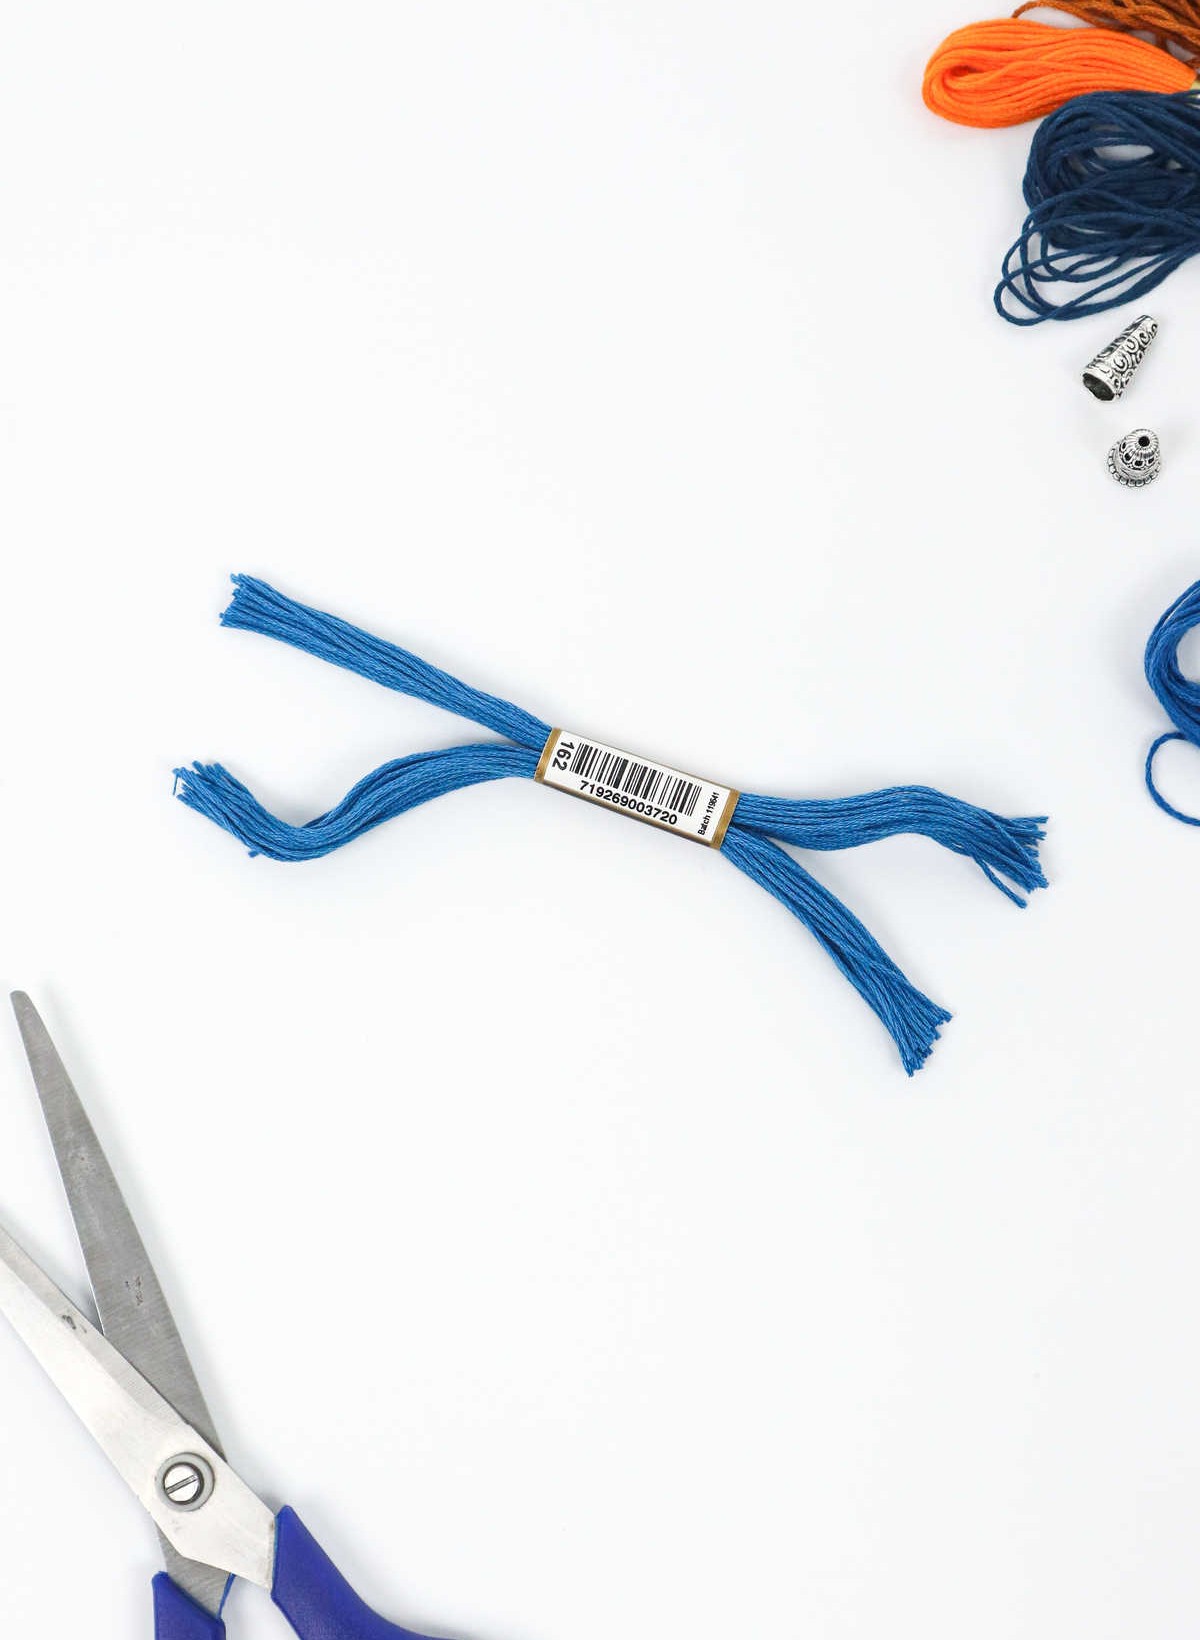
Step 2
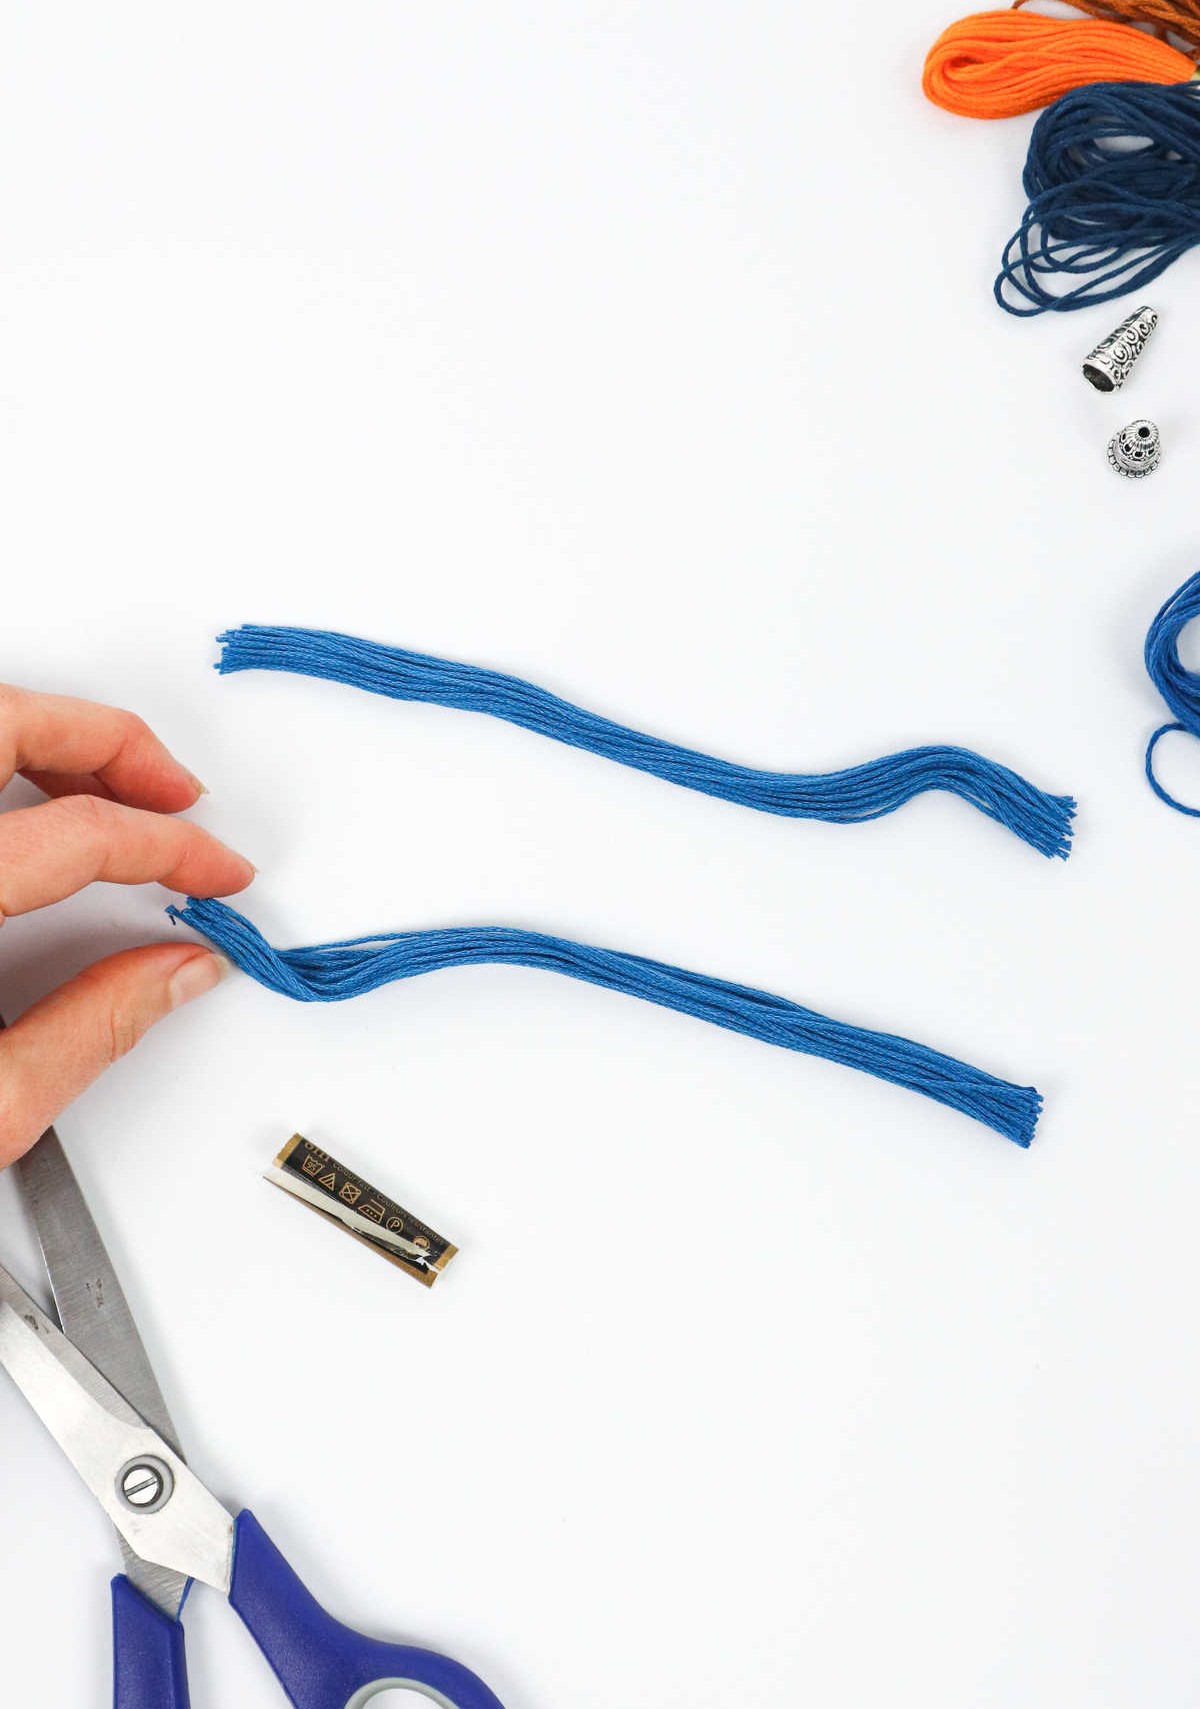
Begin by delicately removing the wrapper from your embroidery threads, then divide them evenly into two distinct sections. This initial step is crucial in setting the stage for a successful project.
Step 3
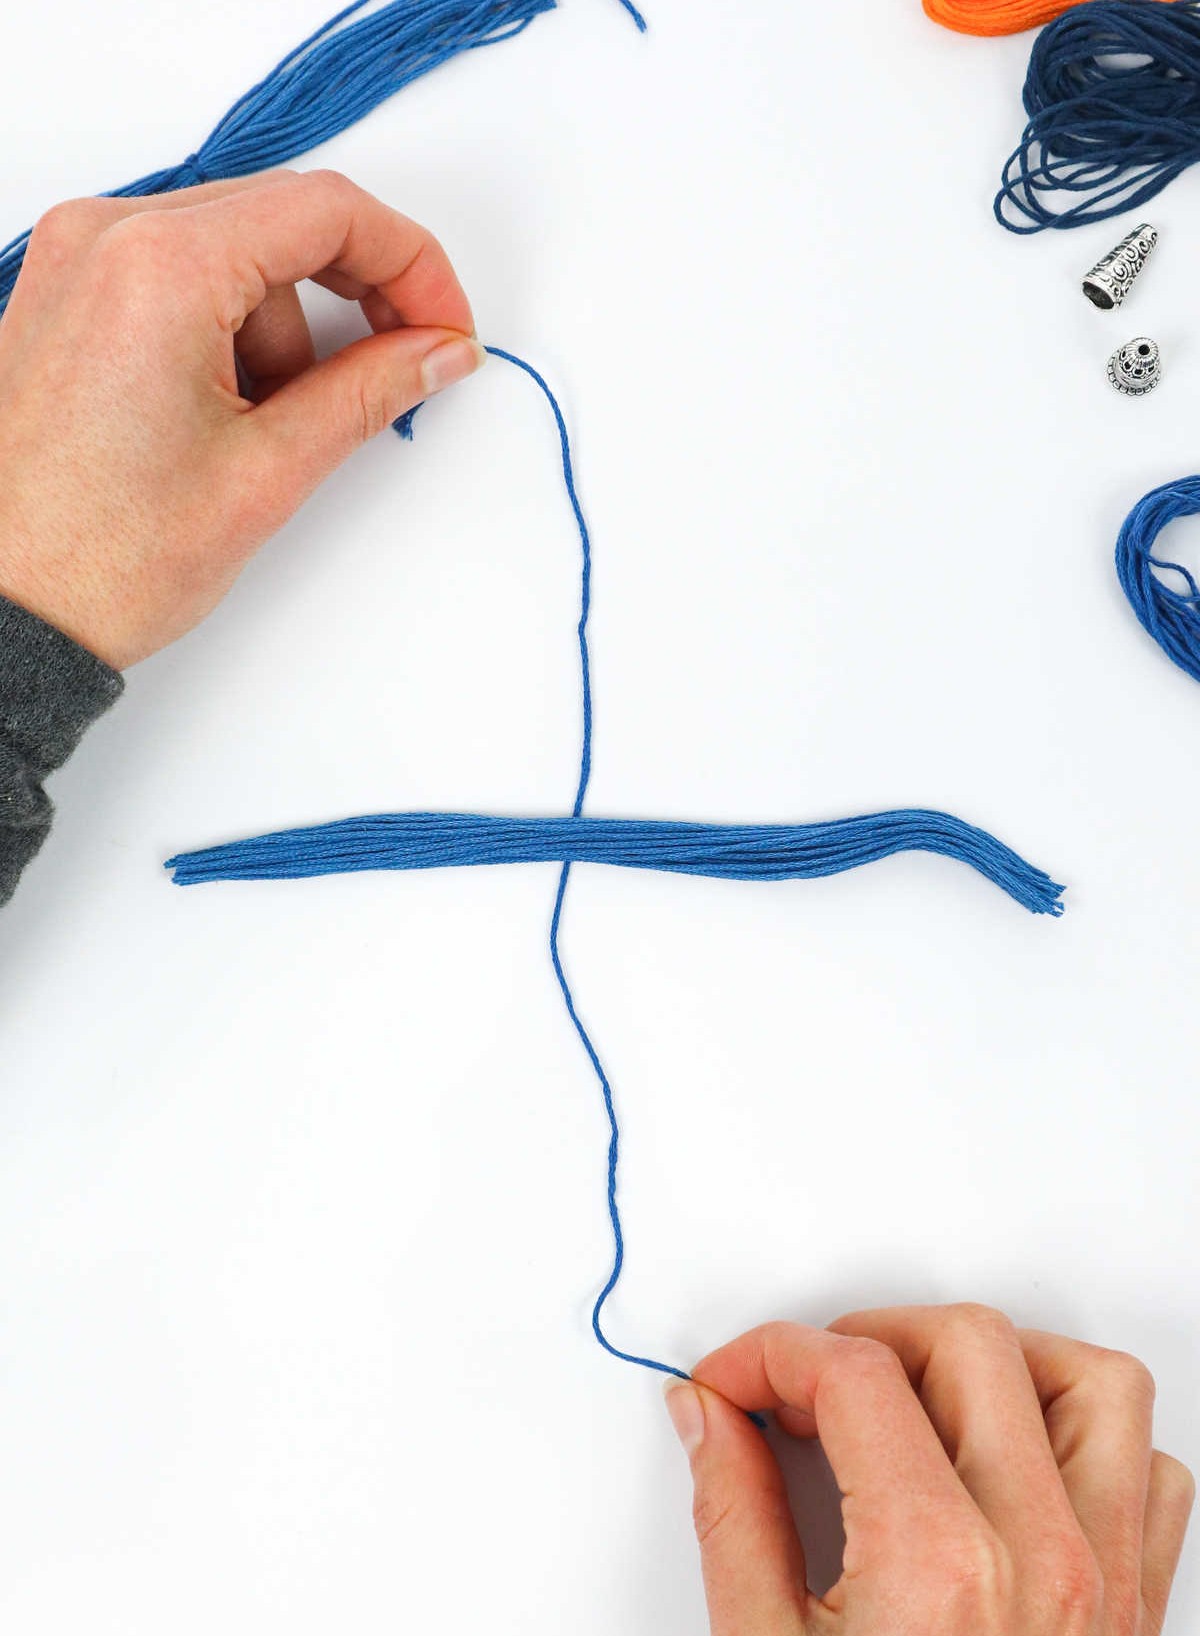
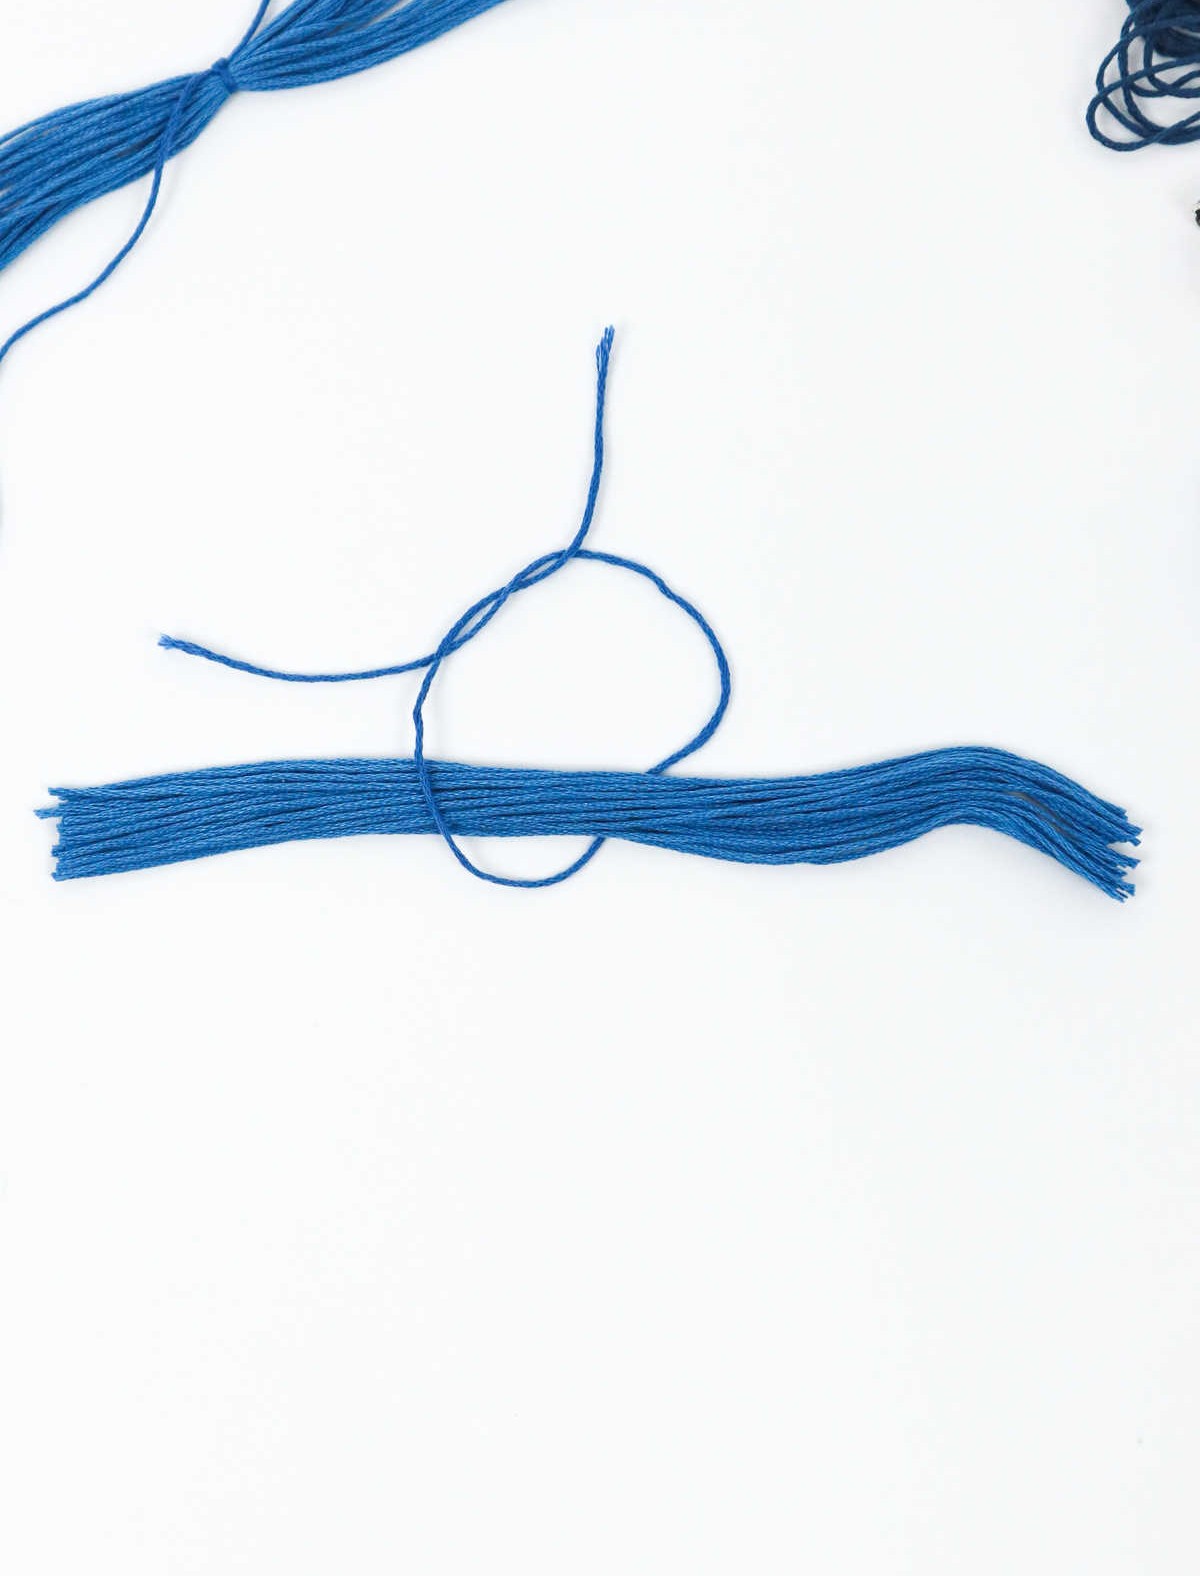
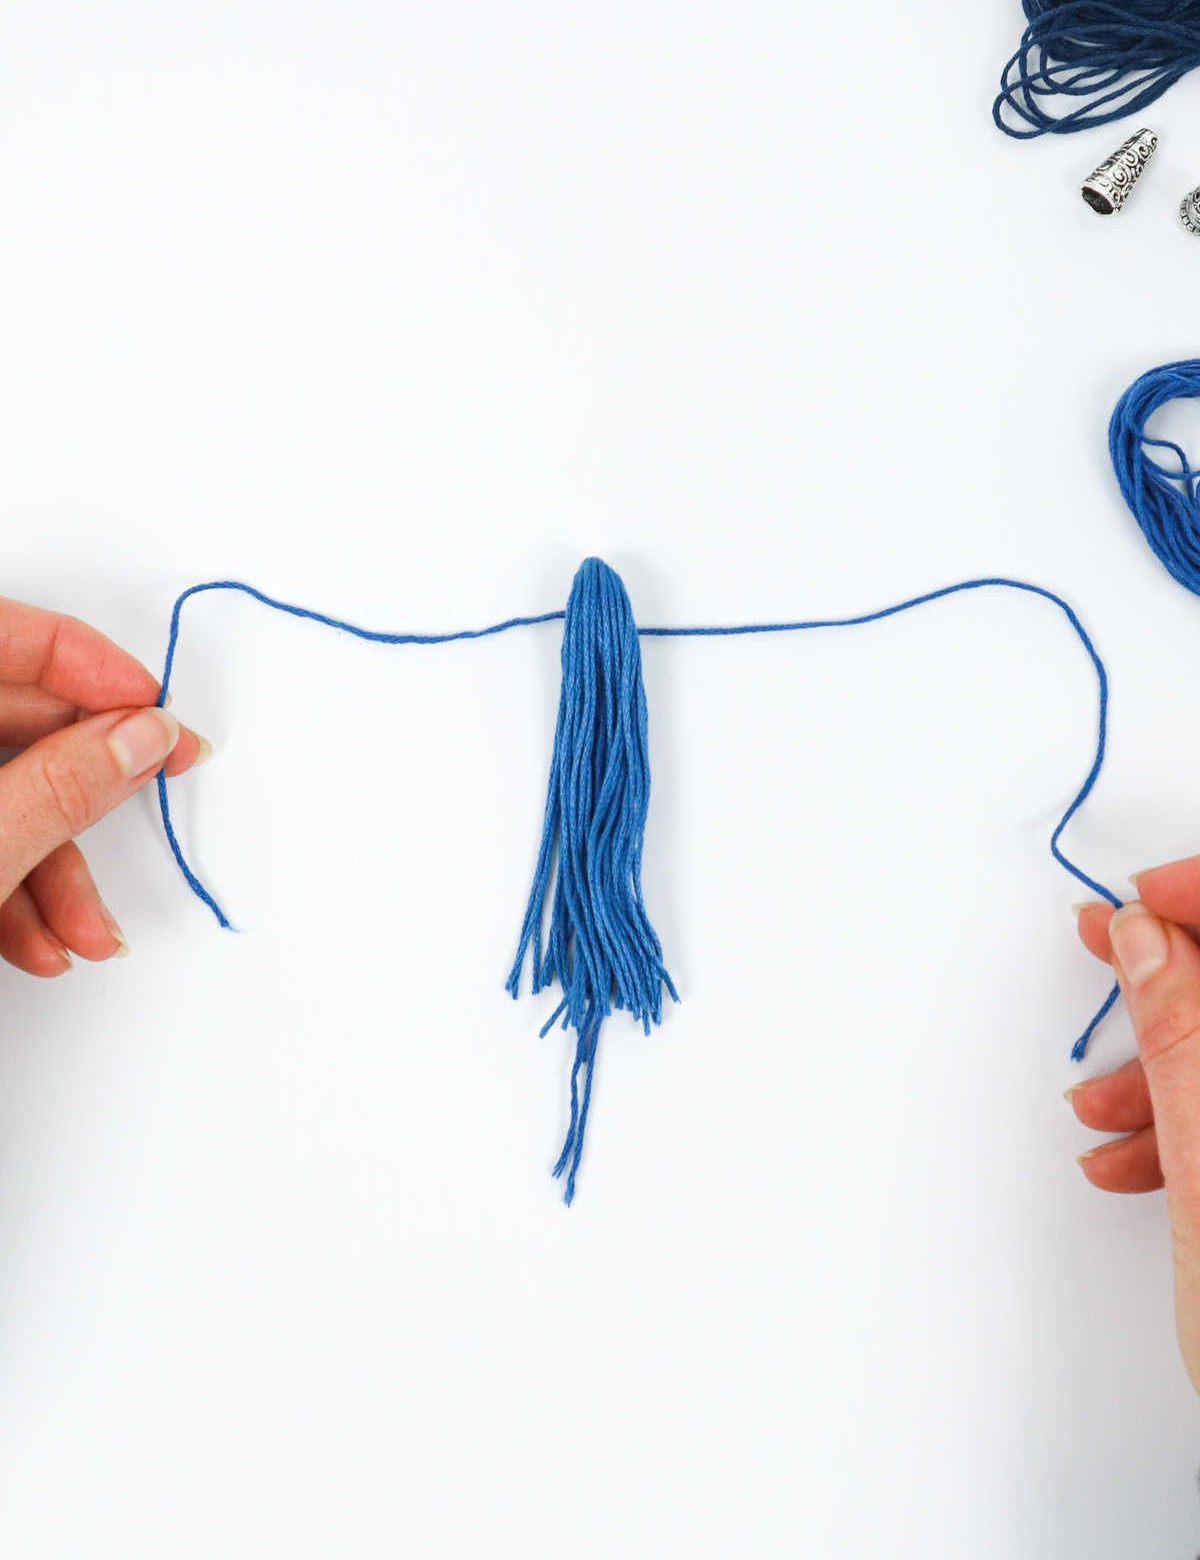
To complete the stitching process, start by cutting an 8-inch piece of embroidery thread from a matching color batch. Next, pass the thread underneath the fabric, dividing it into two equal parts. Secure the thread in place with a knot. Repeat this step on the opposite side to ensure a sturdy foundation for your stitches.
Step 4
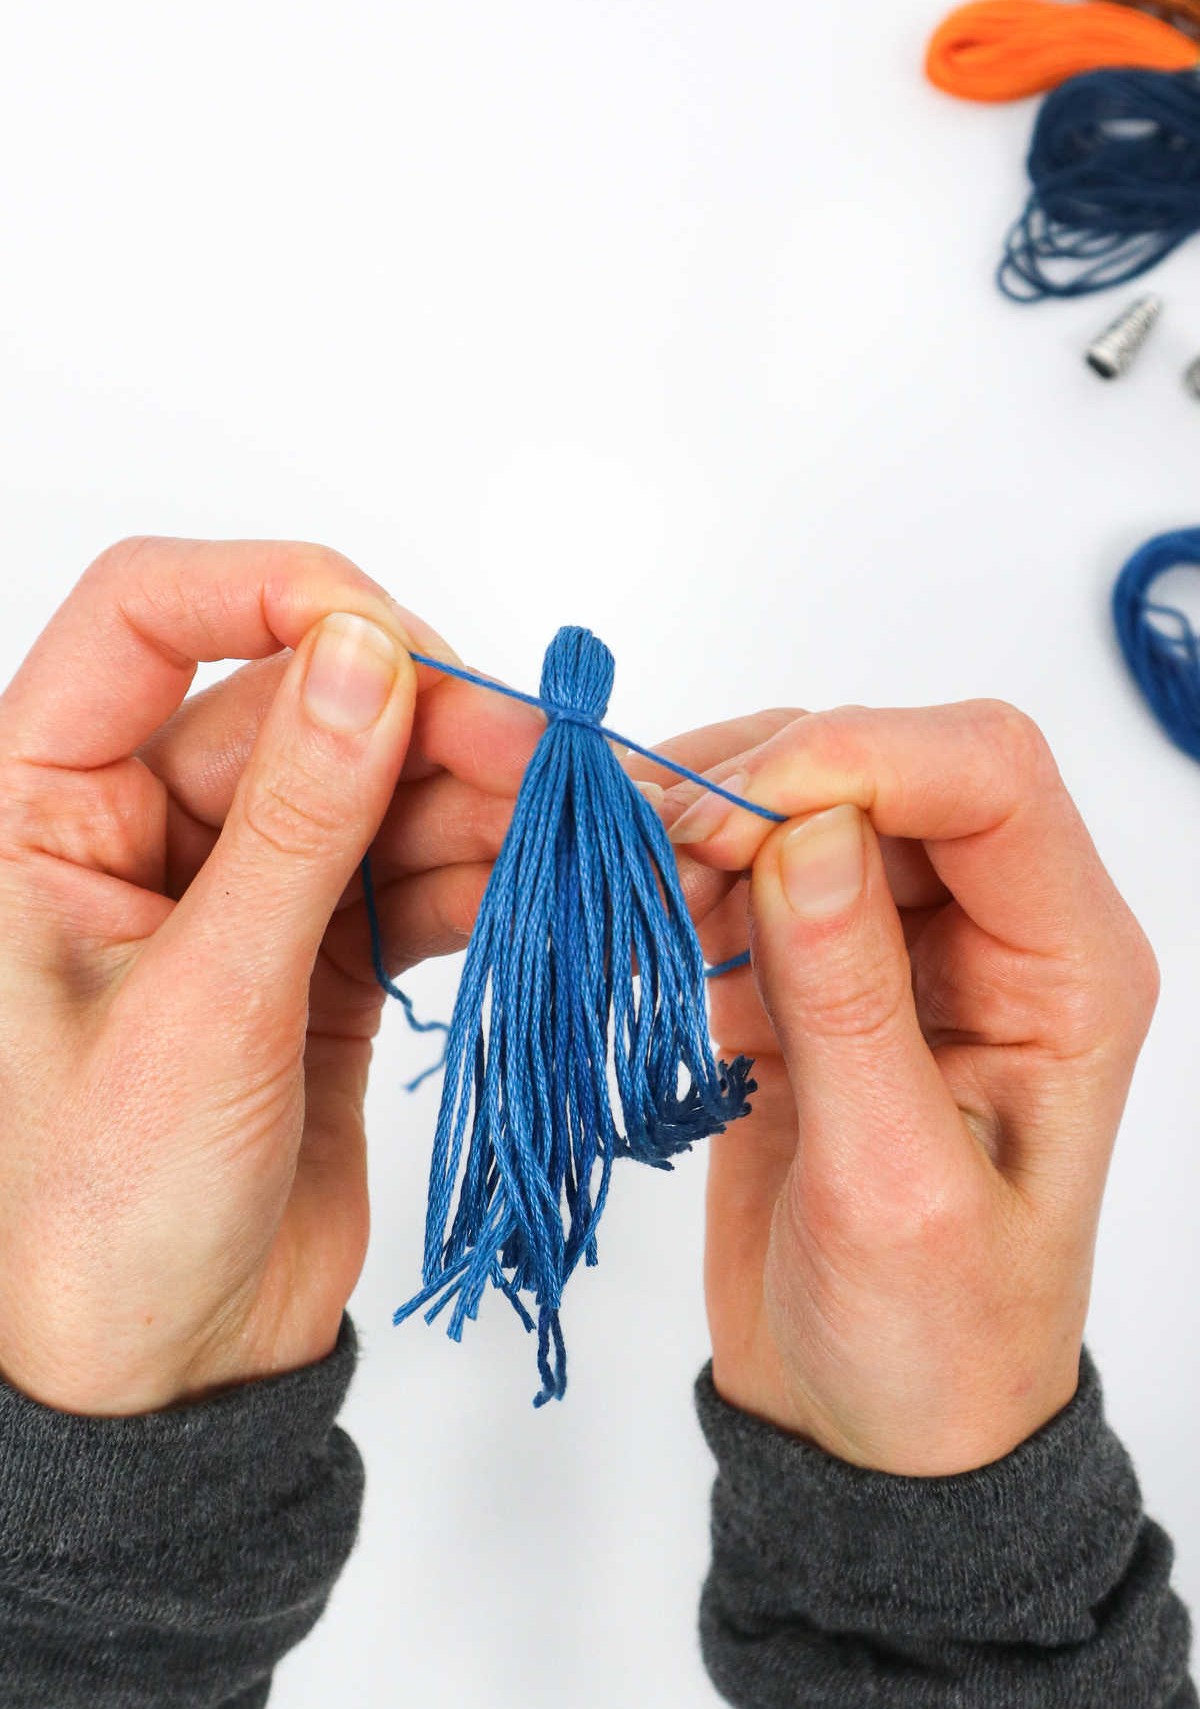
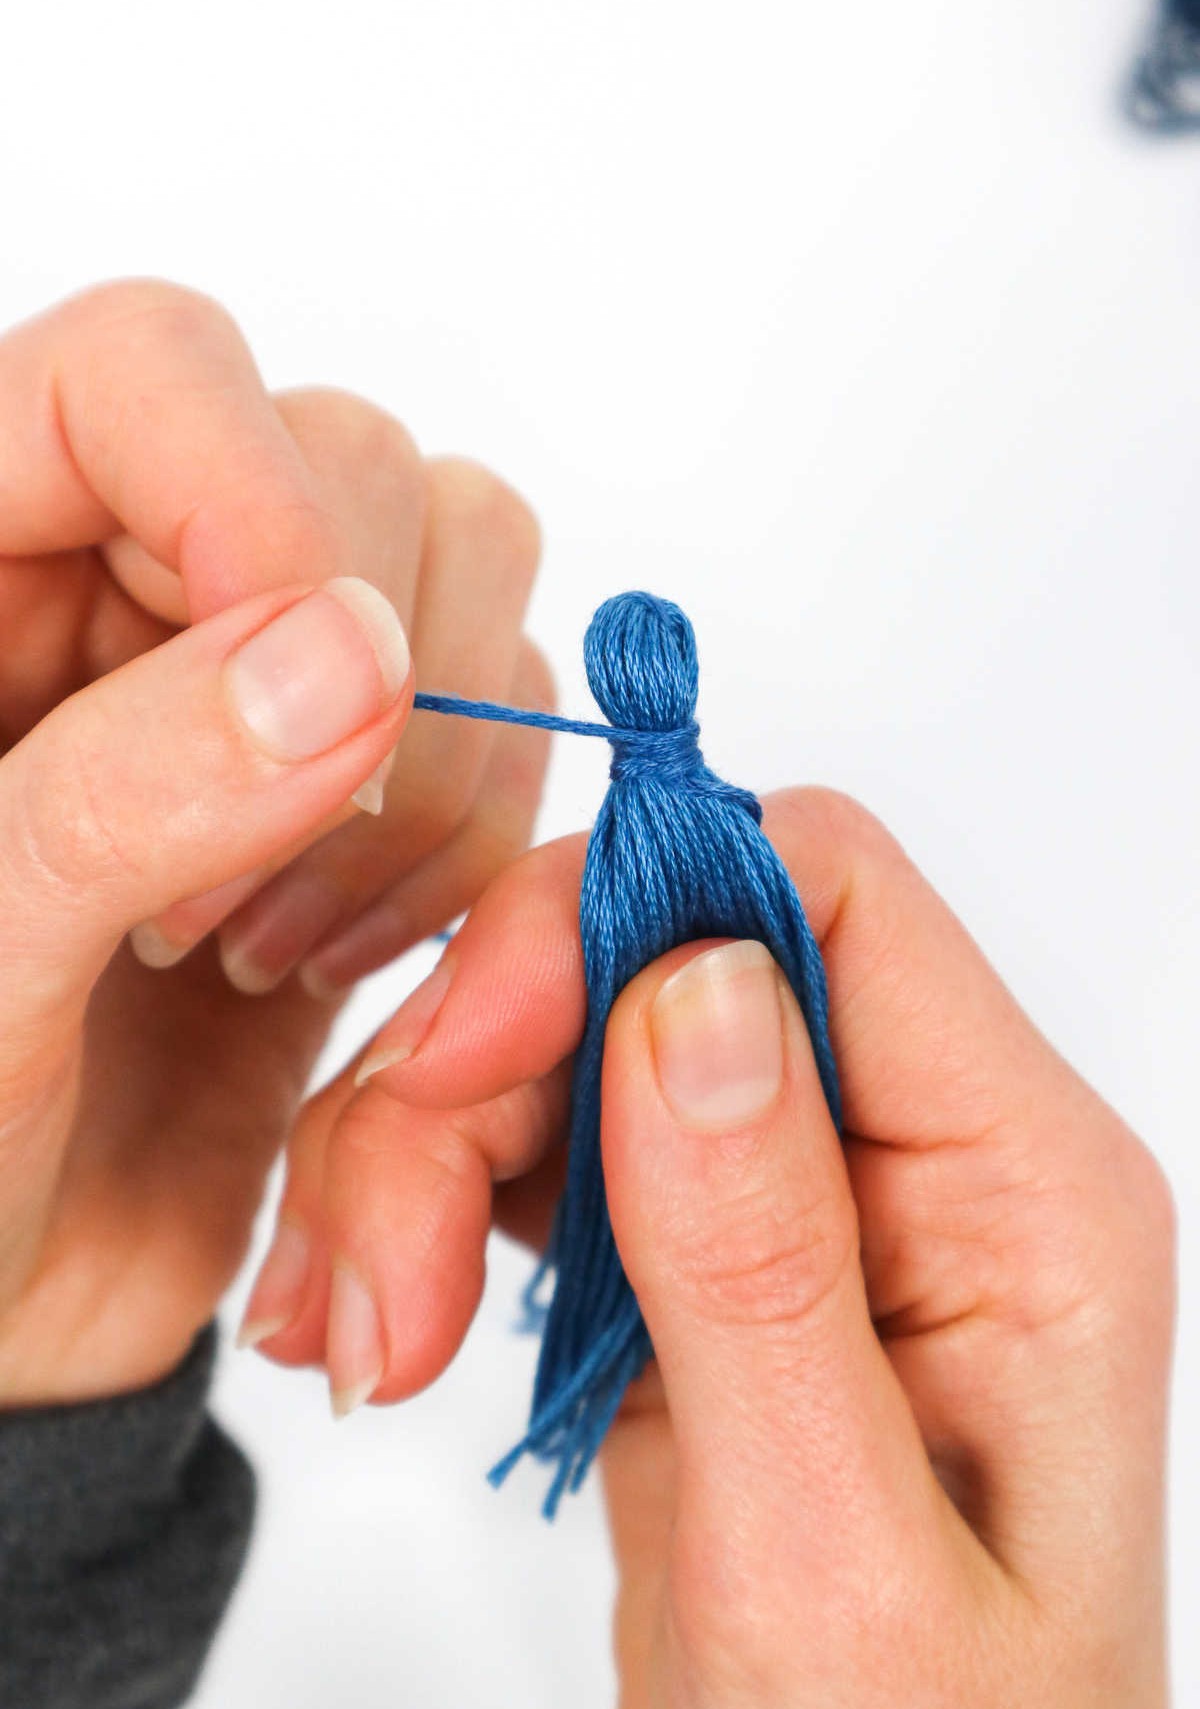
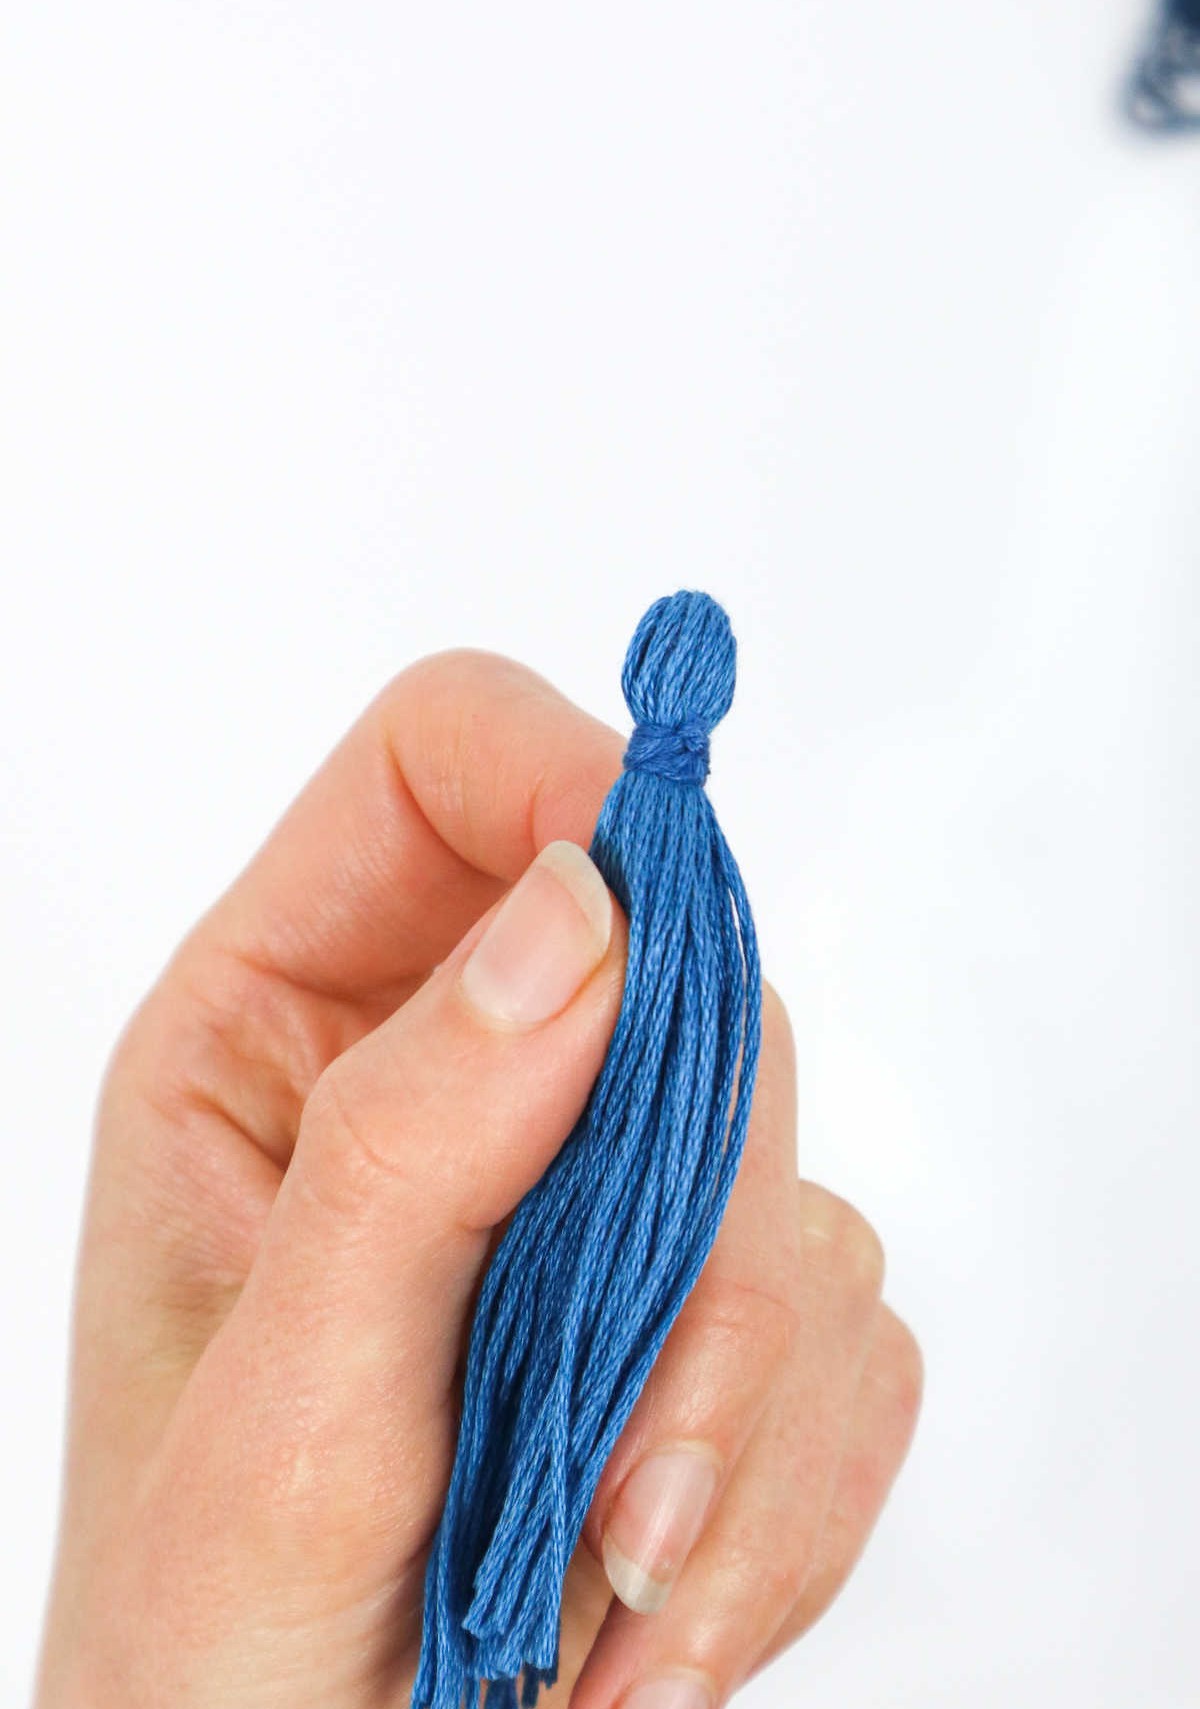
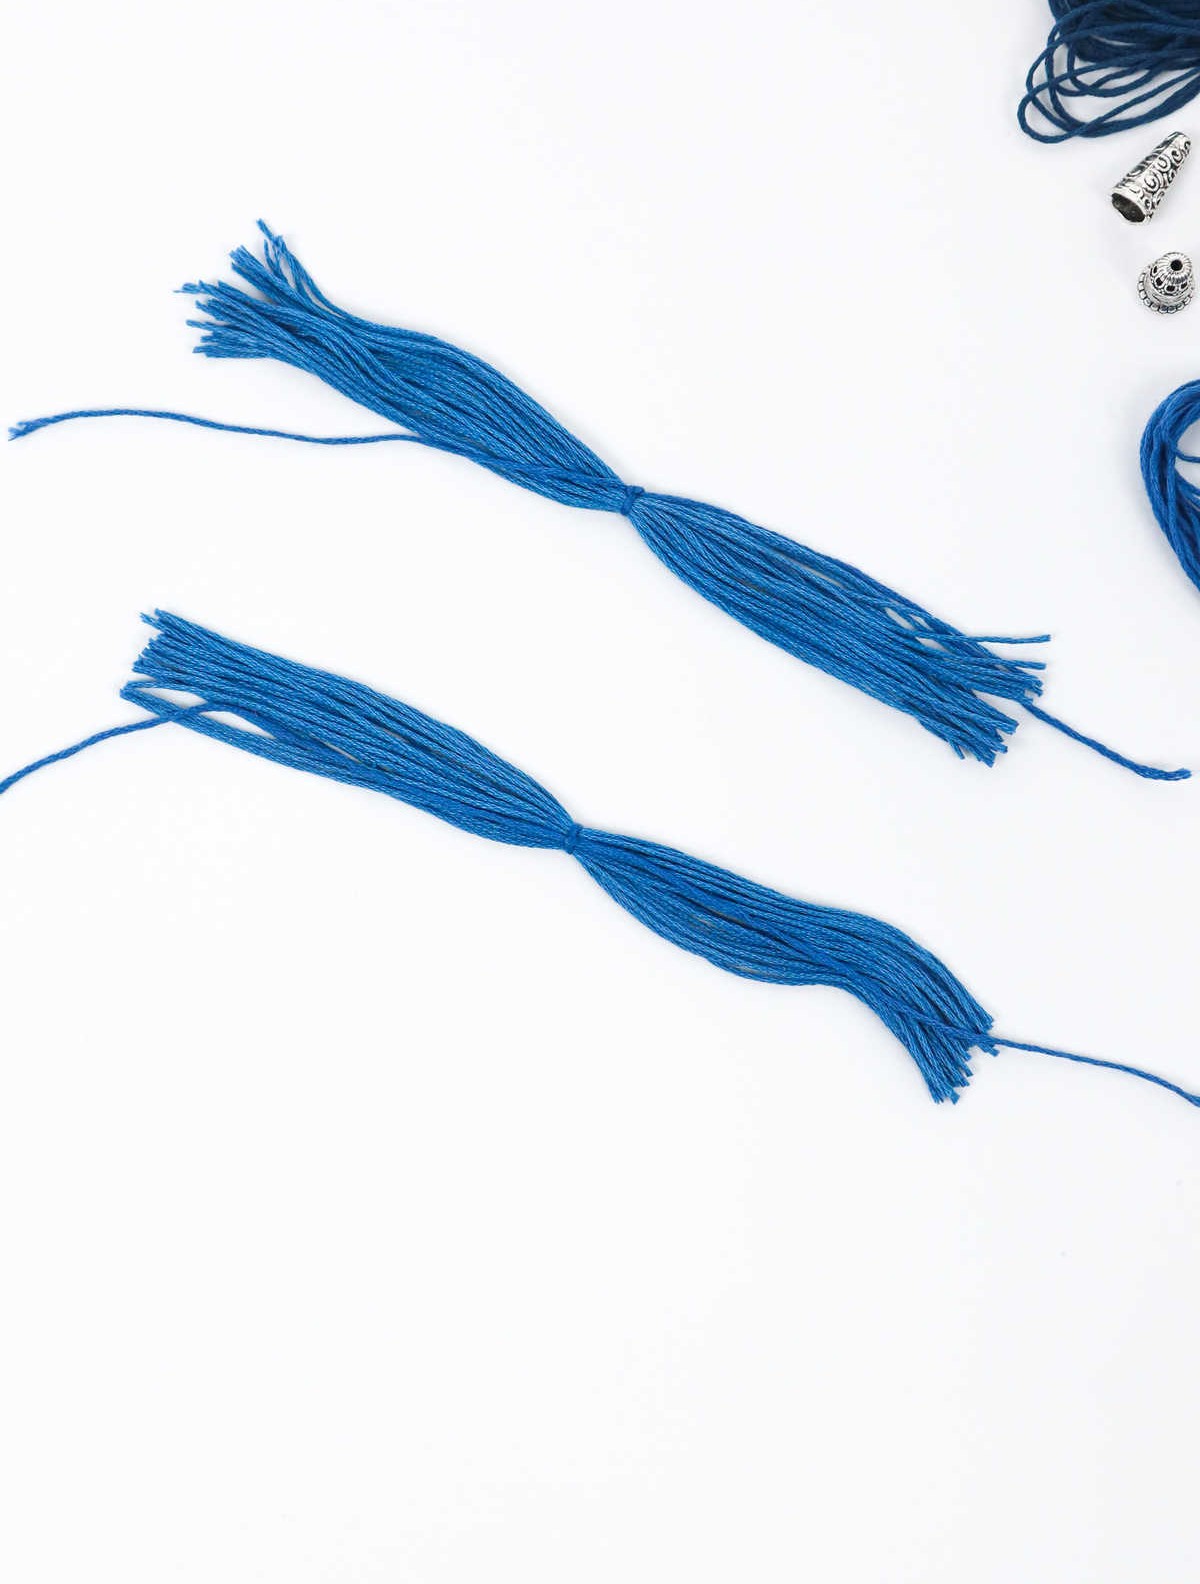
To begin with, fold the thread bundle in half, aligning the knot as depicted in the accompanying image. Next, cut another thread strand measuring approximately 10 inches in length and loop it around the folded threads, about 1 centimeter from the top. Ensure the knot is secure by tugging gently on both ends. Following this, take hold of the longer end and wrap it around the head a few times to create a snug fit.
Finally, tie a double knot to reinforce the strand’s position and trim the excess with a pair of scissors.
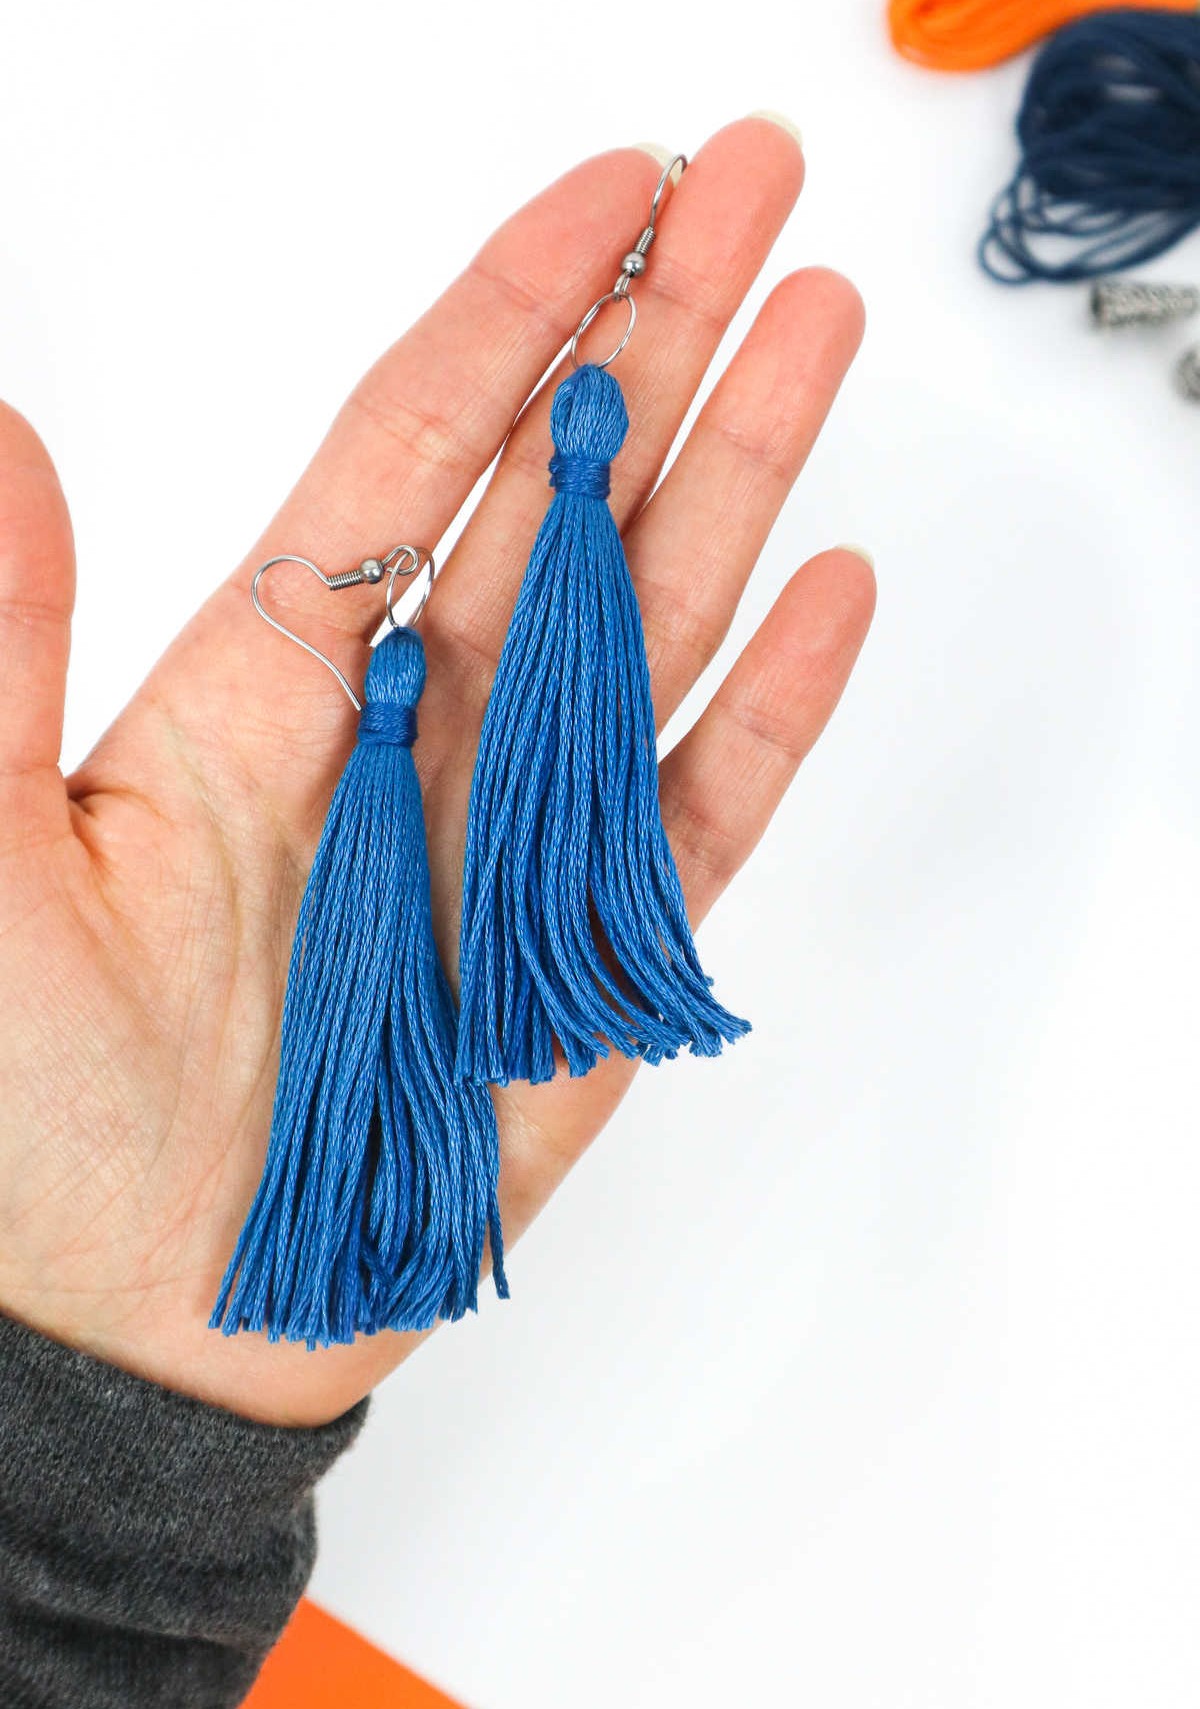
Step 5
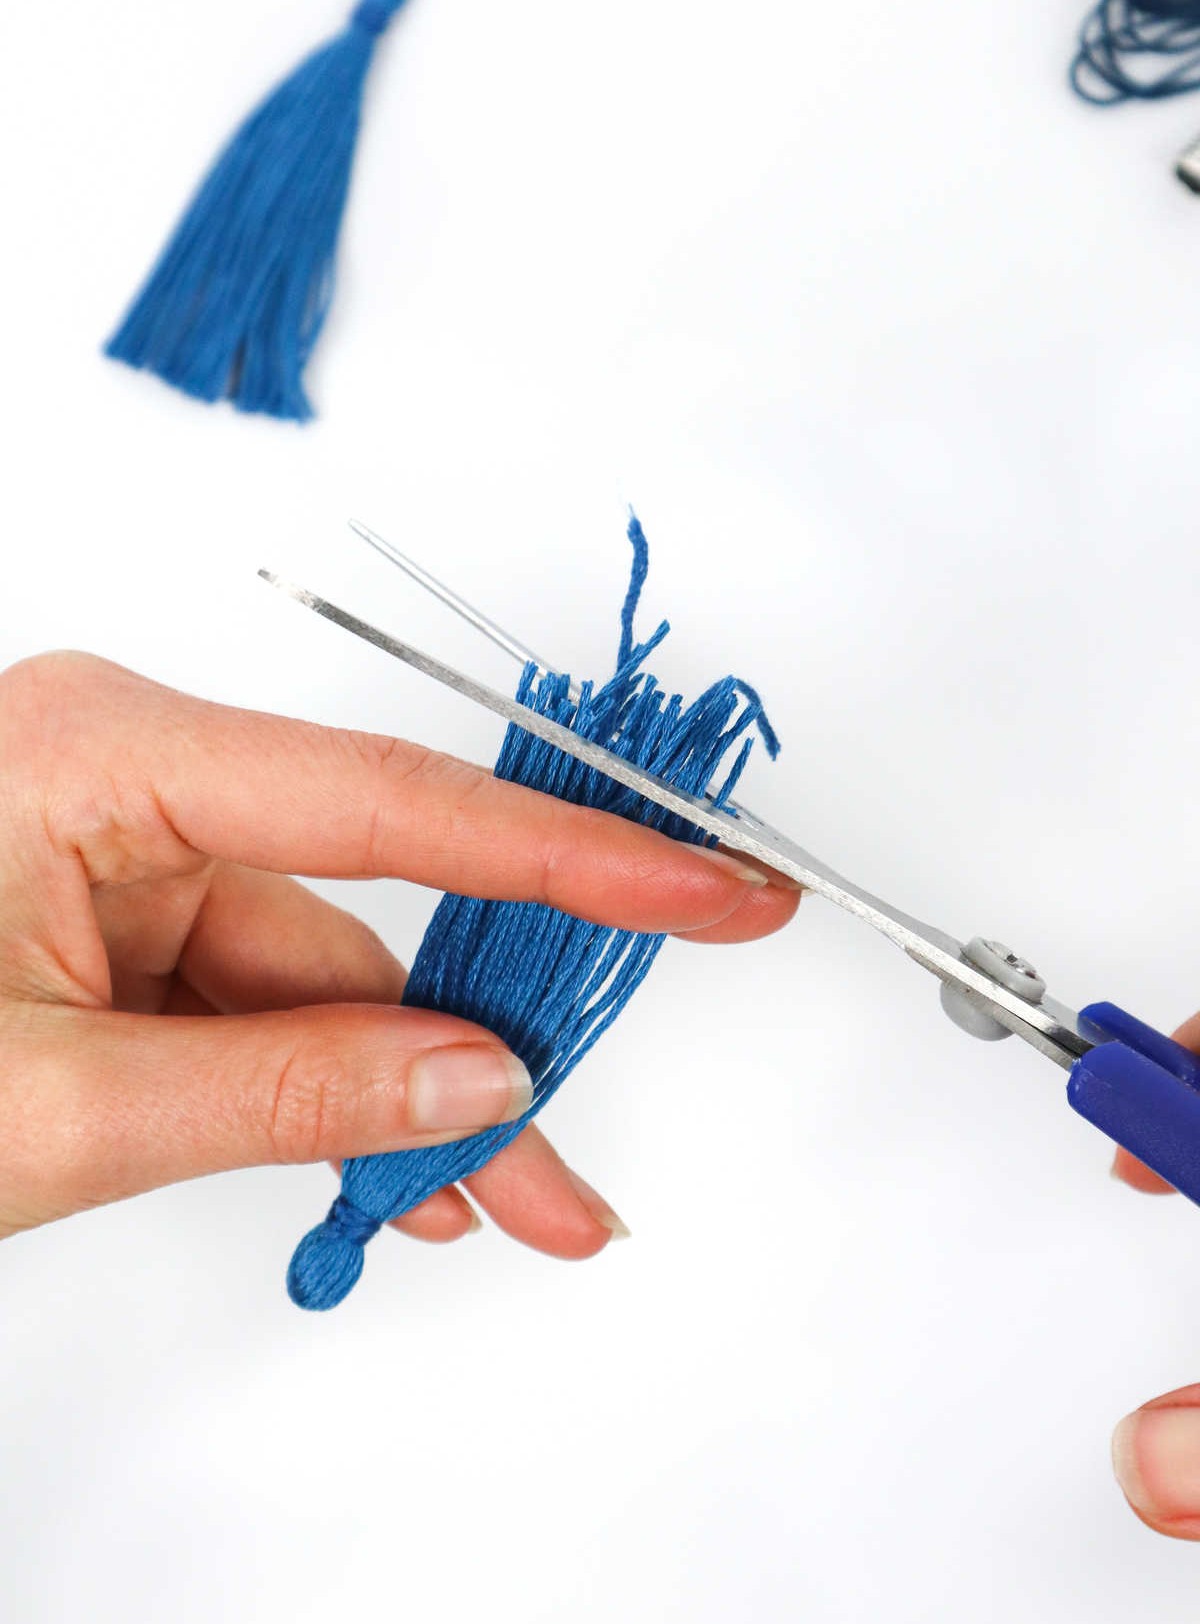
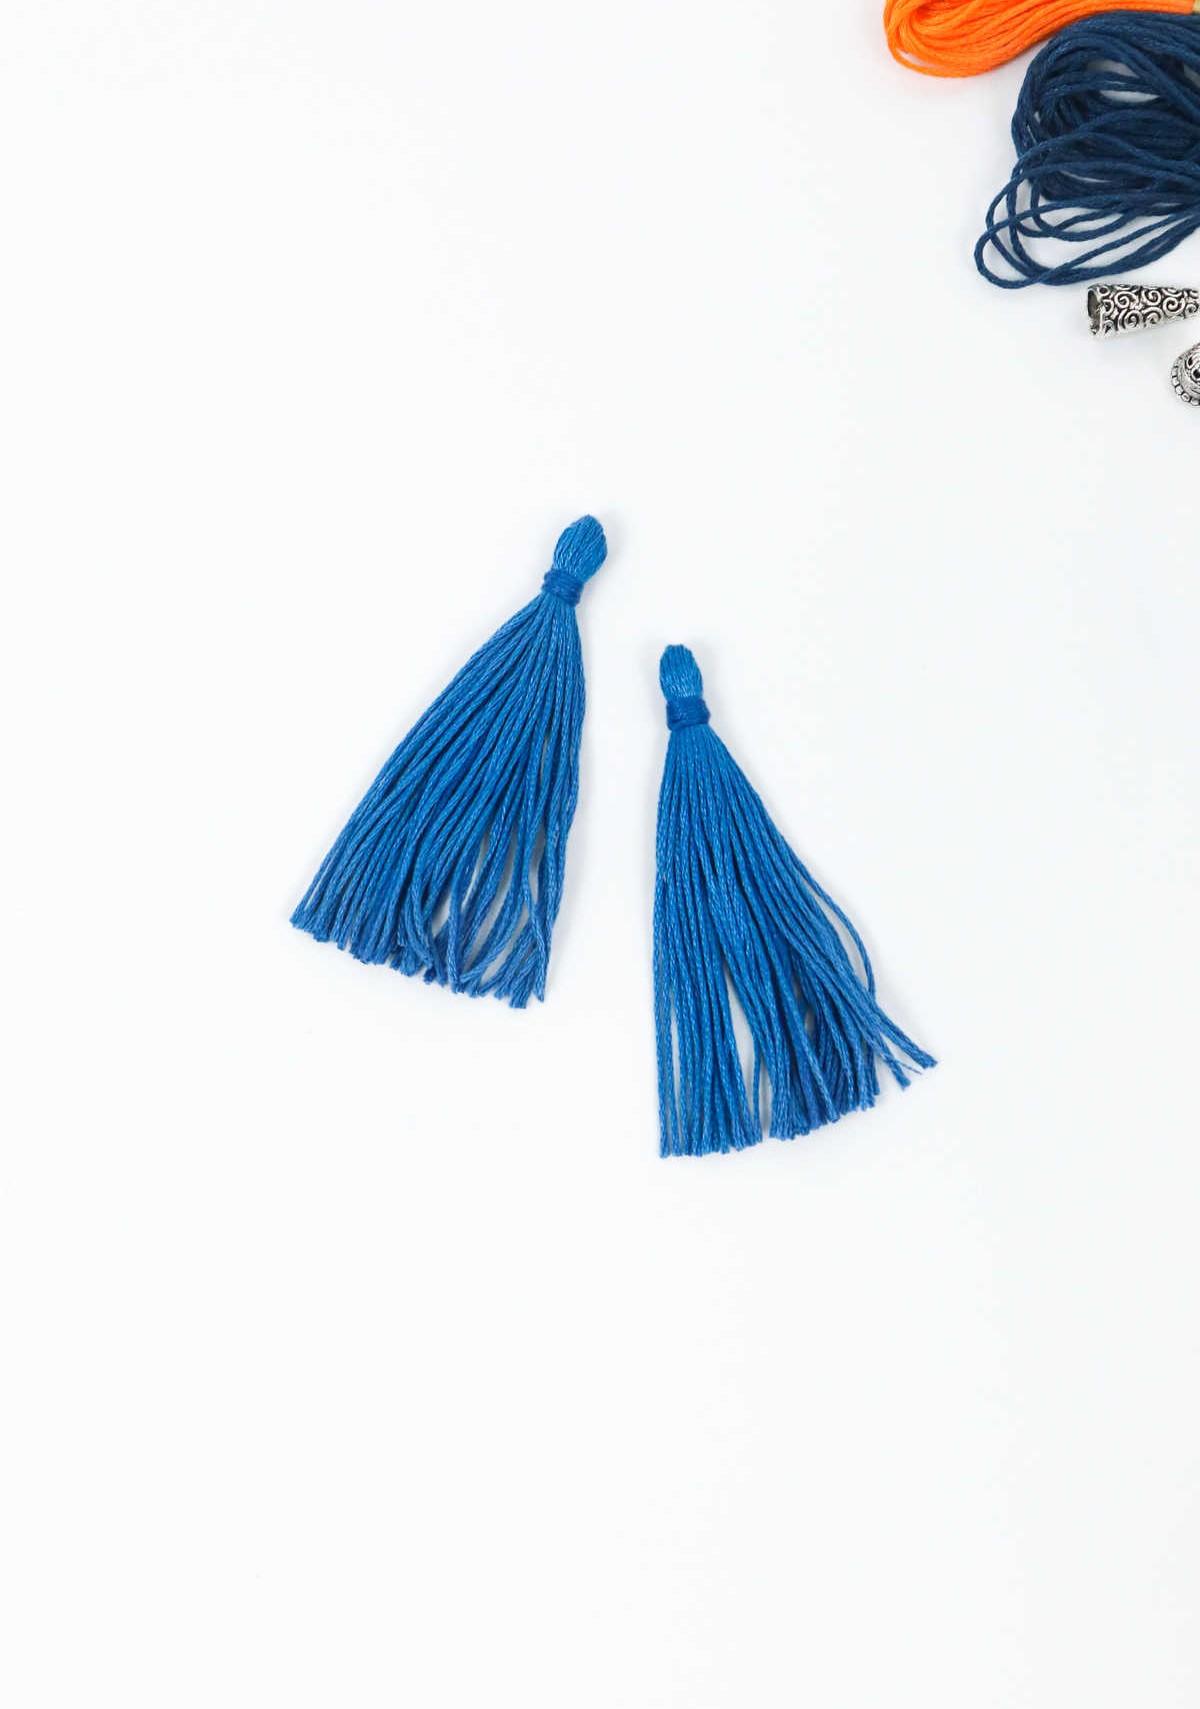
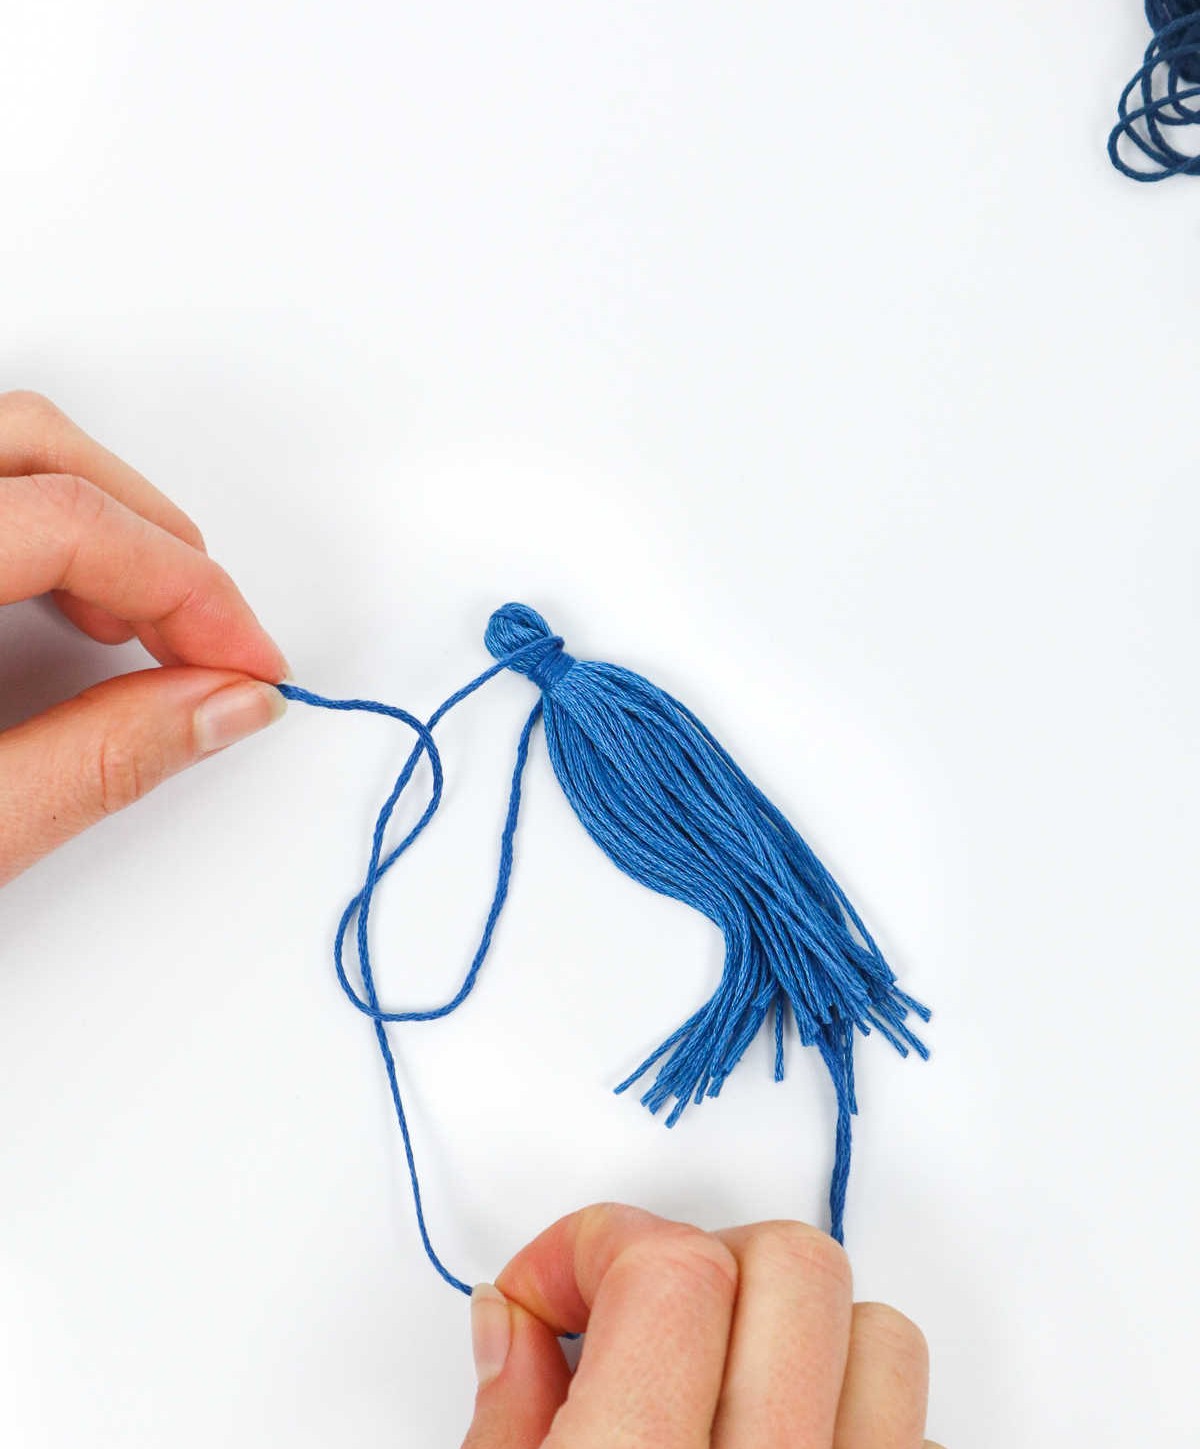
As you finish the first tassel, don’t put away your scissors just yet. Instead, carefully trim the threads at the opposite end of the remaining thread to ensure an even match. This is the perfect opportunity to create a pair by making the matching tassel using the set-aside threads. Once you’ve completed the second tassel, it’s time to transform them into earrings! Feel free to experiment with different methods to determine what works best for your unique style.
Turn Tassels Into Earrings – Method 1
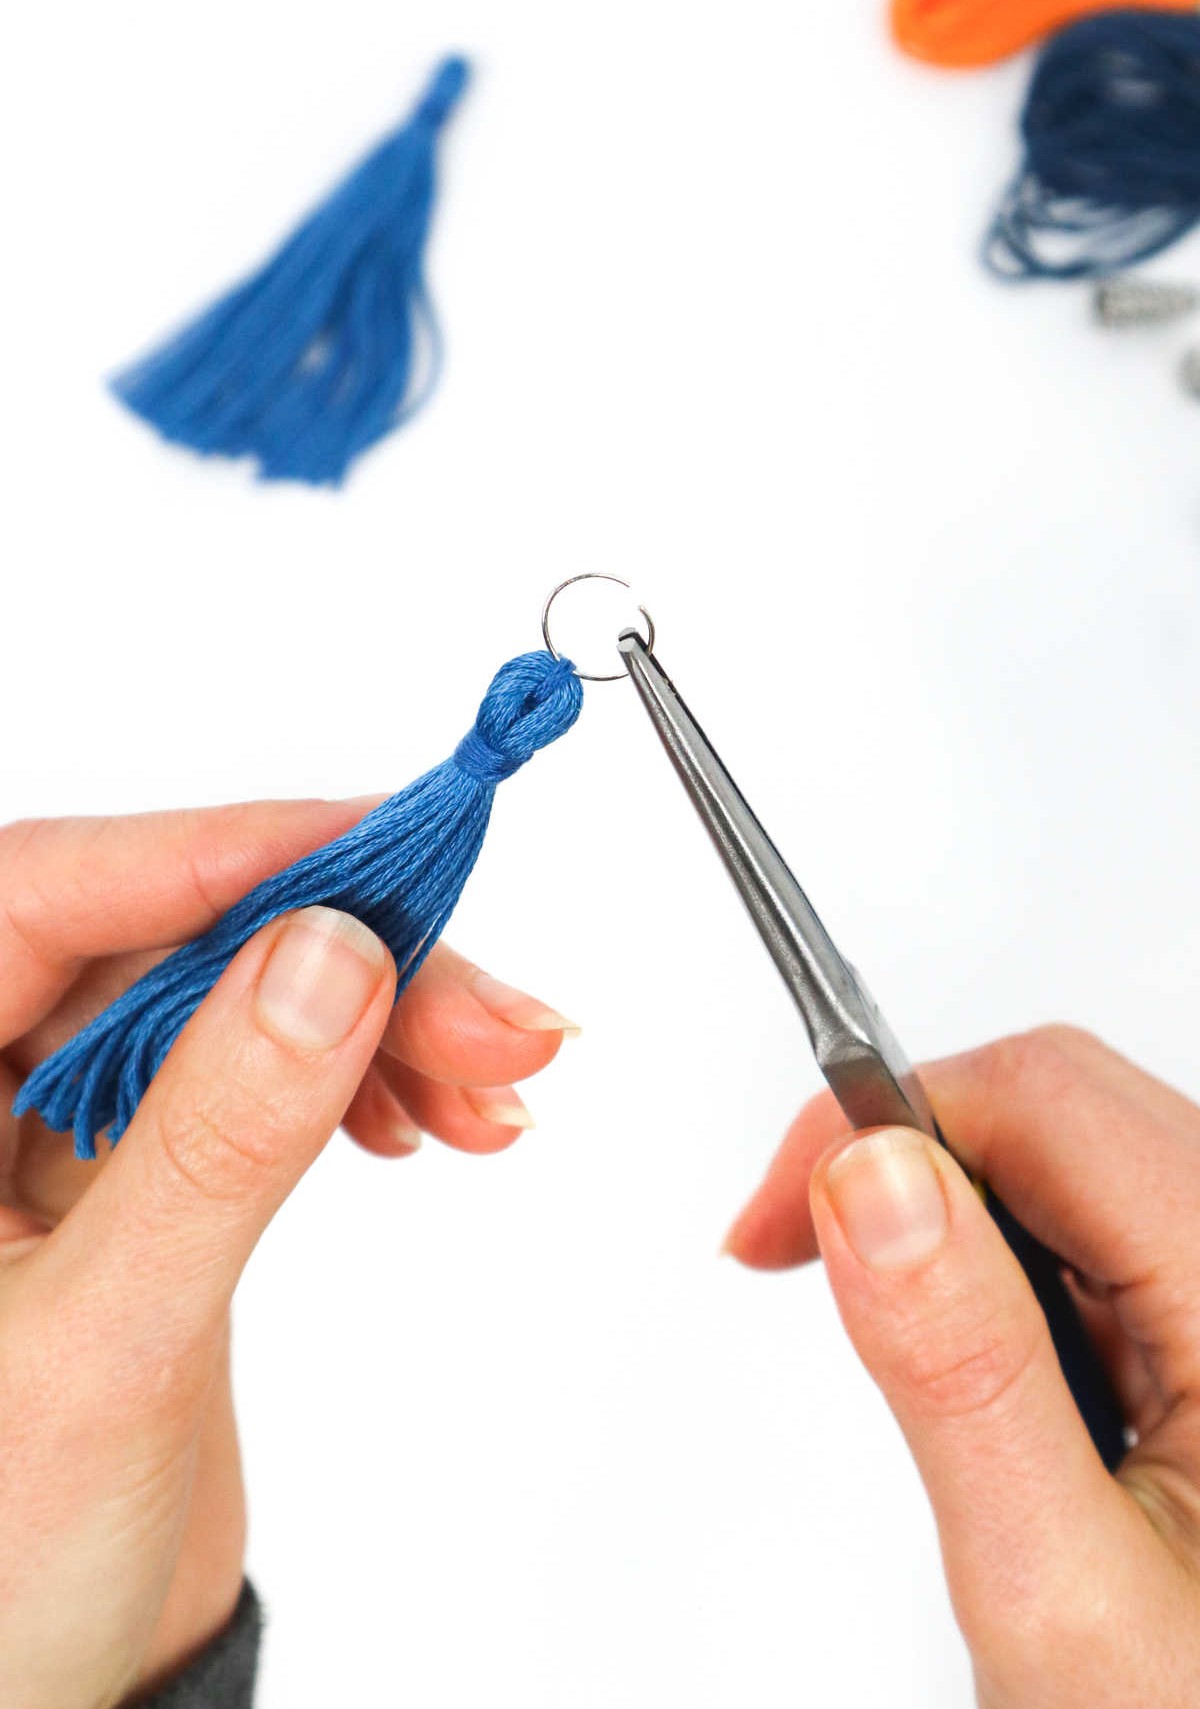
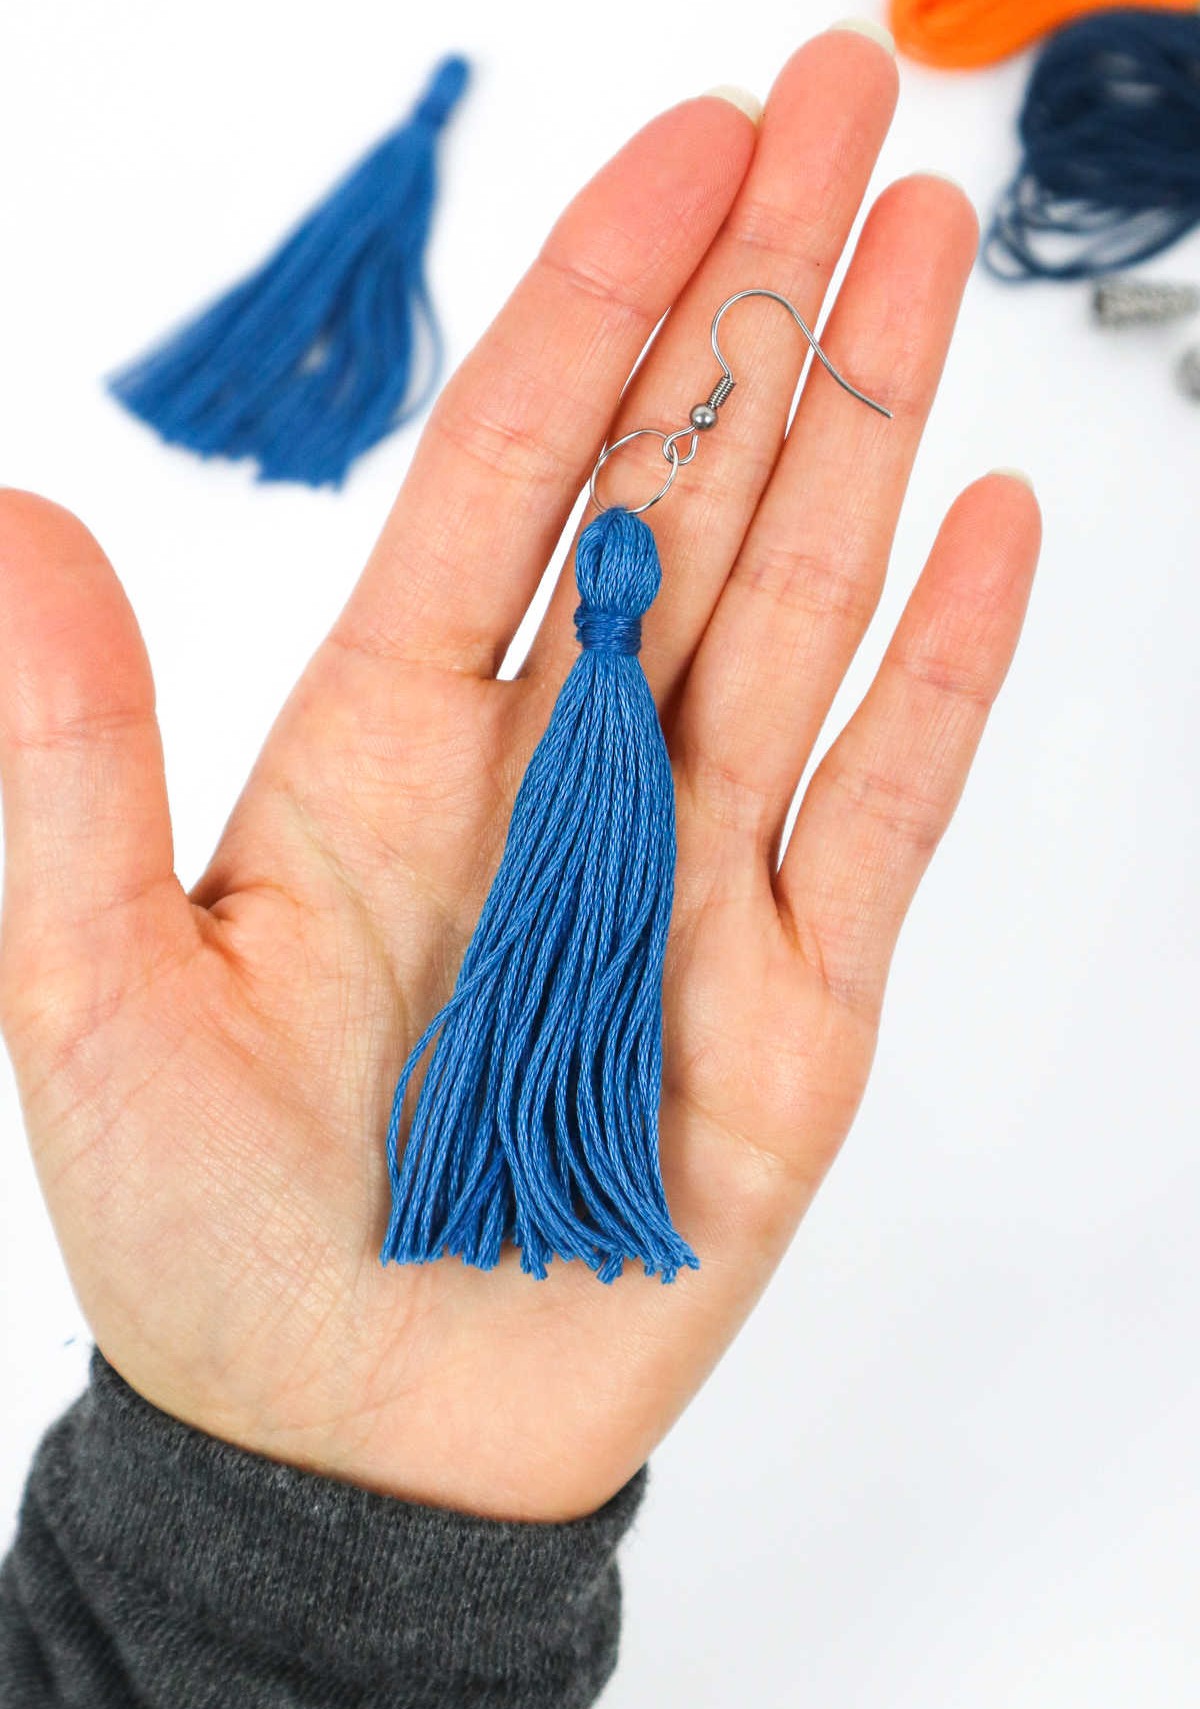
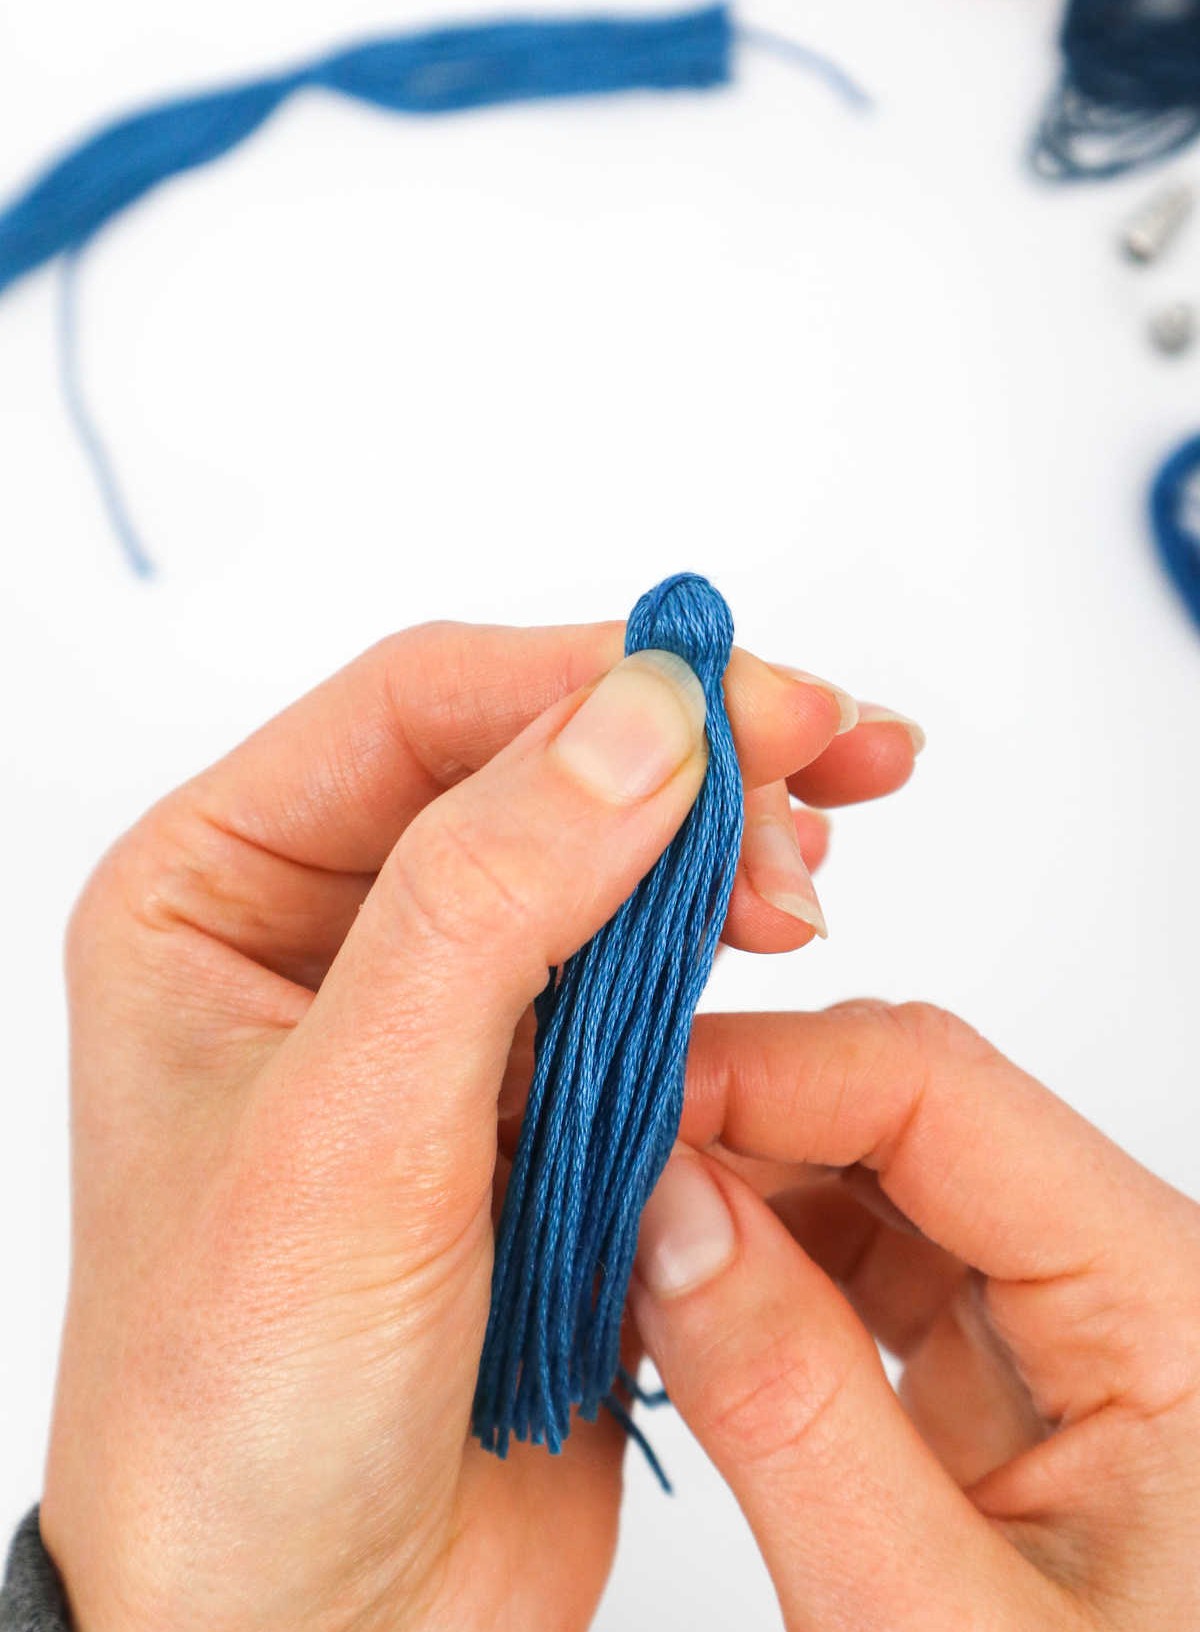
To complete your DIY earring, begin by threading a small jump ring or metal hoop onto one of the upper threads. If you’re concerned about precision, utilize pliers to securely fasten the hoop in place. Next, grasp the earring hook and attach it to the jump ring, effectively securing it.
Method 2
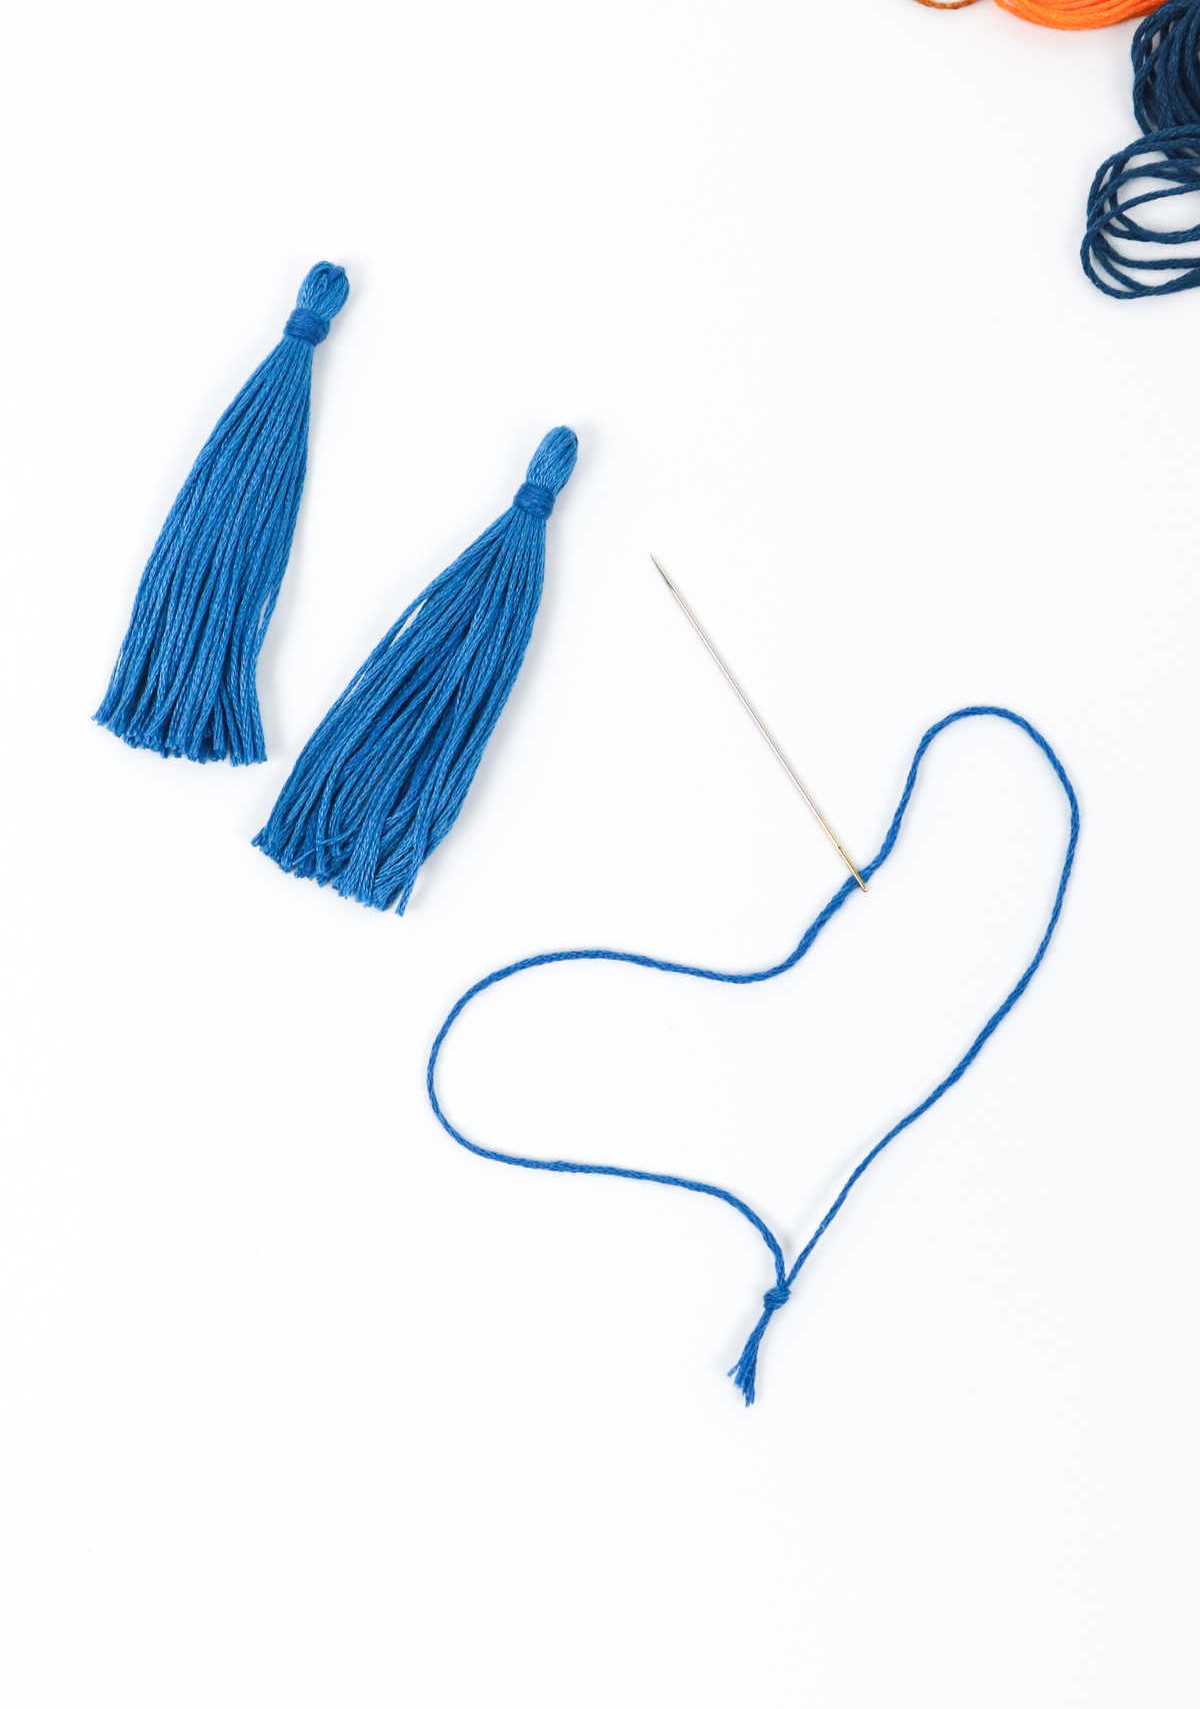
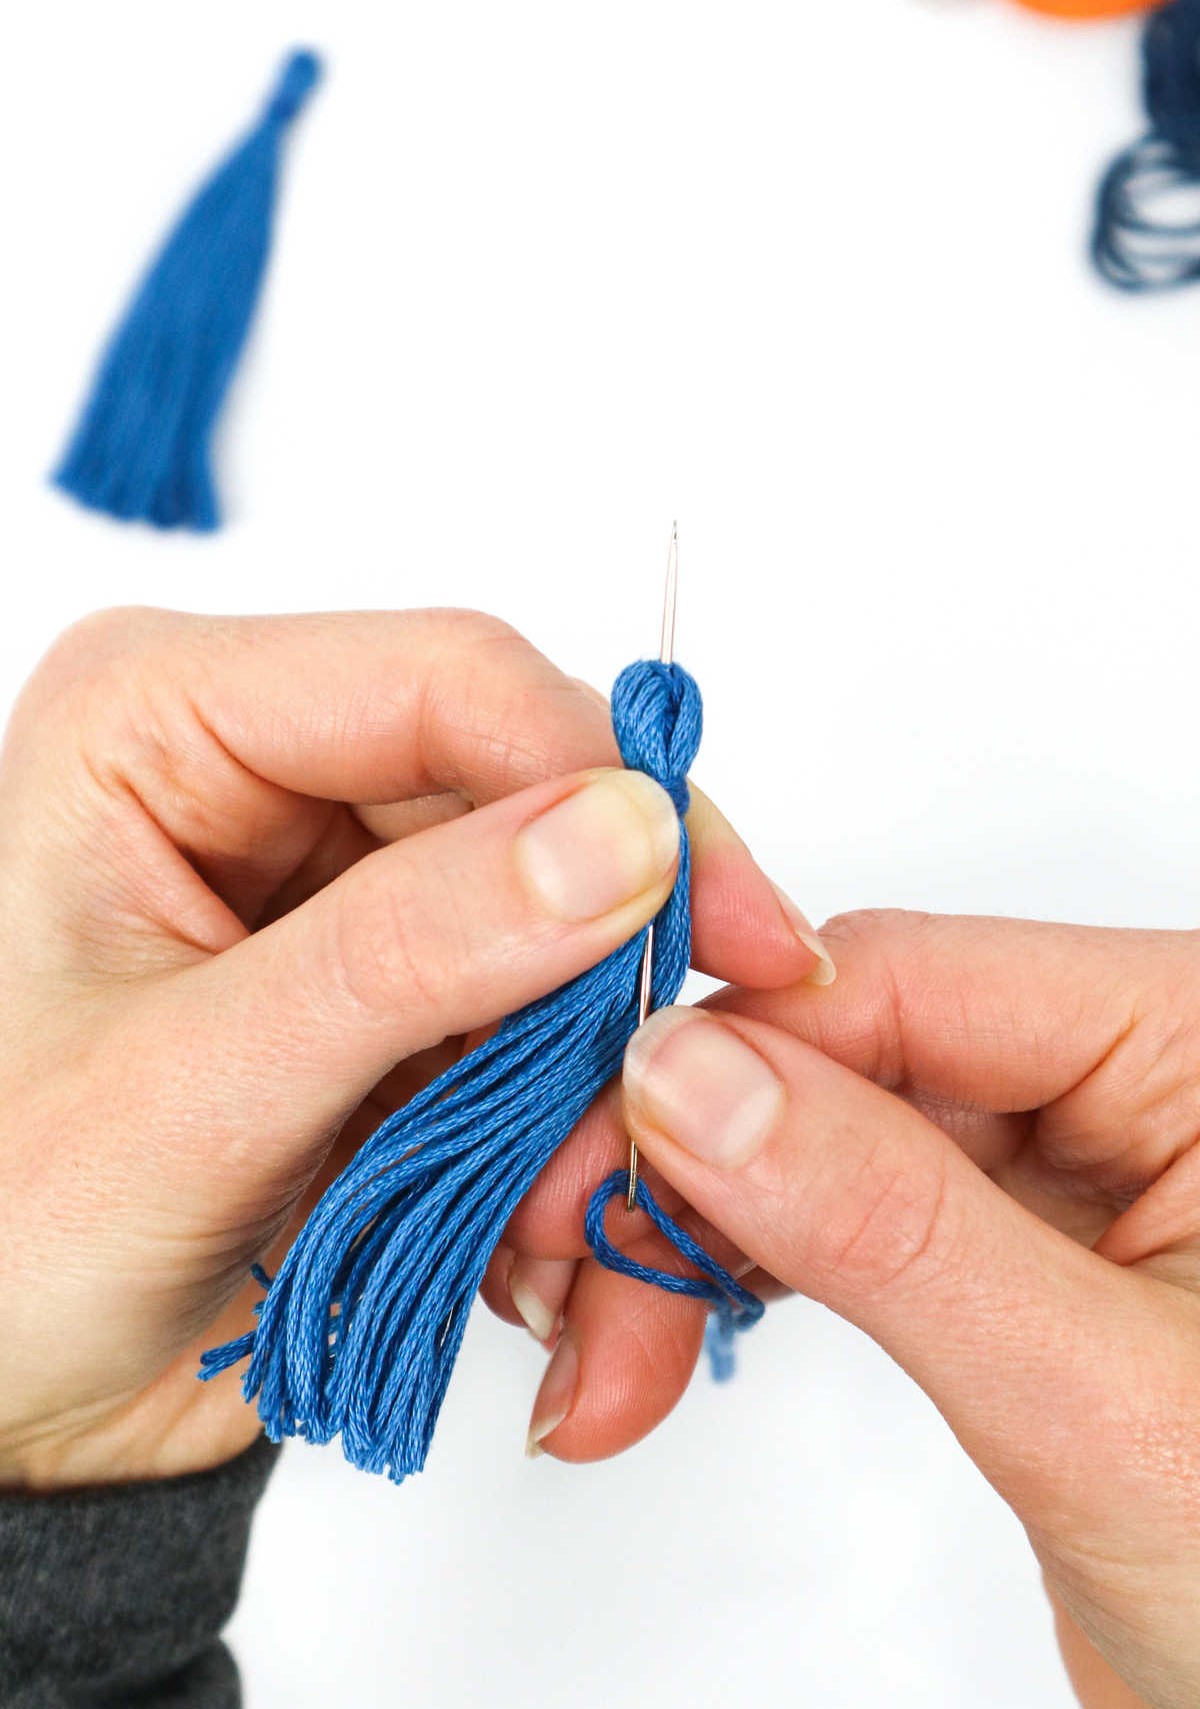
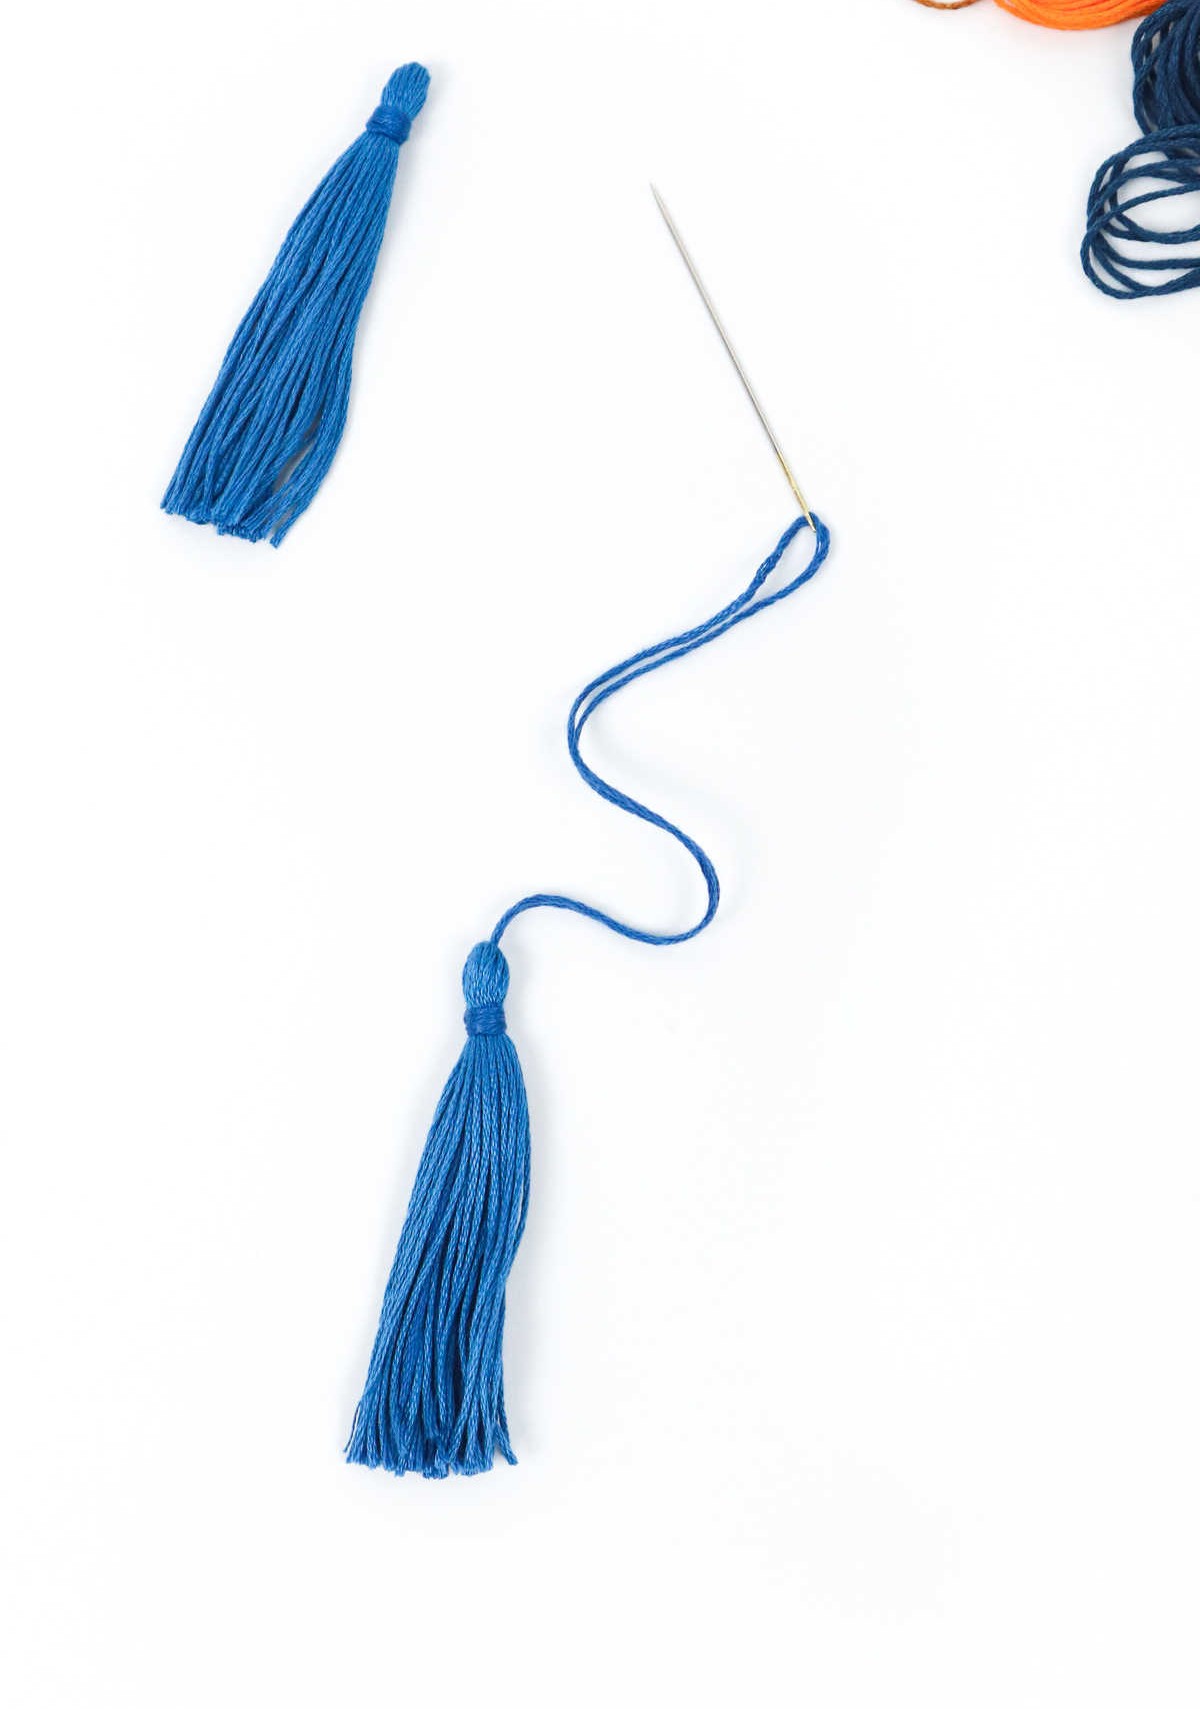

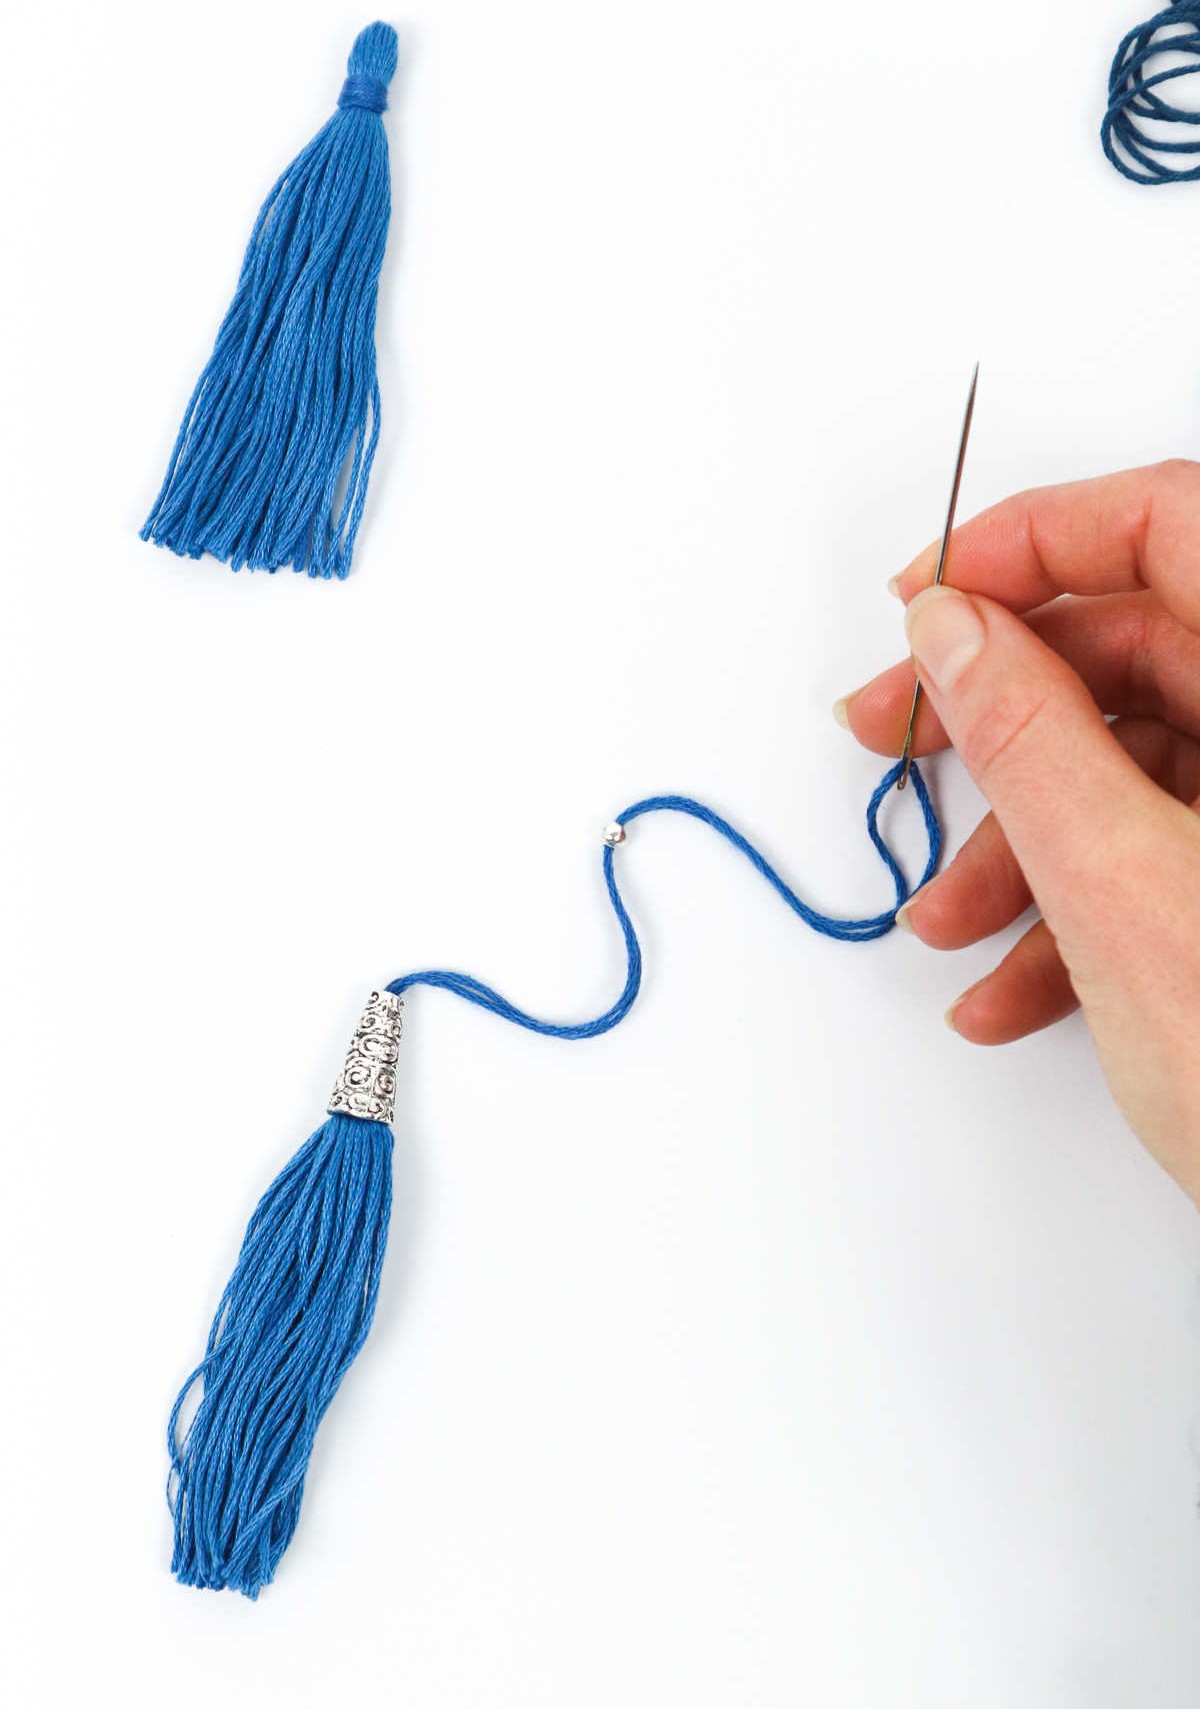
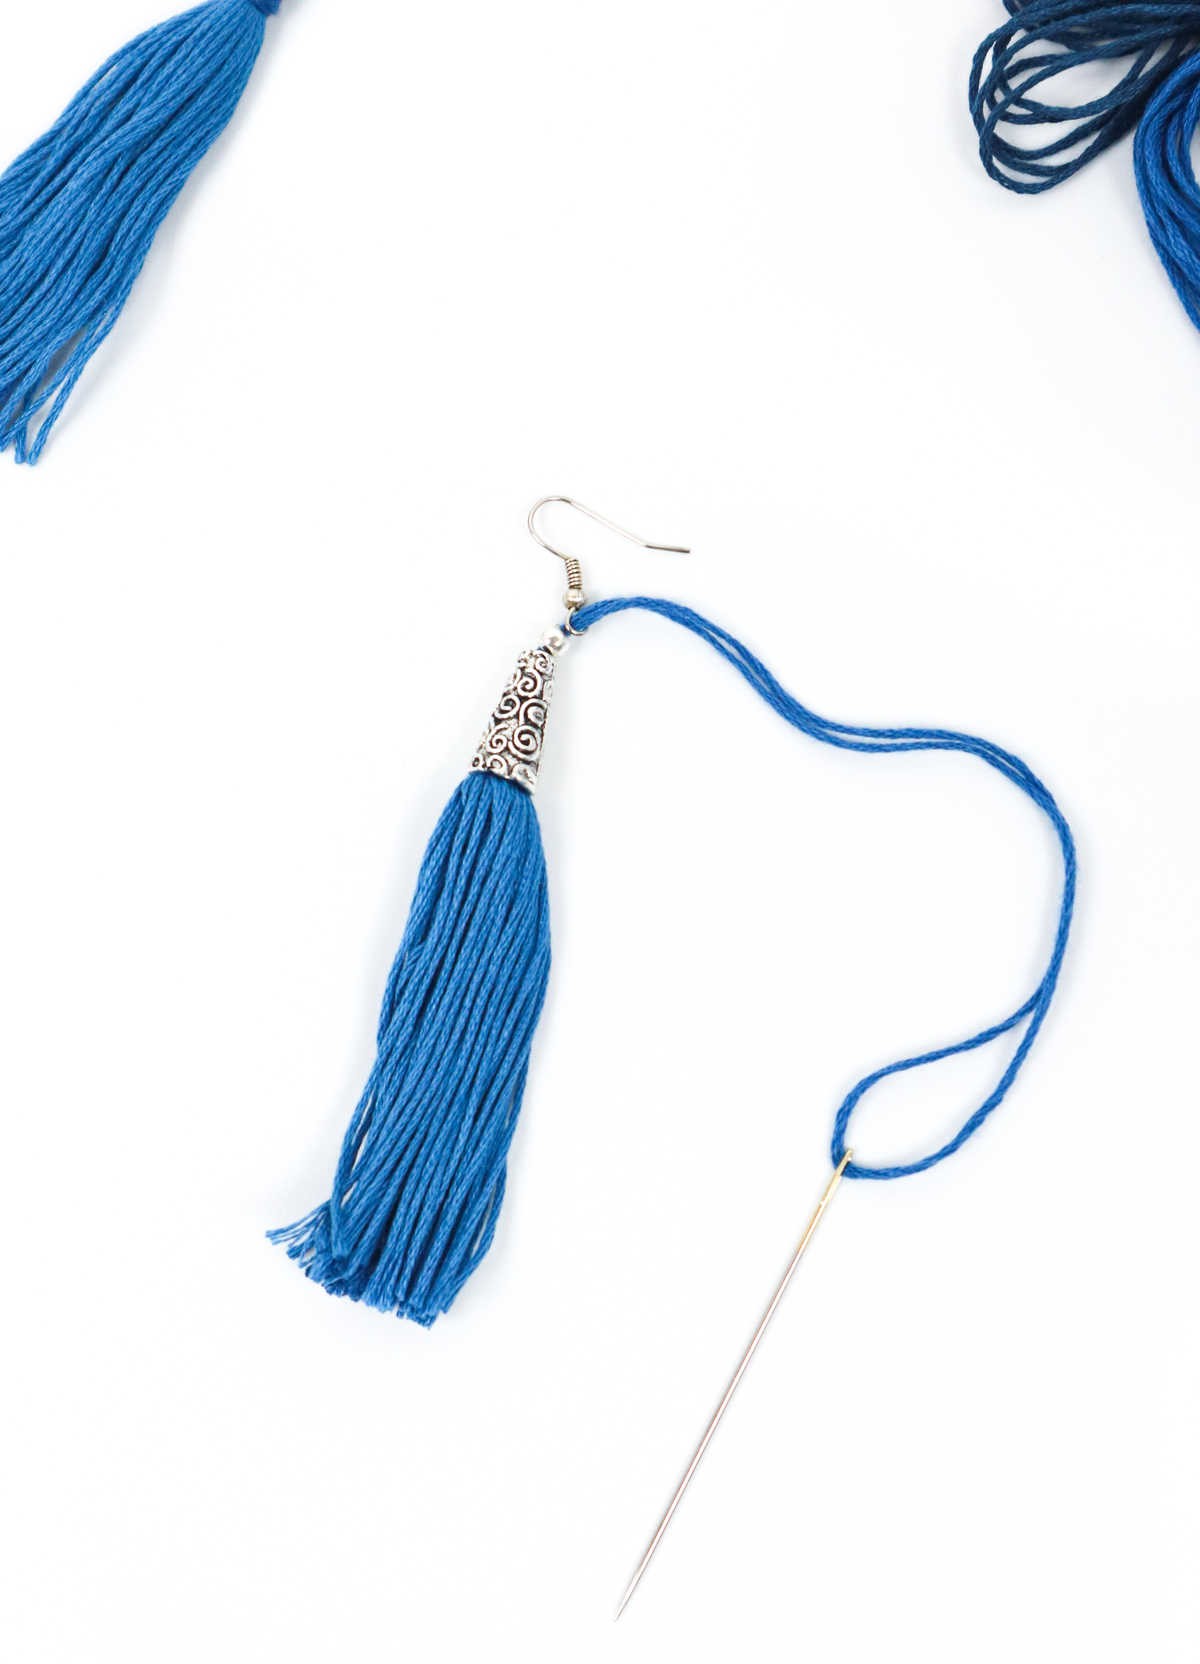
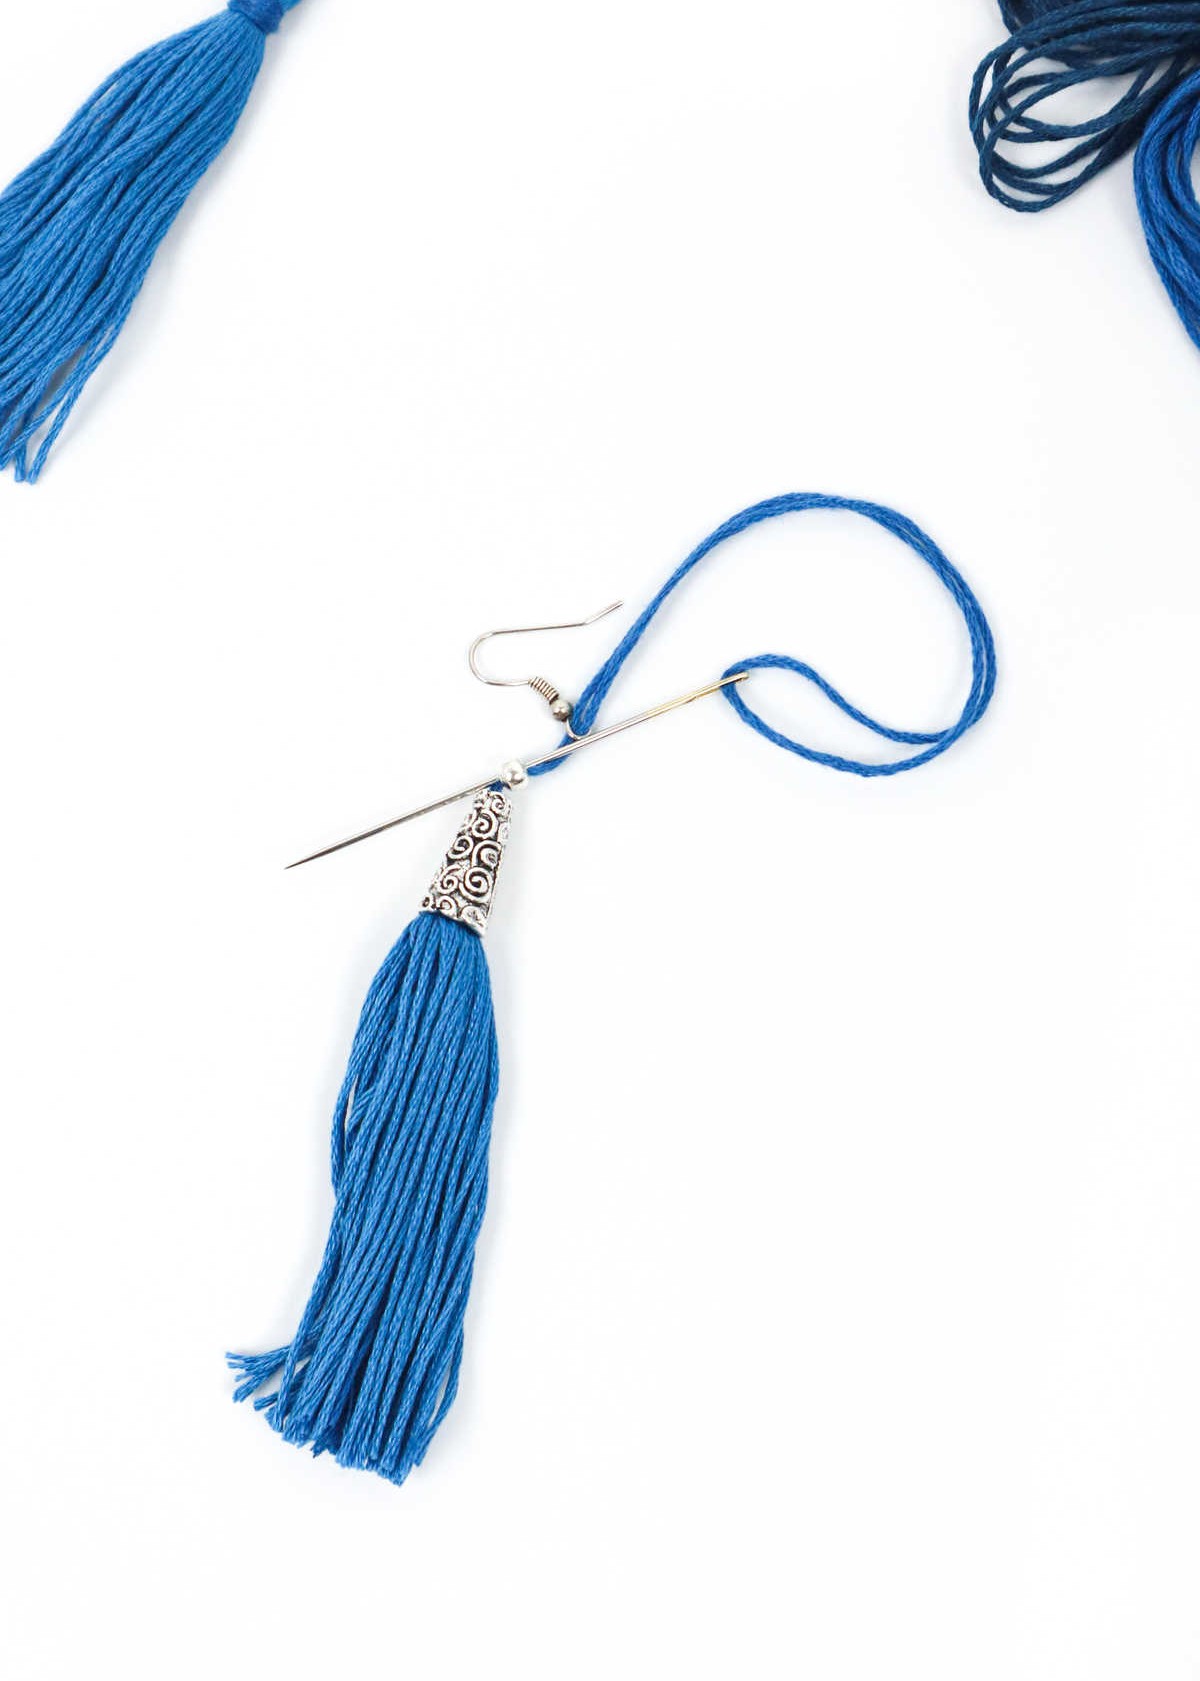


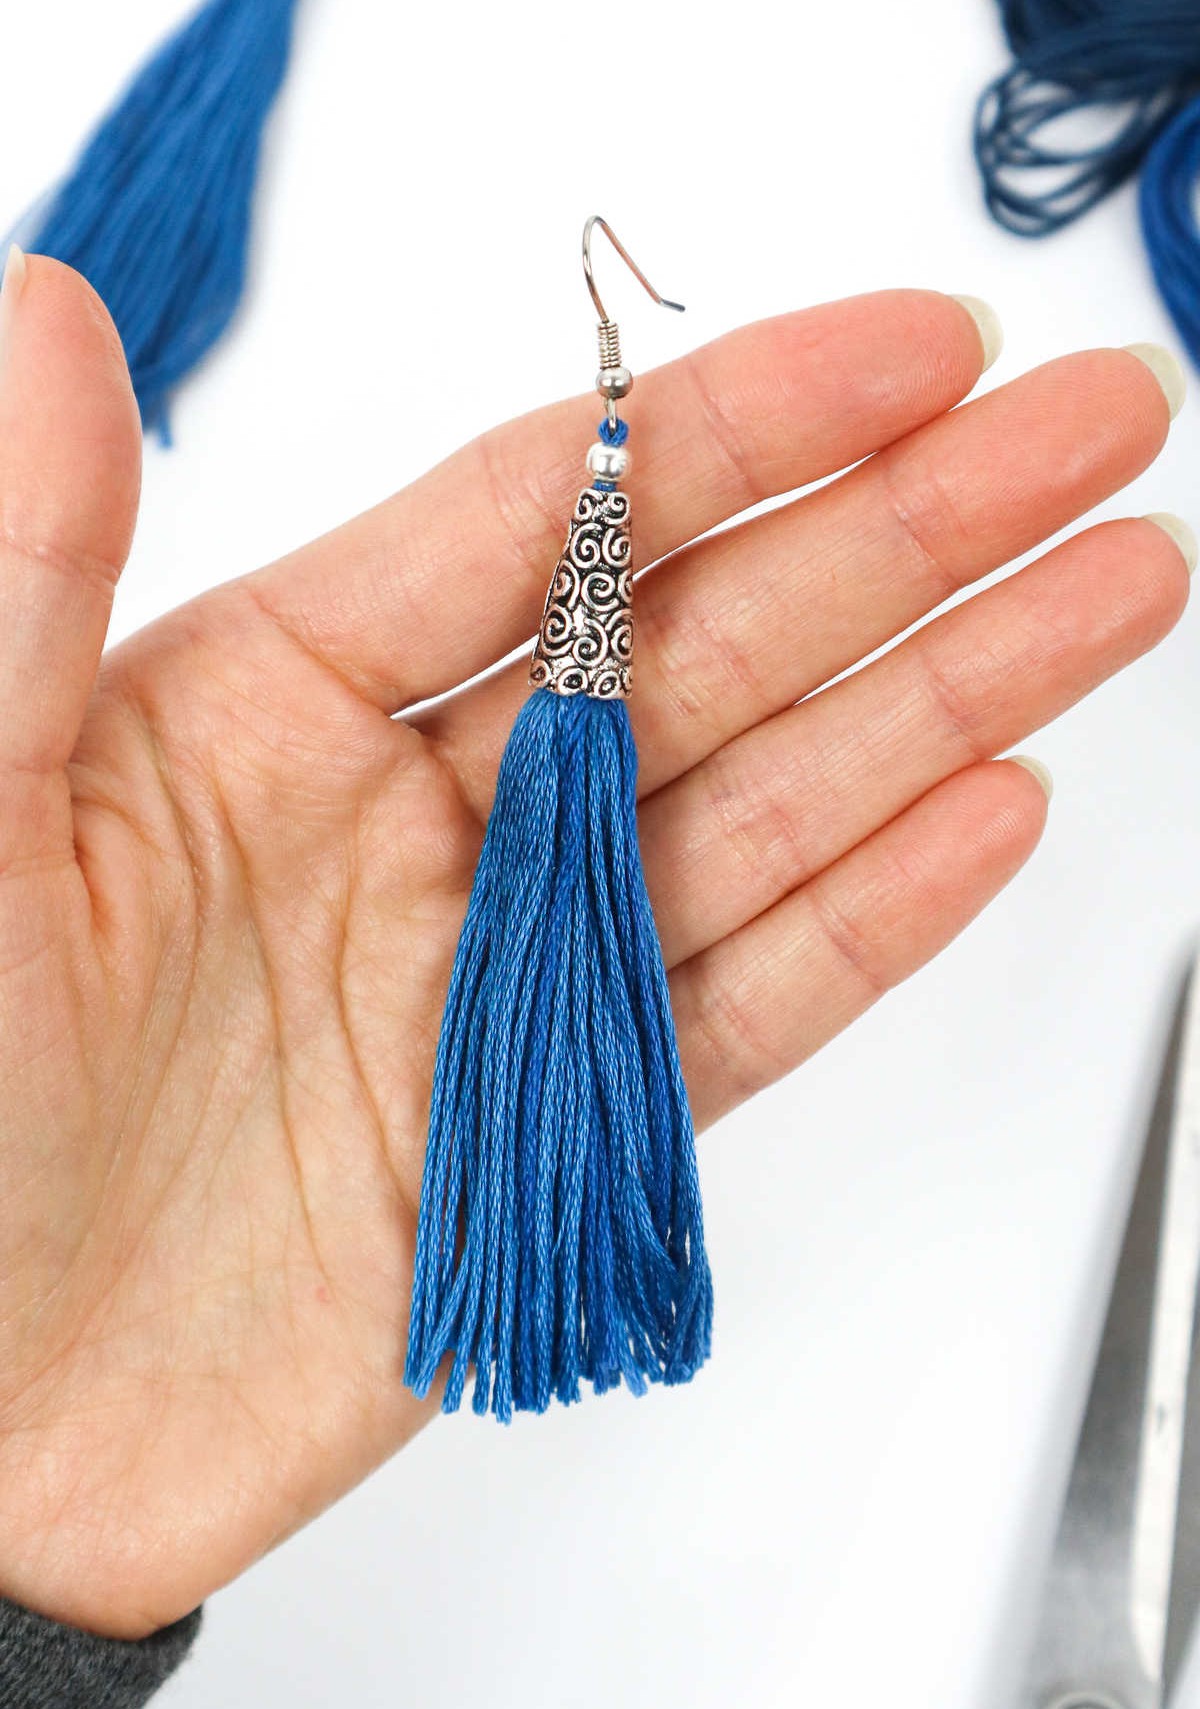
To give your tassel earrings an added touch, you can thread a large embroidery needle with a double knot at the end. Insert the needle through the center of the head and out the top, pulling it through before setting it down for a brief moment.
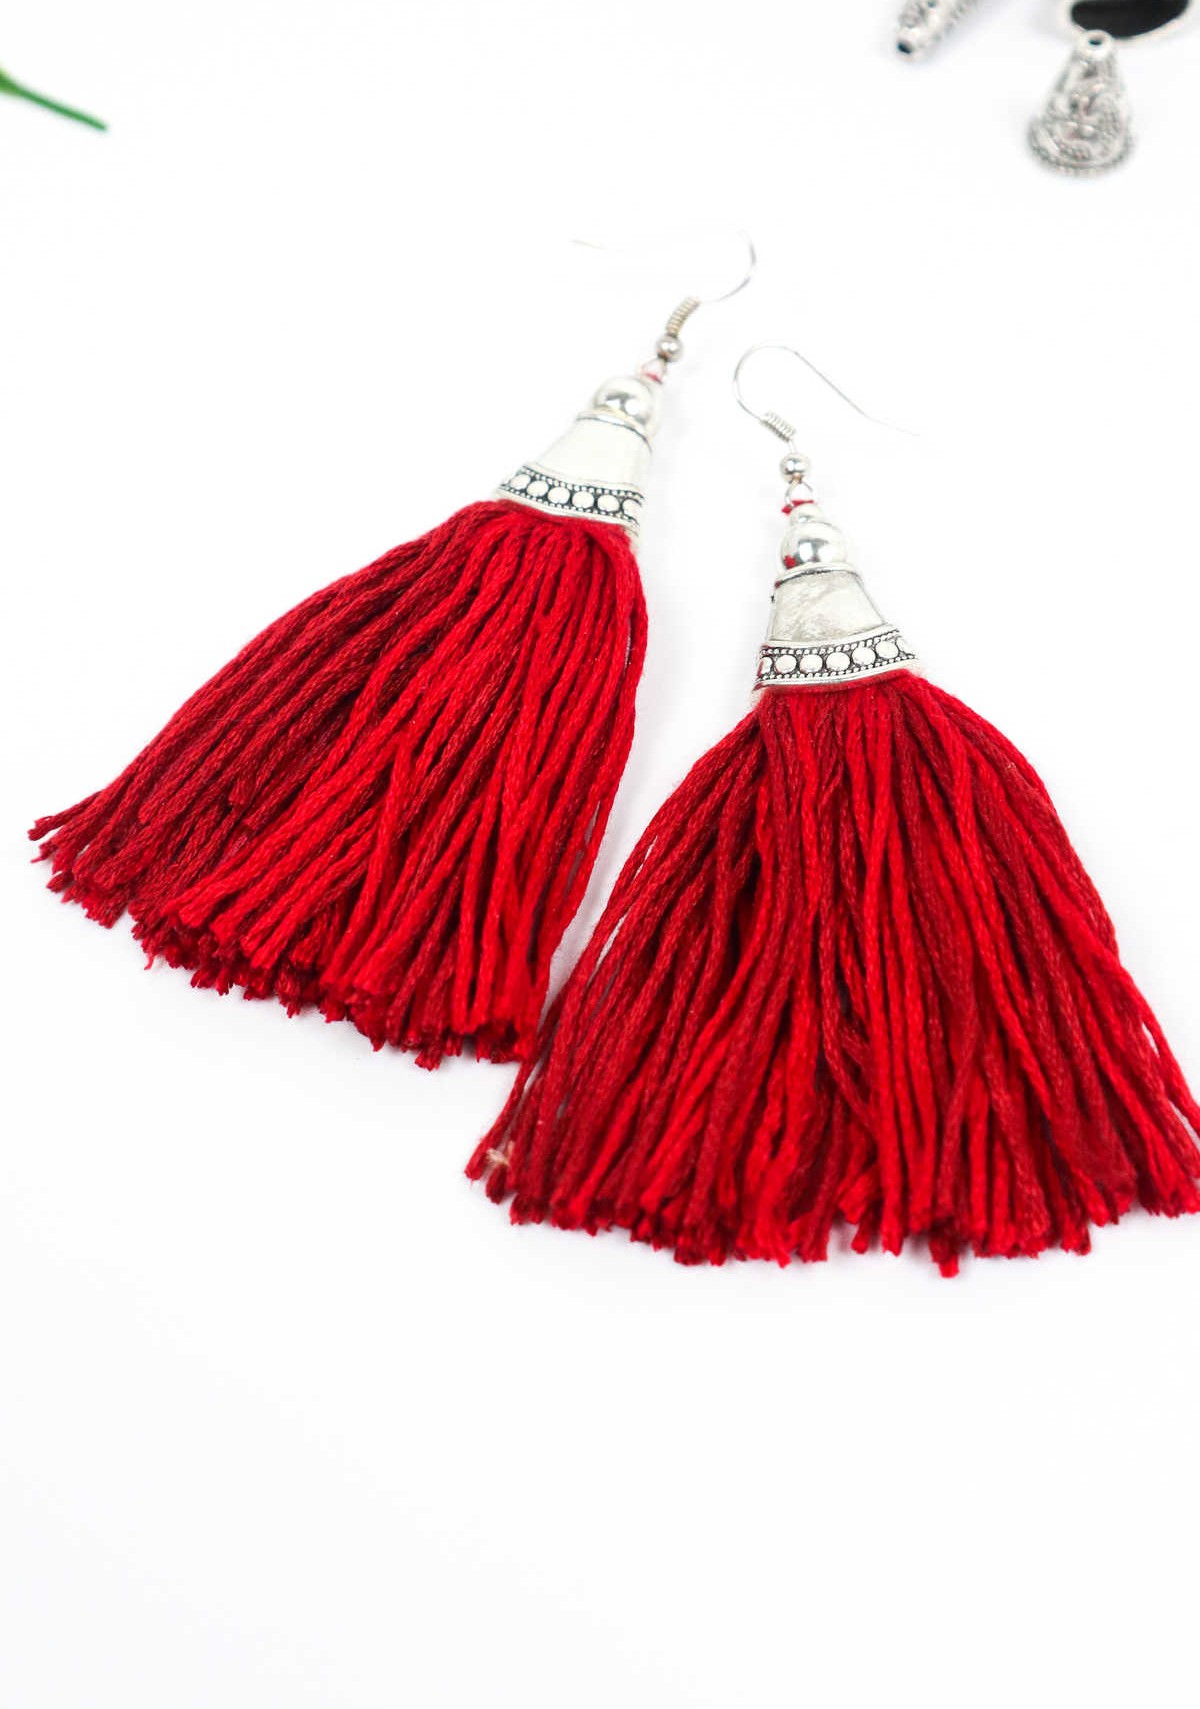
There are numerous ways to personalize your earrings, from adding silver charms that add a unique touch to incorporating beads for extra flair.
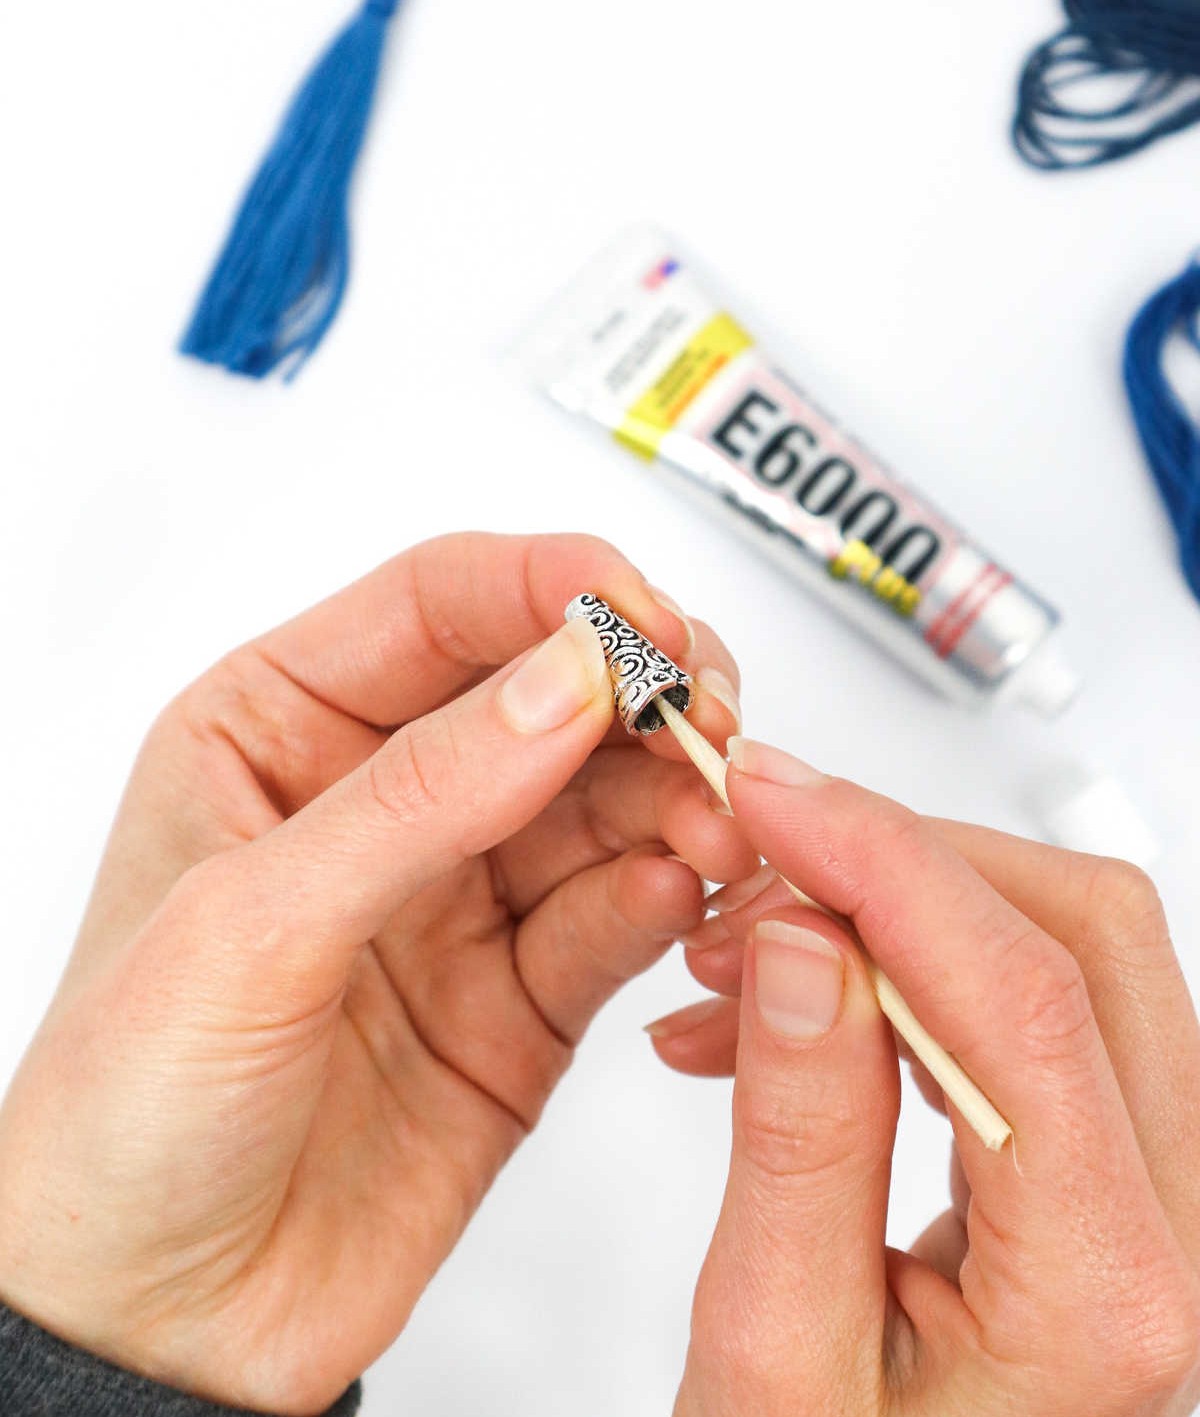
To secure these charms in place, dab a small amount of glue onto the inside of each one before attaching them.
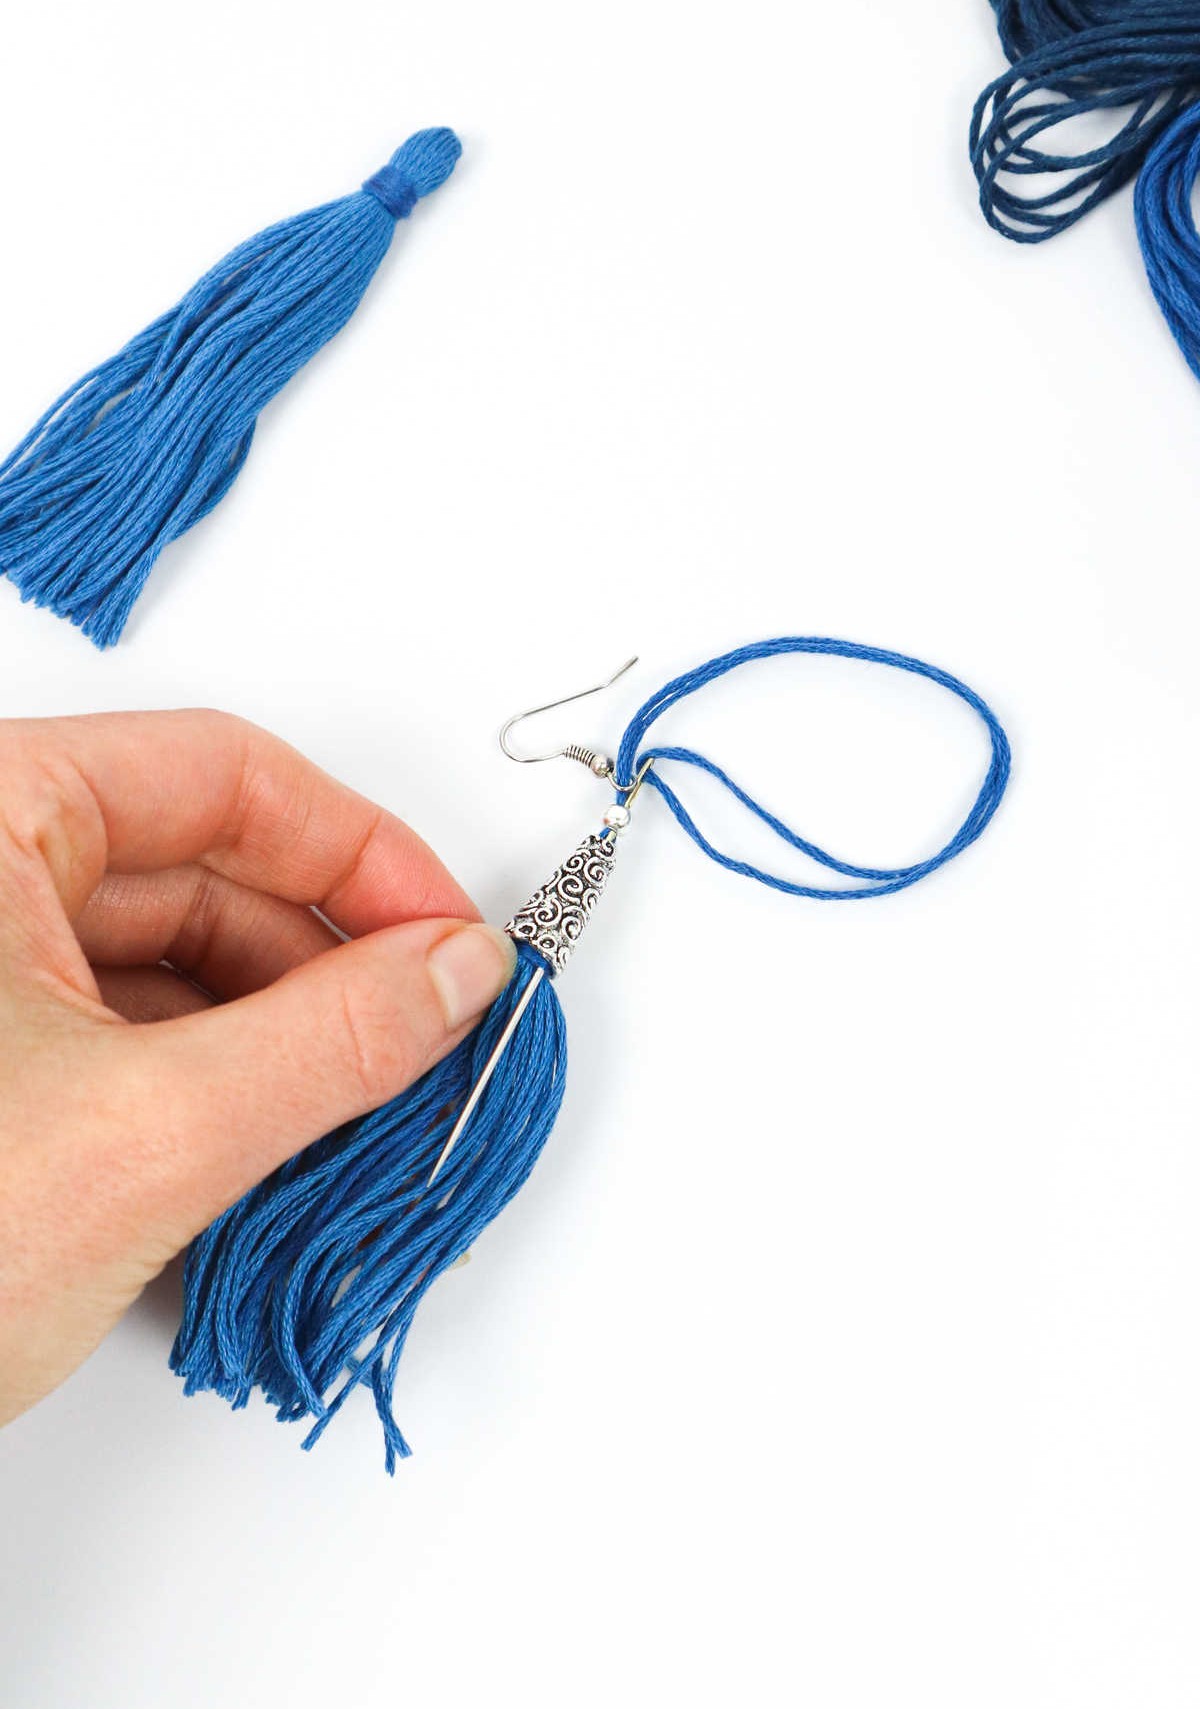
Next, thread the needle through the bottom and out the top of the charm, then push it down over the head. Hold it in place for a few seconds to allow the glue to set. You can also add additional beads or charms and repeat the process, creating a layered look.
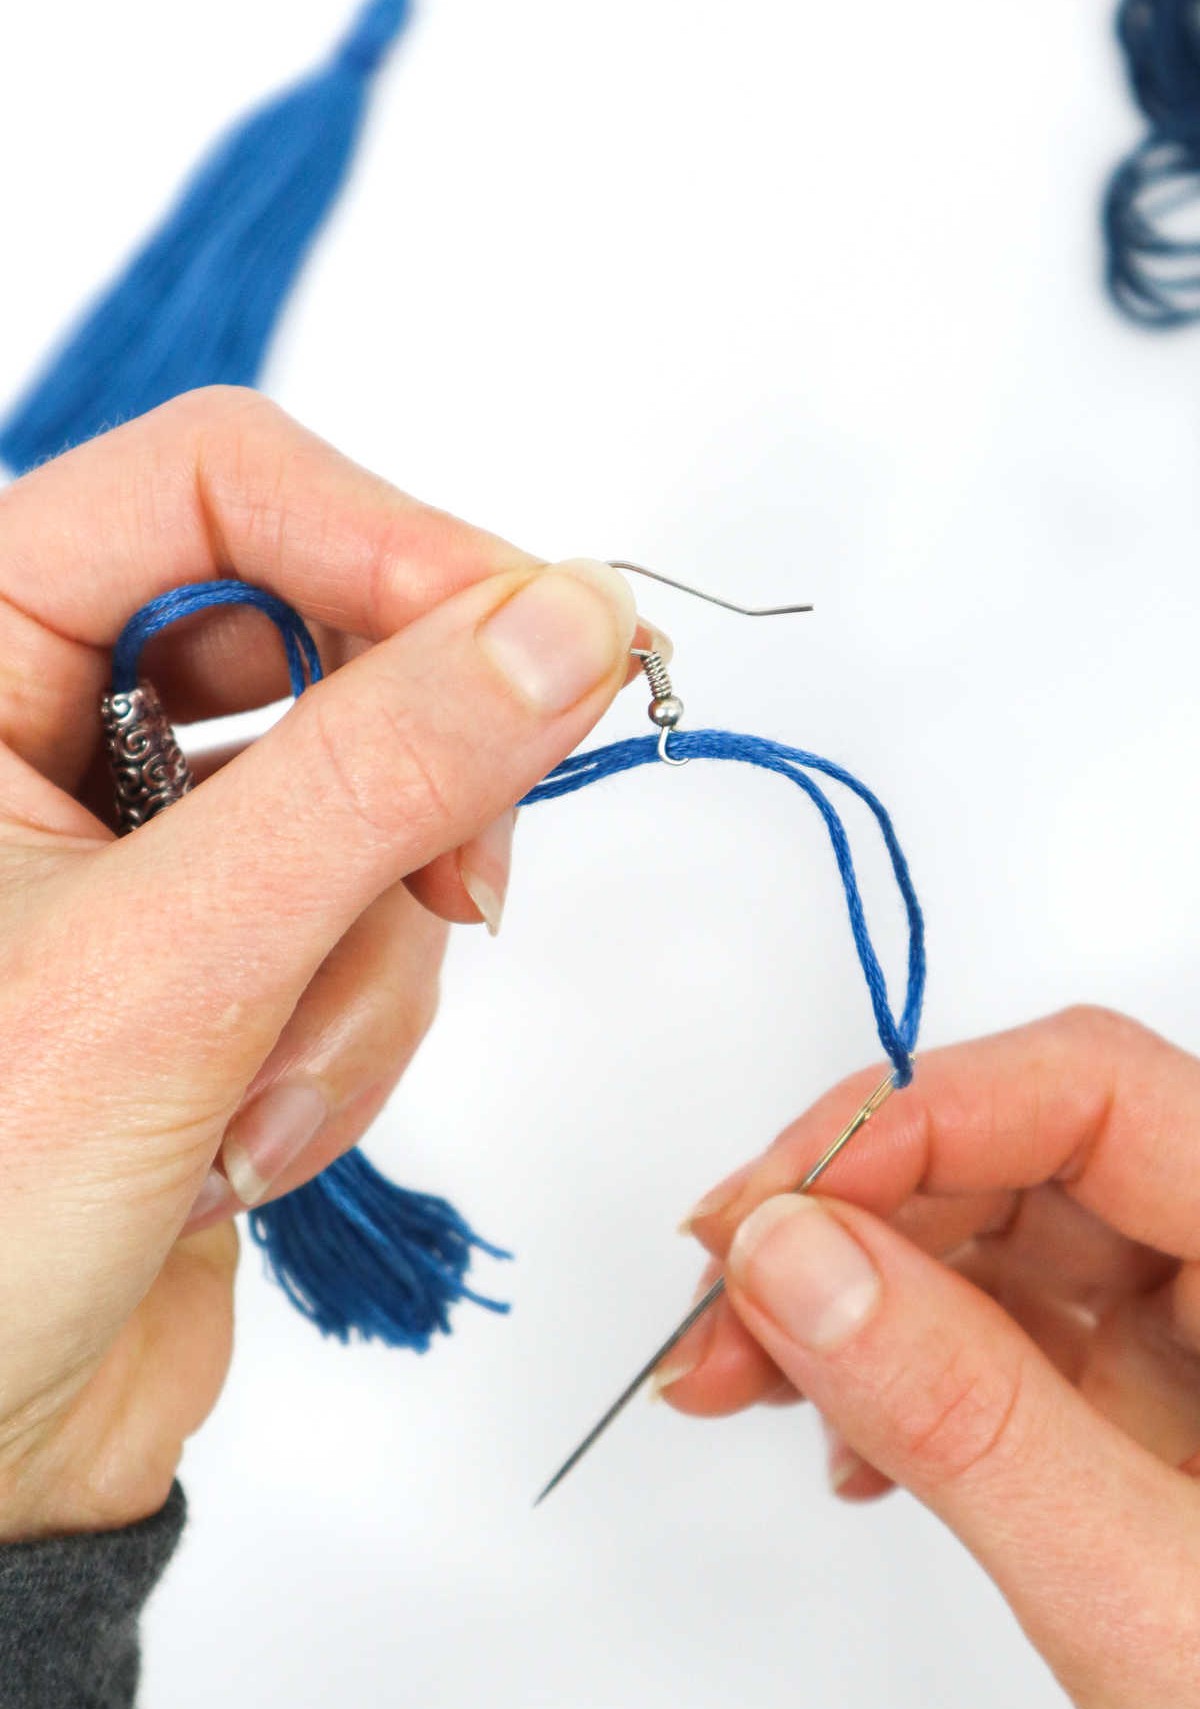
To attach the hook, simply thread the needle through the small hoop underneath it and pull through.
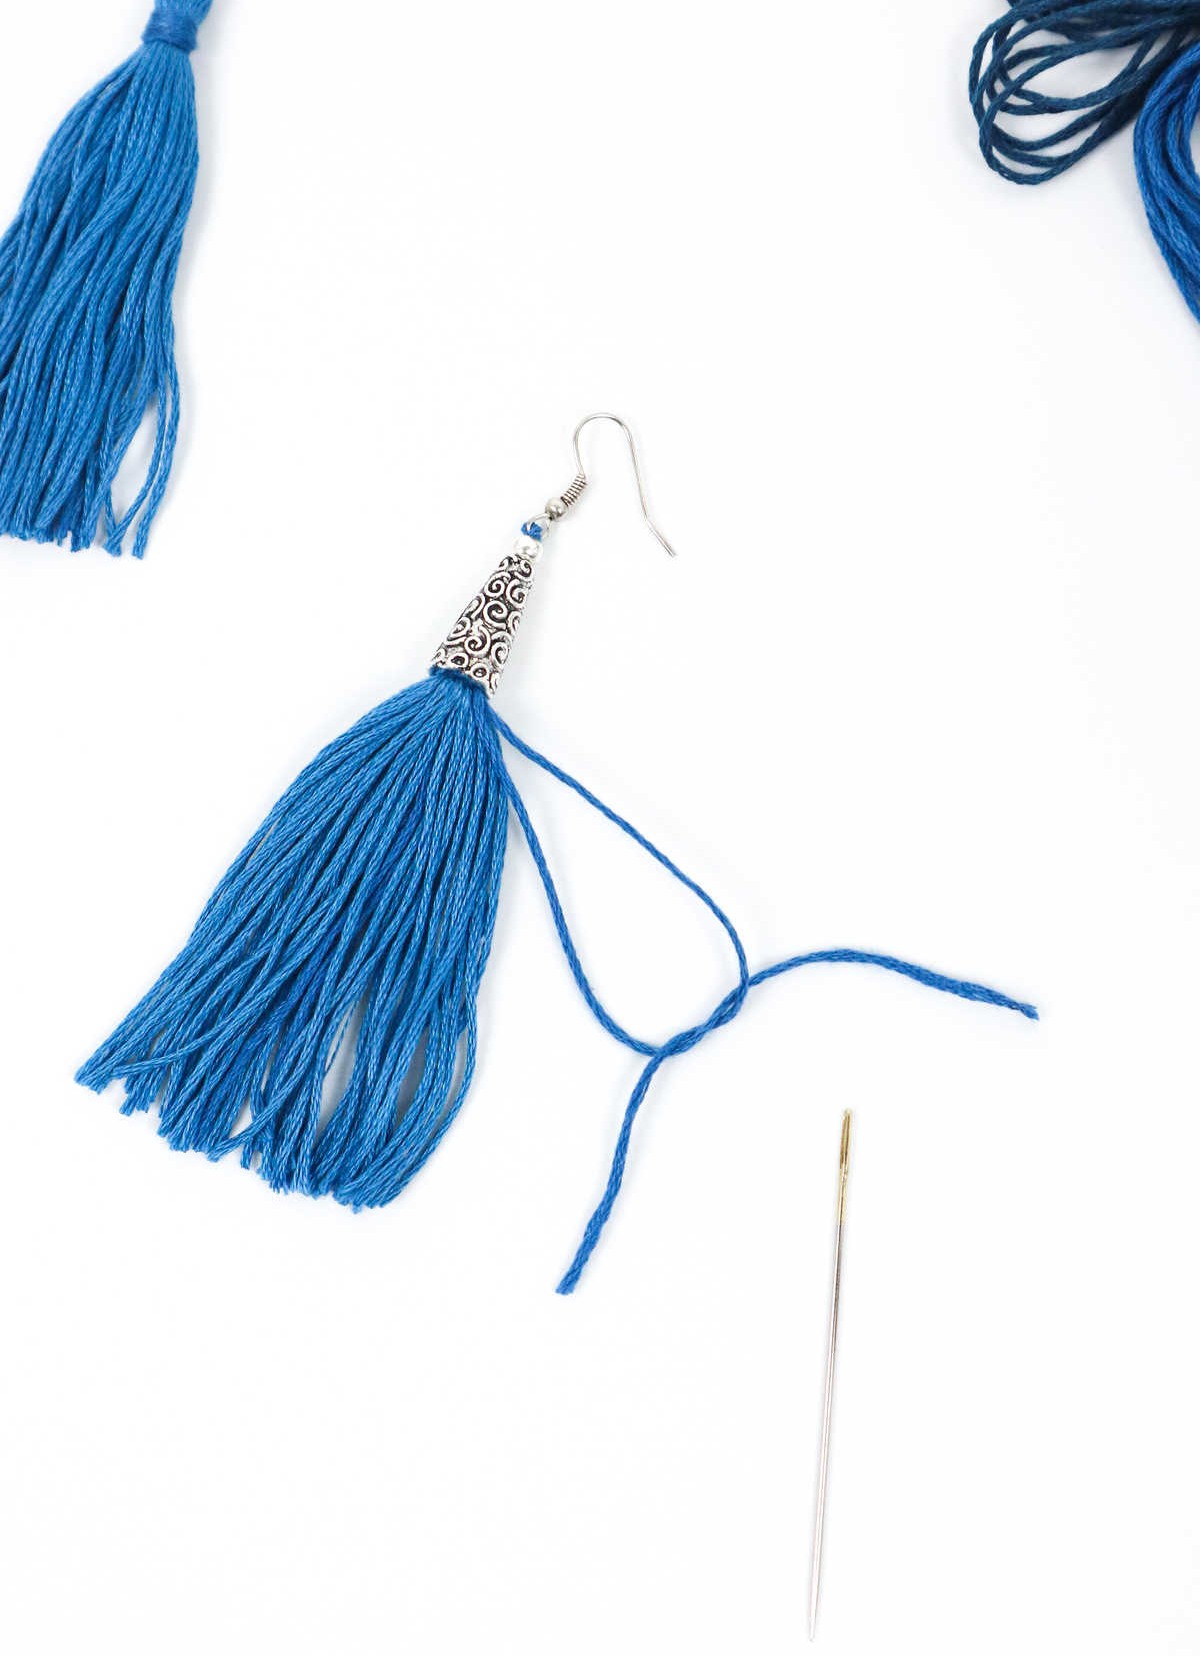
To complete the earring, thread the needle back through the small bead you inserted earlier, then through the larger charm and out the tassel. Secure the ends with a knot, which can be tucked up into the base of the charm to hide it among the threads.
Finally, add a small dot of glue to ensure the knot remains secure. With these simple steps, your macrame earrings are complete!
What Thread Do You Use for Tassel Earrings?
For many embroiderers, the go-to choice for threading their tassel is rayon thread. This is because most embroidery floss is made from this material, making it a convenient option that can be used directly. Rayon threads offer a perfect balance of thickness and texture, with minimal fuzzing. Another popular option is cotton thread, which provides a slightly different look and feel compared to rayon.
For those seeking an even more refined finish, thinner silk floss is also available, adding a sleek touch to the overall appearance of their tassels.
What Can You Wear These Earrings With?
Whether dressing down for a relaxed afternoon or elevating your style for a night out, these earrings offer endless possibilities. The versatility of their design makes them an excellent choice to pair with anything from a flowy summer dress to distressed denim jeans and a graphic tee. For added sophistication, consider incorporating heavy or chunky silver charms into the tassels design – this will instantly upgrade your evening wear outfits.
DIY Tassel Earrings (Step-by-Step Tutorial)
Transforming a simple crafting project into an elegant masterpiece, these DIY tassel earrings offer an unparalleled sense of accomplishment. With a mere $4 investment, you can create your very own unique and stunning accessories that reflect your personal style.
Equipment
Materials
When it comes to crafting unique and personalized earrings, the right materials can make all the difference. In particular, having a variety of embroidery threads on hand can be a game-changer for adding subtle textures and colors to your designs. Additionally, using high-quality earring hooks and jump rings ensures that your finished products are not only visually appealing but also durable and long-lasting.
For example, E6000 is a popular choice among crafters due to its strong adhesive properties and versatility in bonding materials like beads and cone bead caps.
Instructions
To begin creating your earrings, start by preparing the embroidery floss. Take one bundle of floss with the wrapper still attached in the middle and find the center of the loop on either end. Cut the threads at both ends, right through the loop, then peel off the wrapper and divide the bundle into two equal sets of threads. Set aside one half for now. Next, cut a 8-inch strand of thread from another batch of floss and pull it under the threads down to the middle, tying a knot.
Fold the threads in half where you tied the knot. Cut a 10-inch strand and secure another knot about an inch away from the looped top to form a head for your tassel. Then, loop the end of that thread around the knot a few times, tie a double knot, and snip off the ends. You now have one tassel. Set aside the bundle you’ve divided, as you’ll use it to create another tassel later. To attach the earring hooks, there are two methods.
The first is simpler: use pliers to loop a jump hoop into one of the threads at the top of the tassel head and secure the earring hook through the hoop. The second method is slightly more elaborate. Thread a large embroidery needle with floss and tie a double knot at one end. Insert the needle down the center of the tassel head and pull it through from below. Choose matching silver charms and beads, loop one through the needle, and push it snugly over the tassel head.
You can add a drop of glue to adhere the two together. Next, insert a bead or more through the needle and sit them atop the charm. When you’re ready to insert the earring hook, pull the needle through the little hoop under the hook and pull it through. Then, pull the needle through one of the beads you inserted and pull it through. After that, pull the needle through the silver charm as well, and pull it through from under the charm.
Finally, cut the thread off the needle and secure a knot, pushing it all the way up into the base of the charm to hide it. You can also add a bit of glue over the knot to secure it.