Weekends and school breaks can be overwhelming, but one way to keep kids engaged is by exploring arts and crafts with them. As a busy parent, you’re likely looking for ways to nurture your child’s creativity while also getting some much-needed downtime. One simple yet effective solution is to make DIY salt dough ornaments together. These ornaments are a great way to spend quality time with your kids, fostering their creative skills while producing beautiful decorations for their rooms.
The best part? Once you’ve mixed the dough, kids can take charge of shaping and decorating their own unique ornaments. Not only will this activity keep them entertained, but it’ll also give you some much-deserved free time to tackle other tasks around the house.
Supplies You’ll Need for Salt Dough Ornaments
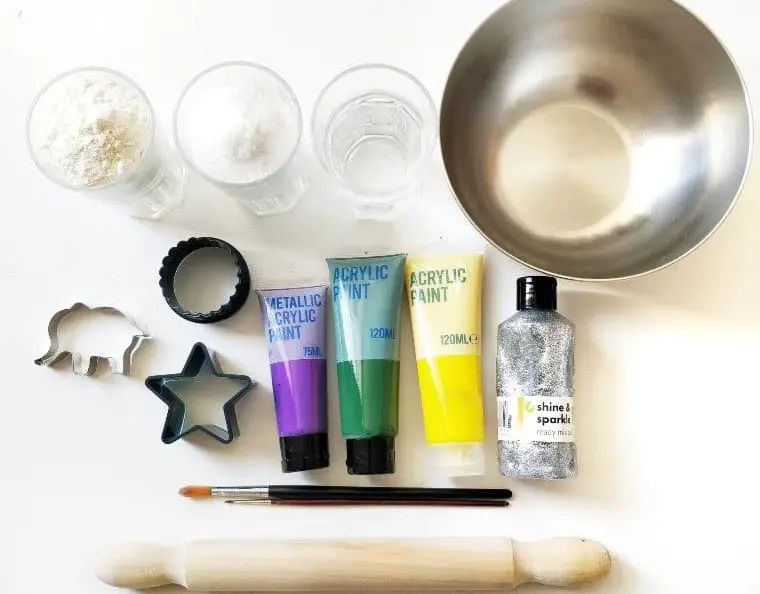
To create a unique and eye-catching DIY project, you’ll need the following materials: a substantial amount of all-purpose flour, measured at one large glass filled to the brim (approximately 250 milliliters or 9 ounces). Additionally, you’ll require an equivalent volume of salt, also stored in a large glass. The recipe also calls for a standard cup filled with warm water, which should be approximately 230 milliliters or 8 ounces.
For the artistic component, you’ll need two types of paint: acrylic and glitter paint.
Tools You’ll Need
In the world of baking, having the right tools can make all the difference. A well-stocked arsenal includes essential items like baking sheets, which provide a flat surface for cookies and other treats to bake evenly. Parchment paper is another must-have, serving as a non-stick barrier that prevents food from sticking and makes cleanup a breeze.
A trusty rolling pin is also crucial for rolling out dough to the perfect thickness, while cookie cutters allow bakers to shape their creations into fun and creative shapes. For those looking to add some artistic flair, paintbrushes can be used to decorate baked goods with vibrant colors and designs. Finally, a large bowl provides ample space for mixing and whipping ingredients to create the perfect batter or dough.
How to Make Salt Dough Ornaments?
Transforming salt dough into ornaments is a fantastic way to spend quality time with your little ones, teaching them essential skills like baking, painting, and crafting. This engaging project can be enjoyed on weekends or during school breaks, making it an ideal activity for families. After you’ve completed the initial adult tasks of preparing the dough, the kids can take over, requiring minimal supervision from that point forward.
Let’s dive in and create these delightful ornaments with your toddlers and kids!
STEP 1
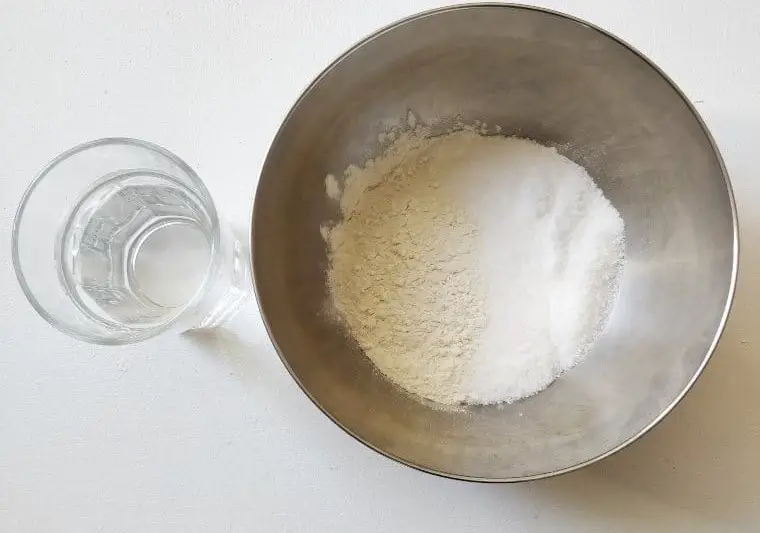
To begin, gather your ingredients and prep your workspace. If you’re lucky, some essentials might be within arm’s reach at home already. Once you have everything you need, start by cracking open a large mixing bowl. In this vessel, gradually pour in 250 milliliters of all-purpose flour, allowing it to settle evenly. Next, add the same volume – 250 milliliters – of salt to the mixture, ensuring a harmonious blend.
STEP 2
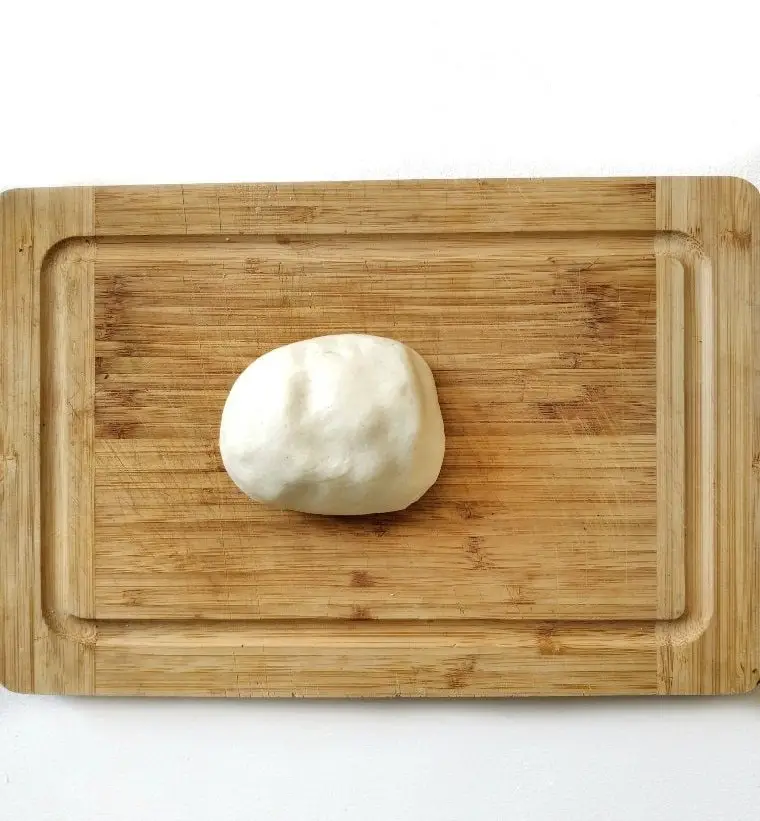
To begin, combine 230 ml of warm water with the ingredients in the bowl. It’s essential that the water is not too hot, as this can hinder the kneading process. Instead, aim for a comfortable temperature that allows for easy manipulation of the dough. This step is also an excellent opportunity to involve your kids in the process. Let them take charge of measuring out the ingredients and pouring them into the bowl.
Not only will they develop their fine motor skills, but they’ll also learn valuable lessons about measurements and following instructions.
STEP 3
As the dough nears completion, transfer it to parchment paper and gently roll it out to your desired thickness. This flexibility allows you to tailor the final product to suit your needs. For instance, a thinner dough will bake faster, resulting in a more delicate but also more fragile finish. Conversely, thicker dough requires a longer baking time, yet yields a more resilient and sturdy end result.
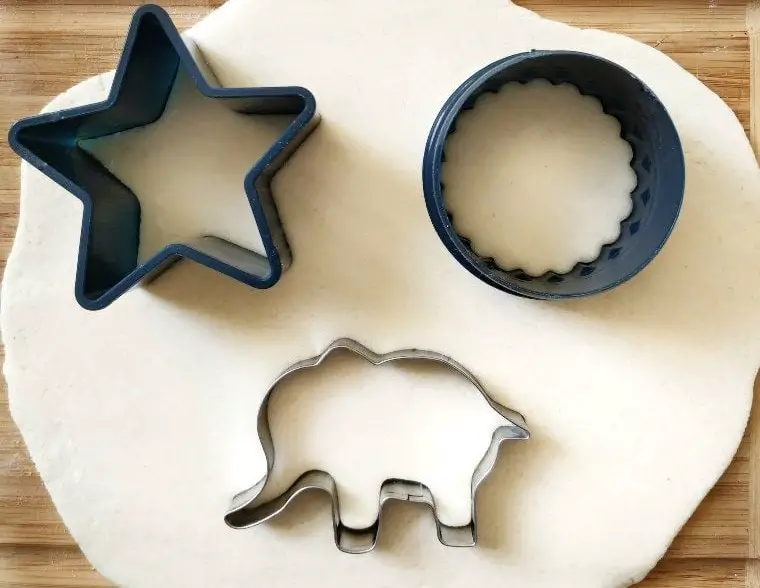
STEP 4
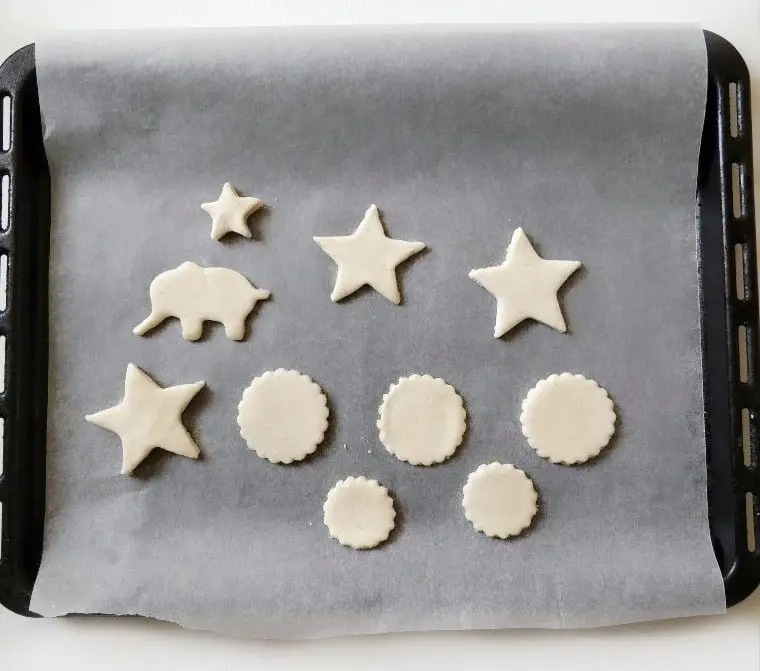
With your dough rolled out and ready, use a cookie cutter to cut out the shapes of your choice – there’s no limit to how many you can create! Place each shape onto a piece of parchment paper, carefully arranging them on a baking tray. Then, pop the tray into the oven preheated to 210F (100C) for three hours. If some of your ornaments still appear slightly doughy after this time, don’t worry – just give them a bit more time in the oven.
As an added precaution, if you find that the dough is still too moist to paint, consider letting it air dry in the sun for a day before adding your finishing touches. This will ensure that any excess moisture doesn’t ruin the overall appearance of your handmade ornaments.
STEP 5
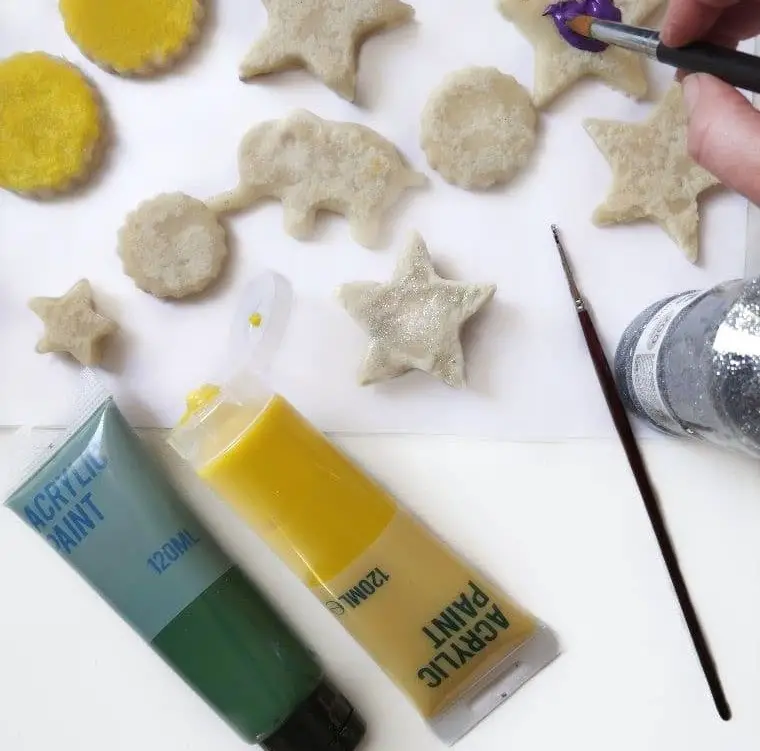
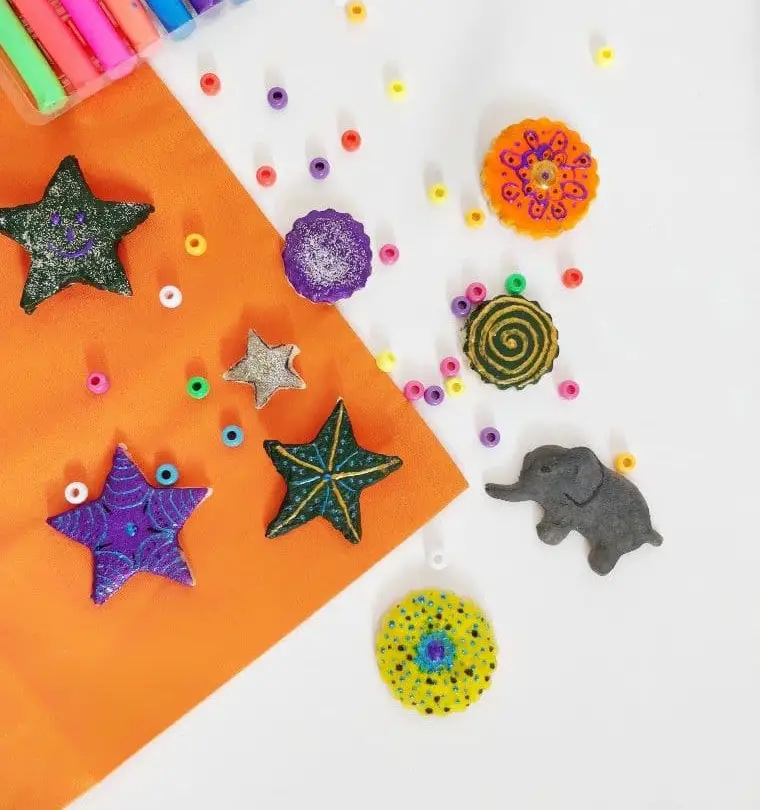
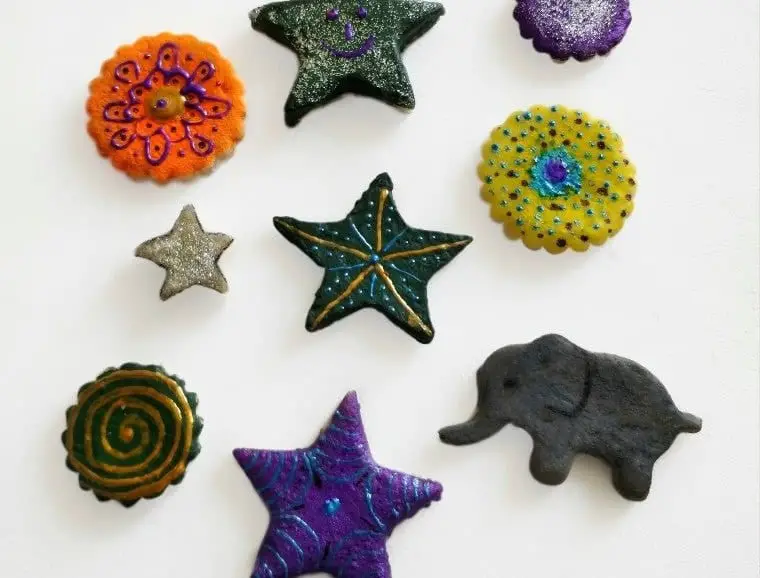
Before diving into the painting process, ensure that the shapes have cooled completely after baking. This step is crucial, as you want a firm, non-doughy texture to work with. Once they’ve reached this stage, you can get creative with acrylic or oil-based paints. If using oil paint, be patient – it may take 2-3 days for the colors to fully dry. Don’t hesitate to add some sparkle with glitter paint and embellish with beads for an added touch of whimsy.
The possibilities are endless when it comes to customizing these ornaments, so let your child’s imagination run wild and marvel at their artistic masterpieces.
How Long Do Salt Ornaments Last?

To extend the lifespan of your salt ornaments, consider taking measures to preserve their integrity. One effective approach is to apply an even layer of mod-podge or clear glaze to all sides, ensuring a comprehensive seal. Additionally, store the ornaments in a protective container, such as a box lined with bubble wrap, when not in use. This will help safeguard them from damage and maintain their condition for years to come.
Why Did Your Salt Dough Ornaments Rise?
When it comes to creating perfect ornaments, there are several factors to consider to prevent them from rising unnecessarily. One common issue is that the dough may be too thick, causing the ornaments to puff up more than intended. To overcome this challenge, try rolling out the dough thinner for your next batch. Another potential culprit is an oven temperature that’s too high. By reducing the heat, you can help minimize the likelihood of your ornaments rising excessively.
Additionally, it’s crucial to ensure you’re using all-purpose flour instead of self-rising flour, as the latter can contribute to unwanted expansion.
Do Salt Ornaments Last Forever?
While the preservation process may not guarantee an eternal shelf life, it does extend the lifespan significantly. The salt added to the mixture serves as a natural preservative, effectively preventing the growth of fungi or yeast that might be triggered by moisture. Furthermore, applying a layer of Mod-Podge or clear glaze can further enhance their durability and allow for safe storage over extended periods.
With proper care, it’s entirely feasible to use these preserved items year after year, or even for decades without compromising their quality.
What Kind of Paint Do You Use on Salt Dough?
For a creative and vibrant finish, you can employ either oil-based or water-based acrylic paint on your ornaments. While oil paint offers a rich, textured appearance, it’s worth noting that it may take up to three days to fully dry, which could impact the overall design process. In contrast, acrylic paint provides a faster-drying solution, making it an attractive option for those seeking a quicker turnaround.
If you’re working with younger children, consider using washable paints as a safe and mess-free alternative.
How to Seal Salt Dough?
When working with salt dough, it’s crucial to maintain a dry environment to prevent moisture from compromising the integrity of the material. To achieve this, consider sealing your creations using a mod-podge or clear glaze. Apply one or two layers of either product to create an impenetrable seal that not only preserves the original color but also extends the shelf life of your ornaments.
DIY Salt Dough Ornaments
Spend a delightful evening crafting with your kids! Our DIY salt dough ornaments tutorial is the perfect way to bond with your little ones and create something truly special. With only 3 hours of prep time and 30 minutes of active crafting, you’ll have a treasure trove of 10 adorable ornaments to cherish for years to come. Get creative with Karo @ CraftsyHacks.com!
Equipment
To get started with baking, you’ll need a few essential tools. At the very least, you should have a good quality baking sheet or two on hand. For added protection and ease of cleanup, consider investing in some parchment paper to line your sheets. A rolling pin is also a must-have for any serious baker, as it allows you to effortlessly roll out dough to the perfect thickness.
Of course, no bakery would be complete without an assortment of cookie cutters, which can add a touch of whimsy and fun to even the most mundane baked goods. And finally, don’t forget a trusty paintbrush or two – yes, you read that right! Paintbrushes can come in handy when you need to apply egg wash or melted butter to your dough.
Materials
The essential ingredients for this craft project include a combination of dry and liquid components. First, you’ll need a substantial amount of all-purpose flour, which can be measured out in large glass measuring cups (250ml or 9oz). You’ll also require a similar volume of salt to add depth and texture to your final product. Additionally, warm water plays a crucial role, with one standard cup (230ml or 8oz) serving as the perfect blend.
As for decorative elements, acrylic paint and glitter paint will allow you to add vibrant colors and visual interest to your finished piece.
Instructions
Before you begin, make sure all necessary ingredients are within reach. To create the dough, combine 250 milliliters of all-purpose flour and 250 milliliters of salt in a large bowl. Next, add 230 milliliters of warm water and thoroughly mix the ingredients together until well combined. Then, take some time to knead the dough until it reaches a satisfactory consistency.
Once you’re happy with your dough’s texture, roll it out onto a sheet of parchment paper to a thickness that suits your desired shape. Using a cookie cutter of your choice, cut out shapes and place them on a baking tray lined with parchment paper. Allow the ornaments to bake in an oven preheated to 210 degrees Fahrenheit (100 degrees Celsius) for three hours. Once completely dry, you’re free to get creative with paint and decorations, ultimately revealing your beautifully crafted ornaments.