Transforming a cluttered workspace into a harmonious haven is often as simple as introducing small yet effective organizers. The statement ‘small things can make big impacts’ rings particularly true in our homes, where a single decorative piece can instantly warm up a modern kitchen. Conversely, a scattering of pens and pins on the desk can quickly render an otherwise organized space chaotic.
To combat this issue, consider investing in a thoughtful office organizer or penholder that will keep your workspace tidy without breaking the bank.
However, you don’t have to rely solely on store-bought solutions. With minimal investment of time and materials, you can craft charming little baskets for your storage needs. These DIY creations require no extensive skillset and are remarkably quick to assemble, making them accessible even to those with limited DIY experience.
Let’s get creative!
Ways to Use These Rope Baskets at Home
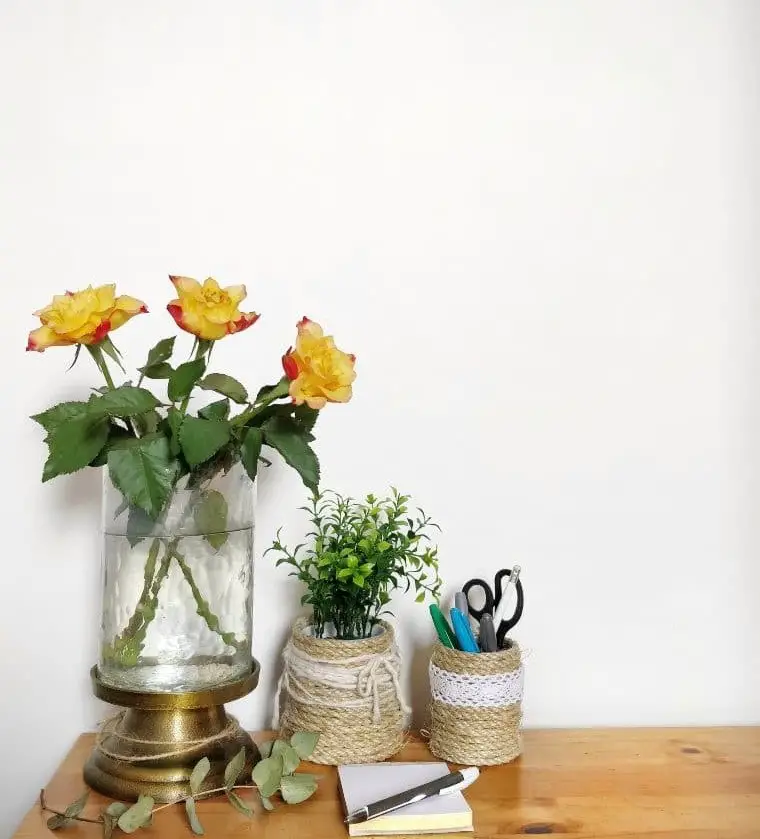
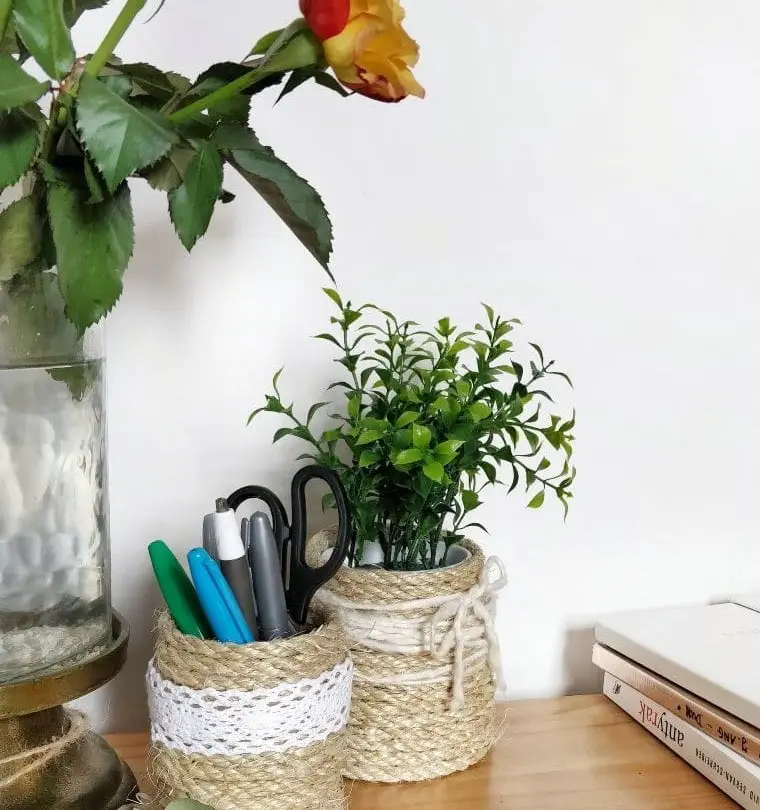
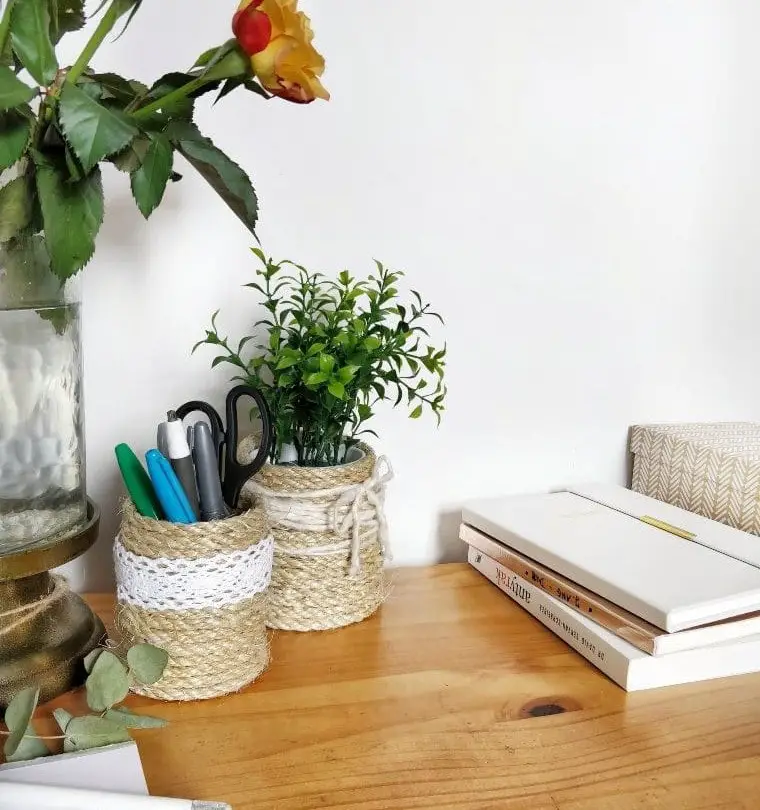
These versatile rope baskets offer a multitude of uses beyond their aesthetic appeal. They can comfortably hold small items like pens, scissors, paintbrushes, kitchen utensils, and even remote controls. Moreover, they can double as planters for decorative plants or containers for art supplies, such as stones or potpourri. With their versatility, you’ll find yourself reaching for them time and again. If simply admiring the basket’s design is your intention, that’s perfectly fine too!
However, by utilizing the storage space within, you can discreetly keep tiny knick-knacks at bay, keeping your home tidy and clutter-free.
Supplies for the Organizer
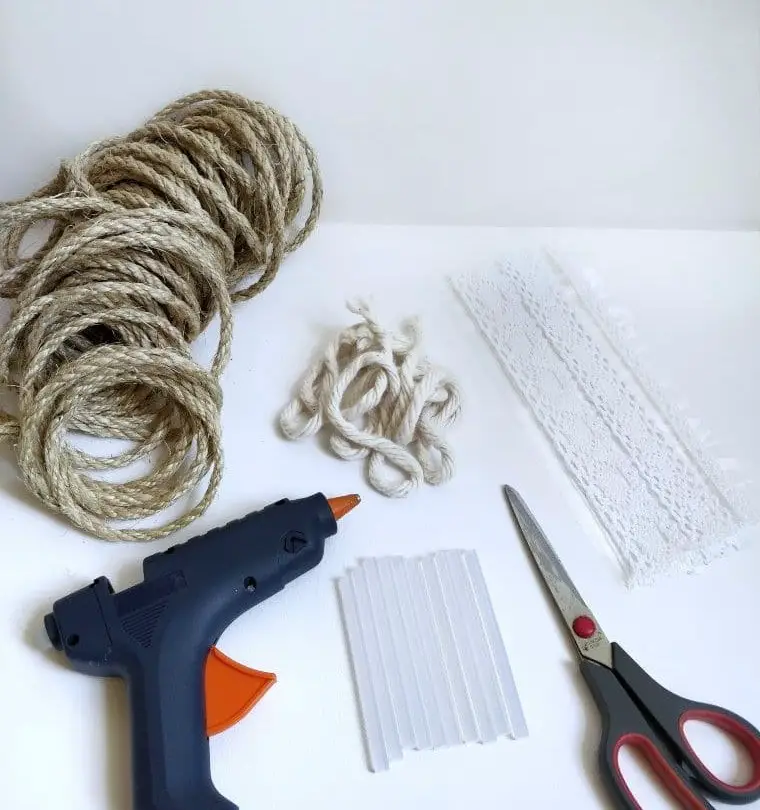
To create beautiful rope baskets, gather these essential supplies: First and foremost, select a rope that suits your basket’s size. Thicker ropes are perfect for larger baskets, while thinner ones work better for smaller creations. In addition to the right rope, you’ll need a hot glue gun with glue sticks, scissors for trimming, some yarn for embellishments, and a length of white lace ribbon for added flair.
STEP 1
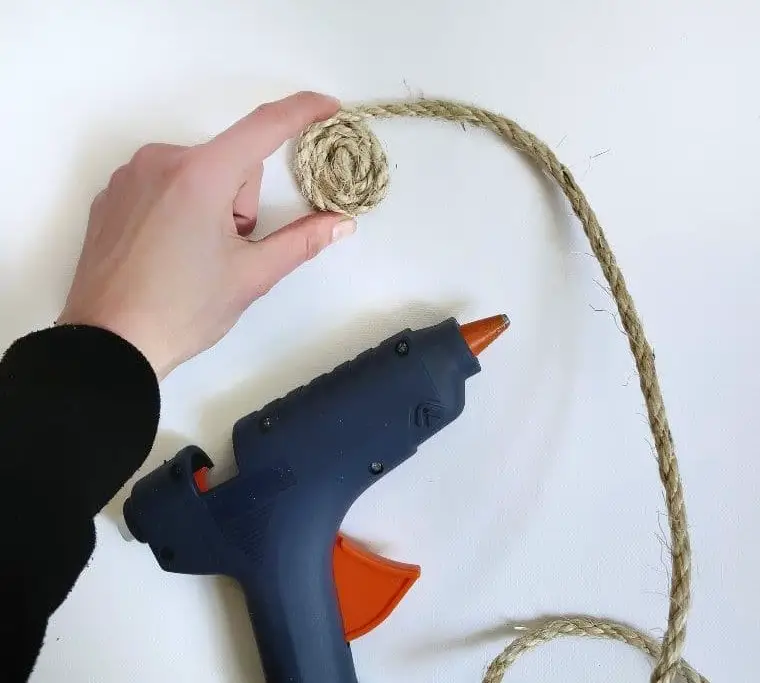
Begin by forming the foundation of your basket by wrapping the rope into a circular shape, securing each layer with a dash of hot glue. As you roll the rope, apply gentle yet firm pressure to eliminate any gaps or loose ends, ensuring a sturdy base for your creative endeavor.
STEP 2
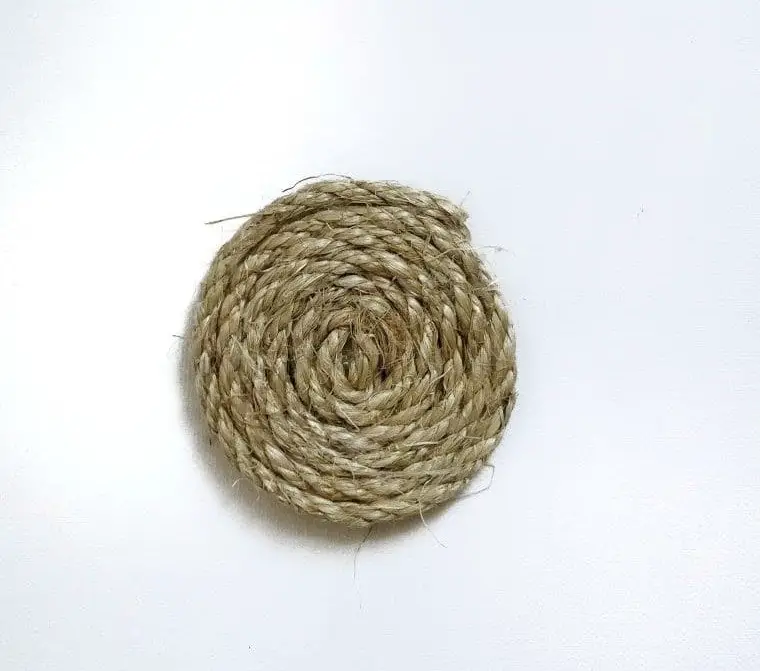
As you continue to roll and glue the rope, focus on achieving your desired circumference for the base of your basket. Once you’ve reached this point, cut the rope and secure it firmly in place with glue, taking care to ensure it won’t come loose. It’s crucial to keep the rope bristles intact, so apply glue to the ends immediately after cutting to prevent individual threads from coming undone or protruding.
Additionally, make sure the base circumference is slightly larger than your desired basket size, as the walls will be built around this foundation. A smaller base can result in a tiny basket that’s not practical for storage purposes.
STEP 3
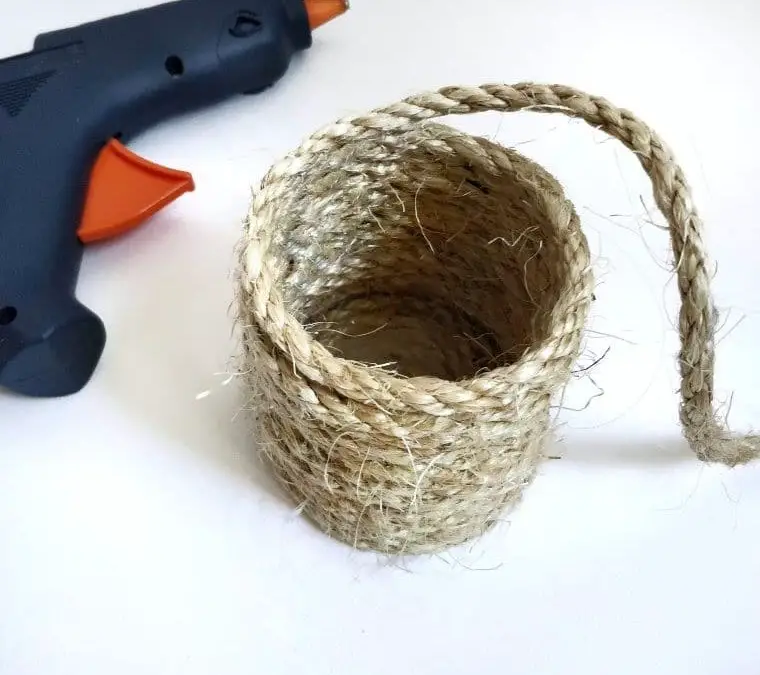
To create the framework of the basket, begin by rolling the rope from the outer edge of the base, carefully stacking each layer while alternating with glue for added cohesion. It’s crucial to maintain precise alignment between layers, as any deviation will impact the overall width and structural integrity of the finished piece.
For optimal results, consider using a tin or glass container as a mold, placing it at the base and coiling the rope along its walls with caution to avoid adhering the material to the surface.
STEP 4
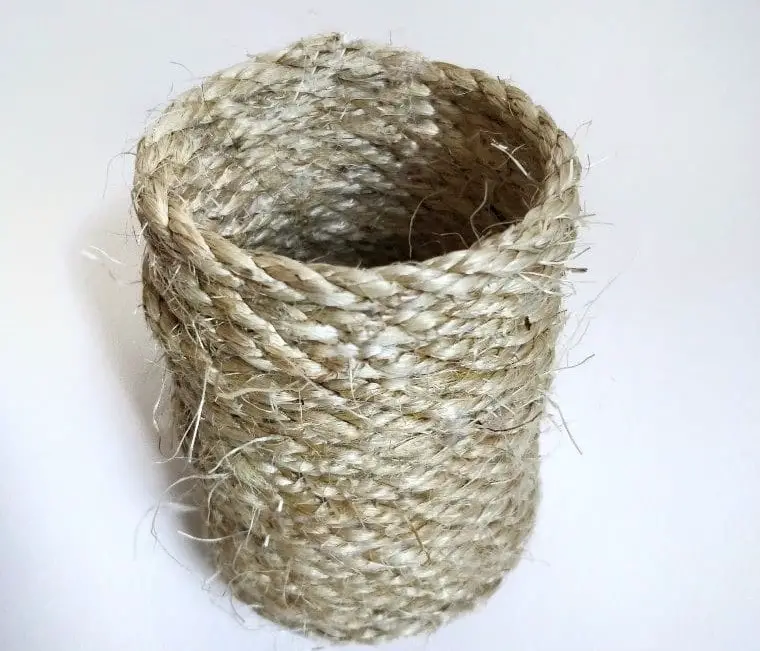
To secure the basket at its desired height, simply cut the rope and reinforce the structure by applying additional glue. For added stability, consider scaling up the design to create a taller basket. A key takeaway is that a narrow base paired with a high frame can compromise the overall sturdiness of your basket construction. By keeping these principles in mind, you’ll be well on your way to crafting a sturdy and visually appealing basket.
STEP 5
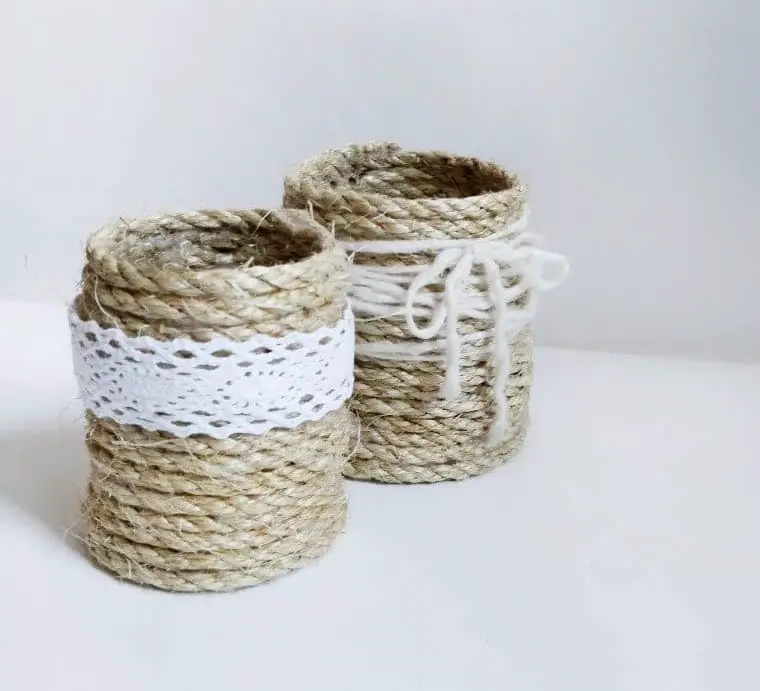
Transform your DIY rope basket into a one-of-a-kind piece by incorporating a variety of materials, such as laces, ribbons, wool, buttons, and more. Consider coordinating the decorative elements with the color palette of your room’s interior to create a cohesive look. For an added touch of flair, incorporate embellishments or beads to infuse the basket with a playful, eclectic vibe.
Who Can Make These DIY Rope Organizers?
Whether or not you’re a seasoned craft enthusiast or just starting your DIY journey, this chic rope basket project is accessible and fun for everyone. To ensure success, simply gather the necessary materials and follow a clear set of instructions. Age isn’t a barrier to creativity, but it’s always a good idea to exercise caution when working with hot tools like glue guns, especially around children.
If you’re planning to involve kids in this activity, be sure to provide close supervision to ensure everyone stays safe and engaged.
DIY Rope Organizer for Your Desk
Elevate your workspace by crafting DIY rope organizers that seamlessly integrate with your desk. These versatile baskets can be used to corral pens, pencils, and other essential office supplies, streamlining your workflow and reducing clutter. With just an hour of active time and a total time commitment of one hour, you can create these useful organizational tools and experience the benefits of a more efficient workspace.
Equipment
Materials
When crafting a unique piece, one often overlooks the humble yet essential materials that bring it all together. Take, for instance, the thick rope that provides structure and foundation to any creation. Next in line are the hot glue guns and glue sticks, which serve as the adhesive force that holds everything in place. And finally, there’s the yarn, white lace ribbon, and other fibers that add texture, pattern, and visual appeal to one’s masterpiece.
Instructions
To craft a beautiful handmade basket, begin by forming the foundation. Start by tightly wrapping the rope into a compact mass, securing it together using a strong adhesive. Once the base is established, remove any excess rope and focus on building the walls on both sides of the structure. Continue this process until you’ve reached your desired height for the basket. Then, cut the rope to size and attach it securely to the wall using more glue.
Finally, add a touch of elegance with a lace ribbon trim. With these steps complete, you’ll be left with a stunning handmade basket that’s sure to impress.
Conclusion
Imagine a space where everything has its designated spot, and clutter is a thing of the past. A world where you can find what you need in an instant, without having to embark on a treasure hunt through your home. It’s not just a pipe dream – it’s achievable with a little creativity and elbow grease. Take the first step towards achieving this harmonious environment by crafting a DIY rope organizer that will keep your desks, tables, and counters tidy and organized.
Say goodbye to the frustration of searching high and low for misplaced items and hello to a sense of calm and control.