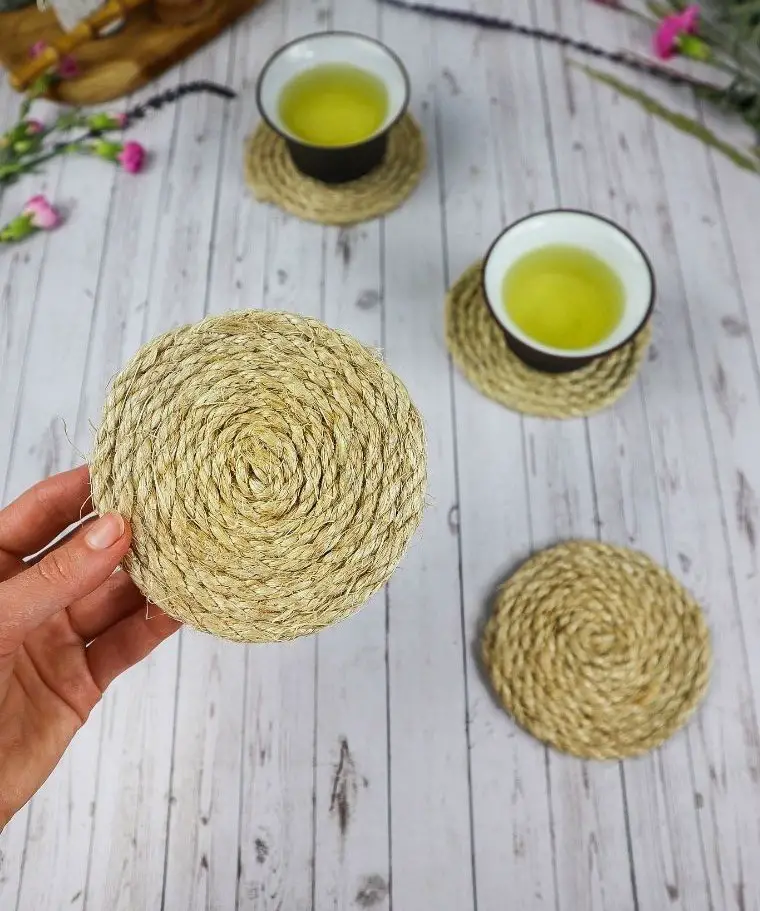
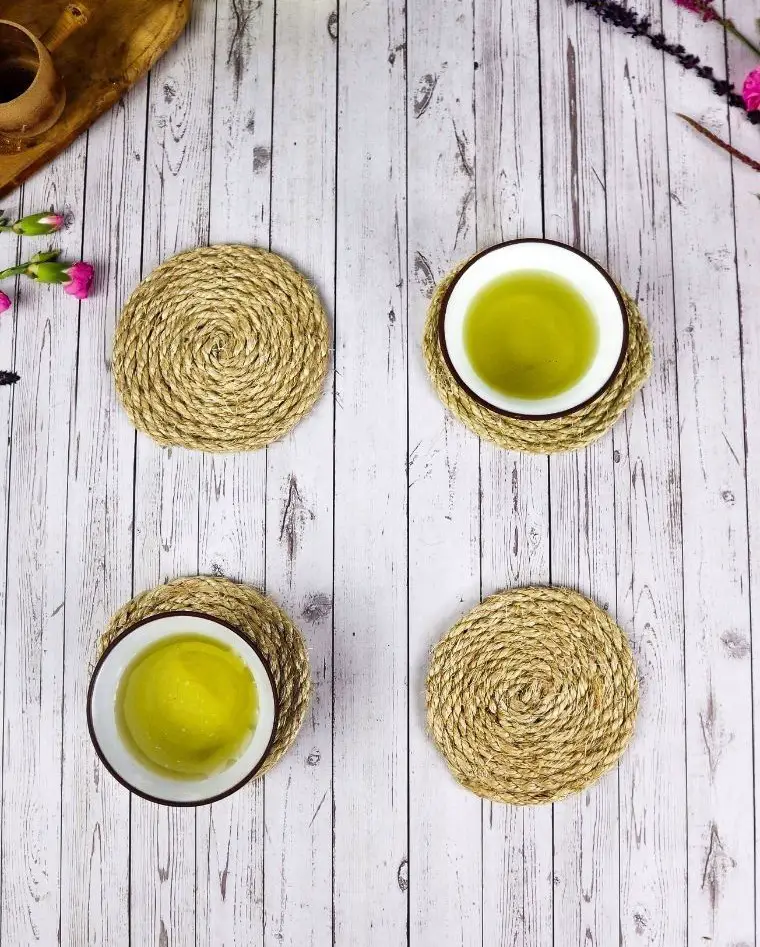
Transform your home’s decor without breaking the bank by creating simple and easy DIY rope coasters. These rustic accents are perfect for keeping surfaces clean and adding a touch of beachy charm to any room.
Whether you’re looking to bring a slice of coastal living into your space or simply desire a unique decorative element, these handmade coasters are an affordable solution that won’t compromise on style. The best part?
You can easily customize the look by experimenting with different rope colors or materials – the possibilities are endless!
What You’ll Need for Coasters
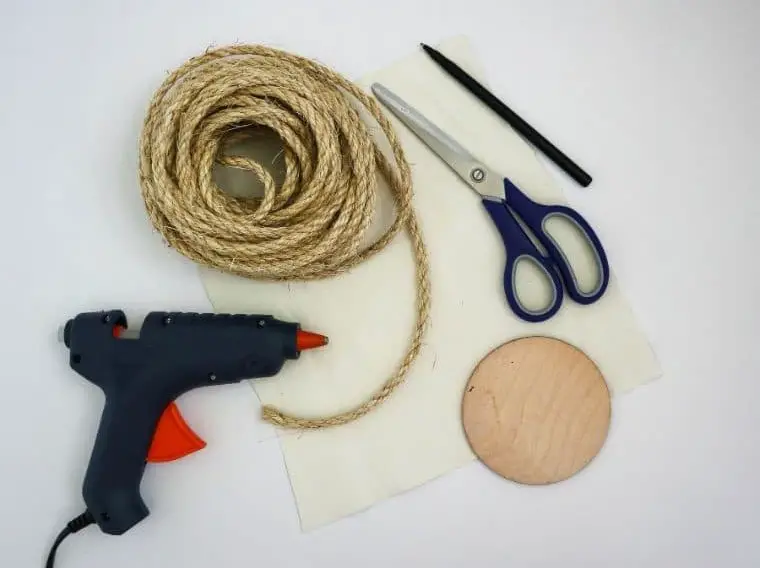
To craft a unique piece, gather the following materials: thick manilla rope, hot glue gun, scissors, pen, and a piece of paper or fabric. The centerpiece will be a wooden circle, disc, or CD, which serves as the foundation for your creative project.
How to Make DIY Rope Coasters
Step One
As you prepare to create your coasters, begin by selecting a suitable base material. For this project, I opted for fabric due to its flexibility and lightweight properties. While you can choose not to use a base at all, it’s crucial to determine the ideal size of each coaster. To achieve this, you’ll need a reference shape. In my case, I employed a circle crafted from lightweight wood, but cardboard or even a compact disc could serve as effective alternatives.
Once you’ve decided on your base, use a pen to trace its outline onto the material.
Step Two
As you prepare to create your masterpiece, take a moment to carefully select a durable fabric that will withstand repeated use without fraying or falling apart. This may seem like an obvious step, but trust us, it’s crucial for ensuring the longevity of your craft project. So, grab those scissors and snip out the piece of fabric you’ve chosen – the end result will be well worth the effort.
Step Three
When prepping your rope for the coaster, whether you’re working with macrame rope or a random find from your garage, aim to create a manageable workable length. Start by winding the rope into a shape that will yield the desired length for your coaster, then cut along that length. To avoid any last-minute trimming, it’s better to err on the side of caution and have a bit more rope than you need.
In my experience, cutting the end at an angle helps create a pointed tip – this feature makes it easier to reattach the tip to the main rope body, resulting in a tighter loop at the coaster’s center.
Step Four
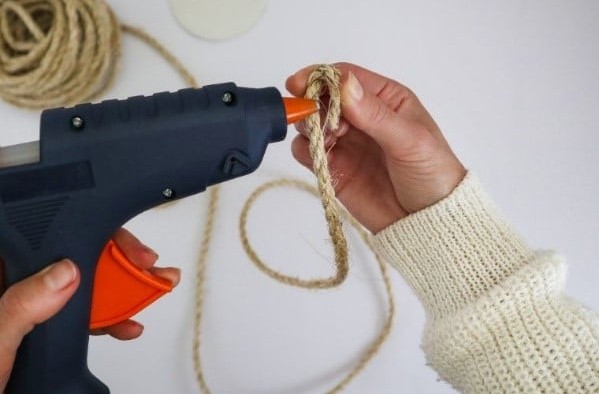
With the hot glue gun at the ready, it’s time to bring the angled tip back into play. To create the coaster’s central hub, carefully guide the tip back onto the main body of the rope in a loop shape. Secure this shape with a strong hold, ensuring the loop remains tight and even. This foundation will serve as the starting point for your coaster’s overall design.
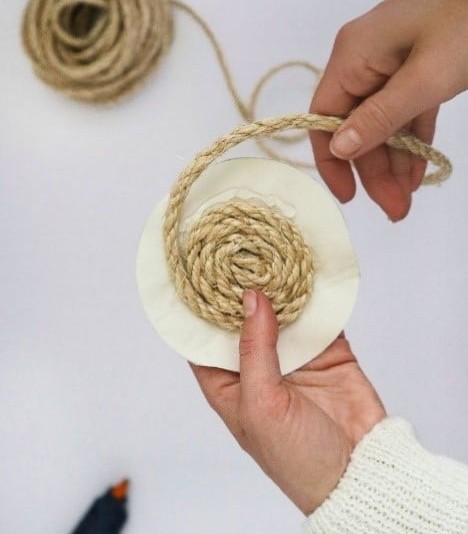
Step Five
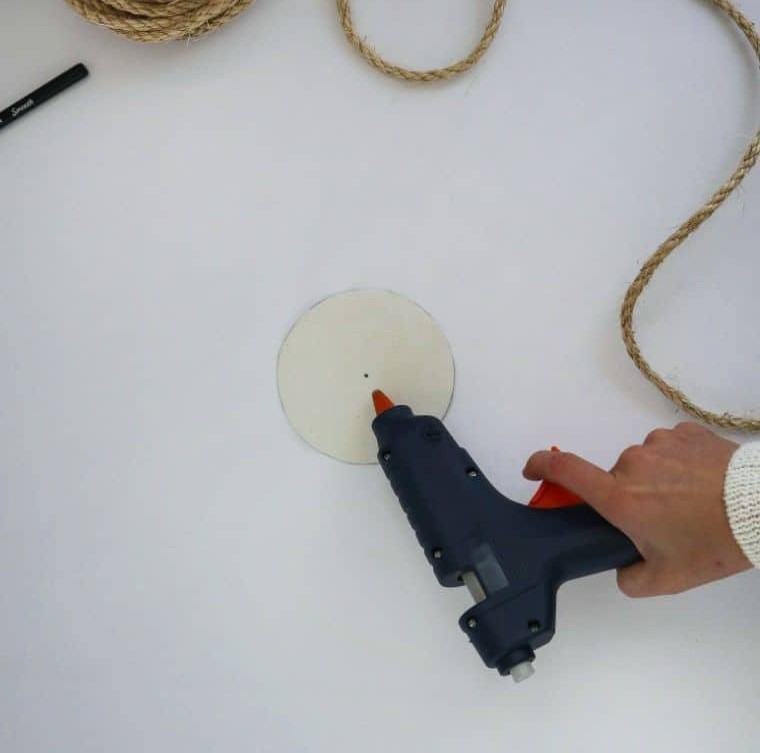
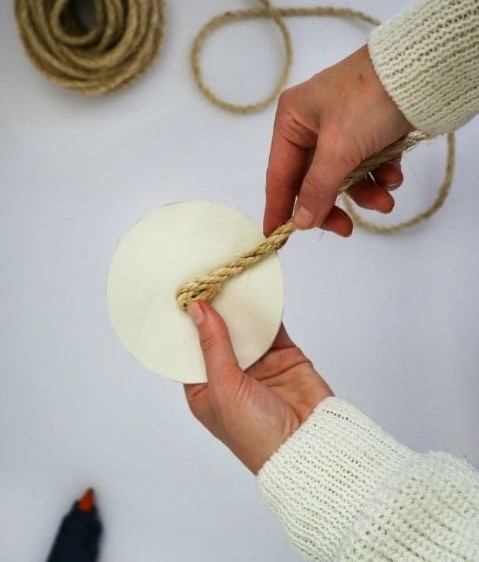
To initiate the winding process, begin by identifying the exact center of your base using a pen. As a reference point, mark this spot with a small dot. Next, take the glued loop and carefully apply it directly atop this marked area. This will serve as the foundation for your coaster.
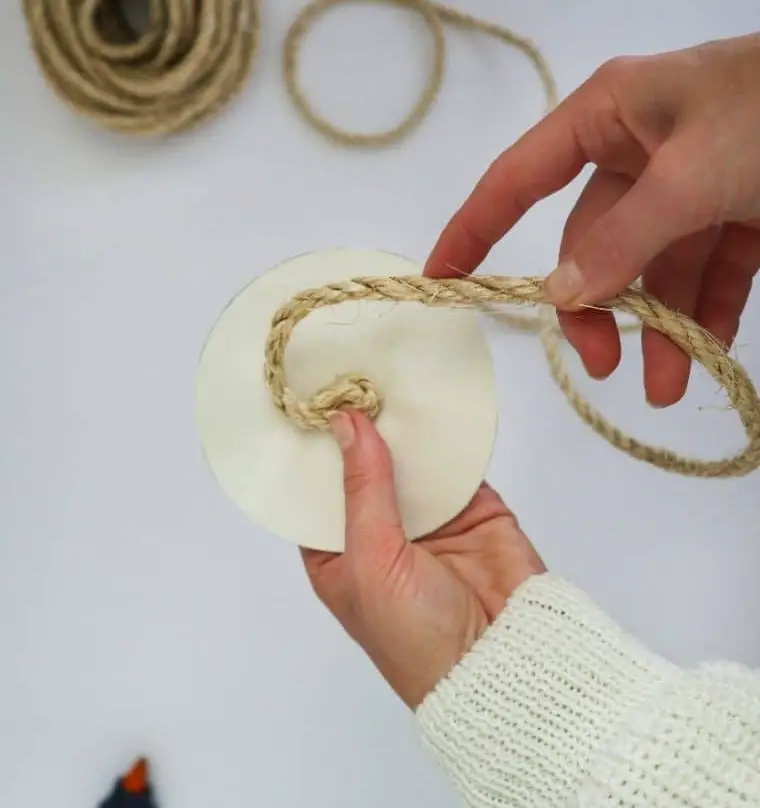
Step Six
As you begin wrapping the rope around the center, it’s crucial to maintain a consistent tension and pull tight as you go. Secure each loop with hot-glue, strategically applying beads of adhesive wherever necessary. Allow the glue to set for a sufficient amount of time before proceeding to wind further, lest the process becomes untidy and difficult to manage.
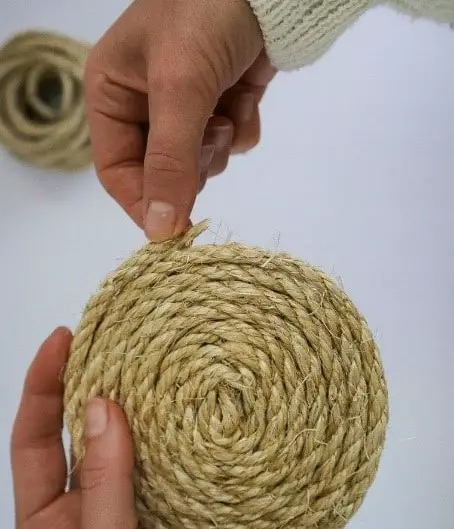
Step Seven

As you near the outer edge of the coaster, maintaining precise control over the loops is crucial to constructing a robust and stable structure that can withstand testing. This attention to detail not only ensures the coaster remains intact but also yields a visually appealing outcome. To achieve this, begin by applying a thin layer of adhesive as the foundation, followed by carefully winding the rope on top. A moderate amount of glue is sufficient, avoiding excess that might compromise the bond.
Step Eight
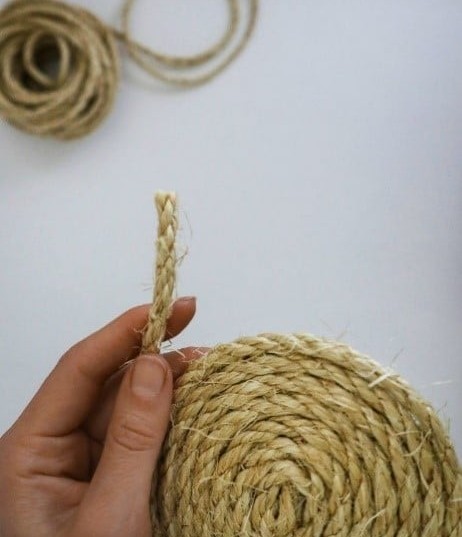
When it comes to stopping your winding process, pay attention to the edges of the base. If you’re not working with a base, simply cease winding when the coaster has reached the desired size in your opinion. To prepare for finishing touches, make sure to leave a substantial portion of rope at the end, as this will be crucial for later steps, such as cutting and gluing the remaining piece to secure the finish.
Step Nine
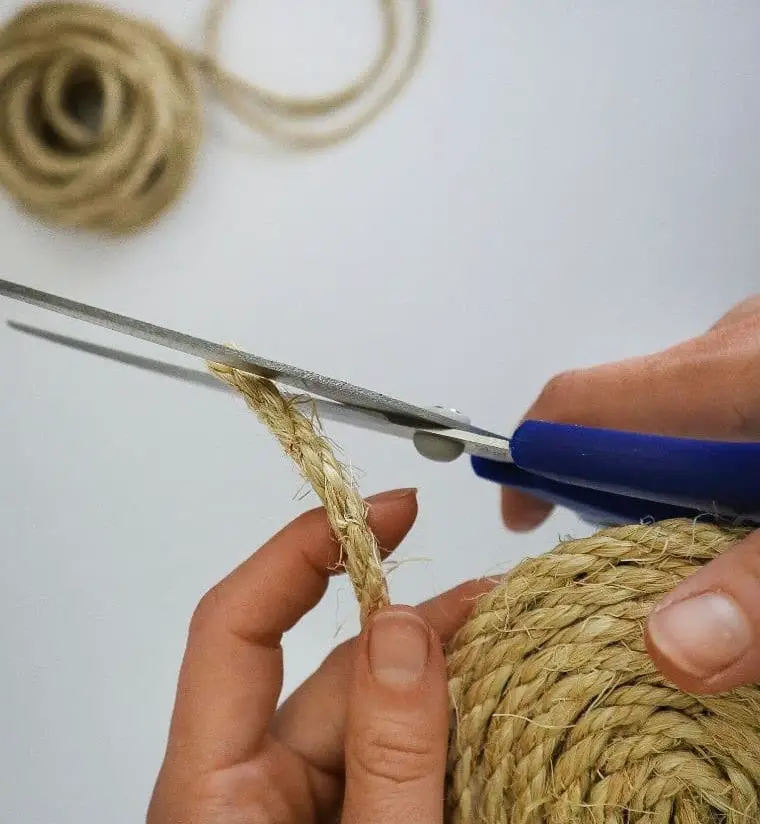
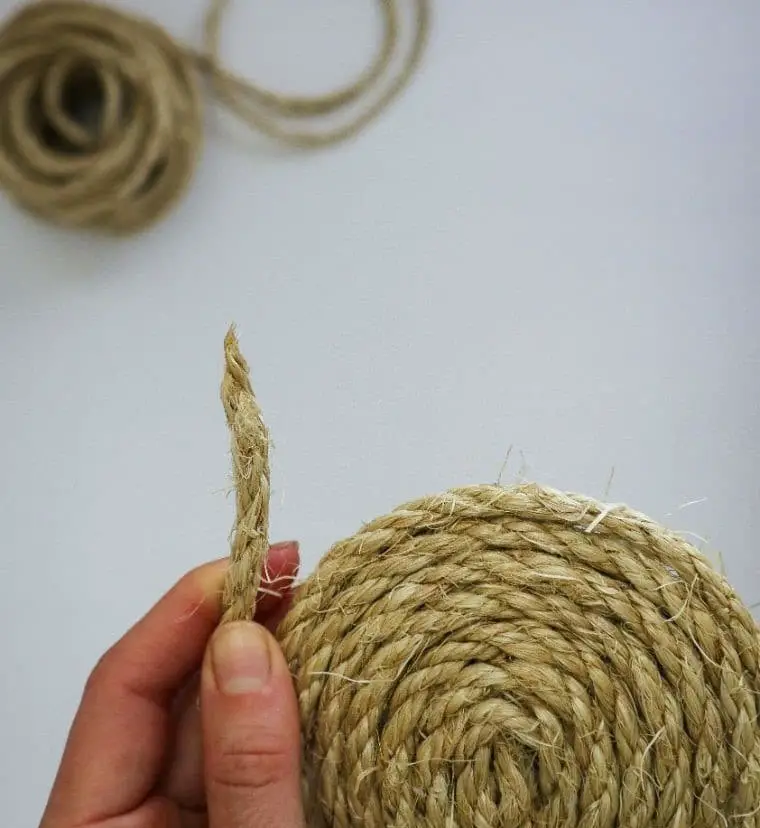
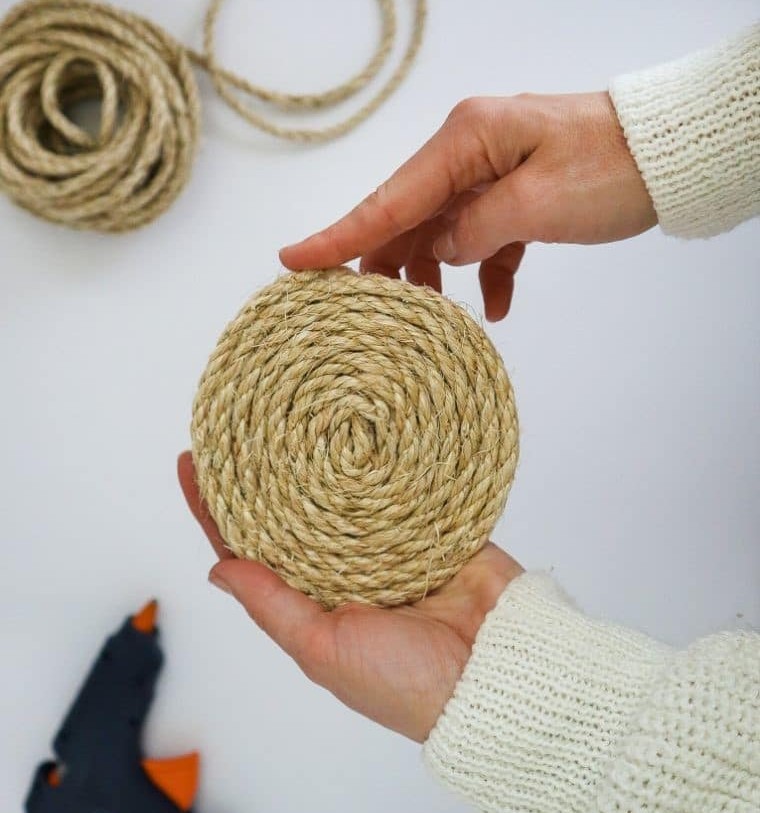
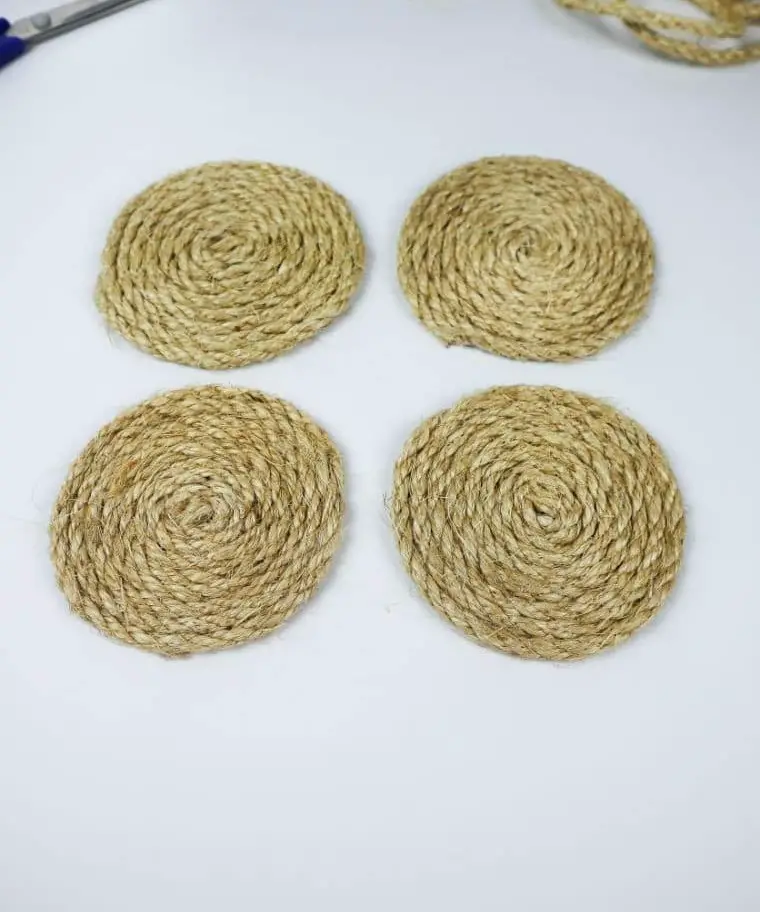
When securing the rope’s end, it’s common for the circle to appear uneven due to the bulkiness of the rope’s tip. To achieve a smoother look, we’ll employ a similar technique used when creating the starting loop: cutting the rope at an angle to create a pointed tip. By doing so, you’ll be able to tuck the point in and glue it securely to the finish, ensuring a neat and even appearance. With this approach, you can easily create as many rope coasters as you desire.
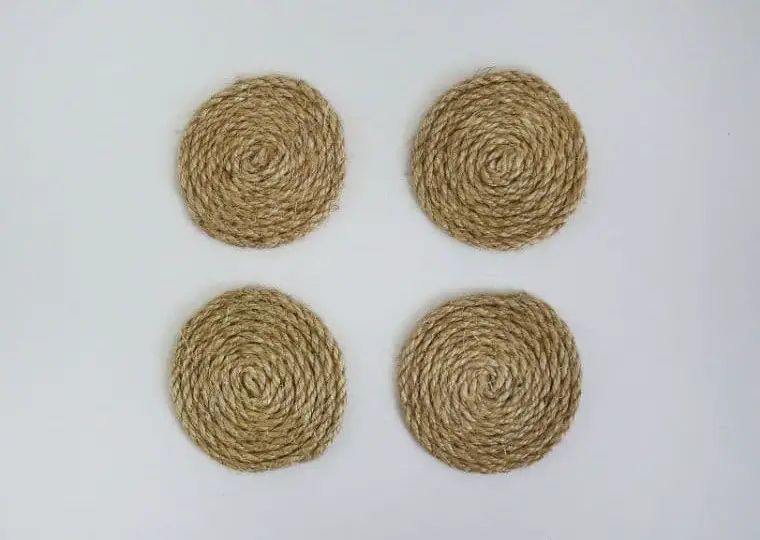
What Can You Use These Rope Coasters For?
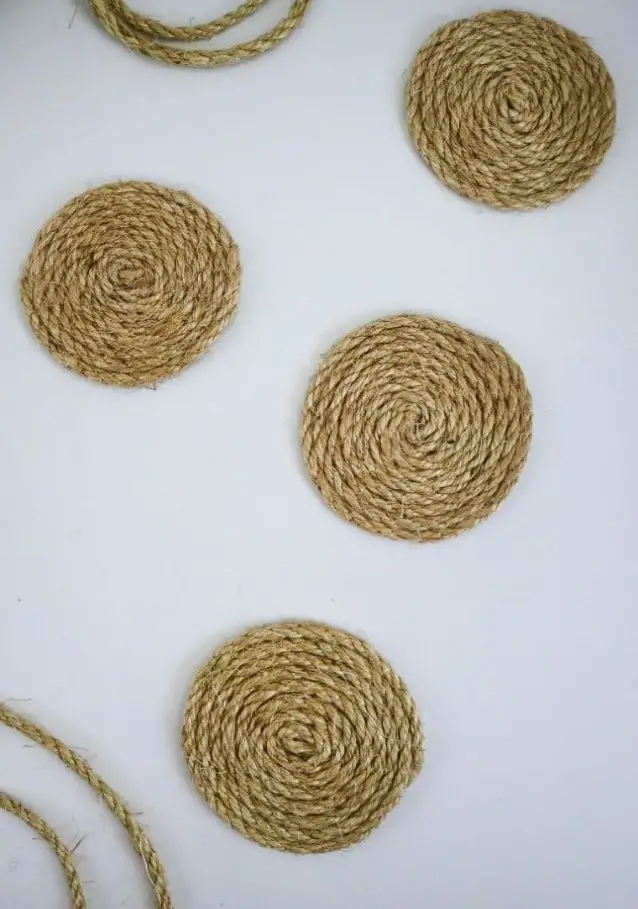
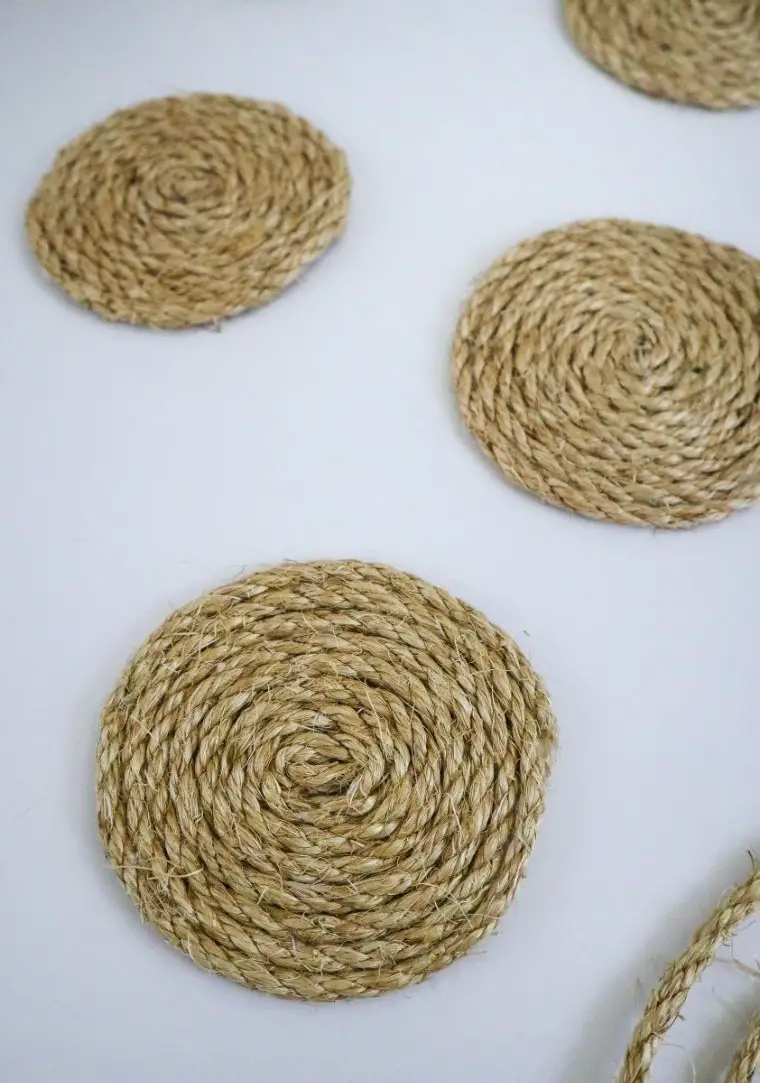
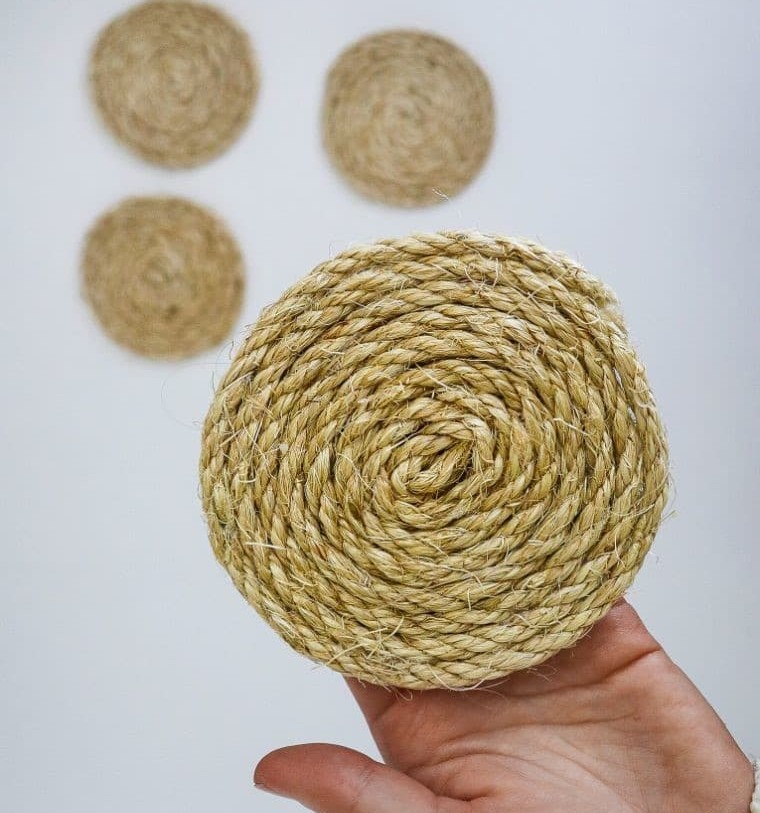
The versatility of these coasters is truly remarkable. Since they’re so easy to make, you have the freedom to customize their size and shape to fit any purpose in your home. Go big or go small – it’s entirely up to you! Consider creating a show-stopping centerpiece for your dining room table by making one giant coaster. Alternatively, use them to protect surfaces in high-traffic areas like the kitchen, where they can keep pots, pans, and cooling racks from leaving scorch marks.
If you’re looking for a more laid-back vibe, hang them on your wall as decorative pieces that add a touch of coastal charm to any room. You could also repurpose them as plant protectors by placing them under indoor pot plants – it’s a win-win for both your floors and foliage! The possibilities are truly endless when it comes to these DIY rope coasters. Want to take things to the next level?
Use this technique to create a massive area rug for your living room, or get creative with other uses like protecting your patio furniture or keeping surfaces safe from spills and messes.
DIY Rope Coasters
In just a few short moments, you can create your own beach-inspired coasters that not only add a touch of natural charm to your home decor but also serve as practical protectors for surfaces. With a prep time of mere minutes and an active time of 10 minutes, this DIY project is perfect for busy crafters. Once complete, you’ll have one beautiful coaster to show for your efforts. According to the creative force behind CraftsyHacks.
com, Karo, you can expect to spend around 23 minutes from start to finish. With a cost of just $2, it’s an affordable and fun way to add some coastal flair to your space.
Equipment
Materials
The importance of a sturdy foundation cannot be overstated, especially when it comes to creating something that will last. In this context, we’re talking about three distinct materials that share a common thread: thick manilla rope, piece of paper/fabric, and wooden disc or CD. While they may seem worlds apart at first glance, each has its own unique properties that make it ideal for specific applications.
The thick manilla rope, for instance, is often used in crafting traditional nautical items, such as anchor lines or towlines, due to its exceptional durability and resistance to wear and tear. On the other hand, a piece of paper/fabric may seem fragile by comparison, but it has its own uses – from creating delicate, intricate designs to serving as a base for more complex craft projects.
Meanwhile, the wooden disc or CD serves as a blank canvas, awaiting artistic expression through painting, drawing, or other forms of creative embellishment.
Instructions
To begin, prepare your materials by creating a base if needed. If not, proceed to shaping the rope. Start by drawing a circular outline on the fabric using a wooden disk as a guide, then cut out the fabric along these lines and mark its exact midpoint with a pen. Next, angle-cut the starting end of the rope, forming a tapered tip that will facilitate subsequent gluing steps. Loop this tip back onto itself to create a loop, apply glue to secure it in place, and let it dry for a minute.
Subsequently, position the formed loop onto your base (if using) centered around the marked dot. Then, begin winding the rope around its own length, maintaining a tight tension as you go and applying small amounts of glue at regular intervals. Be mindful not to overuse adhesive, lest it become difficult to work with. As you near the end of the winding process, cut off the excess rope in a pointed shape once more. Finally, apply glue to secure this newly formed tip and your coaster is complete.