Are you looking for a fun and creative way to spend your free time? Look no further! These effortless DIY projects are perfect for adults, teens, and kids alike. Not only do they provide instant gratification with a job well done, but they also offer practical solutions for your home or decorative pieces that add a personal touch.
The beauty of DIY projects lies in their ability to spark creativity and bring joy to our lives.
While longer, more complex projects have their place, sometimes we just need something quick and easy to give us a sense of accomplishment.
With this in mind, I’ve curated 47 super simple DIY projects that can be completed in a day or less. From decorative pieces to functional items, these ideas are sure to inspire your next creative endeavor.
Rock Photo Holders
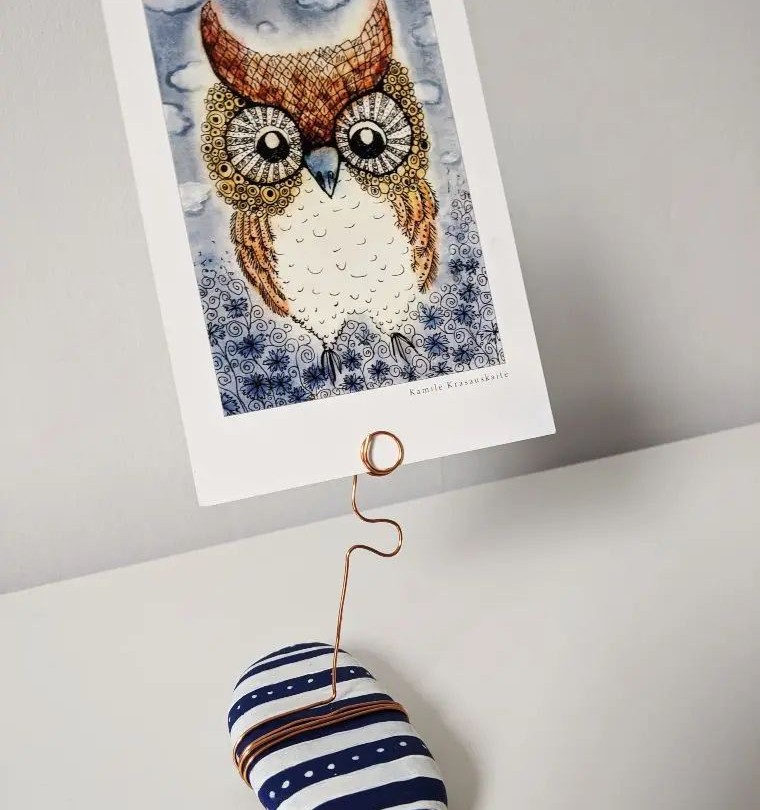
Rock painting is a timeless favorite among kids and a convenient crafting option for busy mums seeking a quick activity to keep their little ones occupied. With just a few swift brushstrokes, you can elevate plain rocks and pebbles into vibrant works of art that make perfect decorative pieces or even serve as functional photo displays. The best part? These artistic creations can be used to hold cherished memories, making them an incredibly thoughtful and unique way to showcase special moments.
Leafy Felt Wreath
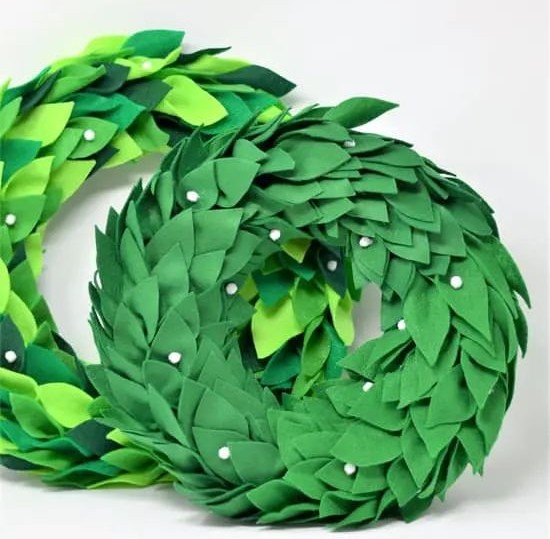
As spring arrives, have you stopped to appreciate the vibrant beauty of leaves? Their lush green hues are nothing short of delectable. To bring this natural wonder indoors, why not craft your own DIY leafy wreath? The key to creating a realistic look is to replicate the texture of leaves as accurately as possible. Felt sheets can be used to achieve this authentic appearance.
Additionally, adding a few strategically placed mini pom-poms with hot glue can introduce an extra burst of color to your wreath, elevating its overall aesthetic.
DIY Yarn-Wrapped Planter
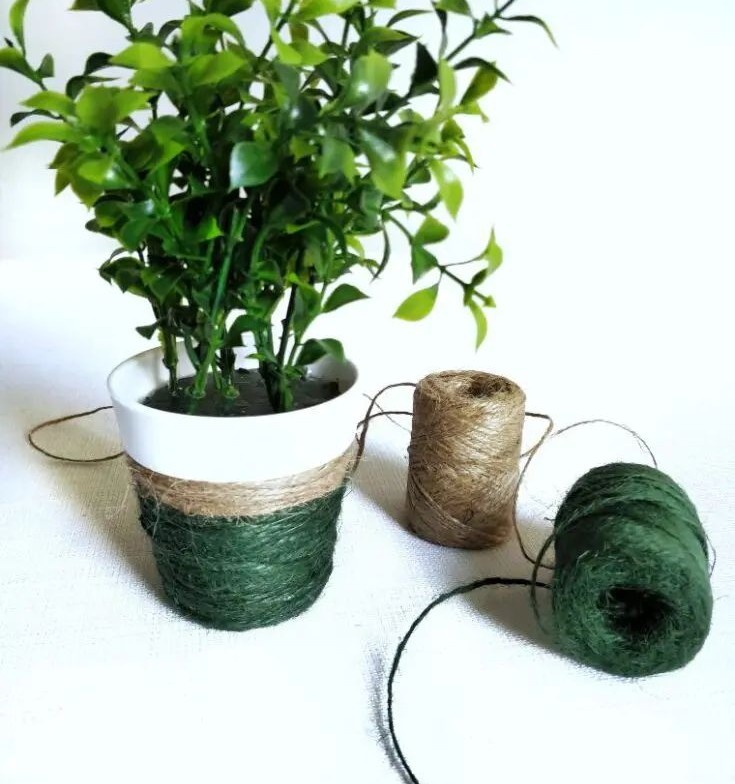
Transforming ordinary planters into unique pieces of art is easier than you think. Instead of painting over imperfections, consider giving them a fresh new look with a DIY yarn-wrapped planter. This creative solution can breathe new life into scratched or chipped pots that might otherwise be headed for the recycling bin.
To get started, gather your materials: colored yarn, a hot glue gun, and of course, your trusty planters.
For added visual interest, apply a coat or two of paint to serve as a base for your yarn wrapping.
Once you’ve prepared your pot, simply wrap the yarn around it in a pattern that suits your style. This charming DIY project is perfect for adding a personal touch to your home decor.
Hanging Succulent Planter
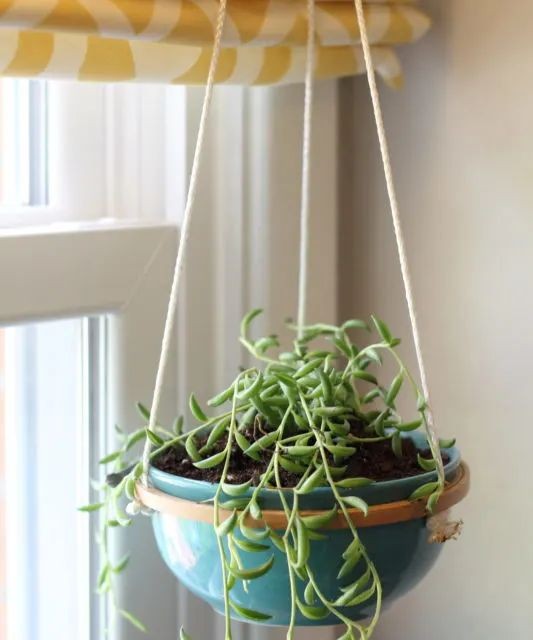
Do you often find yourself with leftover embroidery loops from past projects? If so, you’re in luck! I’ve got a creative solution for those pesky extras. We’ll be embarking on a new adventure – creating a hanging planter that will allow your succulents or cacti to thrive and add a touch of whimsy to your outdoor space. To begin, we’ll start from scratch with some sturdy materials and craft our very own planters.
Not only will this project give you a sense of accomplishment, but it’ll also provide a unique way to showcase your favorite plants. In addition to the embroidery loops, you’ll need a strong and durable synthetic cord to ensure the pots remain securely in place.
Yarn Wrapped DIY Glass Vase
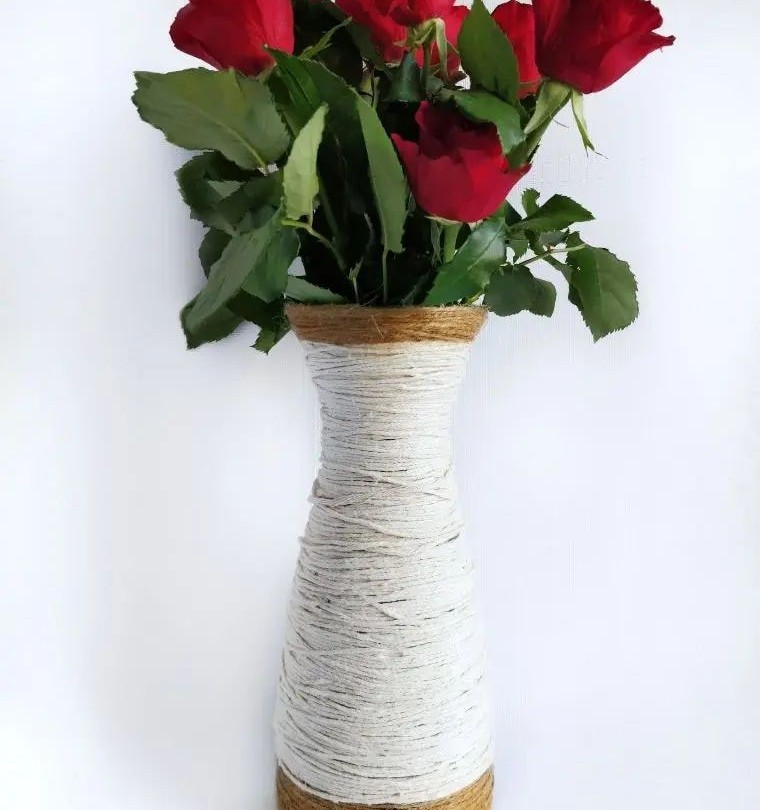
If you’re looking for a creative way to breathe new life into an old vase, look no further than this simple DIY project. The key is to wrap yarn or twine around the vase, effectively concealing any minor imperfections or dents that may be present. But that’s not all – you can also use colorful, textured yarn to give your newly revamped vase a pop of personality and make it truly one-of-a-kind.
Aromatherapy Stress Balls
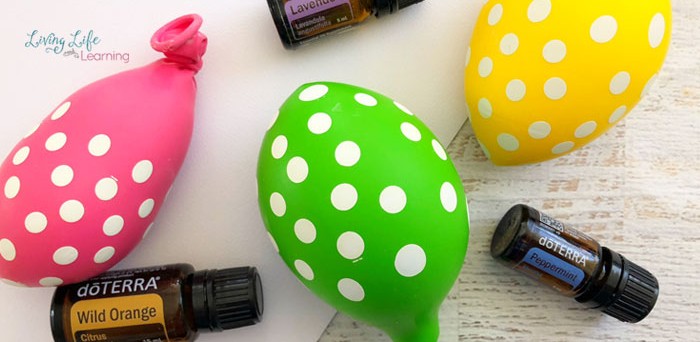
As we navigate the whirlwind of daily life, it’s easy to feel overwhelmed by stress and anxiety. But what if you could find a way to calm the storm brewing within? Enter aromatherapy stress balls – a simple yet effective tool in your self-care arsenal. By incorporating soothing essential oils into the mix, you can harness the power of aromatherapy to stimulate feelings of serenity and tranquility.
Meanwhile, the tactile nature of stress balls allows you to keep your hands busy, channeling tension and anxiety away from your mind. To create your own aromatherapy stress ball, gather a few basic ingredients: cornstarch, a few drops of your preferred essential oil (feel free to explore our options for inspiration), and some balloons – then get ready to breathe easy and find balance in the chaos.
Paper Squishies
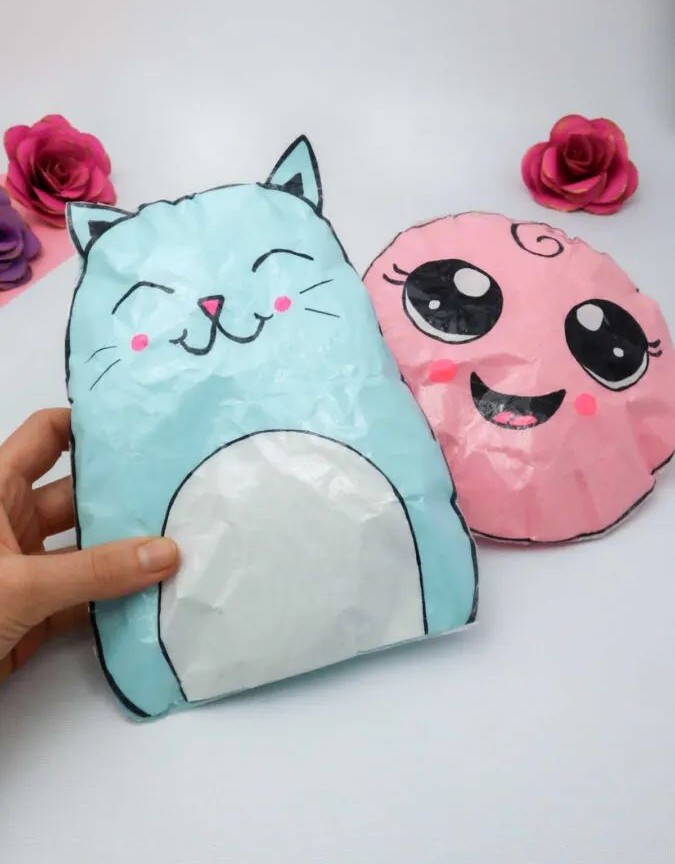
Playing with paper squishies can be an enjoyable activity that’s also budget-friendly. Unlike store-bought versions, these DIY creations are extremely affordable to produce. To get started, you’ll need a sufficient supply of transparent tape, as you’ll be wrapping the entire squishie with it. Make sure to stock up before beginning your project.
Next, gather your hot glue gun and scissors.
You’ll also need to download, print, and cut out your favorite cartoon character – this will serve as the ‘face’ of your paper squishie. As you complete multiple designs, keep in mind that you may end up with a dozen or more finished products. Just remember to have enough tape on hand!
Watermelon Sponge-Stamped Tea Towels
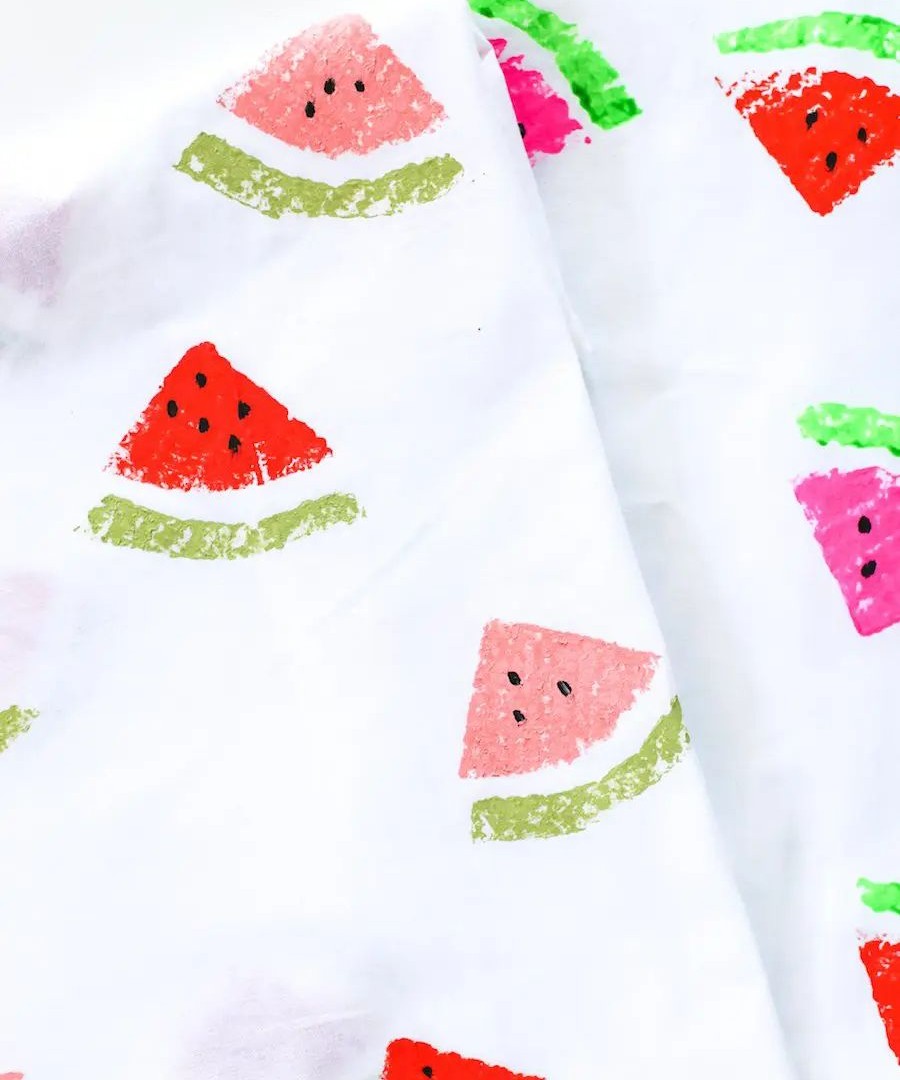
Give your plain kitchen tea towels a makeover by trying out sponge stamping! This fun technique is perfect for adding cute and quirky designs to your linens. Take a look at the adorable watermelons below, for instance. To get started, you’ll need some tea towels, sponges, scissors, paints, brushes, and an iron. You may also want to have a piece of cardboard on hand to help support the towel while you’re ironing out any wrinkles.
The key to creating realistic designs like these watermelons is to add some subtle details, such as seeds or rind texture, to give your stamped design some extra depth.
Paper Rings
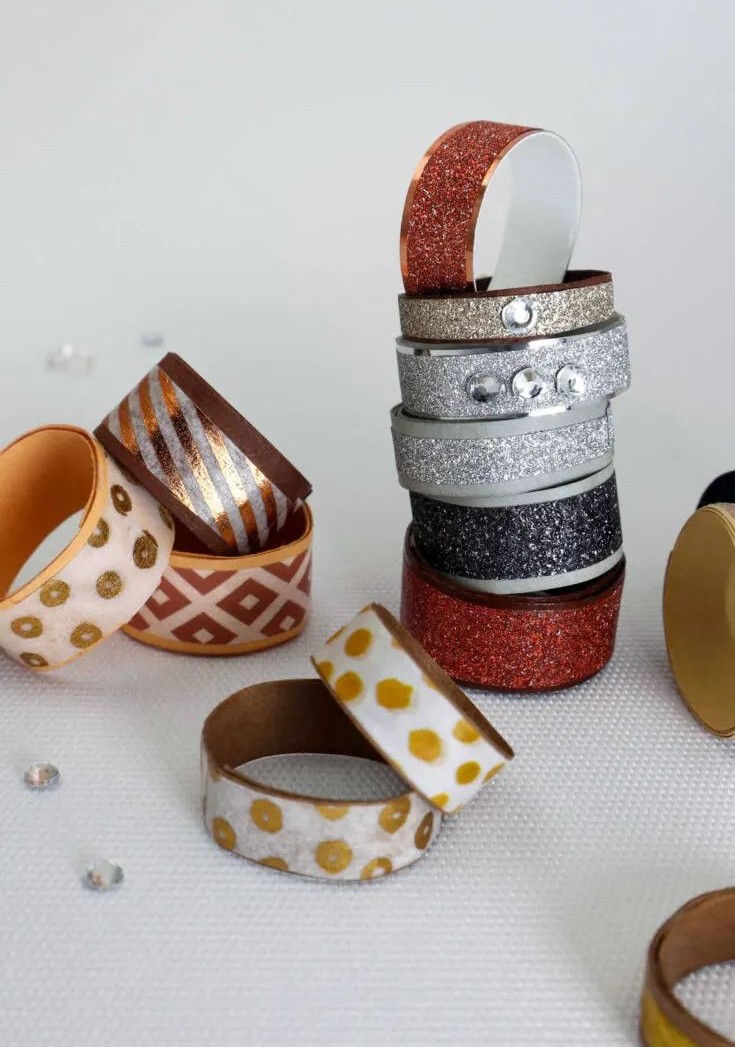
When it comes to crafting on short notice, paper jewelry is a reliable go-to project. Not only are they quick and easy to make, but they’re also an excellent way to keep little ones entertained and engaged. The best part? You likely already have all the necessary materials on hand.
To create these charming paper rings, you’ll need: craft paper, mod podge, brushes, craft glue, a ruler, scissors, and flat back gems or crystals.
These add-ons can be used to give your finished pieces an extra touch of flair. Alternatively, you could opt for different washi tape designs to achieve the same effect.
Consider giving these DIY rings a try and see what unique creations you come up with!
Marbled DIY Coasters
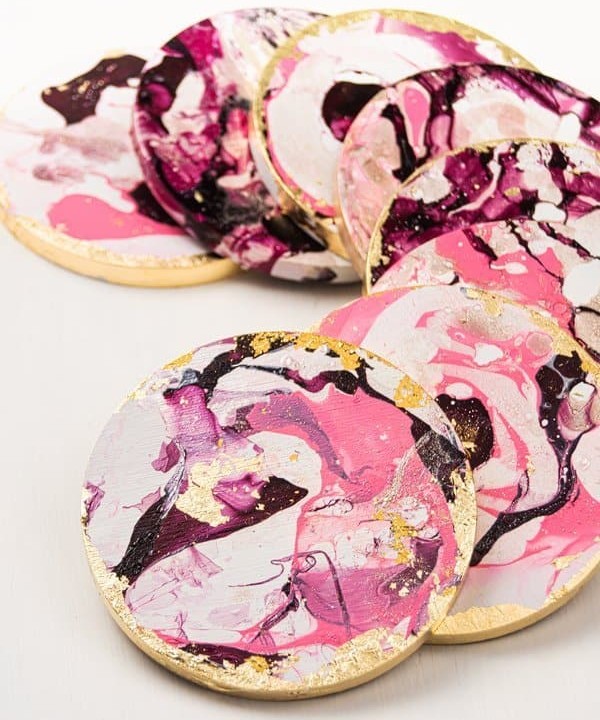
These stunning marbled DIY coasters perfectly blend modern art and decor, offering an unparalleled level of sophistication. What’s more, they’re astonishingly simple to create, taking on a truly irresistible appeal when accented with shimmering gold around the rim. For those seeking an elegant, agate-inspired finish reminiscent of Anthropologie, you’ve struck gold. To achieve this look, gather your supplies: nail polish, water, wooden coasters, and a dash of gold metal leaf adhesive.
You can also seal your masterpiece with Mod Podge or clear sealant spray. If you’re enamored with these coasters, be sure to explore more wood crafts for inspiration.
Scented Candles
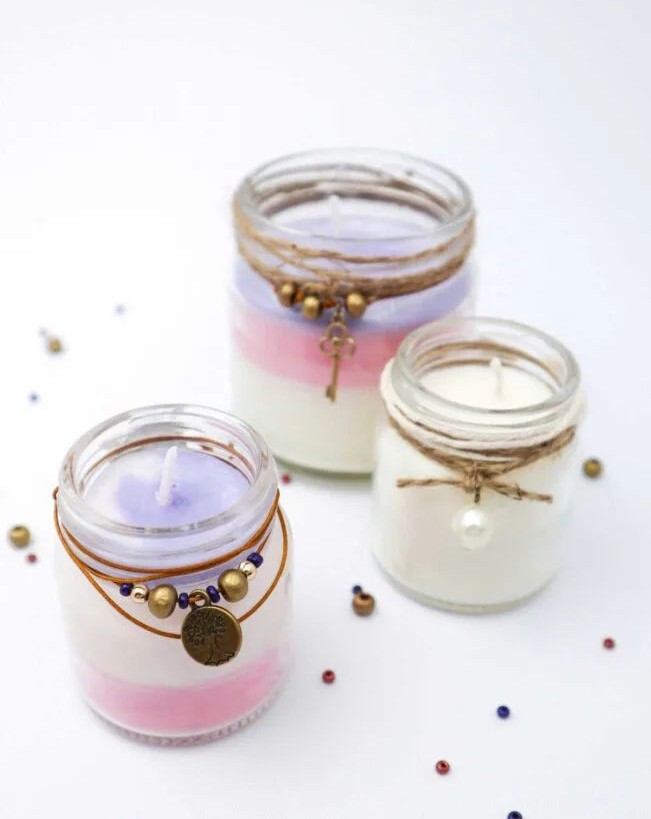
The allure of candles is undeniable – the soft glow they cast, the inviting aromas they release, and the cozy ambiance they create. It’s no surprise then that having an abundance of candles around the home can be a wonderful thing! And when you combine this with the ability to upcycle and reuse materials, it becomes even more appealing. You may already have some glass jars on hand that are perfect for housing your candles, but if not, you can easily acquire wicks, beeswax, and other supplies.
To take things to the next level, consider adding a few drops of food or candle dye, along with your favorite essential oil, to give your creations a unique scent. To really make your candles stand out, why not add some decorative charms or tie a length of twine around the rim? Not only will this add a touch of personality to each one, but it’ll also make them feel like truly special treasures.
If you’re looking for inspiration on how to customize your glass jars, be sure to check out our DIY leaf candle holder tutorial.
Valentine’s Day Garland
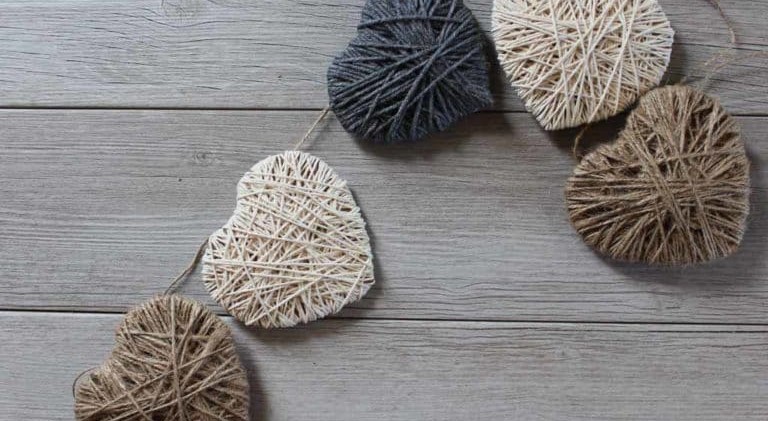
While I appreciate the enthusiasm of Valentine’s Day, I must admit that an overabundance of pinks, purples, and reds can be overwhelming at times. A more subtle approach is often preferred to avoid garishness. In contrast, these elegant garlands exude refinement, with their understated hearts the only hint at their Valentine’s Day origins.
To create your own version, start by gathering some cotton string.
Begin by tracing and cutting out heart shapes on cardboard before wrapping them with thread.
DIY Journal Cover
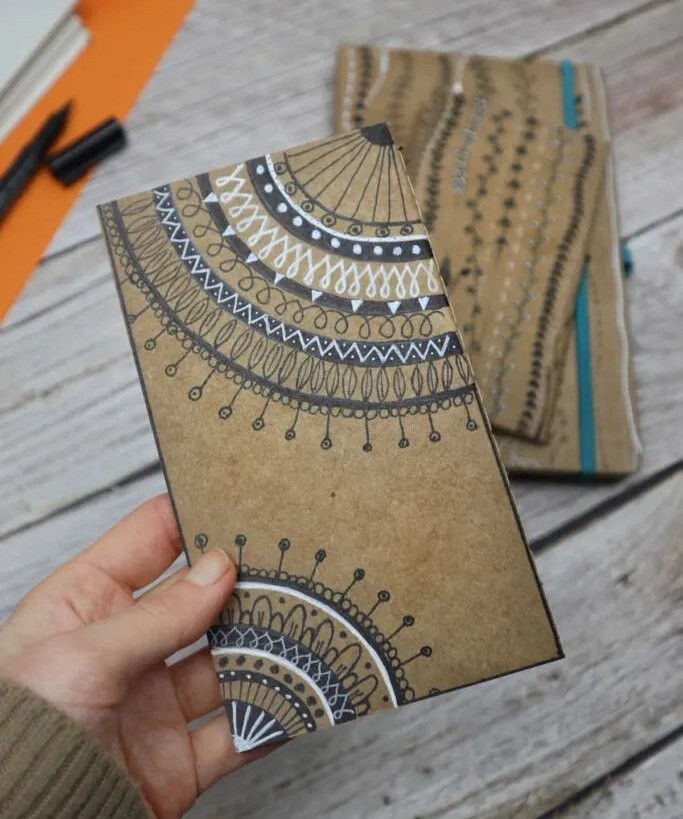
There’s something undeniably exciting about a brand new book – it’s like a blank canvas just waiting for creativity to unfold. While I’ve grown accustomed to the thrill of diving into fresh pages, what really gets my goat is the disparity between high-end aesthetics and mass-market mediocrity. When I want to use a journal for creative expression, I don’t appreciate being limited by uninspiring covers.
But fear not, because with a few trusty pens and an open mind, even the most lackluster book can be transformed into a visually stunning companion. Simply explore the world of doodles, zentangles, or mandala designs to add your personal touch and give those plain covers some much-needed flair.
Wine Bottle Luminaries
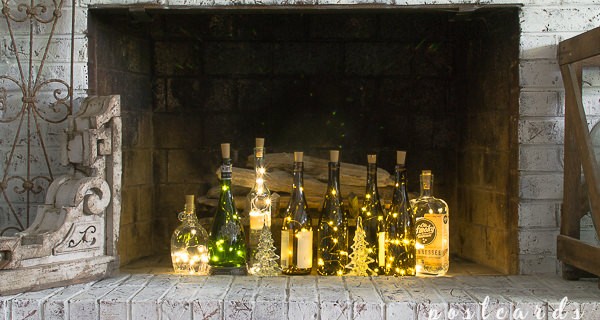
Winter is the perfect time to bring some extra cheer into your home with a beautiful luminary display. The warm glow of the candles and the twinkling lights are especially inviting during the colder months. To create this magical ambiance, you’ll need a few simple materials: empty wine bottles that have been thoroughly cleaned, and wooden corks, which can be easily sourced online.
Once you’ve gathered your supplies, simply thread your fairy lights through the corks and into the bottles to create a stunning centerpiece that will add a touch of winter wonder to any room.
DIY Shoelace Bracelets
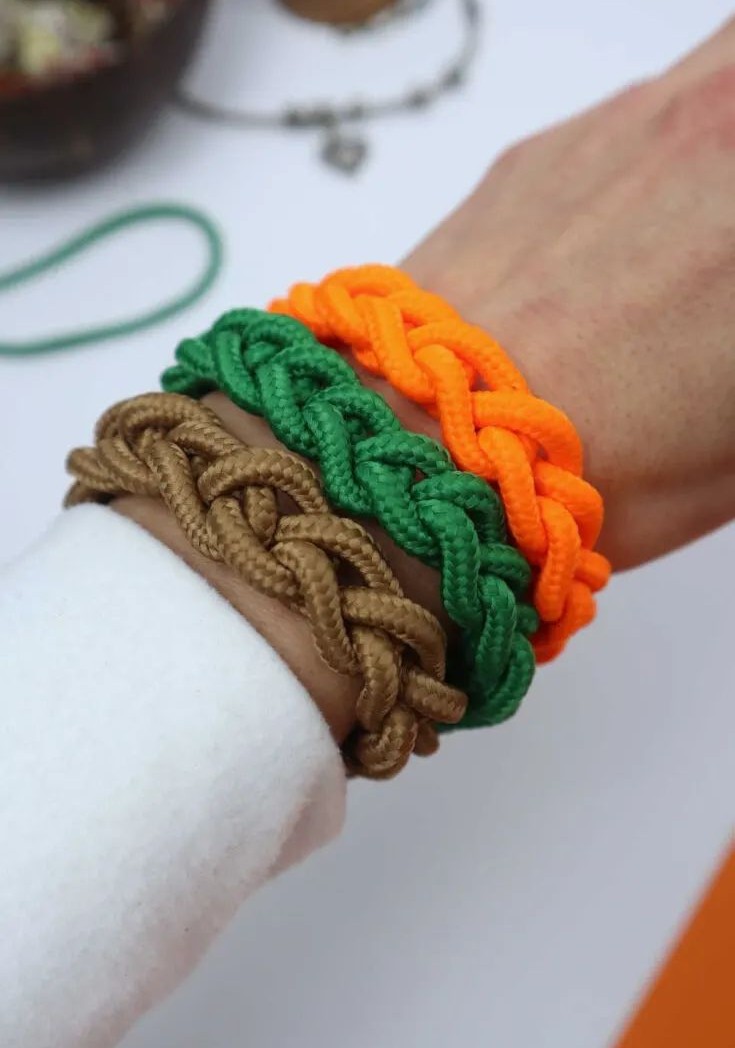
Nostalgic crafting is a wonderful thing, and these DIY shoelace bracelets bring back memories of carefree days with friends. We’d spend hours creating unique accessories from scraps of wire, paper, and embroidery floss. It’s time to revive those quirky crafts, starting with this simple yet delightful DIY project that can be completed in under 30 minutes. All you need is a pair of colored shoelaces, which will soon become the foundation for dozens of handmade bracelets for your friends.
DIY Honey Bee Decor
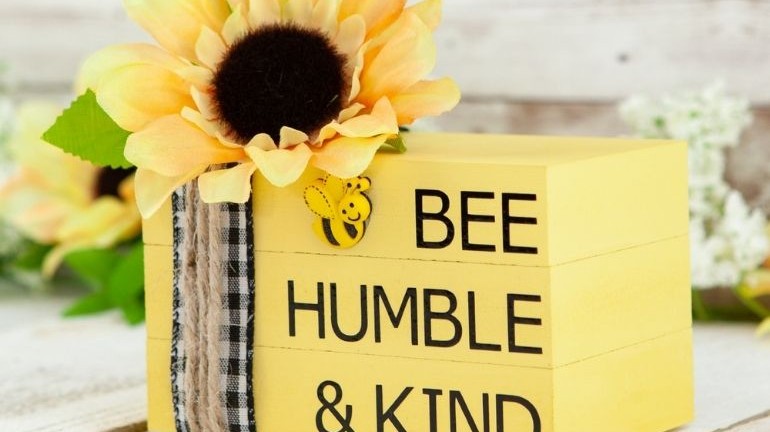
Give your home a radiant boost with this DIY decor project that’s sure to put a smile on your face. The vibrant yellow hues and playful bee puns are guaranteed to brighten up any room. To bring this cheerful design to life, you’ll need to fire up your Cricut machine and get creative. Additionally, gather three wooden blocks that will serve as the foundation for your ‘books.’ You can find these blocks right here.
A crucial step in this project is allowing each block to dry completely after painting before moving on to the decorating phase – so be sure to bee patient!
Unicorn Toilet Paper Roll
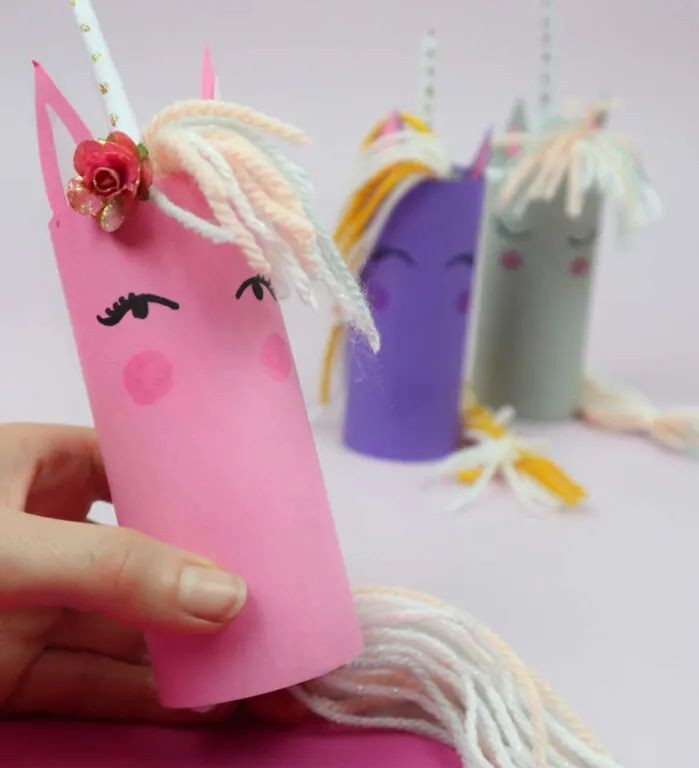
With a stash of empty toilet paper rolls likely at your fingertips, it’s time to gather the remaining essentials for this creative project. A colorful medley of papers, glittery glue, and yarn are all you need to bring your unicorn to life. But that’s not all – feel free to add some faux floral flair with hot glue, giving your creation an extra touch of whimsy. The real pièce de résistance, however, is the unicorn’s majestic tail.
With yarn at your disposal, you can craft a braided masterpiece that elevates your entire project. The end result will be a truly enchanting unicorn that’s sure to delight.
Mandala Trinket Dish
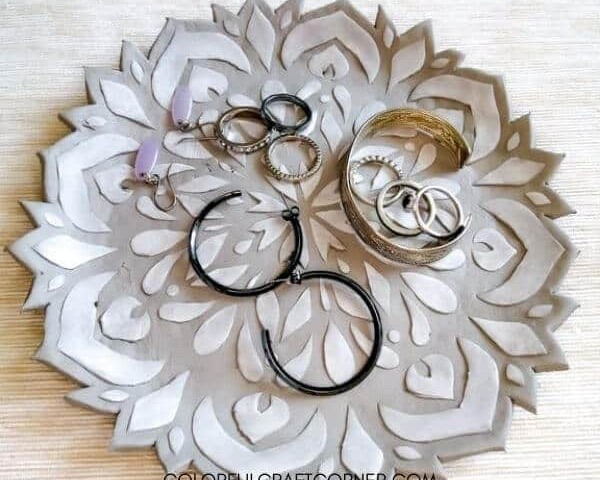
When it comes to trinket dishes, there’s no such thing as having too many. They’re the perfect way to corral all those little items that tend to clutter up our surfaces – think jewelry, keys, coins, and miscellaneous knick-knacks. To create this stunning piece, you’ll need air-drying clay, which can be found here. You’ll also require a mandala stencil, which is available from the same source. Additionally, you’ll need a rolling pin, a craft knife, and a plate to serve as your base.
If you’re feeling particularly creative, you could even take matters into your own hands and design your own custom mandala stencil using your Cricut machine.
DIY Phone Holder
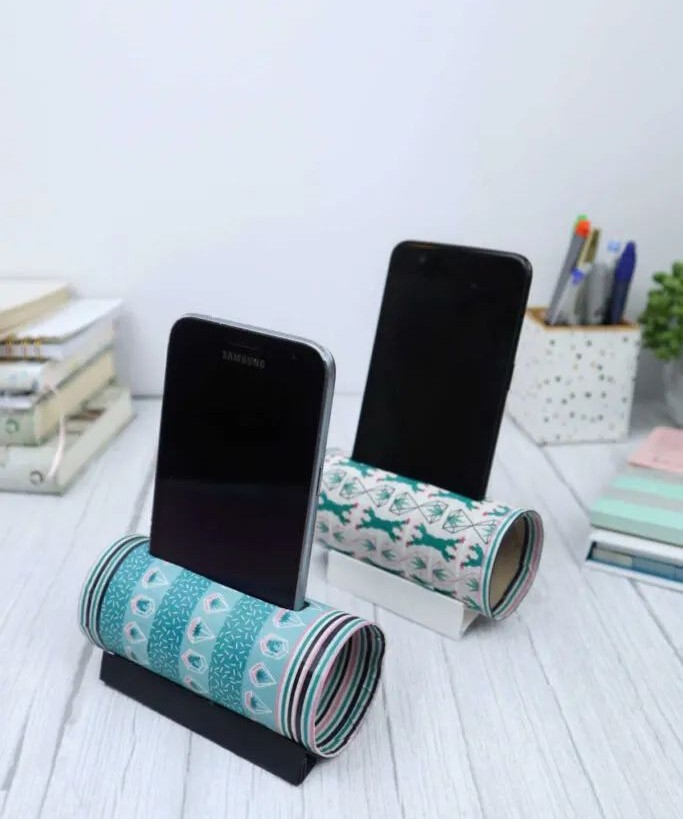
Do you still find yourself stuck with spare toilet paper rolls after that creative project? If so, don’t worry – they’re about to come in handy for this clever DIY phone holder. As a student, we’ve all been there: trying to balance our phones on precarious angles to take notes or watch tutorials. This simple holder is designed to solve this exact problem, and it’s incredibly easy to make using just a few basic materials. The best part?
You get to customize your design with a variety of colorful washi tapes available at your fingertips.
DIY Unicorn Bubble Bars
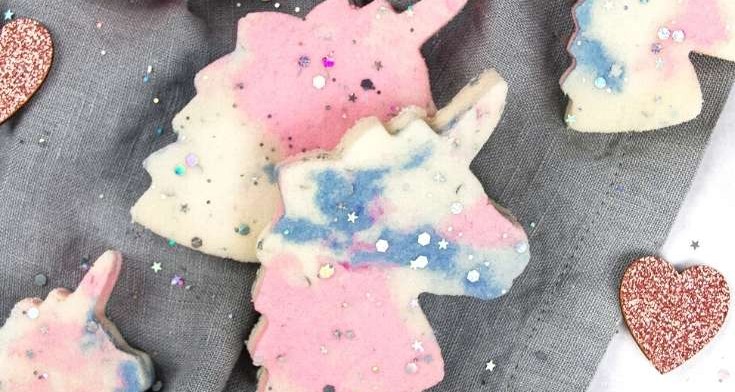
I’m a firm believer in the wonders of bubble bars. However, I’ve always been deterred by their steep price tags. That’s why I’m excited to share with you how to create these enchanting unicorn bubble bars right in the comfort of your own home! Not only will they add an extra layer of magic to your bath time, but they’ll also be a fraction of the cost.
To get started, gather the following ingredients: baking soda, shea butter, your preferred essential oil, biodegradable glitter for that touch of unicorn whimsy, and an emulsifier to ensure the shea butter blends seamlessly. With these simple components, you’ll be crafting your very own unicorn bubble bars in no time!
Upcycled Tin Cans
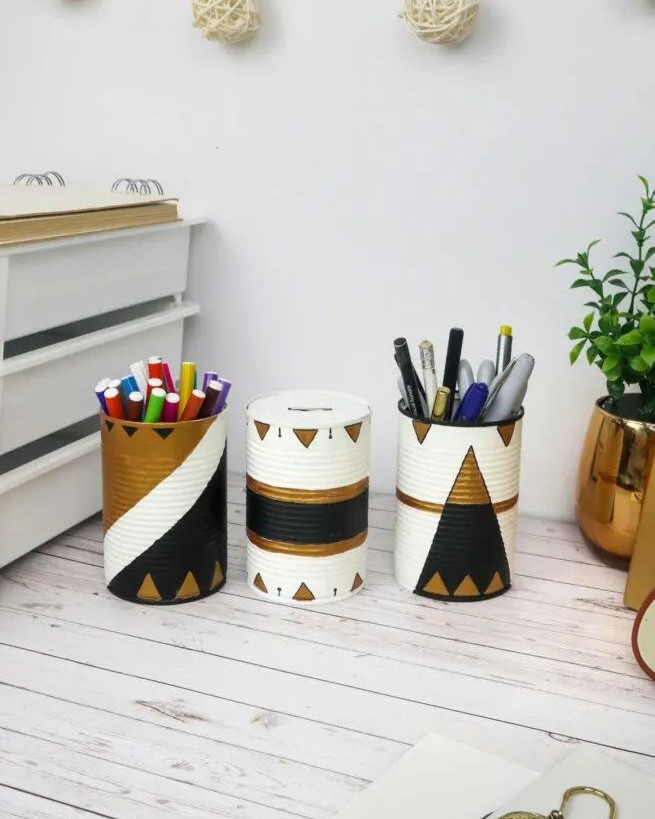
Upcycling tin cans into creative craft projects is an enjoyable and straightforward DIY endeavour that can be completed in no time. The possibilities are endless, with the potential to create a variety of functional desk organizers, pencil holders, and other decorative items. A bold and modern aesthetic can be achieved by combining metallic finishes like gold, silver, and black, which not only retains the original sheen but also adds an edgy touch.
Alternatively, you can opt for a glossy or matte finish that suits your personal taste. Beyond desk organizers, these cans can also serve as charming planters to brighten up your workspace. With a little creativity, the possibilities are truly endless.
DIY Terrarium Magnets
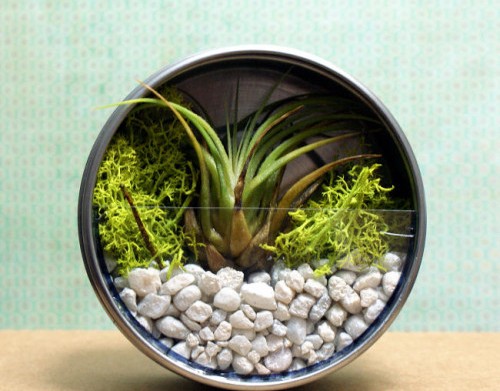
Bring the beauty of nature indoors with this unique family project! A plant terrarium can be a fantastic way to spend quality time together, and it’s an easy DIY endeavor that can add a touch of elegance to any room in your home. Imagine the joy of watching tiny plants grow and thrive amidst a miniature landscape. This craft is perfect for a family session, as everyone can contribute and work together to create a one-of-a-kind piece.
Once you’ve crafted your terrarium and are satisfied with its appearance, simply attach a magnet to the back, allowing you to effortlessly move it around or display it on a metal surface.
Paper Envelopes
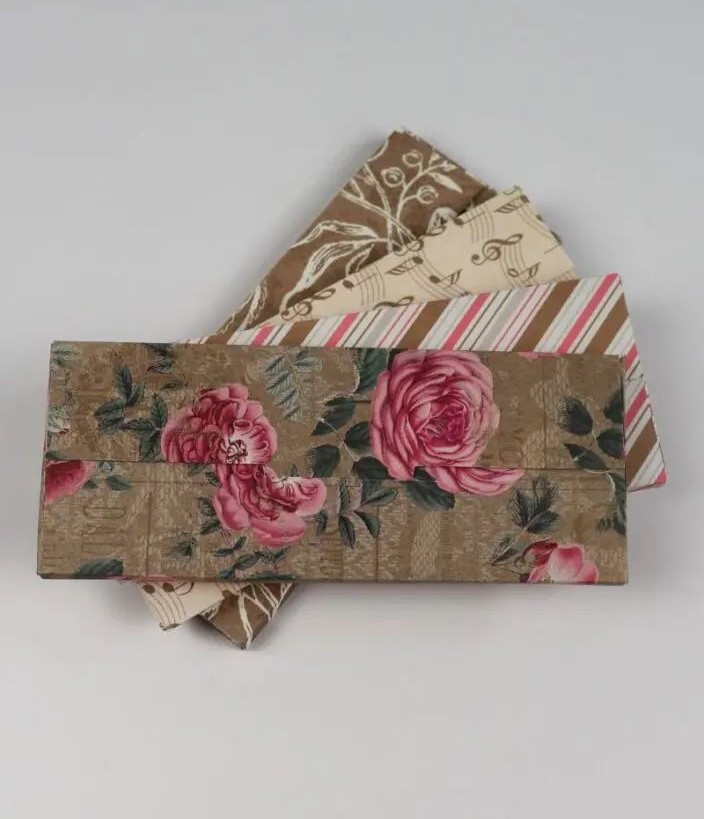
When it comes to purchasing paper envelopes, the cost can add up quickly at most supply stores. However, with a few simple materials and some basic crafting skills, you can create a dozen or more of your own custom envelopes right in the comfort of your own home. This project is also an excellent opportunity to declutter your scrap paper stash and reuse any leftover papers from previous projects.
When selecting the cardstock for your envelopes, it’s recommended to opt for thicker, padded varieties to ensure they stand the test of time and provide a sturdy foundation for your stationery needs. Not only will you be reducing waste, but you’ll also have the satisfaction of creating unique and personalized paper goods that are truly one-of-a-kind.
Fish Crafts For Kids
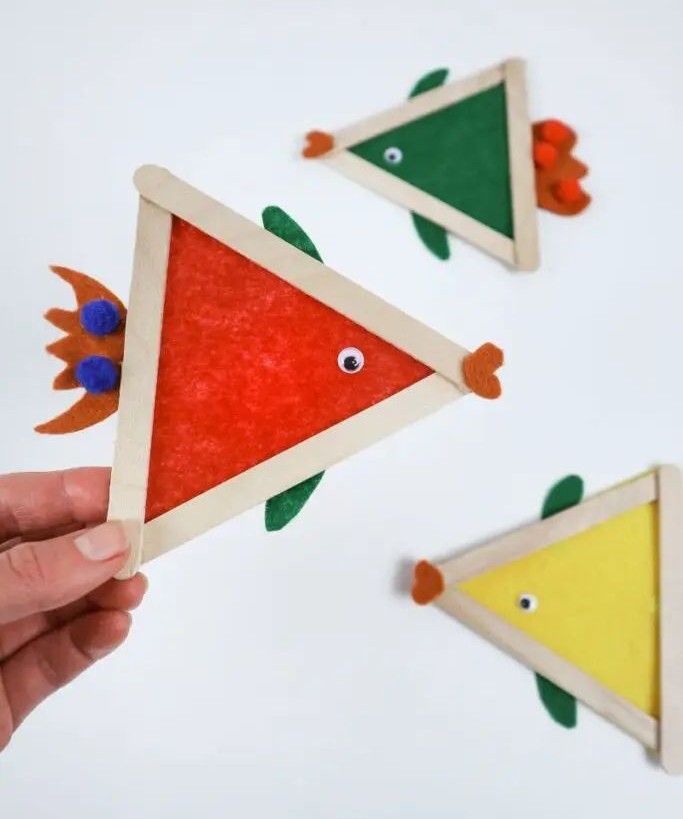
We’ve all experienced the fascination with a particular animal at some point – cats, dogs, tigers, elephants, or even fish. If your child is currently going through a ‘fishy phase,’ consider engaging them in a fun project that combines creativity and learning. Who wouldn’t want to make their own craft fishes? To spark their interest, suggest making ‘sticks’ rather than the actual marine animals. Once they see the process involves crafting, they’ll be hooked for the creative experience.
To get started, gather the necessary supplies: popsicle or craft sticks, a hot glue gun, googly eyes, and felt sheets. This activity is an excellent way to keep your child occupied while you tackle other tasks around the house. There are plenty of fun kid-friendly crafts that can be enjoyed simultaneously.
Pressed Flower Bookmarks
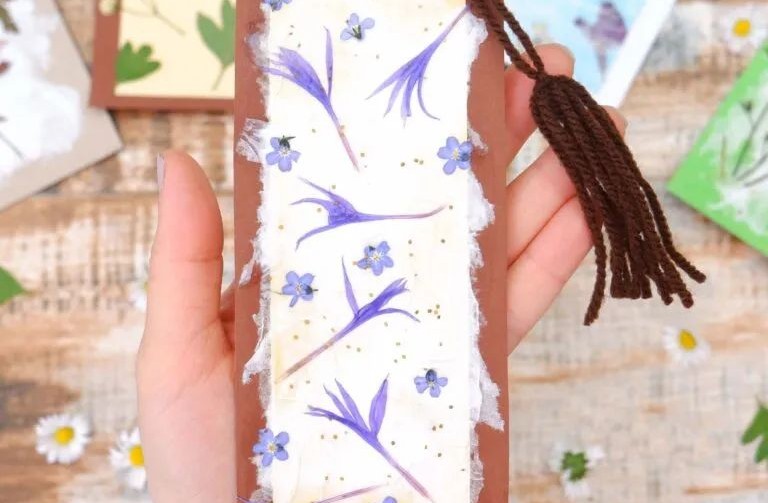
Pressed flower bookmarks evoke a sense of nostalgia and timelessness, transporting us to a bygone era. This charming DIY project is a delightful way to spend an afternoon, but it does require patience – after all, pressing flowers can be a slow process. While you wait for the flowers to dry naturally, you can prepare other materials like colored paper, yarn, scissors, glue, and hole punchers.
With these supplies ready, you’ll be able to craft unique and personalized bookmarks that showcase your creativity.
DIY Bookmarks For Kids
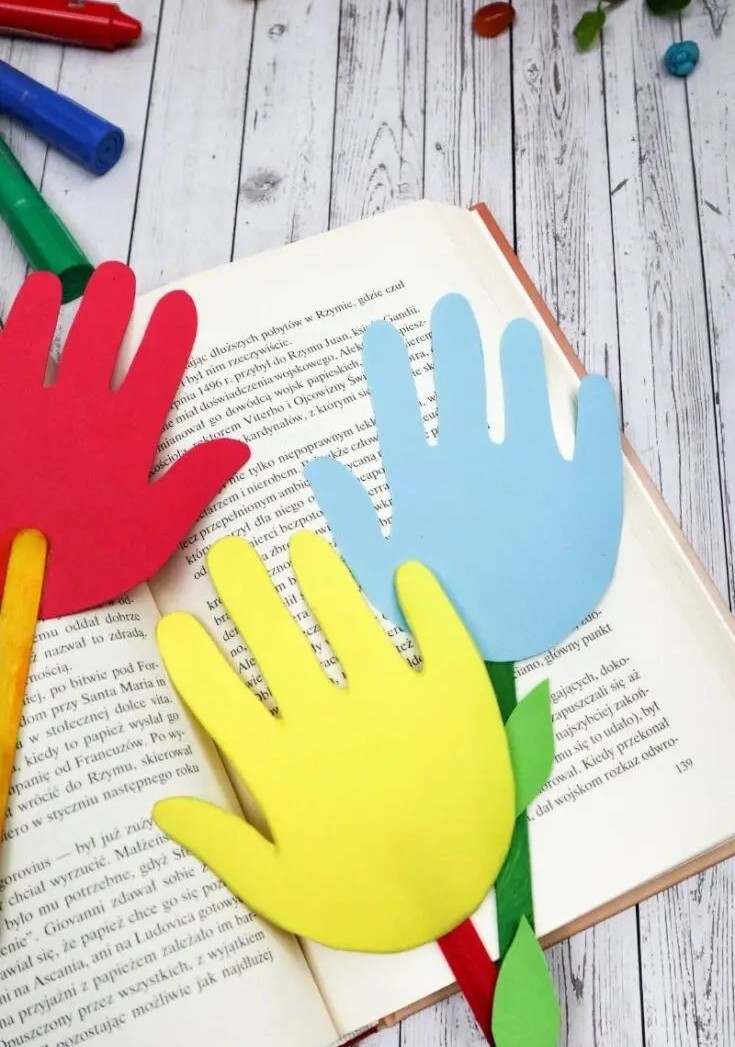
Satisfy your little ones’ eagerness for a bookmark by introducing them to a fun and easy project: creating handprint bookmarks! While waiting for pressed flowers to dry can be a bit of a wait, this activity gets kids excited about reading and sets the stage for more creative endeavors. All you need is some cardstock, a willingness to help your little ones trace their handprints, and a craft stick or two. With just a few simple steps, glue the stick to the bottom of the bookmark and voilà!
You’ve got a one-of-a-kind keepsake that’s sure to delight.
Painted Flower Pots
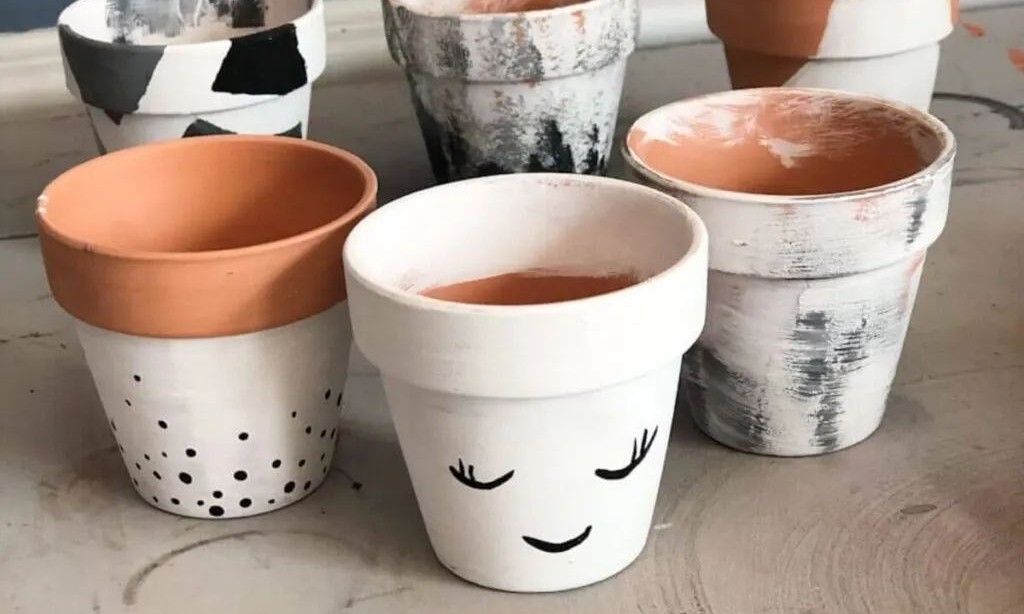
When it comes to giving your flower pots a makeover, there are countless ways to do so. Whether you’re working with old, worn-out pots or brand new ones, a little creativity and some basic painting skills can go a long way in transforming them into beautiful planters. The examples shown here showcase a monochromatic aesthetic, perfect for those who appreciate minimalistic-chic designs.
Begin by applying a base coat using your paintbrushes, allowing the layer to dry completely before moving on to the next step. Once the base coat is fully set, apply a sealant to ensure the final result remains vibrant and durable. With these simple steps, you’ll be well on your way to creating stunning planters that will elevate the beauty of your flowers.
DIY Leaf Candle Holder
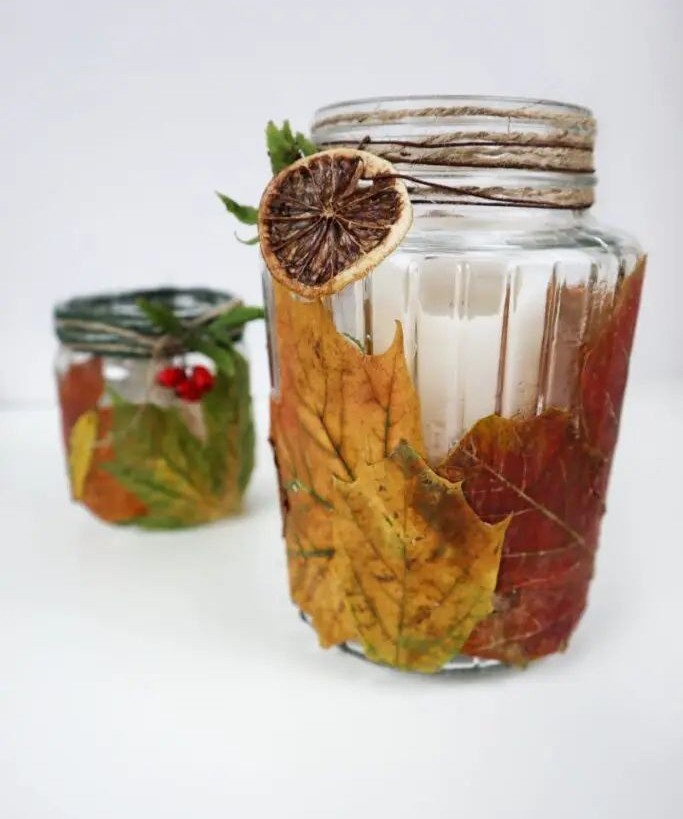
Take a stroll into your backyard and discover the abundance of natural materials available for this DIY project – leaves! The beauty lies in the seasonal variety, allowing you to collect jars filled with distinctively colored leaves. Imagine the autumn hues adorning a cinnamon-scented candle jar, enhanced by the subtle sweetness of a dehydrated orange peel. Simply pierce a hole through the peel, thread some string around the rim, and secure it with a knot.
As you gaze upon your handcrafted candle jar, allow yourself to be enveloped in the warmth and aroma of cinnamon and citrus.
DIY Milk Carton Bird Feeder
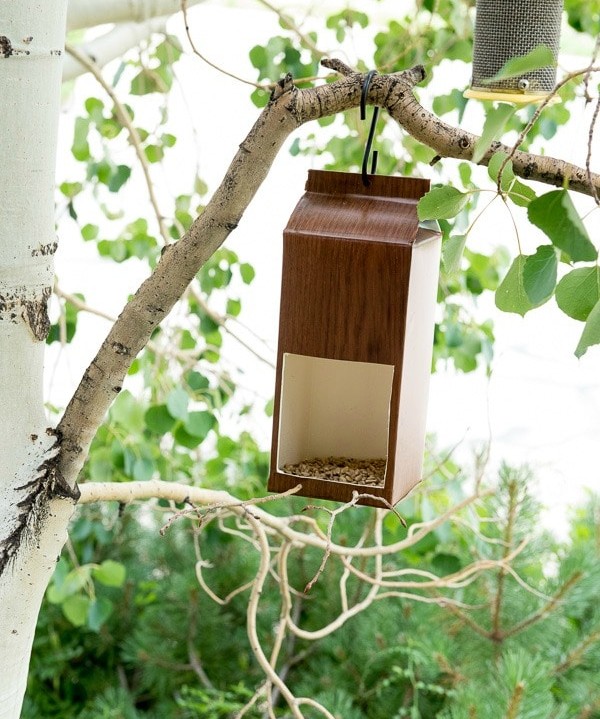
For bird enthusiasts, it’s only natural to have multiple bird feeders scattered around their home. You can place one in your backyard, another on your front porch, or even create a unique hanging feeder like this one by suspending it from a tree branch. To transform an old milk carton into a functional feeder, start by thoroughly cleaning and rinsing it with soap and water. Allow the container to dry completely before repurposing it for your feathered friends.
To complete the project, you’ll need a box cutter, some twigs for perches, and an S-hook to hang the feeder from its new branch-based perch.
Tissue Paper Pompom
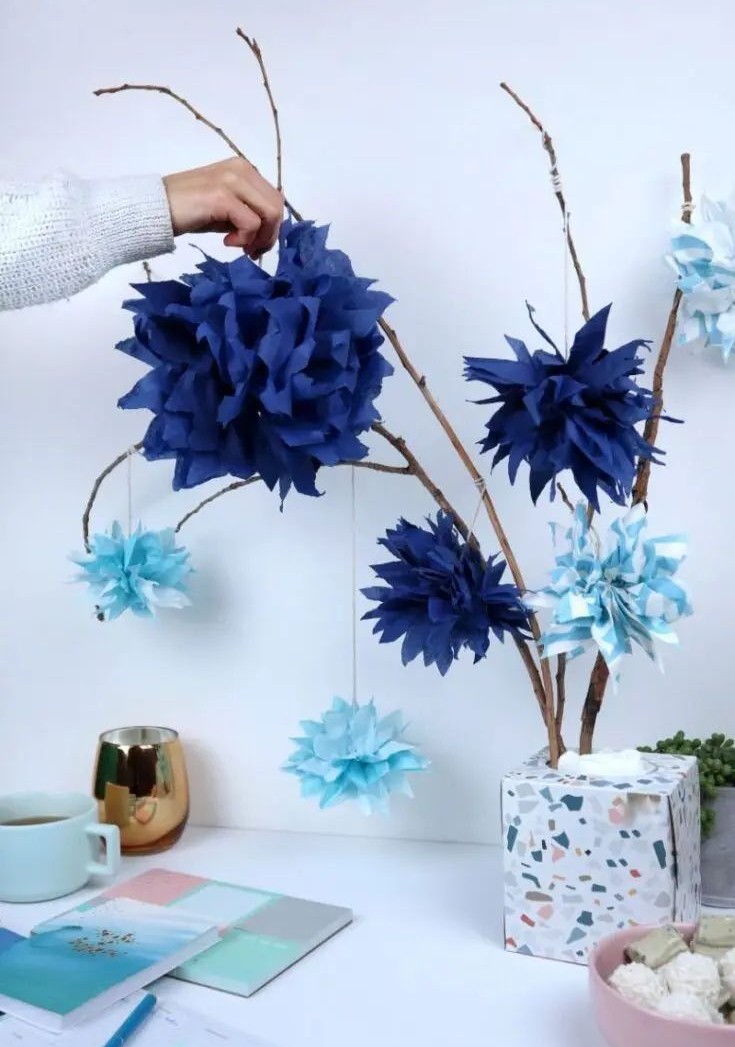
There’s an undeniable charm to working with tissue paper, don’t you agree? The tactile experience of manipulating its delicate fibers is simply irresistible. And who wouldn’t revel in the joyous crinkling sounds it makes when rumpled? For a crafting adventure that’s sure to delight, start by gathering a stash of vibrant colored tissue paper.
These delightful pom poms are perfect for adding a touch of whimsy to your home decor, whether as dangling decorations or incorporated into backdrops.
They also make fantastic accessories in photo booths, adding an extra layer of playfulness to your memories.
DIY Milk Carton Lanterns
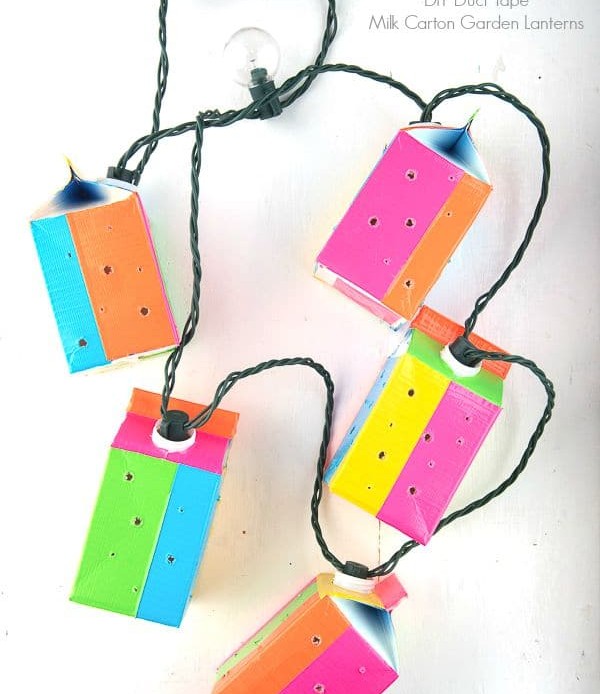
Get creative with your little ones by working on this fun craft project together! Since you likely already have all the necessary supplies on hand, simply gather a few empty milk cartons. Before you start decorating, make sure they’re squeaky clean by washing, rinsing, and drying them thoroughly. To add some extra flair, wrap washi tape around the cartons for a pop of color.
Once they’re dry and decorated, string them up with fairy lights and hang them on your porch to enjoy the whimsical display!
Paper Flowers
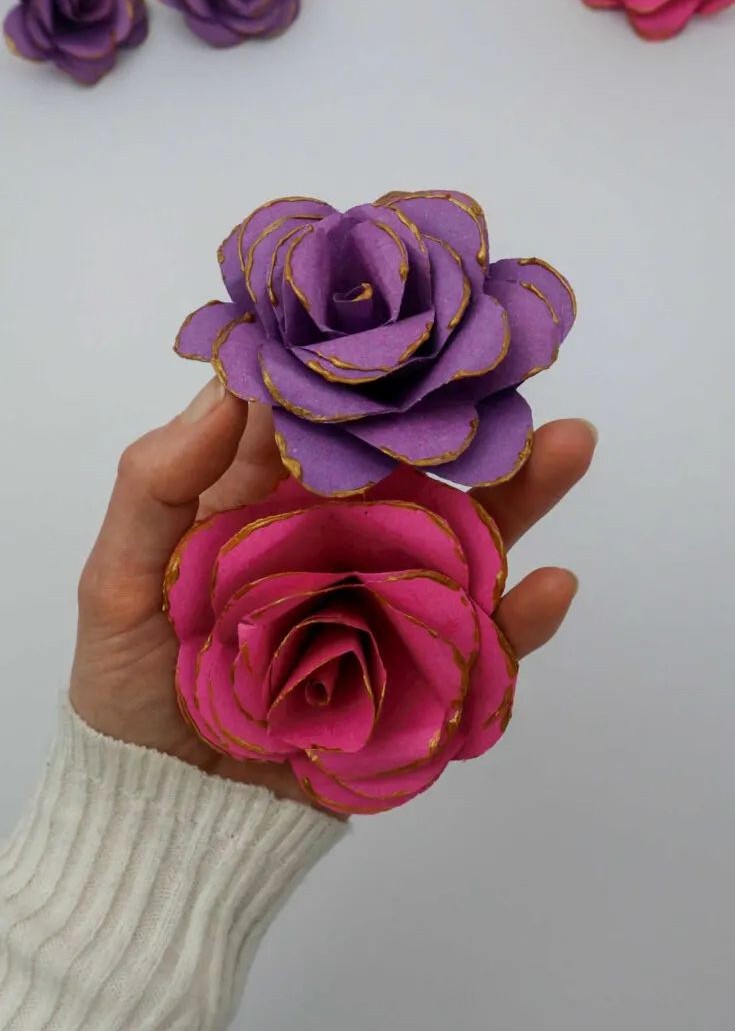
The versatility of paper flowers is one of their greatest advantages – they can be used to enhance a wide range of craft projects. As such, it’s a good idea to make a batch and store them for future use, rather than rushing to create each one as needed. What really sets these flowers apart, however, is the opportunity to add a touch of elegance with metallic glitter glue along their edges.
By experimenting with different paper types, sizes, colors, and textures, you can create an array of unique and attractive blooms. Furthermore, using patterned paper can result in truly stunning craft flowers that will elevate your projects to the next level.
Bottle Cap Emoji Magnets
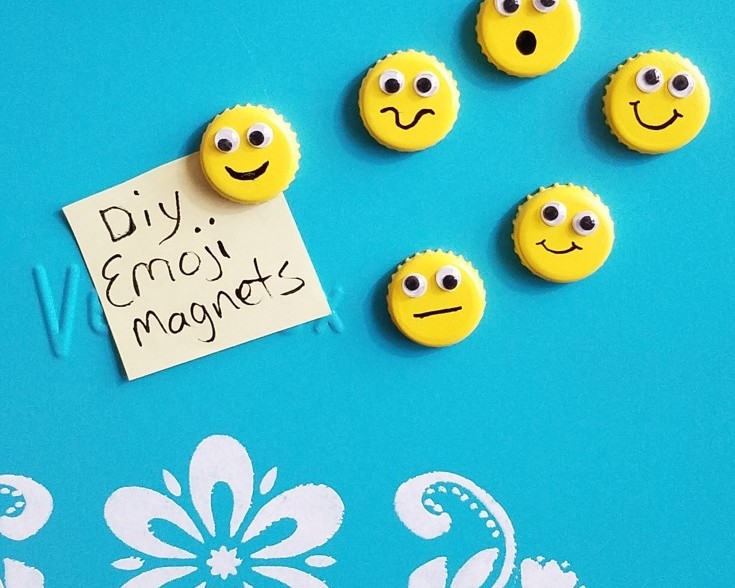
Do you recall collecting soda bottle caps as a kid and decorating them with paint? It was an exciting hobby! Let’s revive that nostalgia, but this time let’s craft emojis instead of painted caps. To get started, grab some googly eyes from [insert source] to add a playful touch. In addition, you’ll need gorilla glue to securely attach the magnets within the bottle cap. Be sure to use round magnets that fit snugly inside the cap.
DIY Woven Bowl Out Of Paper Plate
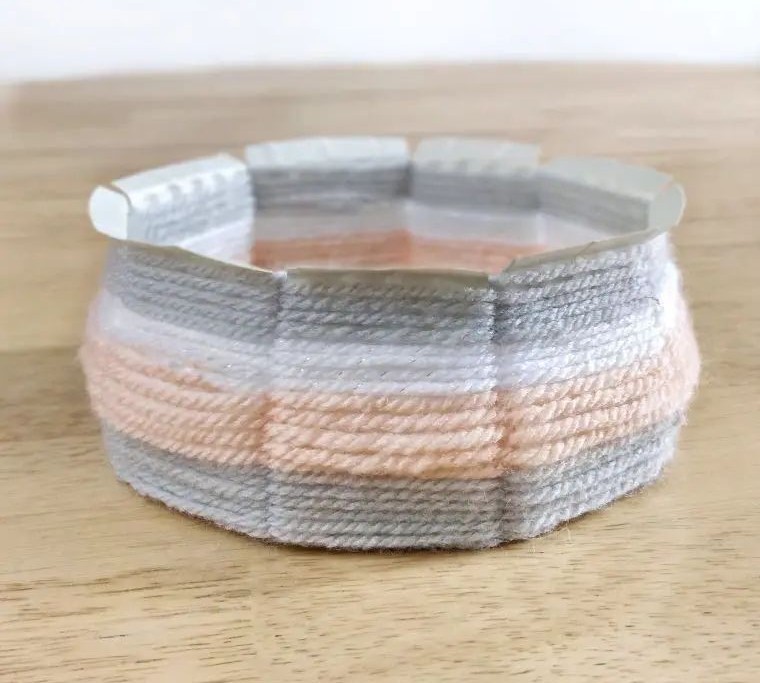
As an avid crocheter, I have a plethora of yarn at my disposal, which not only fuels my passion for the craft but also provides me with a constant supply of leftover skeins from completed projects. These scraps often find their way into new creations, like DIY woven bowls. If you’re sitting on a stash of yarn as well, grab a few skeins and a paper plate – it’s time to get creative!
The beauty of this project lies in its versatility; you can experiment with various colors, textures, and ply types to create a truly unique piece.
DIY Cork Honeybee
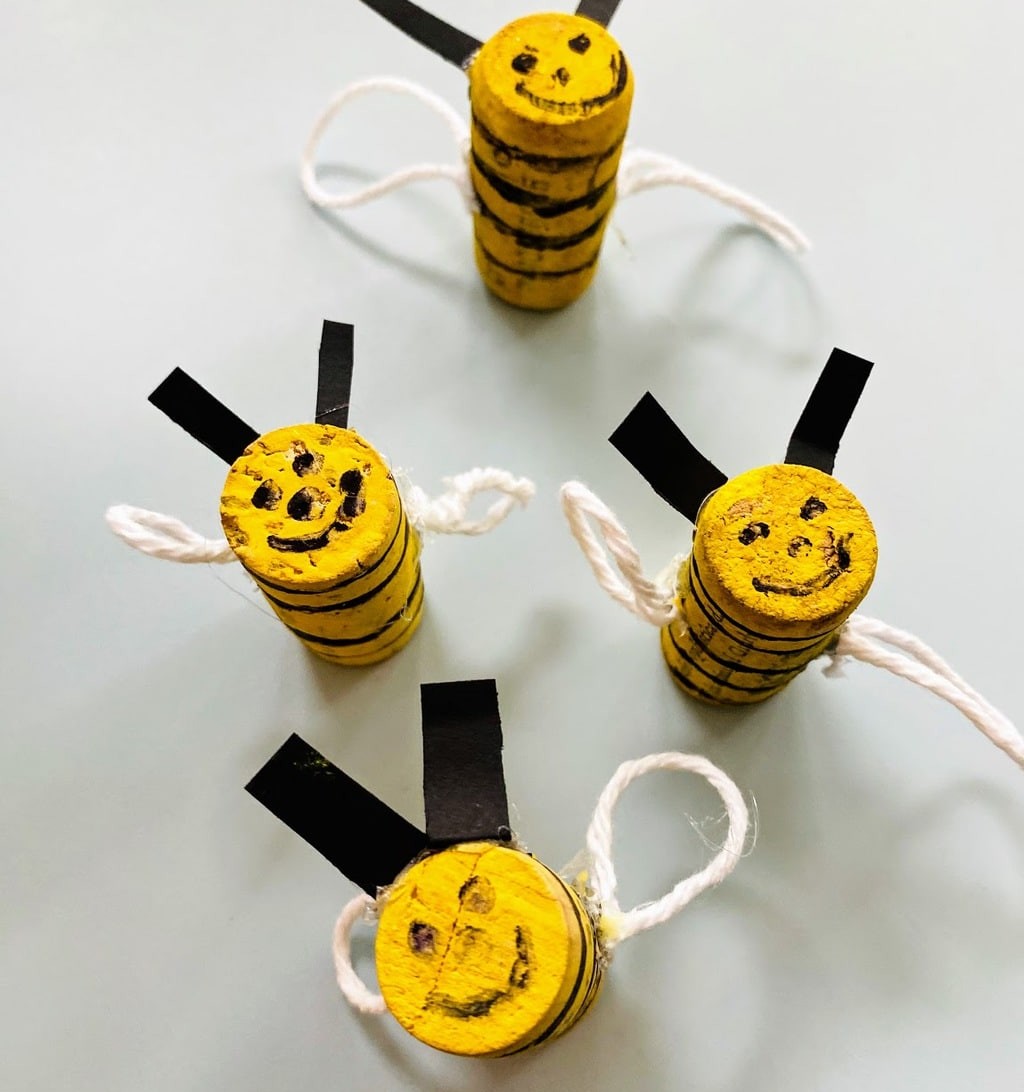
If you have a stash of old wine corks or leftover corks from a past project, it’s time to get creative! Begin by painting the corks in bold black and yellow stripes using your paints and brushes. Once they’re dry, take some cotton twine or yarn and shape them into wing-like forms that will add texture and visual interest to your final product. Next, use a strong adhesive to attach the wiggly wings to the sides of the corks.
To give your creations some personality, use a marker to draw on eyes, or glue on some playful googly eyes for an added touch.
DIY Bottle Cap Candle
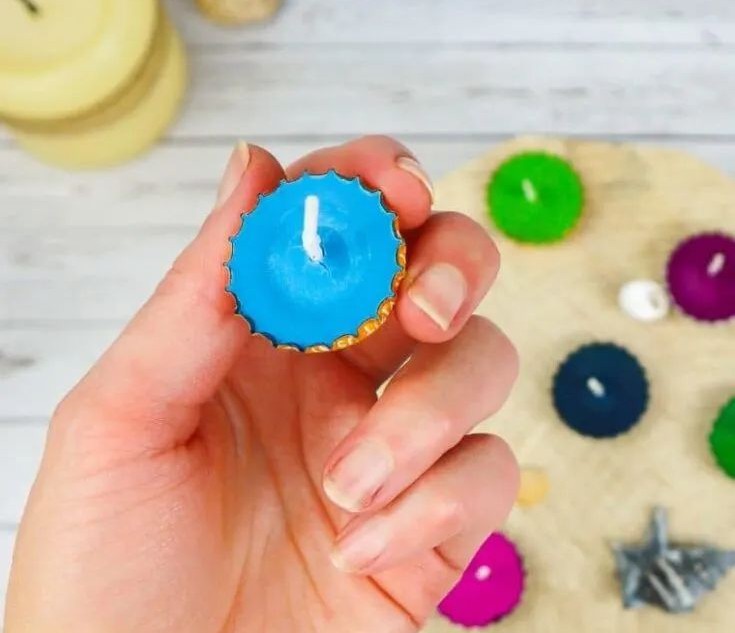
While bottle cap candles may seem like a small-scale project, their impact on decor can be significant. These tiny candles pack a big punch when it comes to adding character to your space.
If you’re running low on supply, don’t worry – just grab some bottle caps and wicks (or tea light wicks that you’ll need to trim down). This craft is particularly well-suited for men who want to try their hand at something new.
Washable Home Fabric Paint
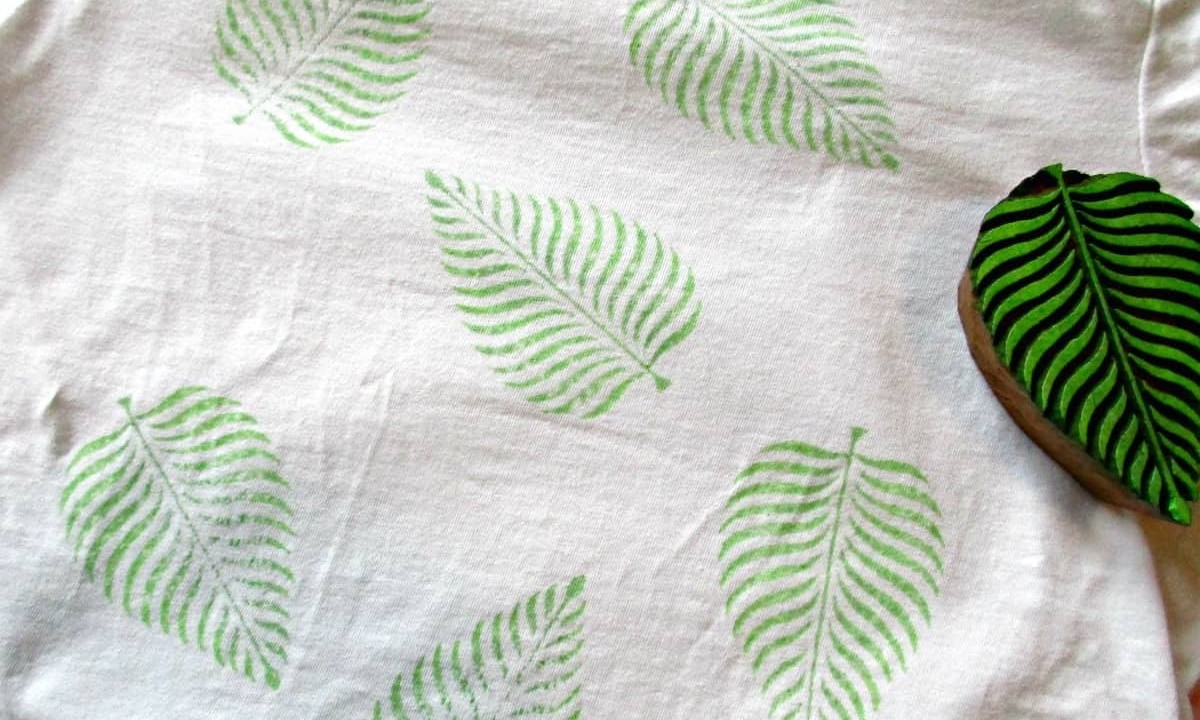
Make your own fabric paint by mixing acrylic paint with household ingredients like glycerine and white vinegar. The result is a versatile medium that allows for endless creativity. Once you’ve concocted your custom paint, use it to add unique designs to fabrics using wooden stamps or brushes. Simply apply the paint to the stamp or brush, then press it onto your chosen fabric to achieve the desired design.
And don’t be afraid to think outside the box – why settle for a plain green leaf when you can create a vibrant, rainbow-colored masterpiece? The possibilities are endless!
Paper Picture Frame
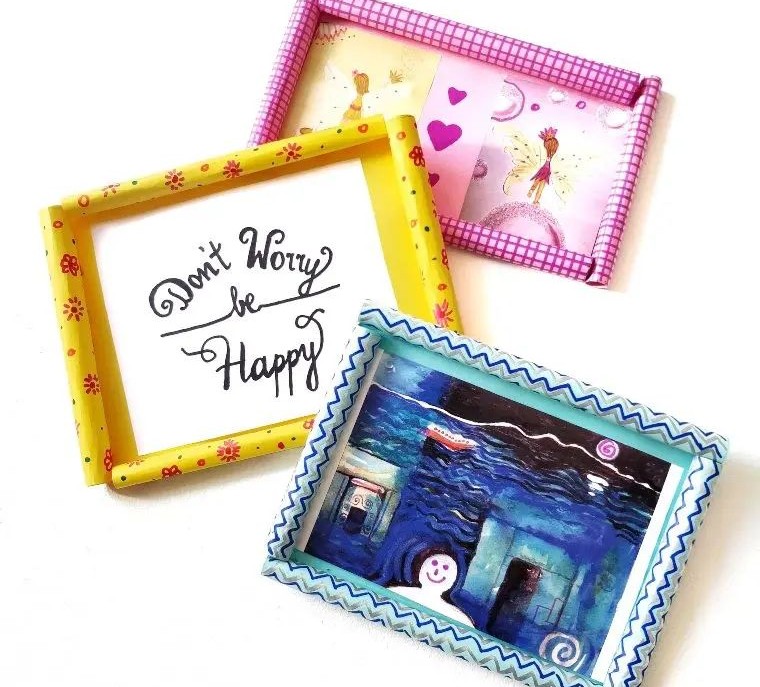
With craft paper at hand, you’re poised to create something special. The abundance of picture frames in your home is a testament to their versatility. Begin by designing and decorating the paper with permanent markers before constructing the frame. A series of small, repetitive patterns and motifs will ensure that your design remains intact, even when cutting the paper for the frame.
For added inspiration, you may want to explore construction paper crafts and discover new ways to express yourself.
DIY Giant Jenga
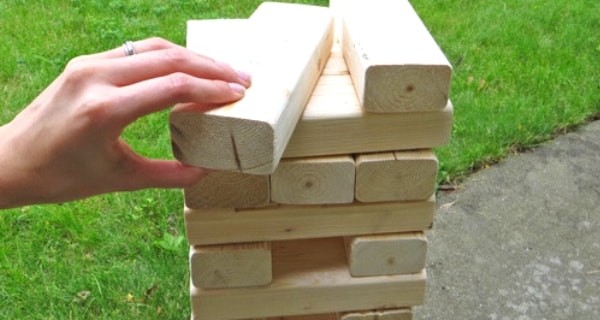
Imagine the scene: a warm and sunny Sunday afternoon, the smell of barbecue wafting through the air as friends gather in the backyard. The perfect setting for a game of giant Jenga that’s sure to be a hit. In fact, why not take it to the next level by introducing themed Jenga games? Think about how much fun you’ll have with truth or dare Jenga, but imagine the excitement of playing Jenga with a twist.
You could create a pirate-themed game, a superhero-themed one, or even a movie-themed game that ties in perfectly with your Sunday Funday vibe.
Concrete Succulent Planters
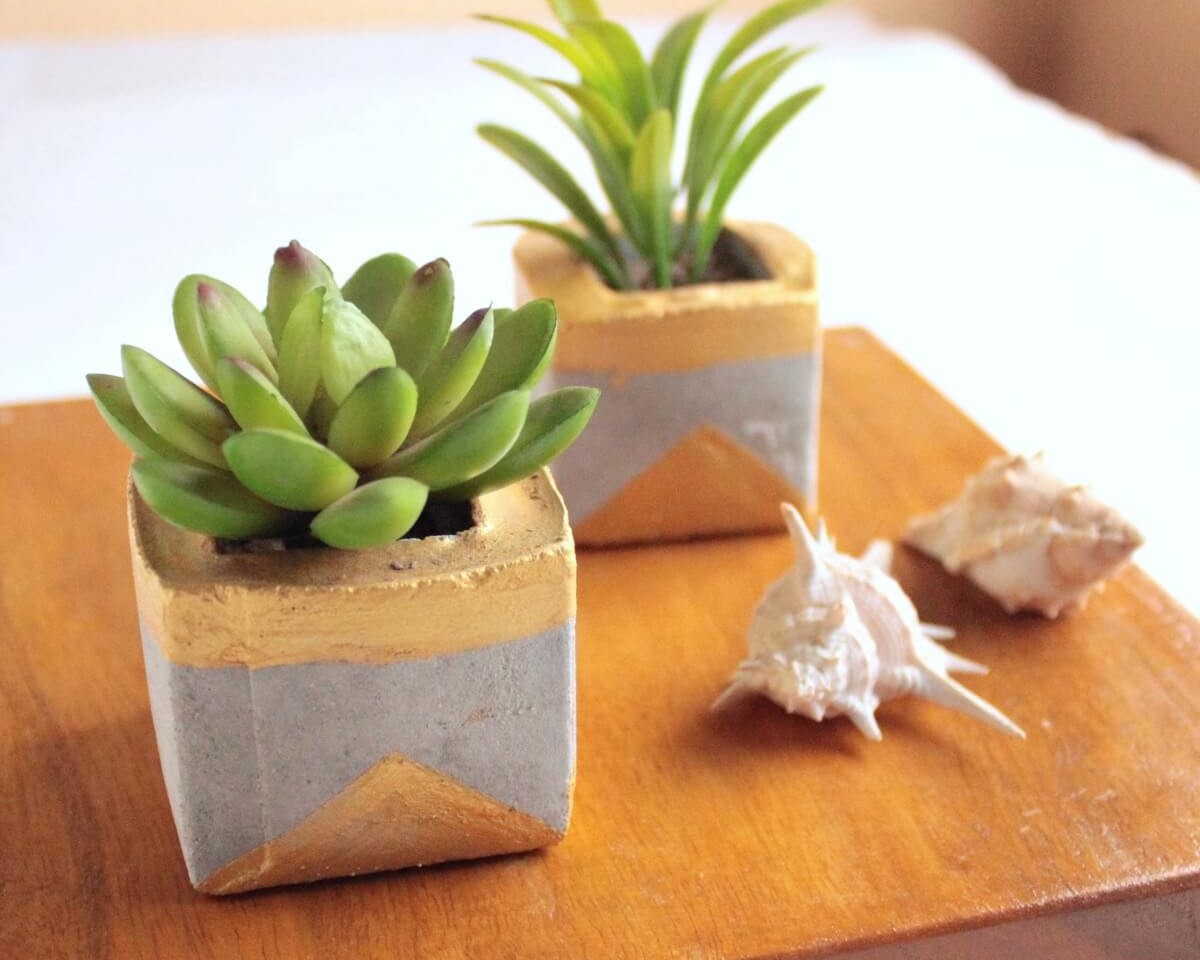
Urban-tinged elegance is effortlessly achieved through the strategic combination of concrete planters and succulents, seamlessly merging nature’s essence with urban chic. This harmonious blend can be effortlessly brought into your home, much like that. Recreating these modern planters for your personal space is surprisingly straightforward.
Begin by gathering a few essential materials: dry cement from your local supplier, a plastic bucket to mix the mixture, sand for added texture, and a sturdy stick to stir the concoction. To shape your concrete planter, you’ll need two cardboard boxes that can serve as molds. Feel free to experiment with different sizes to achieve the desired effect. Alternatively, repurpose an old milk carton or cereal box by reshaping it to create smaller planters.
DIY Boho Wall Decor
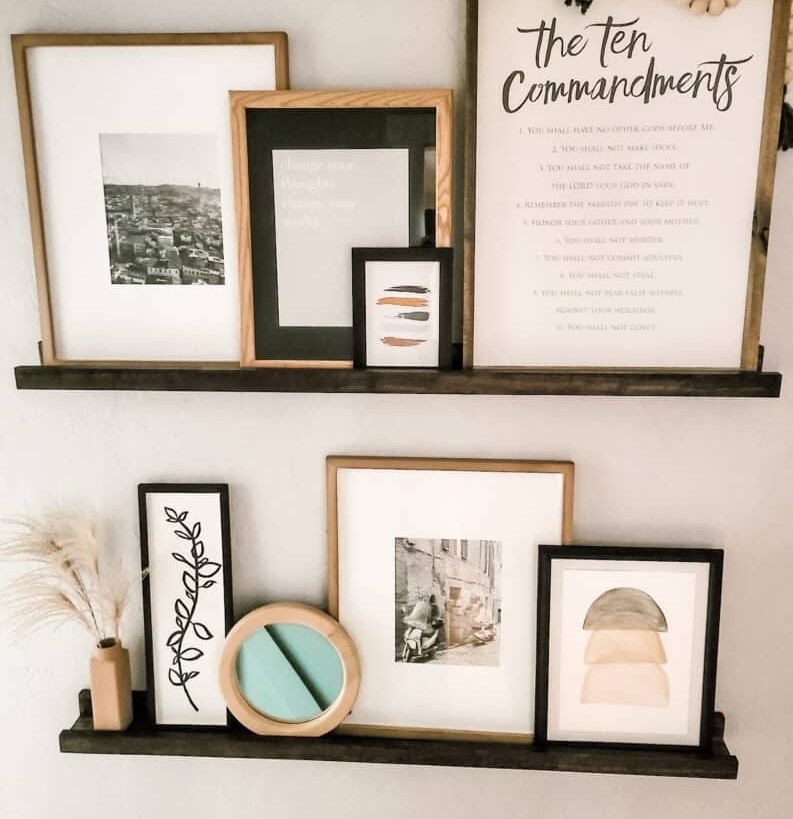
Add a touch of boho-chic flair to your home decor without breaking the bank! Create your own abstract wall piece using watercolor paints and a picture frame. Simply gather your materials – brushes, watercolor paints, watercolor paper, and a frame (you can even DIY it if you’re handy with woodwork). Browse through Pinterest for inspiration on bohemian patterns and designs that resonate with your unique style.
With just a few simple steps, you’ll have a one-of-a-kind piece that adds a personal touch to any room.
DIY Wood Storage Bookends
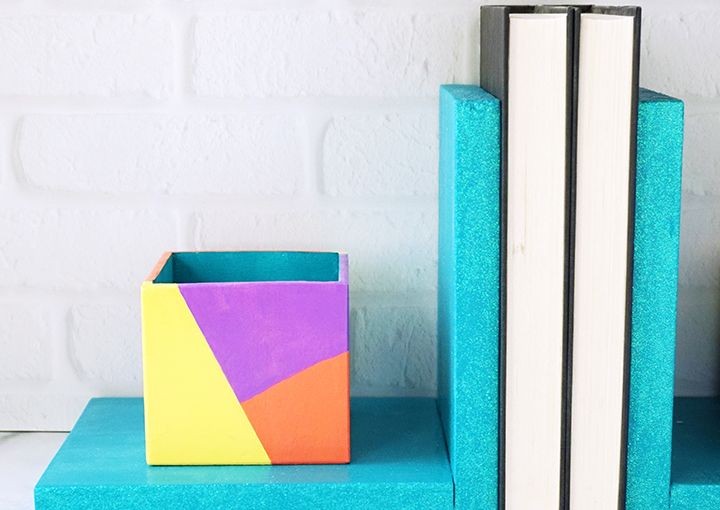
As a crafty individual with a passion for woodworking and crafting, I’m sure you’ve accumulated a stash of woodblocks and scrap wood just begging to be transformed into something new. One creative project that’s perfect for upcycling these materials is a set of wooden bookends! These handmade keepsakes make thoughtful gifts for book lovers in your life, whether it’s a friend, family member, or significant other.
To take it to the next level, consider attaching small boxes to store bookmarks or other treasured mementos. Then, let your creativity shine by painting the wood in vibrant hues or using a wood stain to add depth and dimension. For an added touch of elegance, you can also carve simple yet beautiful designs onto the wood.
Upcycled Vase
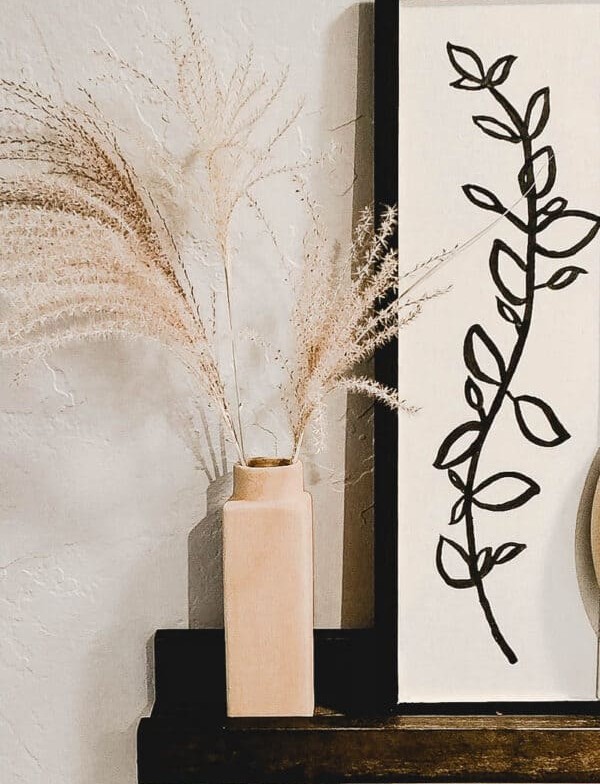
Want to breathe new life into an old vase while keeping it visually appealing? Look no further! By embracing the bohemian spirit, you can effortlessly transform your glass vase into a unique ceramic-finish masterpiece that will be the envy of your home decor enthusiasts. And the best part? You won’t need any fancy materials or skills to achieve this look – just everyday baking soda and acrylic paint.
The result is a beautiful, one-of-a-kind piece that’s not only functional but also budget-friendly. So why not get creative and turn an old vase into something truly special? It’s the perfect DIY project for anyone looking to add a touch of boho chic to their space.
Honeycomb Wood Shelves
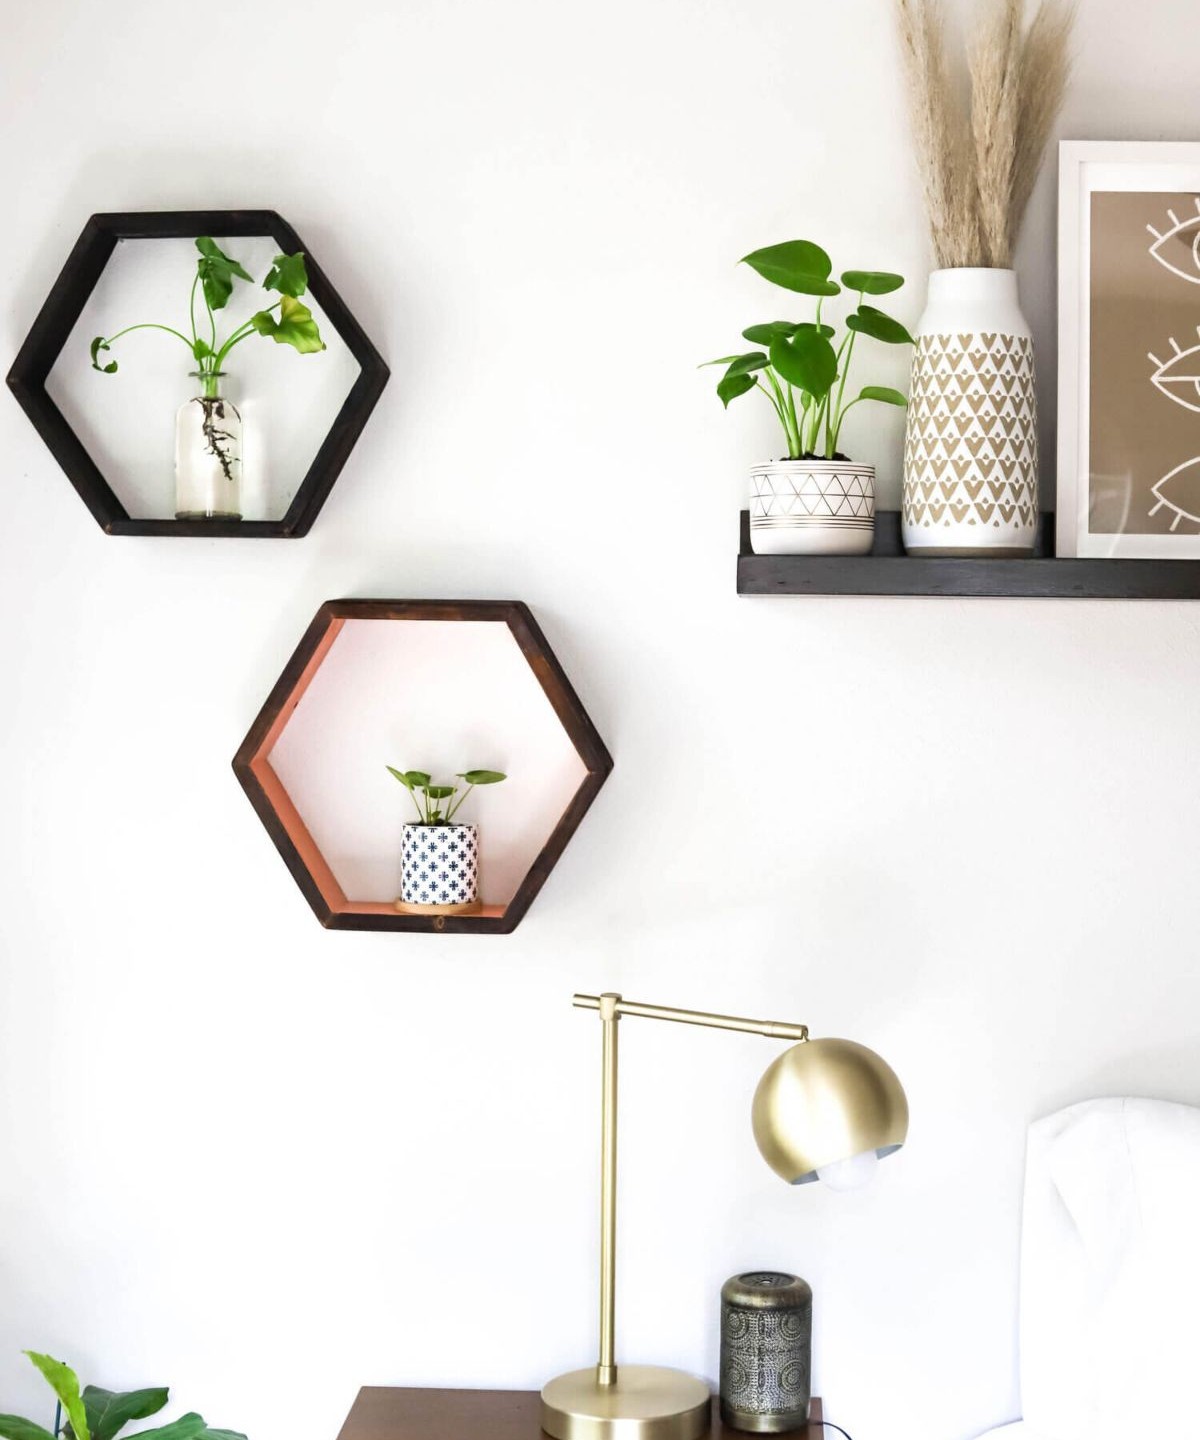
While floating wood shelves can be lovely, there are more impactful and stylish ways to maximize your wall space. One such example is the honeycomb shelf. Not only do these unique shelves elevate the aesthetic appeal of your wall, but they also offer additional storage capacity. The honeycomb design allows you to place items both within the cells as well as on top, providing a sense of depth and visual interest.
To ensure the long-term effectiveness and durability of this design, it’s essential to opt for high-quality wood materials.
DIY Wooden Tray
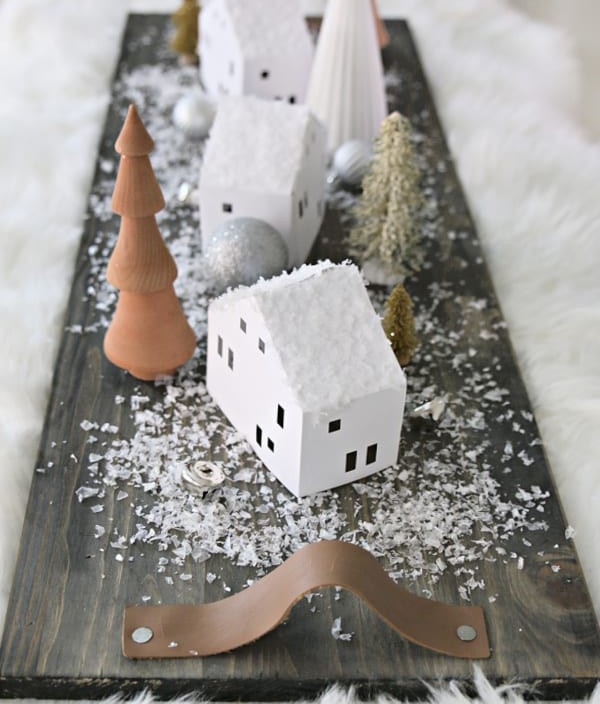
For those with a passion for woodworking, it’s common to accumulate scraps of wood in the workshop. Rather than discarding these remnants, why not breathe new life into them by transforming old wooden planks into a stunning tray? To get started, select your preferred wood stain and some strips of leather fabric for crafting the handles. The harmonious pairing of wood and leather is undeniable – much like the perfect blend of flavors in a classic peanut butter and jelly sandwich.
Transfer Image Onto A Candle
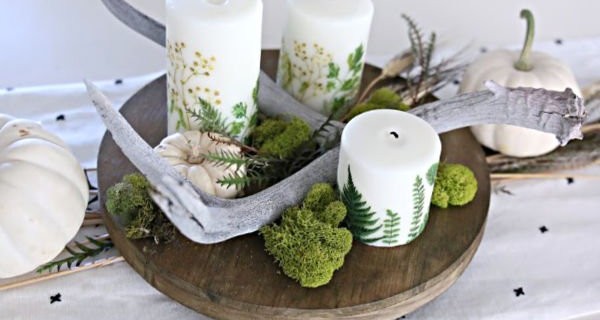
I often thought that creating photo candles would be a complex process, but surprisingly, it’s quite straightforward. The misconception likely stems from the perceived complexity of transferring images onto a candle. However, with the right materials, you can achieve this in no time.
To get started, make sure to have a suitable candle at your disposal. Additionally, gather the following supplies: patterned paper napkins, a printer, wax paper, washi tape, and a blow dryer.
Once you’ve assembled everything, you’re ready to begin! Simply follow these steps and you’ll be creating beautiful photo candles in no time.
