Take a moment to appreciate the simplicity and creativity of upcycling leftover toilet paper rolls into a DIY phone holder. This fun craft project is perfect for people of all ages, from teens to kids to adults. There’s something special about transforming an everyday item like a toilet paper roll into a functional and stylish phone holder. It’s a testament to the power of creative thinking and the ability to turn trash into treasure.
One of the best things about this project is that it’s ridiculously easy to make, requires no specialized skills or materials, and won’t break the bank. Plus, you probably already have everything you need right at home, making it the perfect solution for a quick DIY fix.
What You’ll Need to Make These Phone Holders
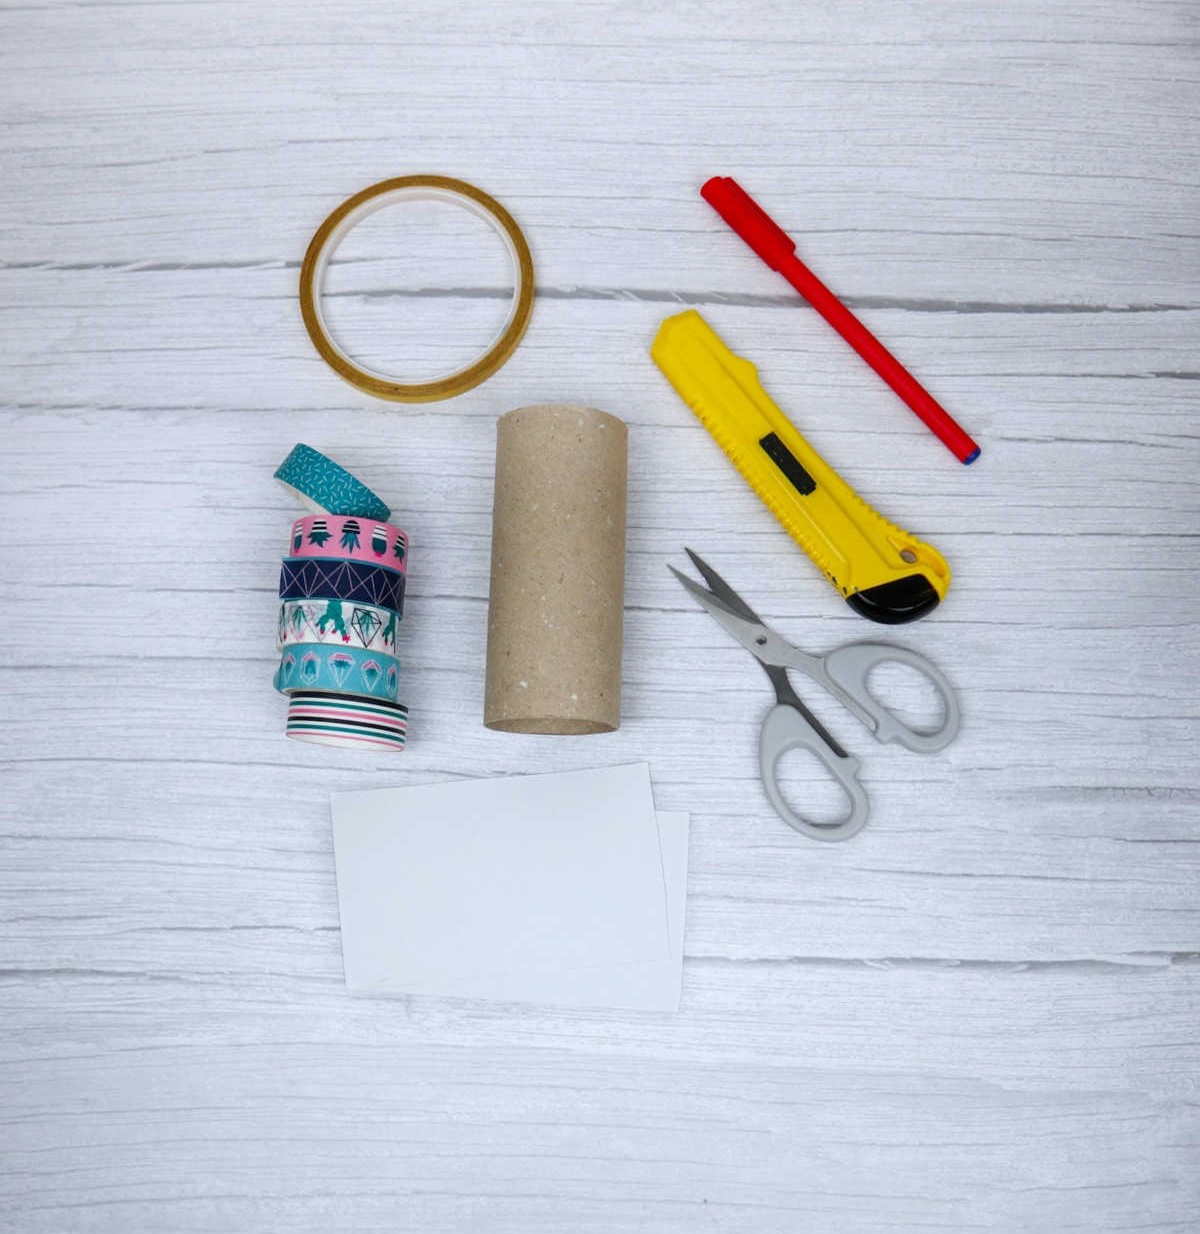
To get started on this DIY project, take a moment to review the essential materials required. You’ll need a few basic supplies, including scissors or a cutter, a marker for decoration, a toilet paper roll as your base structure, washi tape and double-sided tape or glue for bonding, and two pieces of paper measuring 2.5 inches by 3 inches. A ruler may also come in handy if you want to achieve precise cuts.
Once you’ve gathered all the necessary supplies, feel free to proceed with the step-by-step guide that follows.
How to Make DIY Phone Holder from Toilet Paper Roll
Before diving into the nitty-gritty details of this DIY project, take a moment to prepare yourself with the right tools – literally. Make sure you have your trusty mobile phone within arm’s reach, as it will likely be your go-to resource for referencing instructions or seeking inspiration along the way.
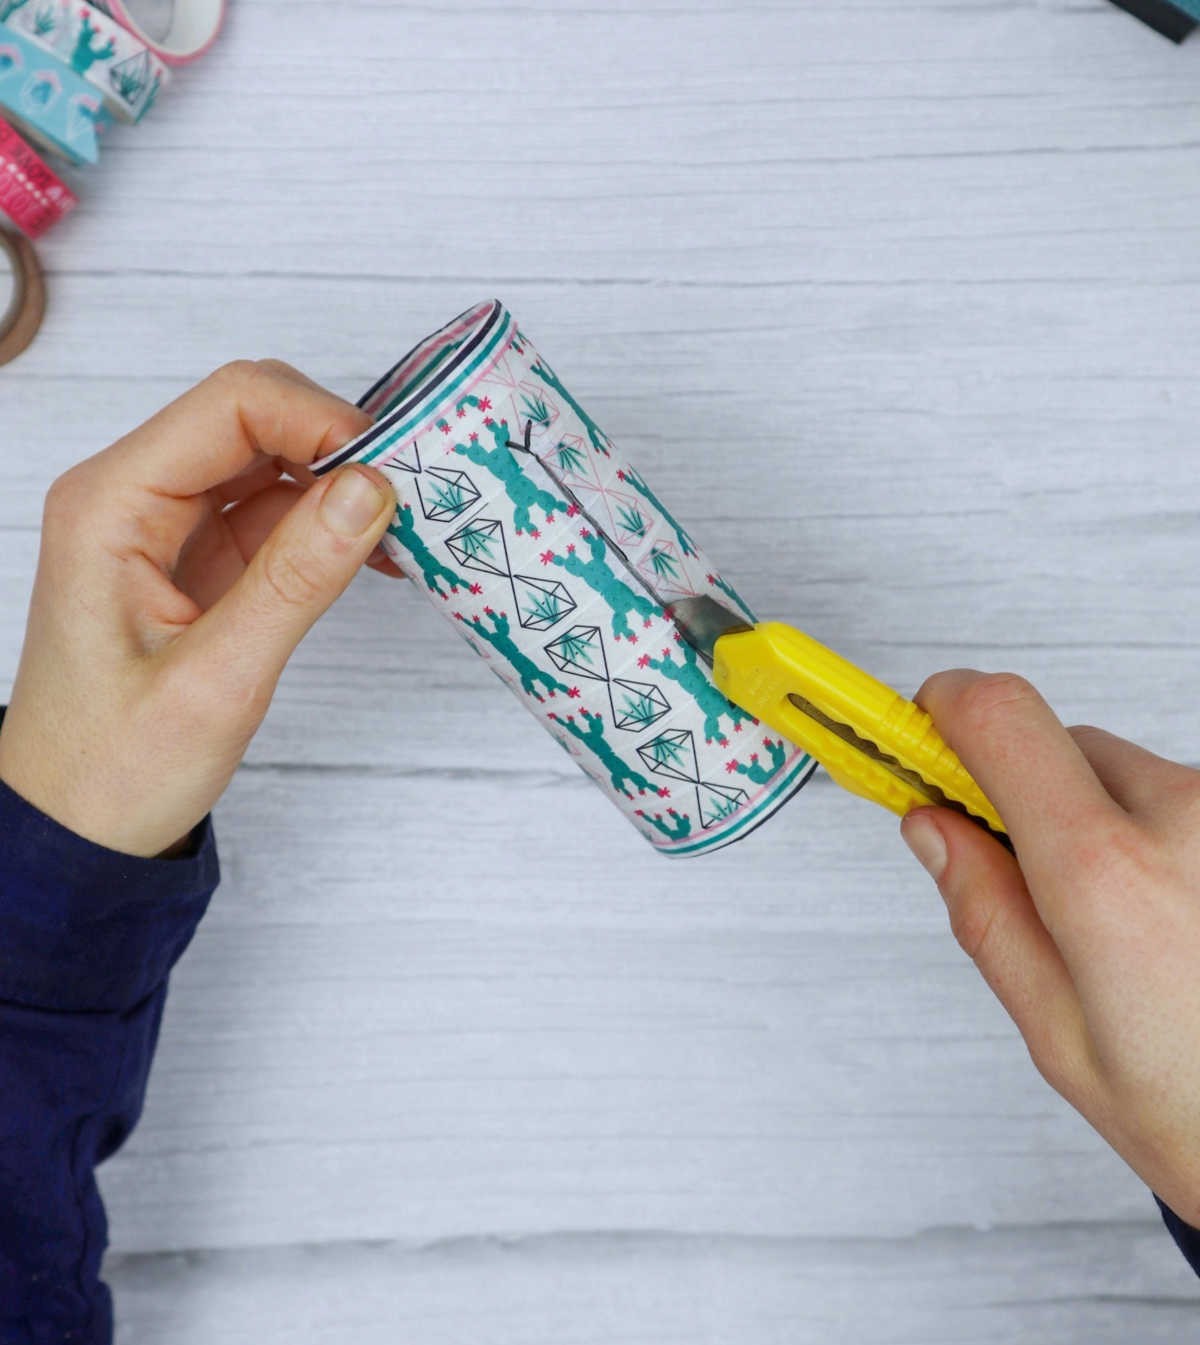
Step 1
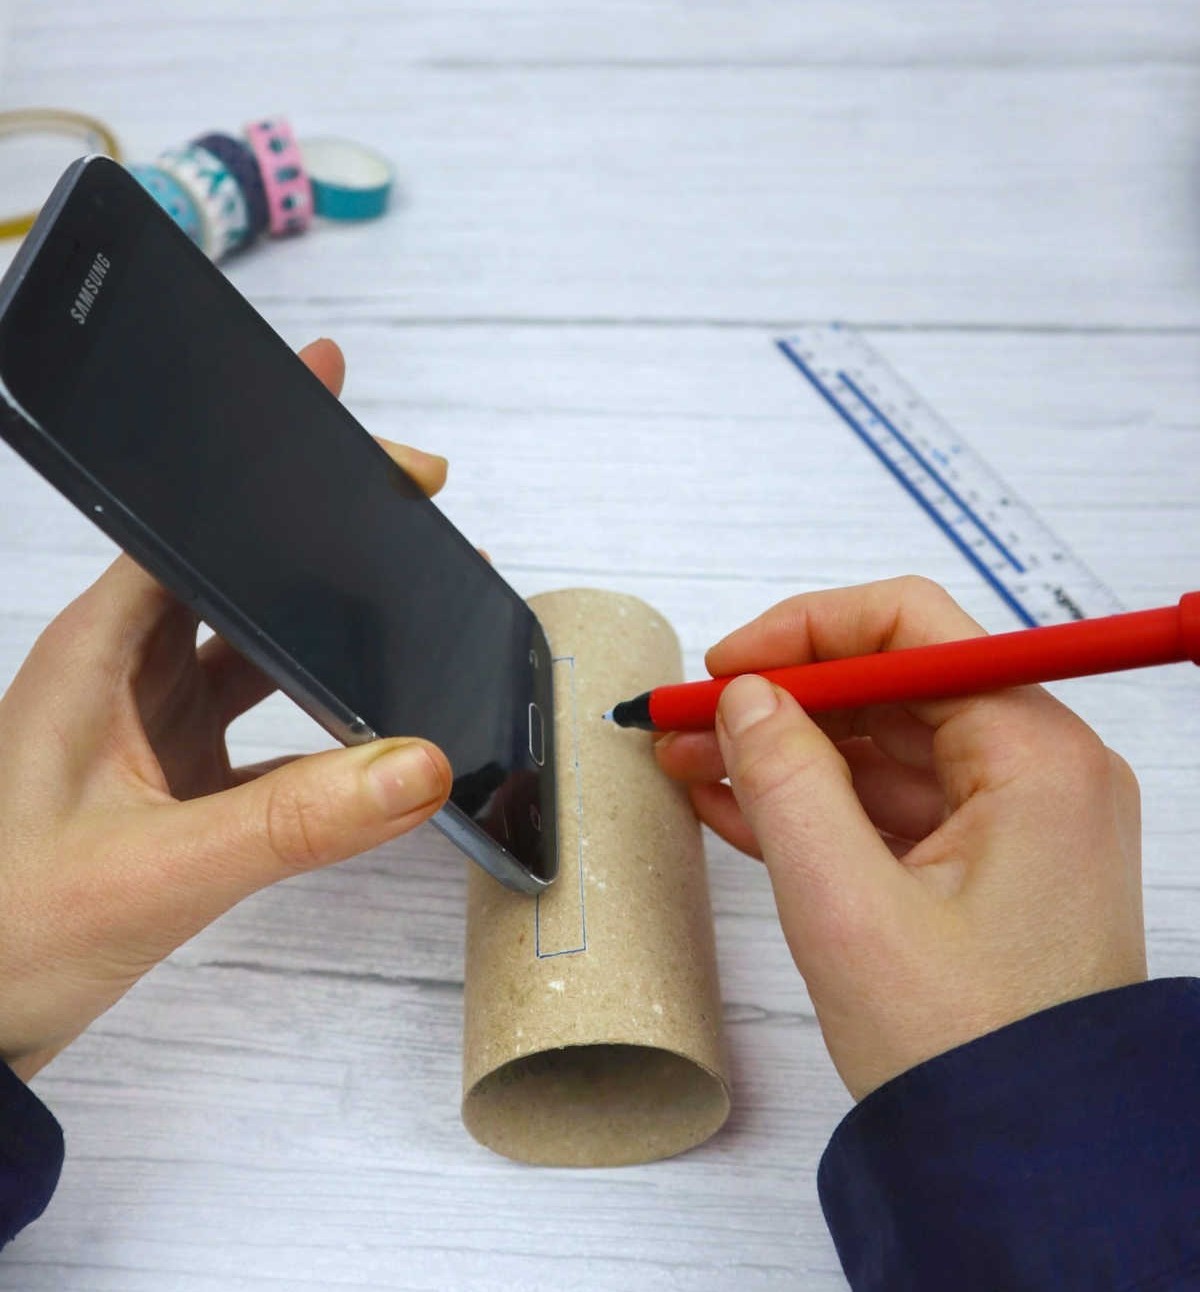
To determine the ideal size of your mobile holder slot, hold your phone holder against a toilet roll and draw an outline around the base of your phone with a pencil or marker. Leave enough clearance for easy insertion and removal, while also ensuring it’s snug enough to keep the phone securely in place. This simple technique will help you create a custom-fit holder that keeps your phone organized and within reach.
Step 2
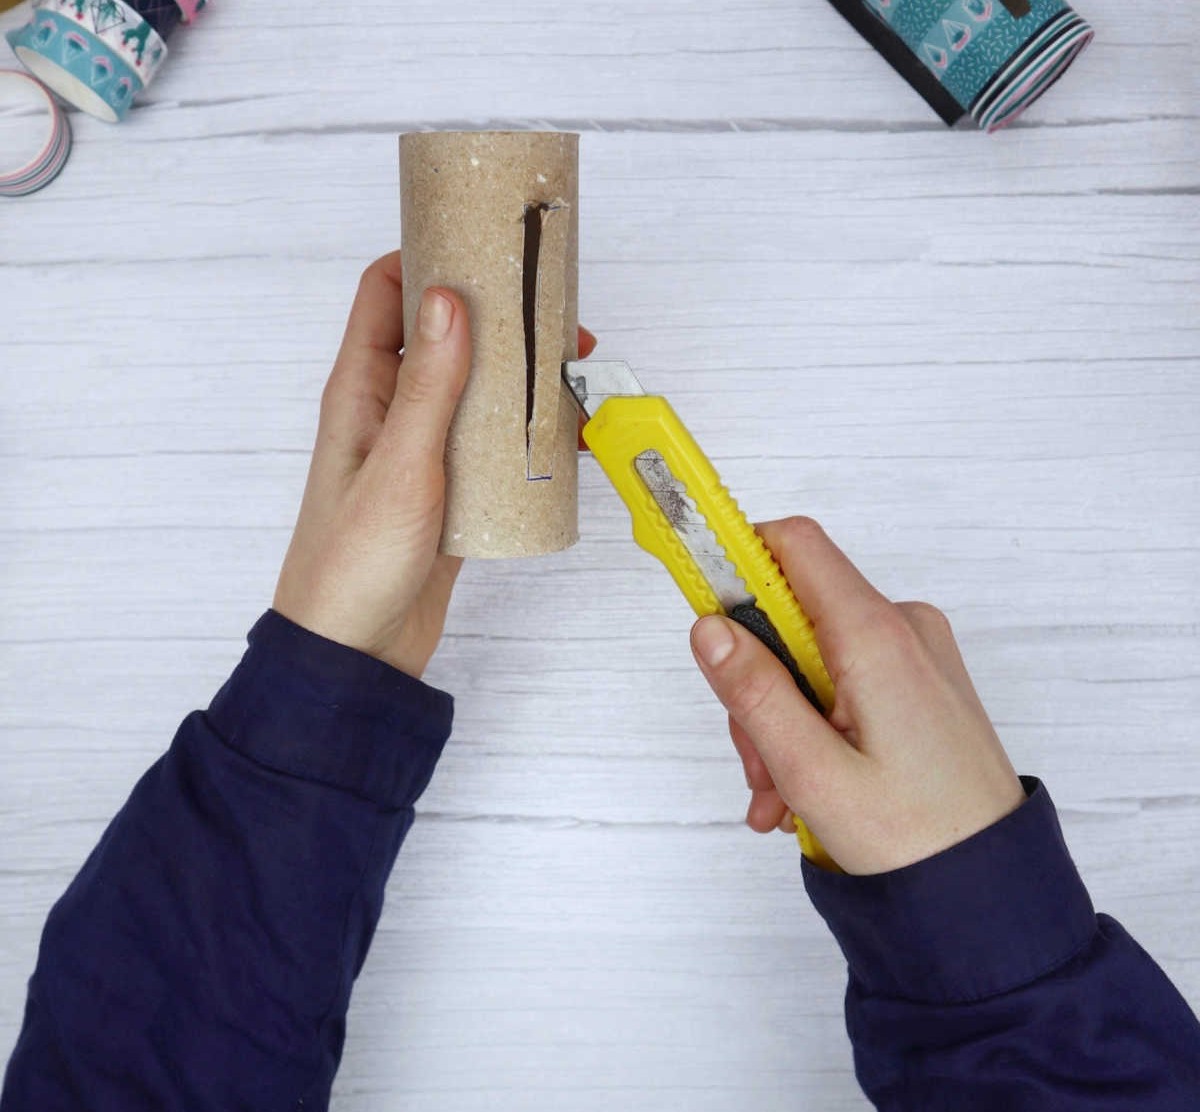
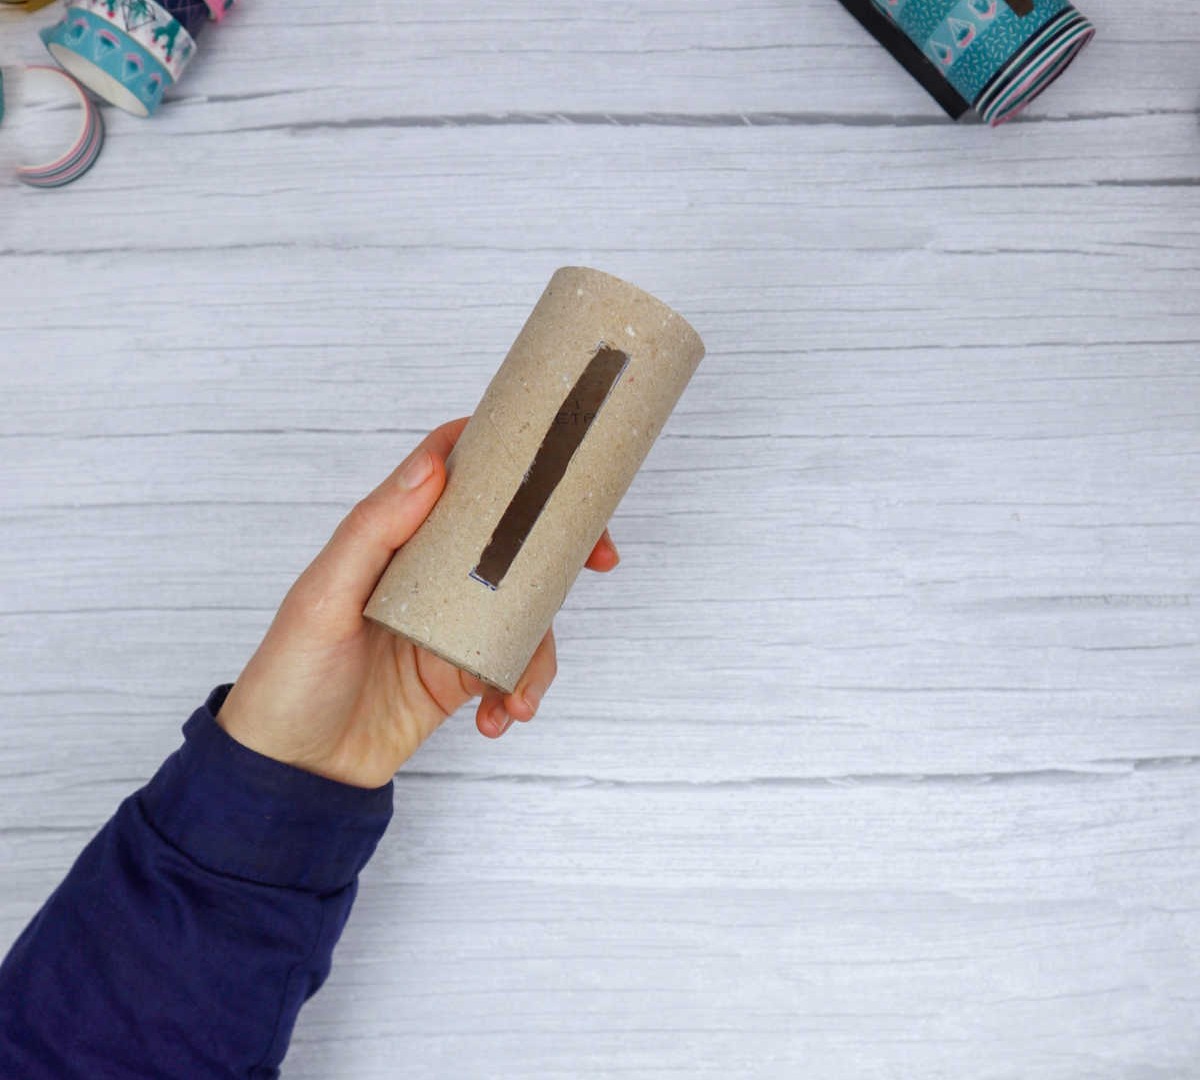
To complete this stage, employ your craft cutter to carefully extract the design you previously sketched out. As you do so, make sure to maintain a steady hand to achieve a precise and seamless cut along the edges.
Step 3
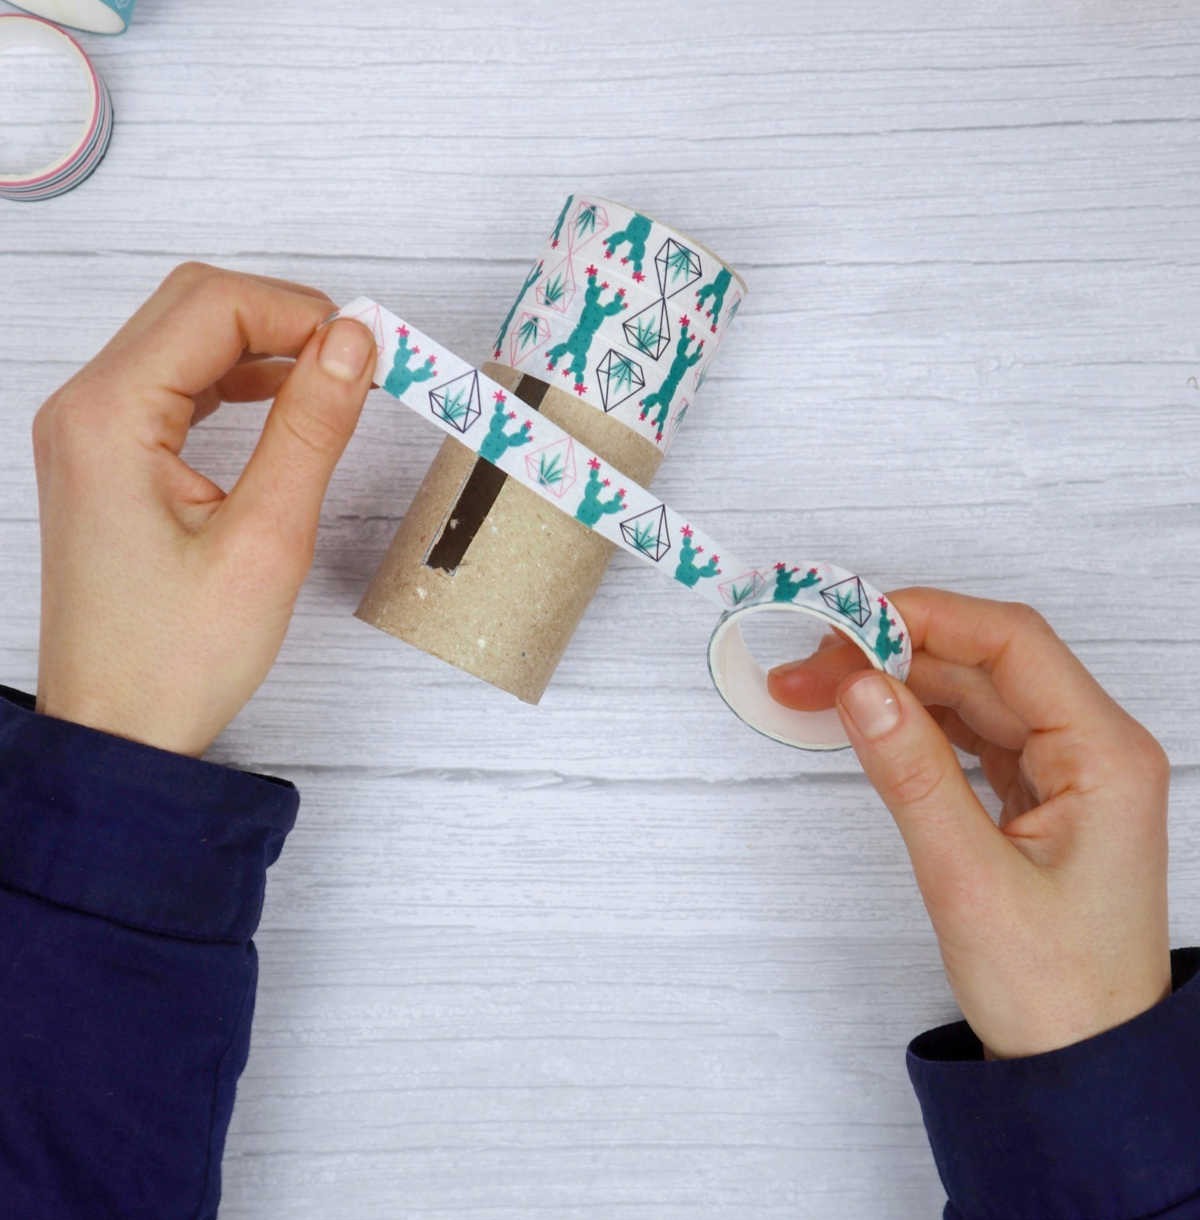
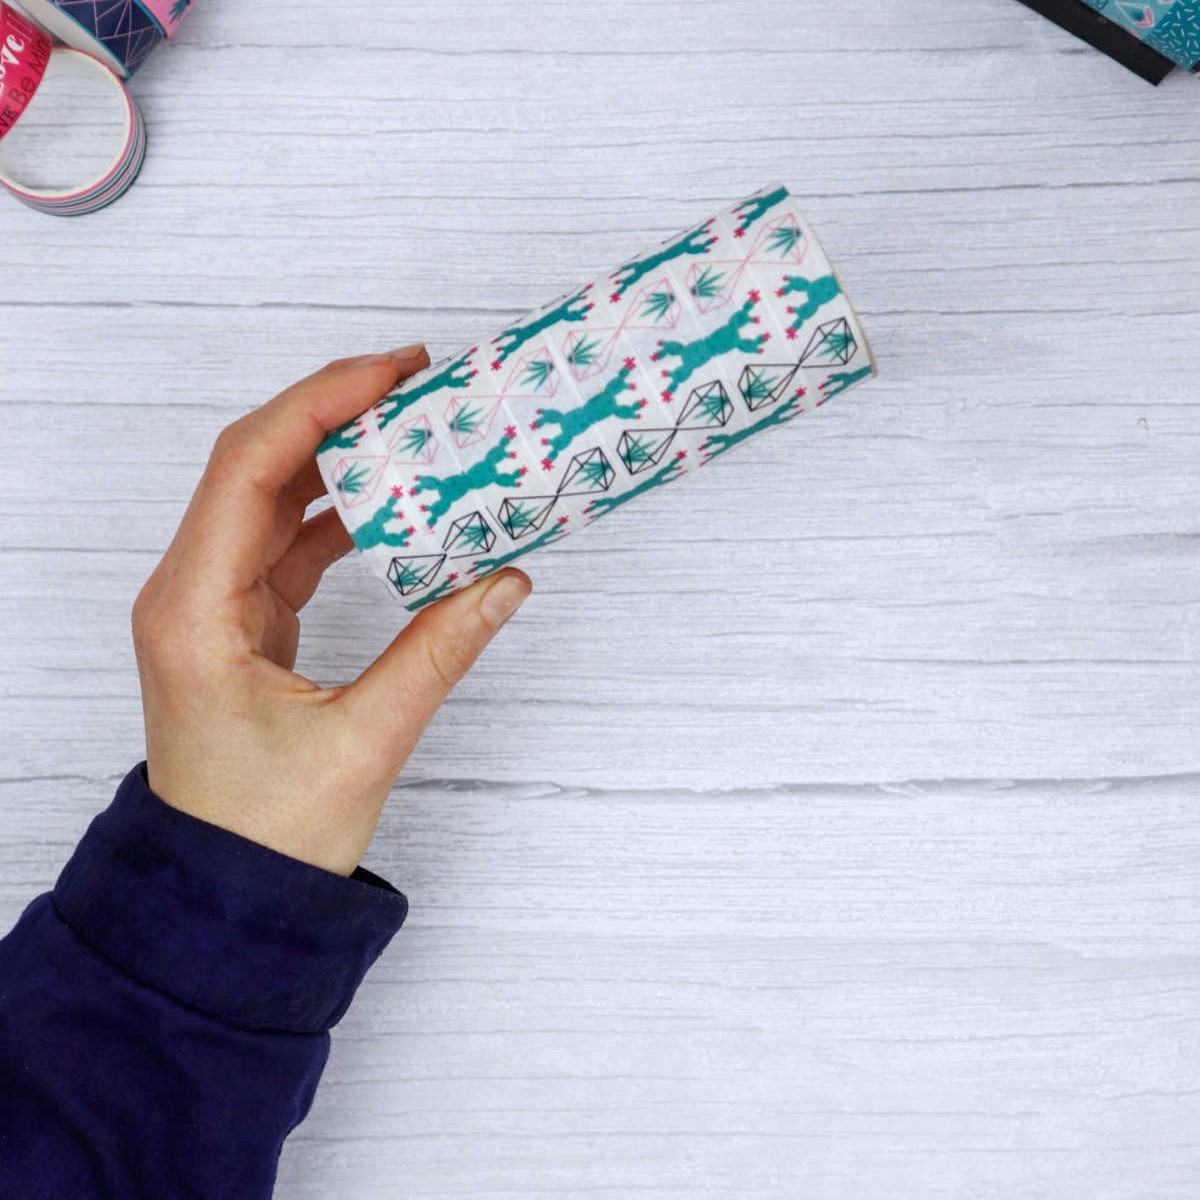
The decorating stage is often the most exciting part of this DIY project, as you get to unleash your creativity. Take out those rolls of washi tape and let your imagination run wild! Start wrapping it around the toilet paper roll, using one color or mixing and matching for a unique, themed look. Don’t worry about covering the phone slot just yet – we’ll come back to that later.
Step 4
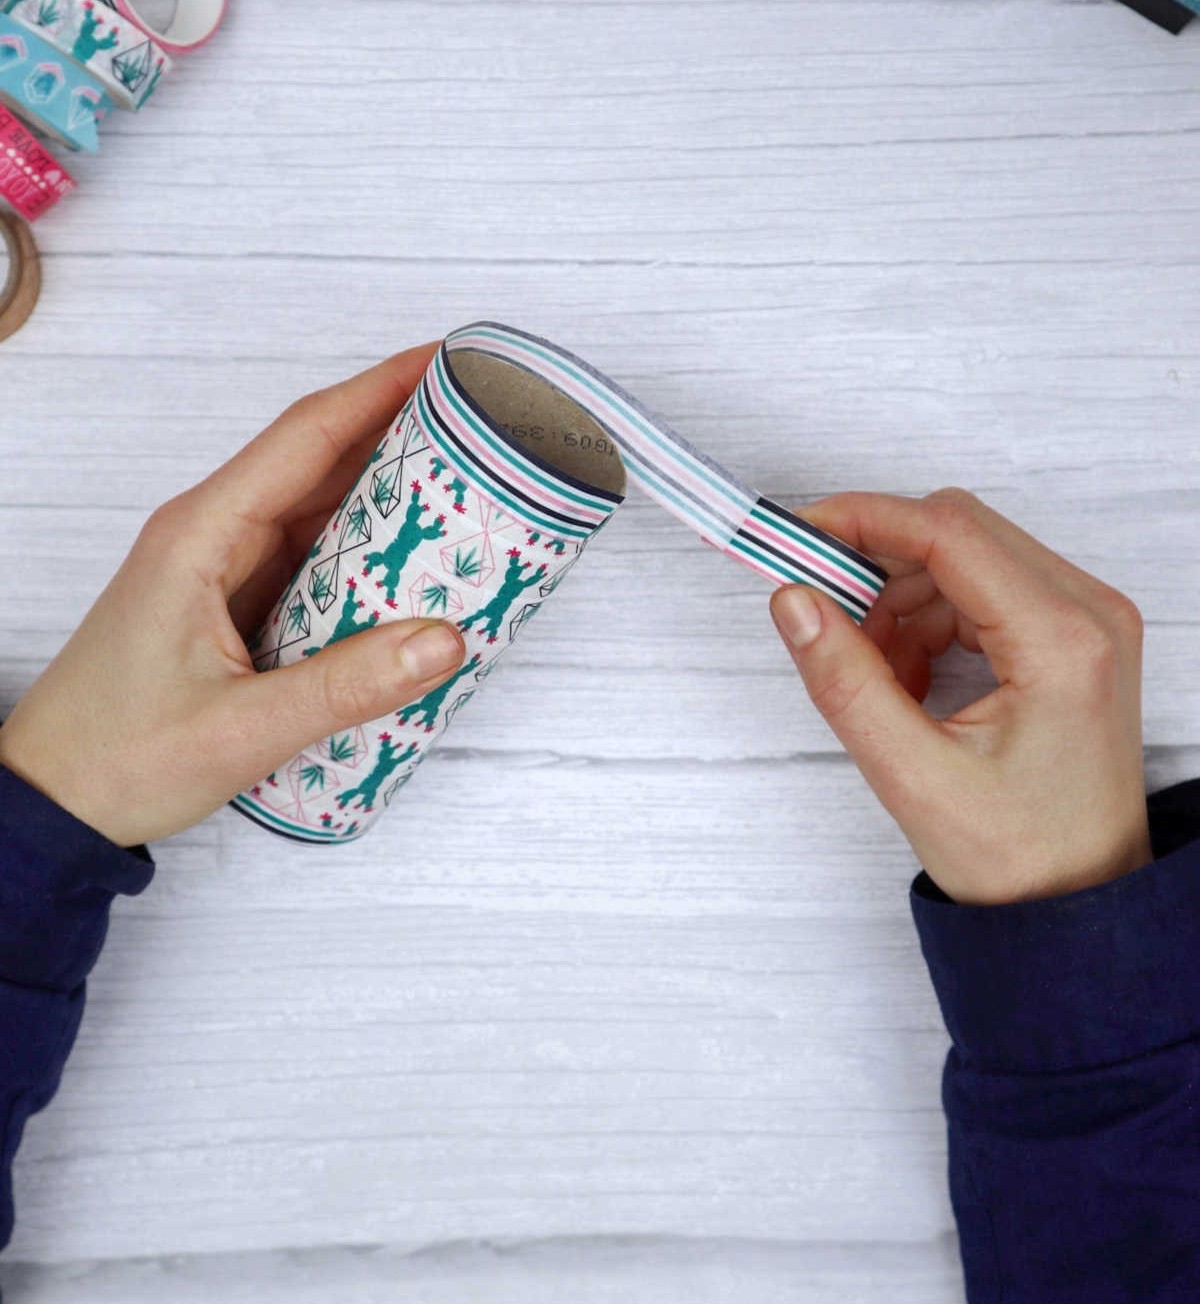
Toilet paper rolls often leave an unsightly brown cardboard edge in their wake. However, a simple solution can be found by revisiting that trusty roll of washi tape. To conceal this imperfection, wrap a layer around the rim of the toilet paper holder, ensuring that three-quarters of the tape protrude beyond the edge.
Step 5
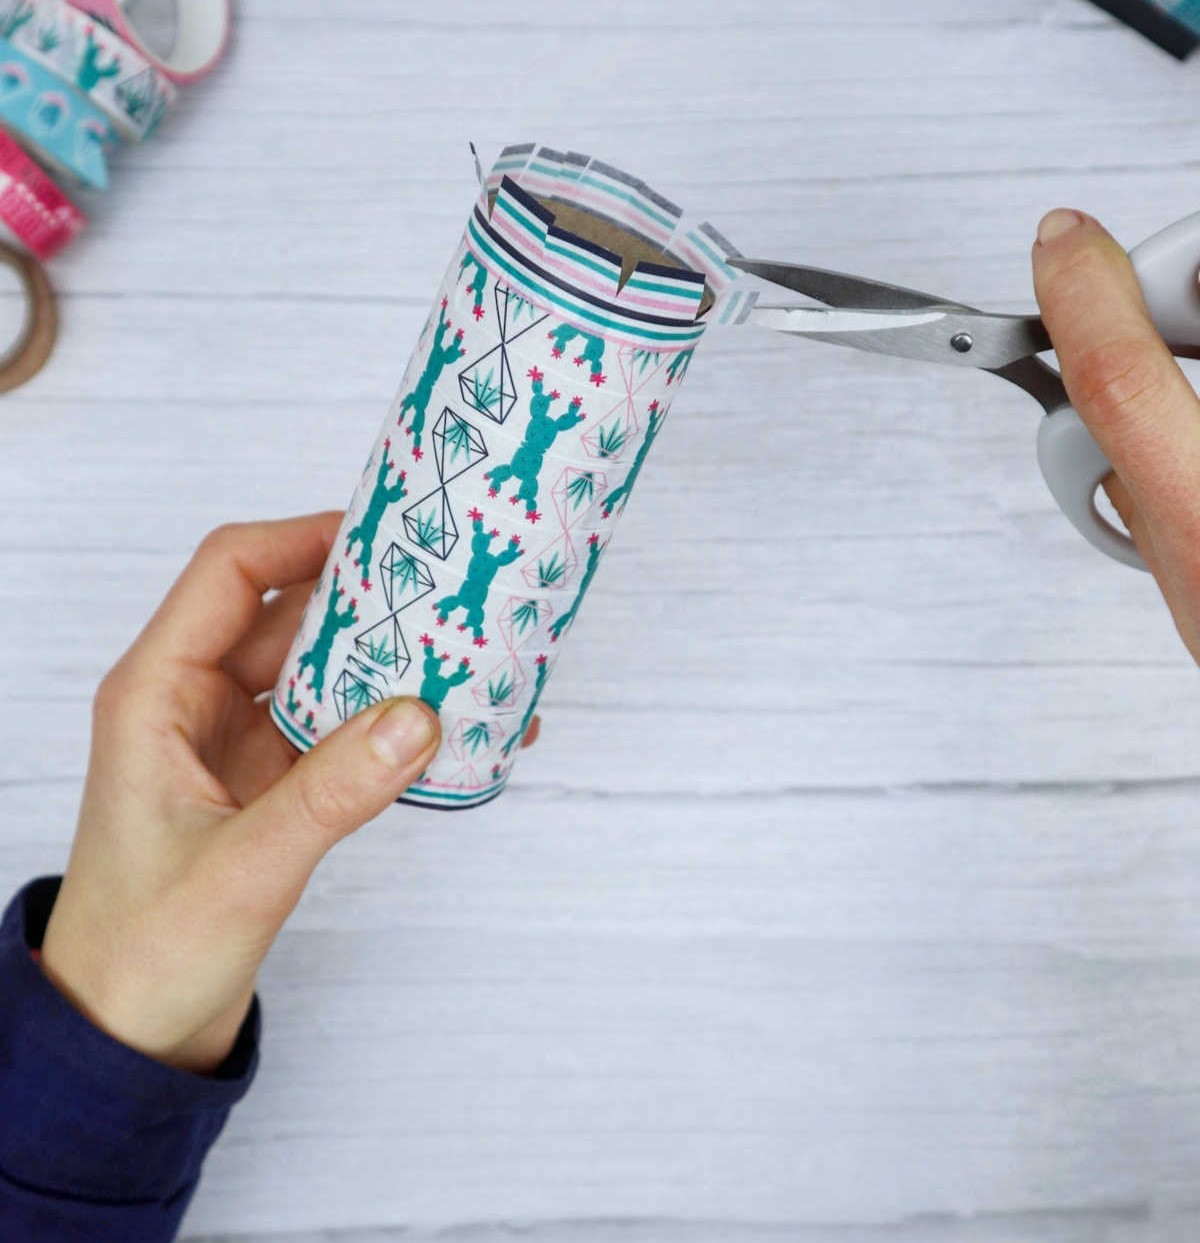
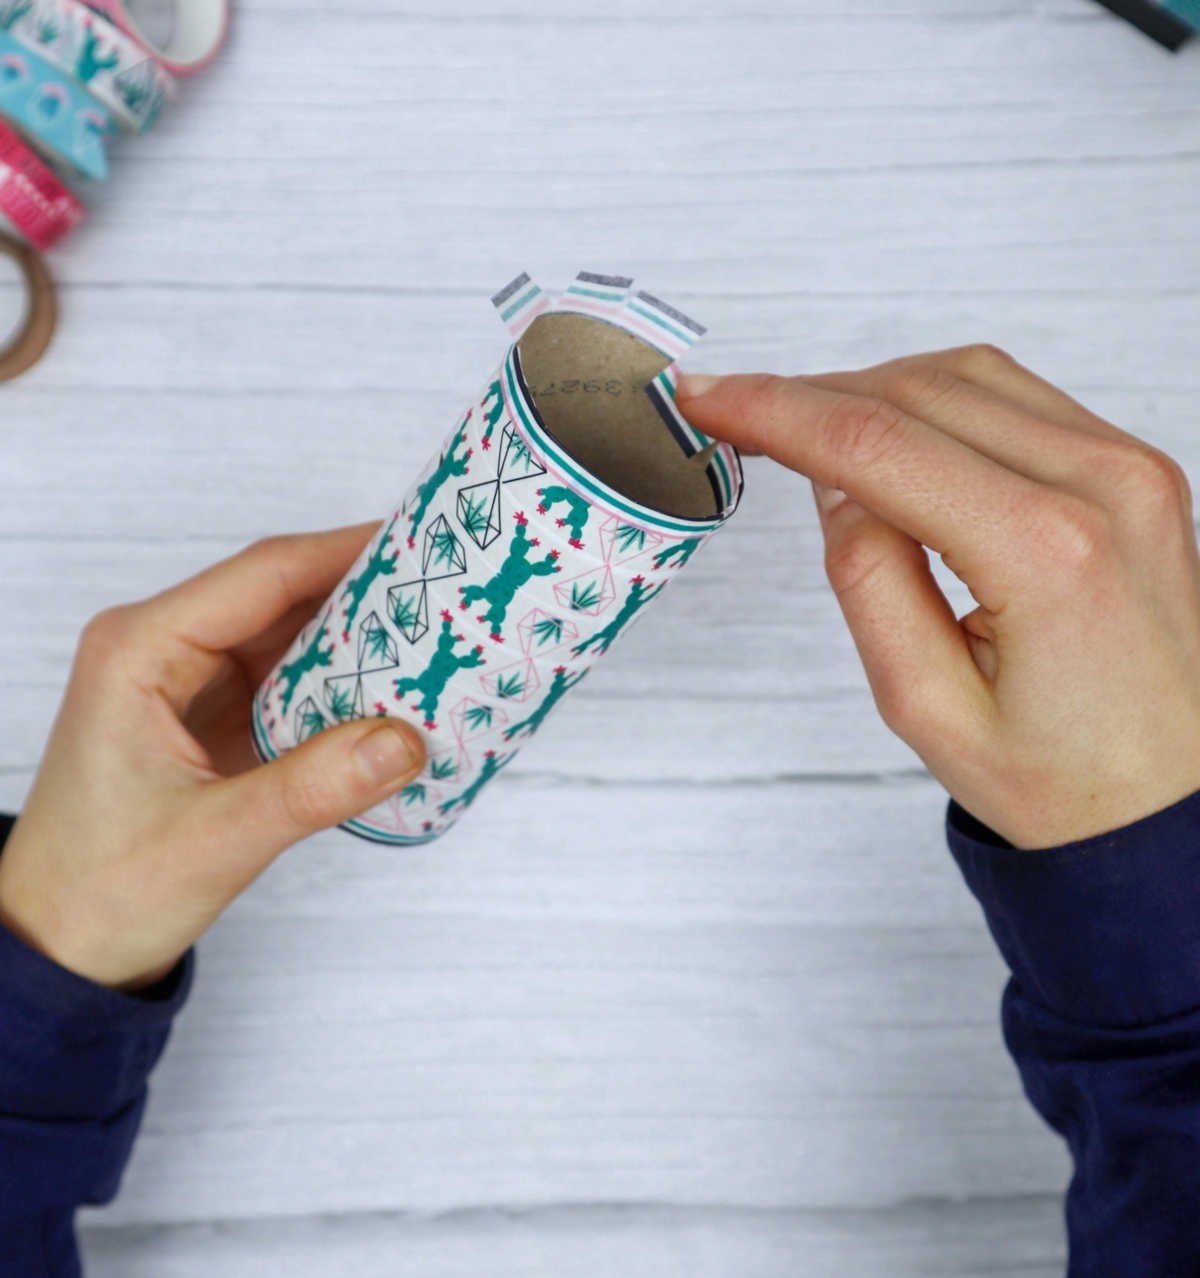
To refine the appearance of your DIY project, begin by carefully cutting small tabs along the edge of the tape, using scissors as your tool. This will create a series of flaps that can be manipulated to achieve a more polished look.
Next, gently press each flap inward, allowing the tape to adhere smoothly to the cardboard base. As you work your way around the diameter, take care to maintain an even border-like trim.
The end result is a visually appealing transformation that adds a touch of professionalism to your handmade creation.
Step 6
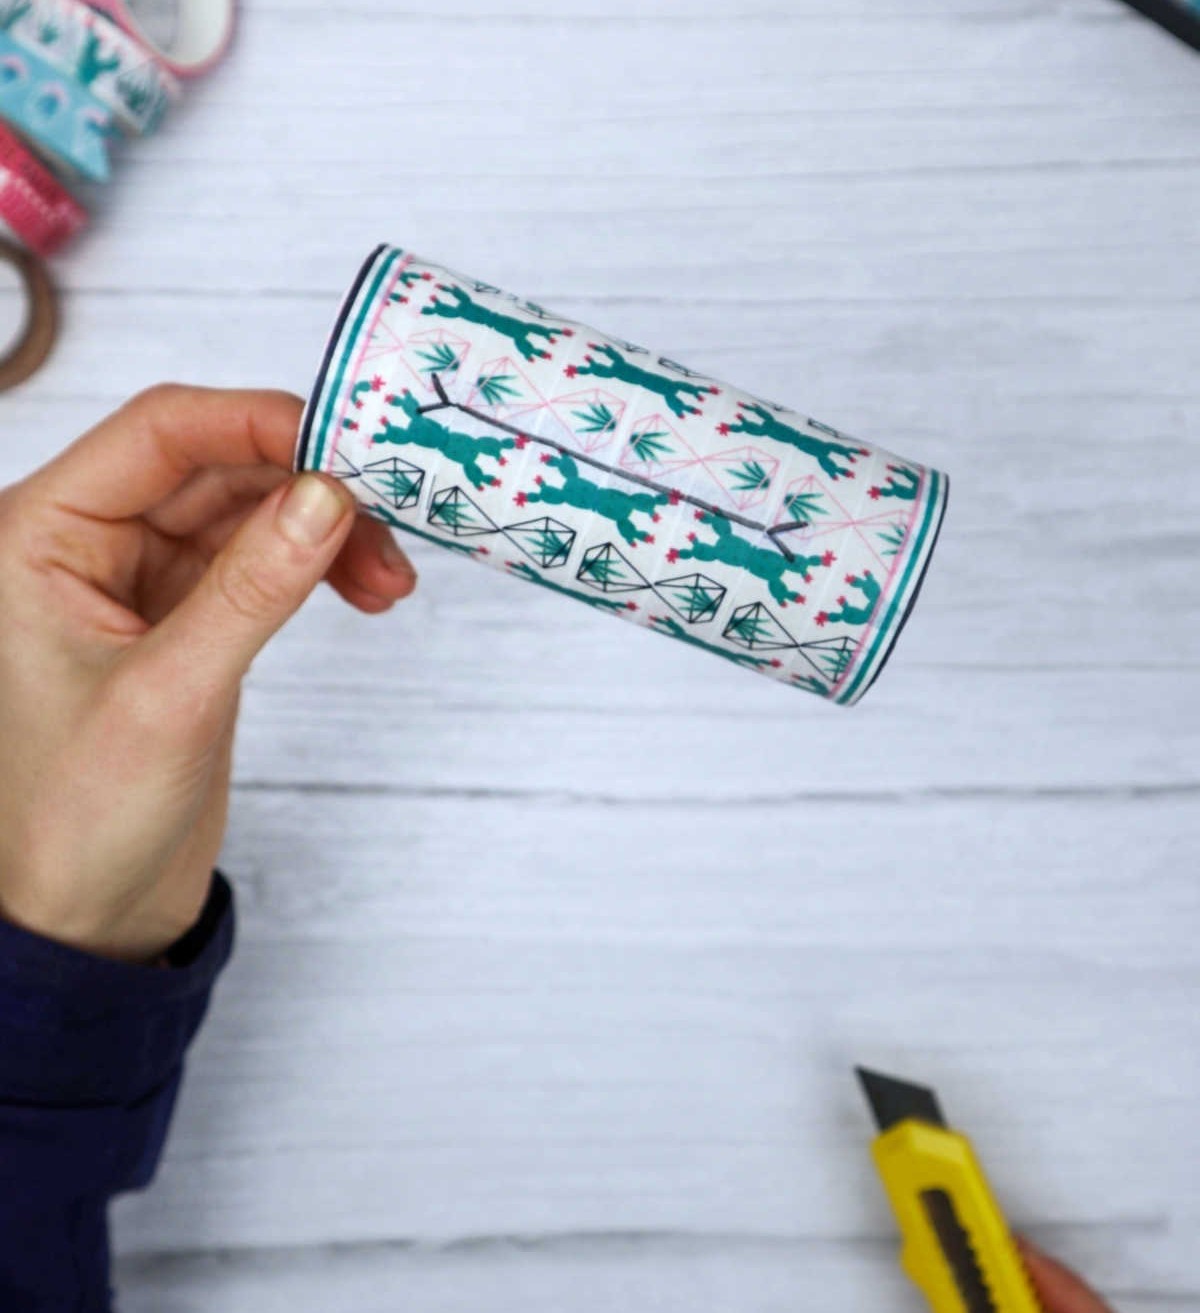
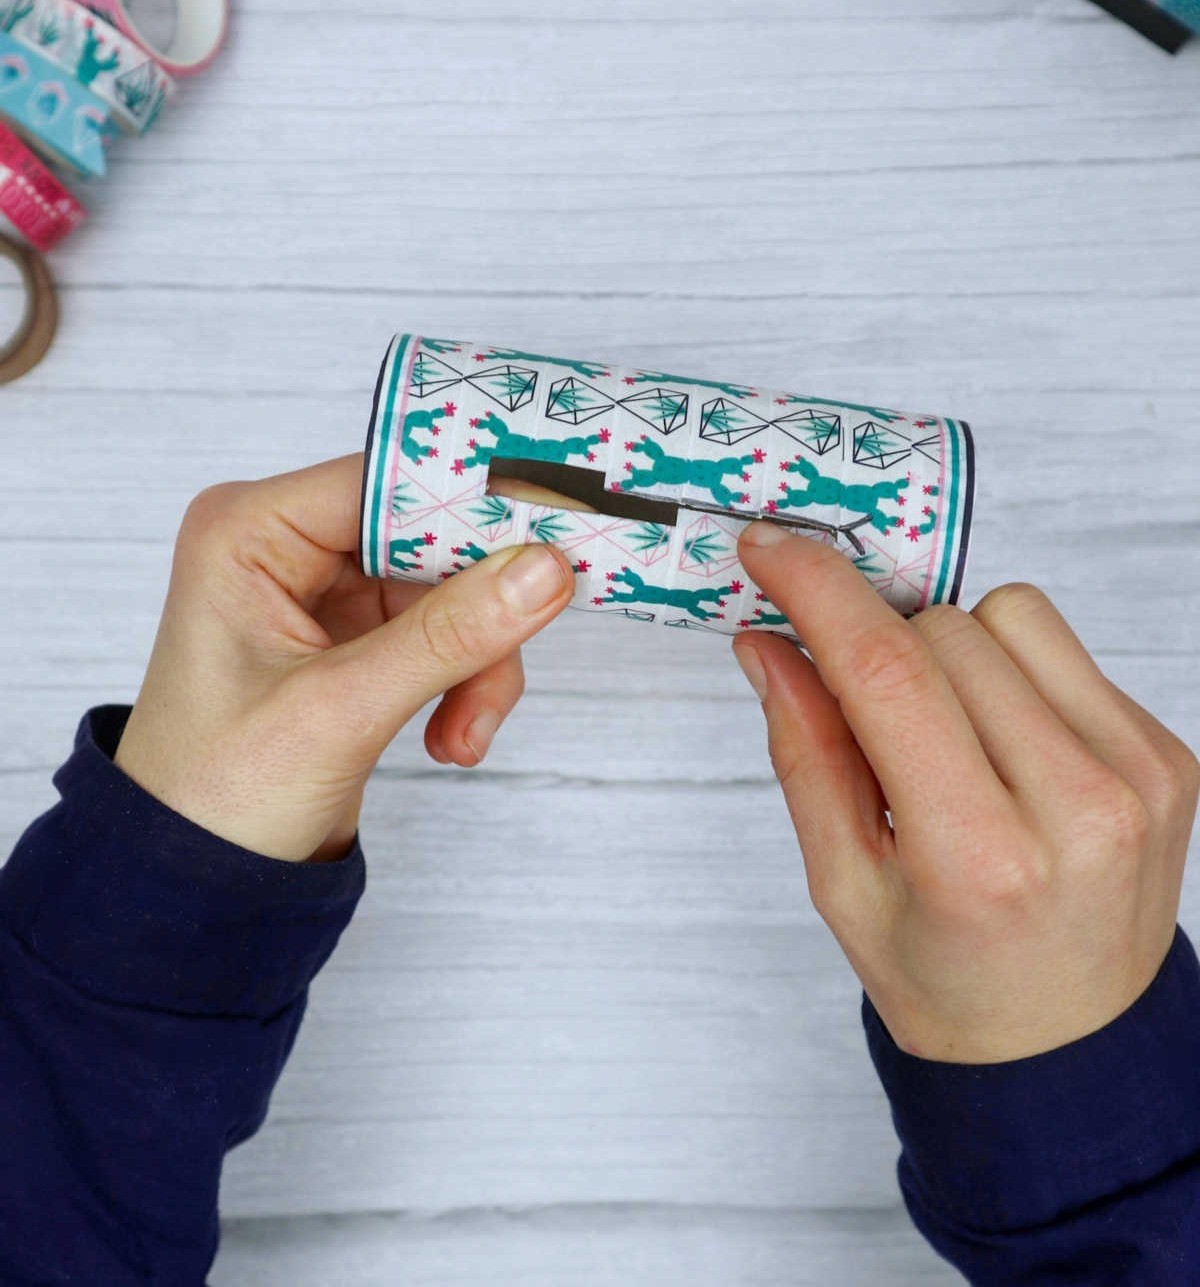
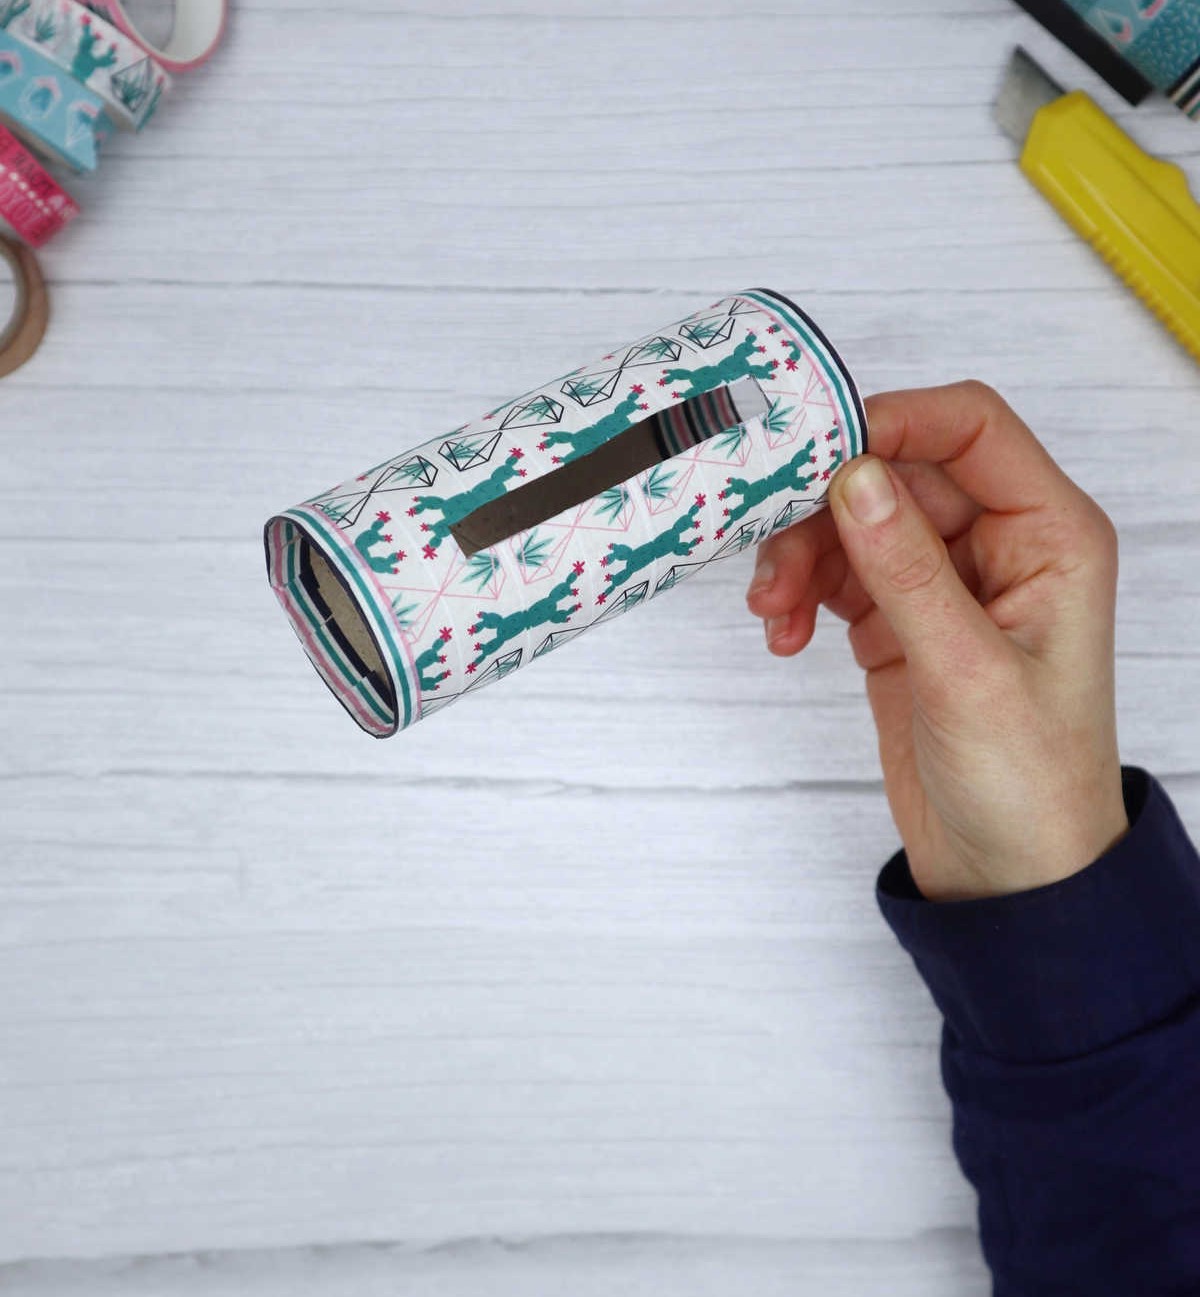
Don’t stress if you’ve covered your phone’s charging slot – there’s a solution! To tackle this minor issue, grab your craft cutter and carefully cut along the outline of the hole. This small but crucial step will allow you to work with the tape effectively. Here’s an essential tip: when trimming down the length of the tape, aim for one continuous clean line, punctuated by two gentle v-like incisions at either end.
By doing so, you’ll be able to seamlessly press the tape into place and align its edges. As a result, you won’t have to worry about the cardboard core making an unwanted appearance in your finished project – and that’s exactly what makes all the difference!
Step 7
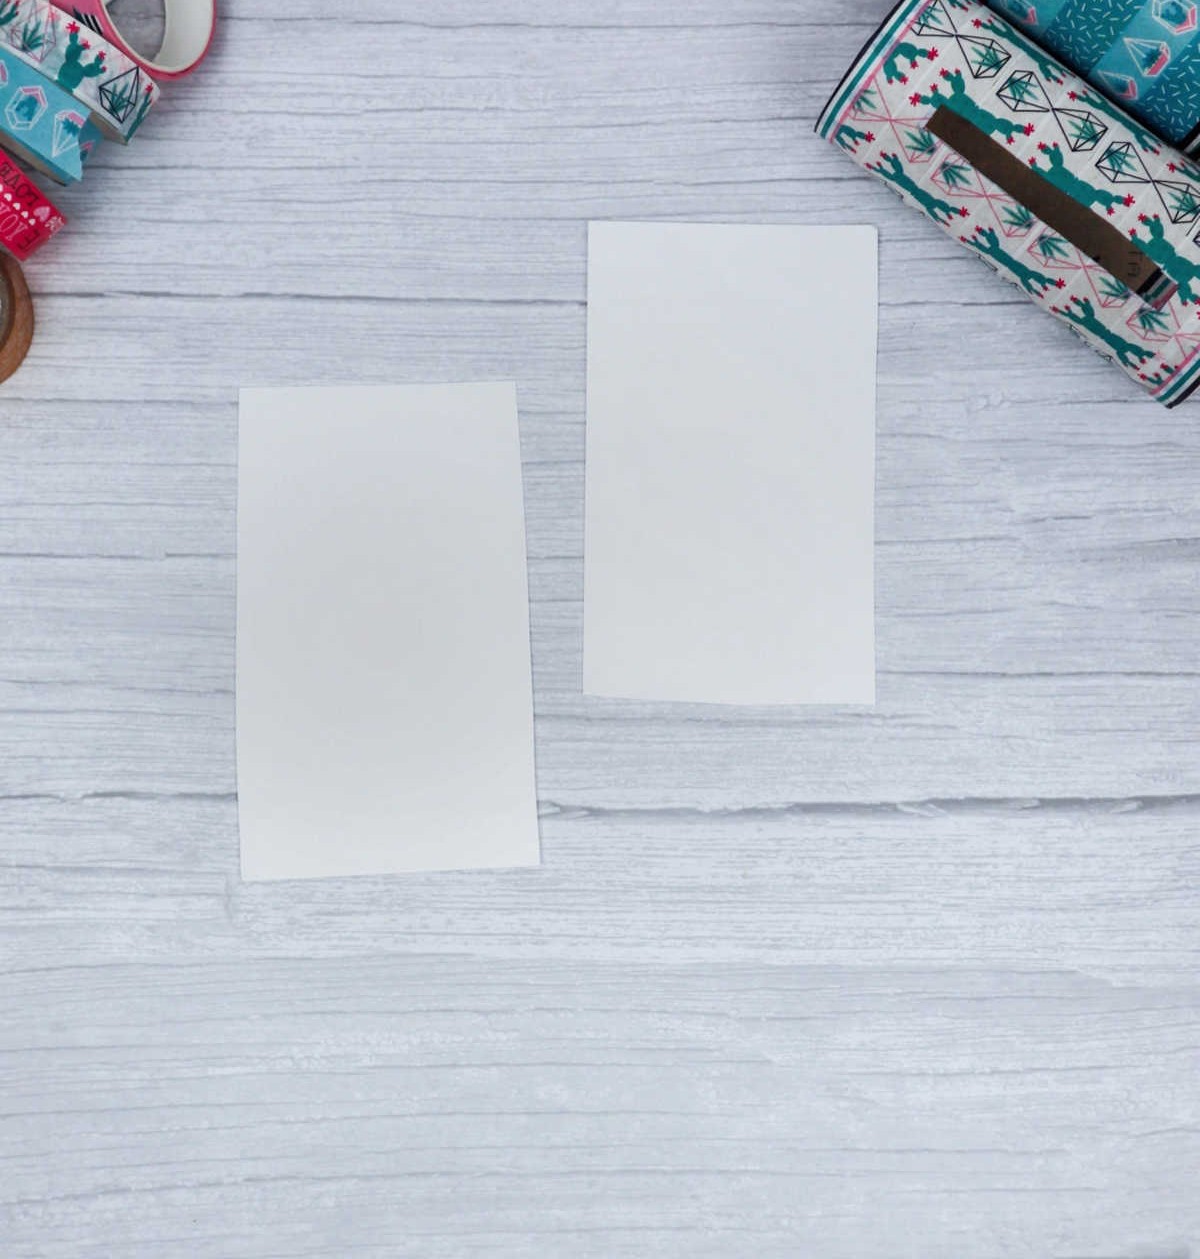
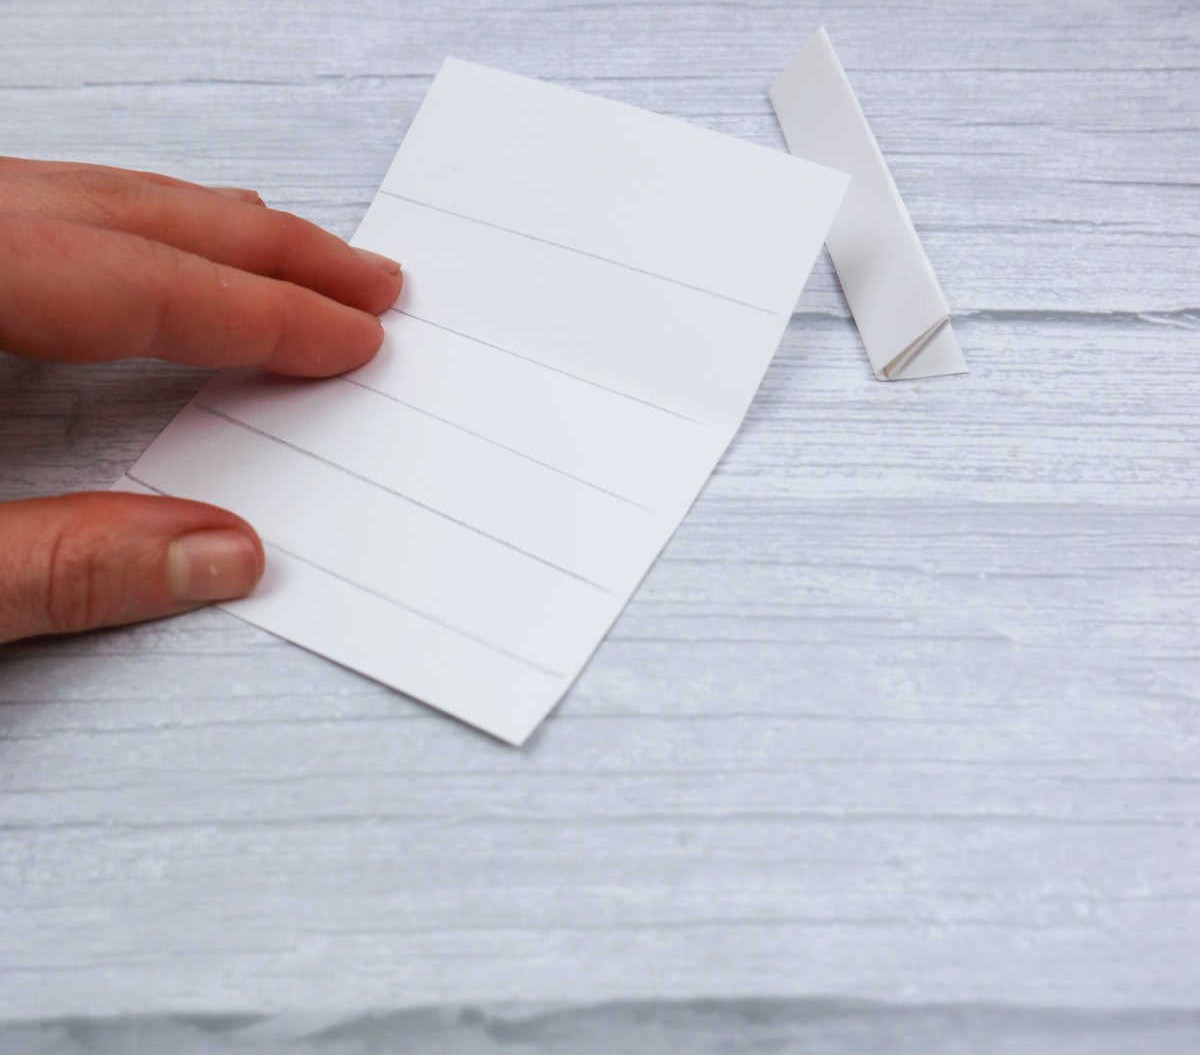
As you’re about to bring your DIY project to life, it’s essential to create the foundation – in this case, the legs or holders. This step is surprisingly uncomplicated, requiring only a single sheet of your preferred paper. To get started, divide the sheet into six identical strips, each with the potential to support the overall structure and add stability to your creation.
Step 8
To create the distinctive folded design, begin by folding each strip inward, following the pattern illustrated above. Apply gentle pressure to ensure a crisp crease forms at each fold. Once all the strips are folded, carefully unfold them, and you should be left with a lively zig-zag pattern, perfect for adding texture and visual interest to your project.
Step 9
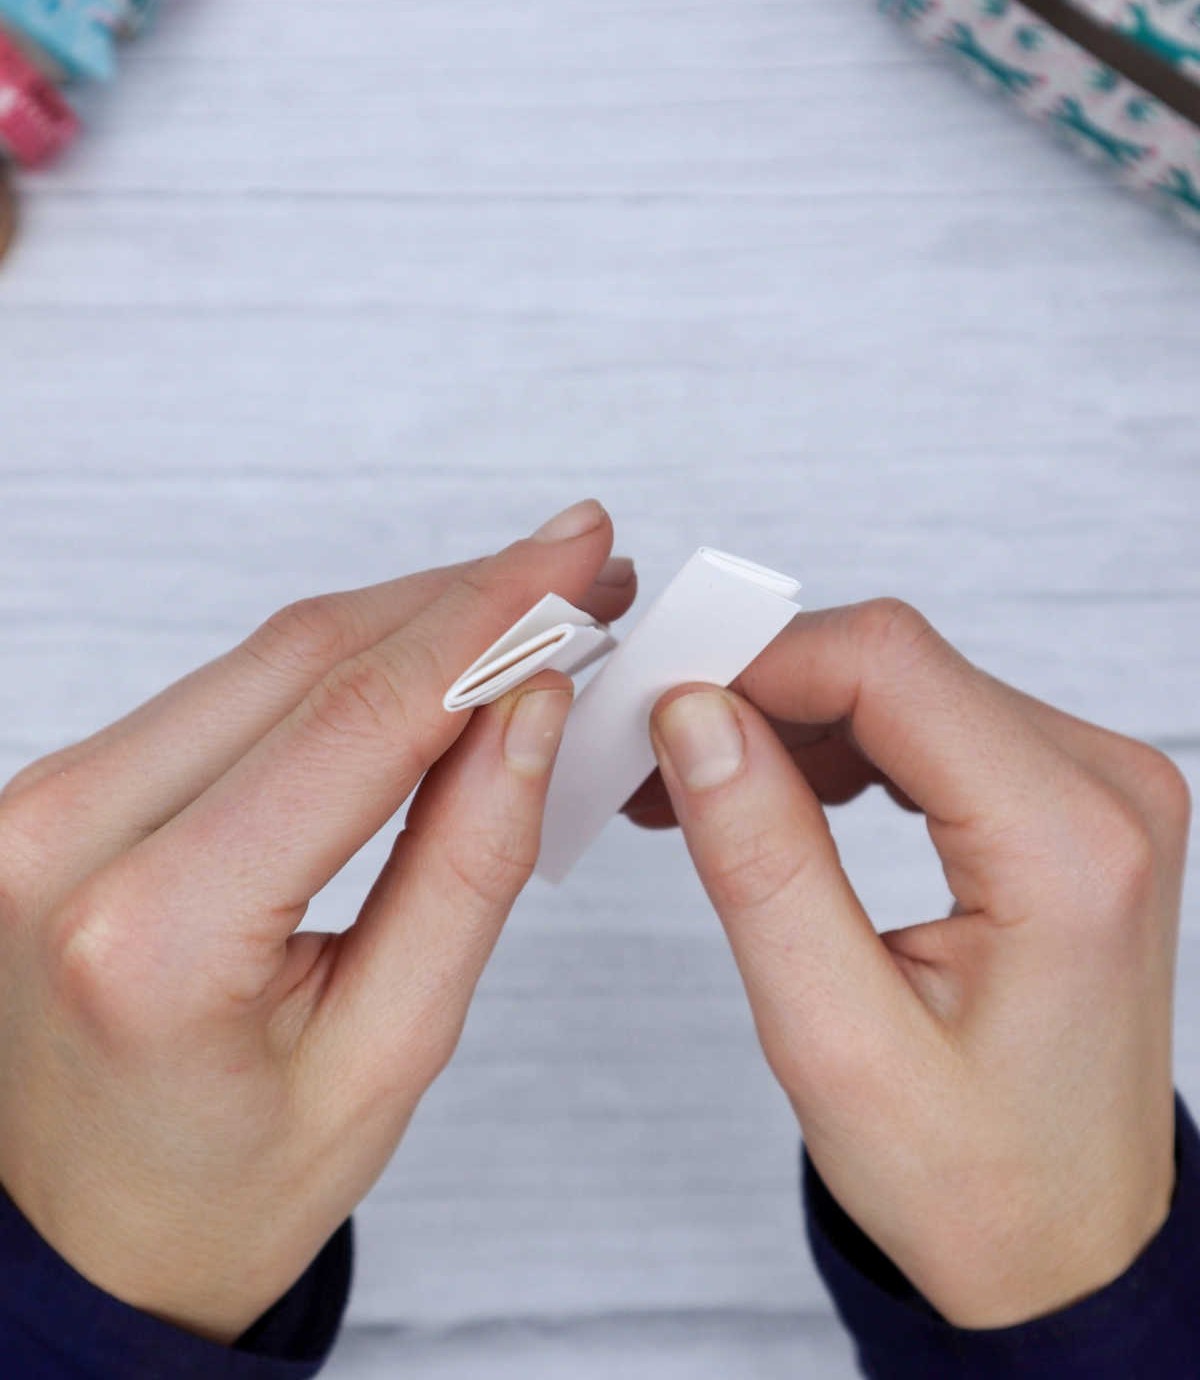
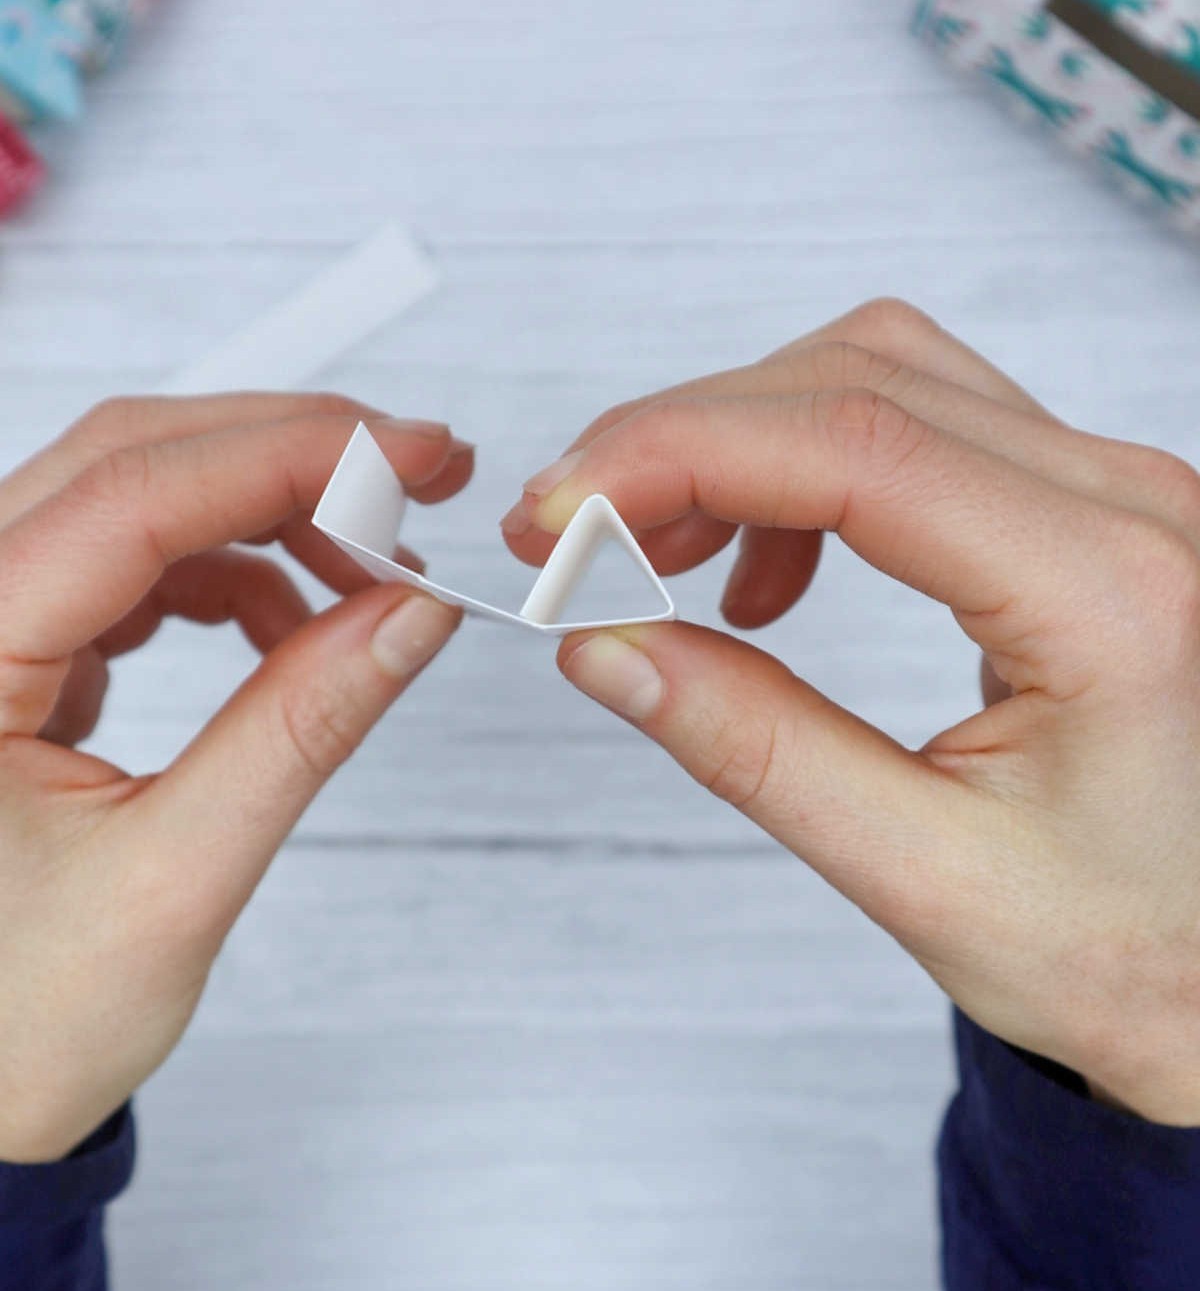
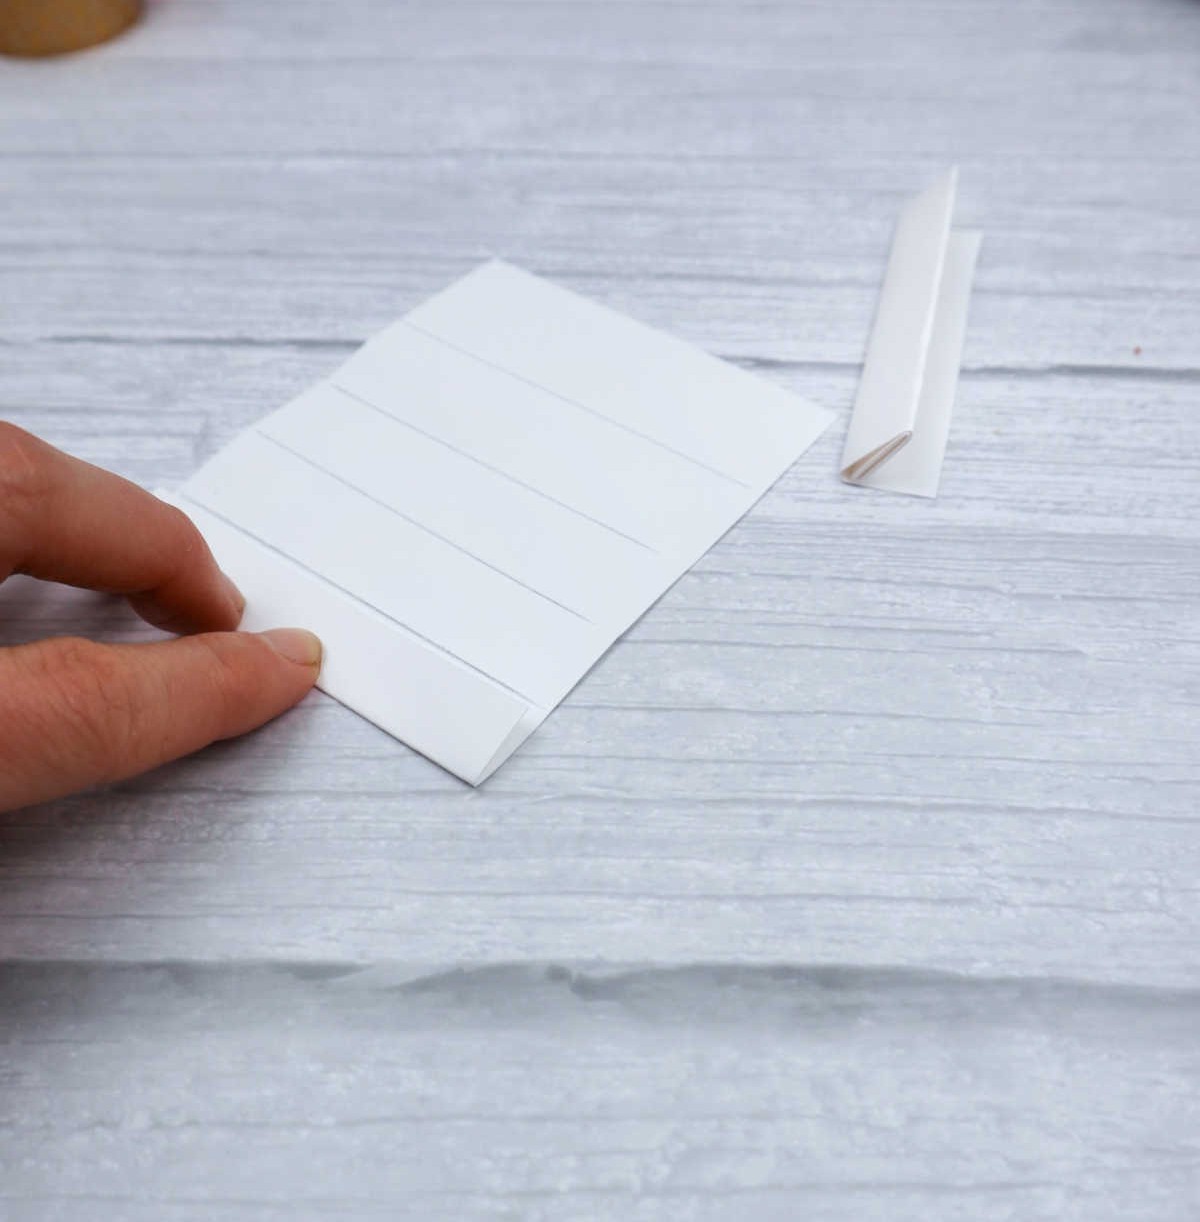
To bring your creation to life, start by folding the paper strips into a triangular shape. As you fold, envision a three-dimensional structure taking form before your eyes. The folds should result in a sturdy, three-walled framework that gives your design depth and dimension.
Step 10
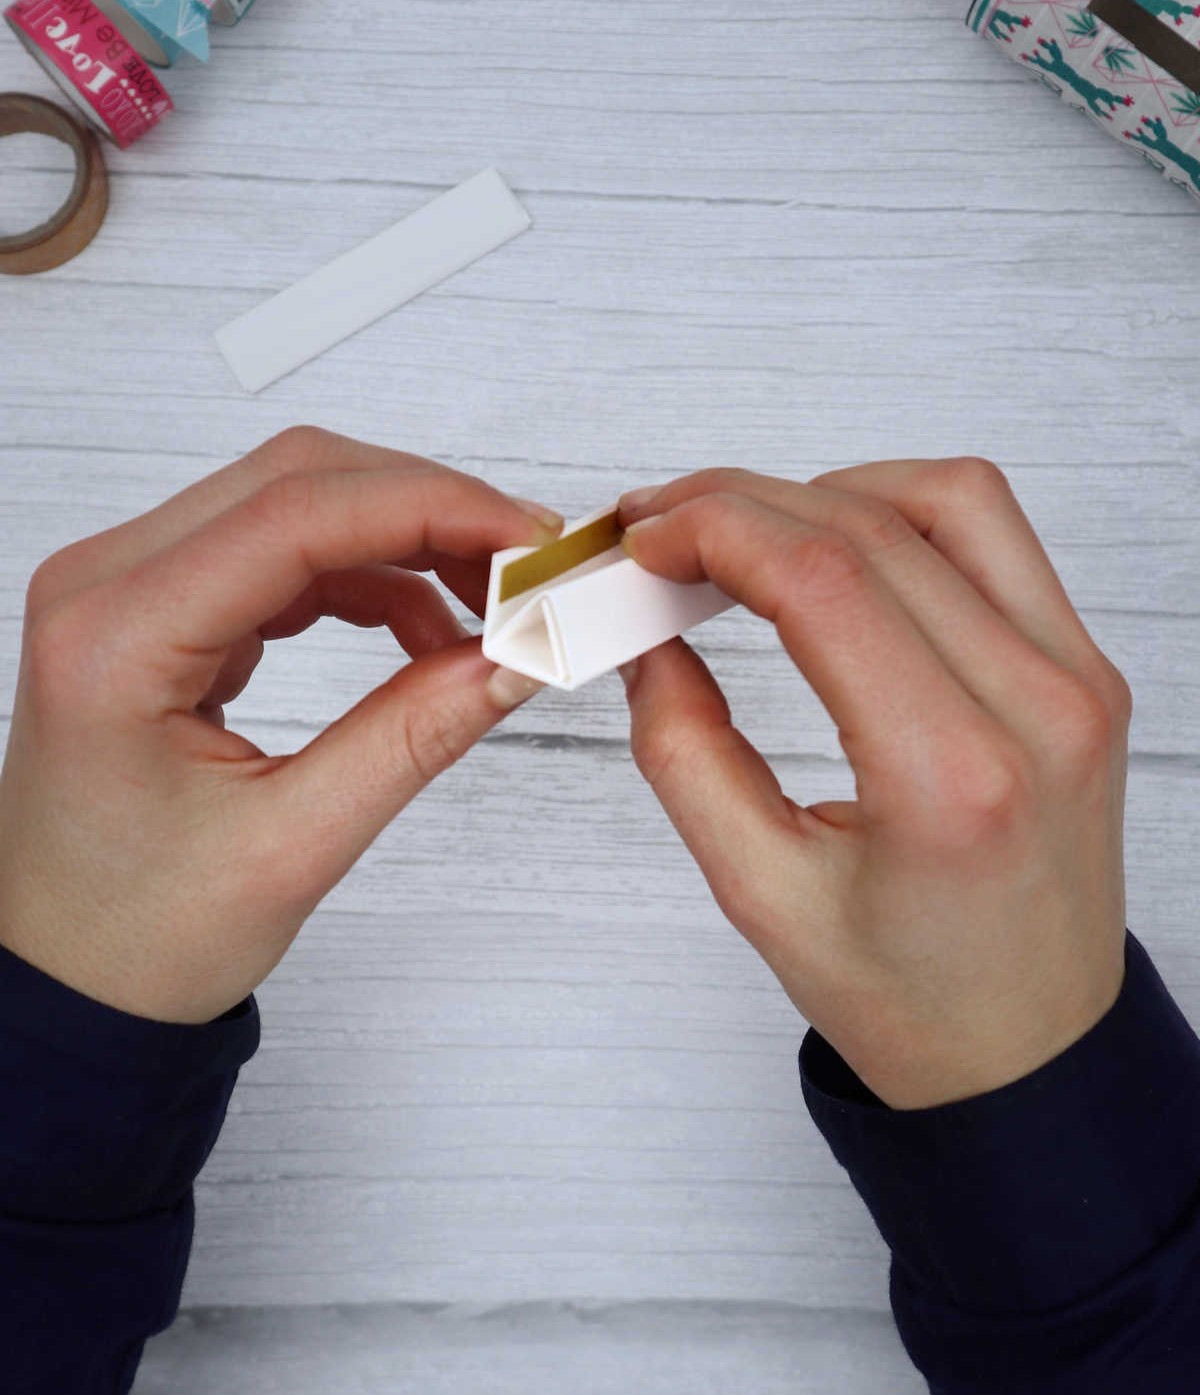
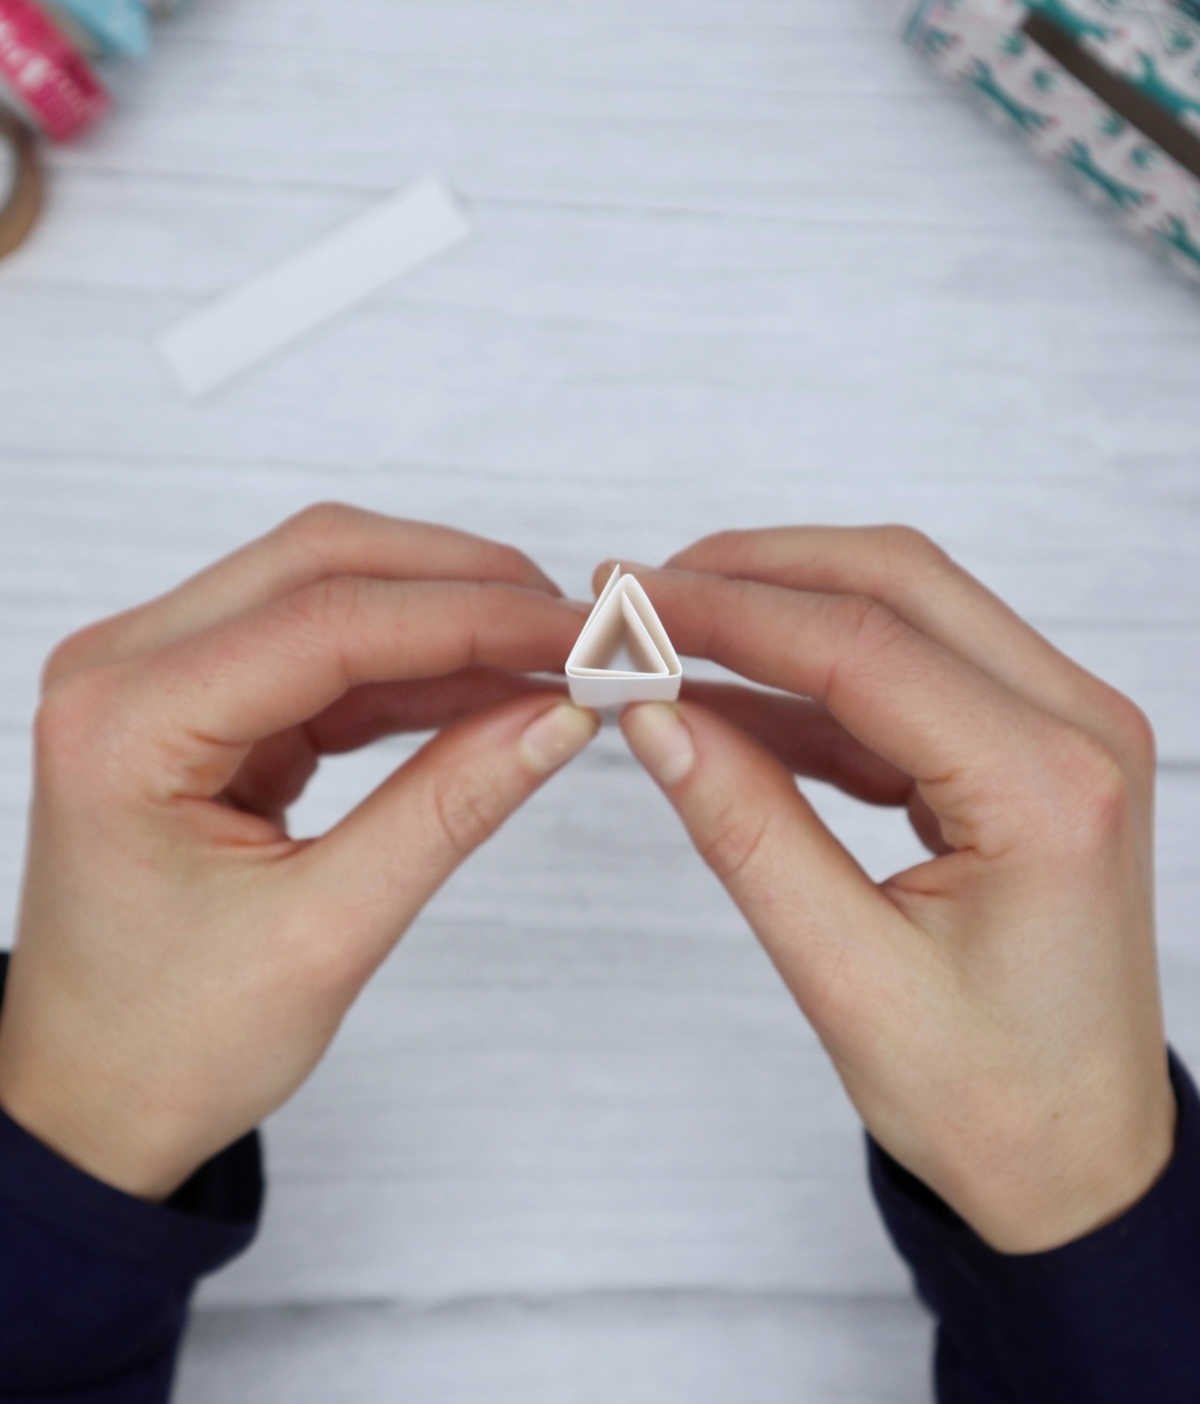
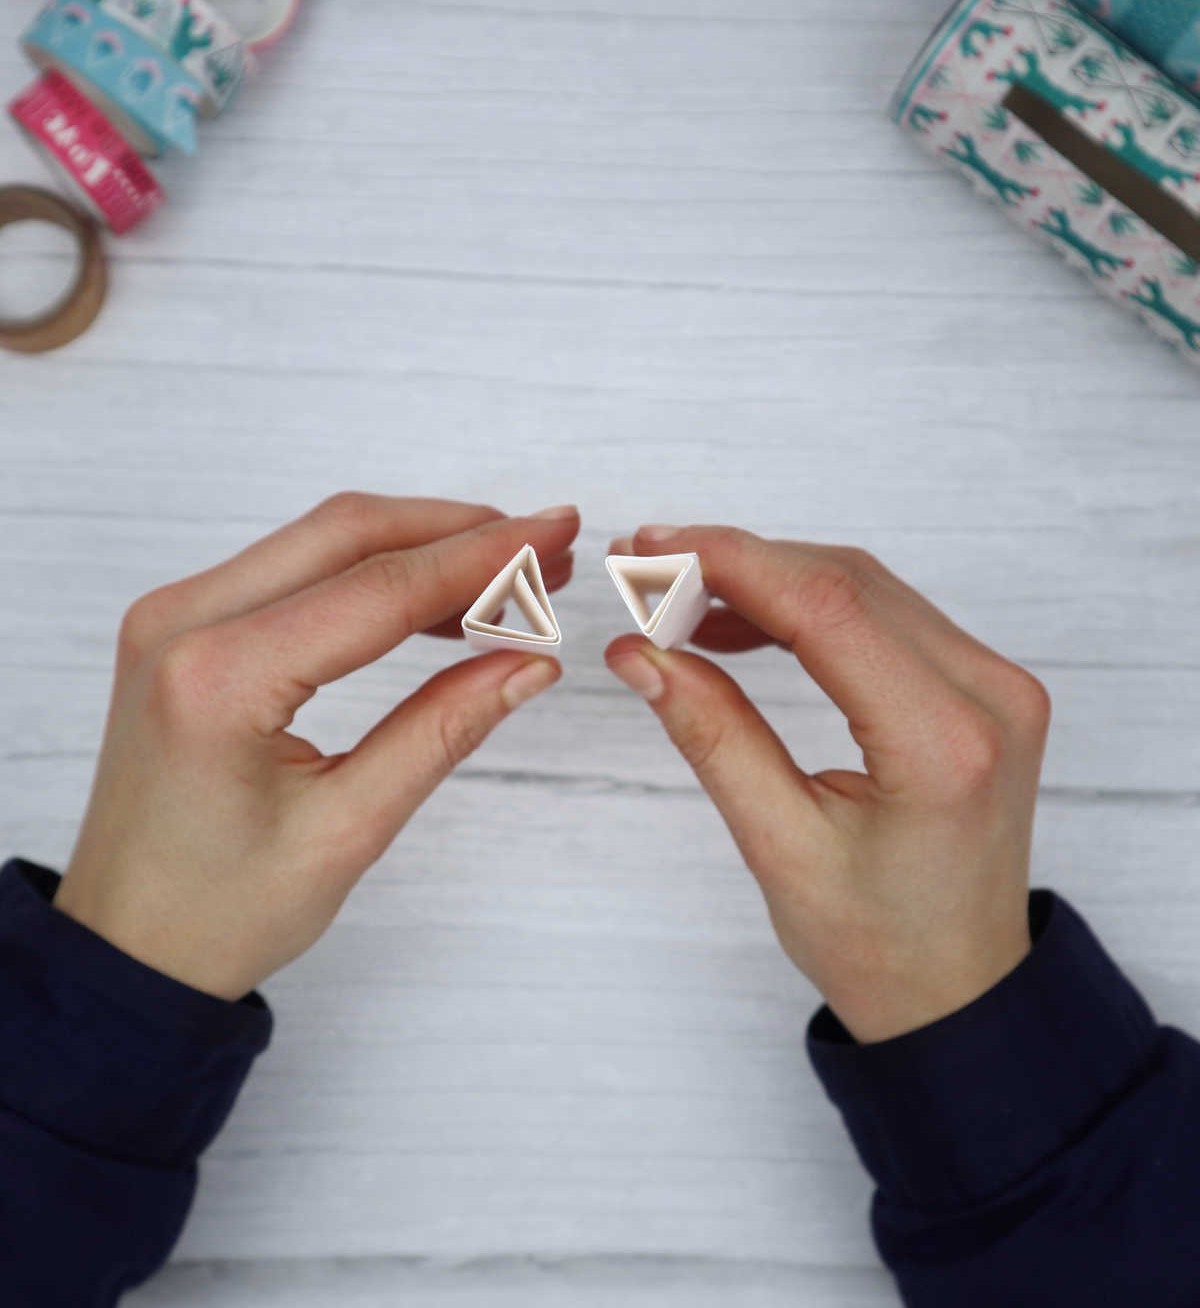
To secure the open ends, use double-sided tape and apply gentle pressure to ensure a strong bond. This process is crucial in creating a sturdy structure. Repeat this step for each stand until they are both prepared, resembling the finished product with their secured open ends.
Step 11
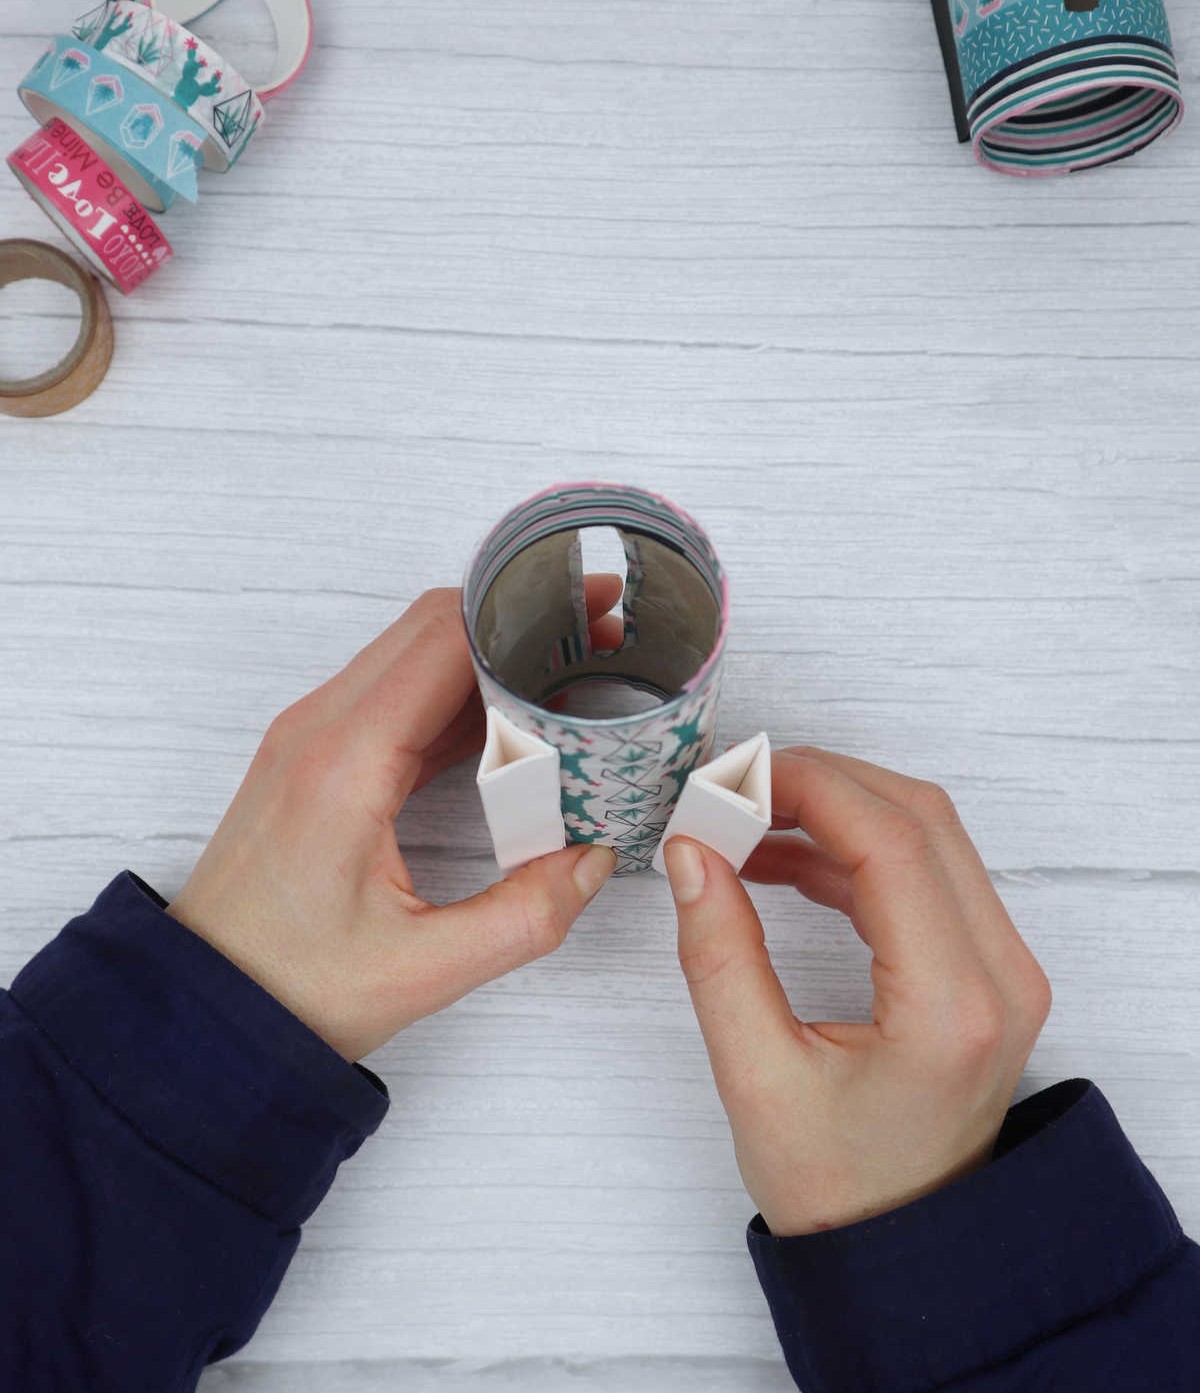

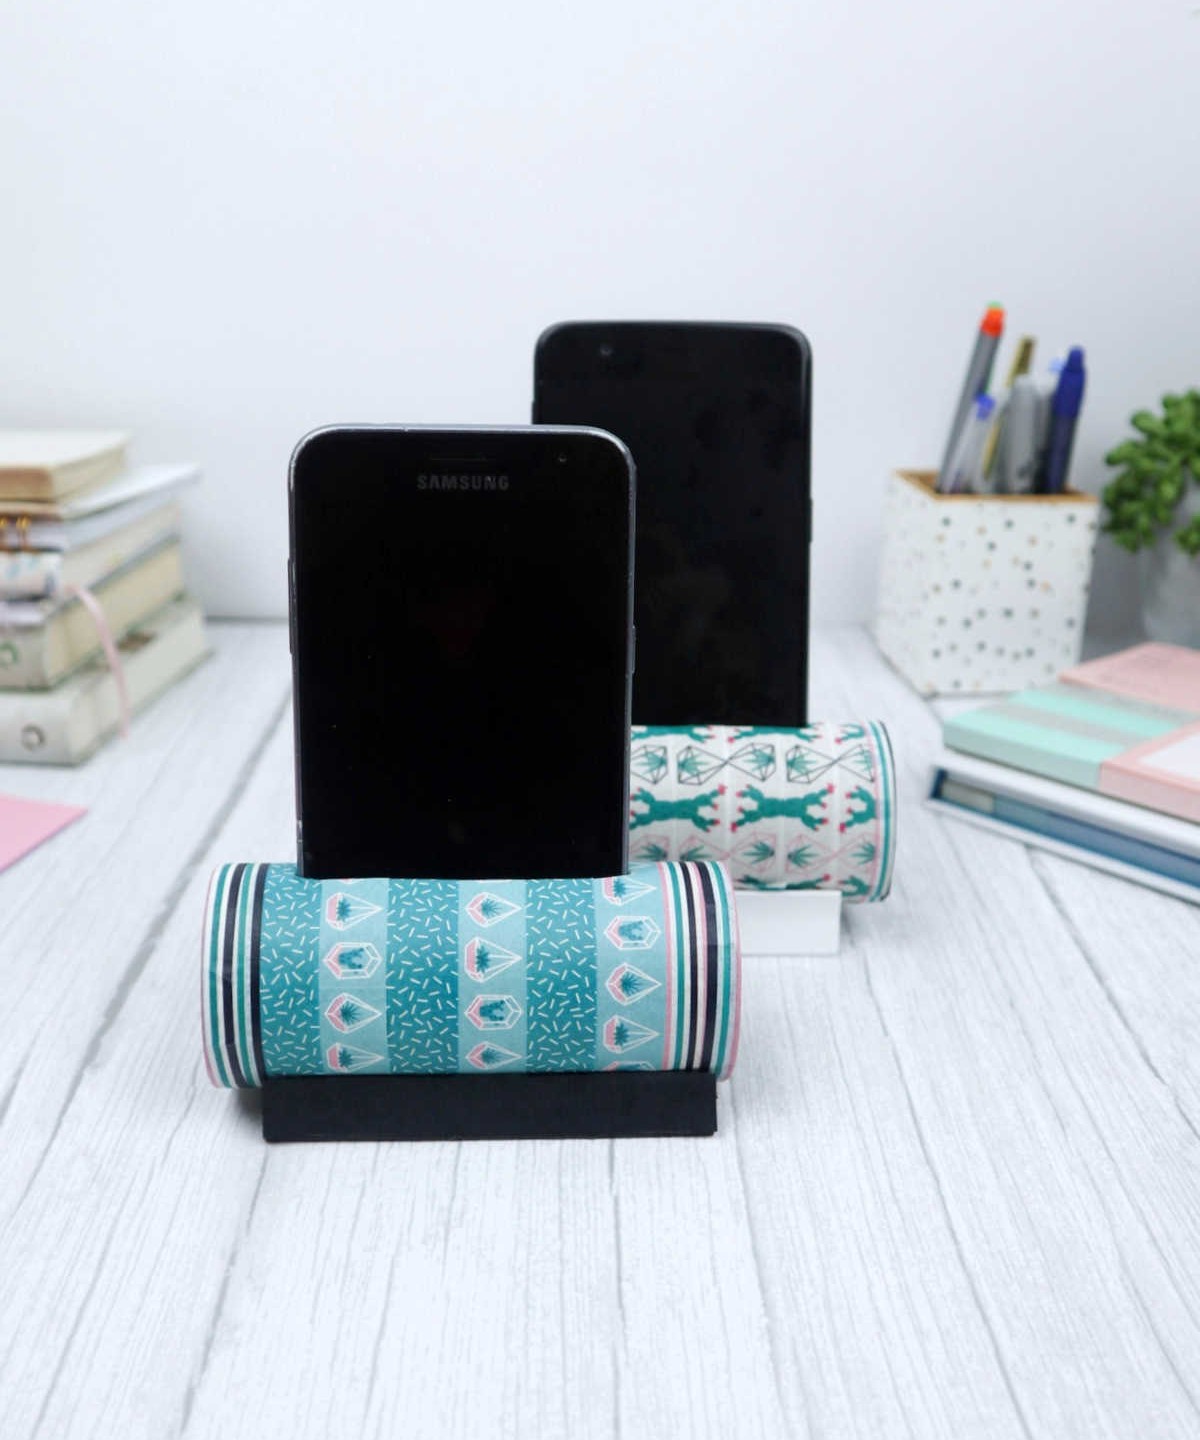
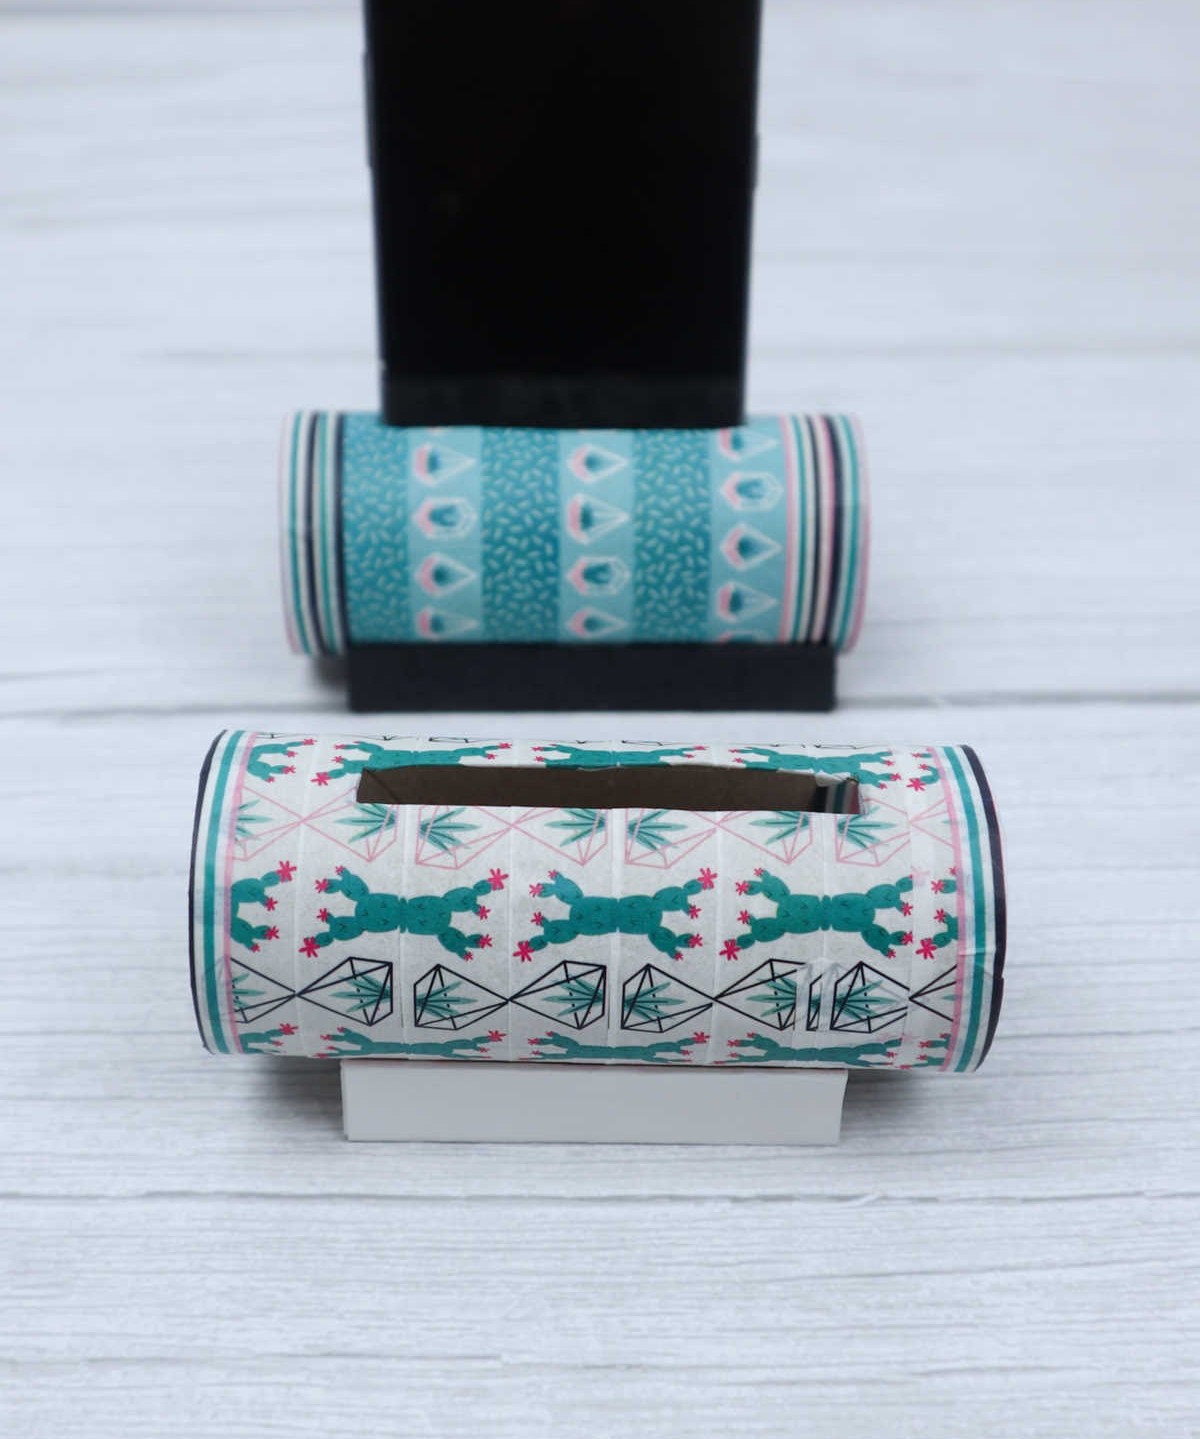
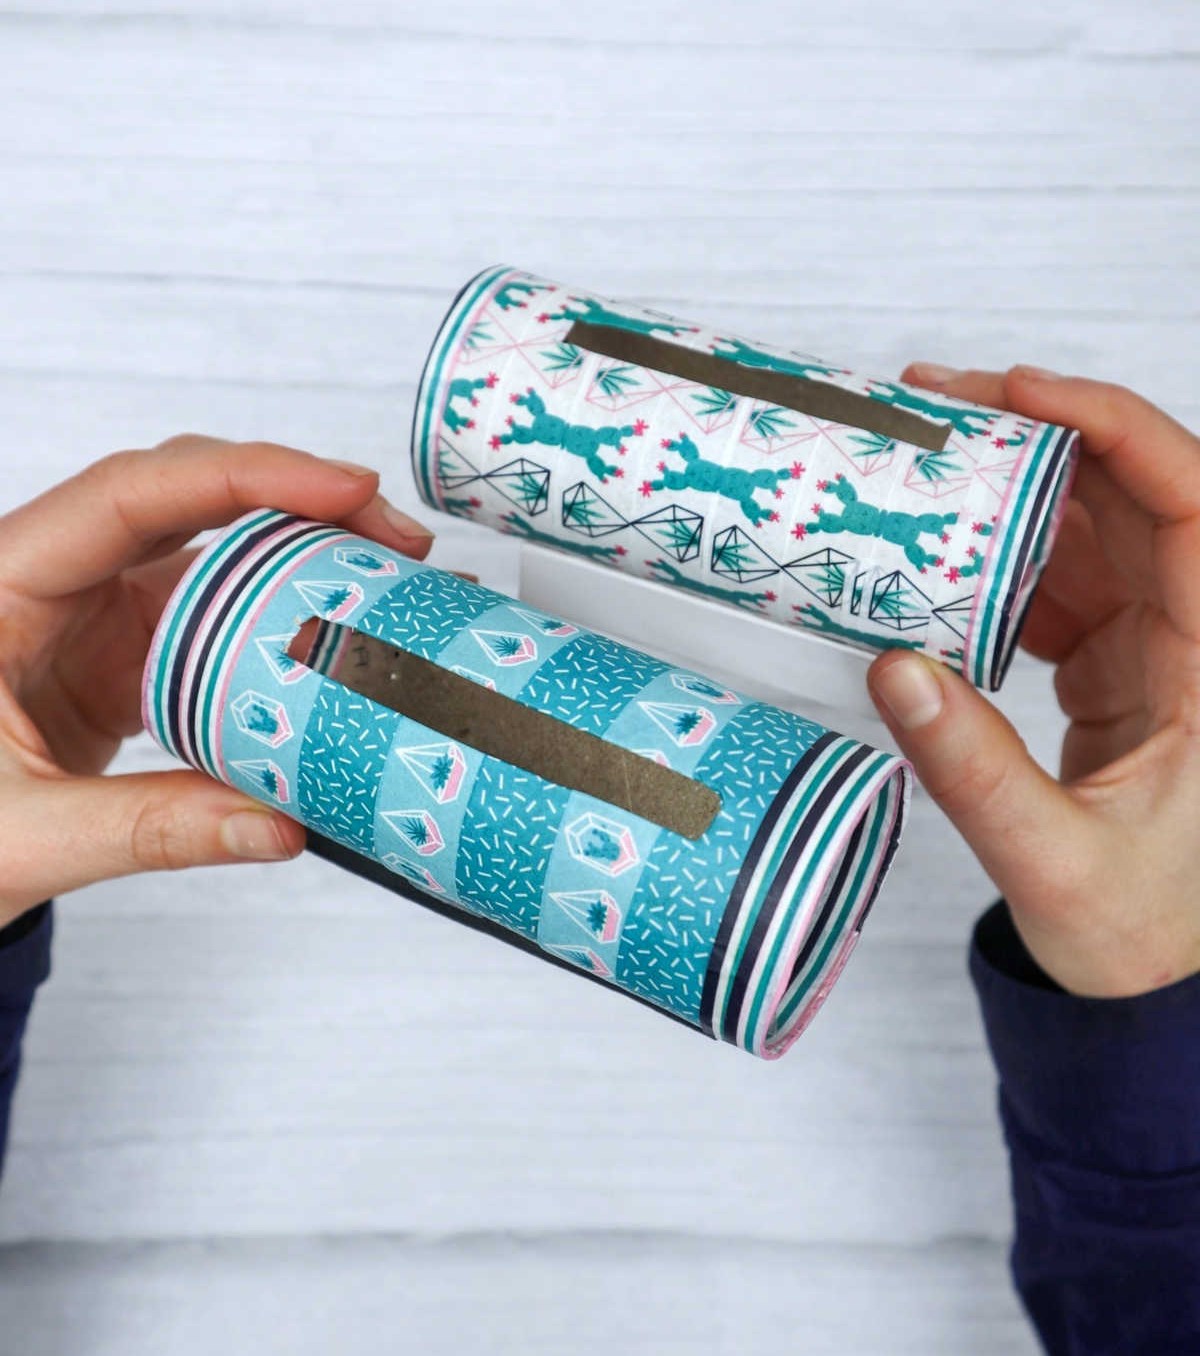
Before assembling the toilet paper roll phone holder, you can add a touch of elegance by wrapping the roll with washi paper to match your desired pattern. Once you’re satisfied with the result, secure the legs to the roll using double-sided tape or liquid glue. Be mindful that the latter may cause the washi tape to become soggy. Once the legs are in place, test the stability of the holder by placing it on a flat surface.
If needed, adjust the position to ensure it remains sturdy and can comfortably hold your phone. As an alternative to attaching legs, you can use pushpins to create a makeshift stand. This option is just as effective and may even save you some time in the process. To complete the holder, simply place your phone inside and admire your handiwork. The toilet paper roll phone holder’s rustic charm is undeniable, making it a unique conversation piece.
For more creative ideas on repurposing household items, explore these 20 fun and easy toilet paper roll crafts.
DIY Phone Holder from Toilet Paper Roll
Transform old toilet paper rolls into functional DIY phone holders, perfect for all ages – teenagers, adults, and kids alike! This clever project requires only 20 minutes of active time, supplemented by an additional 5 minutes for preparation. In total, you’ll invest a mere 25 minutes to create something truly useful.
Equipment
Materials
The humble office supply closet is often overlooked, but it’s a treasure trove of creative problem-solving solutions. For instance, when searching for a spare toilet paper roll to use as a makeshift marker holder, you might also find other versatile items like washi tape and double-sided tape or glue that can be repurposed in various ways around the office.
Instructions
To create a DIY phone holder, start by preparing the cardboard core from a toilet paper roll. Draw an outline of the base of your phone on the roll and then use a craft cutter to carefully cut along the lines, removing any excess edges. Next, wrap the entire roll with washi tape, making sure to cover any exposed cardboard around the rim. To tidy up this edge, apply a strip of washi tape around the rim, leaving the ends sticking out.
Use scissors to create flaps at each end and press them inward to conceal the cardboard. When cutting the washi tape that will eventually hold your phone, make a small incision down the center of the gap and add two V-shaped cuts at either end – this will ensure smooth, even edges when the holder is complete.
To create the legs for your phone holder, take a sheet of paper and divide it into six equal strips. Fold each strip inward, pressing firmly to create a sharp crease.
Unfold the paper, then use the creased strips to form triangular legs by folding them until you have three distinct walls. Secure the ends with double-sided tape or use 4 push pins as an alternative. Once you’re satisfied with the stability of the legs, your phone holder is ready for use.