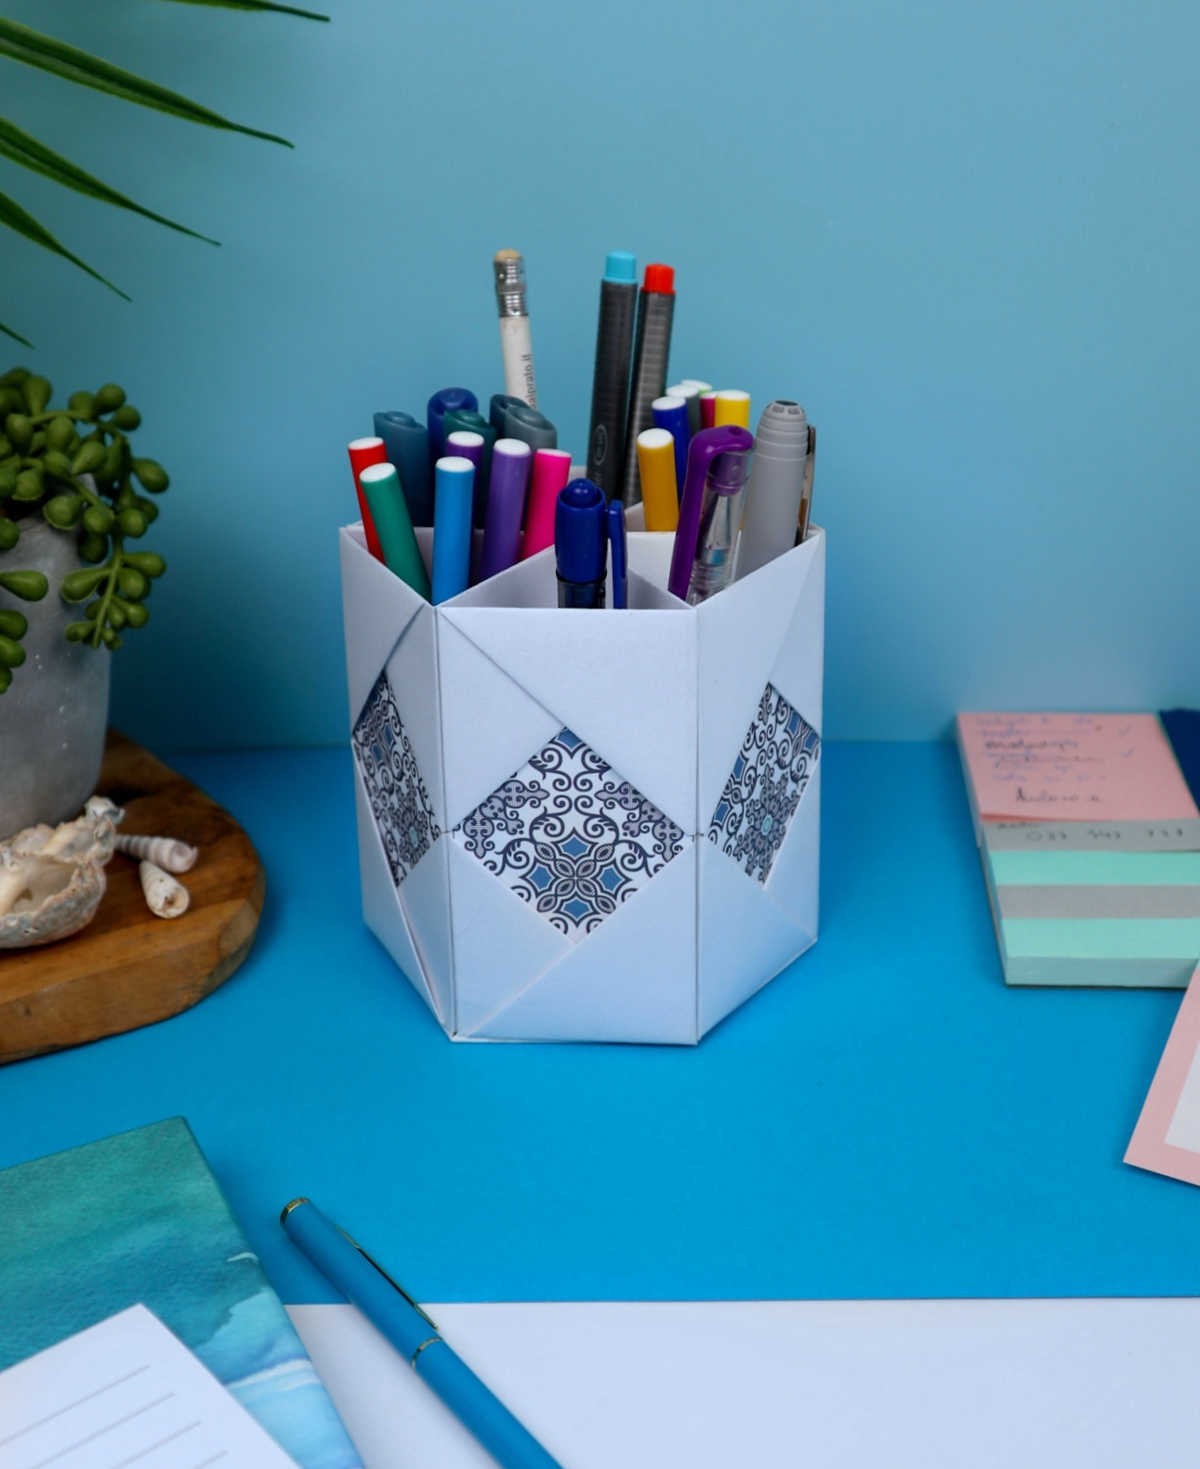
Got some spare time and a few scraps of paper lying around? Why not turn them into a functional piece of art that also happens to keep your office supplies organized? With just a little creativity, you can craft your own stunning DIY pencil holder from humble beginnings.
At first glance, this multi-faceted masterpiece might have you wondering if it came straight from the pages of a design catalog or a high-end office supply store.
But trust us, its paper origins are as genuine as they are impressive.
The beauty of DIY projects like this is that they can be tailored to your unique style and flair. Want it to pop with bright colors? Go for it! Prefer a more subdued tone? You’ve got that option too! And the best part? It’s surprisingly easy to make, requiring minimal materials and no special skills.
So what are you waiting for? Let’s get started on this innovative pencil holder project and show off your handiwork!
Supplies for Pencil Holder
To get started, you’ll need a few basic supplies. You might already have most of these items on hand, and if not, they’re easily accessible at any craft store or online retailer.
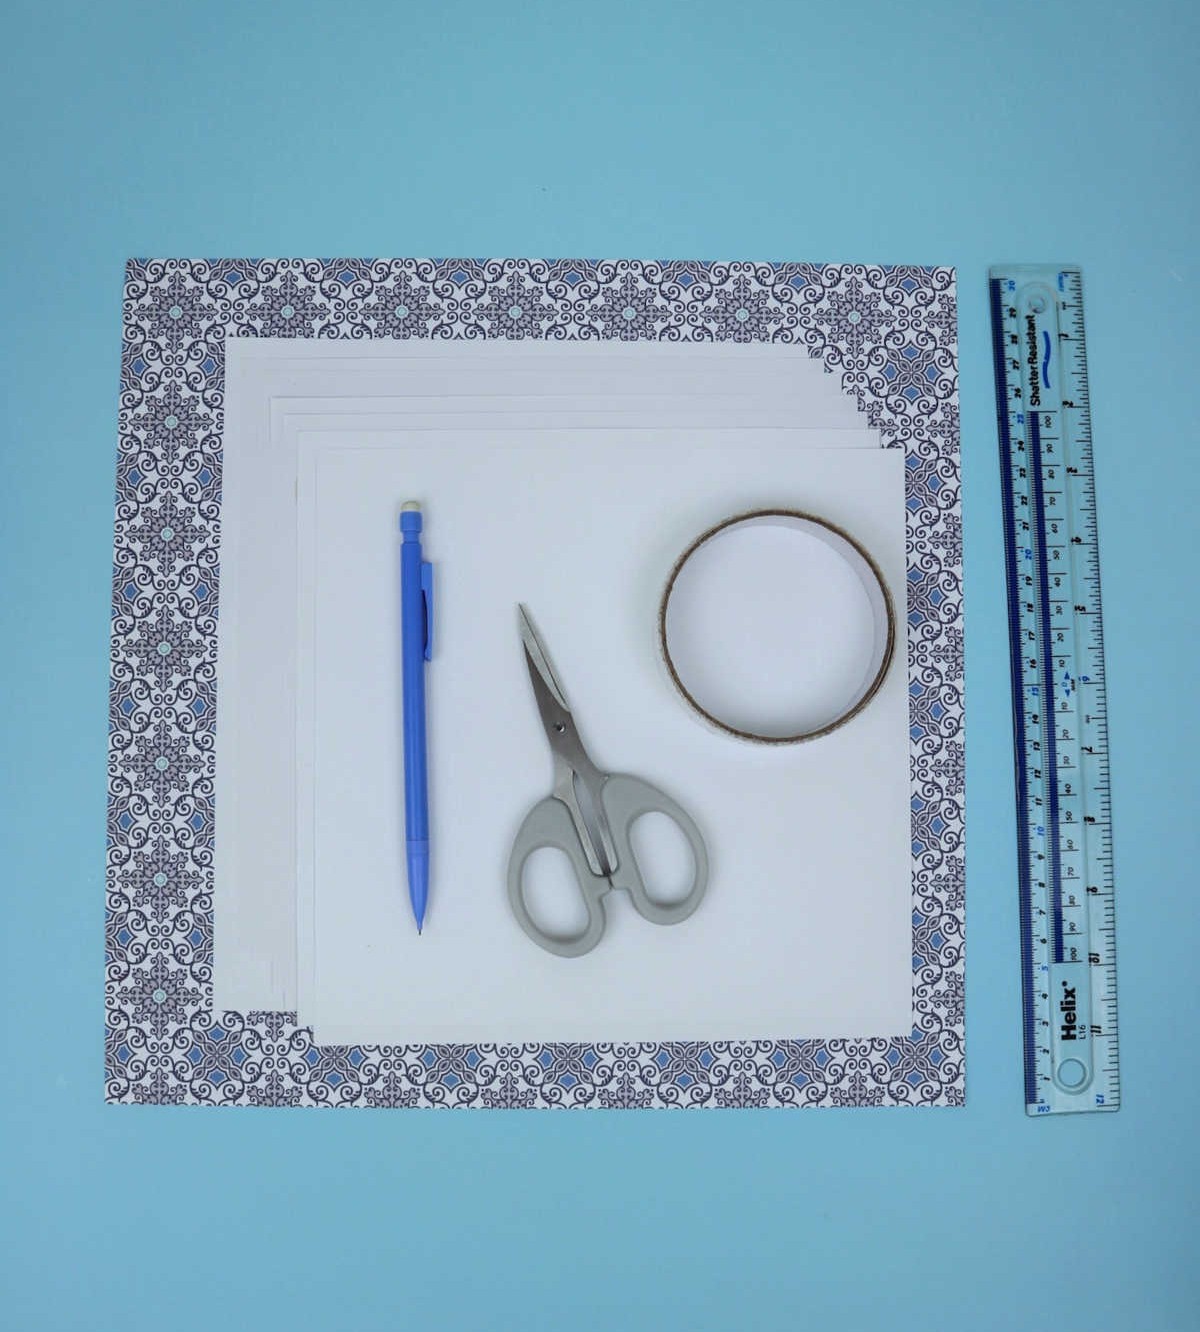
Here’s what you’ll need:A set of five square paper sheets, each measuring approximately A4 size (you can cut these from an existing sheet of paper)One additional square paper sheet for the base, also cut to A4 dimensionsAdhesive – either glue or double-sided tape will do the trickScissors for cutting and trimmingA ruler for ensuring straight lines and even edgesA pencil for making any necessary markings or correctionsDecorative paper (optional) – if you want to add some extra flair to your finished project, this is a great way to do it
How to Make a Paper Pencil Holder
Imagine transforming a simple piece of paper into a functional item that serves multiple purposes, much like the versatility of origami. The process is similar to traditional origami techniques, where you fold and manipulate the paper to create a desired shape or design. However, in this case, your end result will be a practical and useful creation, rather than an aesthetically pleasing one.
Step 1
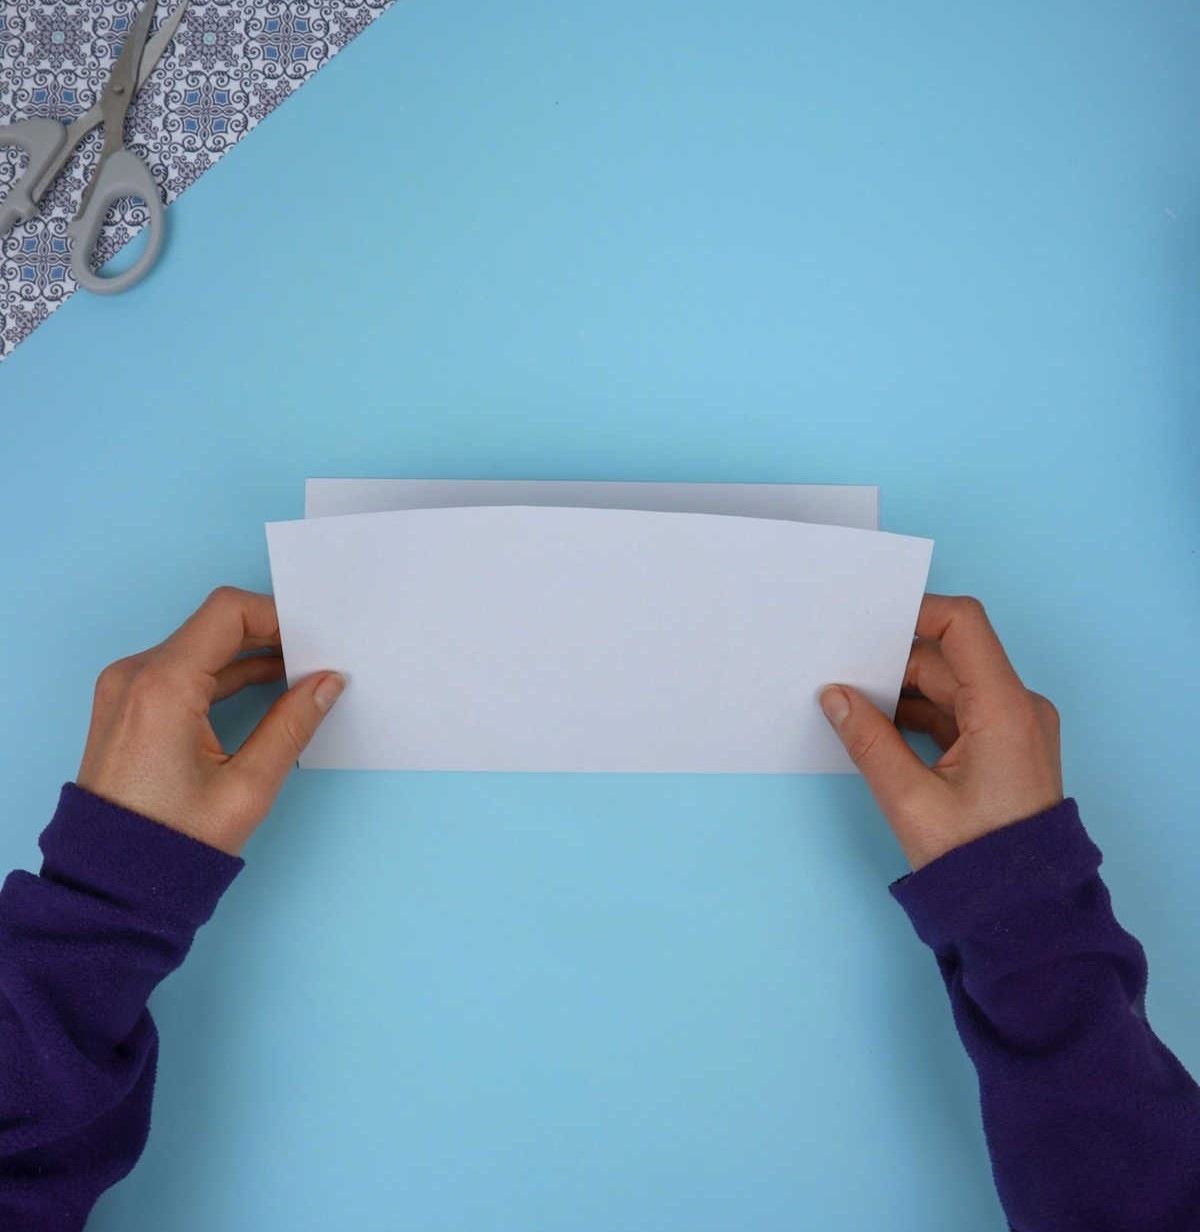
To begin, take a piece of paper and create a crease down the center by folding it in half. This simple step will help you prepare for the creative process ahead.
Step 2

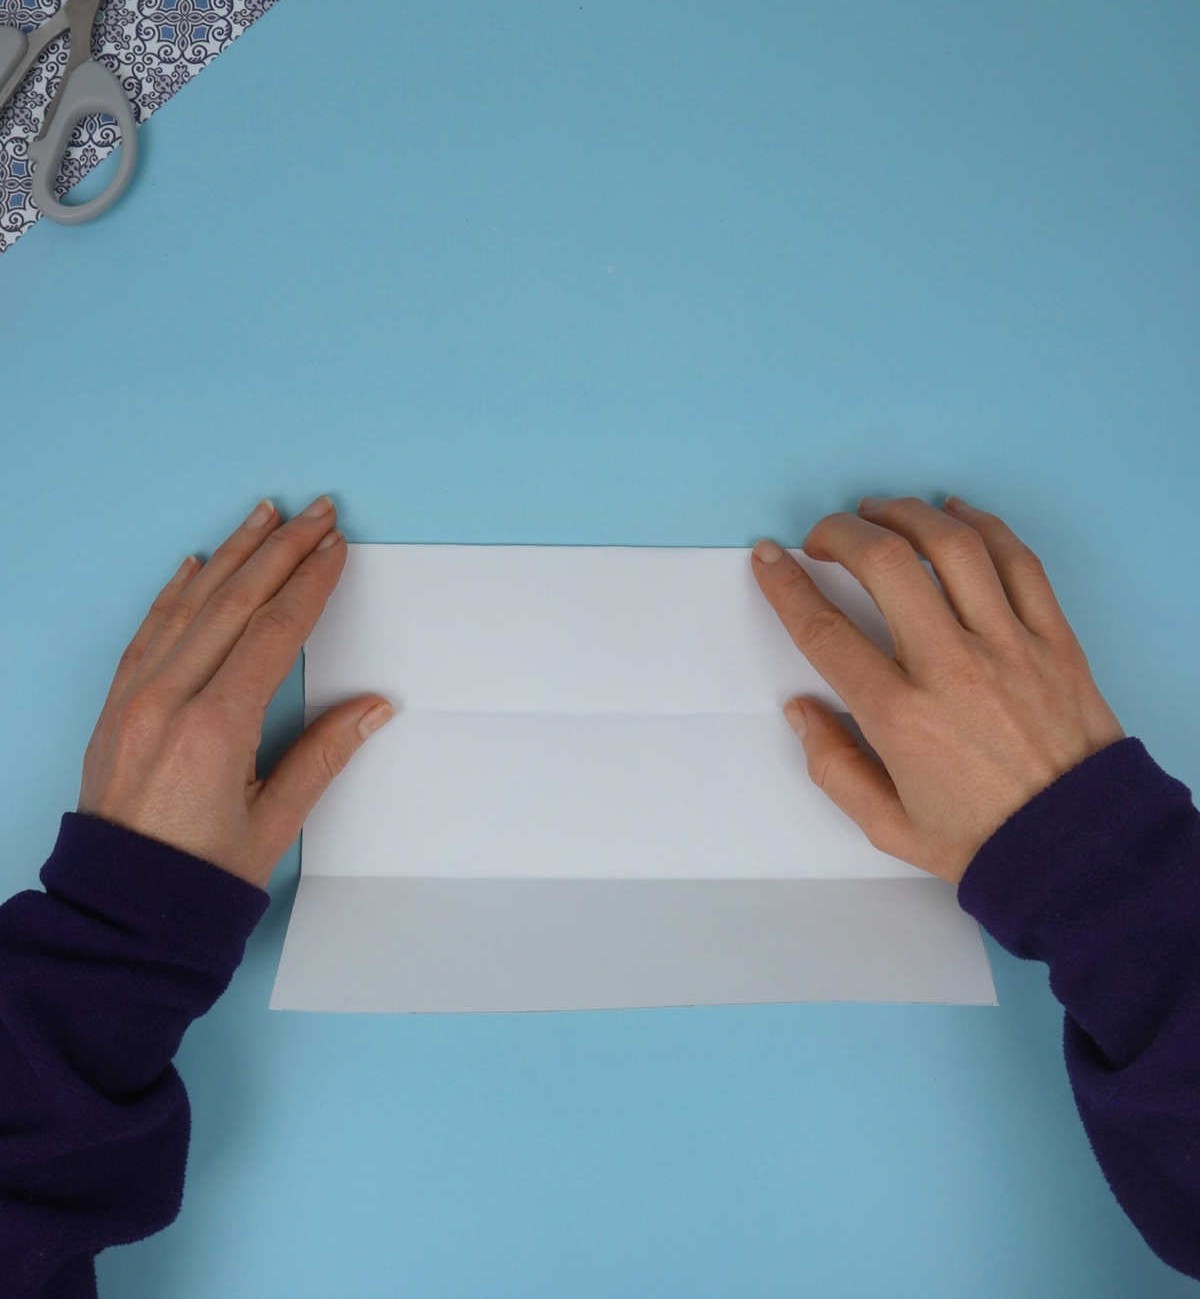
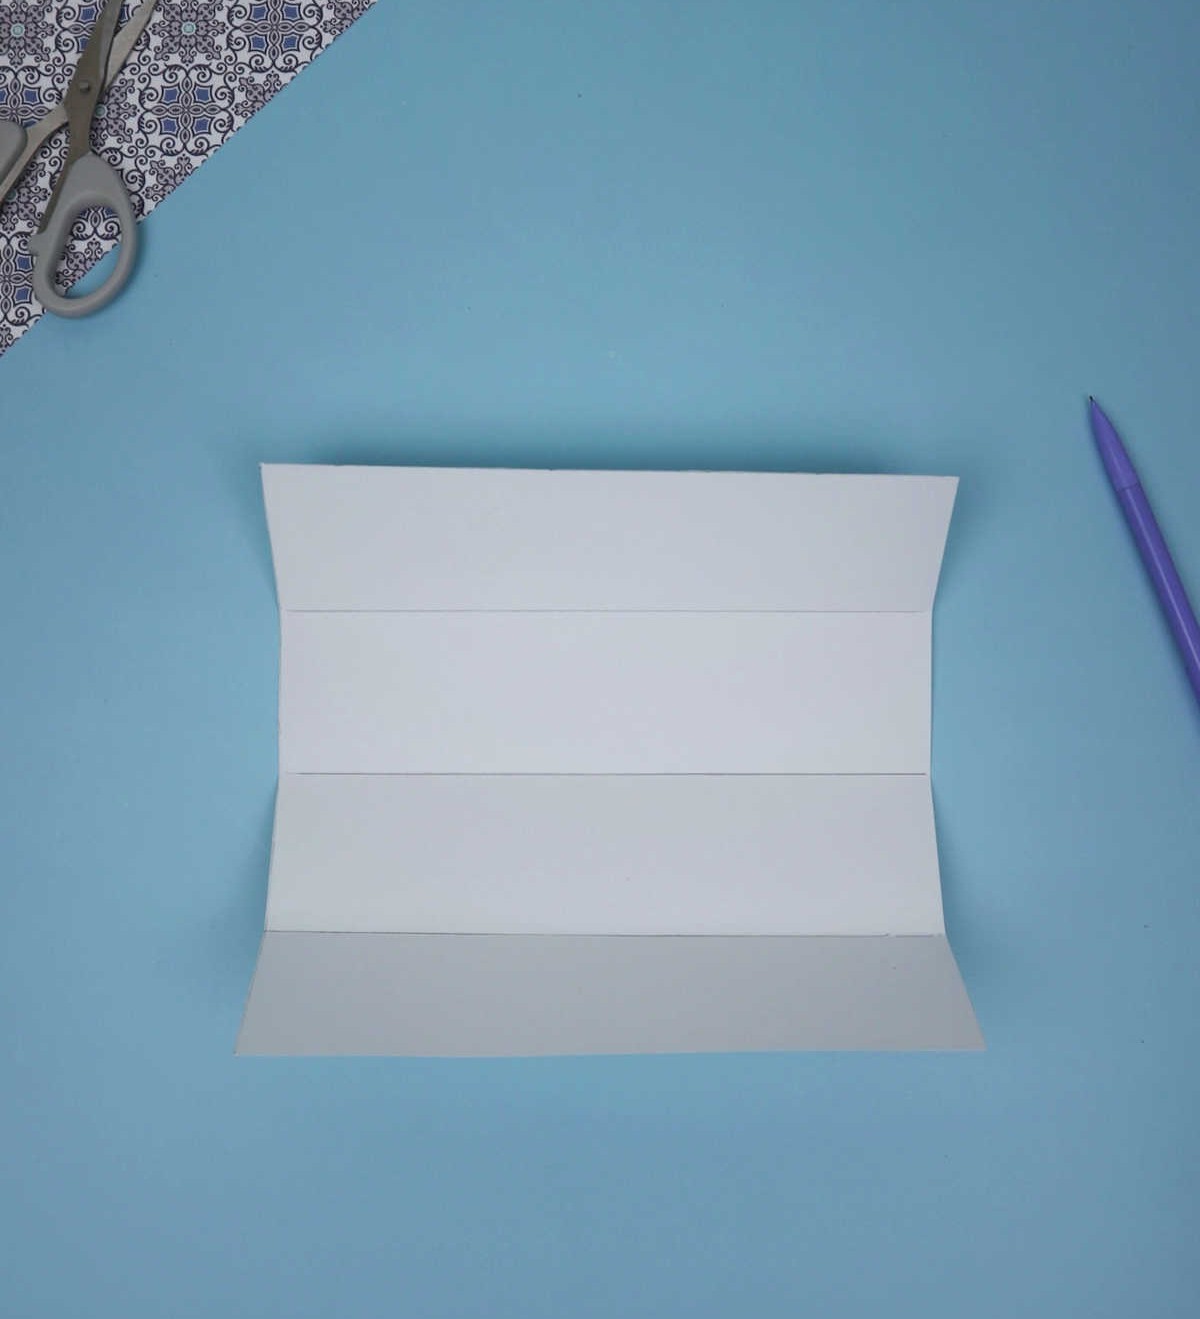
As you carefully open the paper, a distinctive central crease catches your attention. To begin, fold the lower half of the page upwards towards this axis, ensuring a crisp fold by applying gentle pressure. Next, repeat this action with the upper half of the sheet, folding it downwards towards the center crease and pressing firmly to create a sharp fold. Upon unfolding the paper, you’ll discover three deliberate creases that have transformed the original sheet into four equal parts.
Step 3
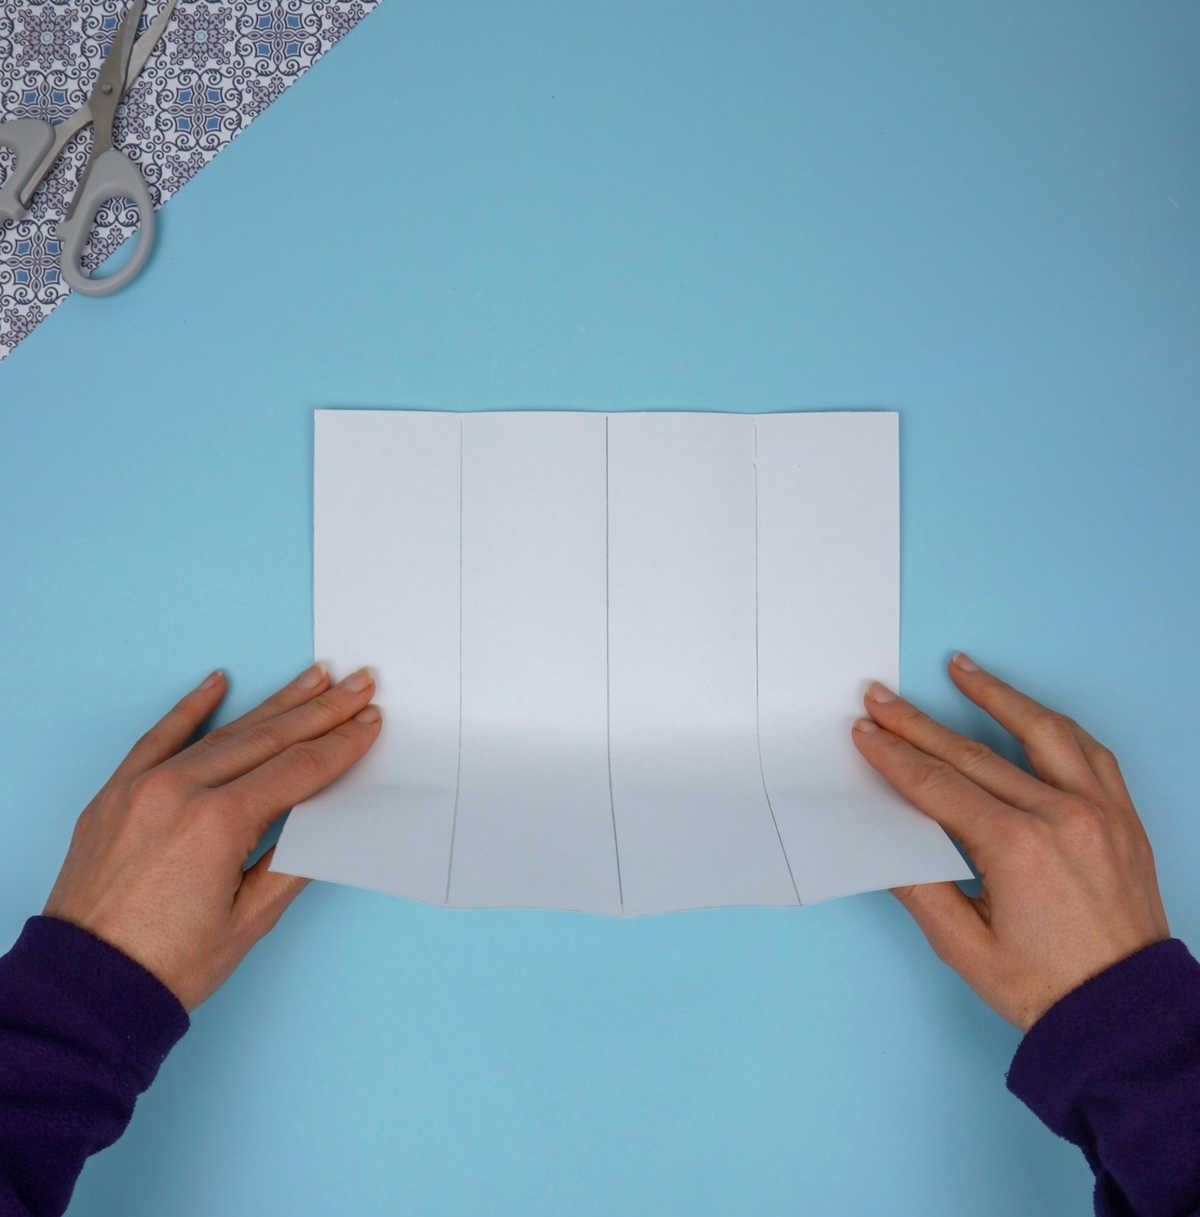
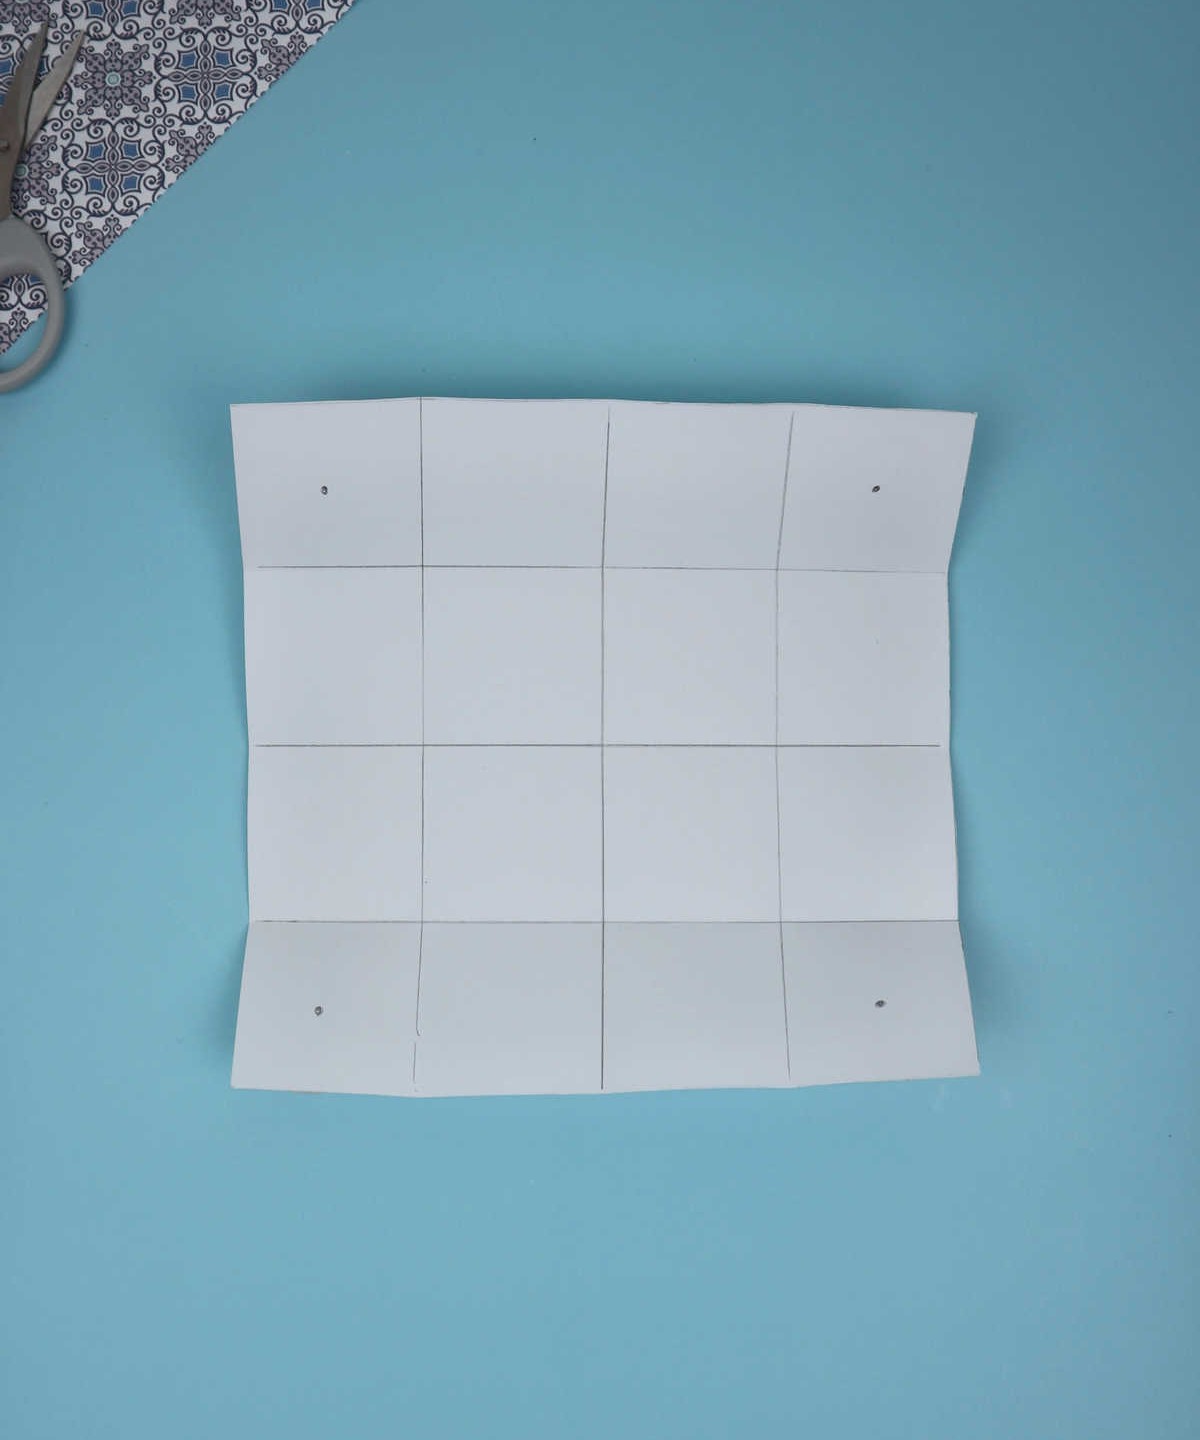
To achieve the desired outcome, start by rotating the sheet so that the existing creases align vertically. Next, fold the paper in half and press down firmly to create a new center crease, effectively dividing the sheet into two halves. This process should be repeated until you have four equal parts, resulting in a 4×4 grid with 16 identical squares.
Step 4
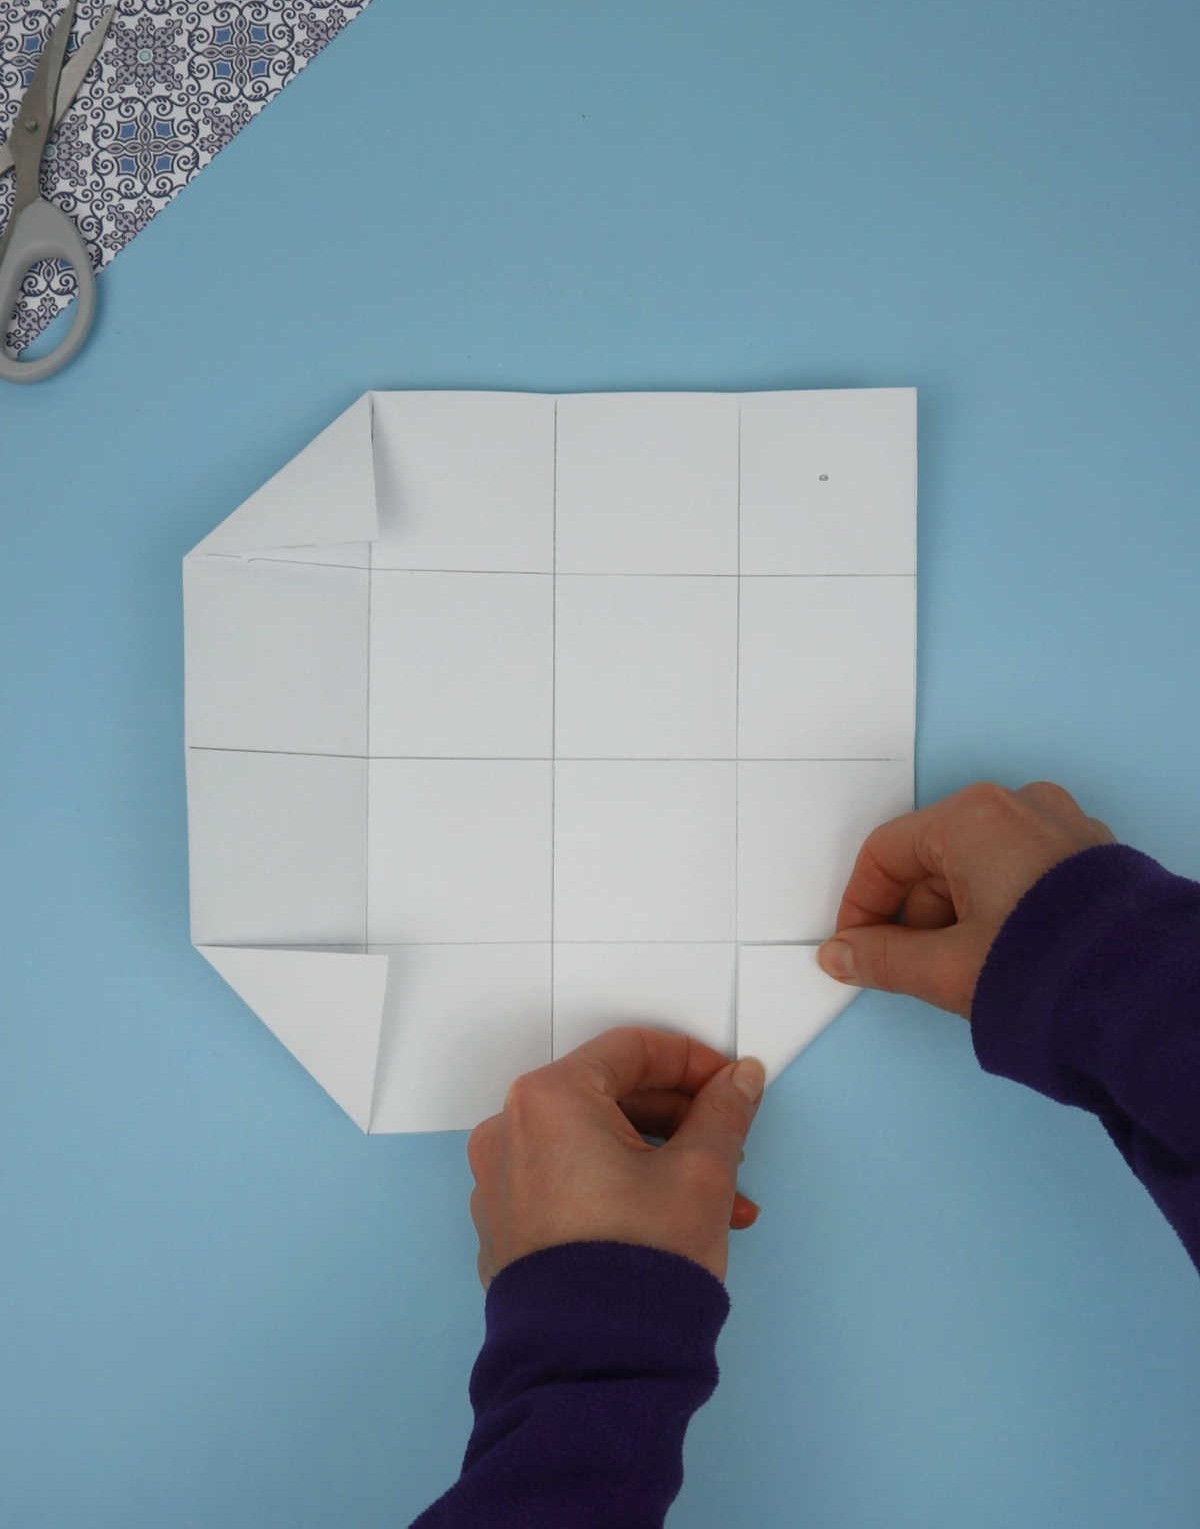
To create the next stage in your origami masterpiece, begin by folding each corner of the paper inward to form a triangular shape. Start with one corner and gently crease the paper to create the fold, taking care not to tear the paper. Once you’ve achieved the desired triangle, repeat the process with the other three corners, making sure each fold is precise and even.
Step 5

To create the desired shape, start by holding the left edge of the sheet steady while keeping the half-folds in position. Gently bring this edge towards the center crease, allowing the folds to align and creating a crisp, sharp line.
Step 6
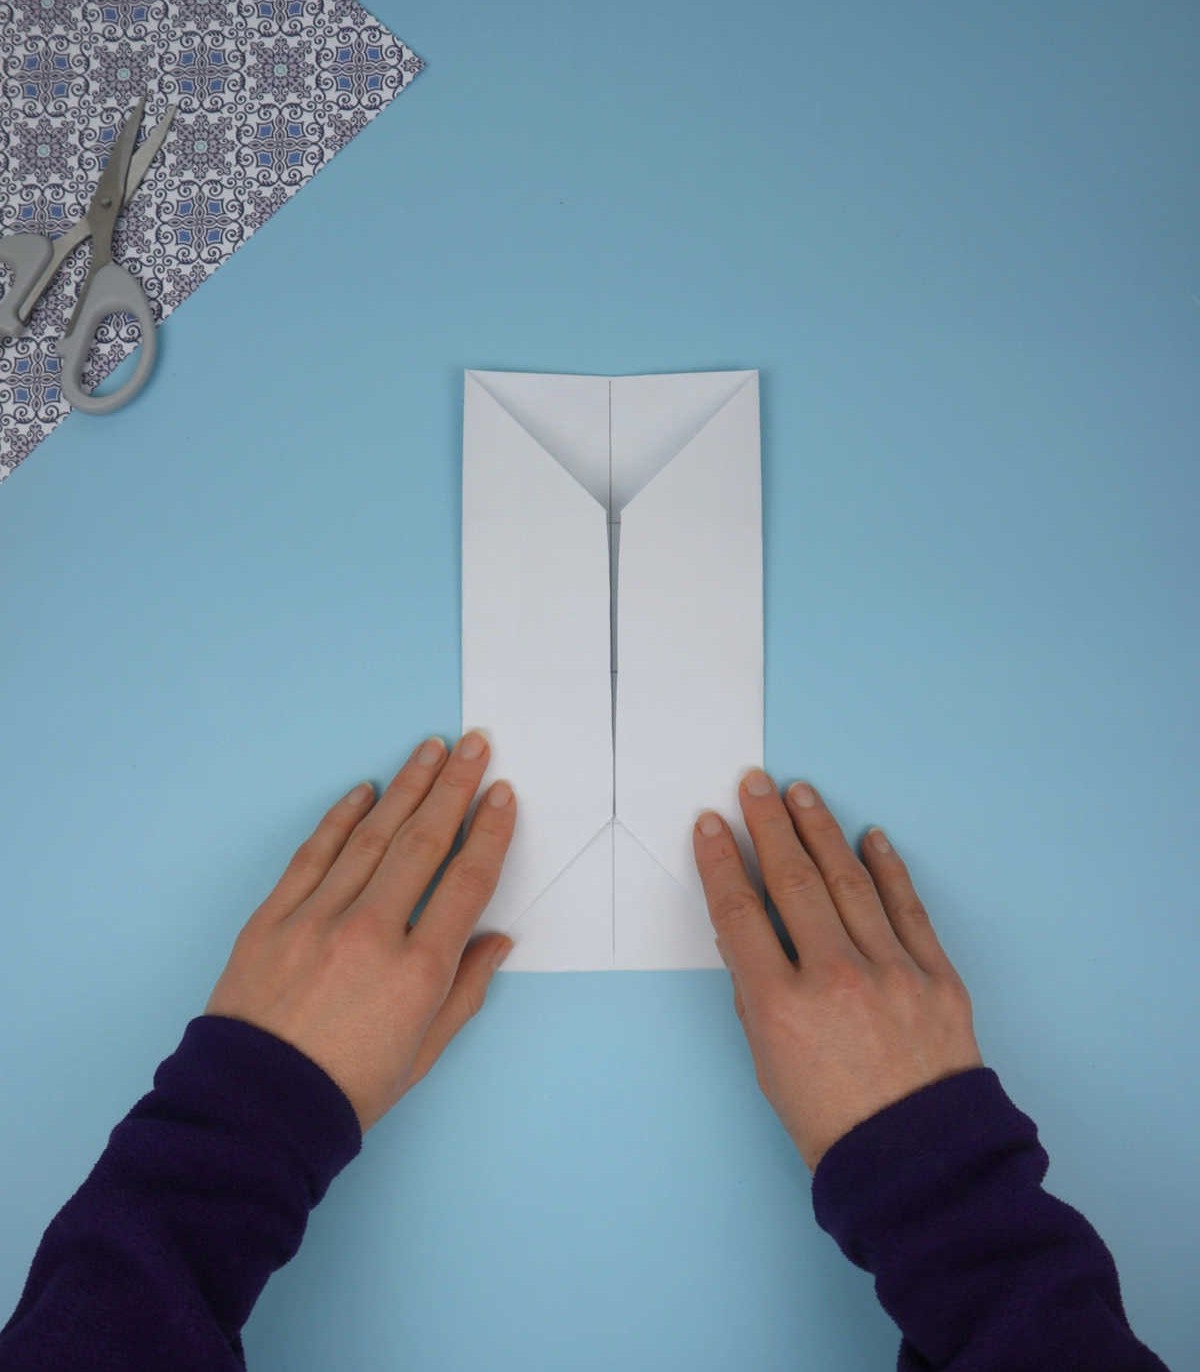
Now that you’ve prepared your paper for folding, it’s time to bring everything together. To do this, hold the bottom edge of the paper and fold it up by one square width, just like before. Make sure the crease stays in place. Next, repeat this process with the top half of the paper. As you make these folds, aim for the ends to meet at the center, creating a symmetrical shape.
Step 7
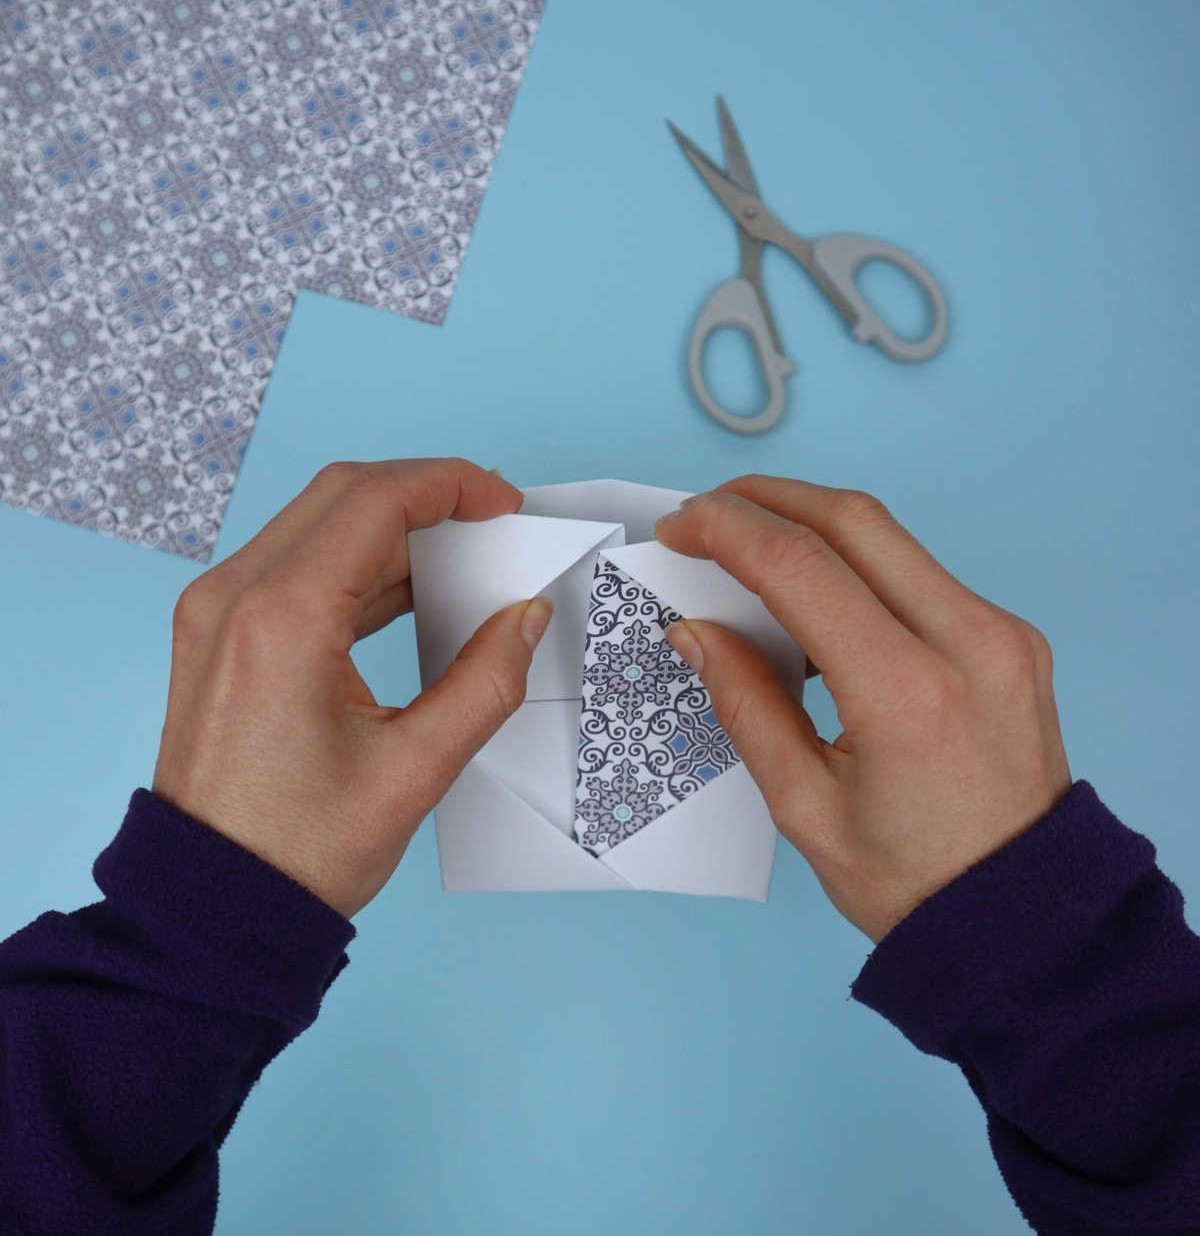
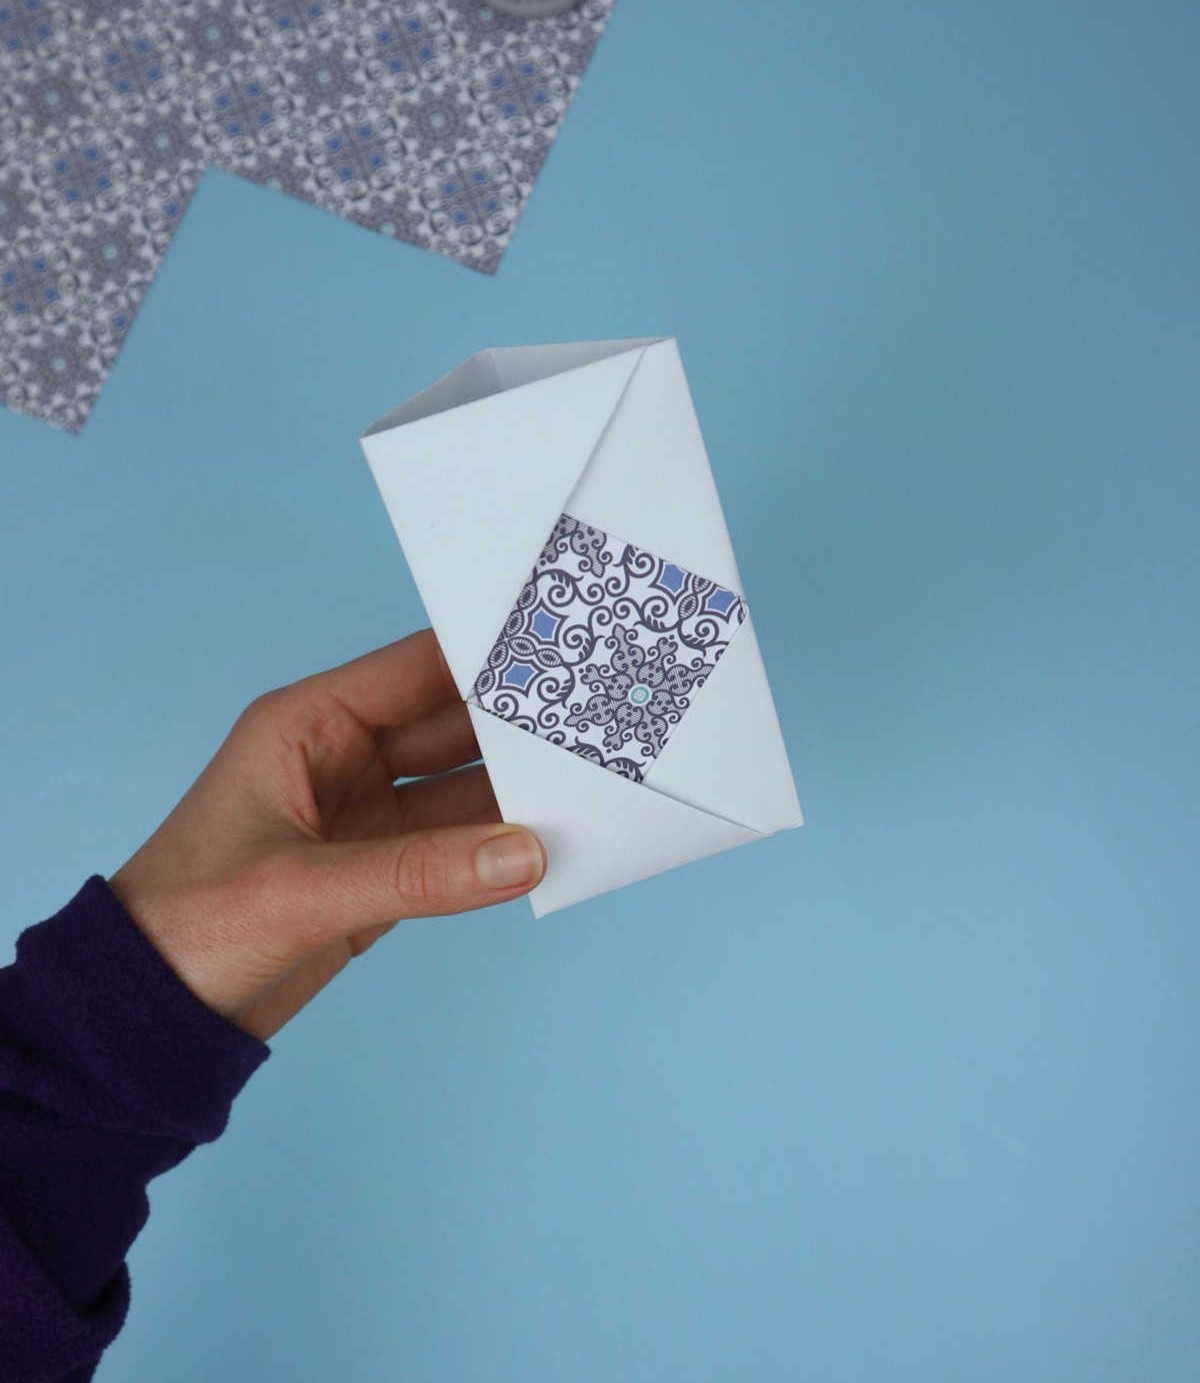
When it’s time to give your paper pencil holder a makeover, consider adding some visual flair. Cut a piece of decorative or colorful paper that matches your desired aesthetic and shape it to fit the diamond-like opening in the holder. Secure the paper in place by tucking it into the folds, ensuring it stays put. With this step complete, you’ve successfully transformed one part of your pencil stand.
Step 8
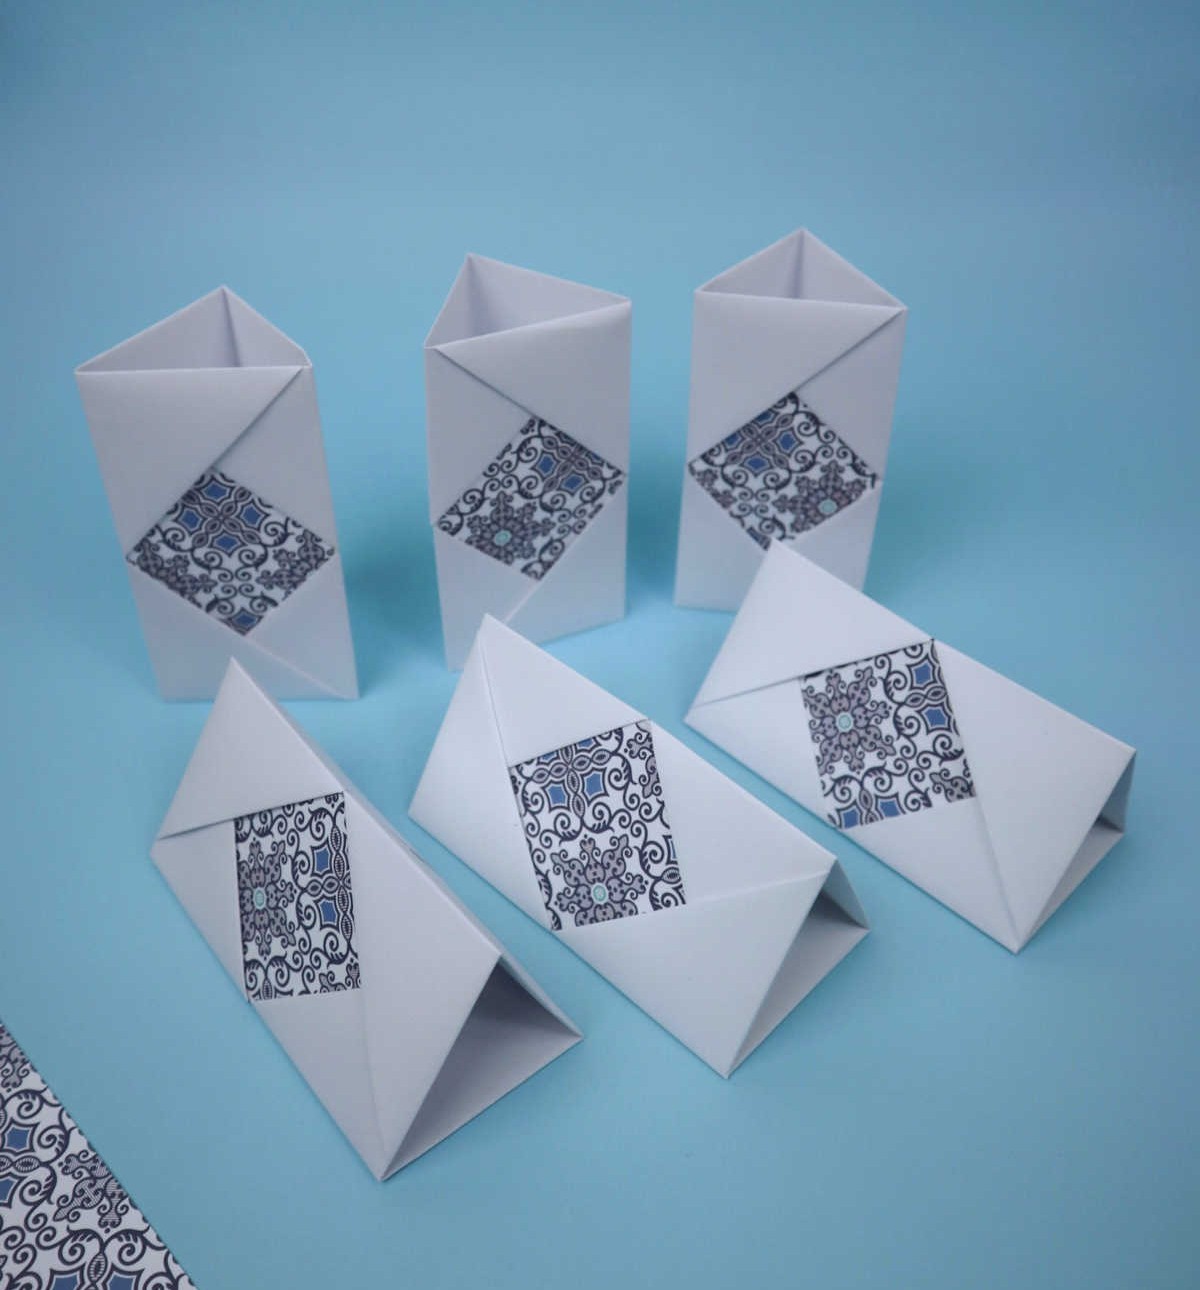
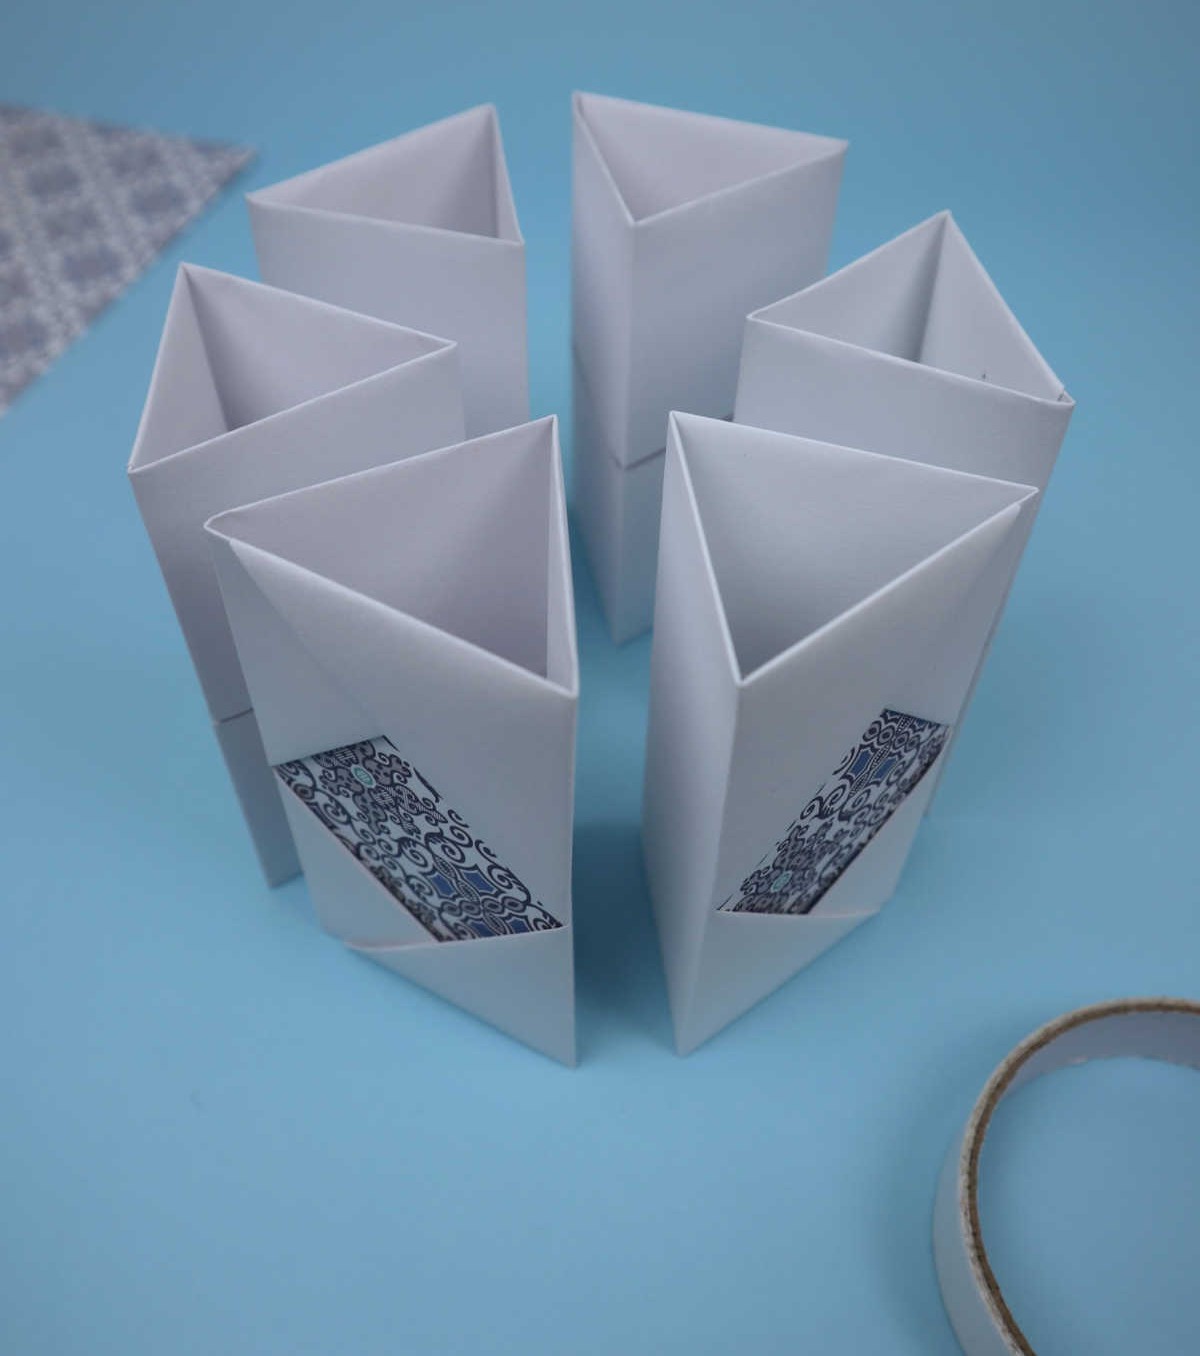
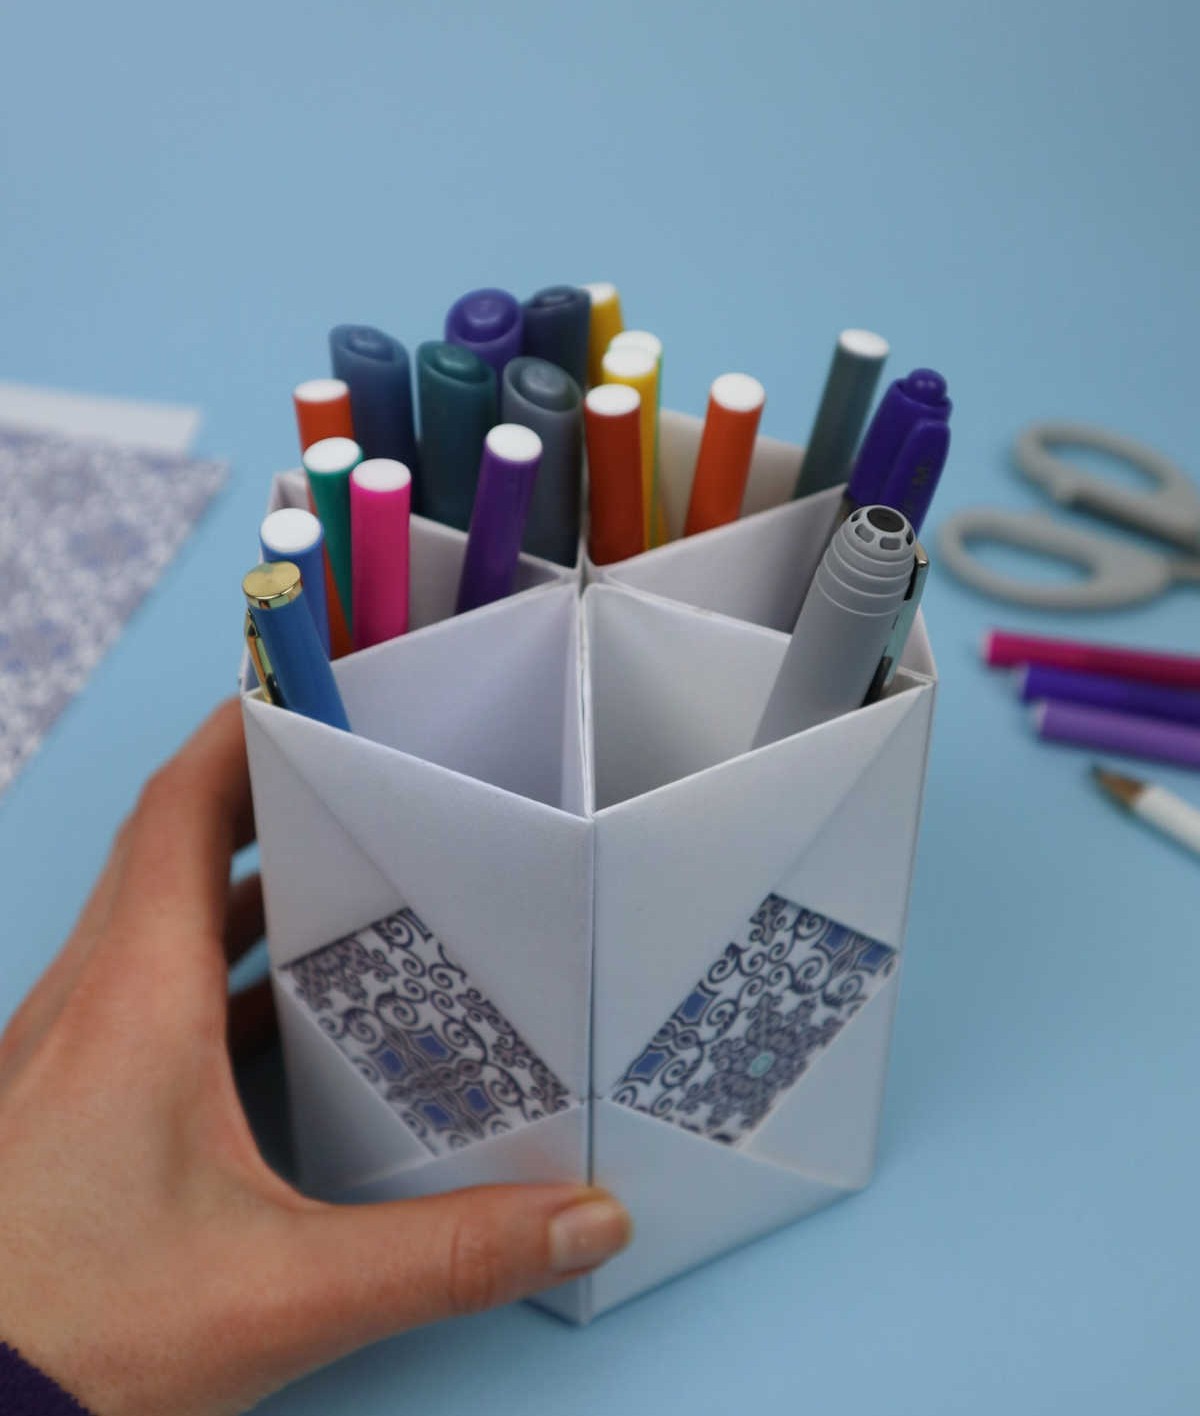
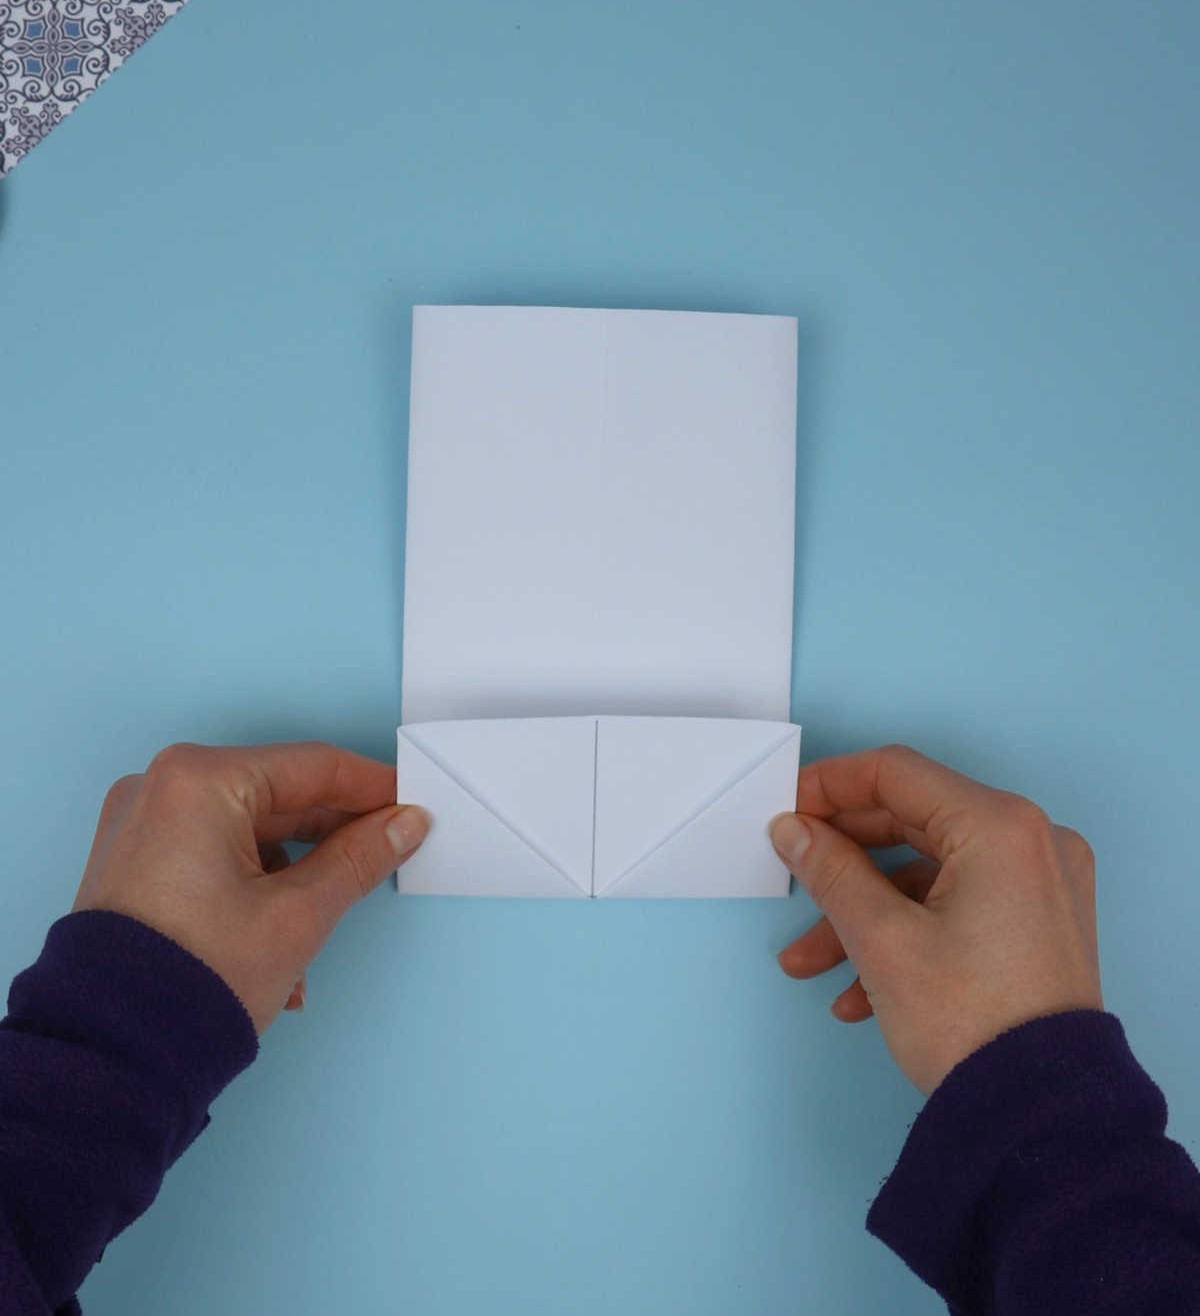
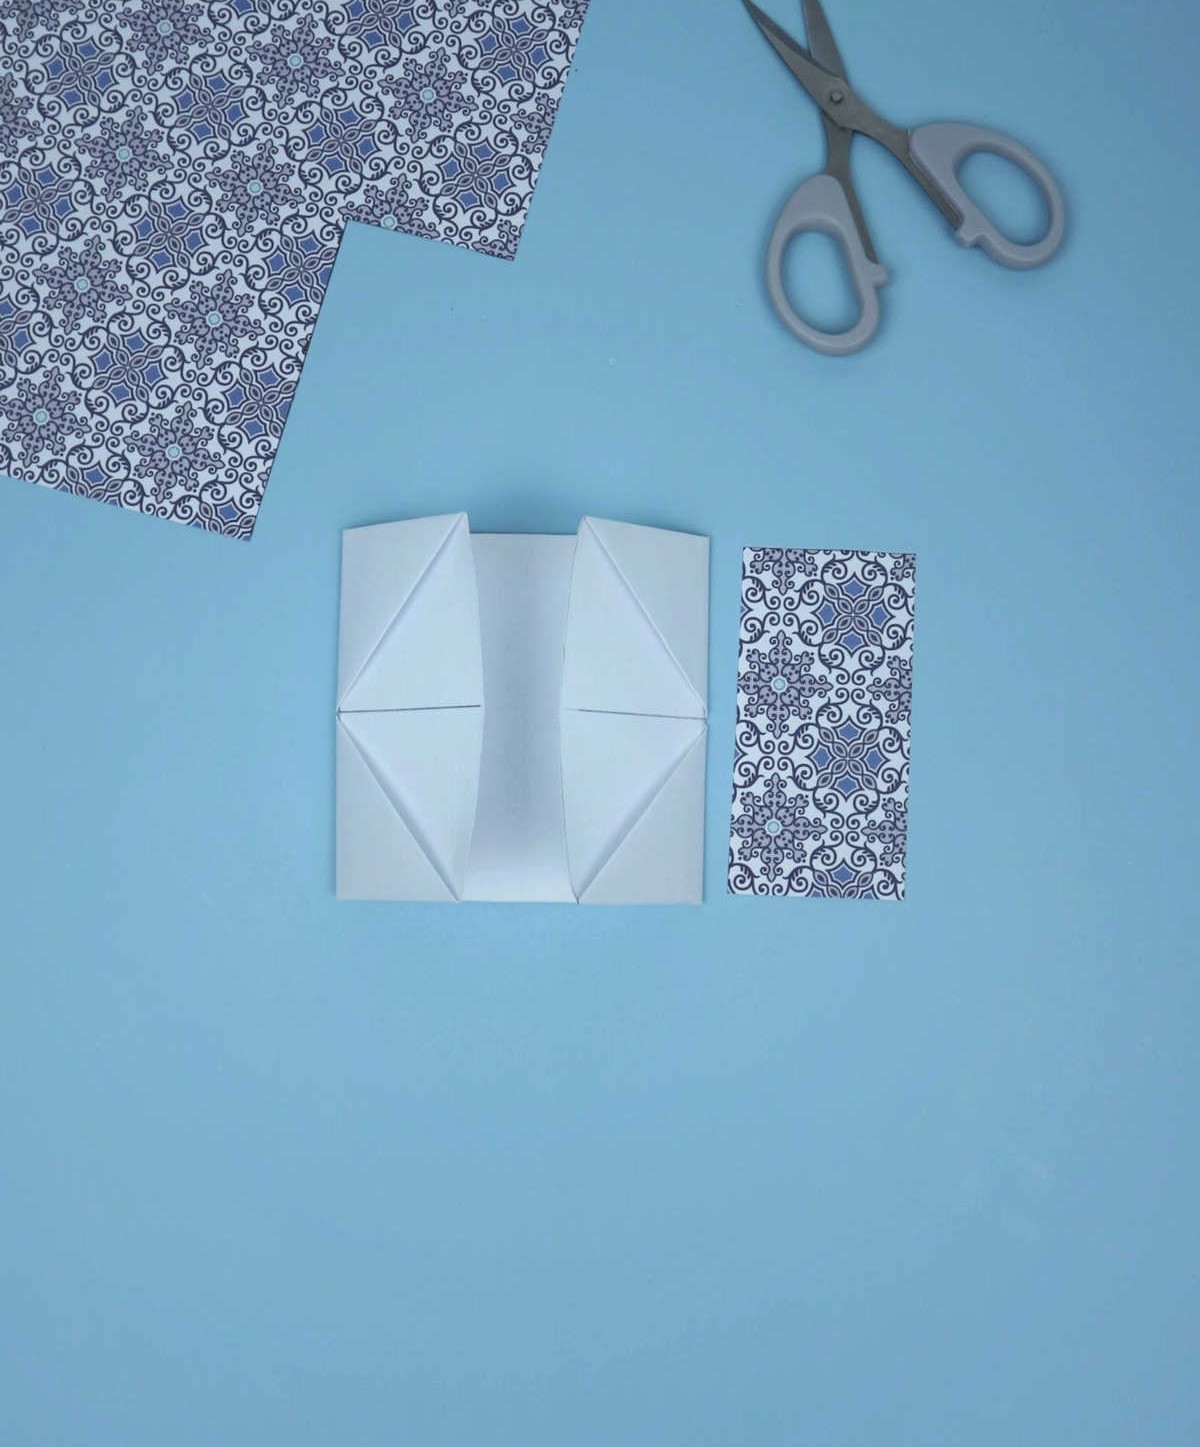
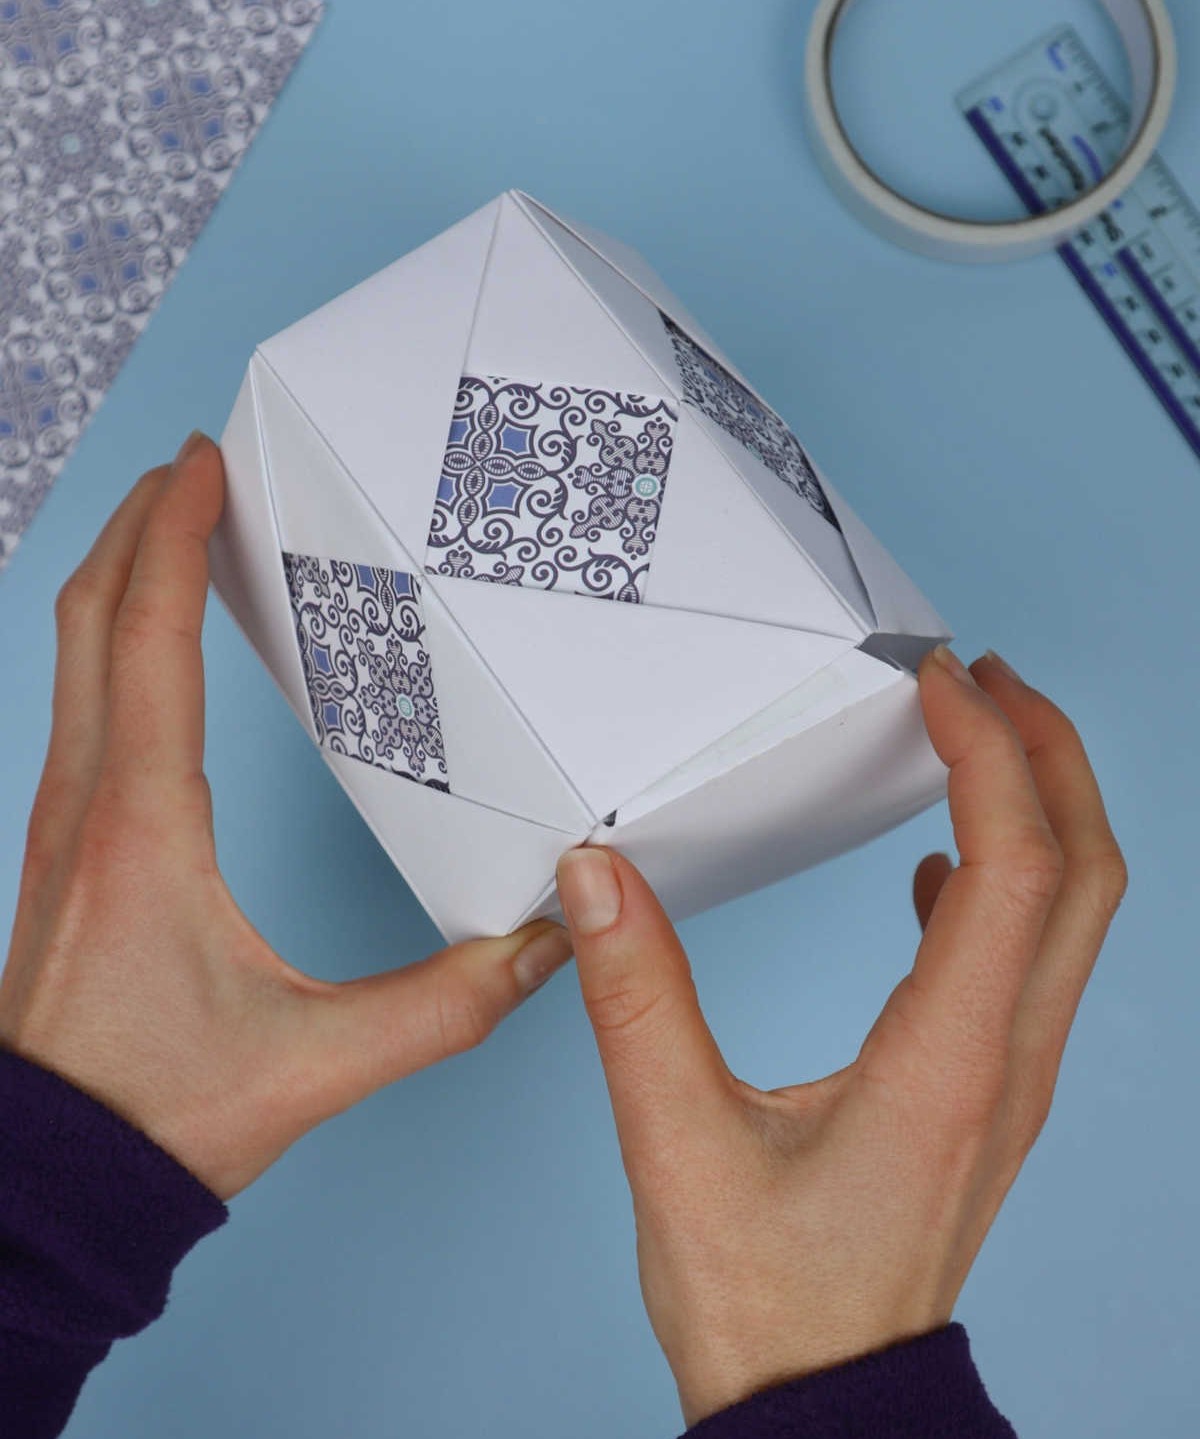
To complete this project, repeat each step six times to create six individual pencil holders. These mini-holders are perfect as-is, but if you’re looking for a larger solution, consider combining all six parts to create a comprehensive pencil repository. As you assemble the pieces, make sure the decorated side faces outward to guide your arrangement and ensure a seamless connection.
Step 9
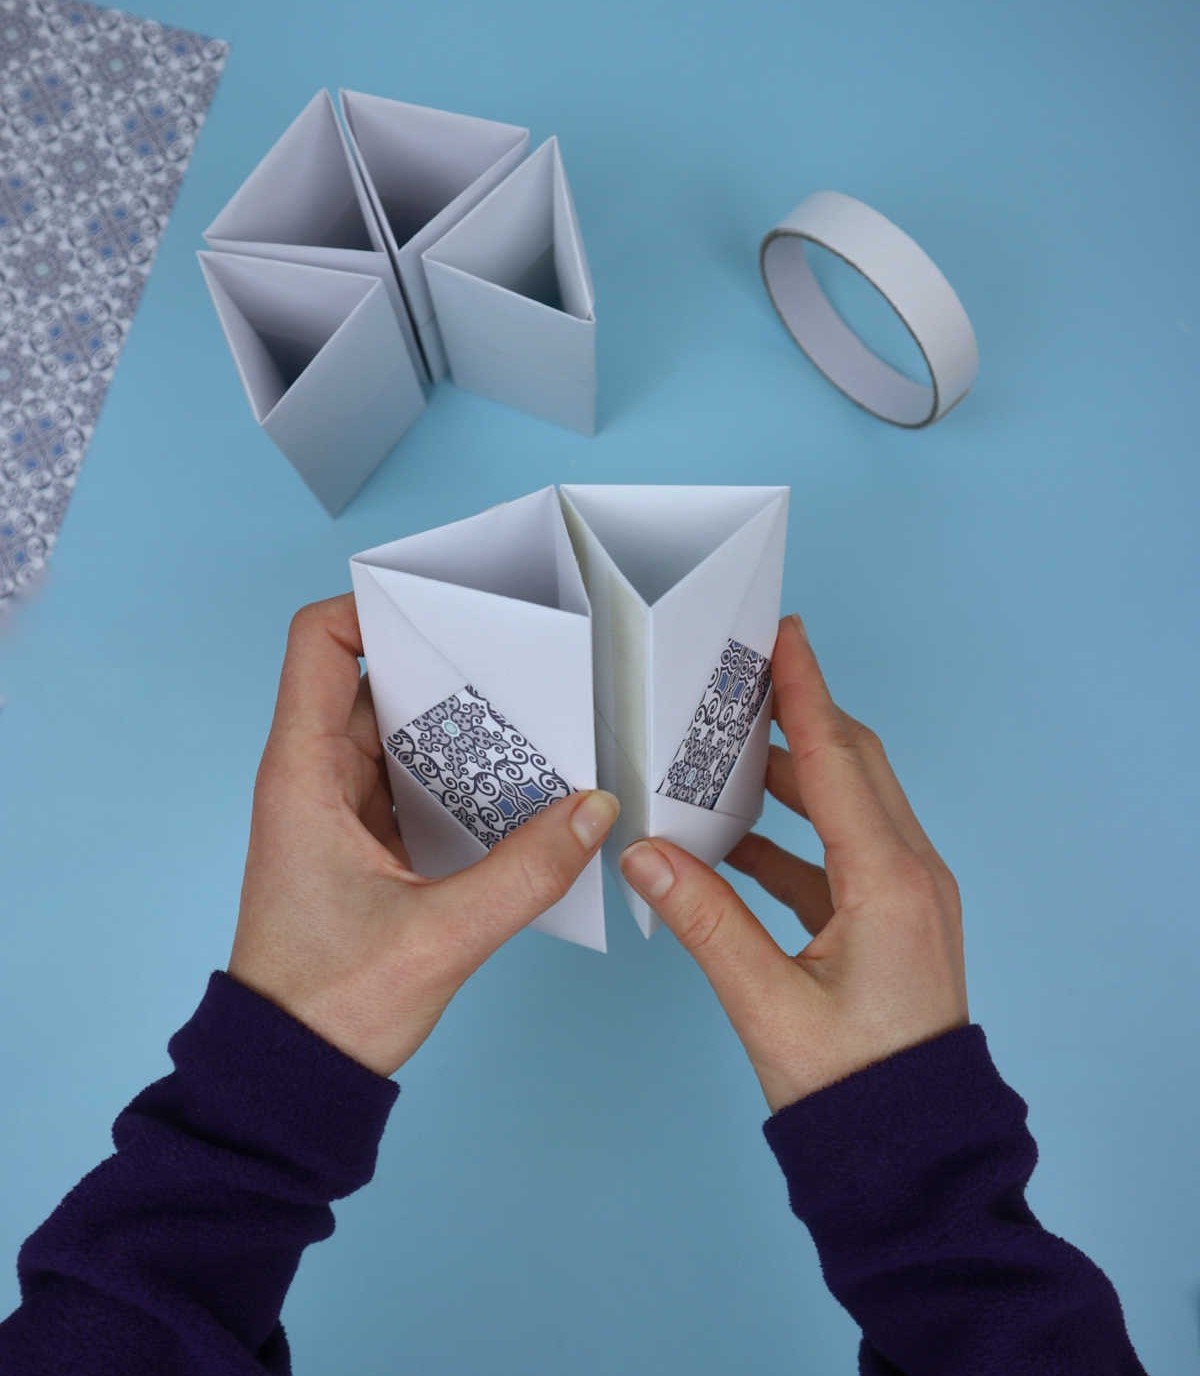
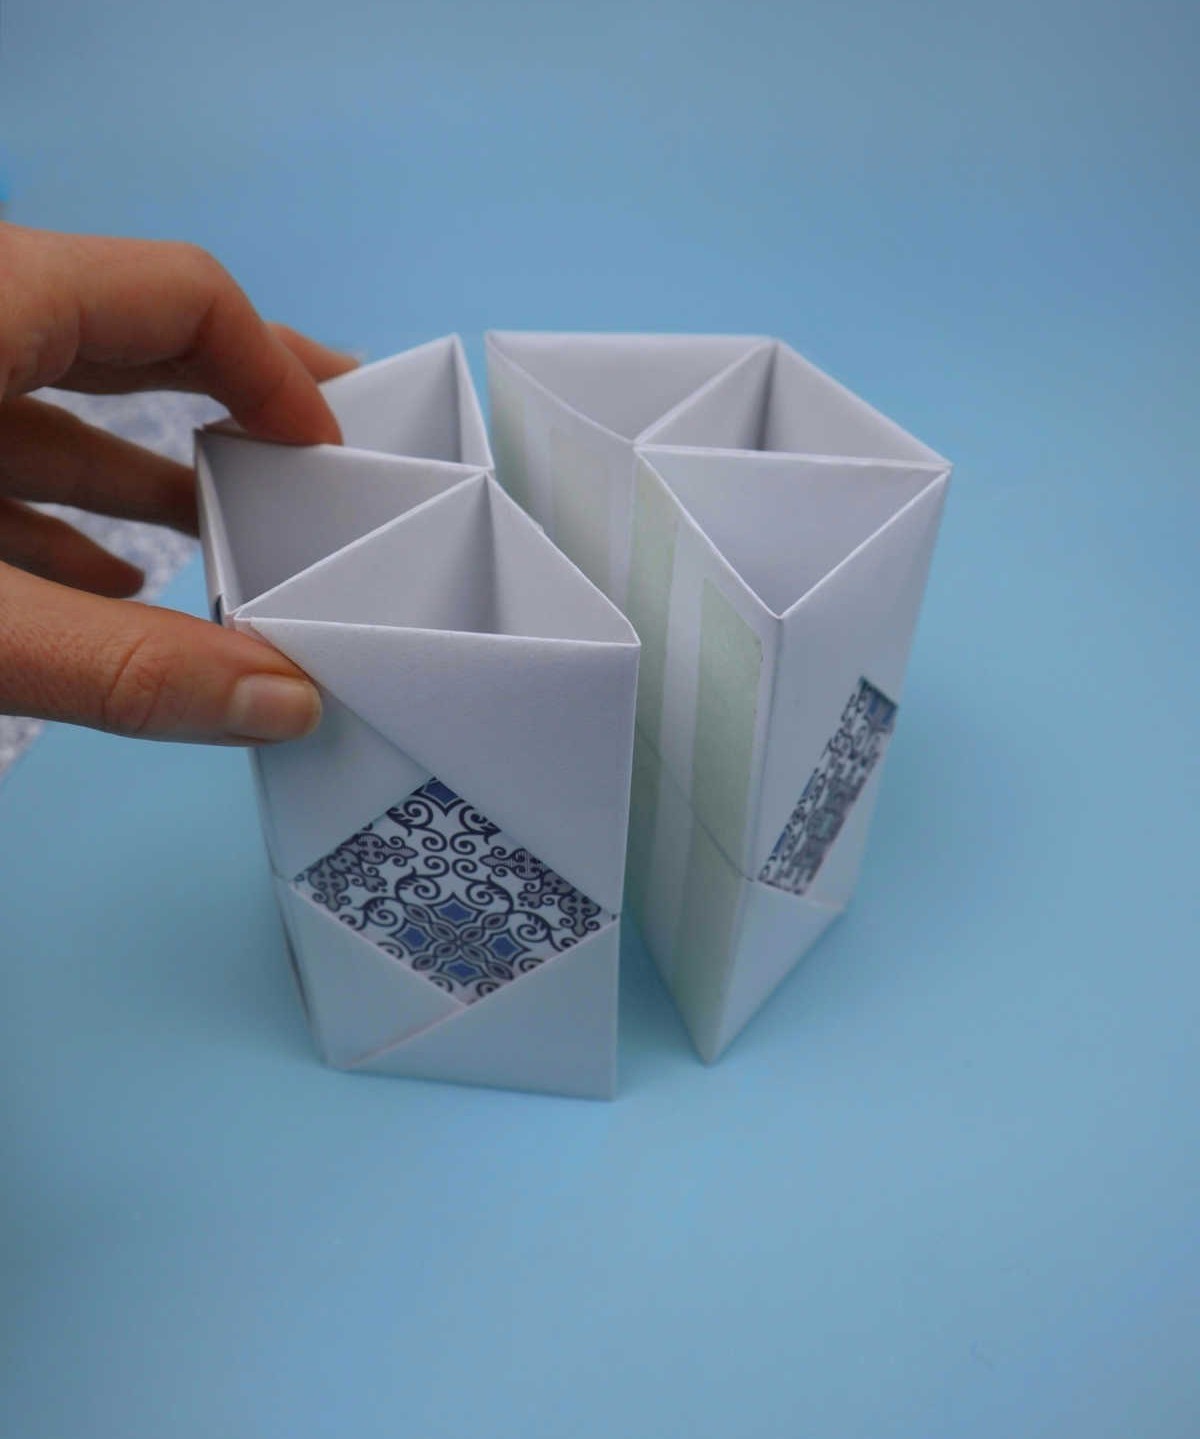

Before combining the individual components of your project, it’s essential to have a clear understanding of each element and how they will work together. By arranging all six parts – [insert specific details or examples] – in a logical order, you can avoid potential mistakes that may arise from hasty assembly. This structured approach allows for a seamless integration of the various components, ultimately resulting in a more cohesive and effective final product.
Step 10
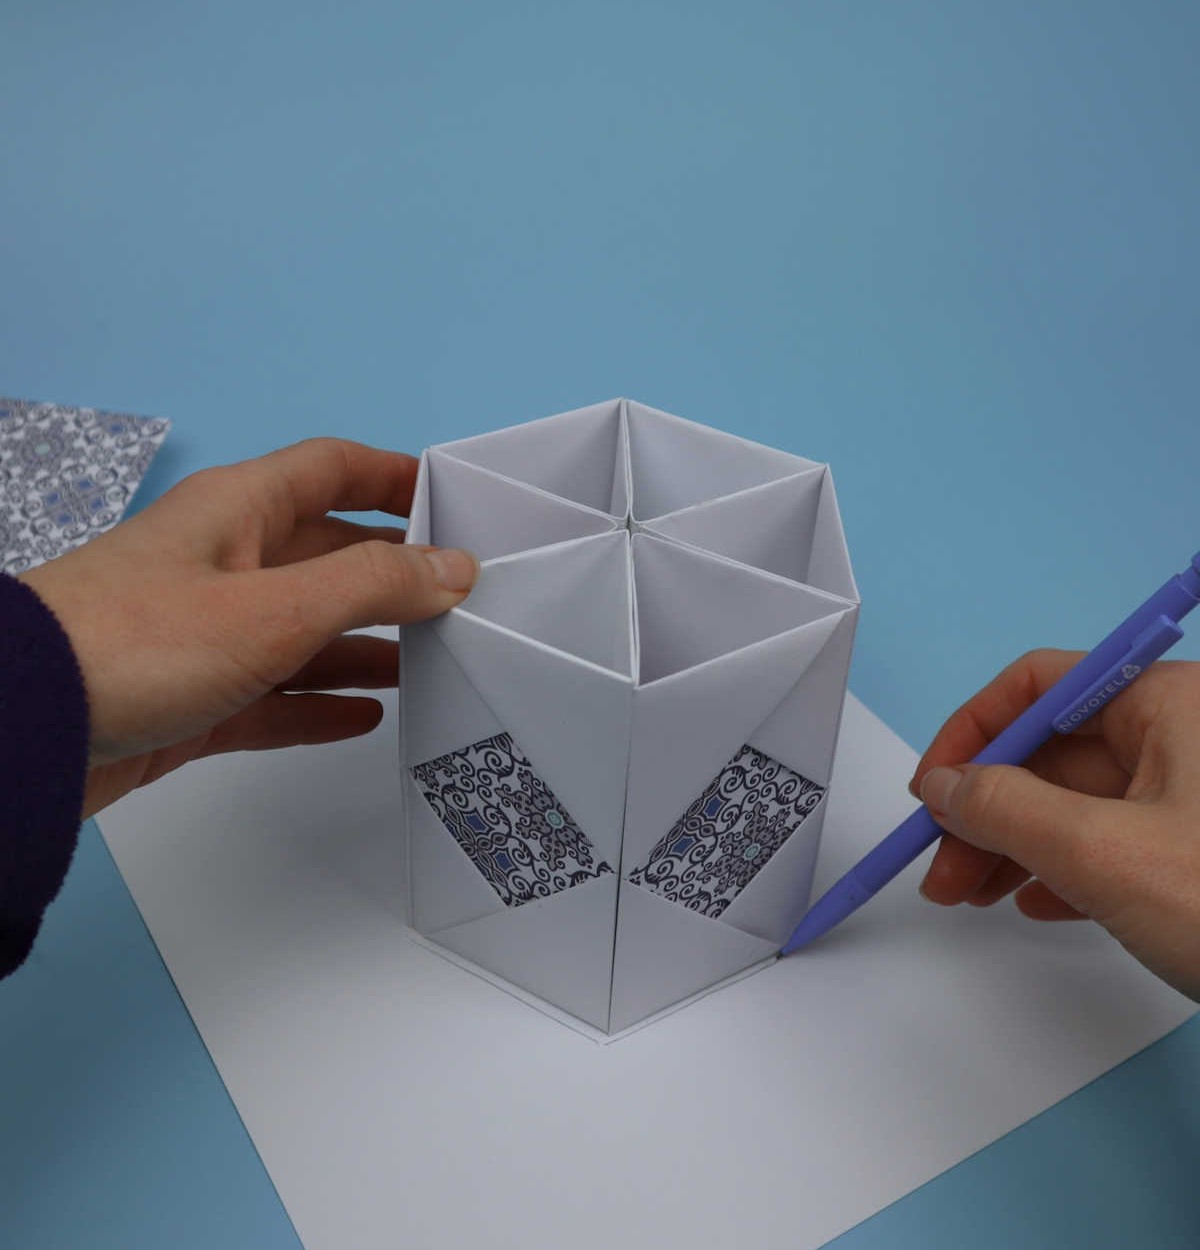
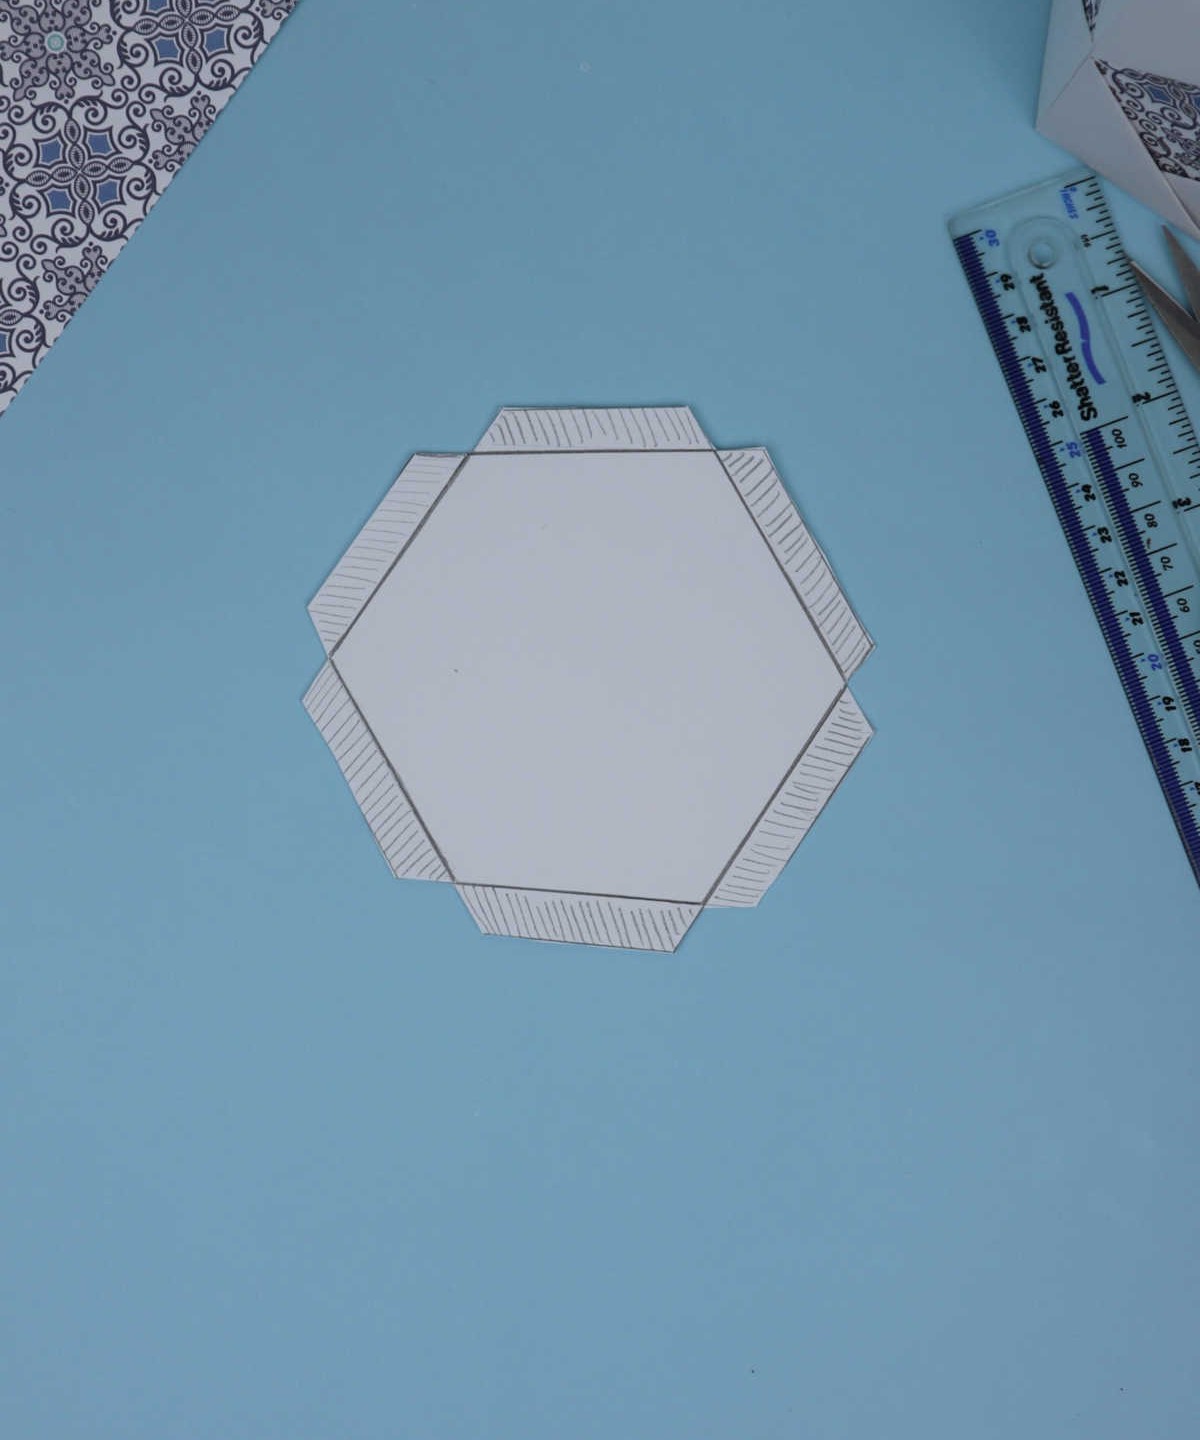
As we near the end of our project, there’s just one more crucial step to complete. Take out the thicker paper sheet from your supplies list and grab a pencil. Using a ruler, carefully draw an outline of the contour on the paper. You’ll notice that the shape will take on a hexagonal form. To ensure a secure and snug fit for your pencil holder, it’s essential to be precise with your measurements. This foundation is vital, so don’t rush through this process – take your time to get it just right.
Step 11
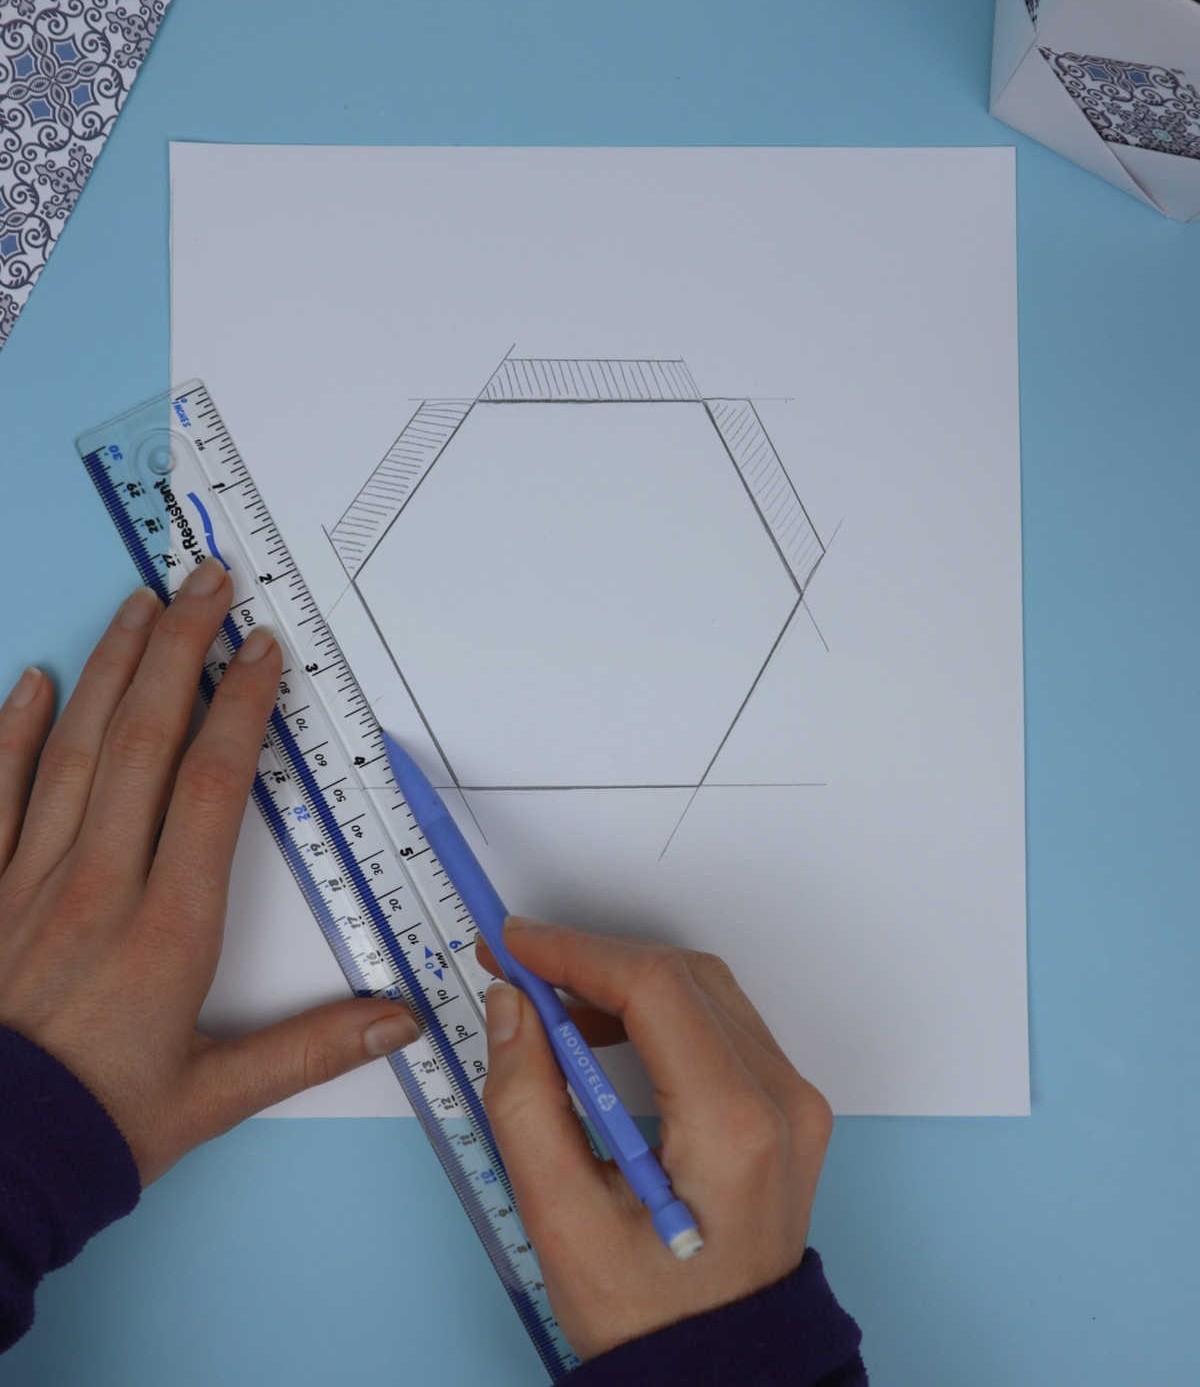
When designing the cutout’s outline, don’t forget to account for those overlap flaps. By taking this crucial step, you’ll be able to neatly tuck the bottom of the design into the pencil holder, resulting in a sturdier overall structure that can withstand the test of time.
Step 12
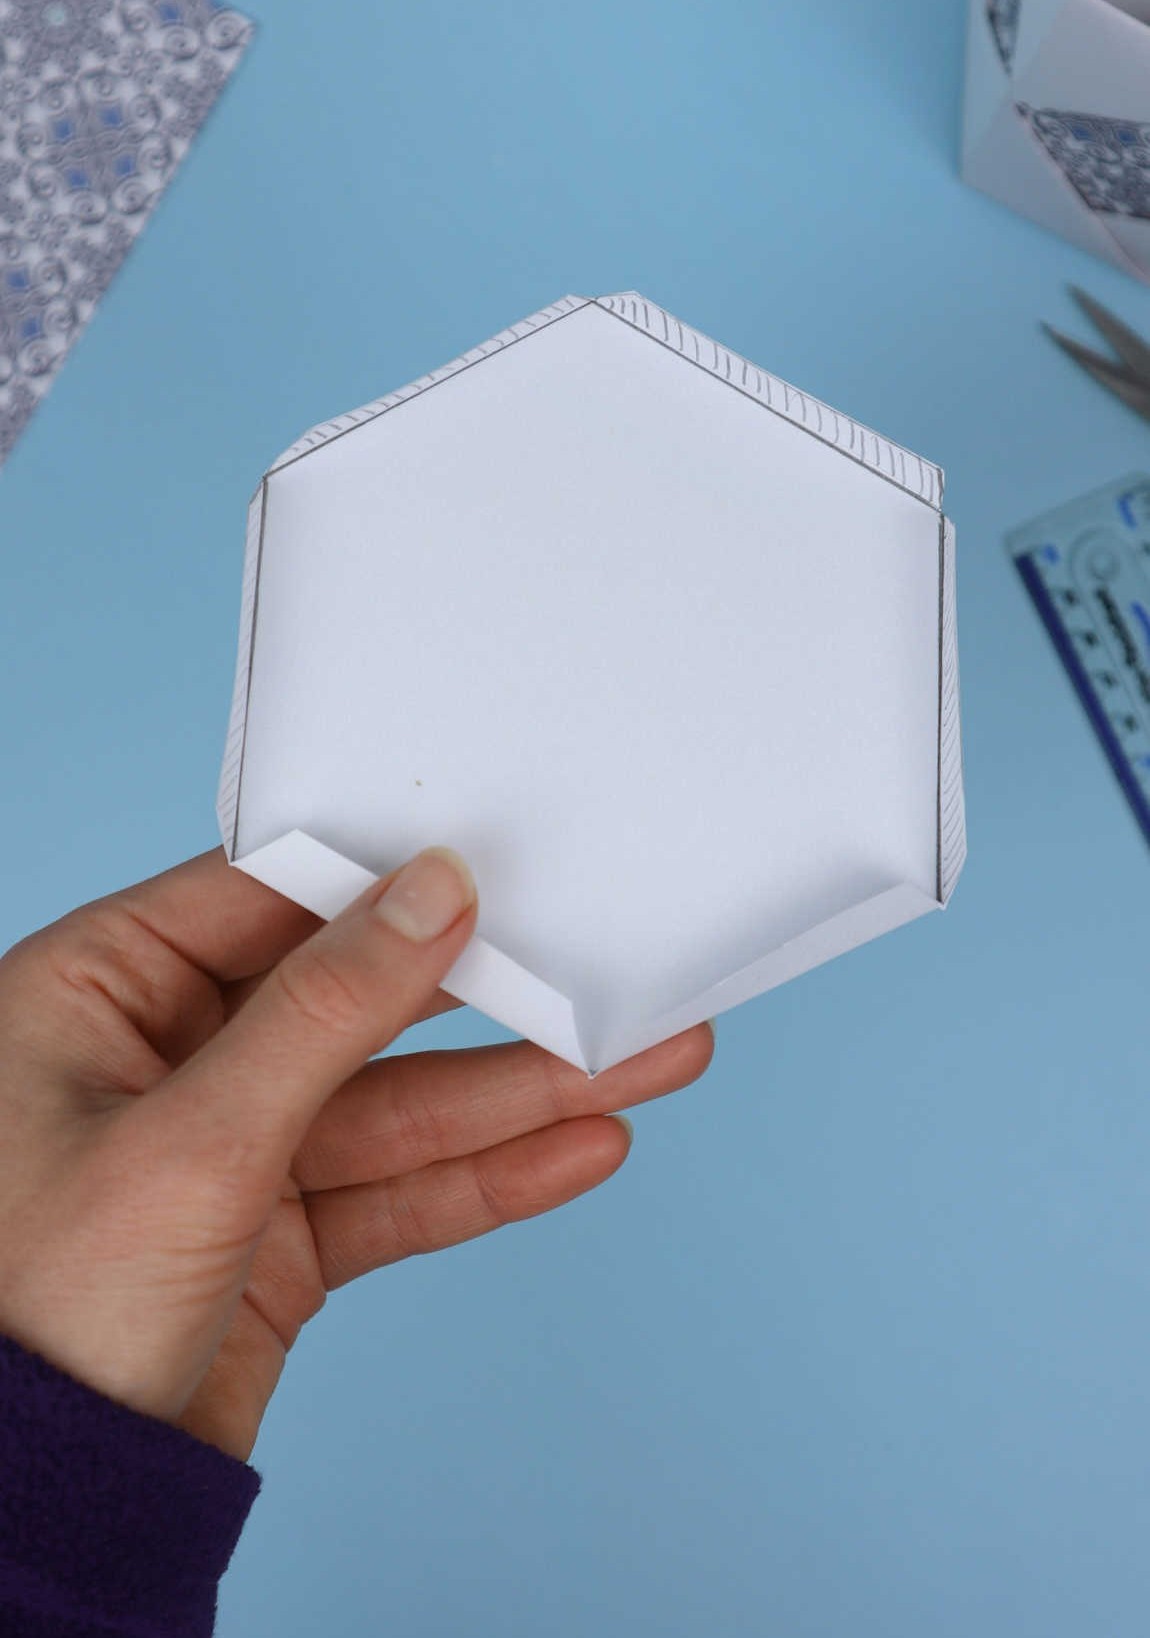
To create a sturdy and well-structured box, start by cutting out the outline according to your design or pattern. Next, fold the flaps inward to provide additional support and stability to the box’s ends. This step is crucial in ensuring that the flaps do not interfere with the overall shape of the box as you see it taking form below.
Step 13
As the final step, secure the base to the pencil holder by folding the flaps inward and ensuring they are flush with the rest of the structure. If your measurements were accurate, the result should be a seamless fit. With that, your DIY paper pencil holder is complete!
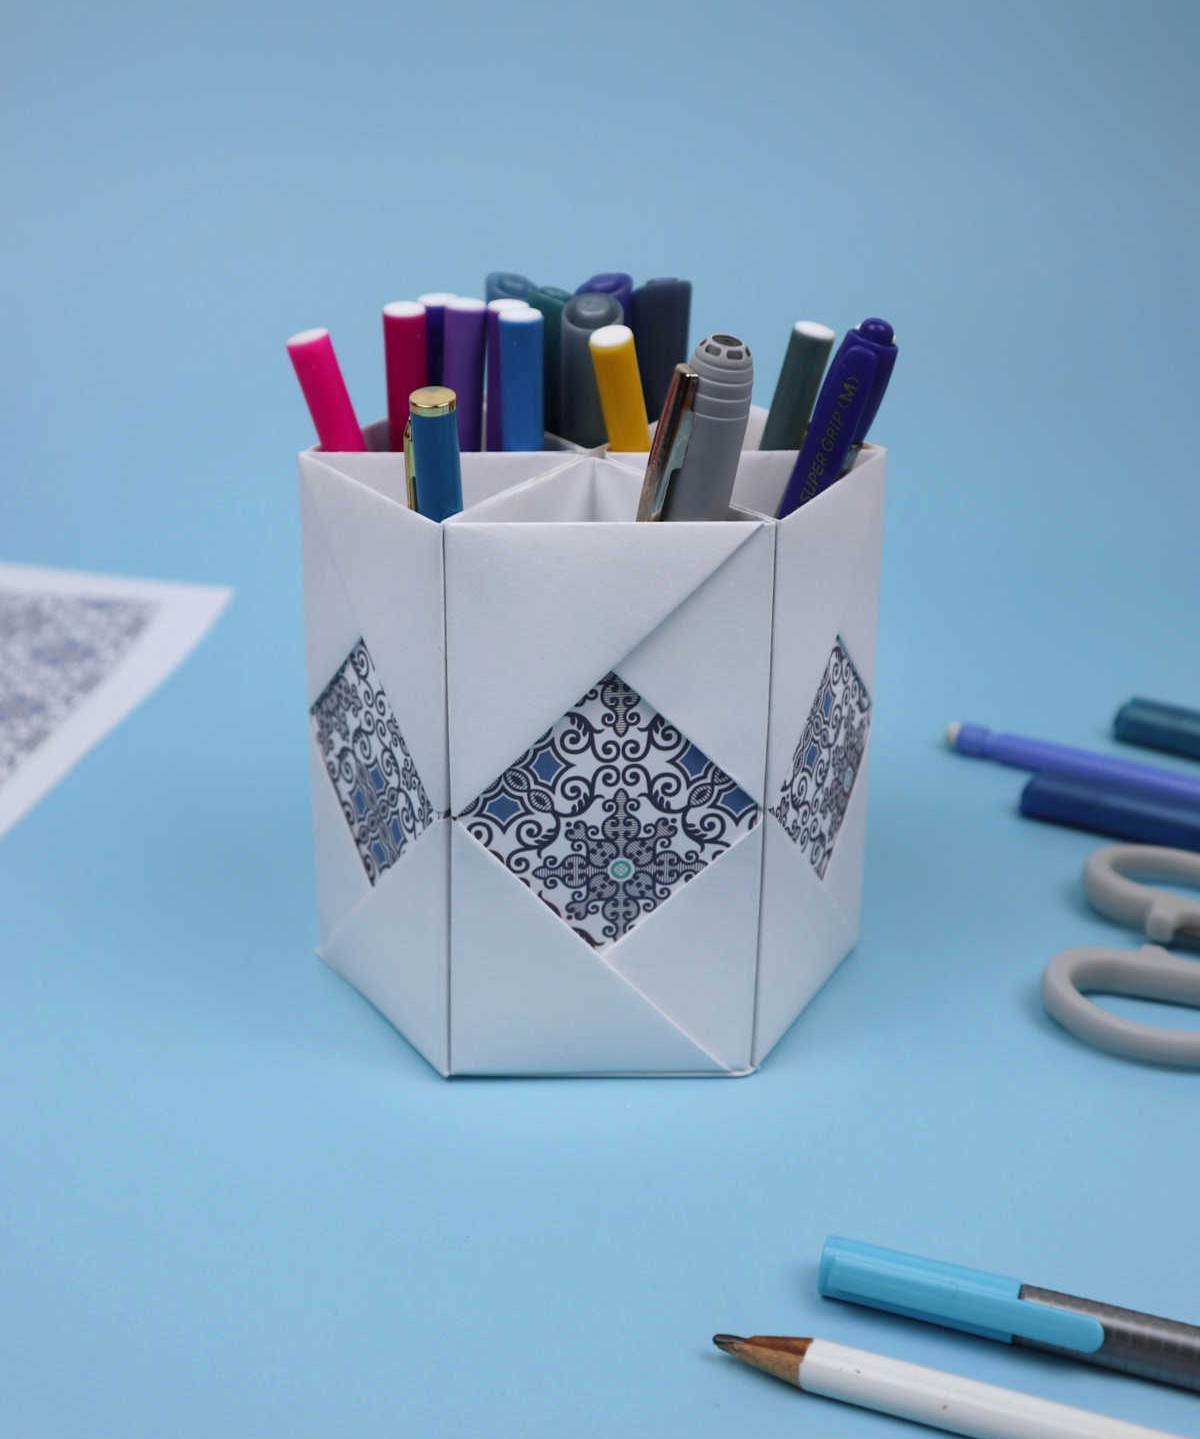
DIY Pencil Holder Out of Paper
In a mere half hour, you can transform your workspace into a tidy haven with this delightful DIY paper craft project. The simplicity of using just some paper to create a functional pencil holder makes it an accessible and enjoyable activity for both teenagers and adults alike. With only 30 minutes invested, you’ll be rewarded with a personalized organizational solution that’s sure to bring a smile to your face. To get started, simply set aside 30 minutes and let the creative process unfold.
Equipment
Materials
To create the foundation of your craft project, you’ll need to prepare a sturdy base. For this, take 5 square sheets of paper, each measuring A4 in size, and cut them down to fit snugly at the bottom of your design. If you want to add an extra layer of stability, consider using glue or double-sided tape to secure these sheets in place. To give your project a pop of color and personality, you can also incorporate decorative paper into your design.
Instructions
To create your DIY pencil holder, start by preparing your materials. Begin with a sheet of paper that you’ll fold in half, then divide it into two equal parts. Next, fold both the top and bottom halves inward toward the center, resulting in four identical sections. Unfold the paper and reorient it so that the creases are vertical, then repeat the previous step to create 16 equal parts – a 4×4 grid of squares. Fold all four corners inward, followed by the left and right edges toward the center.
Reverse the paper and fold the left and right corners inward again. Finally, slide one end into the opposite end and tuck it in place, completing one unit. Repeat this process six more times to create a total of seven identical components. As you assemble each piece, feel free to add decorative touches using colorful paper. Once all the units are complete, arrange them with the decorated sides facing outward and secure them together using double-sided tape or glue.
To finish the base, draw a hexagonal outline around the pencil holder, leaving a 1.5-2 cm gap for flaps. Cut out this shape using scissors and fit it into the holder. Secure it in place, then fill your new stationery storage with pens, pencils, and other supplies.