Unleash your child’s creativity with a fun and functional DIY project – making their very own paper wallets! This easy-to-follow craft is perfect for kids of all ages and skill levels, requiring only a few basic supplies and minimal time commitment. By engaging in this creative activity, you’ll not only be helping to reduce screen time but also fostering a sense of accomplishment and pride in your child’s handmade creation.
Supplies You’ll Need for Wallets
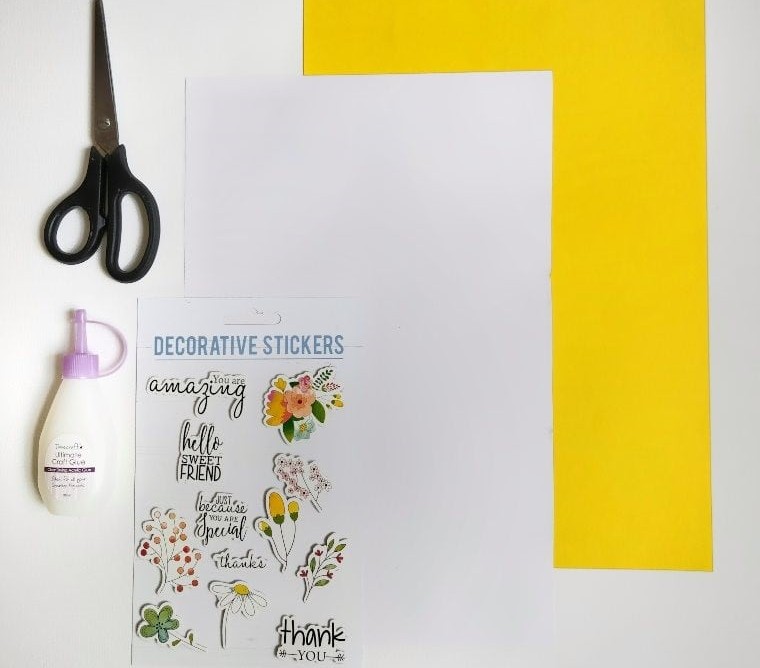
The creative process begins with a few essential tools: scissors for cutting and shaping, glue to bring everything together, and two sheets of A4 paper as the foundation for your masterpiece. To add some extra flair, you’ll also need some decorative stickers that can be used to embellish your design.
How Do You Make a Homemade Paper Wallet?
Create a Paper Wallet in No Time – All You Need is Your Home’s Resources! It may come as a surprise that making a paper wallet requires minimal effort and resources. In fact, you might already have what you need to get started sitting around your house. With just two sheets of paper and the imagination of your little ones, you can craft these lovely wallets in approximately 30 minutes, leaving you with a sense of accomplishment and a unique keepsake.
STEP 1: Prepare Your Supplies
Before diving into the creative process, take some time to gather all the necessary supplies. This is an opportunity to add your personal touch by selecting a variety of colors and stickers that reflect your unique style. With such a vast array of options available, you’re sure to find the perfect combinations to make your wallet truly one-of-a-kind. Once you have your supplies at the ready, you’ll be all set to embark on this fun and creative journey, so let’s get started!
STEP 2: Create Creases
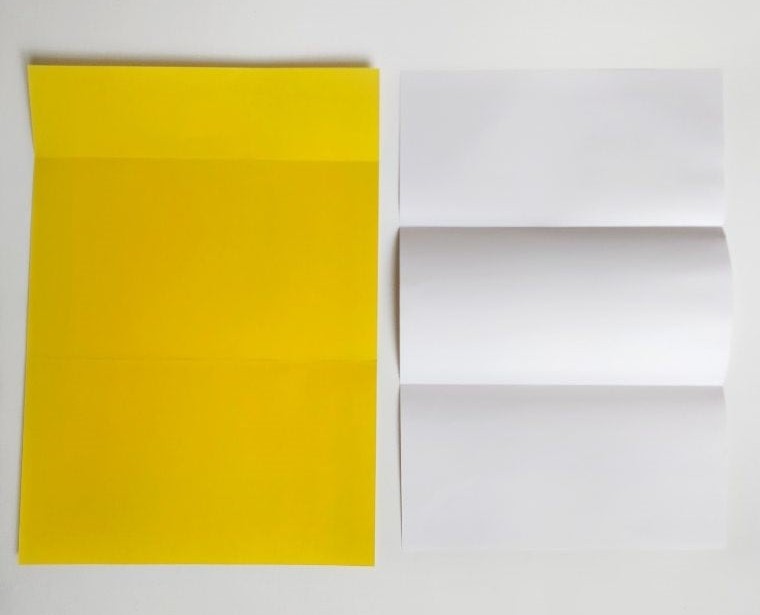
To begin, lay out your sheets on a flat surface and take measurements for the folds. For the first sheet – the one that will form the body of your wallet – make two precise folds to divide it into three equal parts. The outer sections should each occupy 2/5ths of the sheet’s area, while the central section takes up the remaining 1/5th. This layout mirrors the example provided earlier.
Next, fold the second sheet in thirds, just as illustrated in the accompanying image.
STEP 3: Get Folding
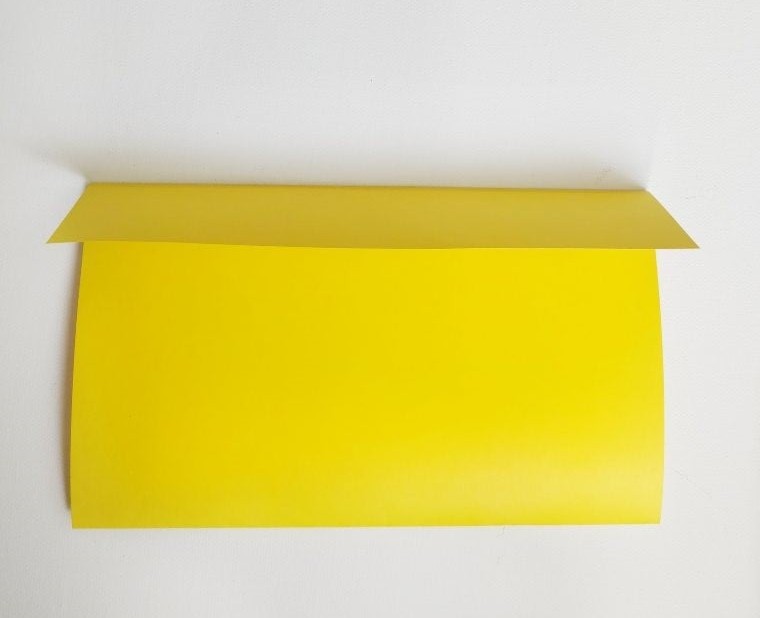
To complete the third step, begin by folding the first sheet along the creases you created earlier. Start by folding the bottom of the paper upwards towards the first mark, ensuring a crisp fold. Next, fold the top of the paper over the initial fold, using the crease as your guide to achieve symmetry. As you make these folds, pay attention to the overlap at the top – it should be even and consistent. The result should be two equal folds that meet at the top.
STEP 4: Zigzag Folds
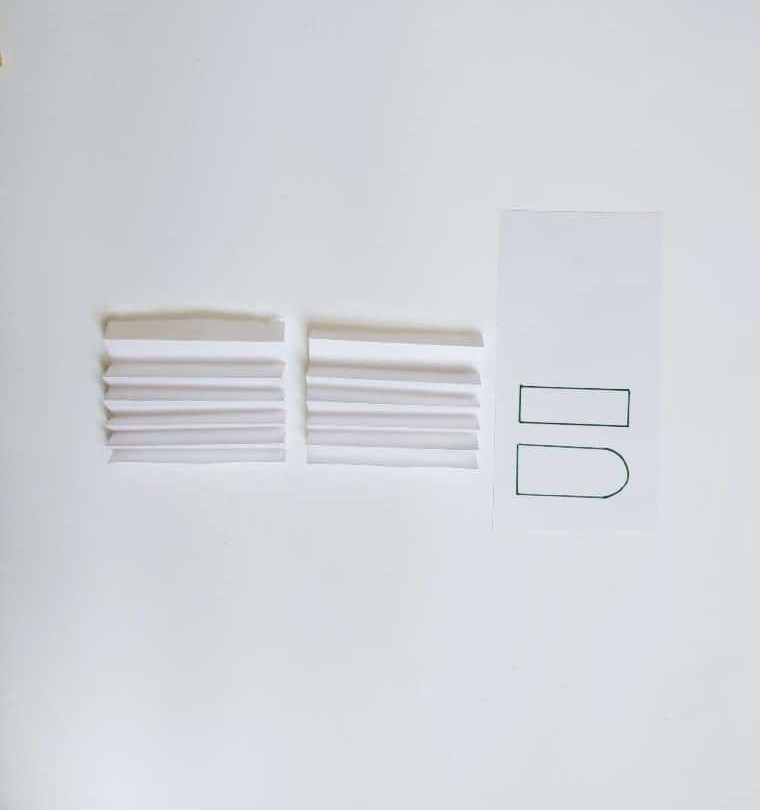
To proceed, utilize the second sheet from your materials. Pay close attention to the fold lines, as you’ll be dividing it into three distinct sections. Each of these pieces will play a crucial role in the final product, so handle them with care.
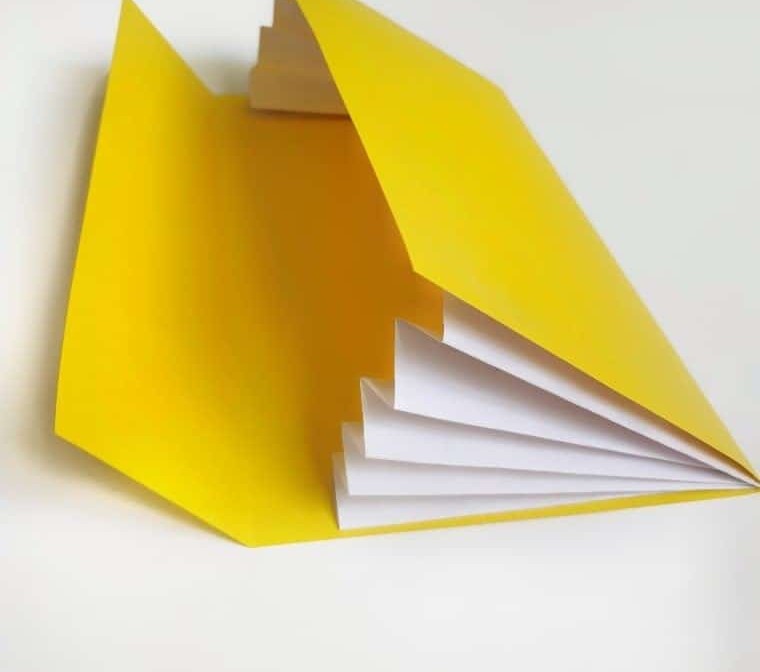
Begin by folding the first two segments horizontally, mimicking an accordion-like motion. Set these aside for now, as they will be revisited later.
Next, focus on the third piece and create a rectangular outline across its width.
Make sure to maintain one edge curved, just as illustrated in the accompanying visual aid. Using your scissors, carefully cut along both boundary lines.
STEP 5: Assemble the Wallet
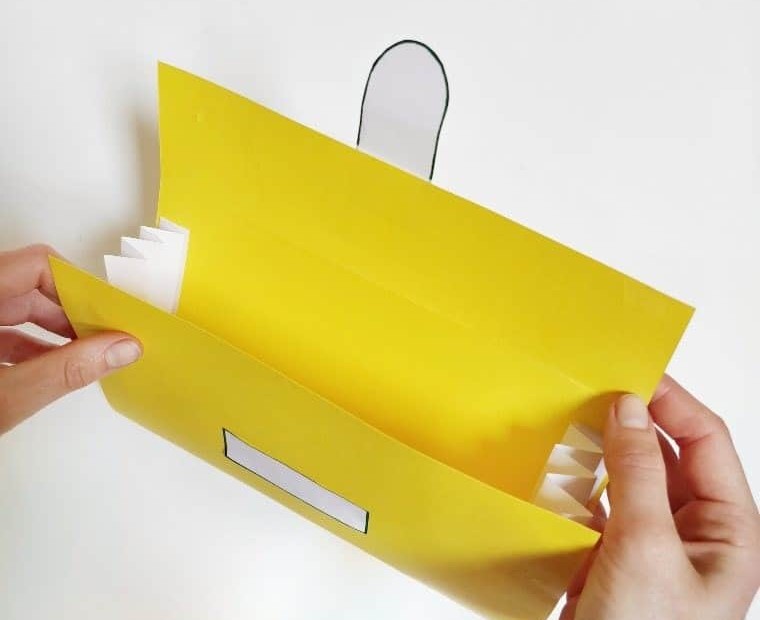
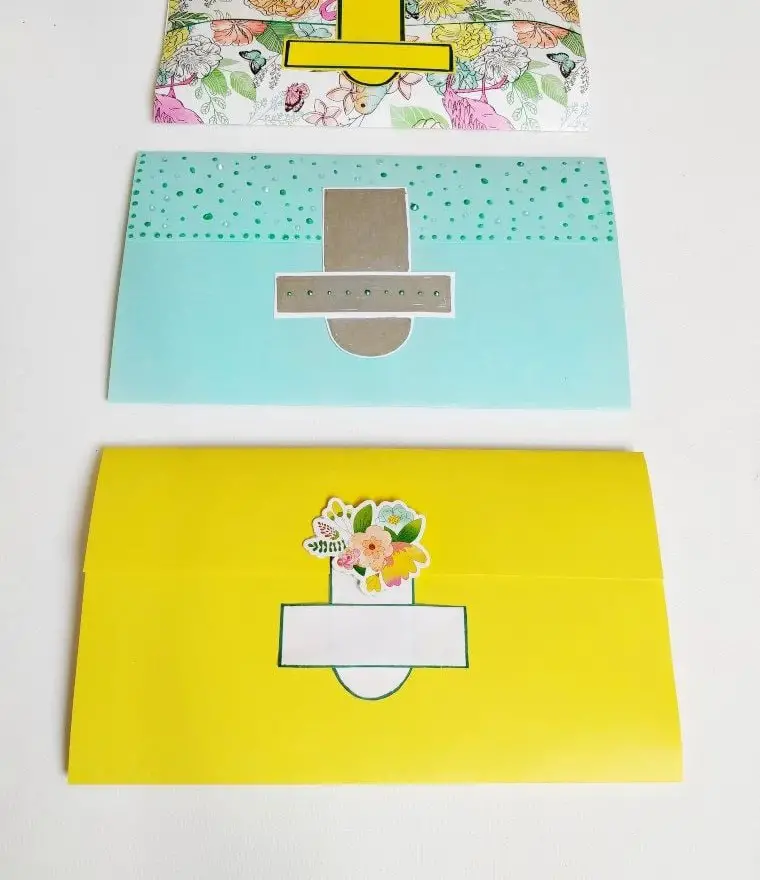
To assemble the accordion-style components, start by applying glue to both top and bottom edges of the sheets. Next, attach these strips to the interior surfaces of the first sheet, ensuring a secure bond. Repeat this process on both sides, allowing the adhesive to dry completely before proceeding. This modified design will grant increased storage capacity within the wallet, accommodating a greater quantity of items.
Once the foundation is established, focus on adding the zigzag component.
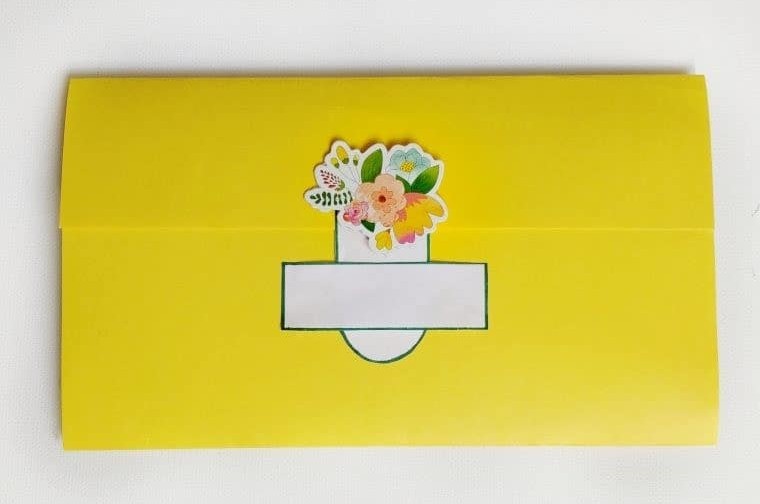
This unique feature allows for an optimized storage experience. Set aside the cutouts, then apply glue to the rounded rectangle and secure it to the central area of the overlap. Ensure the curved edge aligns with the downward-facing direction after folding the flap.
The second rectangle should be attached to the front surface of the wallet, situated in the middle. To achieve a seamless integration, focus on attaching only the corner regions, leaving sufficient space for the buckle’s passage.
STEP 6: Make Sure the Wallet Closes
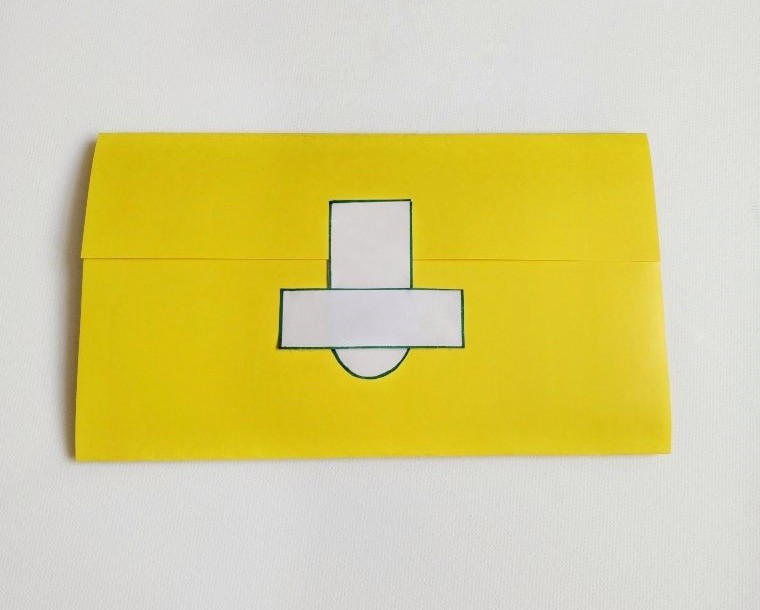
Secure the flap by threading the rounded strap through the slit created with the rectangular strip. This will keep it closed. If you’d like a more elegant design, consider replacing the strip with a button and the paper strap with a thread loop. However, this advanced technique may be better suited for older children or adults, as it requires more skill.
For beginners, I recommend starting with this simple method and progressing to button flaps once your children have gained sufficient experience.
STEP 7: Stick On Those Stickers
Unleash your child’s creativity by adding decorative flourishes – stickers or glitters, take your pick! As you do this, you’re not only making the wallet visually appealing but also encouraging your kid to express themselves artistically. And before you know it, your DIY paper wallet will be complete and ready for use!
Where Can You Use These Paper Wallets?
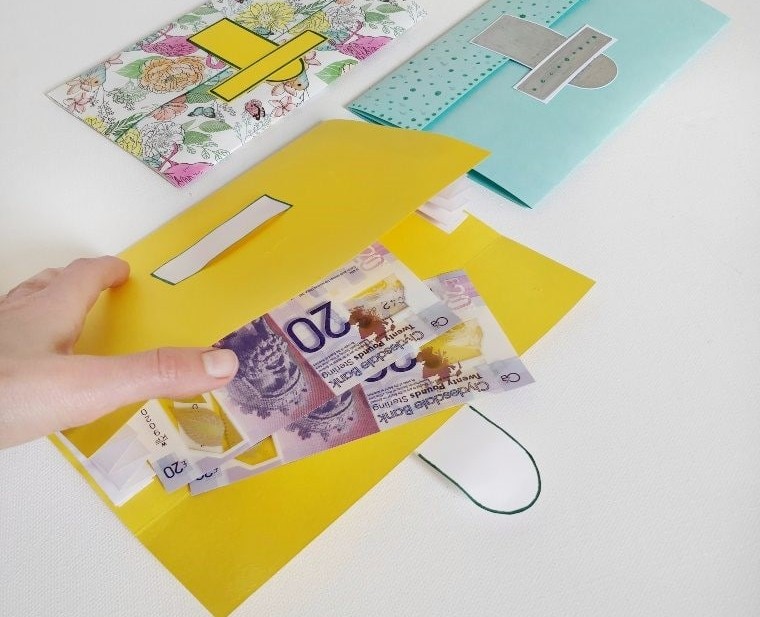
The versatility of paper wallets is truly remarkable, offering a multitude of creative uses. One idea is to create personalized gifts for your children’s friends, allowing you to share the joy of crafting with others. Another option is to utilize these wallets as unique vessels for delivering handmade cards to loved ones. When spending the day outdoors with kids, consider using paper wallets as makeshift money pouches for a fun and interactive lesson in counting coins.
Alternatively, allow your youngsters to take charge of their own finances by providing them with their very own paper wallet, complete with a chance to learn valuable skills like budgeting and responsibility. Finally, don’t forget the aesthetic appeal of these handcrafted wallets – use them as decorative accents in your children’s bedrooms or your living room, proudly showcasing their artistic prowess.
DIY Paper Wallets for Kids to Make
Embark on a creative adventure with your little ones and craft a DIY paper wallet together! Not only can you store valuable items like cash and receipts, but the process itself is an enjoyable experience. With just 10 minutes of active time, you’ll have a fun and functional project to show for it.
Equipment
Materials
Instructions
To create the wallet’s closure mechanism, begin by folding the initial sheet in half, ensuring an even overlap at the top. Next, fold the second sheet into thirds, creating a precise and uniform division. Cut this sheet into three equal sections. Then, fold each of the first two pieces accordion-style, while reserving the third piece to be cut into both a rectangular shape and a rounded rectangle with one flat side.
Glue the accordion-folded pieces within the initial sheet’s interior, while positioning the rectangular and rounded rectangles outside, thus forming the wallet’s closures. And just like that, your wallet is complete!
Conclusion
While the concept of paper wallets may not seem particularly exciting at first glance, they can actually be a fun and educational activity to share with children. The simplicity of creating a wallet from a single sheet of paper belies the potential for creative expression and financial literacy that it embodies. By making these simple yet practical tools with your kids, you can help them develop important skills like problem-solving, spatial reasoning, and even basic arithmetic.
So, what do you think about incorporating paper wallets into your family’s activities? If you’re game, share some of your creations and let’s see what other creative ideas come to the forefront!