

Elevate your upcycling game with this effortless, stylish no-sew t-shirt hack! Whether you choose to embellish it with fabric paint and embroidery or leave it au naturel for a chic look, this DIY project is sure to impress. And the best part? It’s an excellent way to breathe new life into old clothes, making it a perfect fit for our increasingly sustainable fashion-conscious world.
What You’ll Need for the Shirt
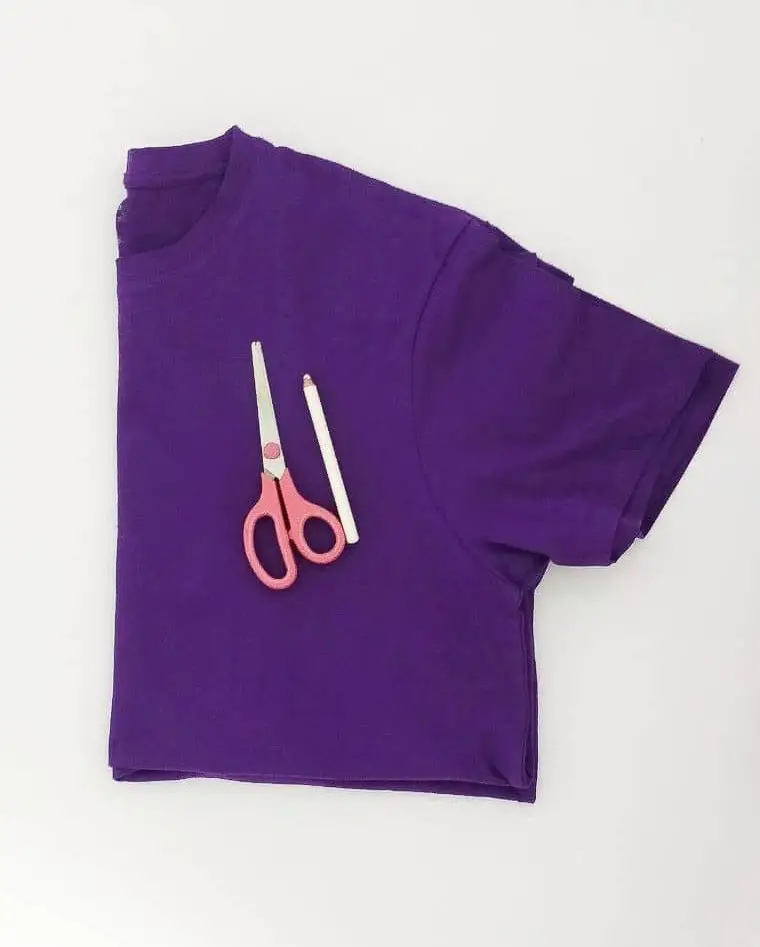
To get started on your DIY journey, you’ll need some basic materials that can be found lying around the house. One essential item is an old t-shirt, which will serve as a template for creating your own customized designs. Additionally, you’ll require a chalk pencil or tailor’s chalk to mark out the areas where you want to apply the paint. Finally, make sure you have some fabric scissors on hand to carefully cut out any excess material and achieve the desired shape.
How to Make a DIY No-Sew Shirt
Transforming an outdated shirt into a stunning piece is easier than you think. With just a few straightforward steps, you can breathe new life into your wardrobe. Here’s the lowdown: simply follow these simple steps and get ready to turn that old shirt from drab to fab!
Step One

When selecting a t-shirt to repurpose, start by considering its original size and how it will fit after your creative alterations. Visit your local second-hand store or thrift shop to explore an array of options. Opt for a shirt that is one to two sizes larger than your typical fit, as the tying, cutting, and tightening processes will likely reduce the garment’s size by a corresponding amount.
Alternatively, you can choose a slightly bigger shirt if you prefer a more relaxed, baggy fit at the end result.
Step Two
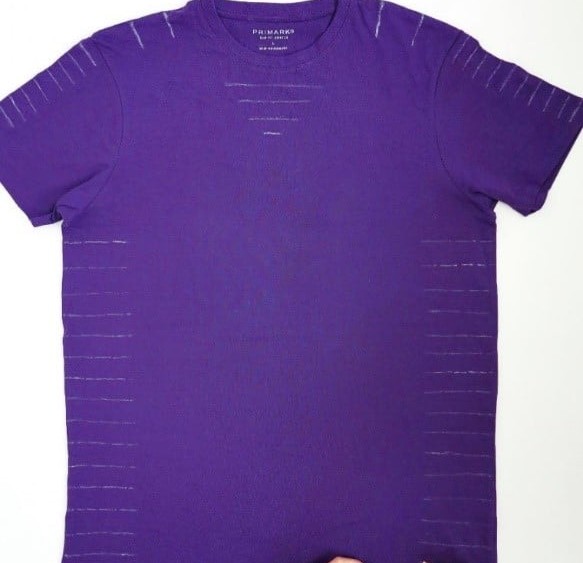
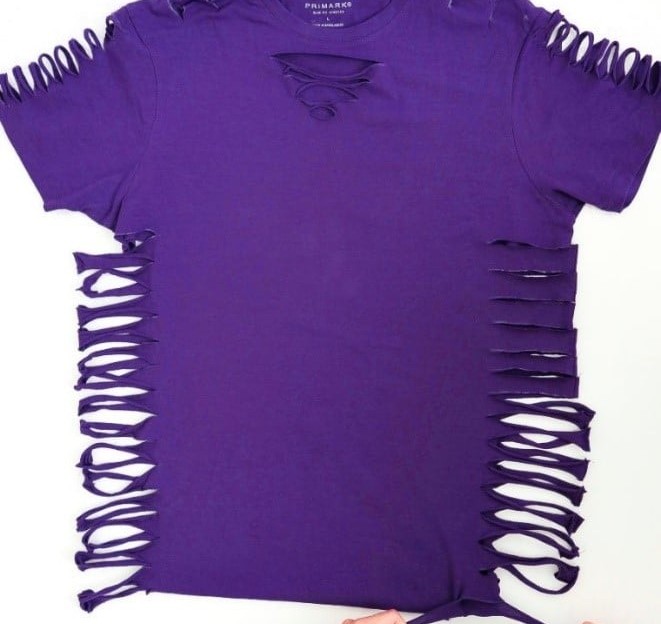
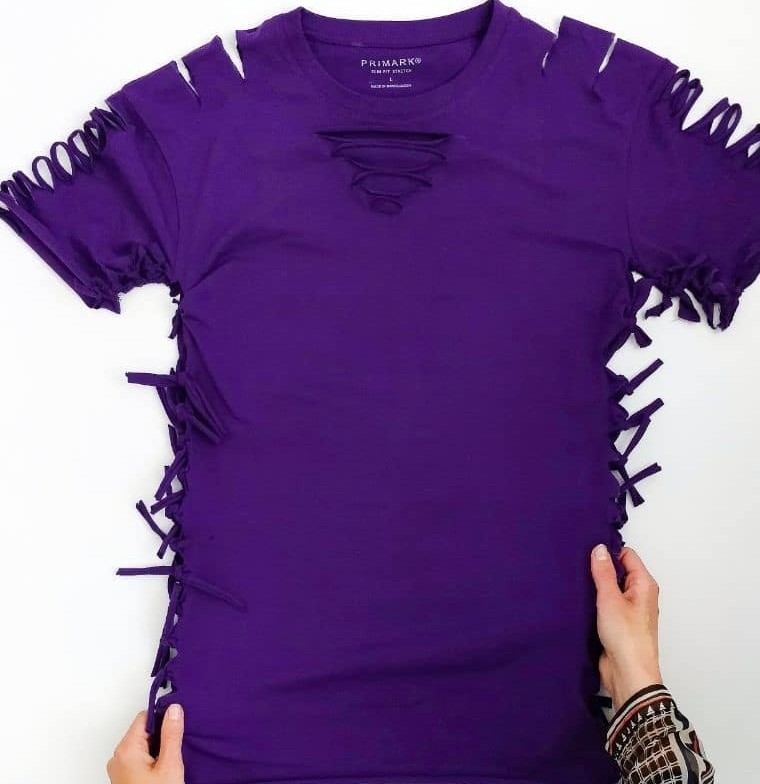
To initiate the process of resizing your t-shirt, begin by placing it flat on a stable surface. Next, retrieve your chalk and prepare to create cutting lines that will ultimately determine the garment’s new dimensions. The number of cuts you make will depend on the size of your original shirt and the desired level of shrinkage. In general, the more lines you cut, the tighter the t-shirt will be able to tie up. For my own project, I opted for a spacing of approximately 1.
5cm between marks, with each individual cut measuring around 4cm in length along the side seams.
Step Three
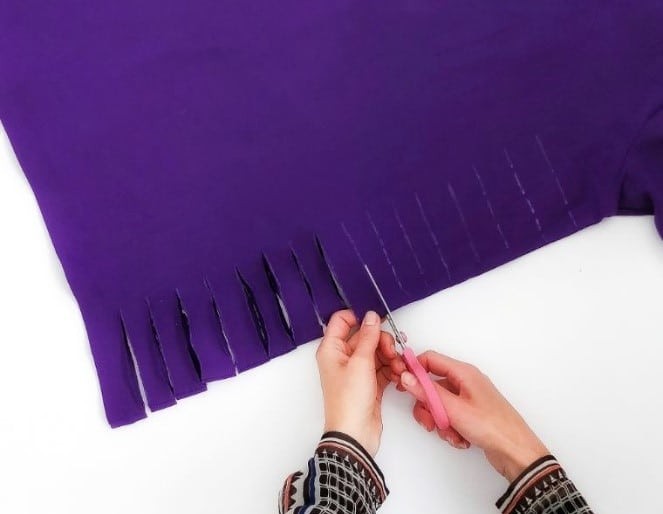
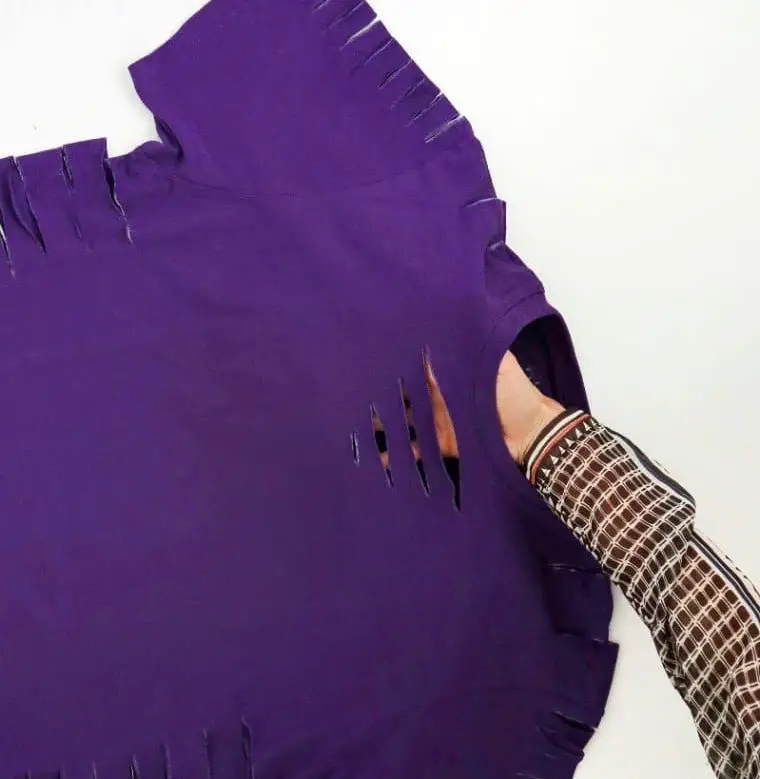
As you begin cutting along each fold, take care to ensure both edges align precisely. Before moving forward, try on the shirt to gauge the placement of the cutouts. This is a prime opportunity to pause and admire your handiwork – if you’re pleased with the result, consider stopping here. Alternatively, proceed to step four, where creativity knows no bounds.
Step Four
To successfully stretch your shirt strips, start by gently pulling each strip from both sides, maintaining an even and steady pressure to prevent any tears or damage. It’s essential to keep trying on the shirt as you go, making adjustments as needed to ensure a comfortable fit. Remember, it’s always better to err on the side of caution and stretch more later if required.
Step Five
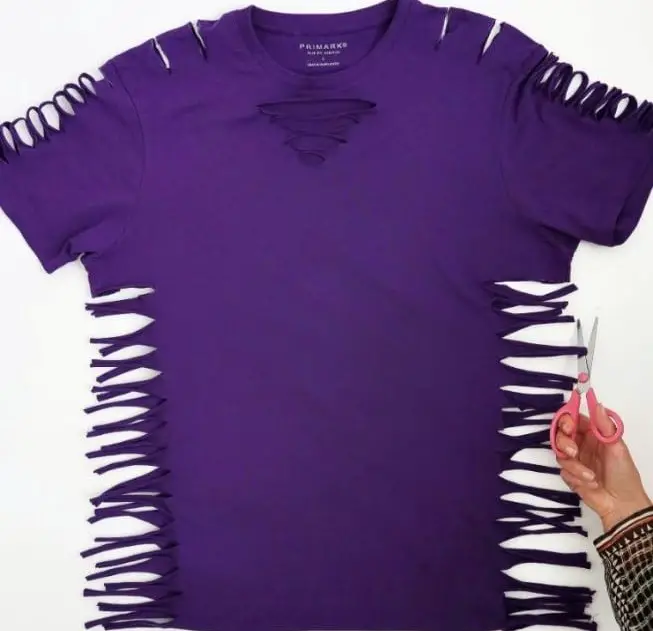
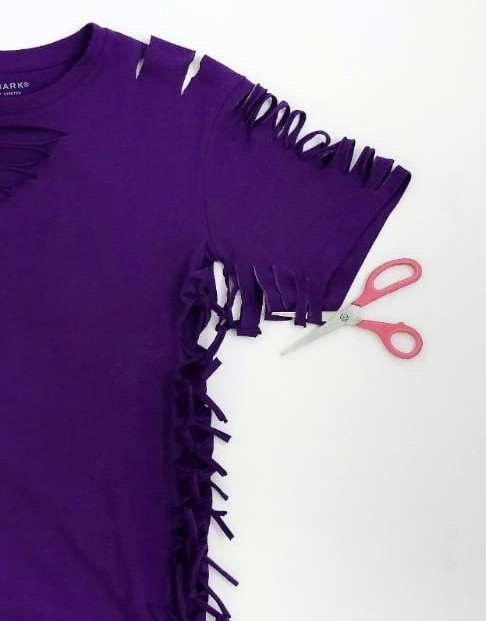
To transform those extended loops into stylish ties, retrieve your scissors and carefully snip along the sides of the garment. Ensure you’re targeting only the loops themselves, avoiding any sensitive areas such as the shoulders, arms, or collar. Precision is key to achieve a clean and precise cut.
Step Six
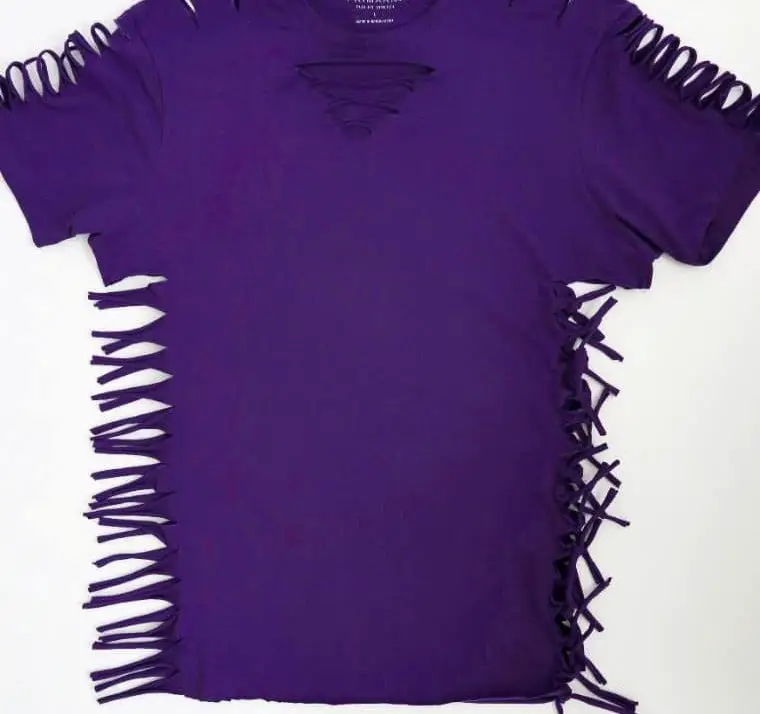
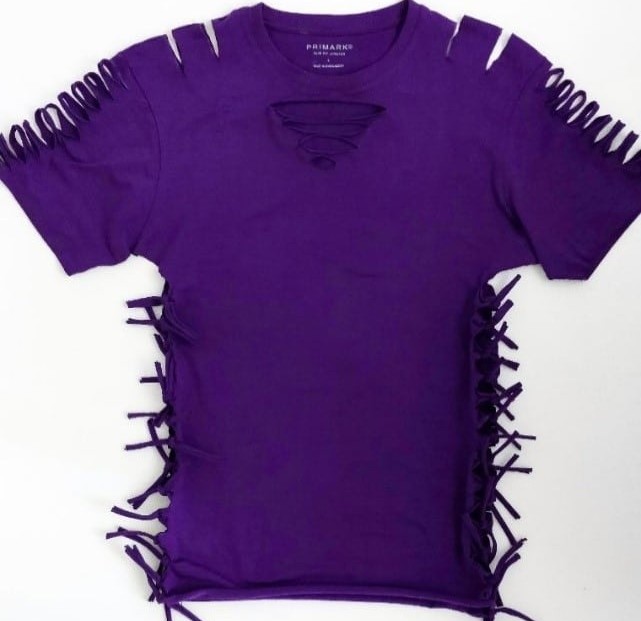
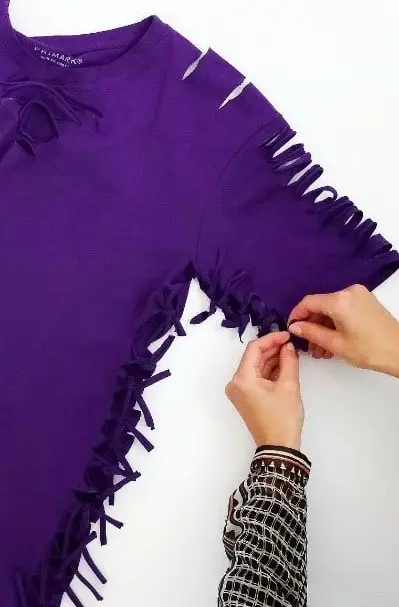
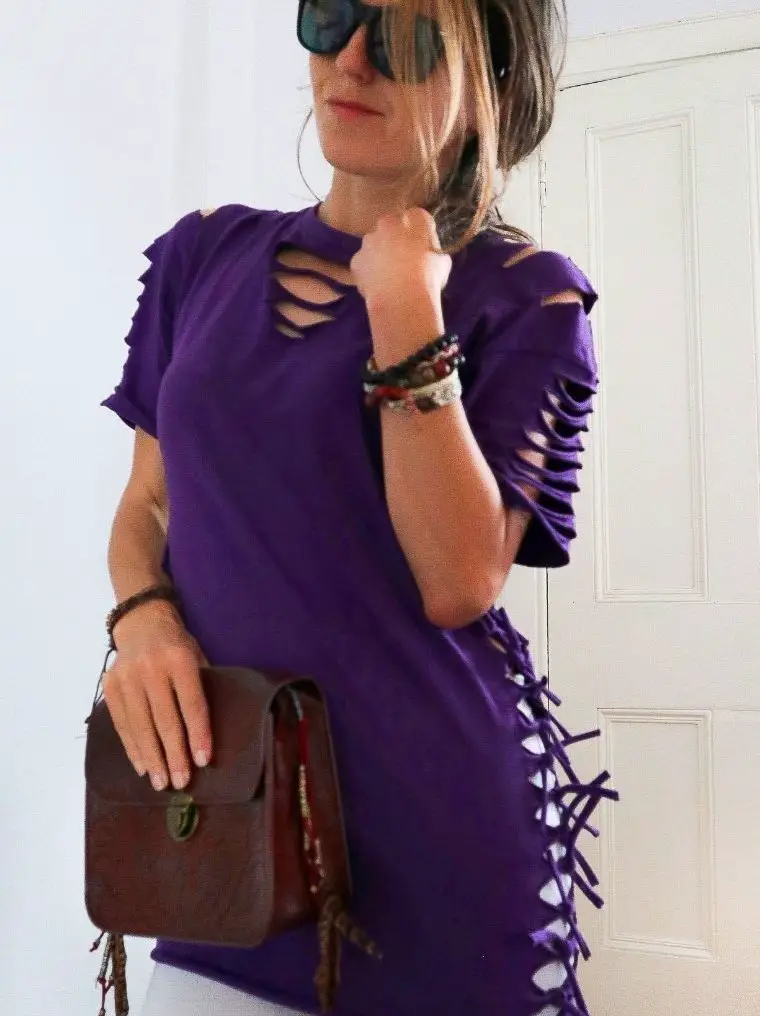
As you’ve now arranged your strings in order, it’s time to start weaving together the front and back strips of your shirt. Begin by pairing up corresponding strips and securing them with a simple double knot. The resulting loose ends will give your DIY creation an intentionally frayed appearance. Be patient and don’t be afraid to put on the shirt multiple times as you refine this process, repeating it on both sides for a seamless finish.
Step Seven
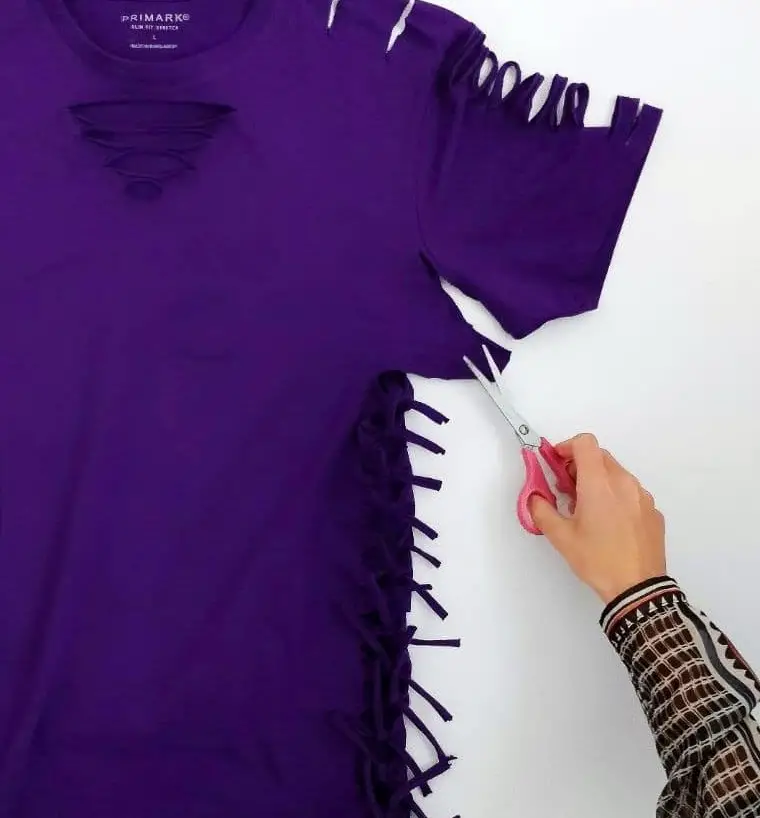
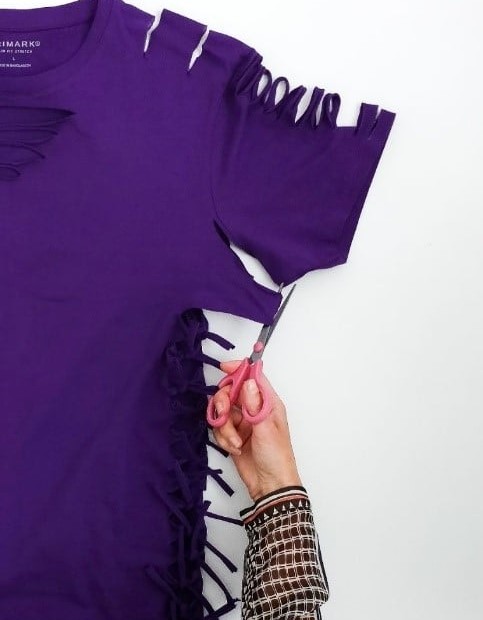
To fine-tune the fit of our DIY button-down shirt, we’re going to make some targeted adjustments. First, carefully cut a small slit along each armpit seam on the T-shirt, stopping just short of the edge. This will create a tieable flap. Next, trim the loop as you did with the previous slits, ensuring the flap remains intact.
Step Eight
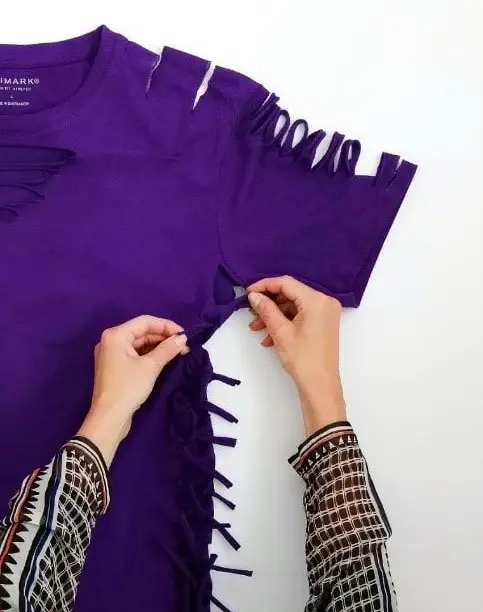
To secure the garment in place, create a snug double knot under your armpit. This clever trick not only ensures a comfortable fit but also helps shape the shirt to your body, creating a flattering silhouette that accentuates your figure.
Step Nine
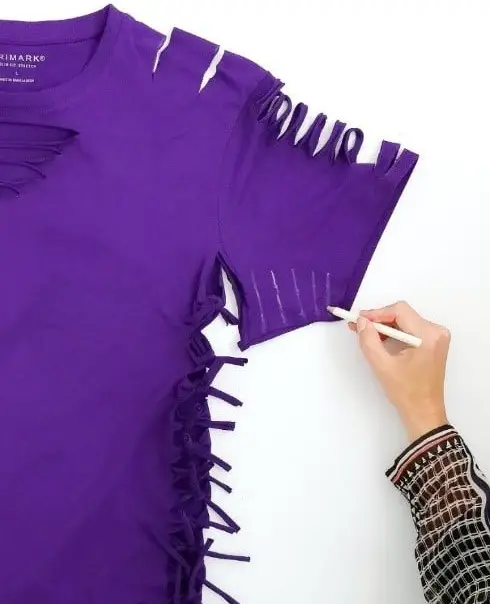
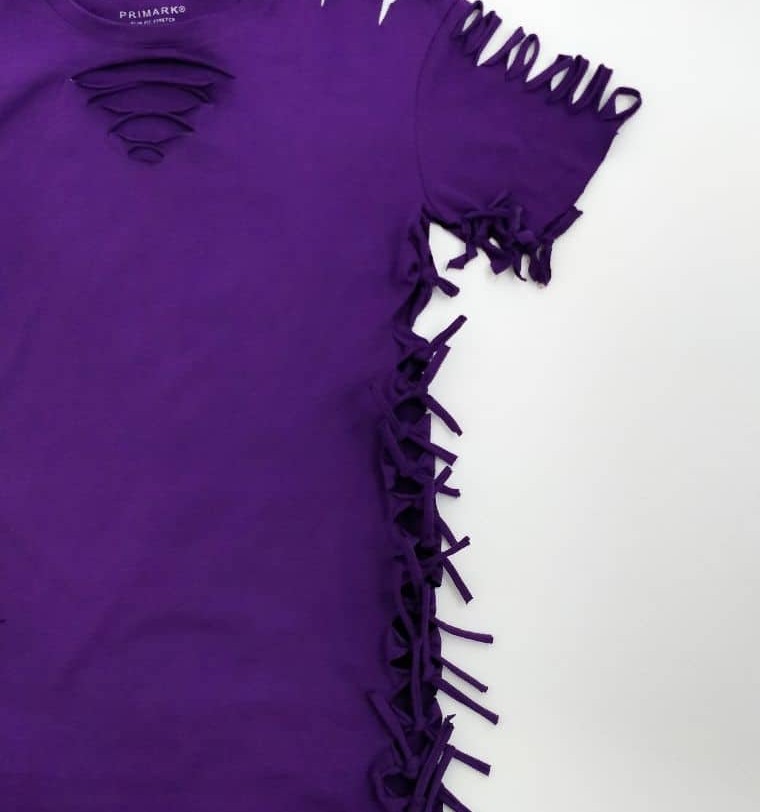
To maintain consistency in your design, add additional lines to the sleeve’s bottom, spacing them evenly apart from the existing lines. This strategic placement aims to create a more tailored appearance by subtly cinching the fabric under the arm. The result is a shirt that appears expertly fitted, showcasing your keen sense of style.
Step Ten
To achieve a seamless finish on your upcycled clothing project, it’s essential to focus on creating loops and ties that are both secure and visually appealing. To begin, take a close look at the fabric and identify areas where natural folds or creases have formed. These organic lines can serve as a guide for creating loops, which will help to conceal any raw edges or unevenness in the stitching.
Step Eleven
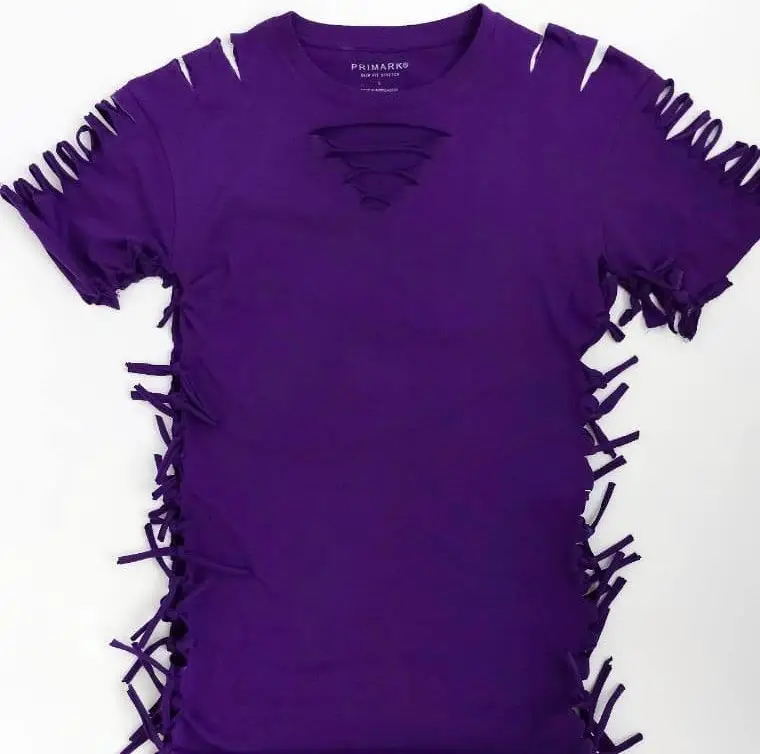

As you work to cinch the sleeves of the shirt, transform the loose tee into a stylish garment that’s far more appealing than its original state. It’s crucial to regularly try on the shirt as you go along, ensuring a perfect fit at every stage. With these simple yet effective tweaks, you’ll be left with a beautifully tailored and fashion-forward t-shirt – all without needing to break out the sewing kit.
DIY No-Sew Shirt (Cut T-Shirt)
Embark on a creative journey by upcycling a basic shirt into a stunning blouse without the need for sewing skills. This DIY project is an excellent way to express your individuality and transform a simple garment into a unique piece of clothing. With only 25 minutes of total time invested, you can create a one-of-a-kind blouse that reflects your personal style. To get started, you’ll need just 5 minutes for preparation and 20 minutes to bring your creative vision to life. The best part?
This project won’t break the bank, with an estimated cost of only $5. So why not give it a try and unleash your inner fashion designer?
Equipment
Materials
Instructions
As you prepare to tailor your t-shirt, lay it flat on a surface, ensuring the seams are aligned and the fabric is smooth. Use a chalk pencil to sketch cutting lines, spaced approximately 1.5cm apart, along the sides, shoulders, armholes, and front of the shirt. When satisfied with your markings, carefully use scissors to cut along the lines, taking care to align the front and back of the garment as you go.
As you cut, gently stretch out the loops on either side of the t-shirt until they become thin strips. Cut these loops in half and then match the ties from the front and back together, securing them with a double knot. Aim for a snug but not overly tight fit to withstand washing machine cycles. If desired, stop here or proceed to alter the sleeves. To do so, cut along the armpit seam, stopping about halfway through.
Cut through the loop you’ve created and tie it under the armpit to tighten the sleeve. Next, sketch additional chalk lines on the underside of each sleeve, spaced similarly to your initial markings. Cut out these lines and cut through any remaining loops, then tie them together to achieve the desired fit. As you work, be mindful of the tightness of the sleeves to ensure a comfortable and flattering silhouette.
With these steps complete, you’ve successfully tailored your t-shirt to fit your unique shape and style.