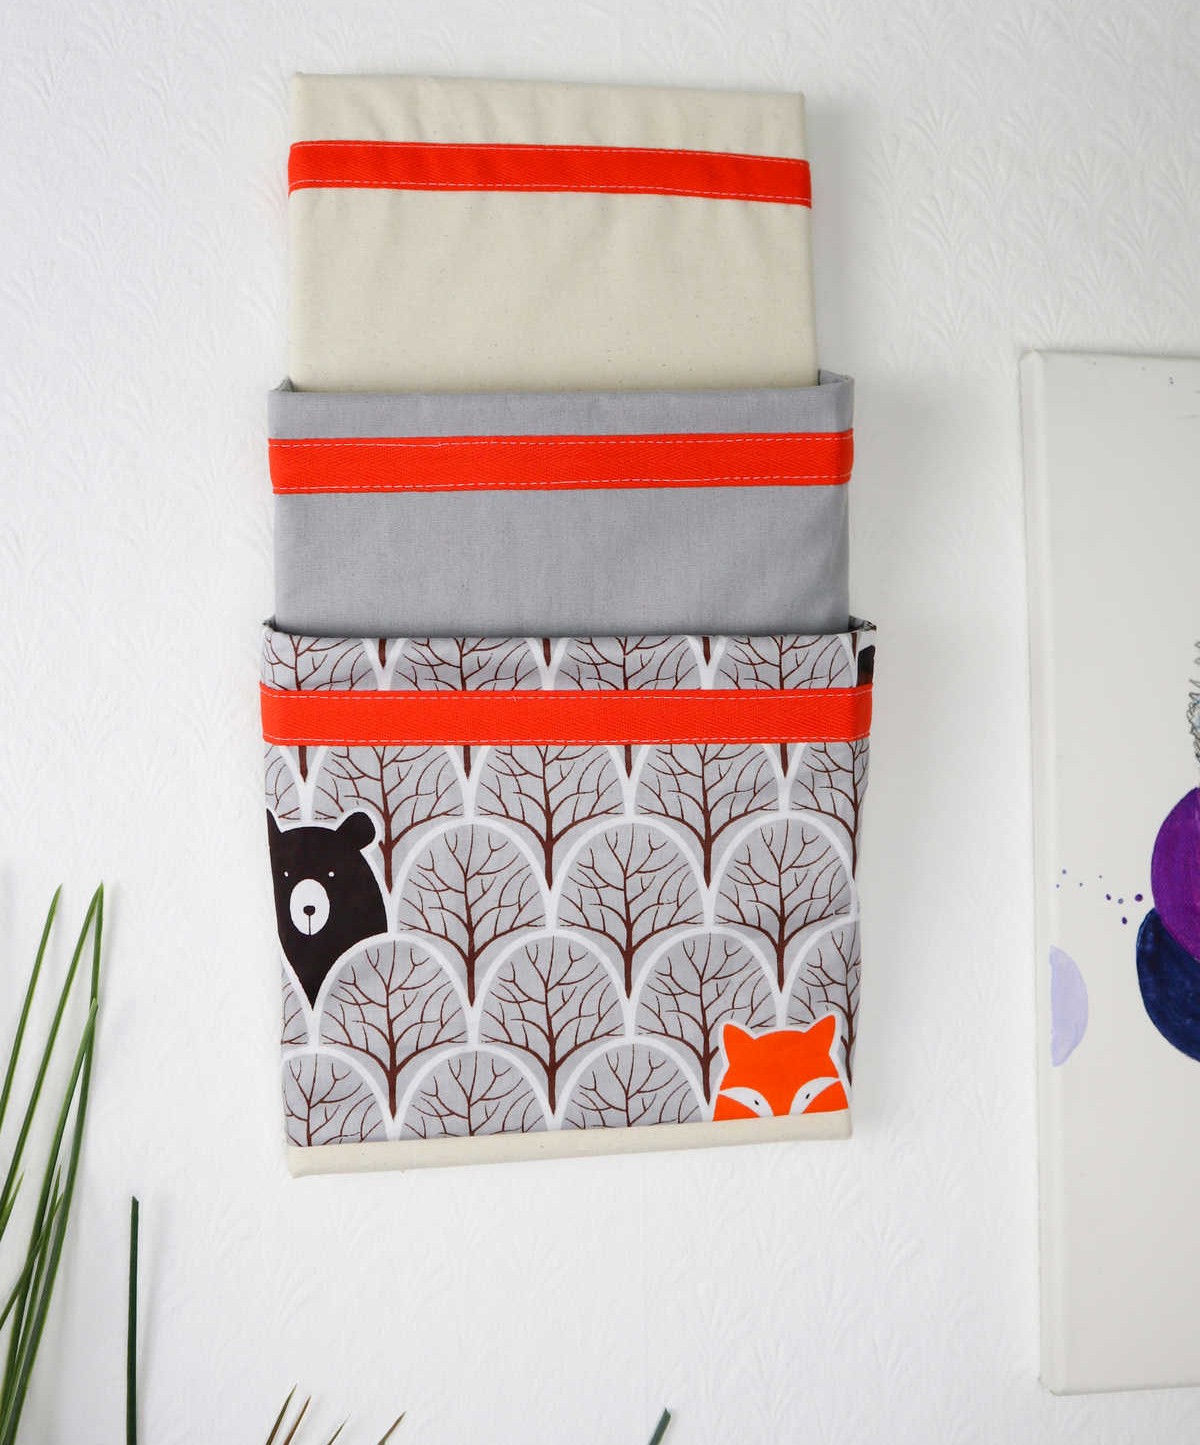
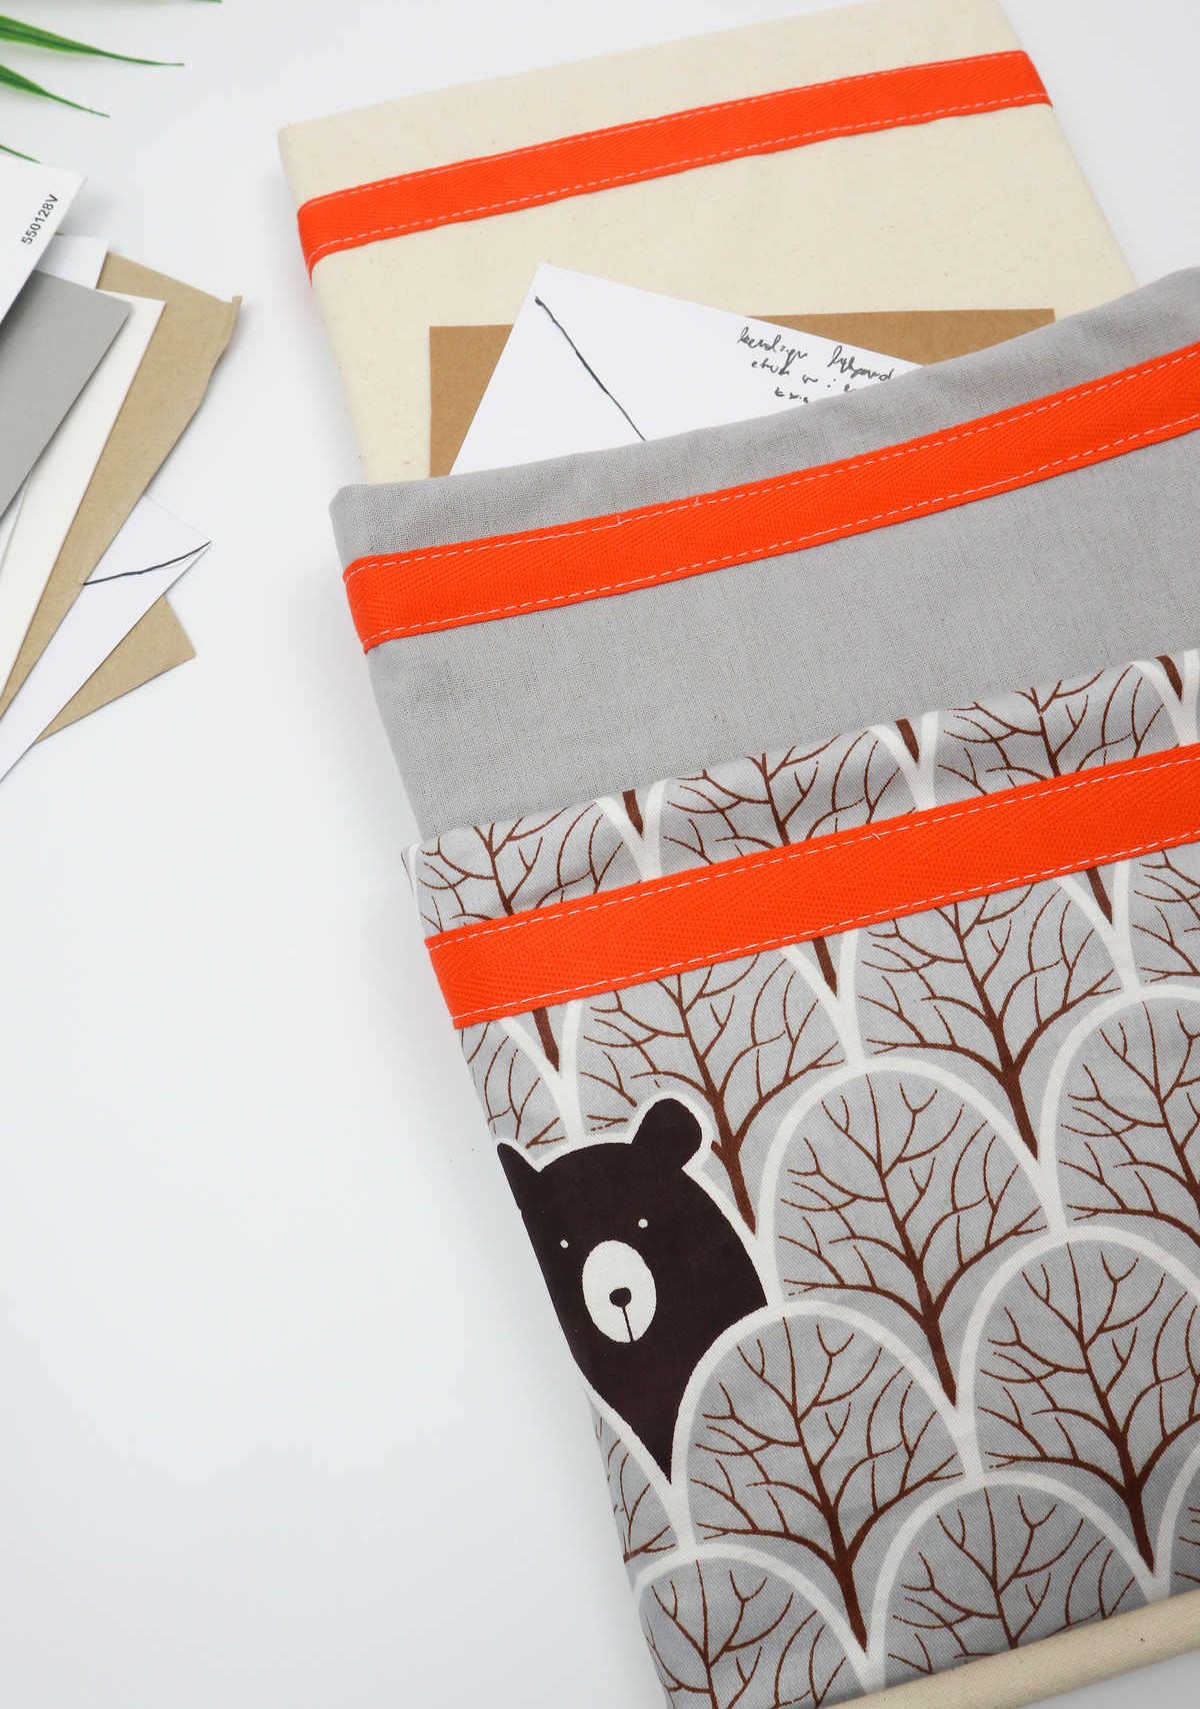
Imagine the bliss of having a dedicated space for your bills, letters, and other mail, where everything has its perfect spot. No more cluttered table by the front door, no more feeling overwhelmed by the sheer amount of paperwork piling up. With a well-organized system in place, life can be so much easier! And it all starts with creating your own DIY mail organizer.
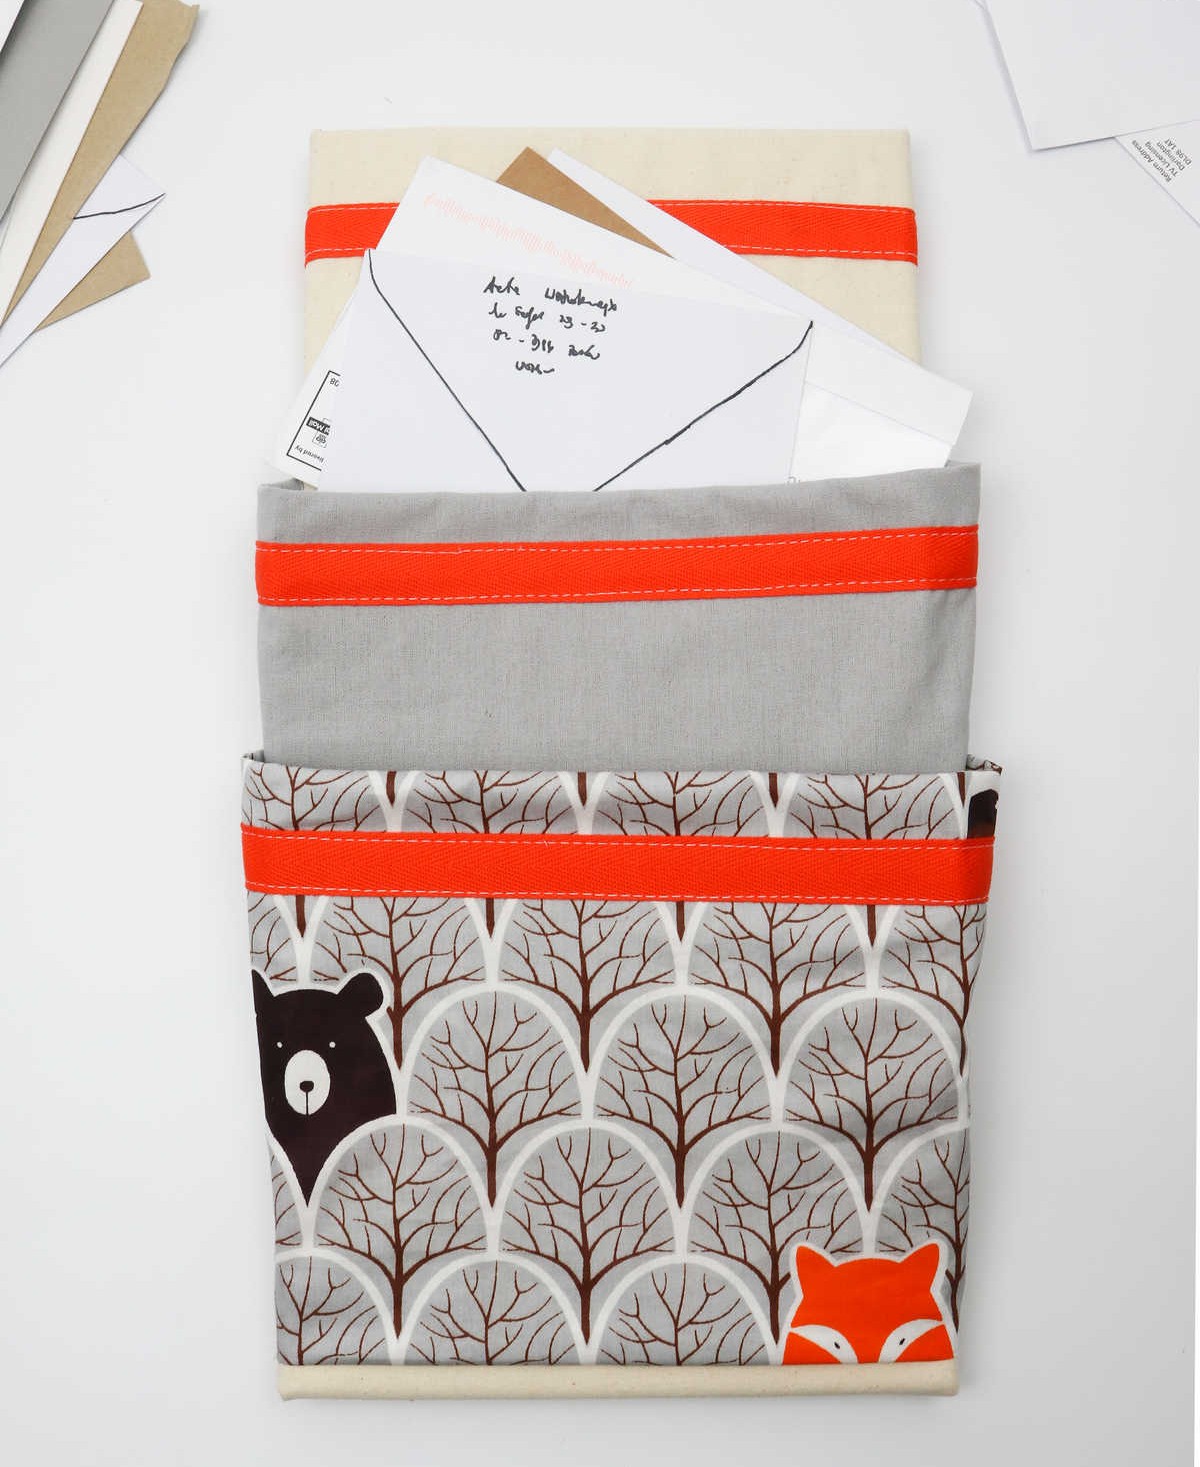
By dividing your mail into separate pouches, you’ll not only keep everything tidy, but also categorize and prioritize your tasks before tackling them. No more procrastination, no more stress. With a simple yet effective system like this, you’ll be amazed at how quickly you can get on top of things.
Supplies and Tools You’ll Need for the Organizer
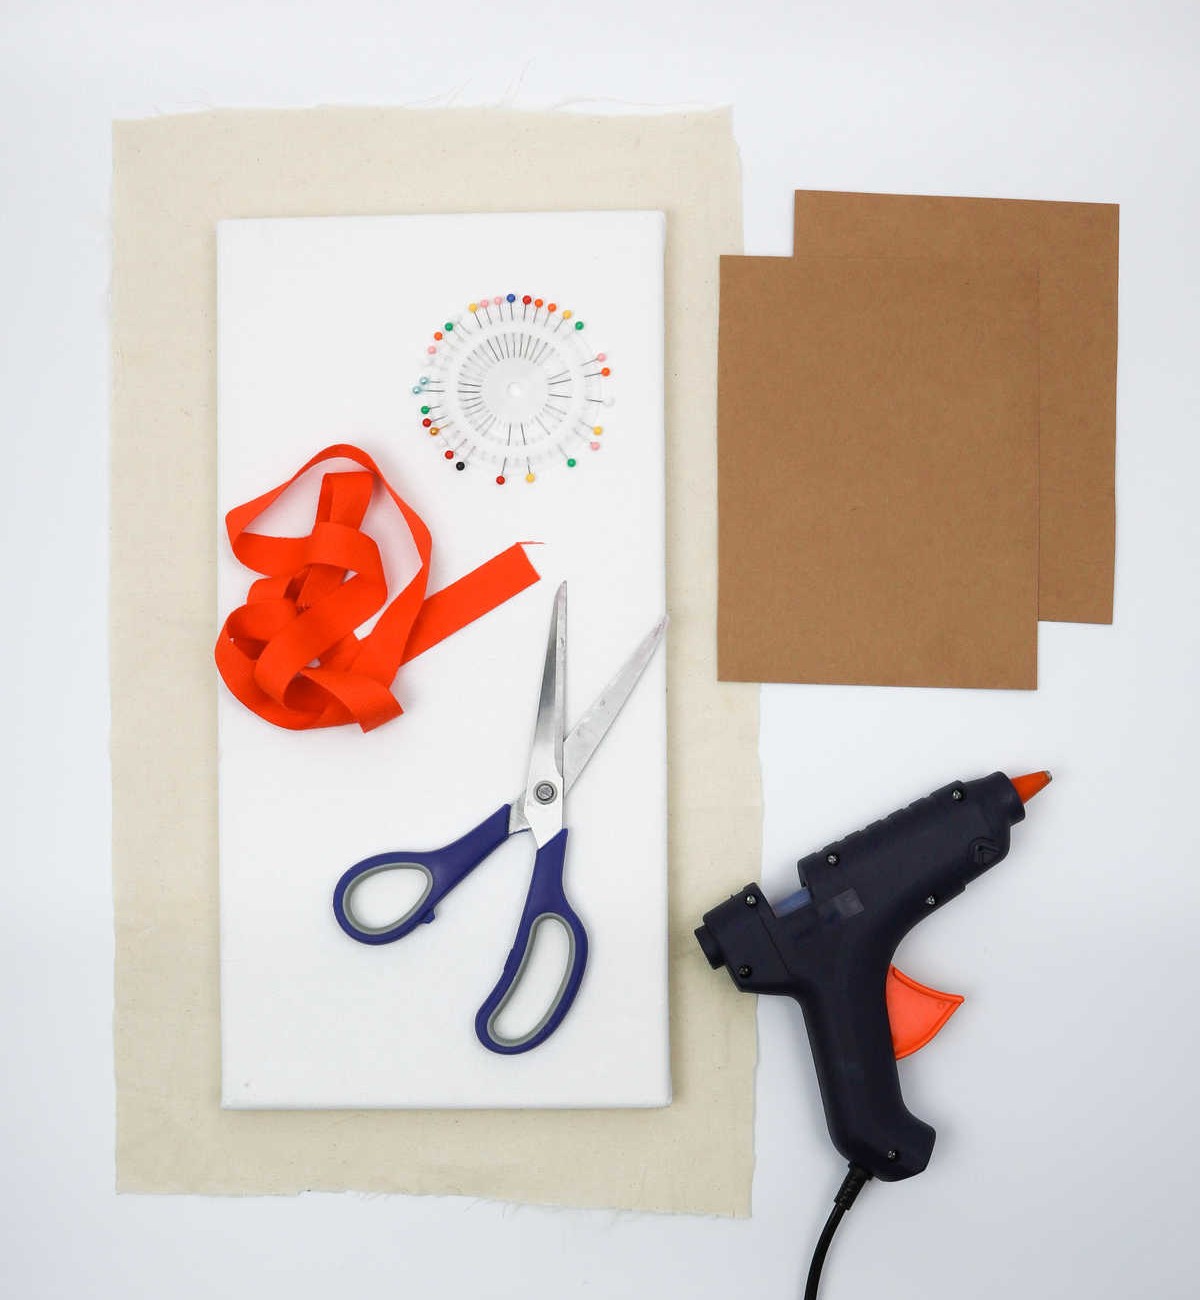
To create your sleeve organizer, you’ll need a few basic materials. These include: an artistic canvas measuring 10 inches by 16 inches; a main piece of fabric measuring 14 inches by 20 inches; two cardboard pieces, each measuring 6 inches by 10 inches. Additionally, you’ll require some tools like a hot glue gun, scissors, sewing pins, and a cotton twill tape. A sewing machine will also come in handy.
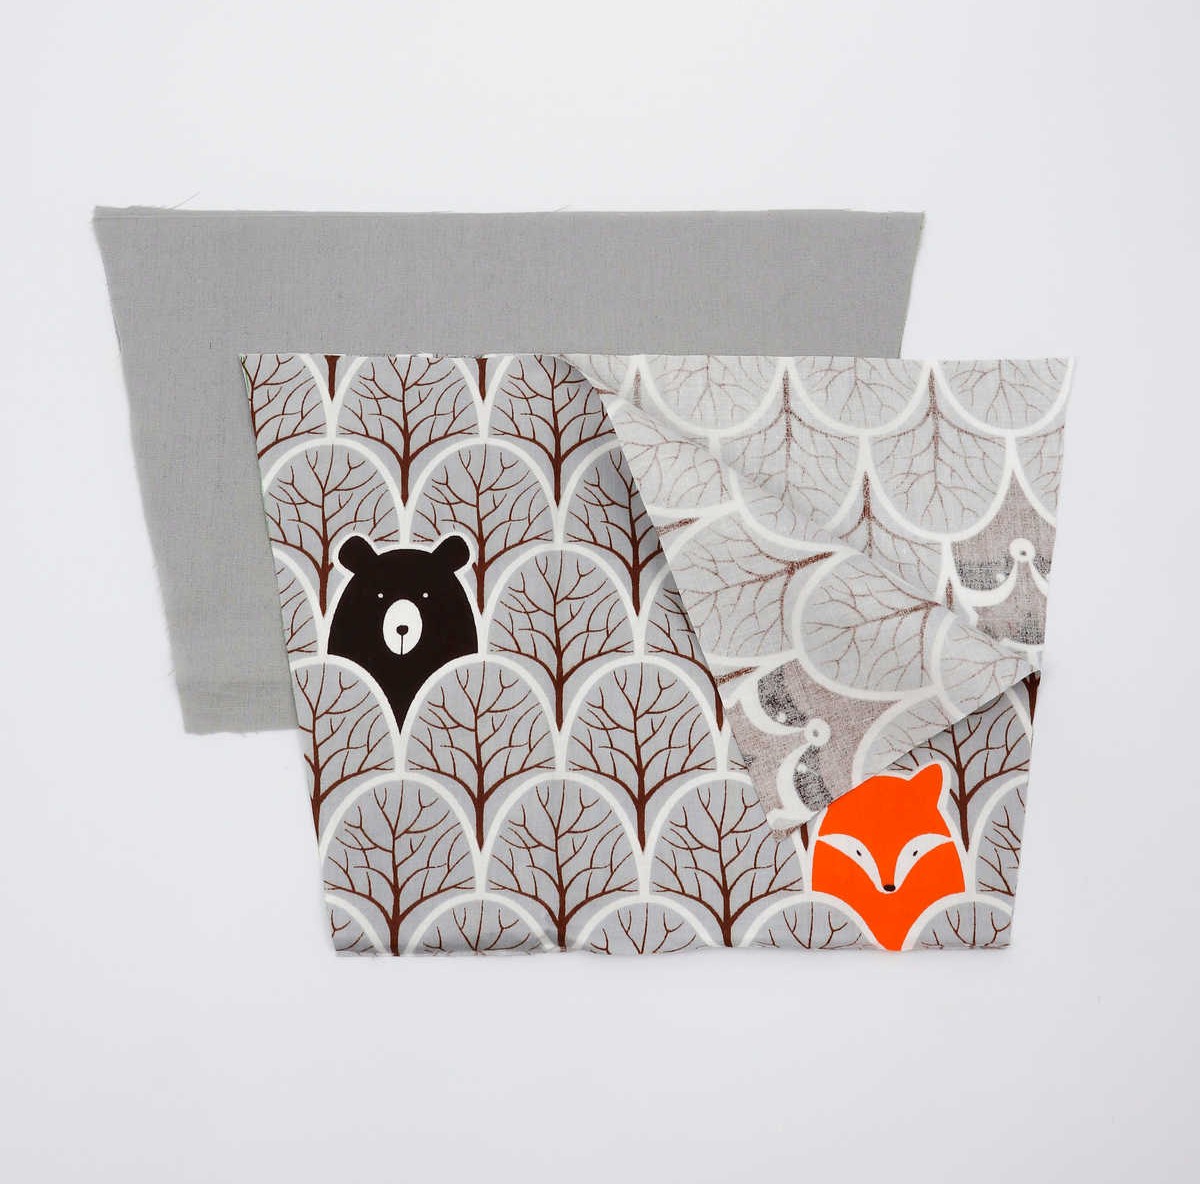
For the two pockets, you’ll need four trapezoidal fabric pieces with varying lengths: one measuring 16 inches, another measuring 12 inches, and both with a height of 7.5 inches.
How to Make a Mail Organizer
Once you’ve decided on the ideal number of pockets for your organizer, it’s time to select a fabric that reflects your personal style. Choose a patterned piece that catches your eye, taking into account the overall aesthetic you want to achieve with your finished project.
Step 1
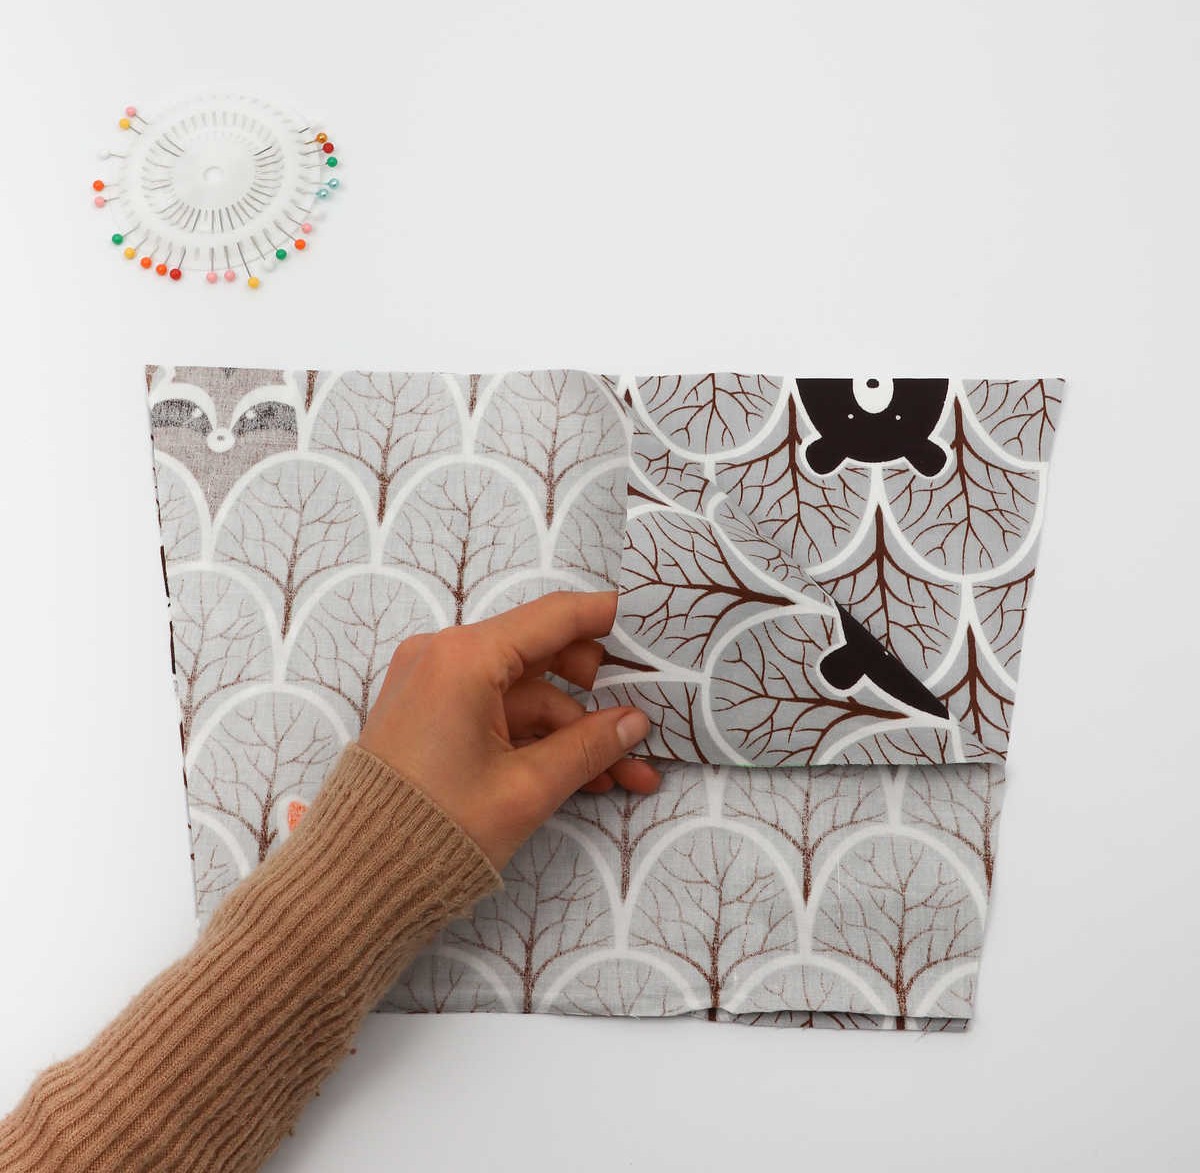

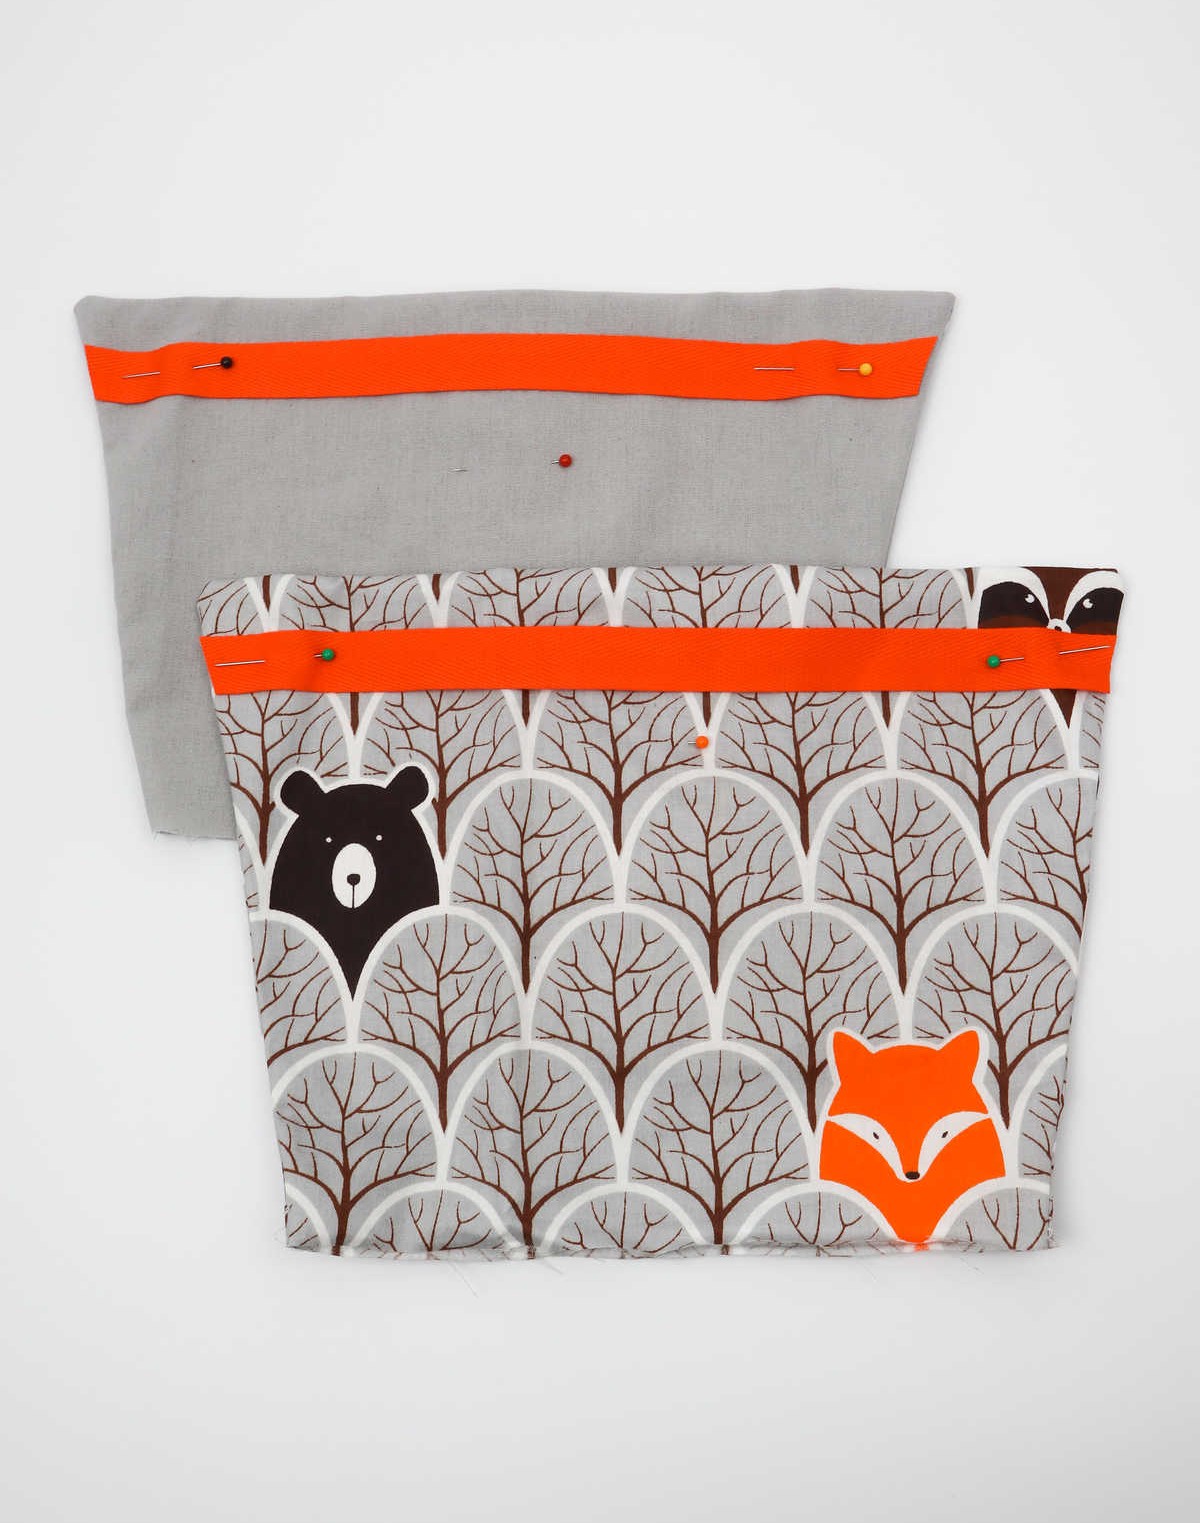
Begin by preparing your fabric for the pockets. Lay it out flat on a work surface and fold it in half, with the wrong side facing upwards. To secure the corners, use sewing pins to tag them in place, just as shown below. A crucial step is to leave one side of the pocket open – do not pin that side together. Follow this process for all your pocket fabric pieces.
Step 2
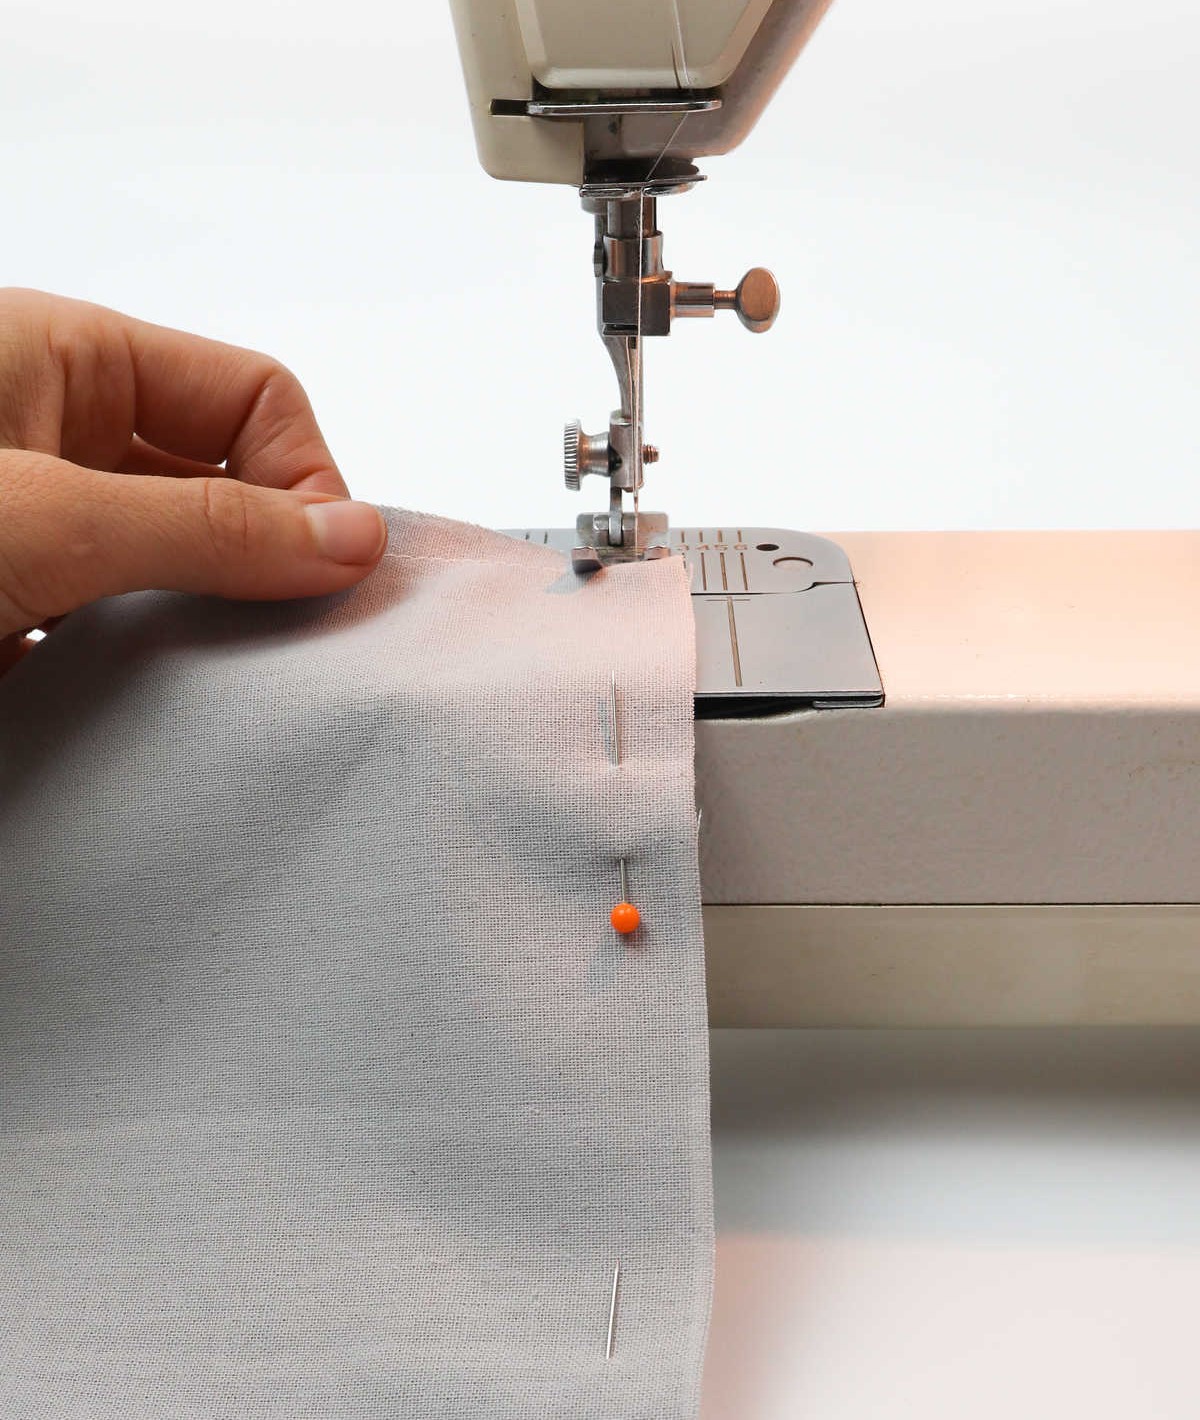
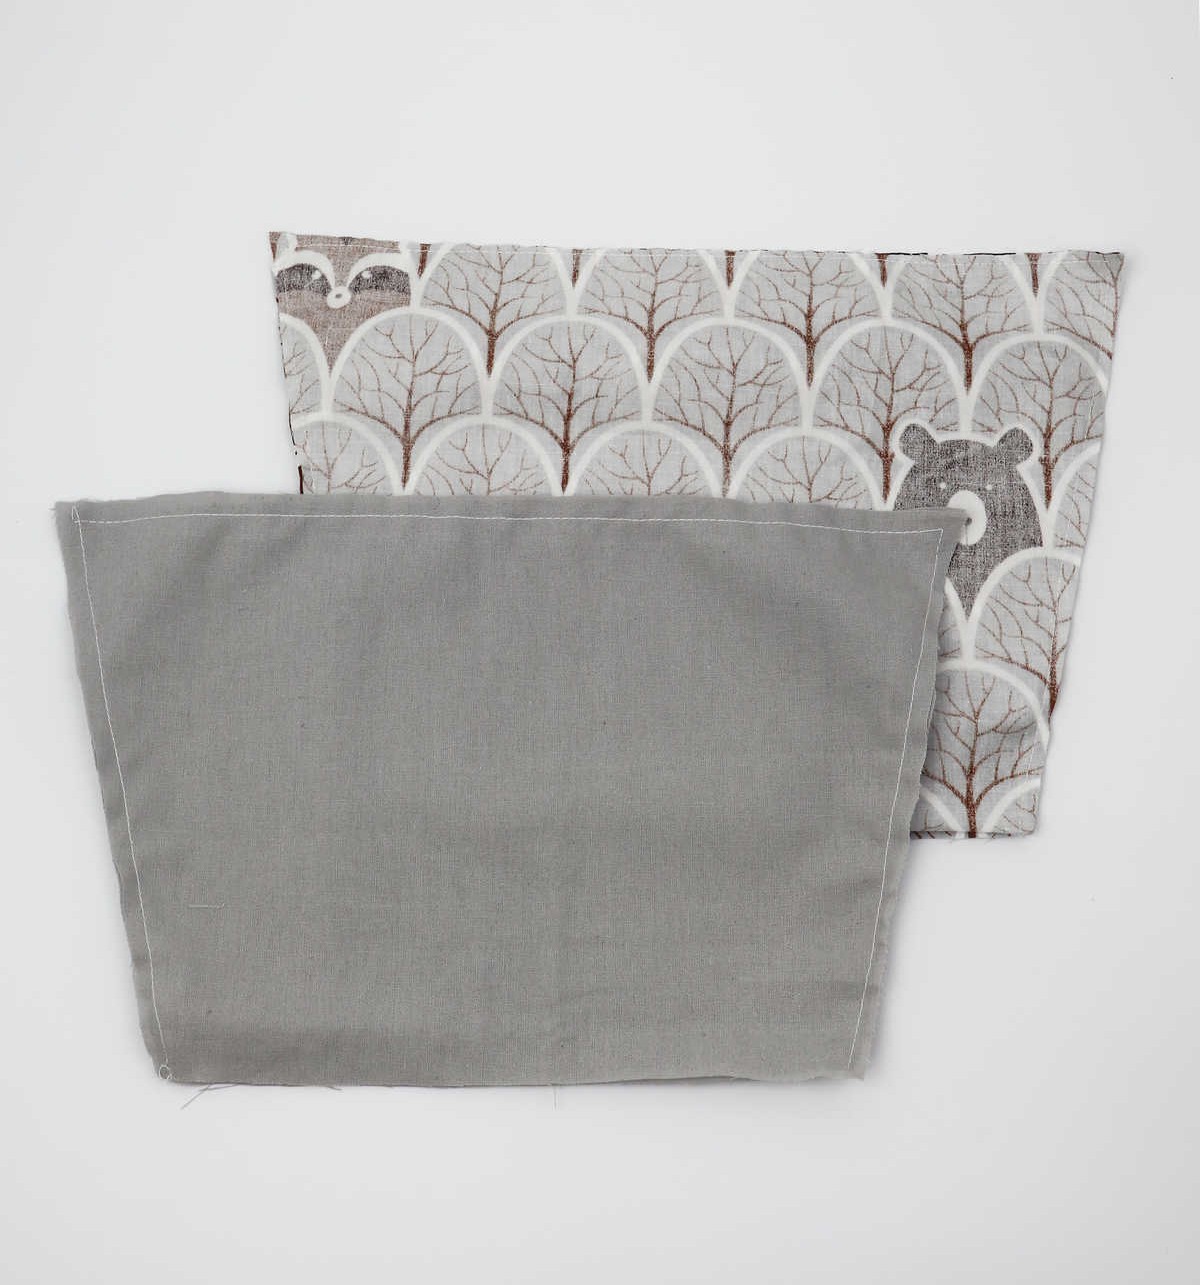
As you progress to step two, retrieve your sewing machine and position it on your workspace. Next, sew along each of the three edges, but intentionally leave one edge unsewn, as directed earlier. This will create a fabric pocket structure that should resemble the final form pictured.
Step 3
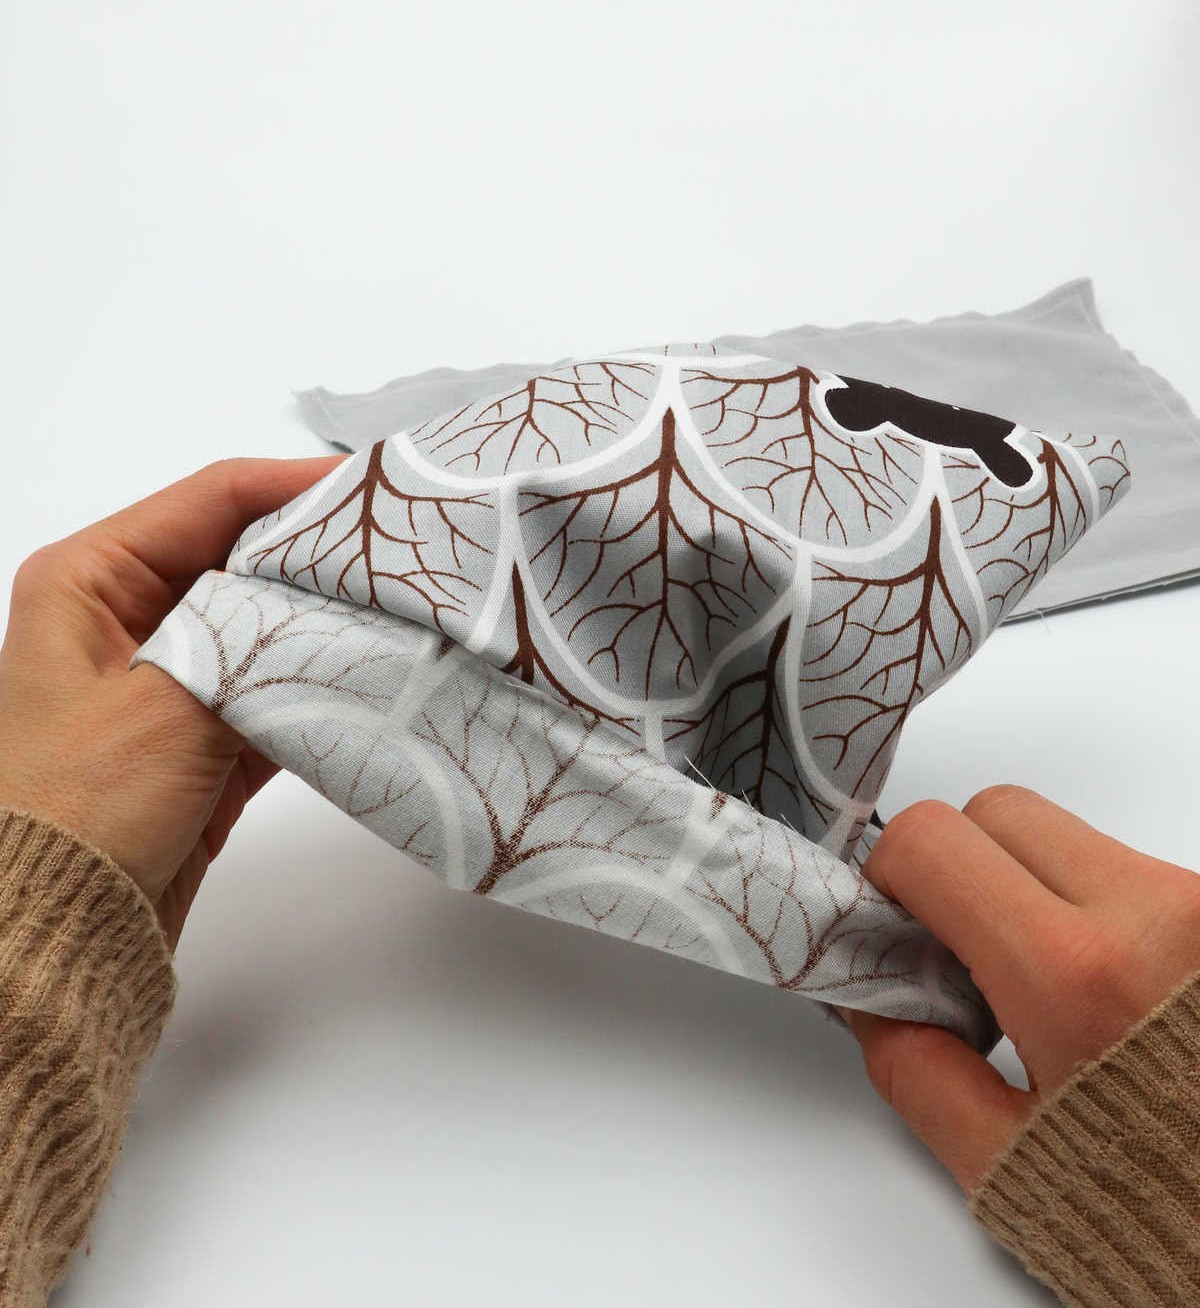
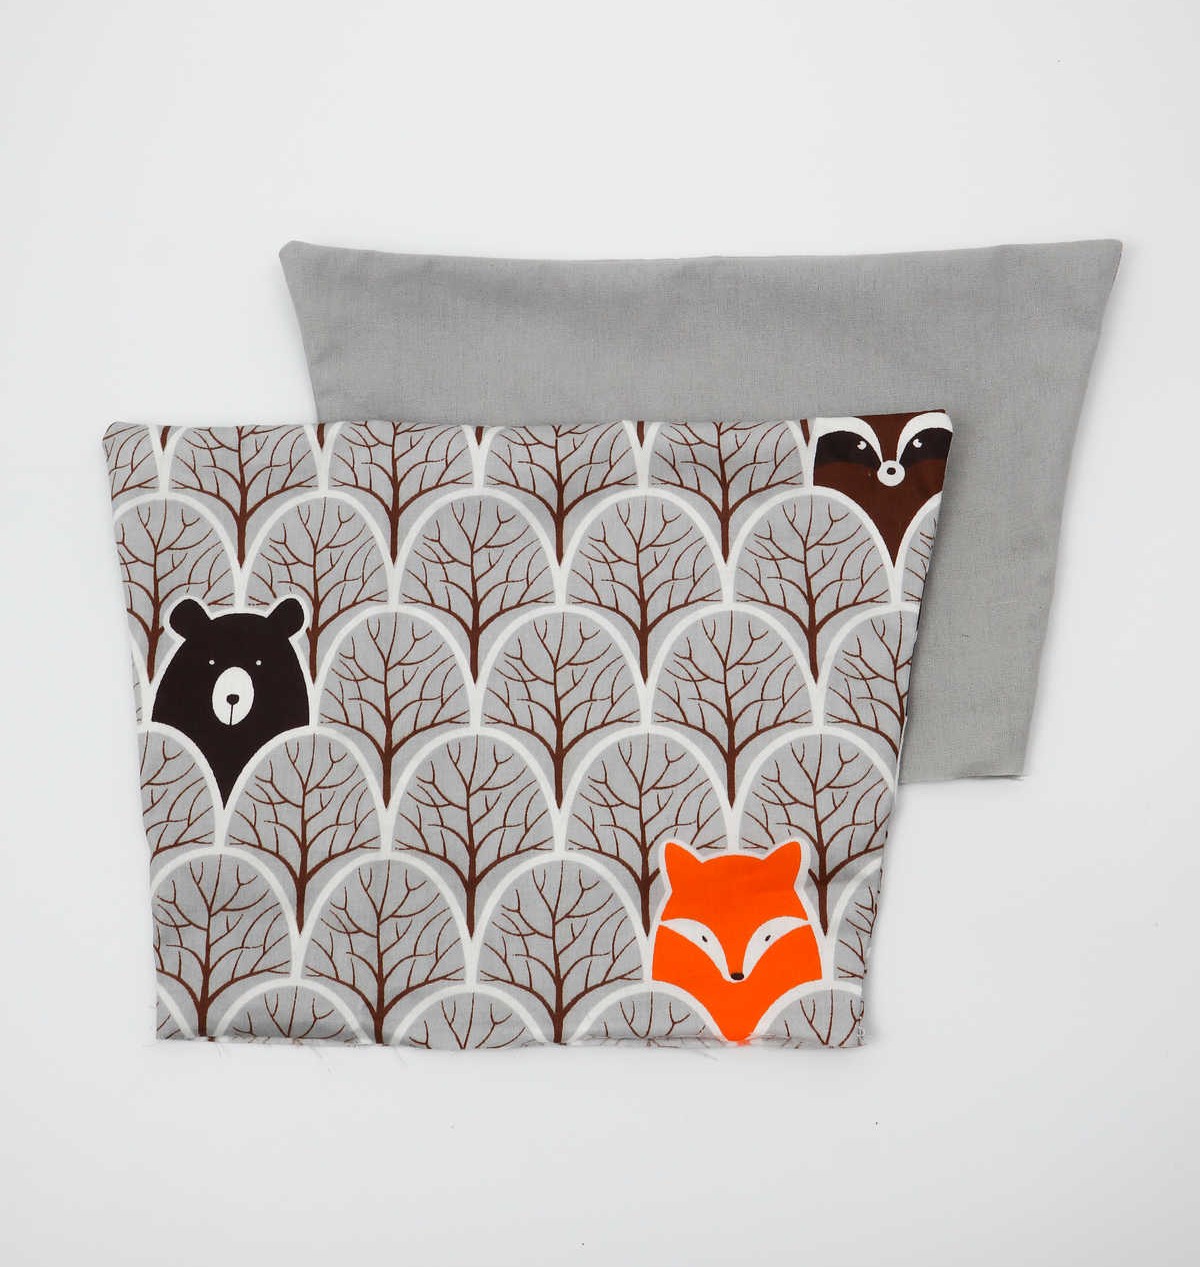
To begin the process, carefully turn the fabric upside down and outside in, ensuring that the side featuring the desired pattern is now facing away from you.
Step 4
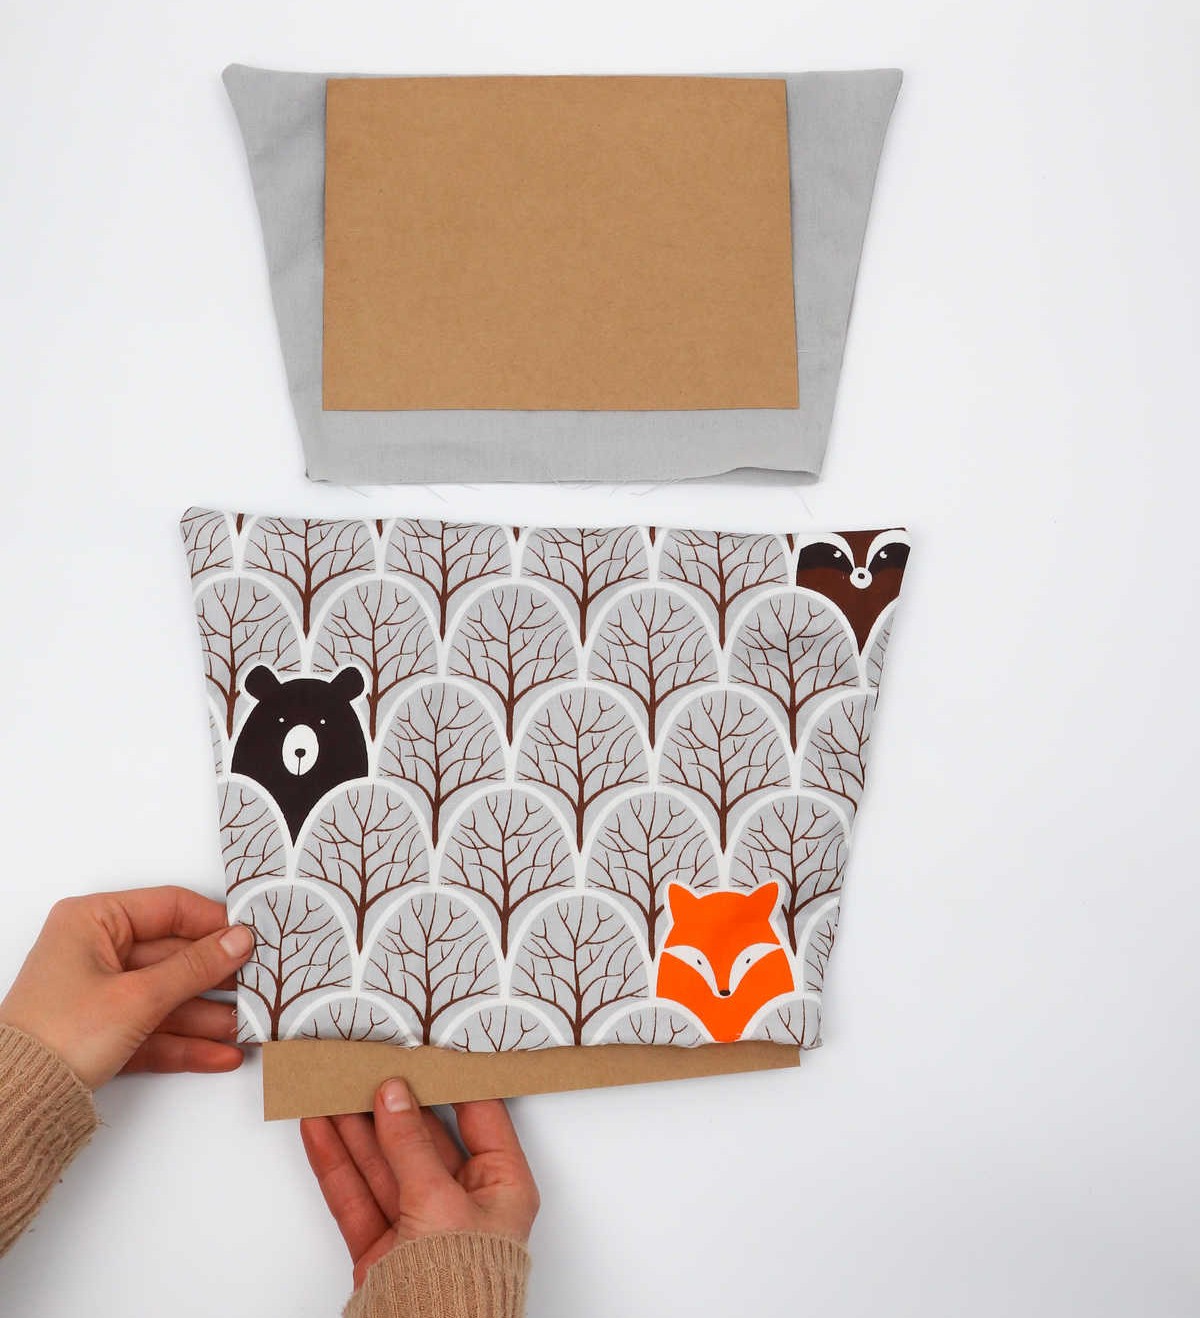
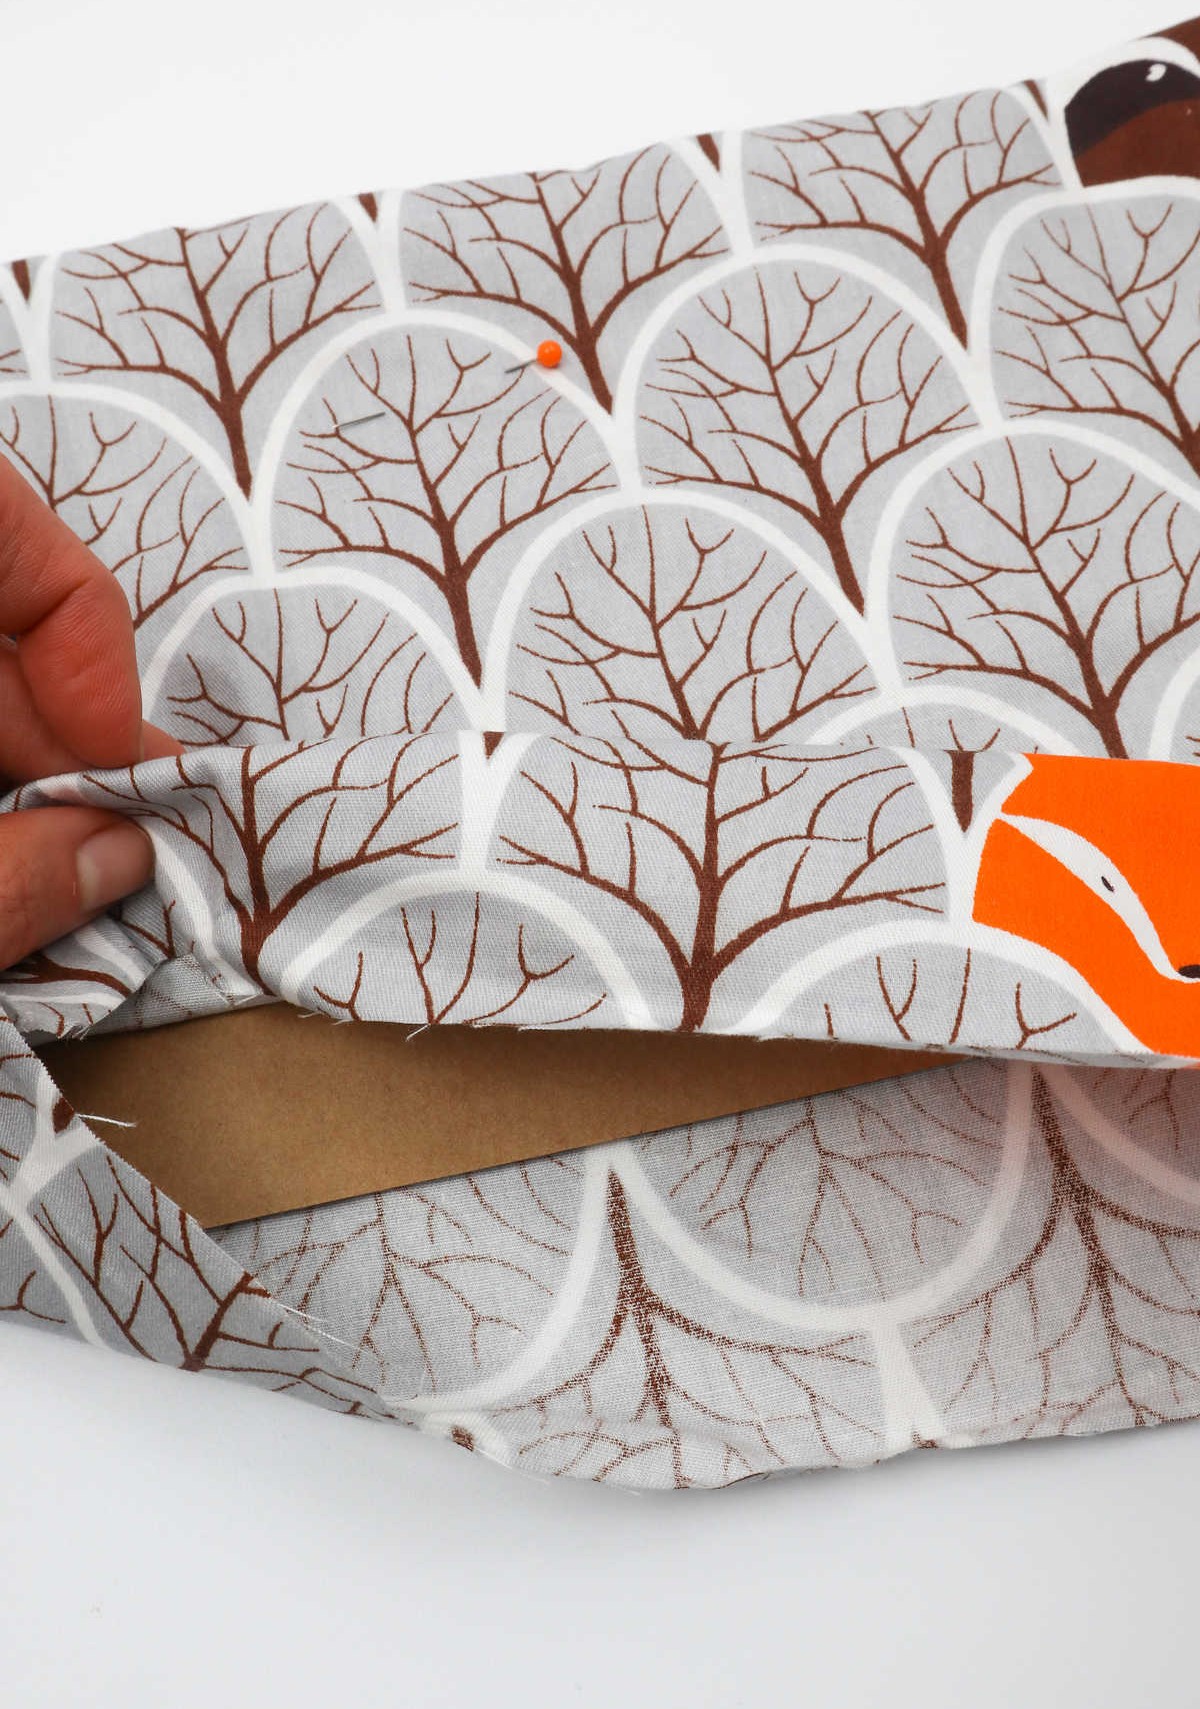
To add extra support to your DIY pockets, start by cutting a piece of cardboard to match the dimensions of your desired pocket size. Next, carefully slide the cardboard into the pocket opening from the inside out. As you do this, ensure that the cardboard is centered within the fabric, leaving equal amounts of fabric on all four sides around it. This strategic placement will help distribute any stress or strain evenly, preventing unwanted sagging or distortion in your finished pockets.
Step 5
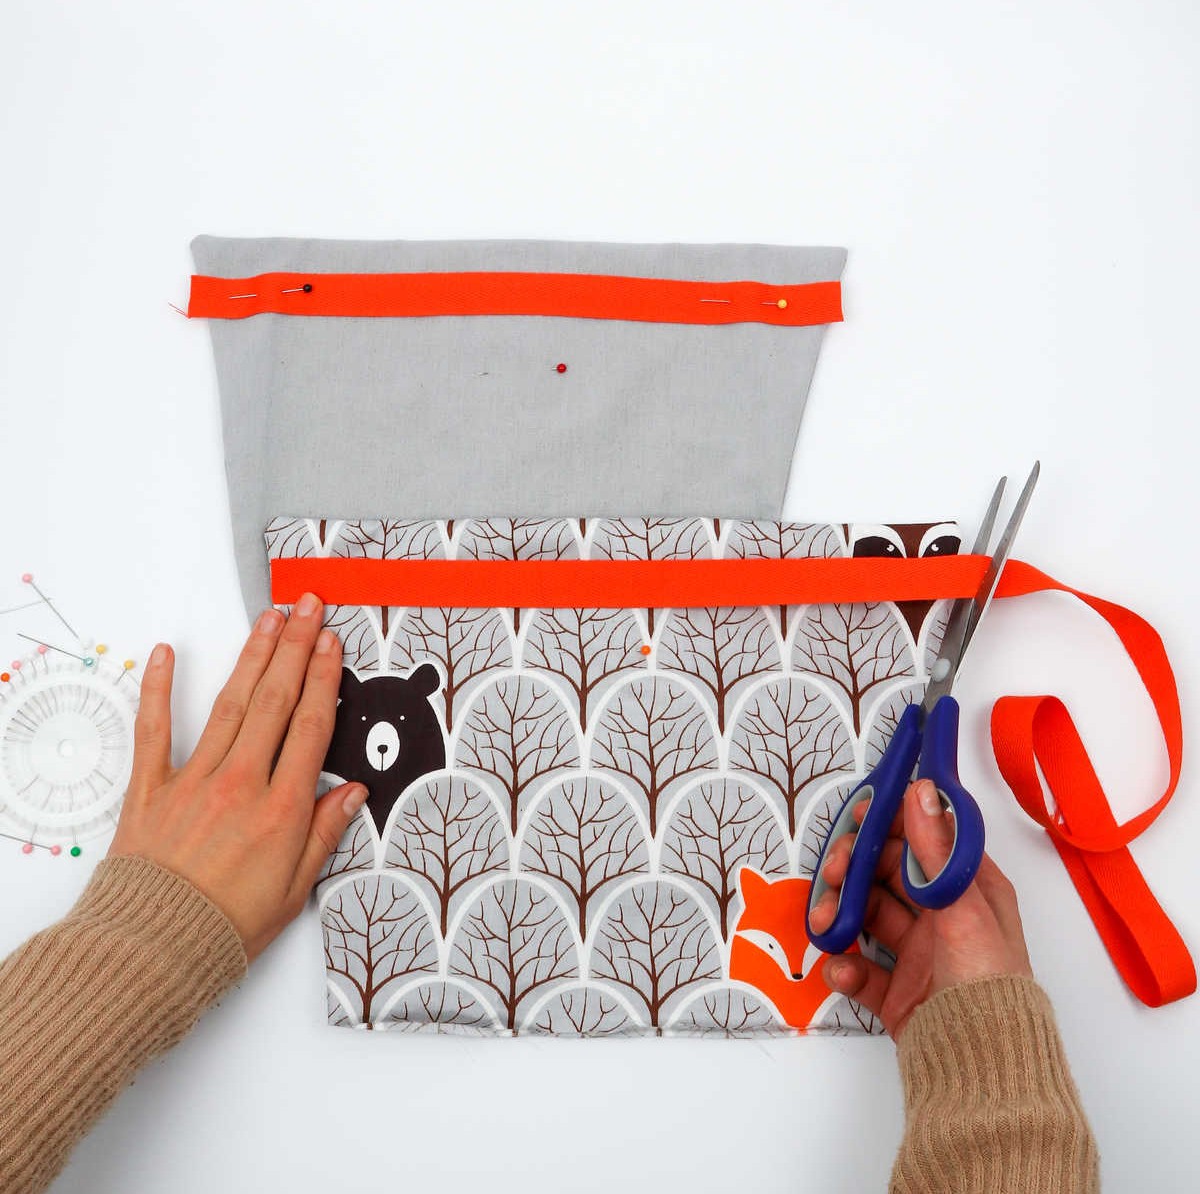

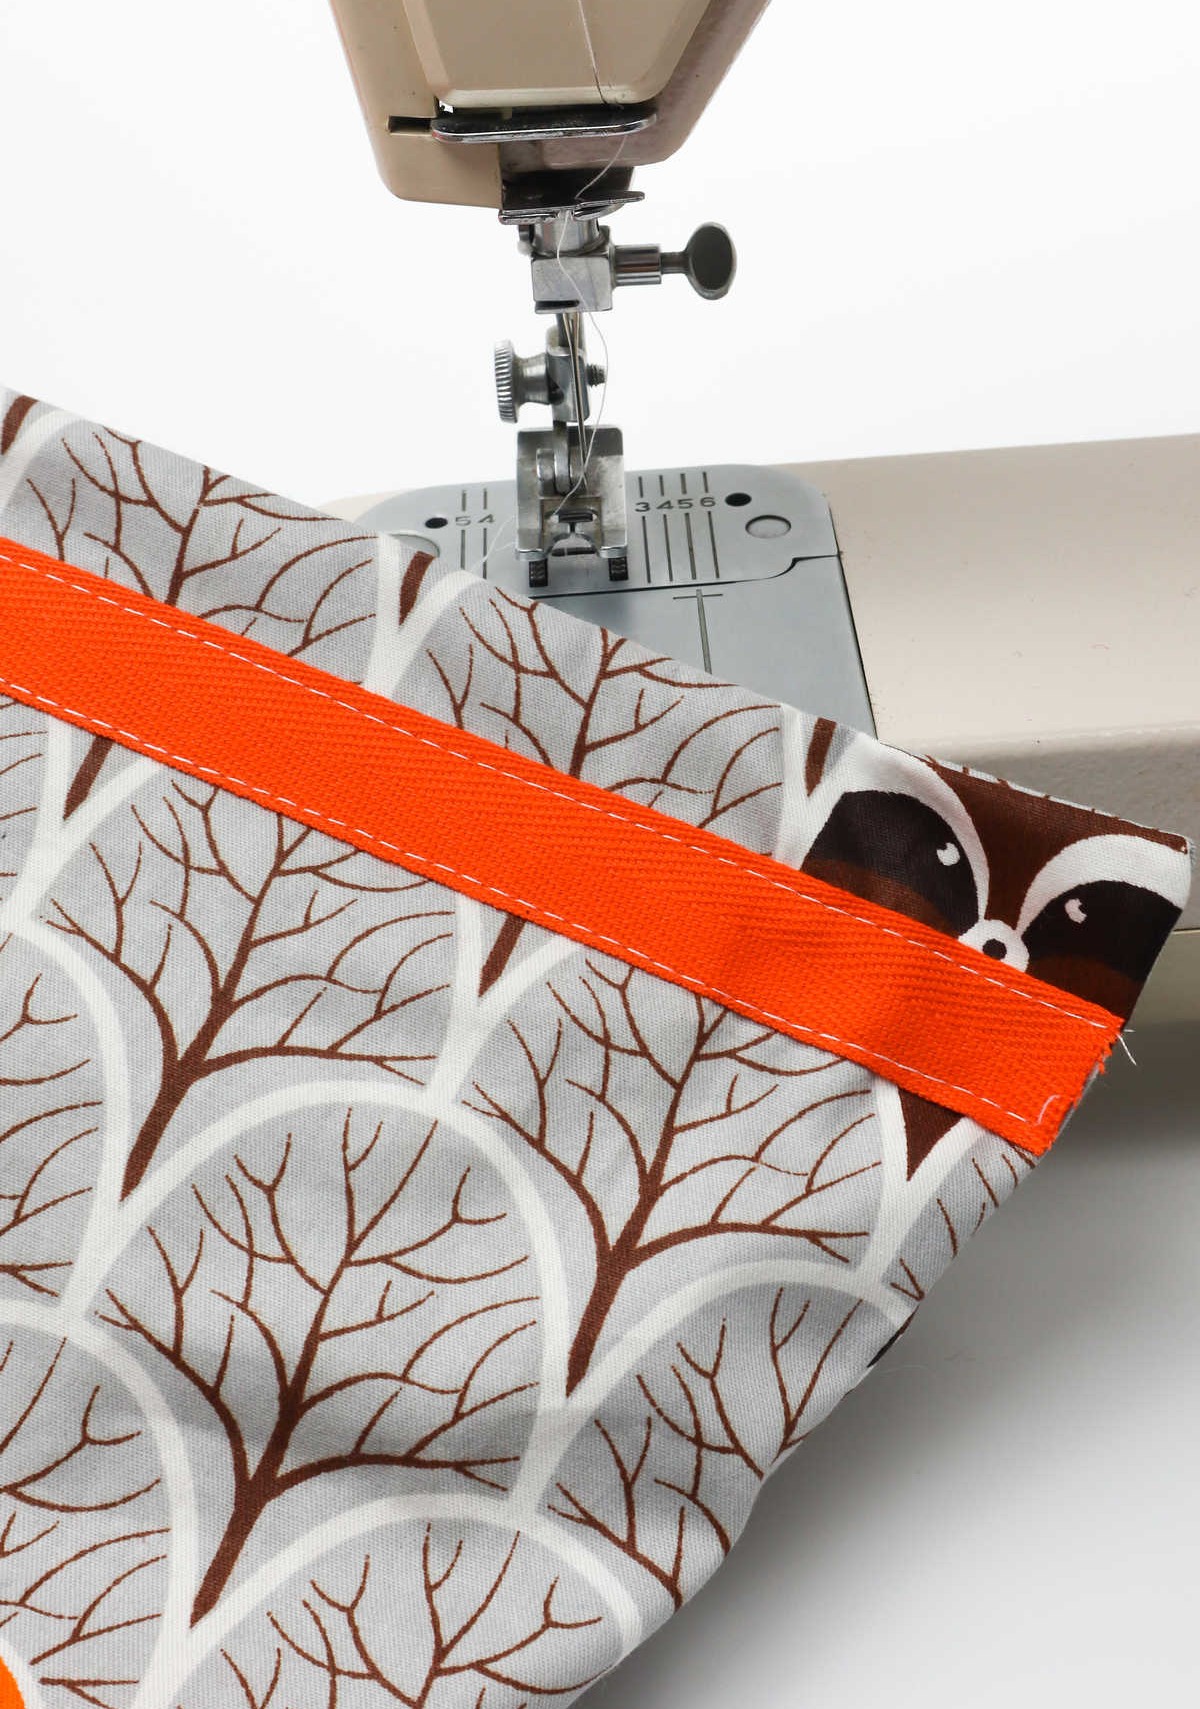
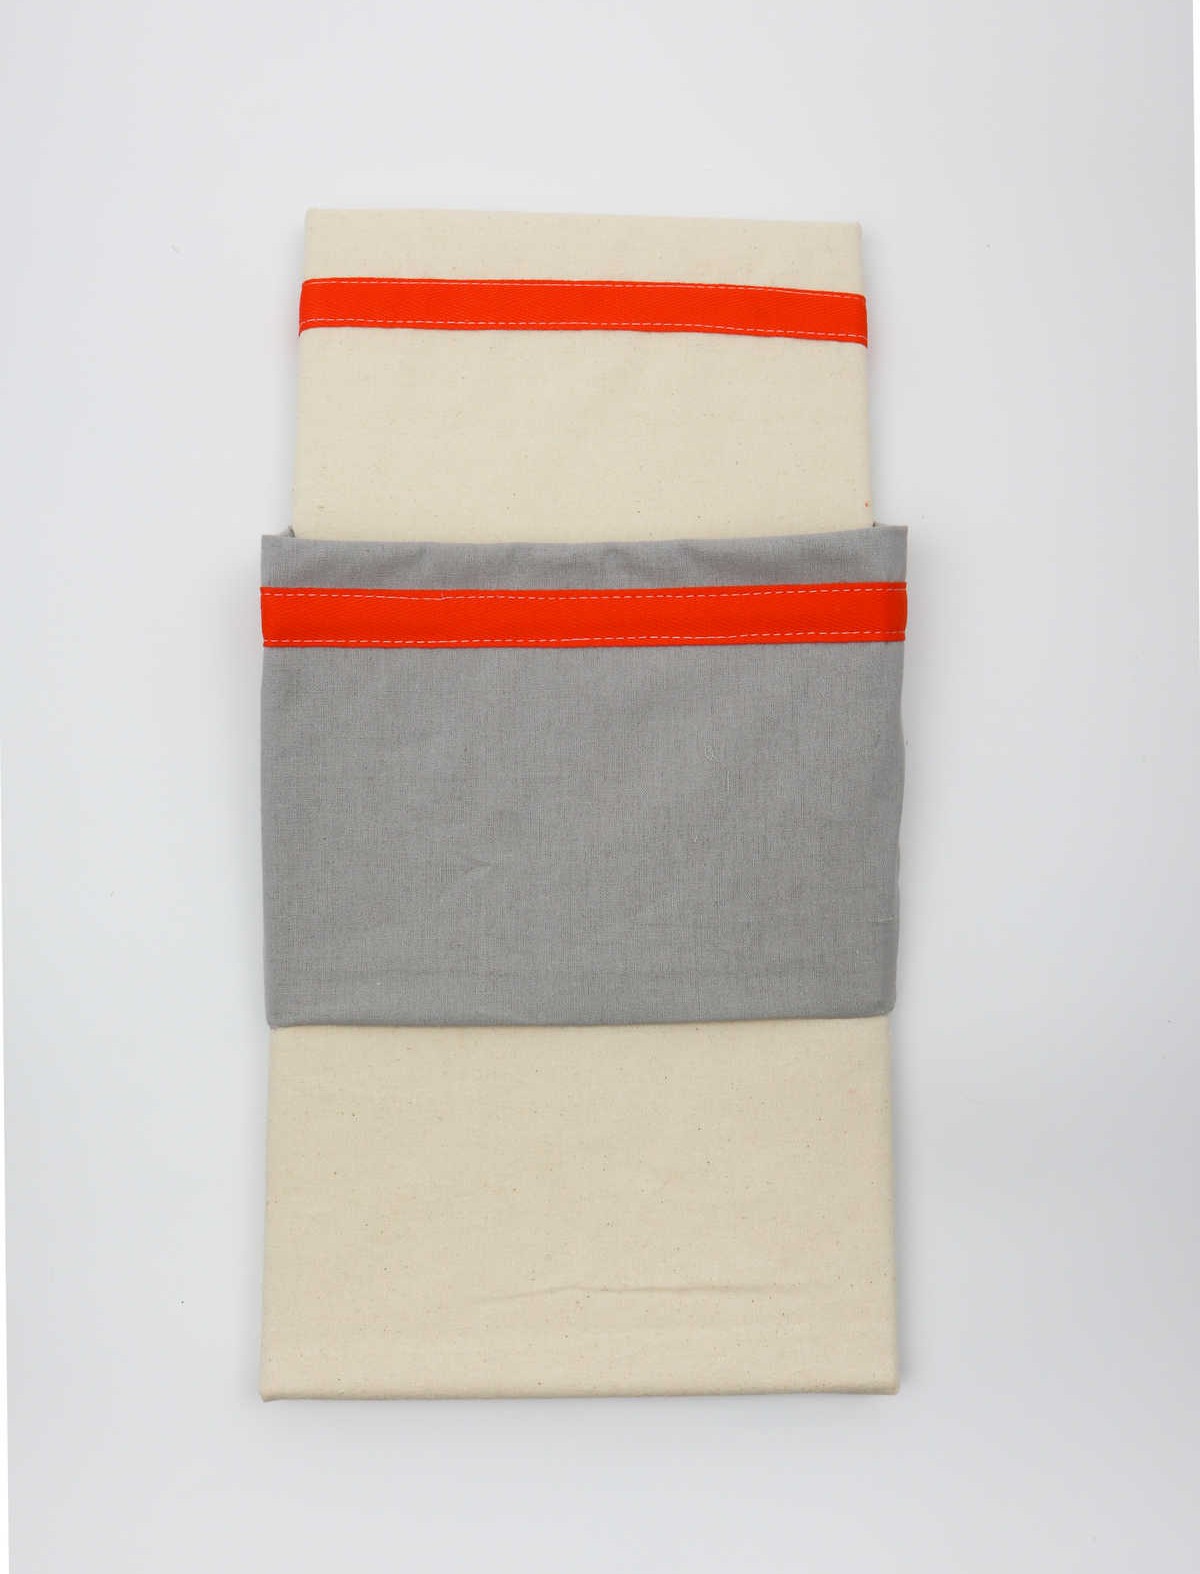
To add a decorative touch to each pocket, start by applying twill tape along the top edge. Pin it in place, taking care to align it with the cardboard insert that will be sewn inside. This dual-purpose approach ensures the cardboard remains secure as you sew along the tape’s length. To do so, feed the fabric into your sewing machine and create a neat seam along the twill tape’s length. If needed, use sewing pins to stabilize the cardboard and prevent it from shifting during the process.
You’ll need to make two passes with your machine, one for each edge of the tape – top and bottom. Repeat this step for all pockets to achieve a consistent, decorative finish.
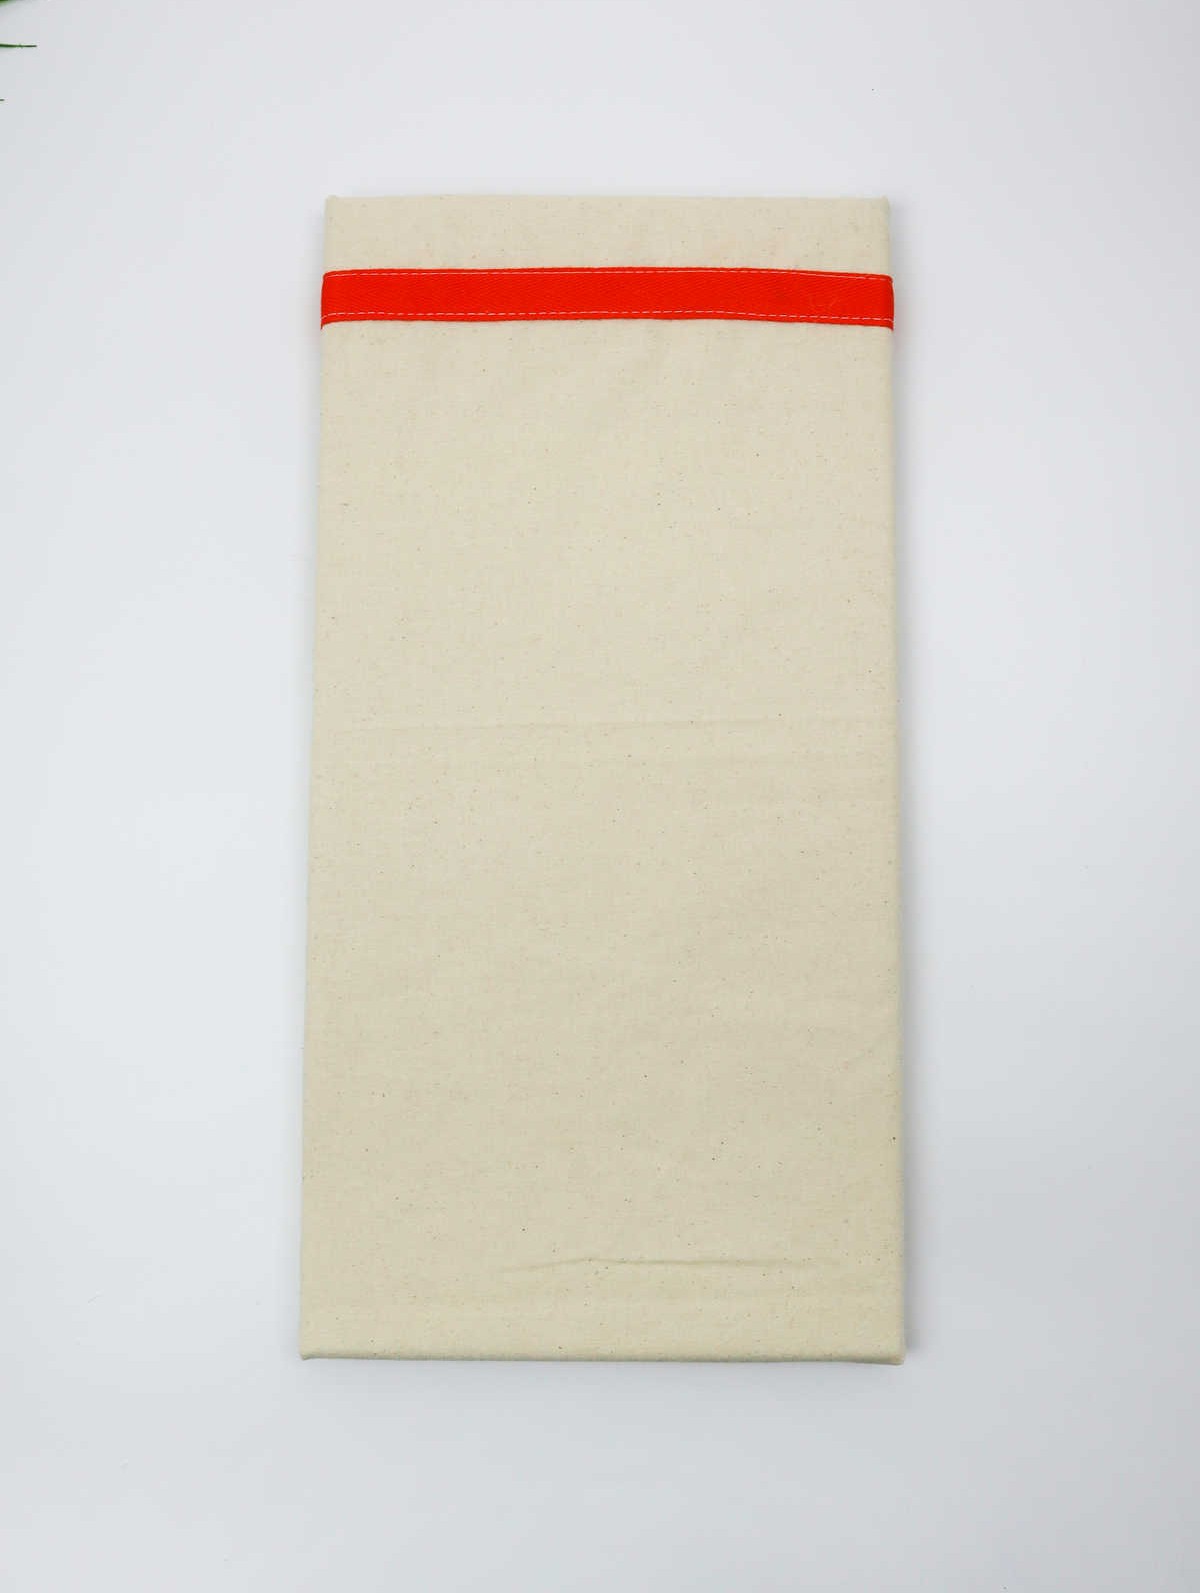
Step 6
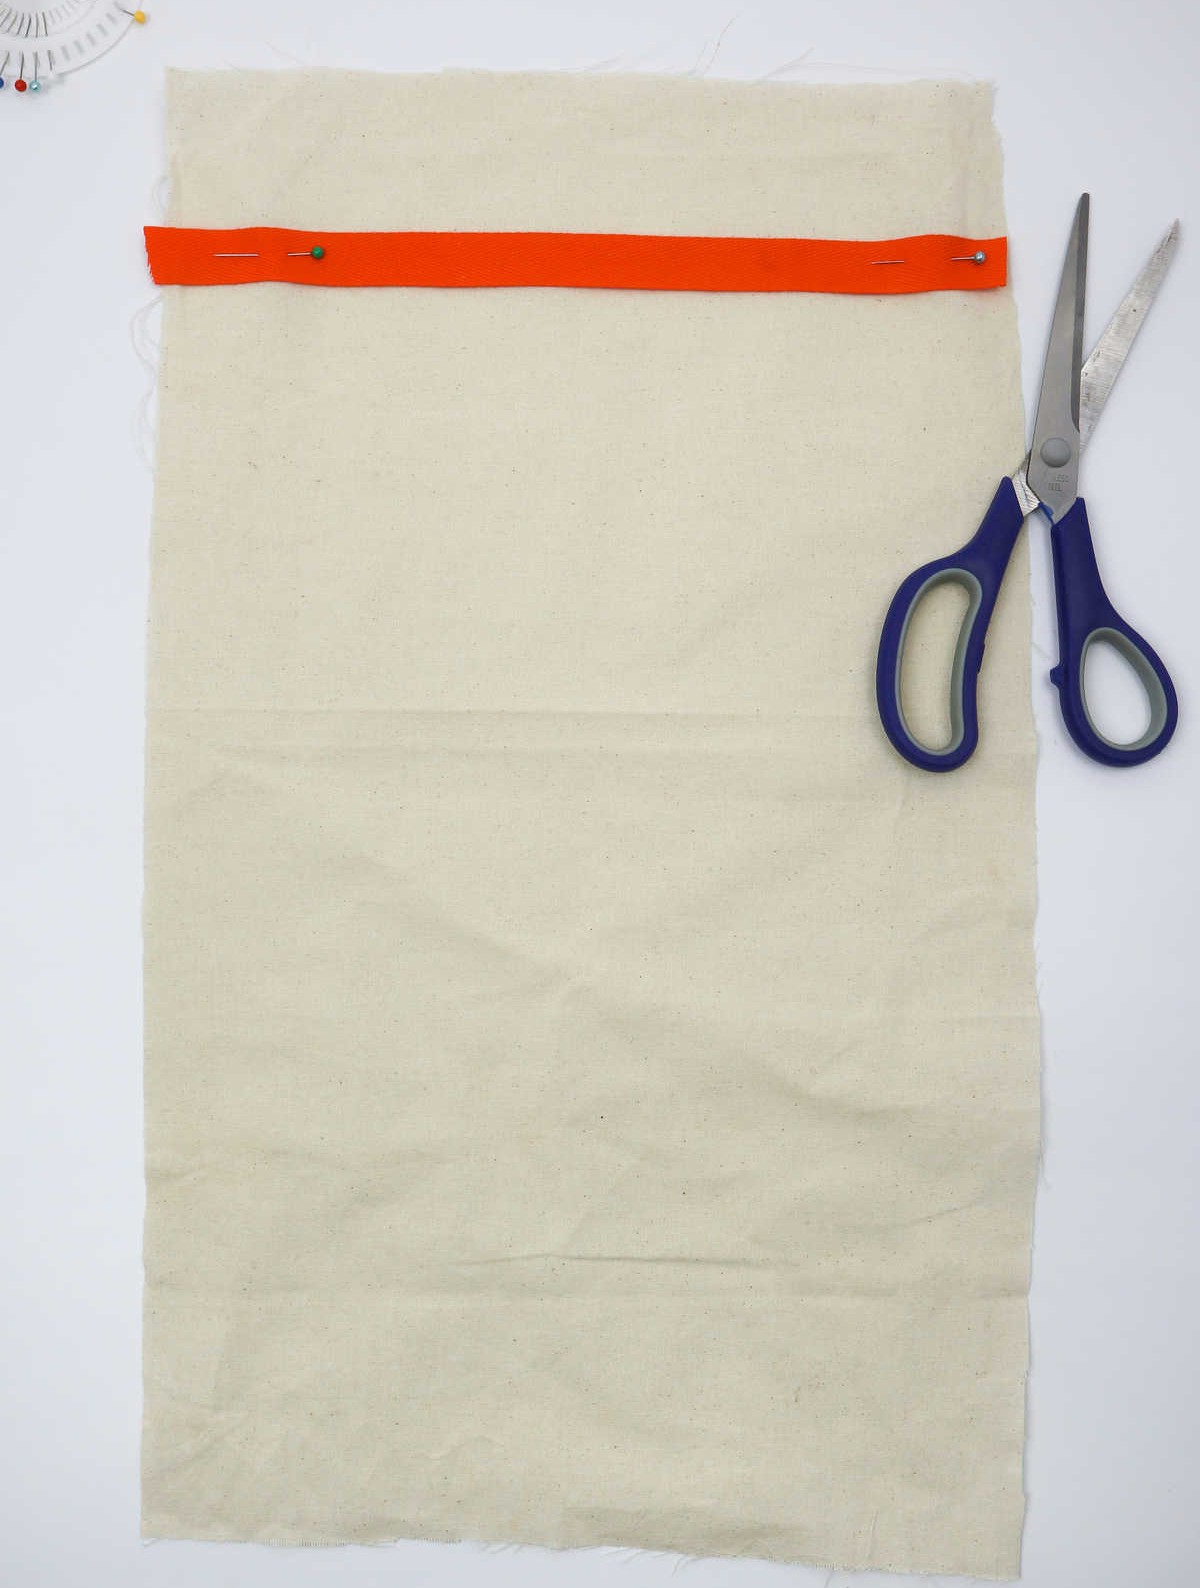
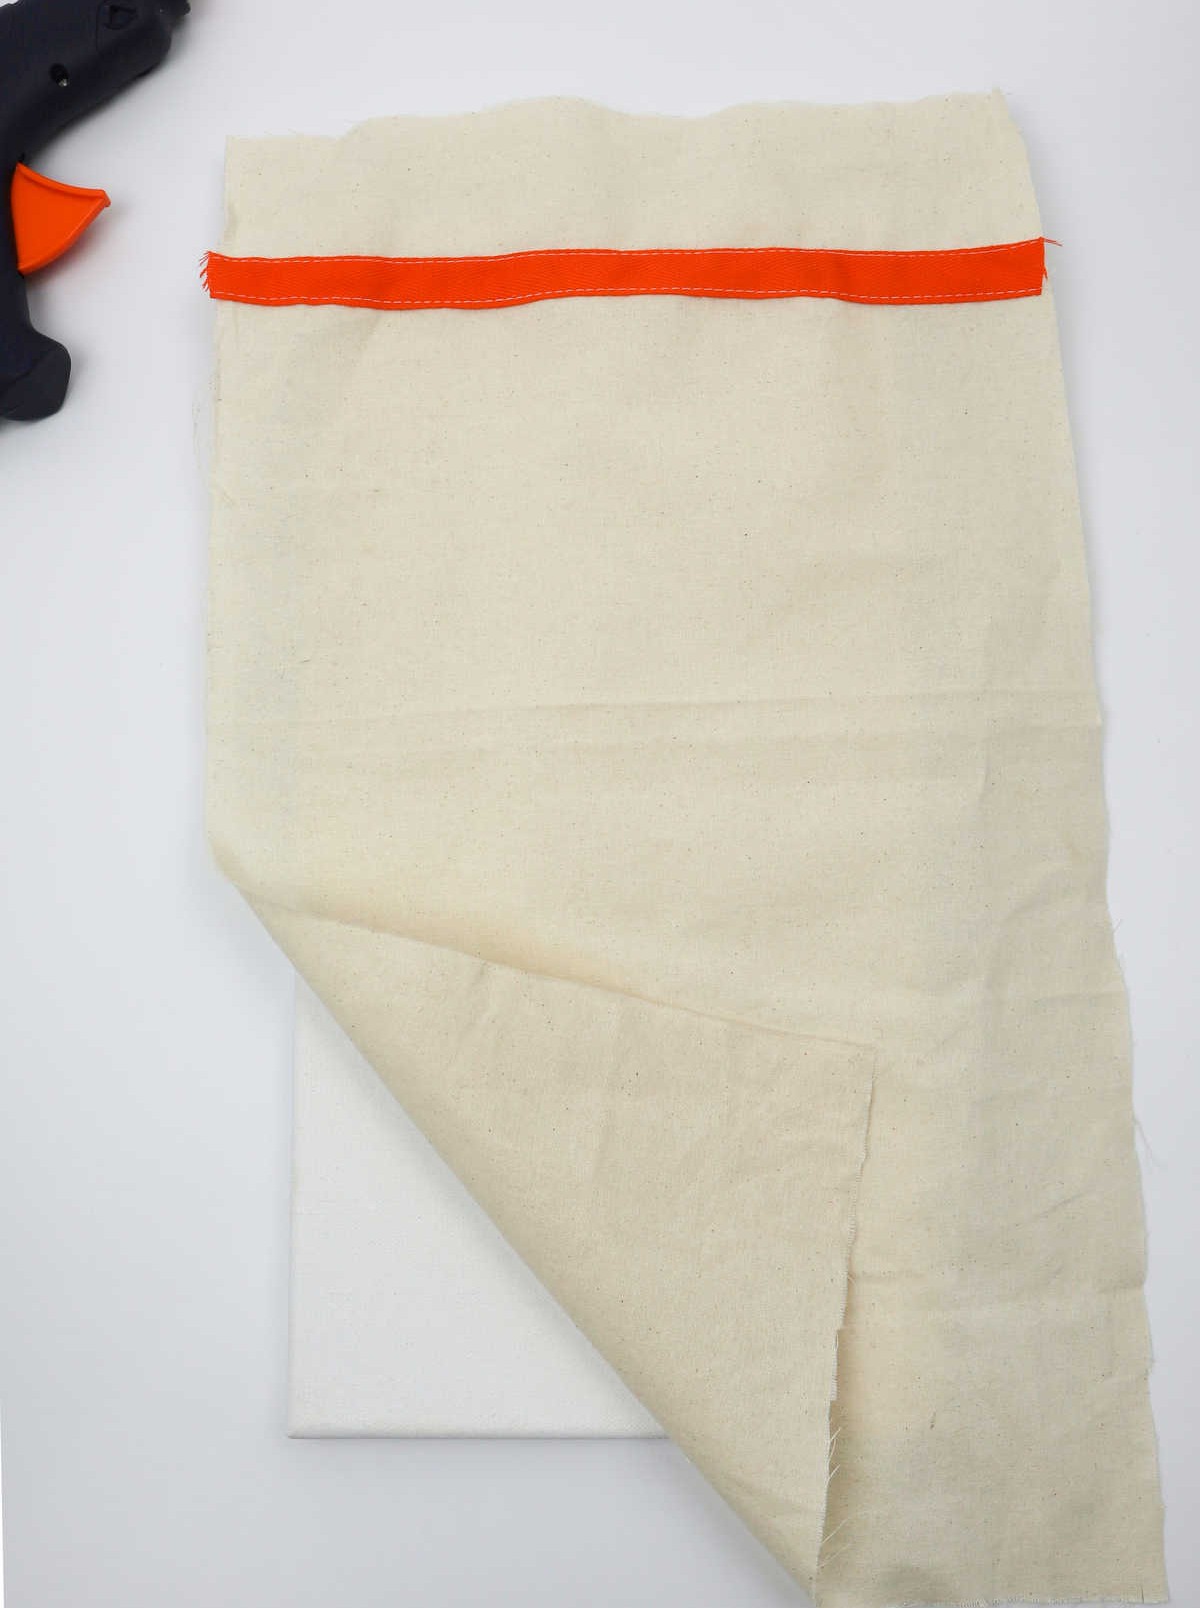
To complete the project, you’ll need to attach a strip of twill tape to the larger base fabric, in addition to the initial fabric piece. This process is similar to sewing on the fabric pockets previously mentioned, requiring you to sew the twill tape strip onto the base fabric with an identical stitch pattern.
Step 7
To ensure a secure and even bond, start by flipping the base fabric over so that the side with the twill tape is facing downwards. Next, carefully position the canvas on top of the fabric, making sure it’s centered and evenly spaced on all four sides. This will prevent any excess fabric from bunching up or compromising the overall structure.
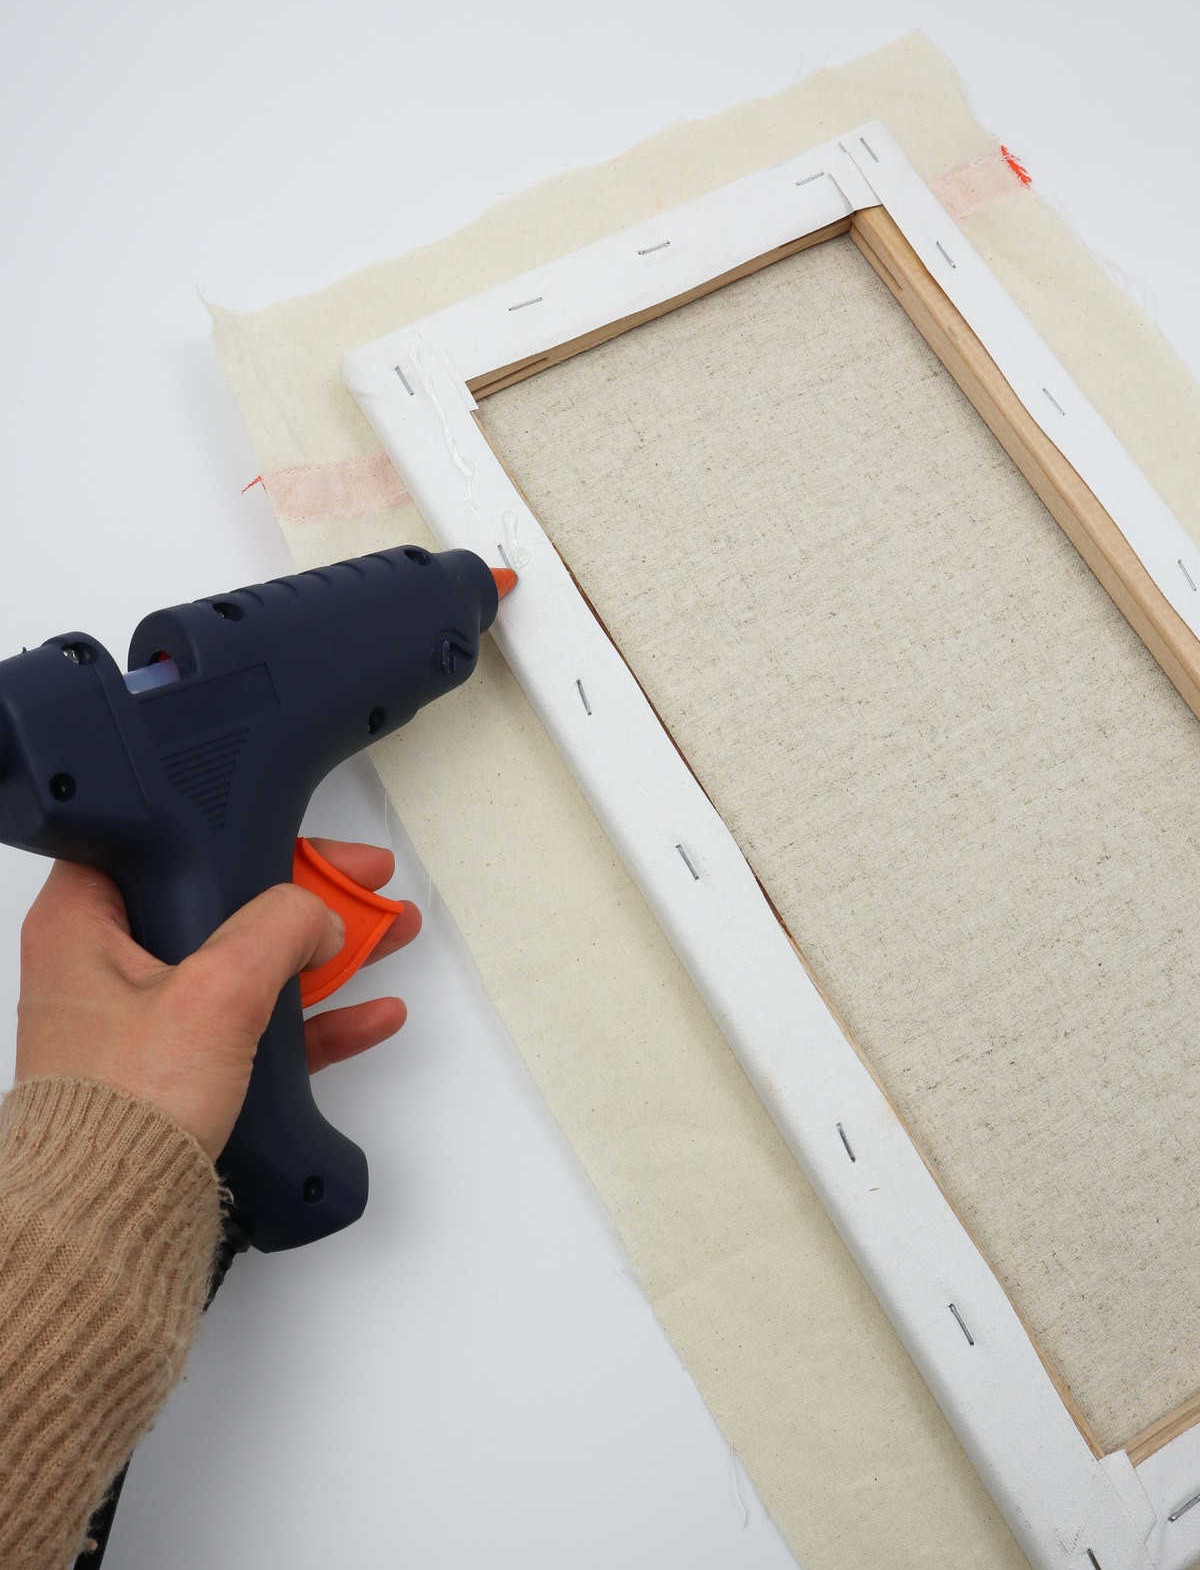
Step 8
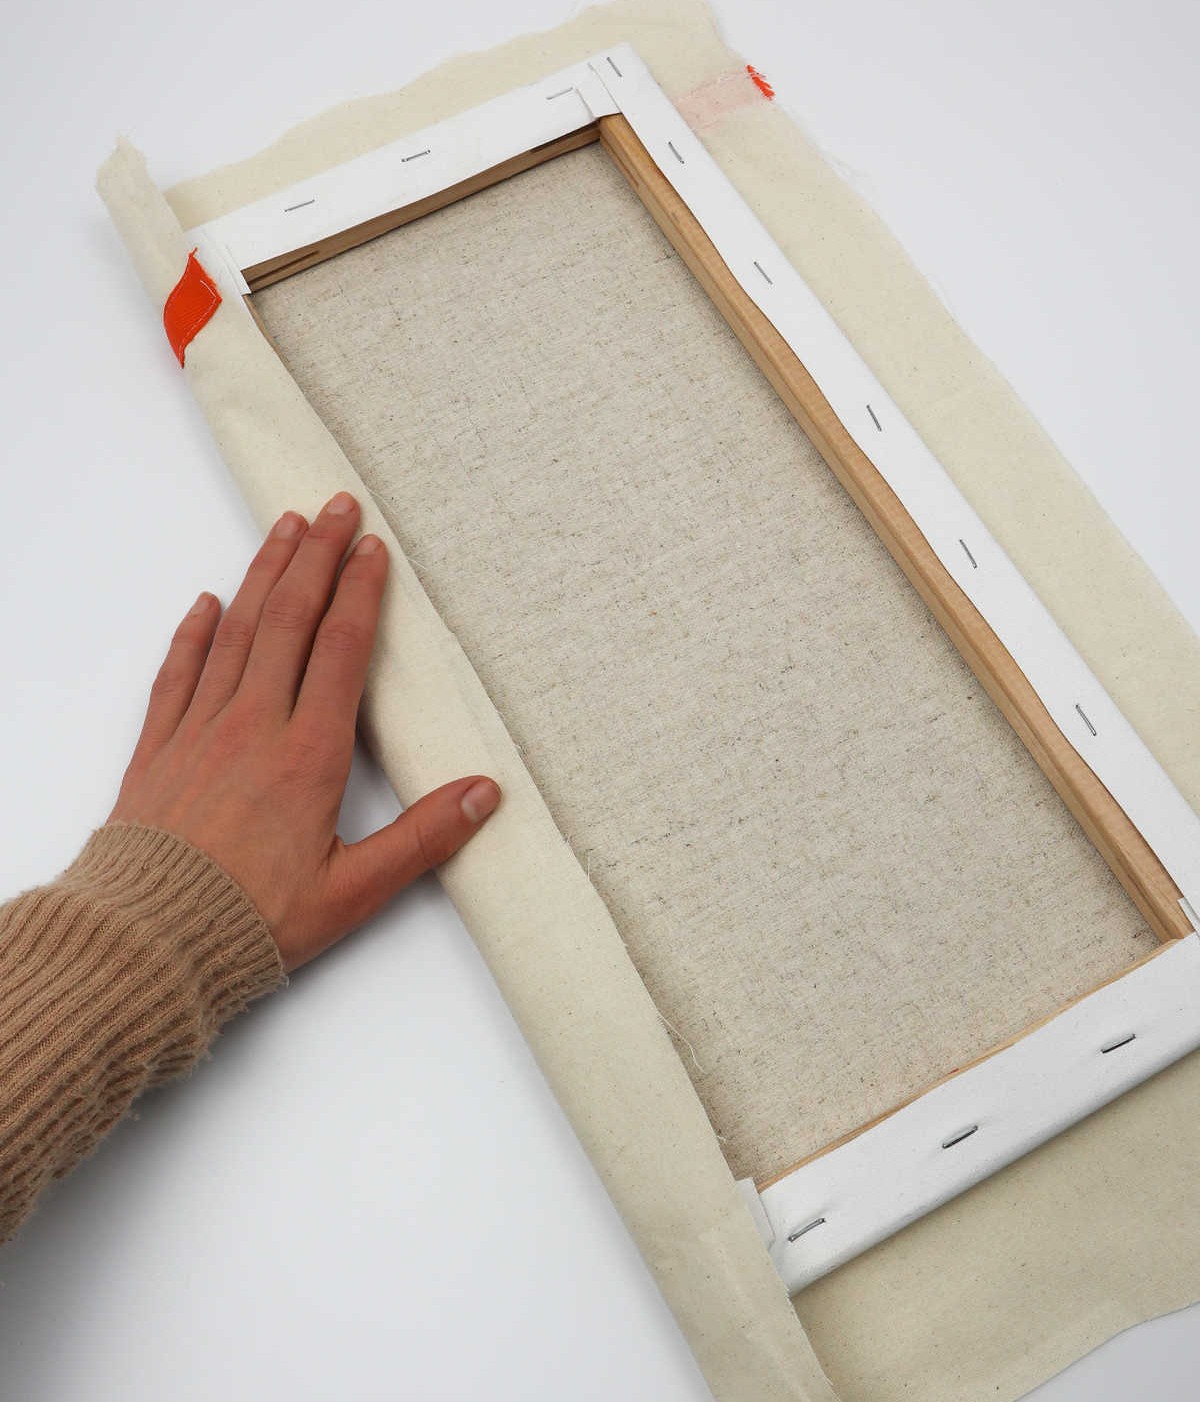
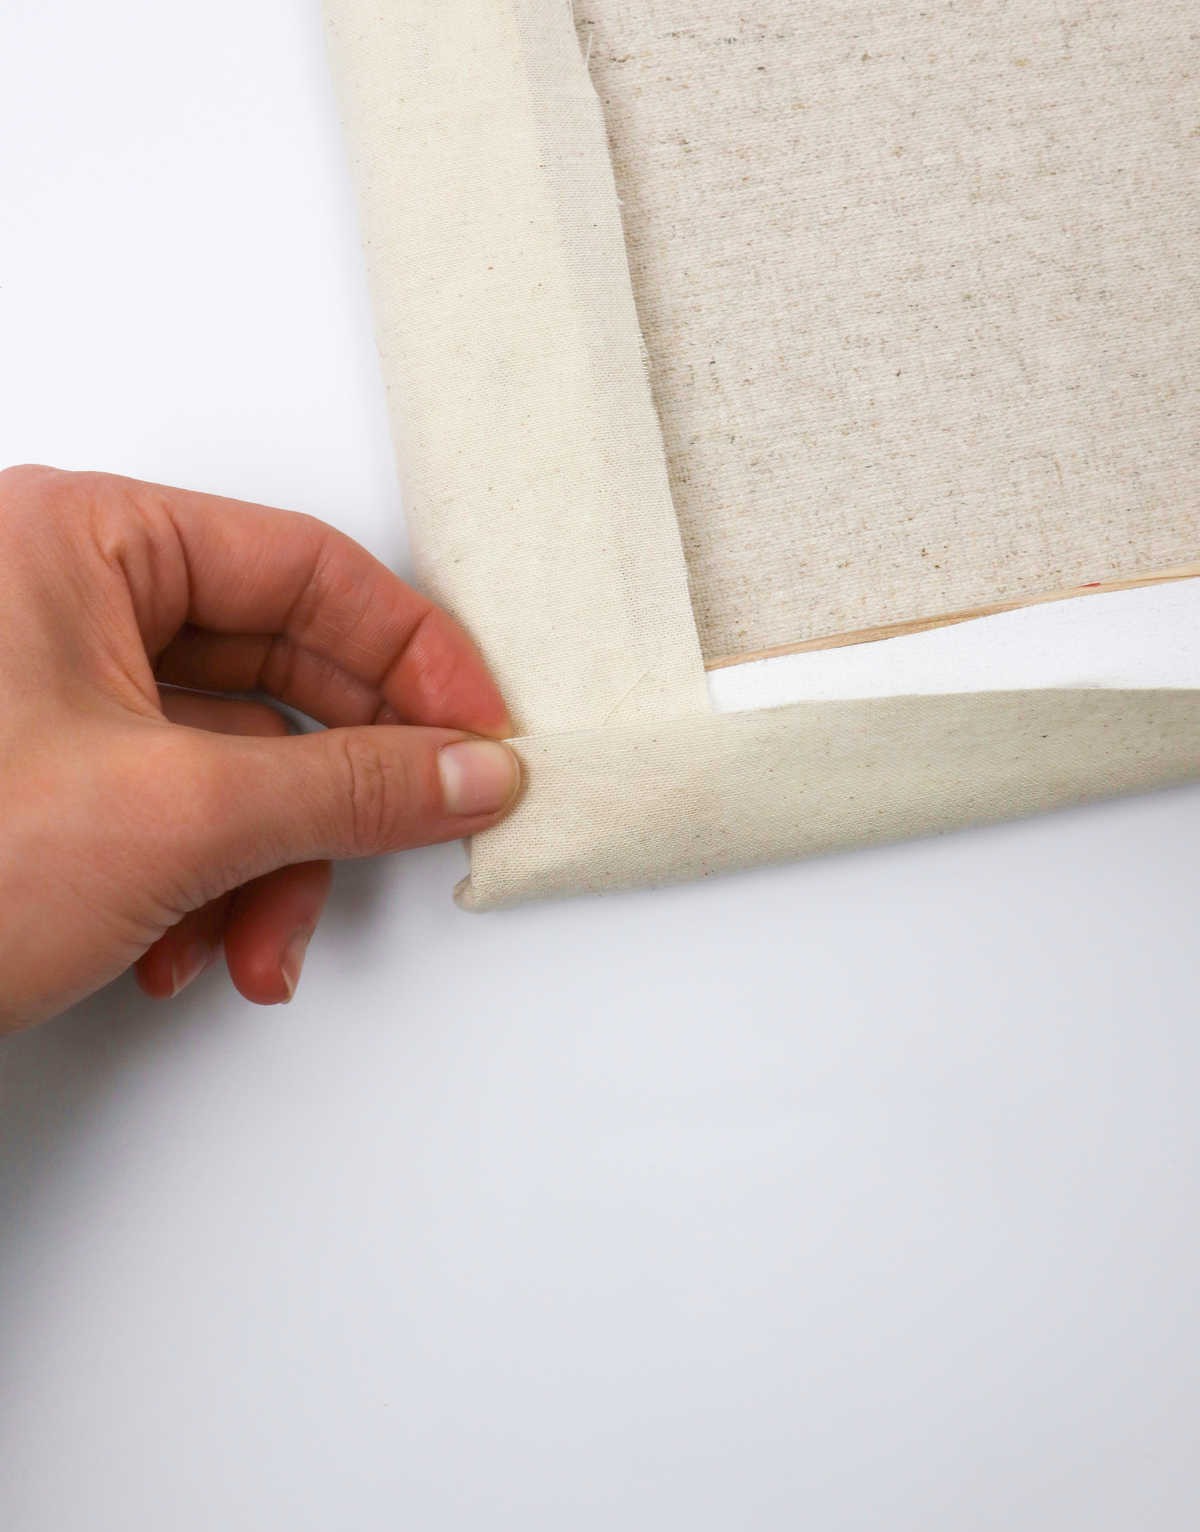
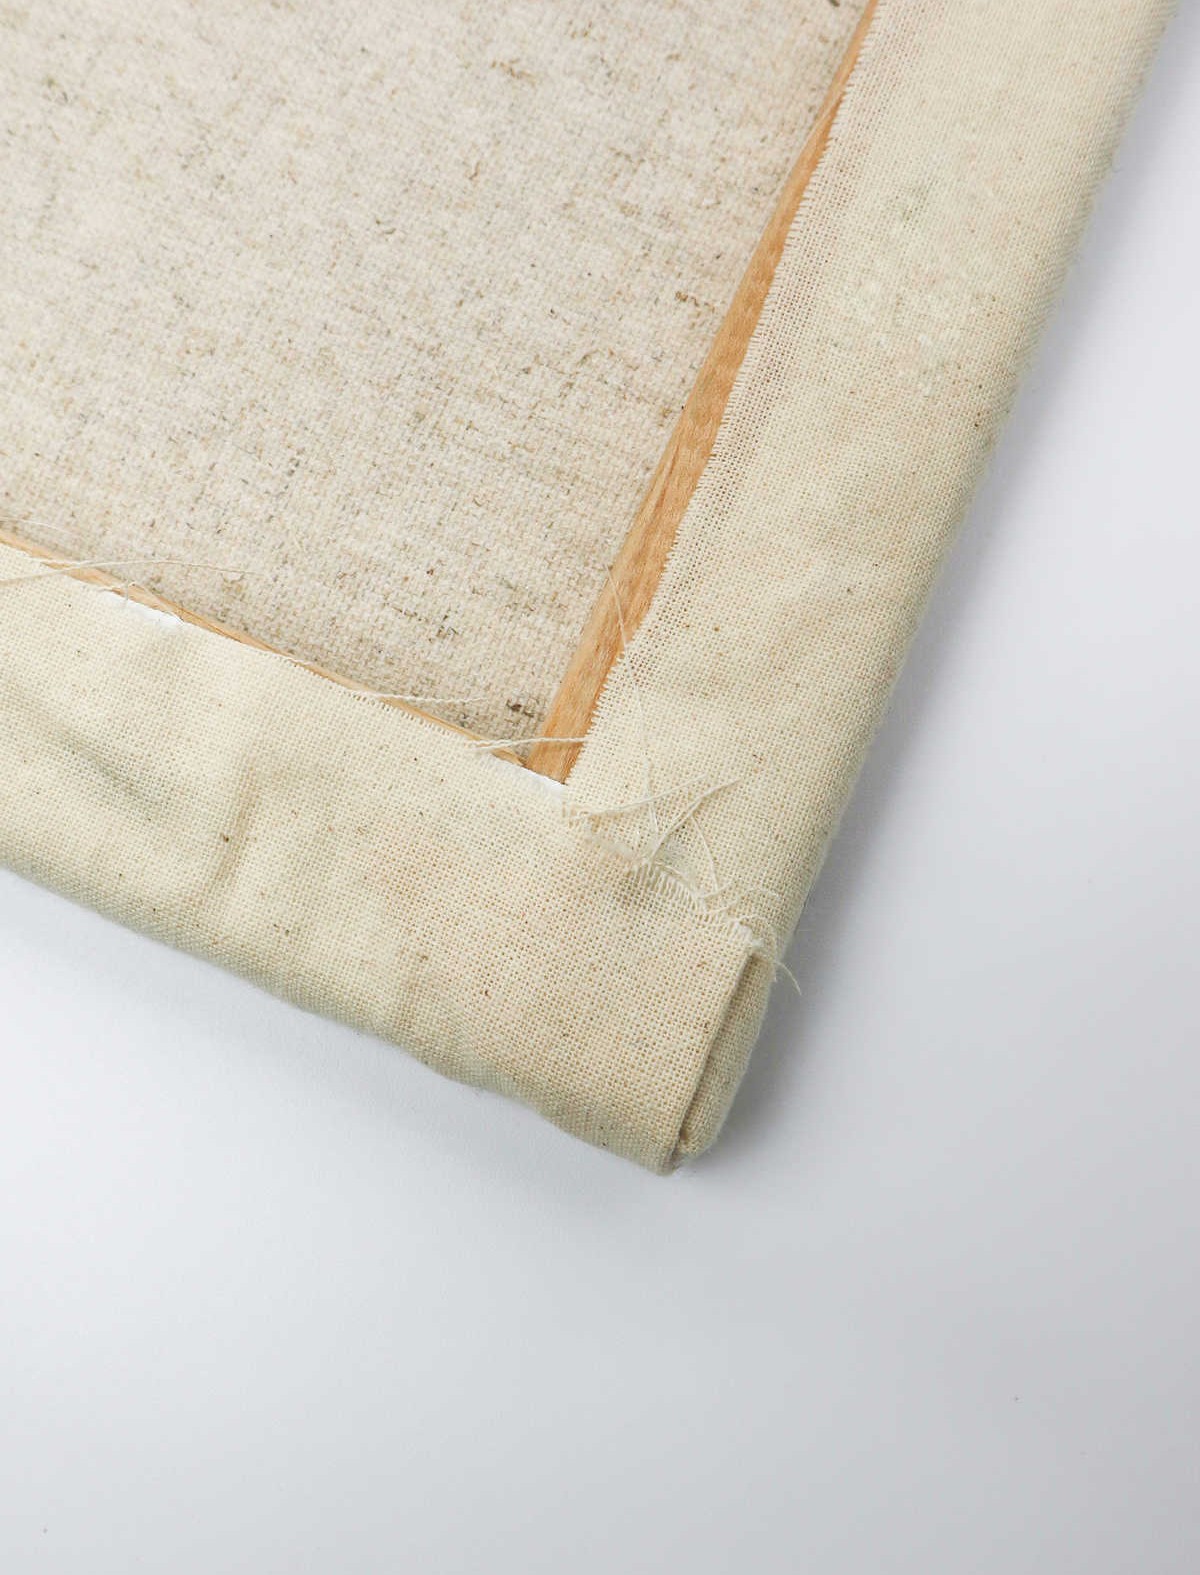
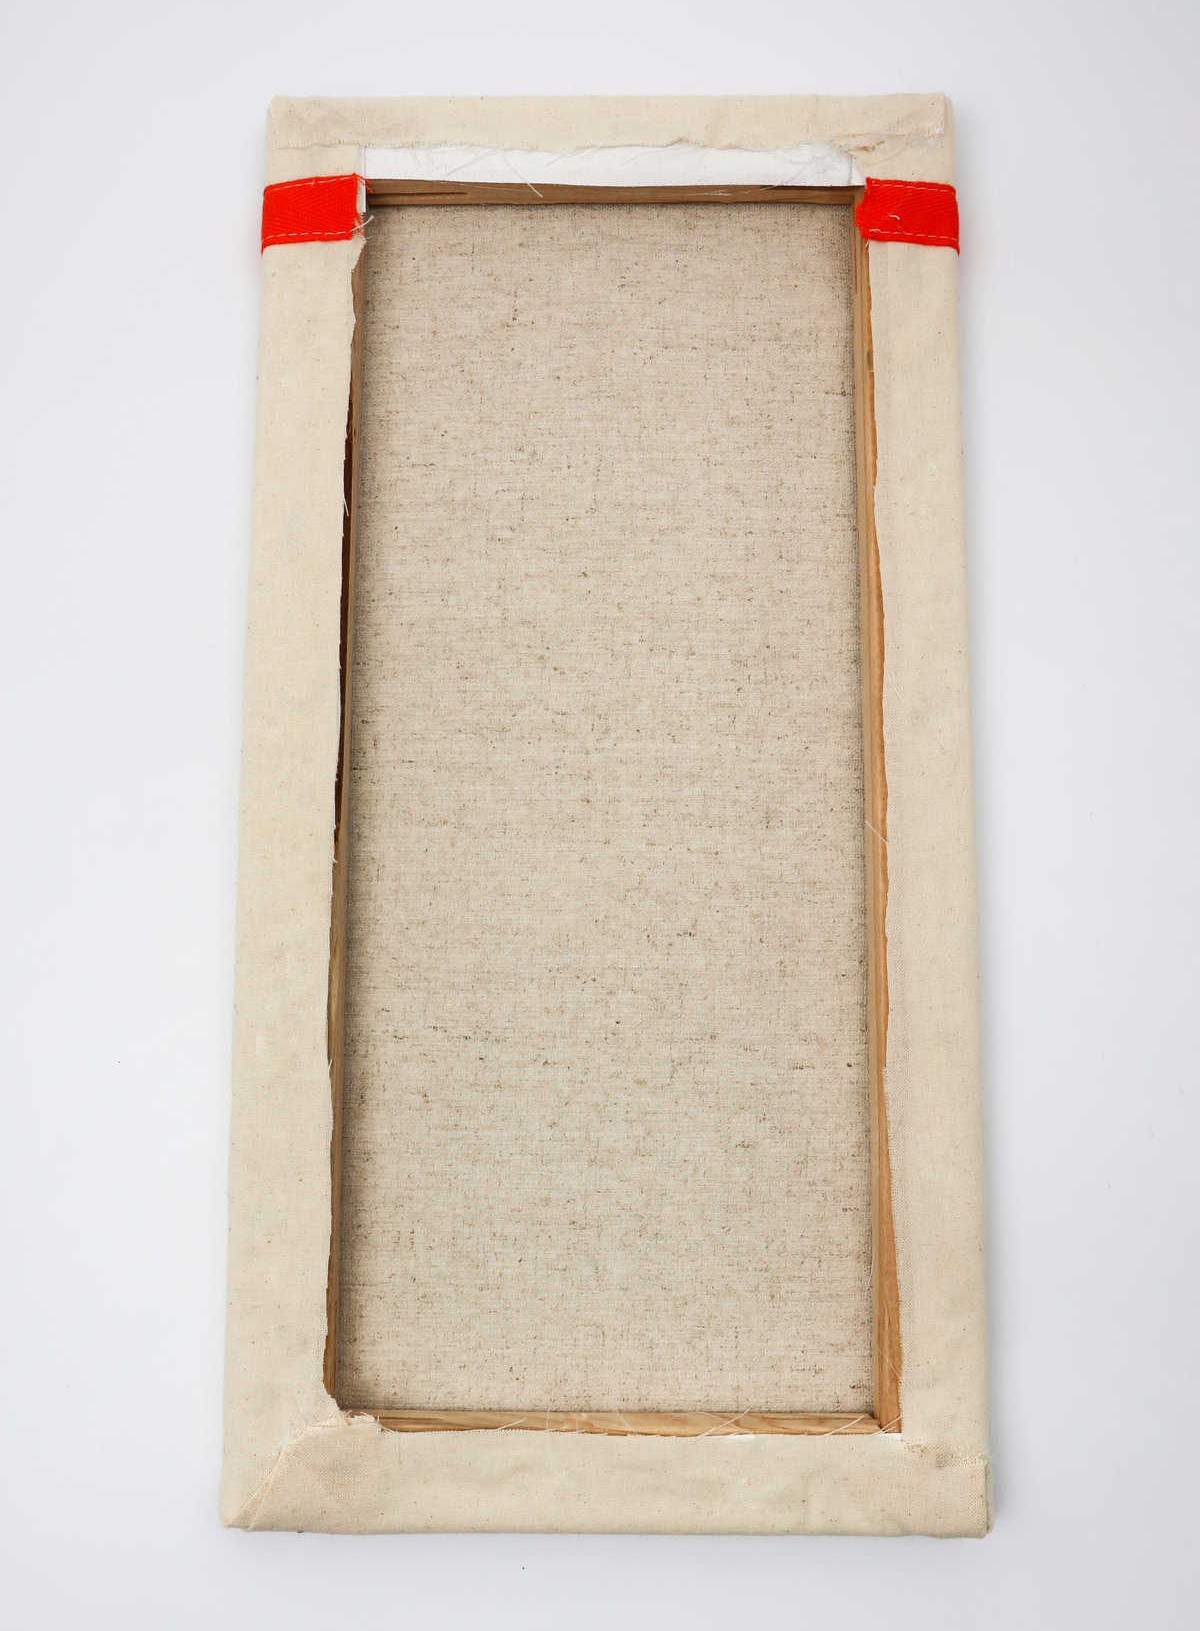
Secure your fabric of choice by applying a thin layer of hot glue along all four edges of the canvas. Press the fabric firmly onto the adhesive, ensuring a smooth and even application. Repeat this process for each side, folding the excess material inward as you go. To create a seamless finish, use hot glue to reinforce any overlapping seams if necessary. Once complete, allow the glue to fully dry before flipping your canvas over to reveal its right side.
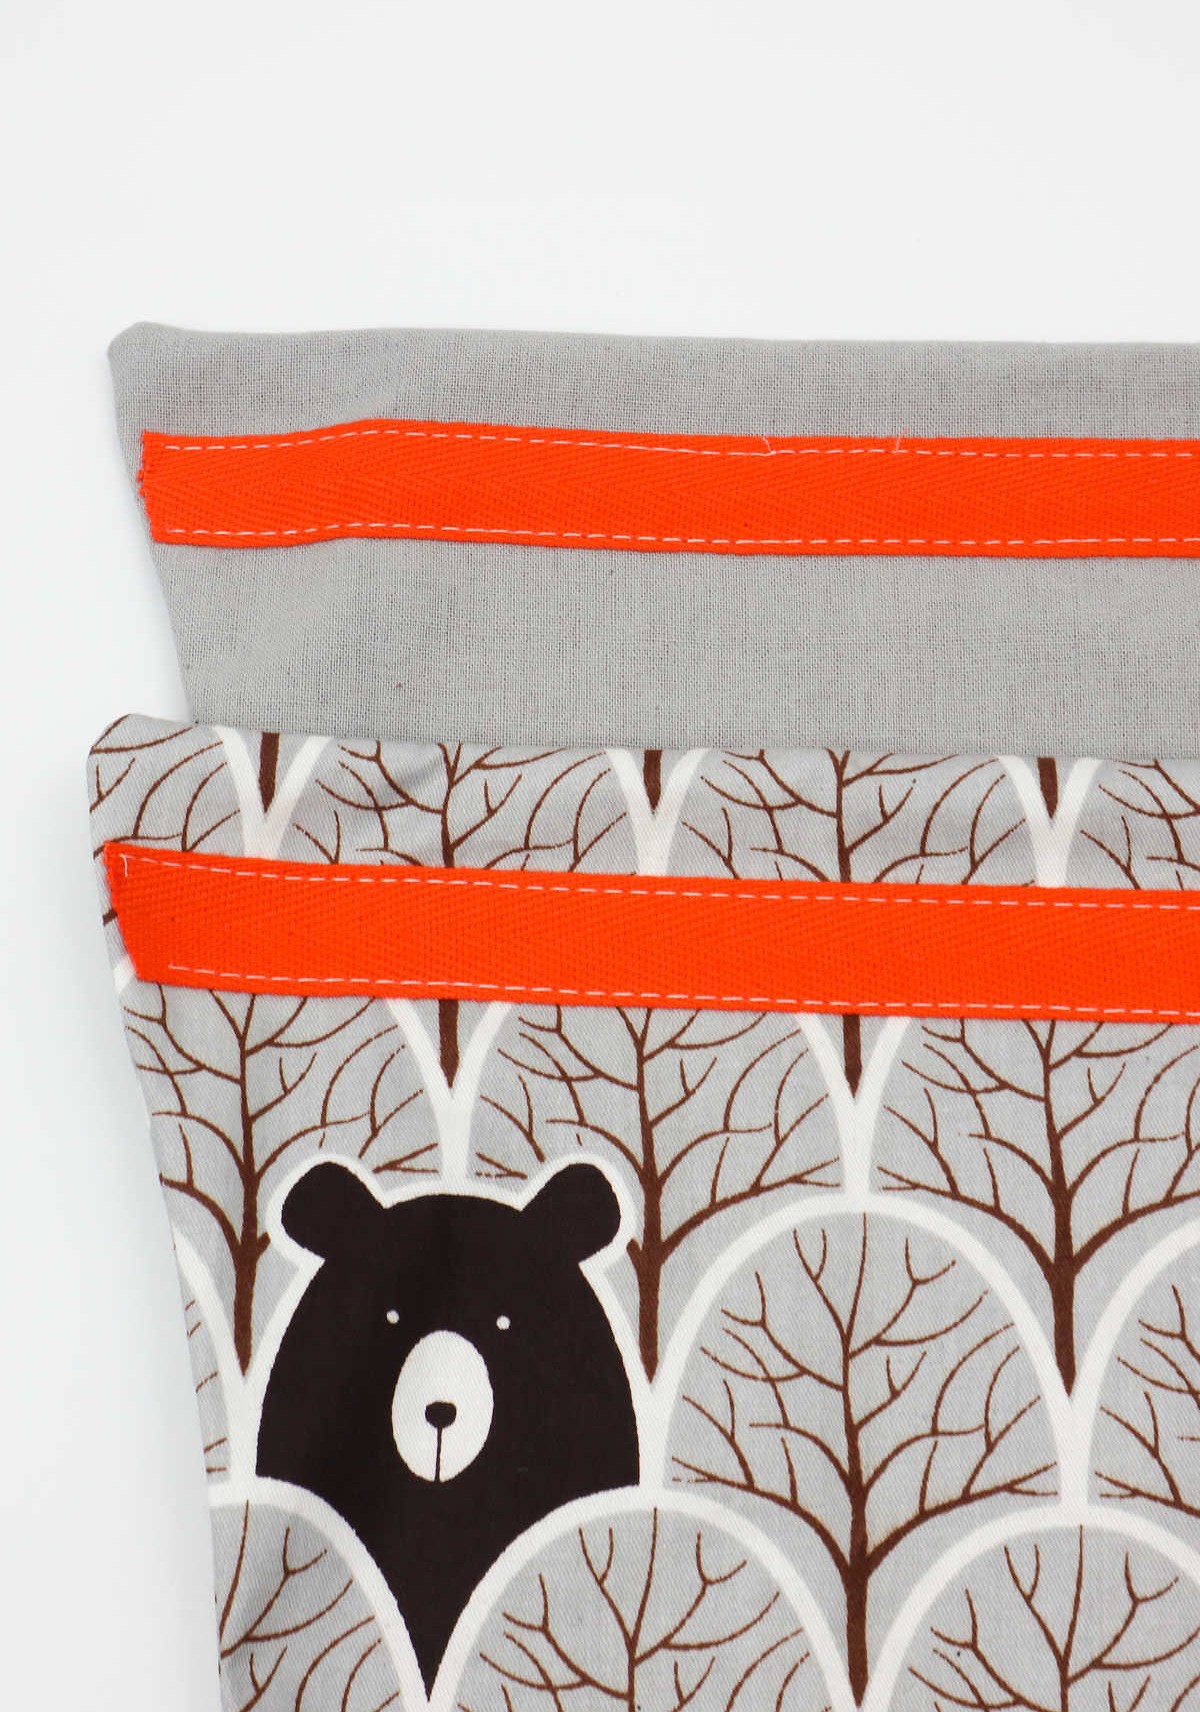
Step 9
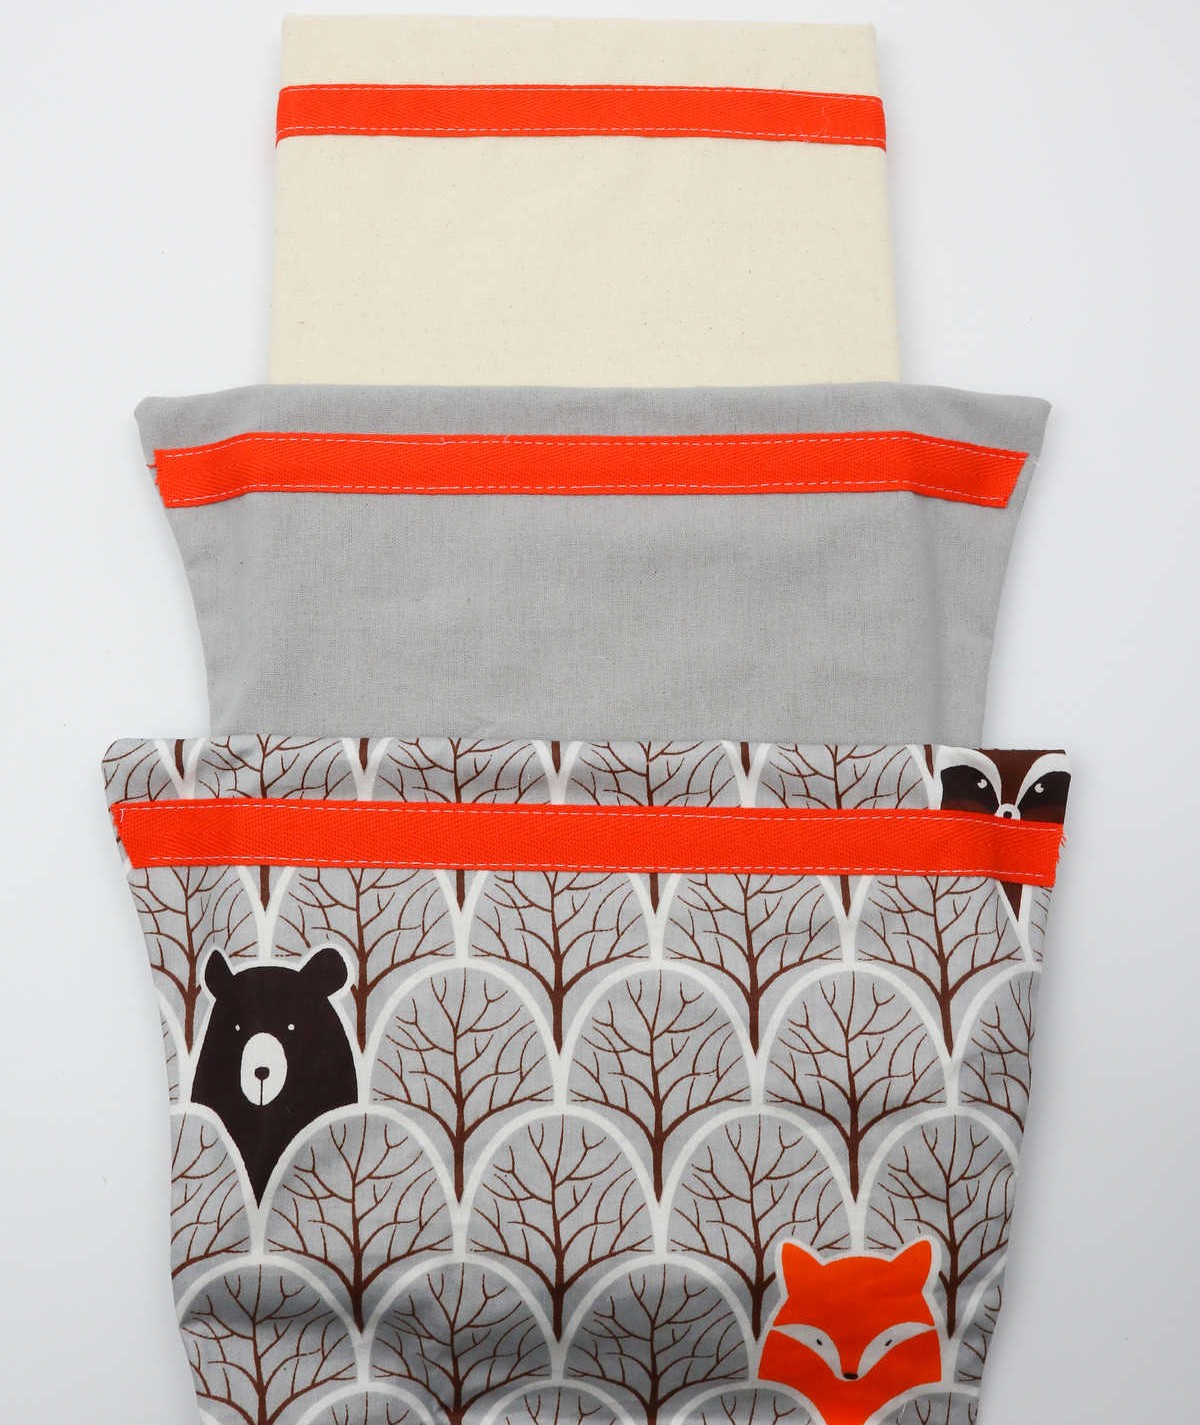
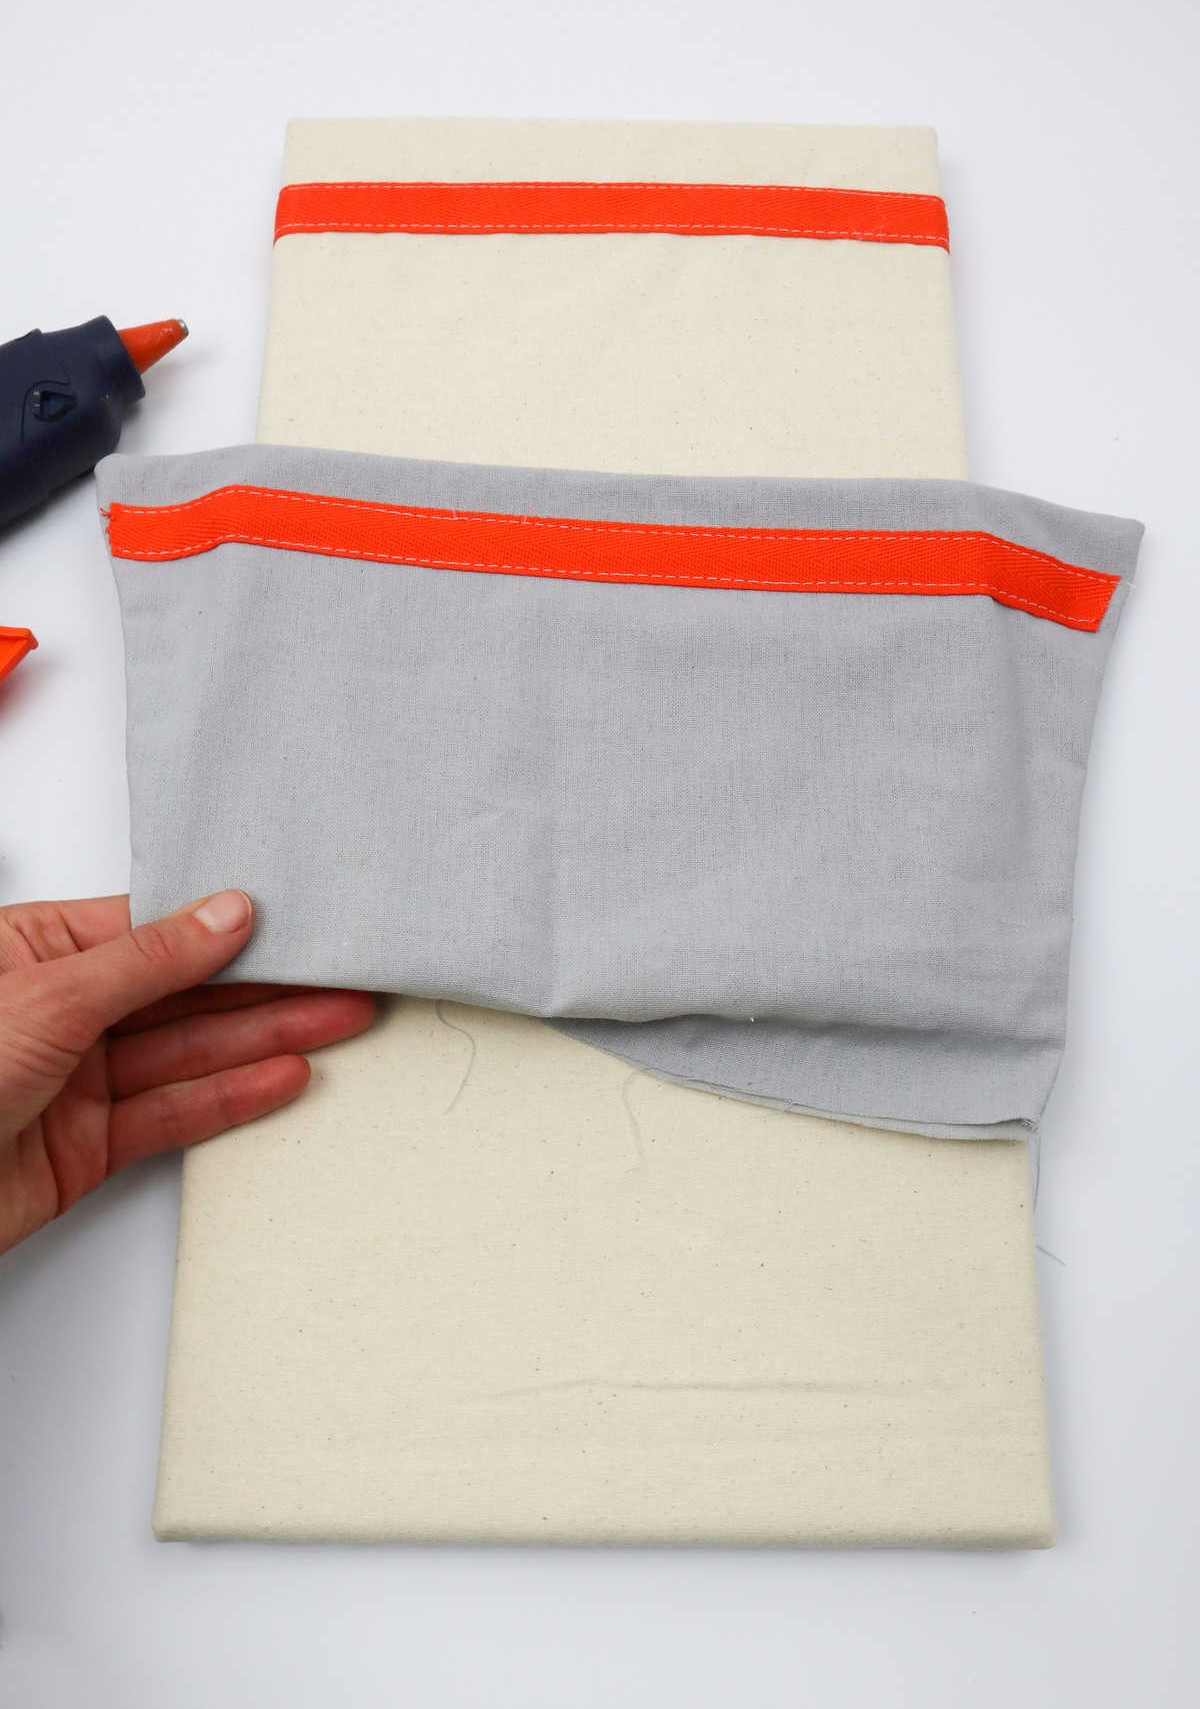
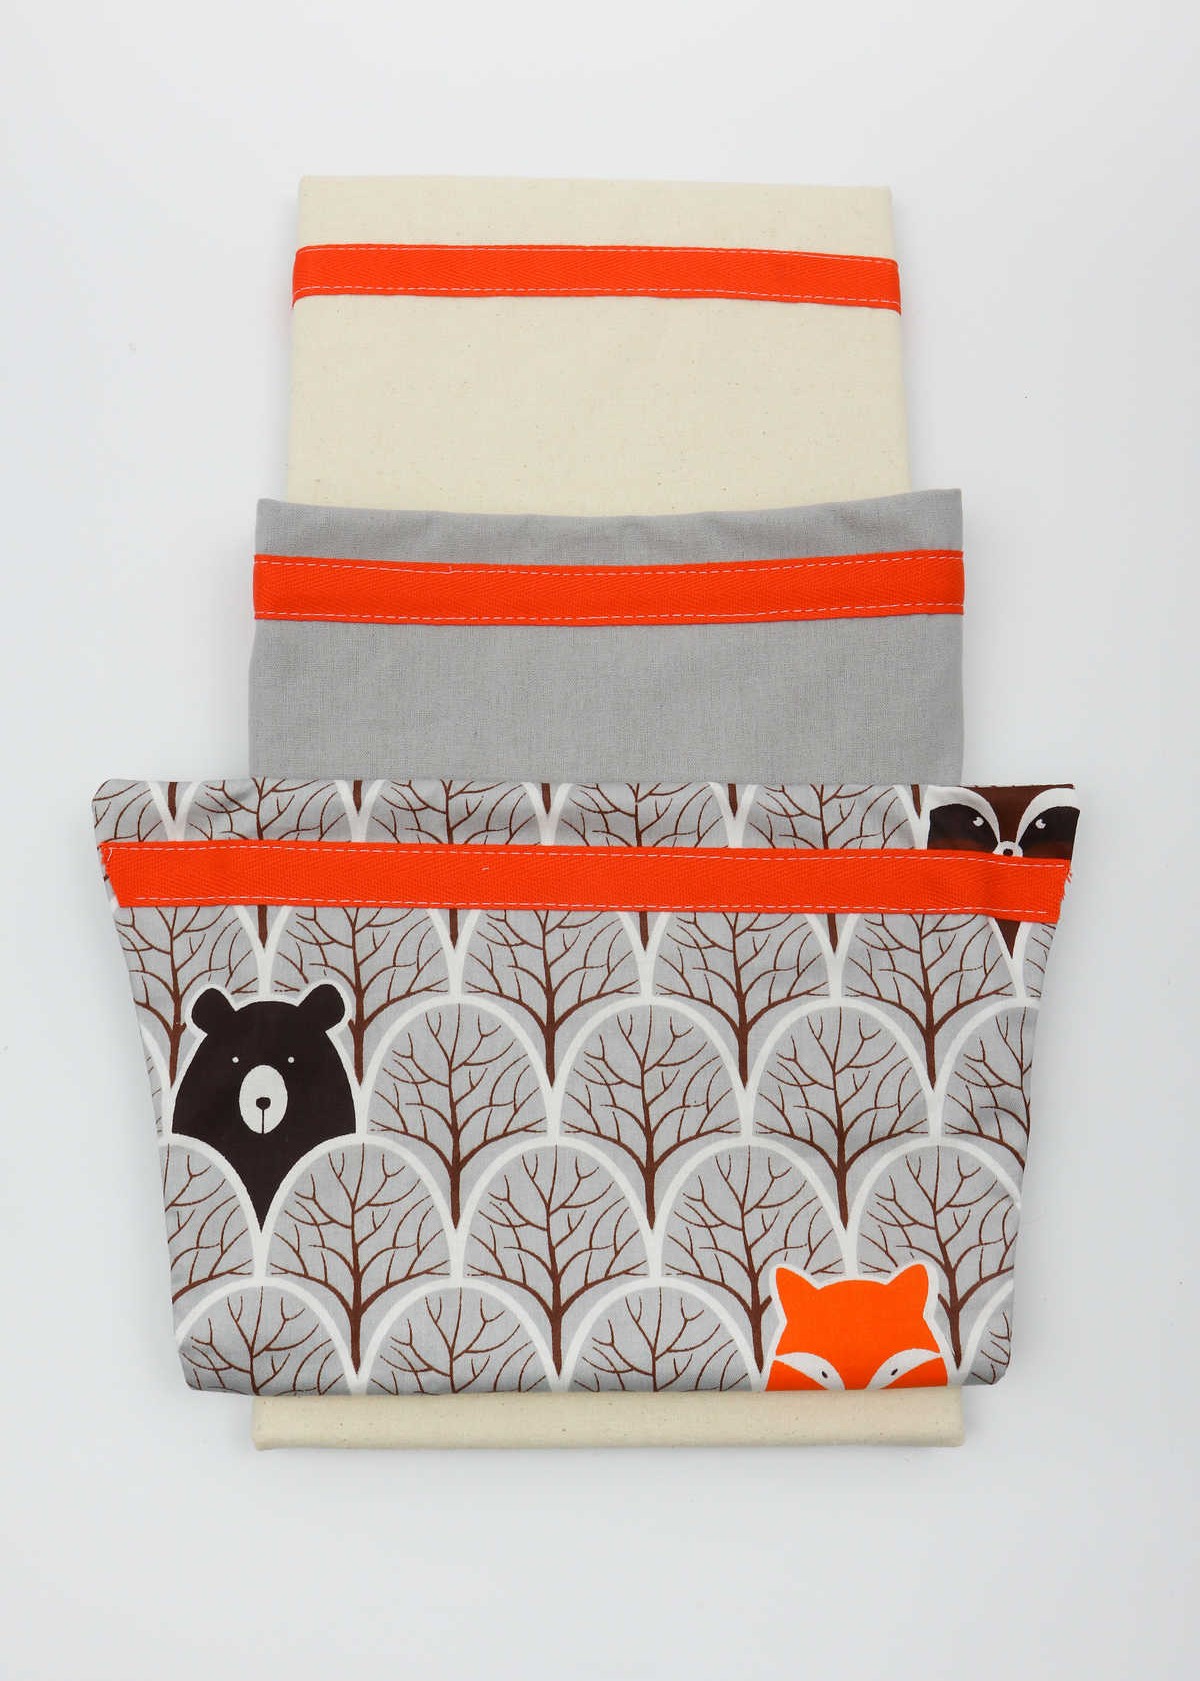
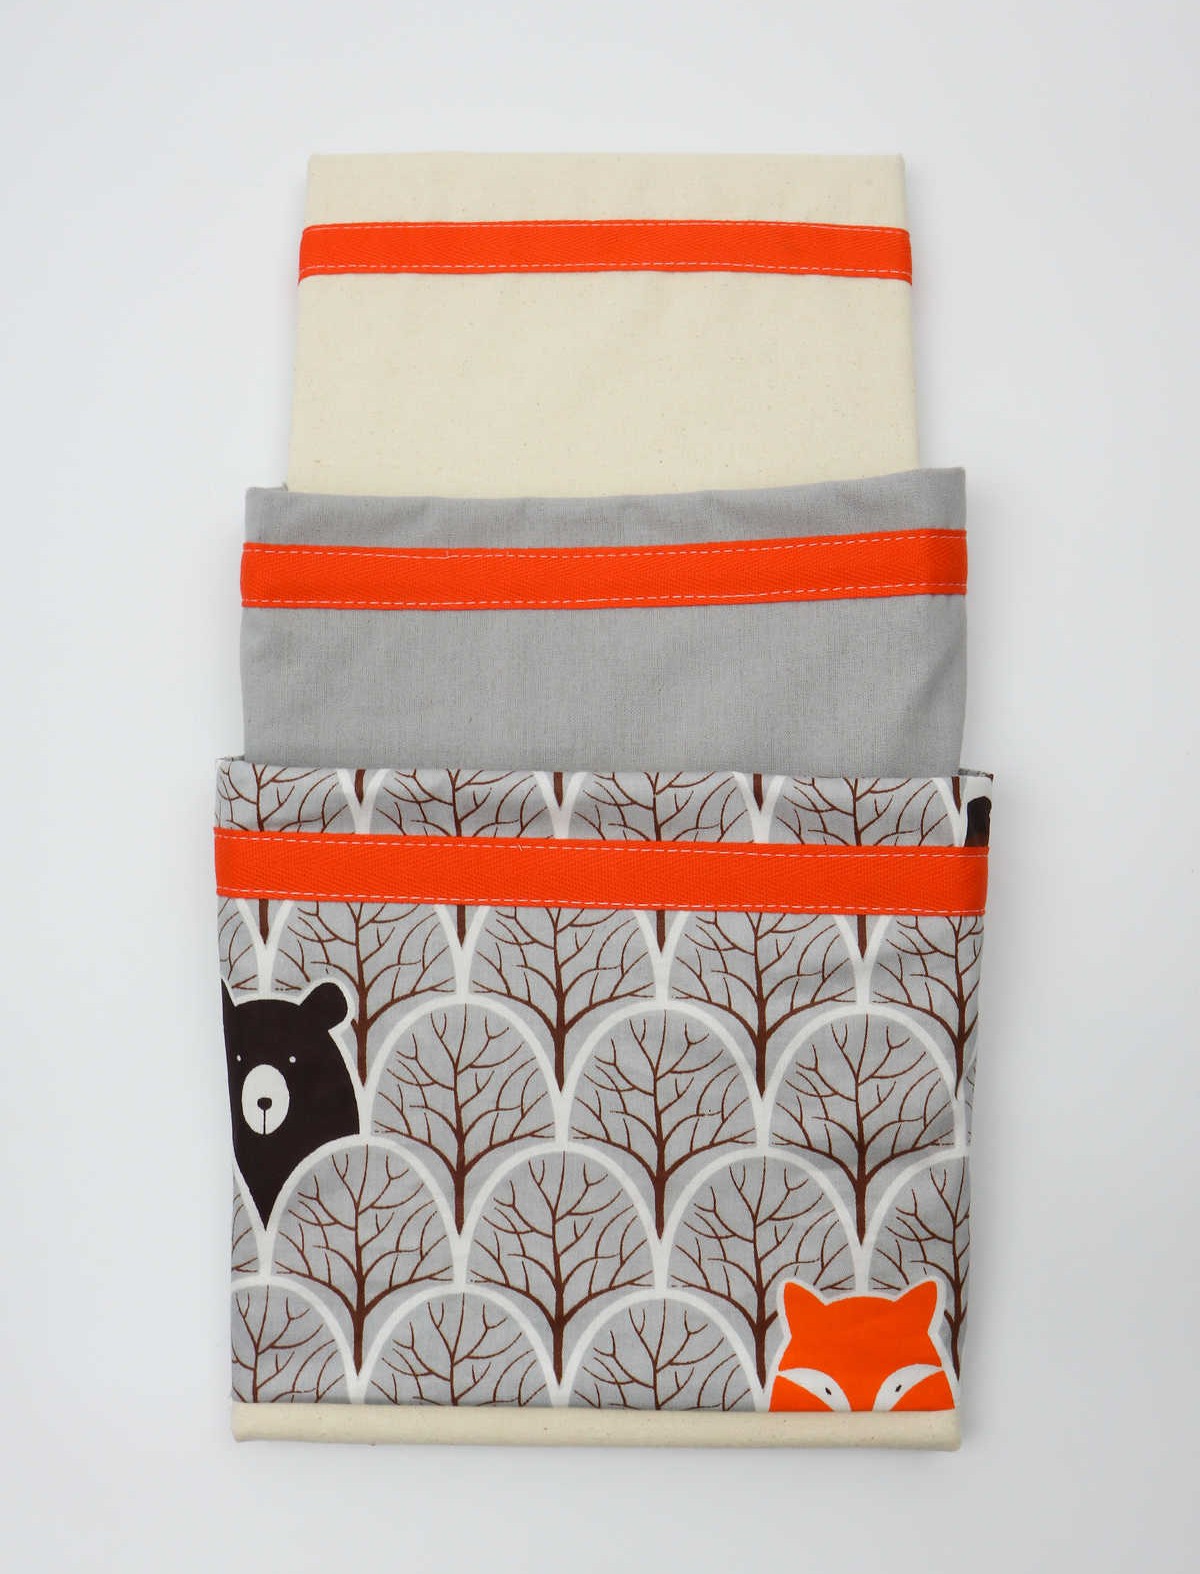
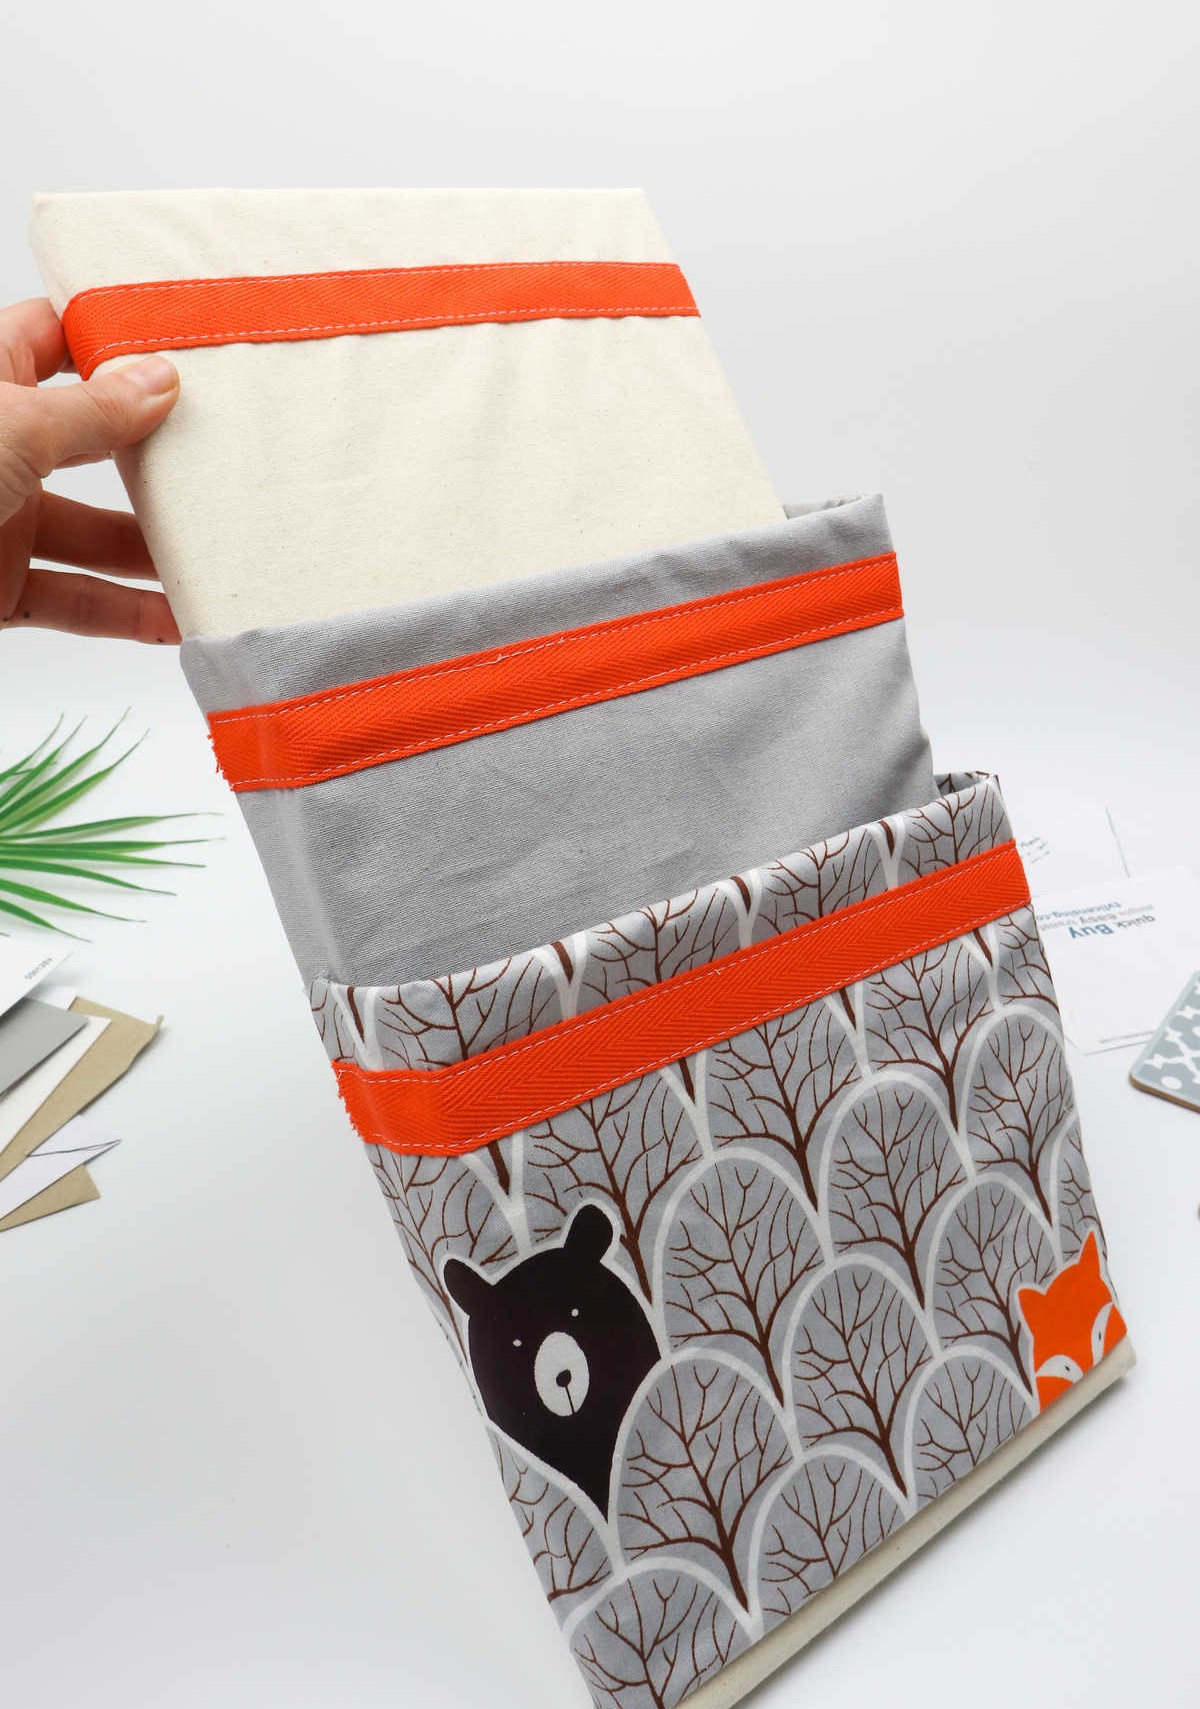
To complete the assembly process, place the fabric pockets you created earlier onto the canvas, carefully arranging them by size and order. Ensure that the lowermost pocket is positioned on top of the one above it. For a clearer understanding of this step, refer to the accompanying image for visual guidance on how to layer each pocket correctly.
Step 10

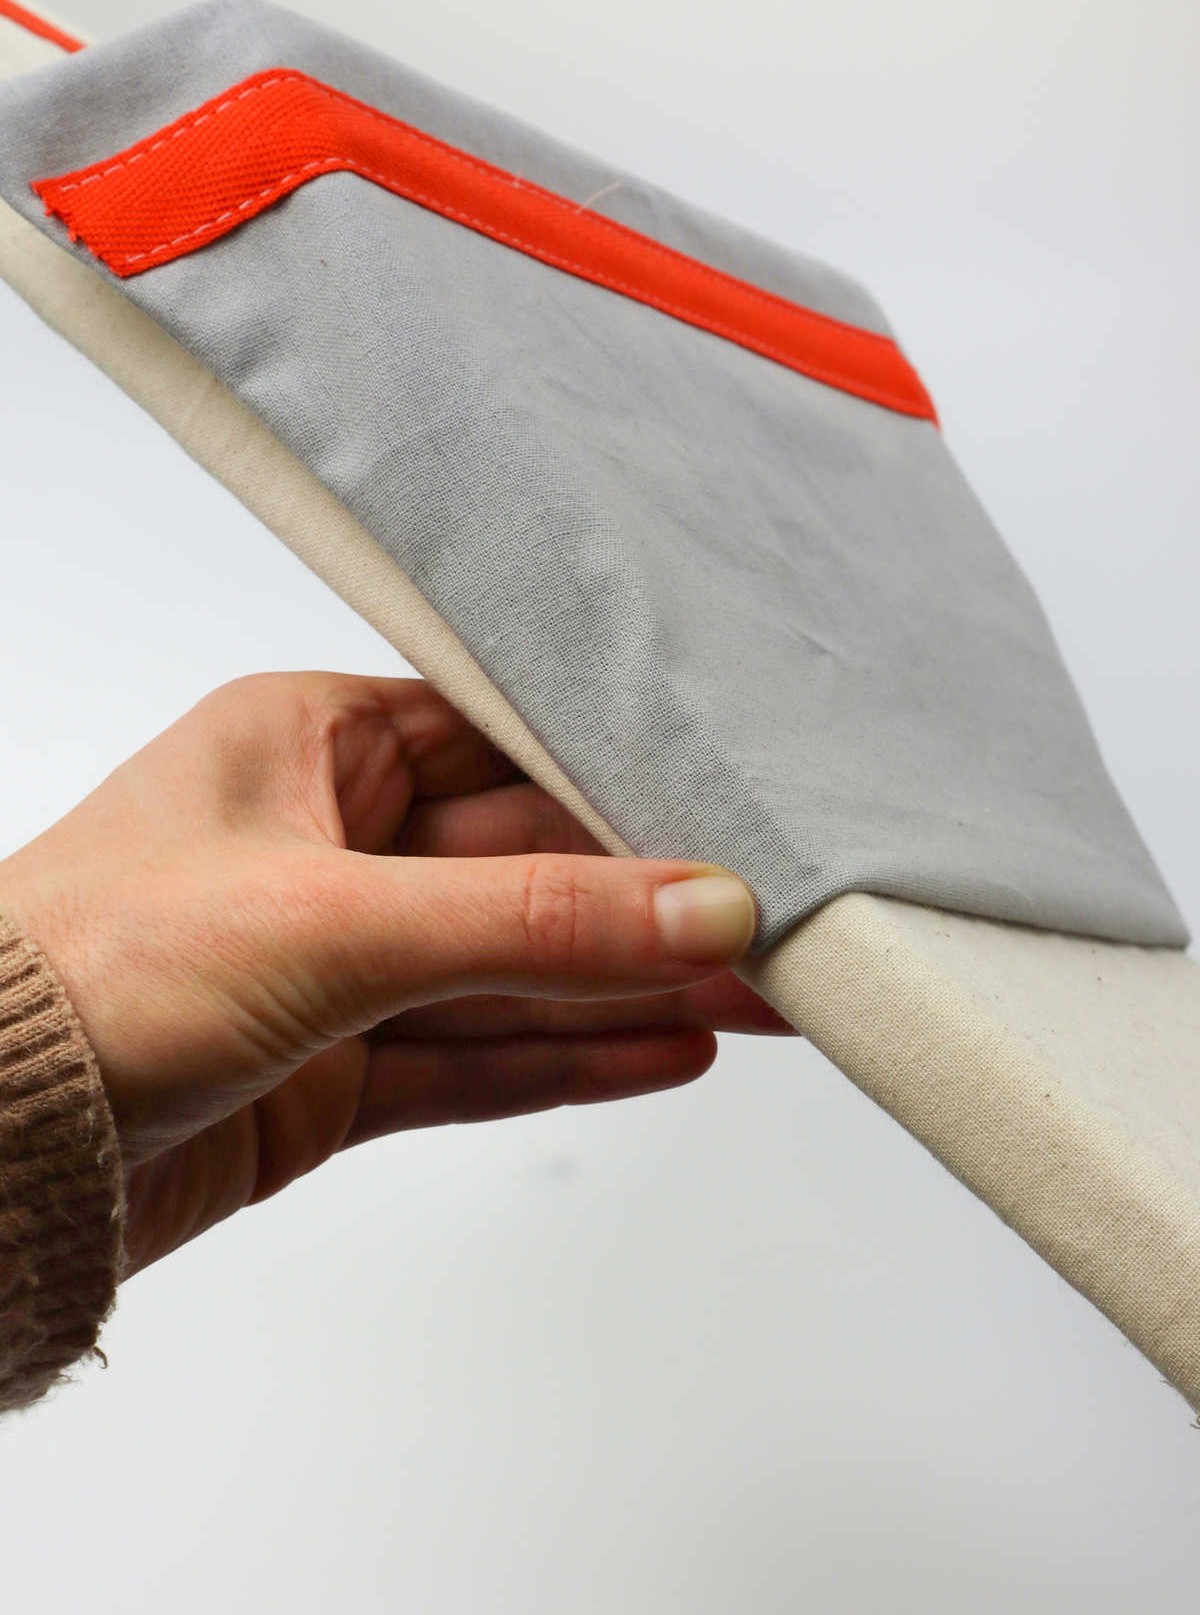
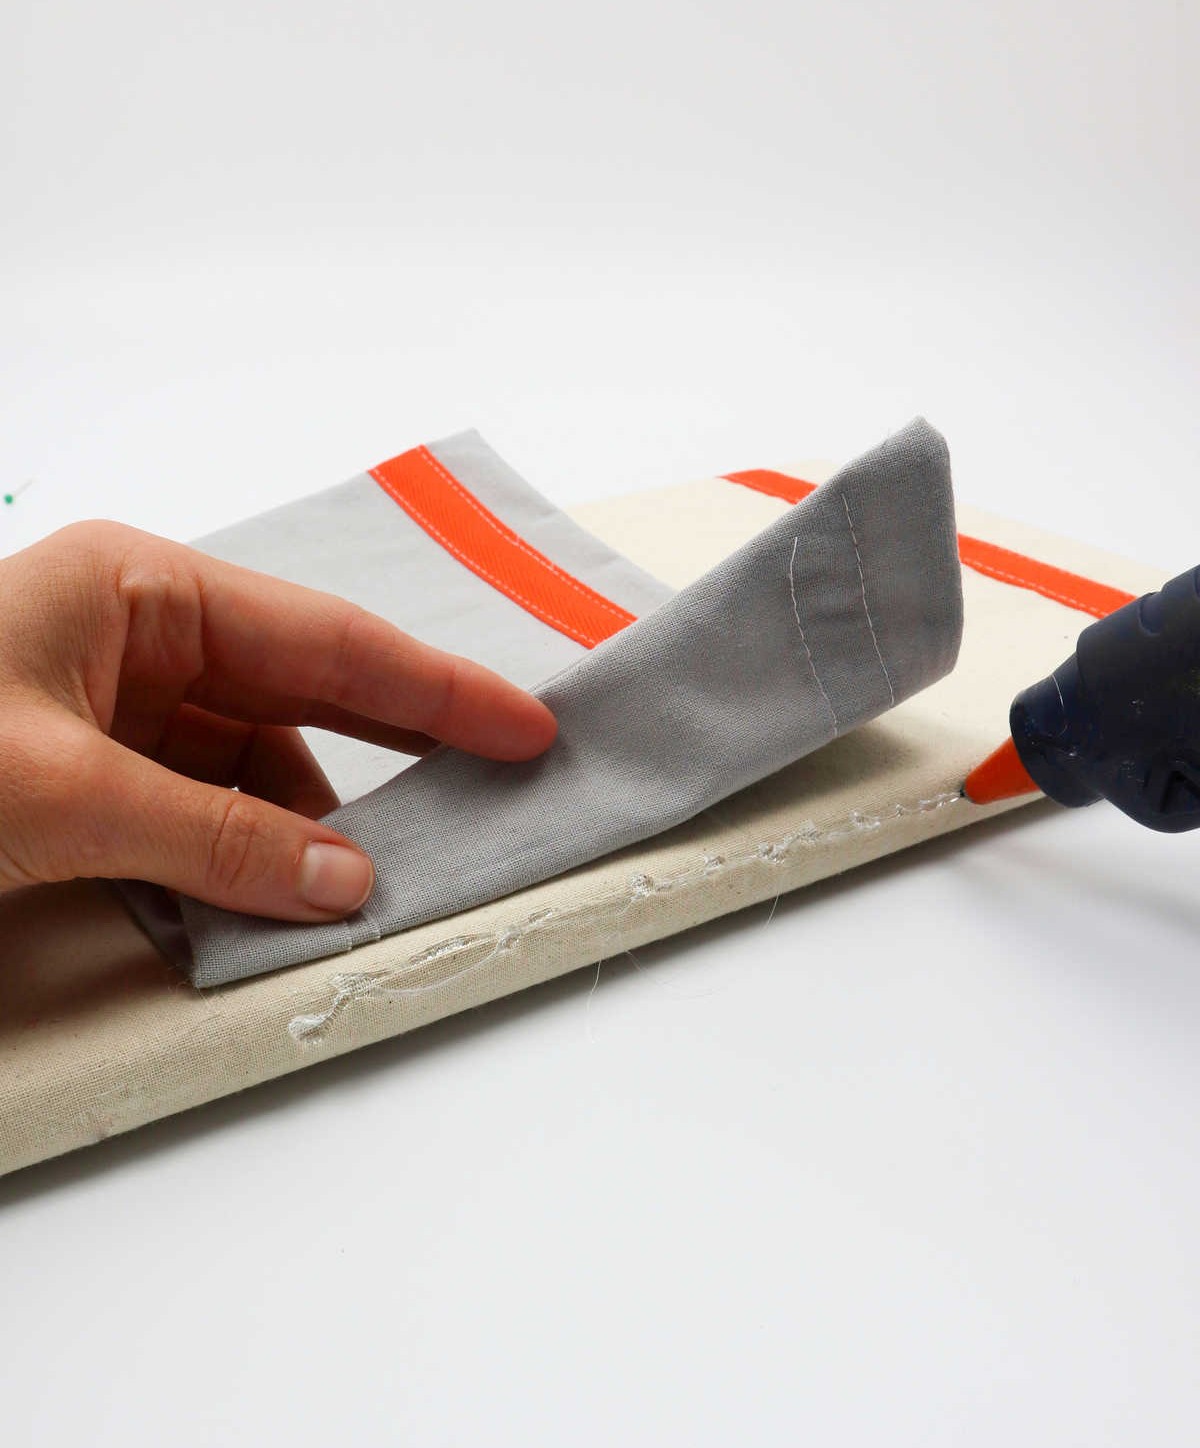
To complete the top pocket, begin by folding the bottom edge of the second pocket inward. Next, apply a thin layer of hot glue along the canvas, ensuring it’s evenly coated. With the folded pocket still in place, carefully stick it onto the canvas and hold for a few seconds to ensure a strong bond. Don’t forget to also secure the sides of the pocket over the canvas edges, making sure they’re firmly attached on both sides.
Step 11
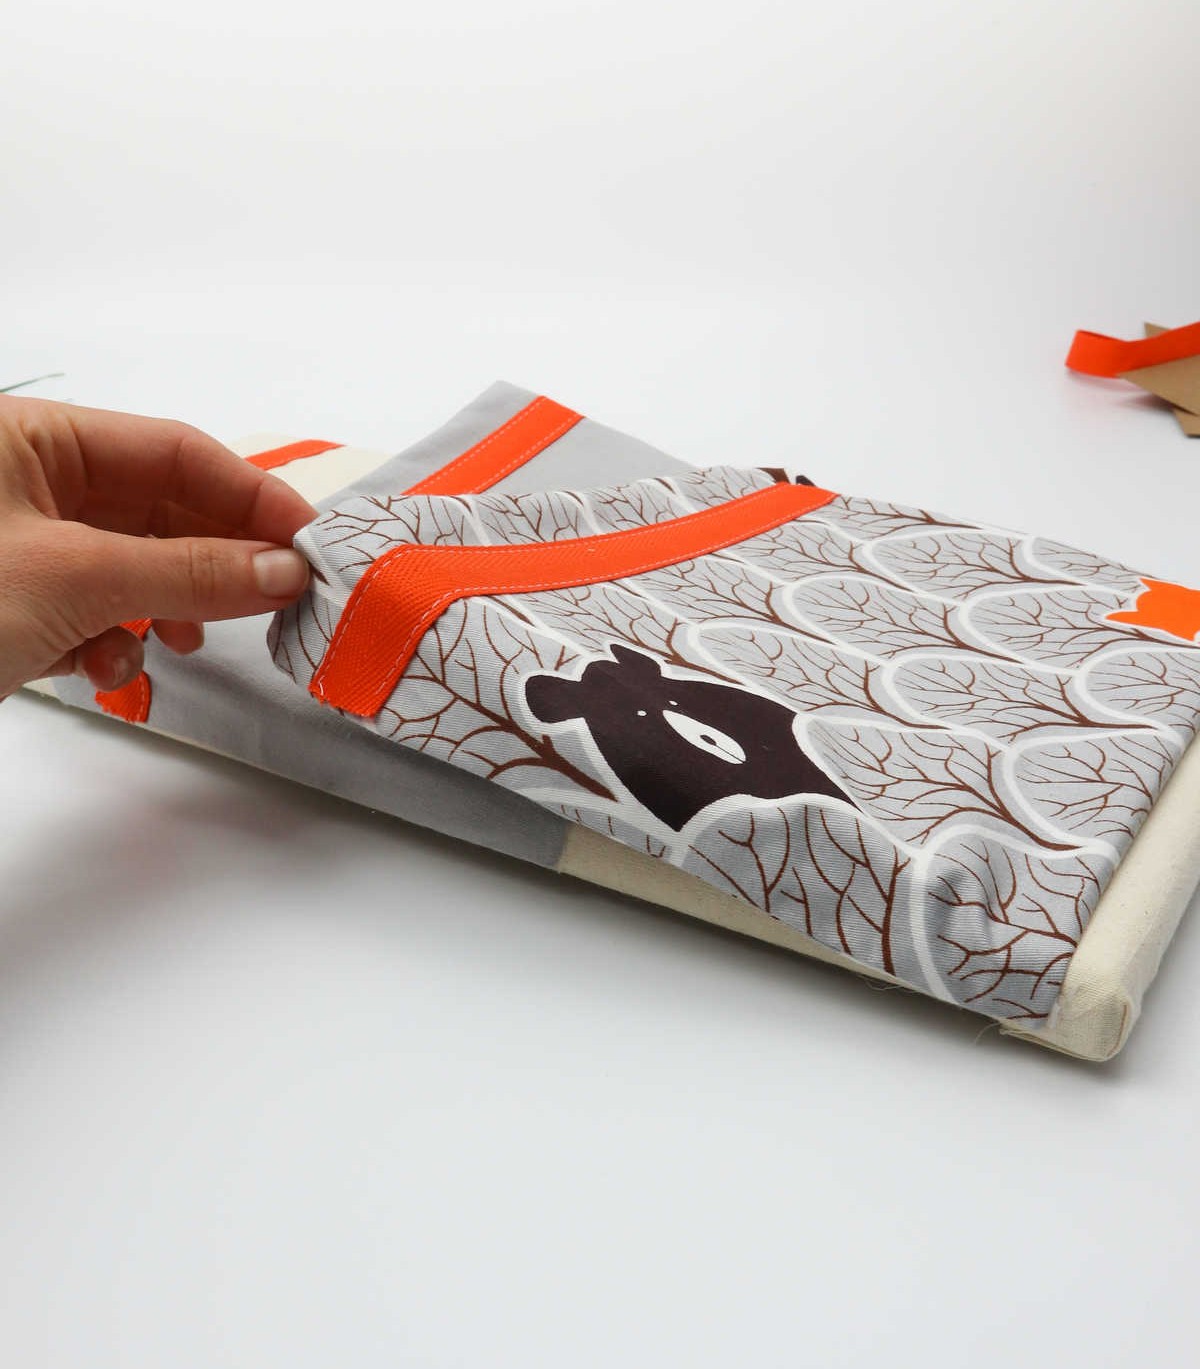
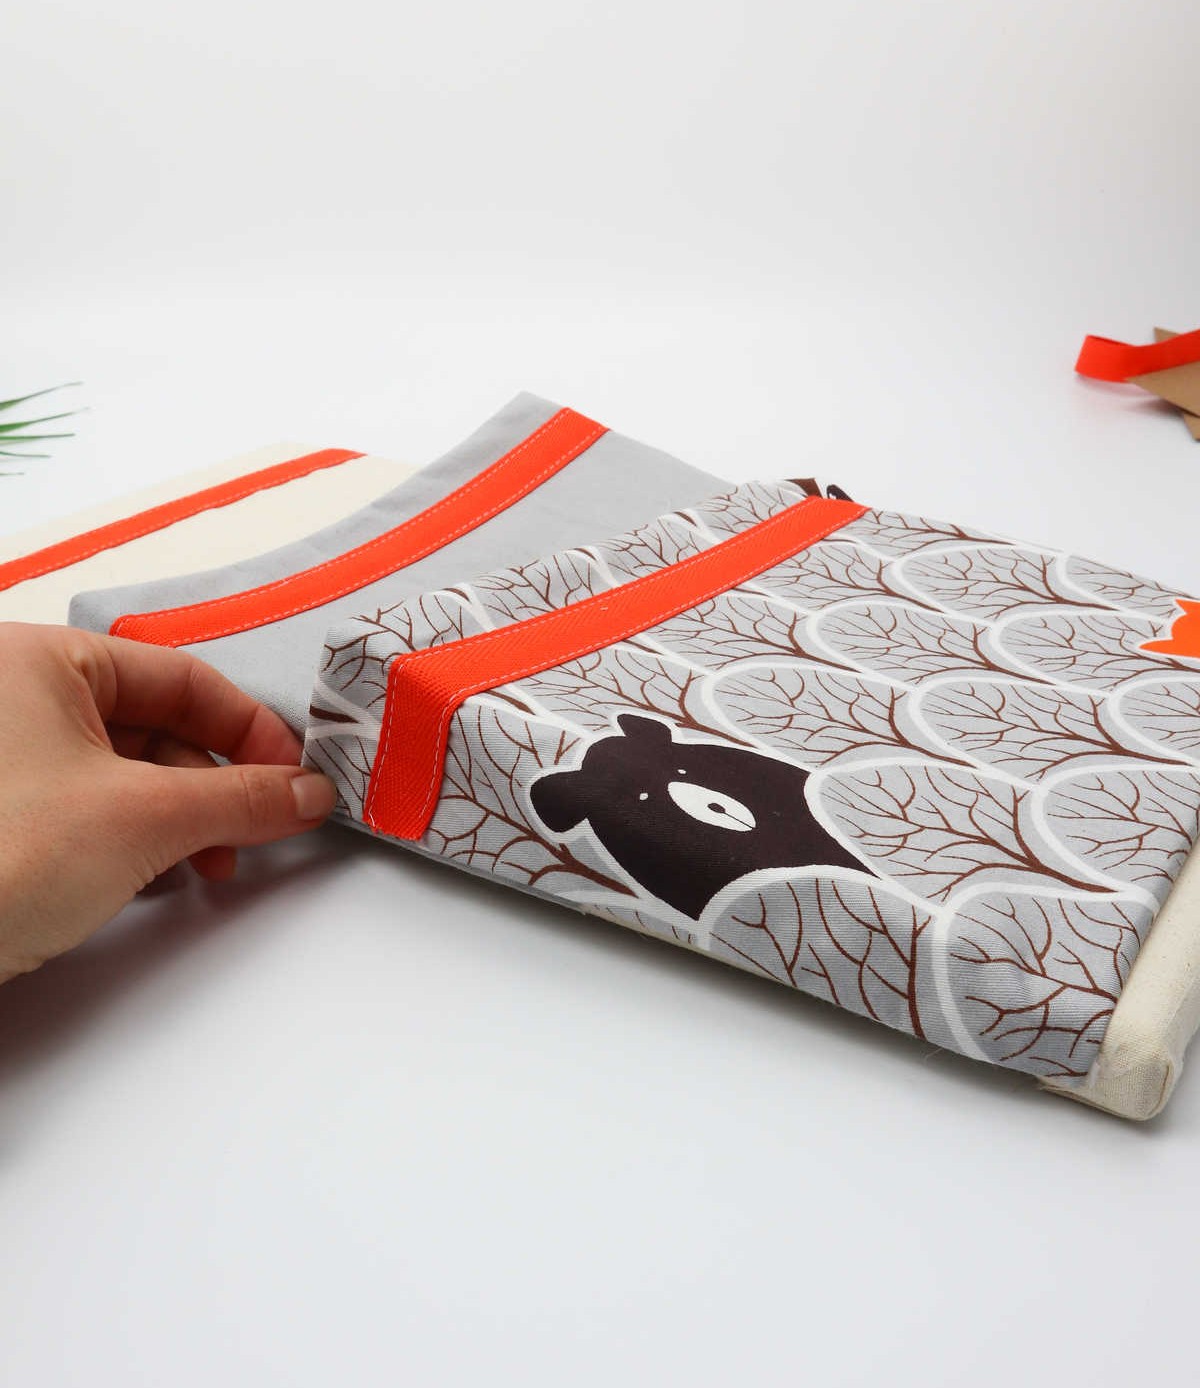
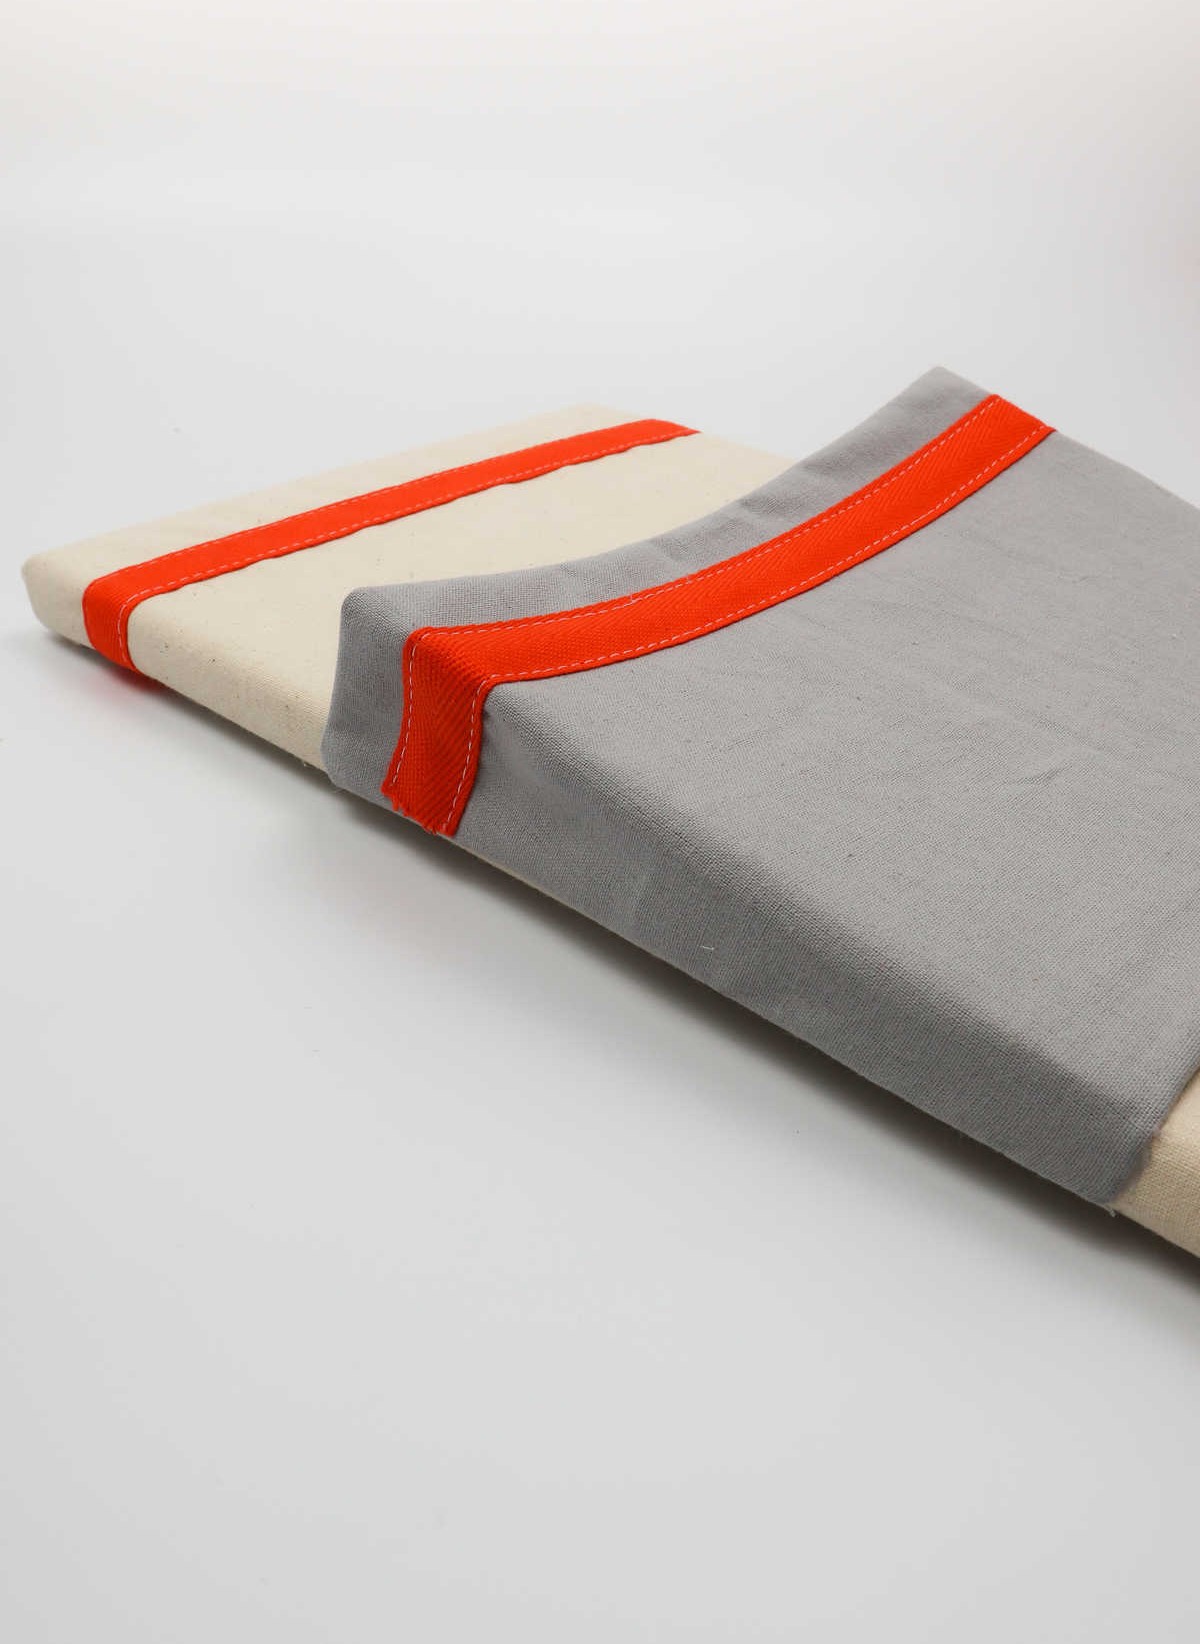
To complete your DIY mail organizer, start by ensuring the bottom pocket has a small canvas border left unattached. This will help evenly distribute its weight. Next, fold the fabric’s bottom and sides inward, securing them with hot glue as you did for the top pocket. Be sure to pull on the top edges to create a subtle projection. With these steps complete, your DIY mail organizer is now ready to use!
What Types of Fabric Can I Use?

Cotton canvas is the most well-known choice among fabric enthusiasts. Its abundance and variety of patterns, prints, and colors make it a popular option. Plus, it’s relatively affordable.
However, if you’re looking to explore other options, there are several fabrics you can consider using, including:
Silk: A luxurious fabric known for its softness and smooth texture.
Linen: A natural, textured fabric with a unique feel.
Denim: A sturdy, durable fabric often used in jeans and jackets.
Leather or suede swatches: Ideal for creating a premium look and feel.
Synthetic leather (rexine) or synthetic suede: A vegan-friendly alternative that mimics the look of real leather.
Vinyl: A versatile, waterproof fabric suitable for various applications.
Wool: A natural, insulating fabric perfect for crafting items like scarves and hats.
Medium-weight fabrics like brocade, crepe, velvet, or satin: These fabrics offer a range of textures and patterns to suit your creative vision.
Neoprene rubber: A synthetic rubber fabric with a unique texture and feel.
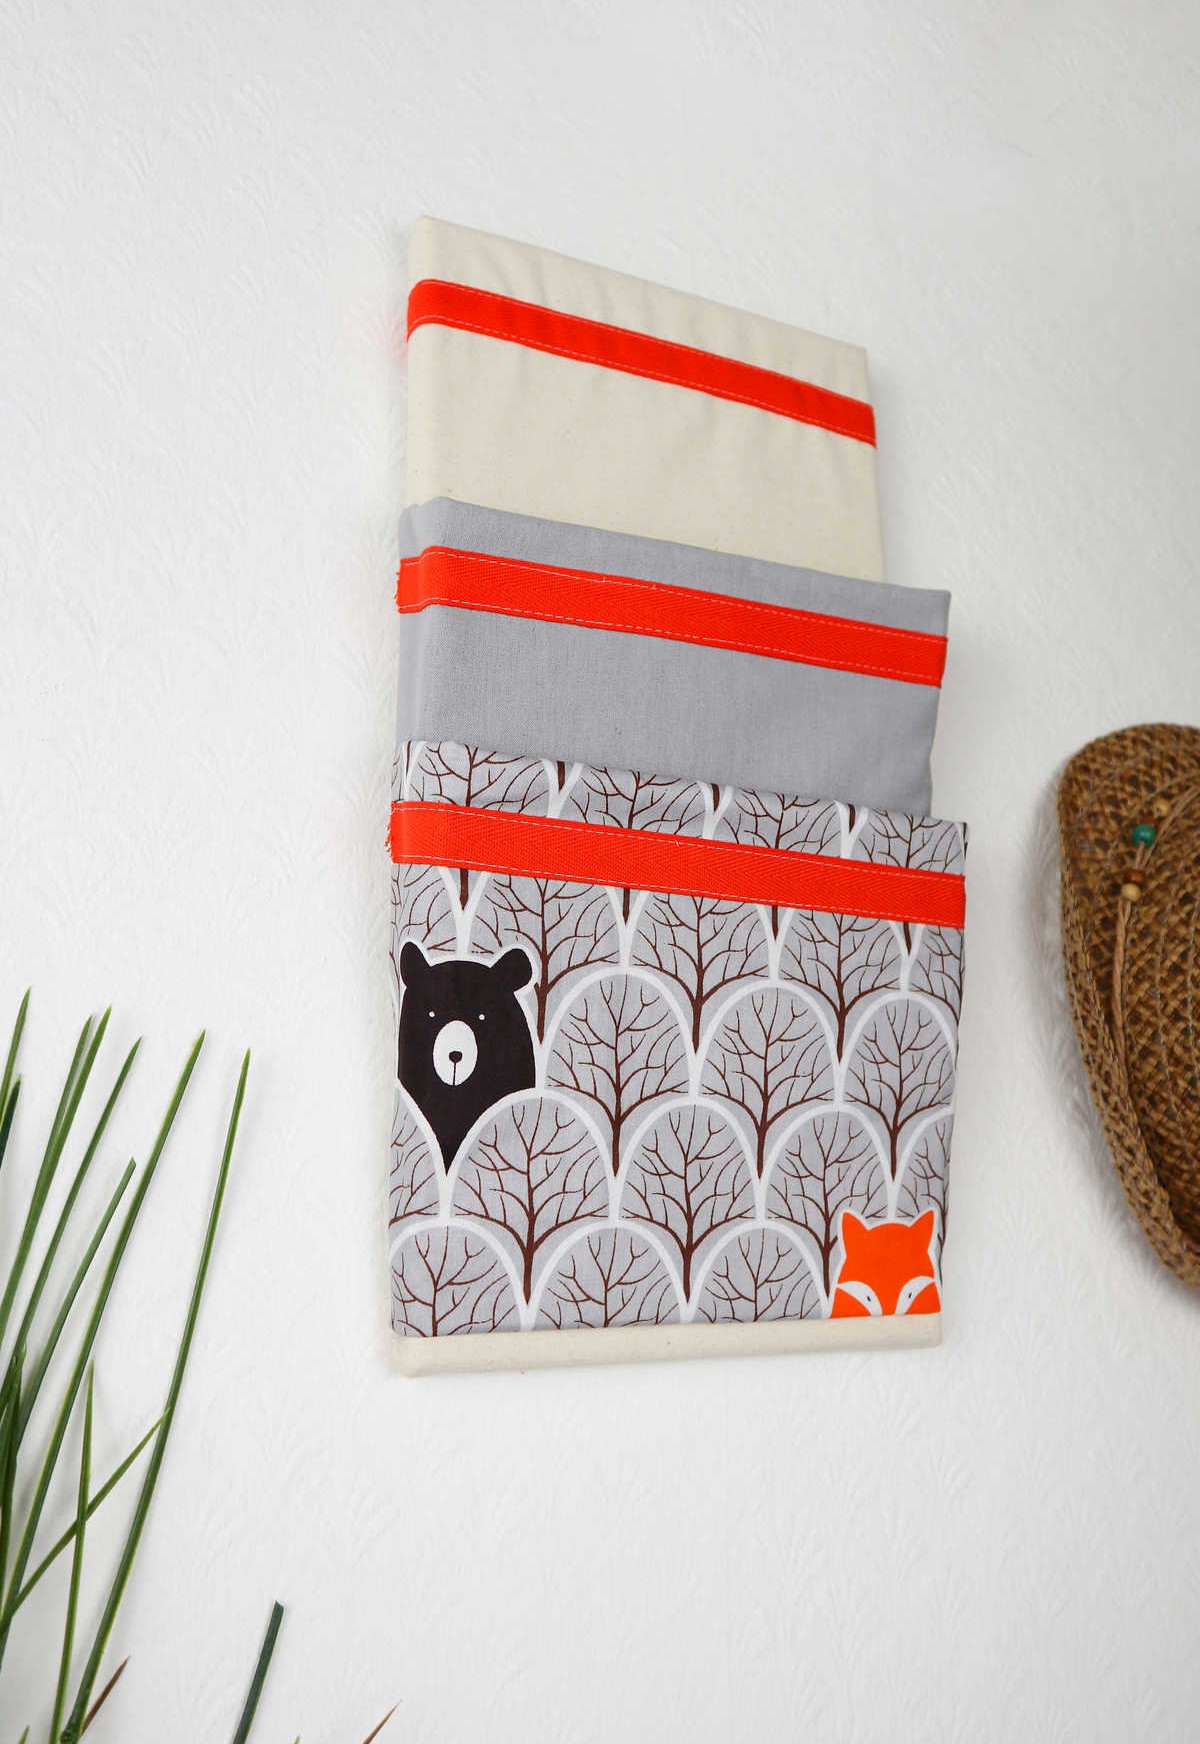
Can I Hang This Mail Organizer Up?
For added stability, this organizer can be easily propped against a wall using its sturdy canvas frame. Alternatively, you can secure it permanently by attaching a command hook to the back of the frame with hot glue, allowing for effortless hanging.
Can I Make This Without a Sewing Machine?
While it’s certainly possible to sew this entire project by hand if you’re up for the challenge, I’d like to offer a more practical suggestion. For one, sewing the twill tape by hand can be quite tricky, especially when working with a cardboard sheet in place. To make things easier on yourself, consider using hot glue to secure the twill tape instead. Not only will this save you time and effort, but it’ll also ensure that your design remains stable and intact.
Where Can I Place It?
When placing your craft desk or work table against a wall, setting up this organizer is a straightforward process. Simply position it on the table as needed. Additionally, its versatile design allows for easy hanging in various locations around your home. Think about where you typically leave your mail when you bring it inside – it’s often a habitual spot that can be challenging to change. To leverage this habit, consider mounting the organizer beside your usual mail drop-off point.
This way, you’ll naturally deposit your letters and packages into the organizer instead, streamlining your workflow.
DIY Mail Organizer (Step-by-Step Tutorial)
Create a stylish and functional DIY wall mail organizer to declutter your office space. This fabric project requires only 1 hour of active time, with an additional 20 minutes for preparation. The end result is a beautiful and practical solution for keeping your mail in check.
Time Breakdown:
– Active Time: 1 hour
– Additional Time: 20 minutes
– Total Time: 1 hour 20 minutes
Yield: 1 mail organizer
Author: Karo @ CraftsyHacks.com
Cost: $10
Equipment
Materials
For this creative project, we will require a combination of artistic and practical elements. First, you’ll need an artistic canvas, measuring 10 inches by 16 inches. Next, the main piece of fabric should be approximately 14 inches by 20 inches in size. Additionally, two cardboard pieces with dimensions of 6 inches by 10 inches each will serve as a foundation for our design. Finally, a length of cotton twill tape will provide a sturdy backing to hold everything together.
Instructions
To kick off this project, gather all your necessary supplies and lay out your chosen fabric on a work surface. Fold it in half, with the wrong side facing out, and pin three sides together using sewing pins, leaving the mouth open. Repeat this process for the second piece of fabric, as you’ll need two identical pockets. Next, sew each pocket separately using a sewing machine, ensuring that the mouth remains open. Once complete, flip both pockets inside out so that the right side is facing out.
Cut a piece of cardboard to the desired size and insert it into one of the pockets, centering it so that it has an equal amount of fabric on all four sides. This will provide resistance during the next step. Pin a length of twill tape across the pocket, aligning the cardboard with the tape’s center. Then, sew both the top and bottom of the tape while securing the cardboard in place. Repeat this process for the second pocket.
Once complete, move on to attaching twill tape to your base fabric, ensuring that it is centered. Turn the fabric over and lay it flat on a surface with the taped side facing down. Position your canvas board over the base fabric and center it. Apply hot glue around all four sides, then pull the fabric over and press it down to cover the frame. When folding in the corners, use additional glue to tuck the fabric in and secure it.
Turn your canvas over and lay out your two pockets on top of it, with the larger pocket at the bottom. This pocket should overlap the smaller top pocket, creating a layered effect. To attach the pockets, grab your hot glue gun and fold the bottom and sides of each pocket up about an inch before gluing them onto the canvas. Make sure to secure all sides. Repeat this process for the second pocket, folding and securing the bottom and sides in the same manner.
Your DIY mail organizer is now ready for use once the glue has dried.