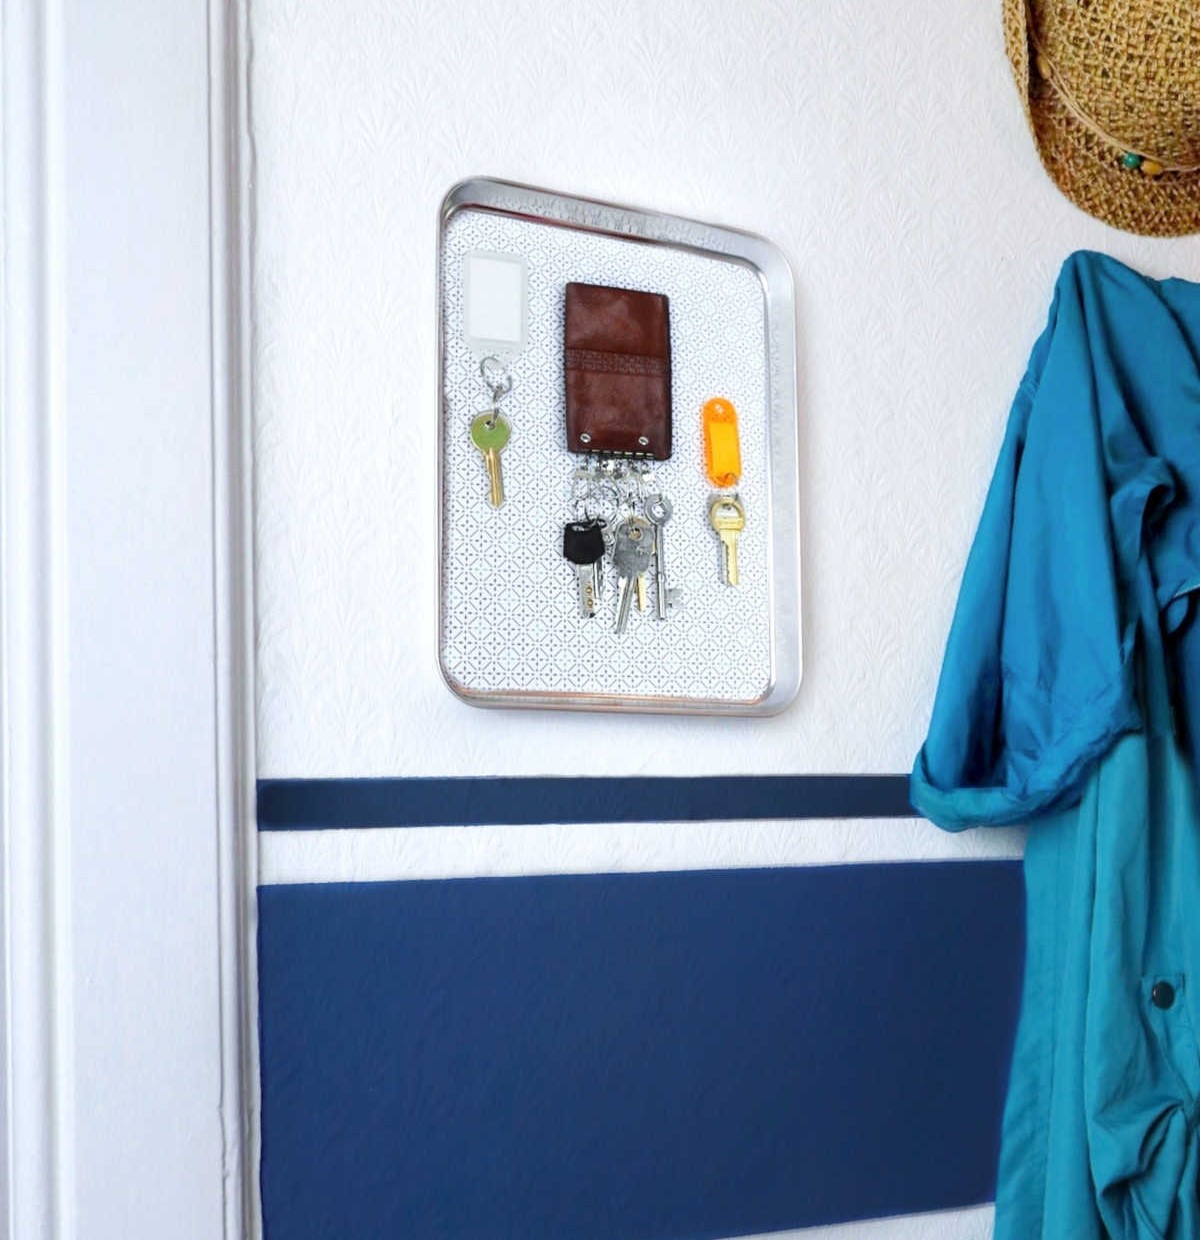
Create your own magnetic organizer to keep track of small items like keys, spare change, or beauty products. Say goodbye to the frustration of constantly misplacing things and hello to a clutter-free space.
Imagine being able to see exactly what you need at a glance, without having to dig through a messy bowl or drawer. With this DIY magnetic organizer, that’s exactly what you can do.
Made with just a few easy-to-find materials, this project is perfect for anyone looking to add some organization and style to their space.
Supplies for the Organizer
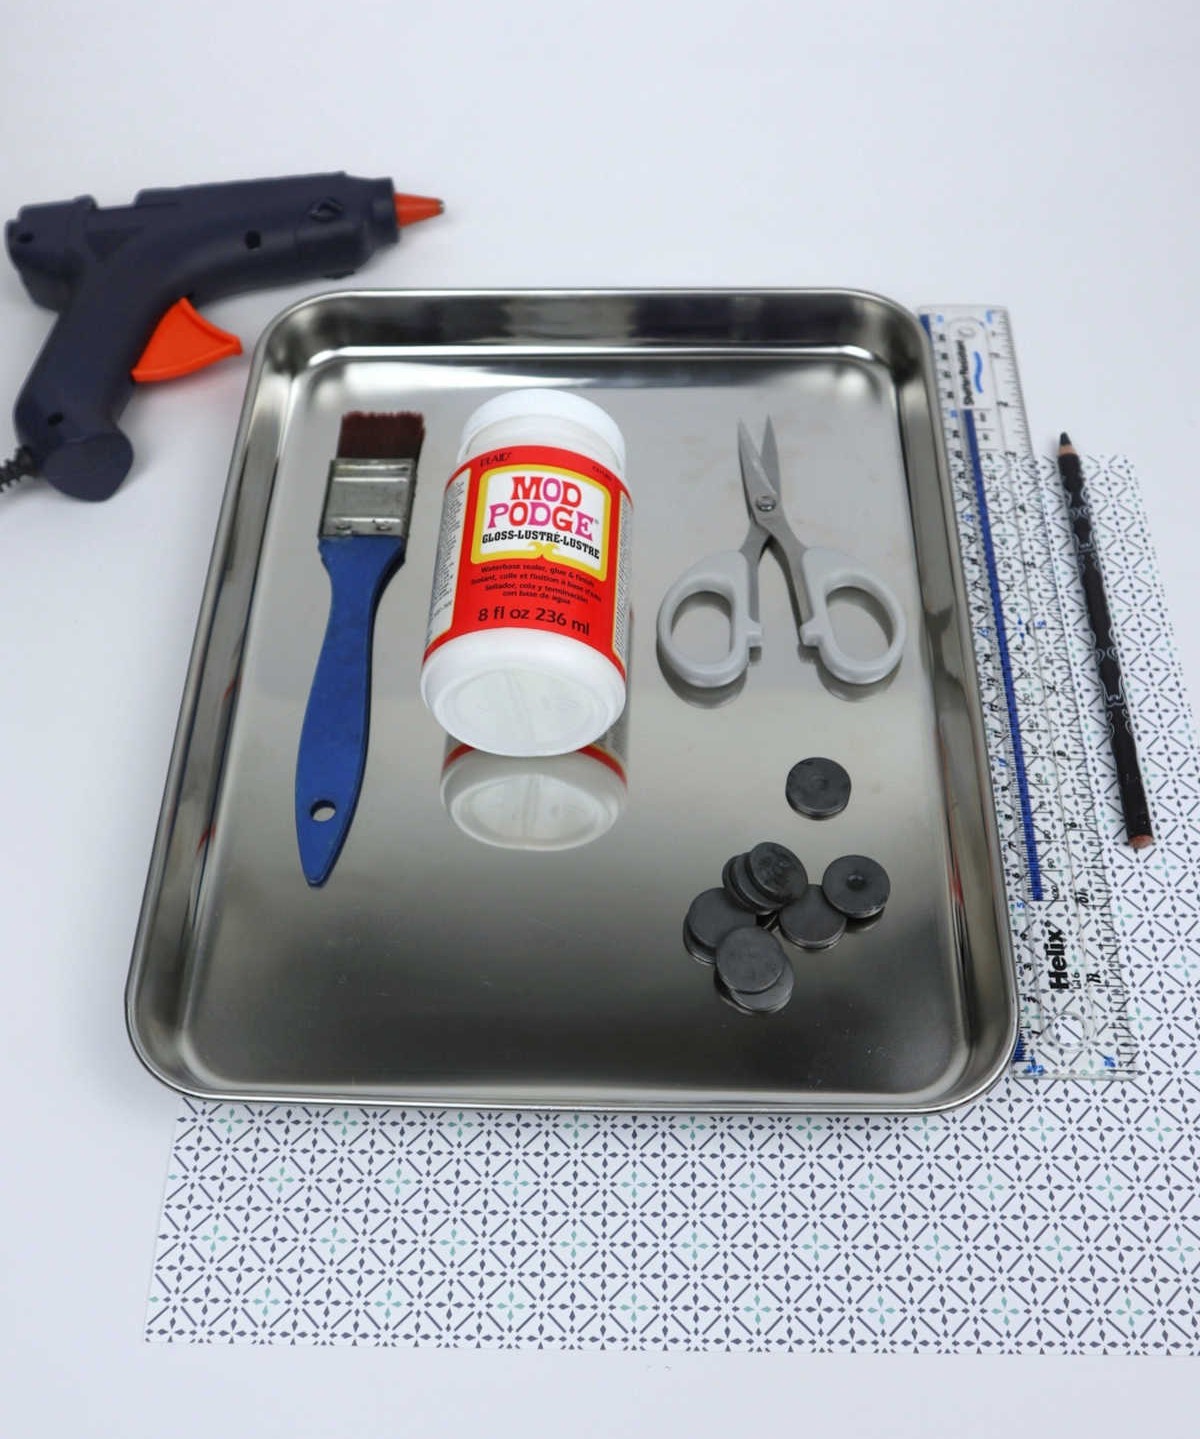
To create your own DIY magnetic organizer, you’ll need the following materials: a stainless steel baking tray or metal cookie tray as the base; scissors for cutting to size; decorative paper in thin sheets for added aesthetic appeal; magnets to provide the magnetic functionality; a ruler and pencil for precise measurements and markings; a hot glue gun to secure the components together; Mod Podge, a versatile crafting adhesive, to reinforce the design; and a painting brush to add any finishing touches.
How to Make a Magnetic Organizer
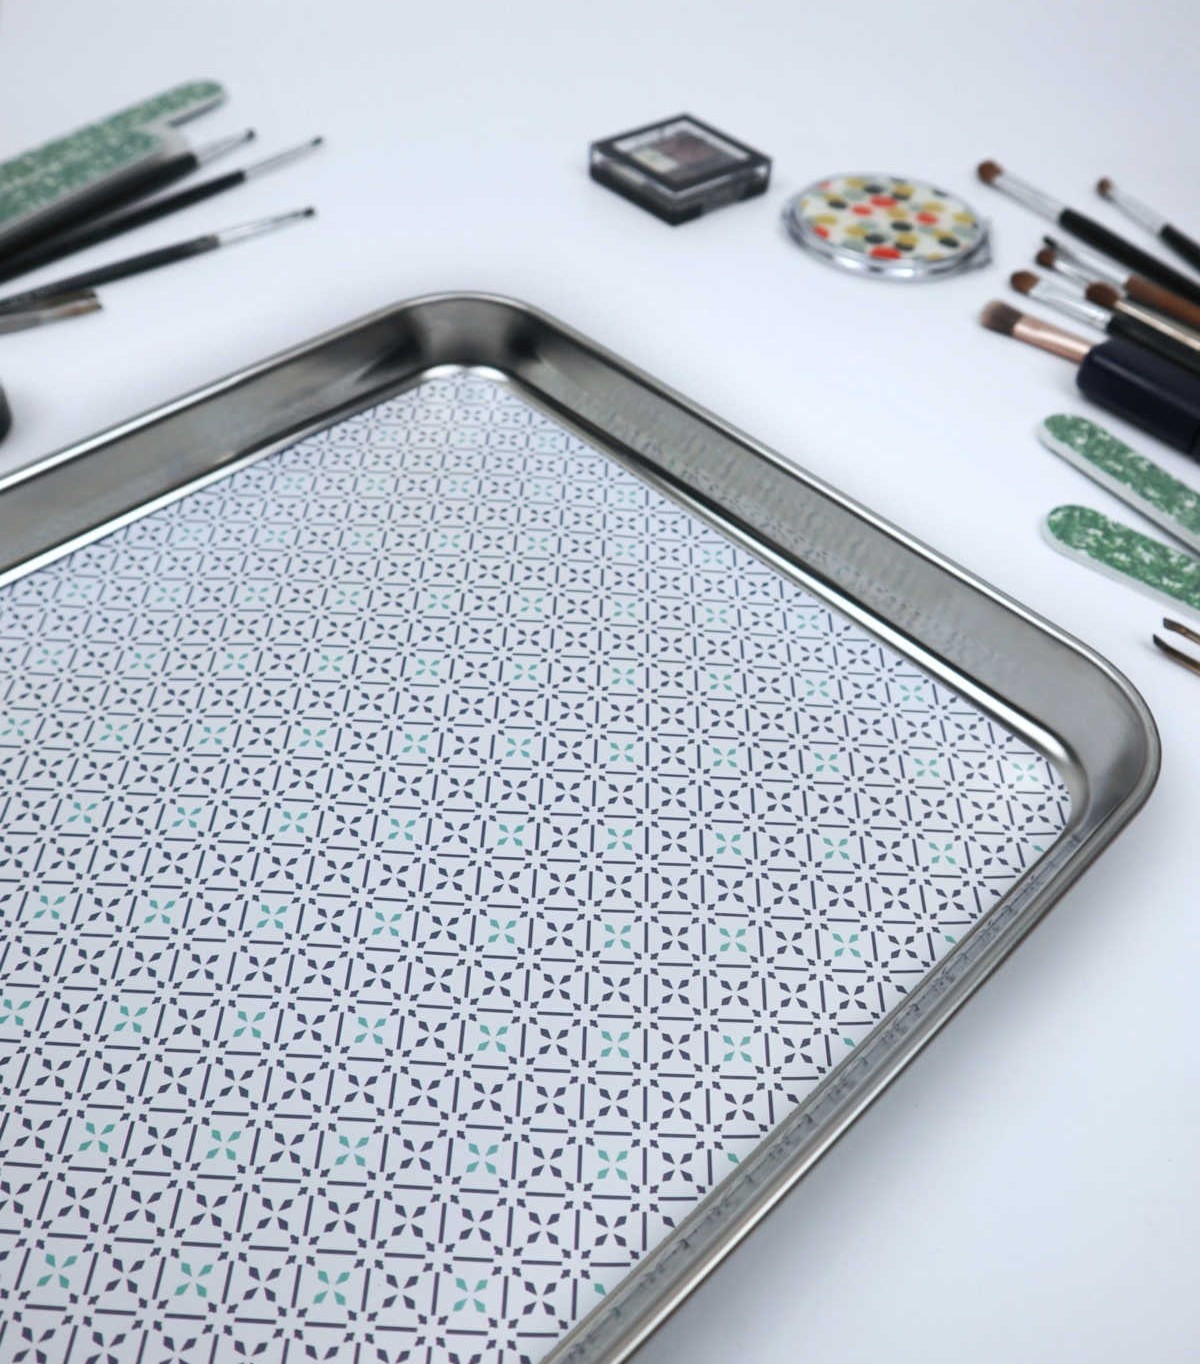
With minimal materials required, crafting a DIY magnetic organizer is quite straightforward. One crucial component to get right is selecting a suitable base – namely, a high-quality stainless steel serving tray or baking tray. If your chosen tray features stainless-steel handles, you’re all set to move forward with the project.
Step 1
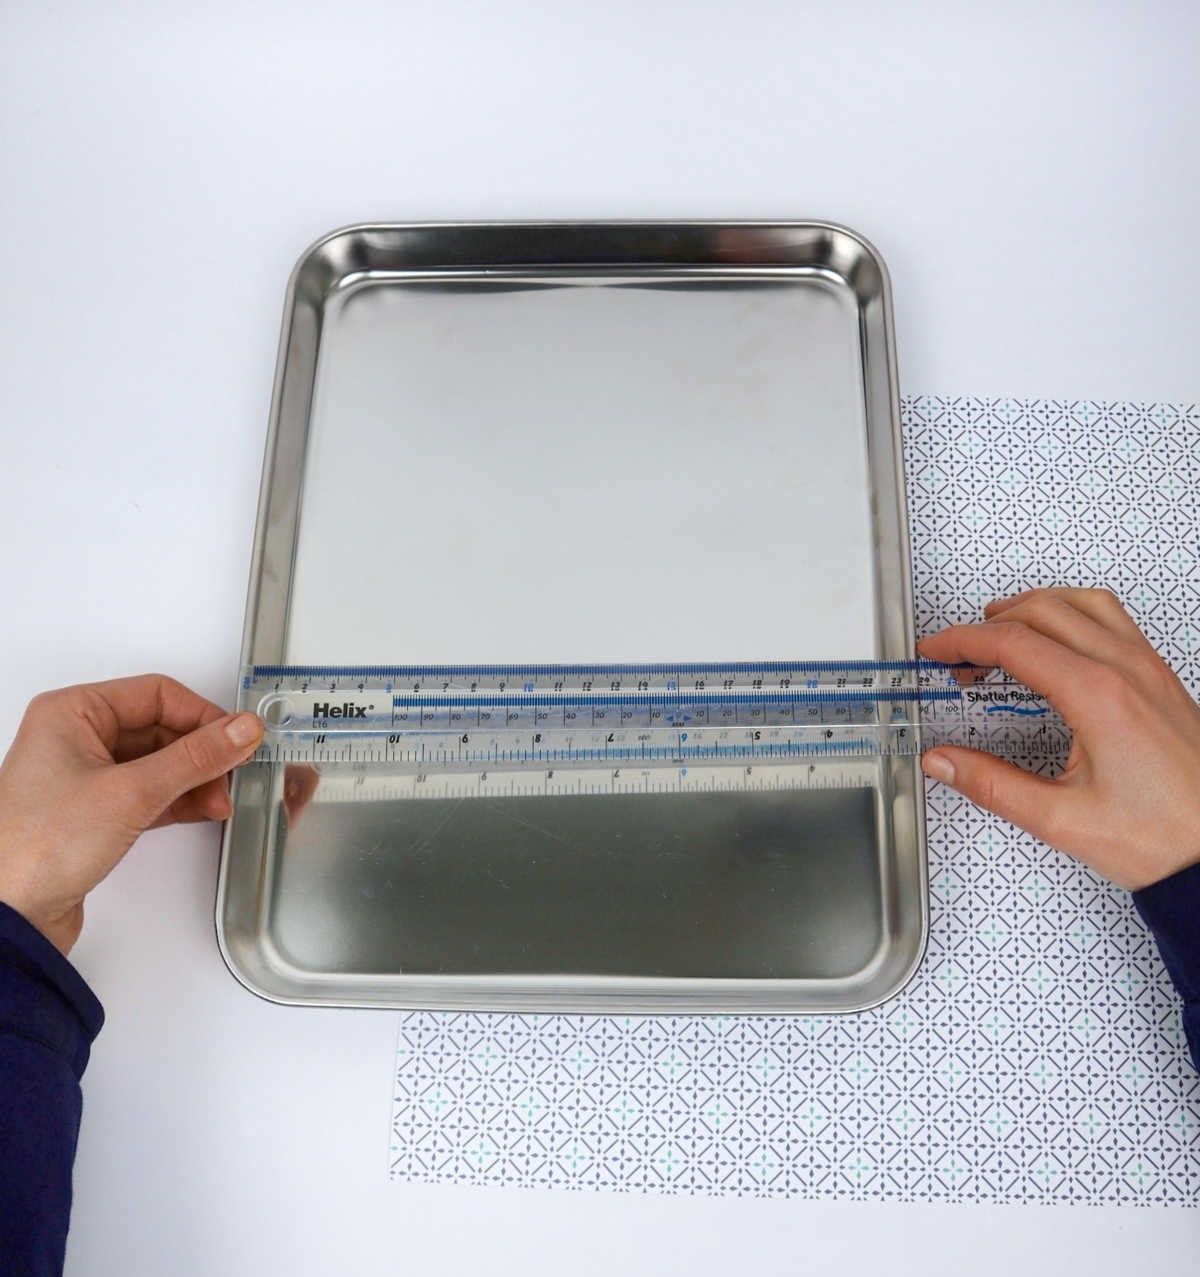
To determine the dimensions of your tray, employ the use of a reliable measurement tool such as a ruler or precision measuring tape. Using these instruments, meticulously record the lengths, heights, and widths of the tray, ensuring accuracy and attention to detail.
Step 2
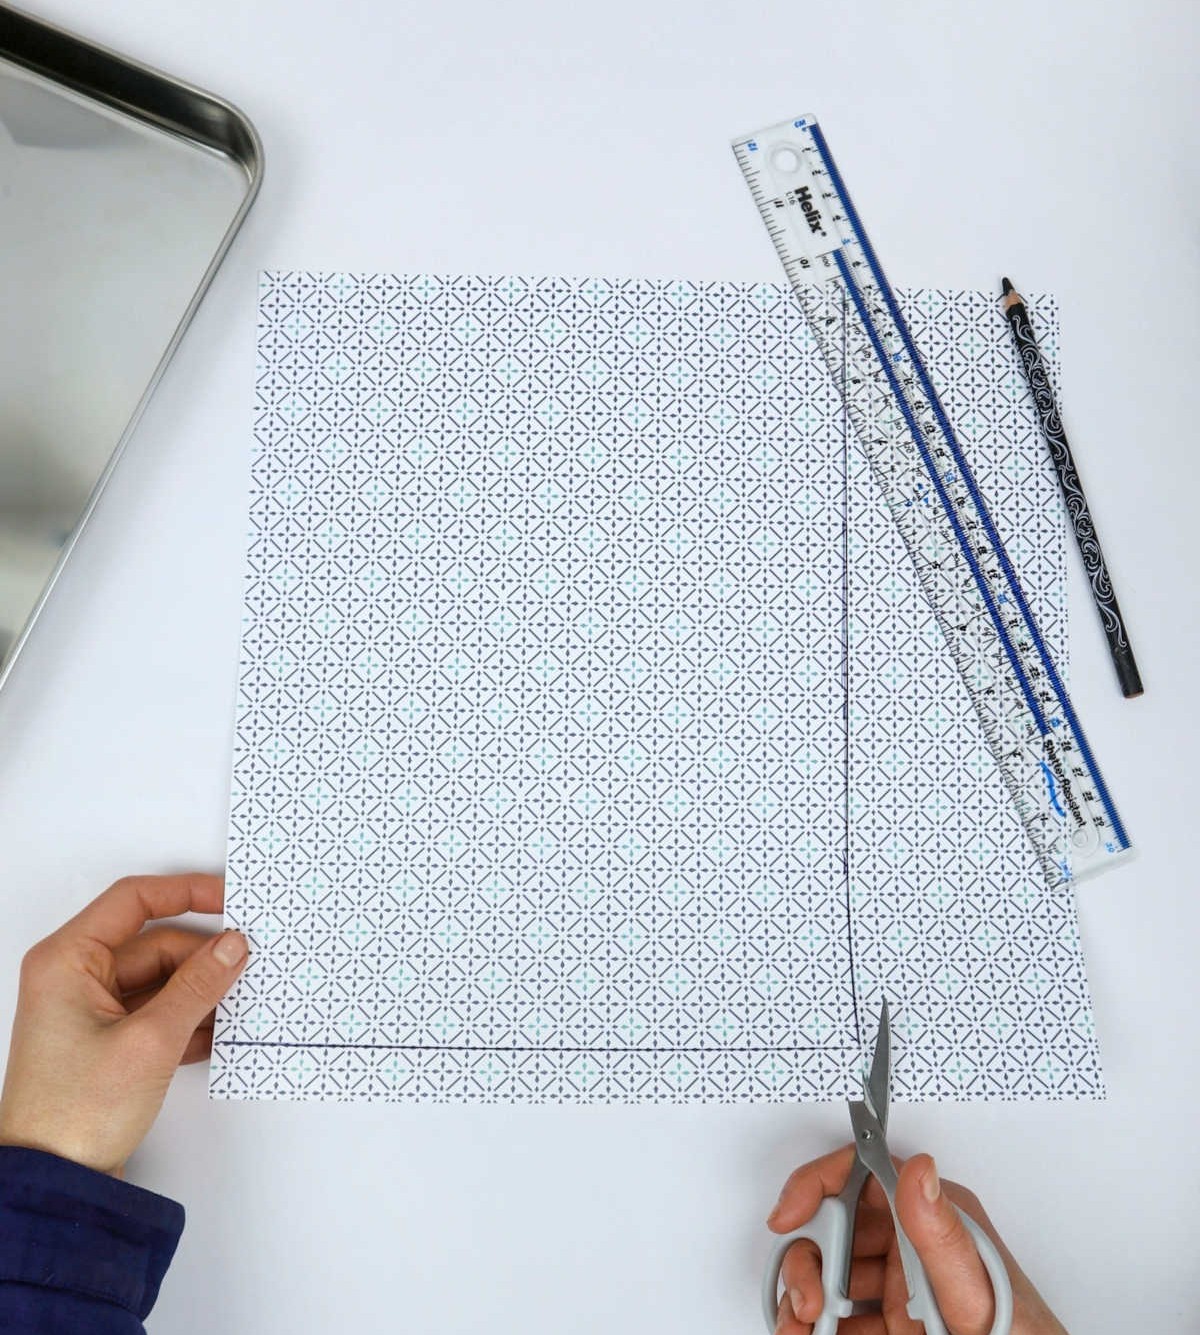
Next, utilizing the precise measurements you’ve recently recorded, create a template on your preferred decorative paper by sketching out the shape and proportions. This visual representation will serve as a guide for bringing your design to life.
Step 3
To get started, measure and trim your decorative paper to the desired size for your craft project. Take a moment to consider the overall vision you have for your creation and determine which dimensions will best serve its aesthetic.
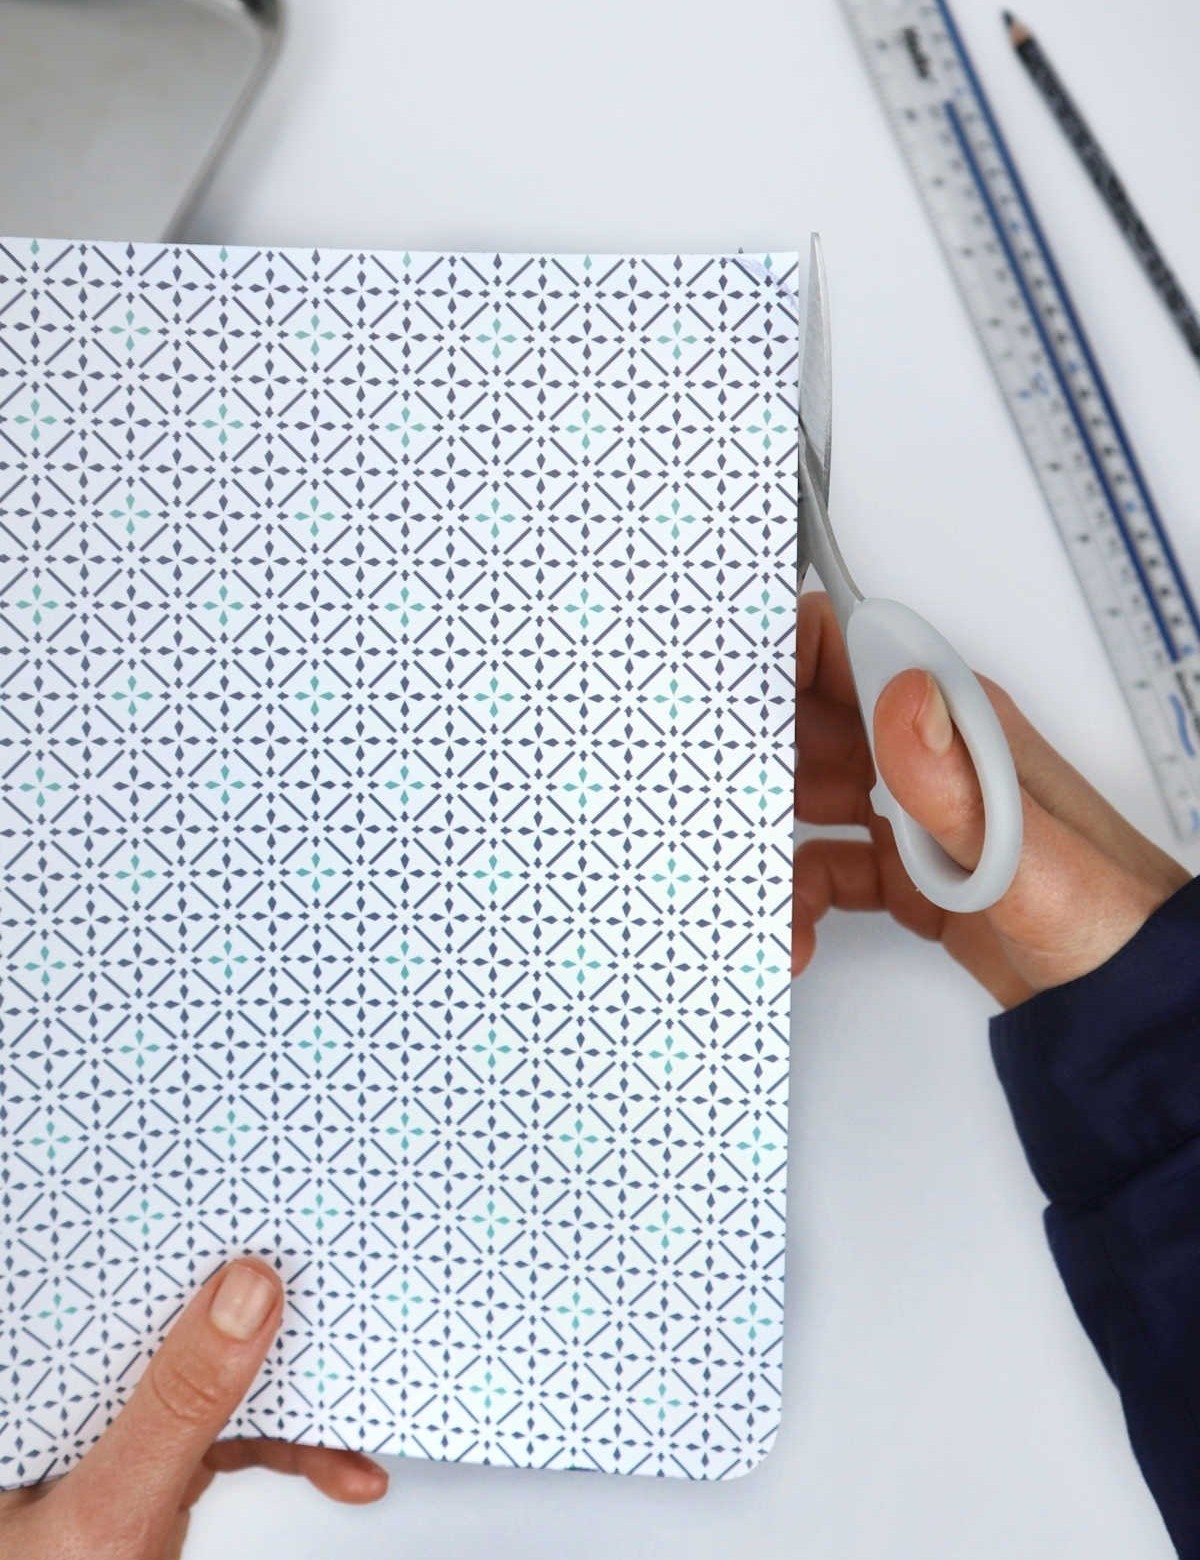
Step 4
After cutting out your paper, carefully position it on the tray’s surface to ensure a proper fit. If necessary, fine-tune the edges and corners by trimming them slightly to guarantee a snug alignment with the tray’s dimensions.
Step 5
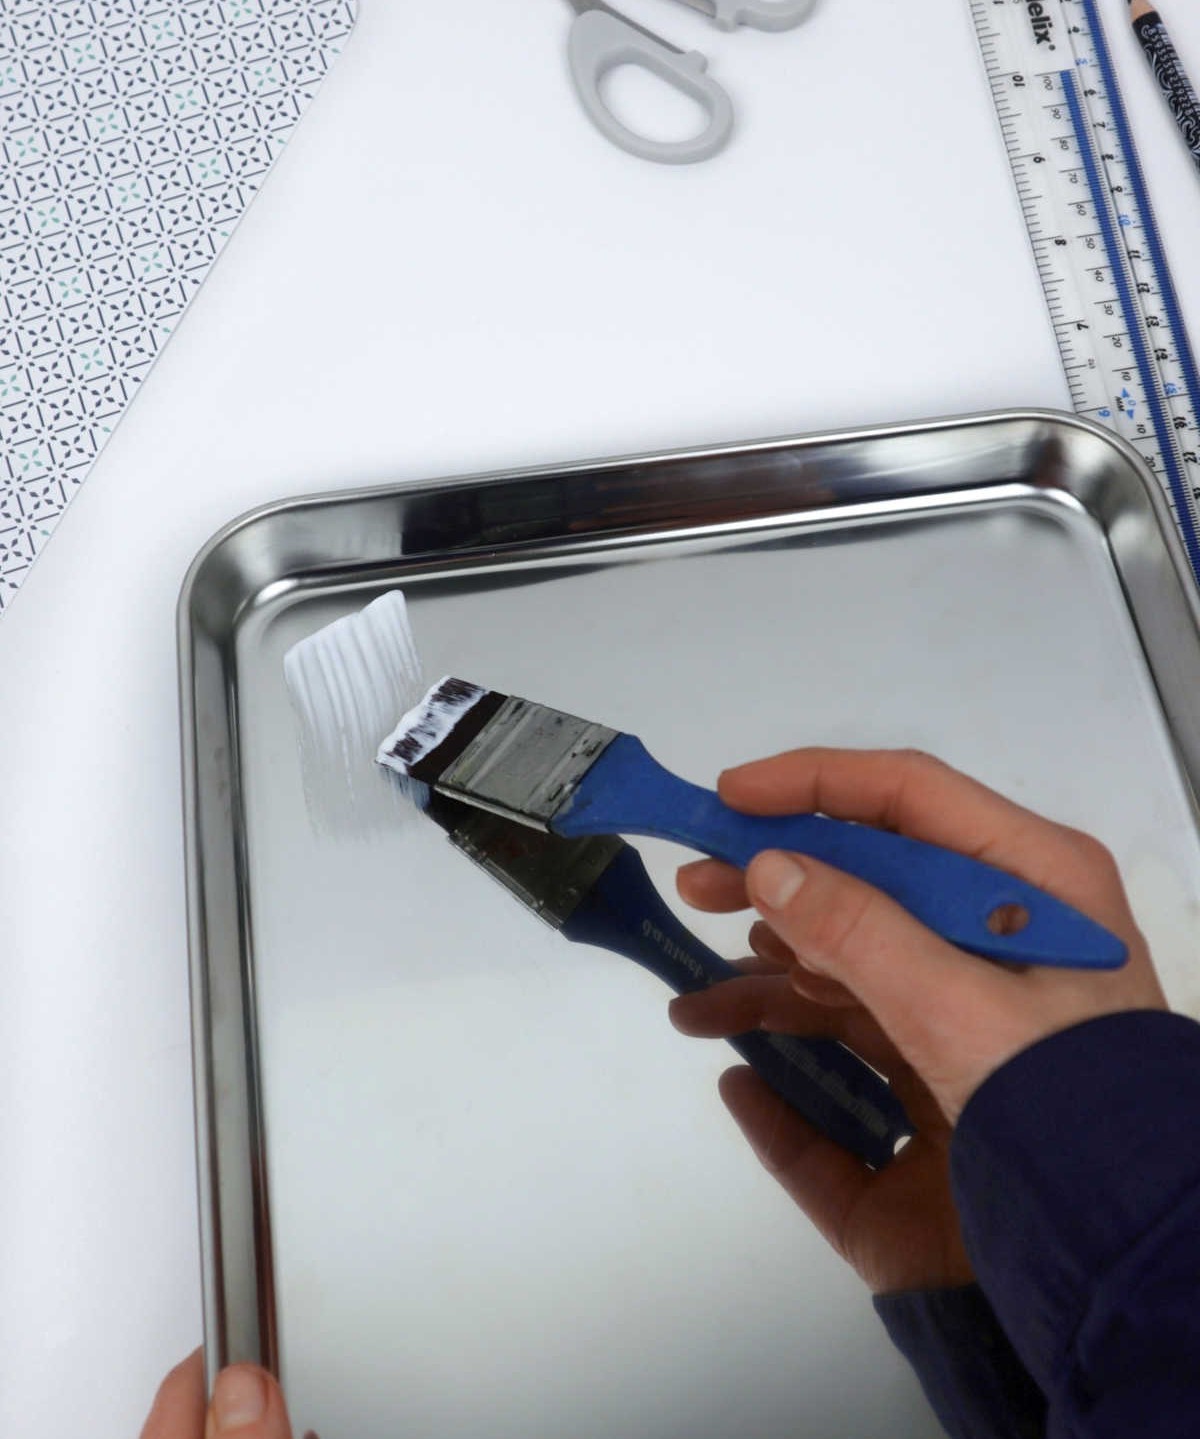
To secure the design in place, begin by applying a thin, even layer of craft glue or Modge Podge to the stainless-steel tray using a flathead brush. It’s crucial to cover the entire surface, taking care to thoroughly coat all areas, including the corners where surfaces meet.
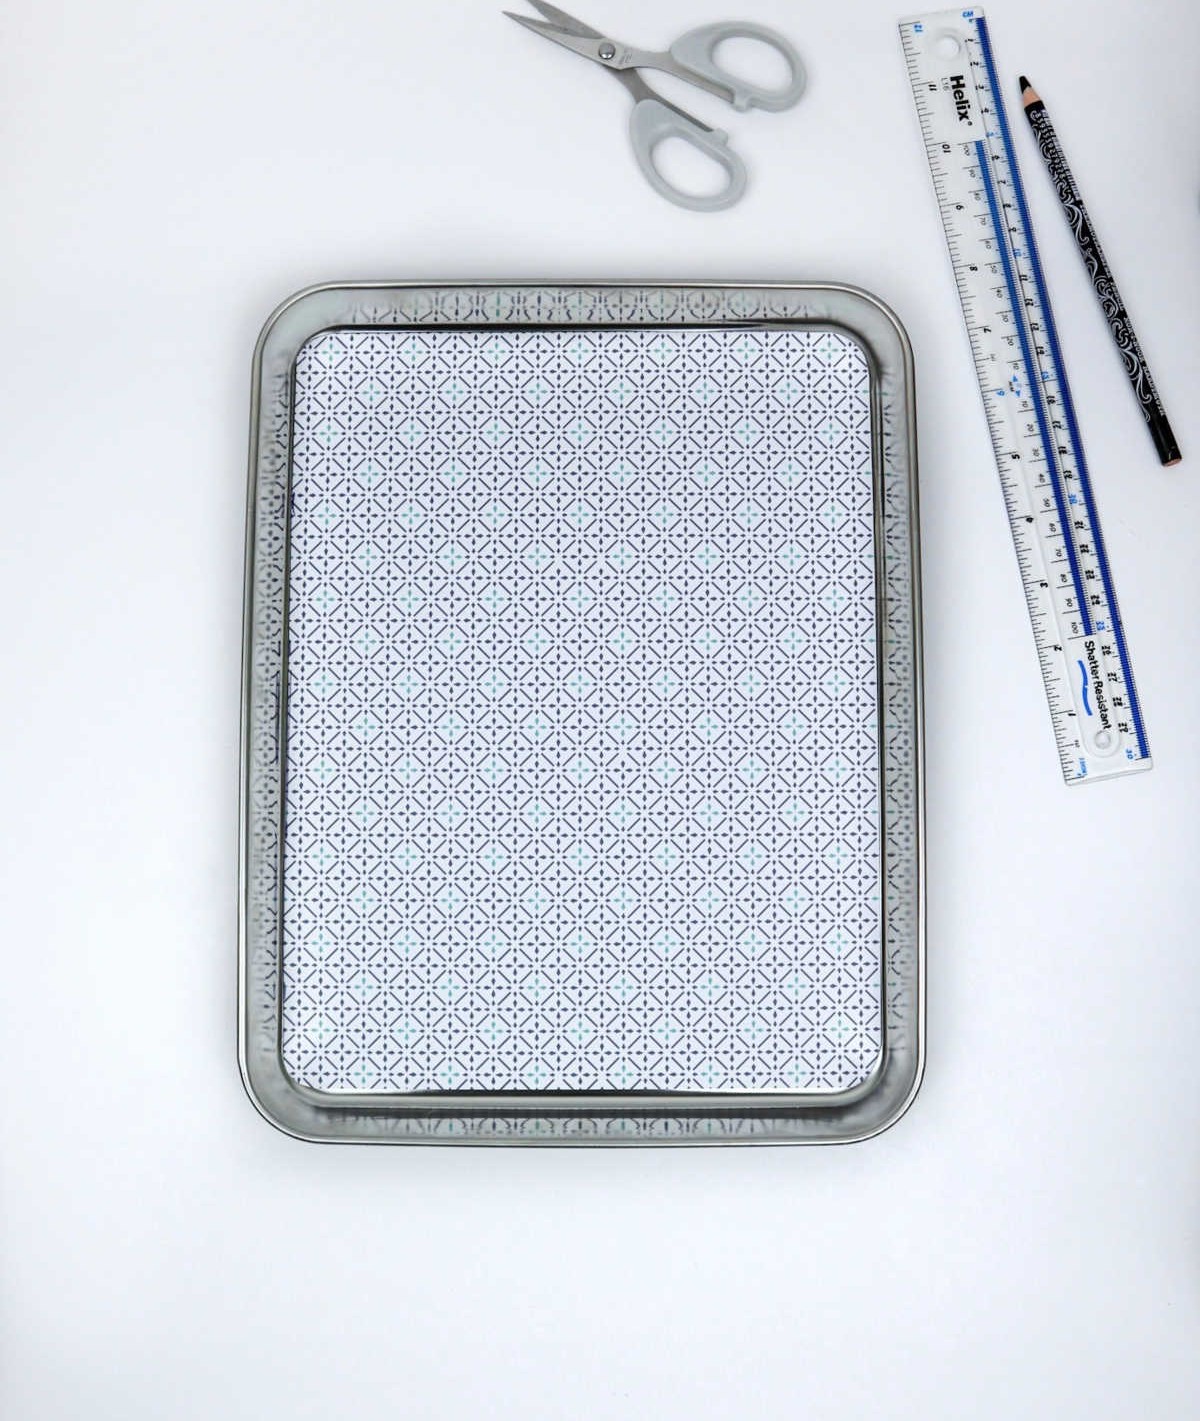
Step 6
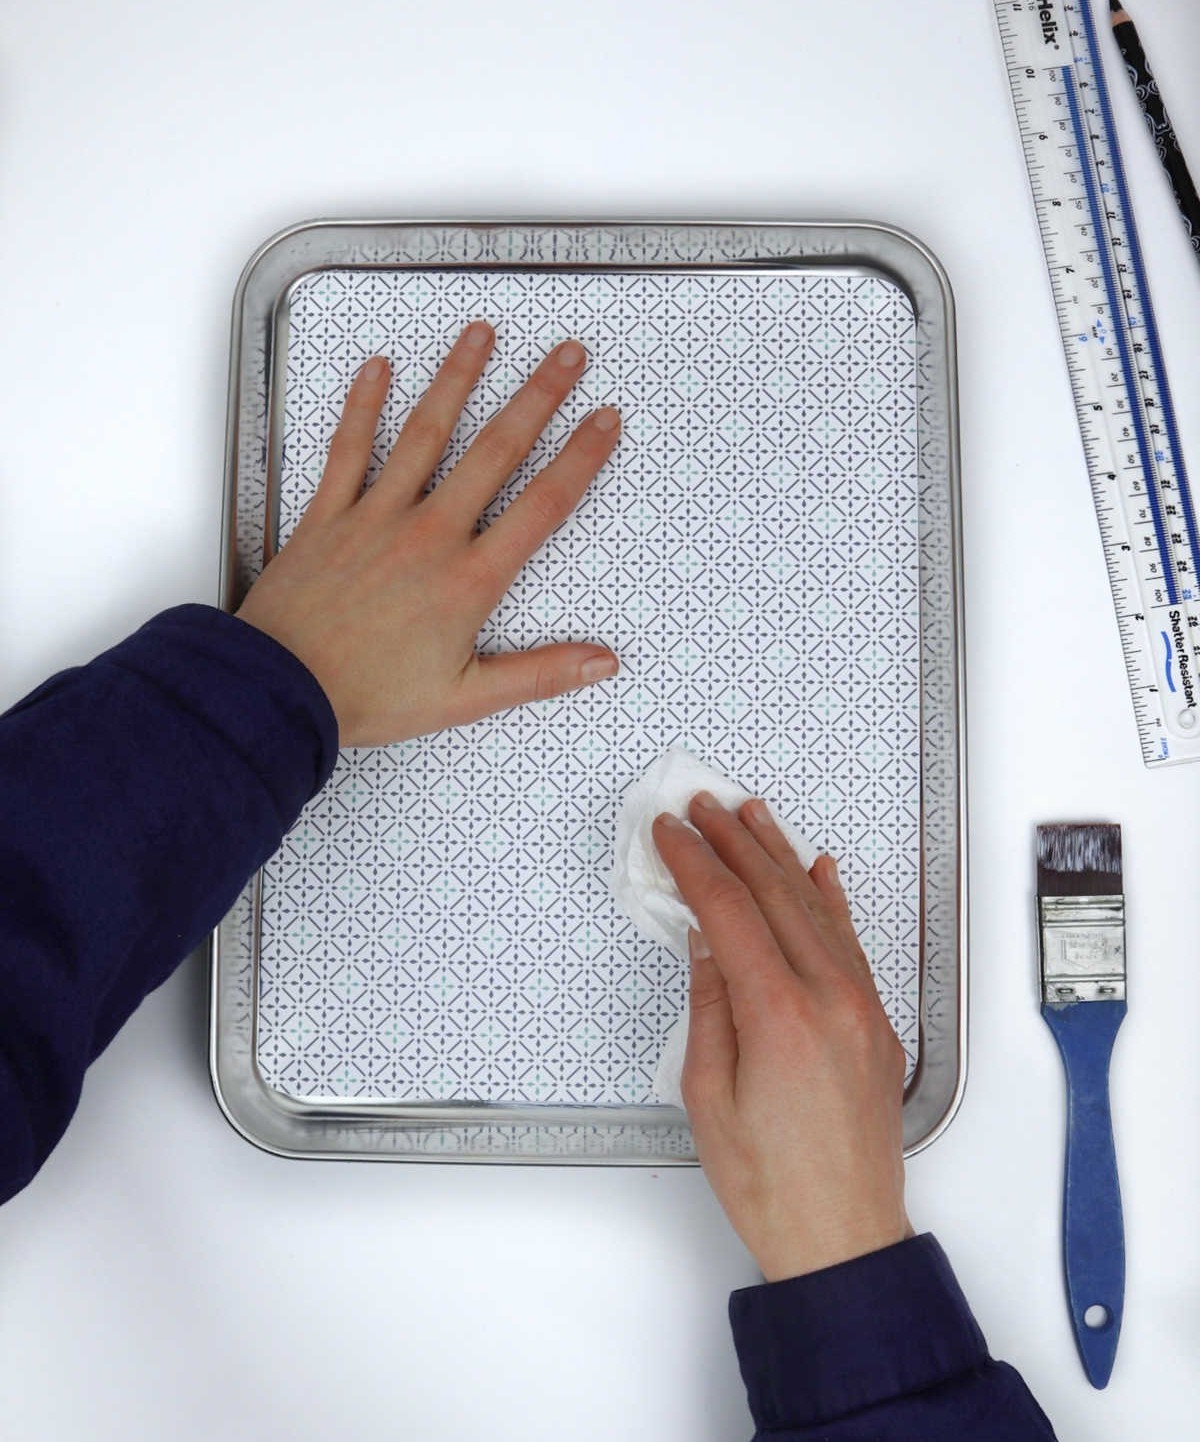
To secure the decorative paper, simply lay it gently over the tray and press it firmly into position. For added ease, you can employ a soft cloth to gently smooth out any wrinkles or creases that might form as you place the paper.
Step 7
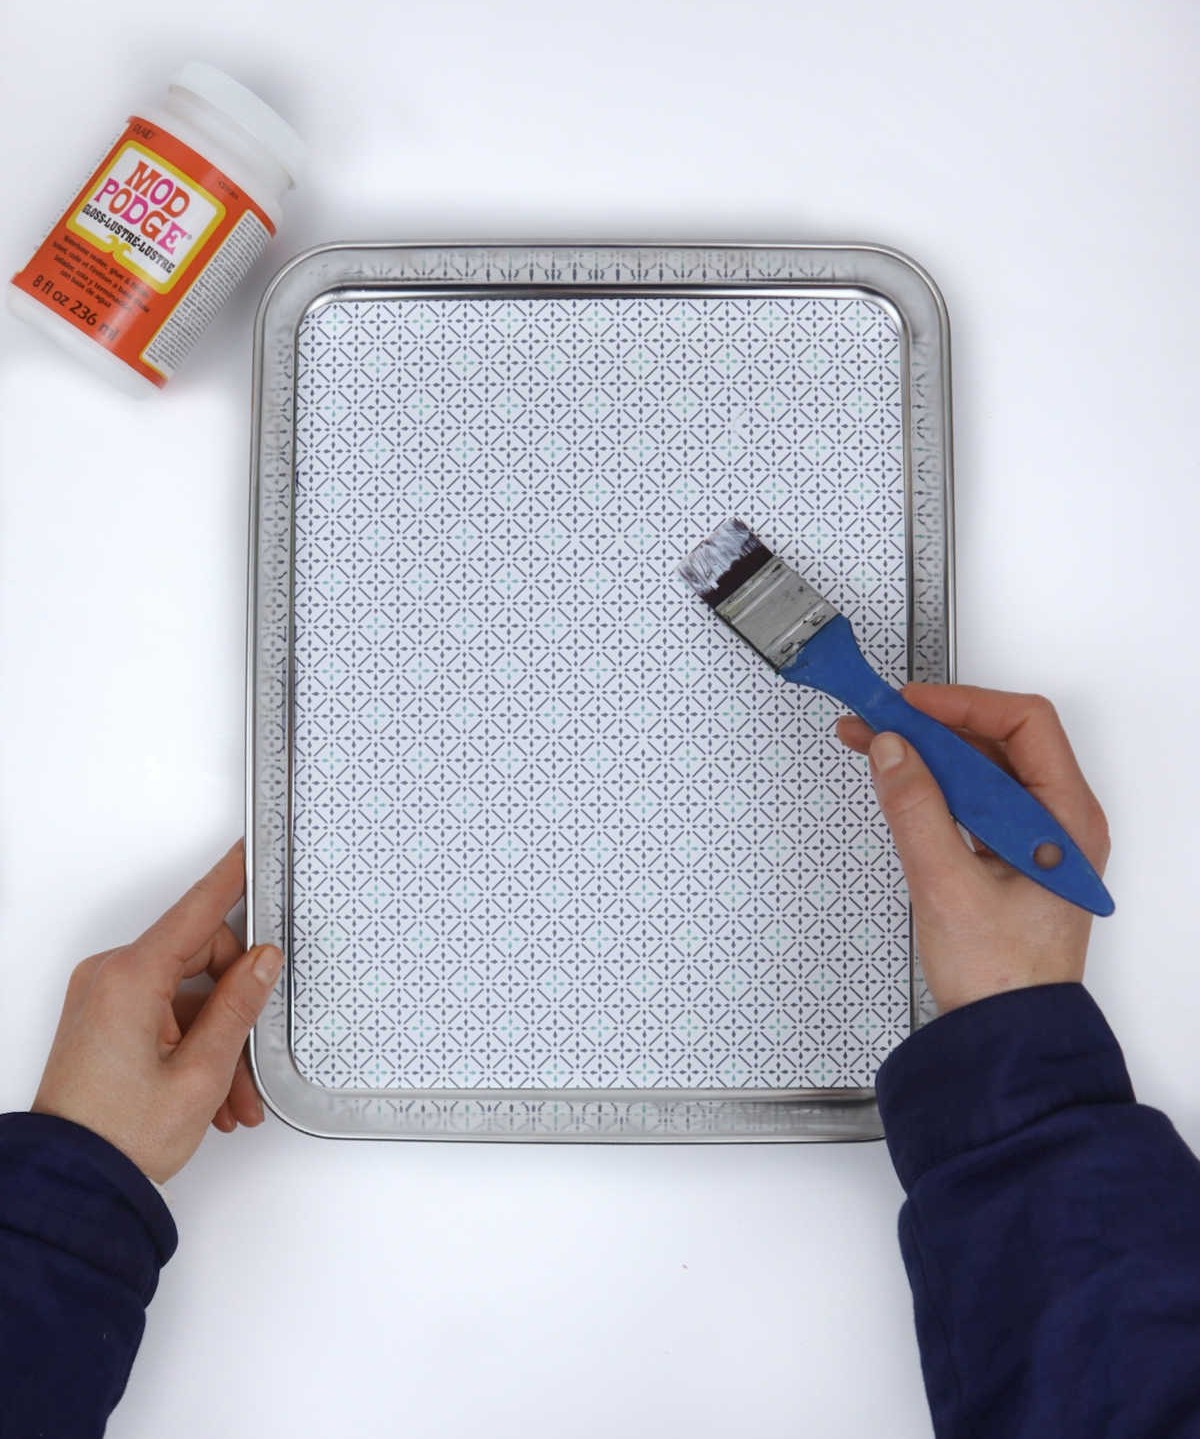
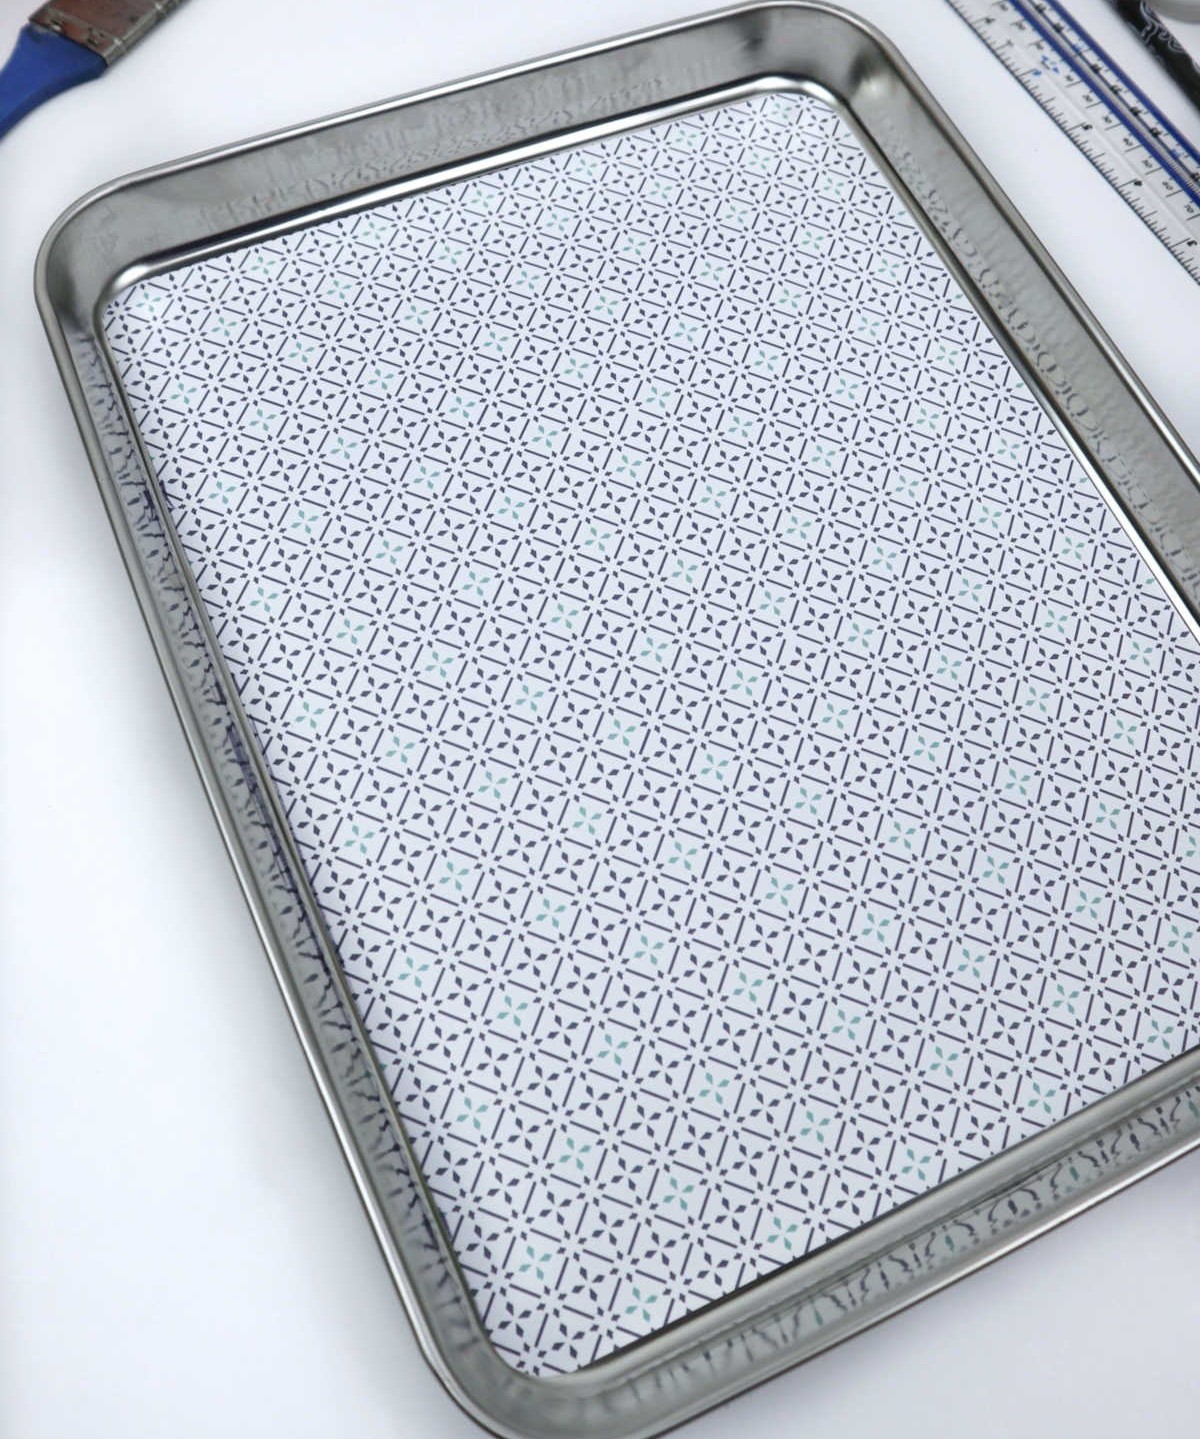
Once you’re satisfied with the initial application of Mod Podge, allow the paper to air-dry for a bit before adding additional coats. It’s crucial not to overdo it – just a light touch will suffice, as excessive Mod Podge can cause the paper to become soggy and compromised. Once the first layer is fully dry, you’re ready to proceed with subsequent applications, building up the desired texture and finish.
Step 8

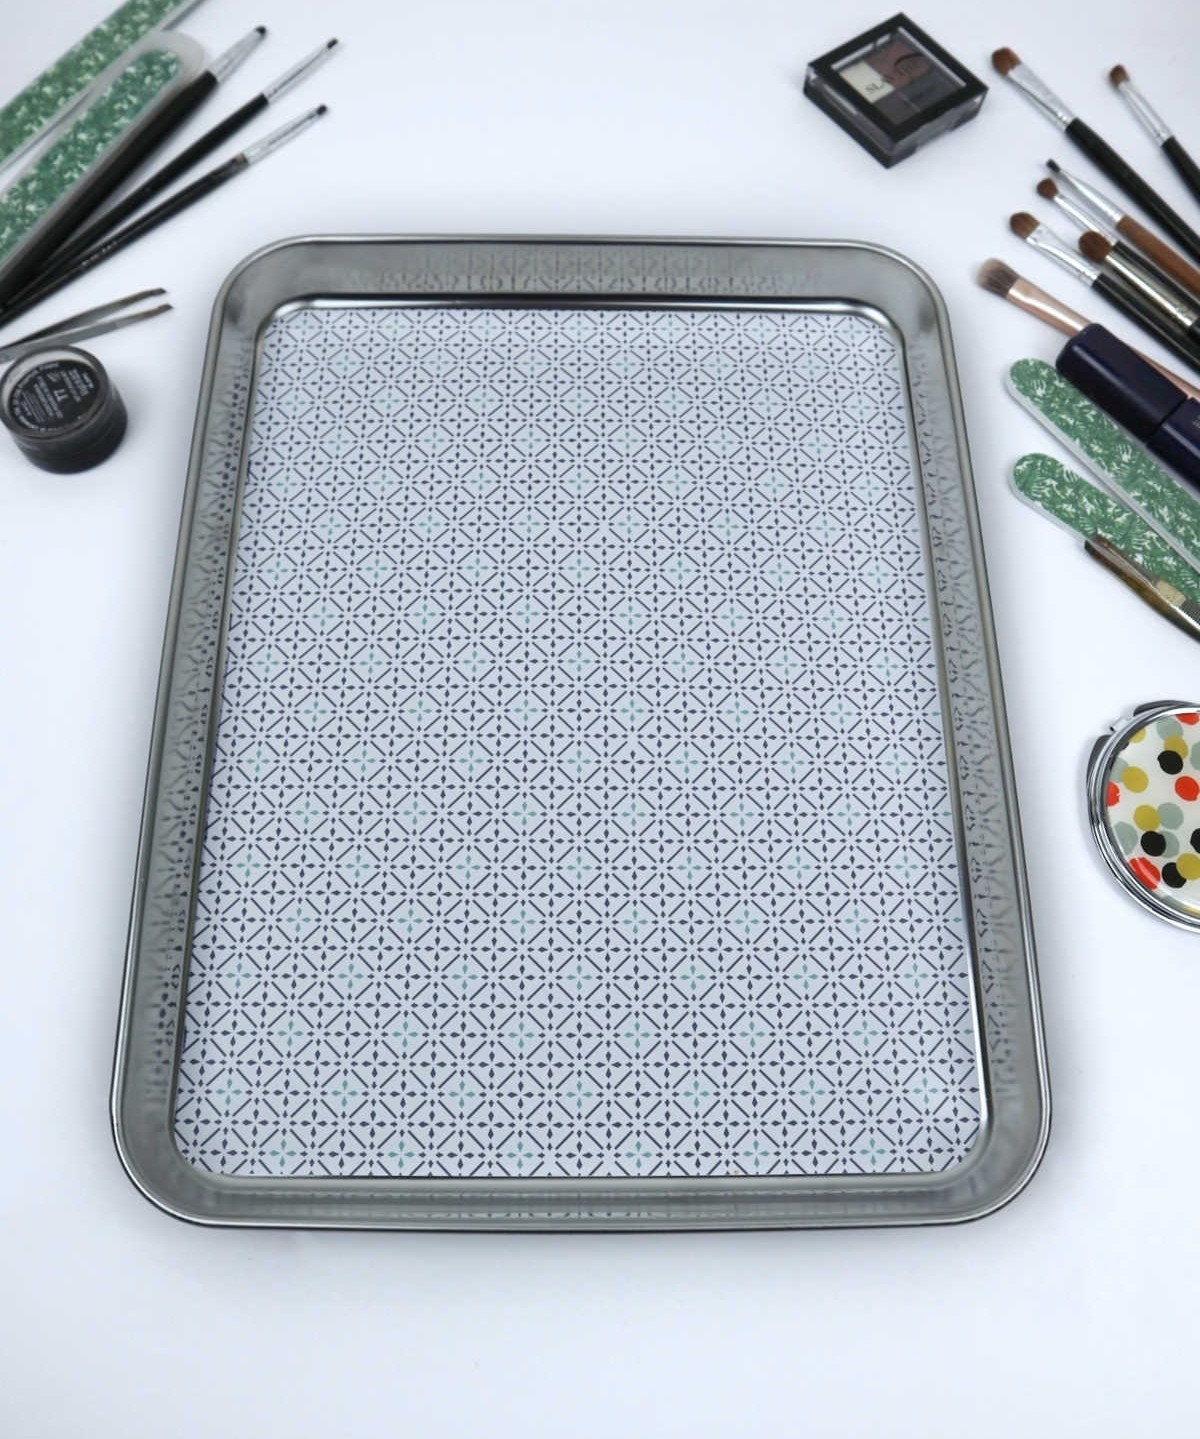
For those who have chosen to utilize their magnet trays to keep their beauty products in order, now is the perfect time to gather all the cosmetic items that need to be categorized and placed into a neat and tidy arrangement.
Step 9
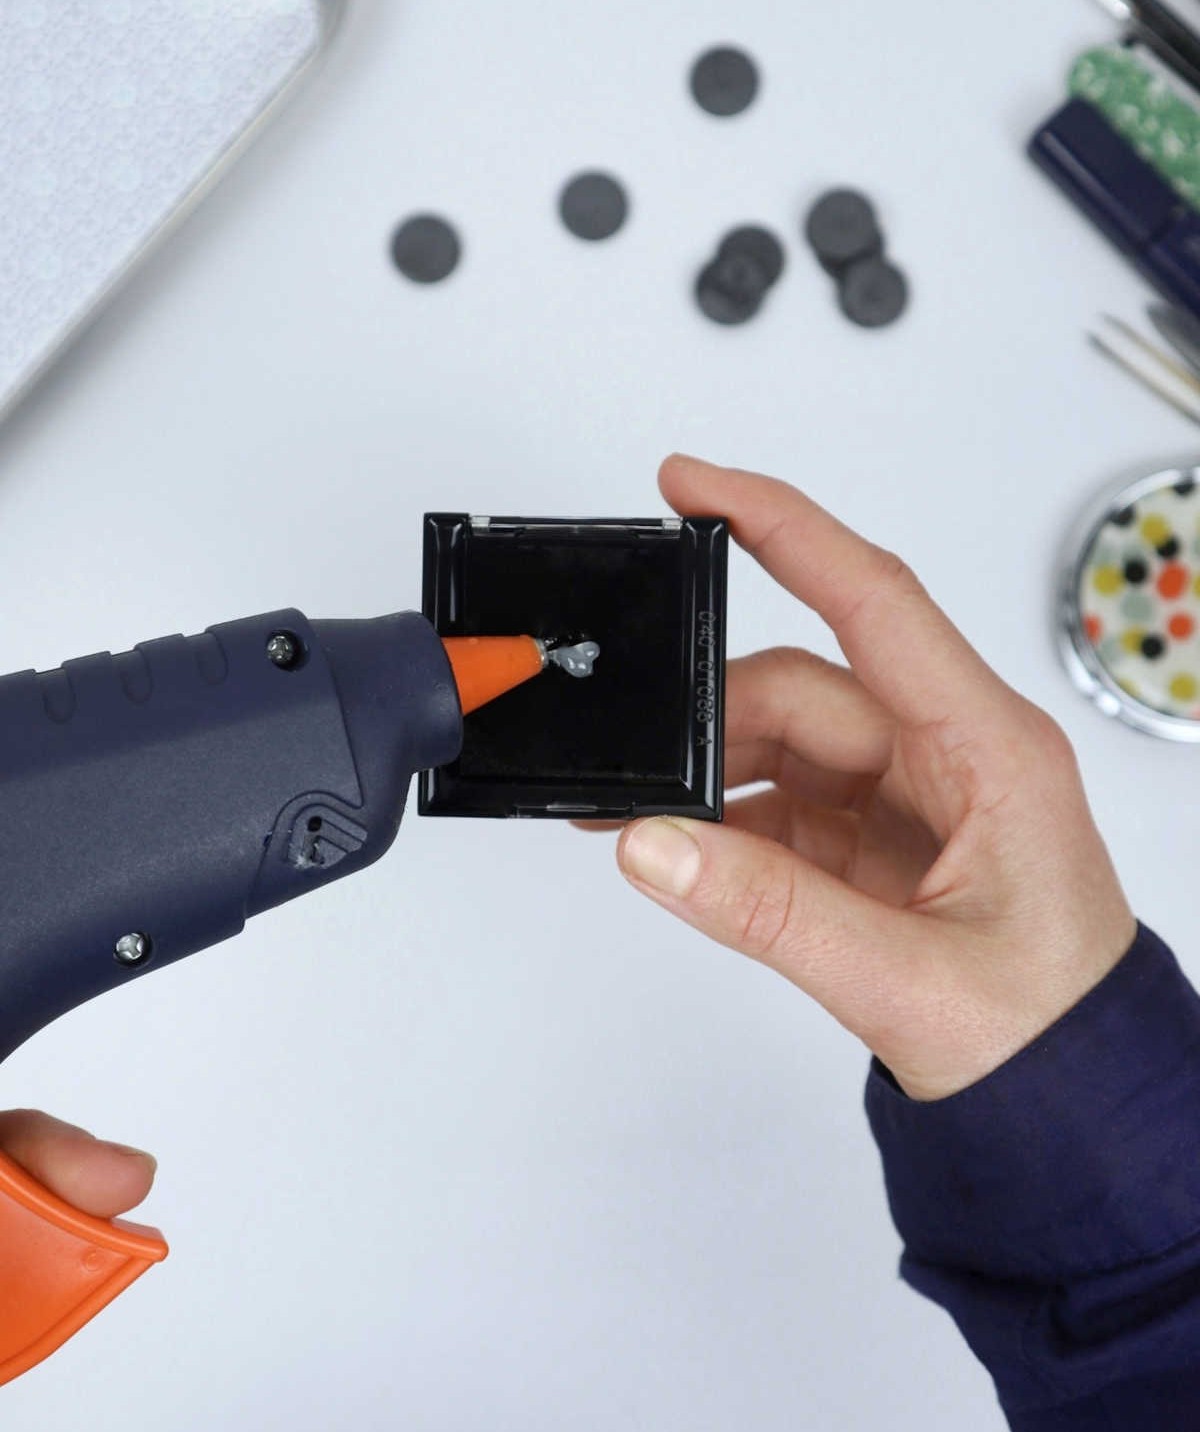
Adopt a minimalistic approach by attaching your cosmetic products to their respective cases using a hot glue gun. Apply a small amount of hot glue to the back of each product, such as compacts, mascaras, and rouges, to secure them firmly in place.
Step 10
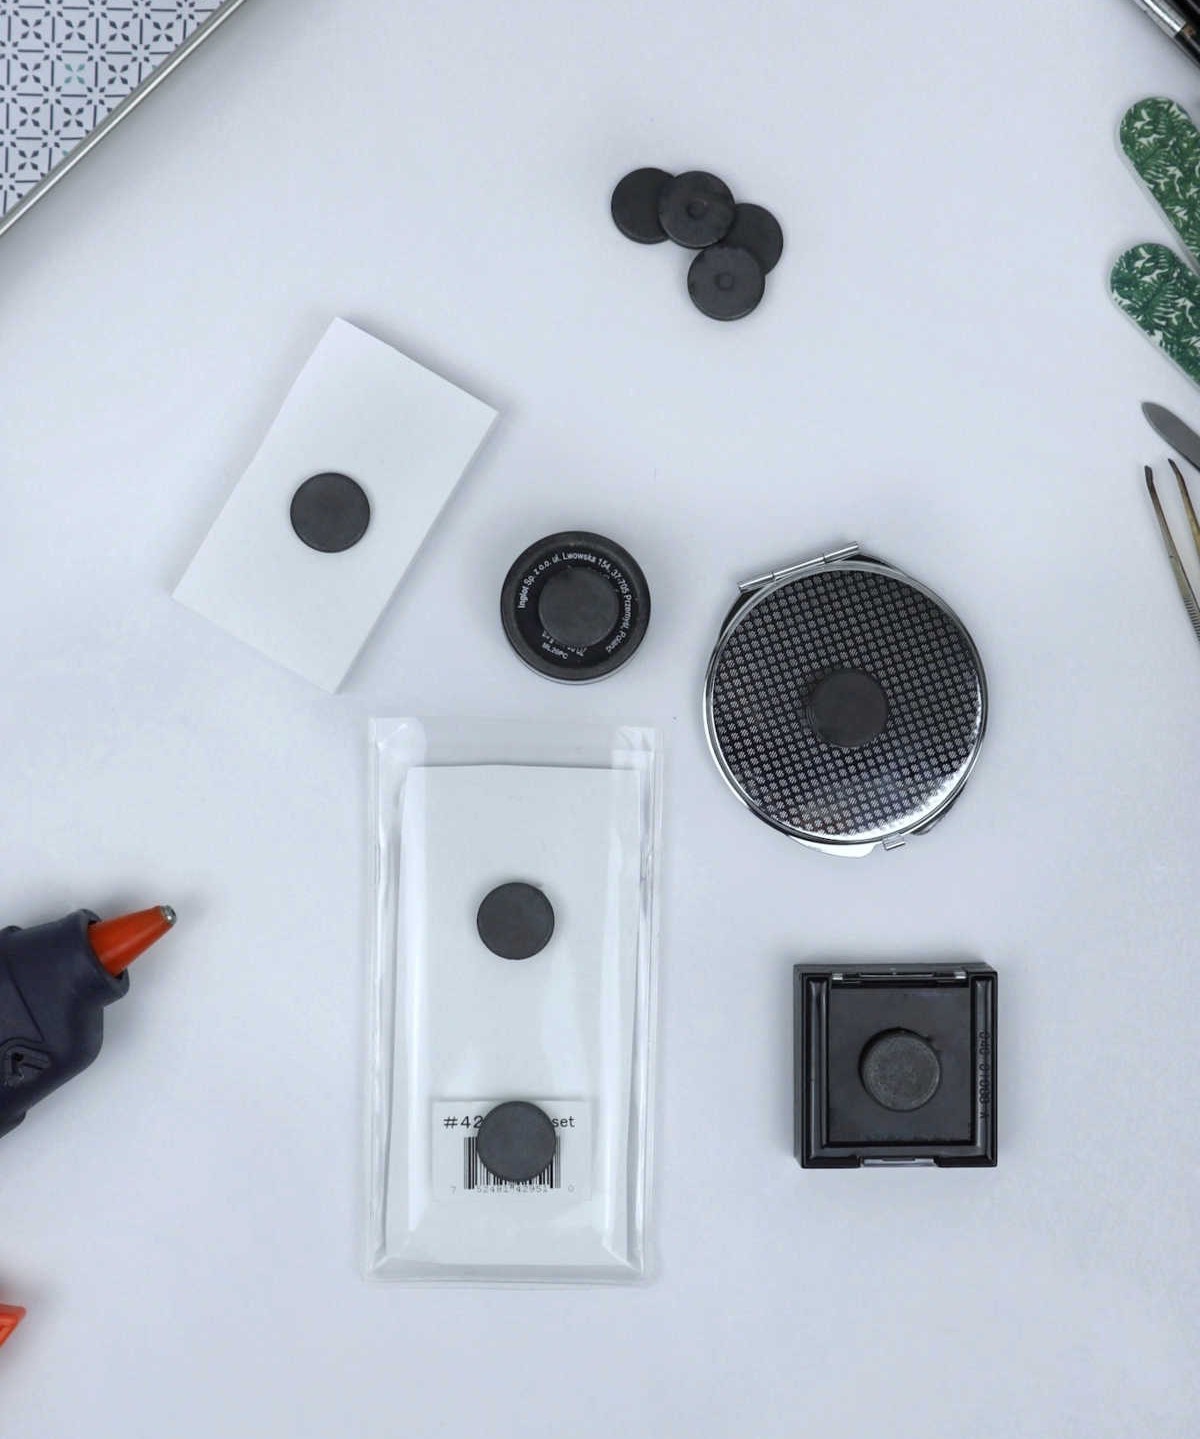
Once the magnetic button is securely attached, apply a thin layer of hot glue to the back of the cosmetics and carefully affix the magnetized products, ensuring they adhere firmly.
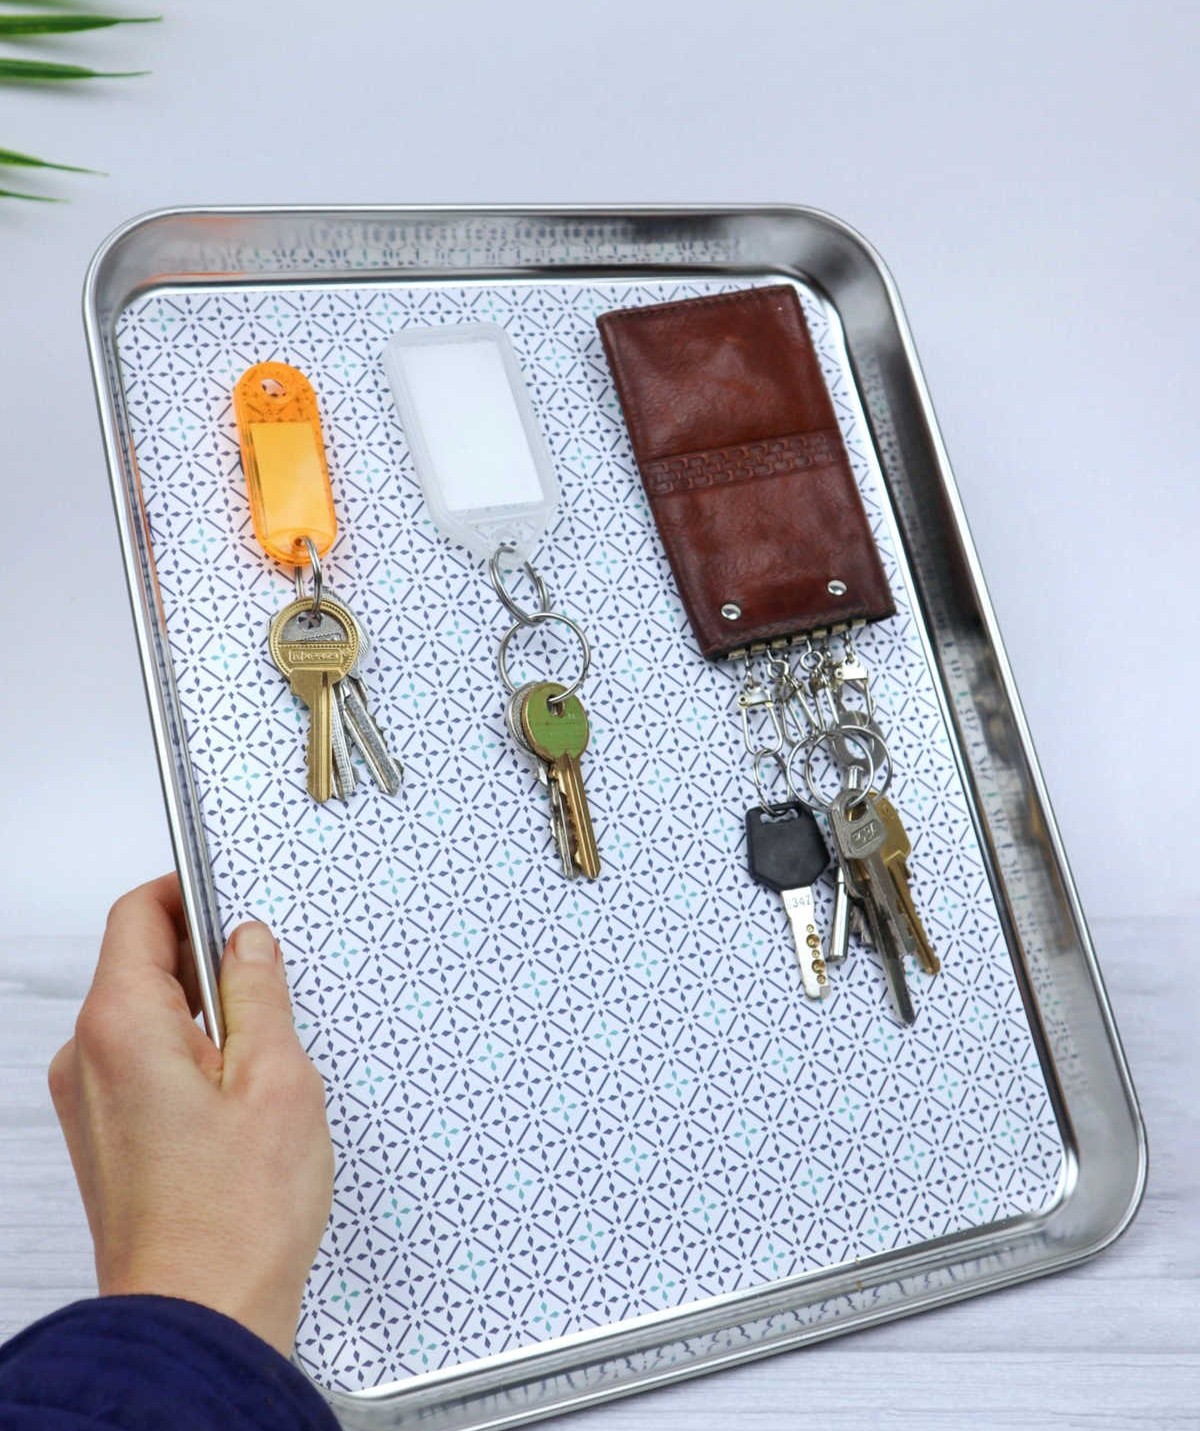
Step 11
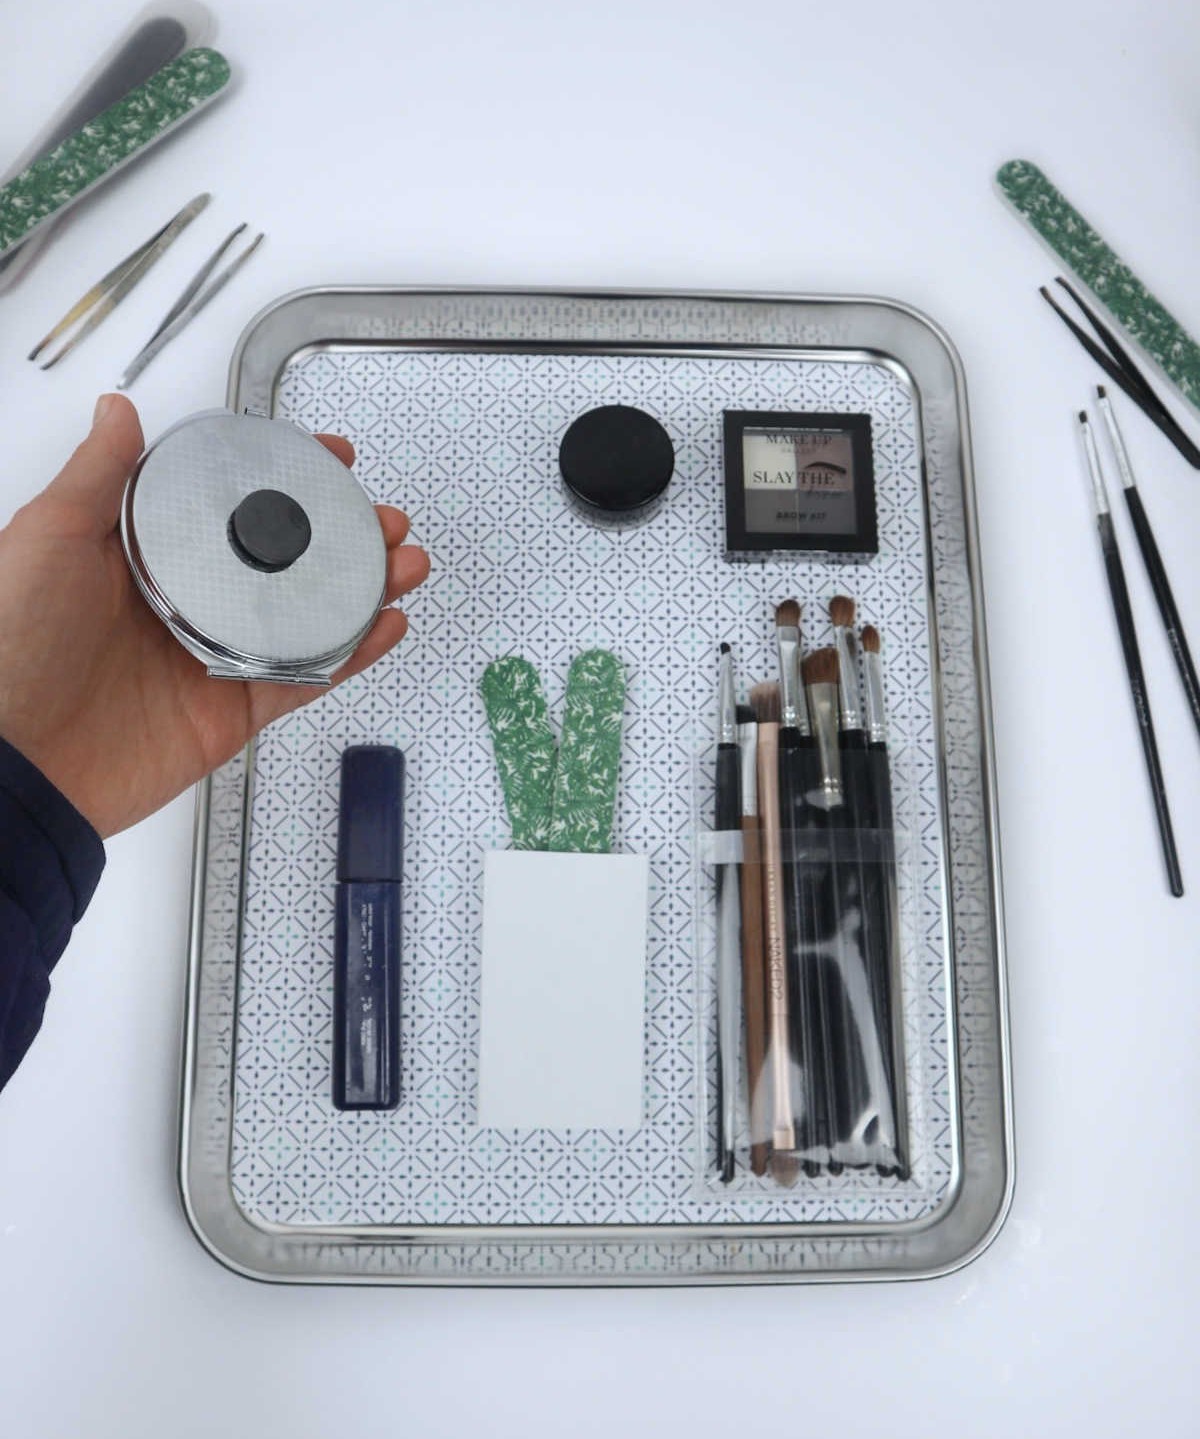
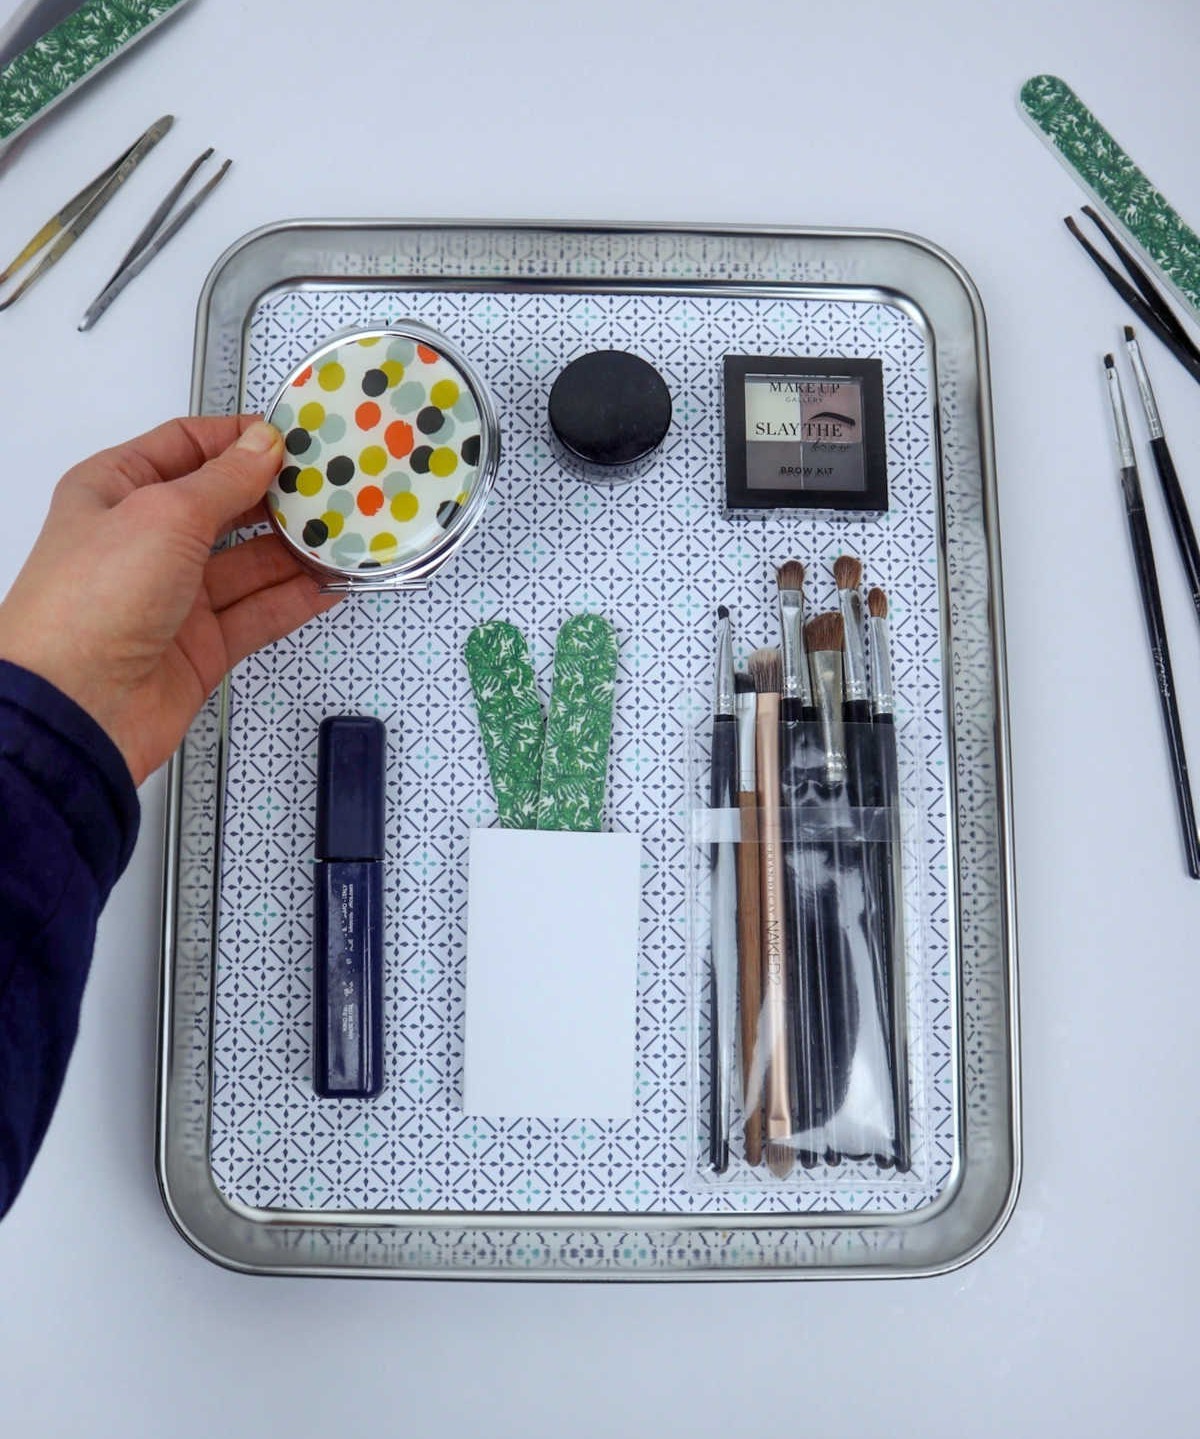
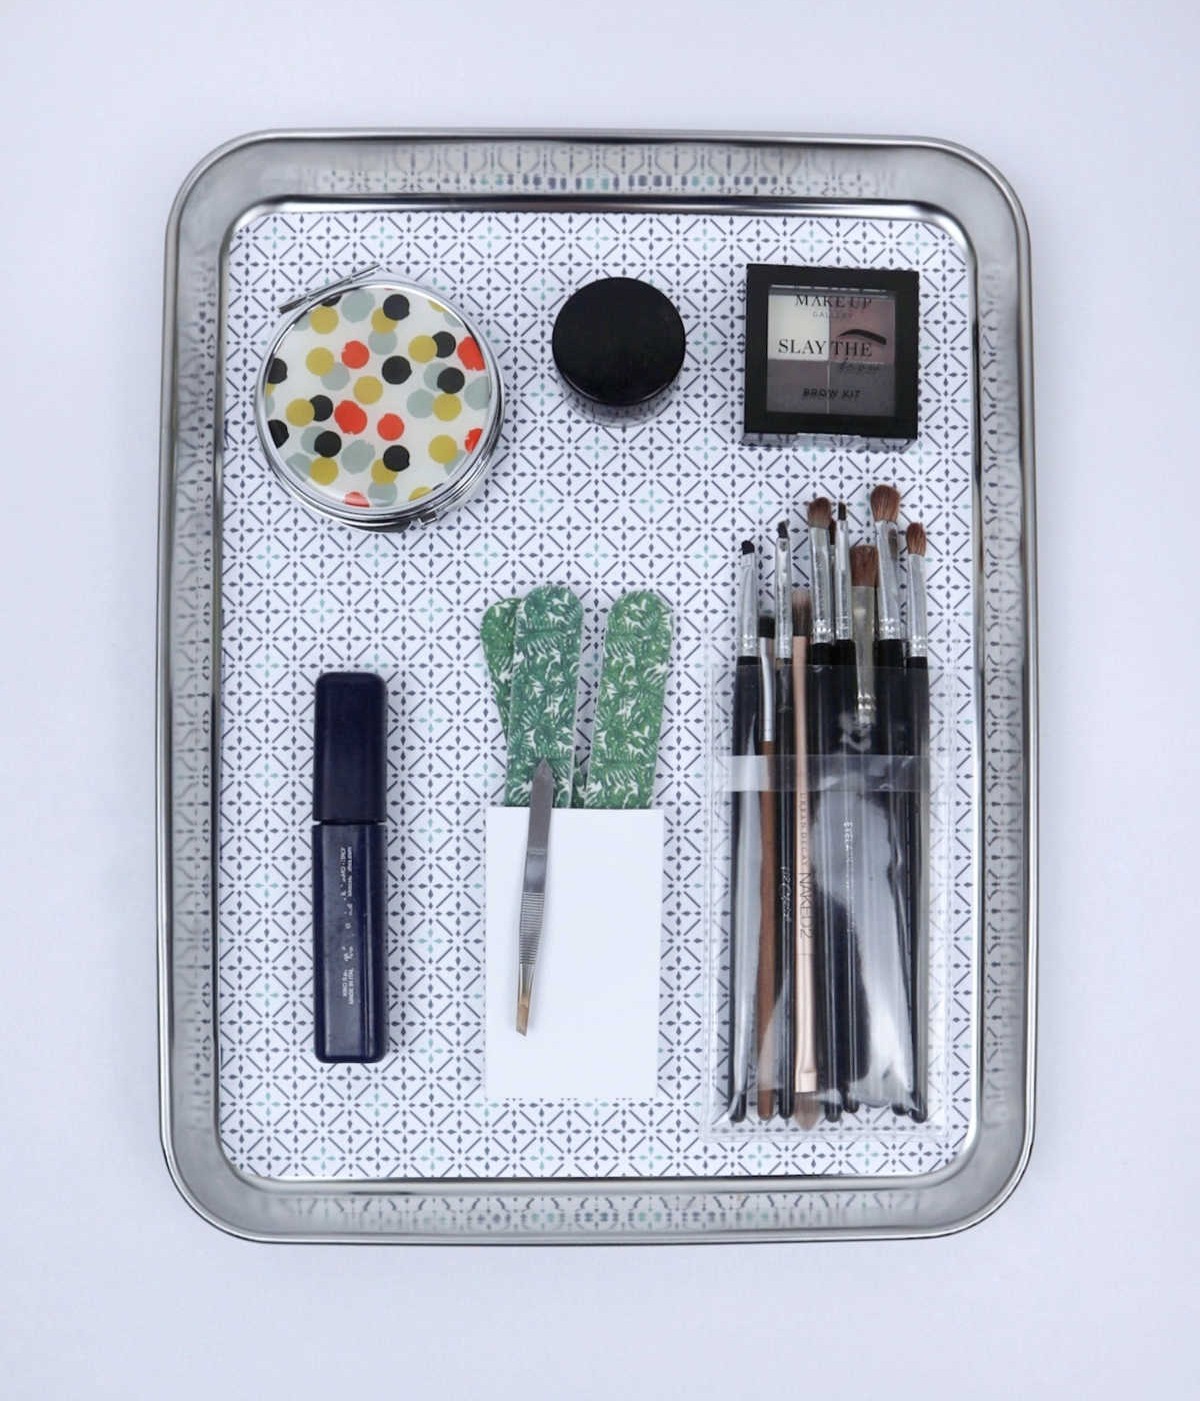
With magnets in place, simply click them onto the tray and appreciate the satisfying sound of the attraction taking hold. The result is a visually pleasing display that also keeps your belongings tidy.
Not only does this solution offer an attractive aesthetic, but it’s also effortless to set up – hang the tray on the wall or mount it as a desk stand for maximum convenience.
For more innovative ways to organize cosmetics, explore these 13 genius beauty product organization ideas and discover new inspiration!
DIY Magnetic Organizer
Transform your beauty routine with a DIY magnetic organizer, perfect for storing makeup products and more. This quick and easy project requires only 20 minutes of active time and $5 in materials, making it an accessible creation for anyone looking to get organized.
Equipment
Materials
When it comes to creating a visually appealing and functional display for your baked goods, you’ll want to consider using a combination of materials that complement each other. A stainless steel baking tray or metal cookie tray provides a sleek and modern base, while decorative paper can add a pop of color and texture. To keep everything in place, magnets can be used to attach small decorations or signs.
For a more permanent solution, hot glue gun and Mod Podge can be employed to create a sturdy and weather-resistant display that will withstand the elements.
Instructions
To begin, ensure a clutter-free workspace by gathering your necessary supplies. Next, take precise measurements of your stainless-steel tray. Using those dimensions as a guide, cut out your decorative paper to size. Apply a sufficient amount of Mod Podge to the tray using a flathead paintbrush, spreading it evenly across the surface. Carefully position the paper over the Mod Podge and smooth out any wrinkles that may appear. Allow the adhesive to dry completely before moving on.
Once set, apply an additional layer of Mod Podge to seal the deal. With the groundwork laid, it’s time to focus on the cosmetic container. Employ your hot glue gun to affix a small glob of glue to the back of the makeup item. Secure the magnetic pellets firmly into place, holding them until they’re fully attached. Finally, attach the magnet to the tray and you’ll have successfully completed this DIY endeavour.