If you’re a fan of macrame, take your passion to the next level by crafting a stunning plant hanger that will elevate the way you display your greenery! This DIY project is perfect for adults and even teenagers looking for a relaxing activity. Macrame has taken the world by storm, and it’s easy to see why – its intricate details and bohemian charm make it impossible to resist.
Imagine adding a touch of whimsy to your indoor or outdoor space with a one-of-a-kind plant hanger that’s as functional as it is beautiful. By creating your own macrame masterpiece, you’ll be trading in ordinary planters for something truly unique and eye-catching. And the best part? You can hang these plant hangers anywhere – indoors, outdoors, on your porch or deck – all you need is a hook to hang it from.
Watch on Youtube: Macrame Plant Hanger
Supplies and Tools You’ll Need
To embark on this project, it’s essential to have the right materials at your disposal. You’ll require a few basic supplies and tools that will aid in the assembly process.
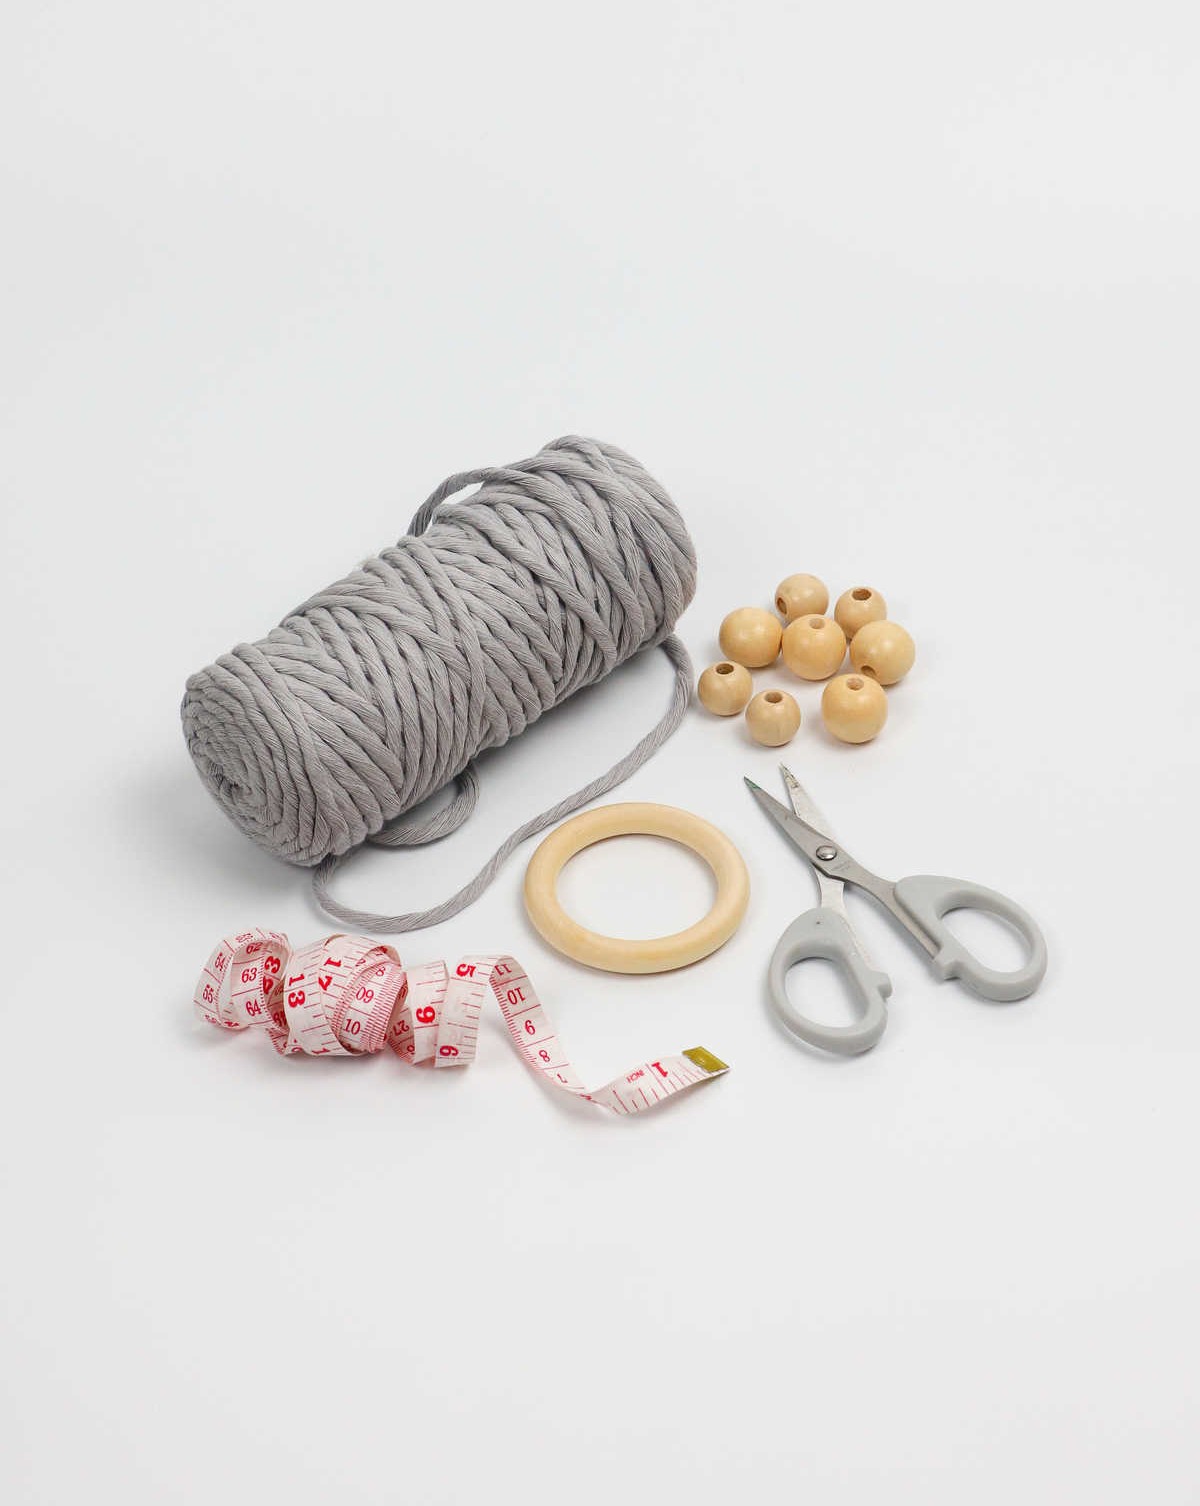
Some of the key items you’ll need include: three-millimeter cotton cord for adding texture and depth, scissors for cutting and shaping the material, a two-inch wooden ring that serves as the foundation for the project, a tape measure to ensure precise measurements, and beads (optional) if you want to add an extra decorative touch.
How to Make a Plant Hanger
When it comes to selecting macrame cords, you’re spoiled for choice. Not only do you have a vibrant array of colors to pick from, but you’ll also discover that you can opt for different thicknesses and types of cord, including braided, single strand, twisted, and more.
Step 1
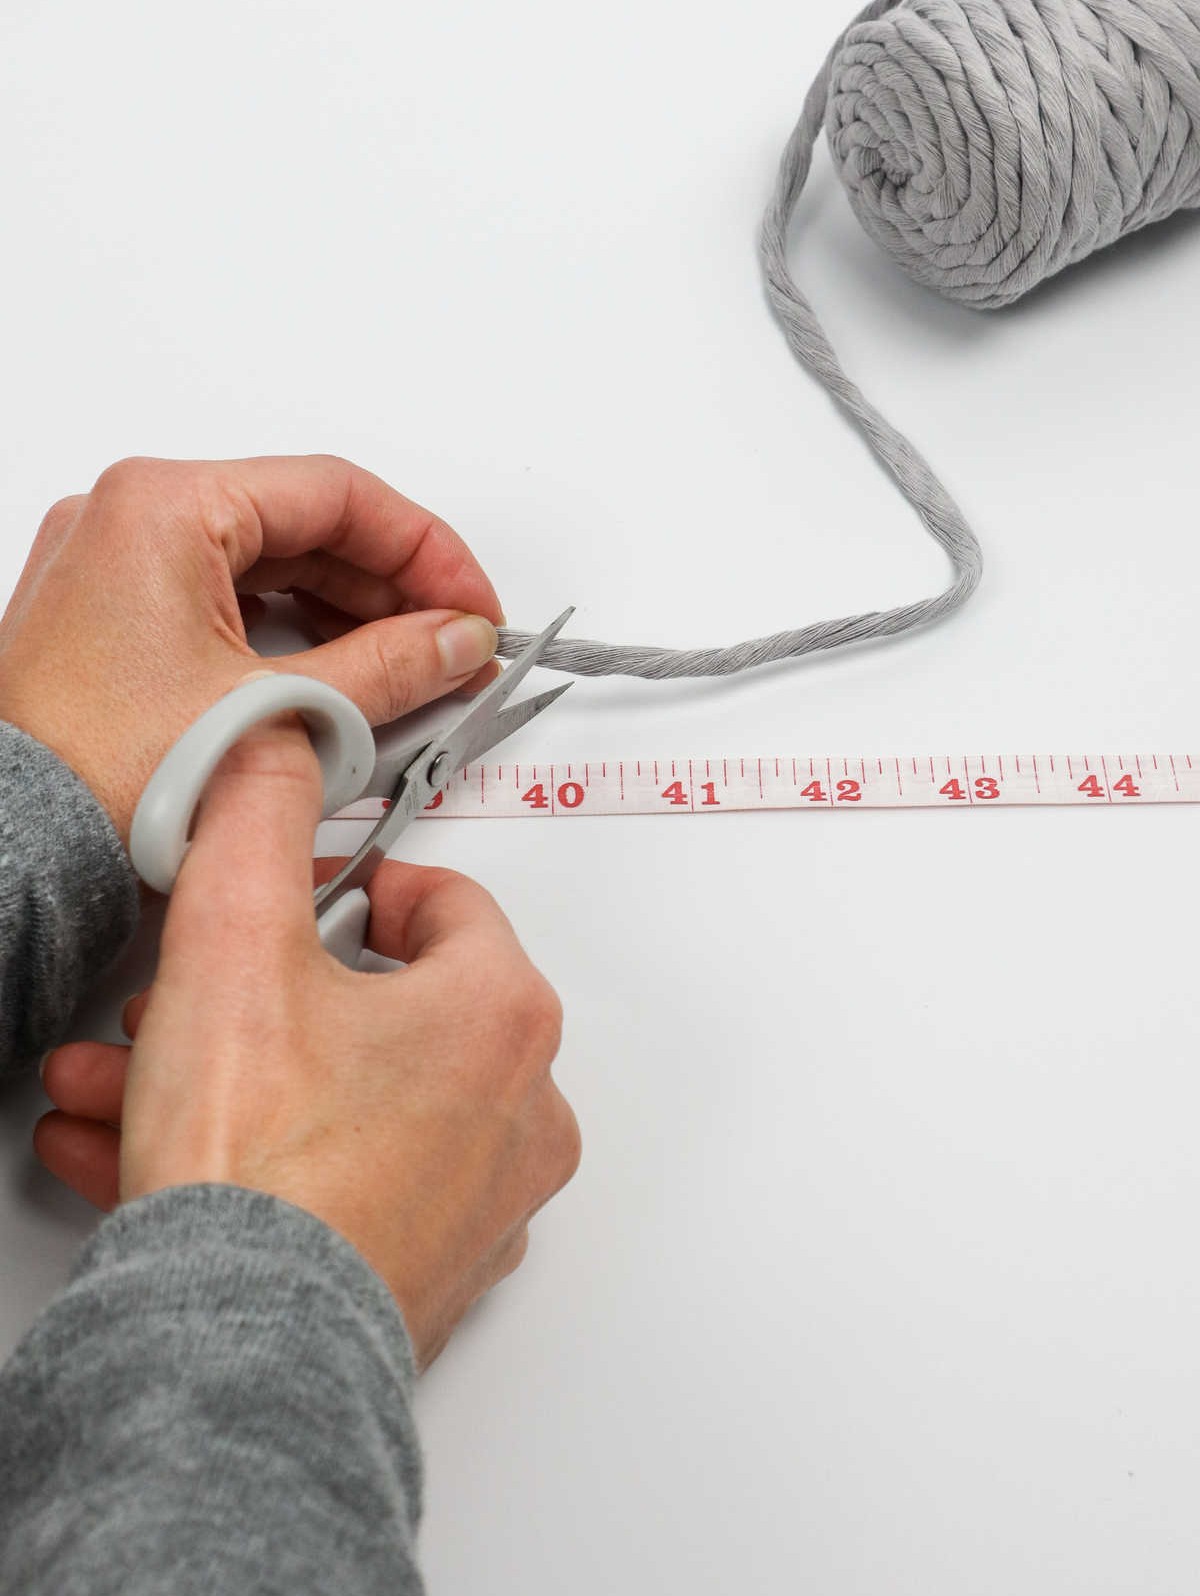
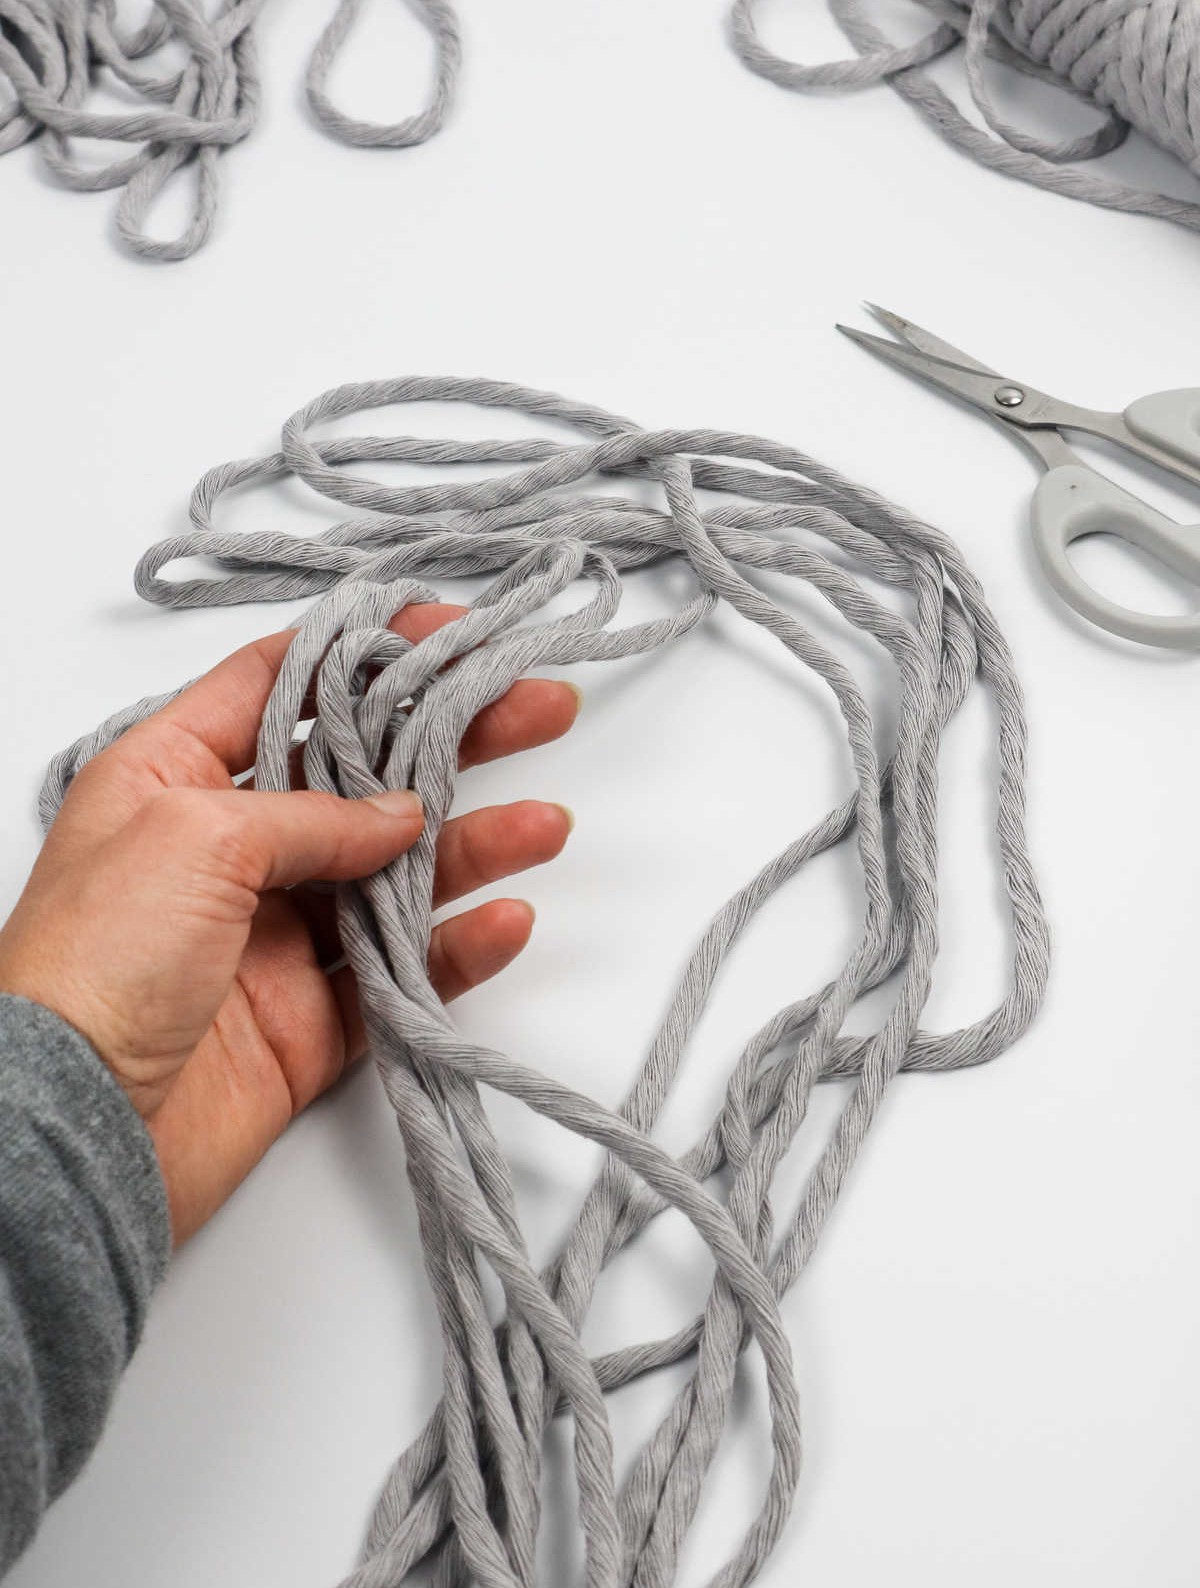
Before diving into the creative process, it’s essential to prepare the necessary materials. The length of the macrame cords you’ll need depends on the size of your planter or pot, as well as the desired hanging height. For this project, specifically, eight cords should be cut to 14 feet (170 inches) in length, while two additional cords will require a measurement of 3.5 feet (40 inches). Simply cut the cords according to these measurements to get started.
Step 2
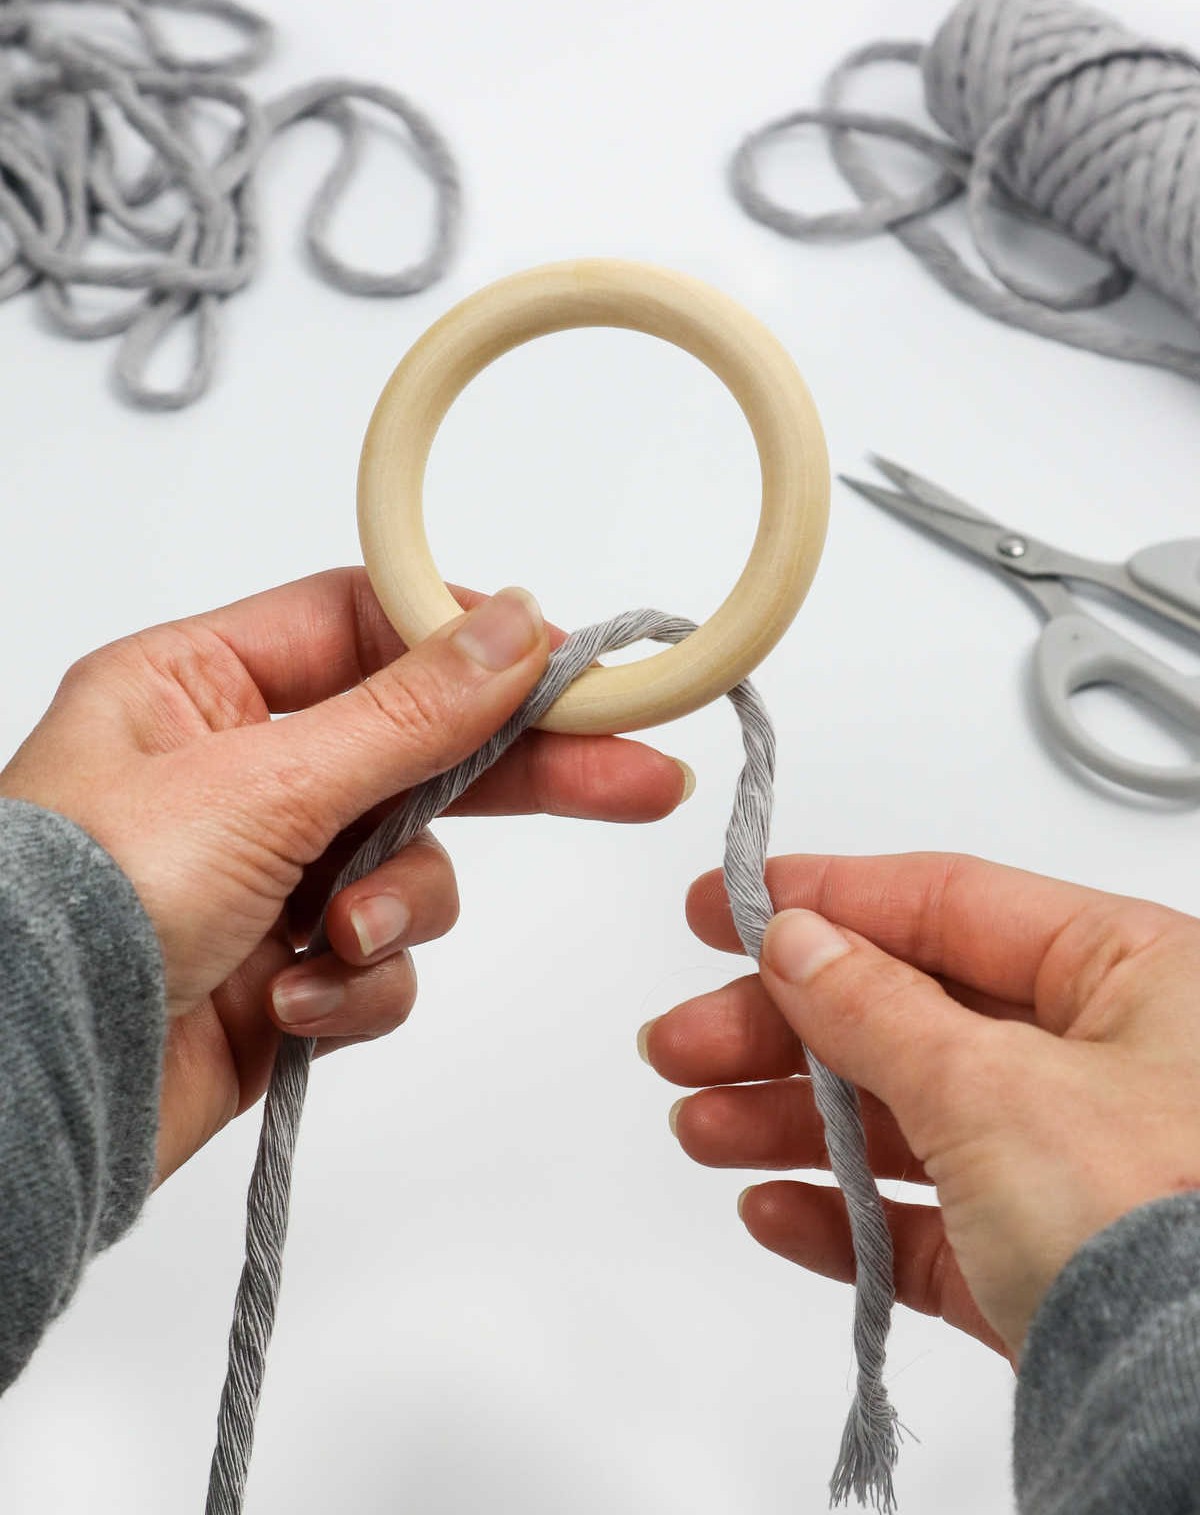
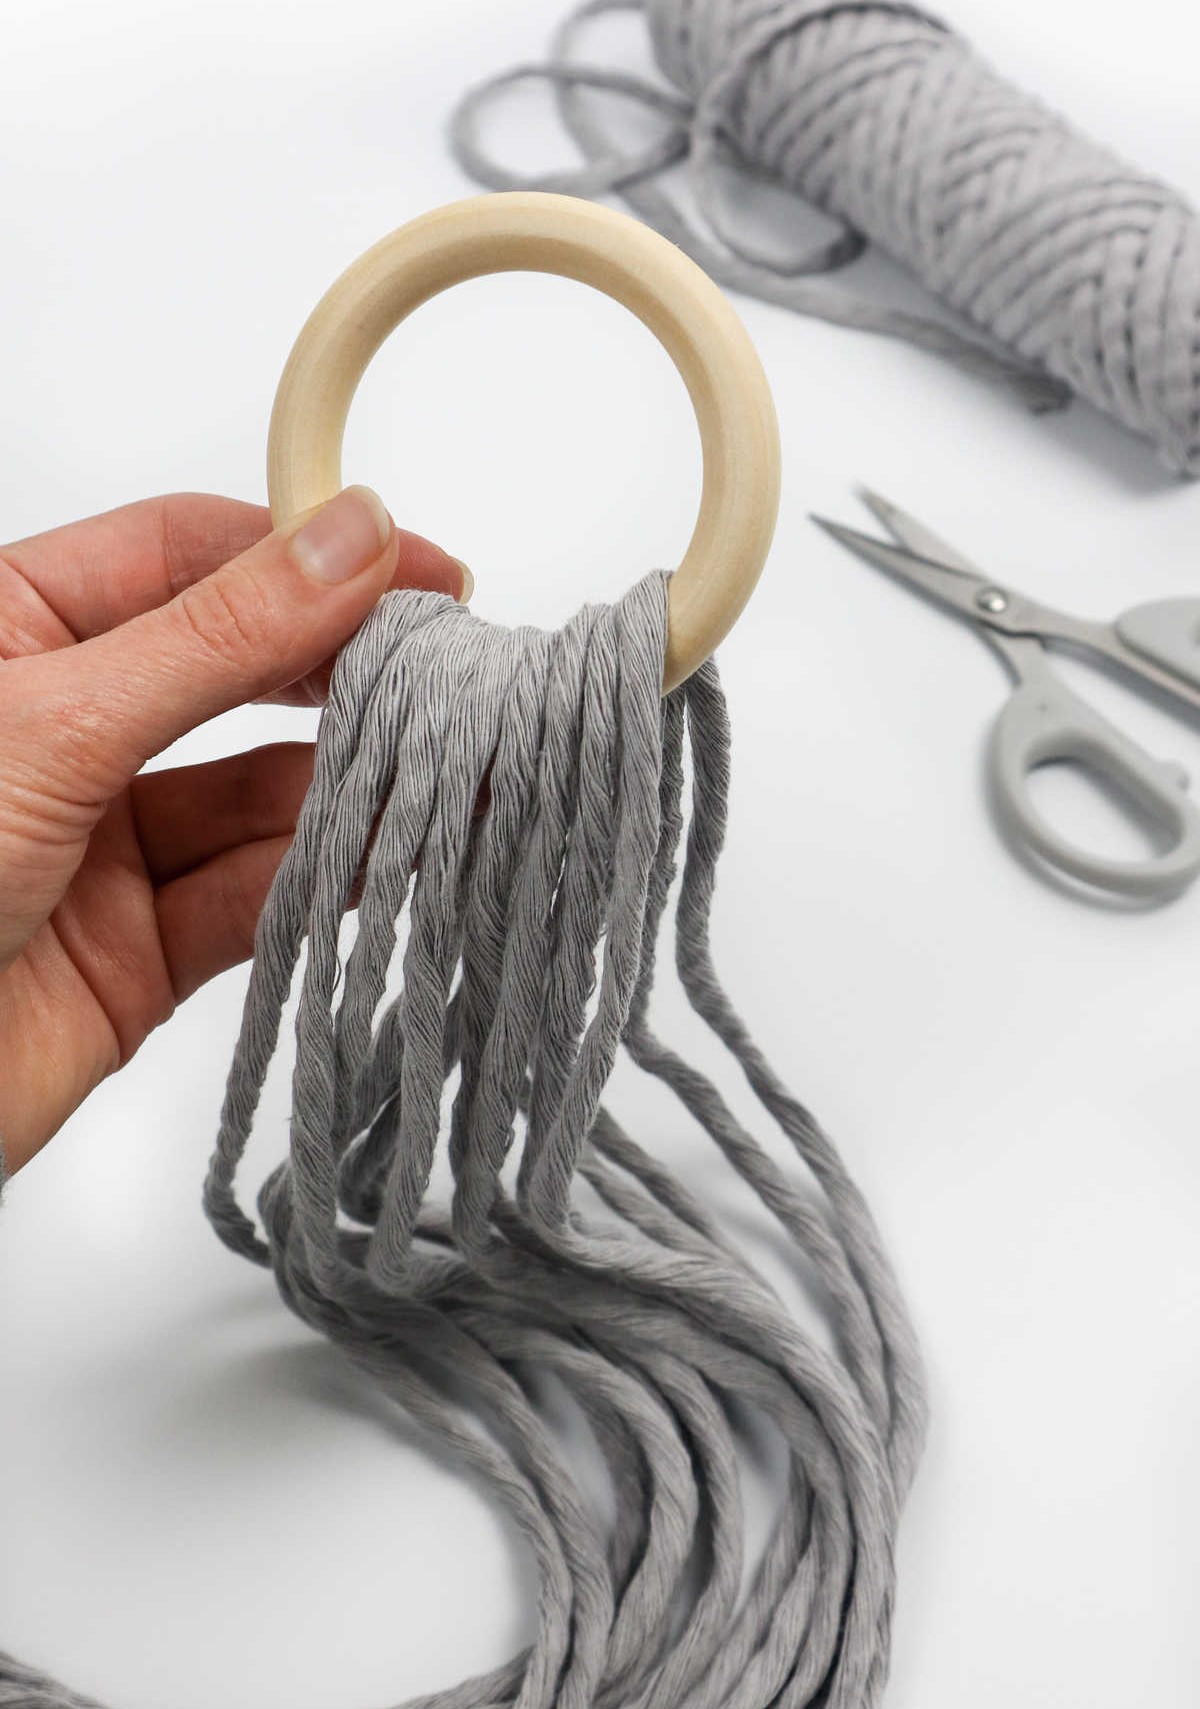
To proceed, take your wooden ring and prepare to thread the eight macrame cords through it, ensuring they hang evenly on either side. This will result in a total of sixteen strands. It’s crucial to ensure all ends are aligned uniformly and that no cord overlaps on the ring, maintaining a neat and balanced appearance.
Step 3
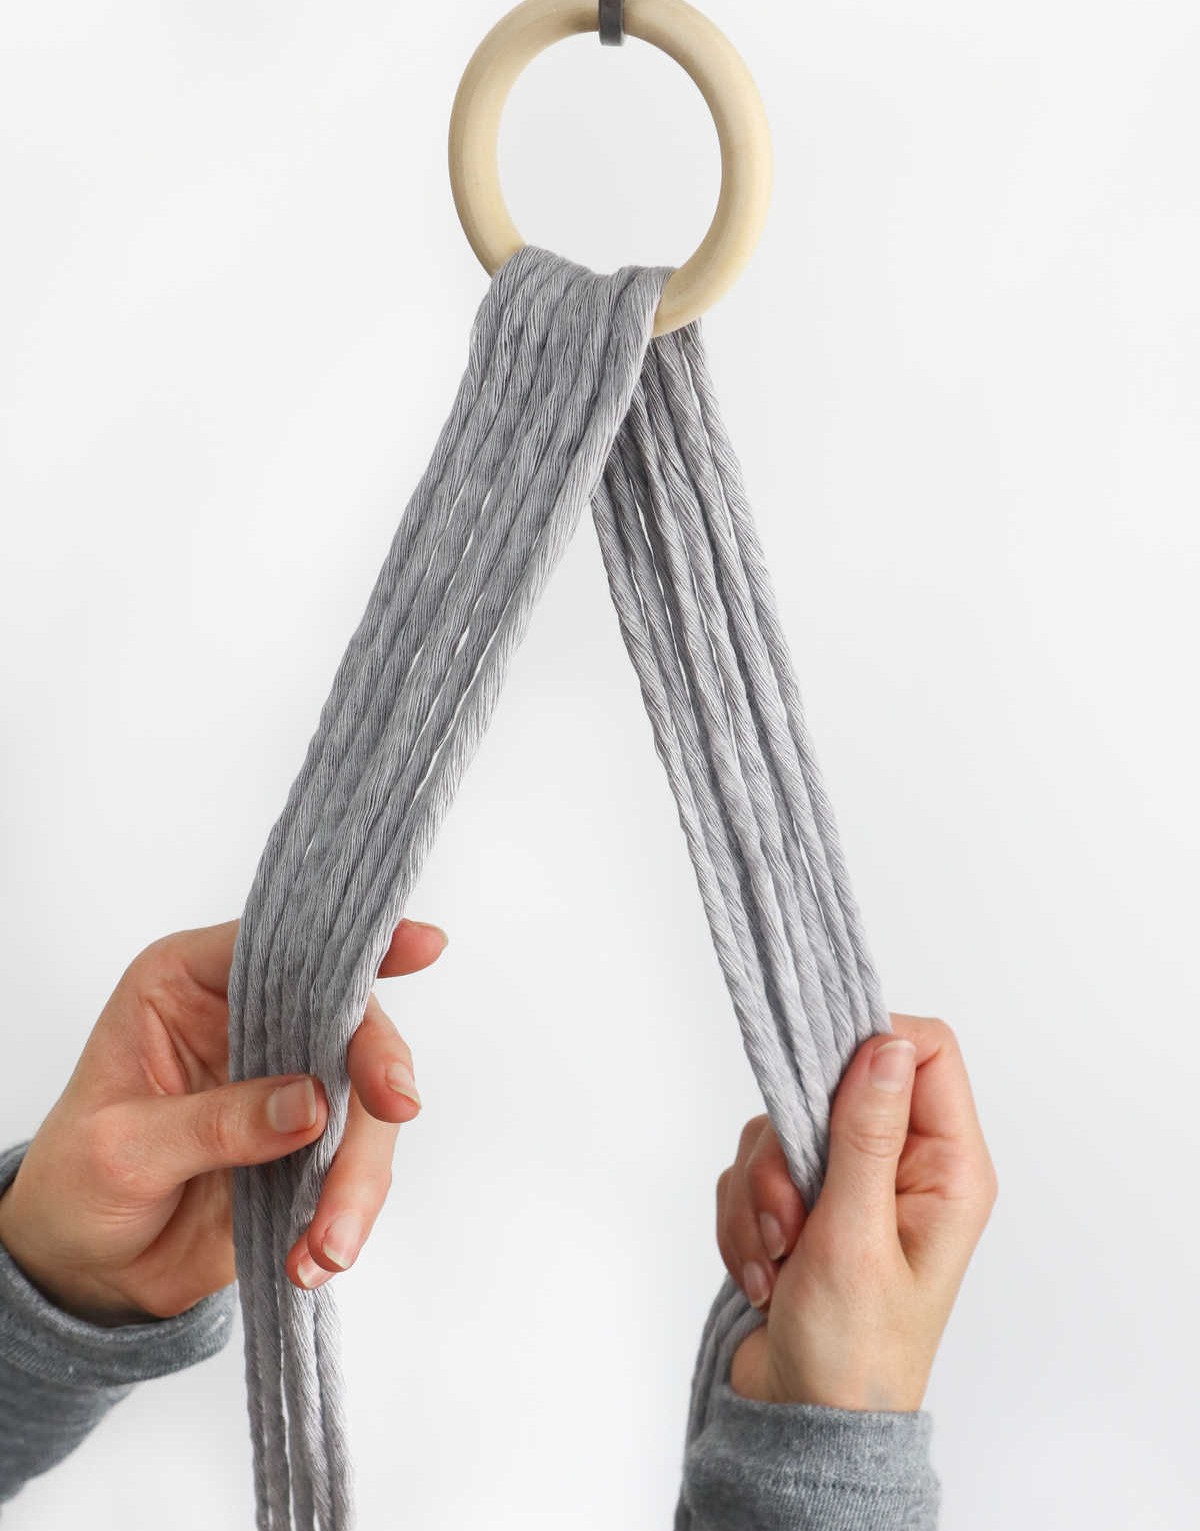
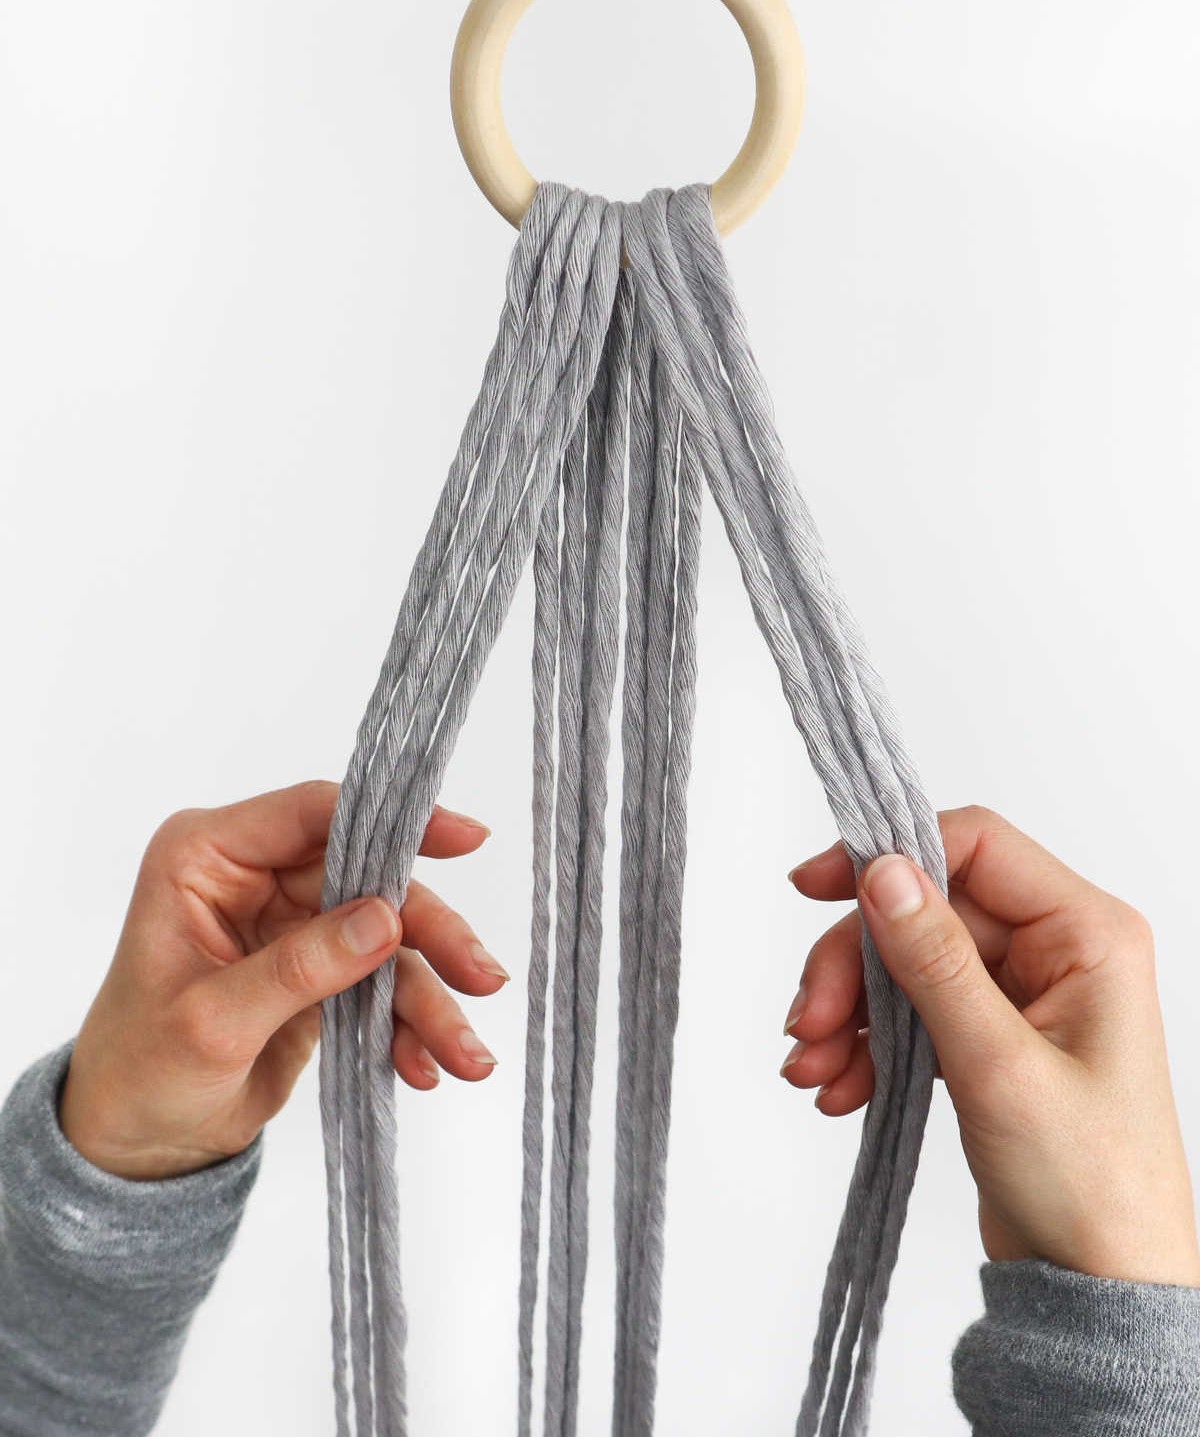
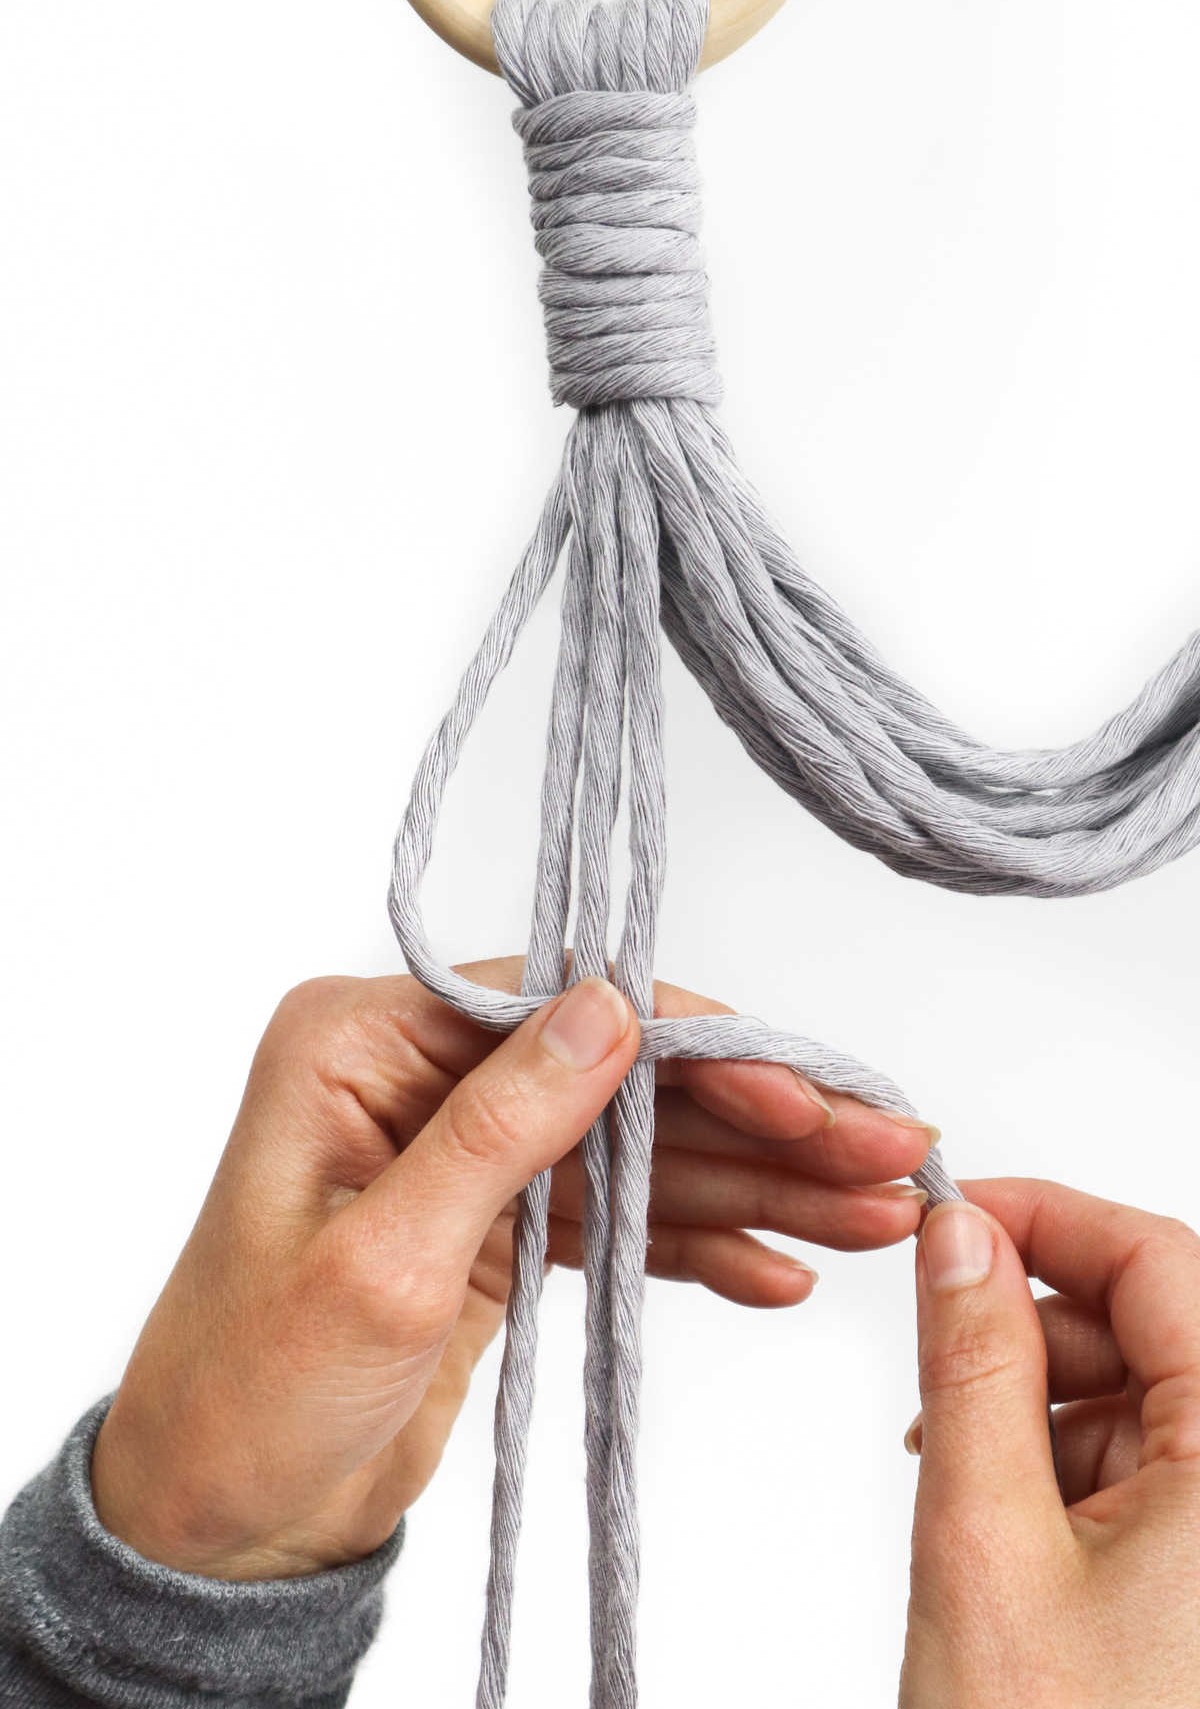
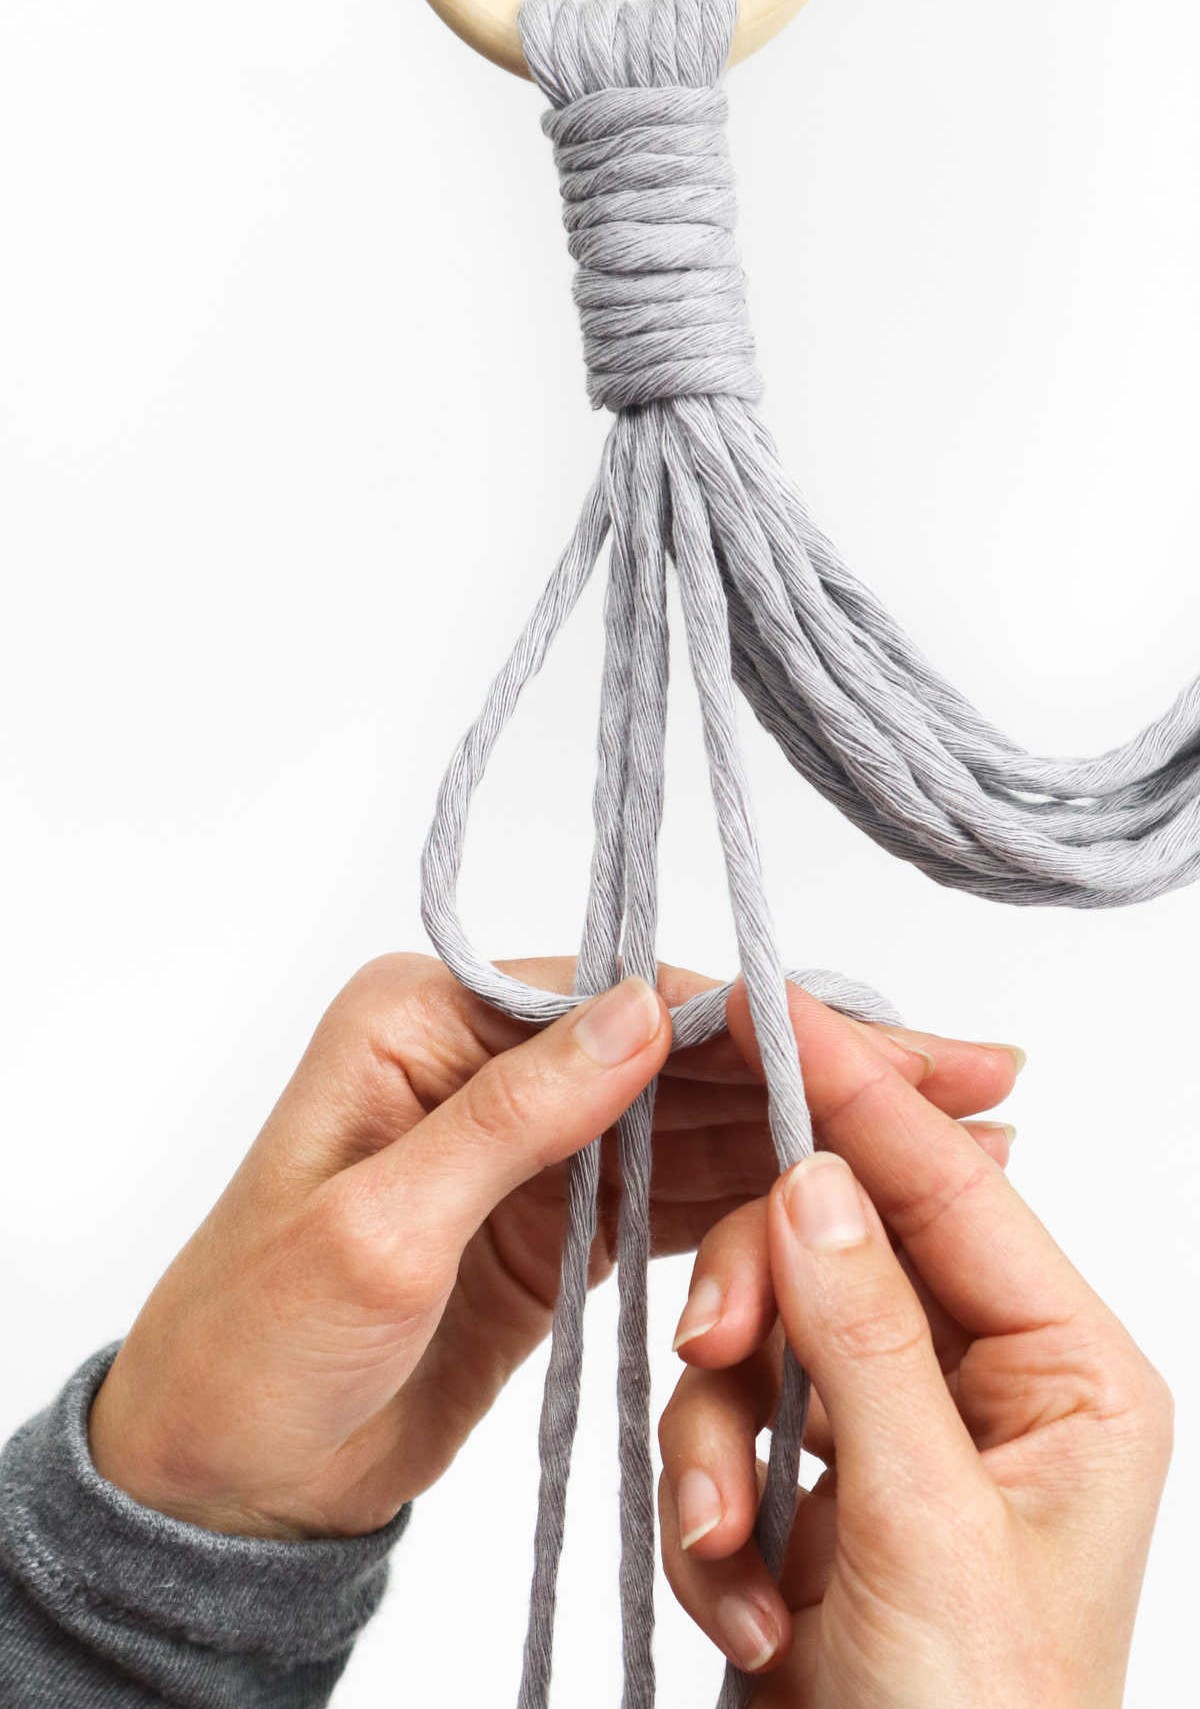
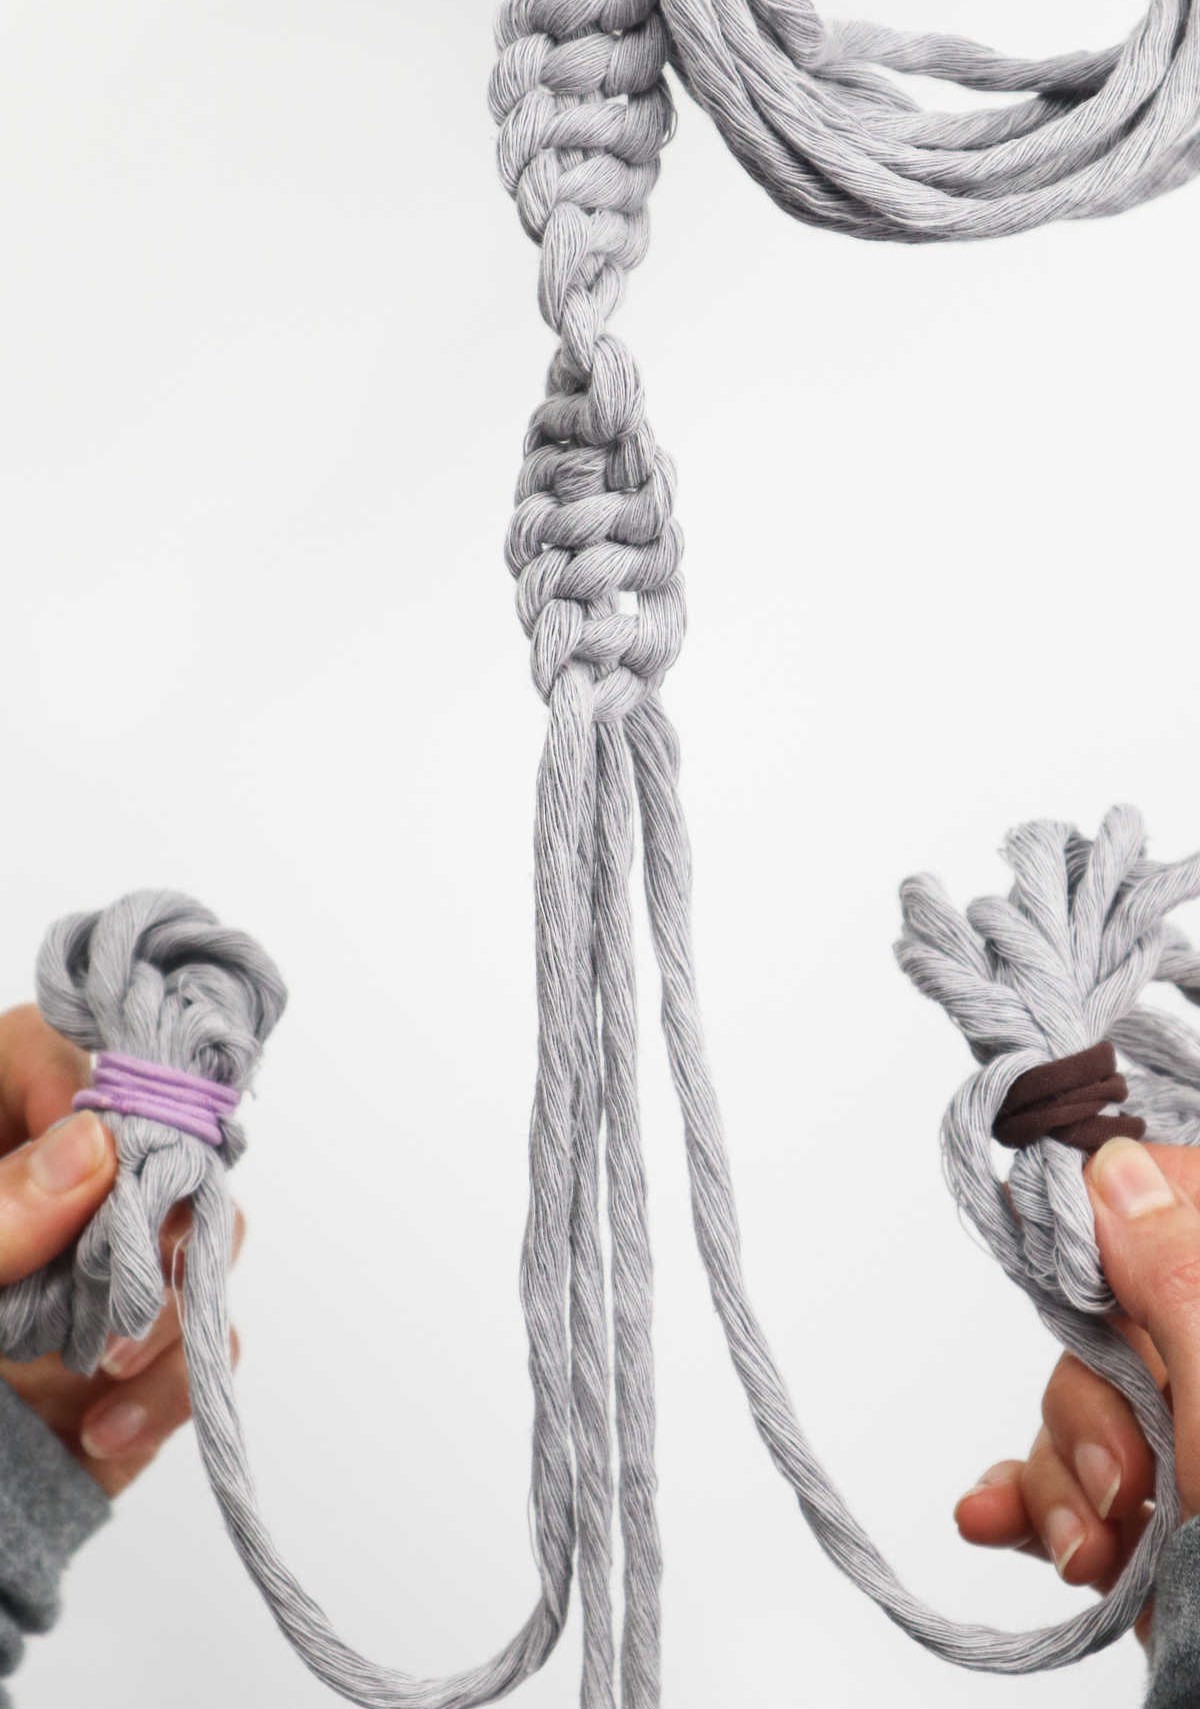
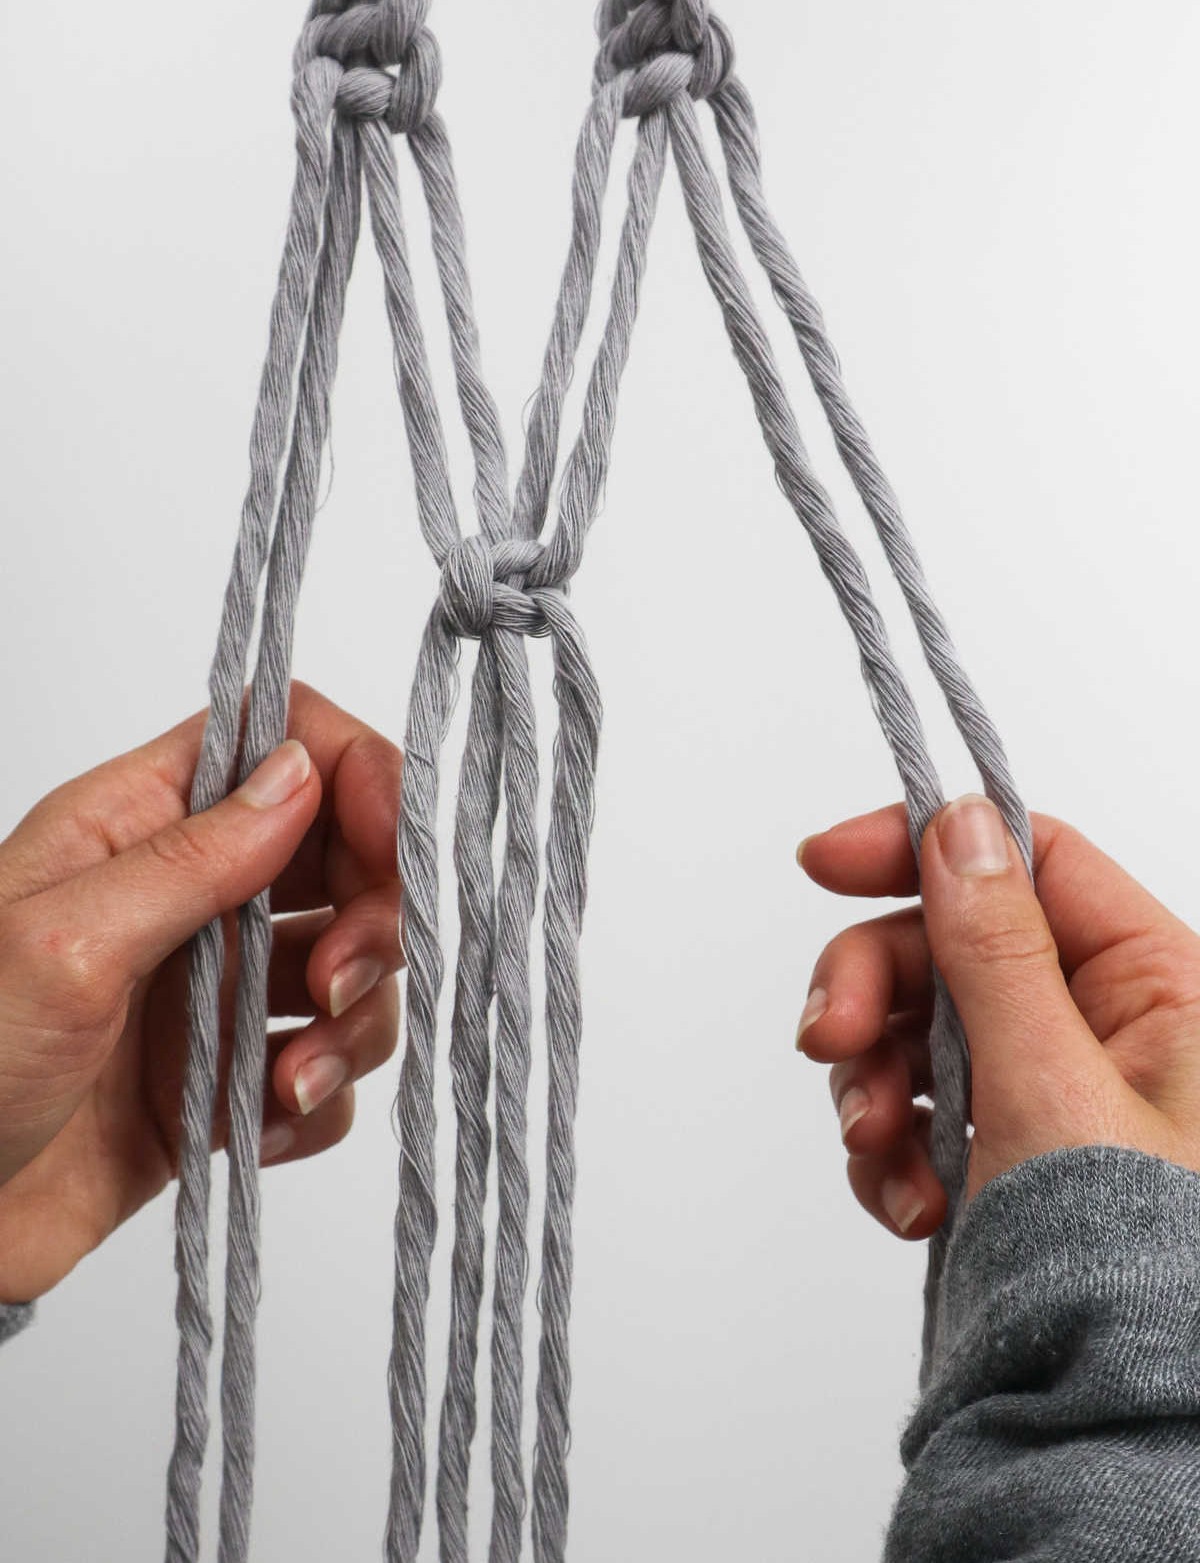
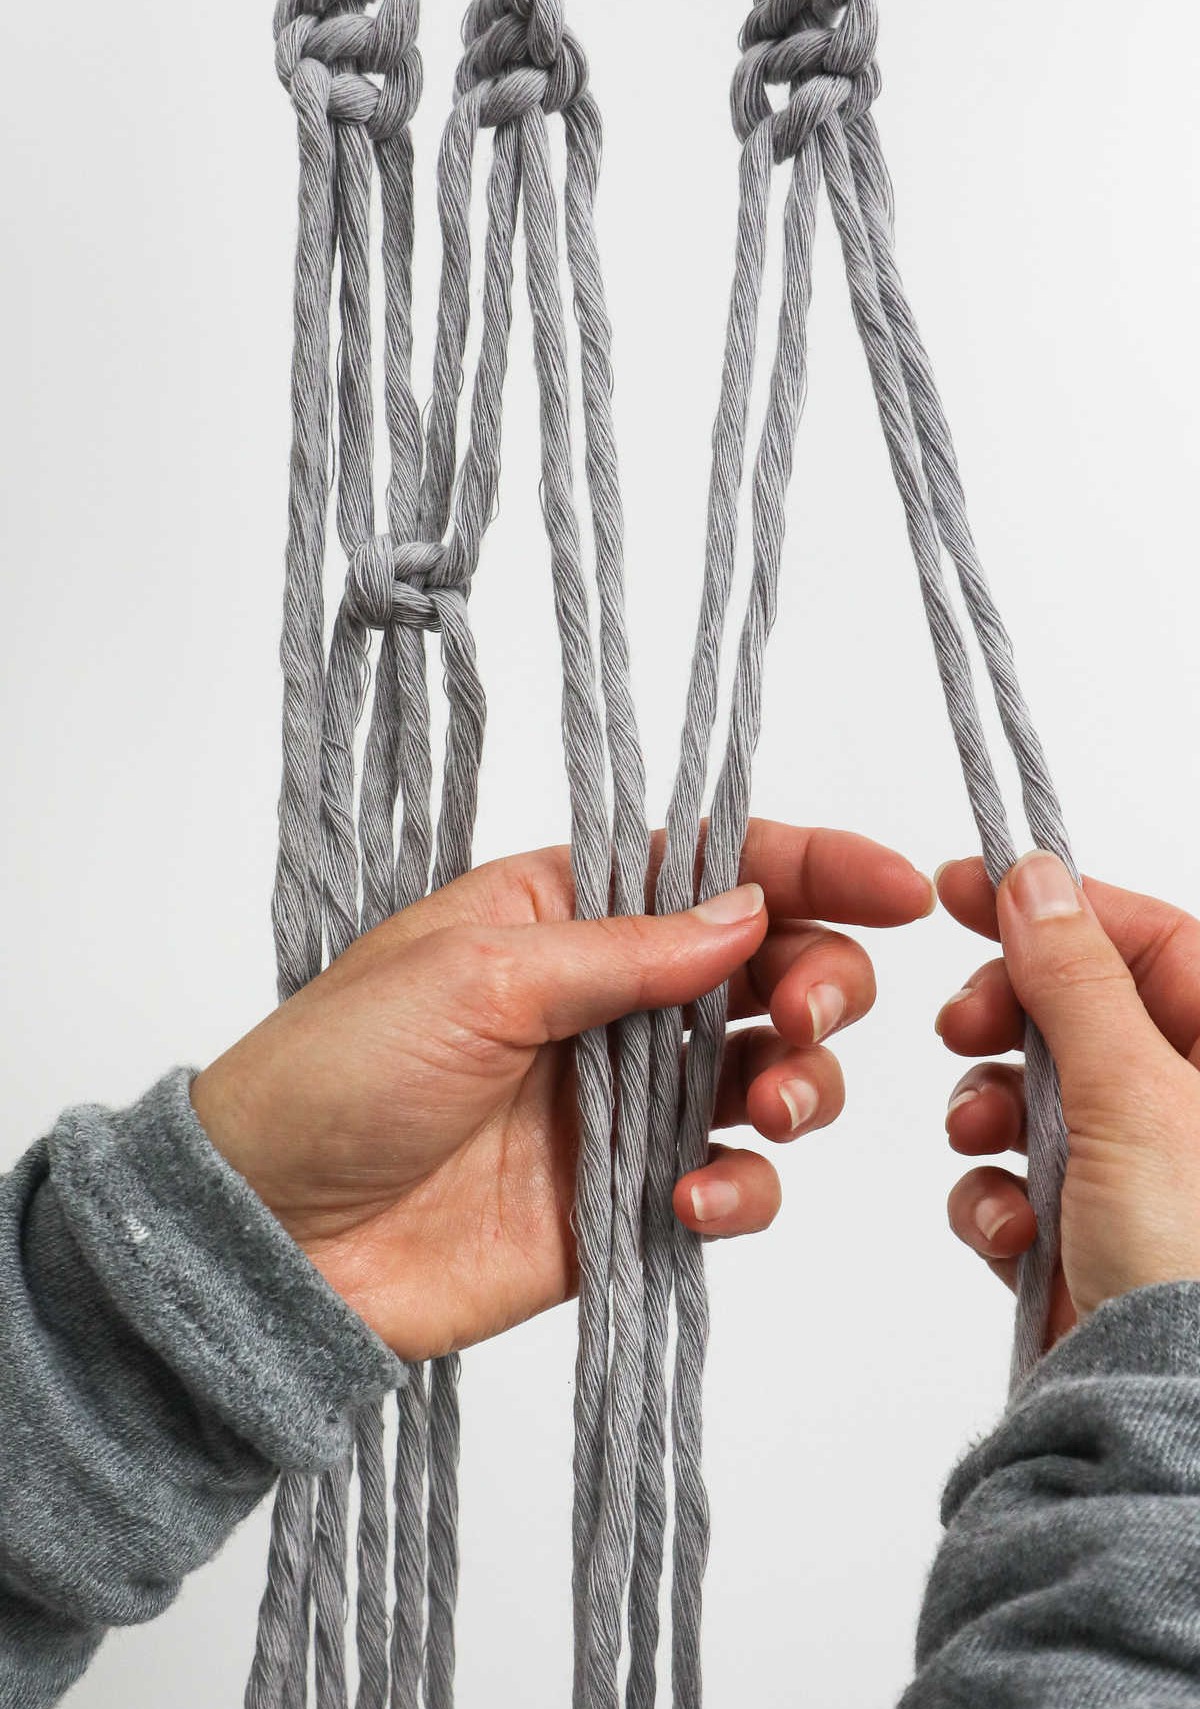
To begin, carefully separate the eight cords into two identical sets. This is crucial for achieving a balanced and even final product. Next, divide each set of cords into four distinct sections, consisting of two frontal and two posterior portions. Each section will contain four strands, which will ultimately make it easier to manage and organize the cords as you progress with the gathering knot.
Step 4
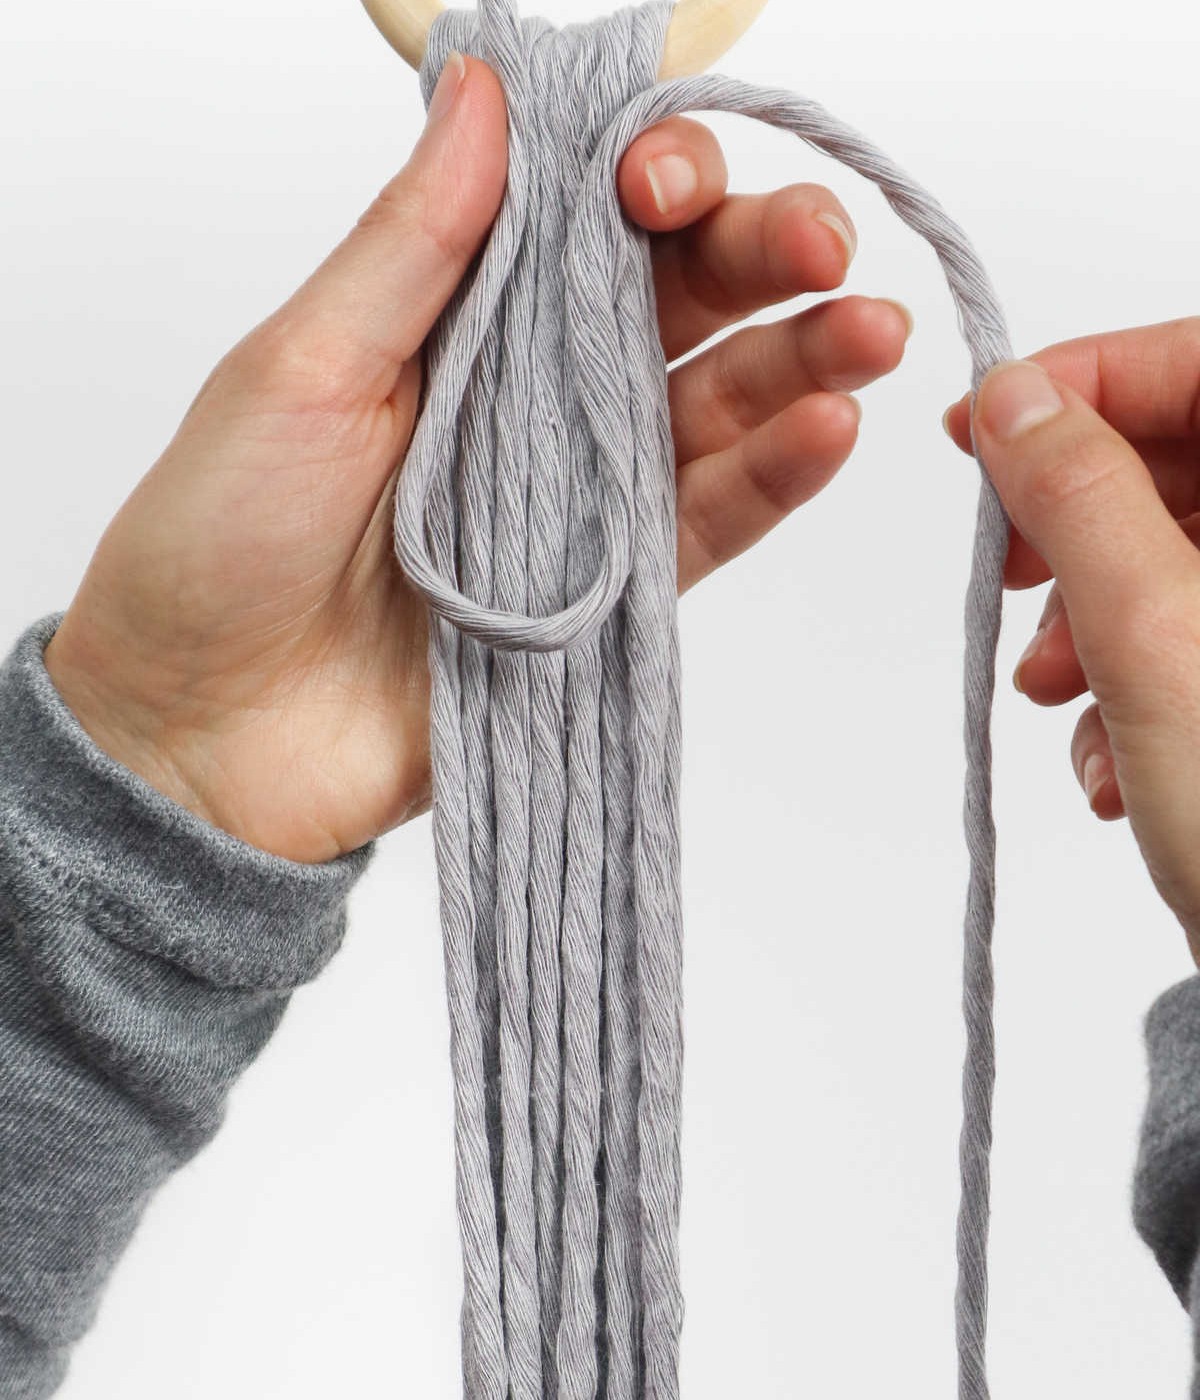
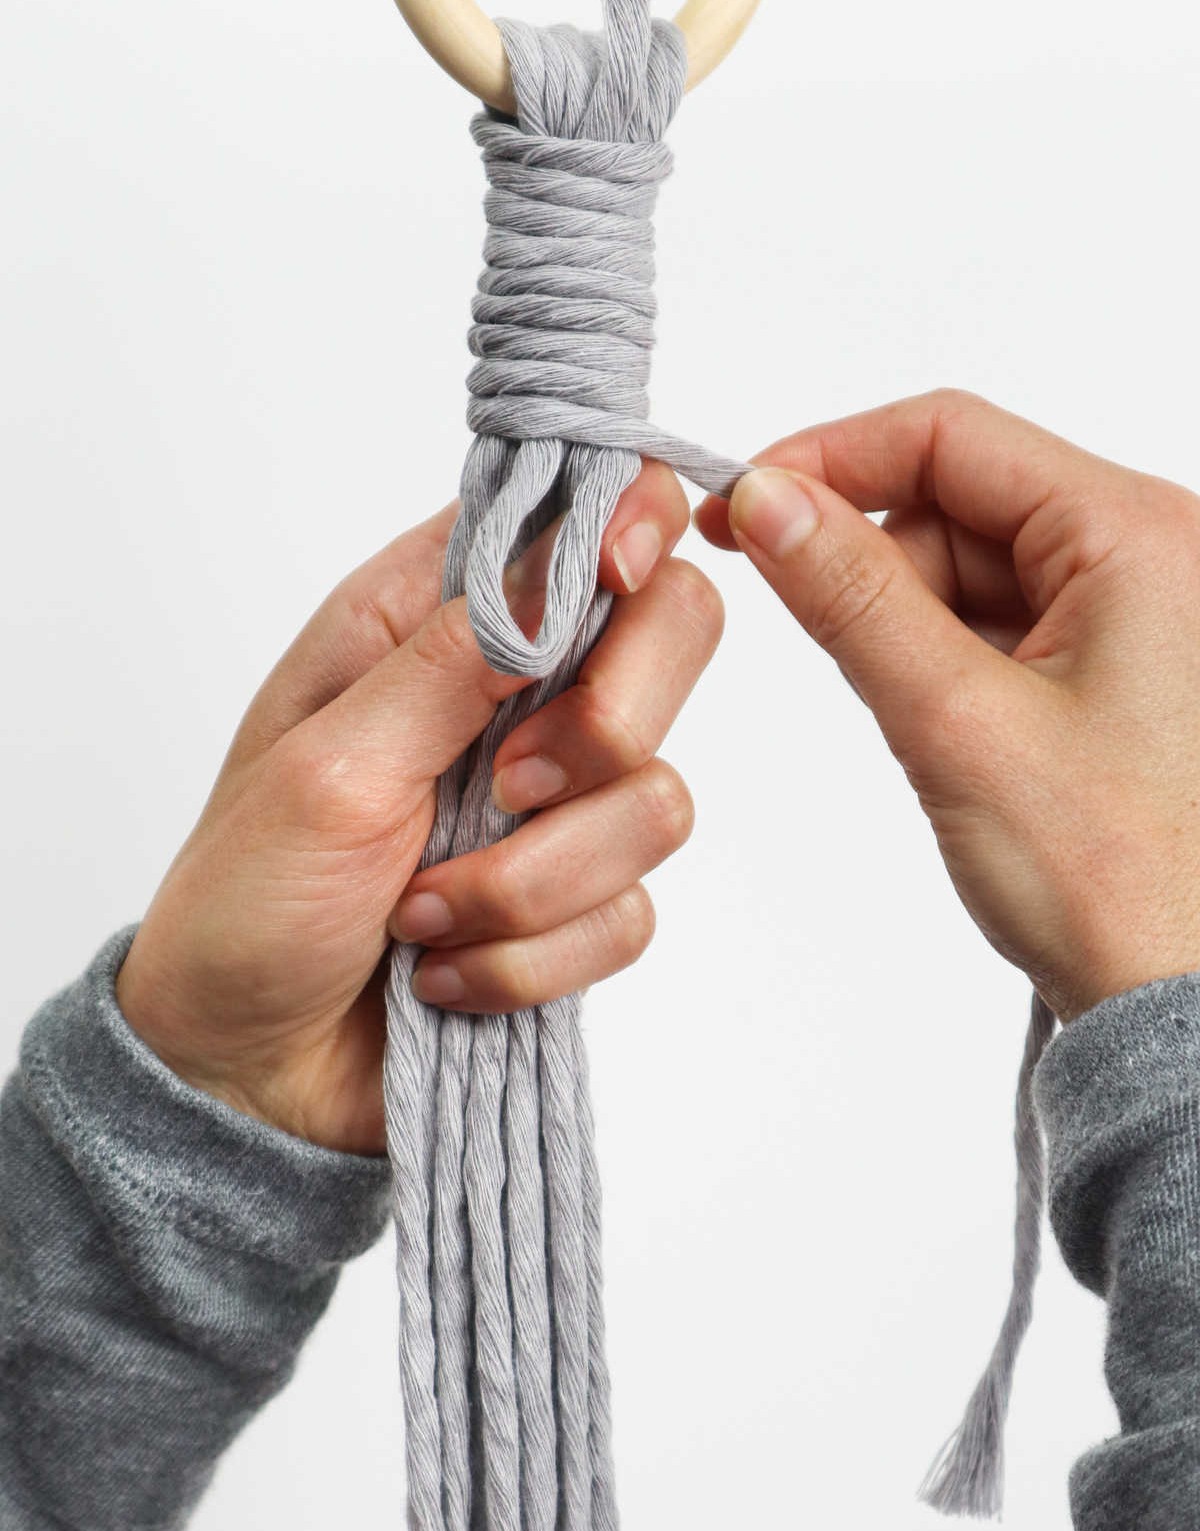

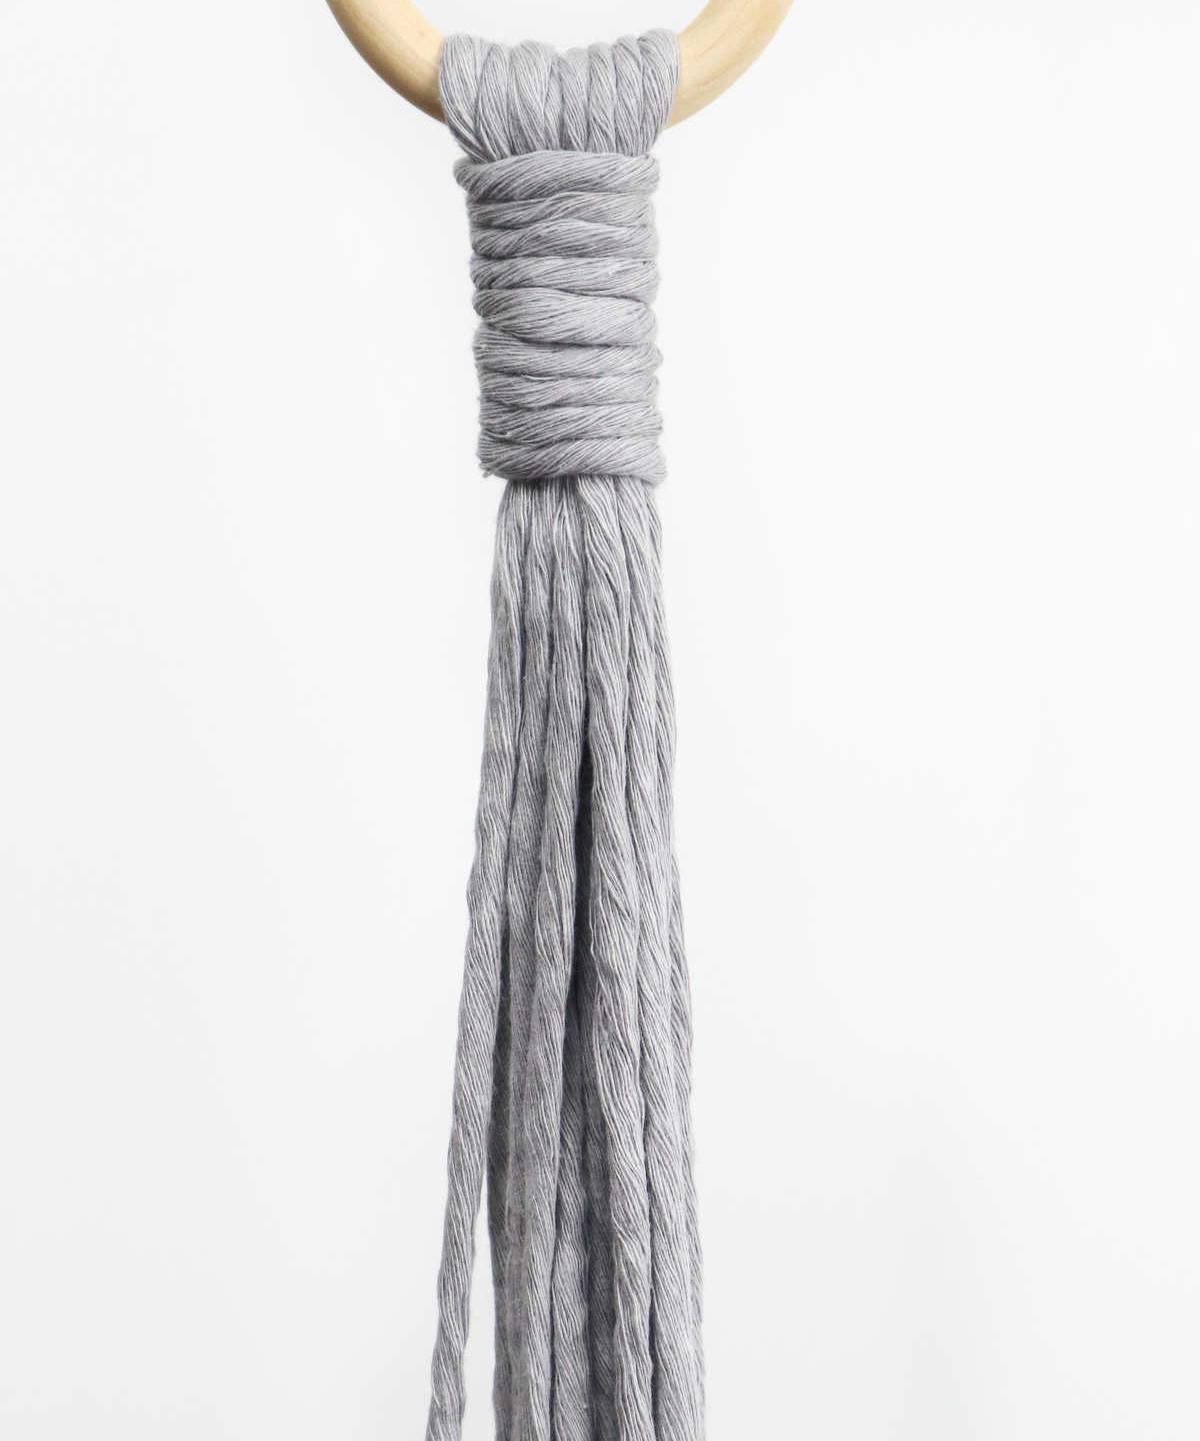
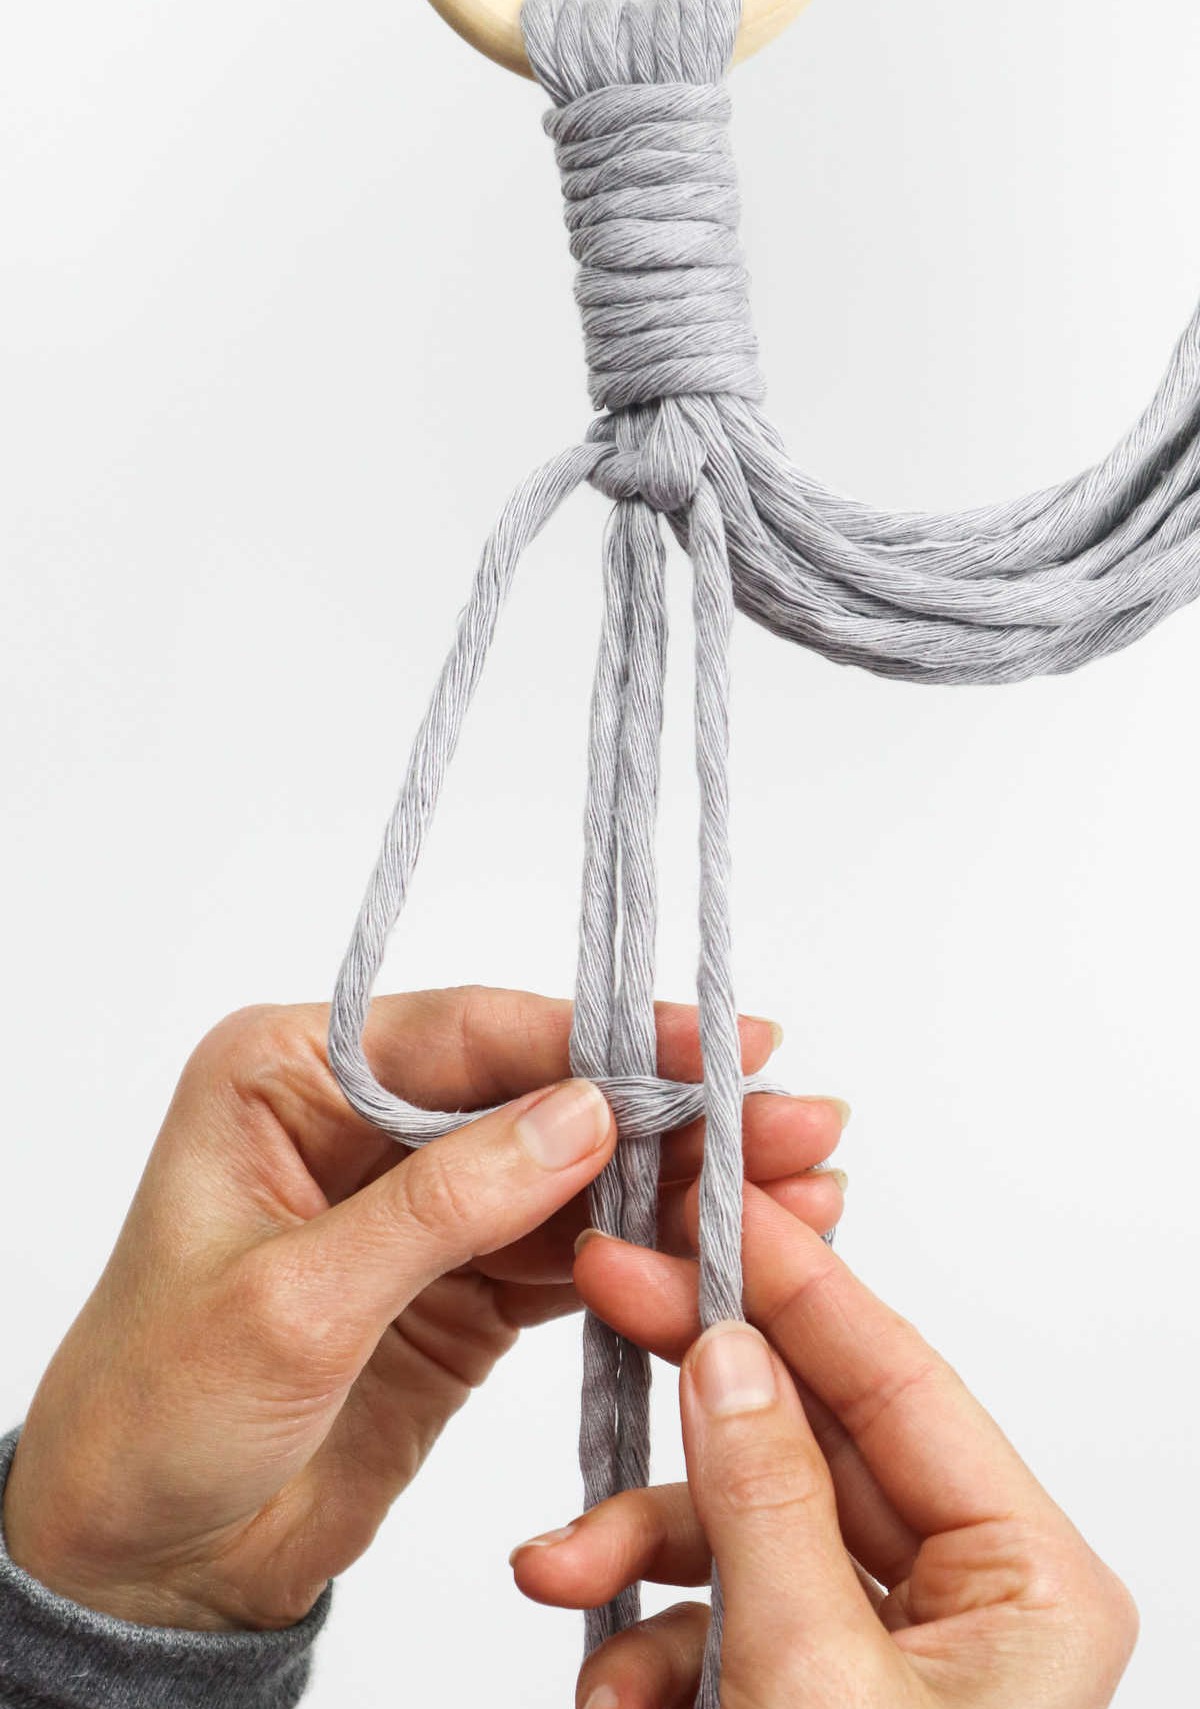
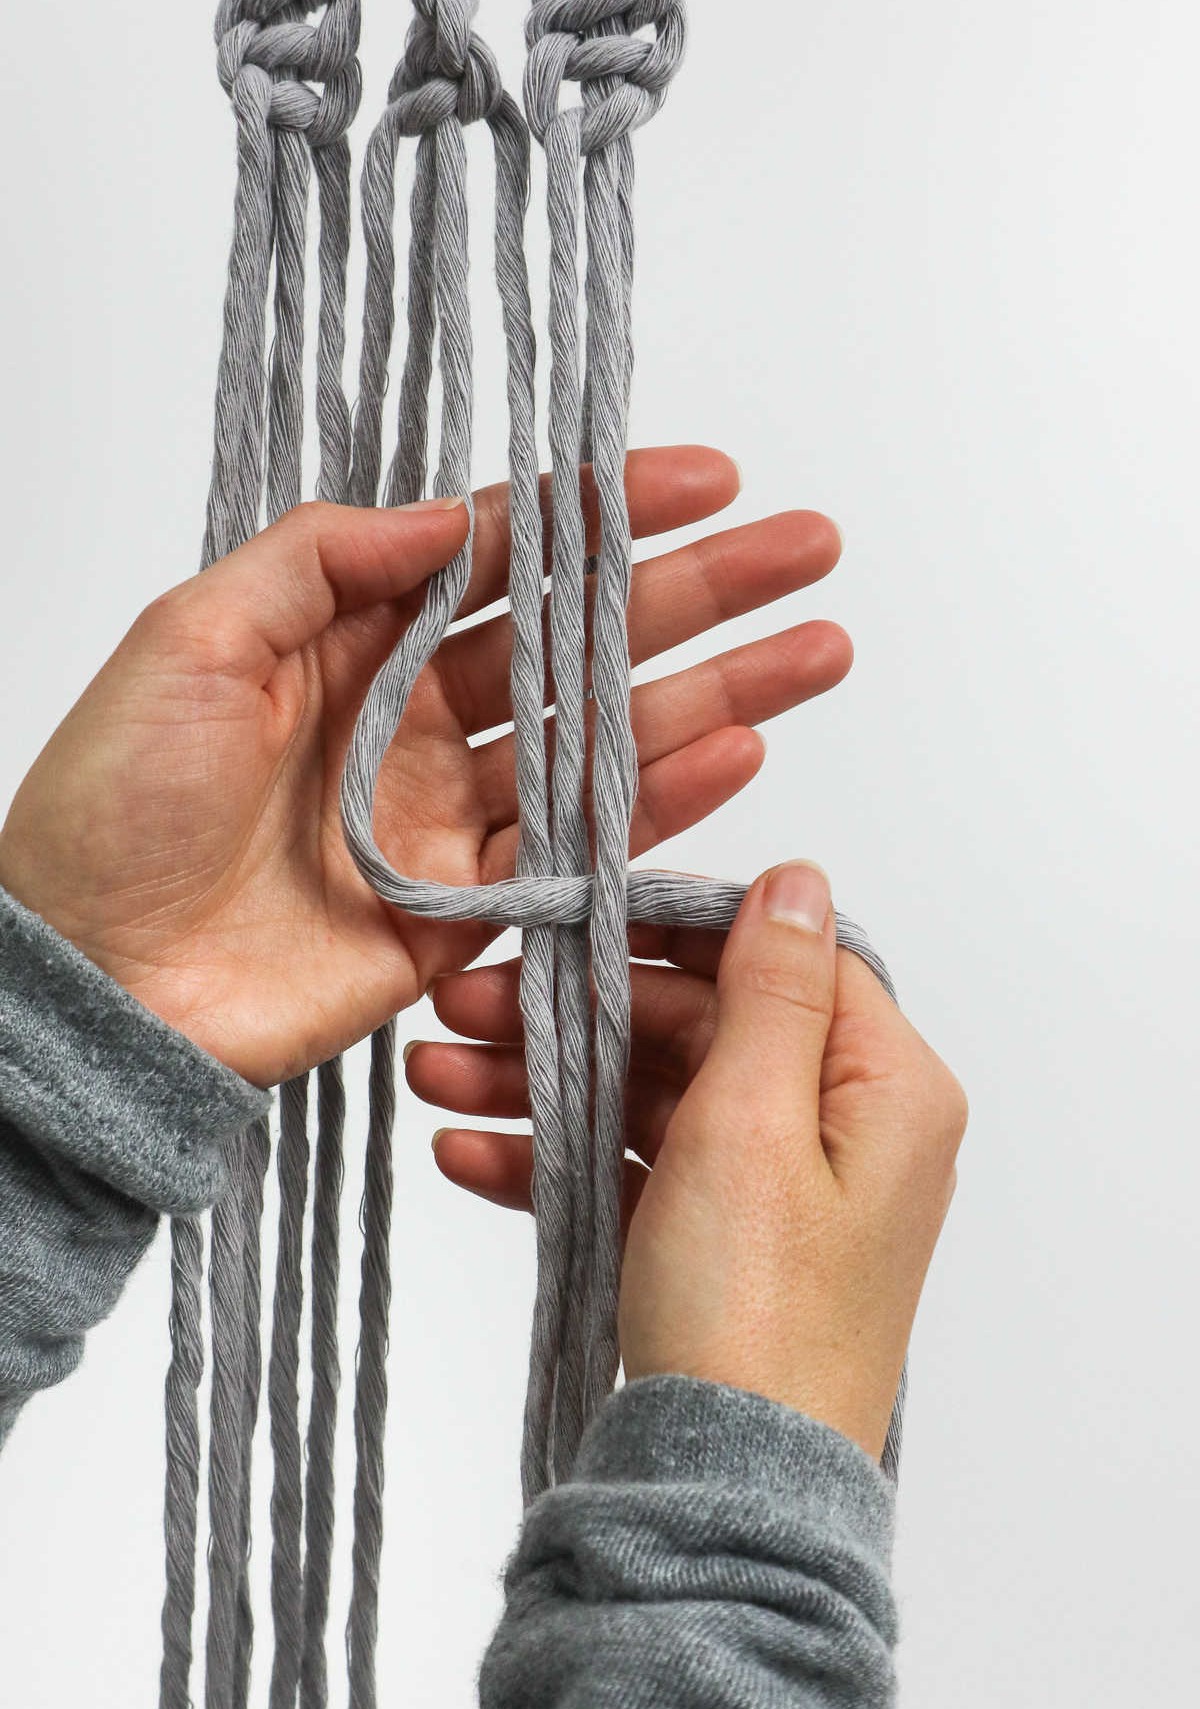
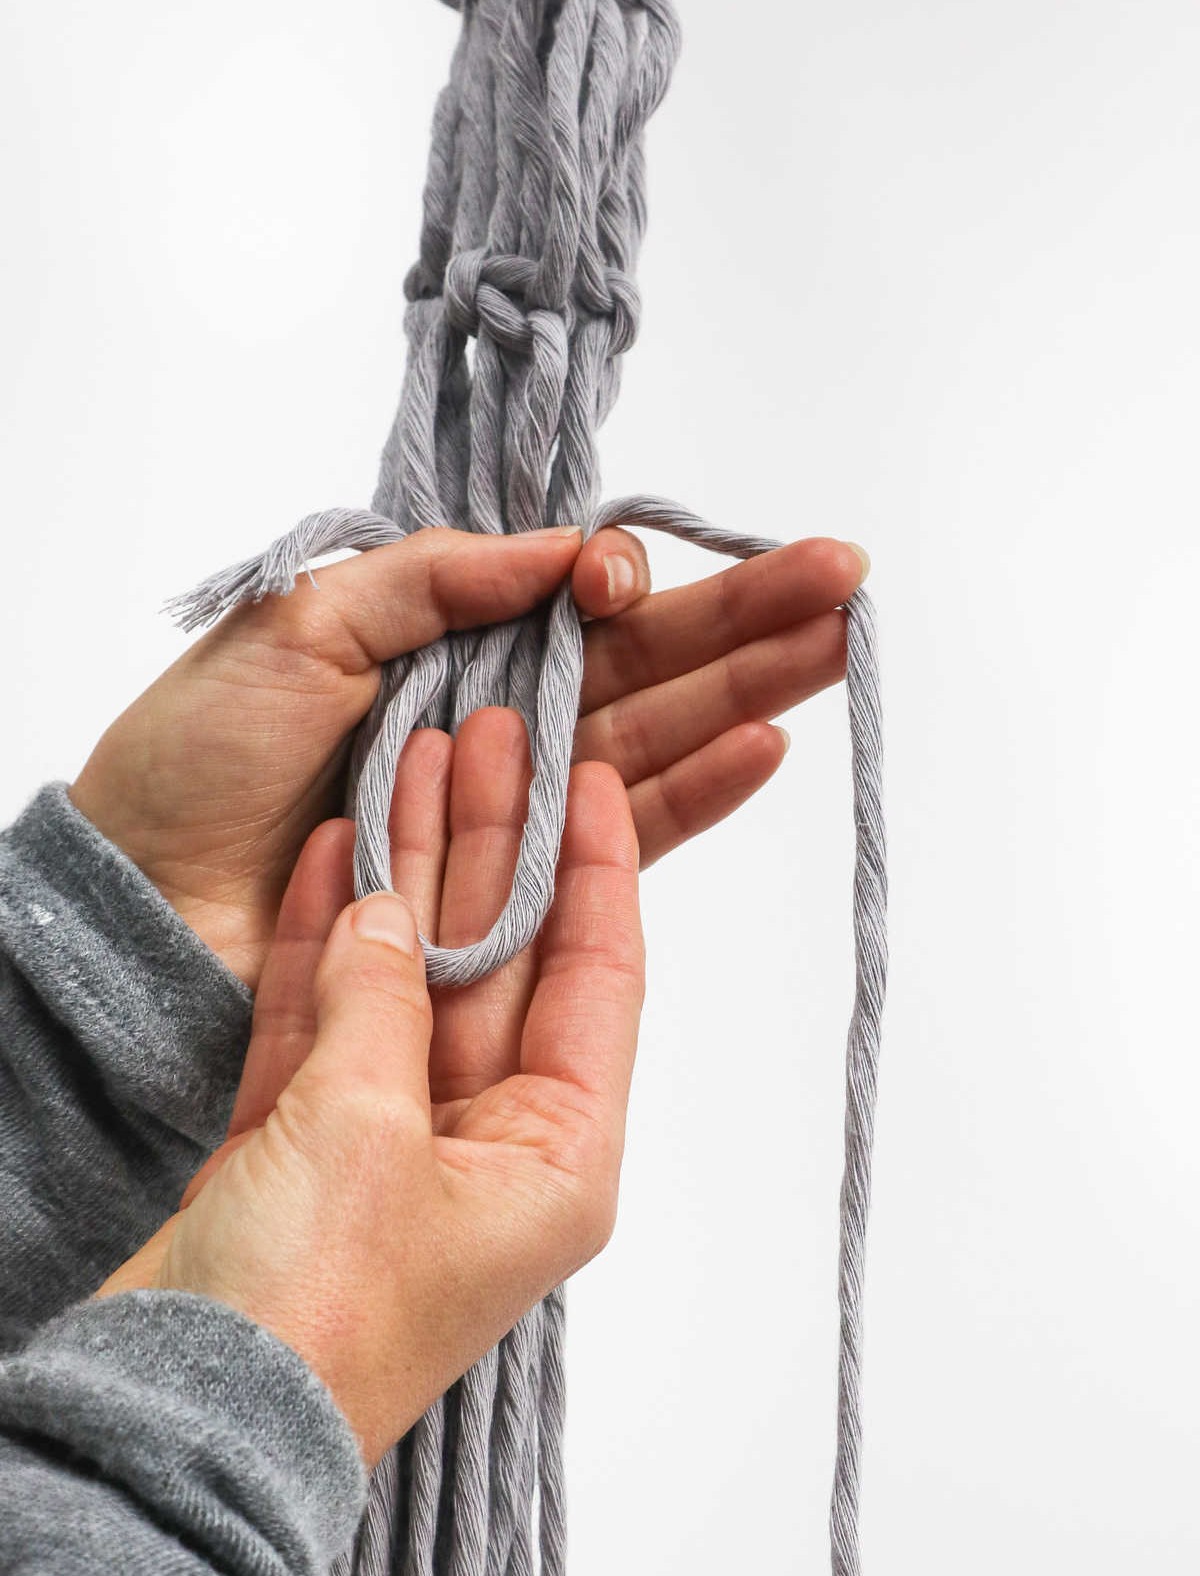
To create a gathering knot, begin by collecting all the strands together just below the ring. Next, take one of the 40” cords and form a U shape with one end, leaving it sticking out upwards.
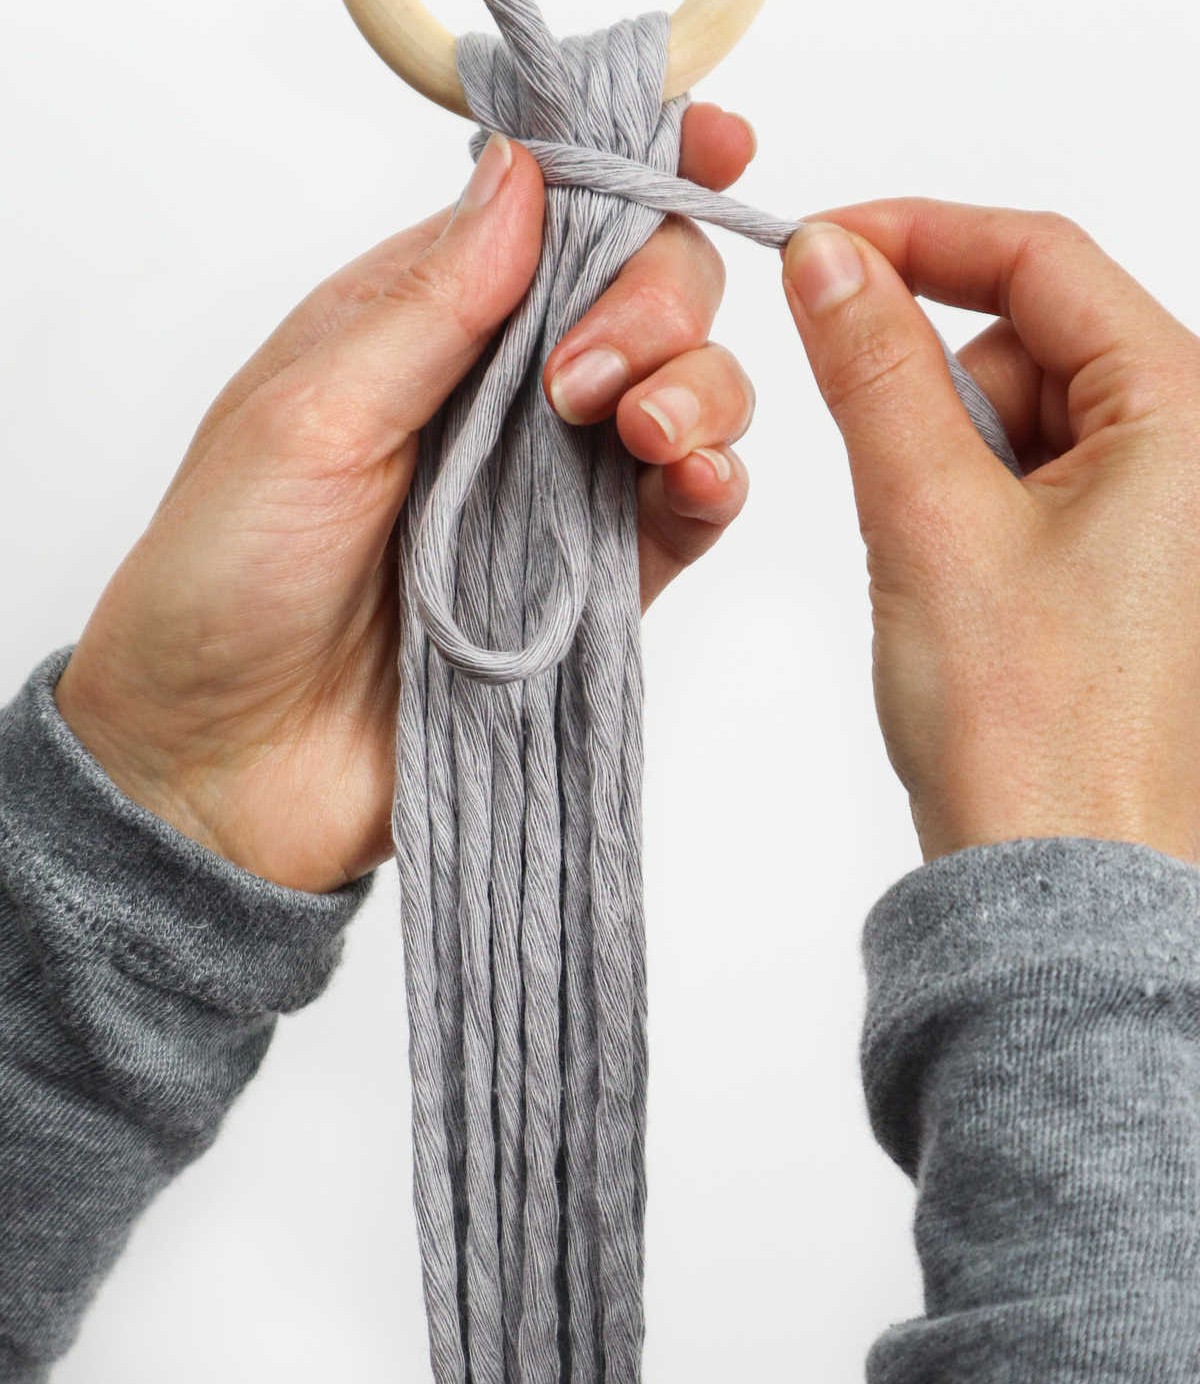
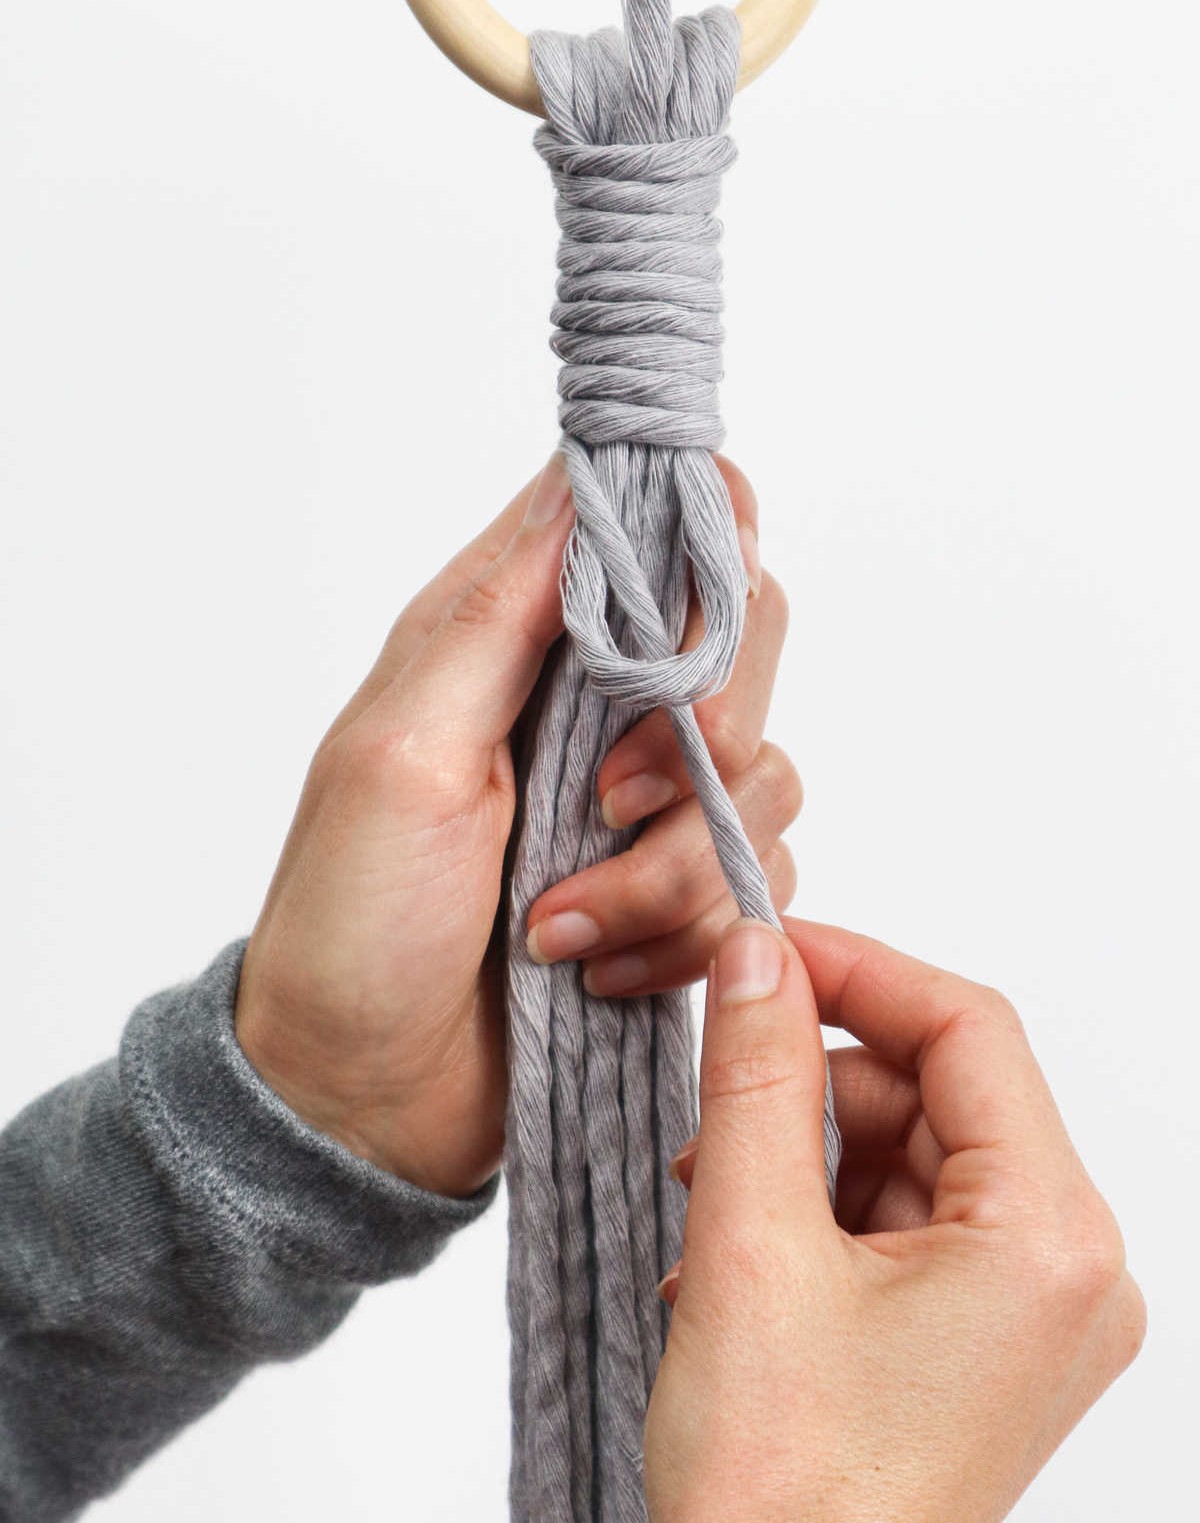
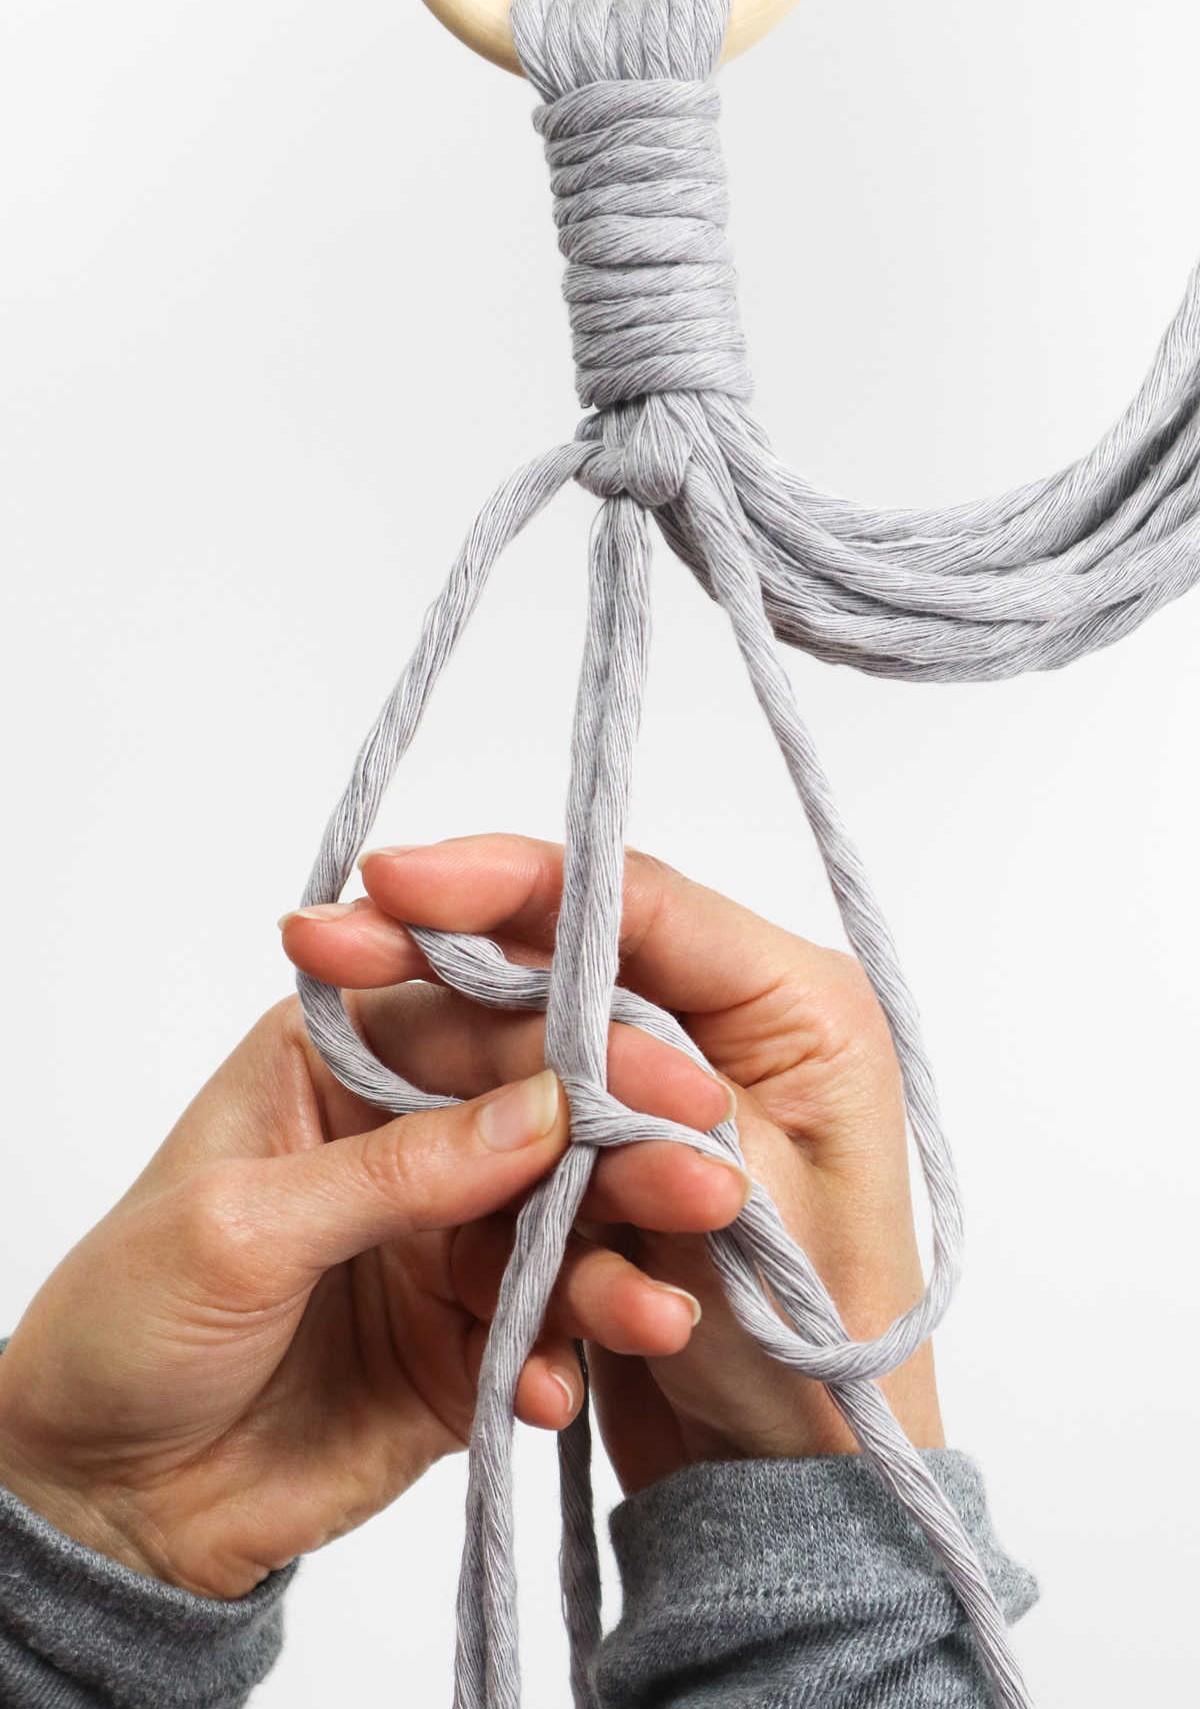
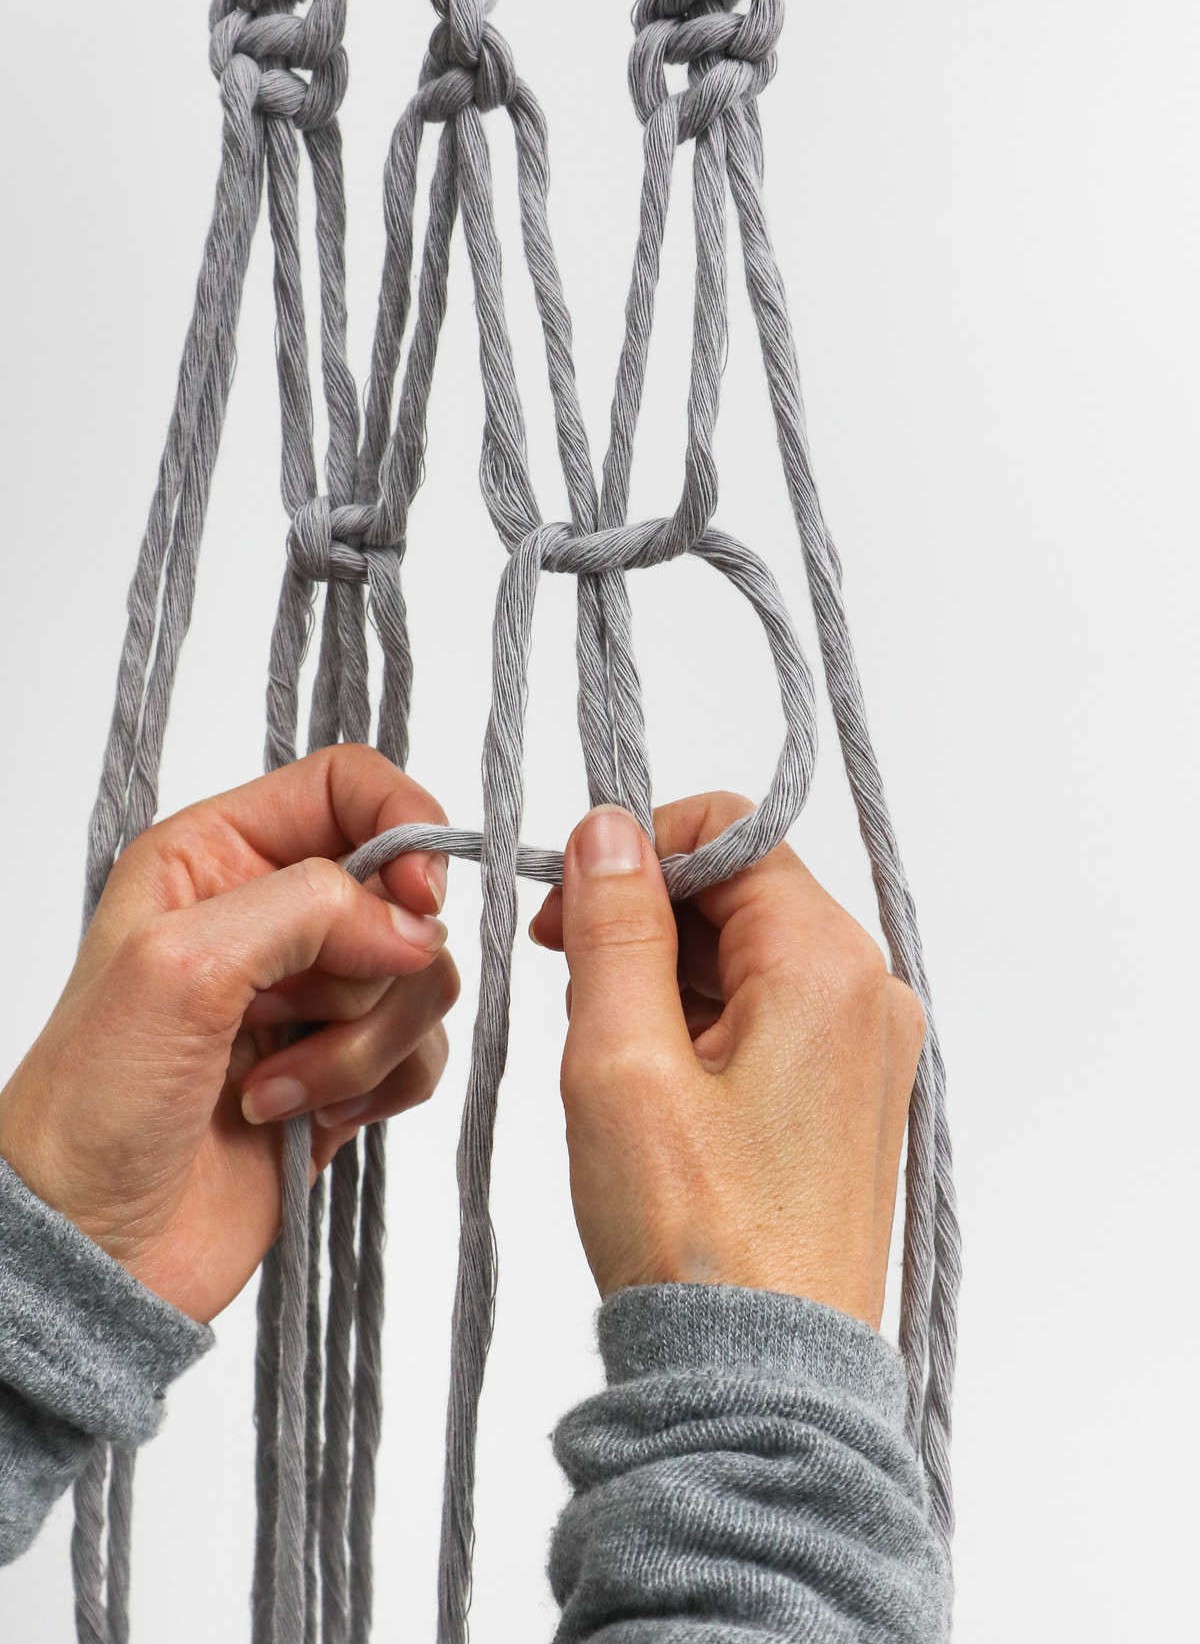
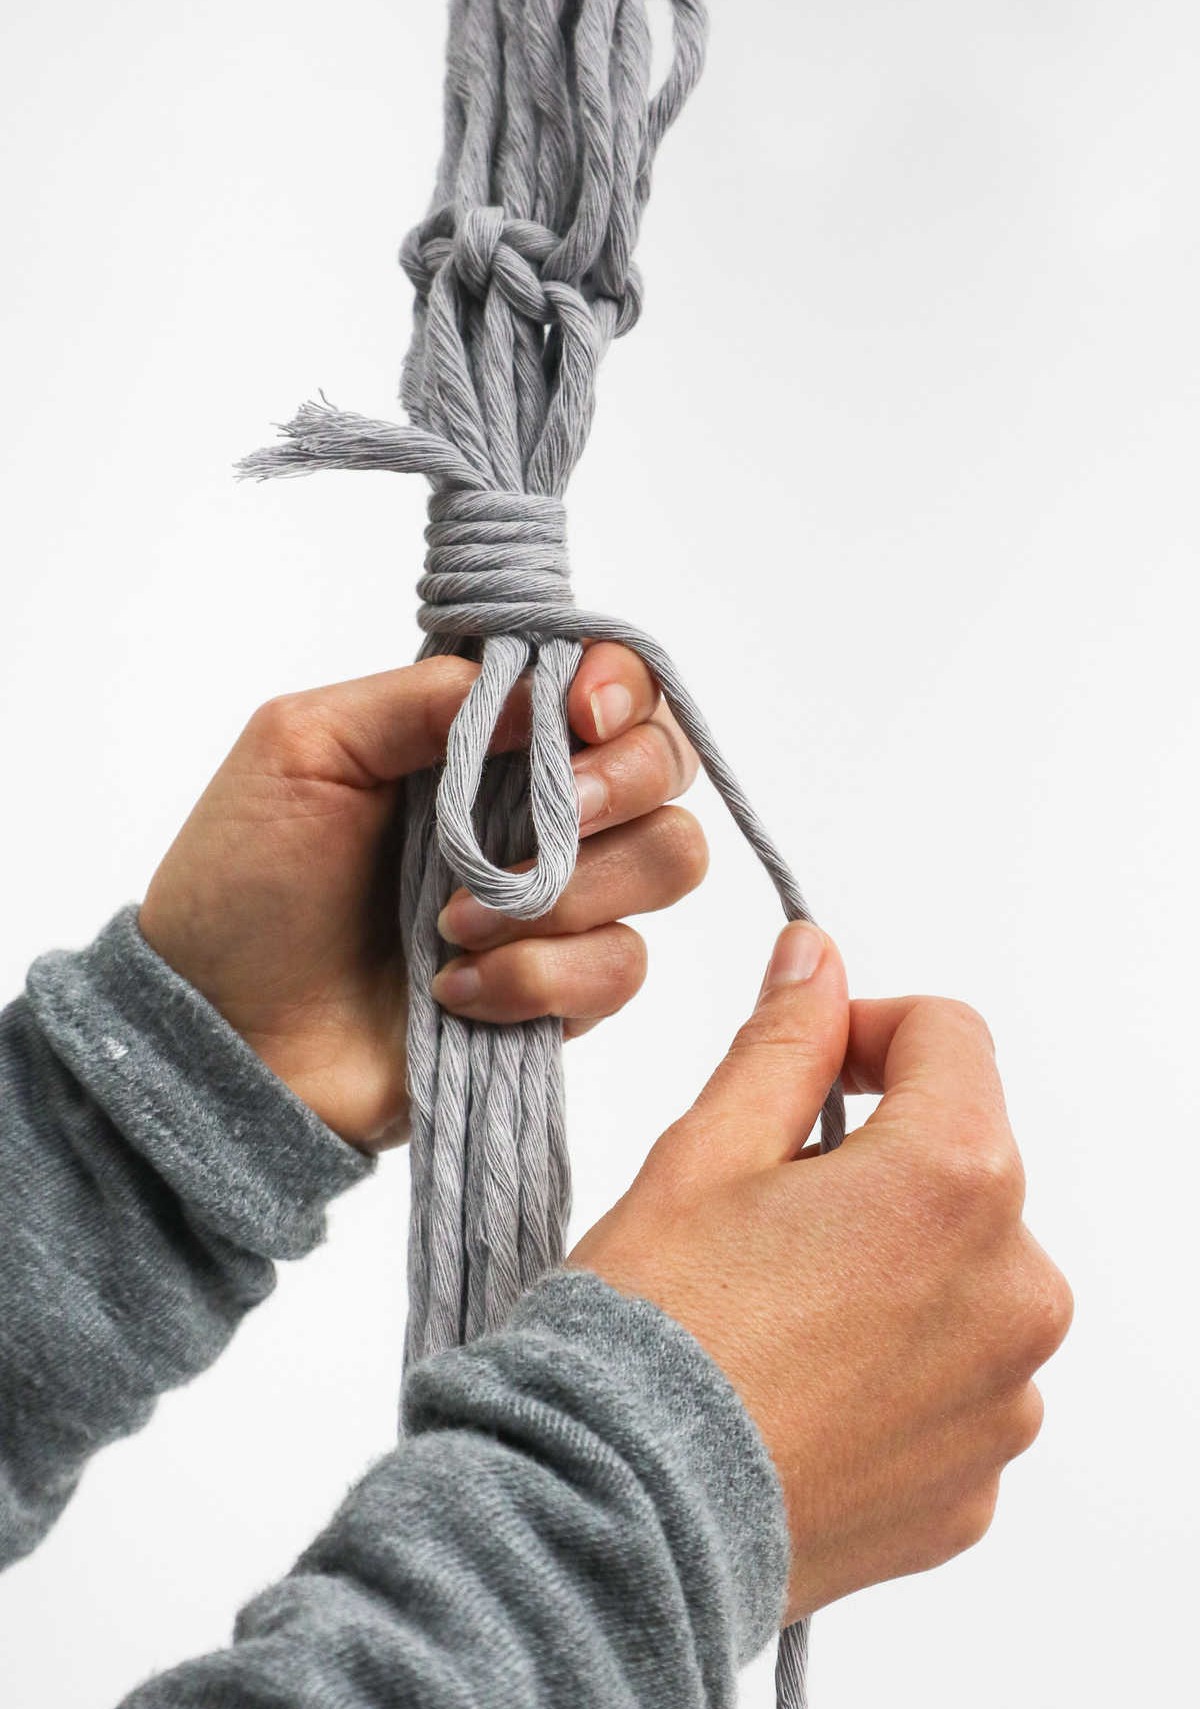
Wrap the longer end of the cord around the strands and the U-shaped loop multiple times. As you approach the end of the cord, stop wrapping and instead pull the end through the loop.
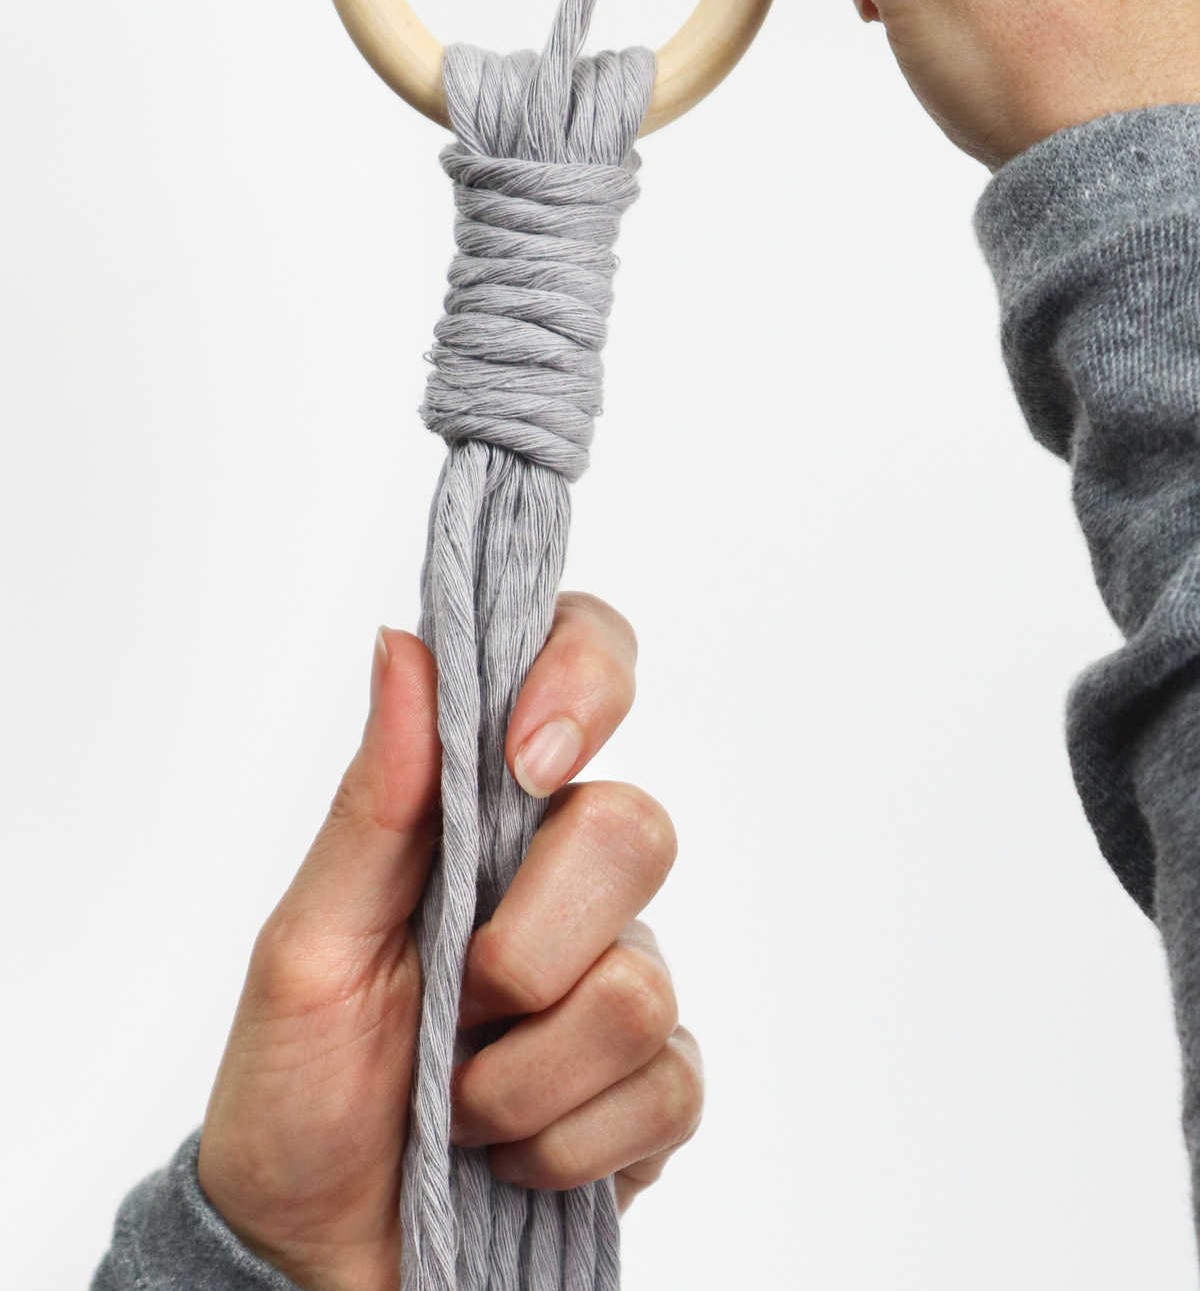
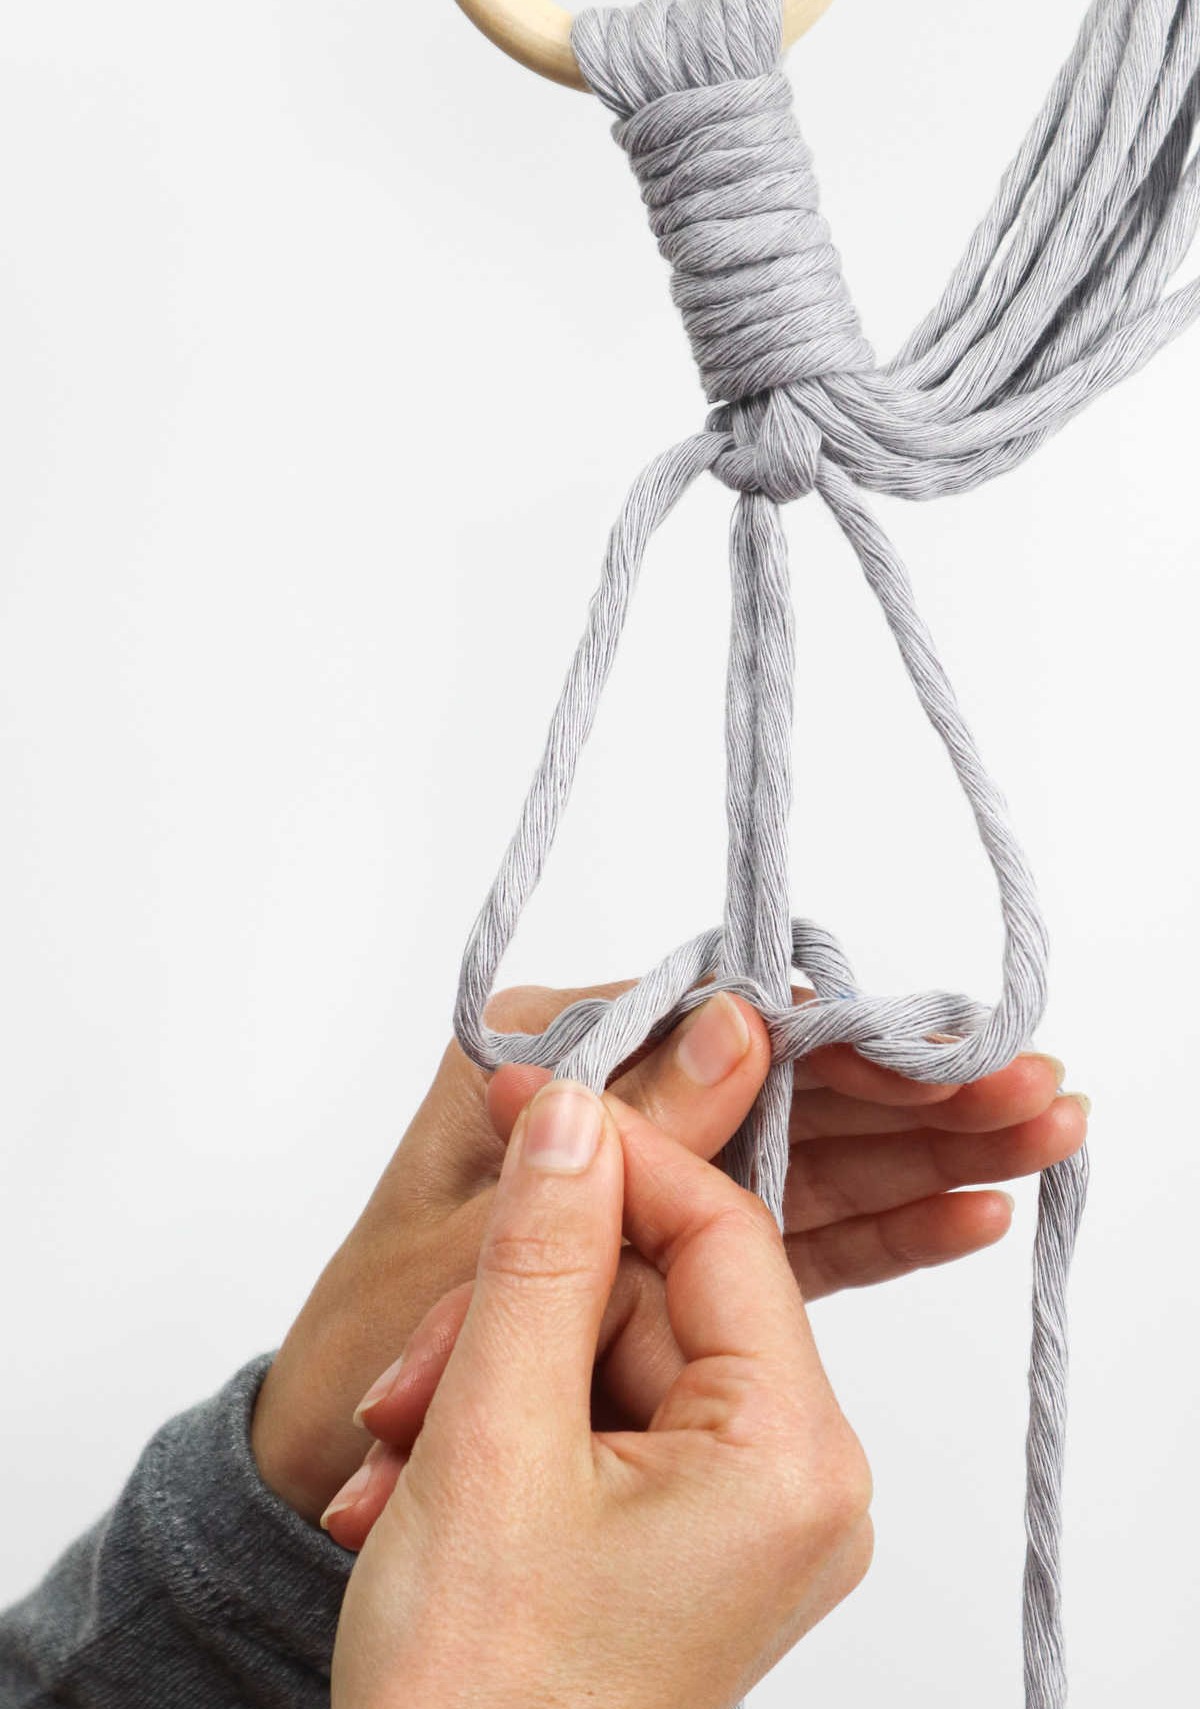
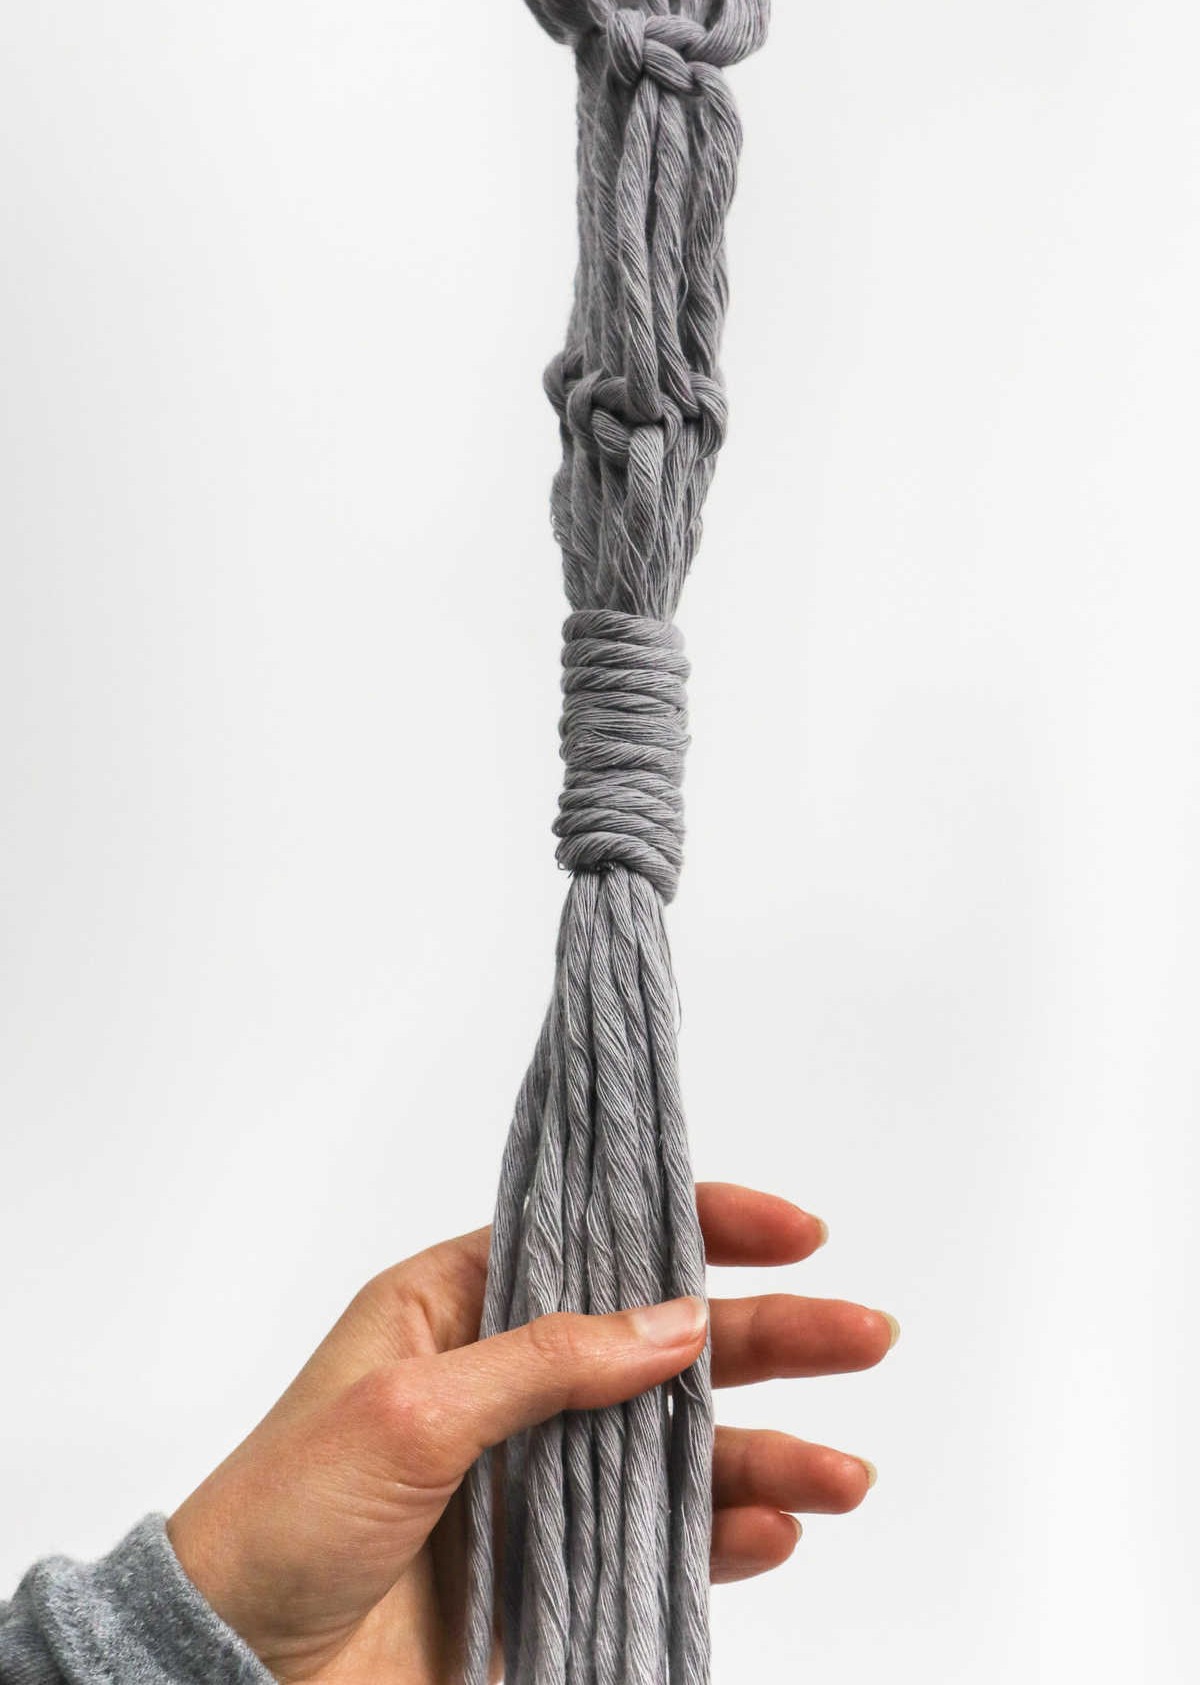
Secure the knot by pulling the top end firmly to draw the U-loop inside the knot.
Once secured, grasp both cord ends – the one that has been pulled through the loop as well as the protruding top end – and gently tug on them.
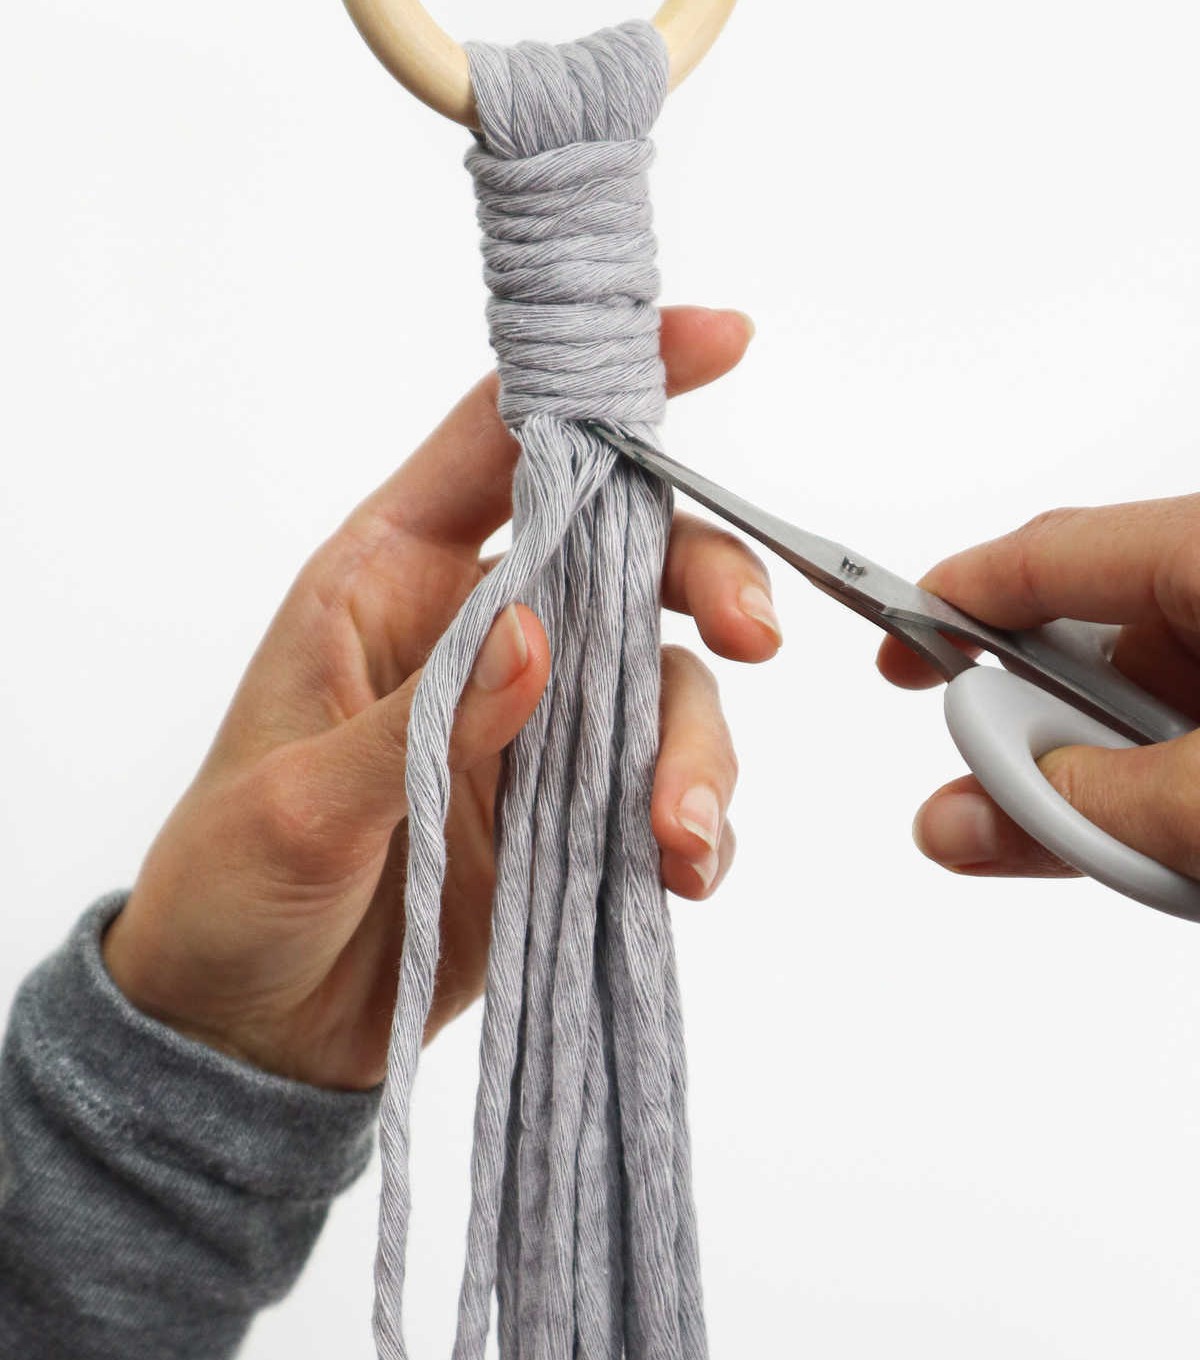
To complete the knot, simply trim the excess cord ends. Your gathering knot is now finished.
Step 5
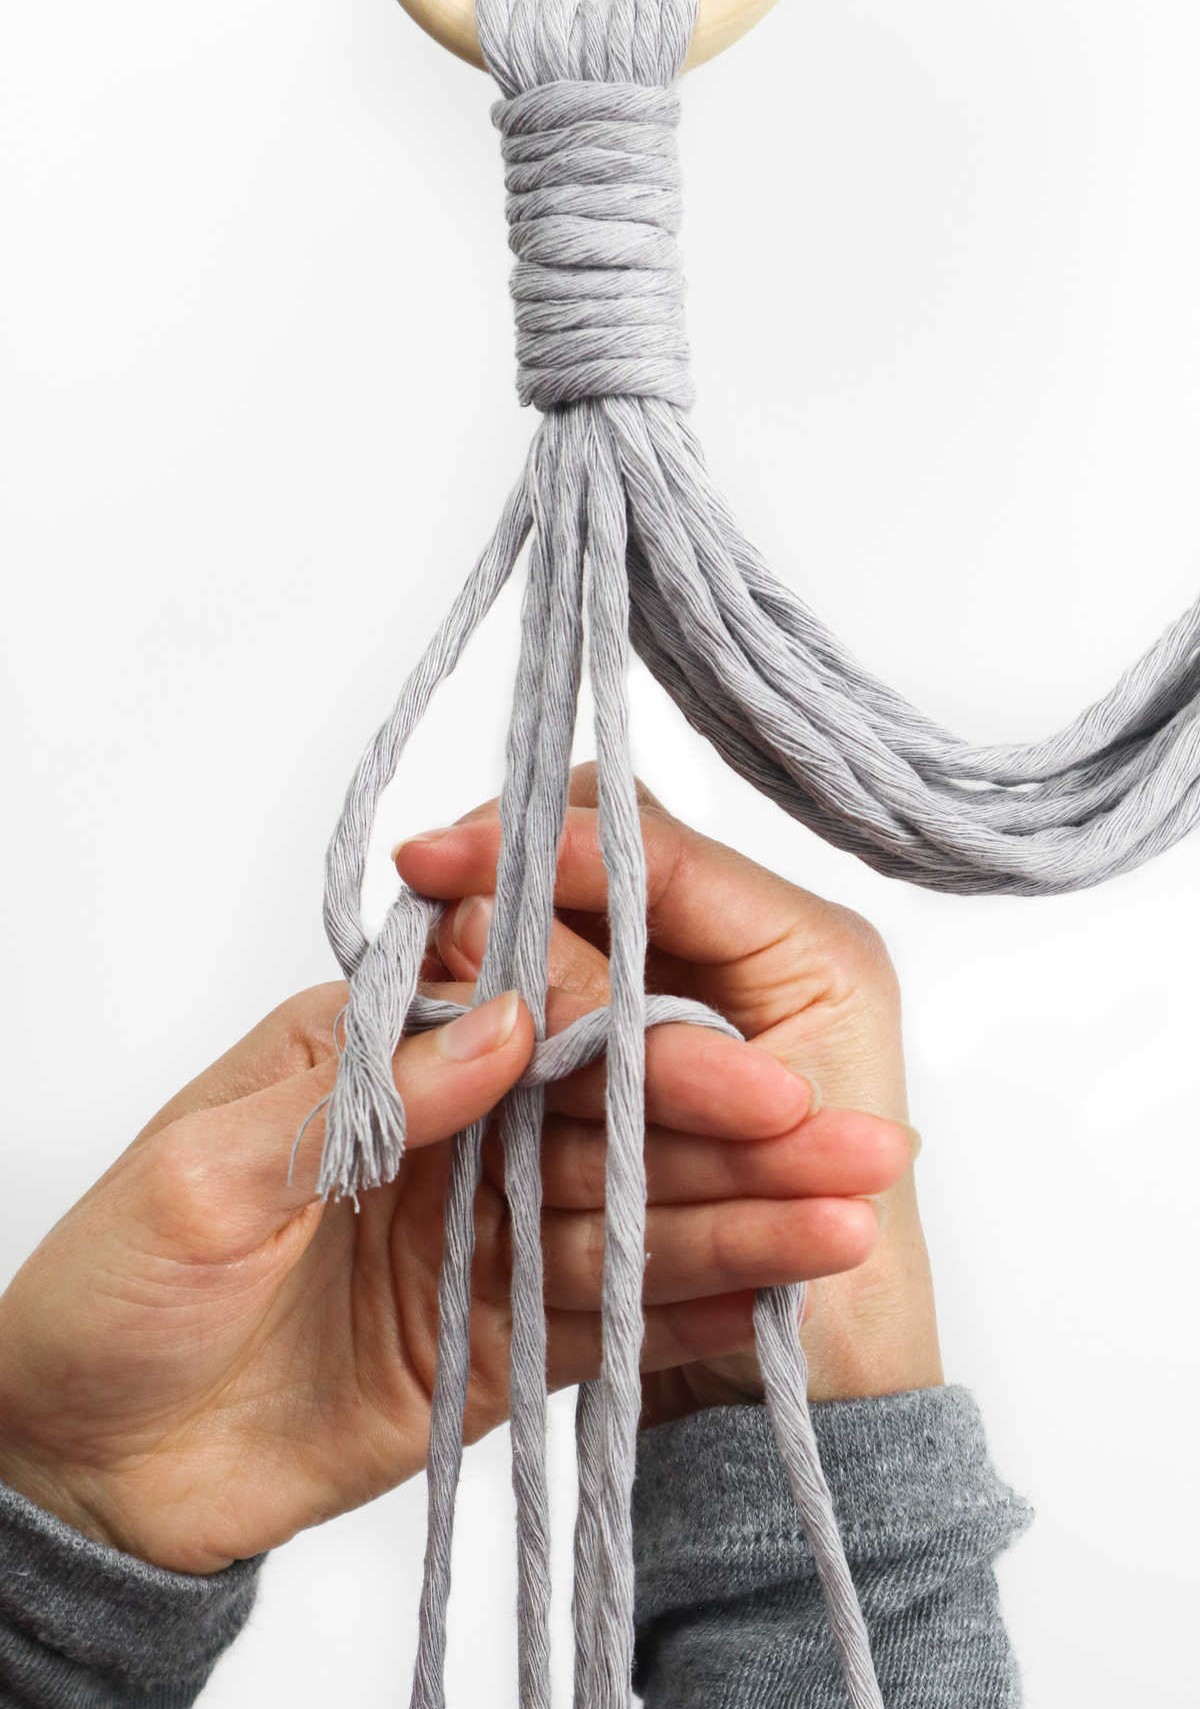
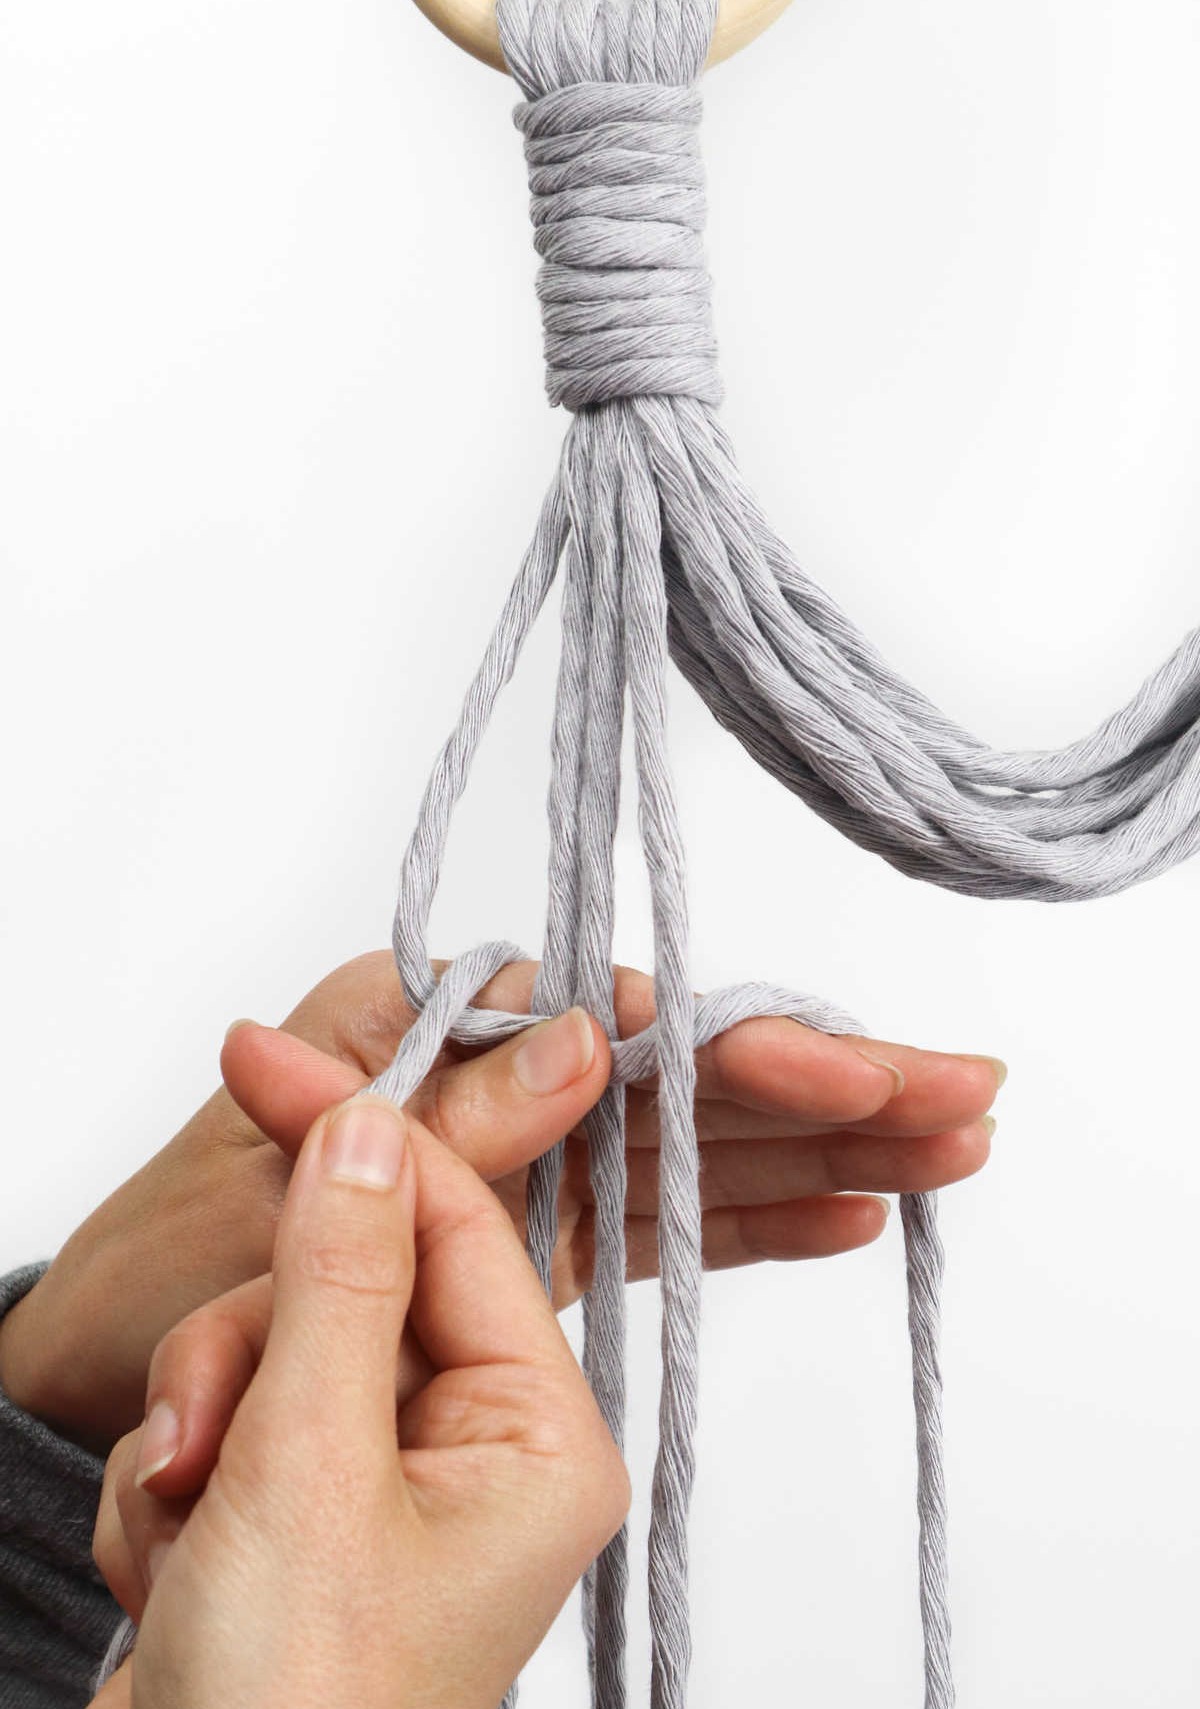
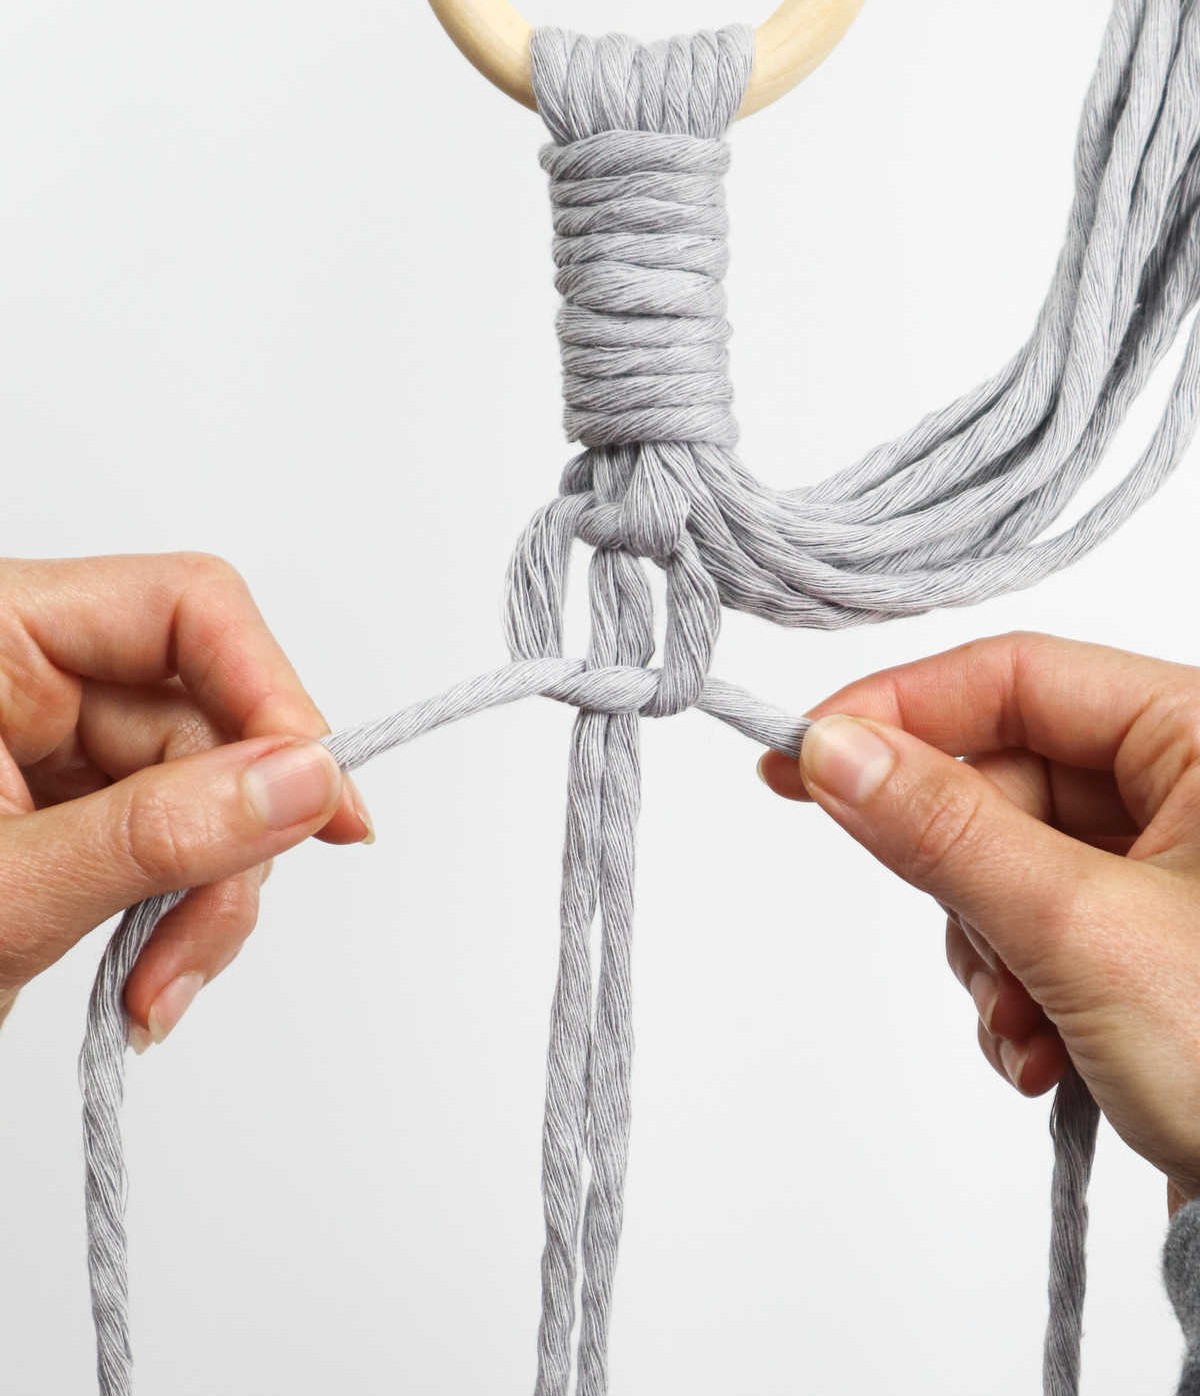
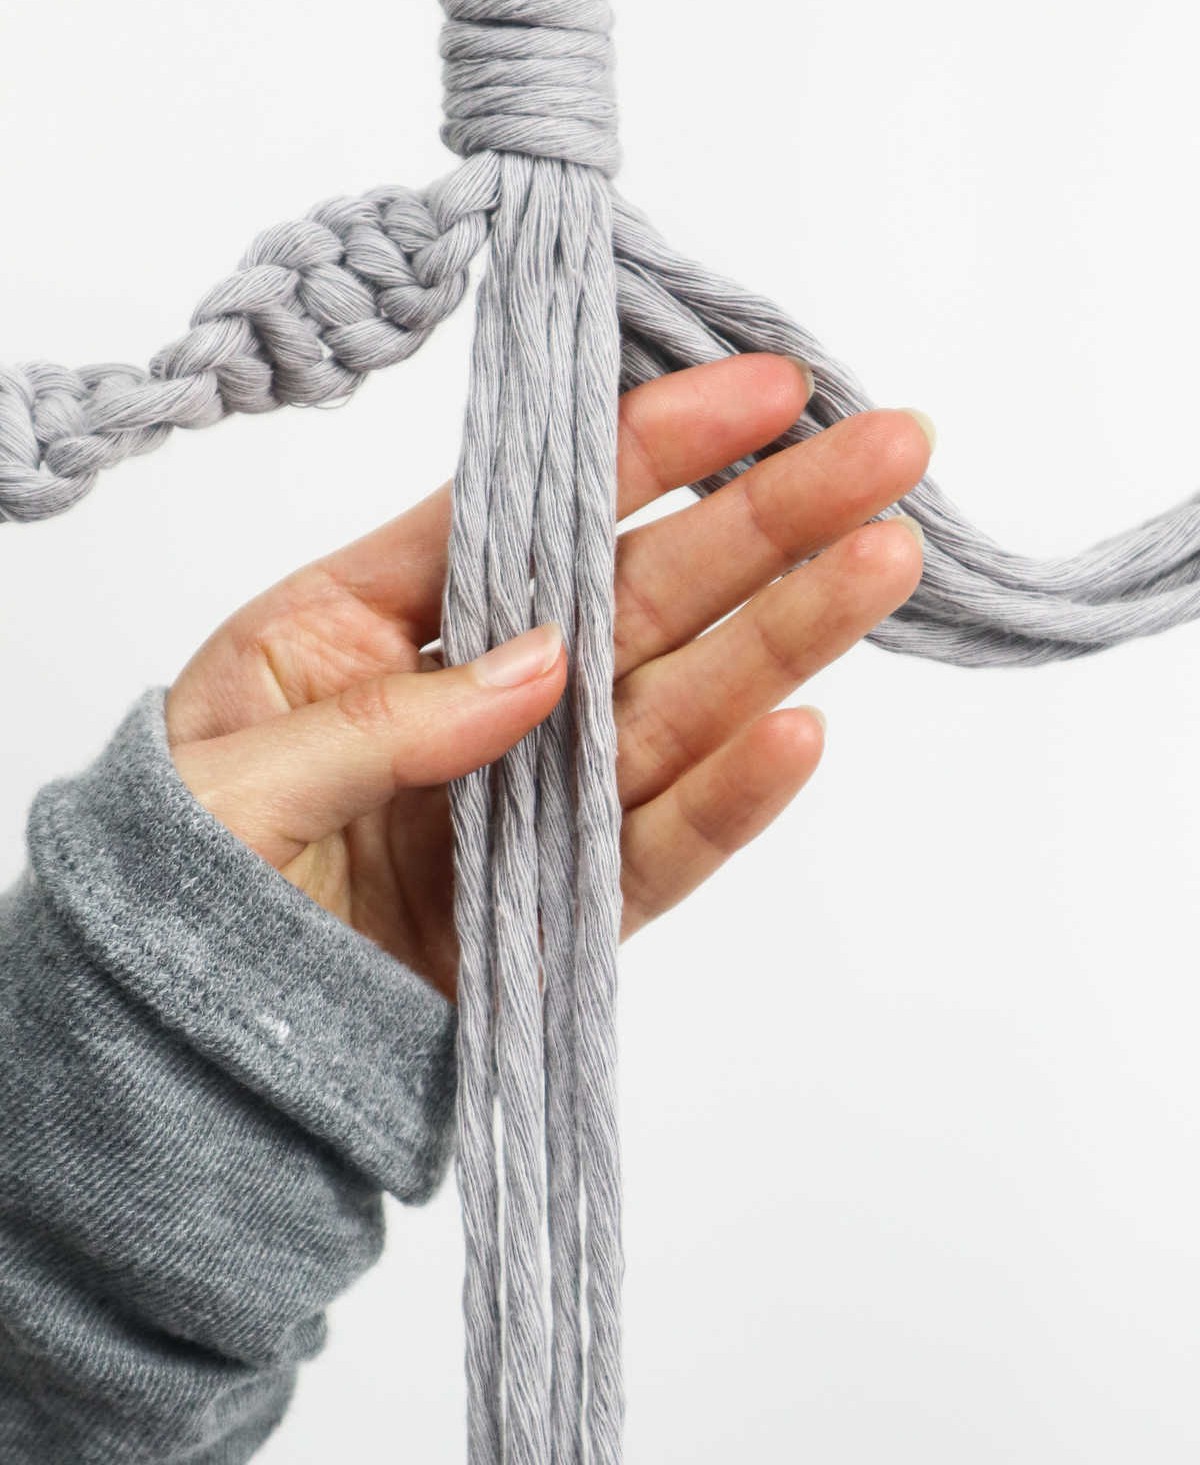
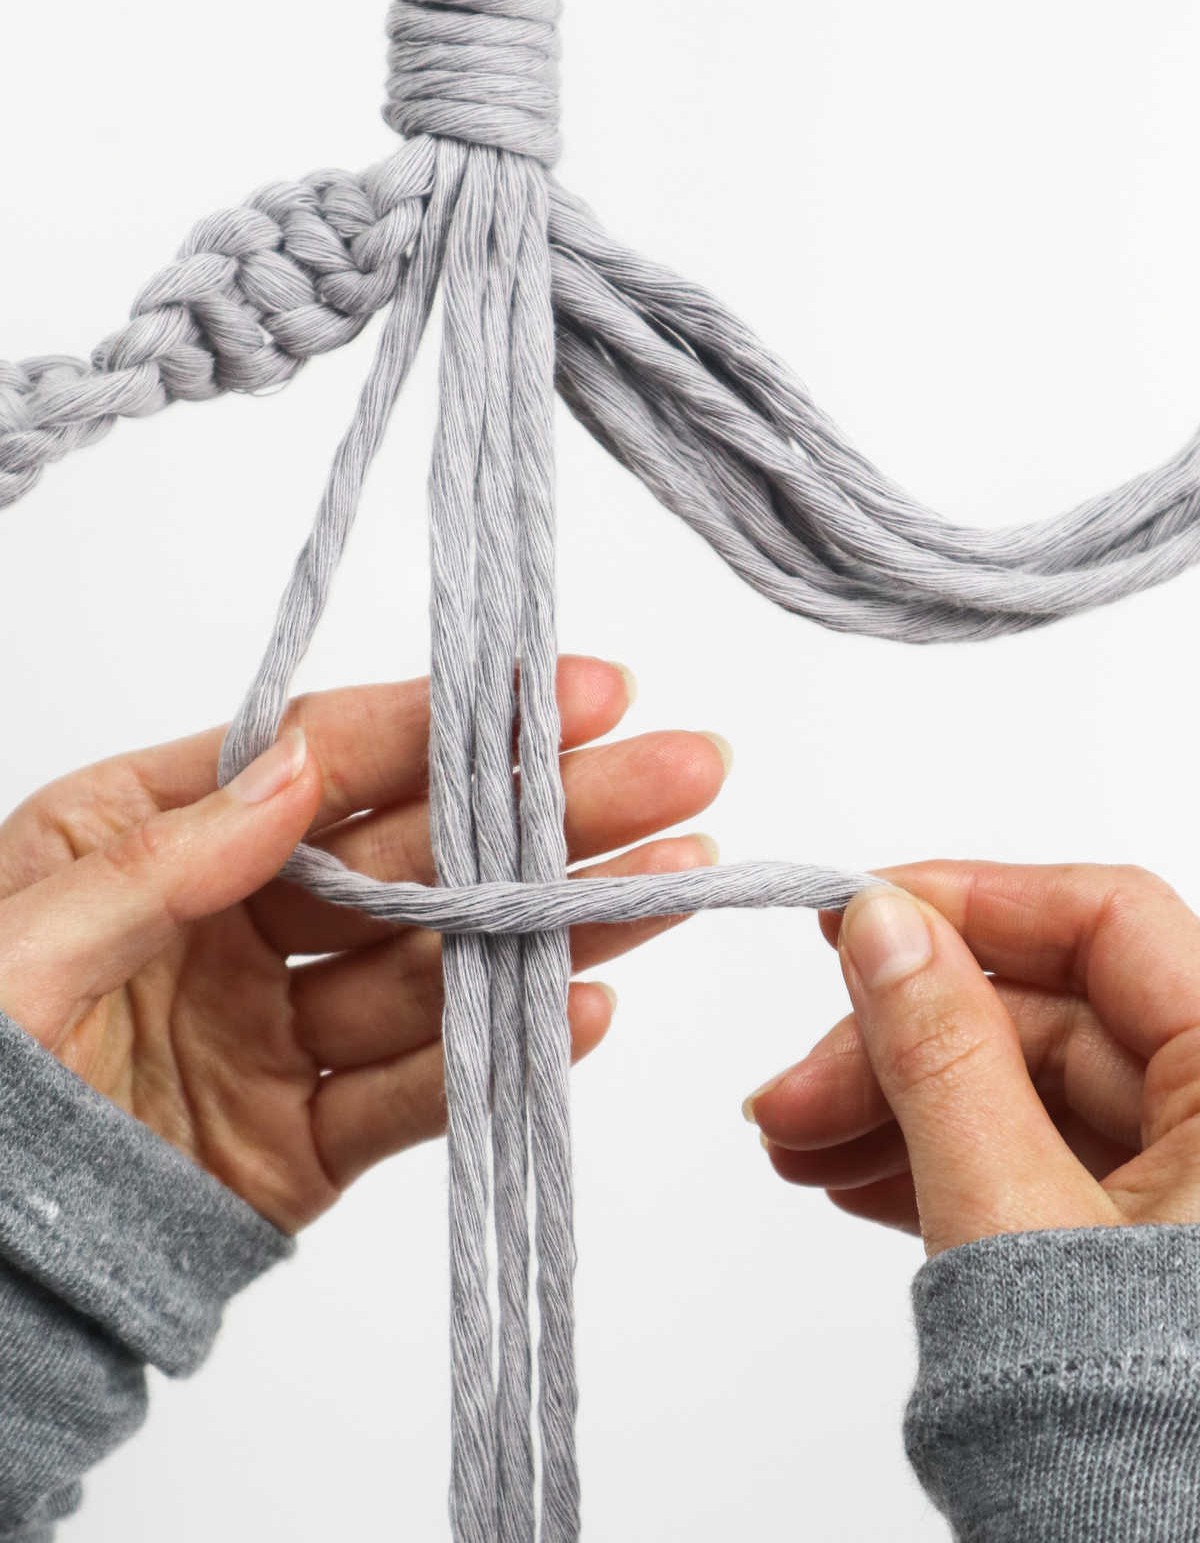
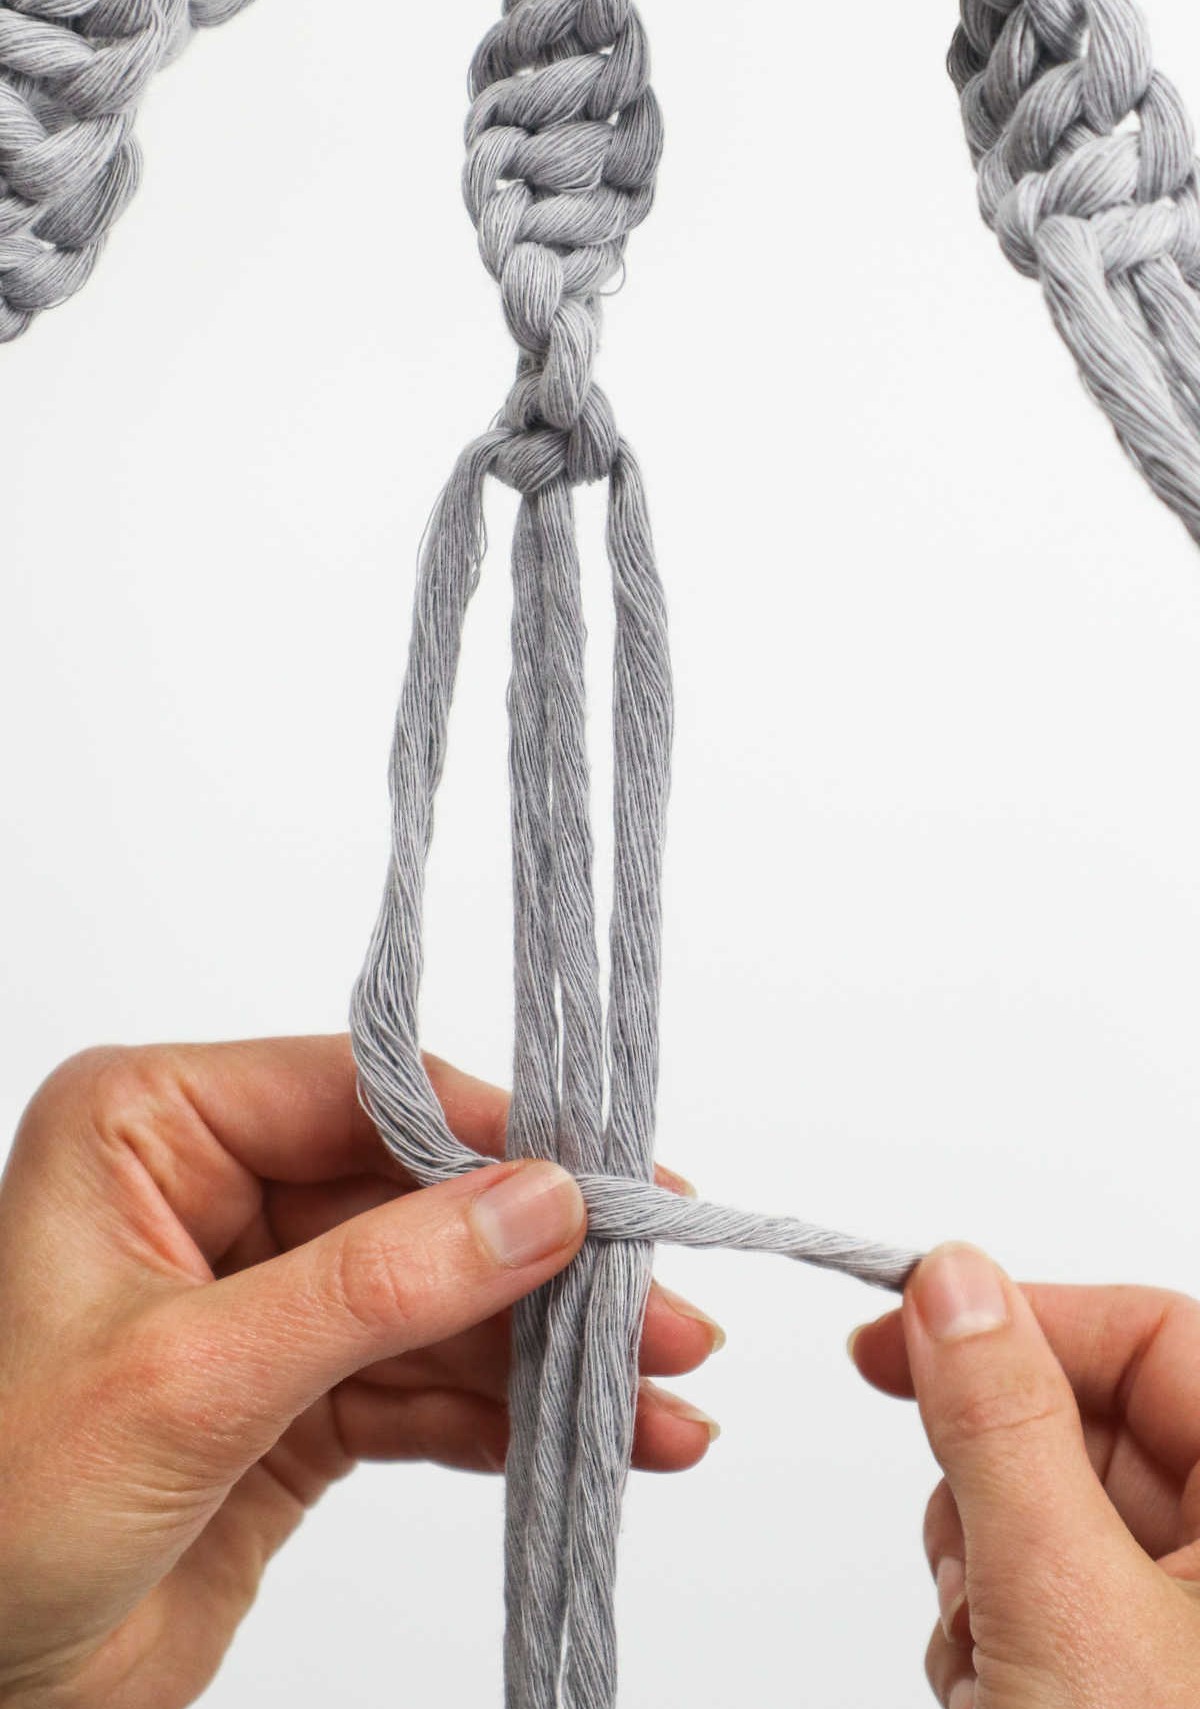
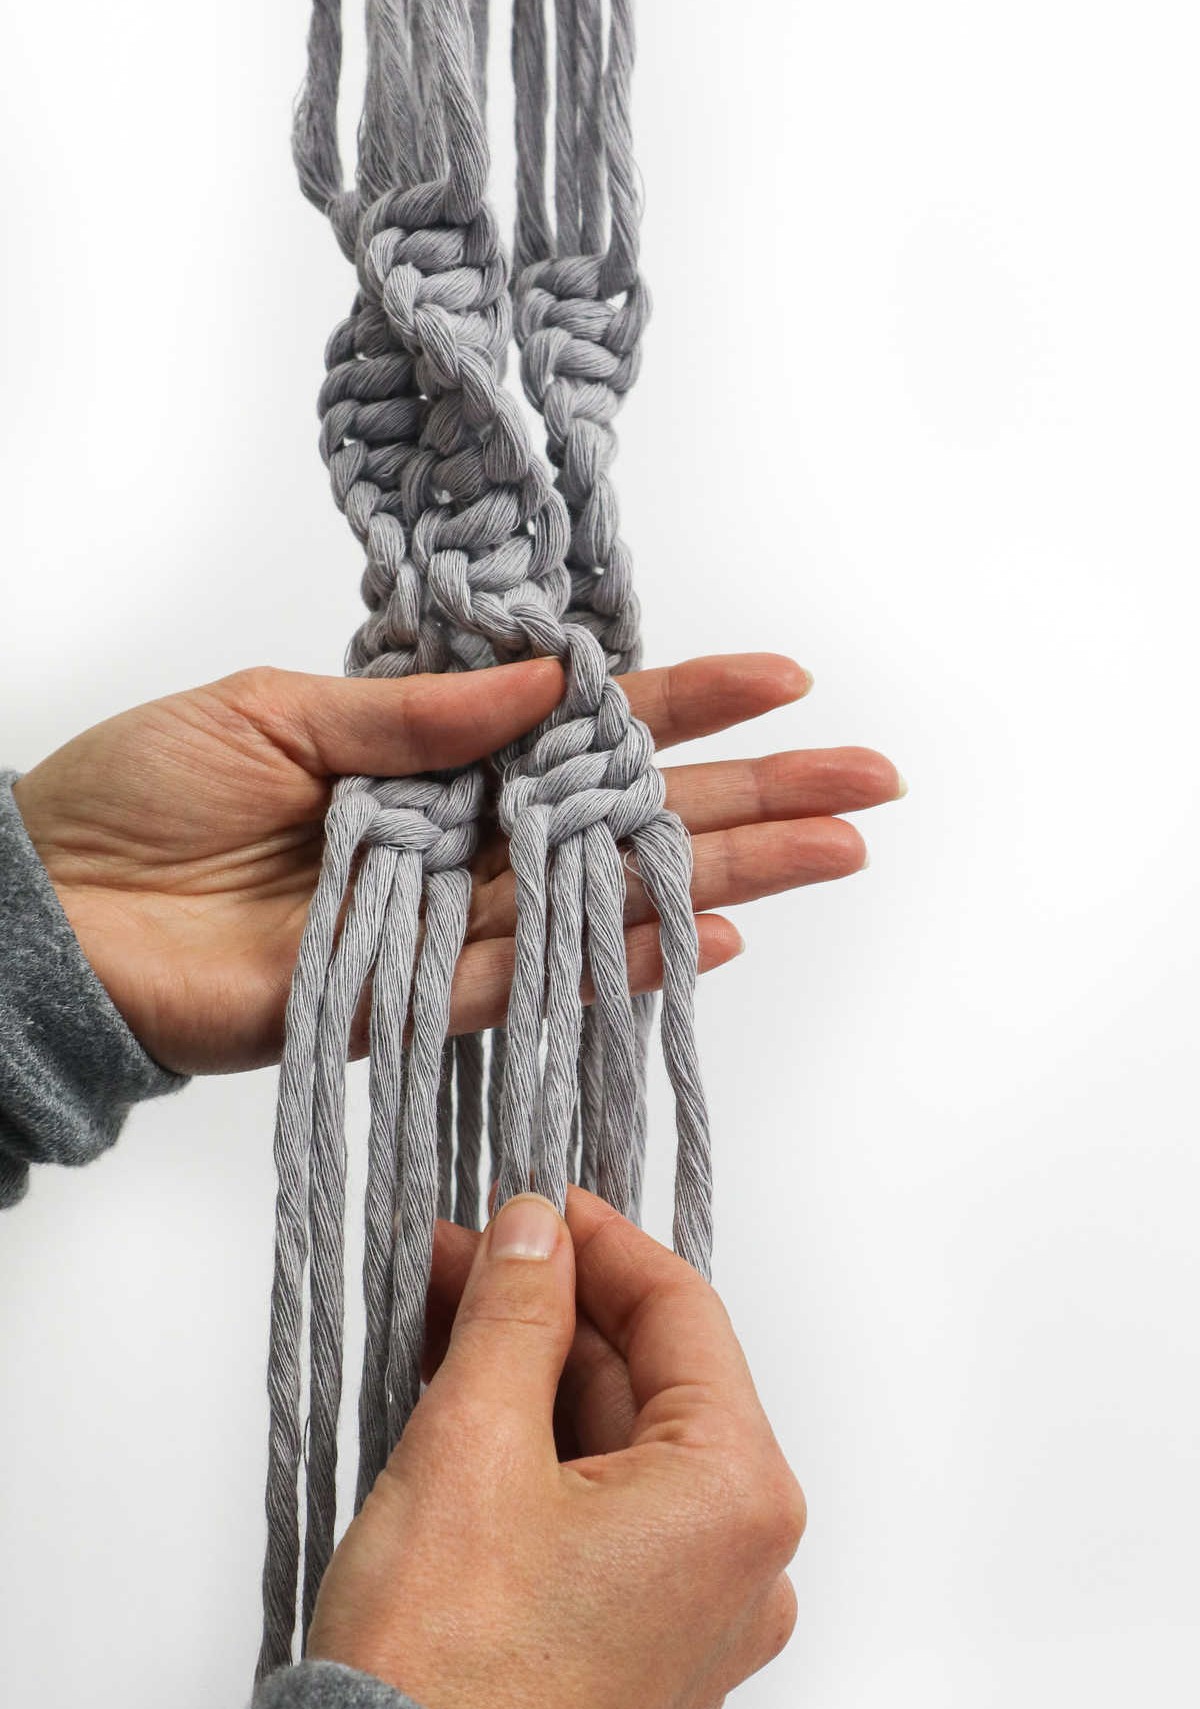
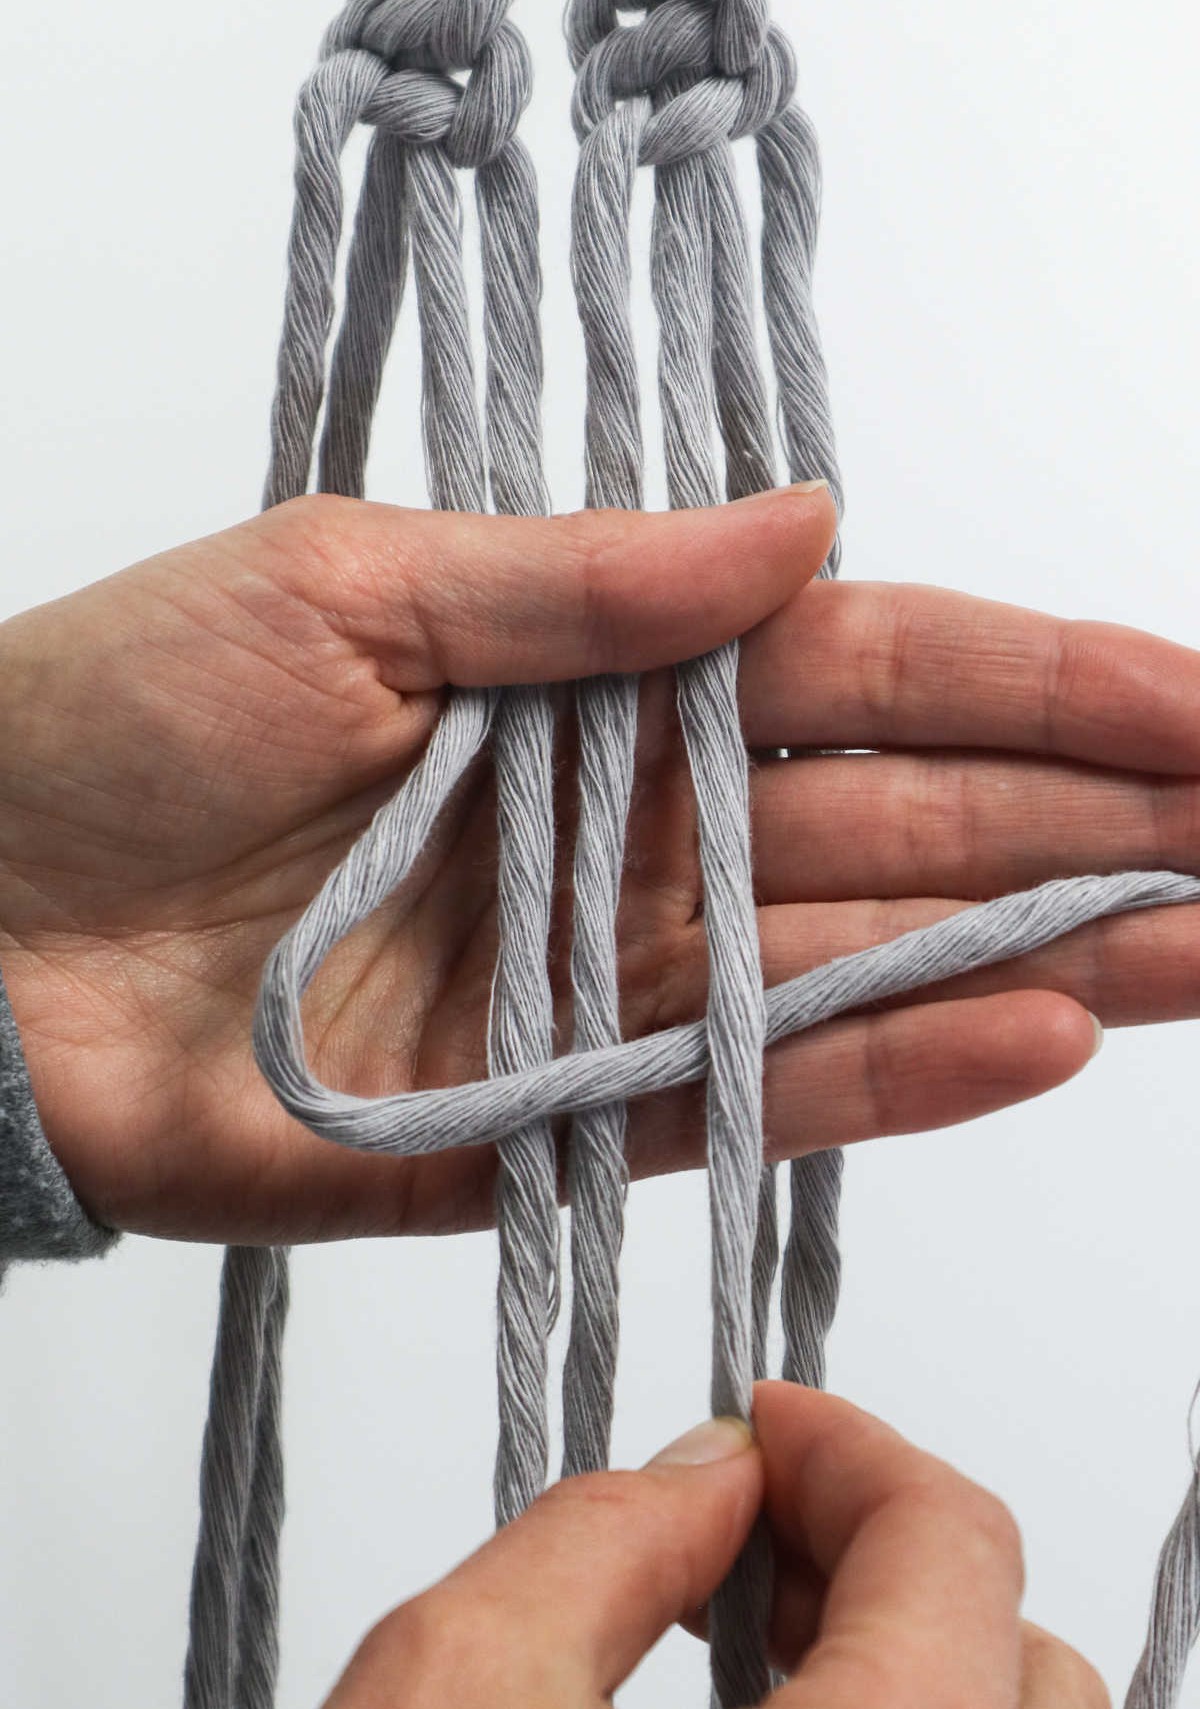
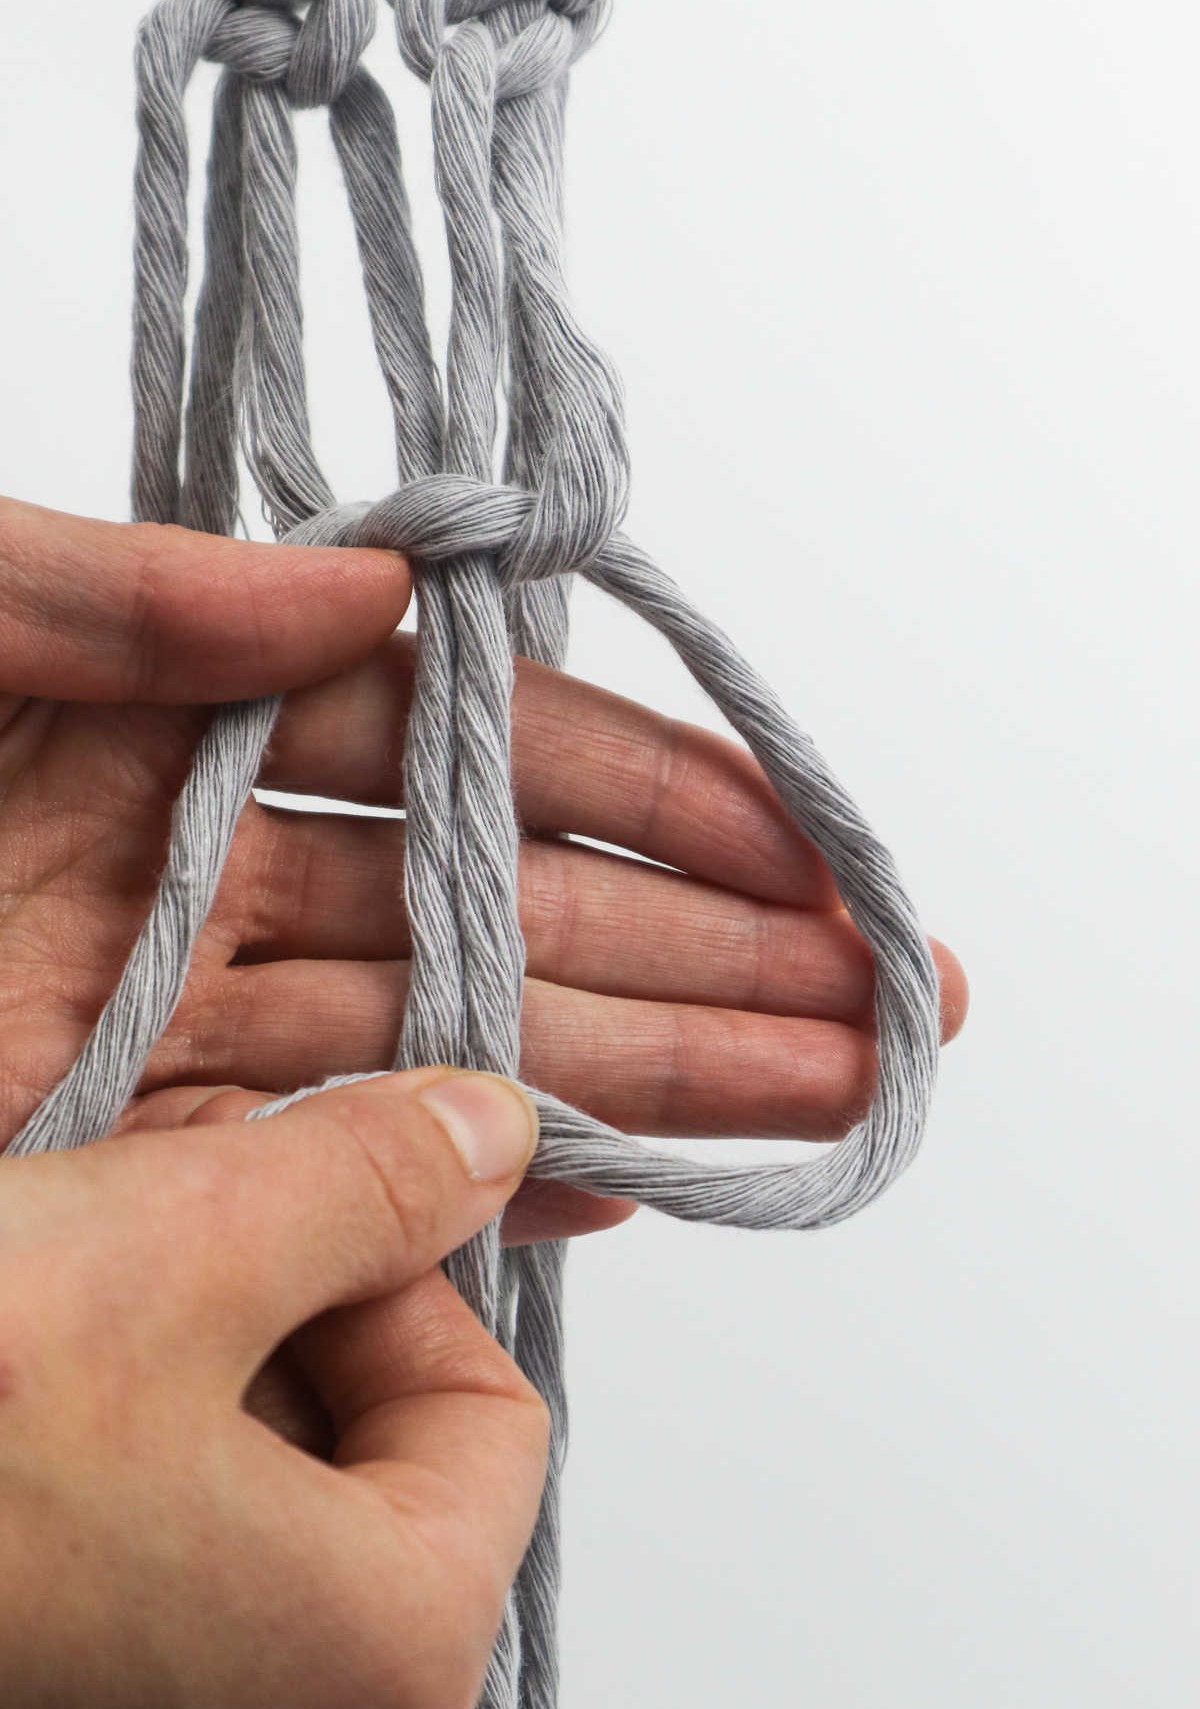
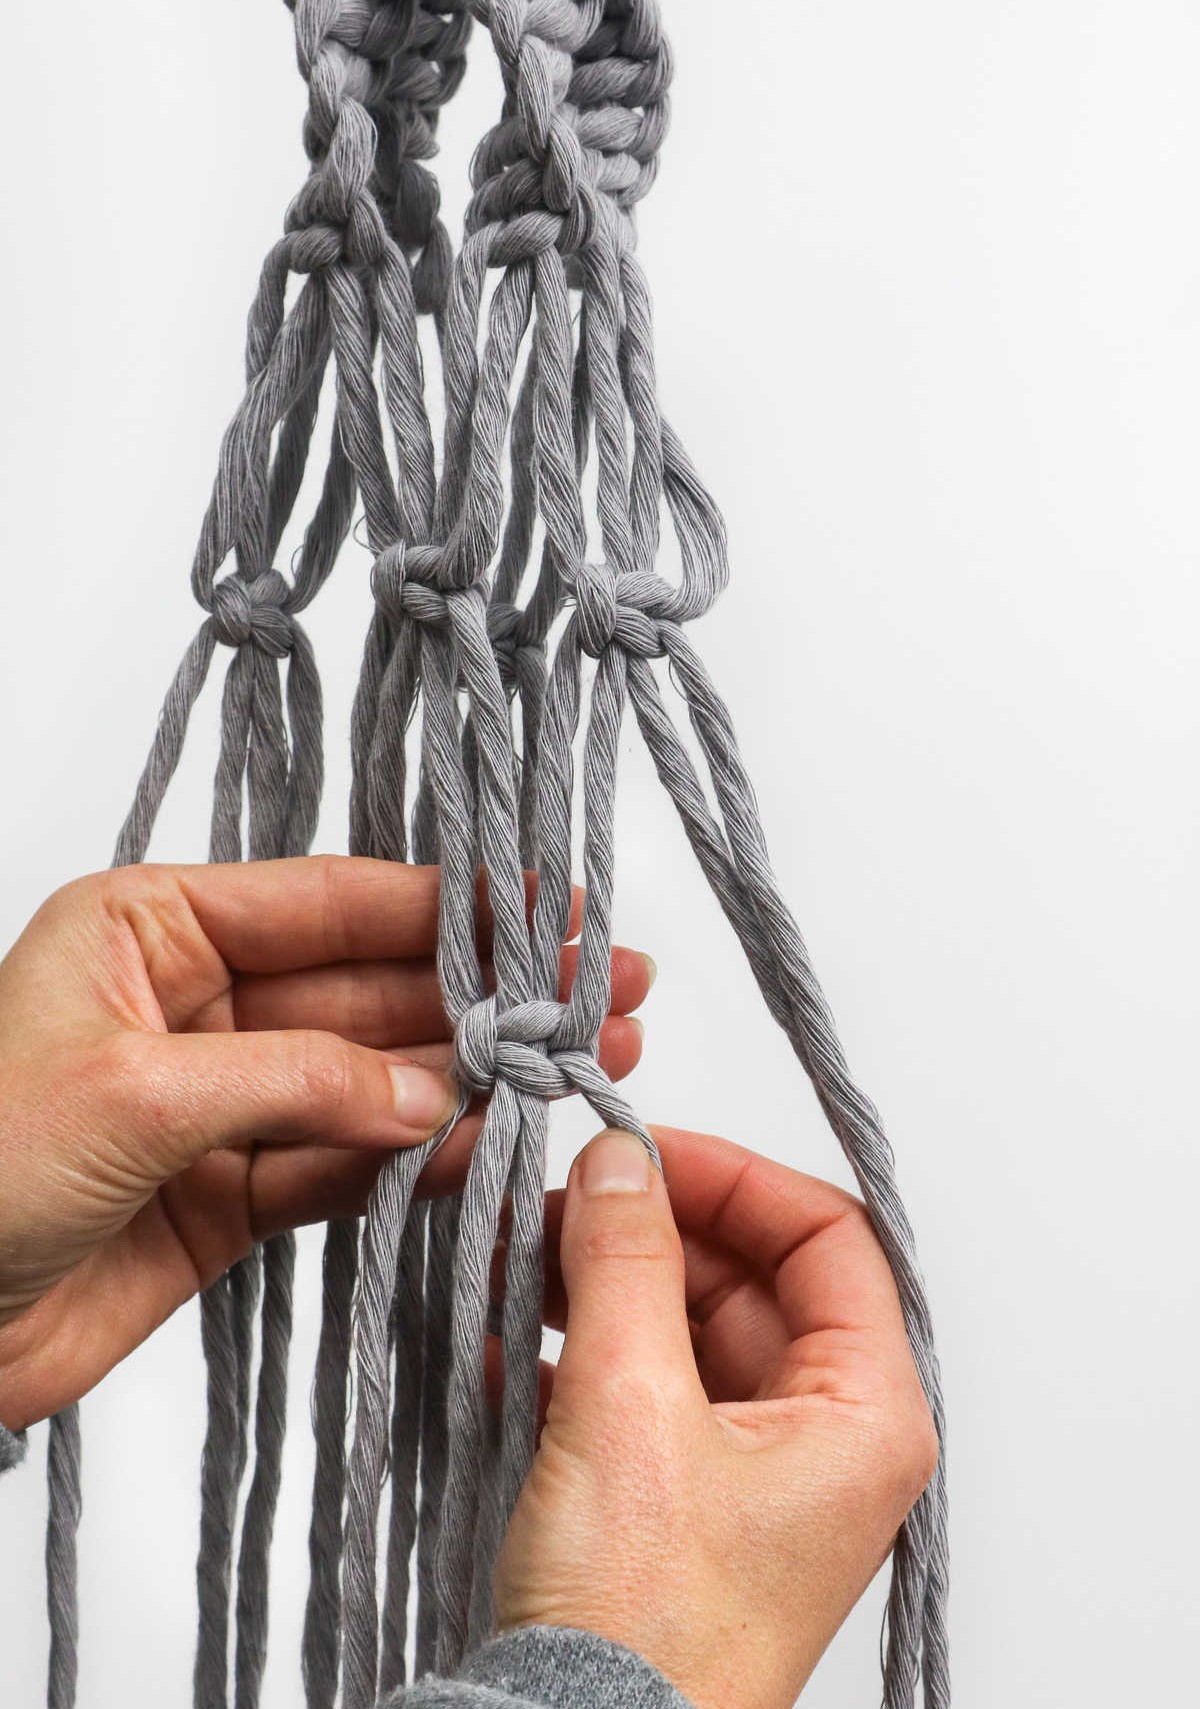
As you begin crafting your design, focus on creating spiral knots. To start, group four strands together to form a single section. Next, hold two strands in the middle steady – you’ll be working with just the left and right strands to create the spiral knot. Take the left strand and wrap it around the center to form a loop.
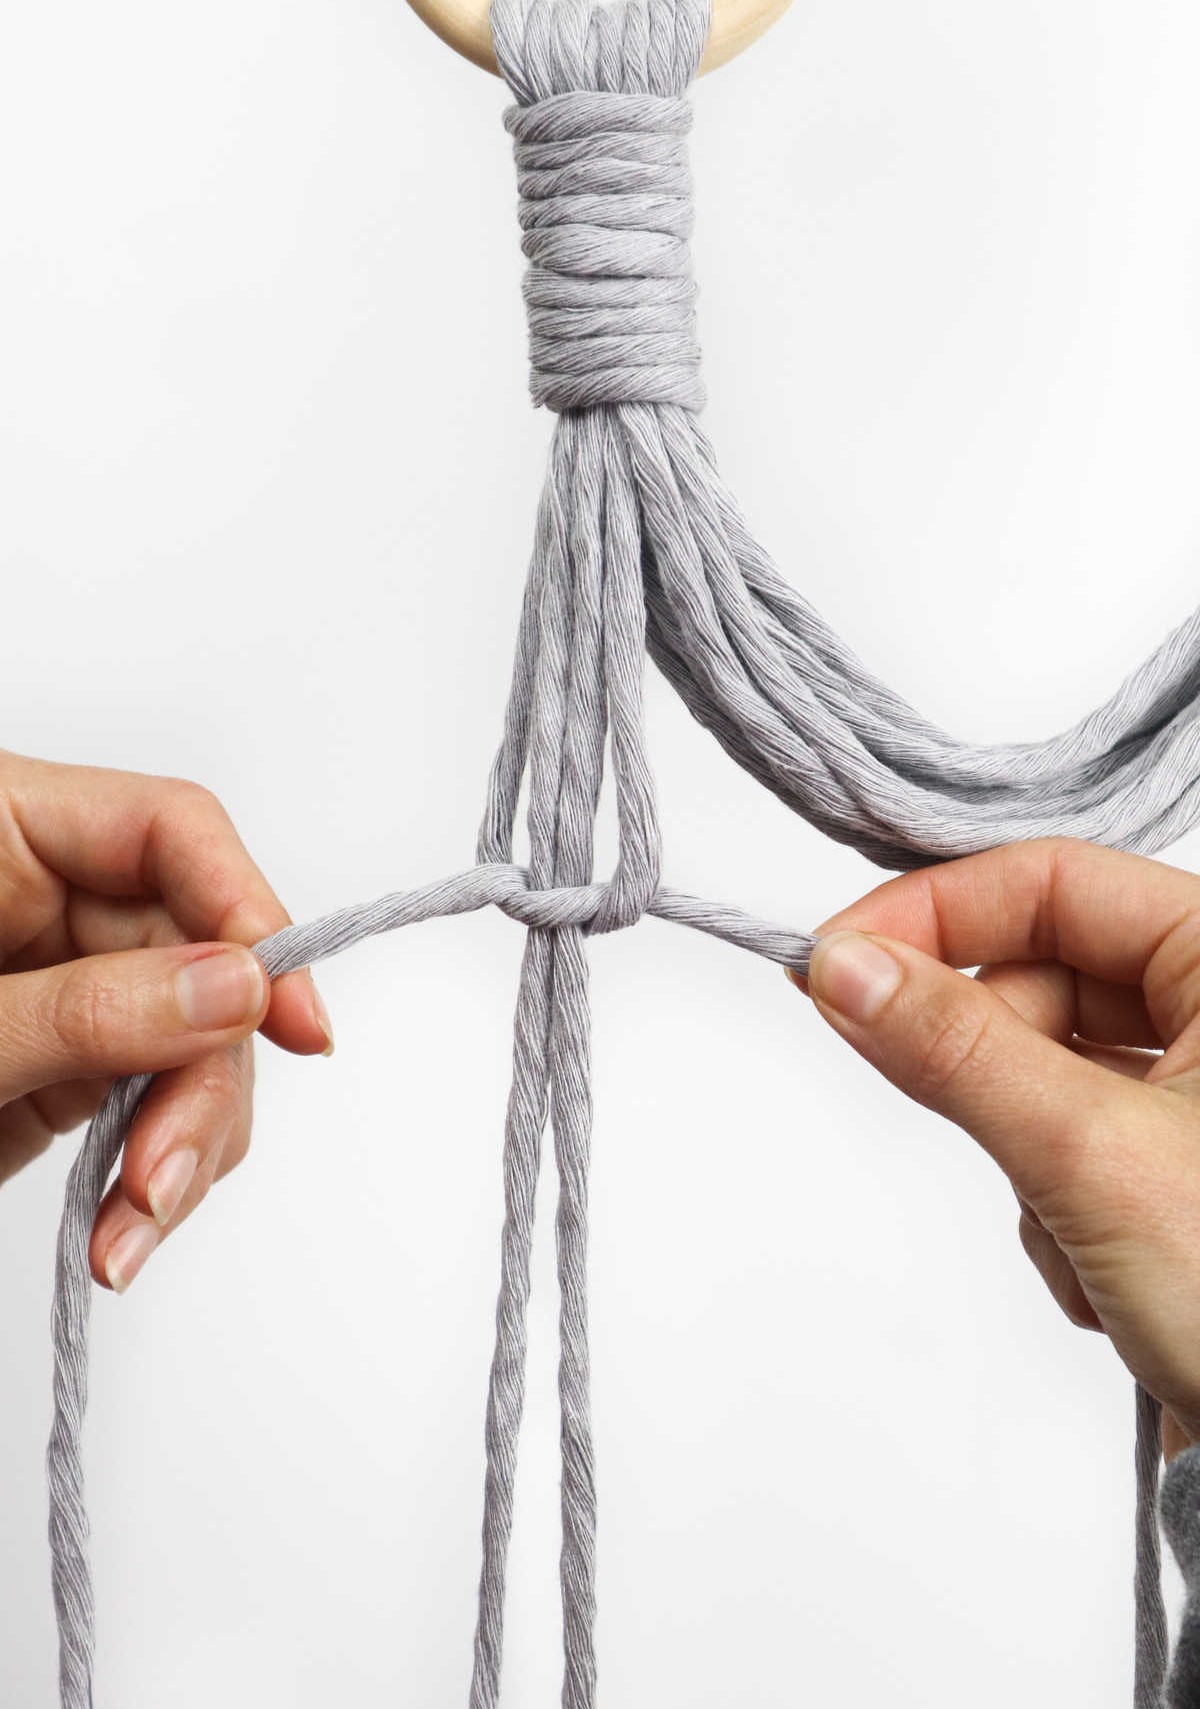
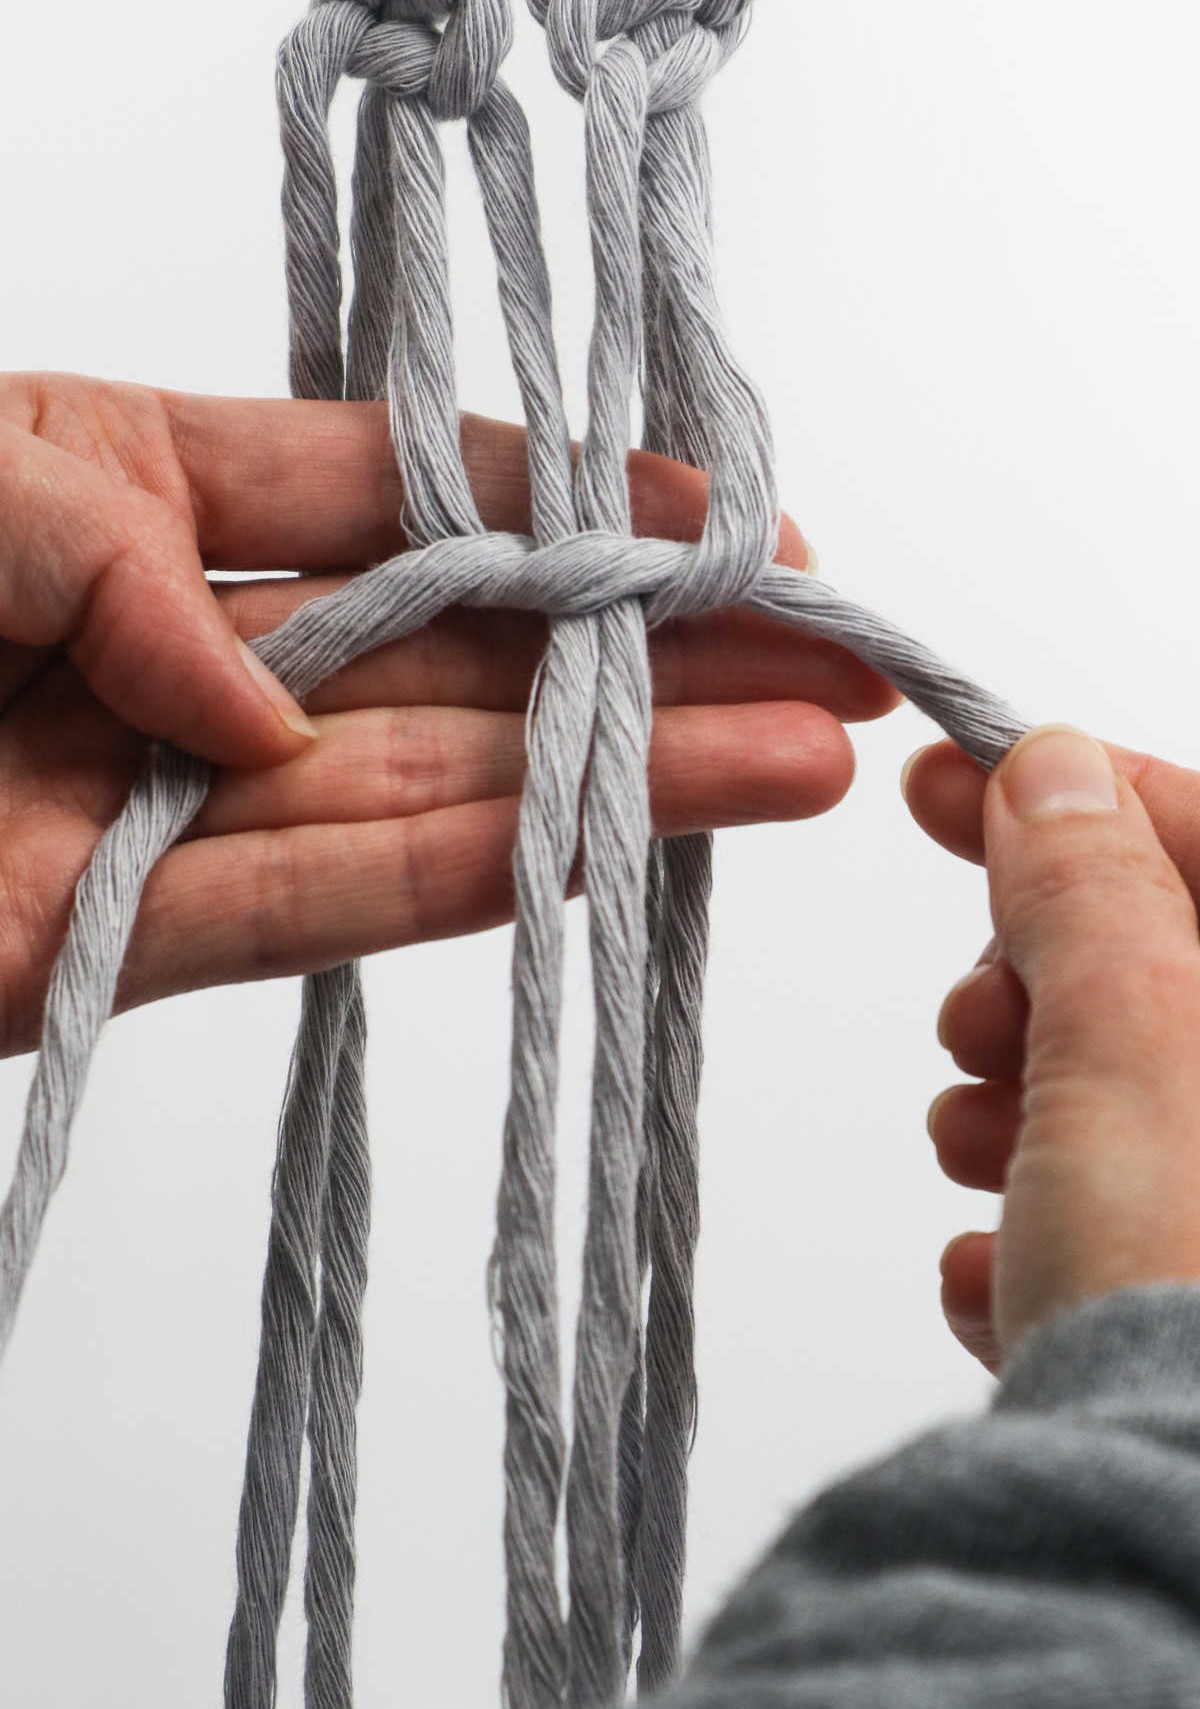
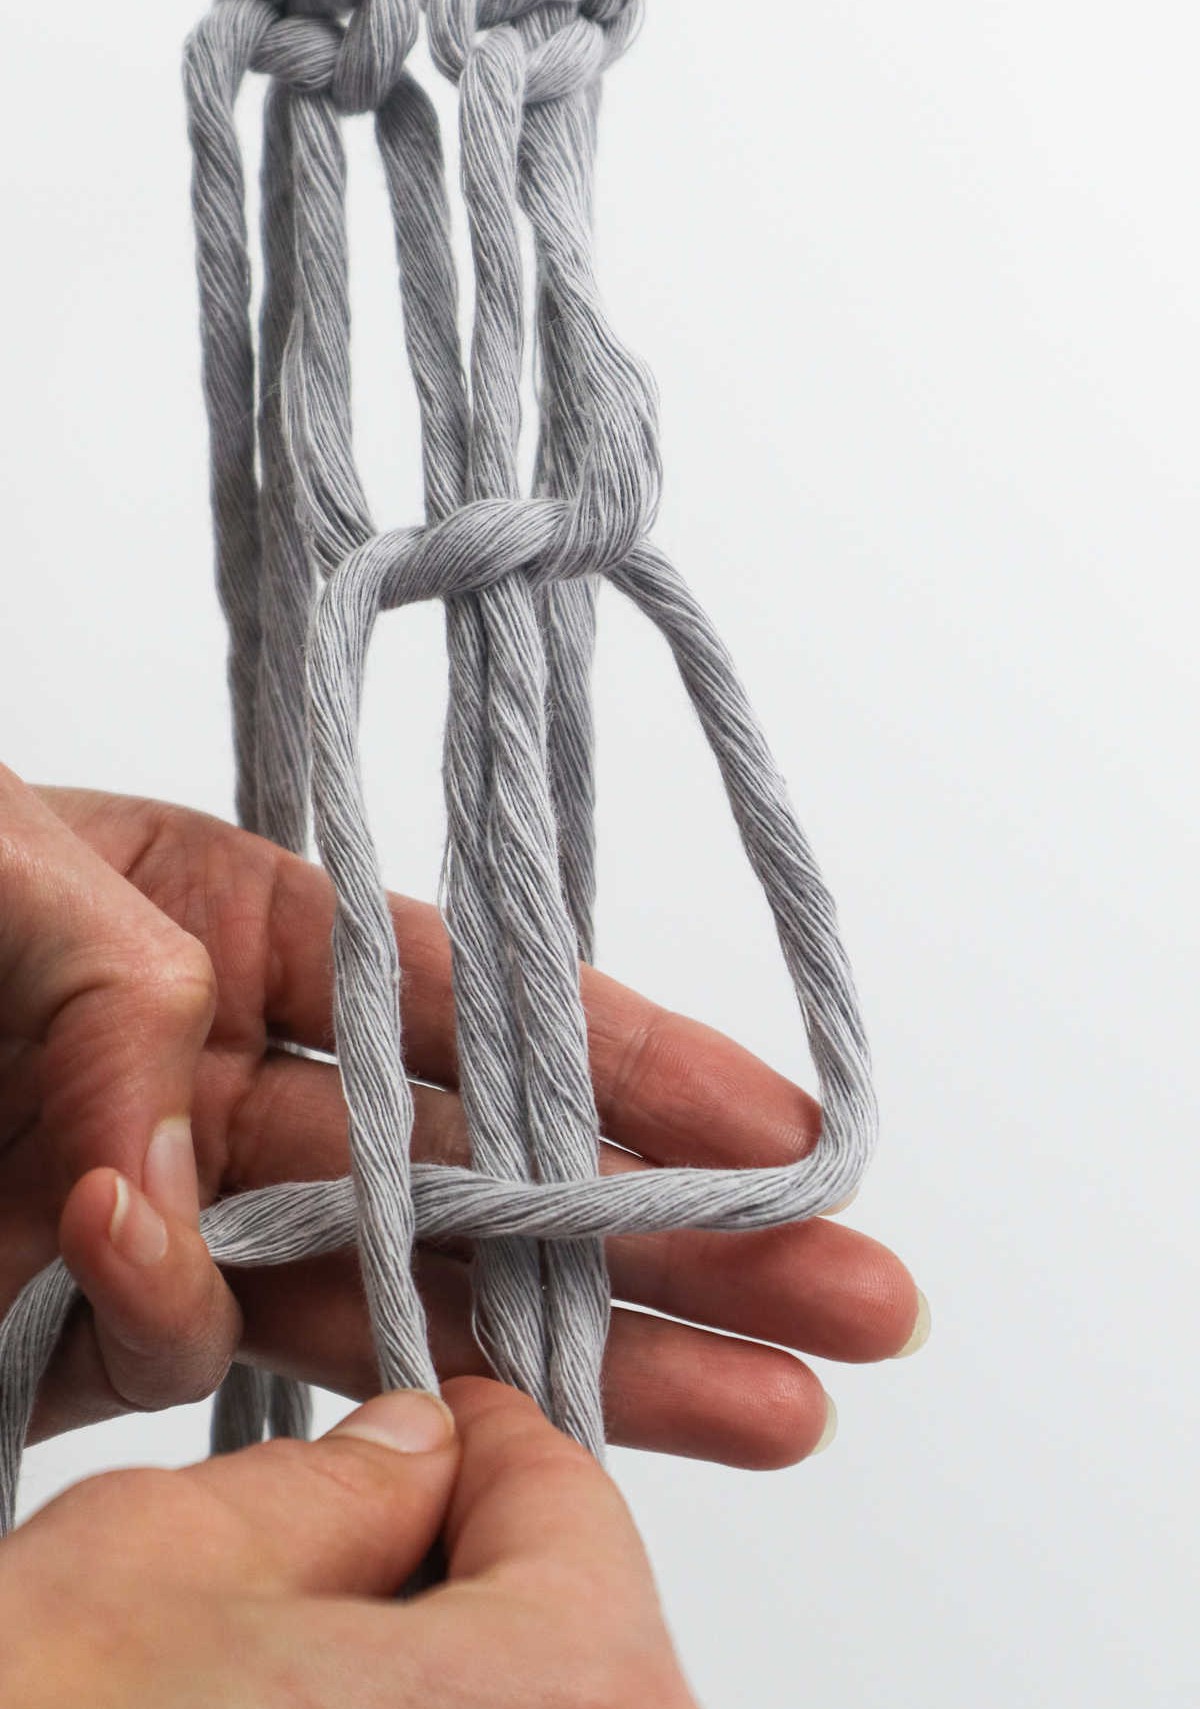
With the loop established, take the right strand and pass it over the left strand before pulling it under both the central cords and through the newly formed loop.
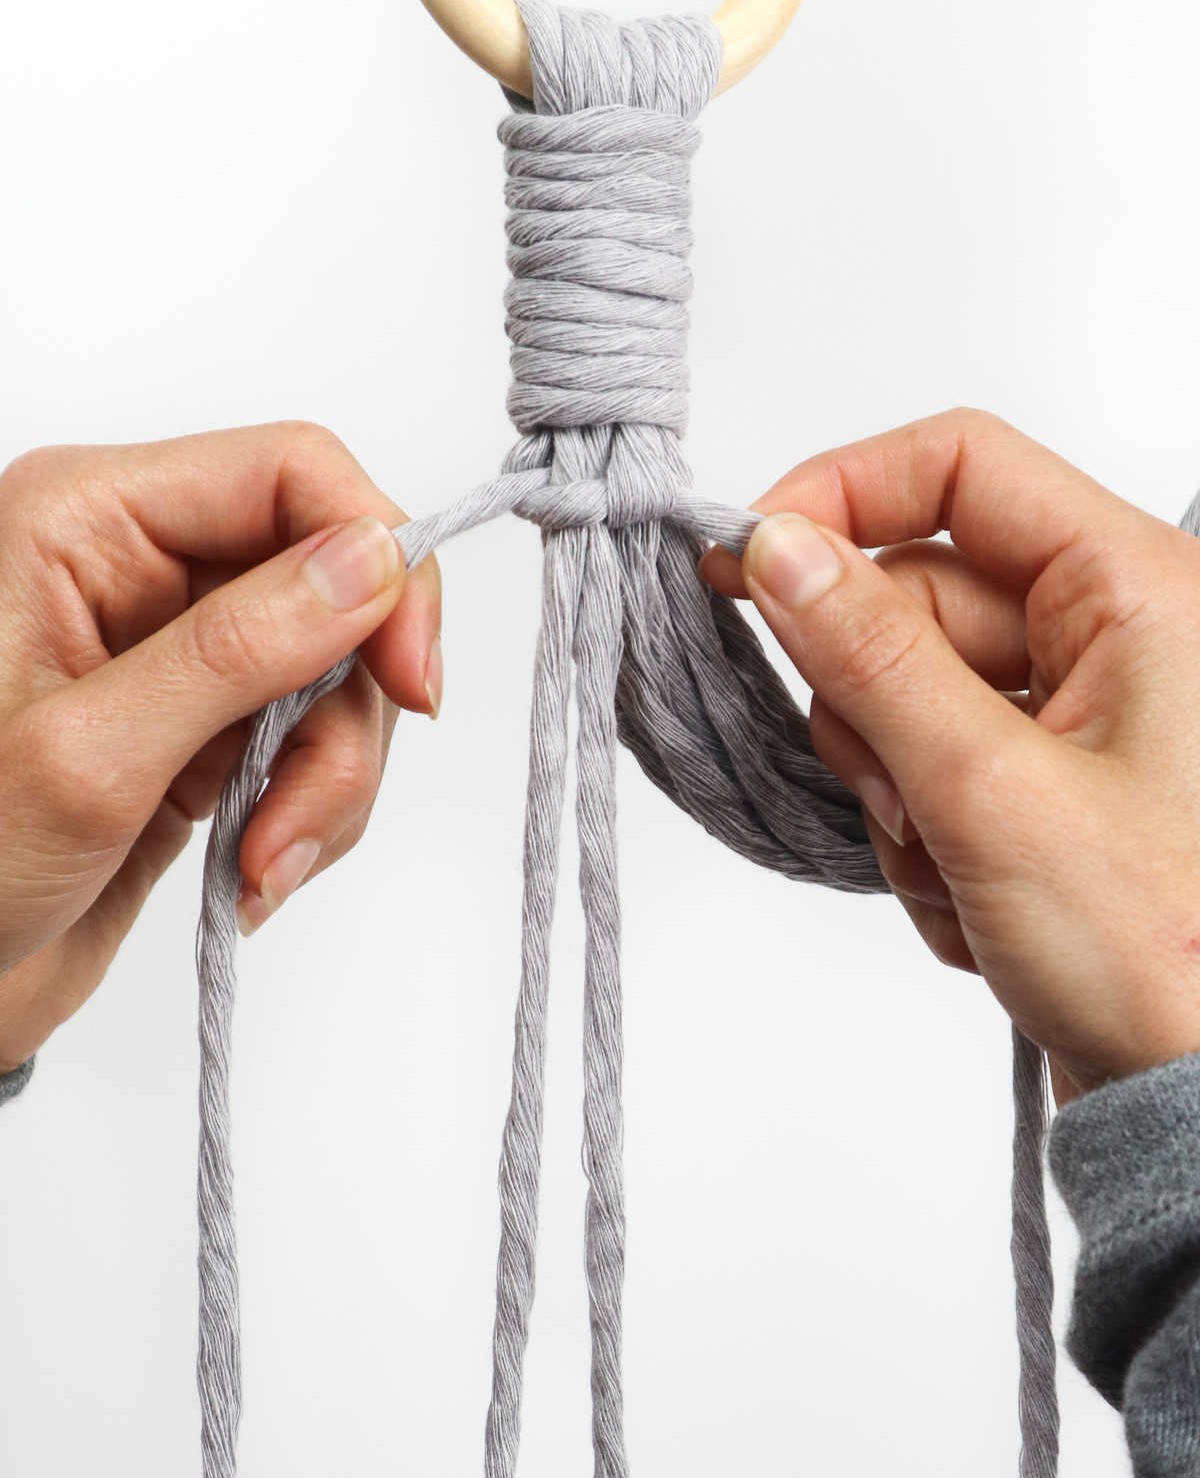
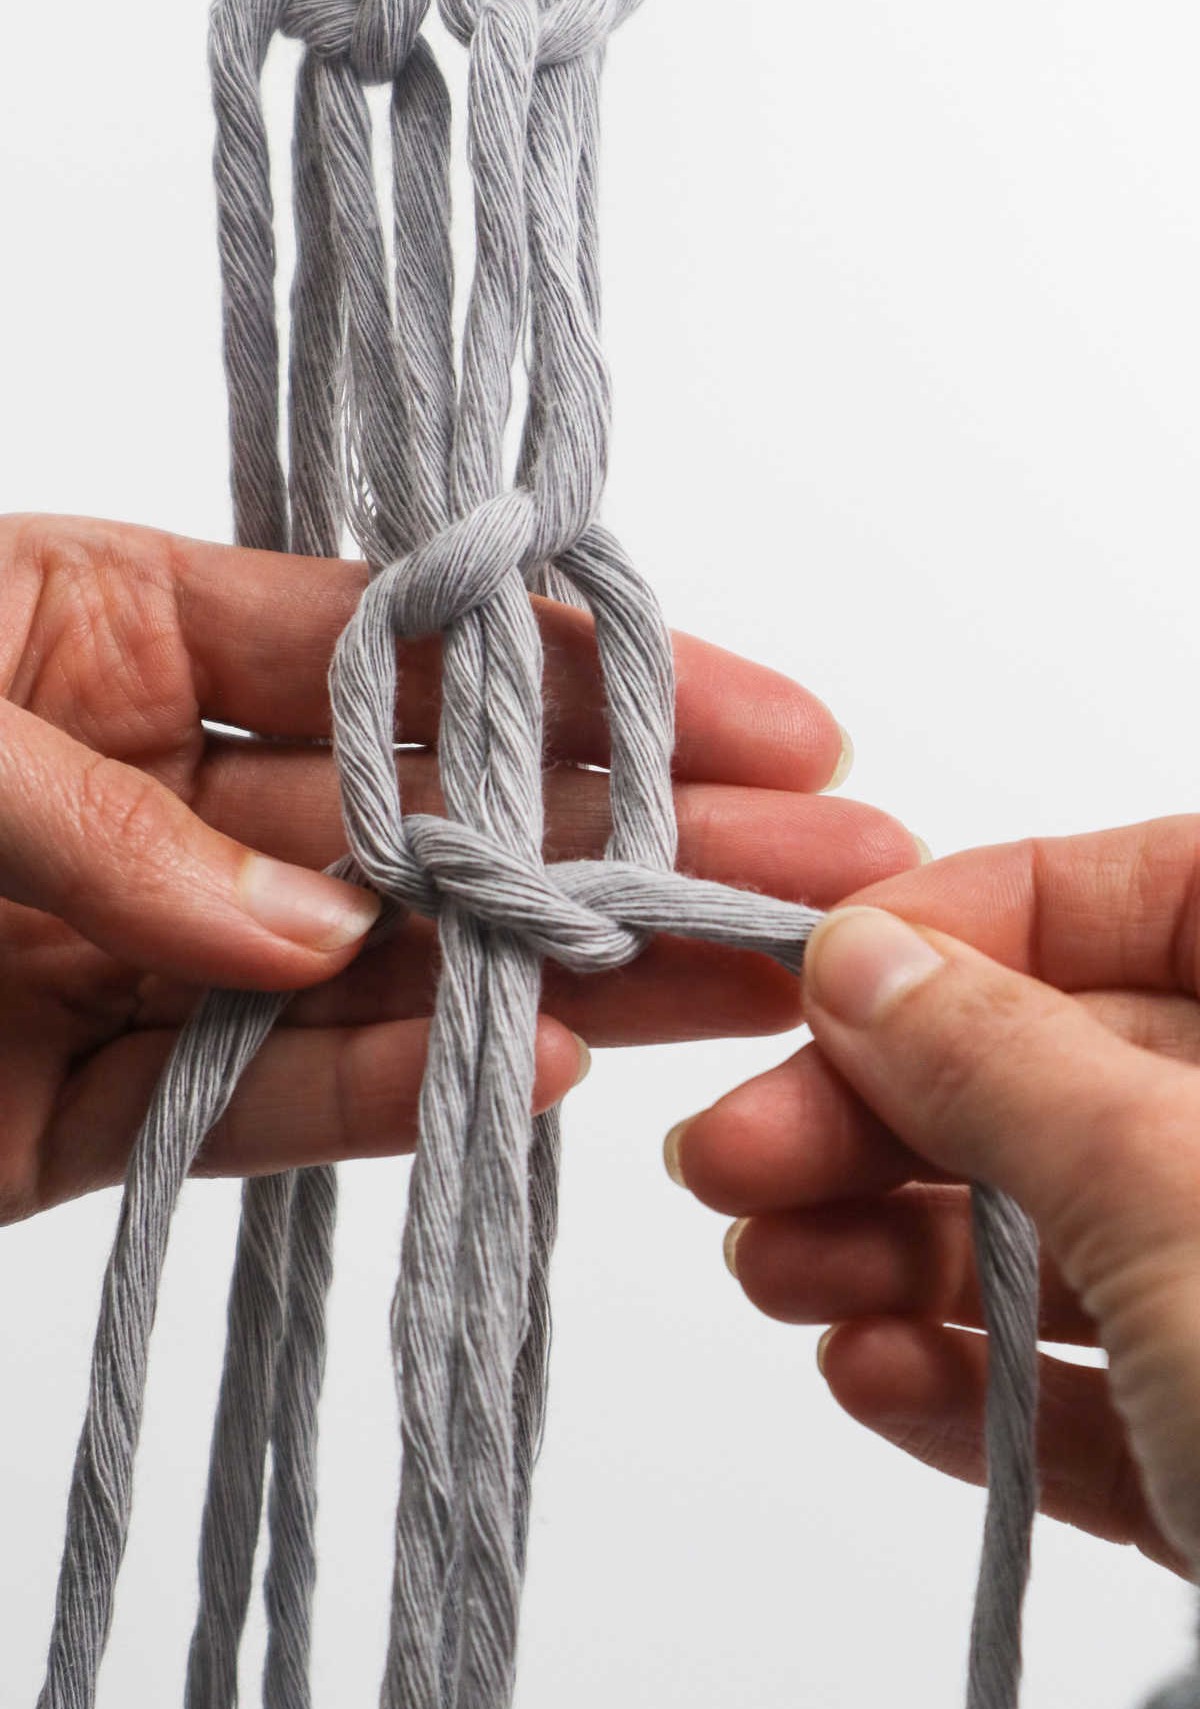
Once you’ve completed these steps, gently pull both ends up and tug them firmly together to secure your first knot in place.
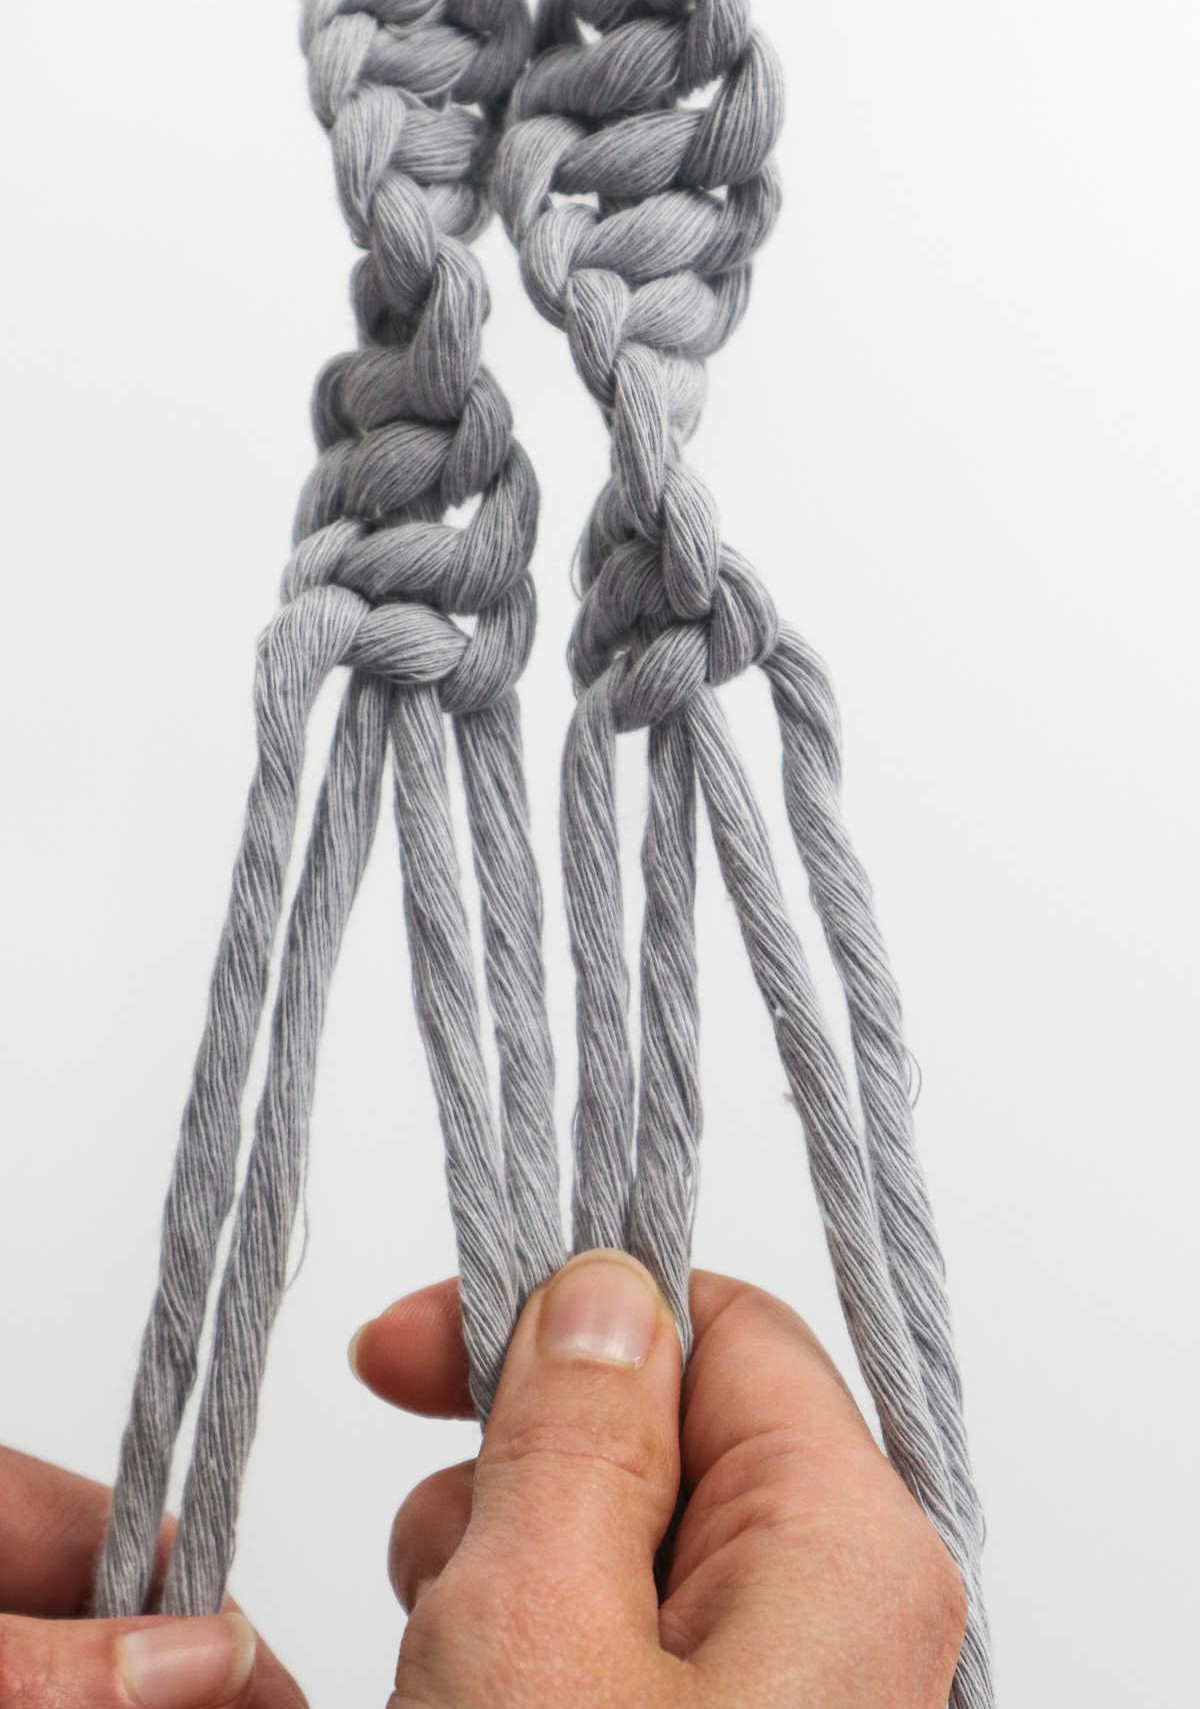
Step 6
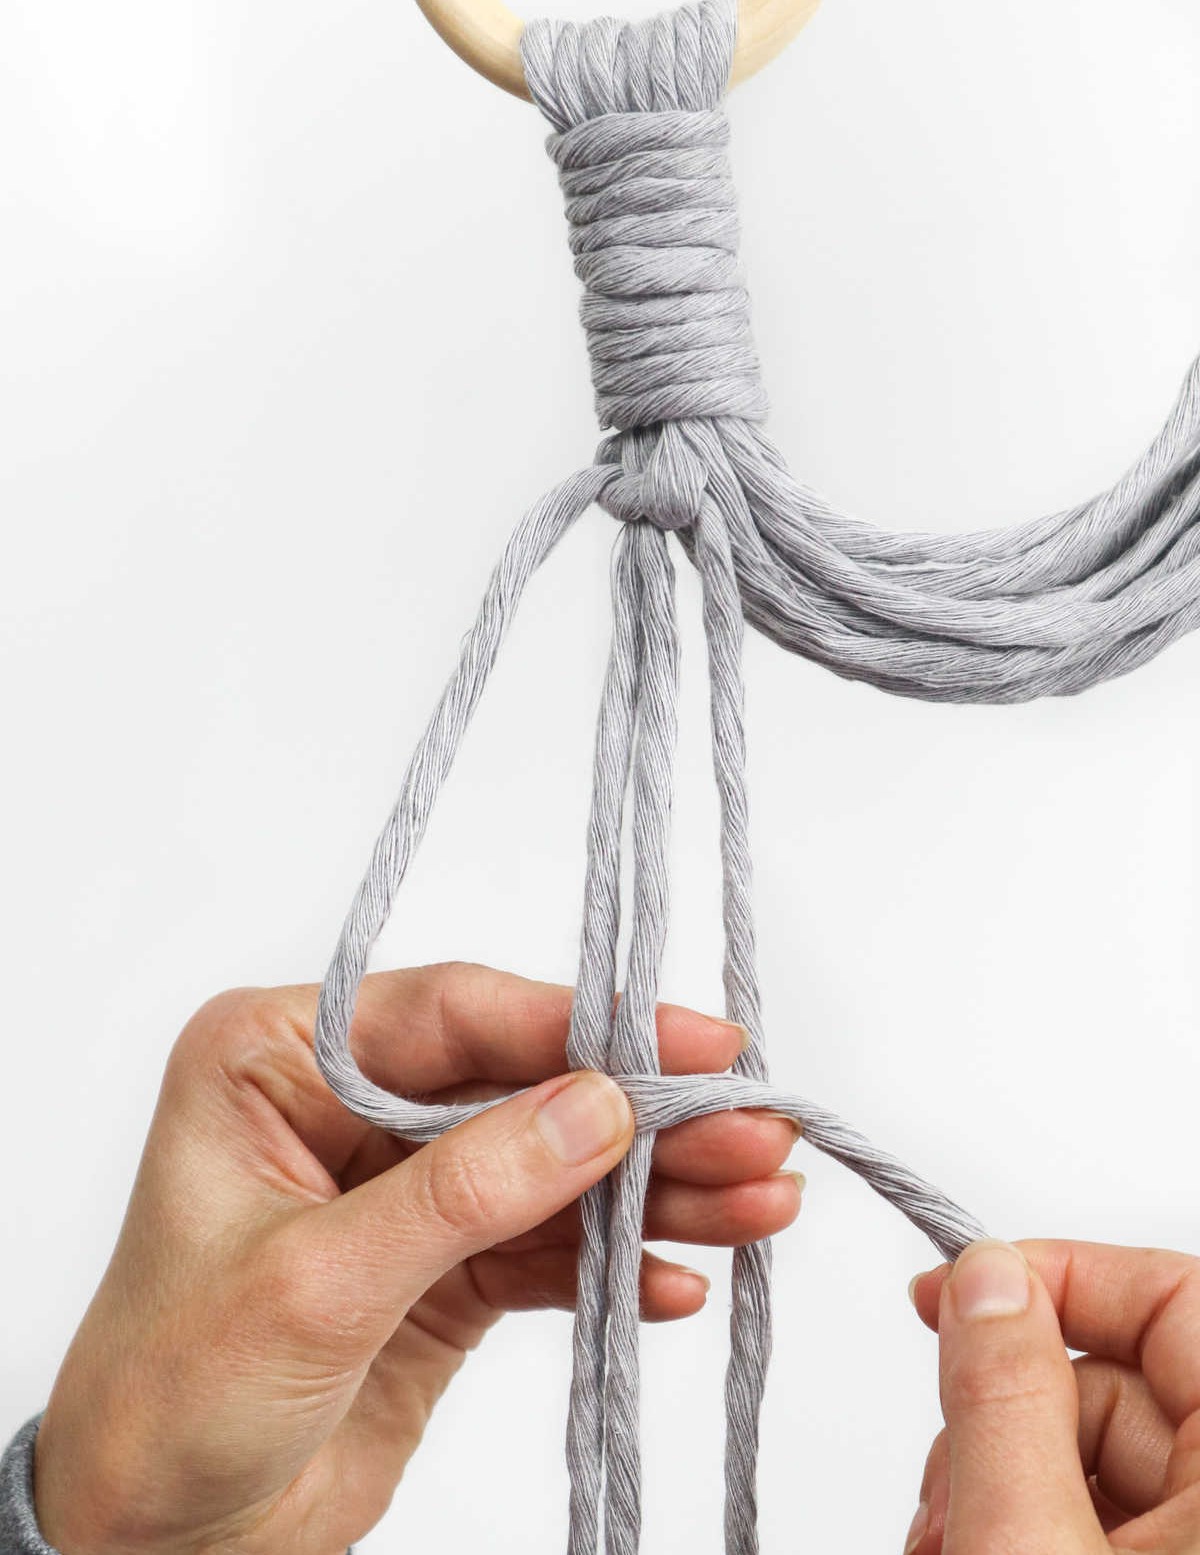

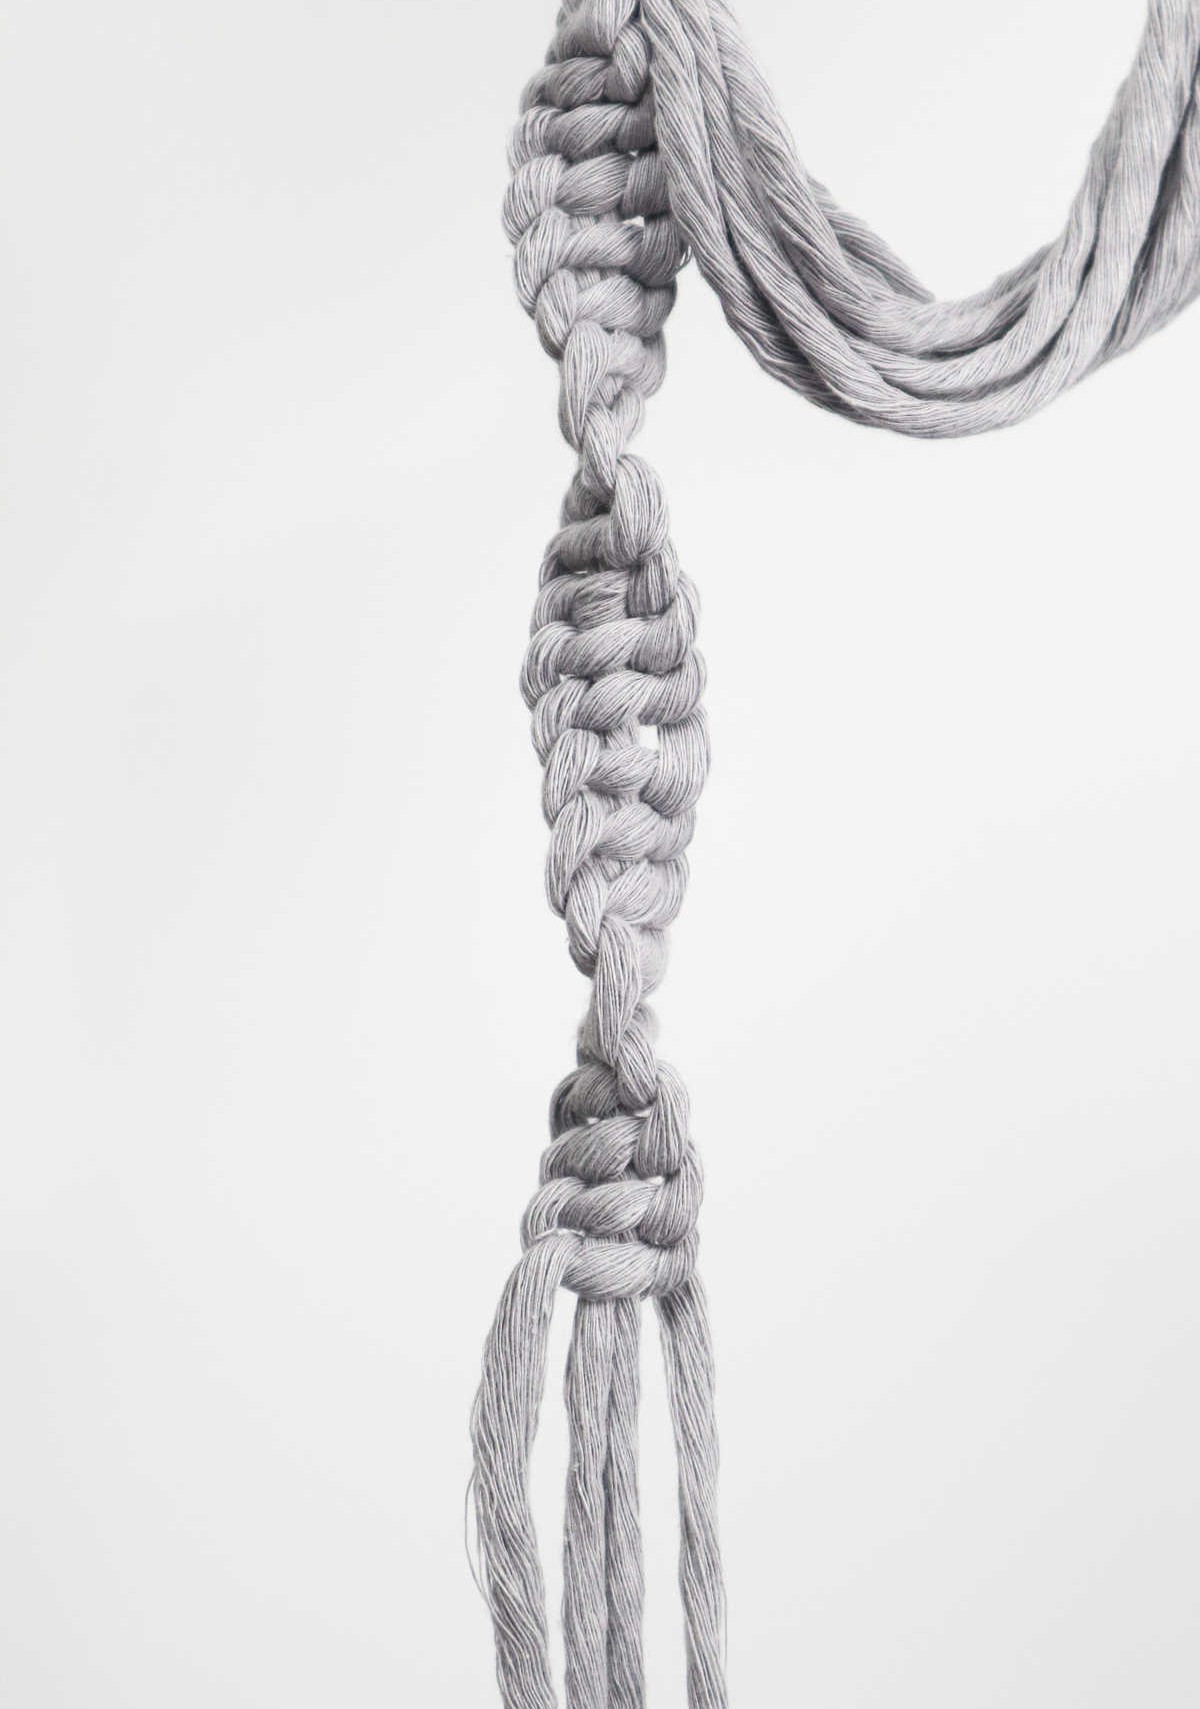
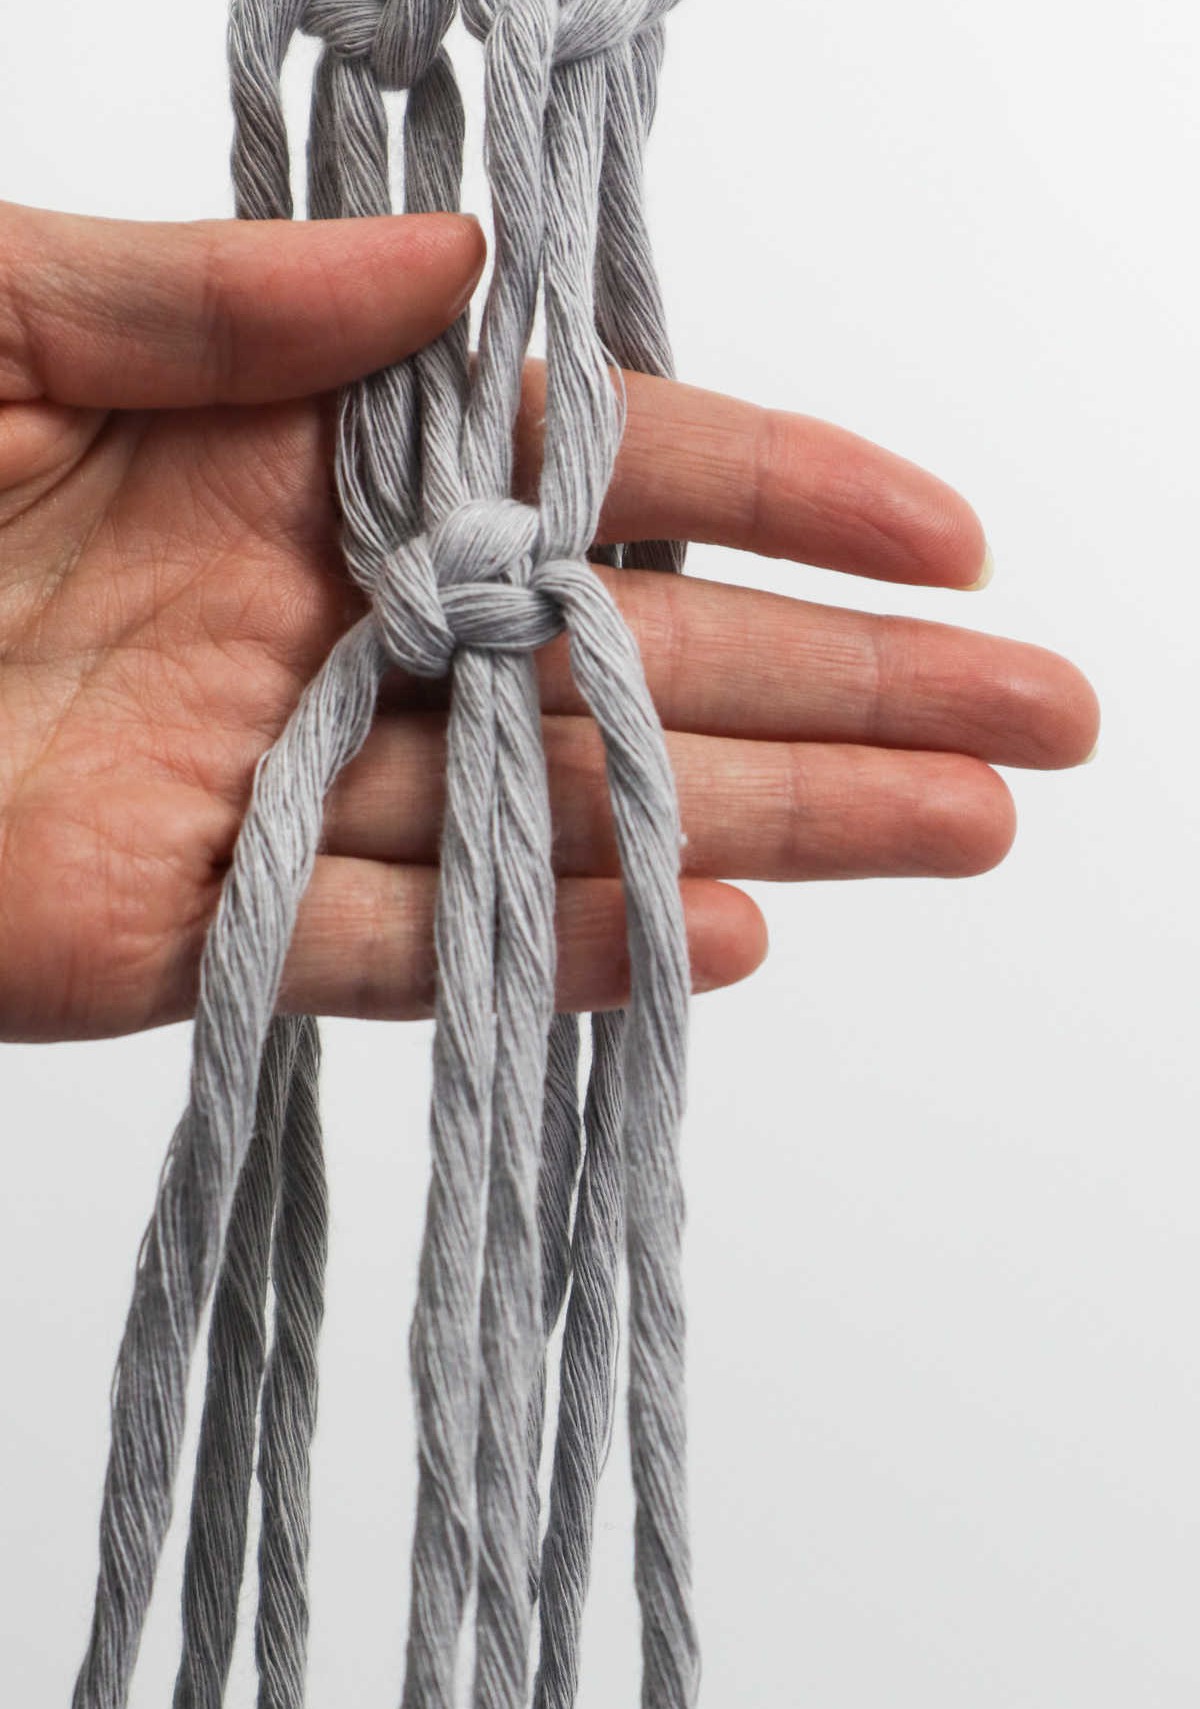
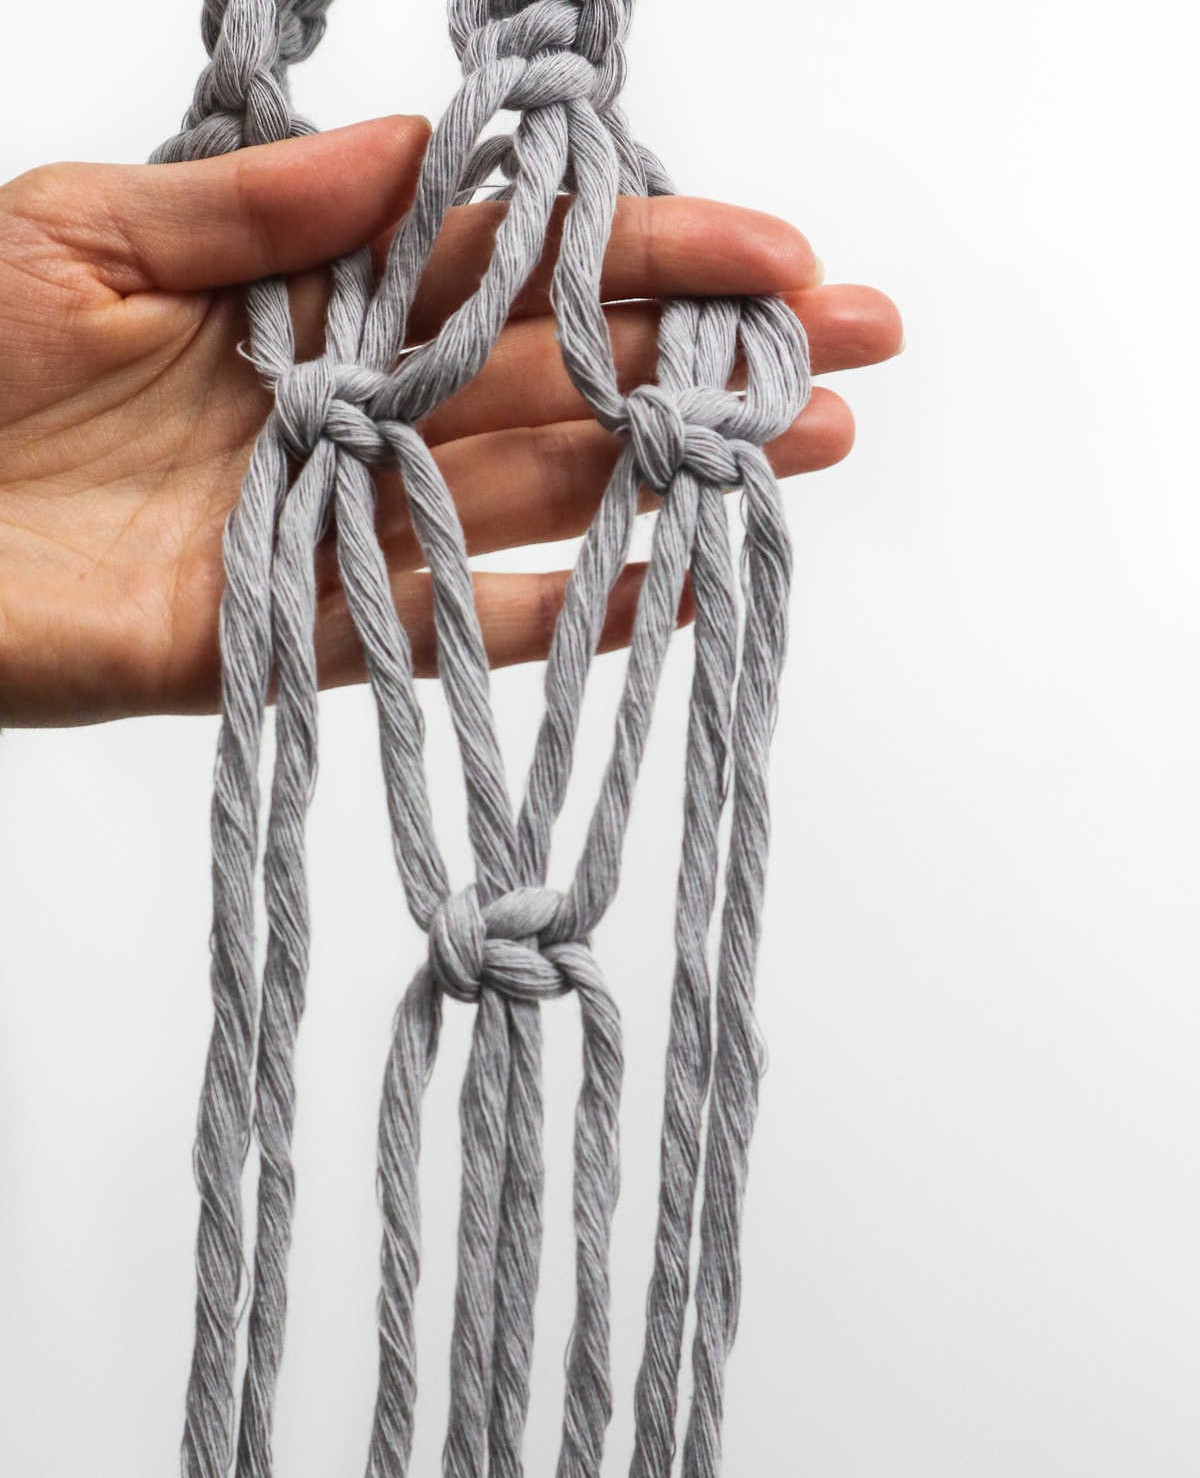
As you work your way along the length of the cords, you’ll begin to notice a fascinating phenomenon – the threads will naturally start to twist and turn upon themselves, forming a beautiful spiral pattern. To achieve this effect, be sure to maintain consistent tension as you tie each knot, allowing the fibers to interlock in a harmonious dance.
Step 7

Continue by gathering an additional four strands, just as you did earlier. As you work with these new fibers, you’ll create a second series of intricate spirals that will further enhance the overall design.
Step 8
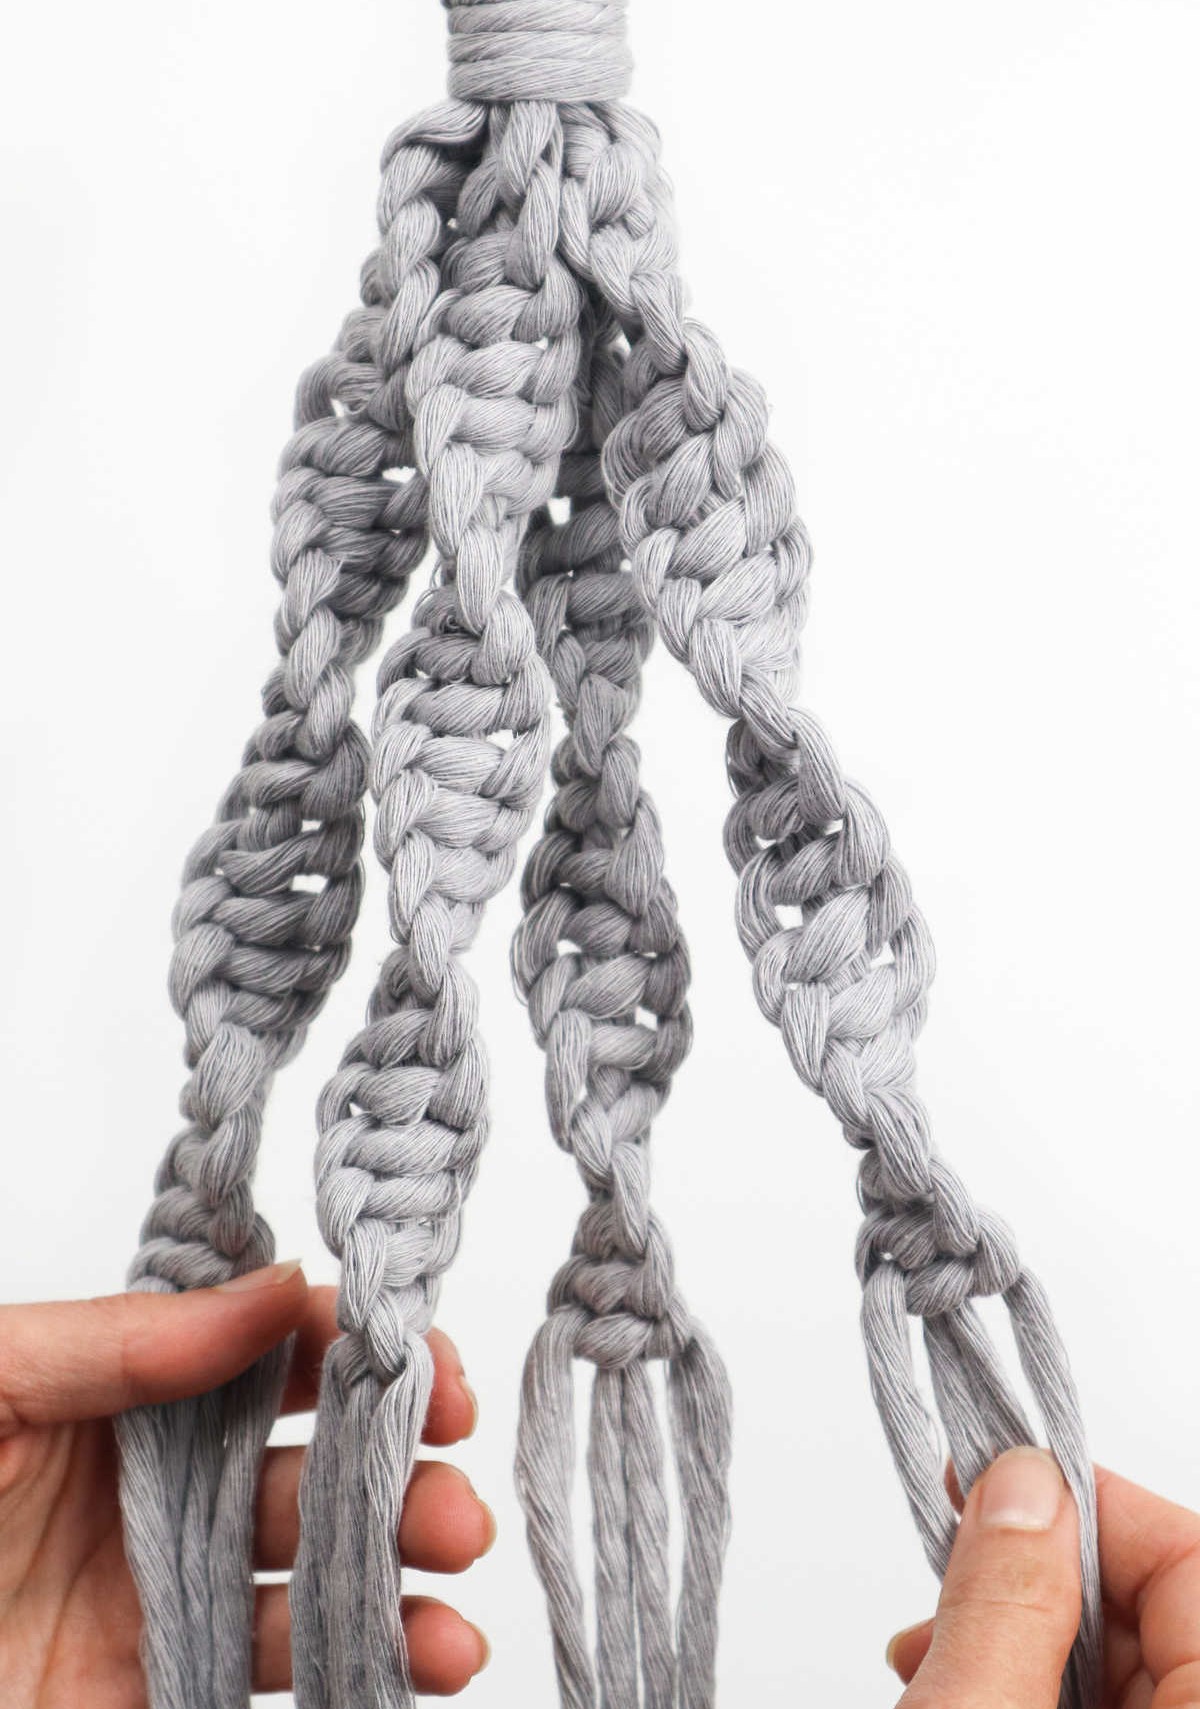
To complete your macrame hanger, ensure the final two sections match the initial pattern. The finished product should resemble a harmonious spiral structure. A crucial consideration is maintaining consistency across all four sections in terms of the number and arrangement of spiraling knots. This balance is essential to achieve a visually appealing and well-proportioned hanger.
Step 9
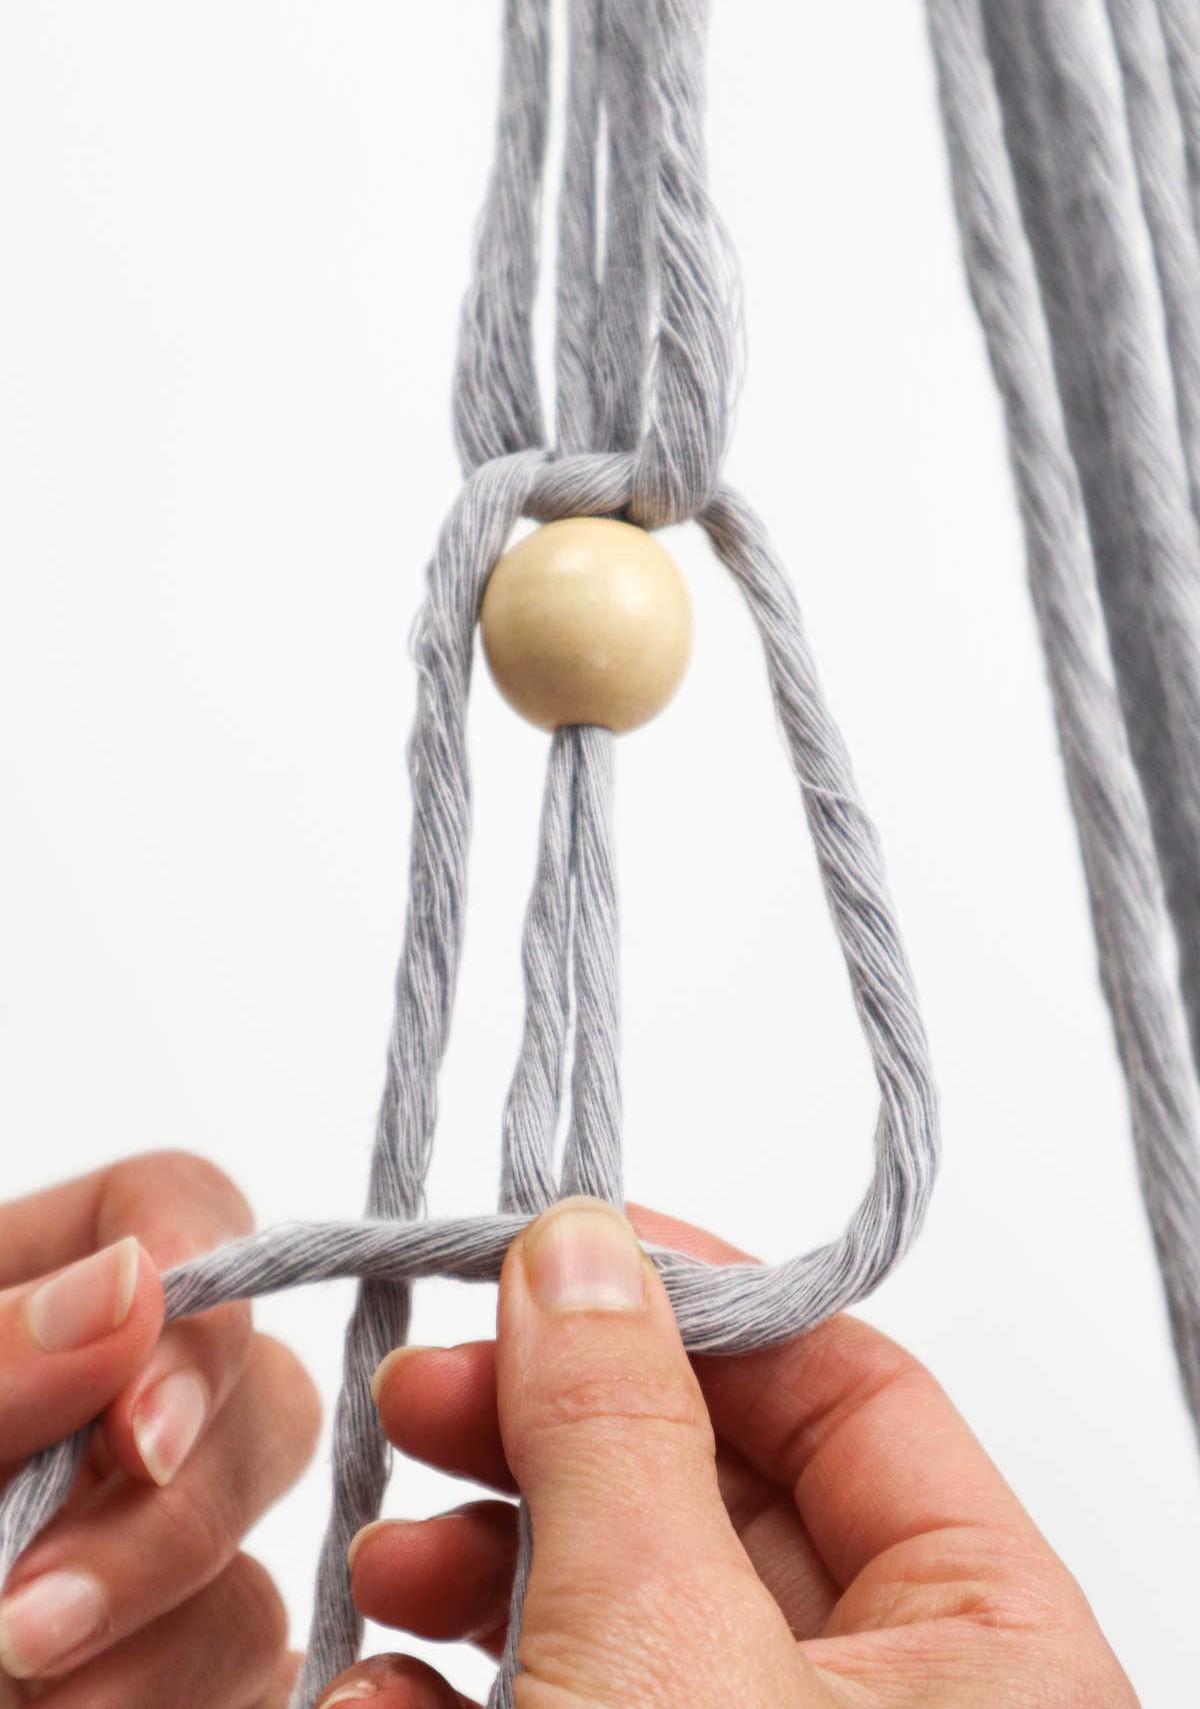
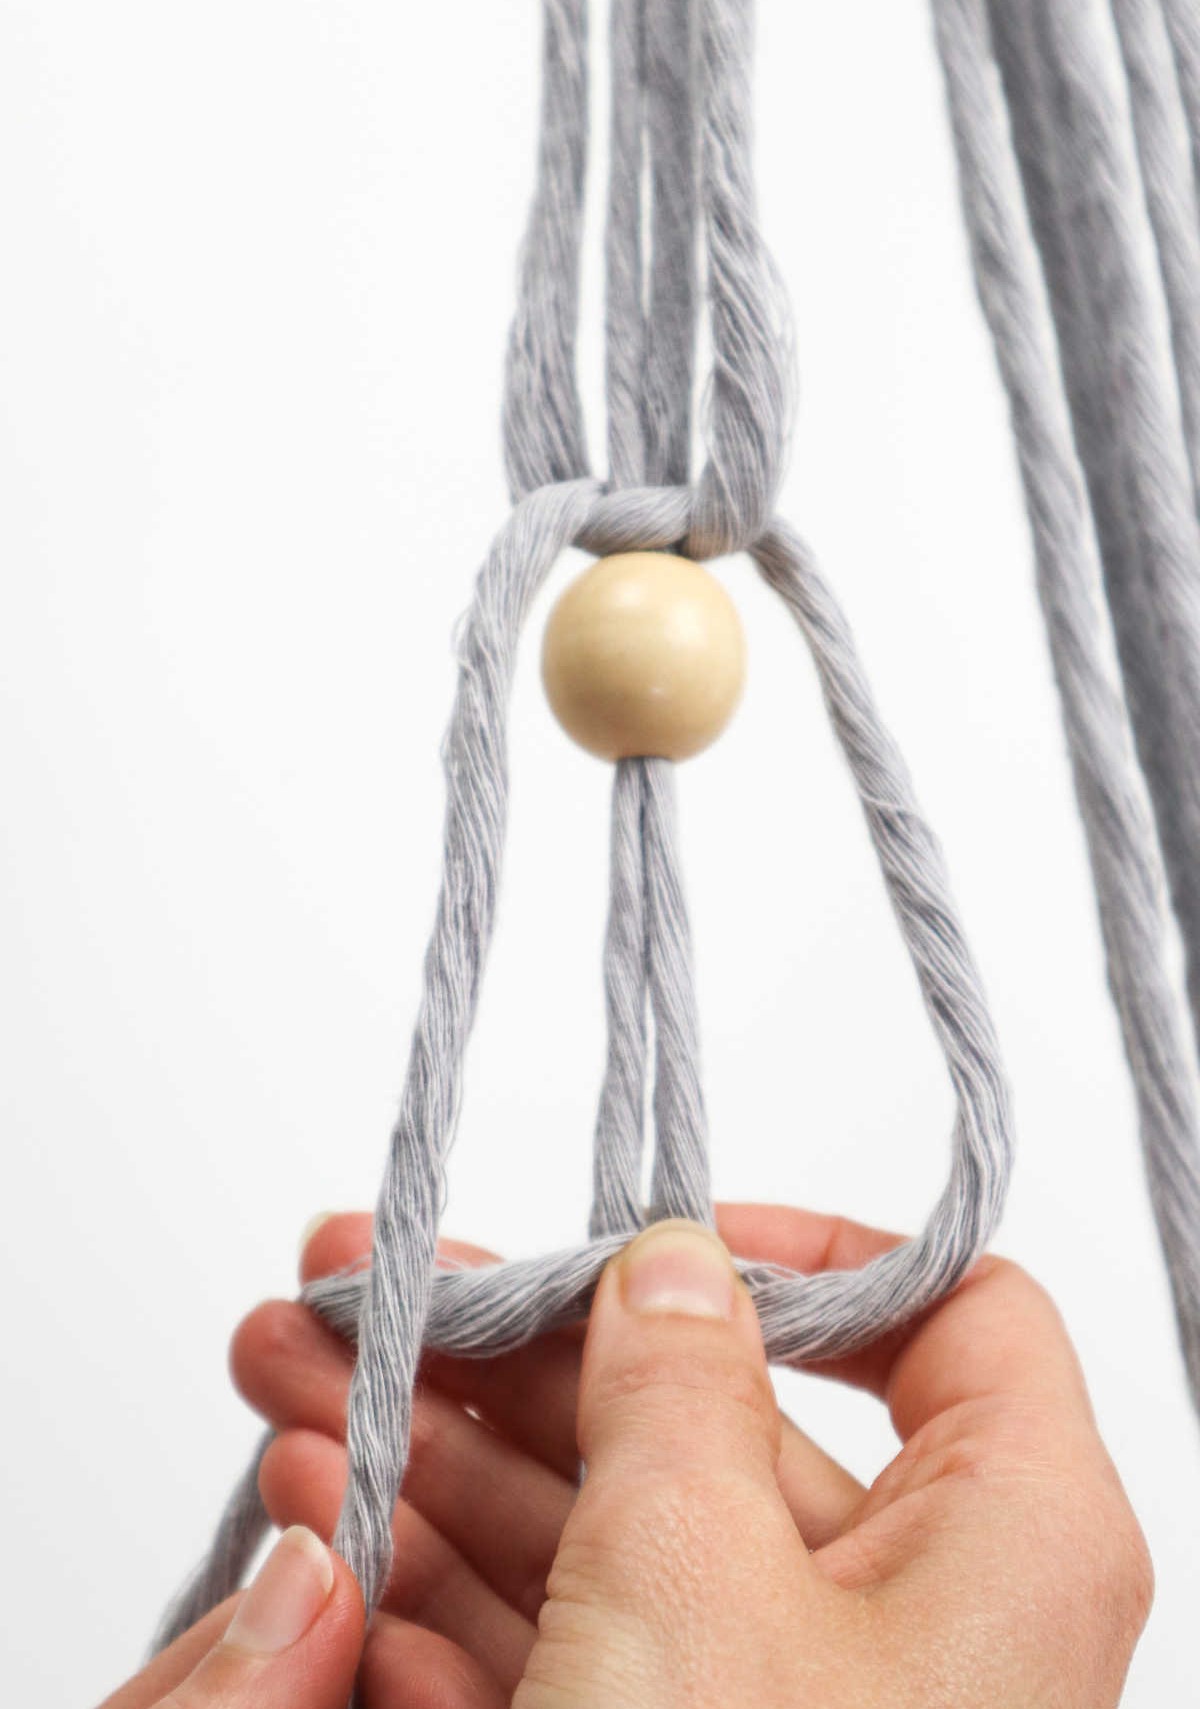
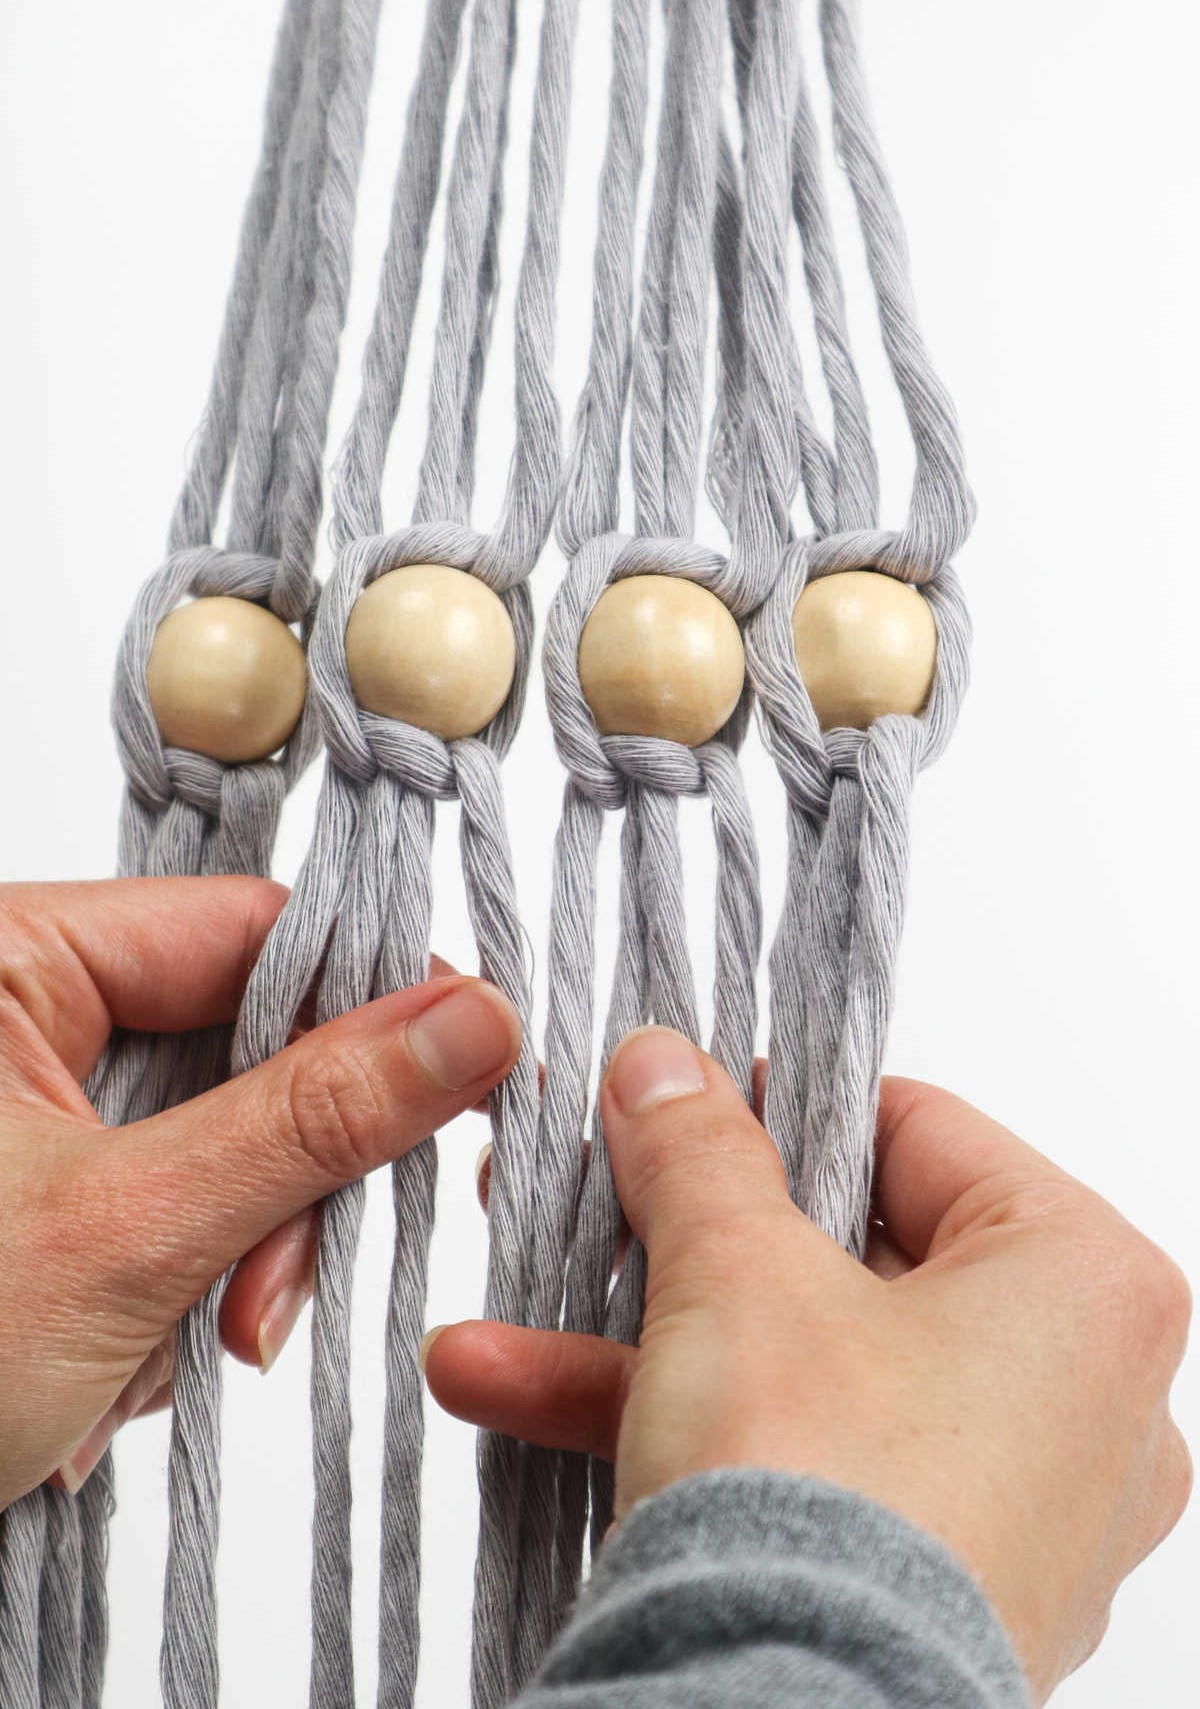
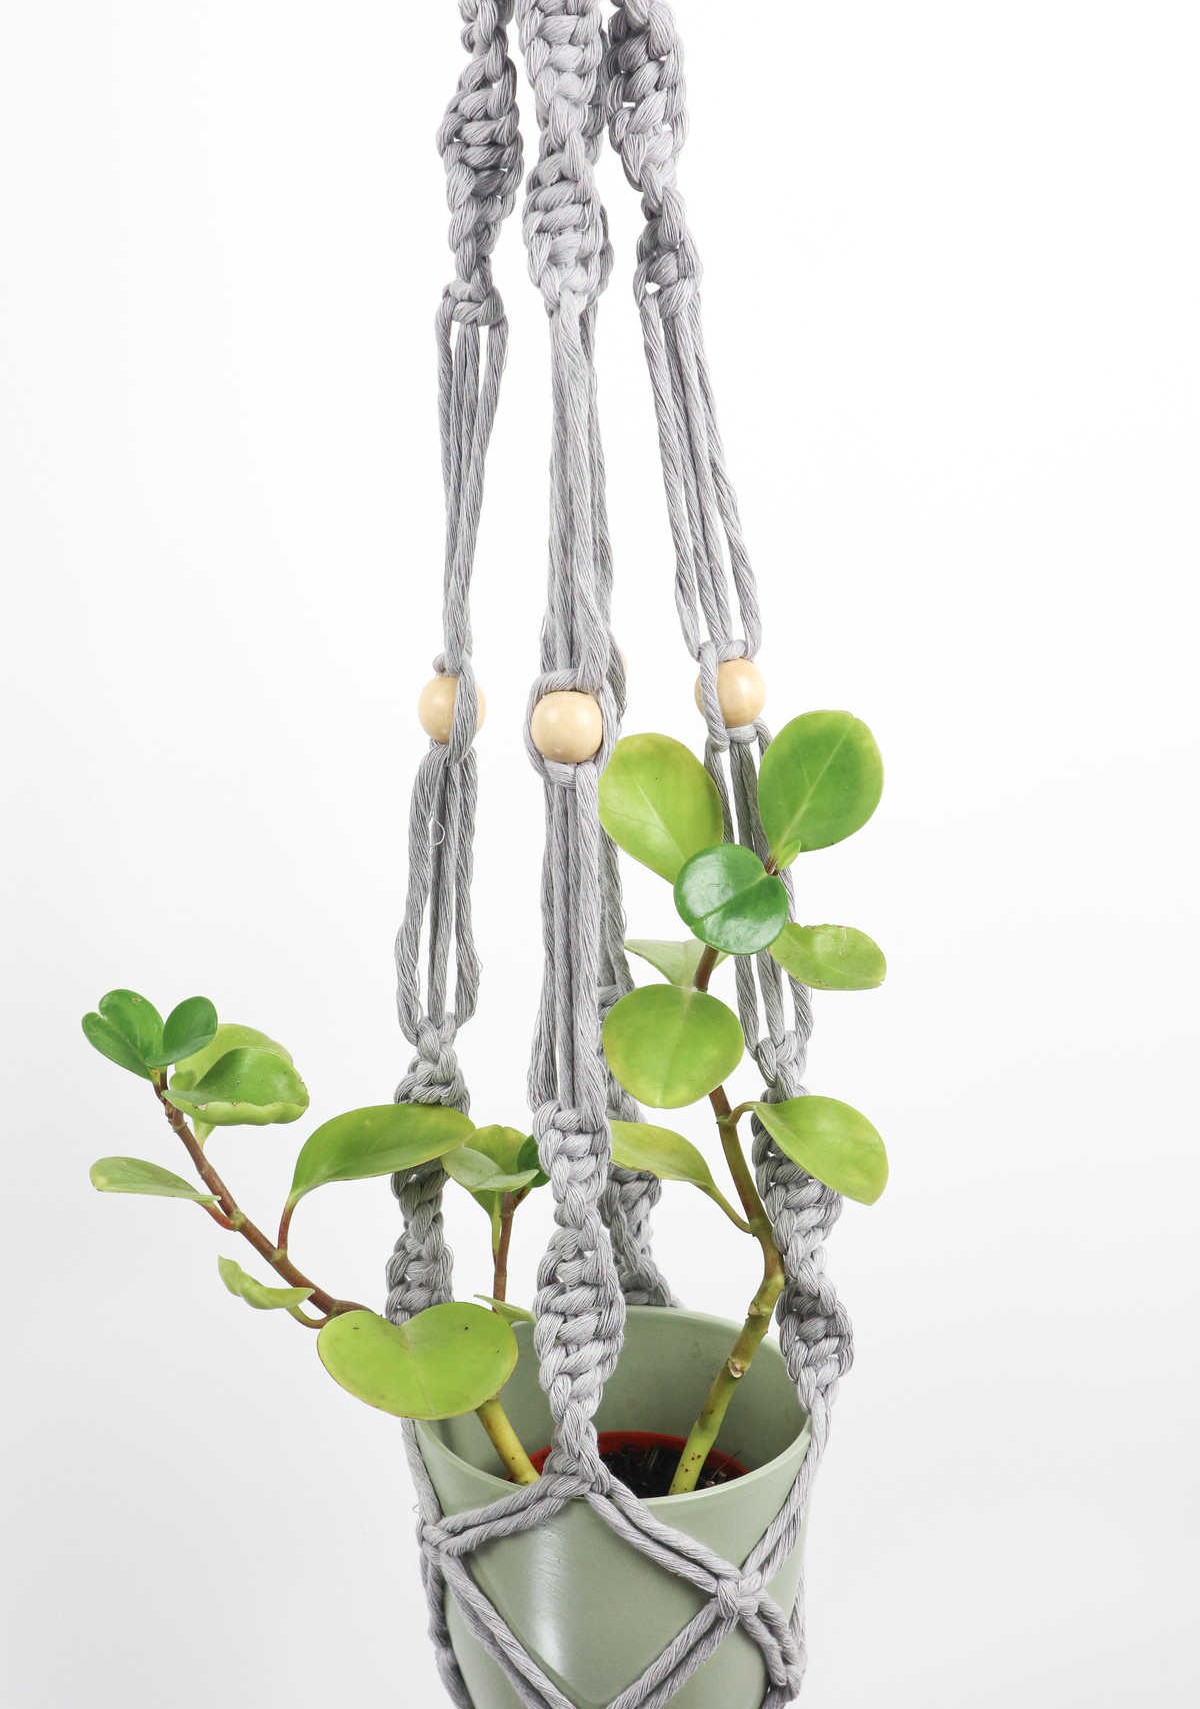
To add an extra layer of flair to our hanger, we’re going to introduce a bead, although it’s entirely optional. I find it gives the finished product a nice touch. To incorporate the bead, we’ll embed it within a square knot.
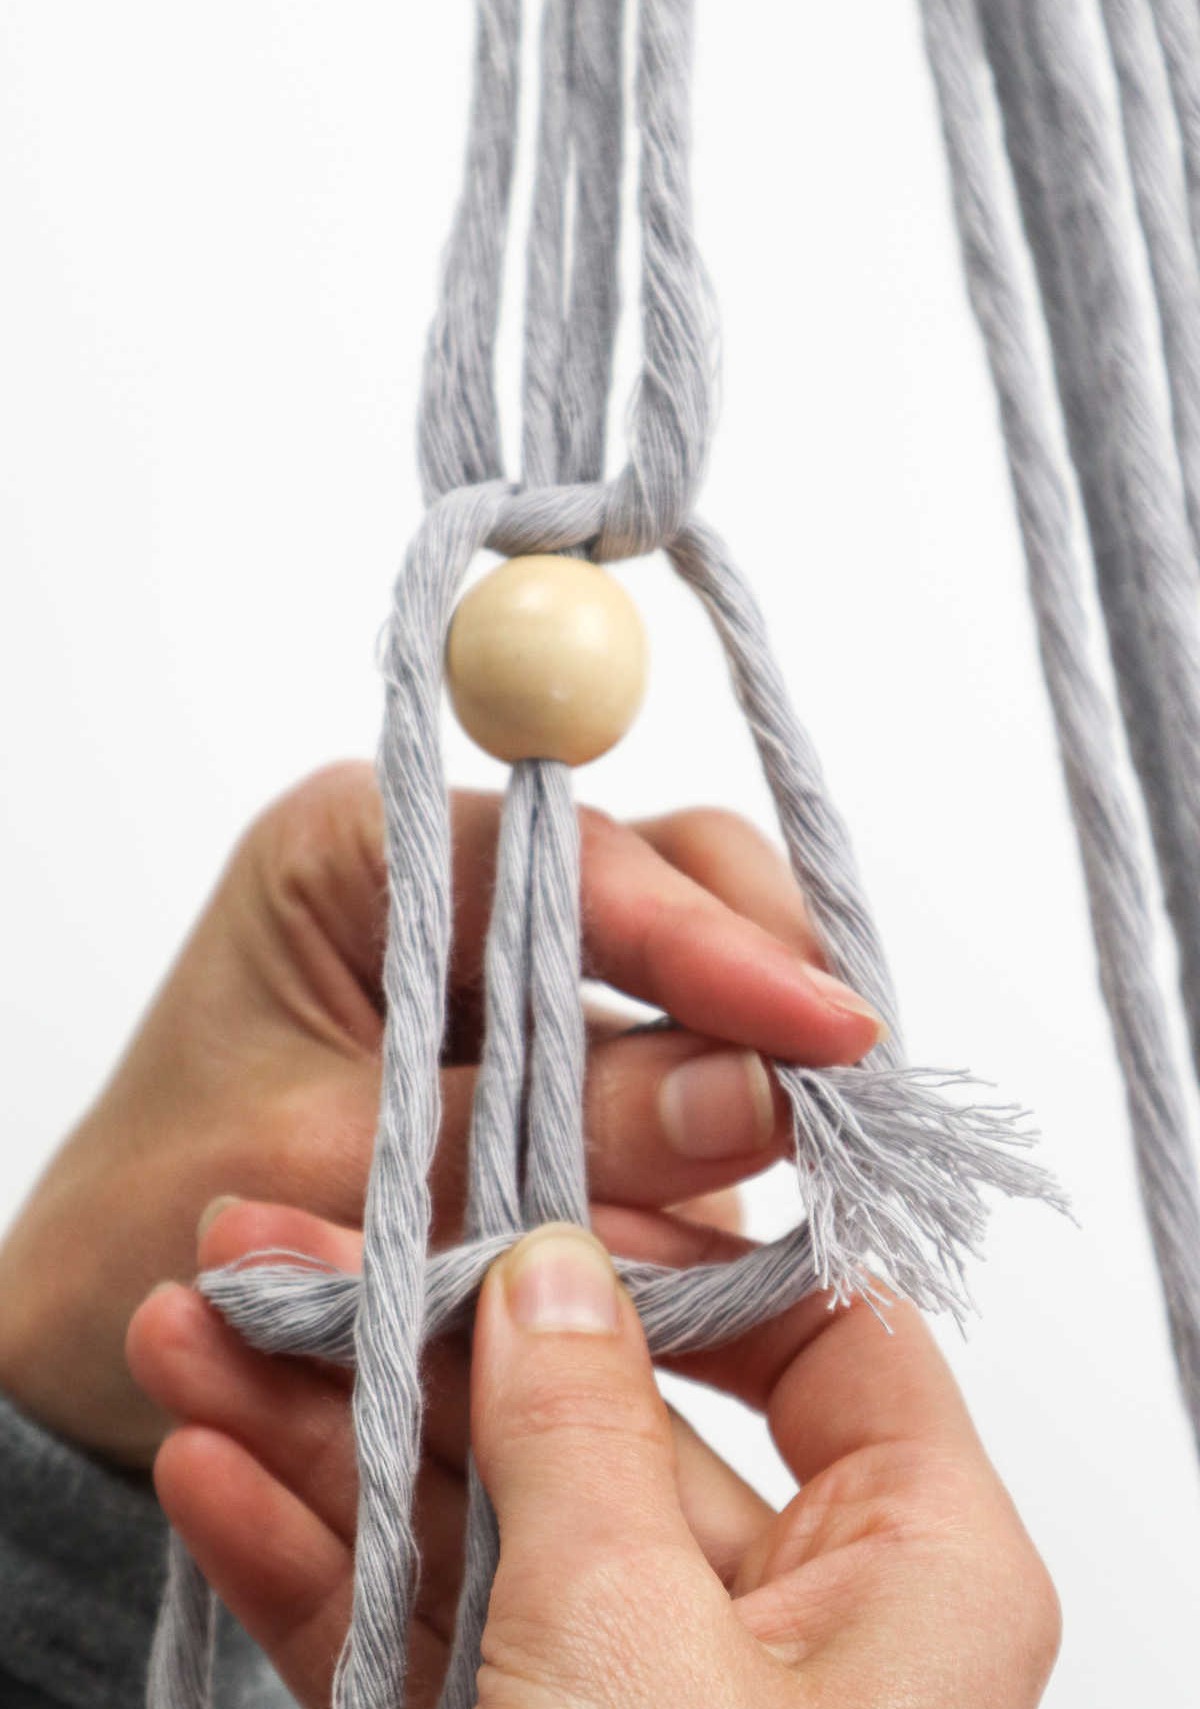
First, create one half of the square knot using the left side of the cord, leaving about 2-3 inches of gap after the final spiral knot. Next, take hold of the bead and pass the two middle strands through its hole.
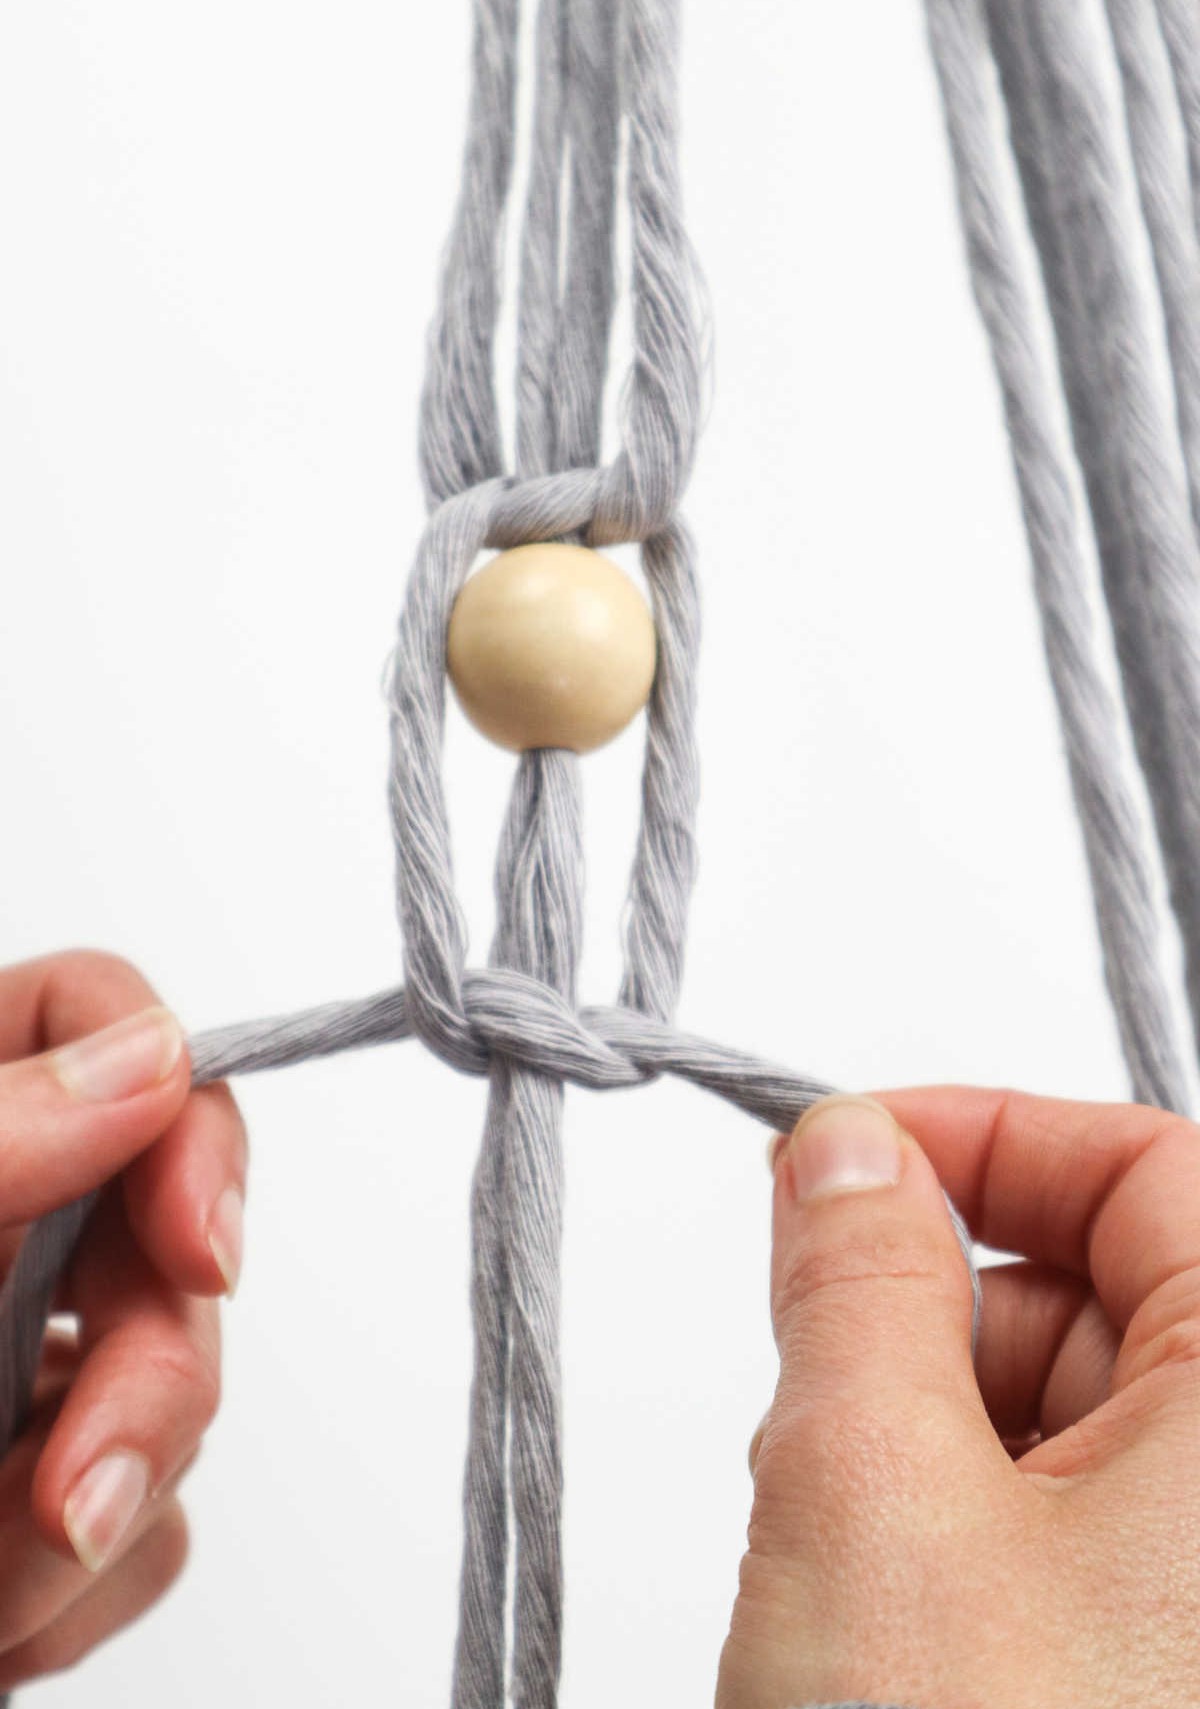
Pull the bead upwards so that it sits just below the half-square knot. Then, grasp the right strand and complete the second half of the square knot.
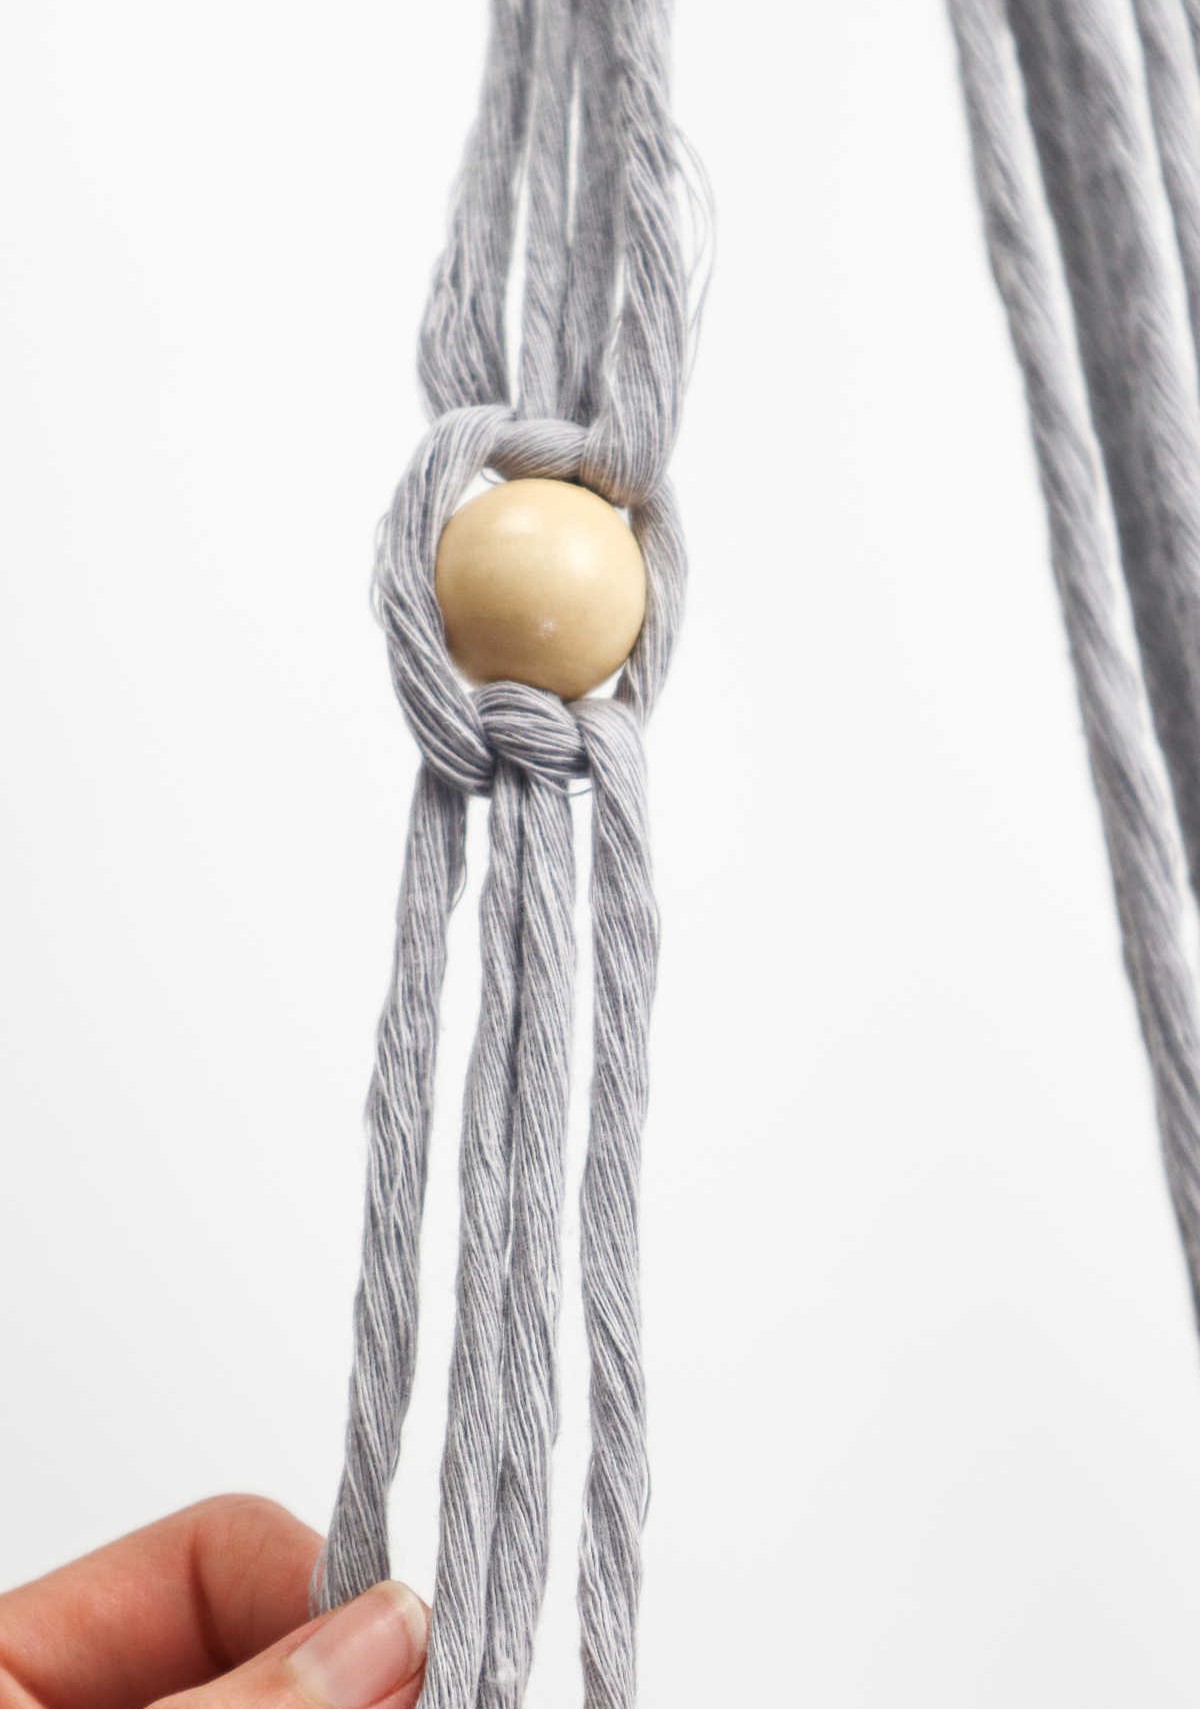
Once you’ve pulled the right strand over the middle strands to form a loop, draw the left strand over the right, under the middle strands, and then through the loop. Finally, tug both ends to secure the bead in place.
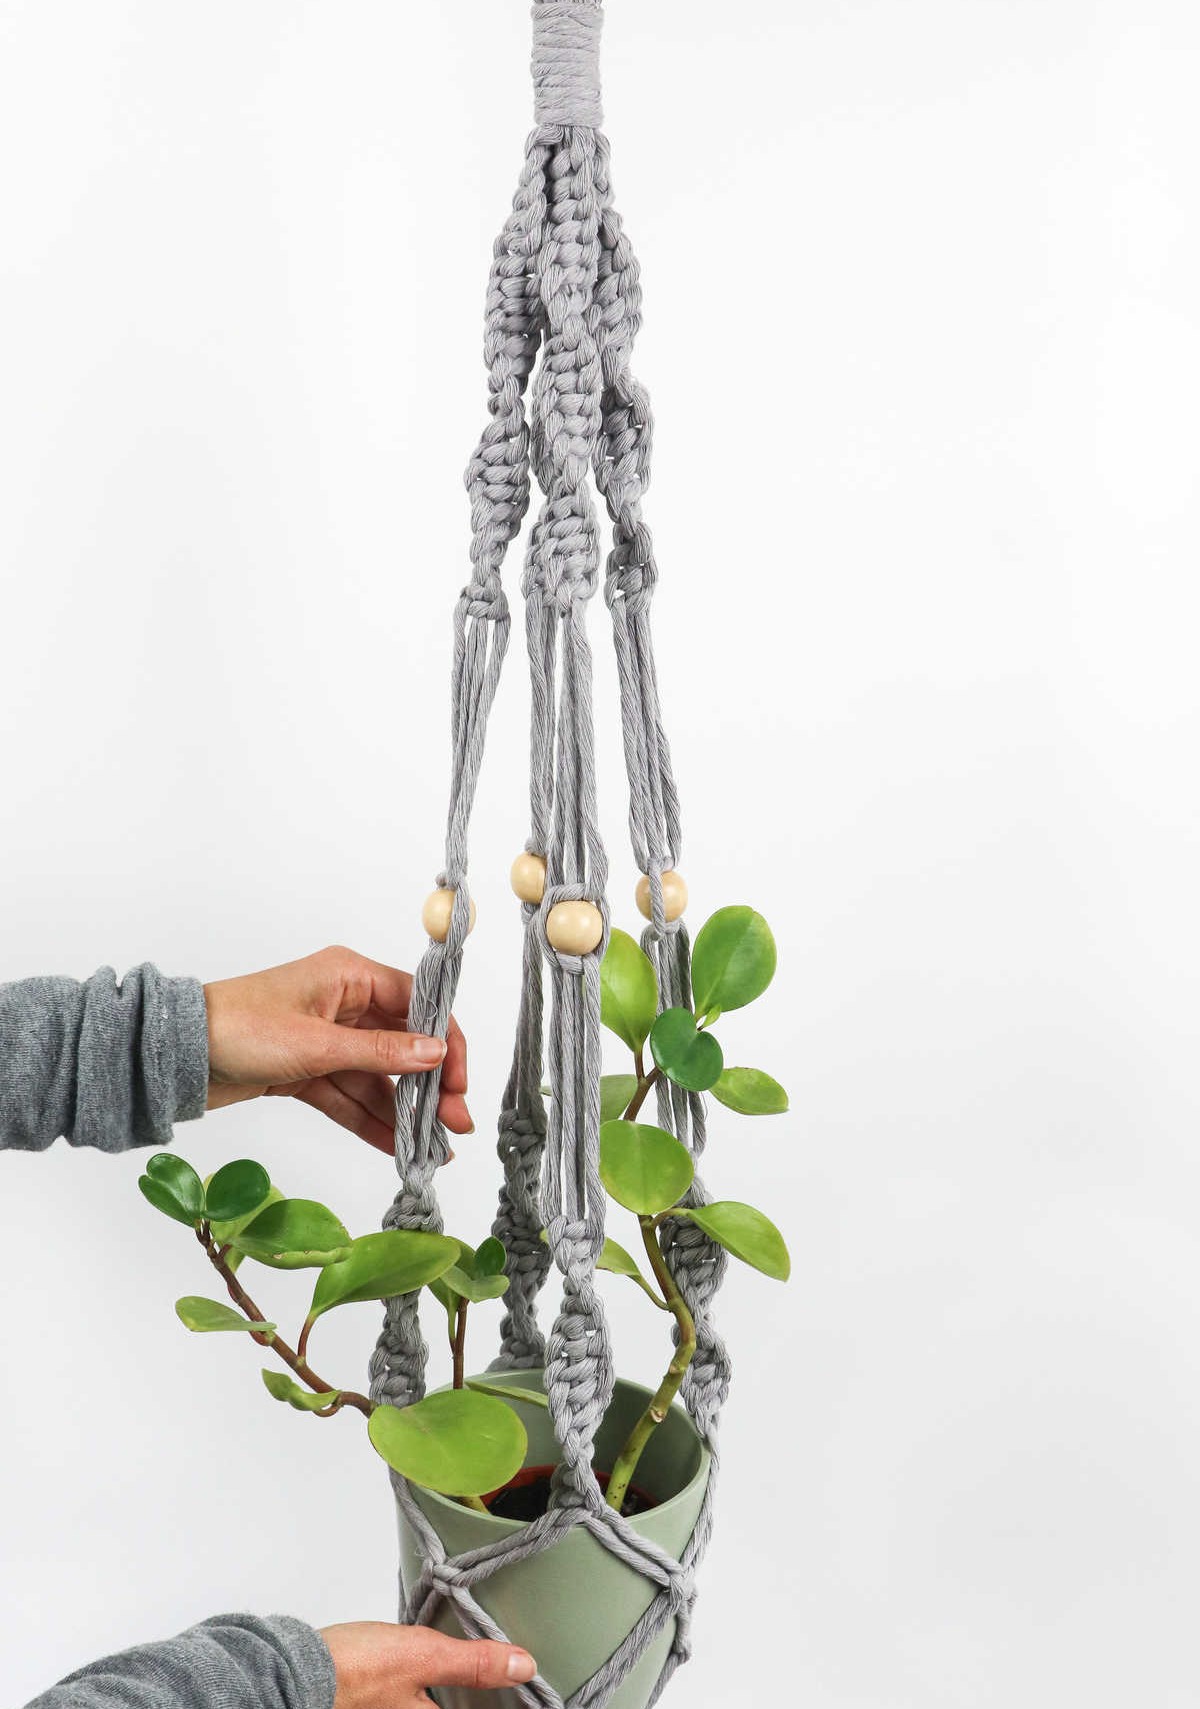
Repeat this process for all four sections, resulting in a total of four beads evenly spaced as illustrated below.
Be sure they are properly aligned.
Step 10
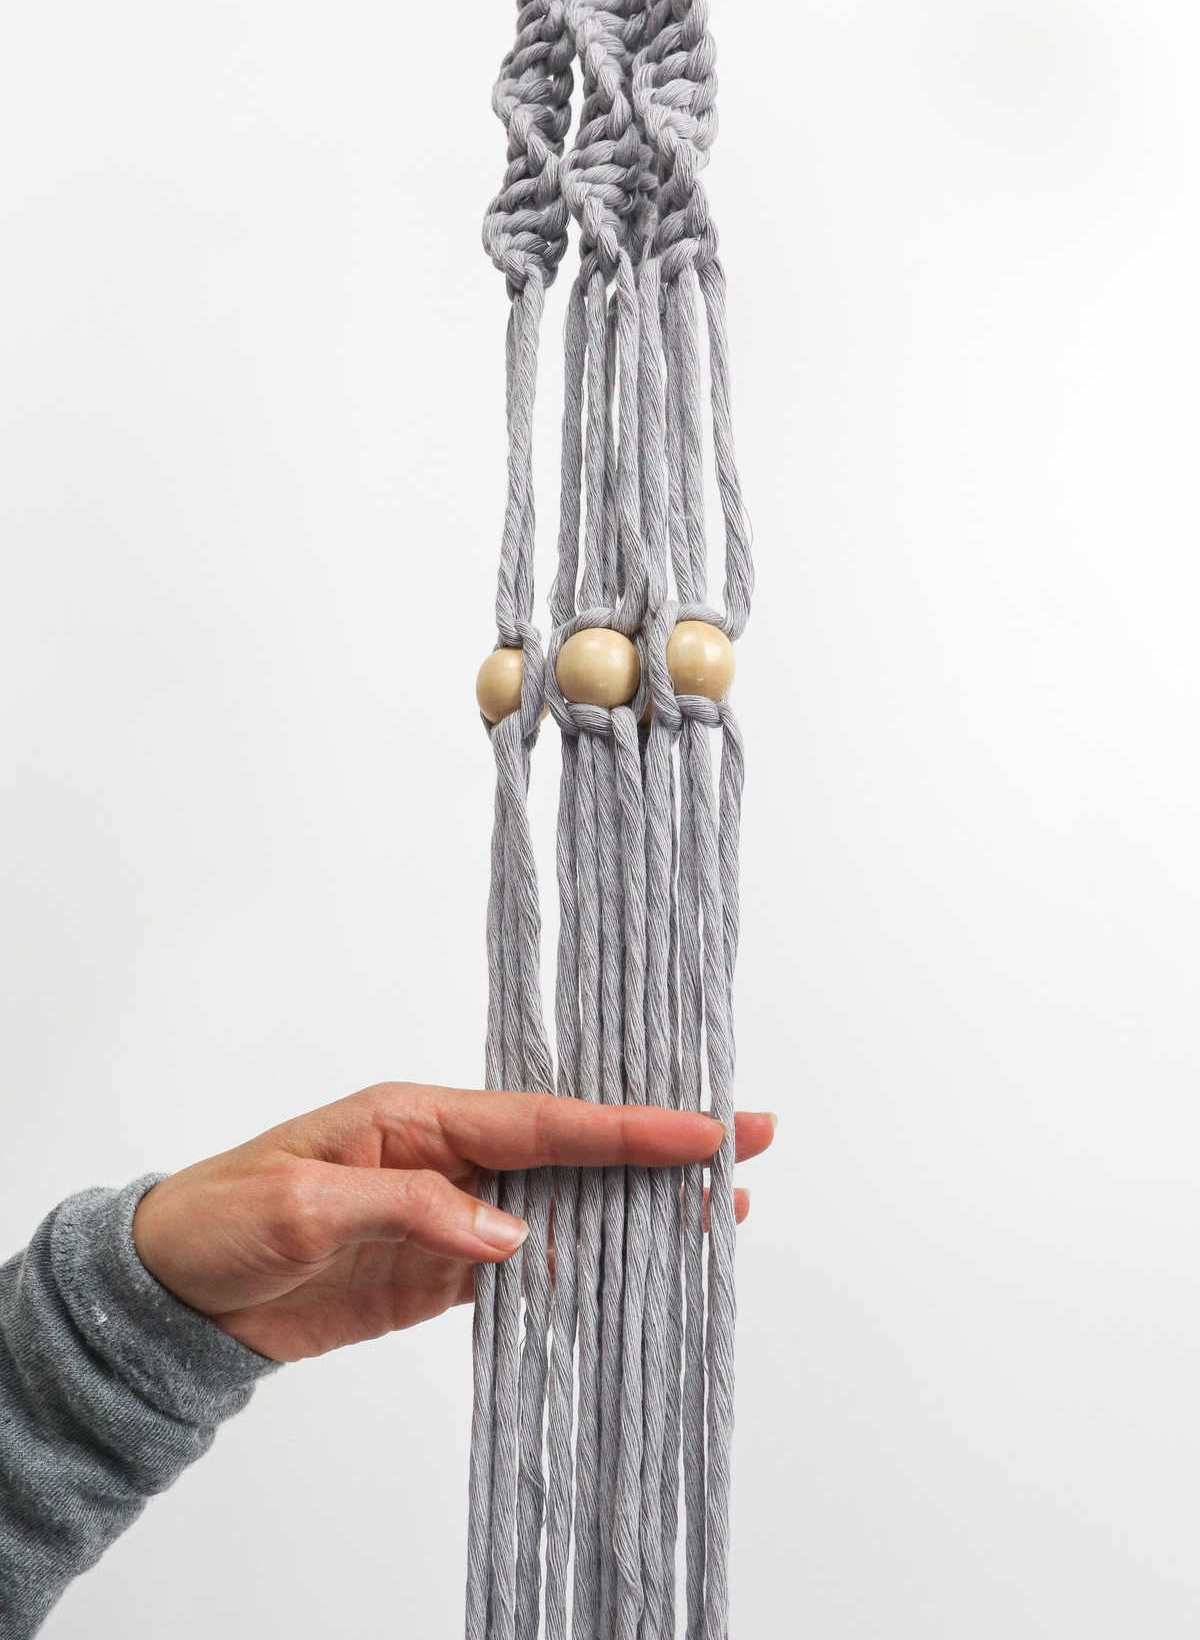

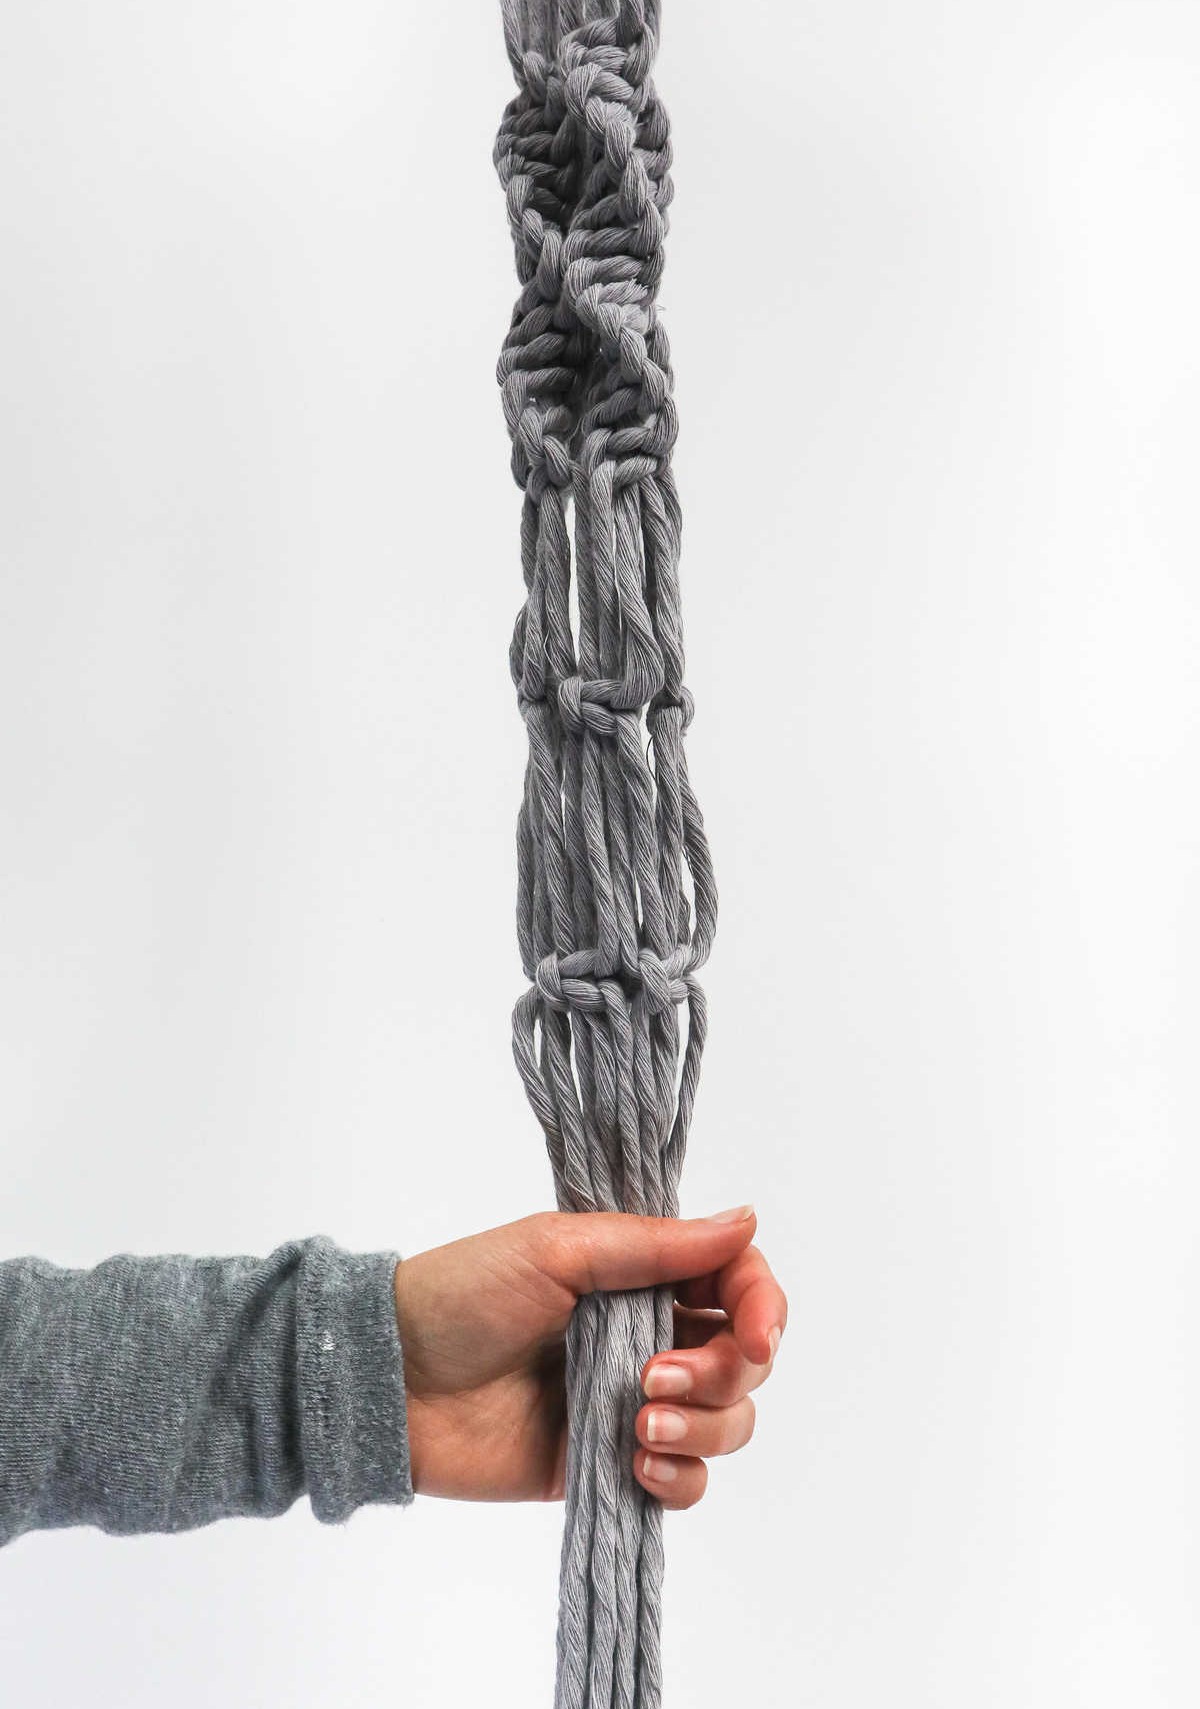
To further enhance the overall design, we’ll be creating additional spiraling knots along the bottom half of each of the four sections. Before you begin, leave a 2-3 inch gap between each section, then gather one section’s four strands together.
Step 11
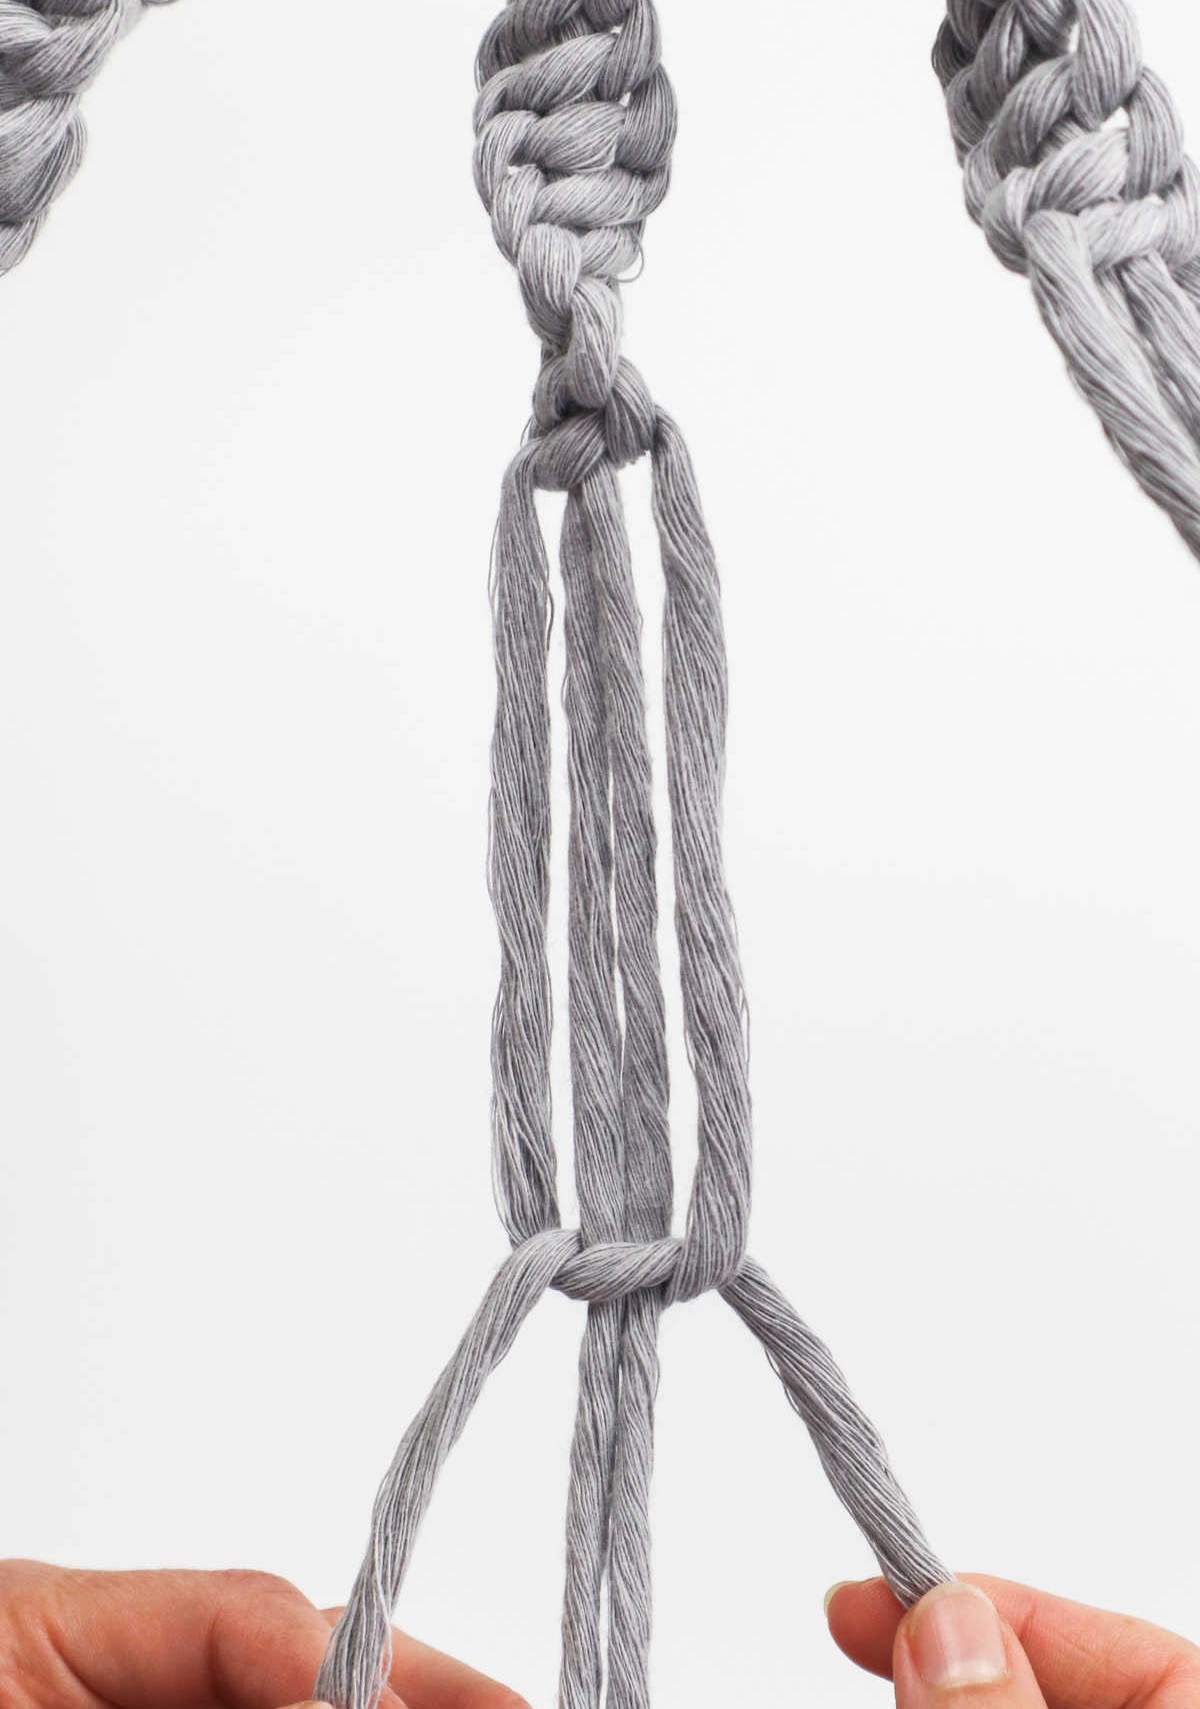
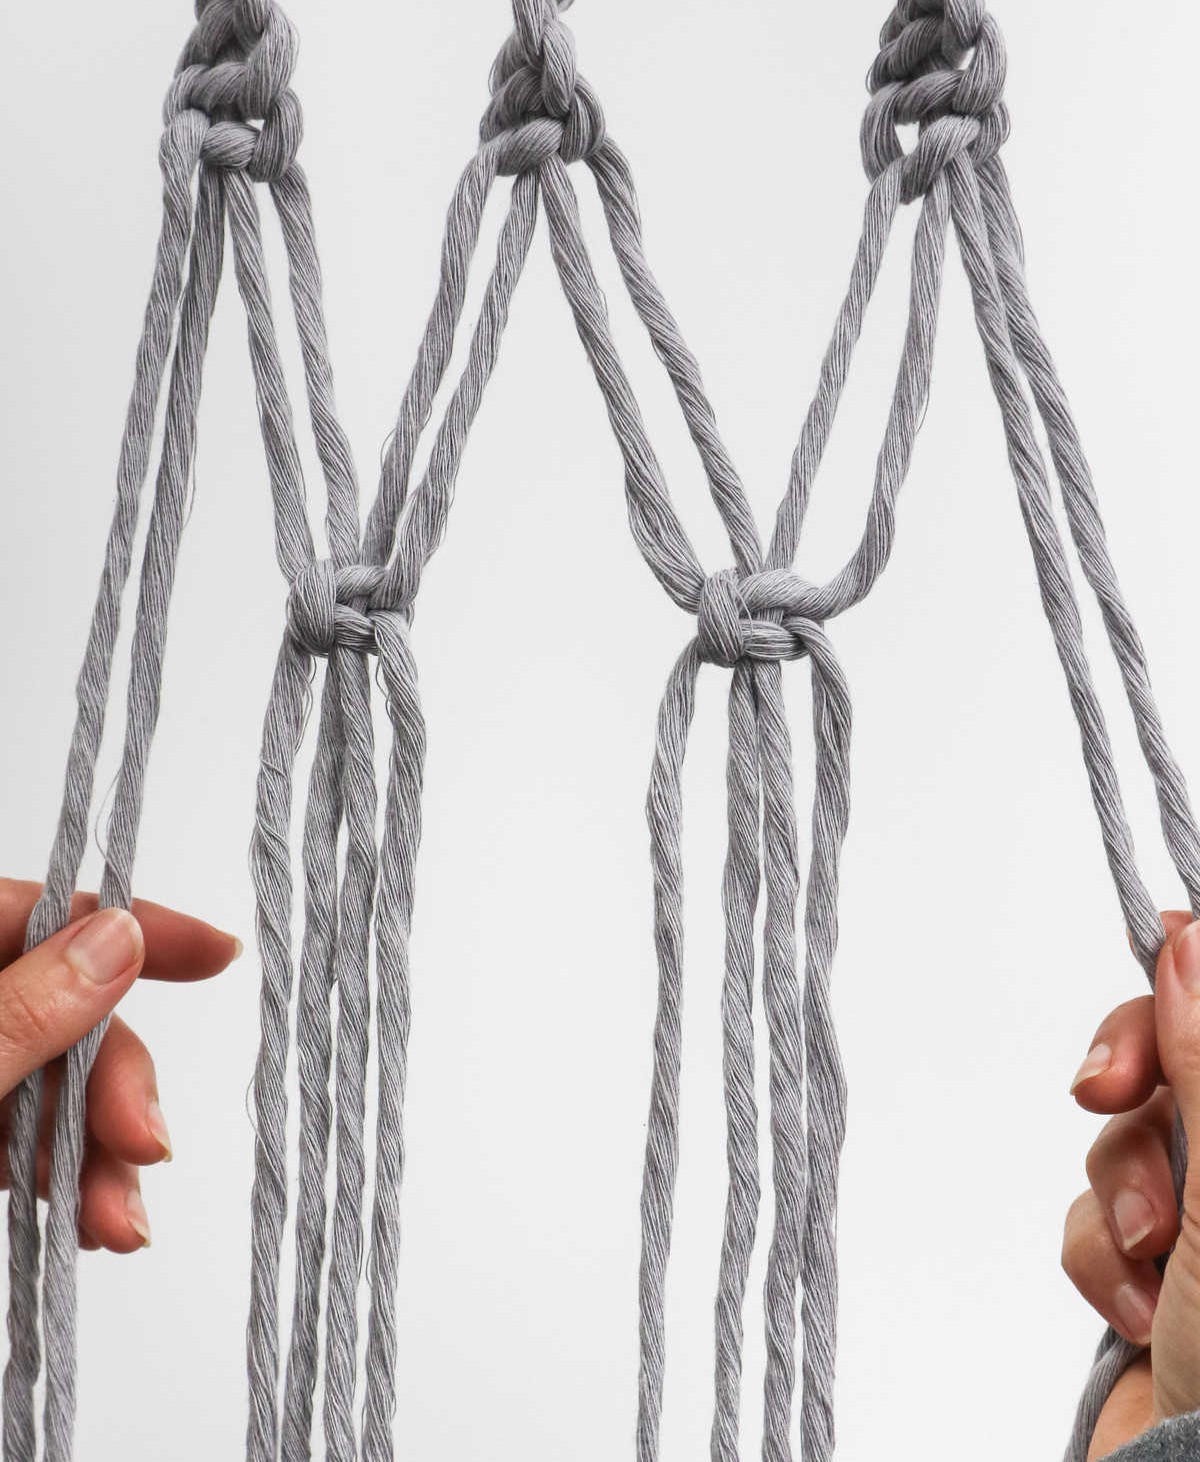
To proceed, separate two portions of the spiraling knots, focusing on the four central strands. This requires dividing the cords into four equal groups: two on each side of the middle section, with another pair situated in the middle. Apply this process to the remaining two sections as well. For clarity, label these latter segments as Section B and the initial ones as Section A.
Step 12
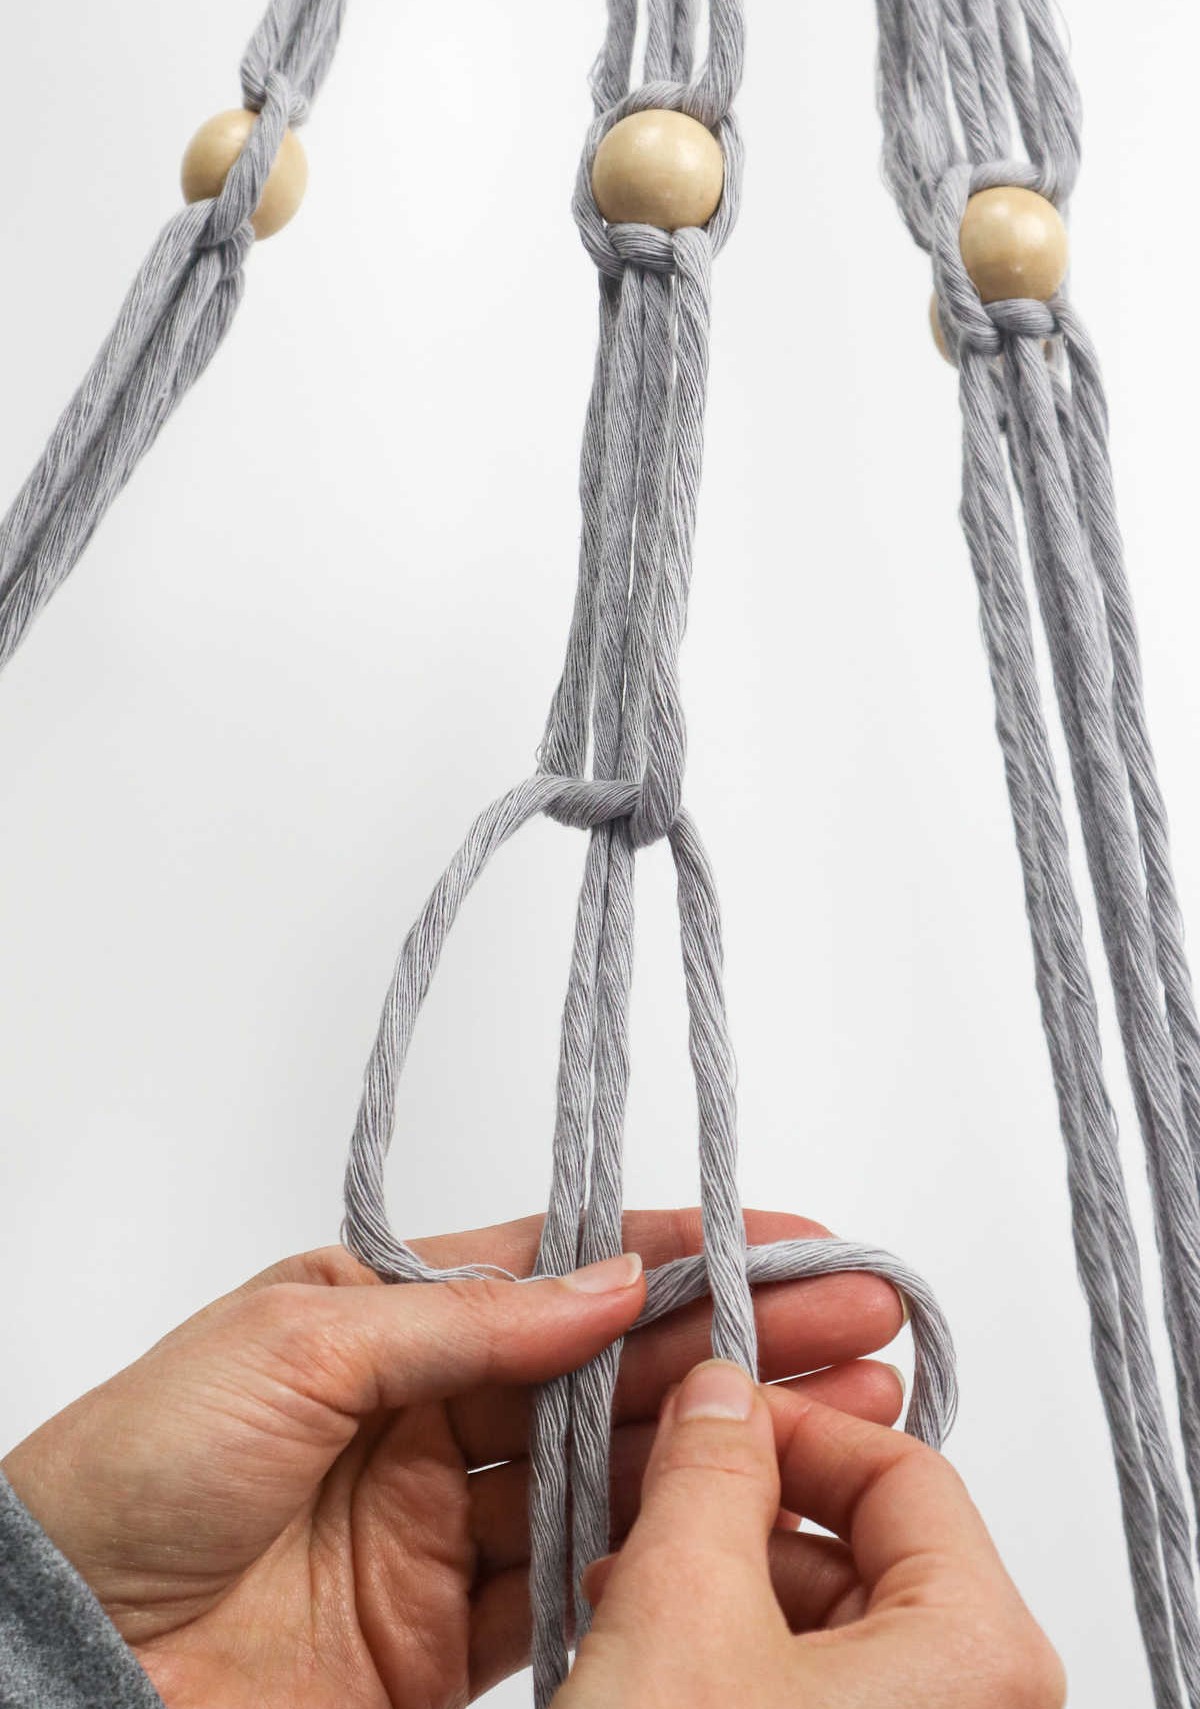
To secure the four center strings, create a square knot by intertwining them in a deliberate pattern, ensuring the ends are tucked away neatly to maintain stability.
Step 13

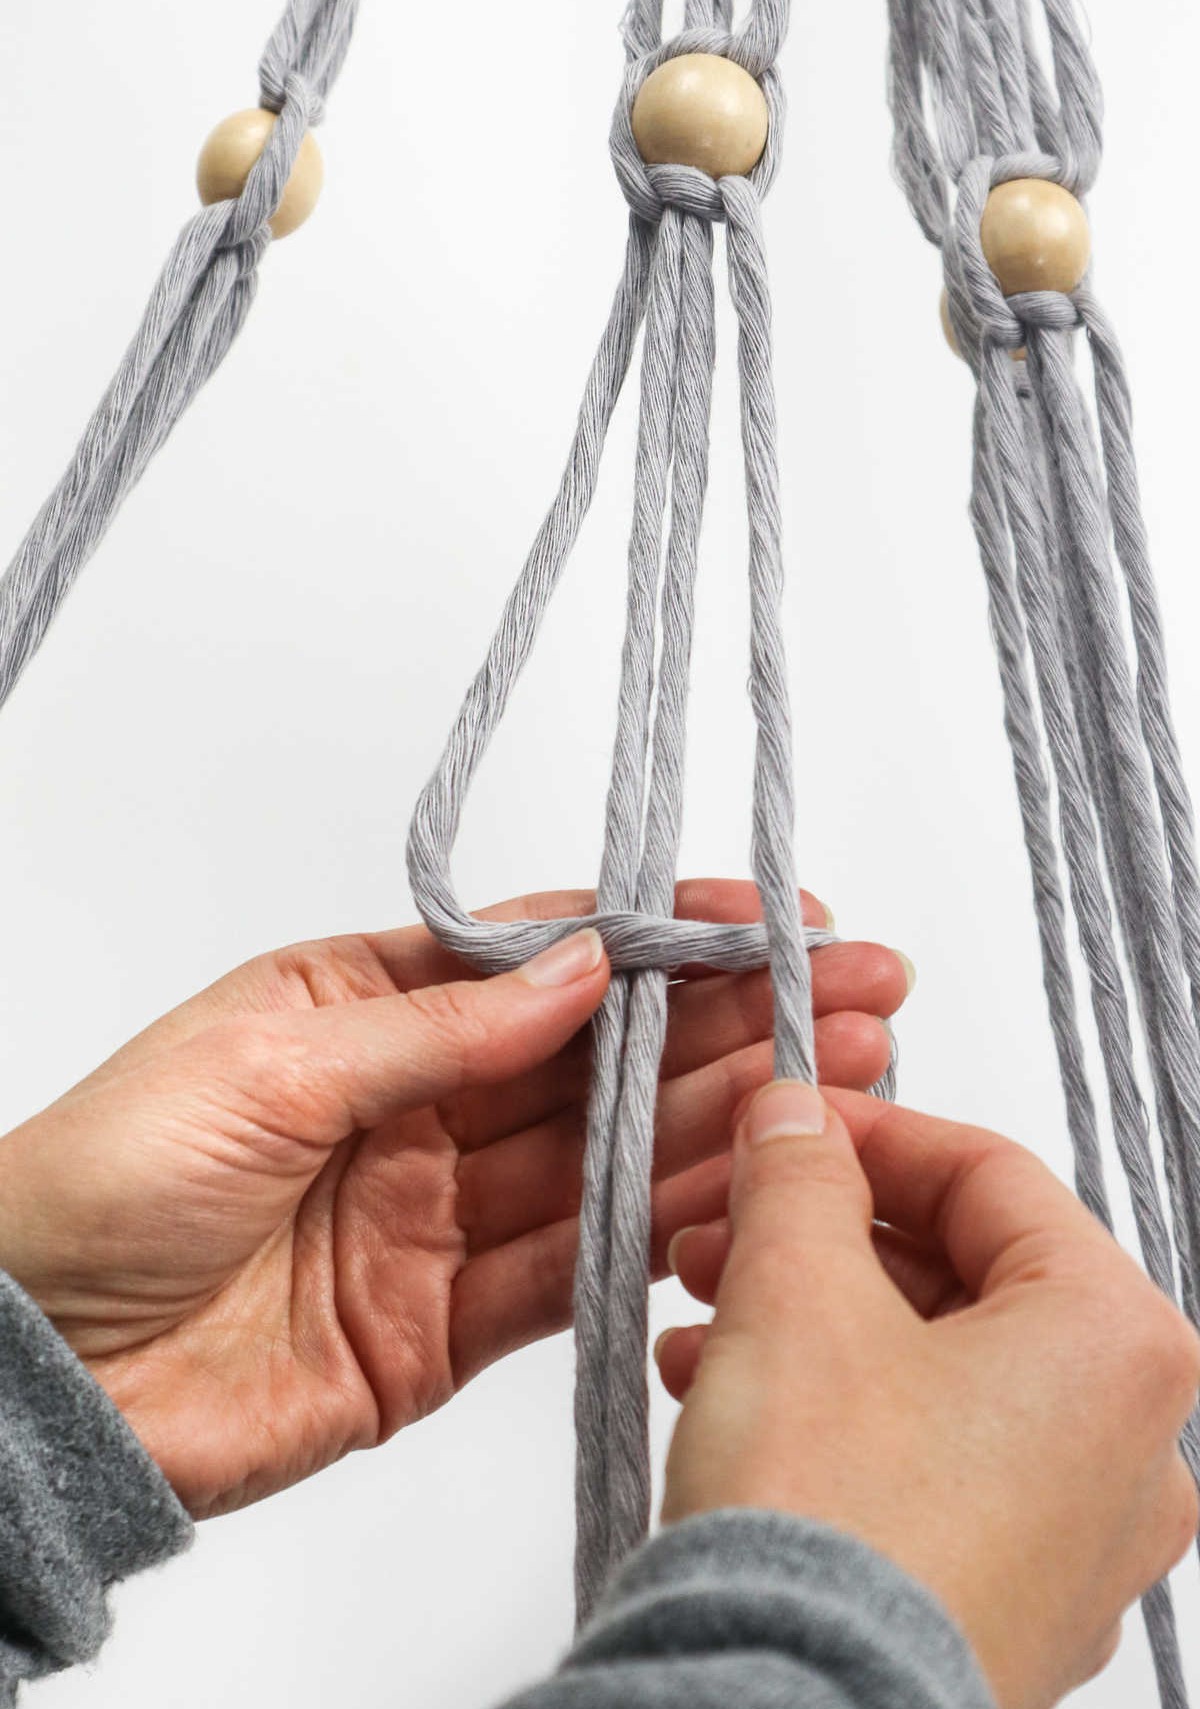
As you progress with the instructions, you’ll now need to focus on the middle-right strands. Hold these in one hand. Meanwhile, recall the left-over strands you set aside earlier – specifically, the two sections from A and B. You’re going to bring those strands together, effectively combining them to create a total of four strands. These will form the foundation for your next square knot.
Step 14
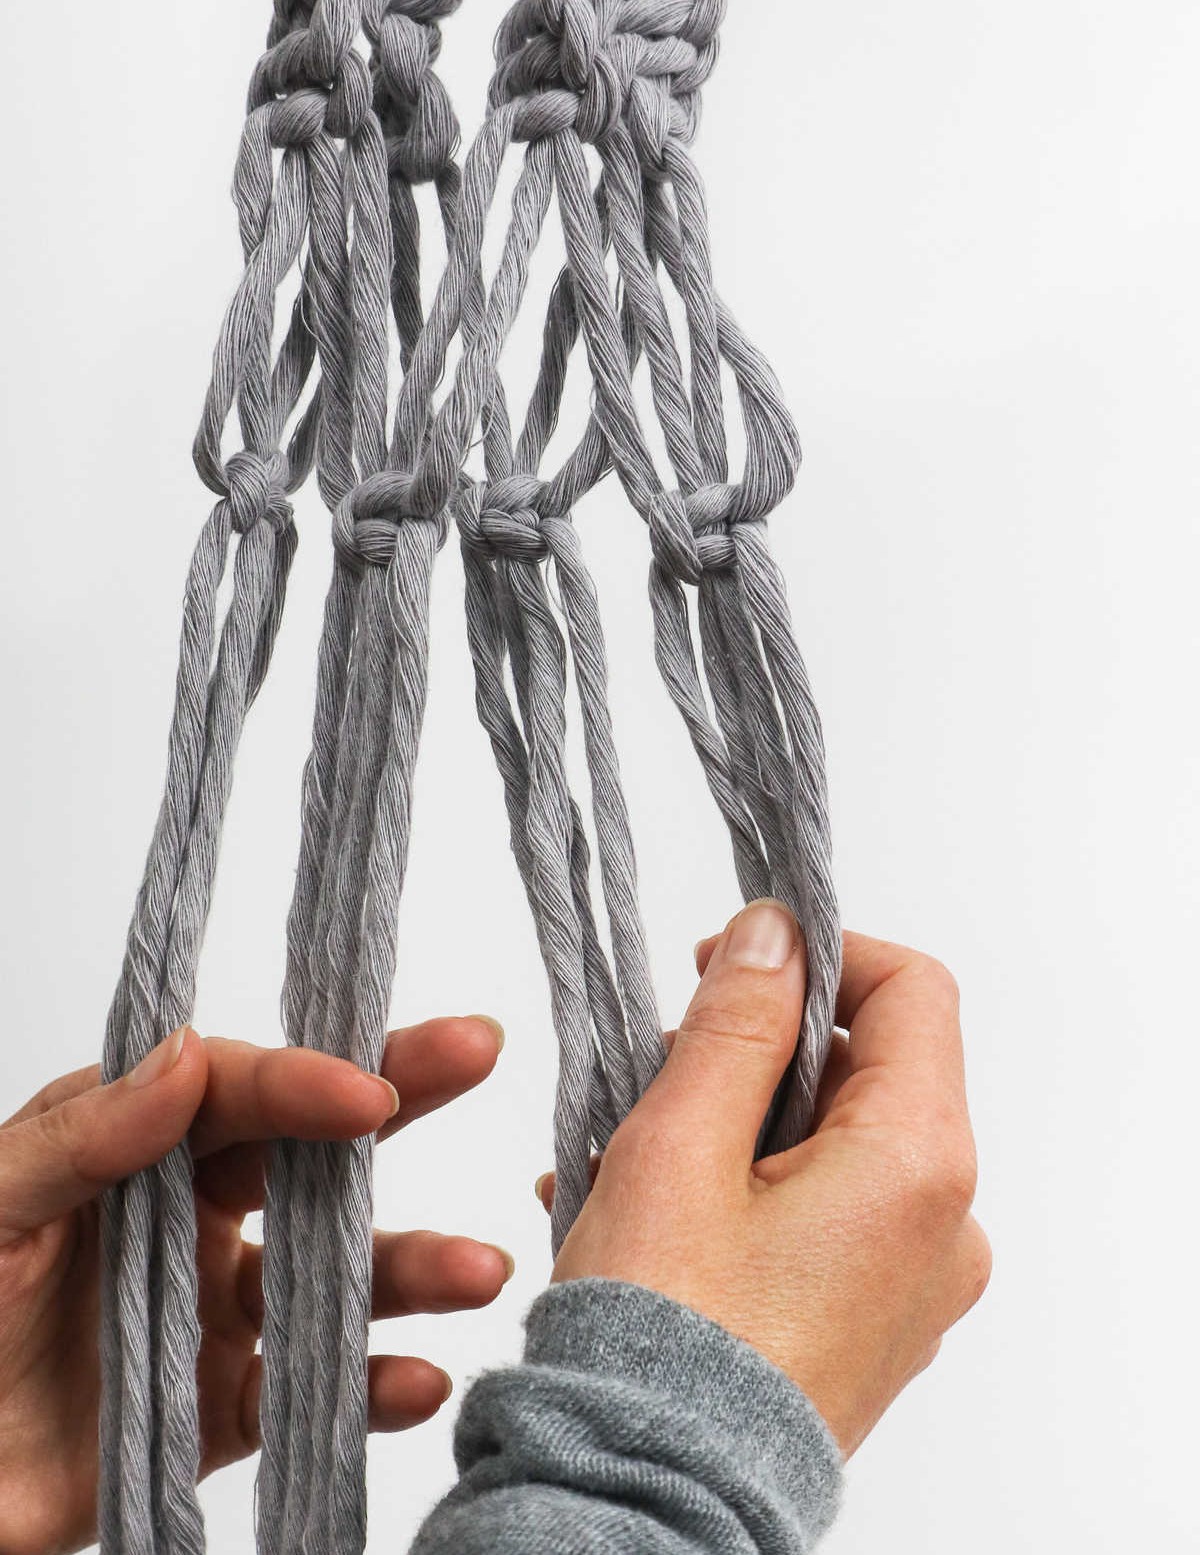
To create a secure and sturdy cord, begin by tying square knots in succession, gradually working your way around the material. It’s essential to achieve at least four sets of these reliable knots before considering your task complete.
Step 15
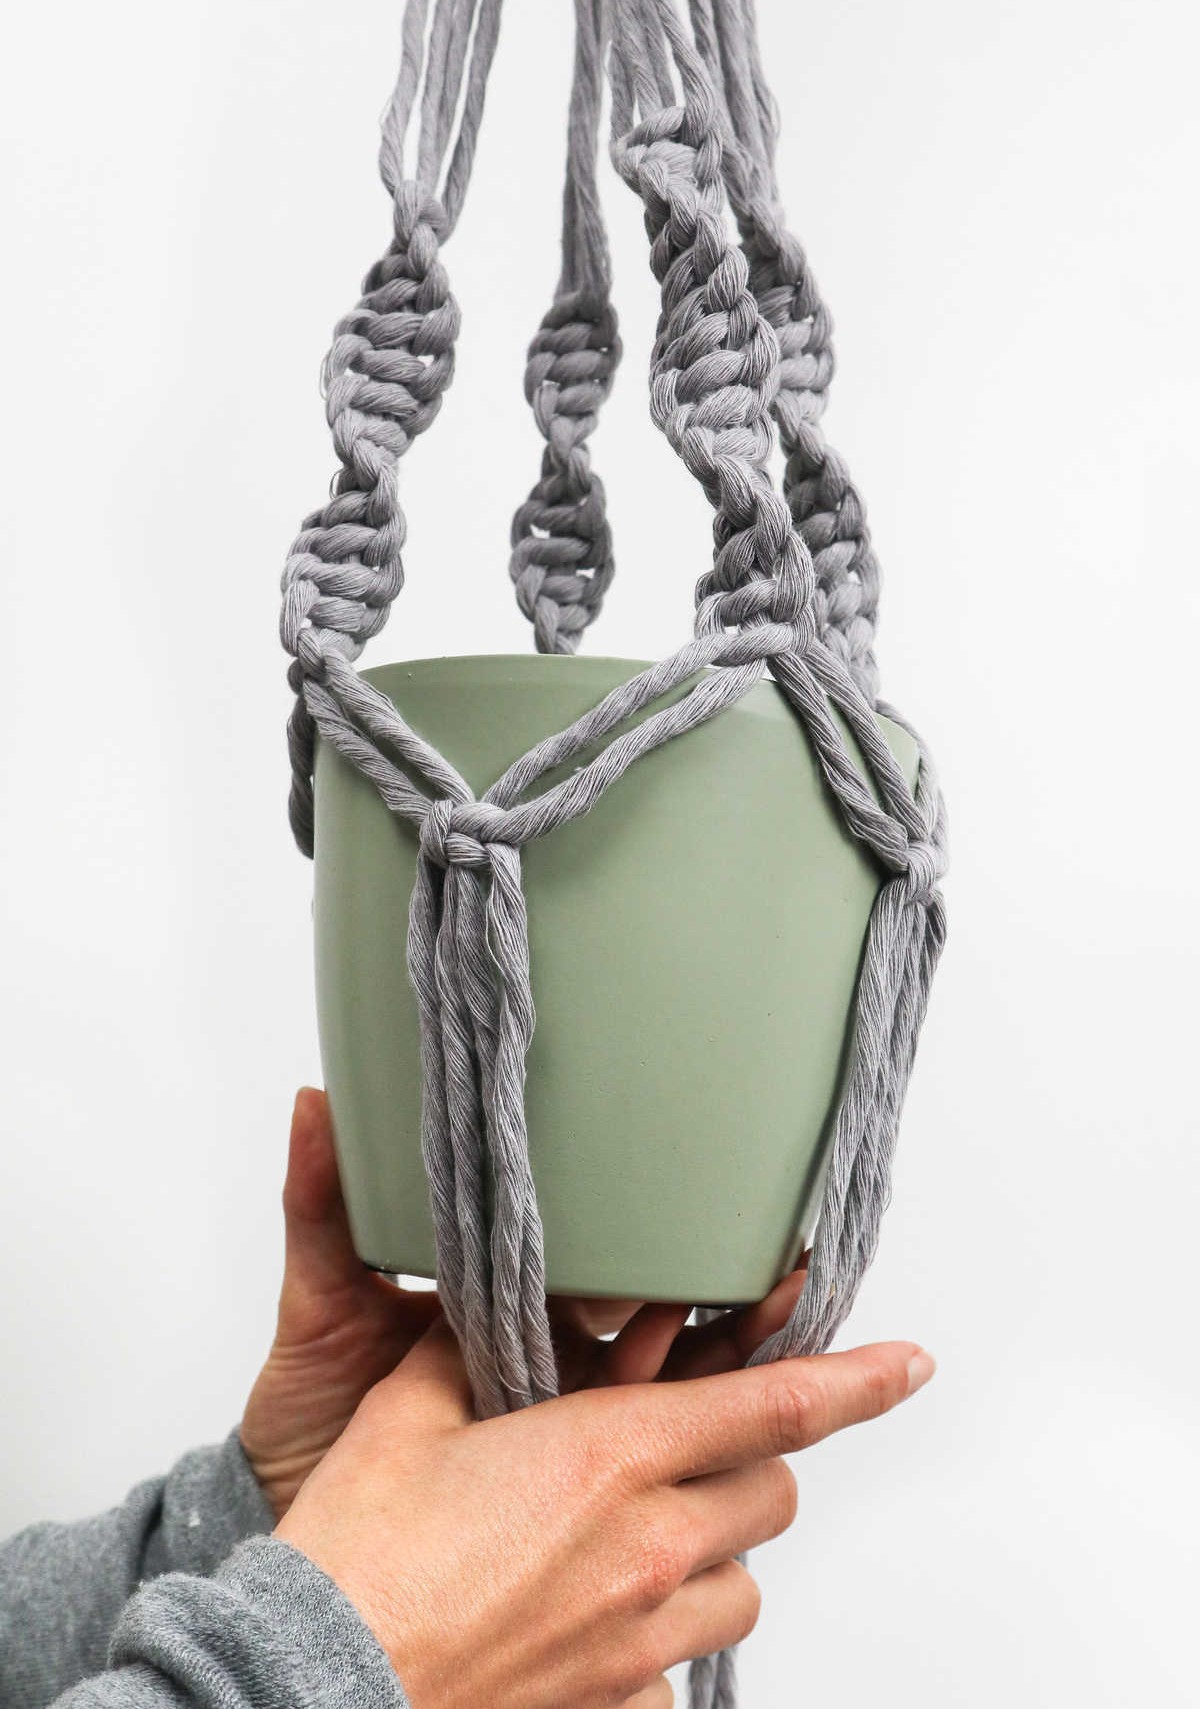
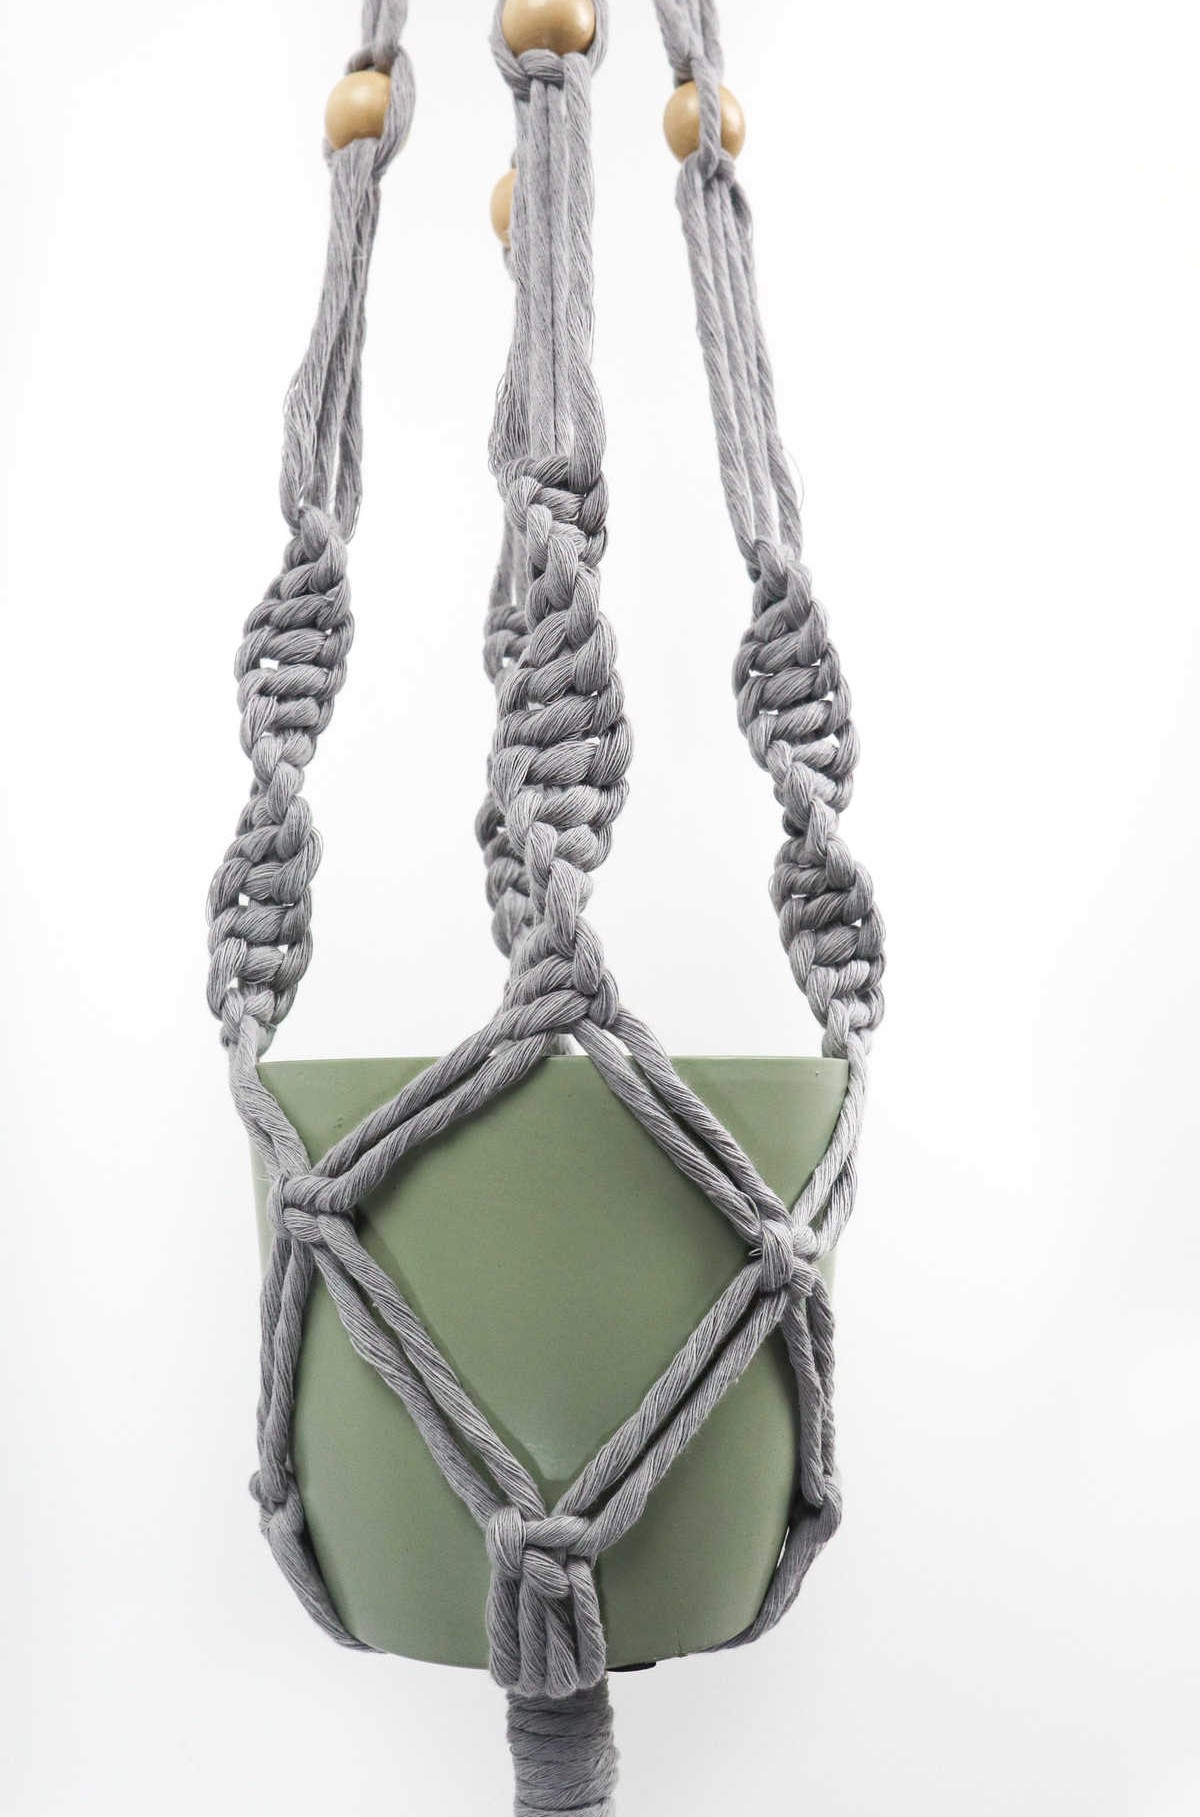
To complete your hanger, it’s essential to measure the length of cord required for your pot or planter. Place the container snugly between the four sets of cords, as depicted below. This will enable you to calculate the necessary cord length. Next, create another round of square knots by joining two strands from two sections and pulling them together to form a new four-strand section. Use the pot as a guide to determine the center point where the next square knot needs to be situated.
Step 16
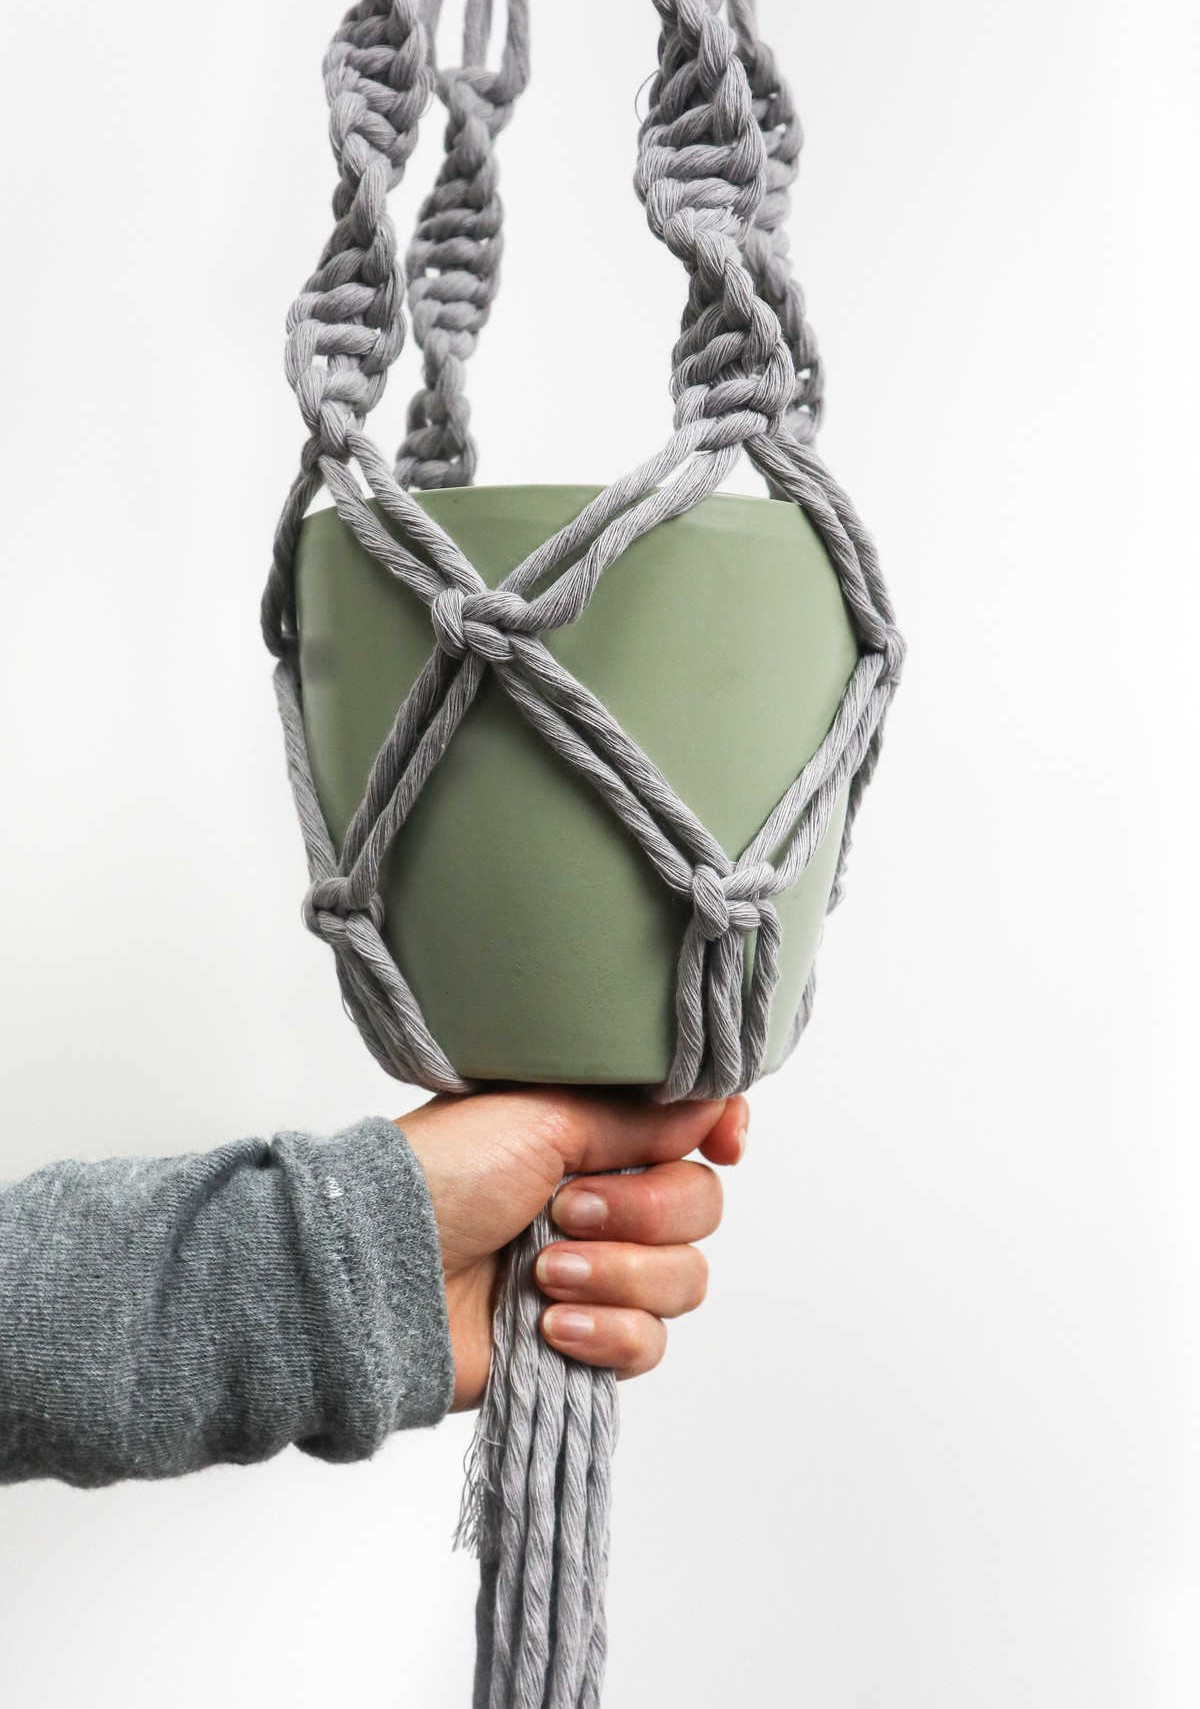
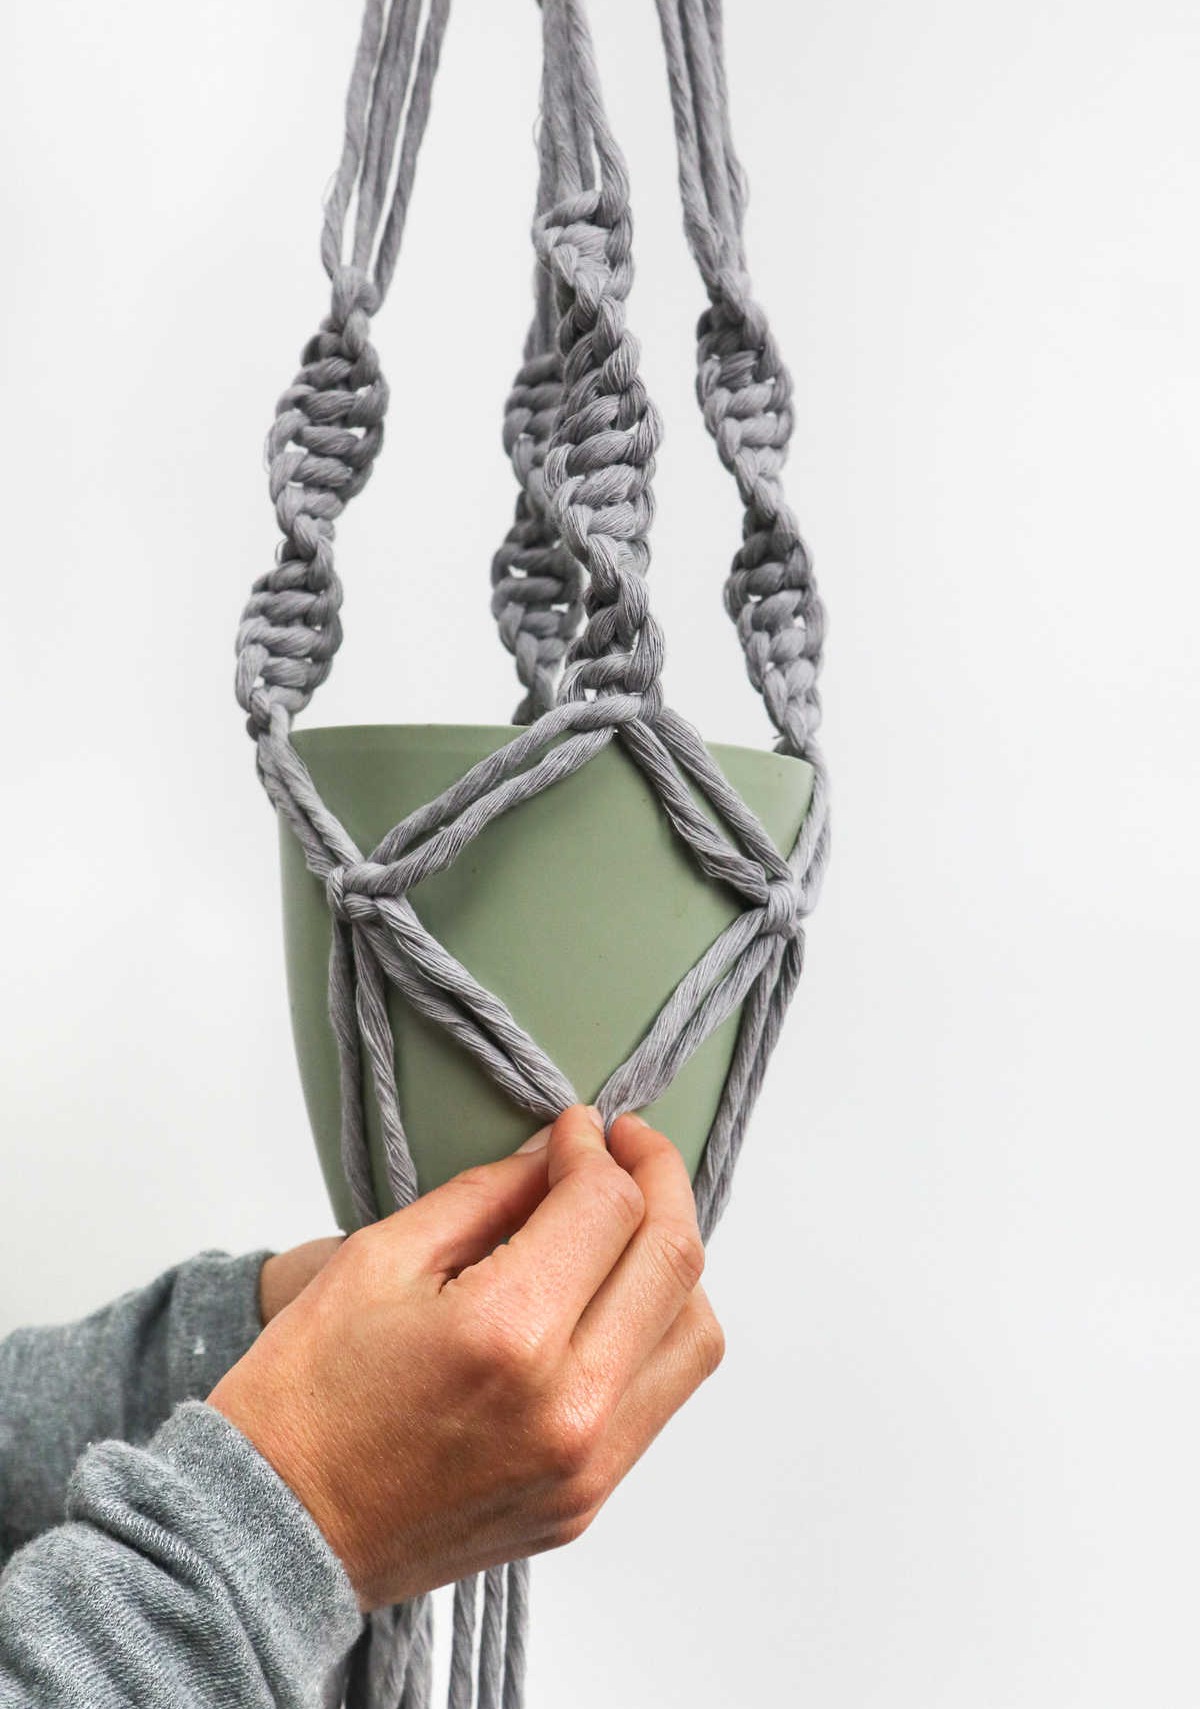
Progress steadily through the sequence, ultimately arriving at an additional layer of square knots, as illustrated in the accompanying visual representation.
Step 17
Once you’re satisfied with the hanger’s appearance, remove the pot and proceed to secure the ends by creating a gathering knot at the base. This final step involves manipulating all 16 strands simultaneously. Hold them in place while taking hold of the second 40-inch strand, which will serve as the foundation for the U-shaped loop. Wrap the longer end around the strands and over the loop, ensuring everything is securely in place.
Step 18

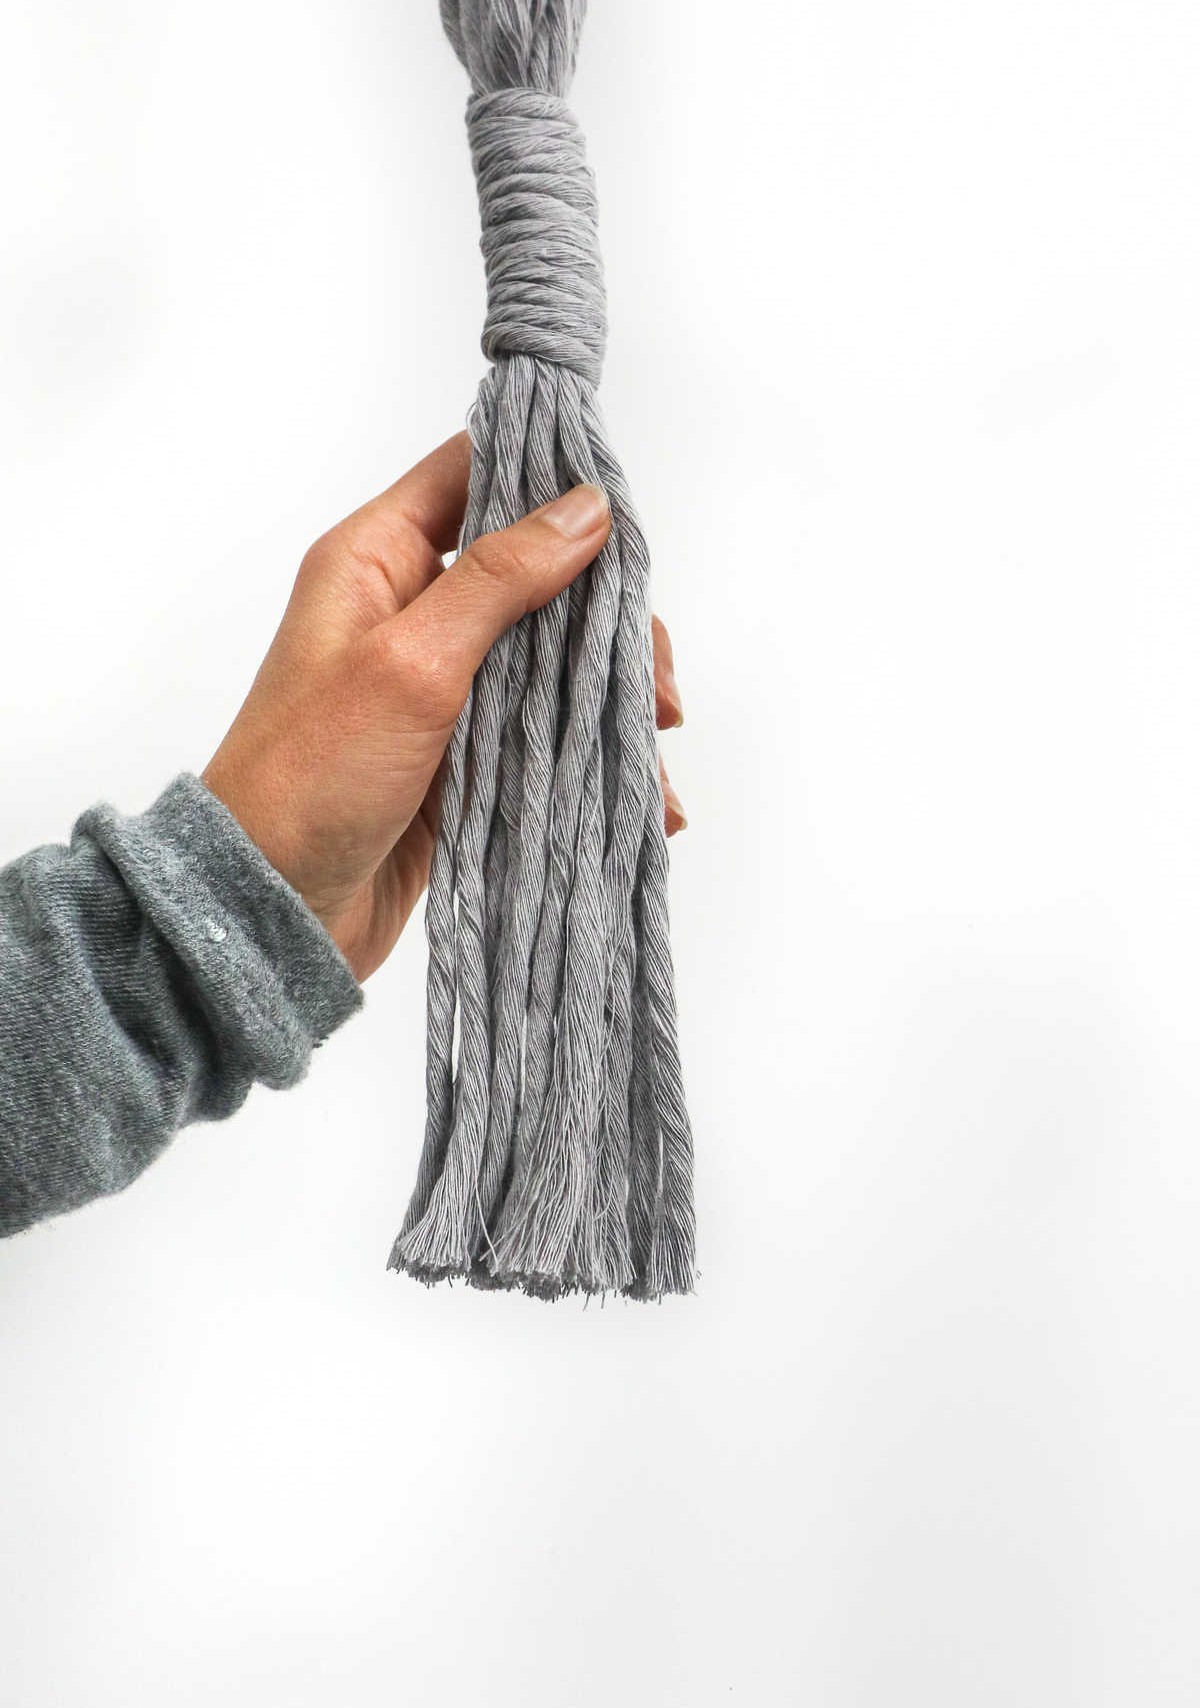

To complete the look, take out your trusty scissors and carefully trim the excess cord ends to an even length. You may want to leave a small section intact, allowing for a subtle tail to peek from beneath the pot’s rim.
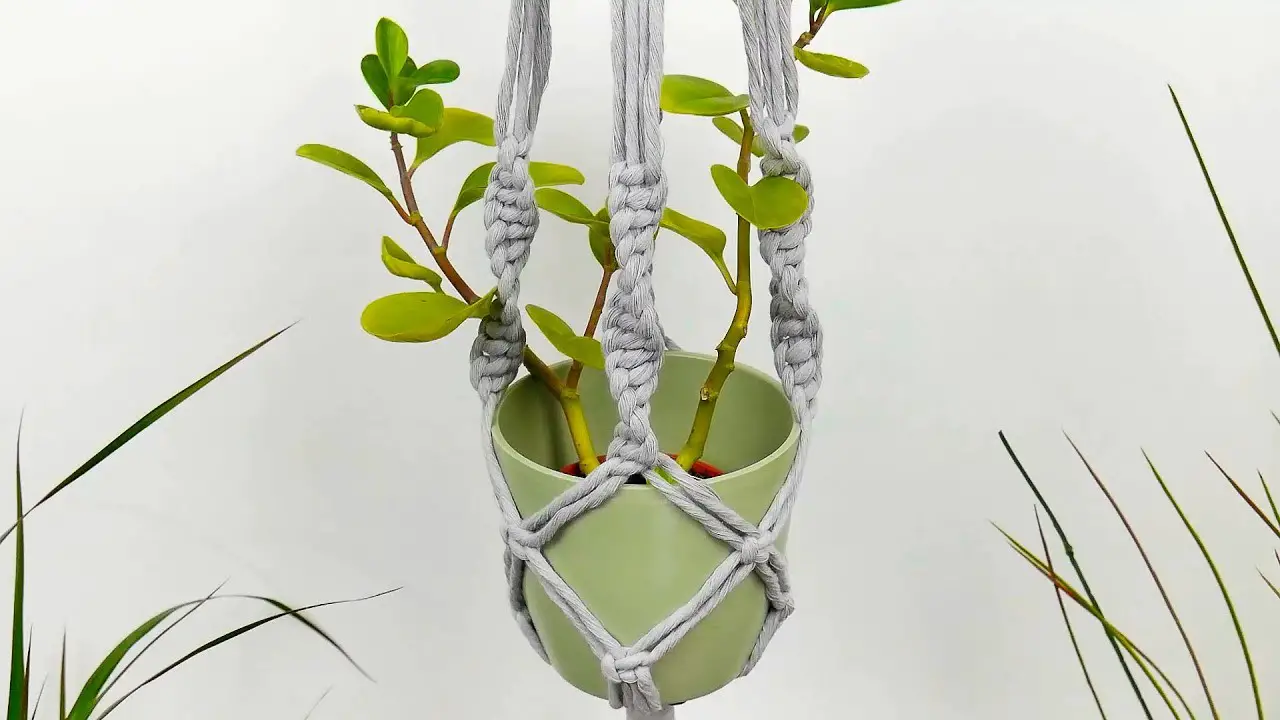
How to Use This Macrame Plant Hanger?
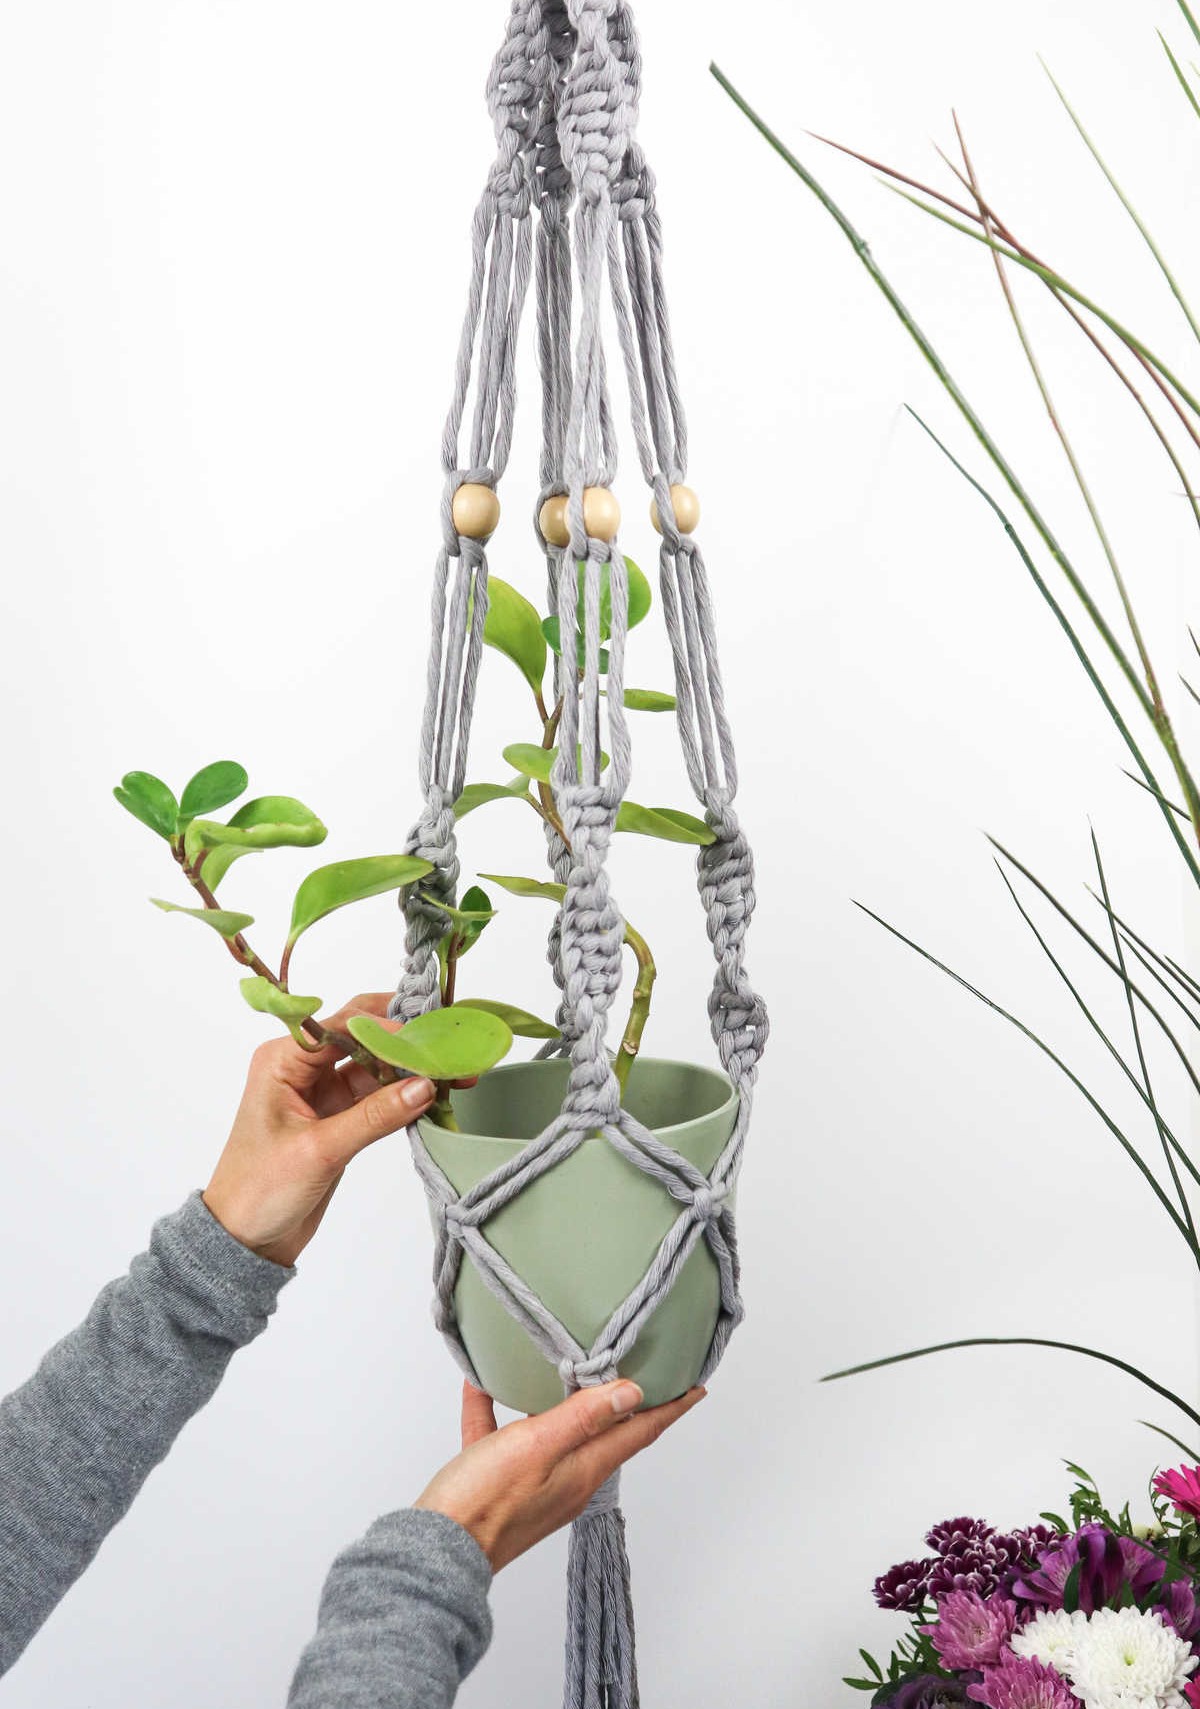
Transform any outdoor space into a lush oasis by suspending your prized plants from the perfect perch. This versatile plant hanger accommodates an array of greenery, including money plants, succulents, and more, allowing you to bring natural beauty to your front porch, deck, or anywhere else a hook can be installed.
DIY Macrame Plant Hanger (Step-by-Step Tutorial)
Are you a fan of macrame? Create this stunning DIY plant hanger for a beautiful decoration that’s surprisingly easy to make. With just 5 minutes of prep time and 55 minutes of active time, you’ll have this lovely piece ready to hang in no time. It’s a perfect project for anyone looking to unwind and express their creativity.
Materials
Instructions
To start, prepare all necessary supplies by cutting 8 strands of 170 inches (14ft) and 2 strands of 40 inches (3.5 ft). Then, thread all eight strands through a wooden ring, aligning the ends to create 16 equal cords, each measuring 85 inches in length. Next, gather the cords just below the ring using a 40-inch cord and secure with a gathering knot.
Divide the 16 cords into four sections of four strands each, holding two middle cords in place as you create spiraling knots with one section’s left strand serving as the lead. Repeat this process for the remaining three sections, ensuring all sections are equal in length and feature the same number of spiraling knots.
Afterward, attach a bead to each section by leaving a 2-3 inch gap from the last spiral knot, creating half a square knot with the left strand, then inserting the bead and securing it with the second half of the square knot (with the right strand). Repeat this process for all four sections. Subsequently, create another set of spiraling knots along each section, leaving a 2-3 inch gap between sets.
Once you have these knots in place, select two adjacent sections and make one square knot by combining two right-side strands from one section with two left-side strands from the other section. Repeat this process to create a row of four aligned square knots. To determine where to secure the ends, position your pot within the hanger, allowing the rim to sit just below the last spiral knot. The row of square knots should align along the pot’s body.
Next, gather two strands each from two consecutive sections and make another square knot, this one situated under a spiral knot and between two previously formed square knots (refer to the image for confirmation). Create three more square knots to complete an additional row. Finally, secure your ends by gathering the remaining strands beneath the pot’s base, carefully removing the pot without disturbing the cords.
Use a second 40-inch cord to create another gathering knot, tug the ends to secure the knot in place under the wrapped cords, and then trim any excess evenly or leave a short tail if desired.