As creative enthusiasts, adults and even teenagers can effortlessly create stunning macrame leaf earrings. These dainty accessories are perfect for any time of the year, adding a touch of elegance to everyday outfits. With bohemian jewelry gaining mainstream appeal, it’s no surprise that unique pieces are becoming increasingly hard to find. While some options may be budget-friendly, others can be quite pricey.
After an exhaustive search, I’ve come to the realization that the only way to truly possess a one-of-a-kind piece of jewelry is to create your own. Believe me, crafting your own jewelry is not as daunting as it seems. Case in point: these macrame earrings. With a little patience and creativity, you can craft a beautiful pair of personalized and unique DIY earrings that exude the perfect blend of chic boho charm.
How to Make Macrame Earrings
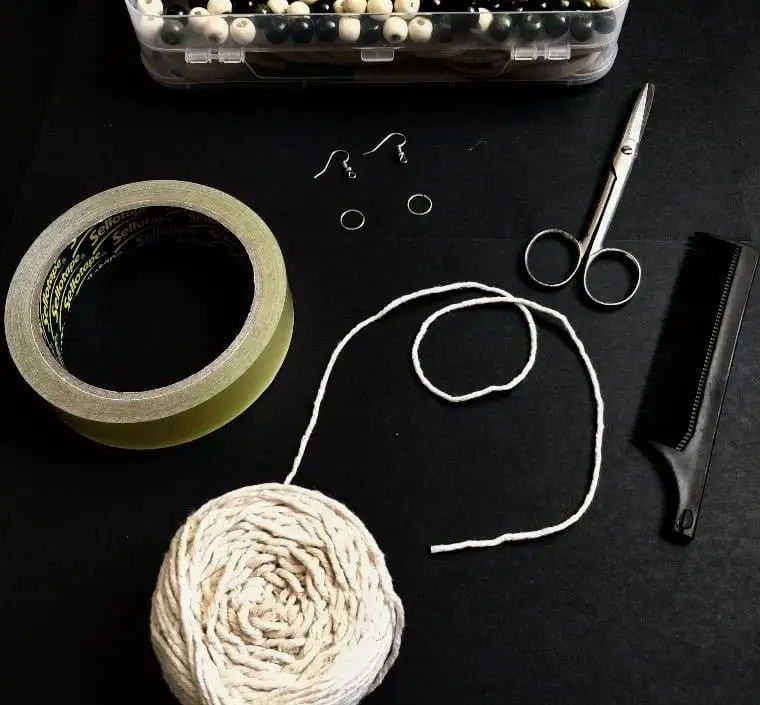
Creating stunning Macrame earrings is a breeze, requiring minimal time and effort. The process unfolds effortlessly, allowing you to customize them with your personal flair. To get started, collect all necessary materials in one place. Begin by preparing the rope, cutting out strings as needed for the forthcoming steps.
A single pair of earrings demands two lengthy strands and 16 shorter ones, allocated thus: one long strand for the spine and eight (or more) short strands to craft each medium-sized feather.
STEP 1
To begin, divide the lengthy strand into two equal halves, which will serve as the foundation or central axis of your earring design. As you work on this step, keep the jump ring within easy reach, as it’ll soon be used in the following stage.
STEP 2
To complete the first step of the process, insert the jump ring into the folded spine, effectively forming a small cotton loop at the top. This will provide a secure anchor point for future adjustments and additions to your handmade item.
STEP 3
To complete the knot, take the remaining loop and slide it downwards, ensuring it overlaps with the jump ring while resting atop the two loose strands.
STEP 4
To complete the look, take the loose ends and weave them together to form a neat head knot. Make sure to tug gently but firmly to secure the knot in place. Only when the knot is stable should you proceed to the subsequent steps.
STEP 5
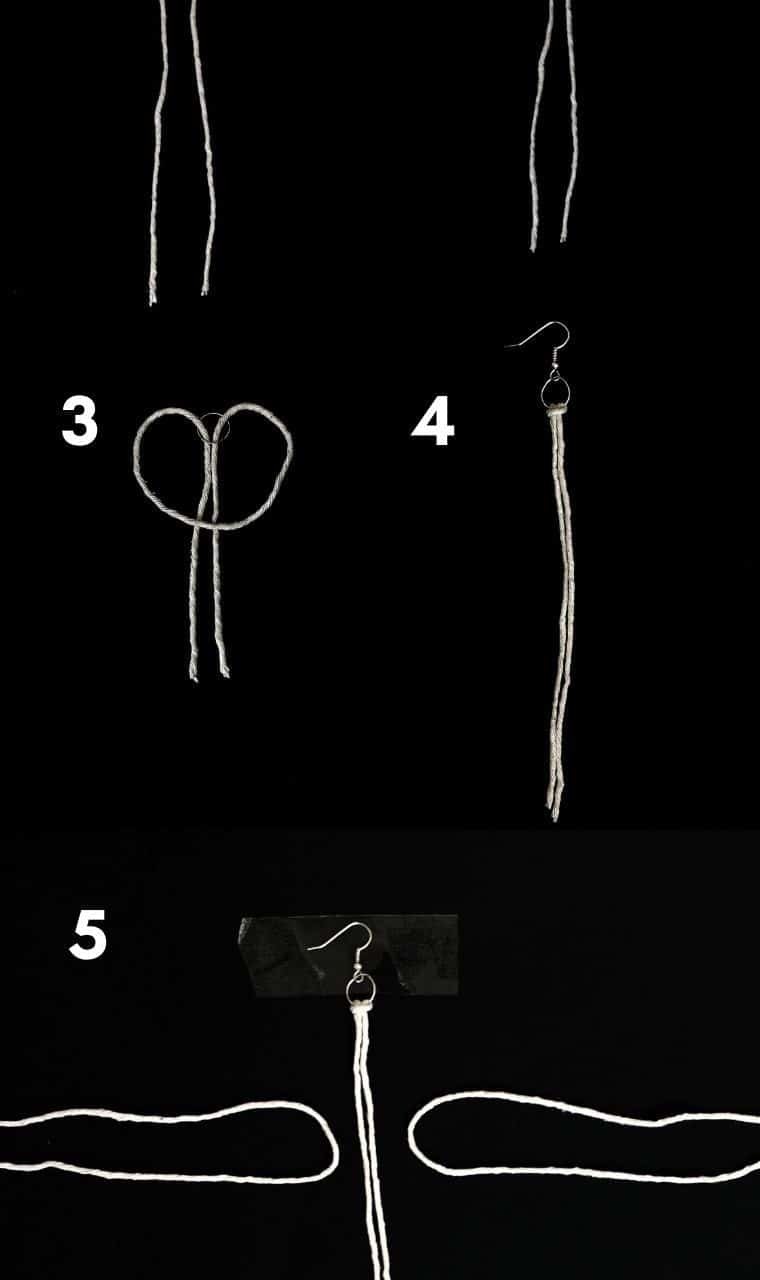
As you prepare to complete the earring, secure the hook onto the jump ring and utilize a piece of tape or a clip to stabilize the top of the earrings. This will enable you to maintain control during the subsequent steps. Moving forward, you’ll need two short lengths of string to create one knot on either side of the spine.
STEP 6
To assemble the piece, start by placing the first folded string directly beneath the spine. Next, take the second string, fold it in two, and then carefully insert the looped end into the ring formed by the top horizontal strand.
STEP 7
Carefully manipulate the second thread, allowing it to overlap with its counterpart while keeping a slight tension. From this position, gently coax the overlapping fibers into a horizontal plane, ensuring they remain parallel to each other.
STEP 8
To complete the knot, carefully guide the dangling ends of the lower strands upwards and through the opening at the top of the knot. Make sure to keep them taut as you work them through, ensuring a secure and tidy finish.
STEP 9
Once the strands are aligned and the tension is applied evenly, ensure that the knot is secure by giving it a gentle tug to confirm it’s properly fastened.
STEP 10
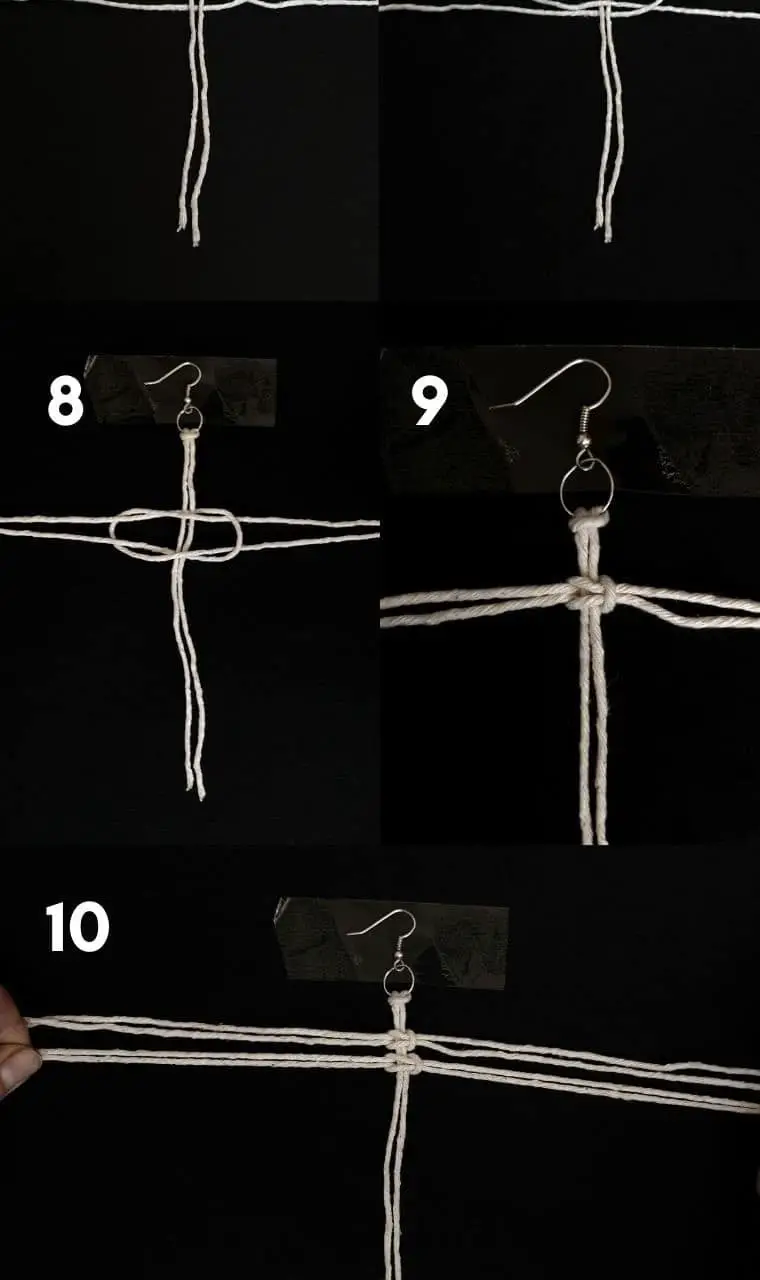
As you progress, flip the direction of the starting side. If you initially began with a right-to-left loop on the first strand, switch to left-to-right for this next step. This will create a loop on the left that you’ll work with moving forward.
To continue, place the first folded strand under the spine and introduce another doubled strand into its loop. Then, draw the loose ends of the lower strands through the top strand’s loop, securing it as needed.
Repeat this process until you’ve accumulated enough strands to form the desired feather shape.
STEP 11
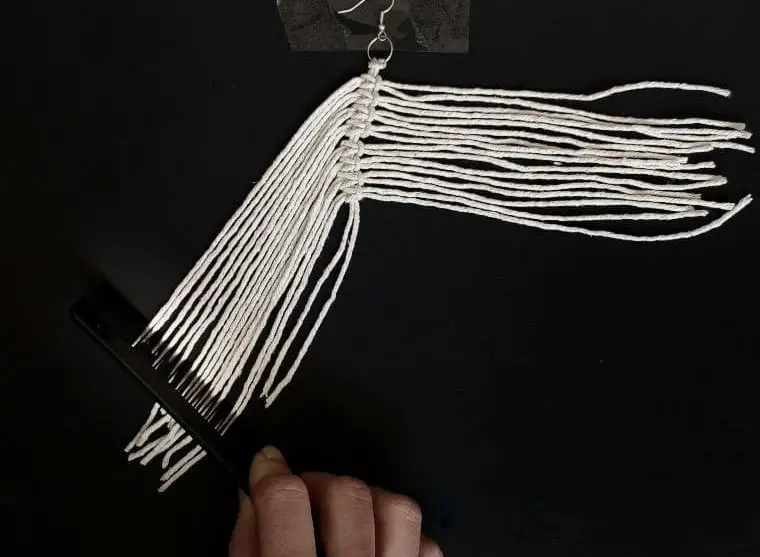
As you work your way down the feather’s shaft, consistently apply gentle tension by pushing the strands upwards after each knot is tied. This ensures a snug and even distribution of material. It’s crucial to maintain this tightness throughout the process, as any gaps between knots can result in an inconsistent texture. Prior to trimming the feather, take a moment to gently comb out the strands to remove any tangles or loose fibers.
STEP 12
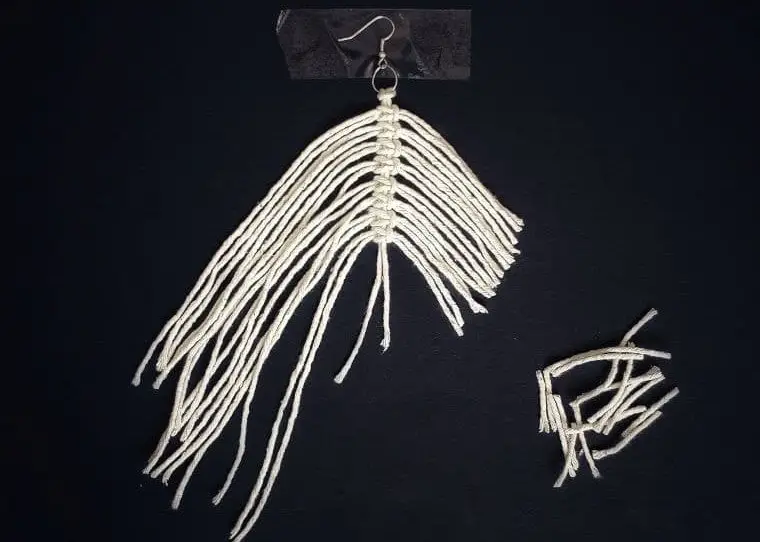
Following the initial detangling process, take some time to rough-trim the strands to remove any lingering knots or folds. Don’t worry too much about achieving perfection at this stage – this step is primarily meant to serve as a guide. By trimming the strands, you’ll not only be shaping the hair but also making it easier to brush out later on. The shorter the strands are, the simpler the brushing process will become, allowing you to achieve the desired style with greater ease.
STEP 13
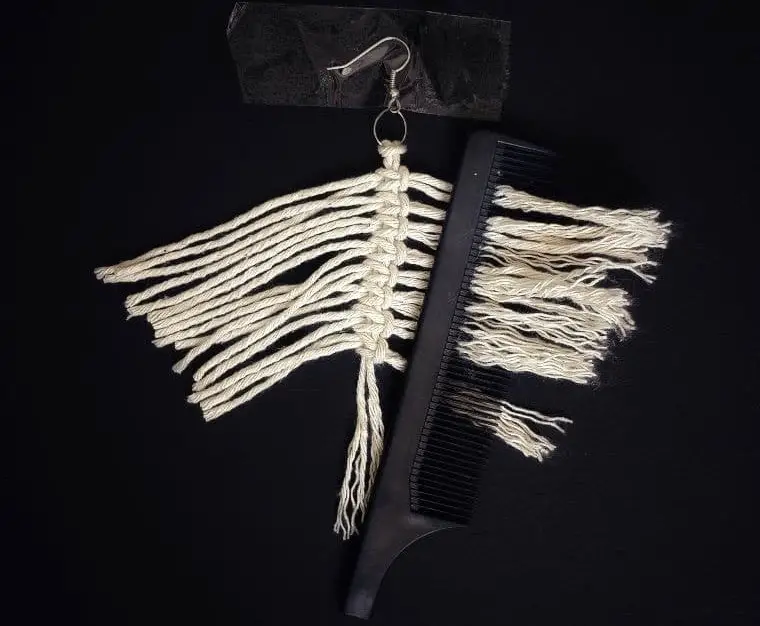
To achieve a smooth texture akin to a feather, begin by carefully trimming the strands. Then, brush each thread outward from the spine toward the ends, just as you would style your own hair. When working on the lower strands, it’s essential to hold the bottom of the spine firmly in place to prevent damage and loosening of the knot. Start at the top and work your way down, applying gentle yet firm pressure to untangle any twist or tangles.
Be particularly mindful when brushing the delicate lower regions, as excessive force could compromise the integrity of the cording.
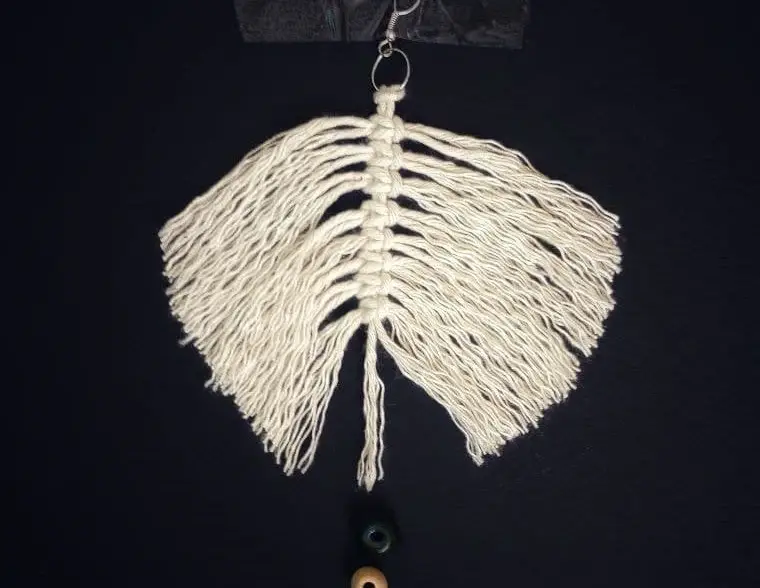
STEP 14
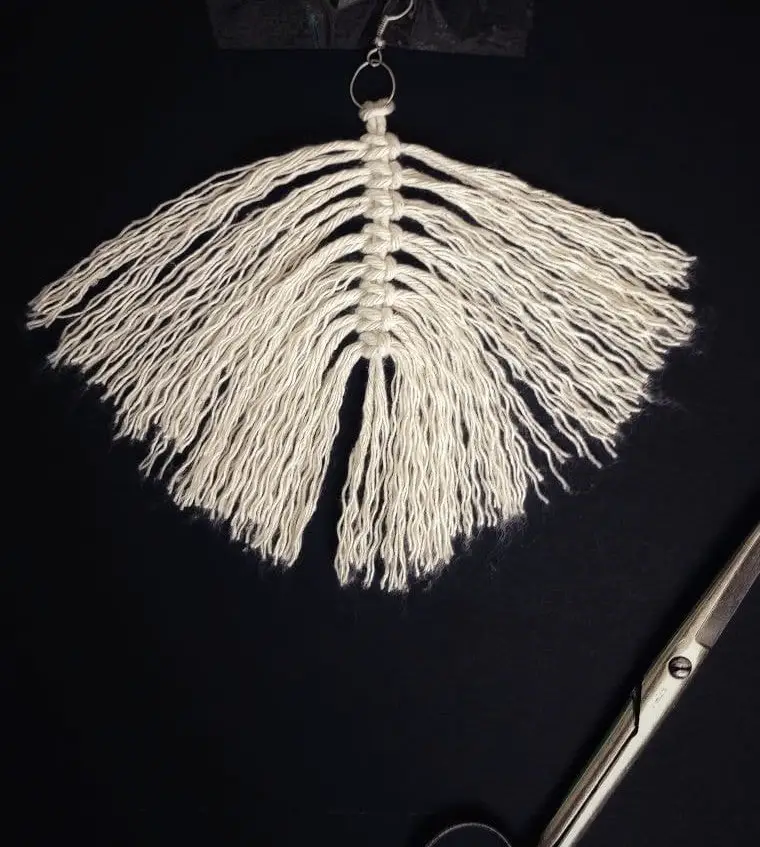
By this point, you should have developed a foundational understanding of your project’s threads. To solidify this comprehension, repeat the process on both sides of the structure. As you work through this step, you’ll begin to visualize each individual thread, much like the illustration that accompanies this text.
STEP 15
One of the wonderful things about this craft project is that you have the freedom to personalize it with beads of your choice before applying the final trim. While it’s entirely optional, I believe it offers a fantastic opportunity to infuse your piece with your own personality and style. By incorporating beads, you can create a truly one-of-a-kind item that reflects your unique perspective.
STEP 16

To create this simple yet elegant accessory, start by threading the beads onto the main string. Select the colors that best represent you or match your outfit – a pair of beads is all you need. Once they’re in place, move on to securing them with an additional short length of string. This will ensure the beads remain stable and add a touch of sophistication to your overall look.
STEP 17
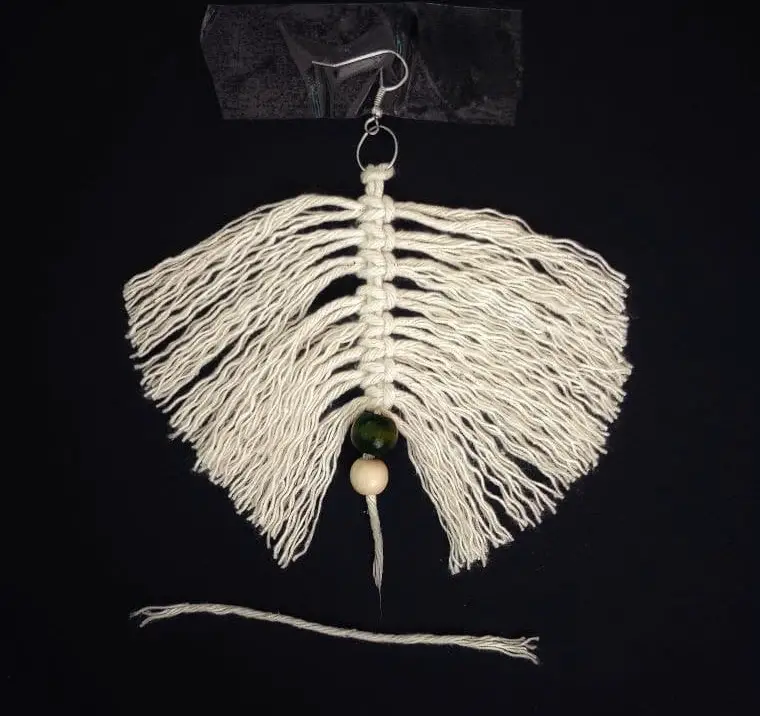
To finalize the bead arrangement, create a thumb knot at the base and tighten it firmly to prevent any accidental movement or loss of the beads. The key is to ensure the knot is snug but not too tight, as you want to maintain a comfortable fit while keeping everything in place.
STEP 18
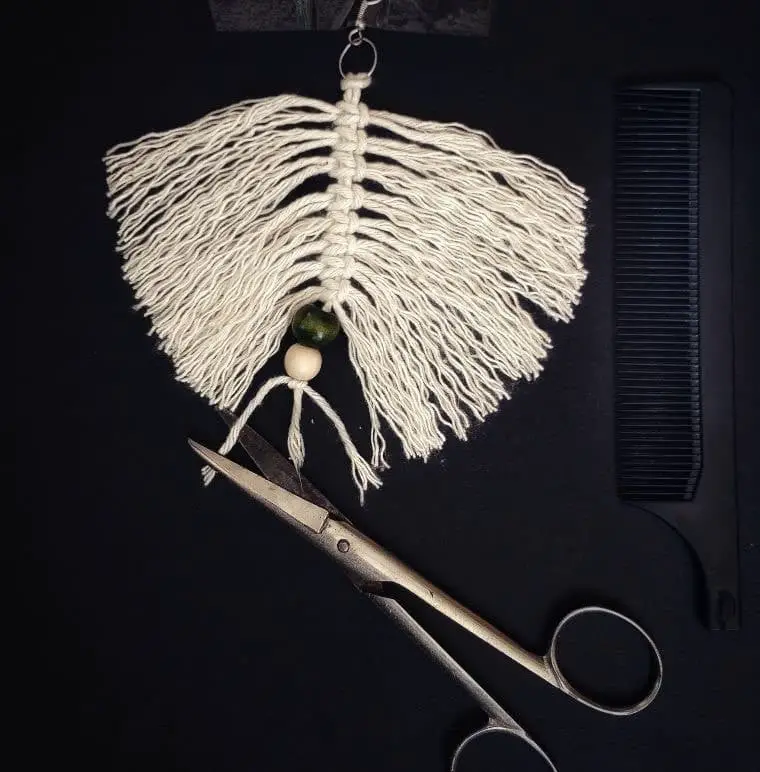
As you approach the finishing stages of crafting your unique earrings, precision is key. The last step involves trimming the feather to achieve the desired shape. It’s crucial to do this carefully, as any misstep can compromise the overall appearance of your finished product. To facilitate a smooth cutting process, consider using water or stiffener to temporarily firm up the threads. This will not only make it easier to trim but also enhance the durability of the thread.
Once you’ve given the feather its final trim, allow it to dry for a period before moving forward. With these steps complete, you’ll be left with a distinctive and charming pair of earrings, ready to add a touch of personality to your next outfit.
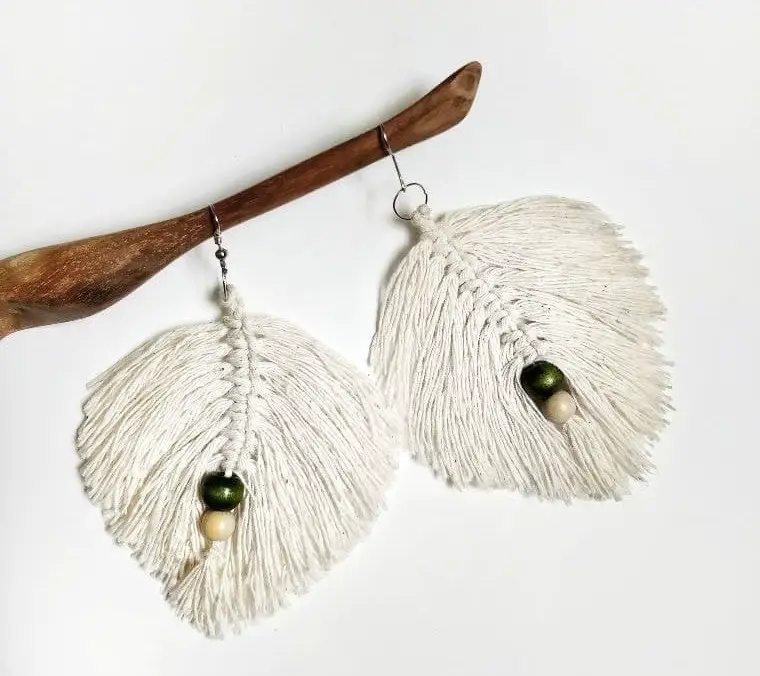
DIY Macrame Leaf Earrings
These charming DIY macrame earrings offer a delightful combination of creativity and practicality. Not only will you be able to wear them as a stylish accessory, but the process of crafting them is also an enjoyable experience. With just two hours invested in this project, you’ll be rewarded with a unique piece that adds a personal touch to your wardrobe.
Equipment
Materials
To create a unique piece of jewelry, you’ll need the following materials: a 4mm single-stranded cotton rope, two jump rings, two earring hooks, and four beads of your preferred choice. These components will serve as the foundation for your creative endeavor.
Instructions
To create your unique pair of earrings, begin by gathering all necessary supplies. Cut two long strings and at least 16 short strings for each earring. Next, fold the long string in half and thread a jump ring through it, securing it with a knot. Then, take the folded cotton loop and pull the loose strings through it, tightening the fibers as needed. Attach the hook to the jump ring and secure the top with either tape or a clip. For the second earring, follow the same steps.
To shape the earrings, take one short string, fold it in half with a loop in the middle, and slide it under the spine of the earring. Next, insert the folded end into the horizontal strand’s loop, pulling it through to position it horizontally above the opposite strand. Then, pull both sides of the strands tightly around the top loop. Repeat this process for the next knot, starting on the opposite side.
Once complete, carefully comb out any stray strands and add beads if desired (remember to secure the beads with an additional string). Finally, make your final trim and wet the strands to facilitate cutting. Allow the earring to dry before flaunting your new creation!
Conclusion
The beauty of crafting lies in its accessibility – it’s not just about creating something beautiful, but also affordable and practical. Take the simple act of making earrings, for instance. With a variety of beads to choose from, you can create an endless array of colors, patterns, and sizes that match your unique style. What’s more, the supplies needed are easily accessible and won’t break the bank, allowing you to whip up a pair (or five!) to suit every outfit in your wardrobe.
And let’s not forget about the joy of gifting these handmade masterpieces to loved ones – I’m confident they’ll be treasured for years to come.