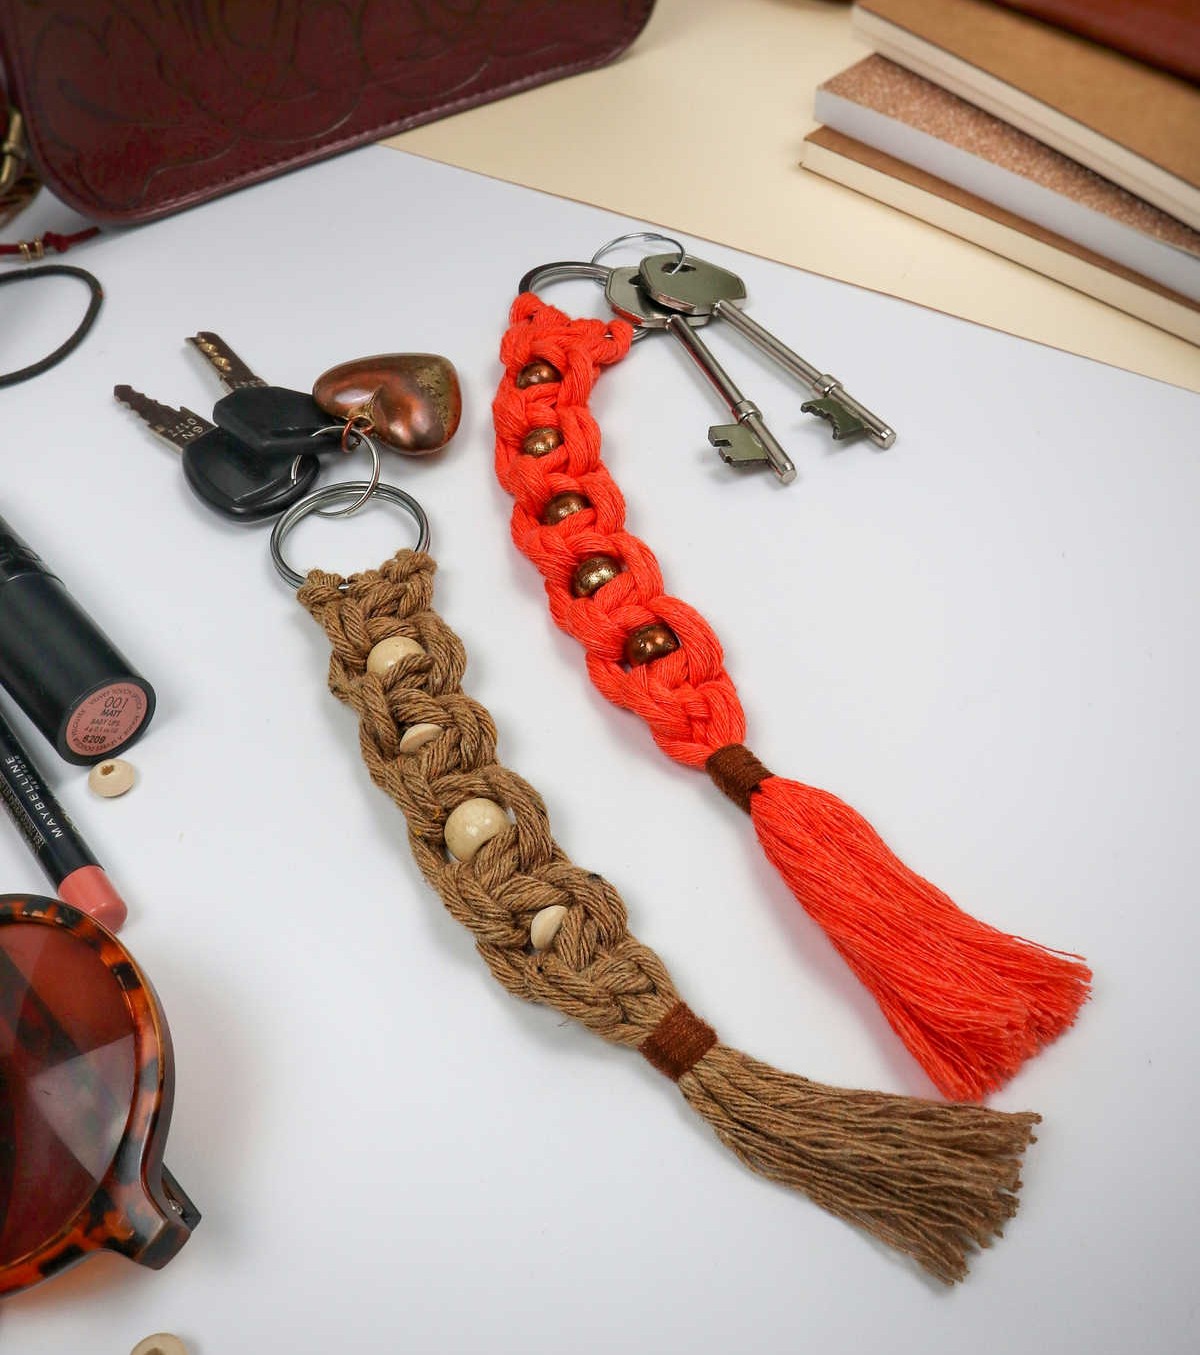
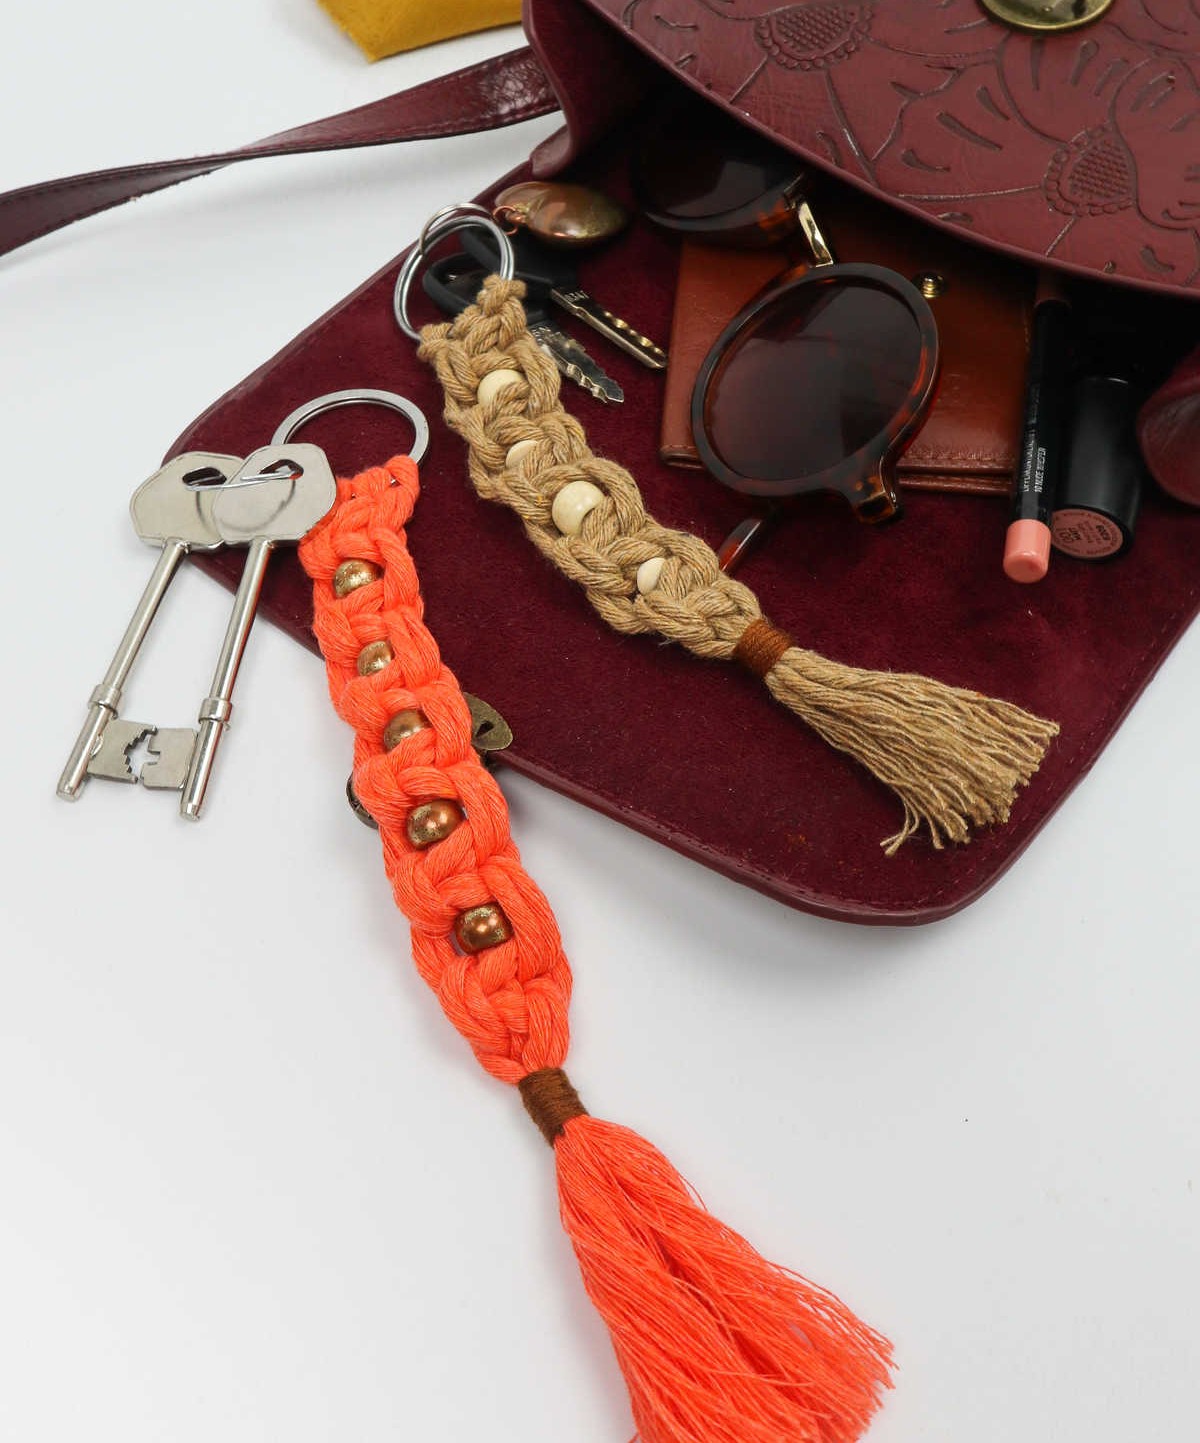
For those just starting out with macrame, this simple DIY keychain project is an ideal introduction to the world of cord-tying. And who knows, you might just find yourself hooked on creating these bohemian-inspired accessories for friends and family.
Tools and Supplies You’ll Need
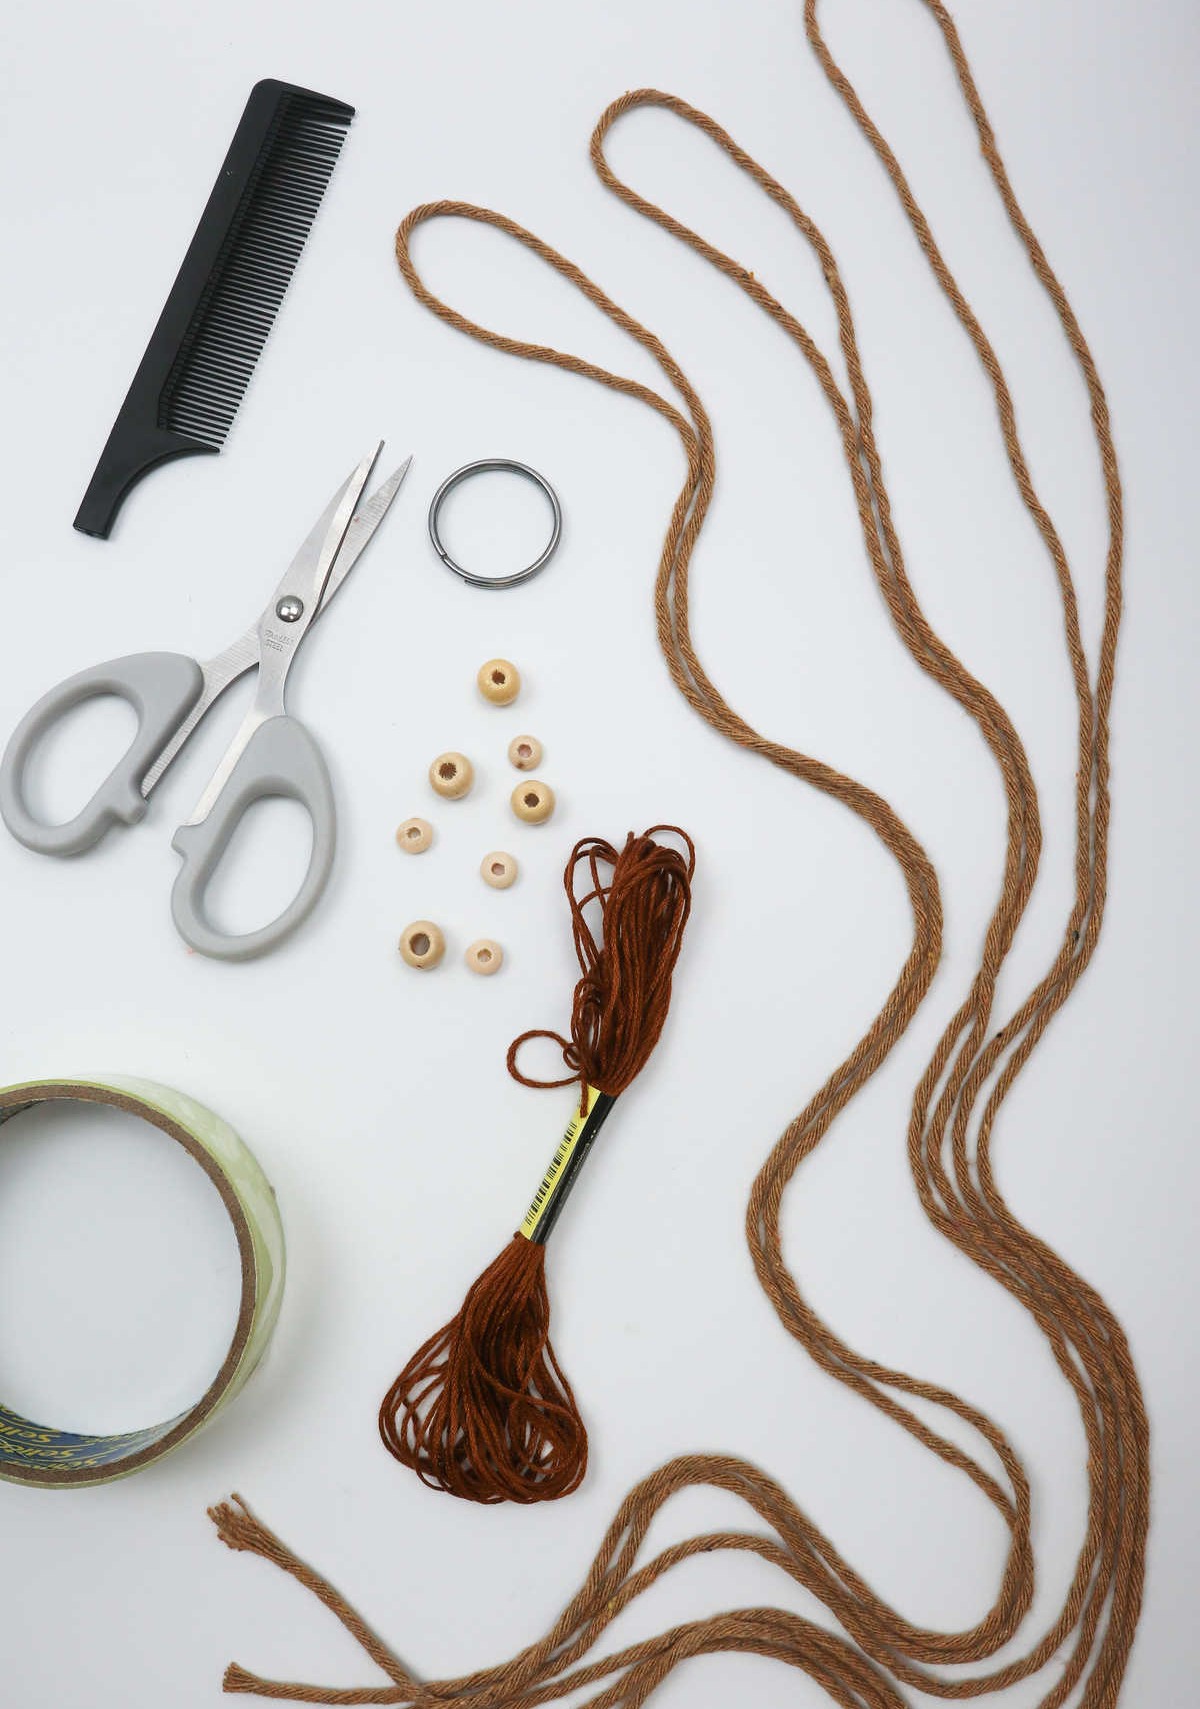
To embark on this creative journey, it’s essential to have the necessary tools at your disposal. As you prepare to begin, make sure you’ve collected the following essential supplies: a key ring, three 4mm single twist cotton cords measuring 32 inches in length, Sellotape for binding, scissors for trimming and shaping, beads for added decoration, embroidery thread for intricate stitching, and a hair comb for securing loose strands.
How to Make a Macrame Keychain
To craft a personalized keychain, follow these straightforward steps: Begin by gathering your materials, which typically include a small piece of leather, fabric, or other flexible material for the strap, some strong thread or cord, and a decorative item such as a charm, button, or bead. Once you have all your components ready to go, start by cutting your strap to the desired length.
Make sure it’s long enough to fit comfortably around your keyring, with a little extra room at the end for tying off the knot. Next, thread your needle and tie a knot at one end of the strap to prevent it from slipping off during assembly. Then, simply thread your decorative item onto the strap and secure it in place with another knot. Finally, tie off the other end of the strap by creating a small loop or tuck that won’t come undone over time.
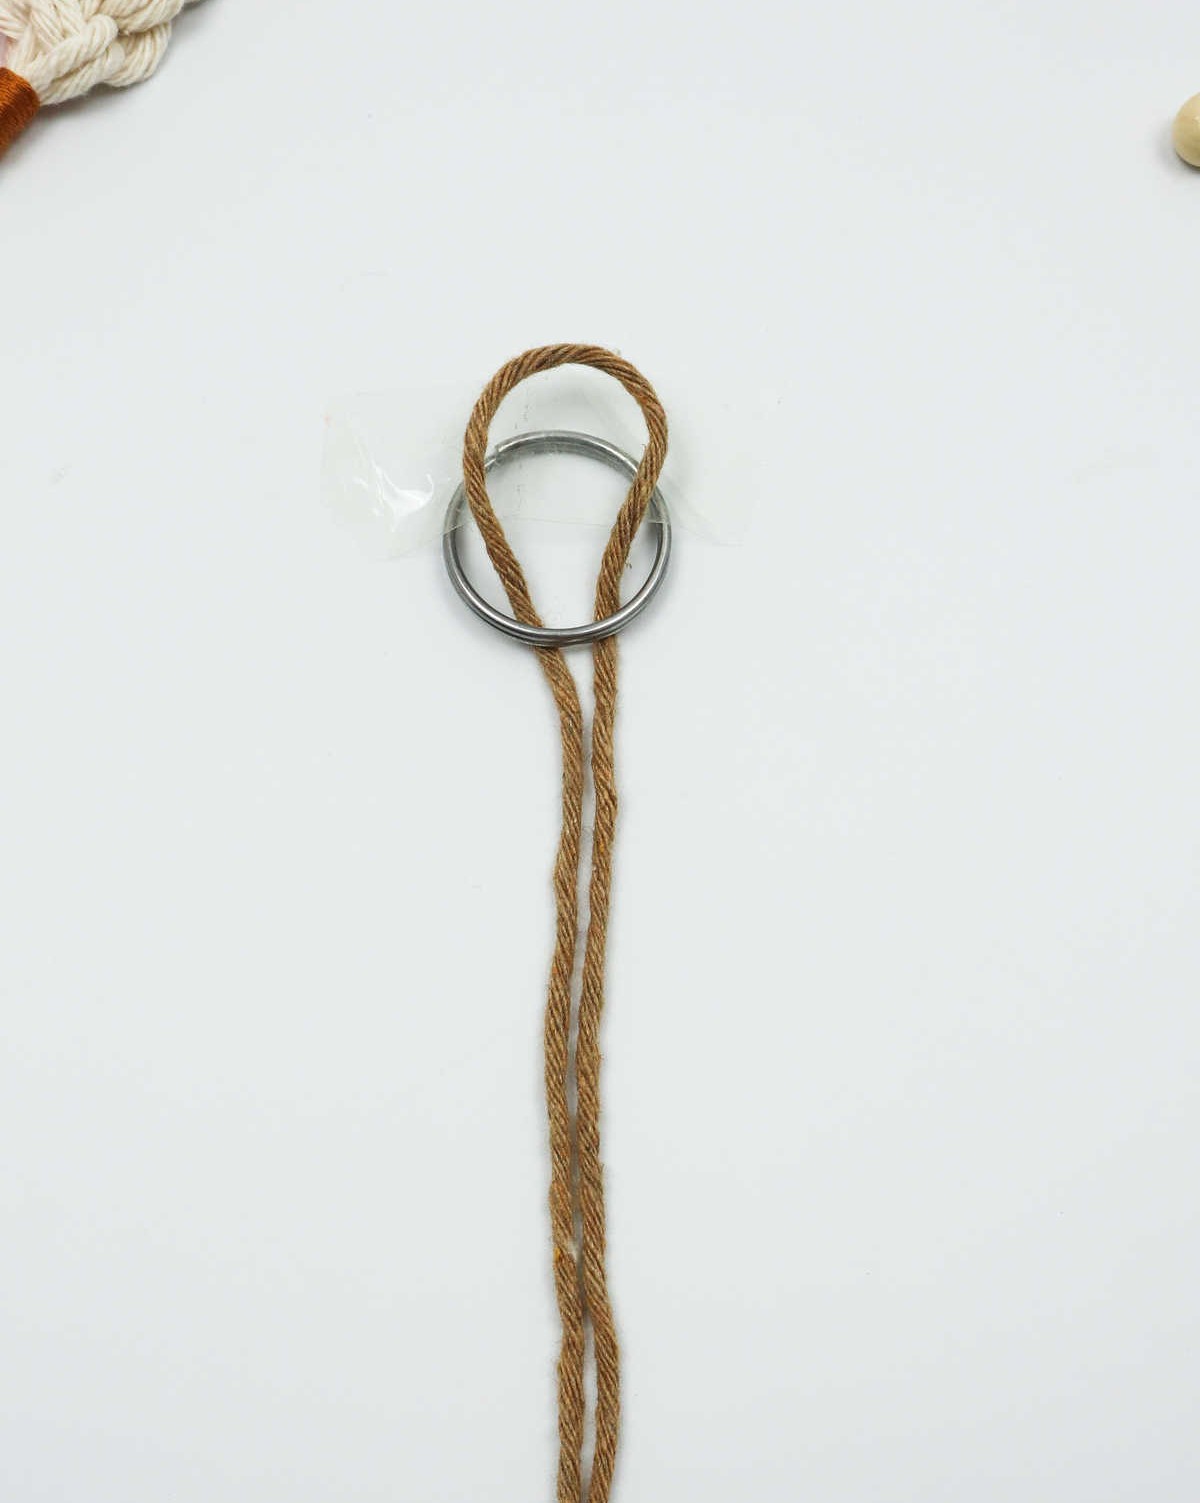
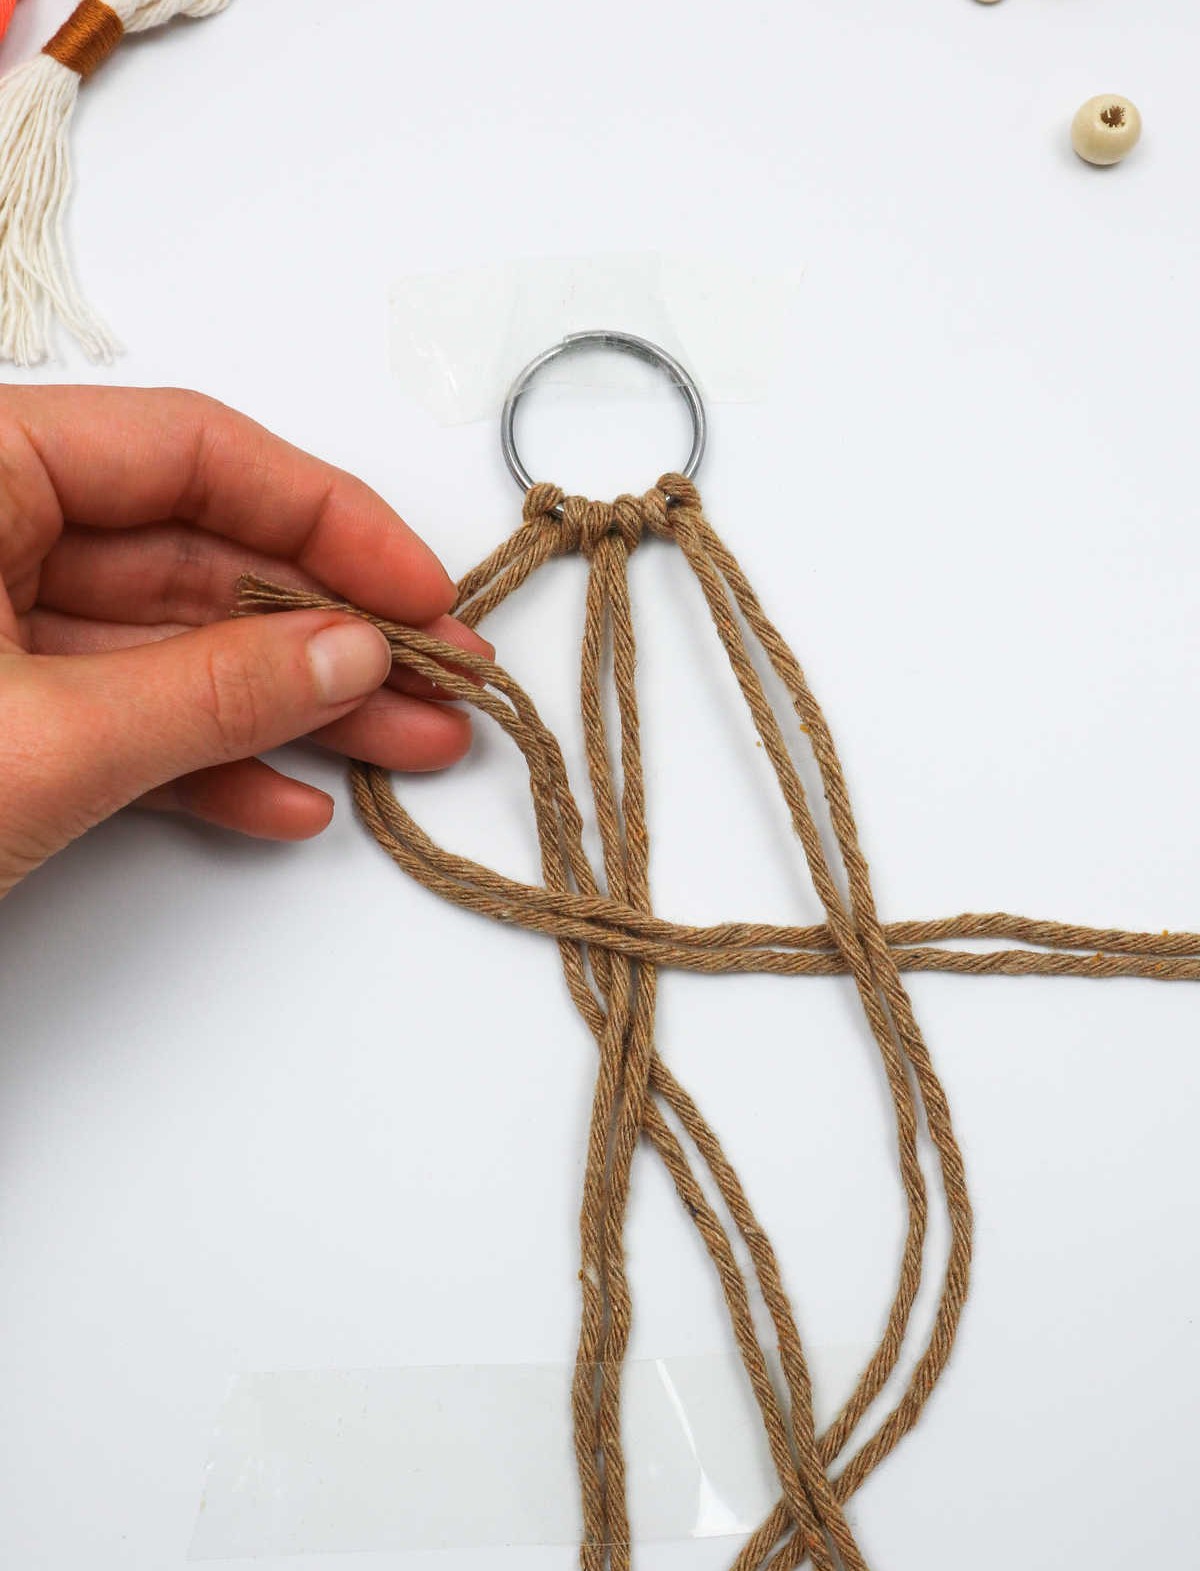
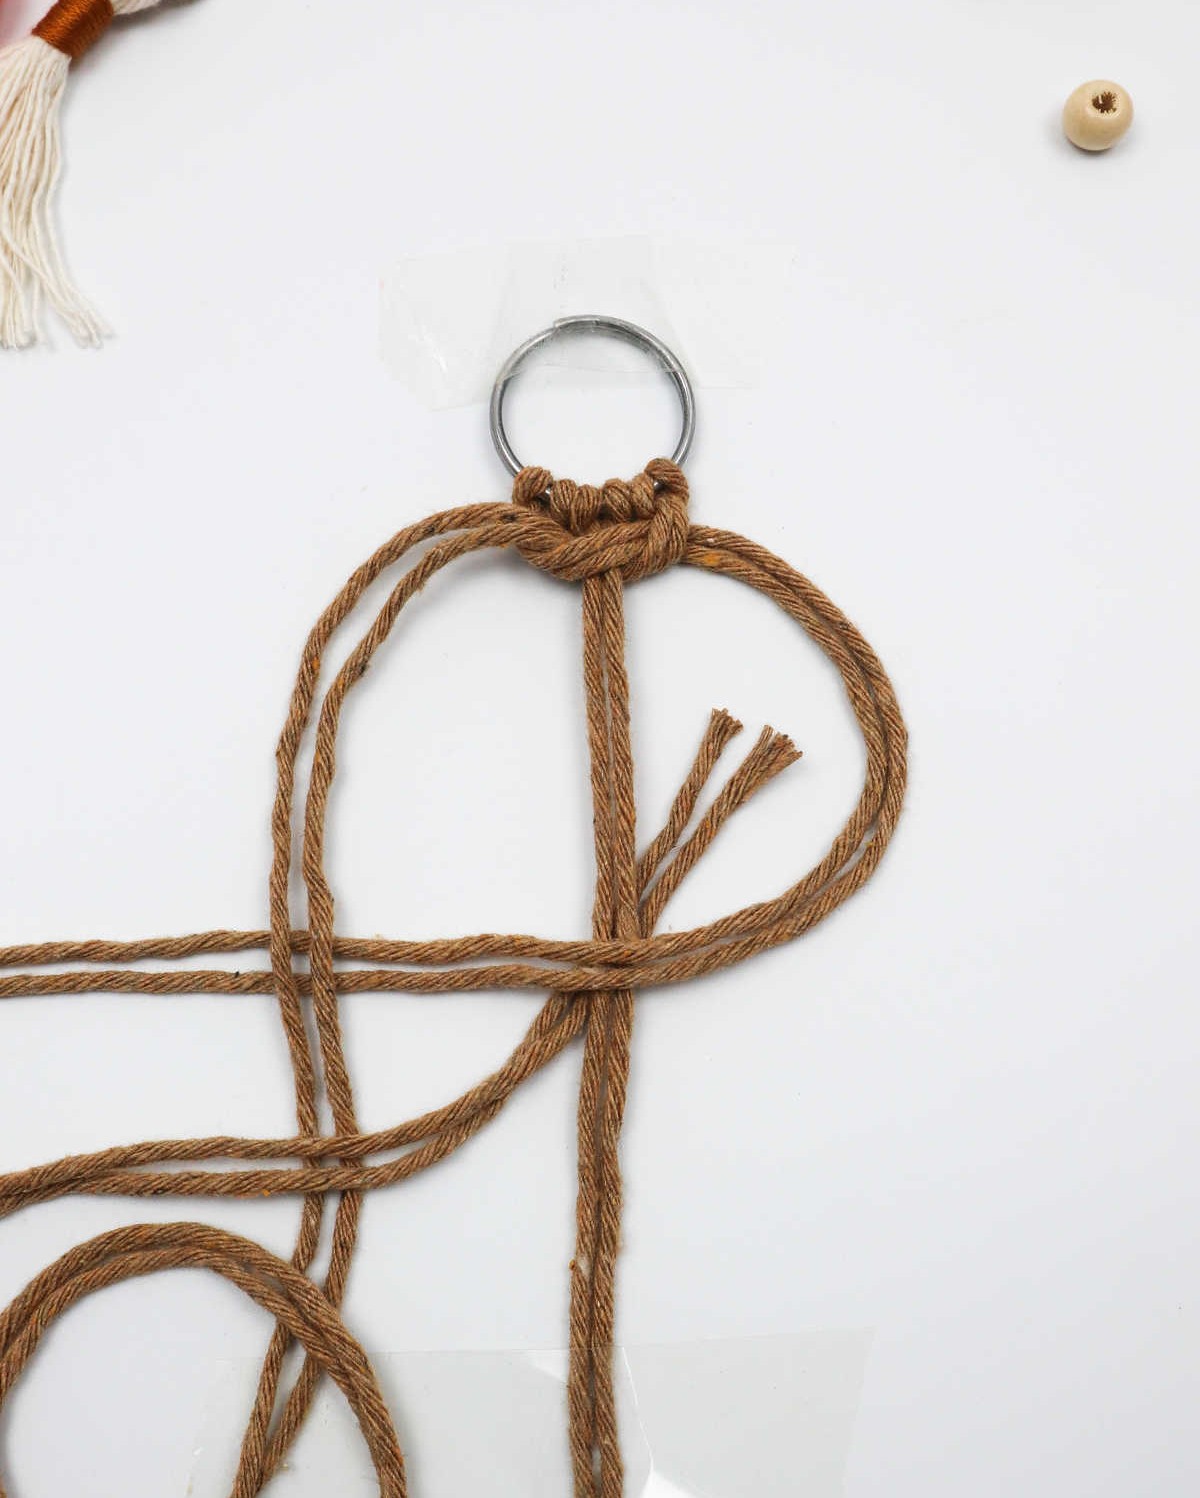
Step 1
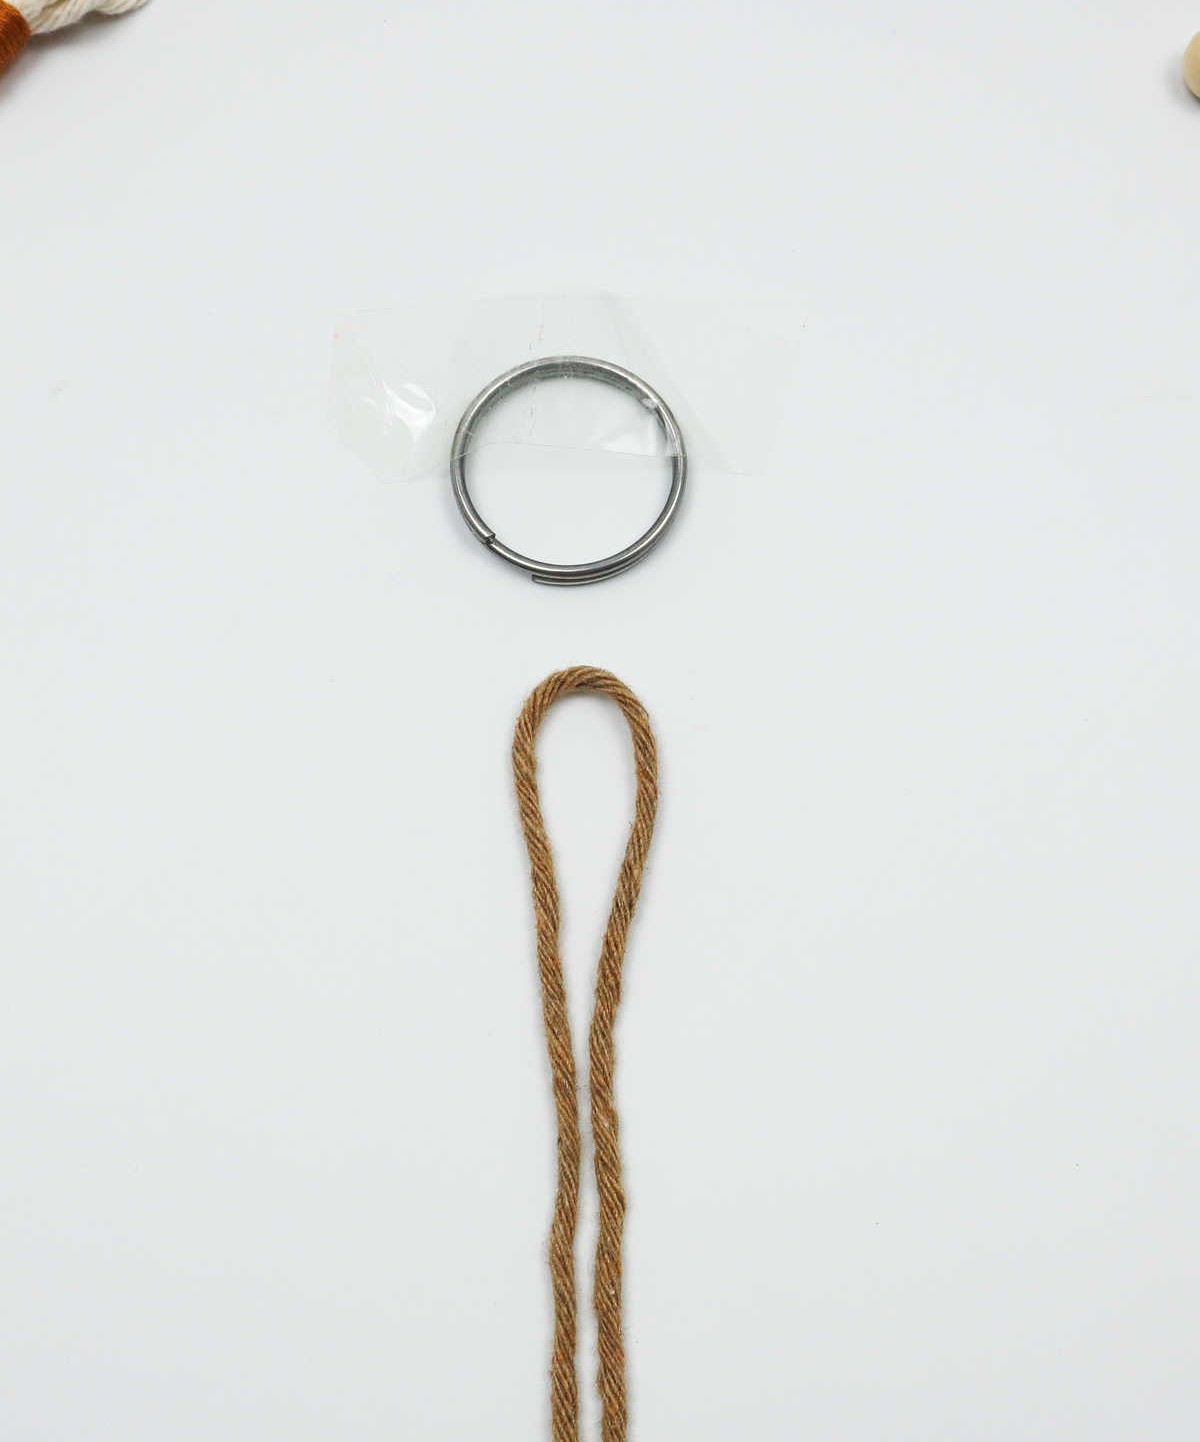
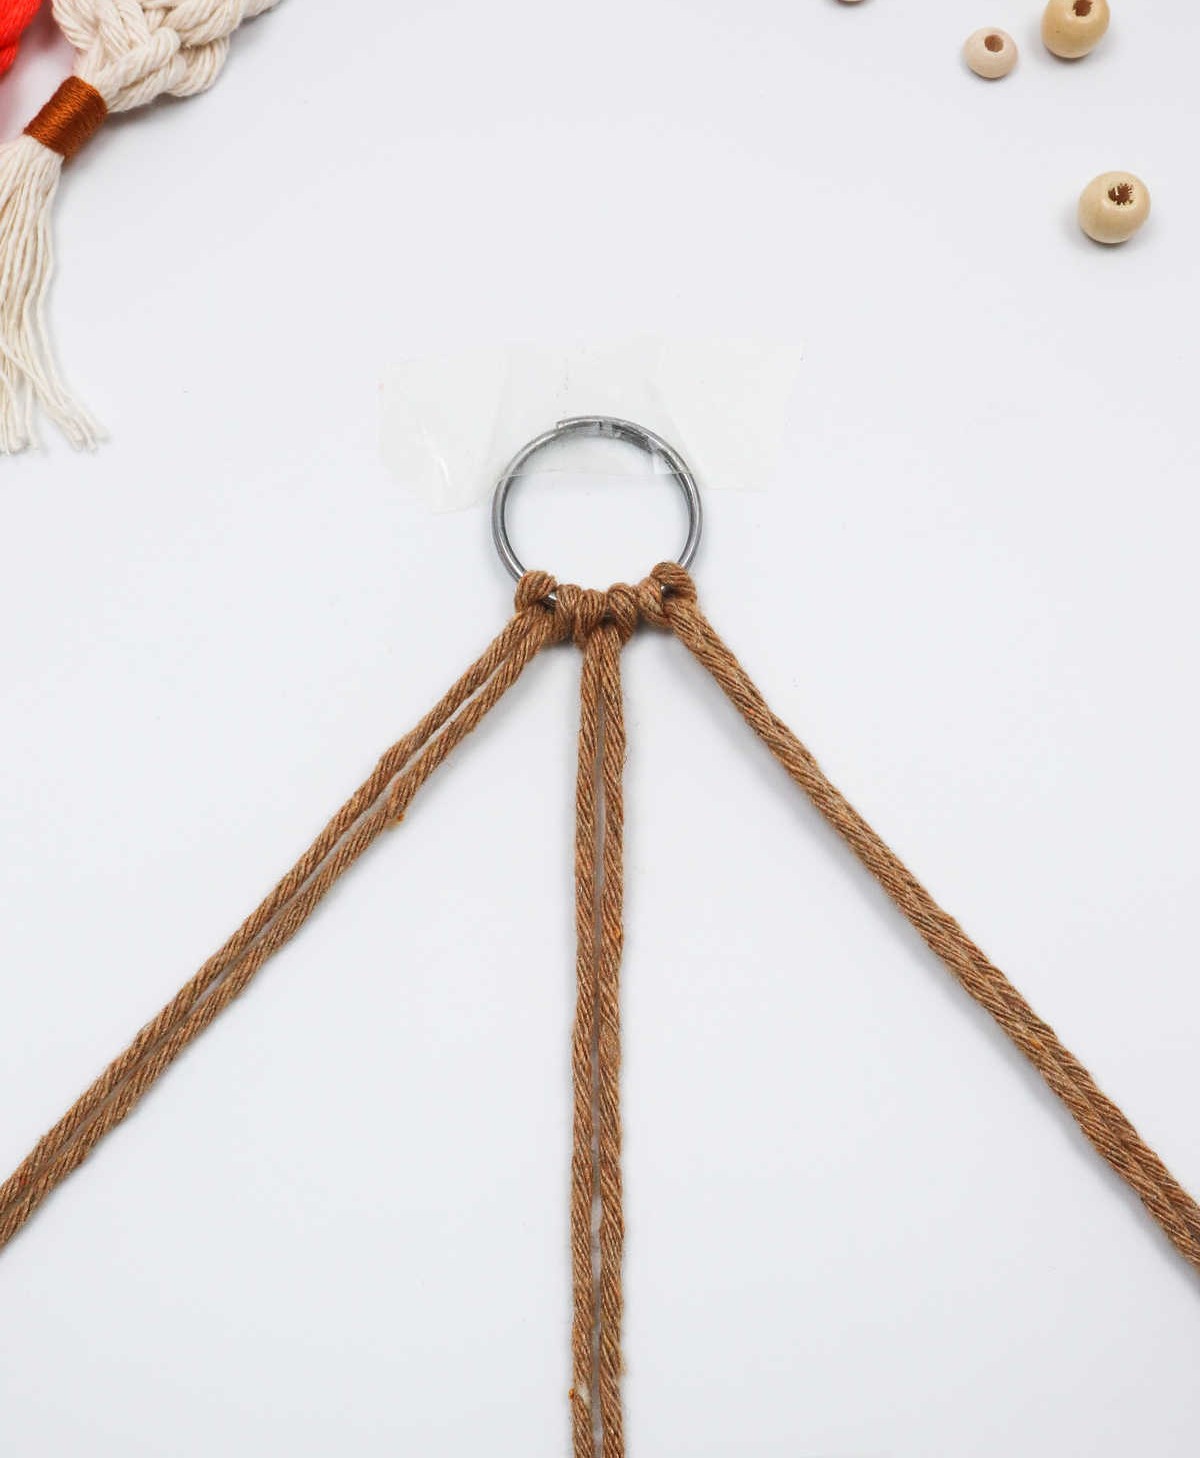
To simplify the process, consider securing the keyring to your workspace by taping its top portion. This will prevent the ring from shifting around as you work on your DIY project, giving you more control and precision. Next, take one of your cords and fold it in half, forming a loop with the ends meeting at the midpoint. The other end should resemble this shape.
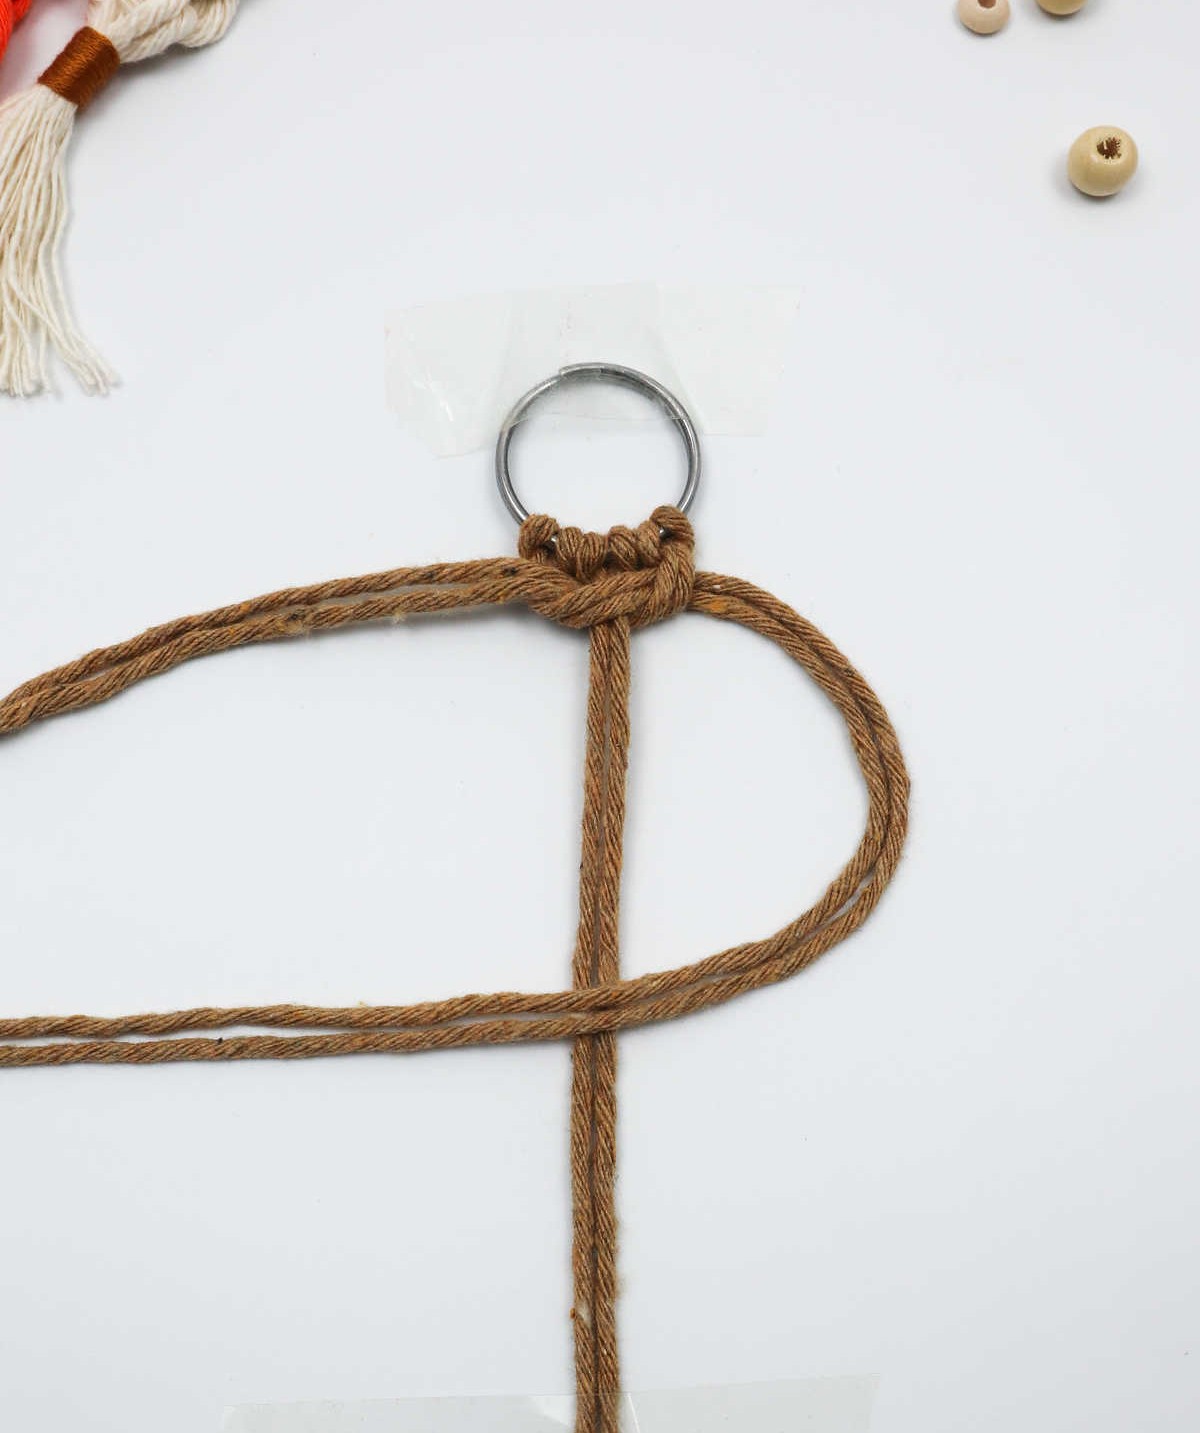
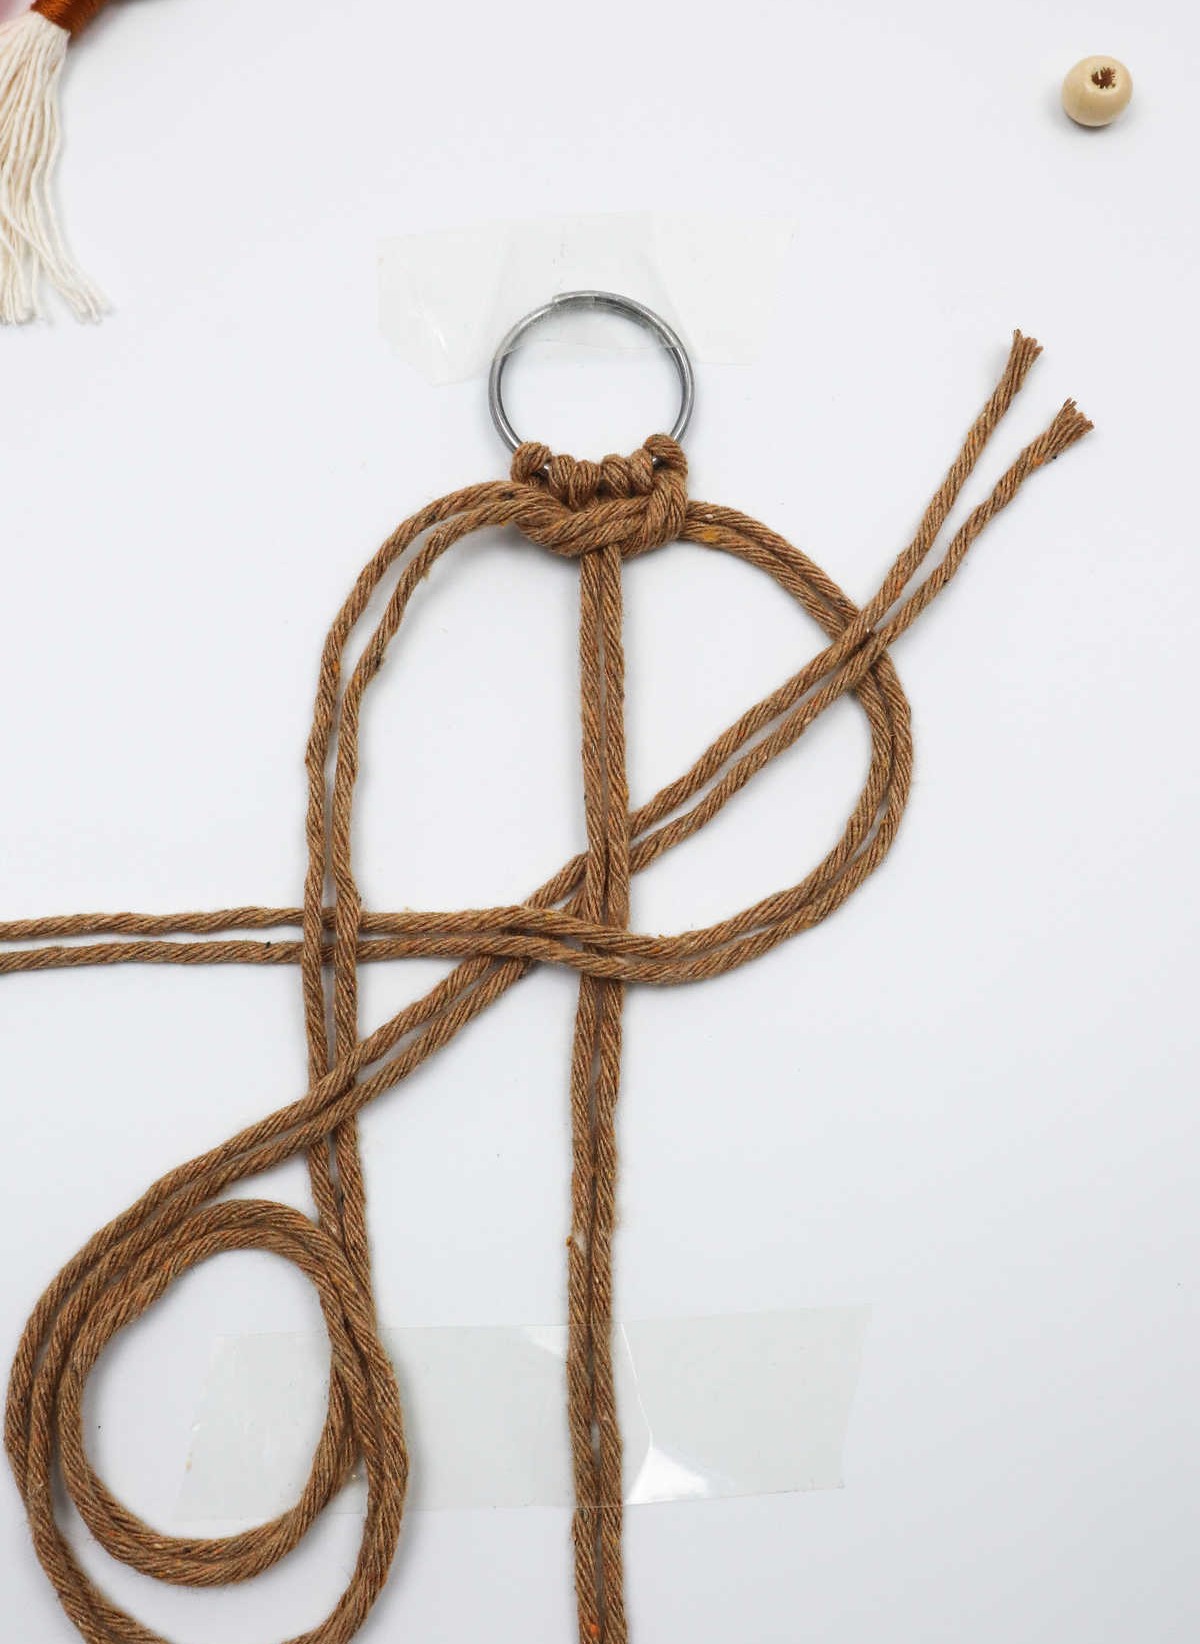
Step 2
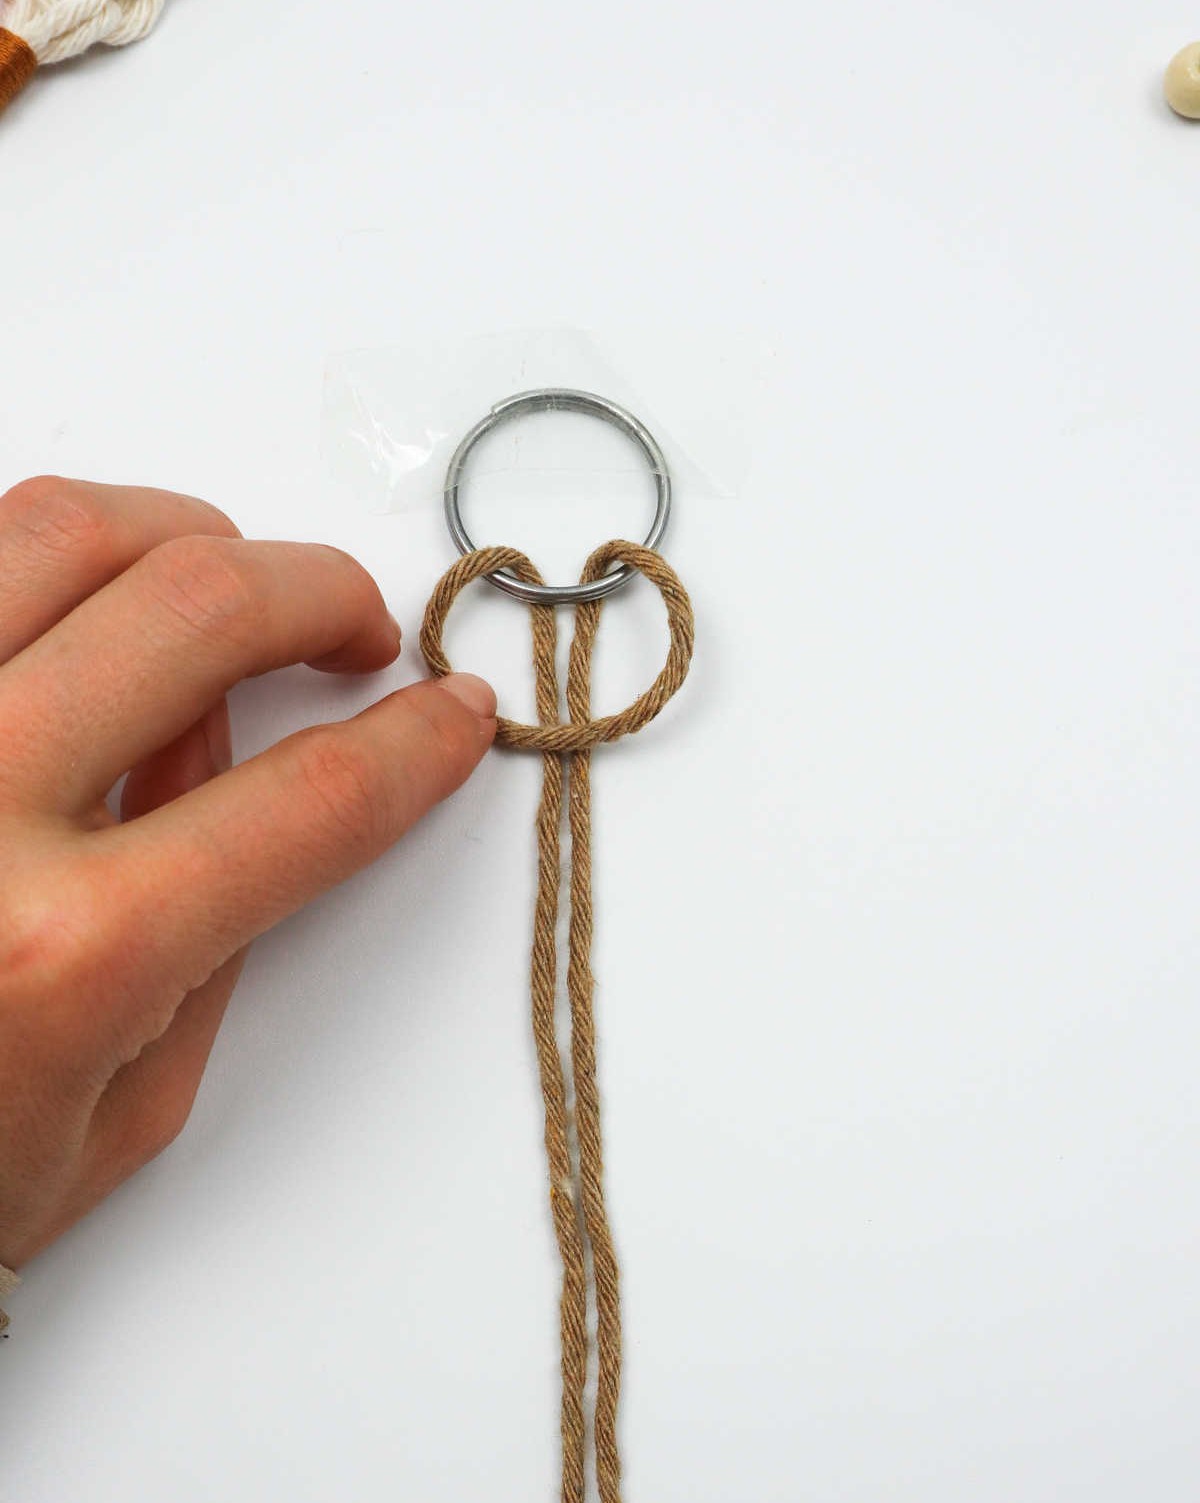
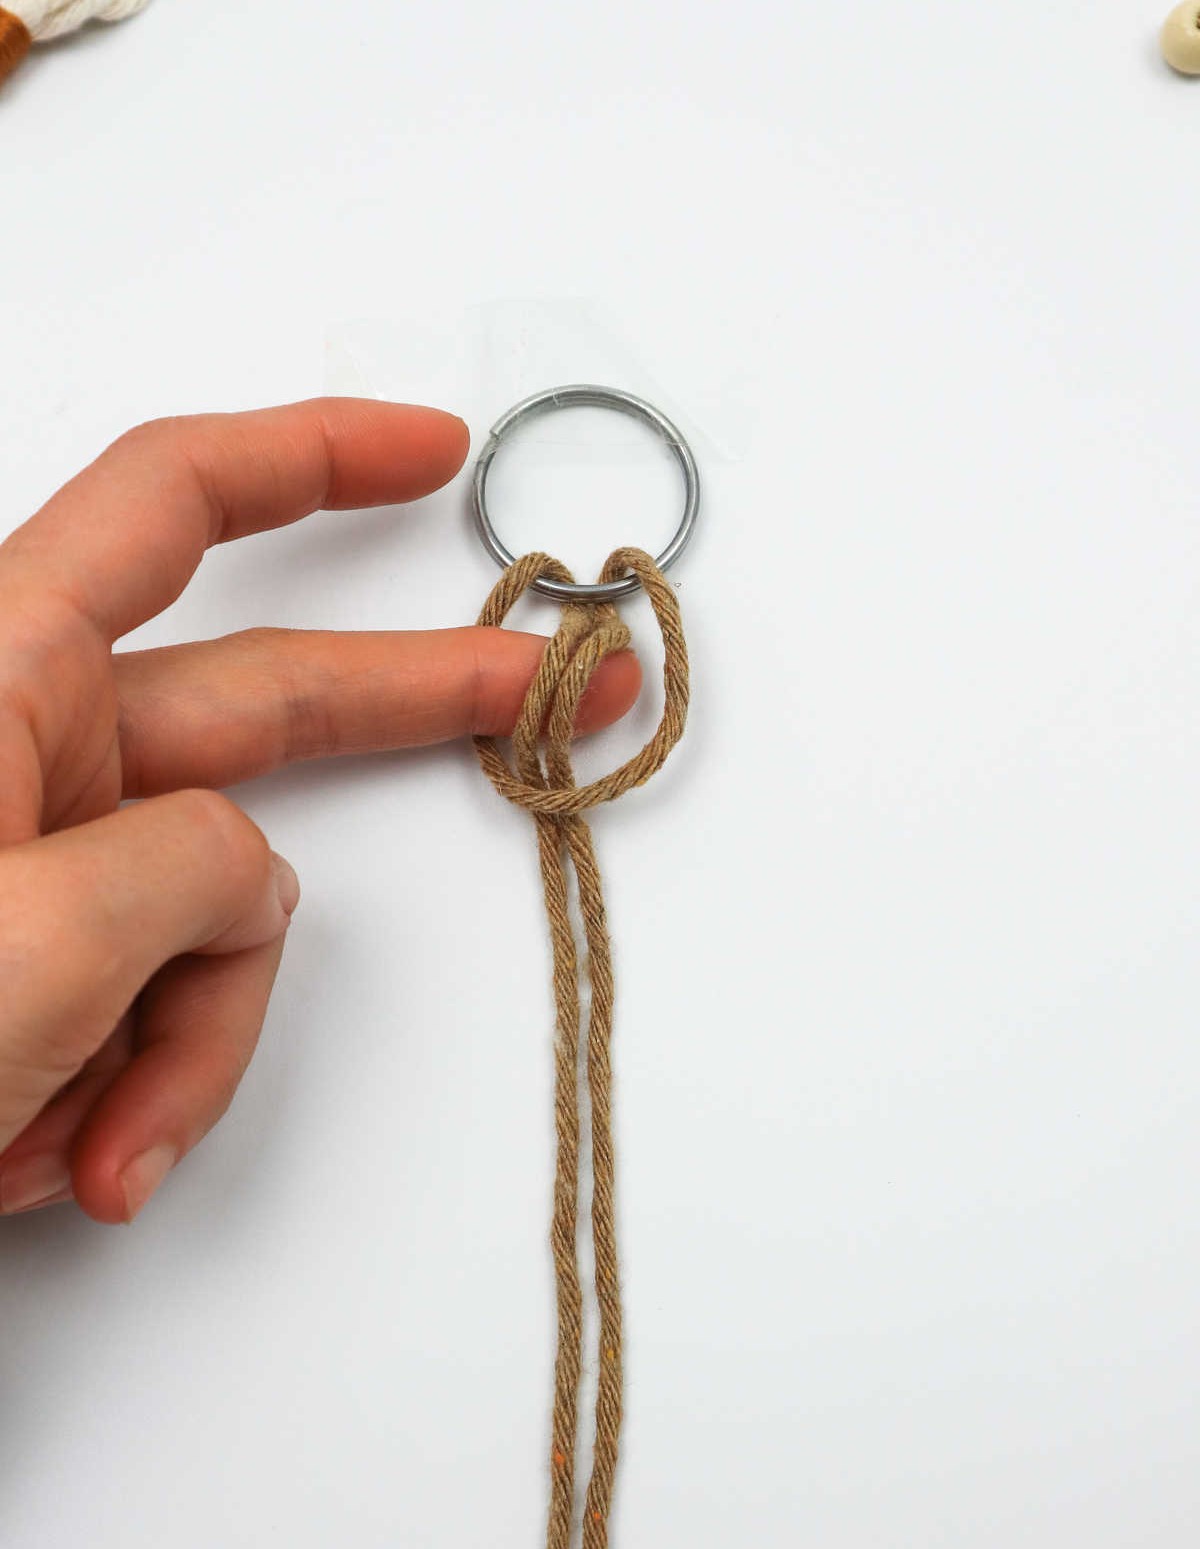
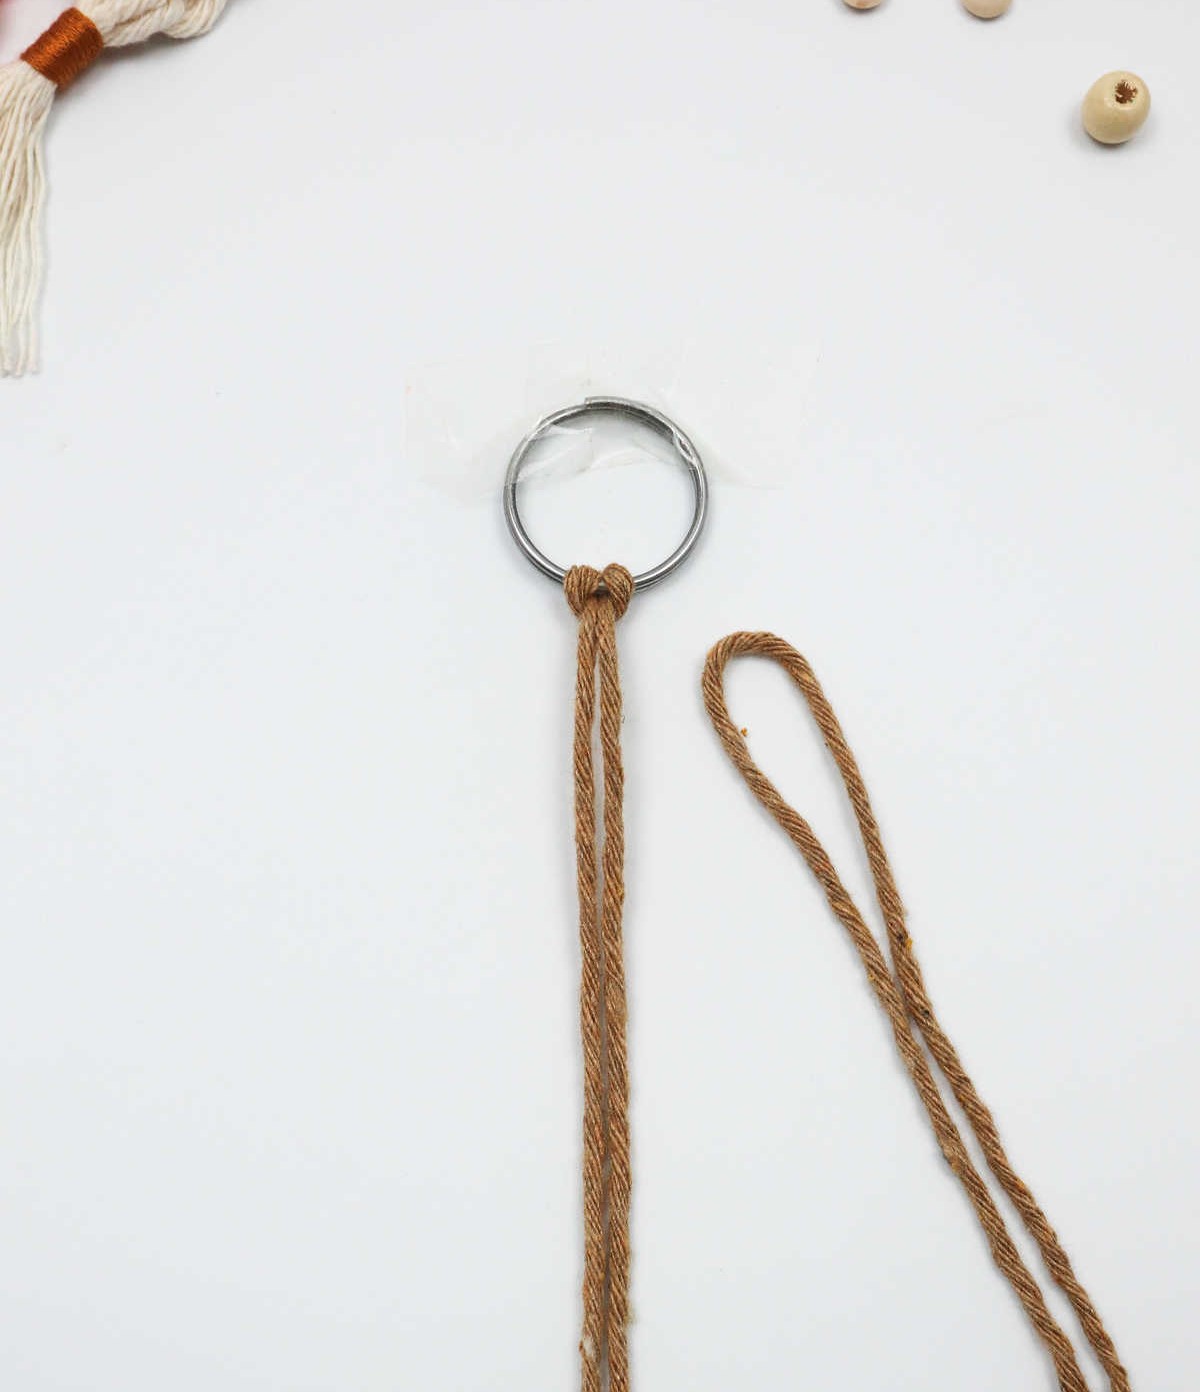
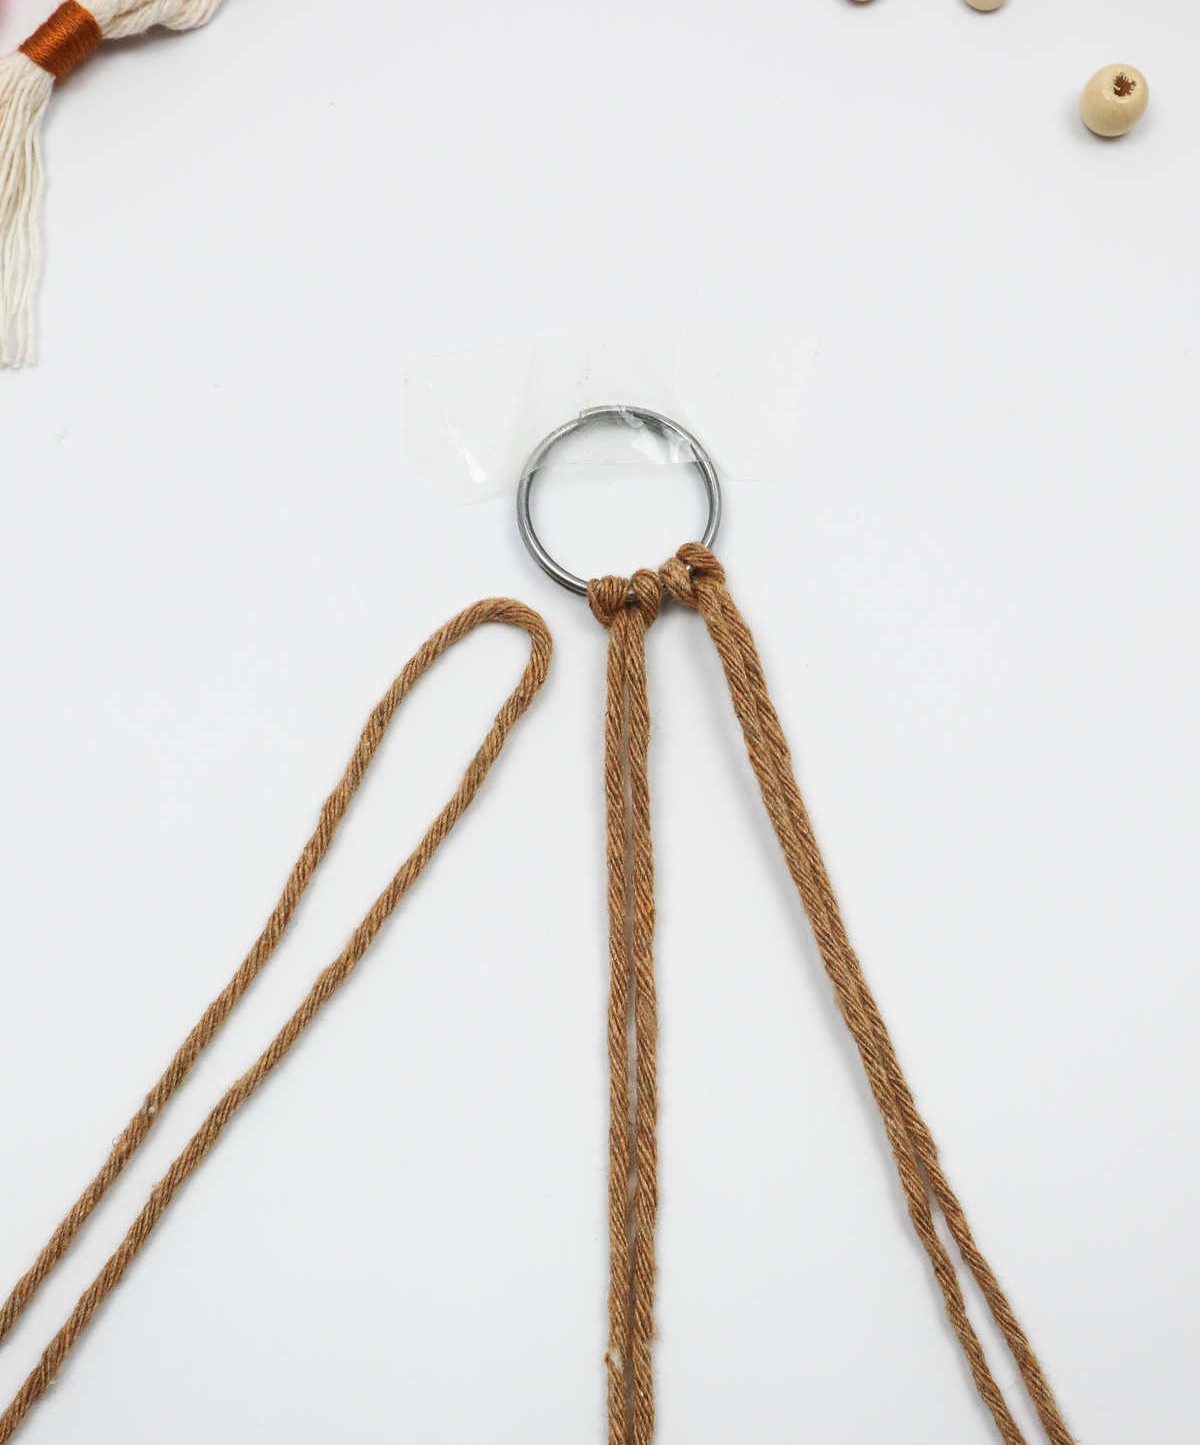
To begin, pull the loop under and then through the key ring. If you’re well-versed in macrame knots, you can skip ahead and create a lark’s head knot by pulling both cords through the ring. However, if this terminology is unfamiliar to you, don’t worry! Simply pull the loop down once more to rest it over the metal, ensuring it’s snugly seated. Next, insert your finger into the loop to gather the two end cords and pull them through.
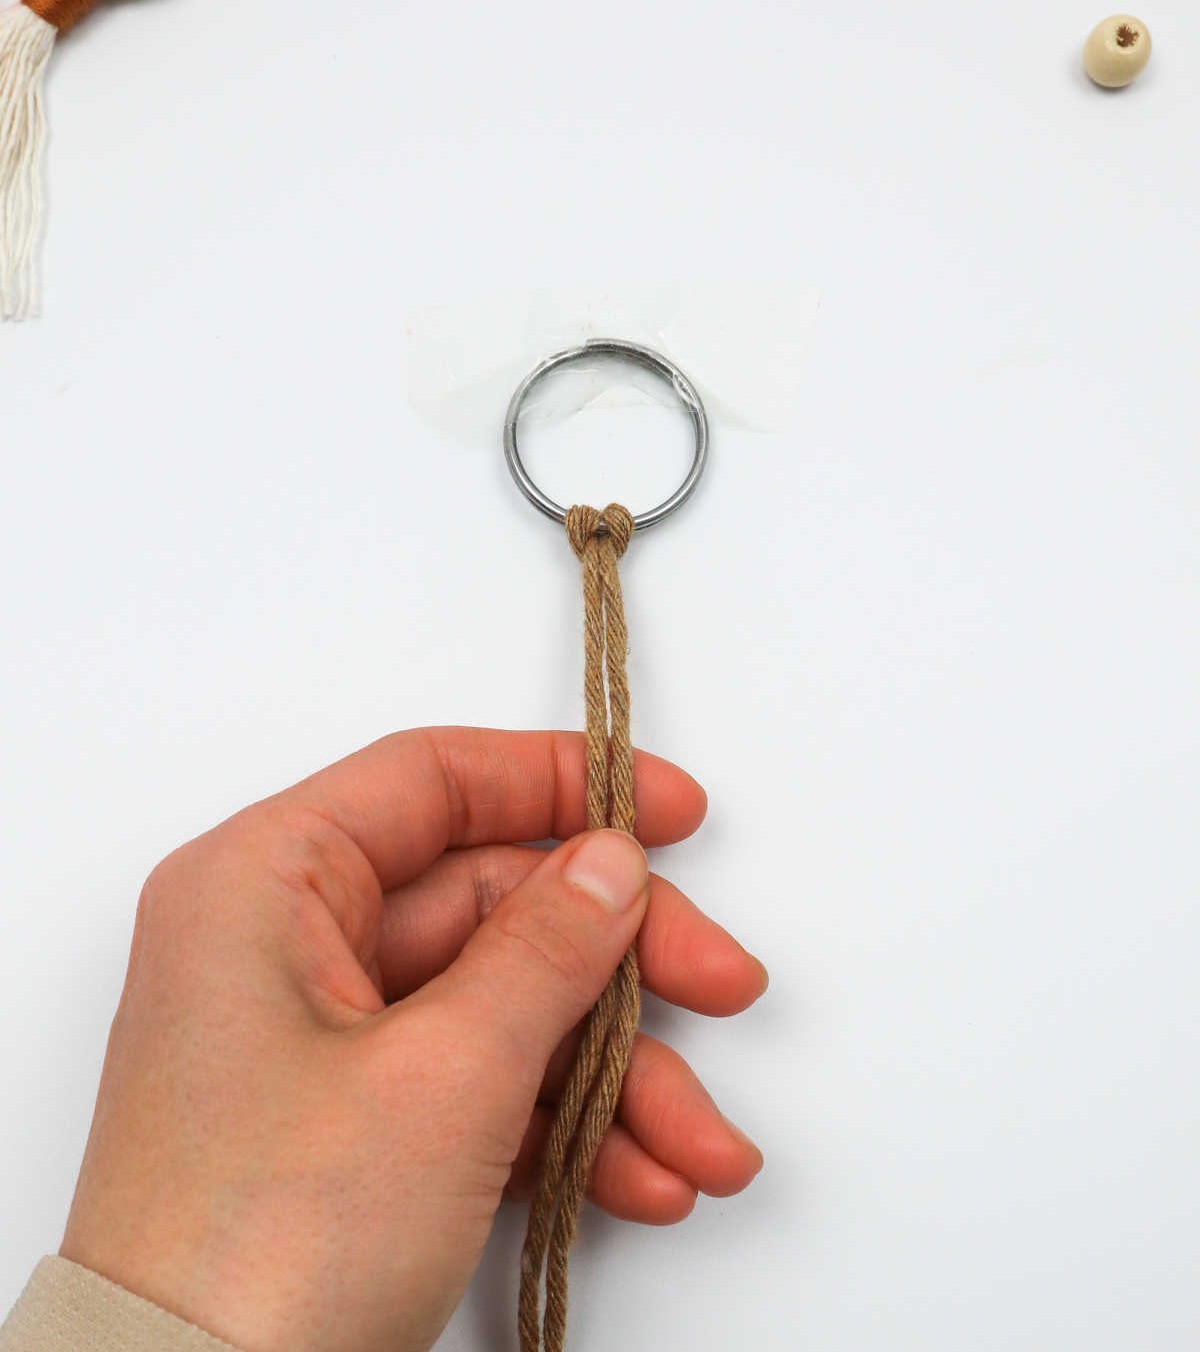
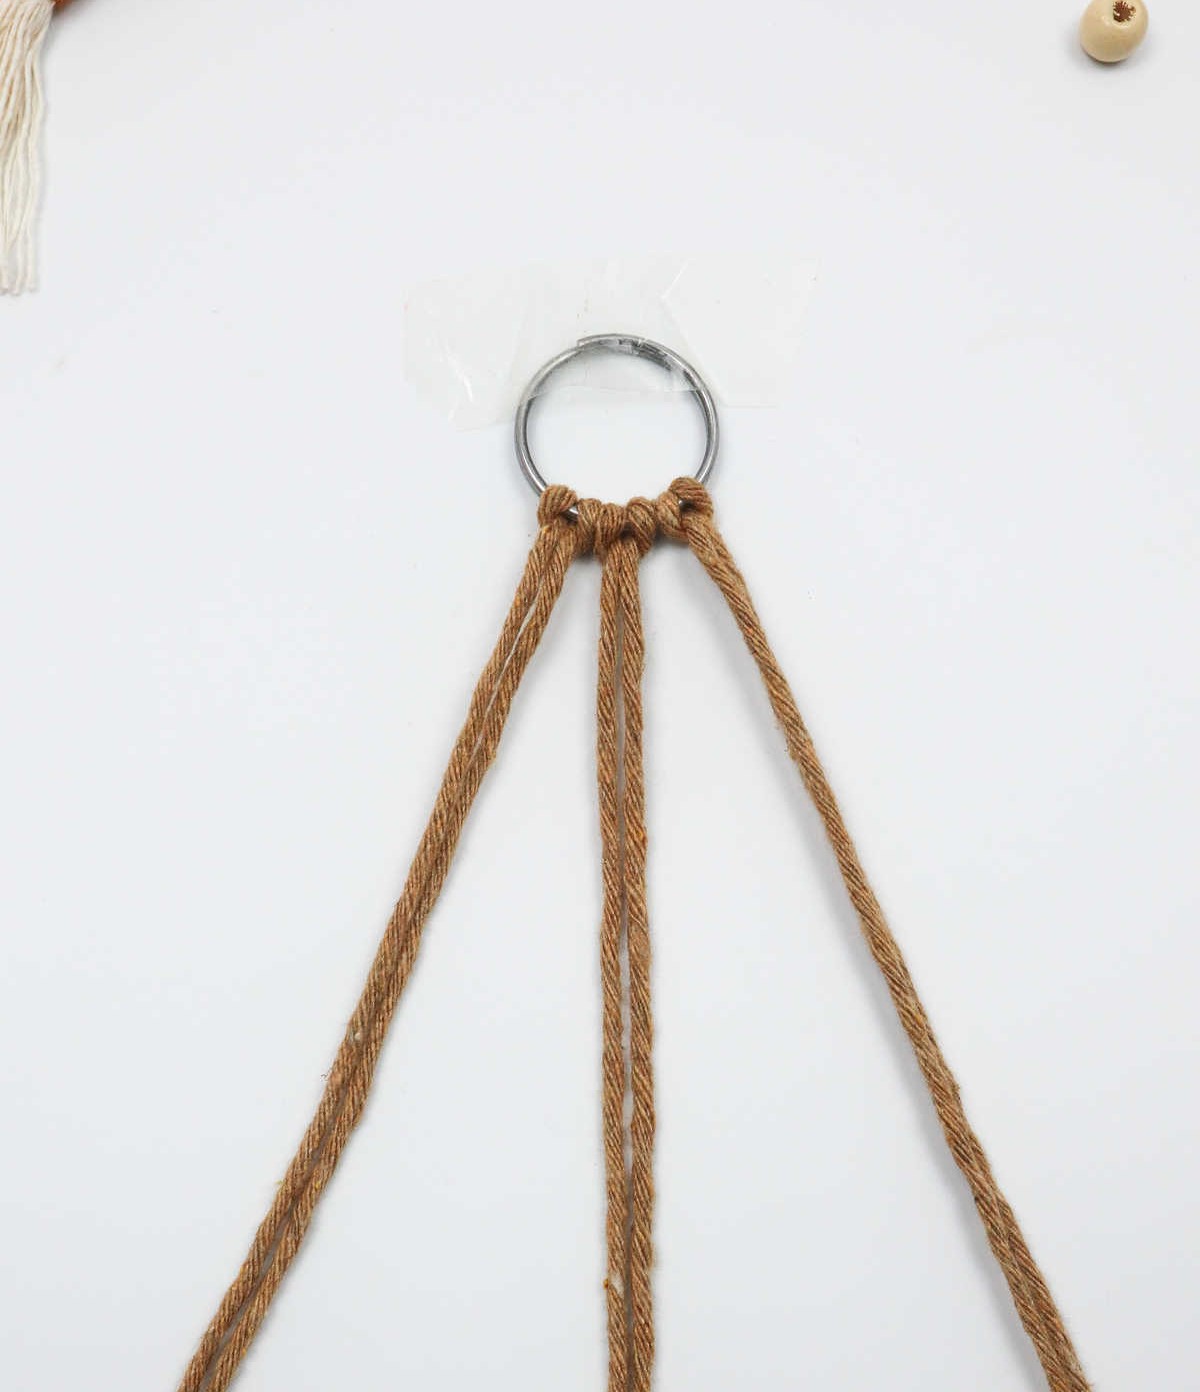
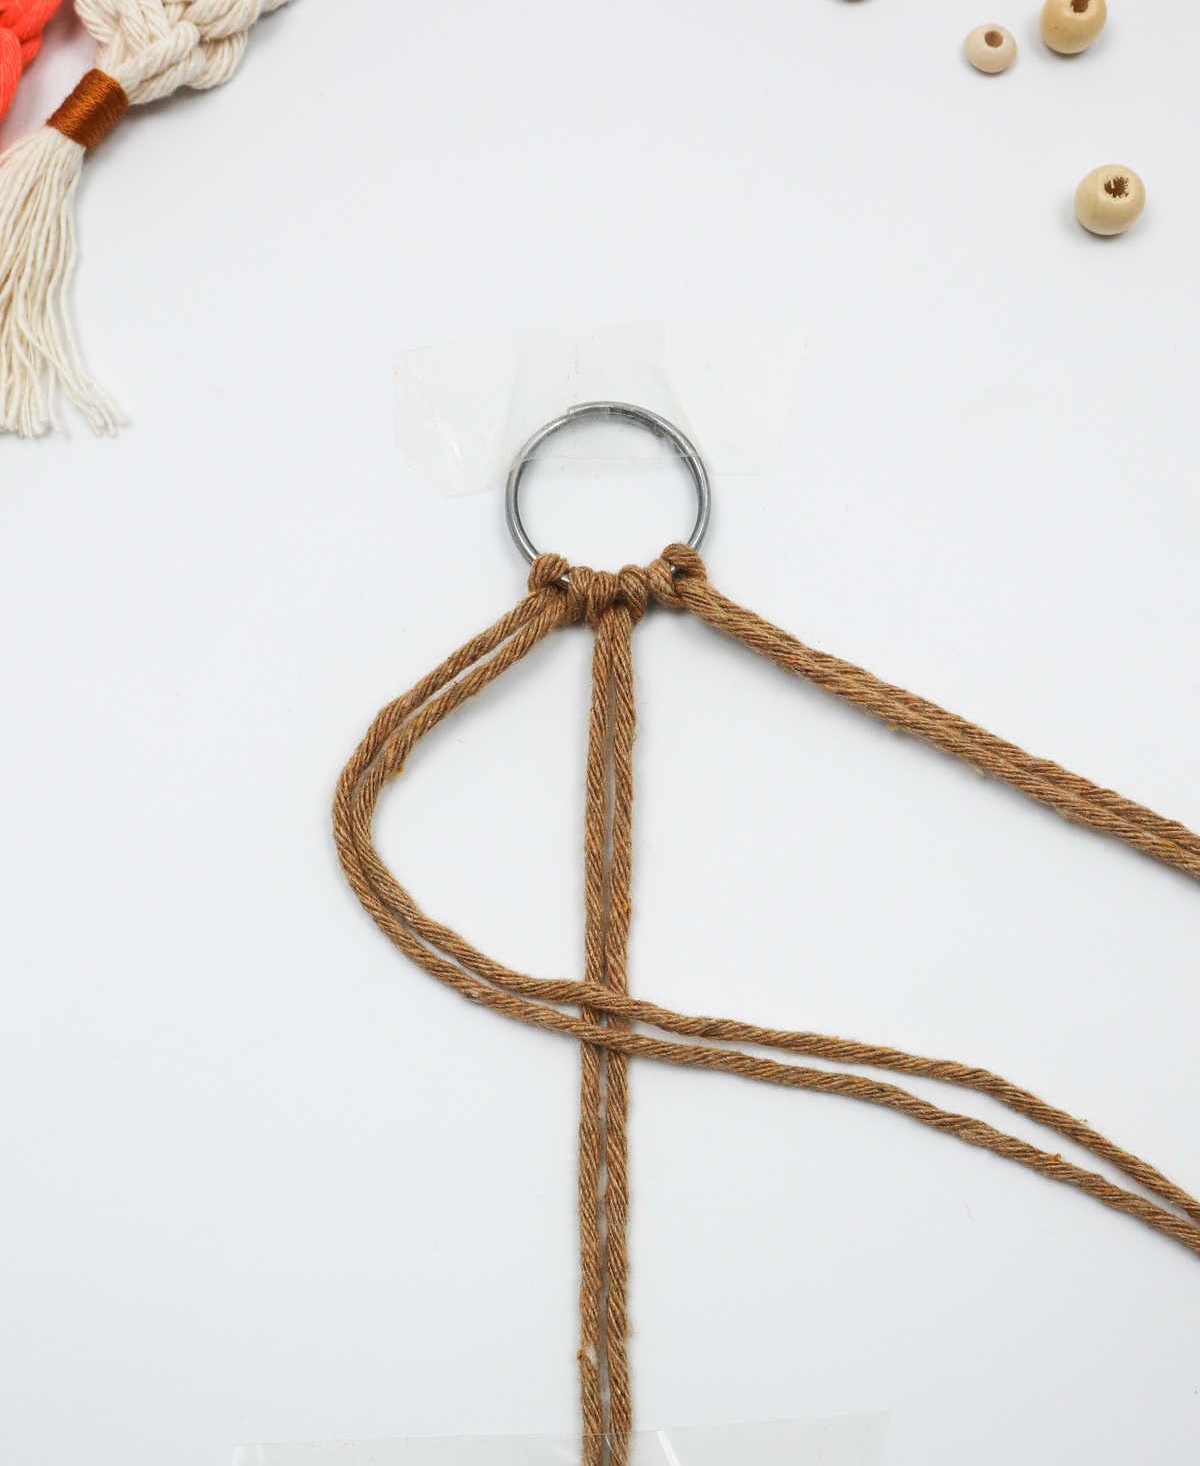
Once both cords are in place, tug gently to tighten the knot around the ring. Congratulations – you’ve just completed your first lark’s head knot! To create the second and third knots, simply repeat this process with the remaining cords, after which you’ll be ready to start designing.
Step 3
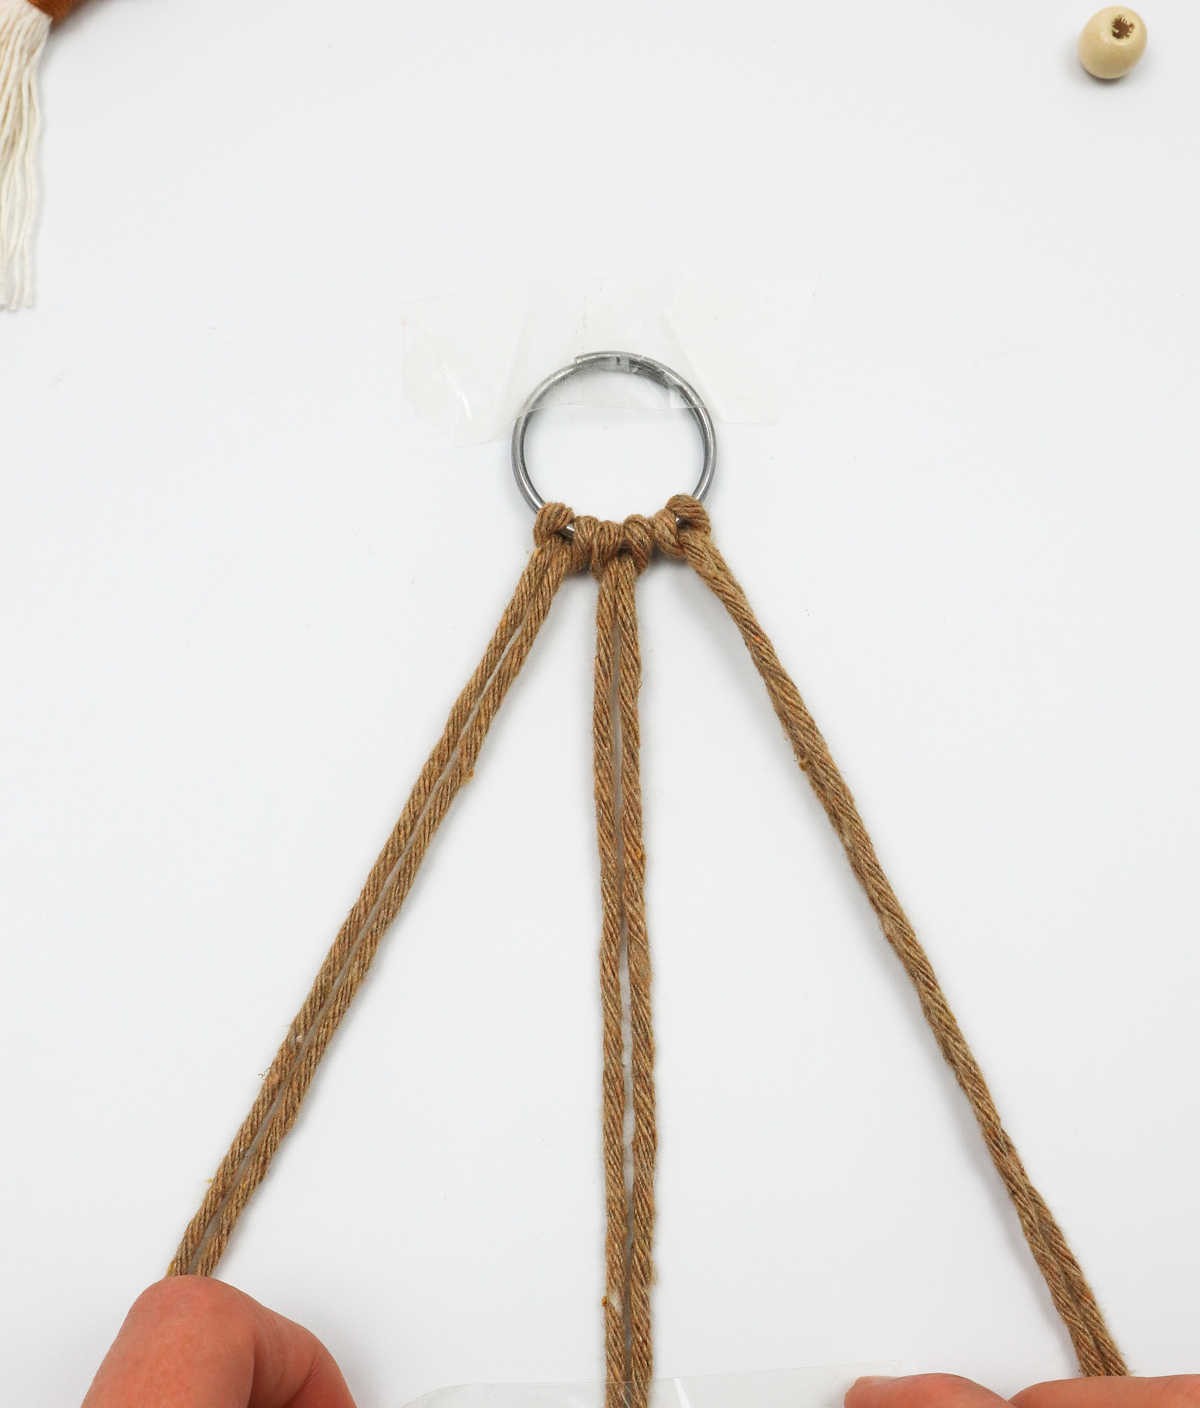
As you progress with this DIY project, consider dividing the six cords into three sections and securing the middle pair to your workspace using a bit of tape. This simple yet effective trick will significantly simplify the process of creating knots as you work through each stage.
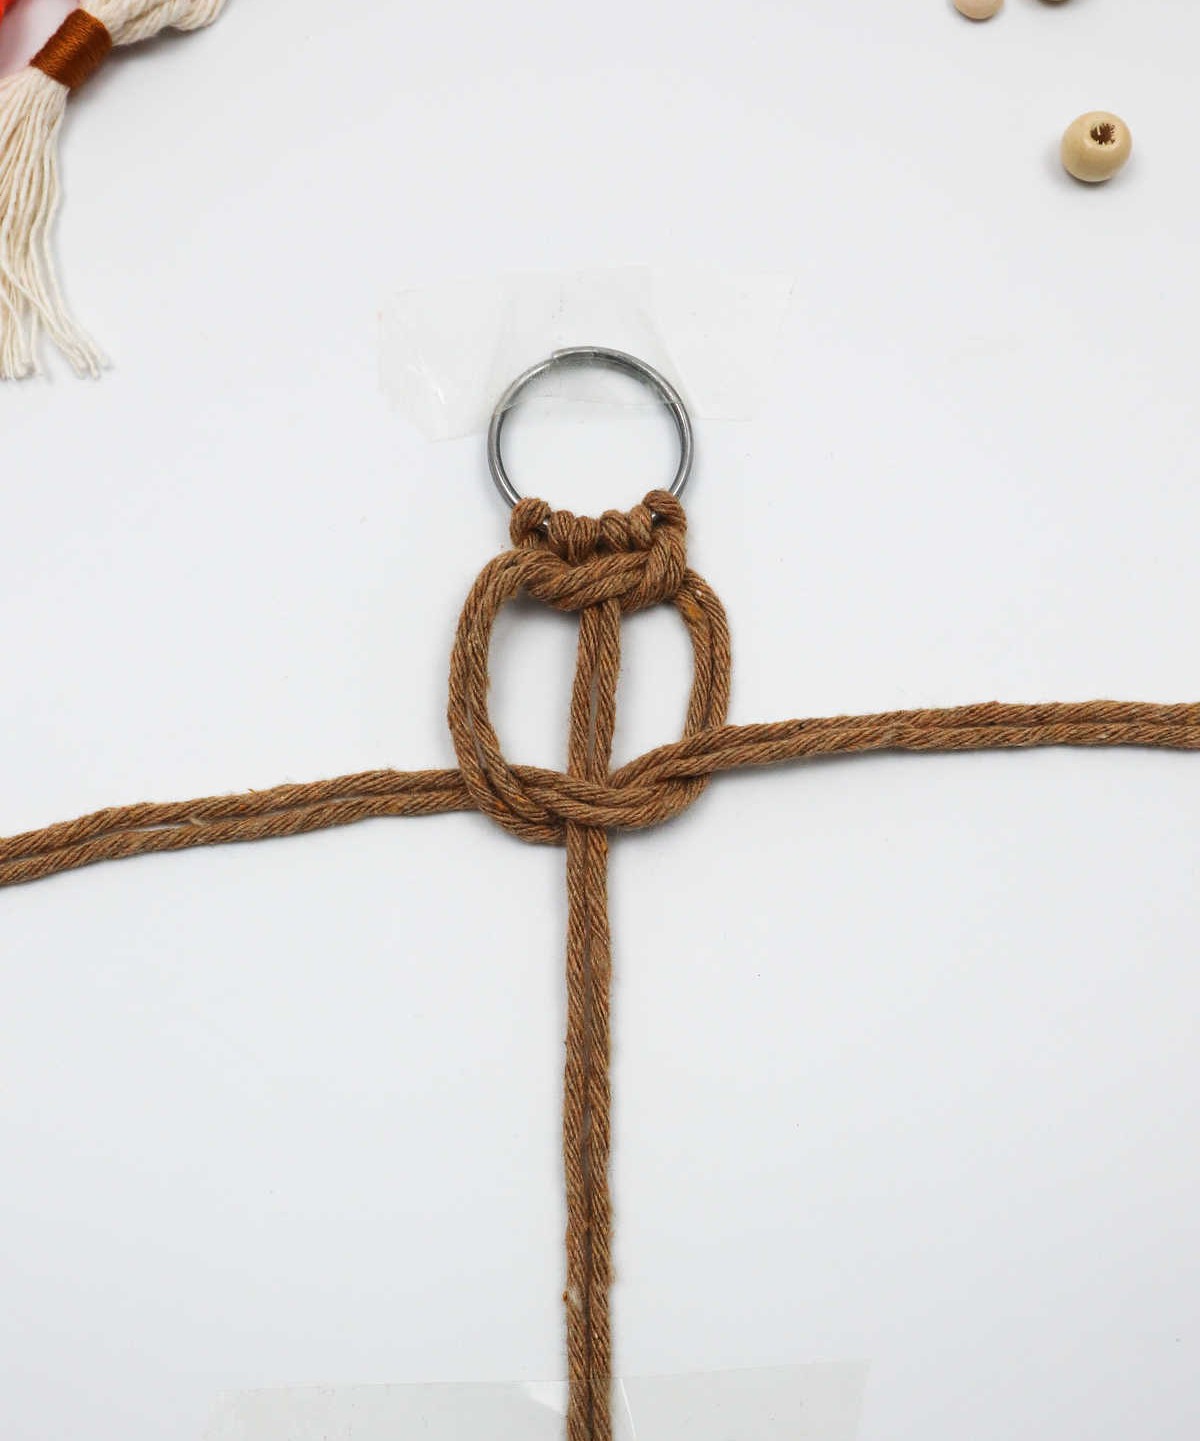
Step 4
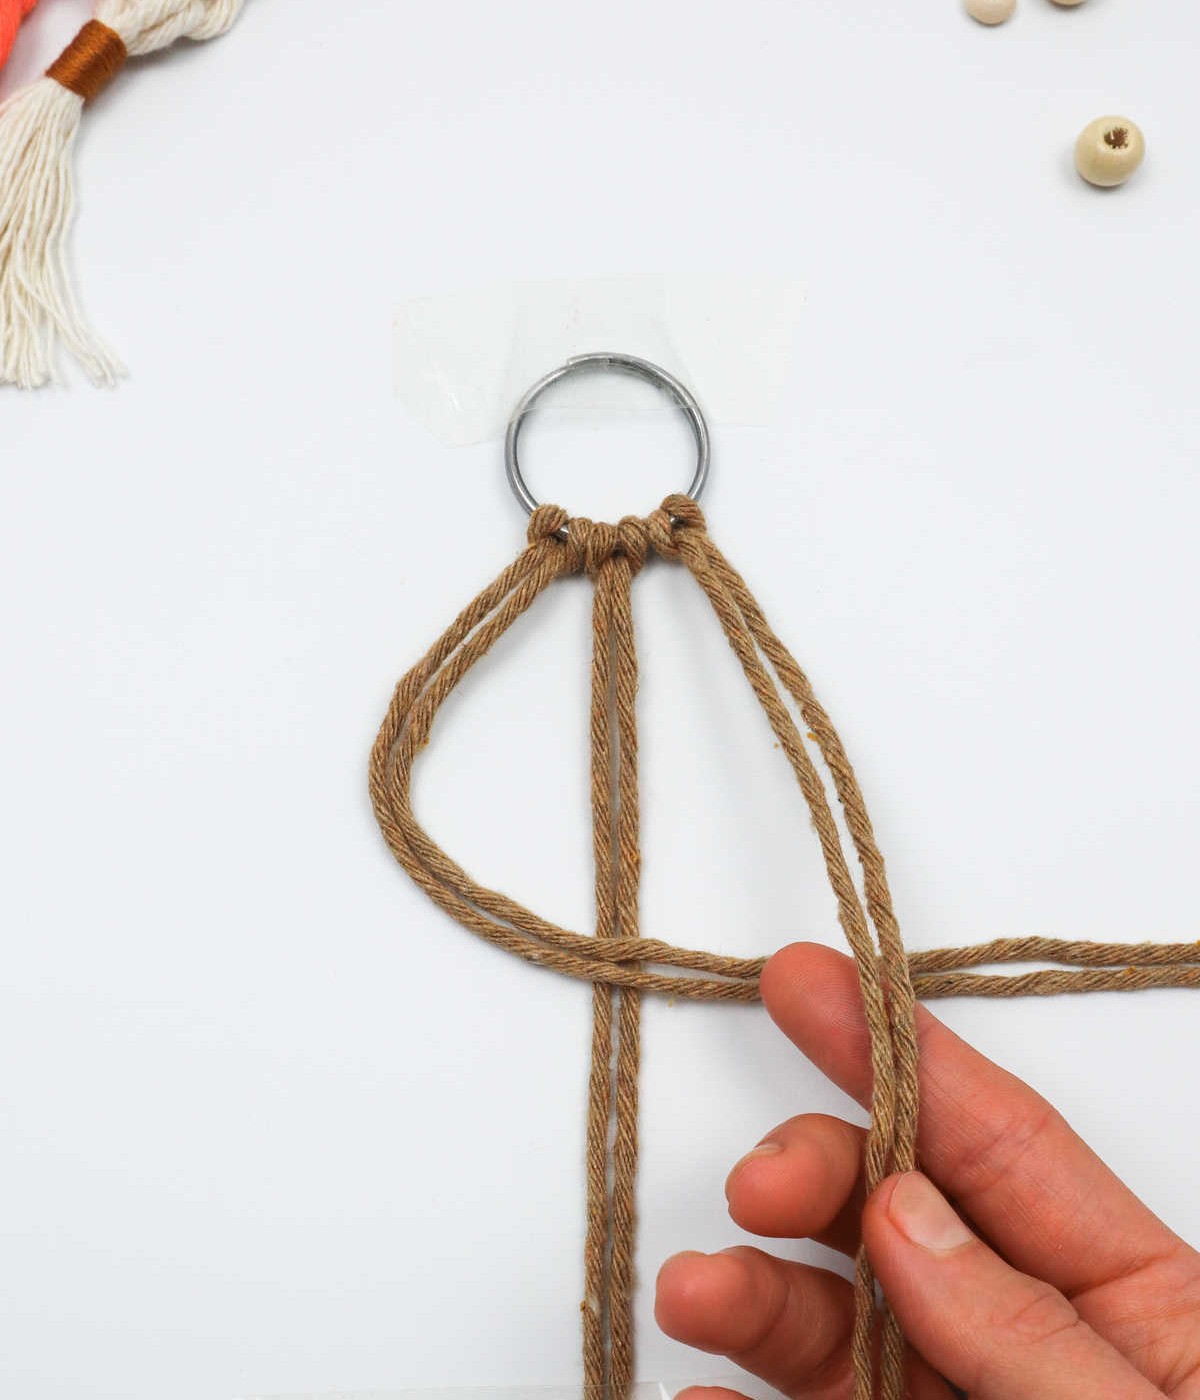
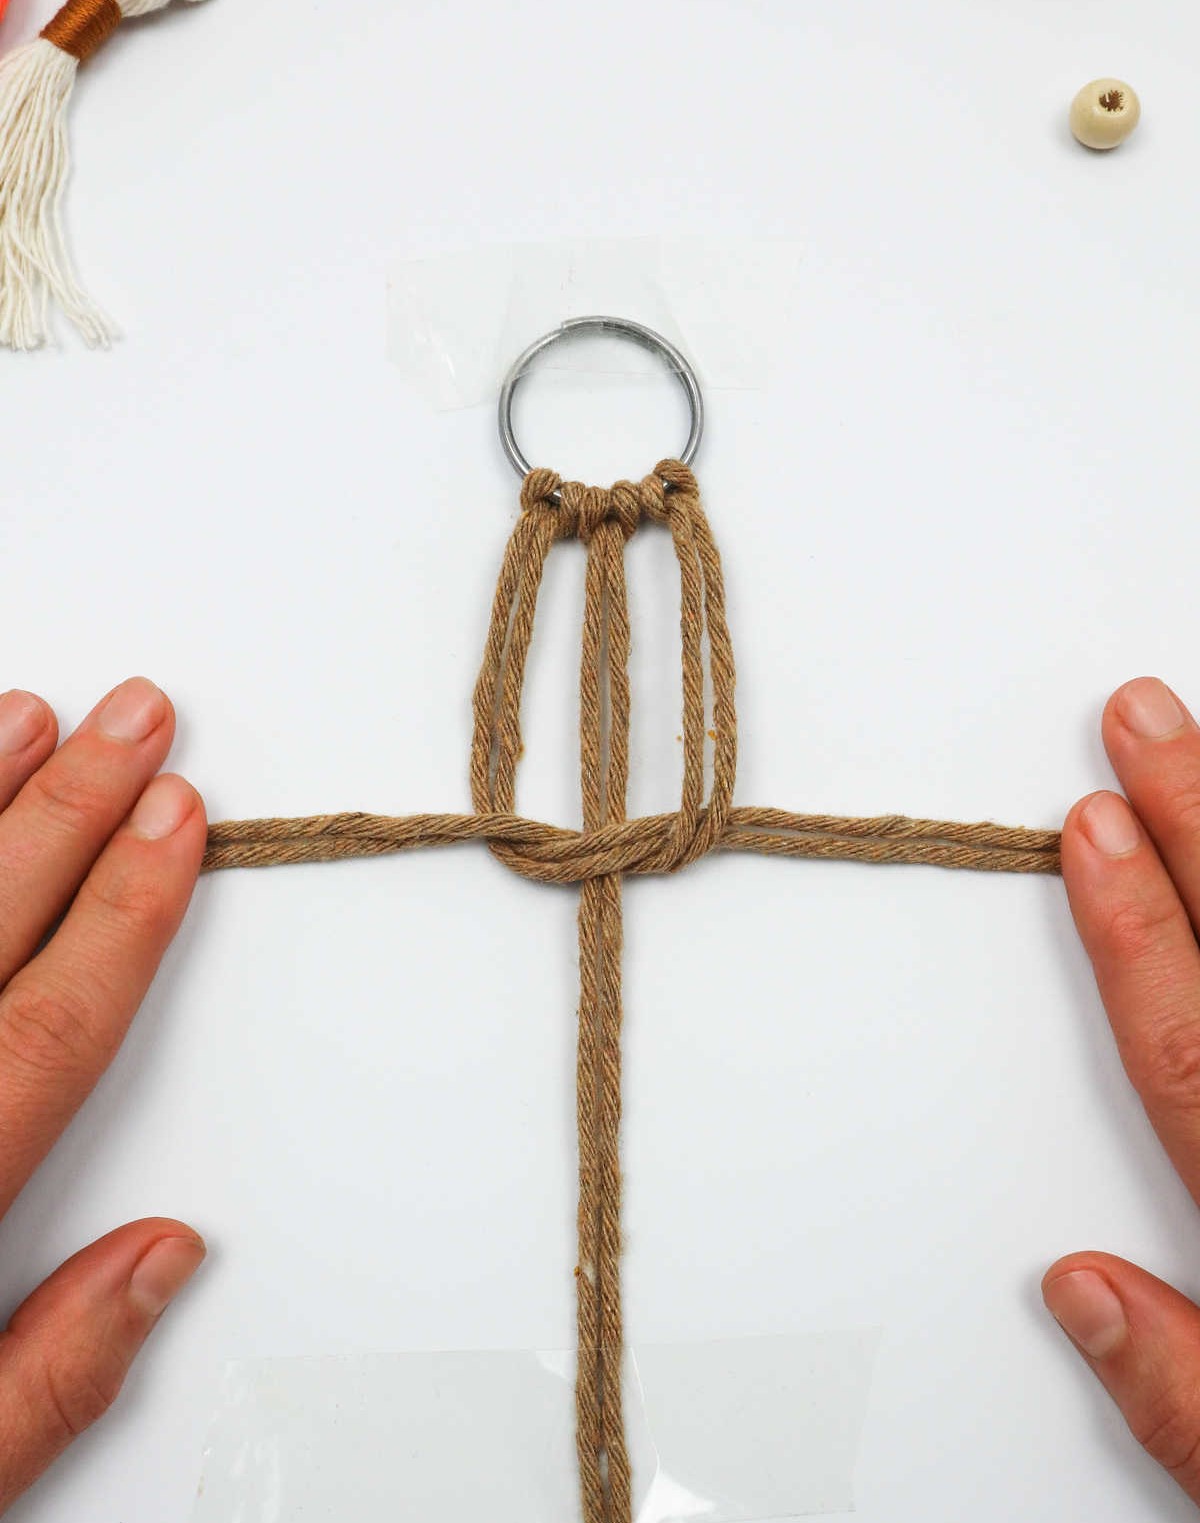
To create this design, you’ll need to master a series of square knots. The process begins by forming a ‘4’ shape with the leftmost cords, which will serve as the foundation for the entire design. Next, position the rightmost cords over the middle ones, carefully aligning them with the existing structure. As you do this, pay attention to the point where the left cords intersect with the middle ones – this is a crucial pivot point in the knot-forming process.
Now, gently pull the right cords beneath this crossover and thread them through the loop created by the left cords. As the right cords pass through, begin pulling their ends in opposite directions while simultaneously guiding them towards the central ring. This initial motion will establish the first half of your square knot.
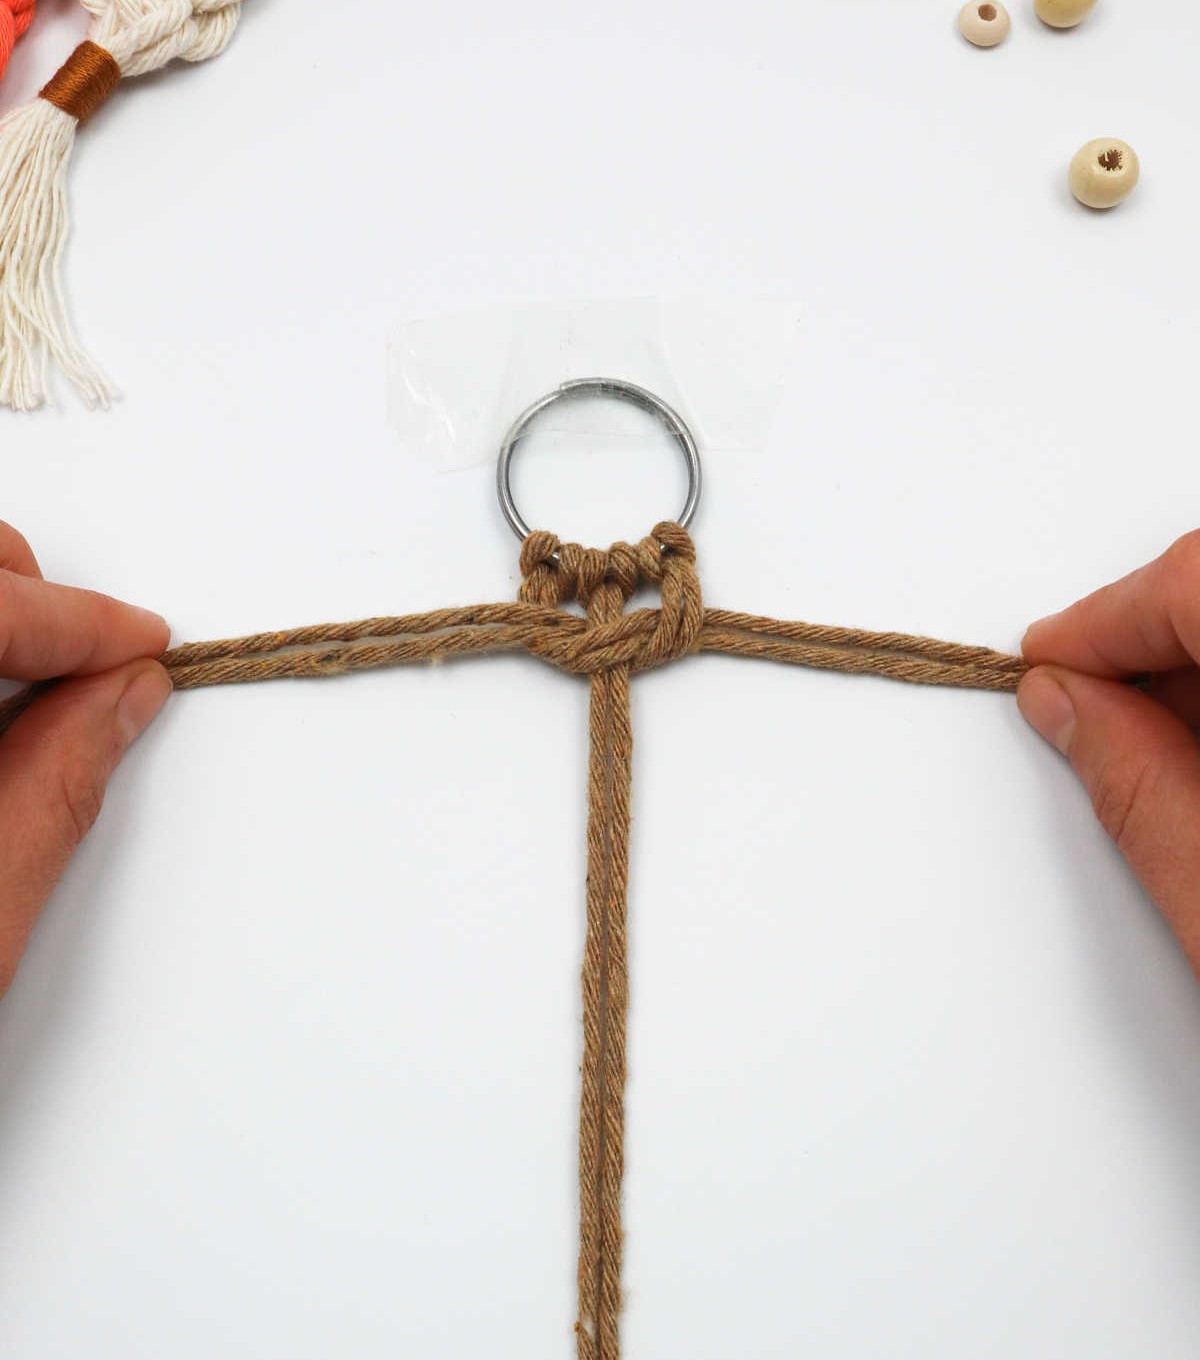
Step 5
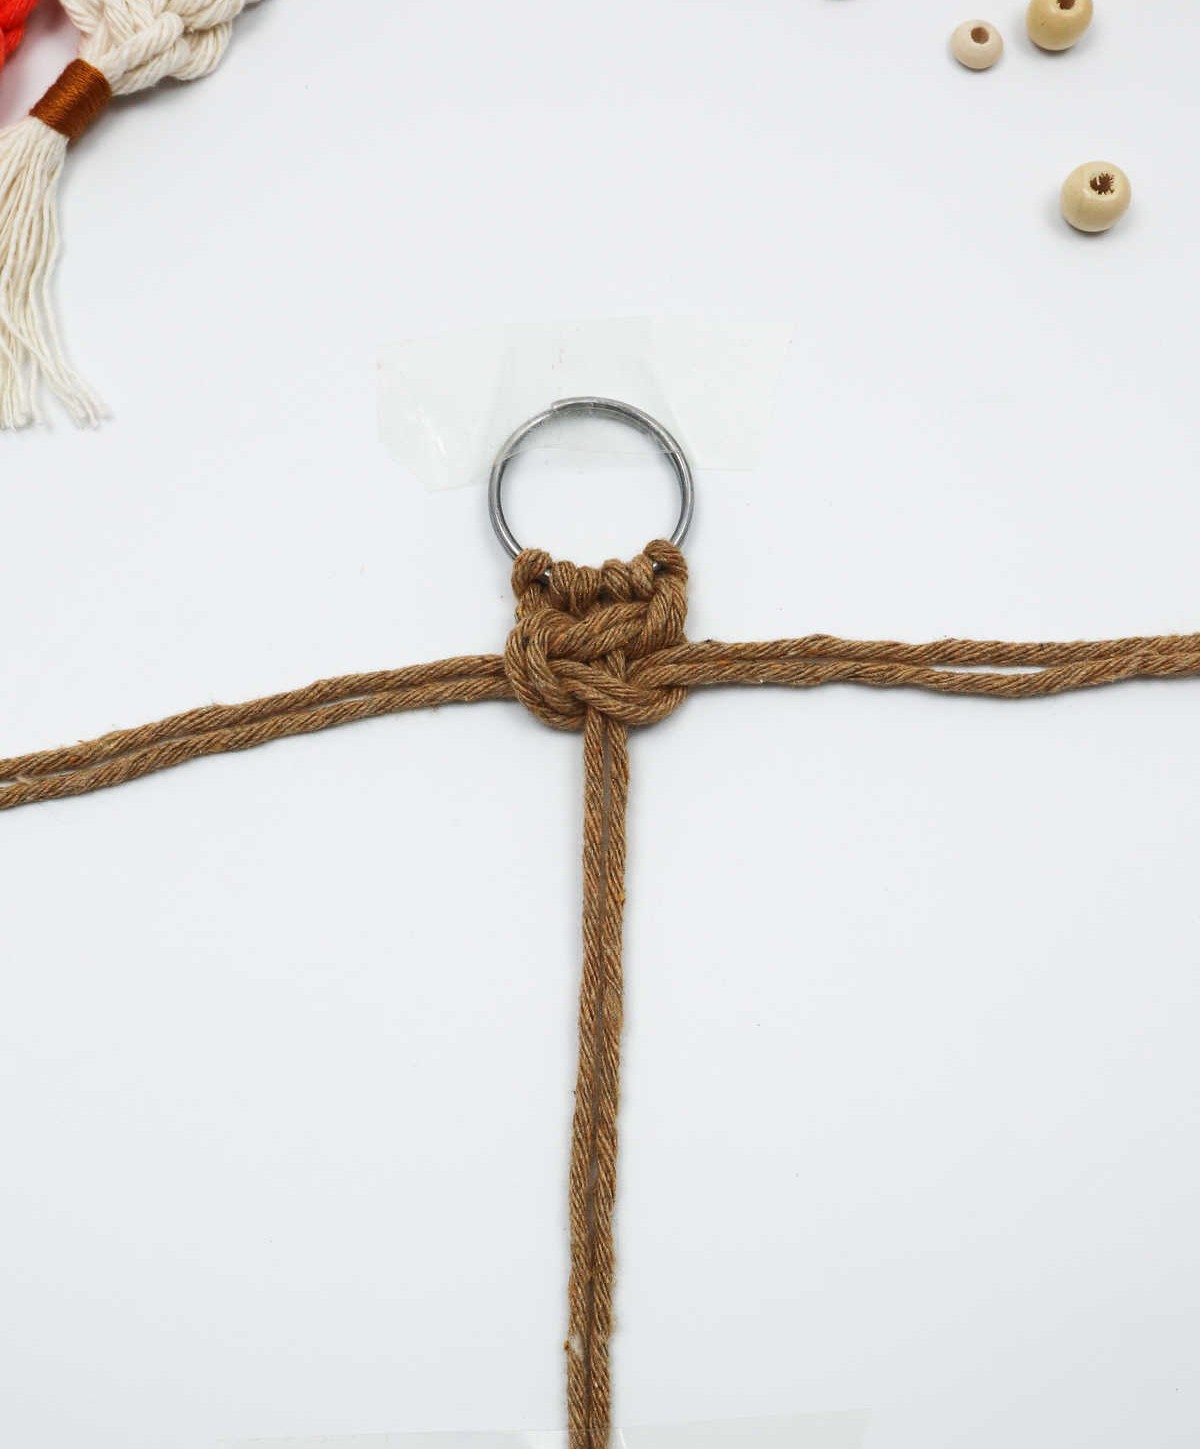
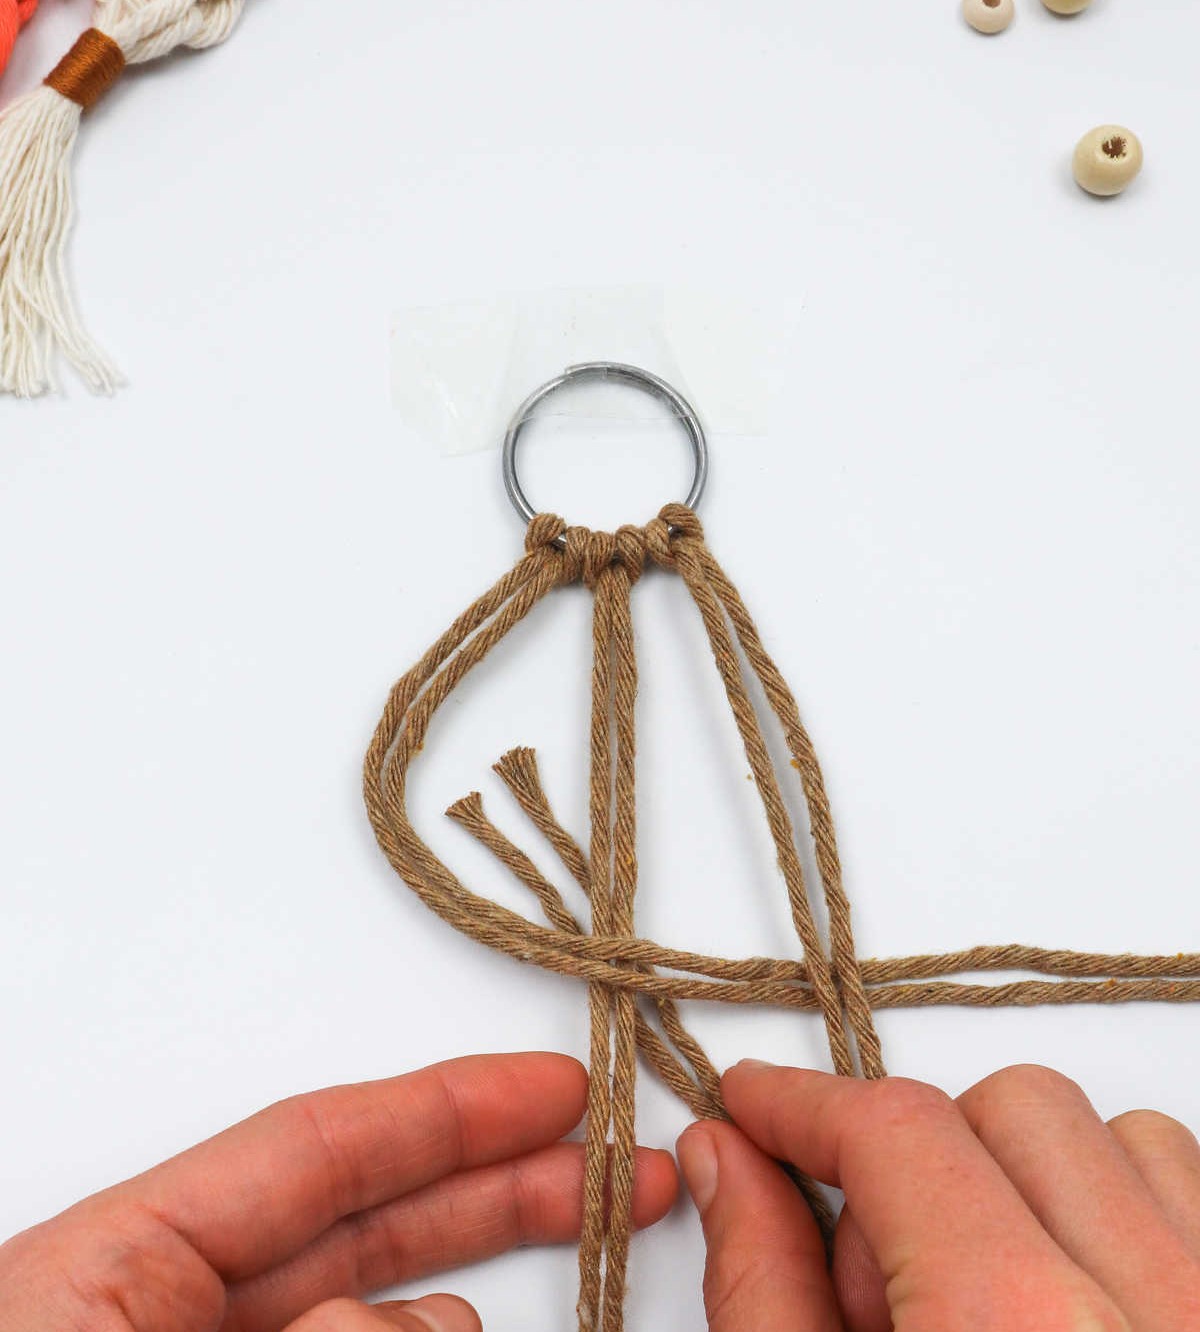
To create a square knot, start by making a similar movement to before, but with some adjustments. This time, pull the cords on the right over the middle ones to form a loop. Next, place the cords on the left above the right ones and then draw their ends under and through the newly formed loop. Once you’ve completed this step, gently tug both sets of cord ends to secure the knot in place.
Make sure it’s snug against the first knot you created, as these two combined will form the foundation of a reliable square knot.
Step 6
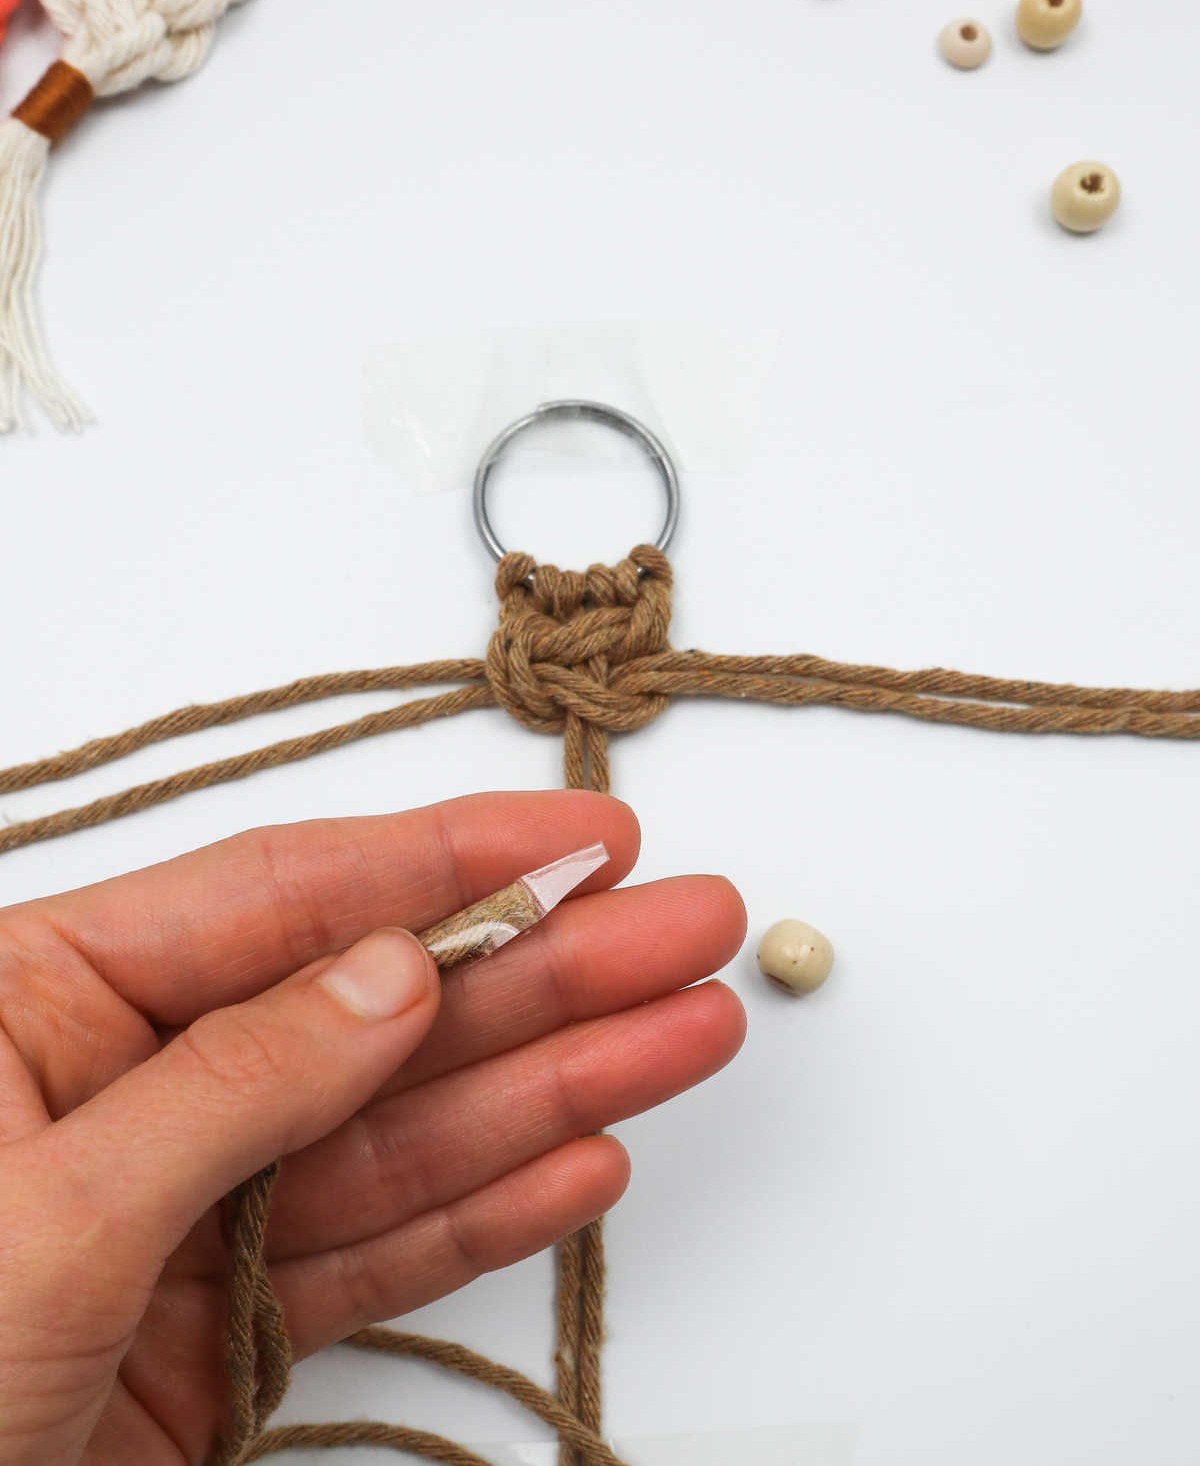

To enhance the visual appeal of your keychain, we’re going to introduce a small bead that adds a touch of personality. To achieve this, you’ll need to secure the ends of the two middle cords with tape, making it simpler to insert them through the bead later on.
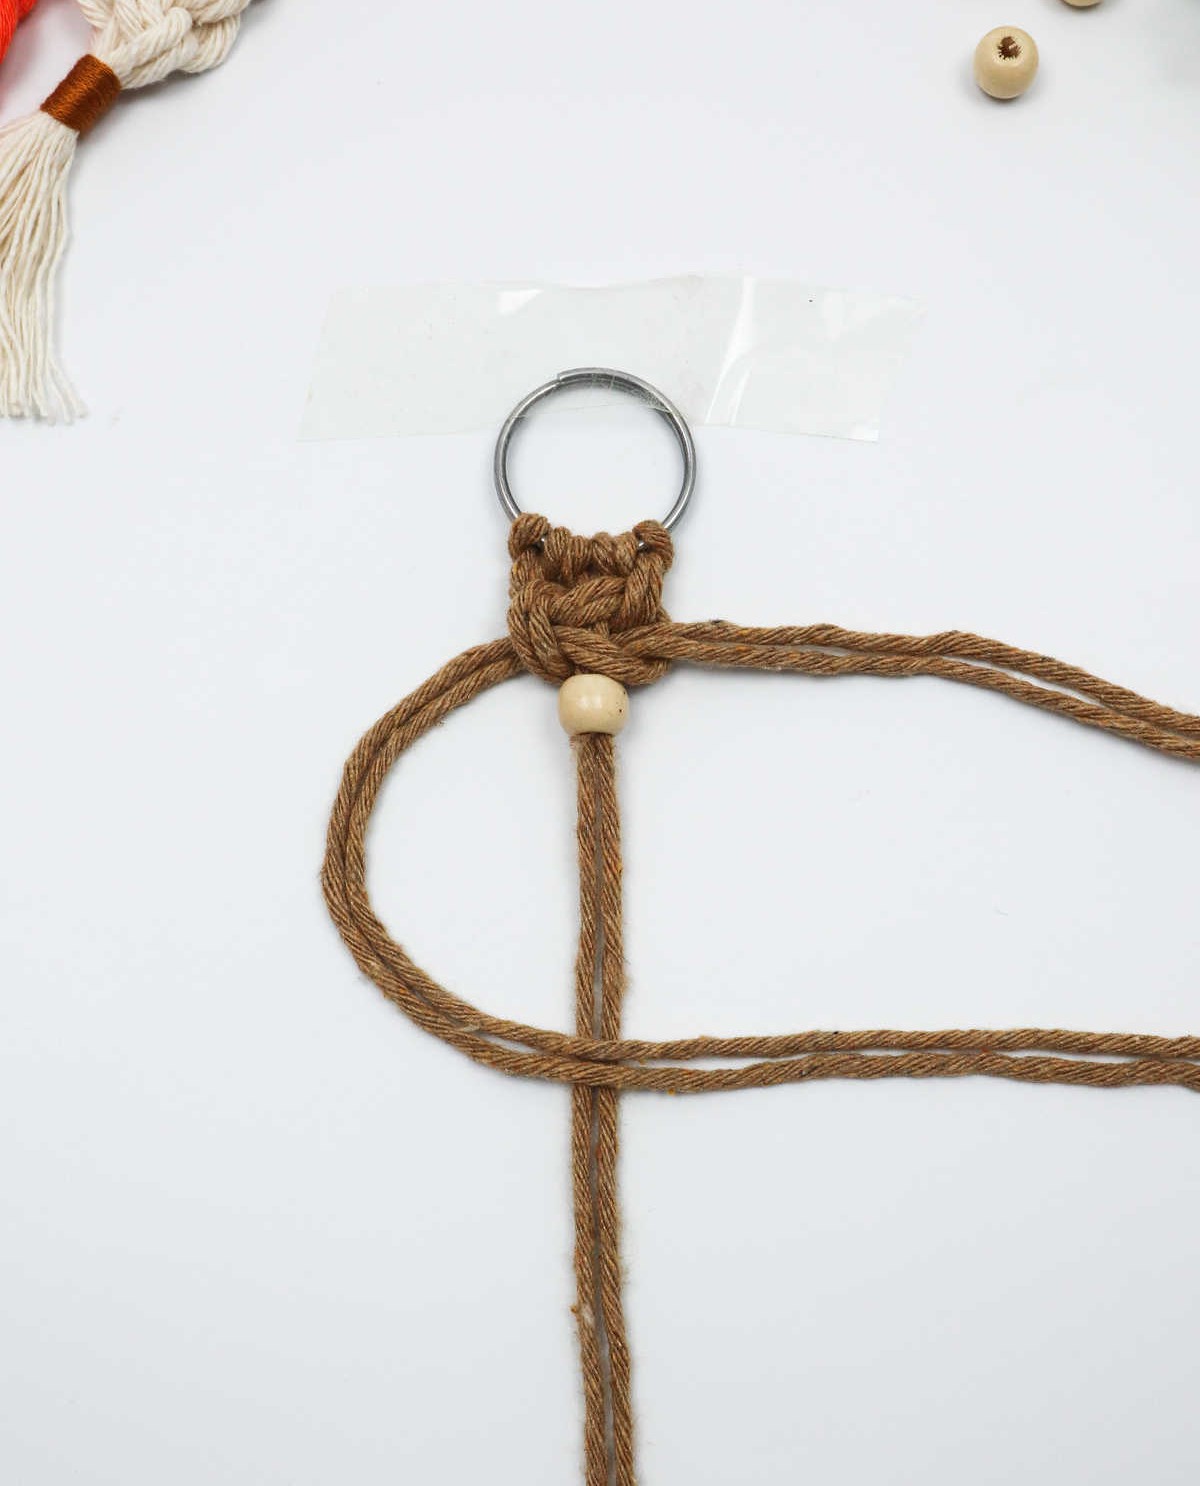
Next, pull the bead through and position it just below your first square knot, ensuring it’s securely in place.
Step 7
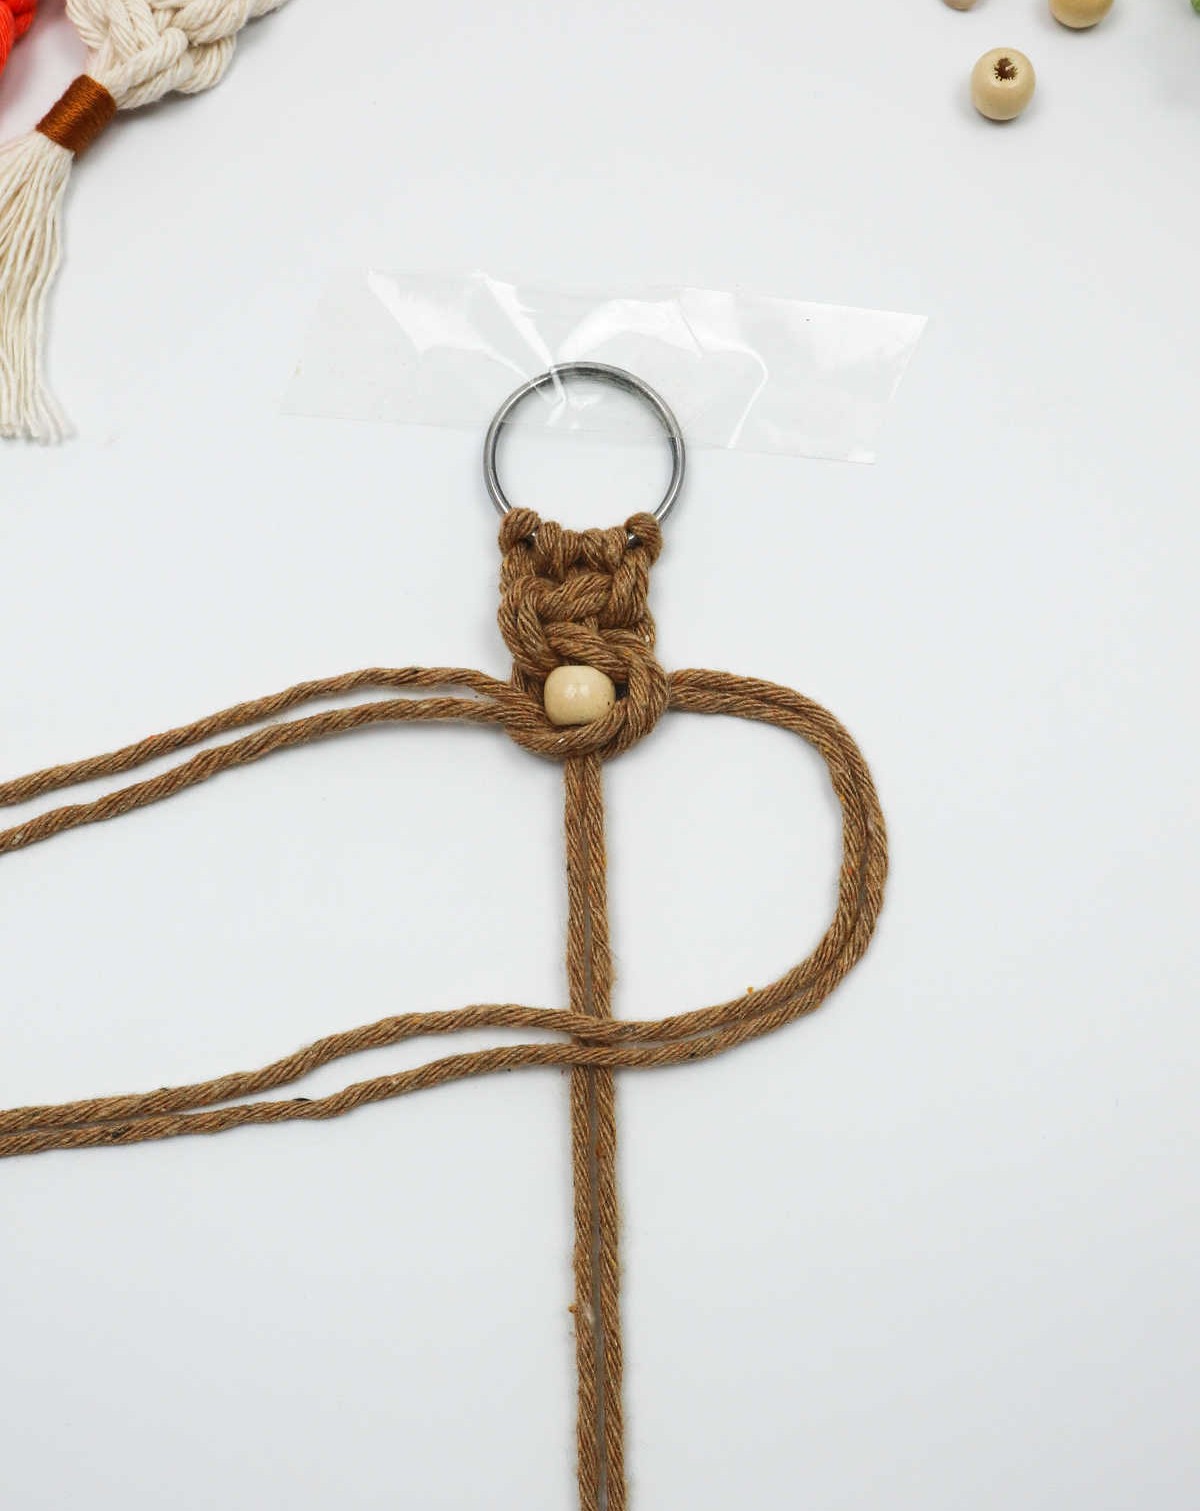
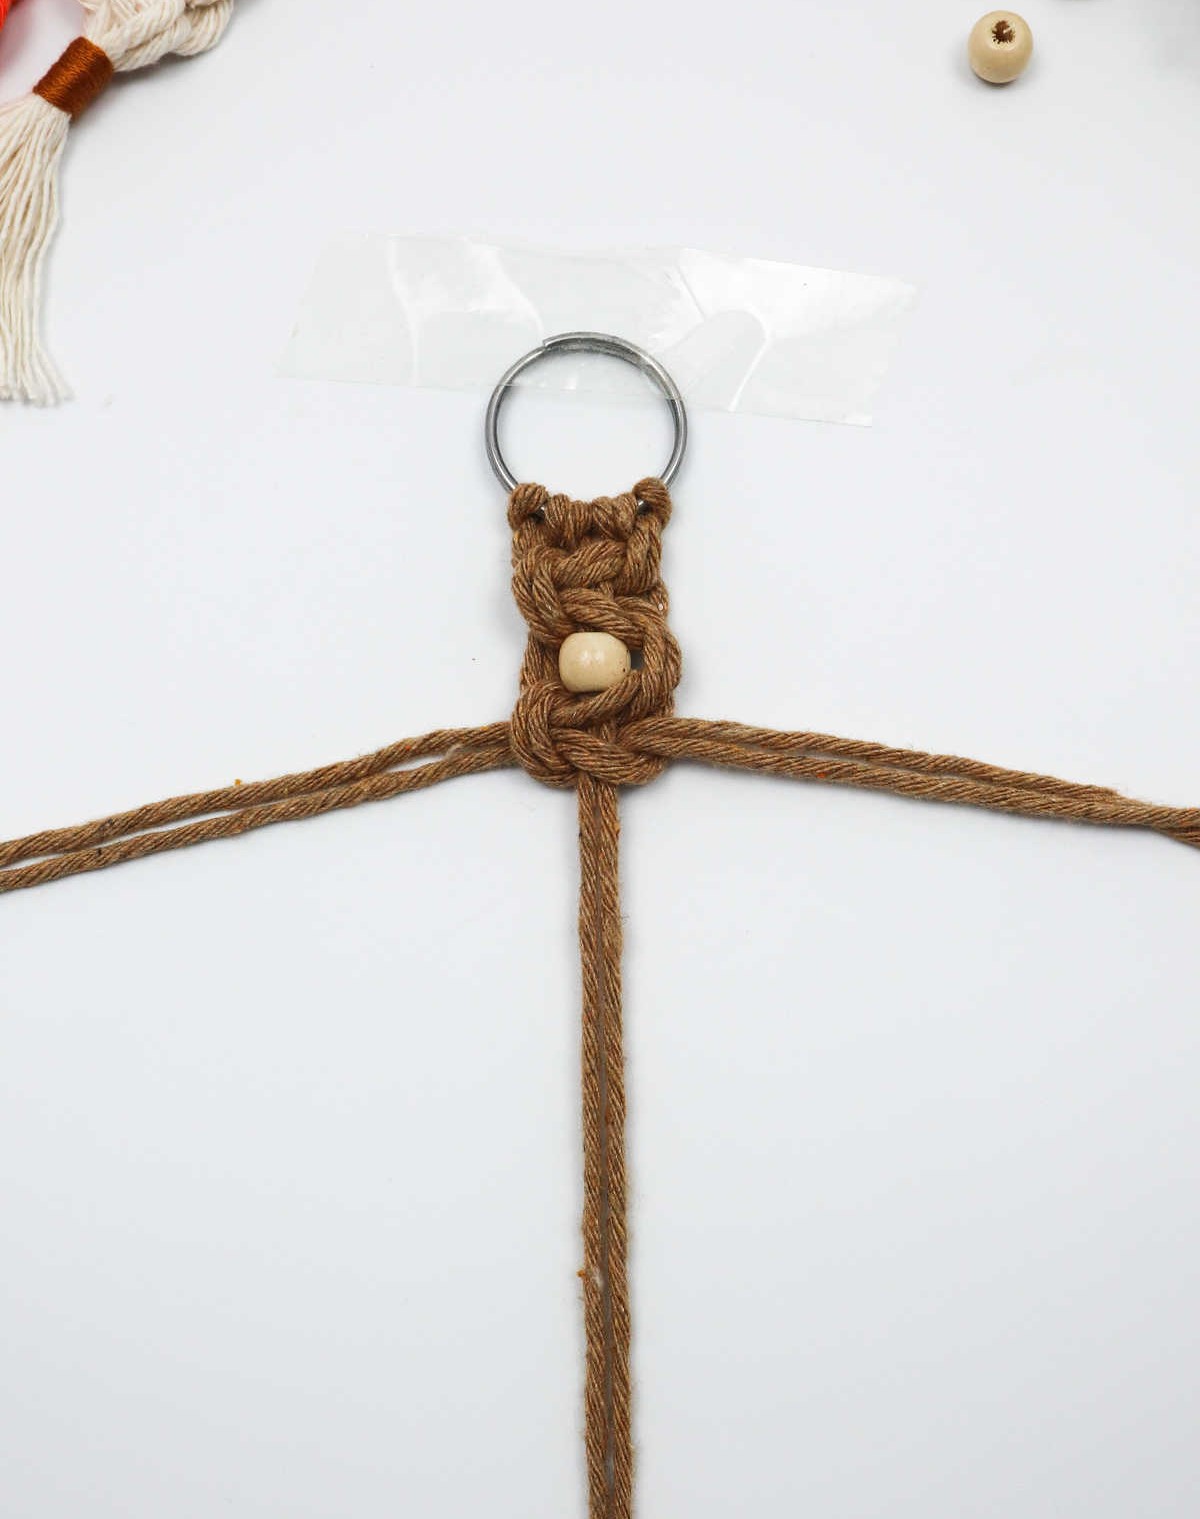
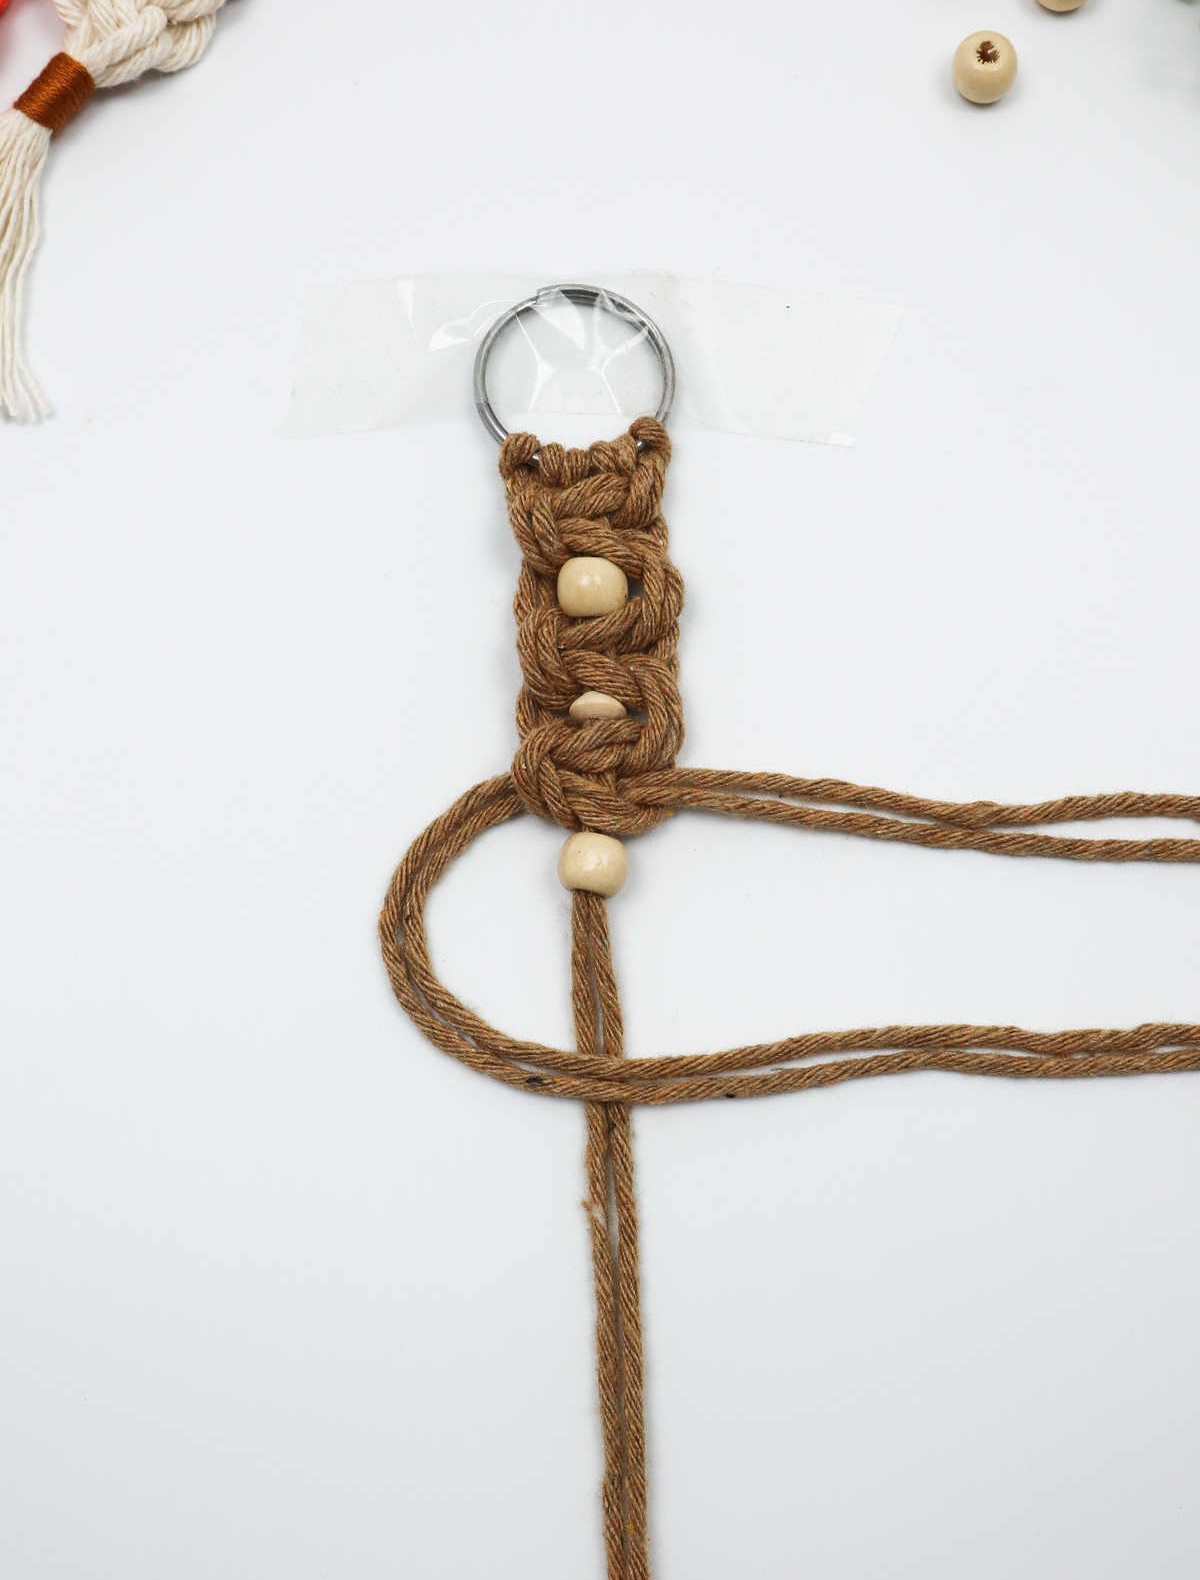
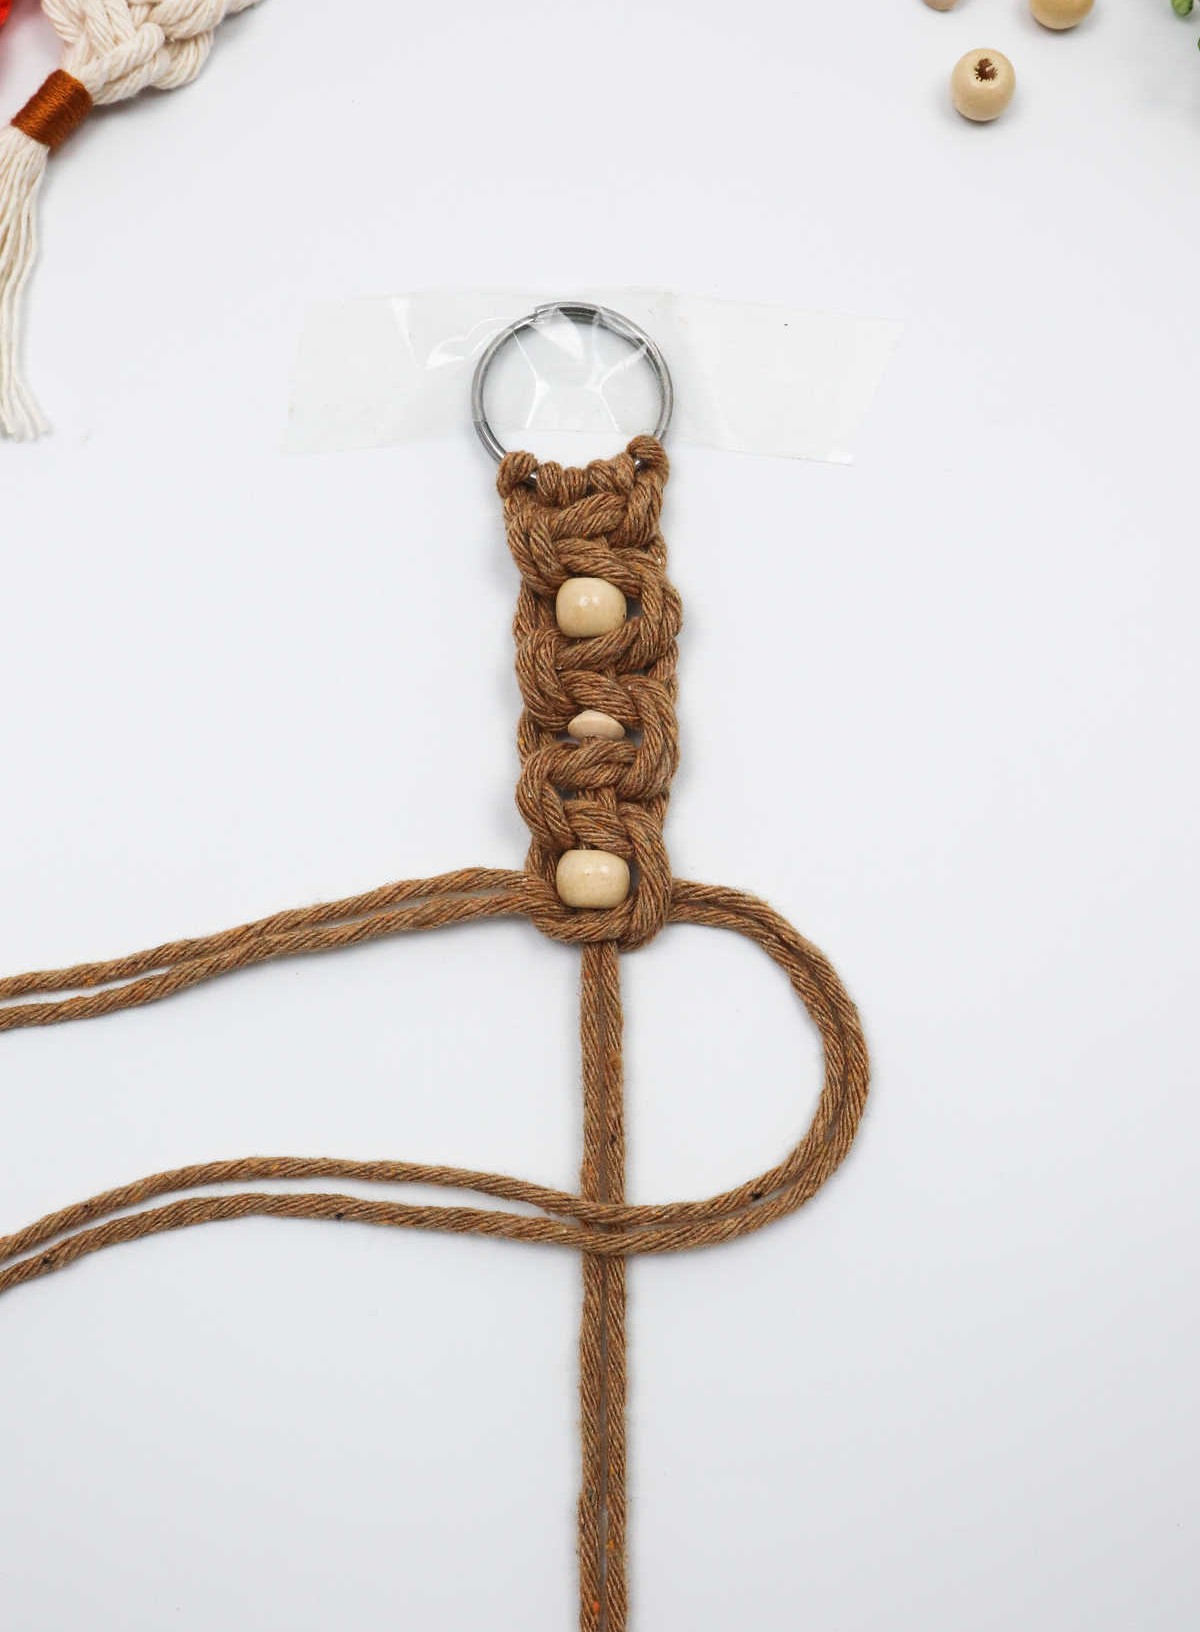
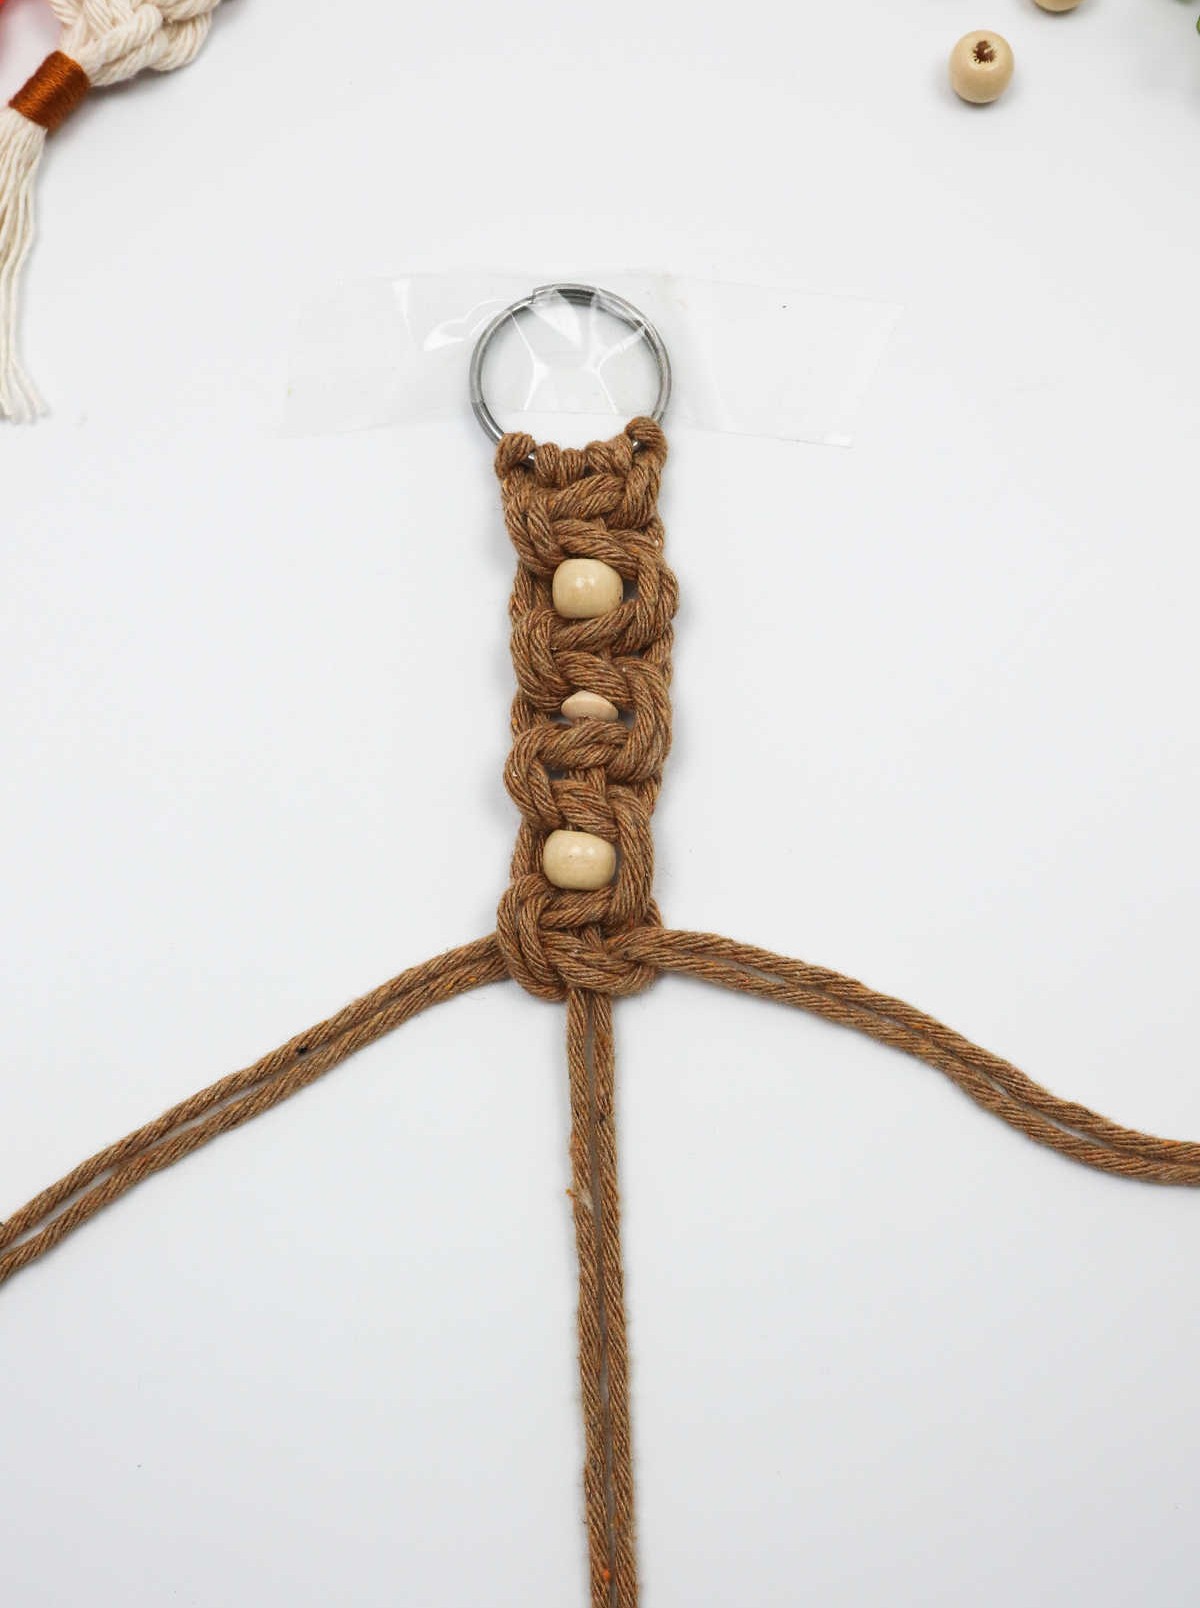
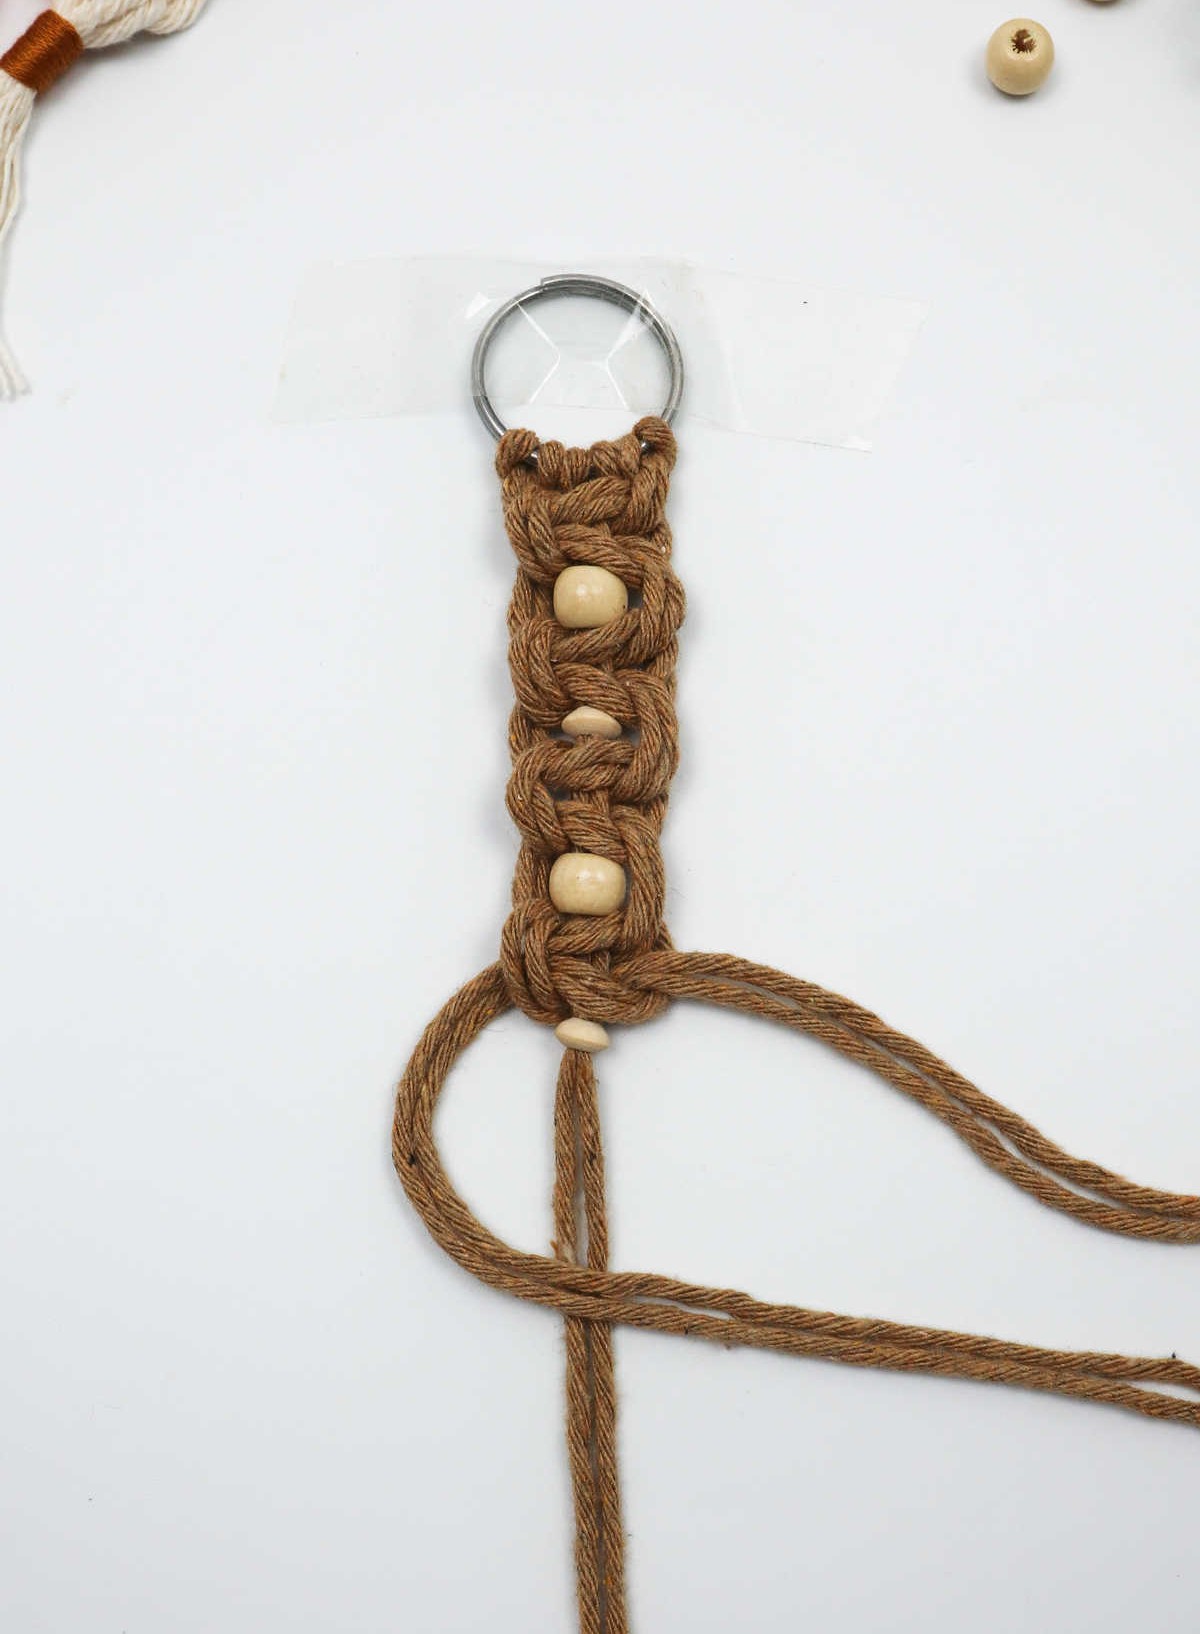
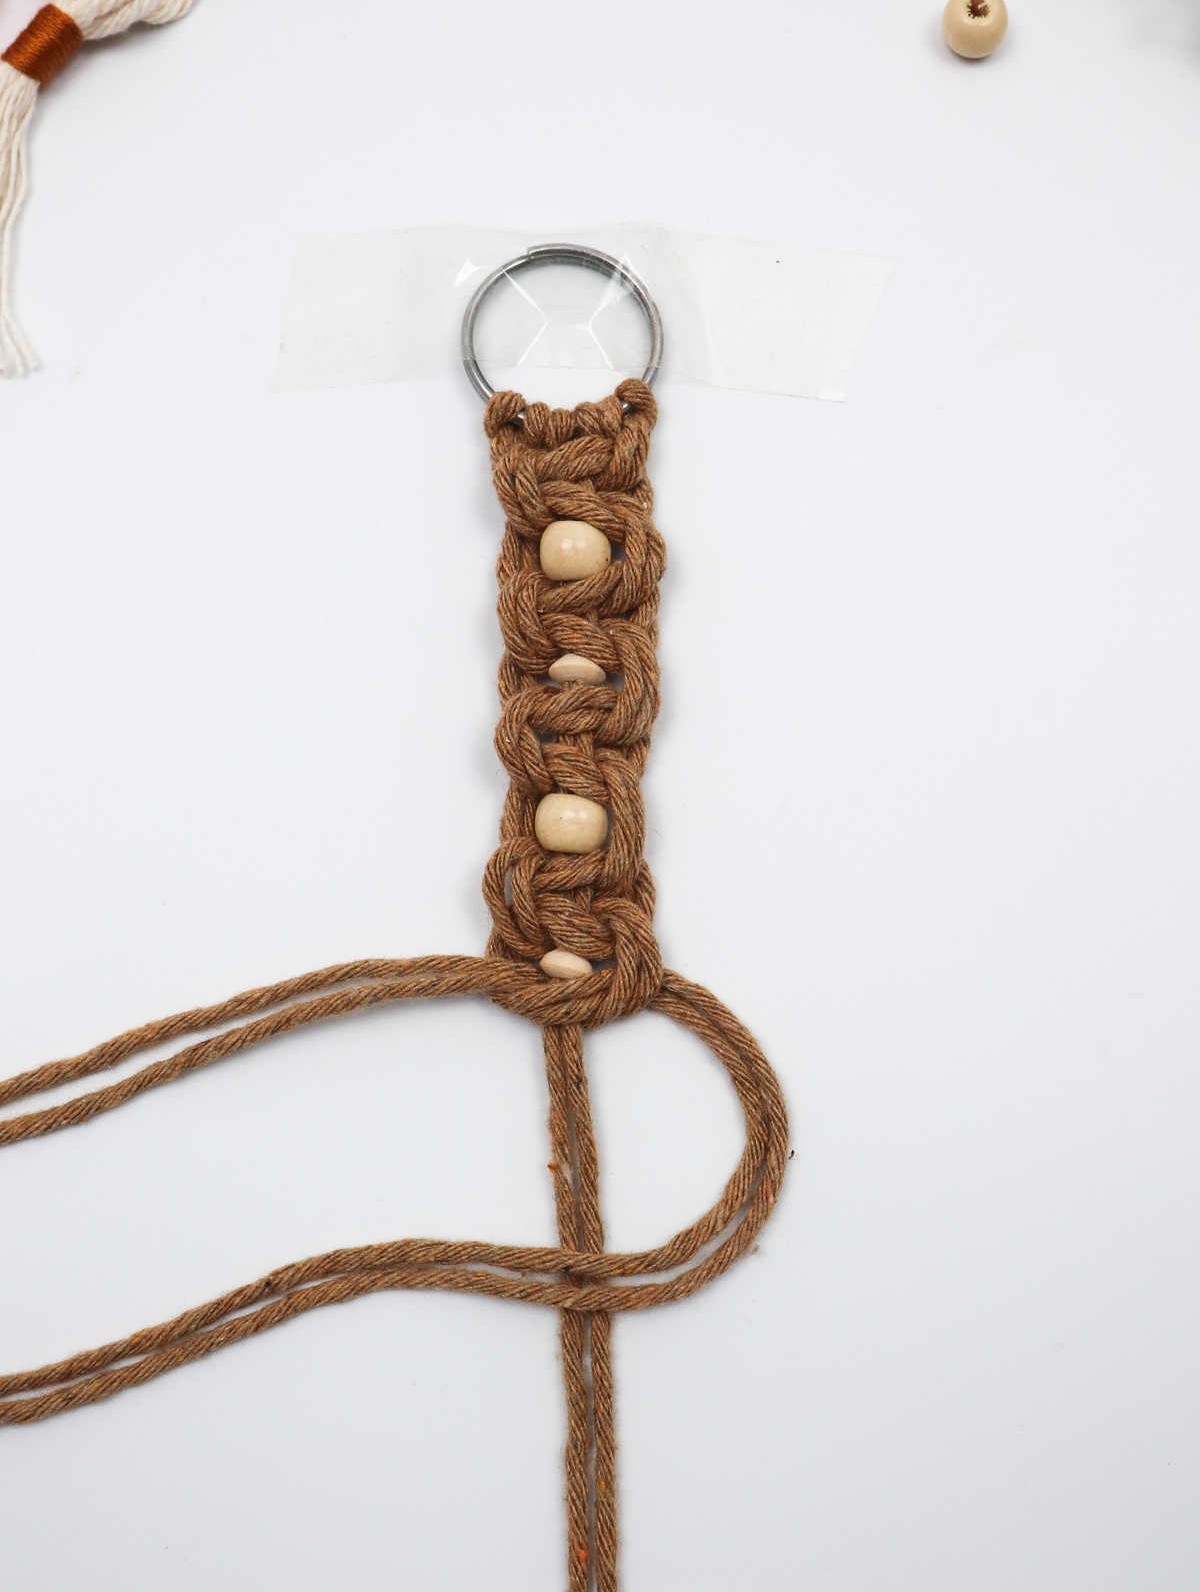
As you near the end of your keychain, secure each bead in place by tying another square knot, starting from the left cord. The process is straightforward: tie a square knot, add a bead, and then round it off with another square knot. With practice, you’ll find this rhythm easy to follow.
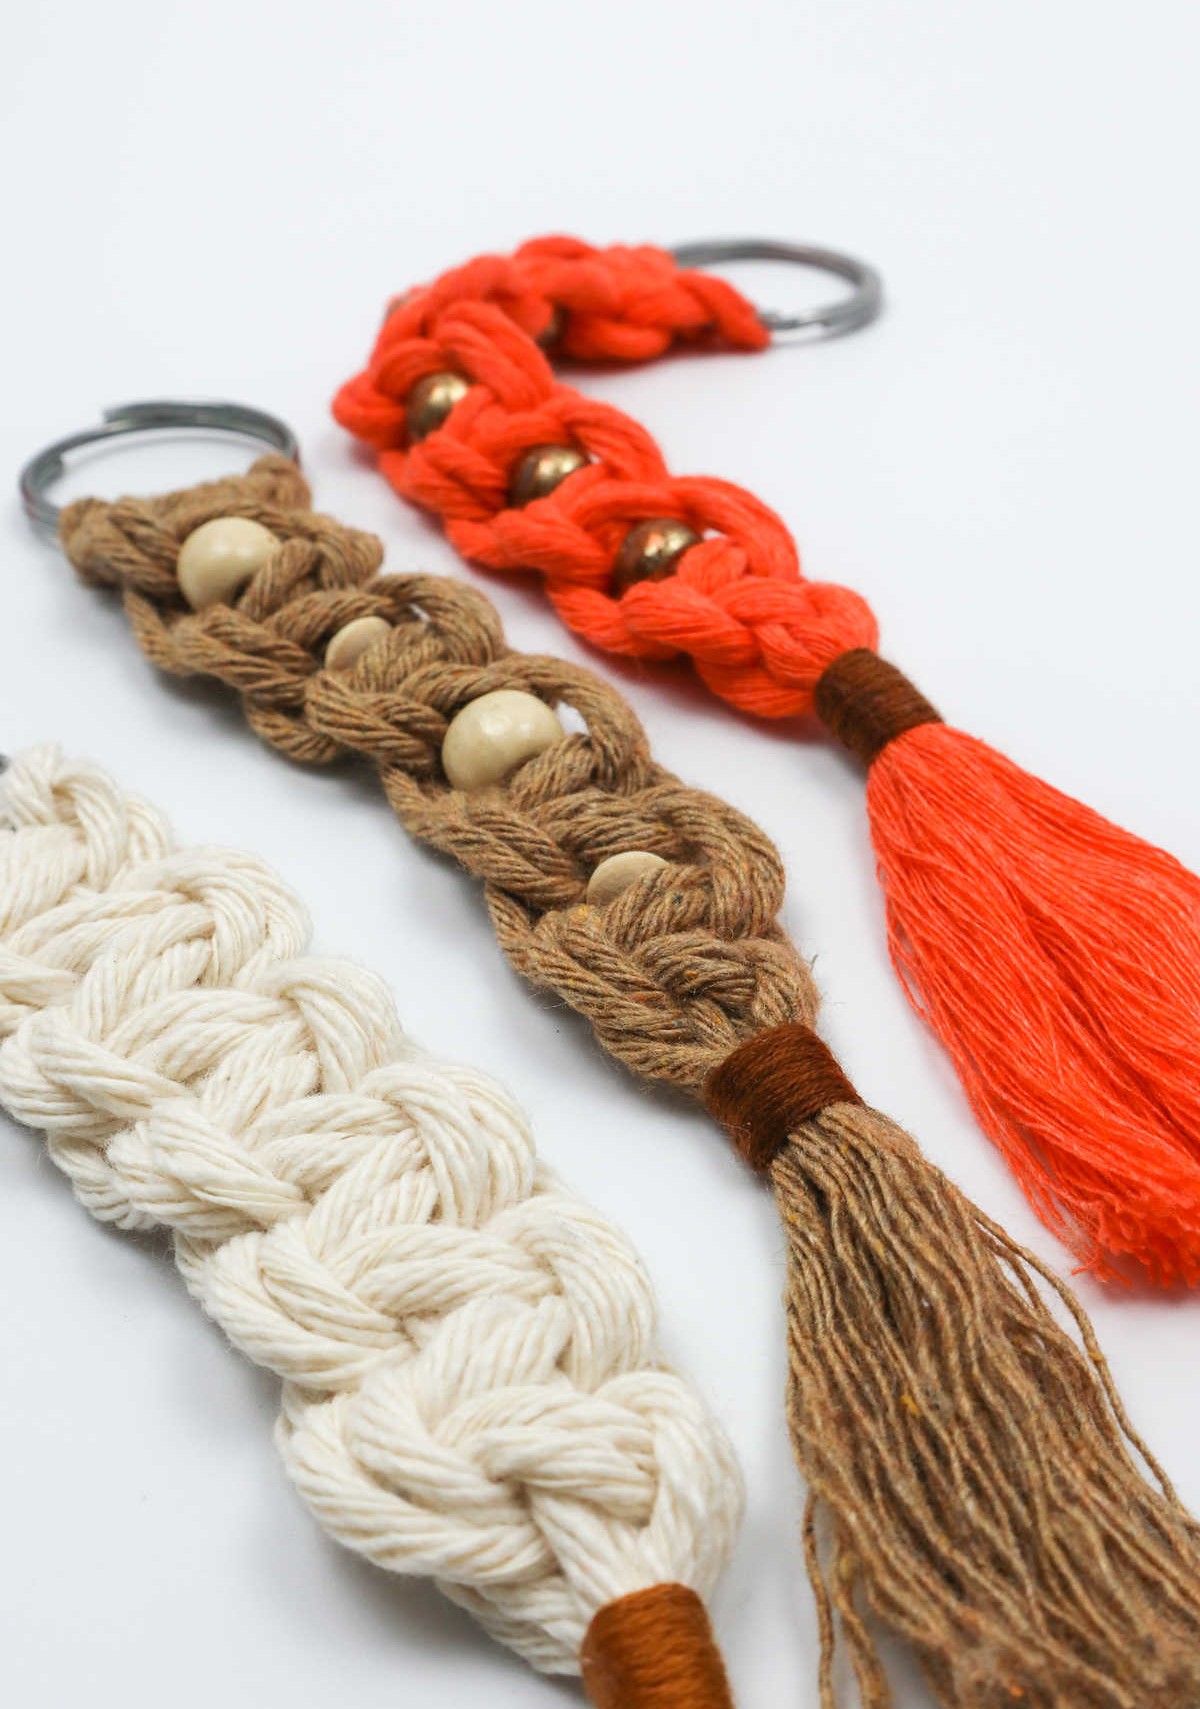
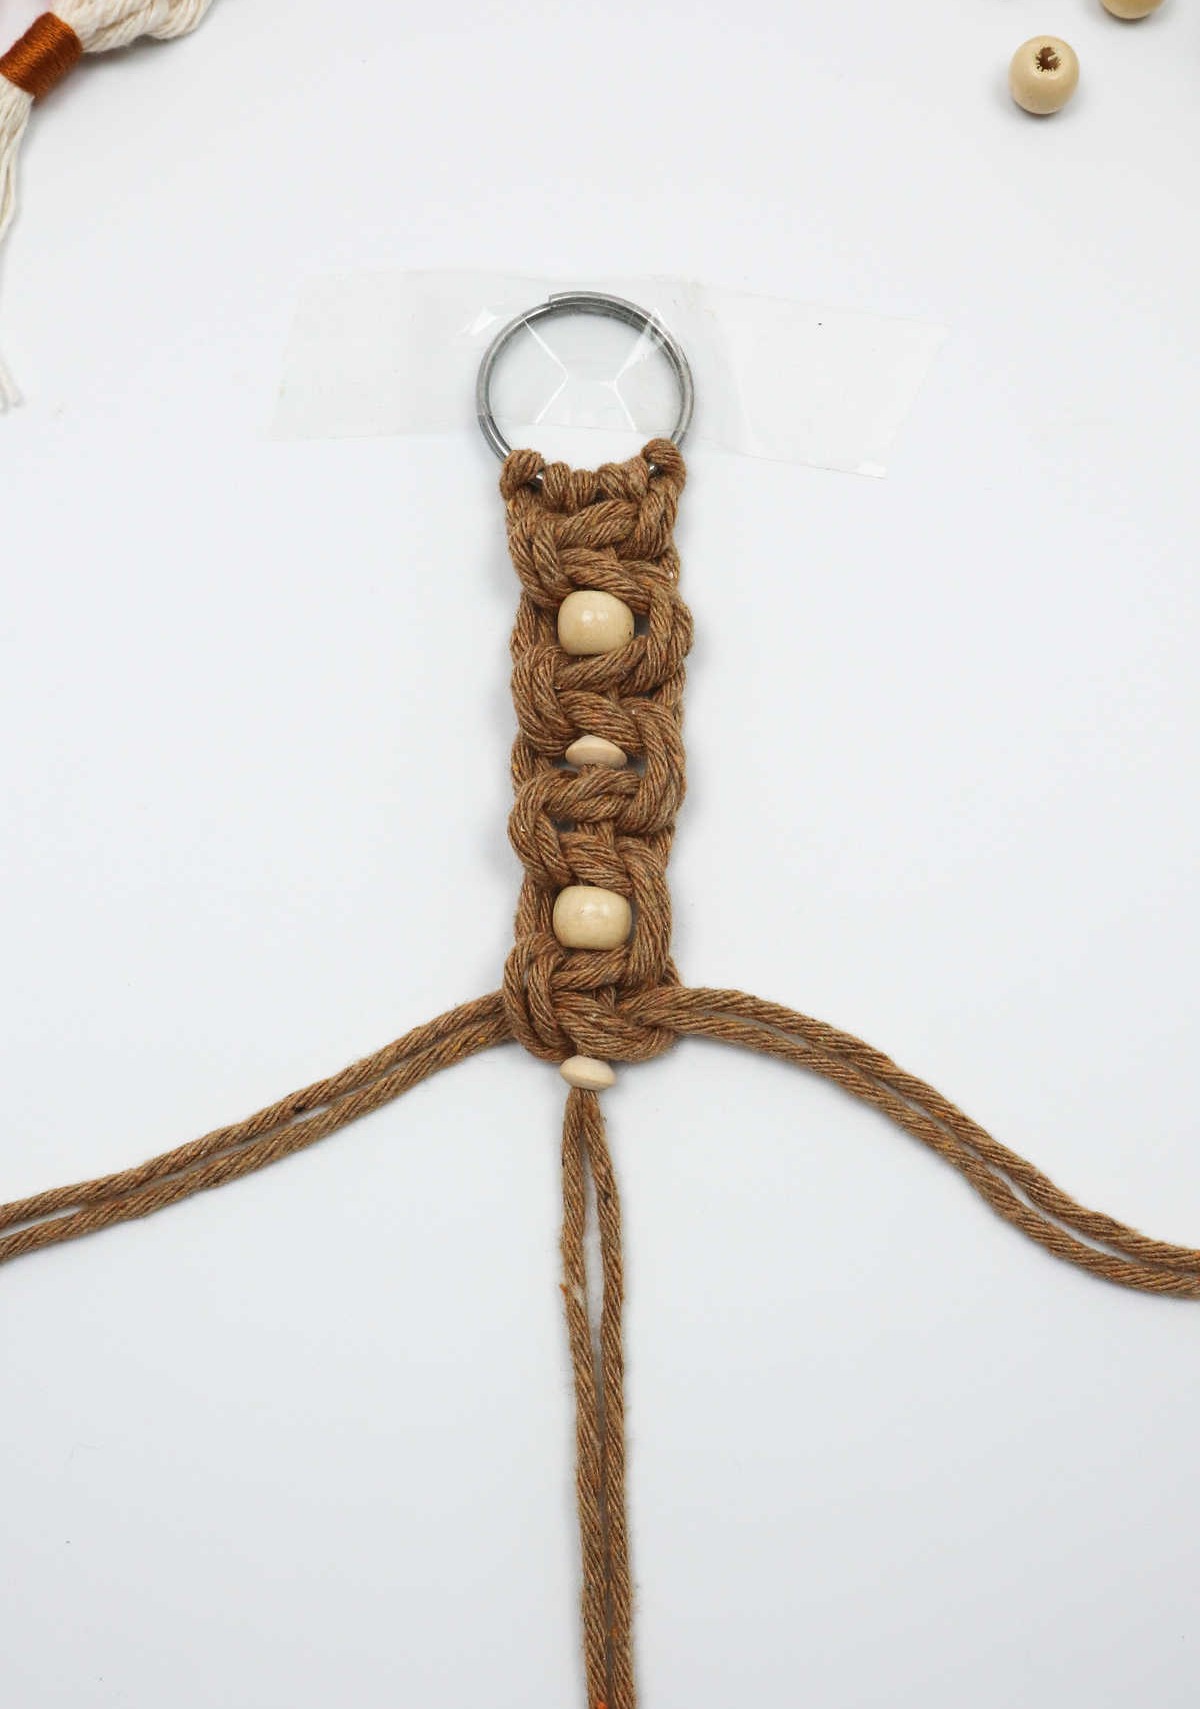
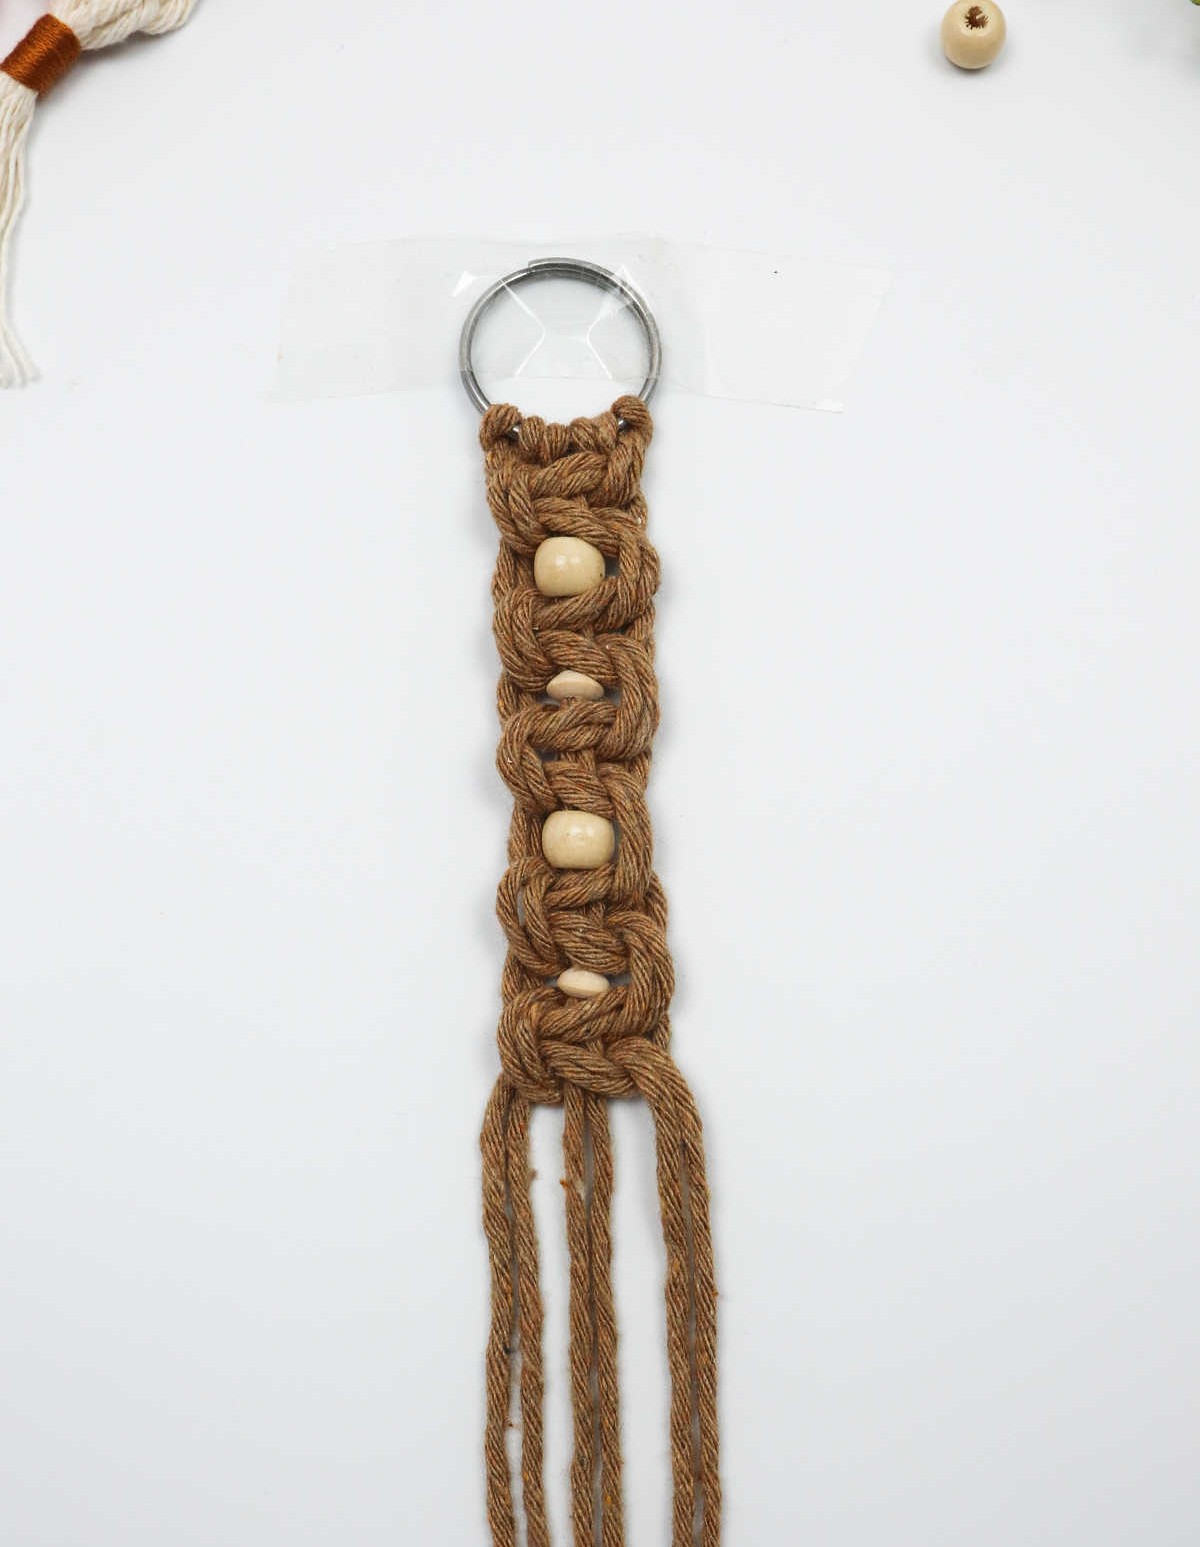
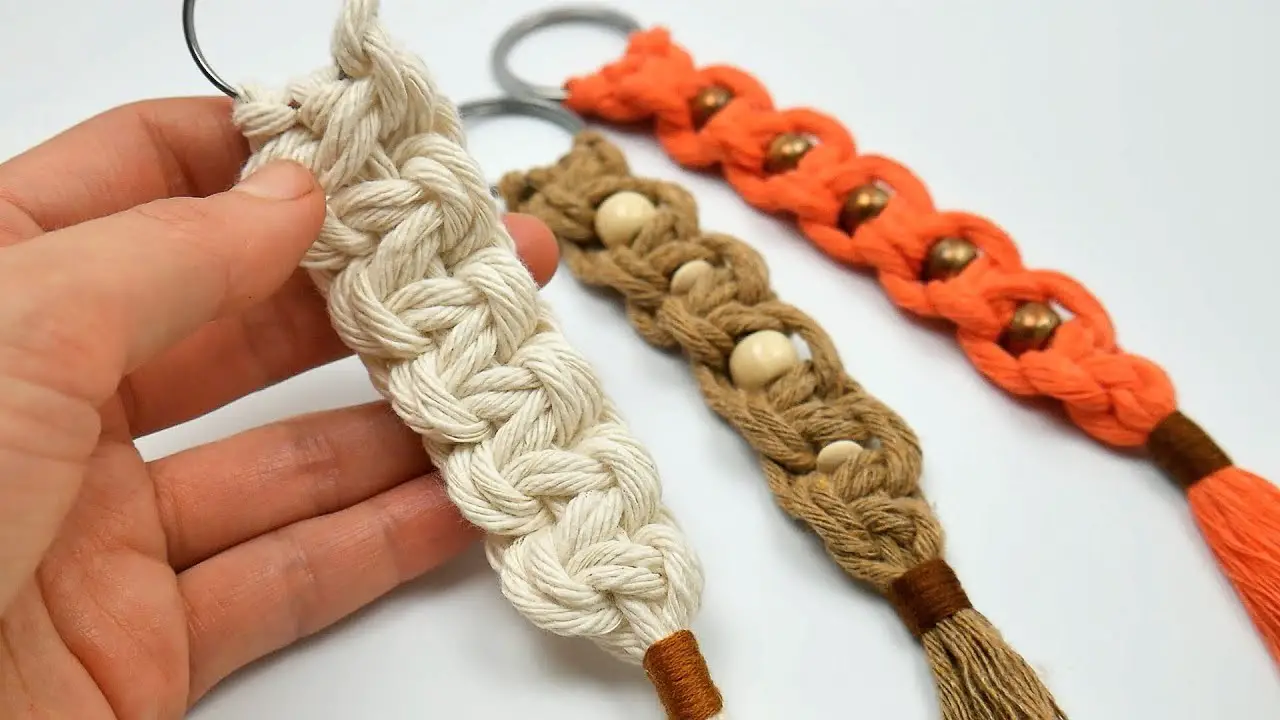
As you work your way down, your keychain should start to take shape. Imagine a series of five square knots, each one separated by four beads.
When you’re satisfied with the length, it’s time to bring things to a close.
Step 8

To begin, carefully trim a section of embroidery floss using a pair of scissors. For added visual interest, you can choose the same hue as your cotton cord or opt for a bold contrast by selecting a thread in a different shade.
Step 9
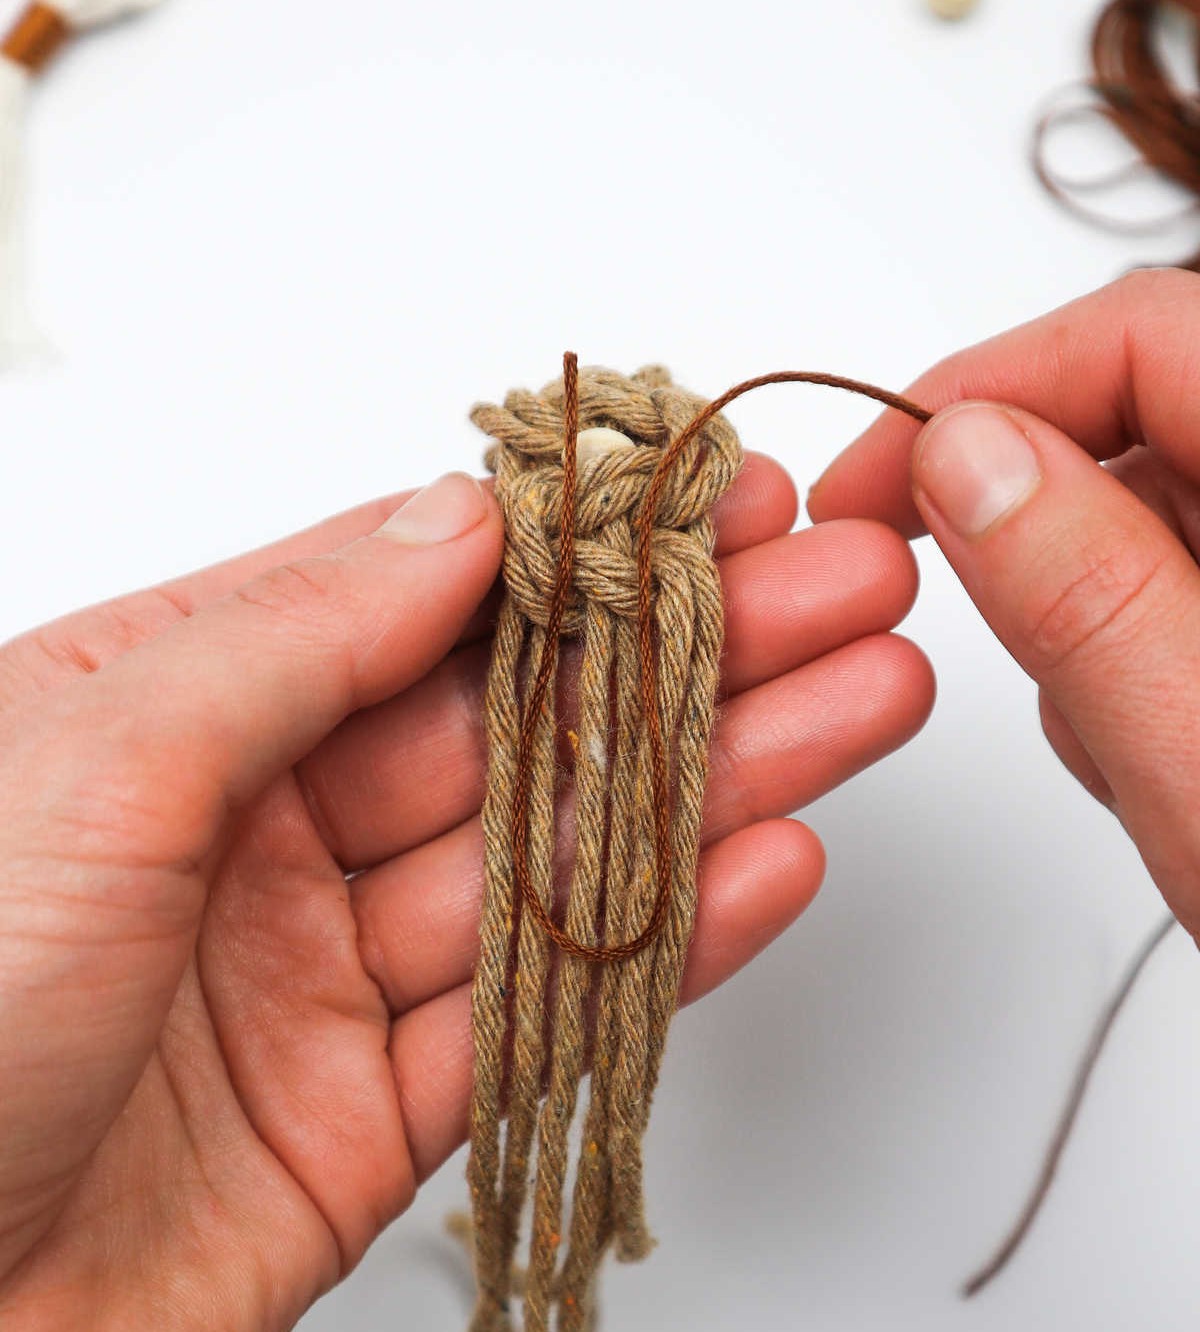
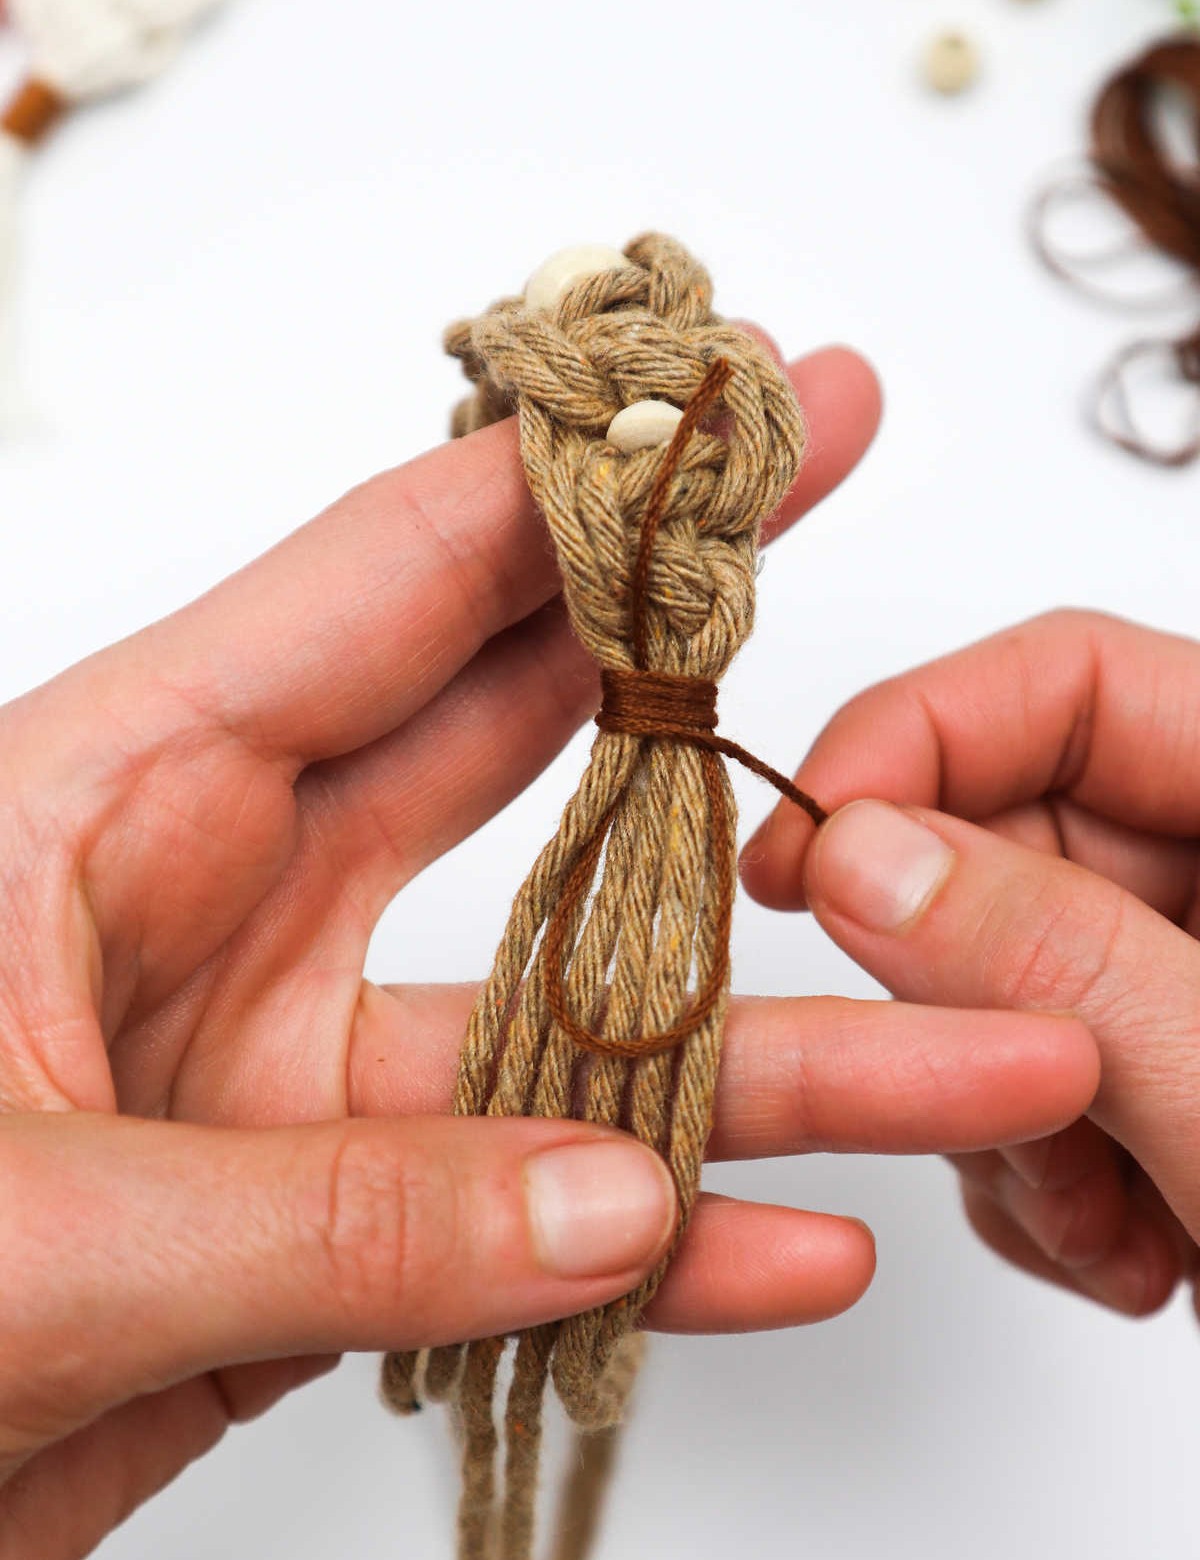
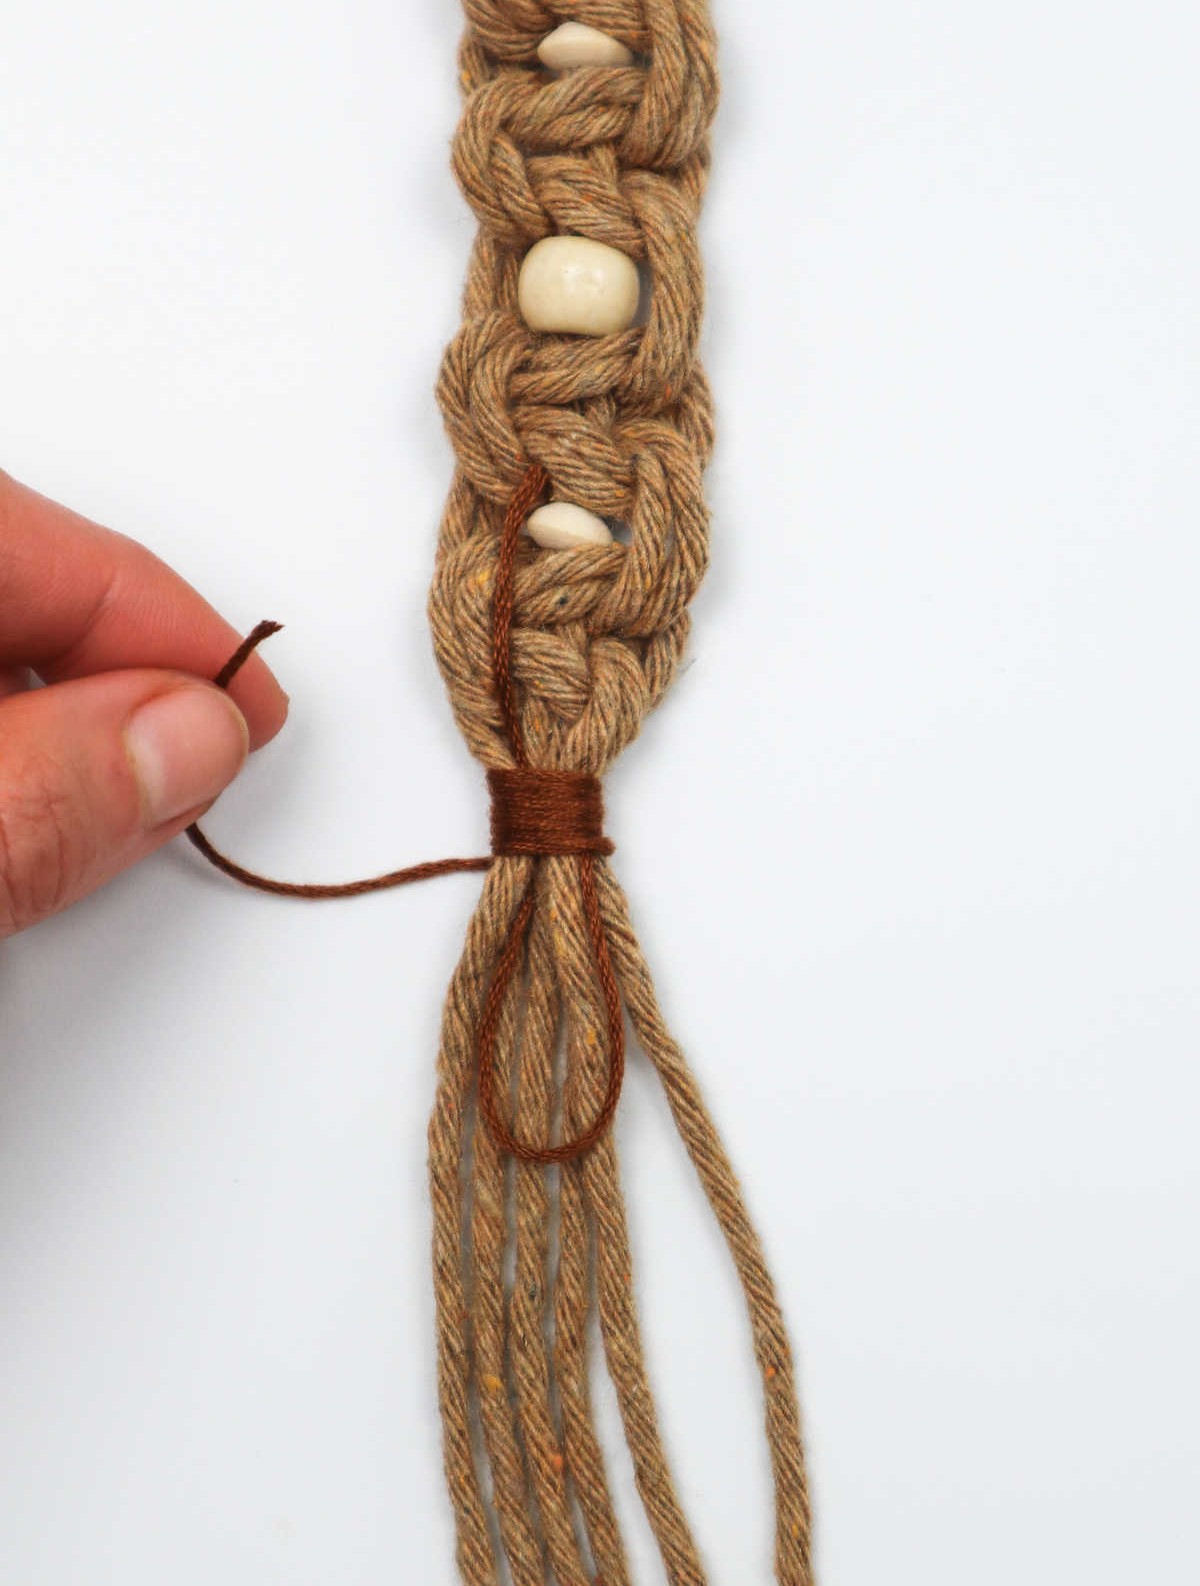
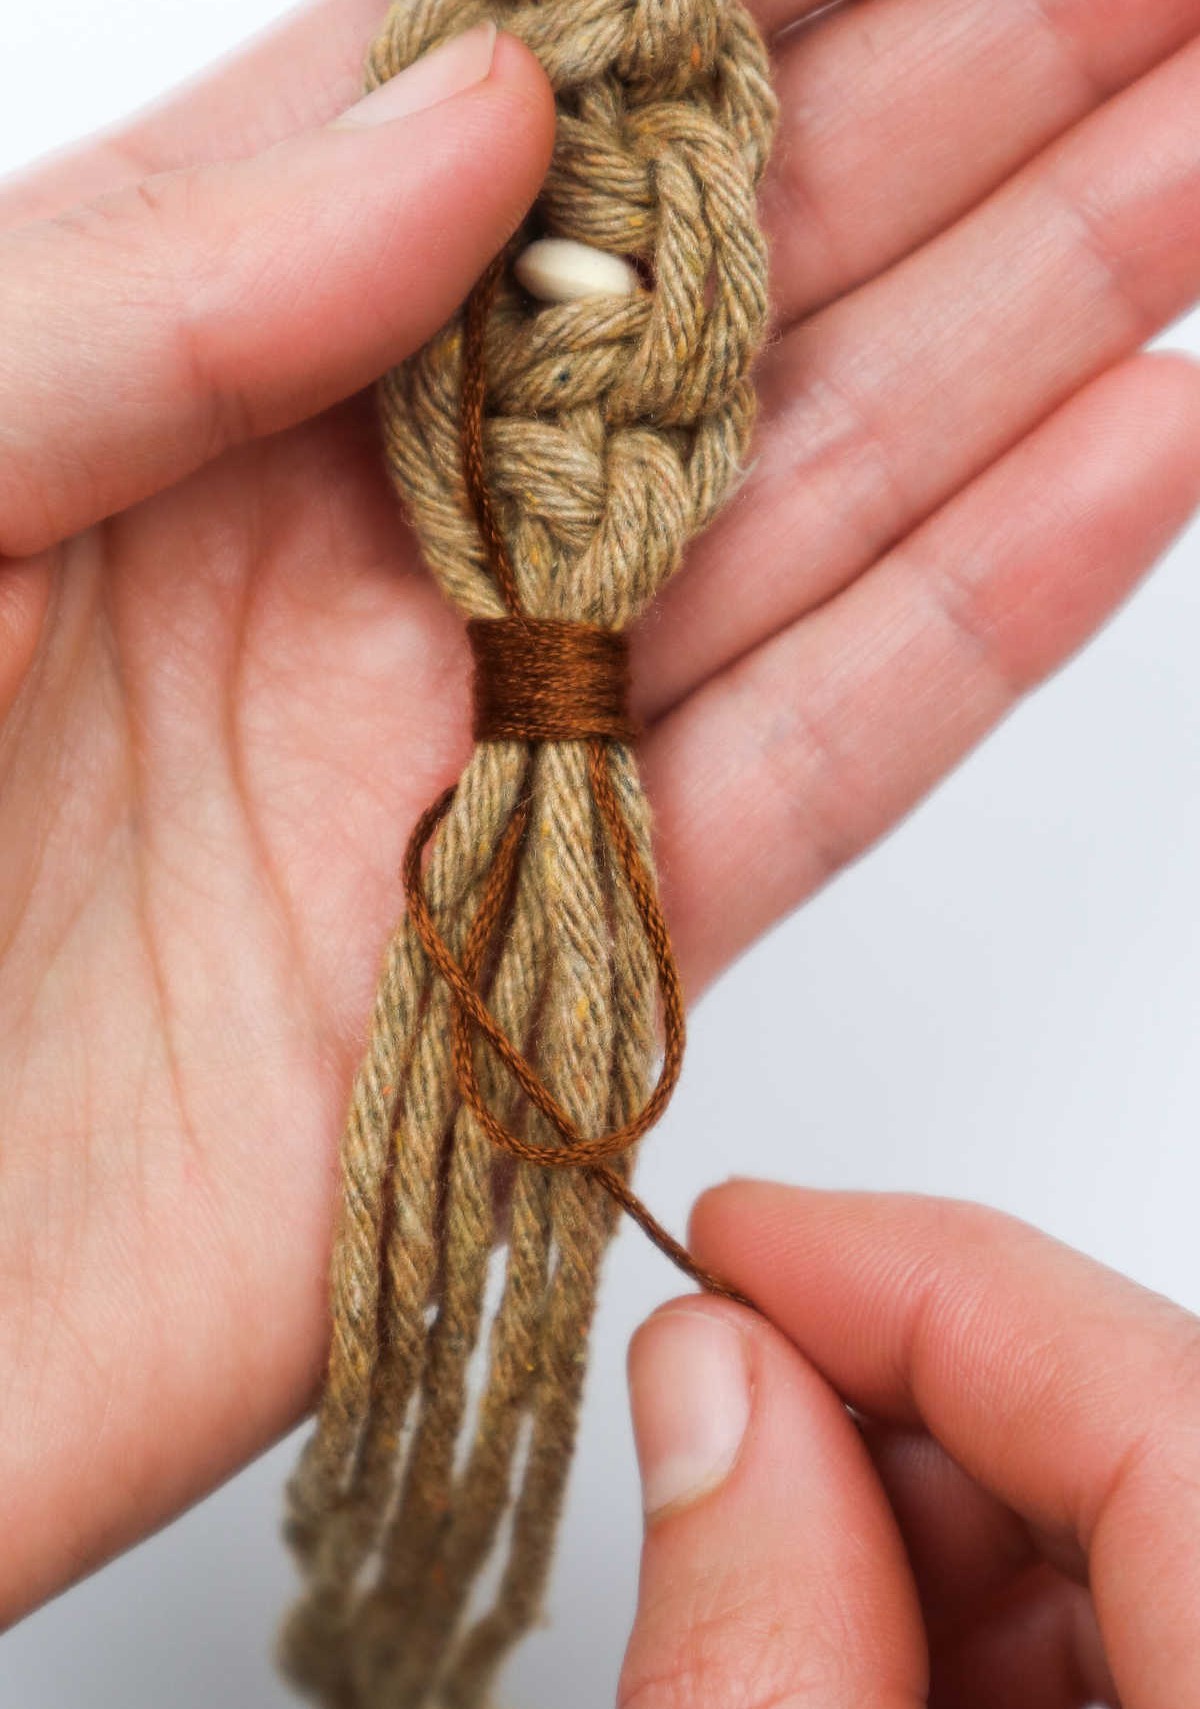
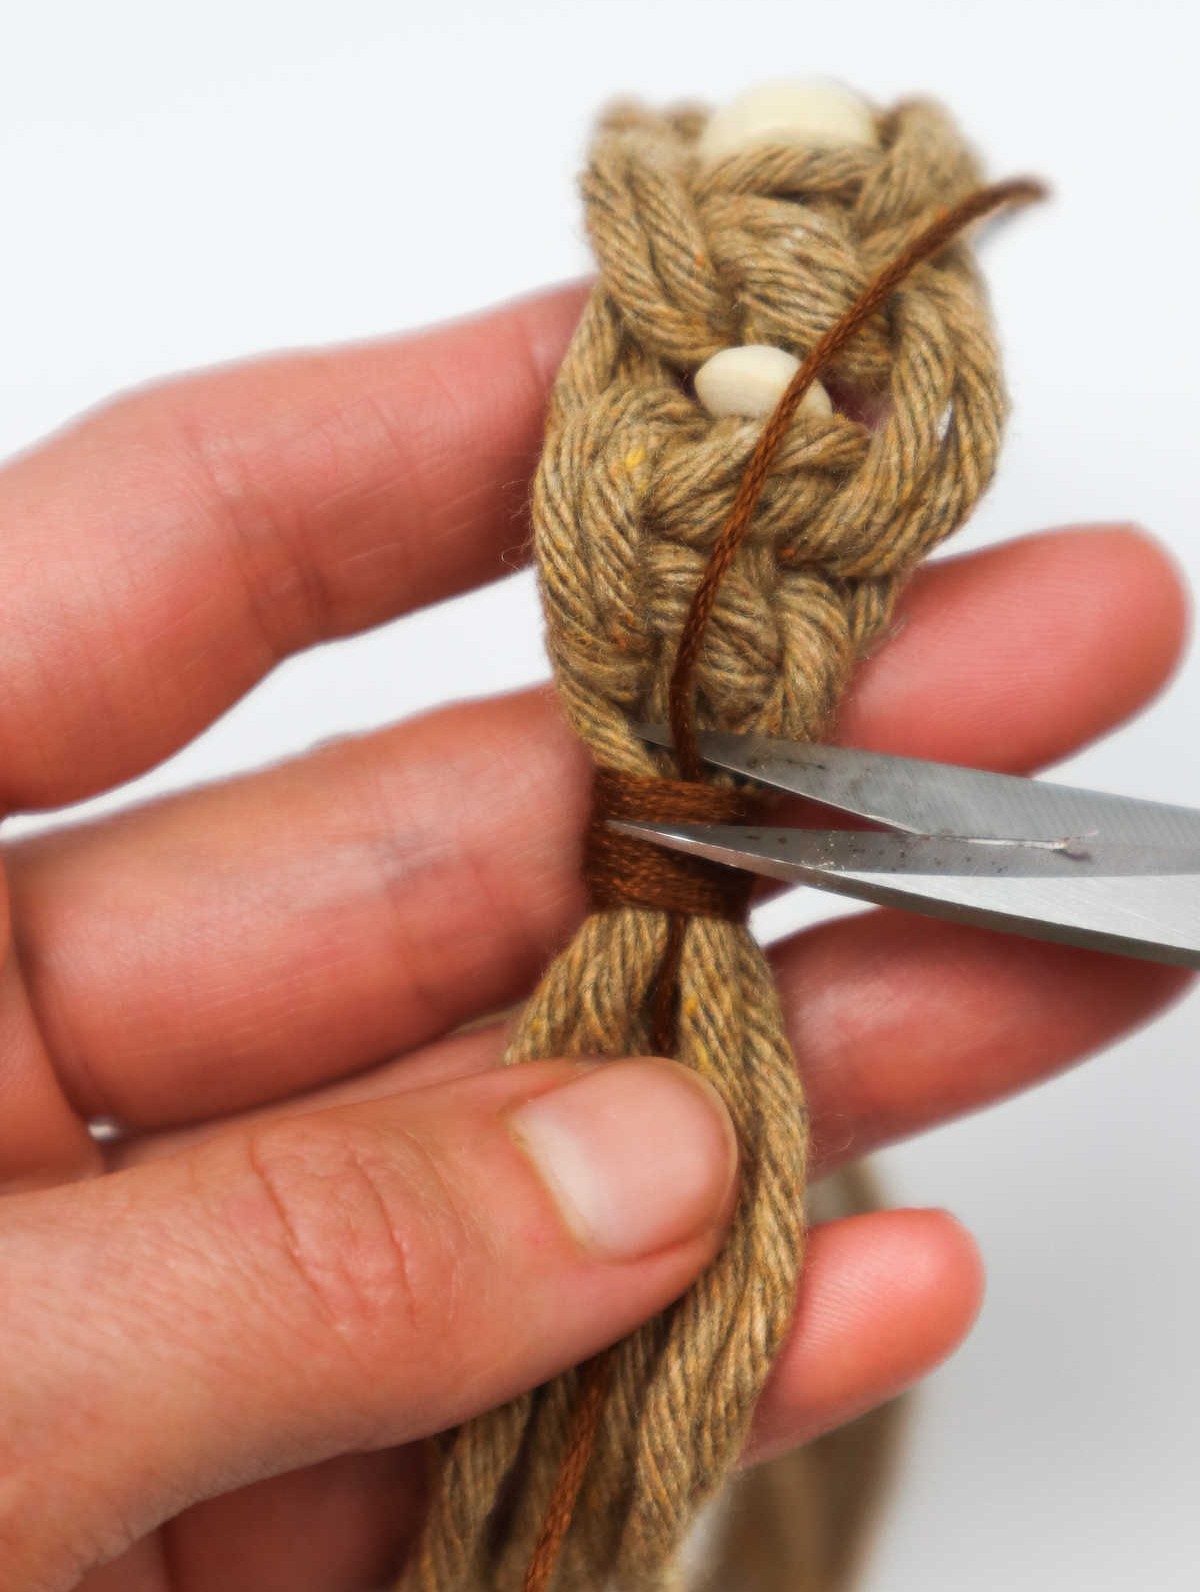
To create a neat and tidy bundle of cords, start by forming a U-like shape with one end of the thread facing upwards. Then, pull the other end to maintain this shape. Hold the U-shape steady while wrapping the remaining thread around the end of the last square knot, grouping all the cords together. Continue wrapping until you’re satisfied with the thickness of the bundle. Next, take the wrapped cord and pass it through the loop created in the initial U-shape.
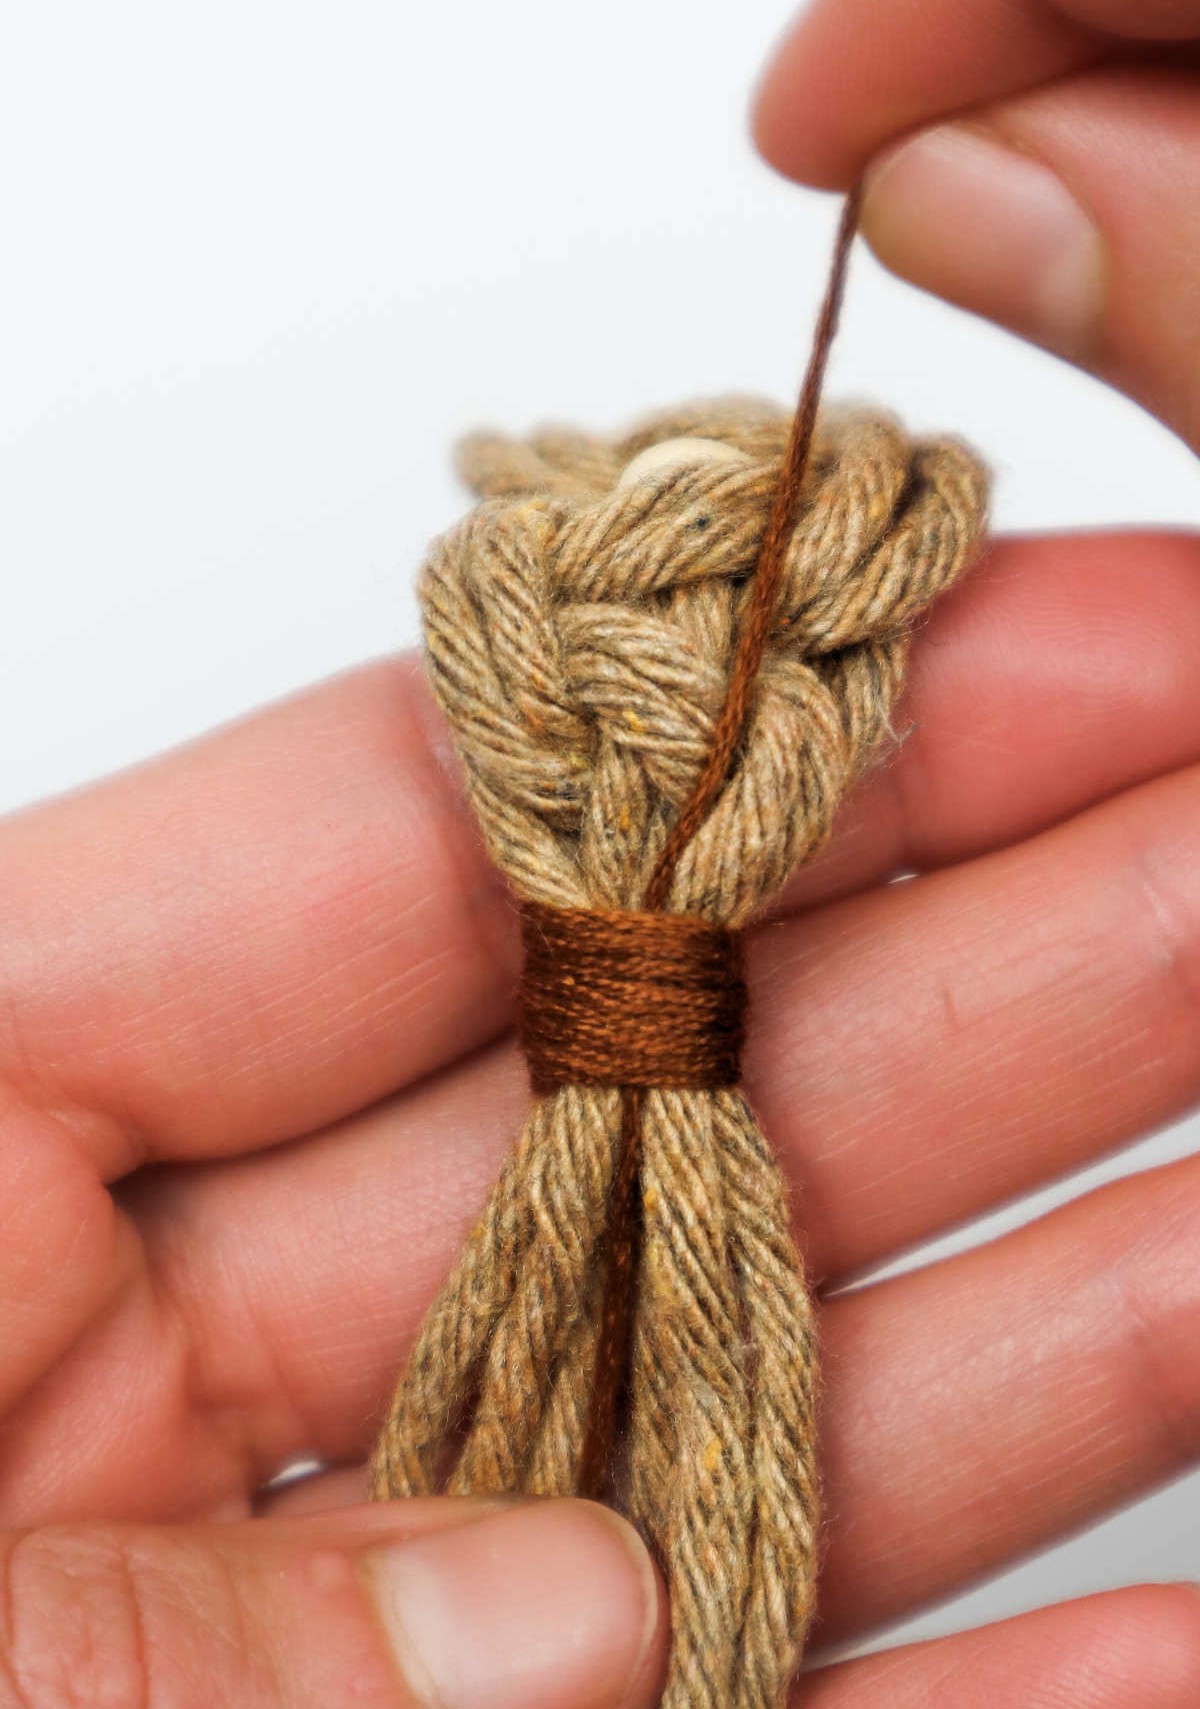
Pull both ends of the thread gently but firmly in opposite directions to secure the wrap in place. Finally, trim the excess thread by cutting off the two ends.
Step 10
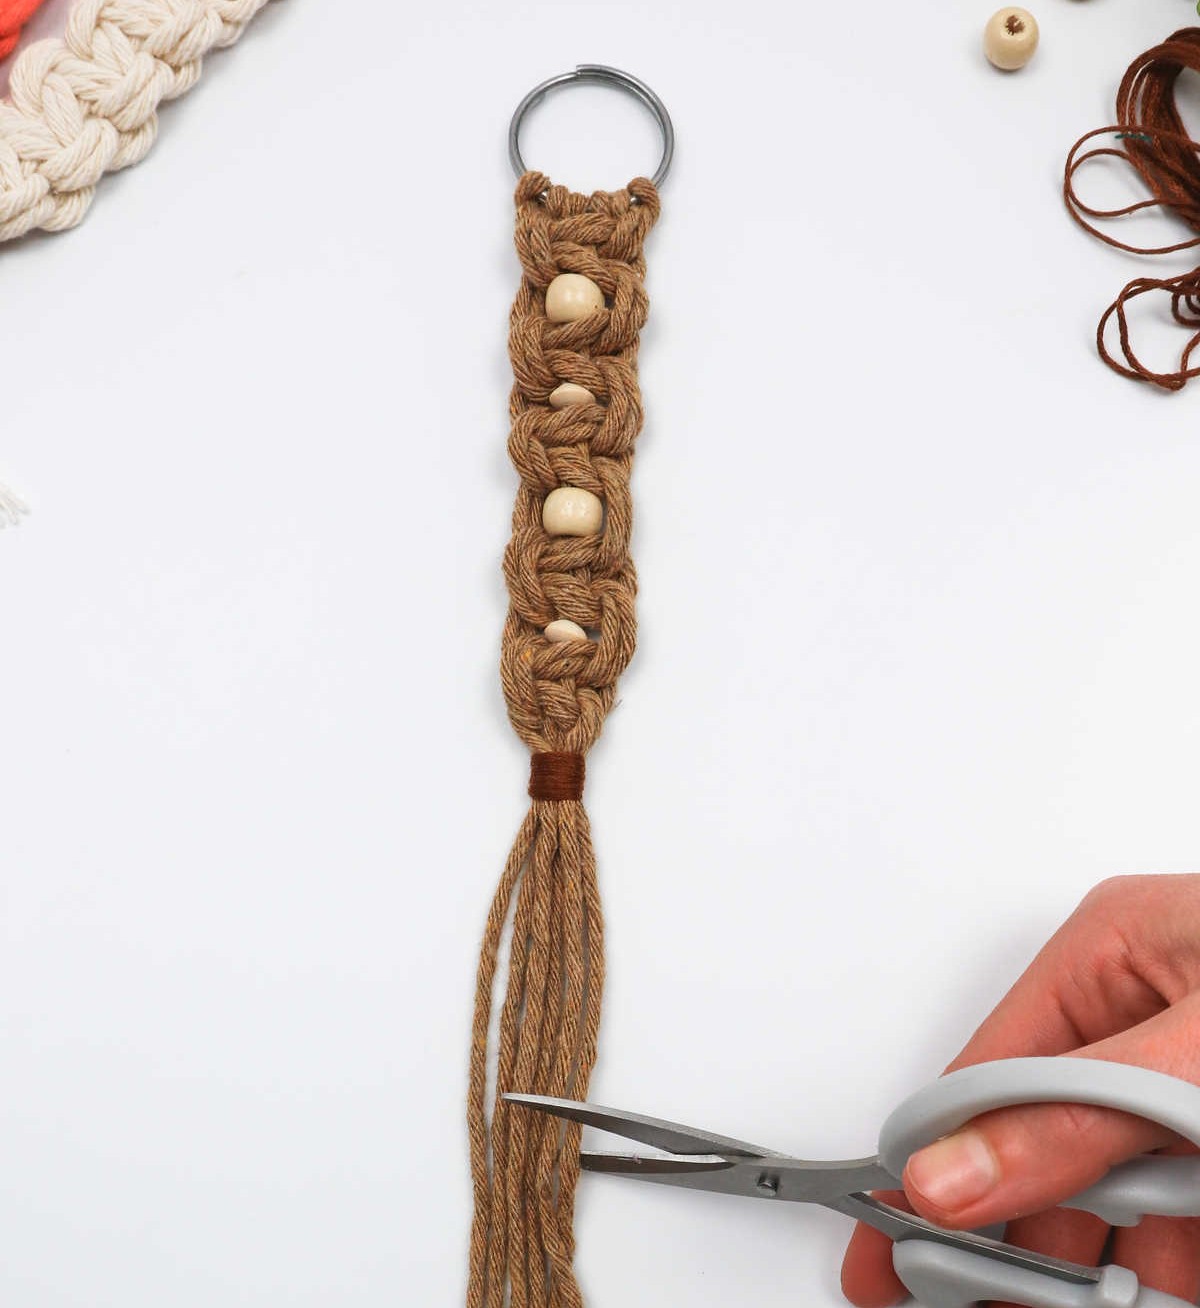
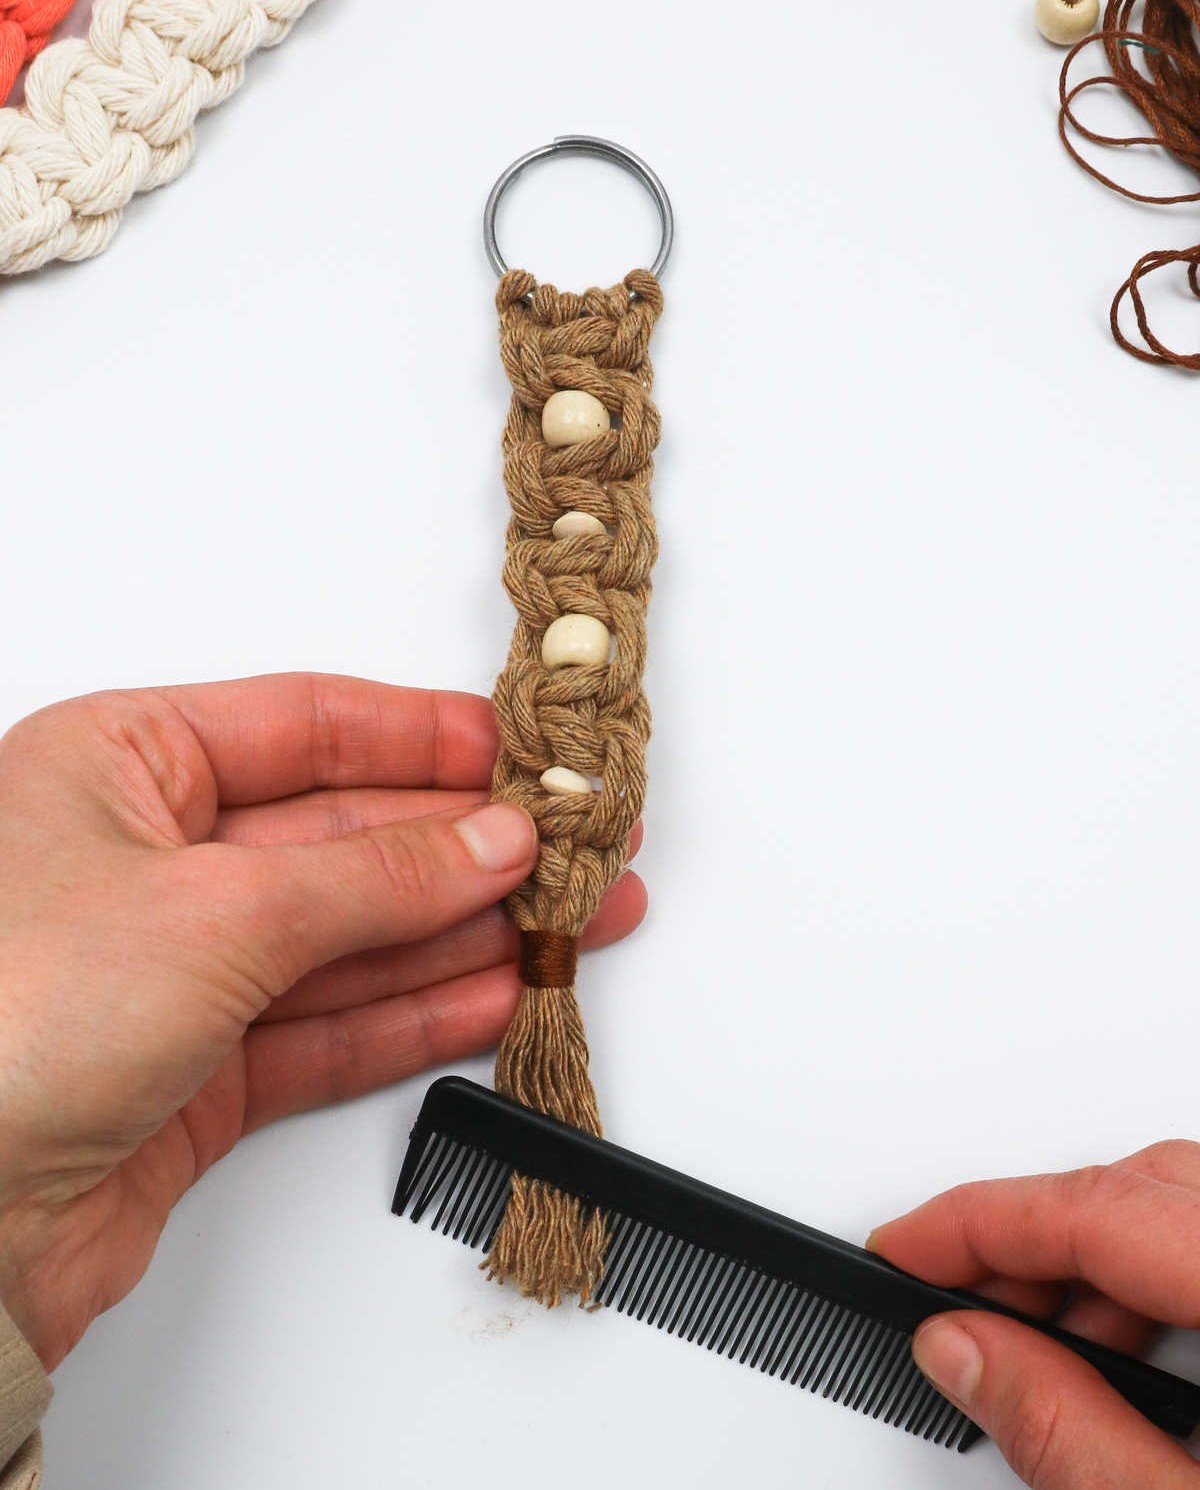
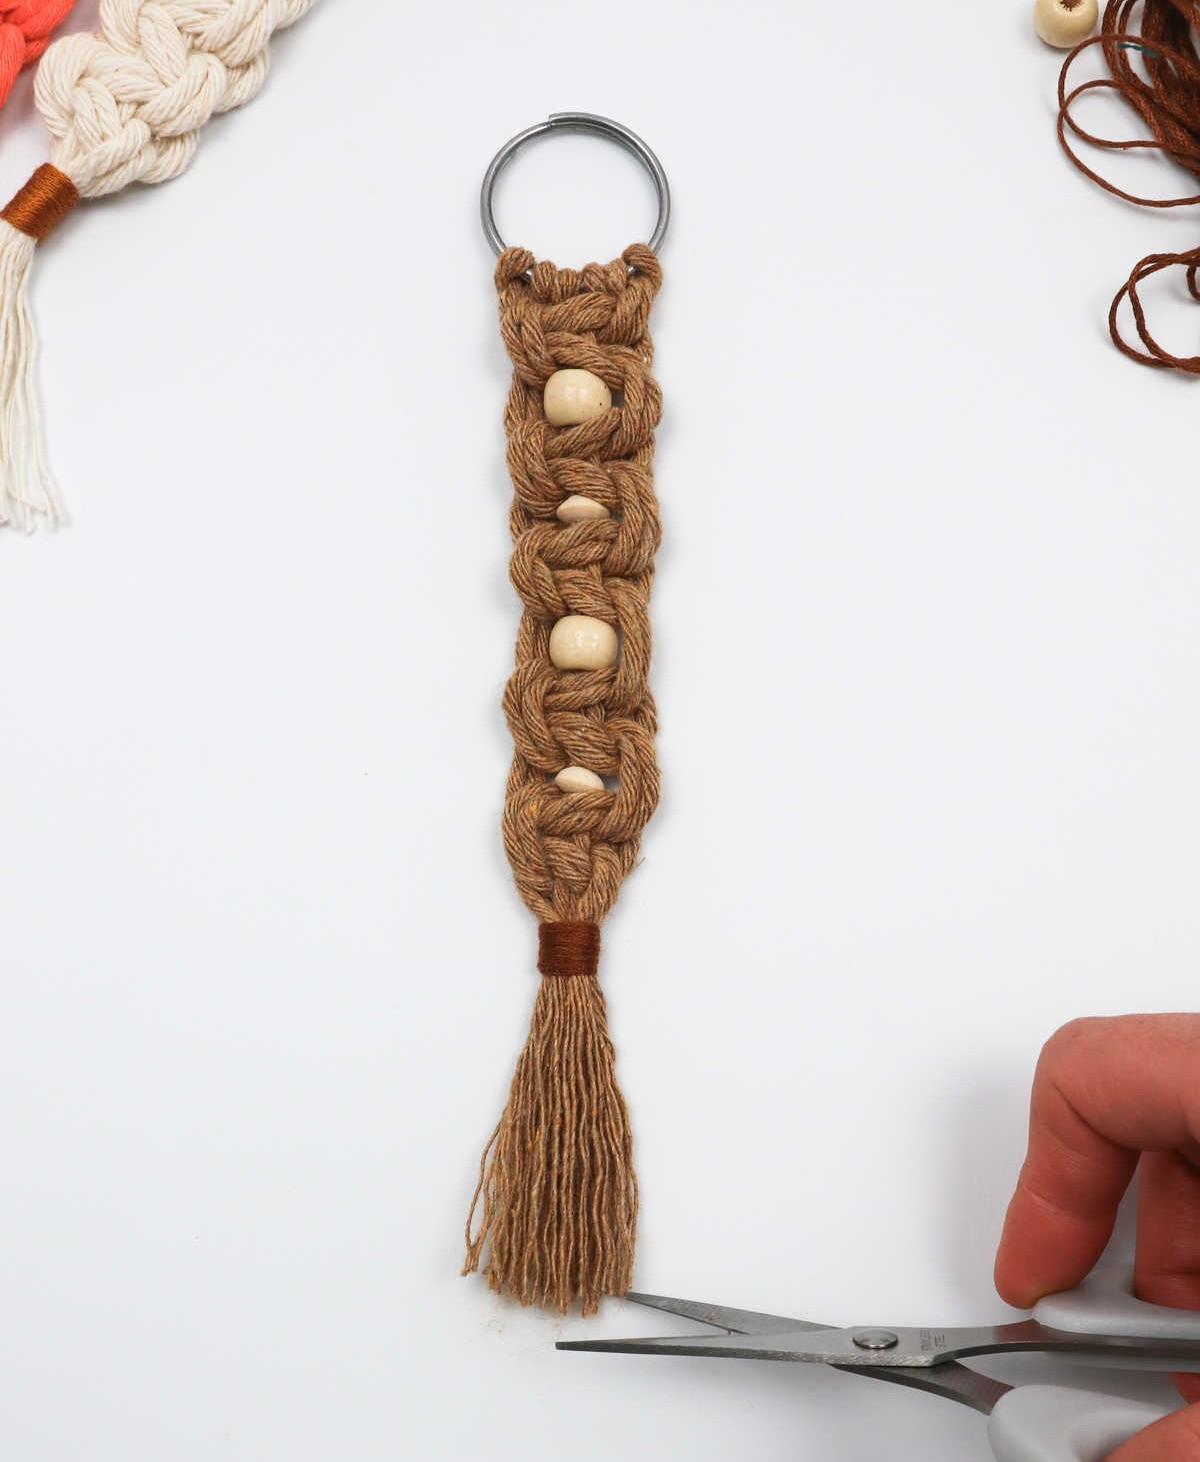

As you near the completion of your macrame keychain, it’s essential to finish off the cords by trimming the ends evenly. This step ensures a polished and professional-looking final product. Take some time to gently comb through the cords with a soft brush or comb to remove any tangles or knots. Once the cords are smooth and even, you can repeat the process of trimming the ends again, this time making sure they’re nice and tidy.
With these final touches complete, your macrame keychain is now ready to be enjoyed!
Watch: How to Make Macrame Keychains
While visual learning is a powerful tool, for those who prefer to absorb information through moving images, we recommend taking a few minutes to watch our comprehensive video tutorial in its entirety. By doing so, you’ll be able to better grasp the concepts and ideas being presented.
What Kind of Cord is Used for Macrame Keychain?
When it comes to macrame cords, cotton cord stands out as the most sought-after option due to its exceptional elasticity and cost-effectiveness. However, nylon and jute are also viable alternatives for those seeking a different texture or appearance. Furthermore, there’s a wide range of cord types to explore, including twisted, braided, and single-strand options.In terms of size, the sweet spot lies between 3mm-5mm cords, which offer the perfect balance of control and finish quality.
How Long Does It Take to Make a Macrame Keychain?
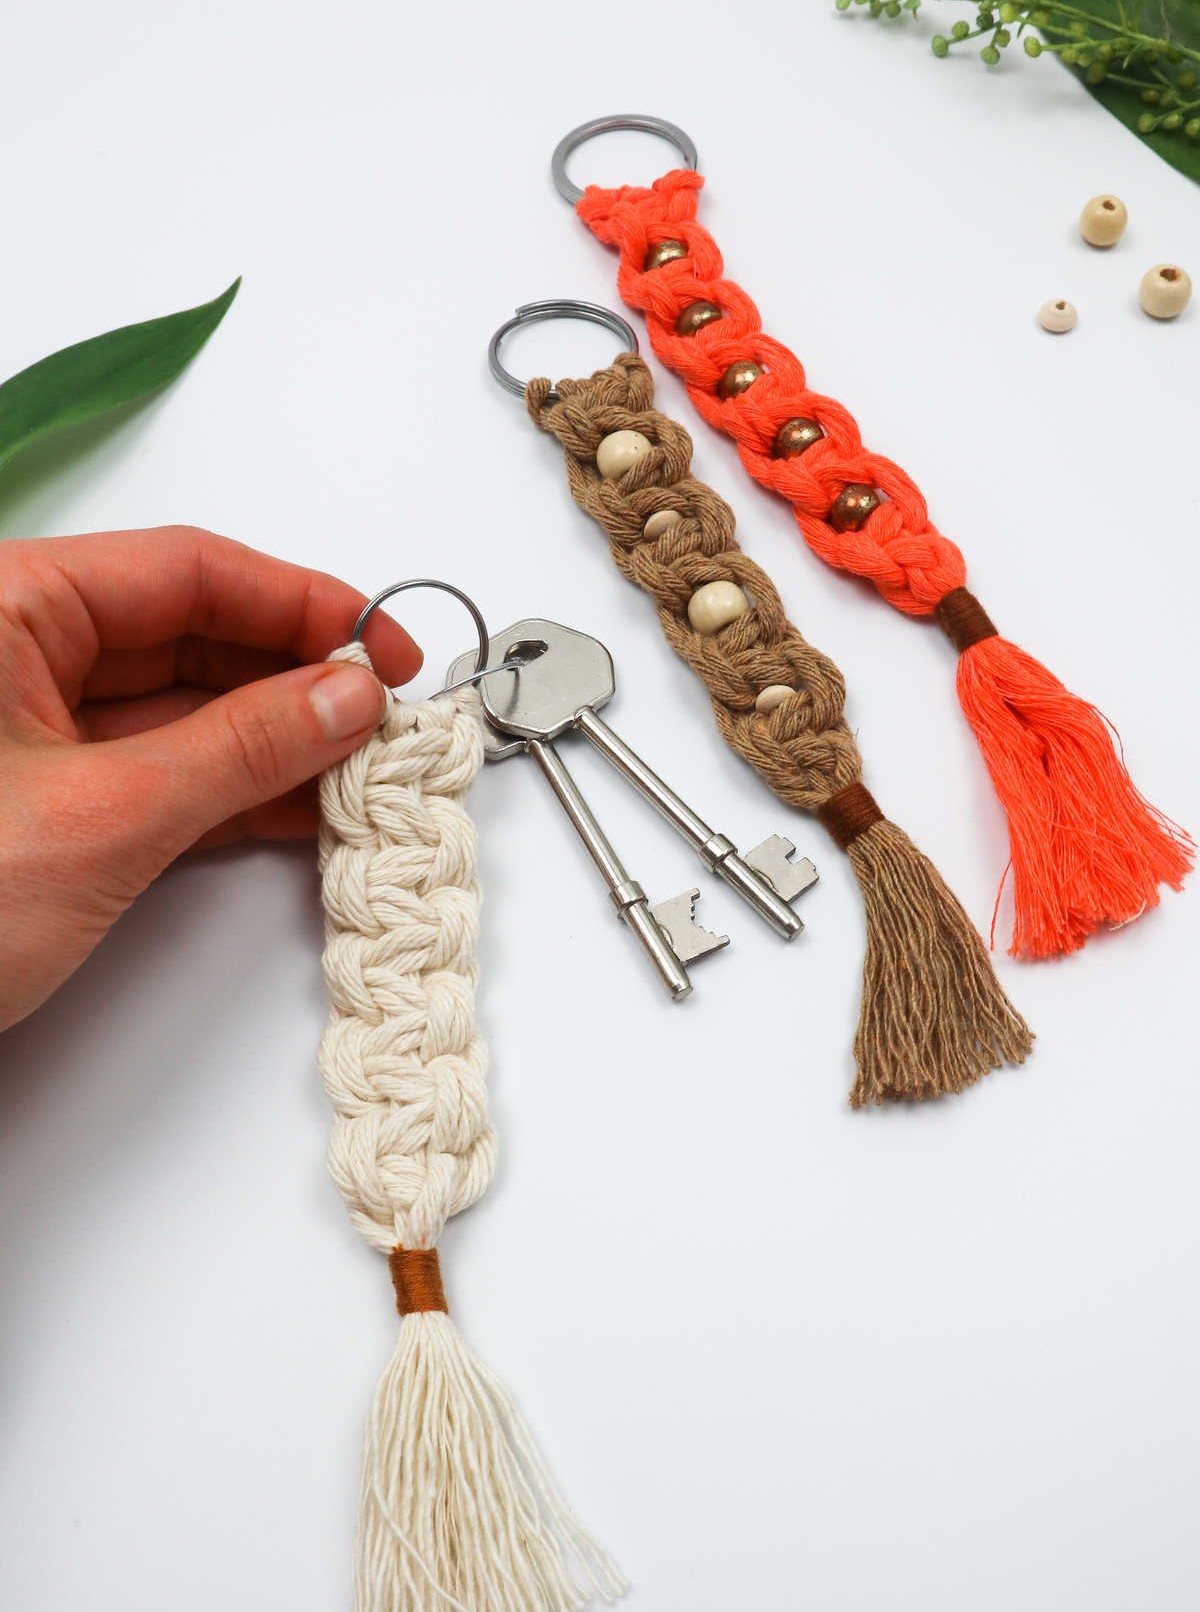
With a little practice, this macrame keychain can be whipped up in no time – even an absolute beginner can complete one in under 30 minutes. Once you’ve got the basics down, you’ll find that subsequent keychains take just 15 minutes or less to finish, allowing you to create multiple customized accessories in a remarkably short amount of time.
DIY Macrame Keychain
Looking for a simple and fun DIY project to get started with macrame? Look no further than this easy-to-make macrame keychain! Not only will you be creating something truly unique, but it’s also incredibly practical. With just 30 minutes of active time required, this project is perfect for busy crafters or those new to the world of macrame.
Equipment
Materials
When it comes to crafting, having a variety of materials at your disposal can be incredibly beneficial. One such item that’s often overlooked is the humble key ring. Specifically, the Key Ring x 4mm Single Twist Cotton Cords measuring 32 inches long can be an excellent addition to any crafter’s toolkit. These sturdy cords are perfect for adding texture and interest to beadwork, while the single twist design allows for easy threading of beads or other embellishments.
For those looking to take their embroidery game to the next level, these cords can also be used as a base for intricate stitch work or as a way to add subtle texture to finished pieces.
Instructions
To begin crafting your macrame keychain, start by preparing your materials and cutting the cords to the desired length. Secure your work surface with tape, then position a keyring in the center. Begin by creating a lark’s head knot by bending one cord in half, pulling the looped end under, through, and over the ring. Pass the two end cords through the loop you just created, then repeat this process for the remaining three cords.
Next, divide the cords into three sections and secure the middle sections with tape. To create your first square knot, place the left cords over the middle section to form a ‘4’ shape, then pull the right cords over the left ones, under both, and through the loop. Tug the ends to secure the first half of the knot. Repeat this process for the second half, switching the position of the cords.
You can opt to insert beads at this stage by securing them with tape and creating a square knot around each one. Alternate between beading and knotting as you work your way through the project until you reach the desired length. To finish, cut a strip of embroidery thread, create a U-shaped loop, wrap the end around the last square knot, and bunch all the cords together. Pull the ends in opposite directions to secure the knot, then snip them off.
Finally, brush out any stray cords and trim the ends evenly. Your macrame keychain is now complete!