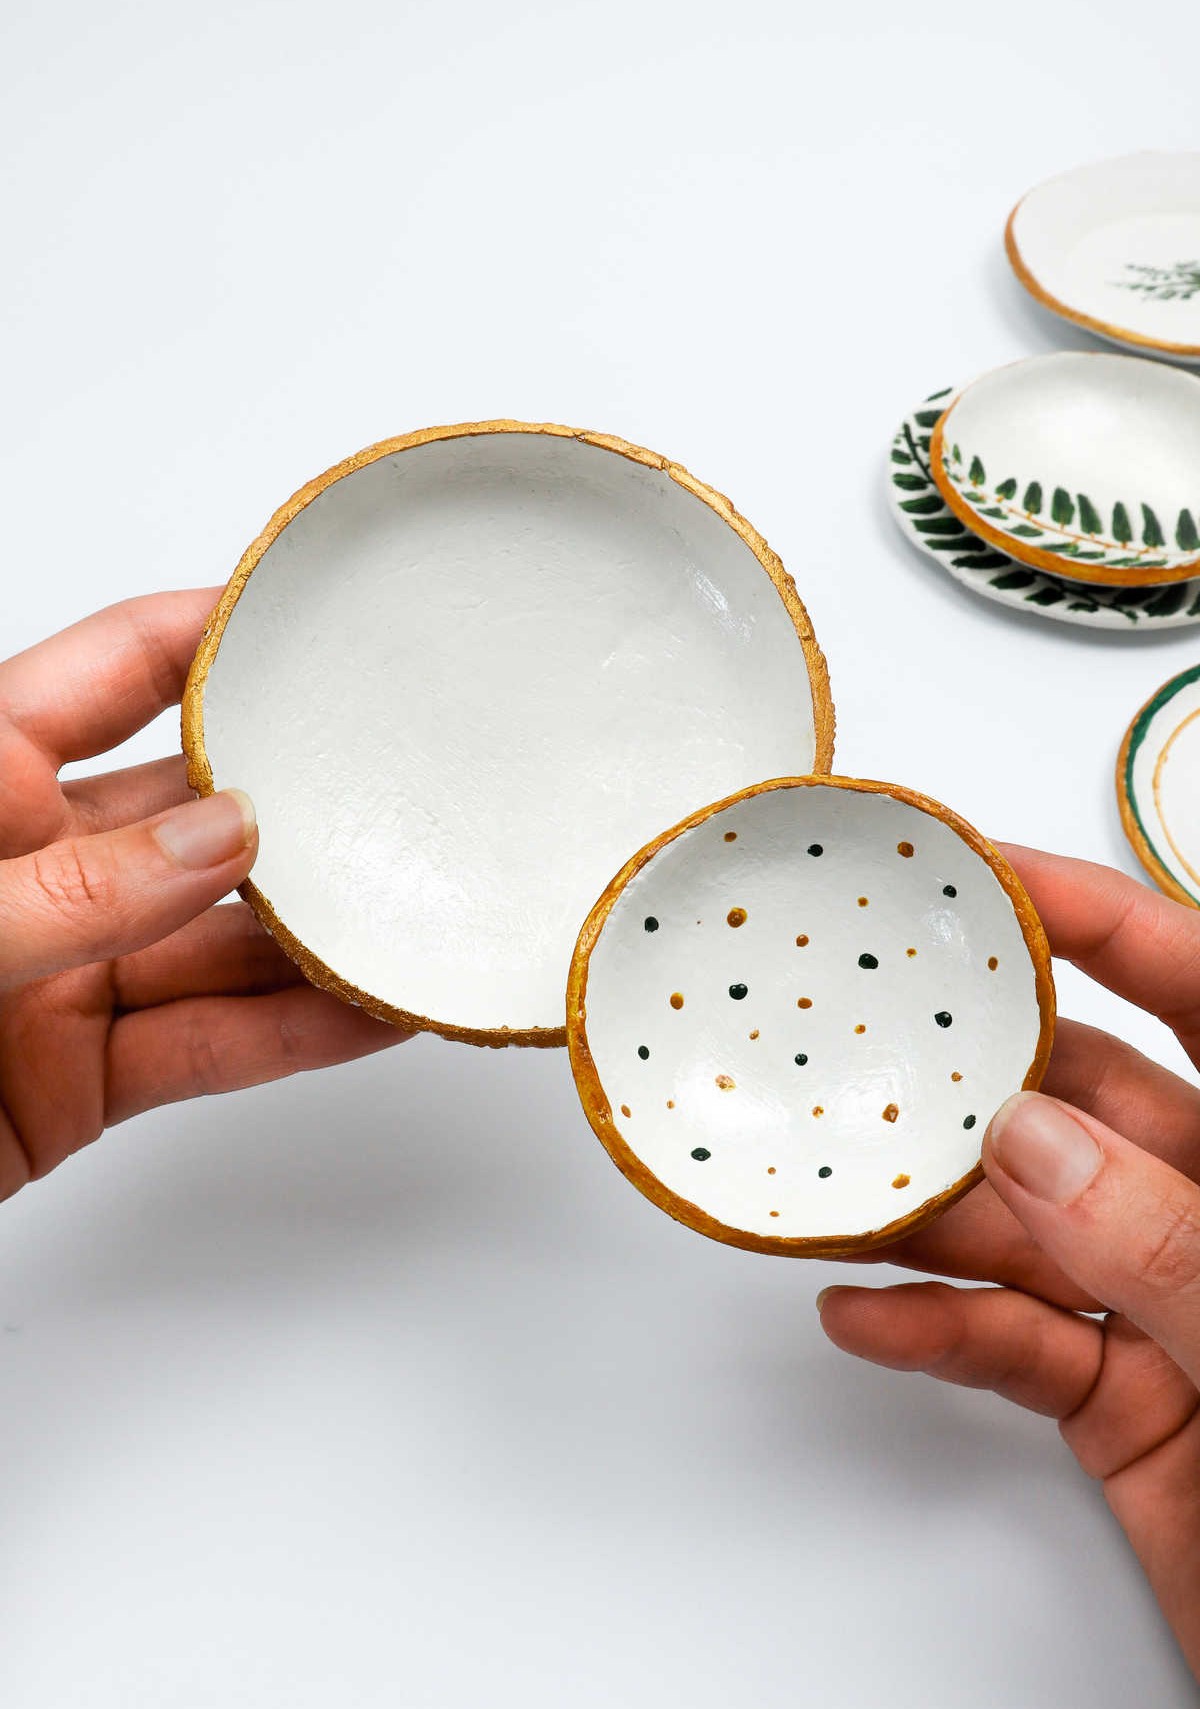
Got a stash of jewelry just waiting for a home? Why not turn it into a unique treasure trove with air-drying clay creations? These rustic-chic trays are surprisingly simple to make, yet offer endless possibilities. Not only do they provide a charming display space for your favorite baubles, but they also double as functional bowls for serving, storing loose change or keys, and even housing tiny trinkets. The best part?
You can create an entire set of matching pieces in varying sizes and shapes – perfect for gifting to loved ones or keeping for yourself. Plus, personalization options abound, making each piece truly one-of-a-kind.
Supplies and Tools You’ll Need

Before diving into the process of creating bowls, let’s first cover the essential supplies you’ll need to get started. While there are many optional items that can be used for decorative purposes, don’t worry if the list seems overwhelming – most of these extras are purely for personalization and aren’t necessary for the basic bowl-making process.
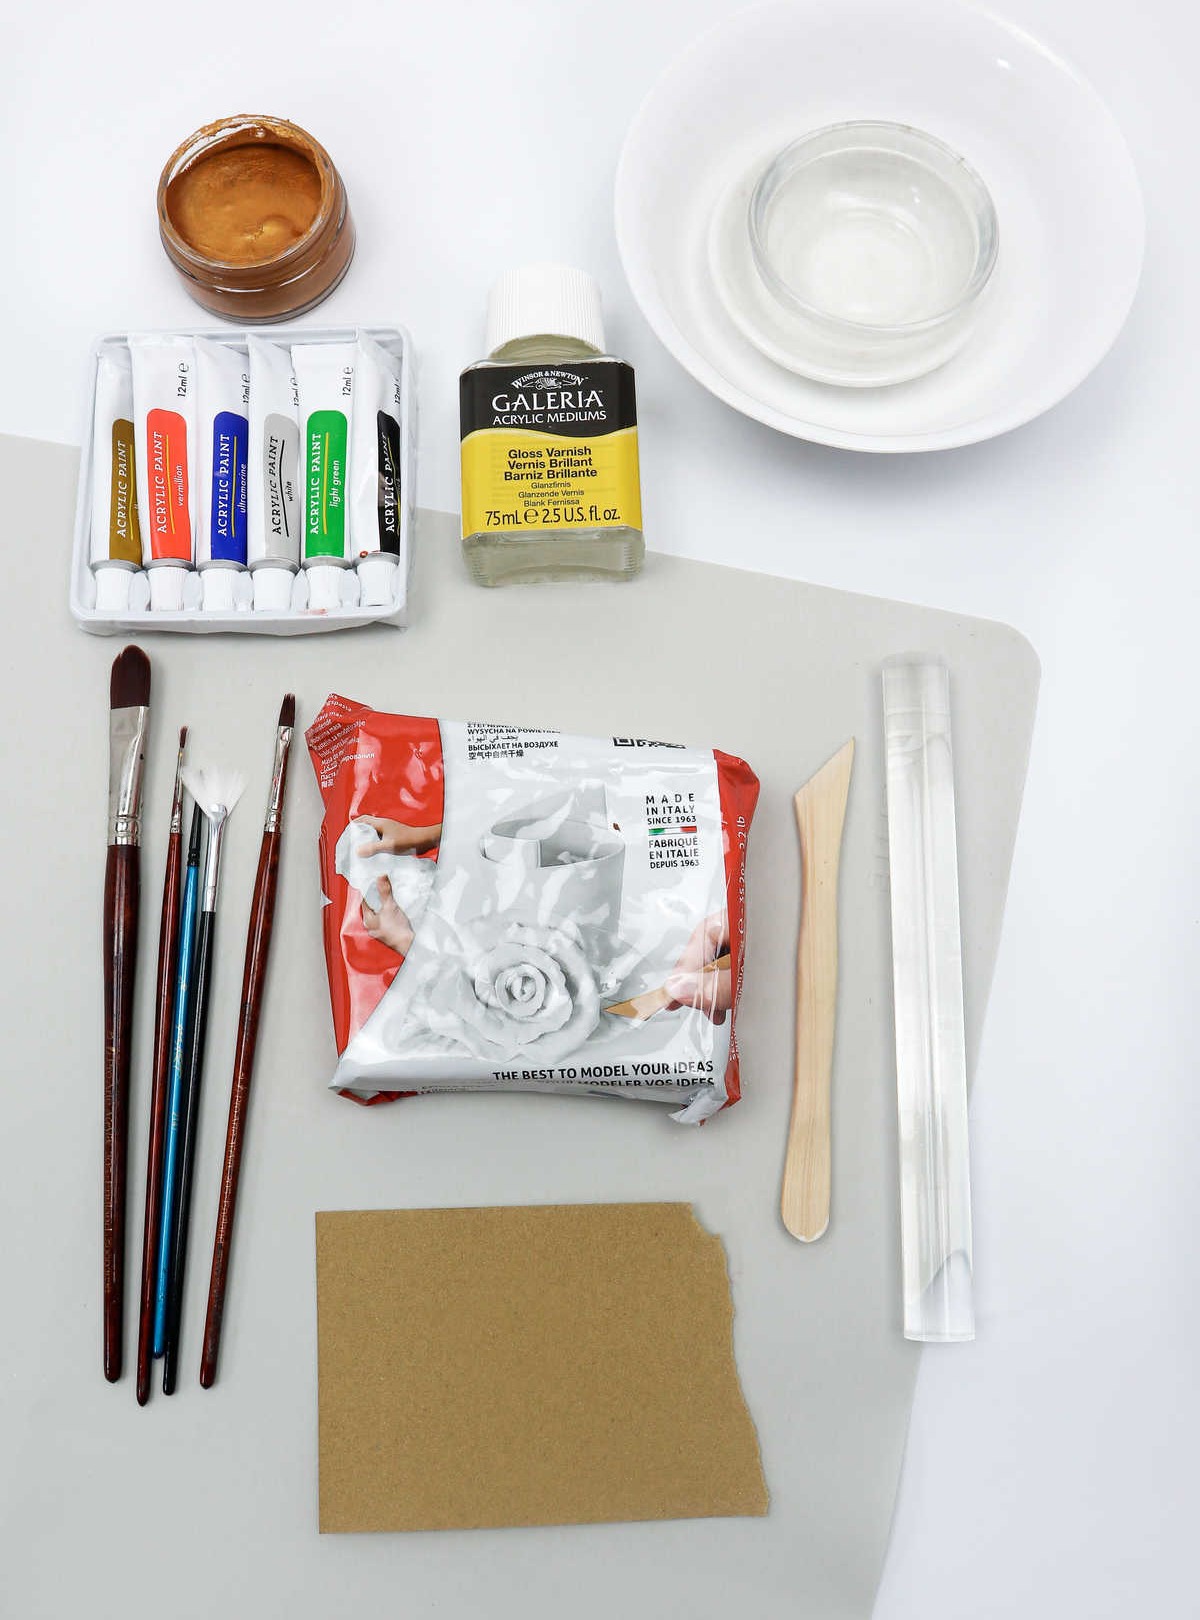
The following essentials will provide a solid foundation: air drying clay, an acrylic roller or bottle, a non-stick placemat, bowls (various sizes to use as molds), acrylic paints, paintbrushes, a craft knife, and fine sandpaper. Optional items include acrylic gloss varnish, artificial leaves, ball chain, beaded chain, embossing rolling pins, and stamps.
Watch: DIY Jewelry Trays
For those who learn best through visual aids, we’ve got you covered! Our comprehensive tutorial is available in its entirety on video – simply head over to our platform and get started with your learning journey!
How to Make Air Dry Clay Bowls
For those eager to get creative, we’re providing a comprehensive guide on crafting these unique clay bowls from start to finish. By following our step-by-step process, you’ll be able to create your own stunning pieces of art that showcase your personal touch.
Step 1
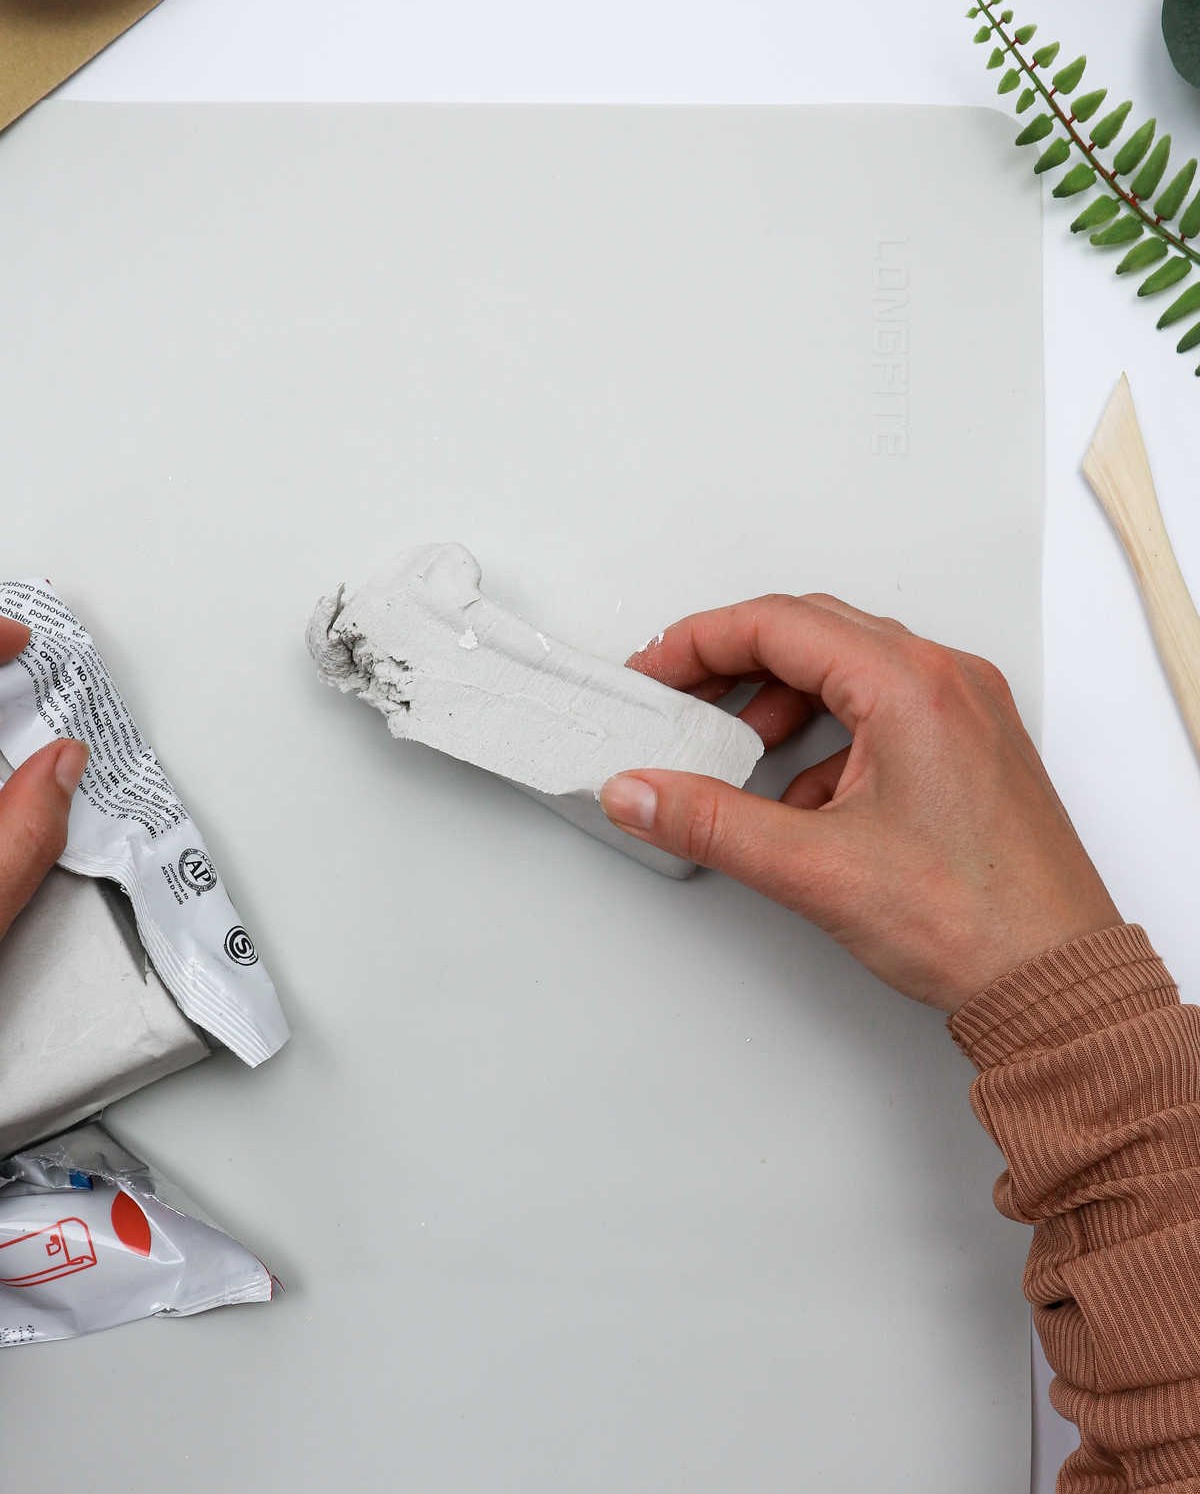
Next, roll up your sleeves and begin crafting the ceramic bowls by cutting off a segment of clay from the larger block. Take care to re-contain the remaining clay within its original packaging, ensuring it remains undisturbed for future use.
Step 2
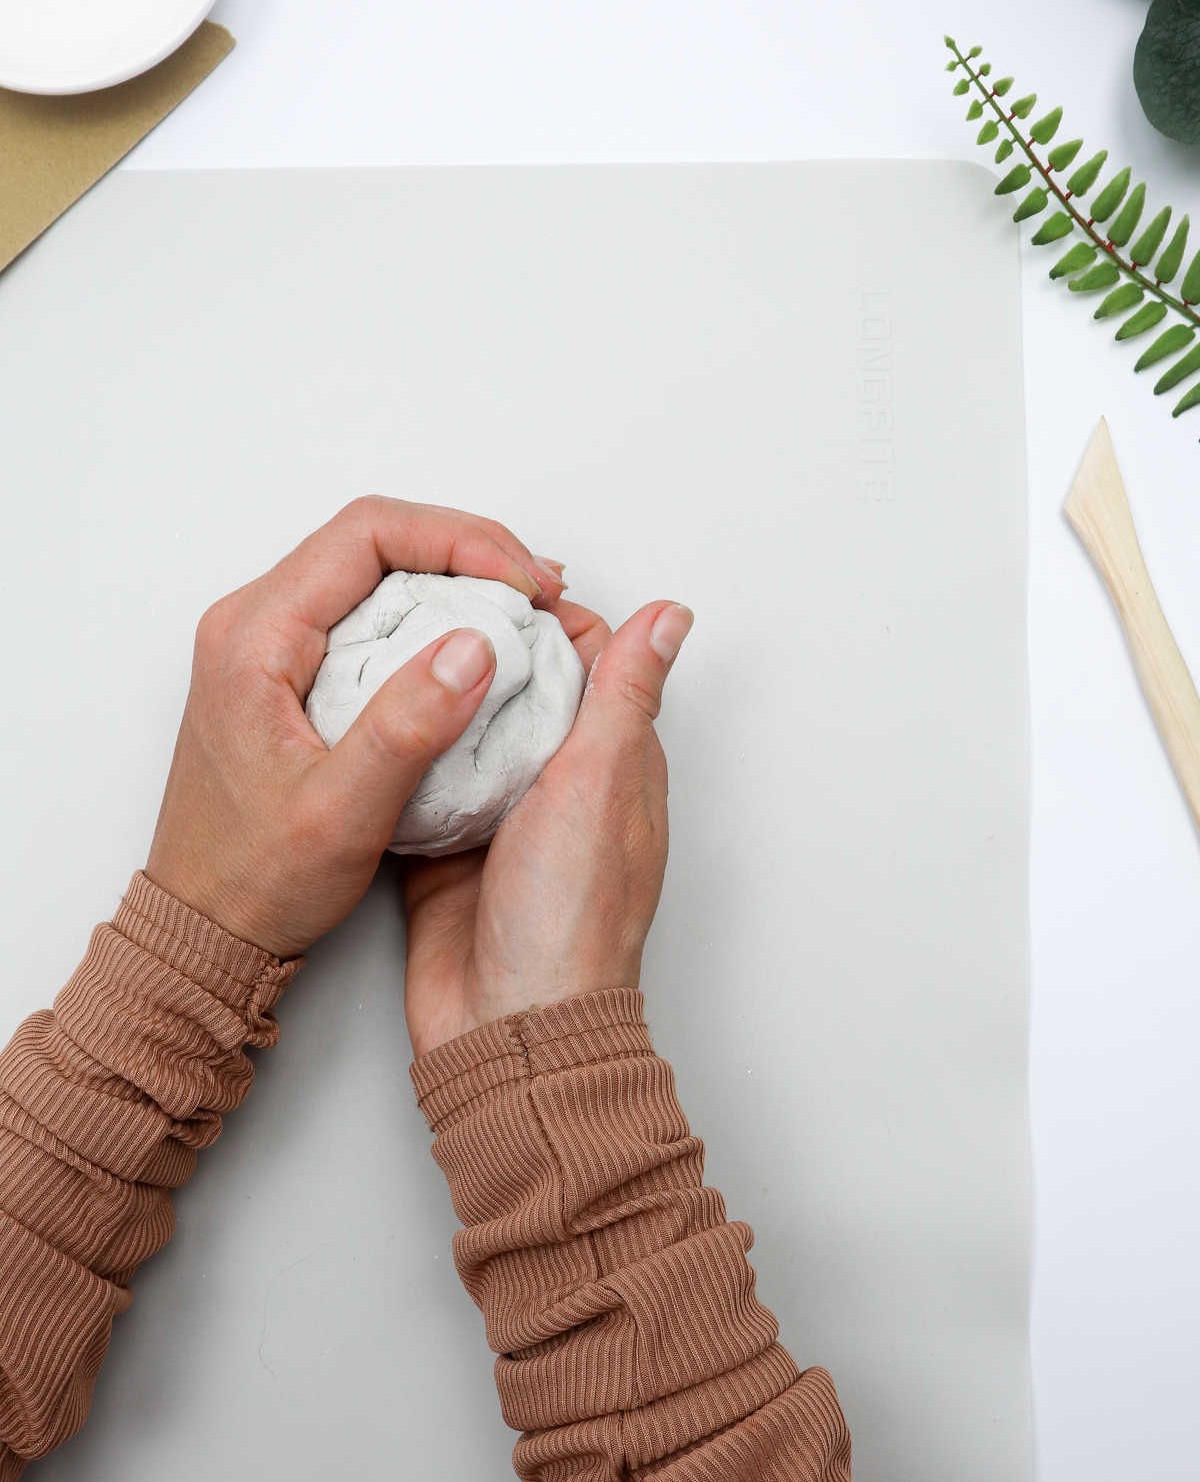
As you begin shaping the clay, employ the palms of your hands to warm and manipulate the material until it reaches a state of lump-free softness and pliability. This process is crucial in preparing the clay for further manipulation.
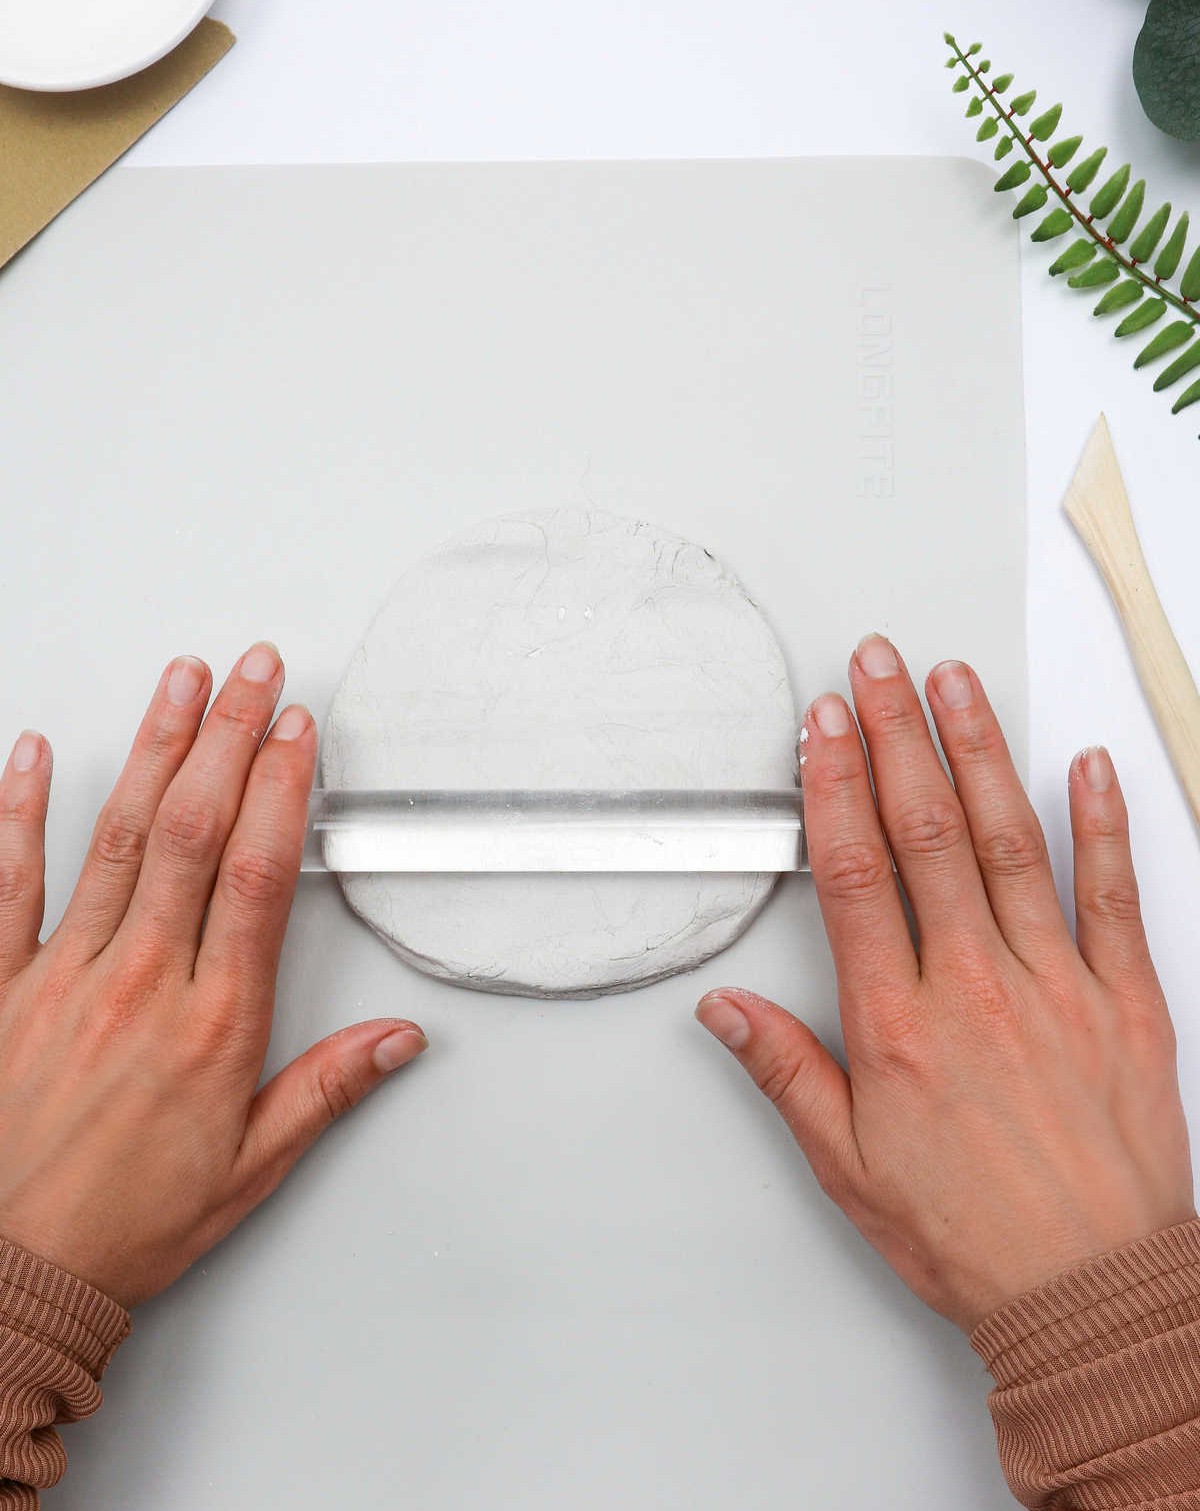
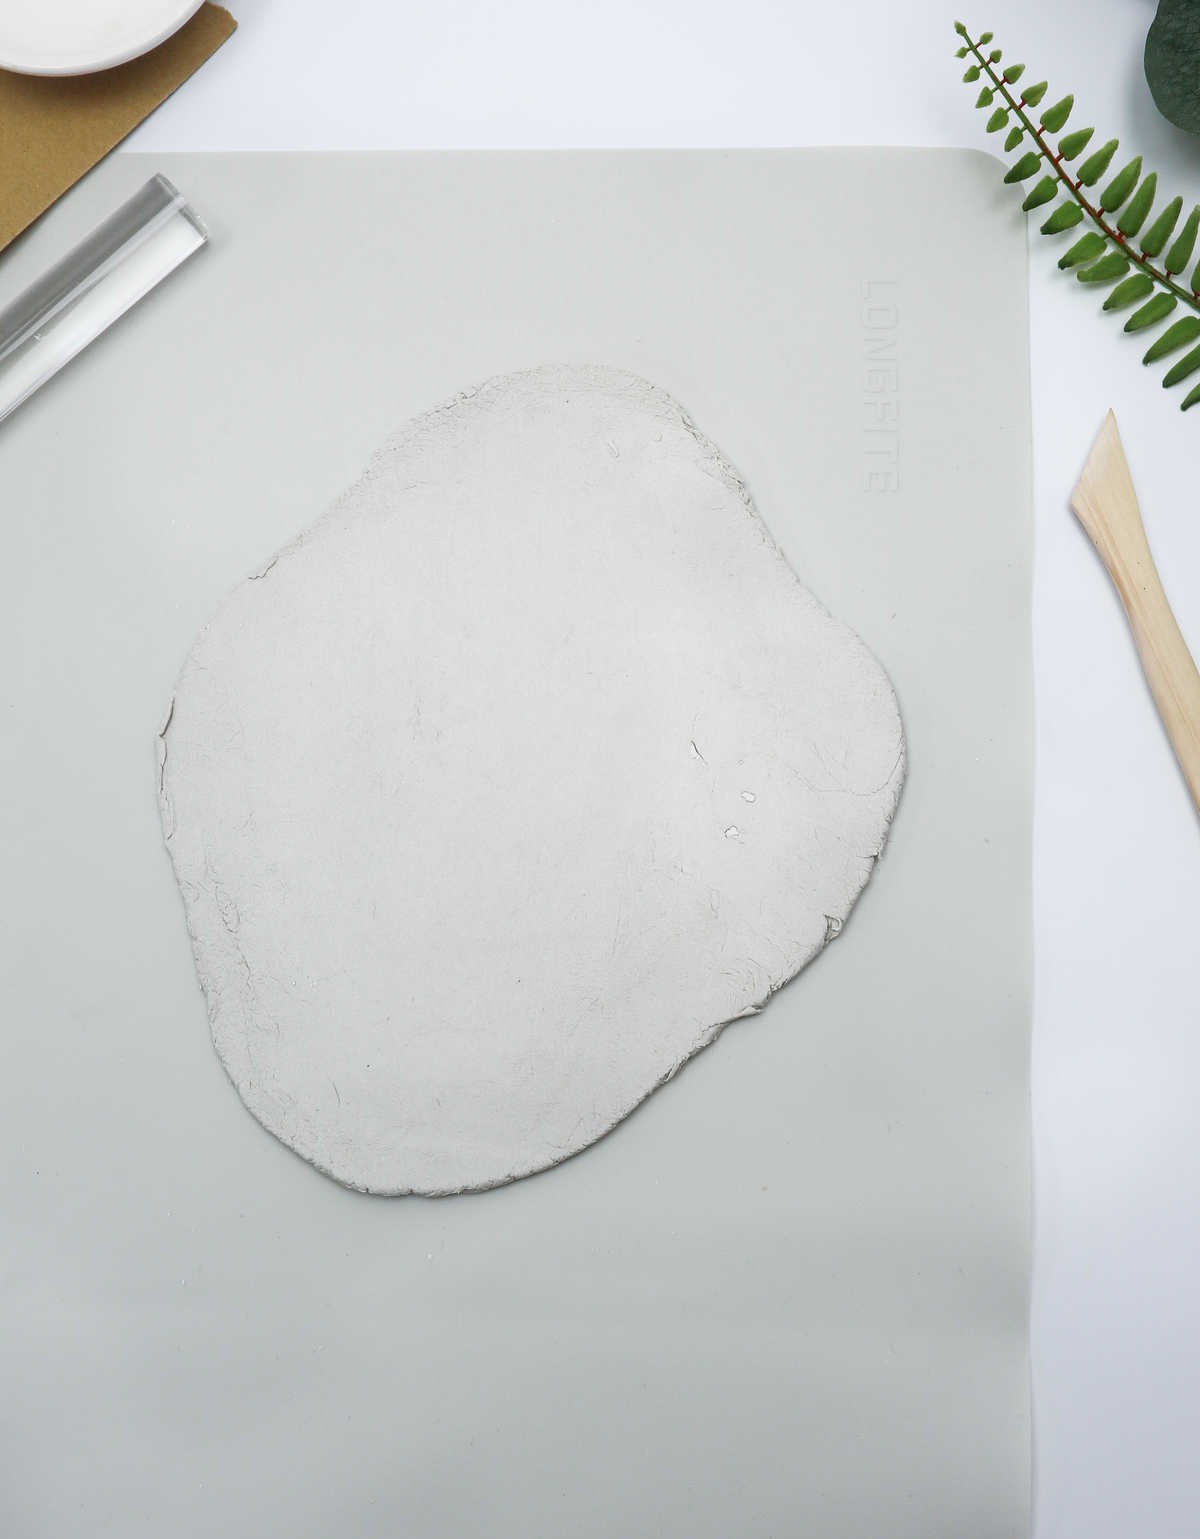
With the kneading complete, retrieve a rolling pin or a glass container and utilize it to slowly roll out the clay.
It’s essential to strike a balance between thickness and thinness, as overly thin sections may lead to cracking when the clay dries, while excessively thick portions will prolong the drying process. As such, aim for an optimal thickness of approximately 5 millimeters.
Step 3
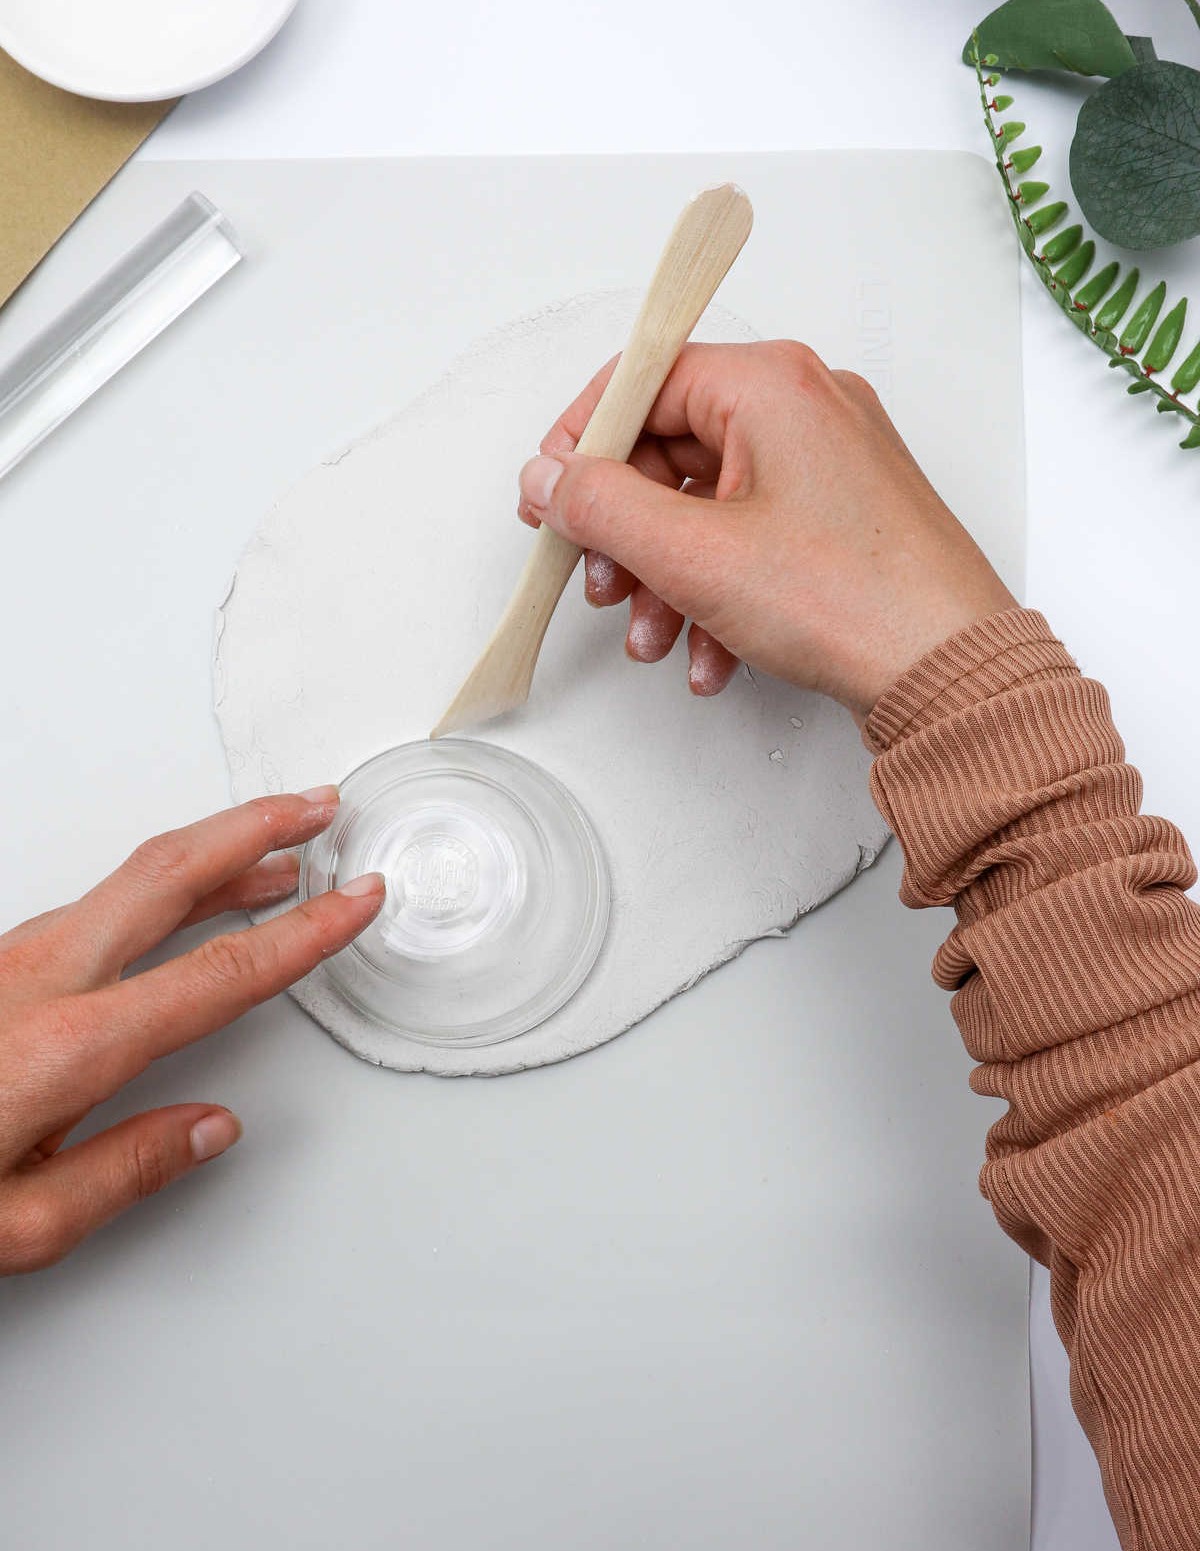
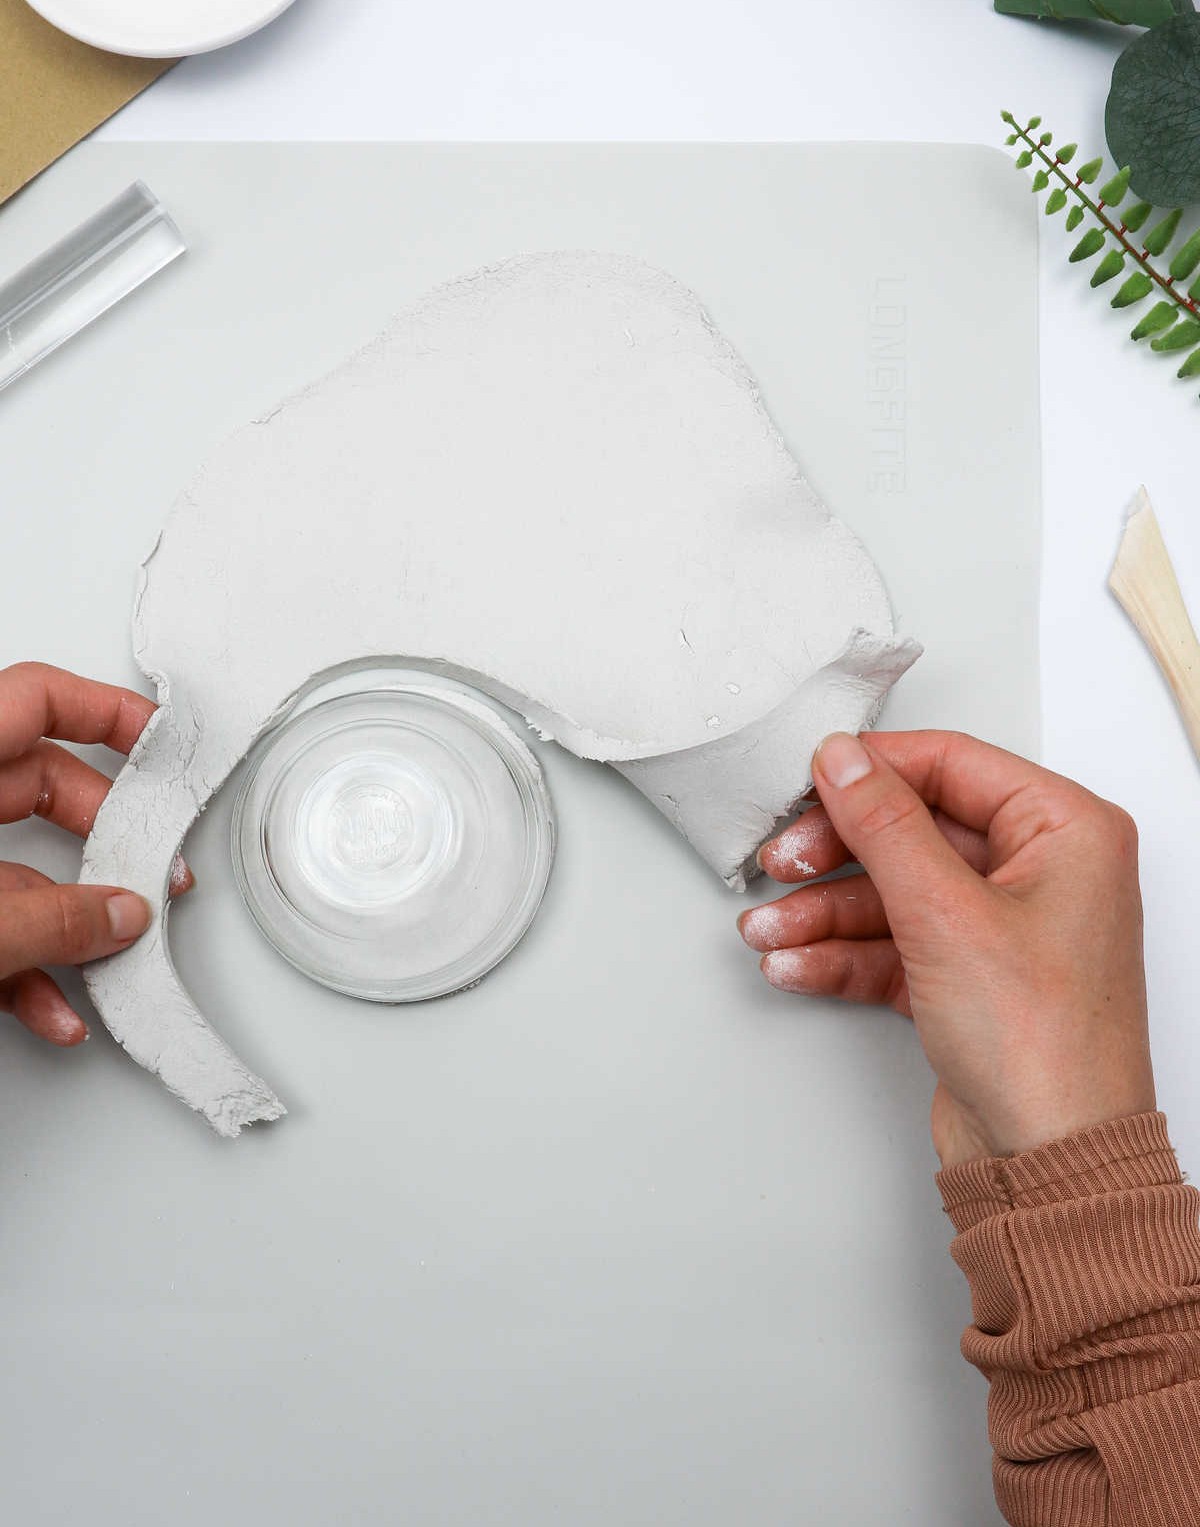
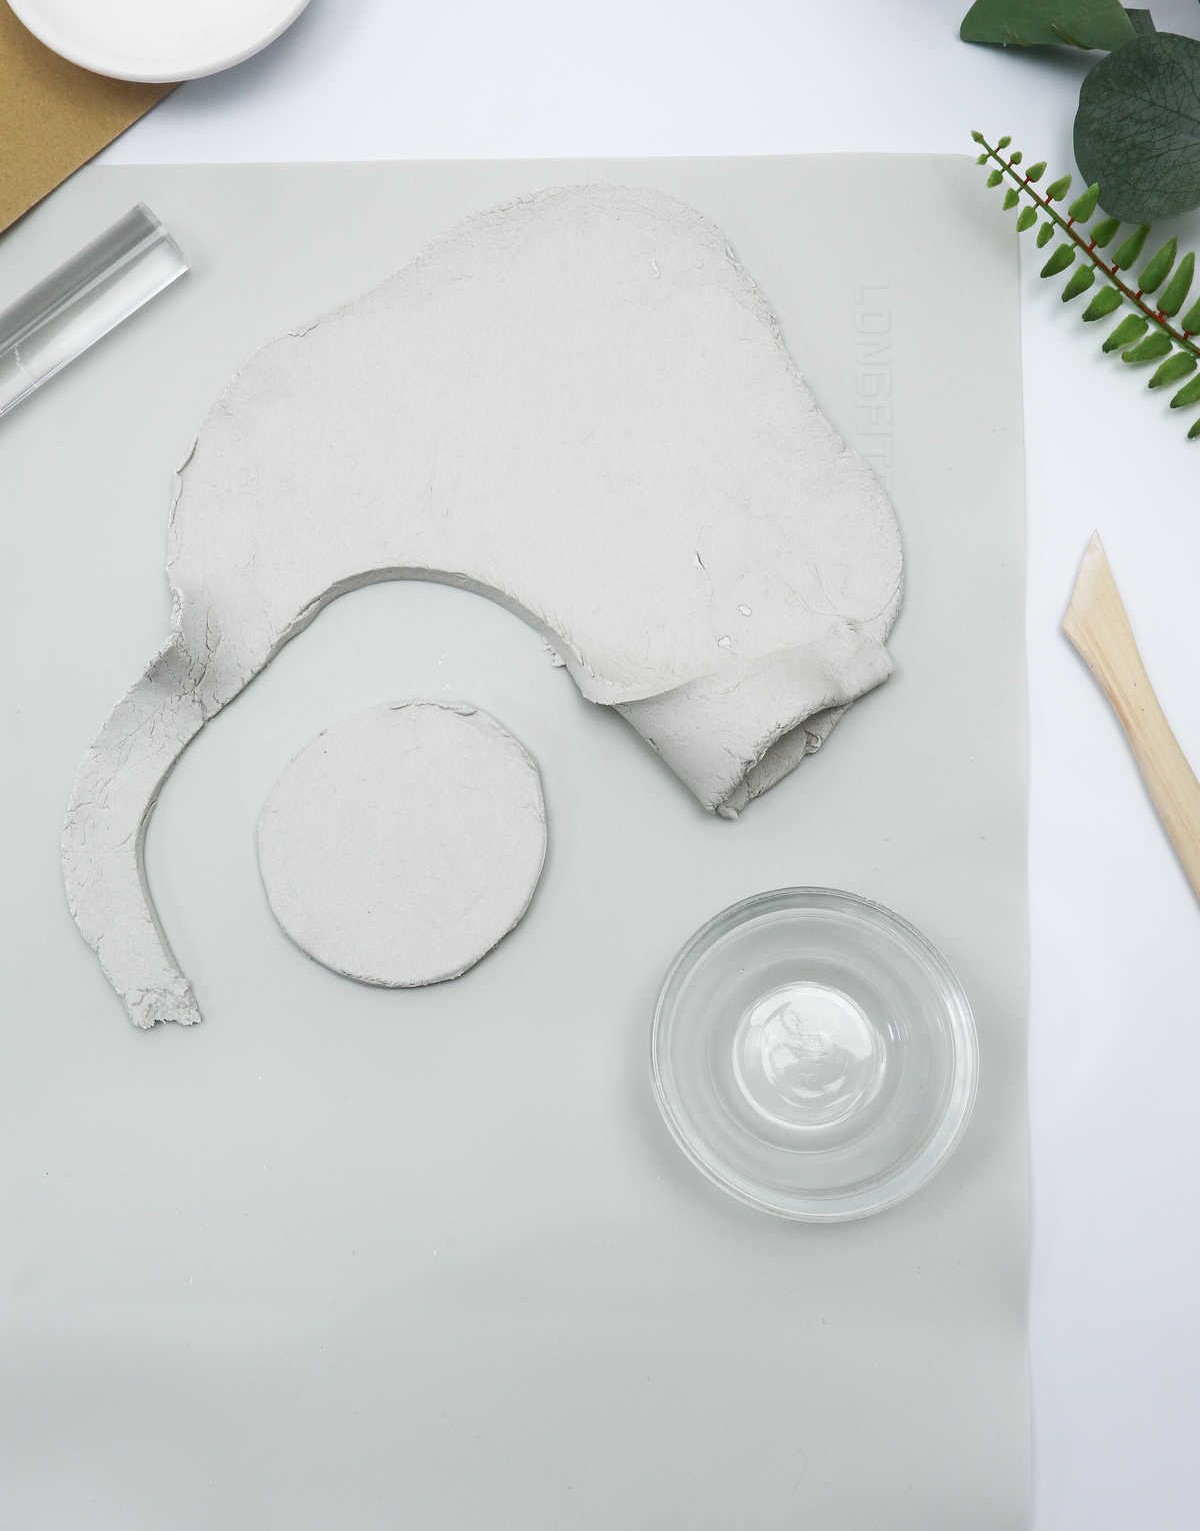
To create your ceramic piece, start by placing a bowl upside down onto the clay. Next, use a craft knife or cutter to carefully cut around the rim of the bowl, creating a precise outline. This will serve as the mold for your design. Once you’ve cut along the edge, gently peel away any excess clay from the surface, setting it aside for later use.
Step 4
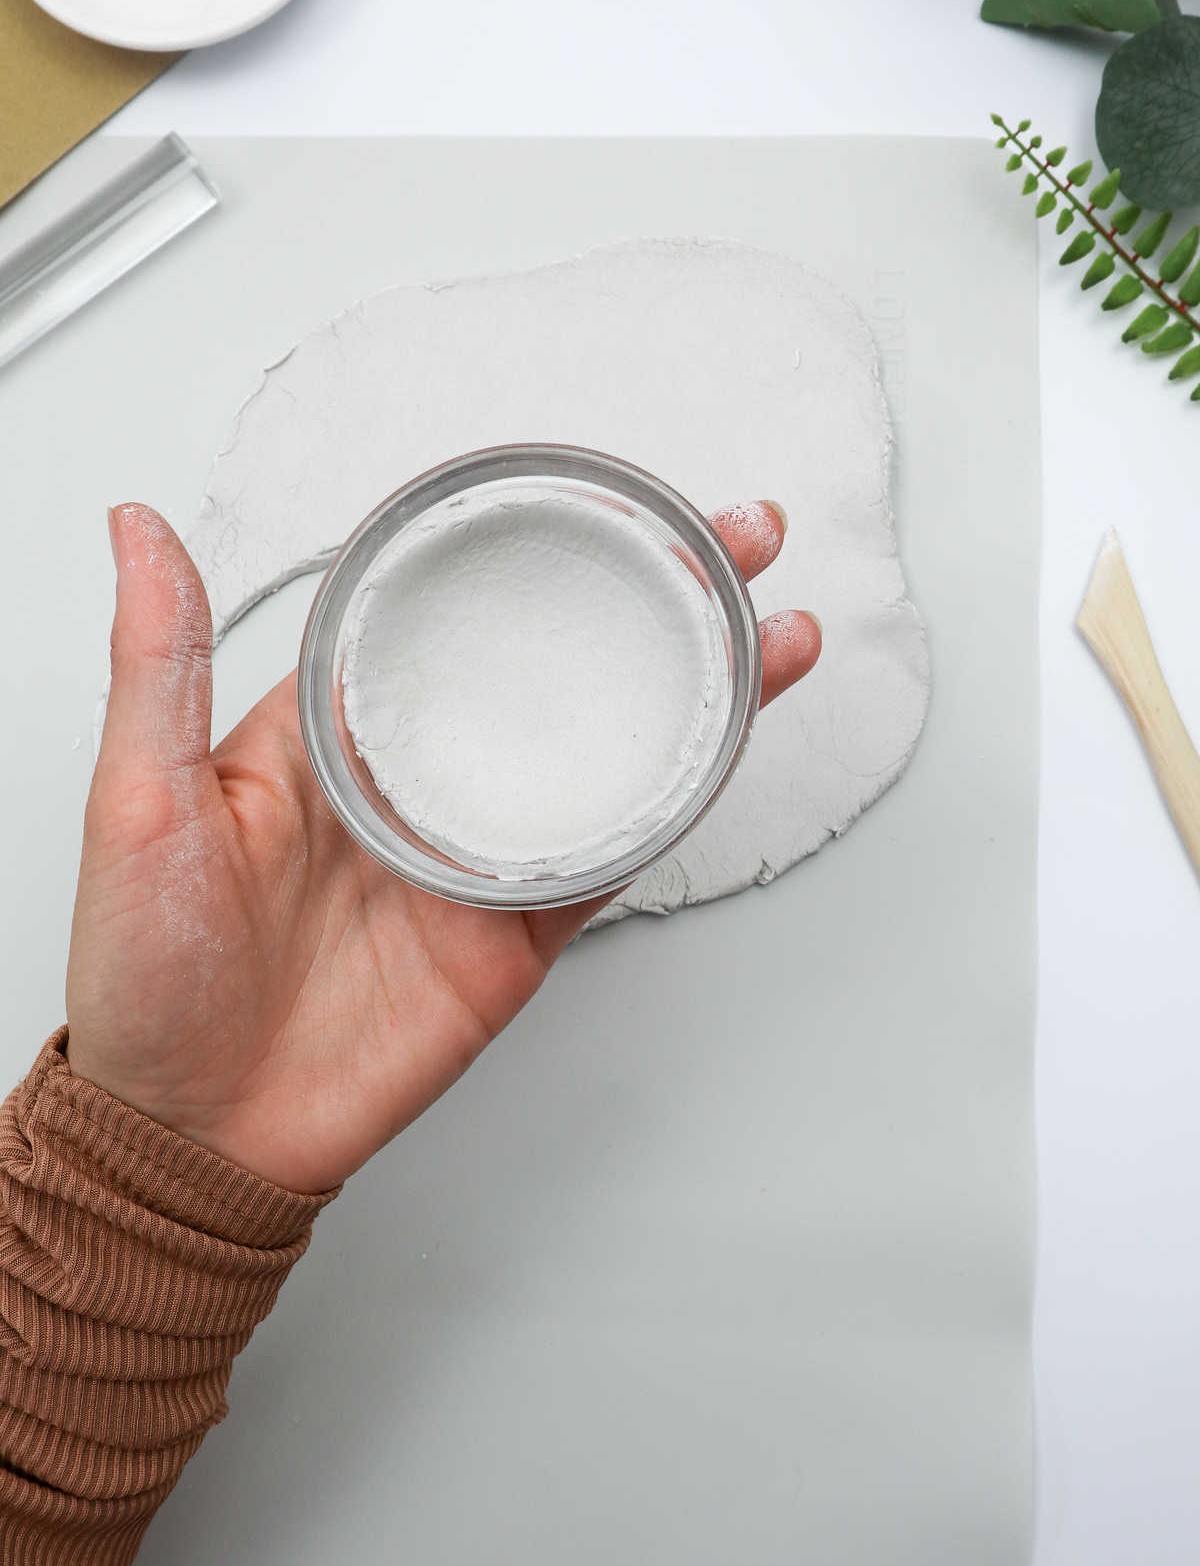
Gently place the clay into the bowl and apply gentle pressure to ensure it’s evenly distributed. Be mindful not to press too hard, as this can result in unwanted fingerprints on the surface.To effortlessly smooth out any rough edges or cracks that may emerge, simply moisten the tip of your finger with a small amount of water and gently rub the area. However, be cautious not to add too much moisture, as excessive wetness can cause the clay to become sticky and difficult to work with.
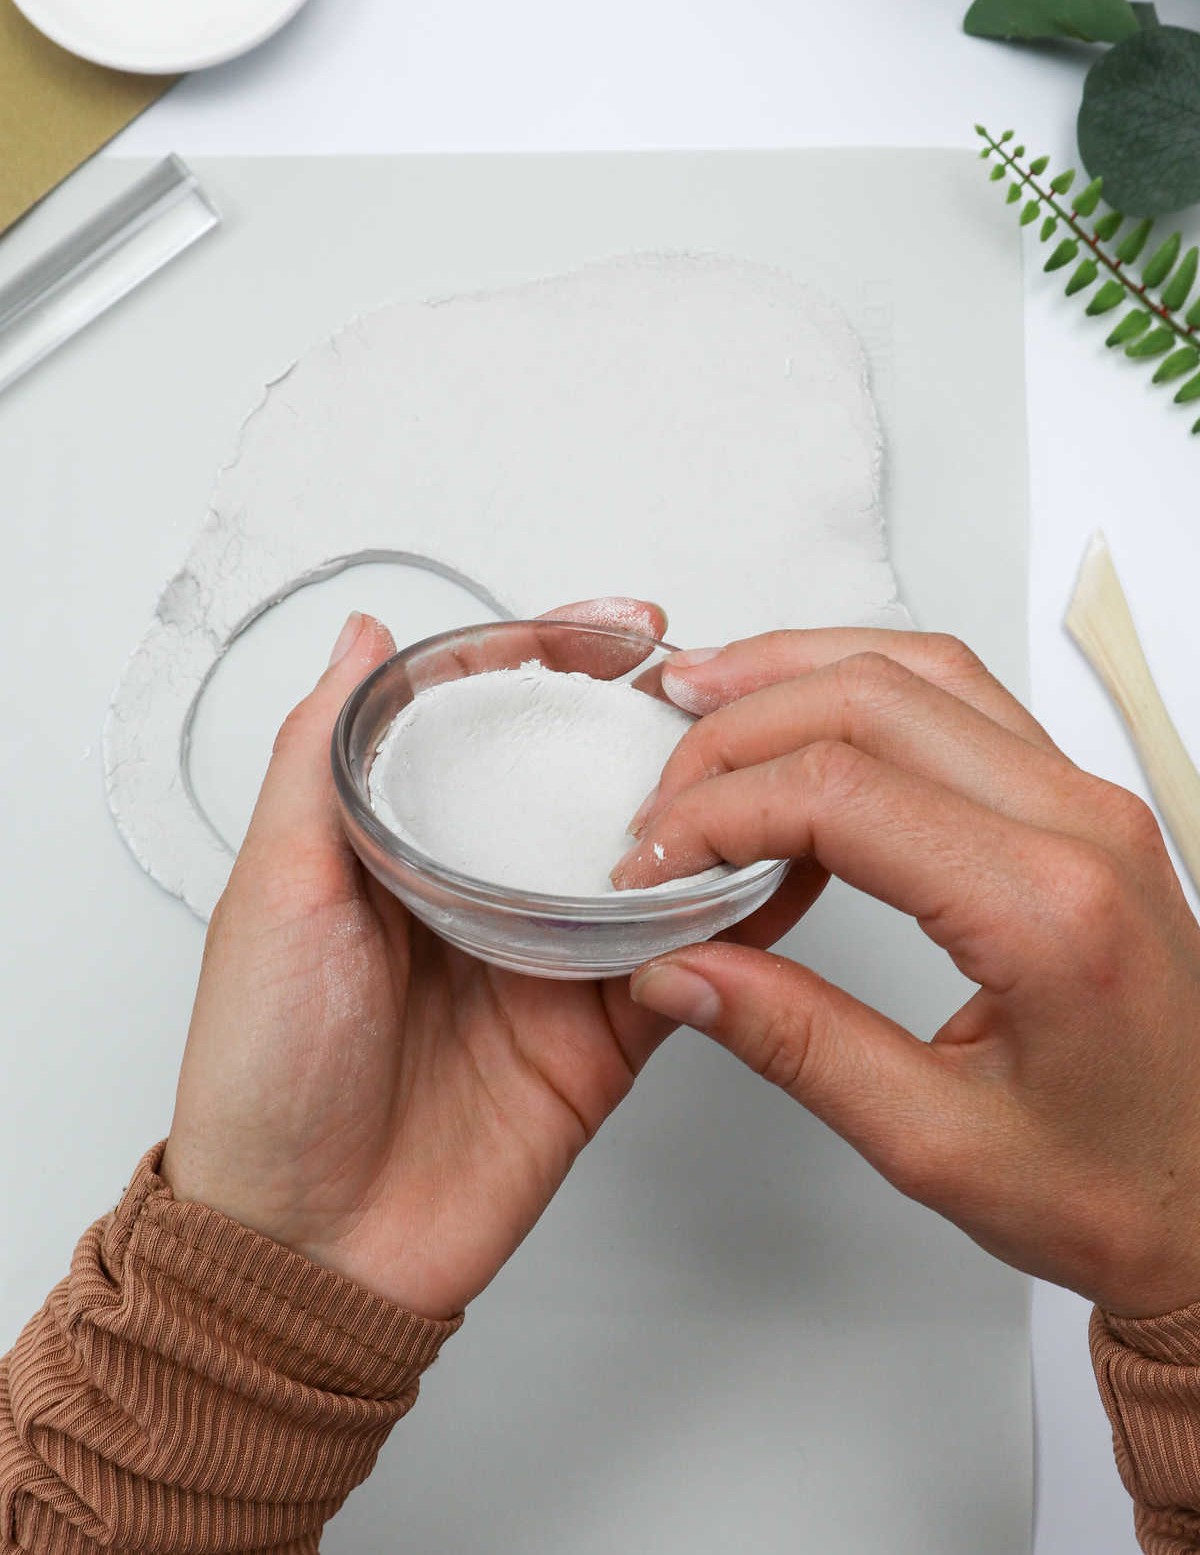
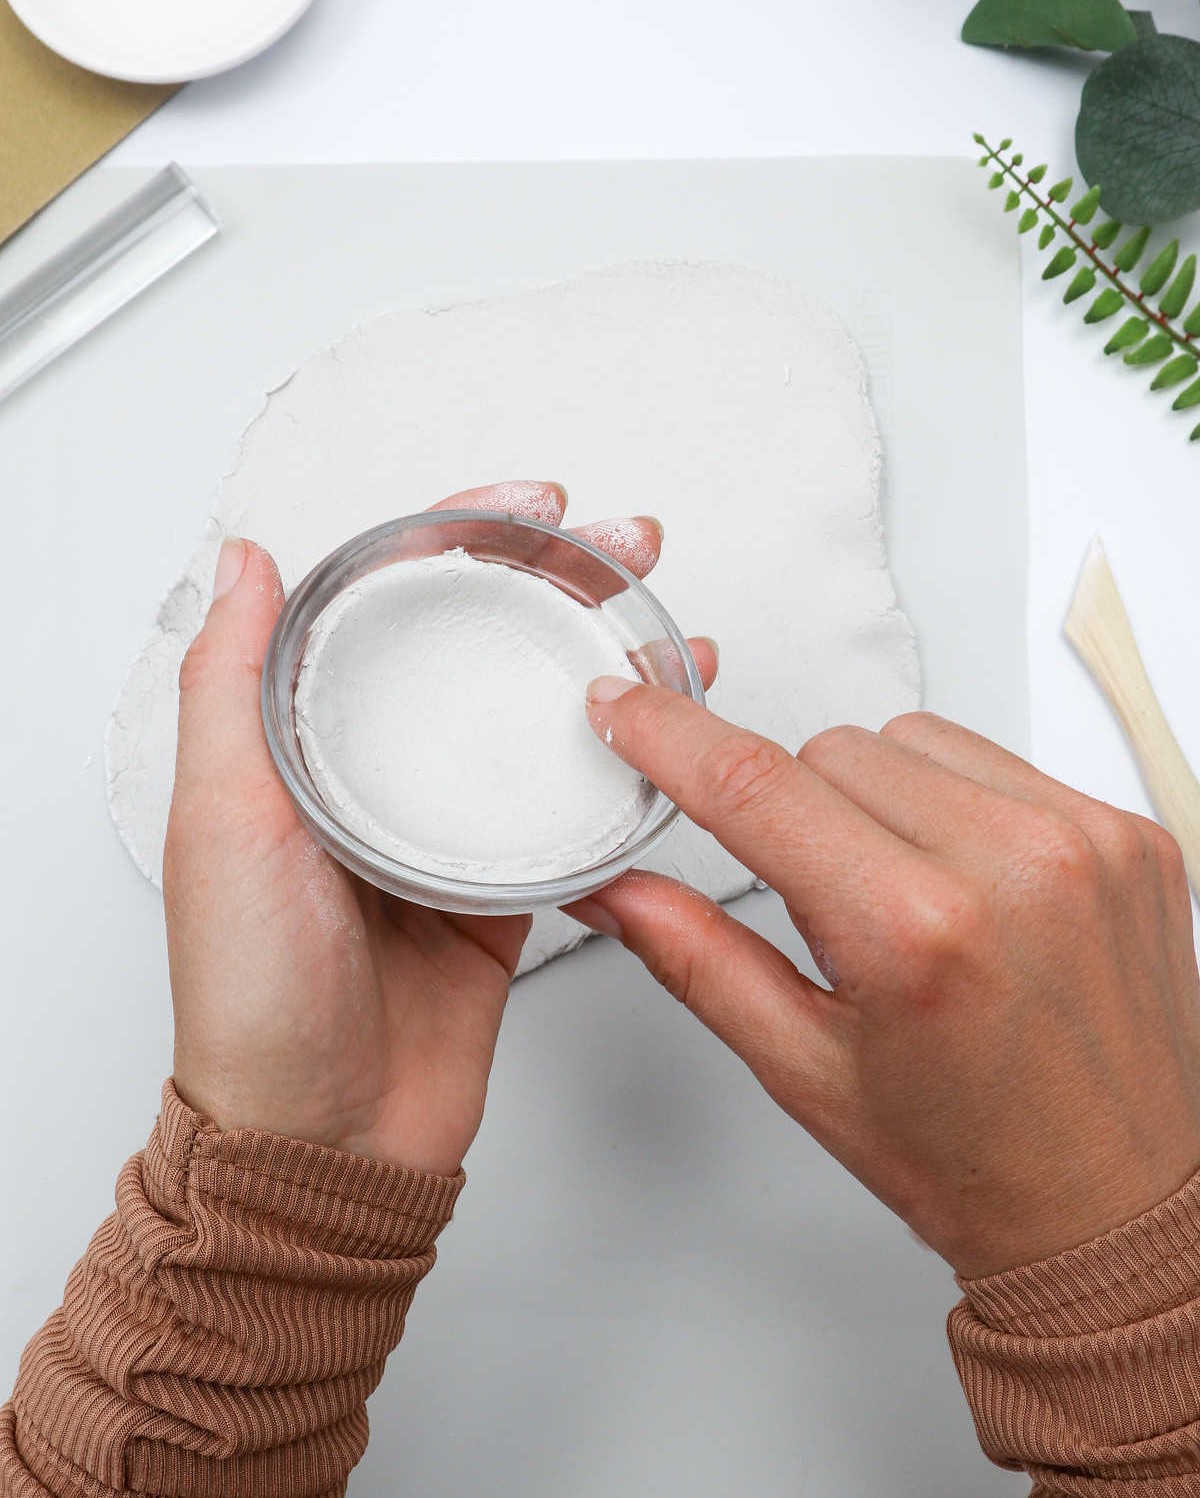
Step 5
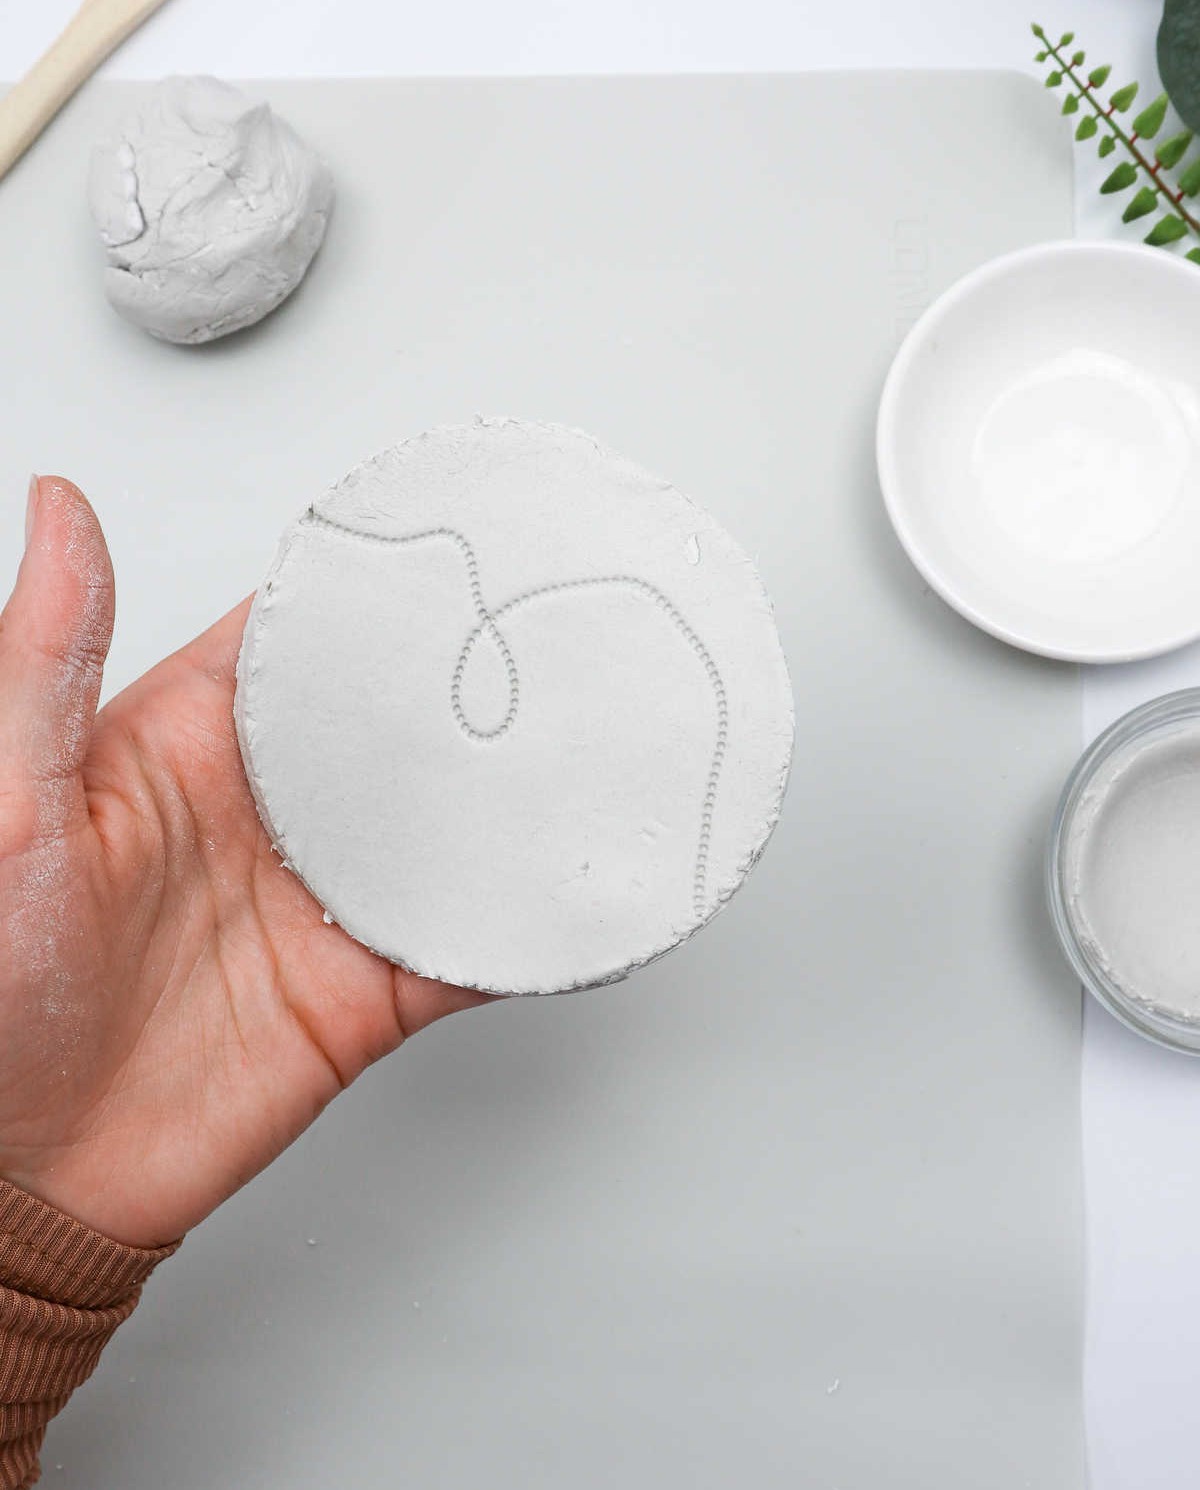
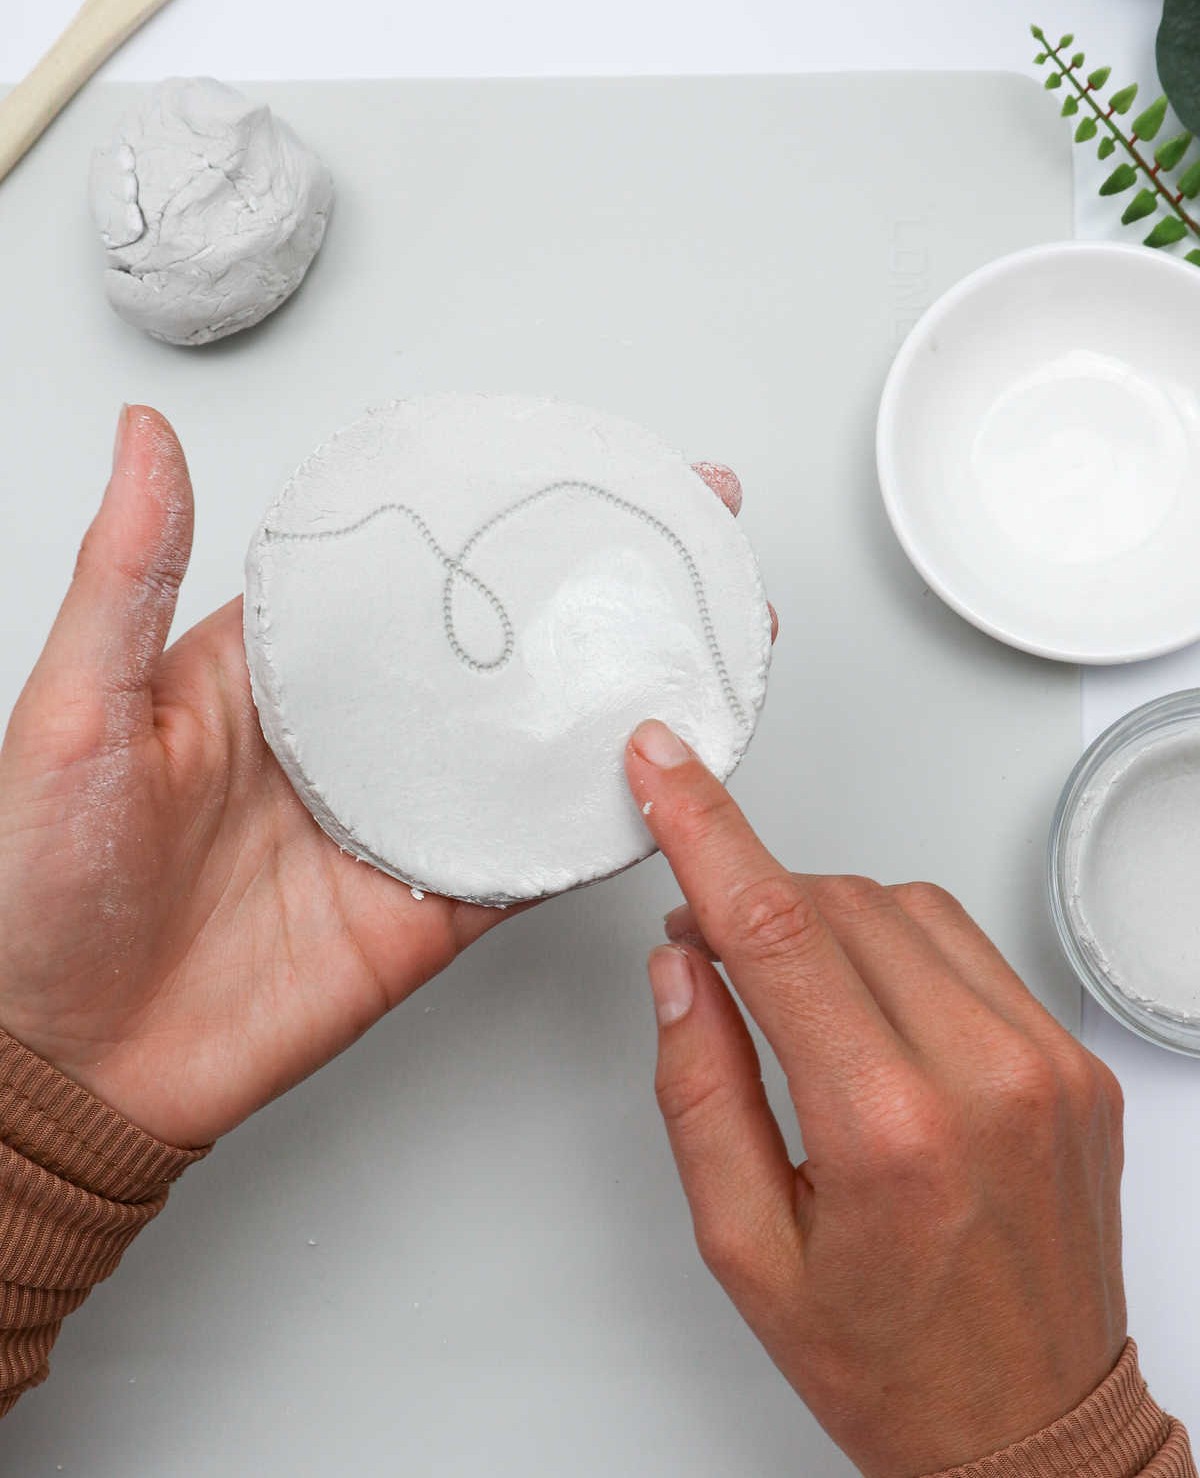
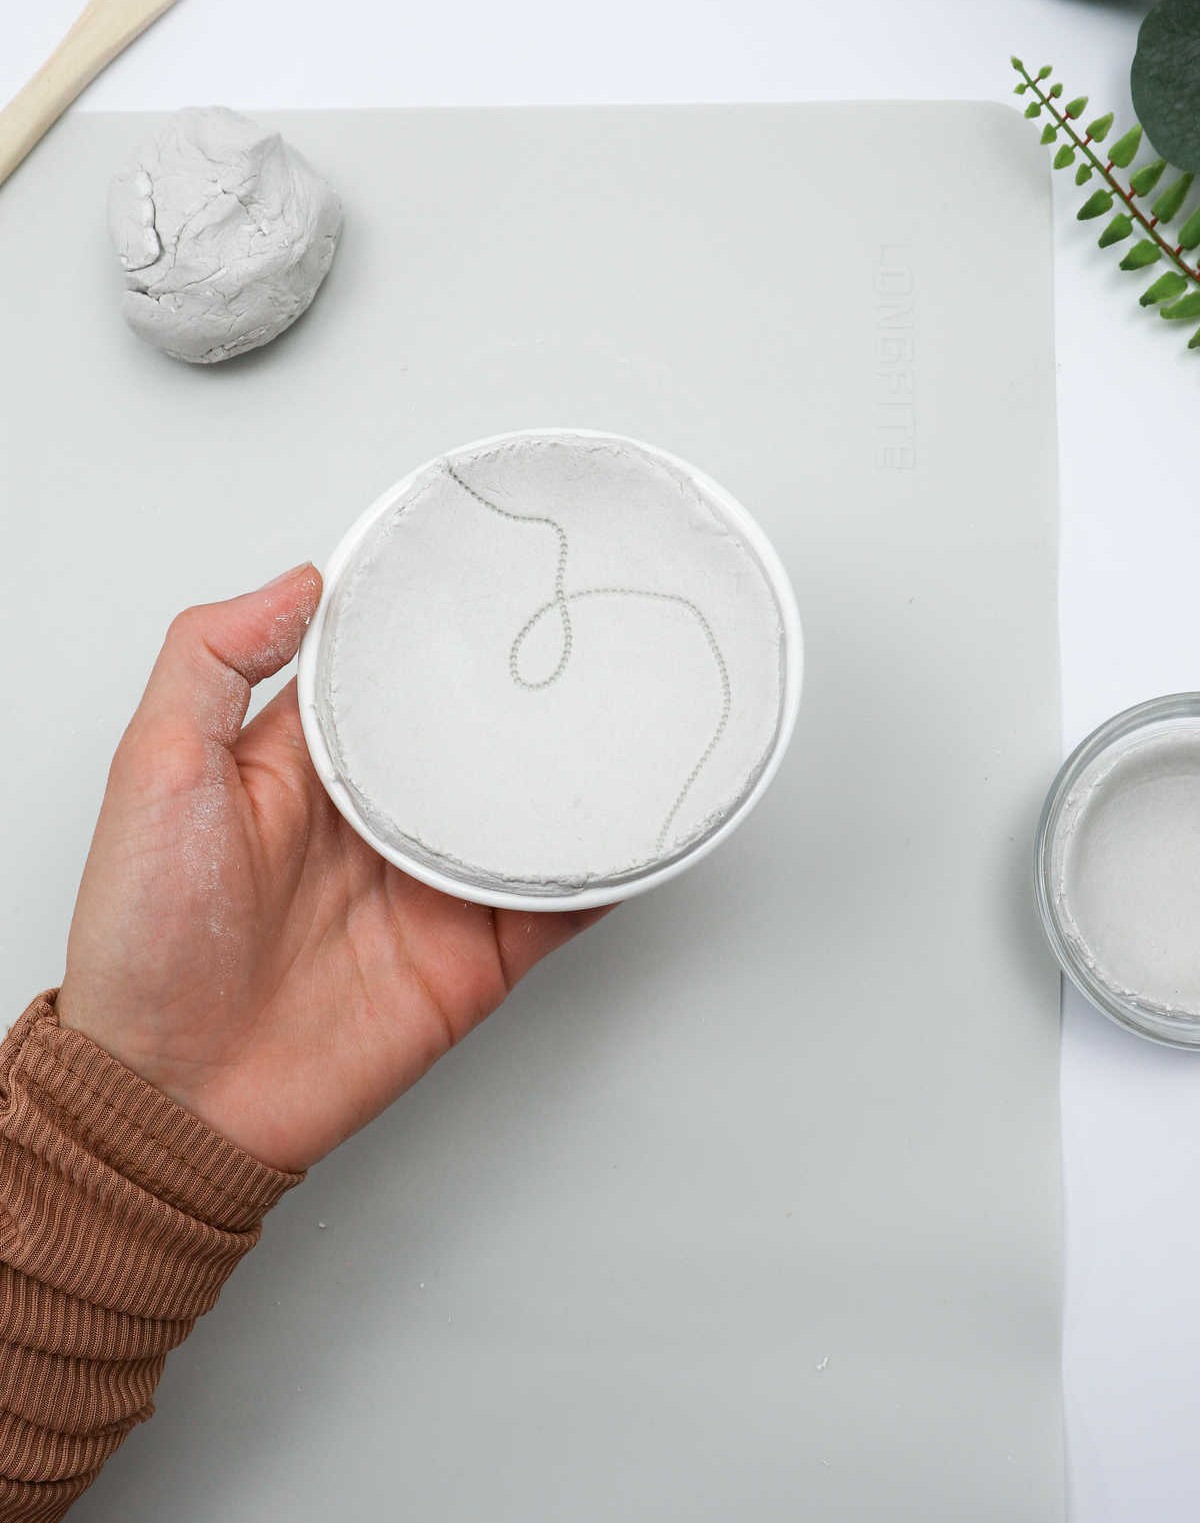
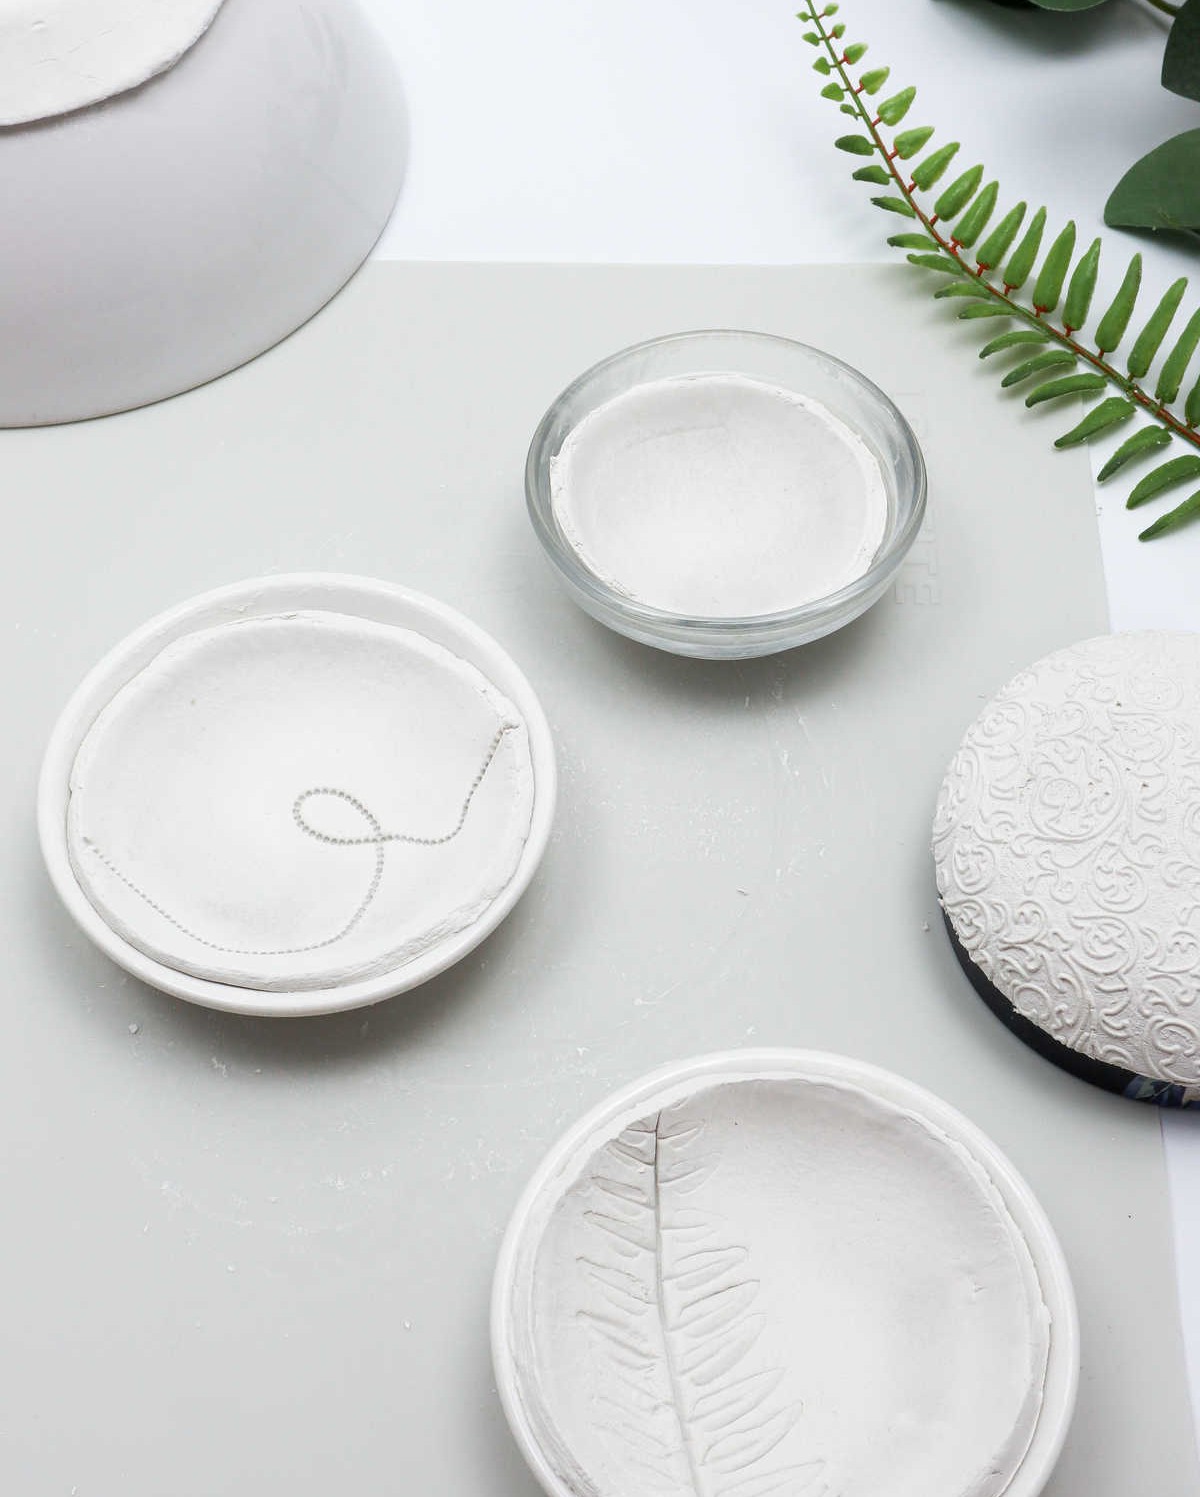
With the fundamental techniques mastered, it’s time to add some visual flair to our creations! By incorporating various designs and patterns, we can take our simple bowls to the next level. To do this, let’s start by setting aside a small portion of clay. Next, grab a length of chain and use a rolling pin to gently press it down into the set-aside clay, creating an intricate pattern.
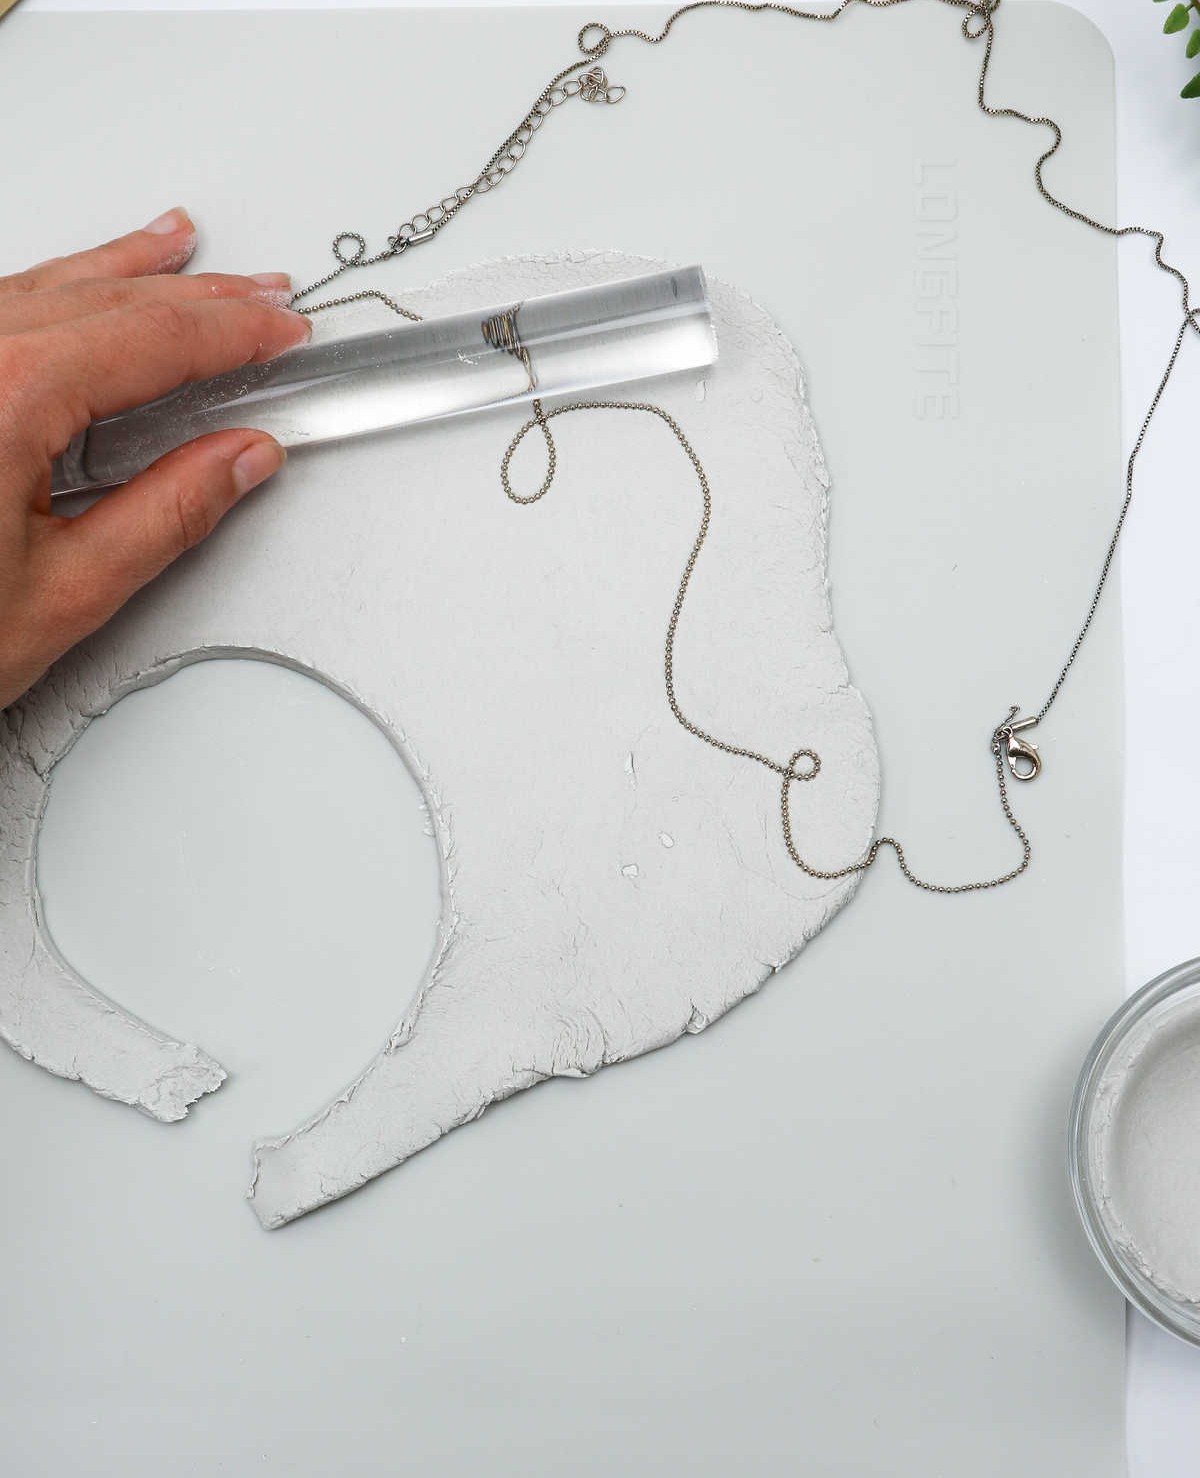
Step 6
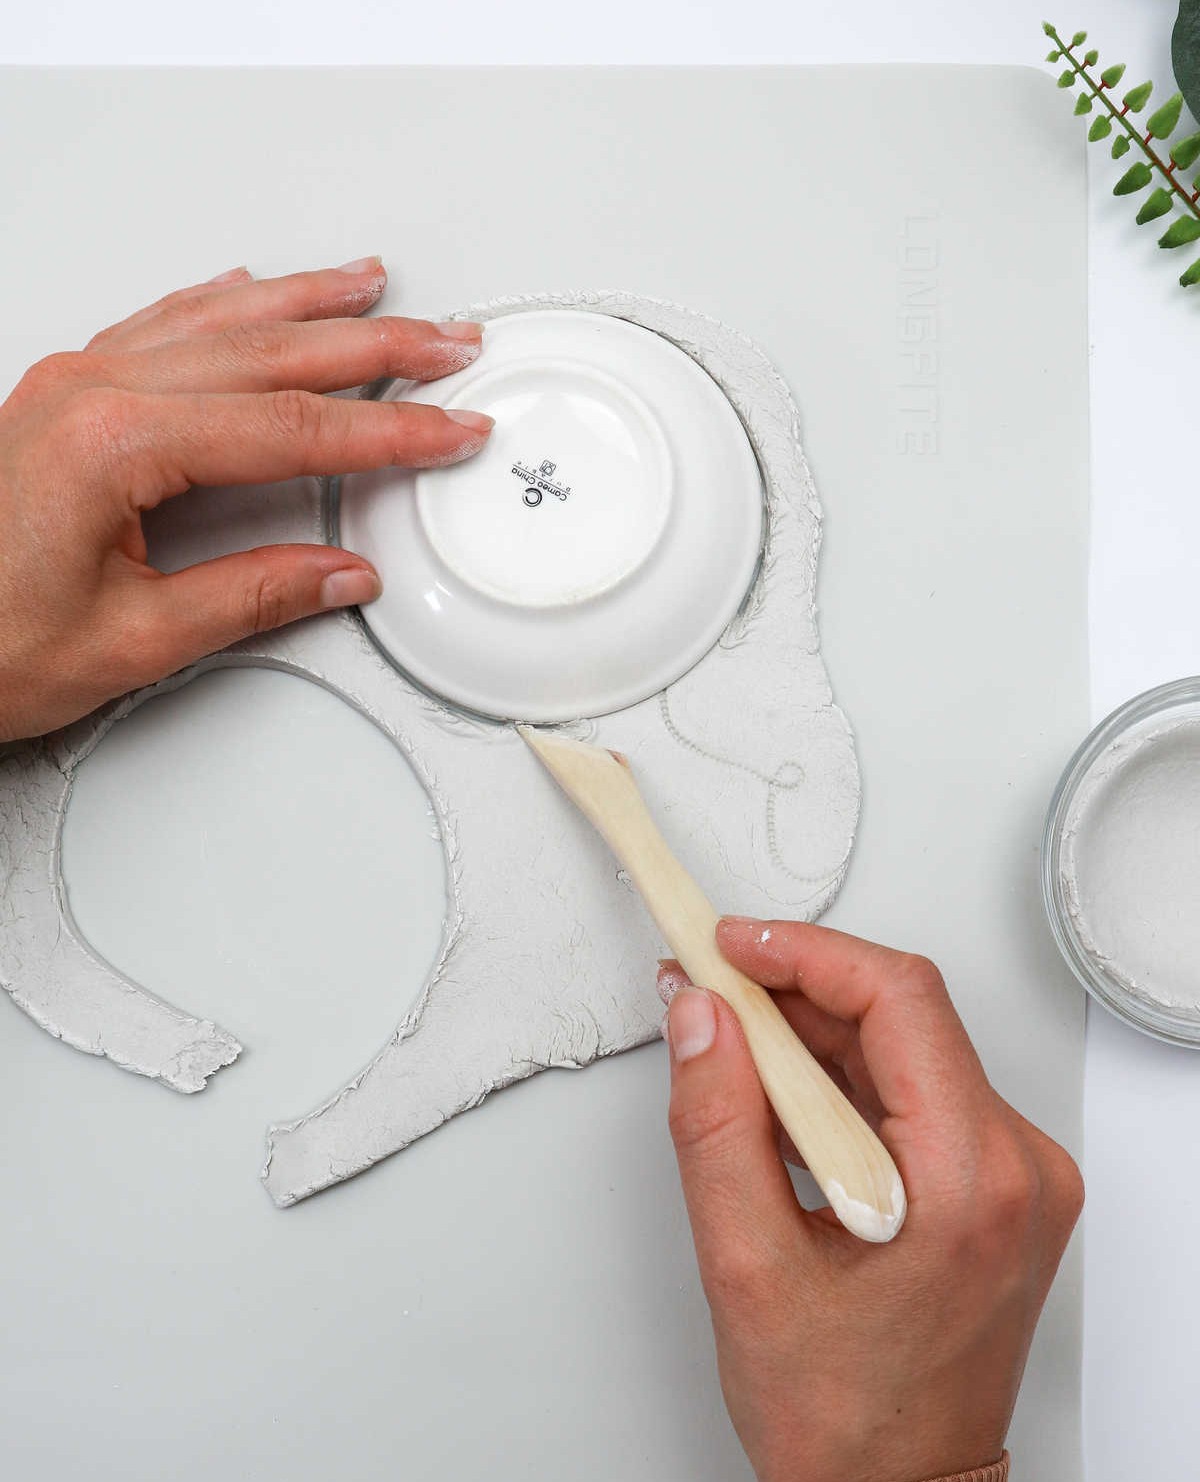
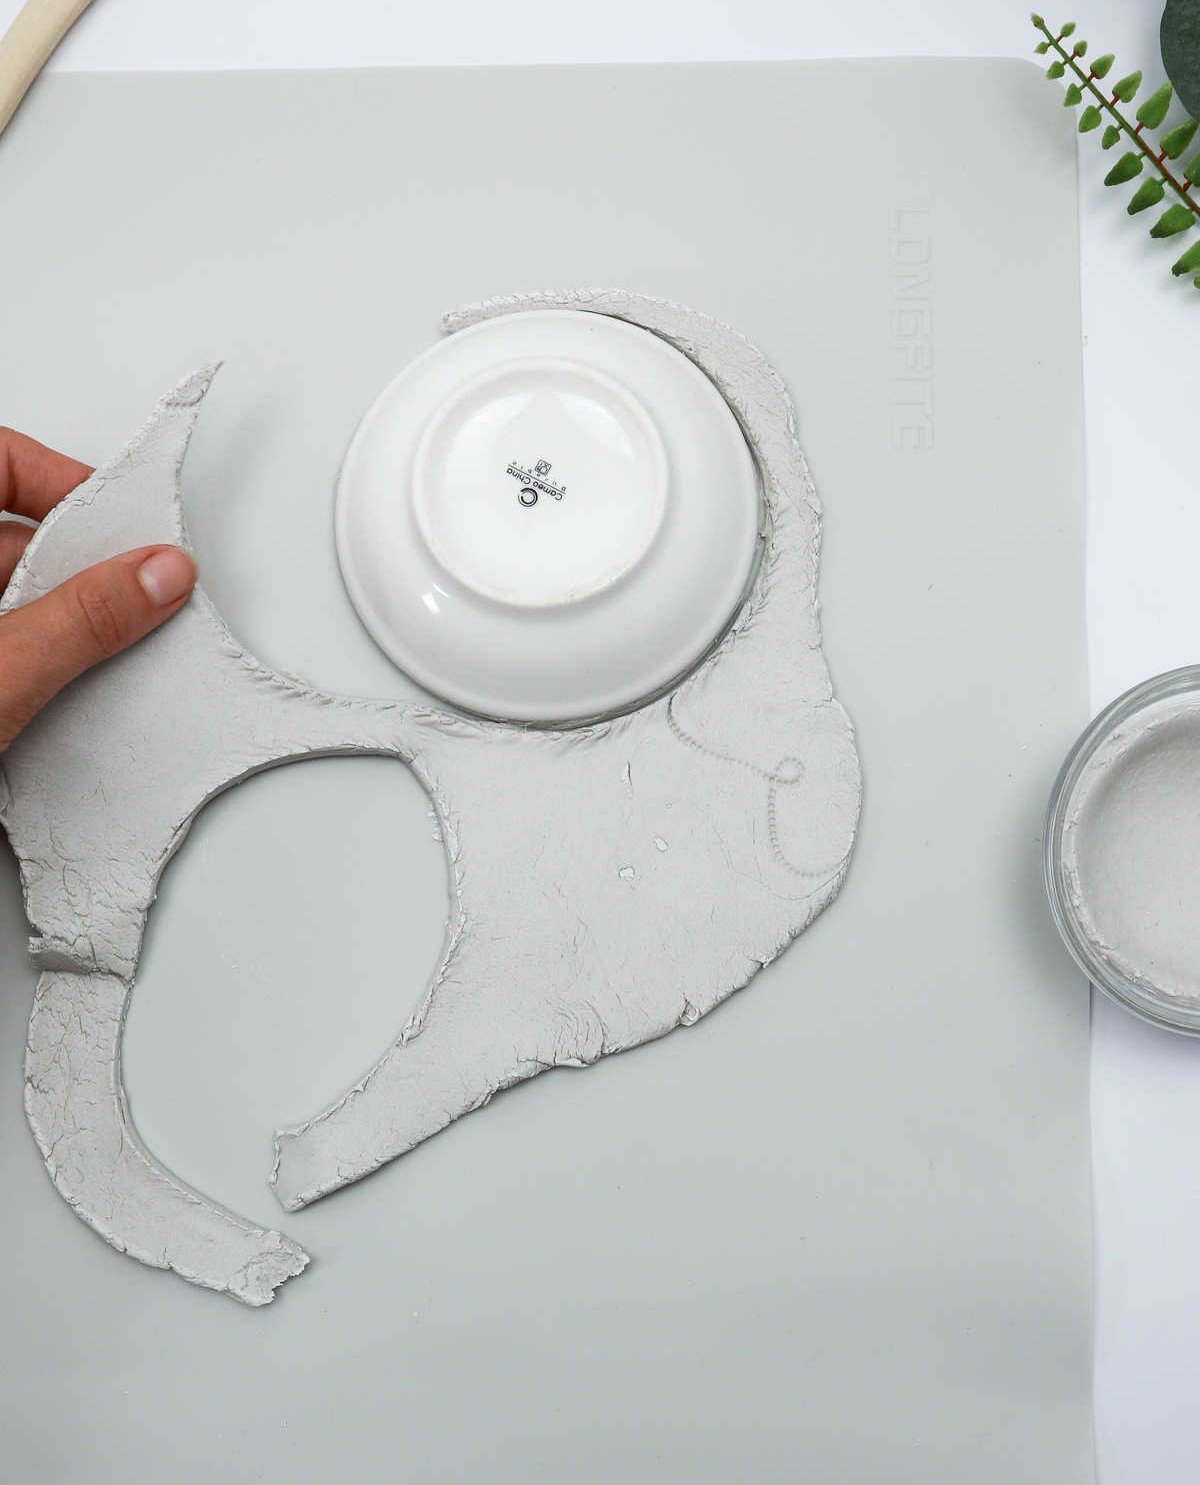
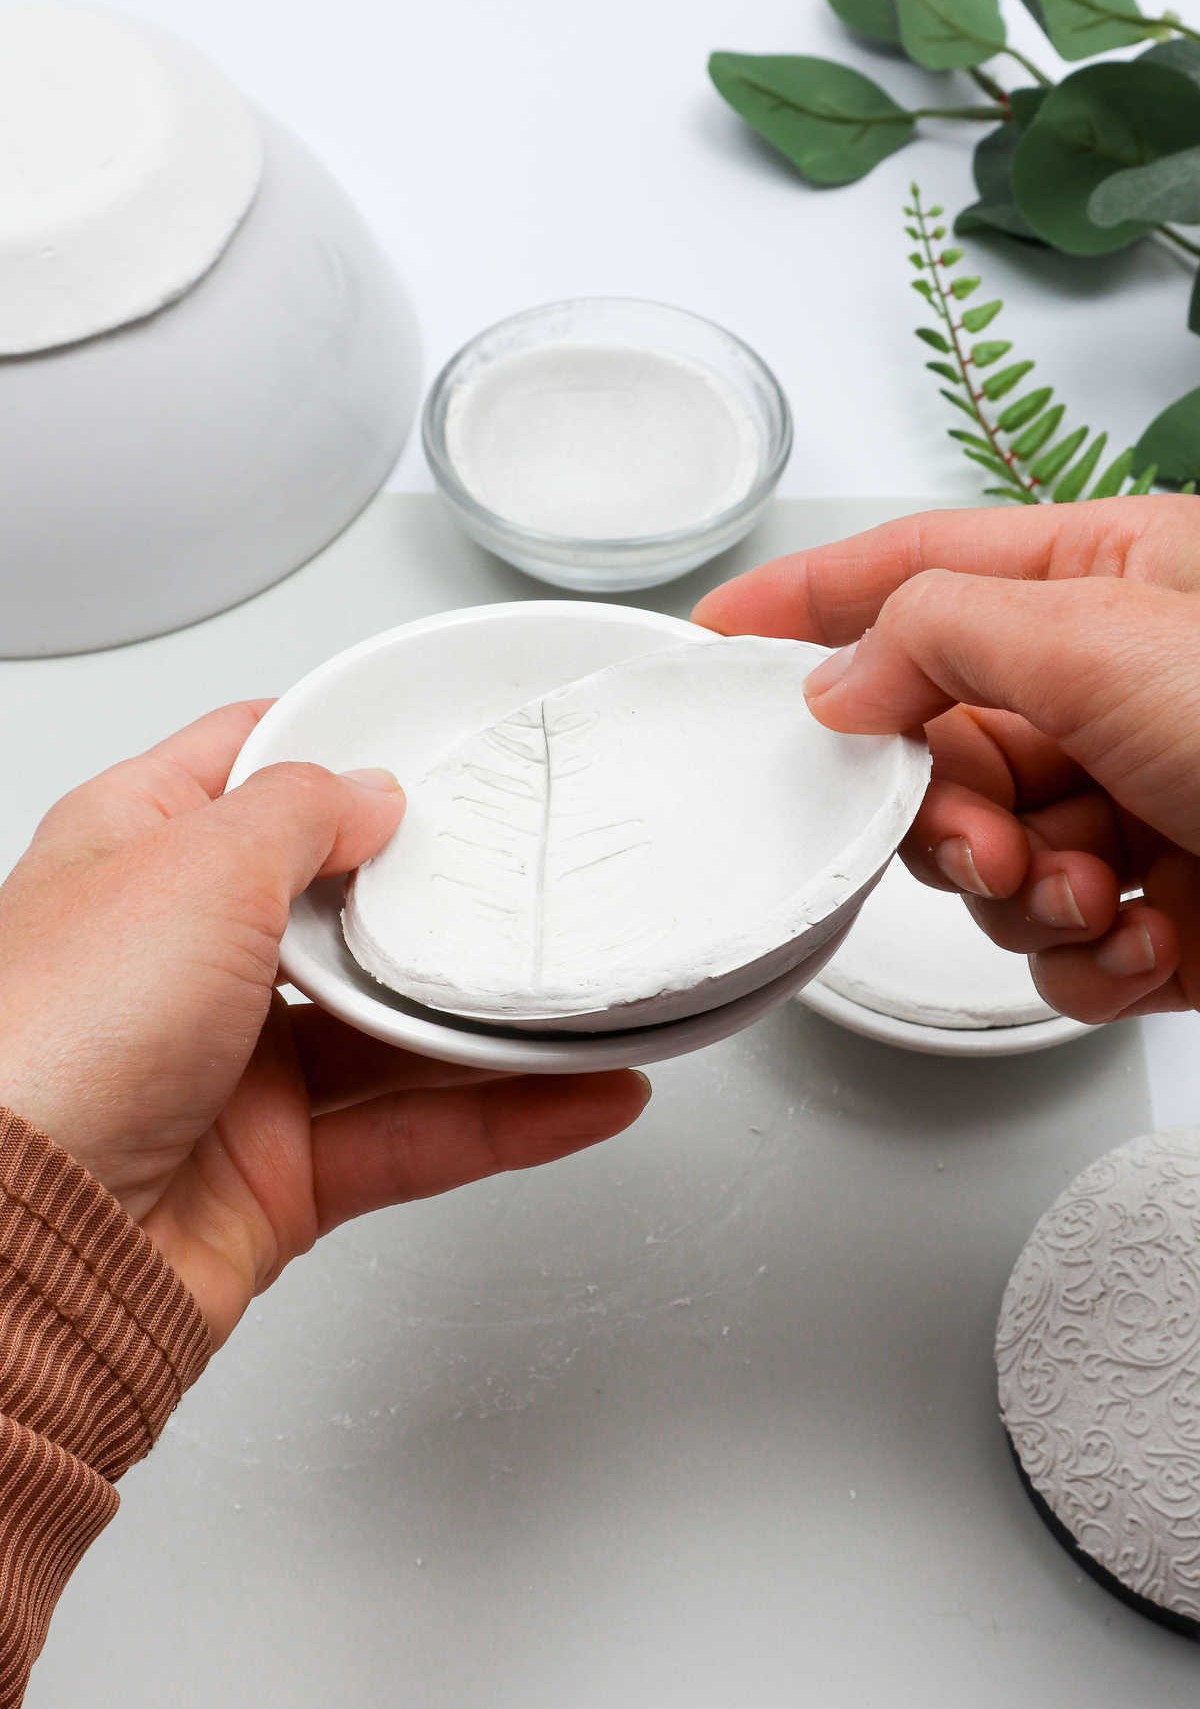
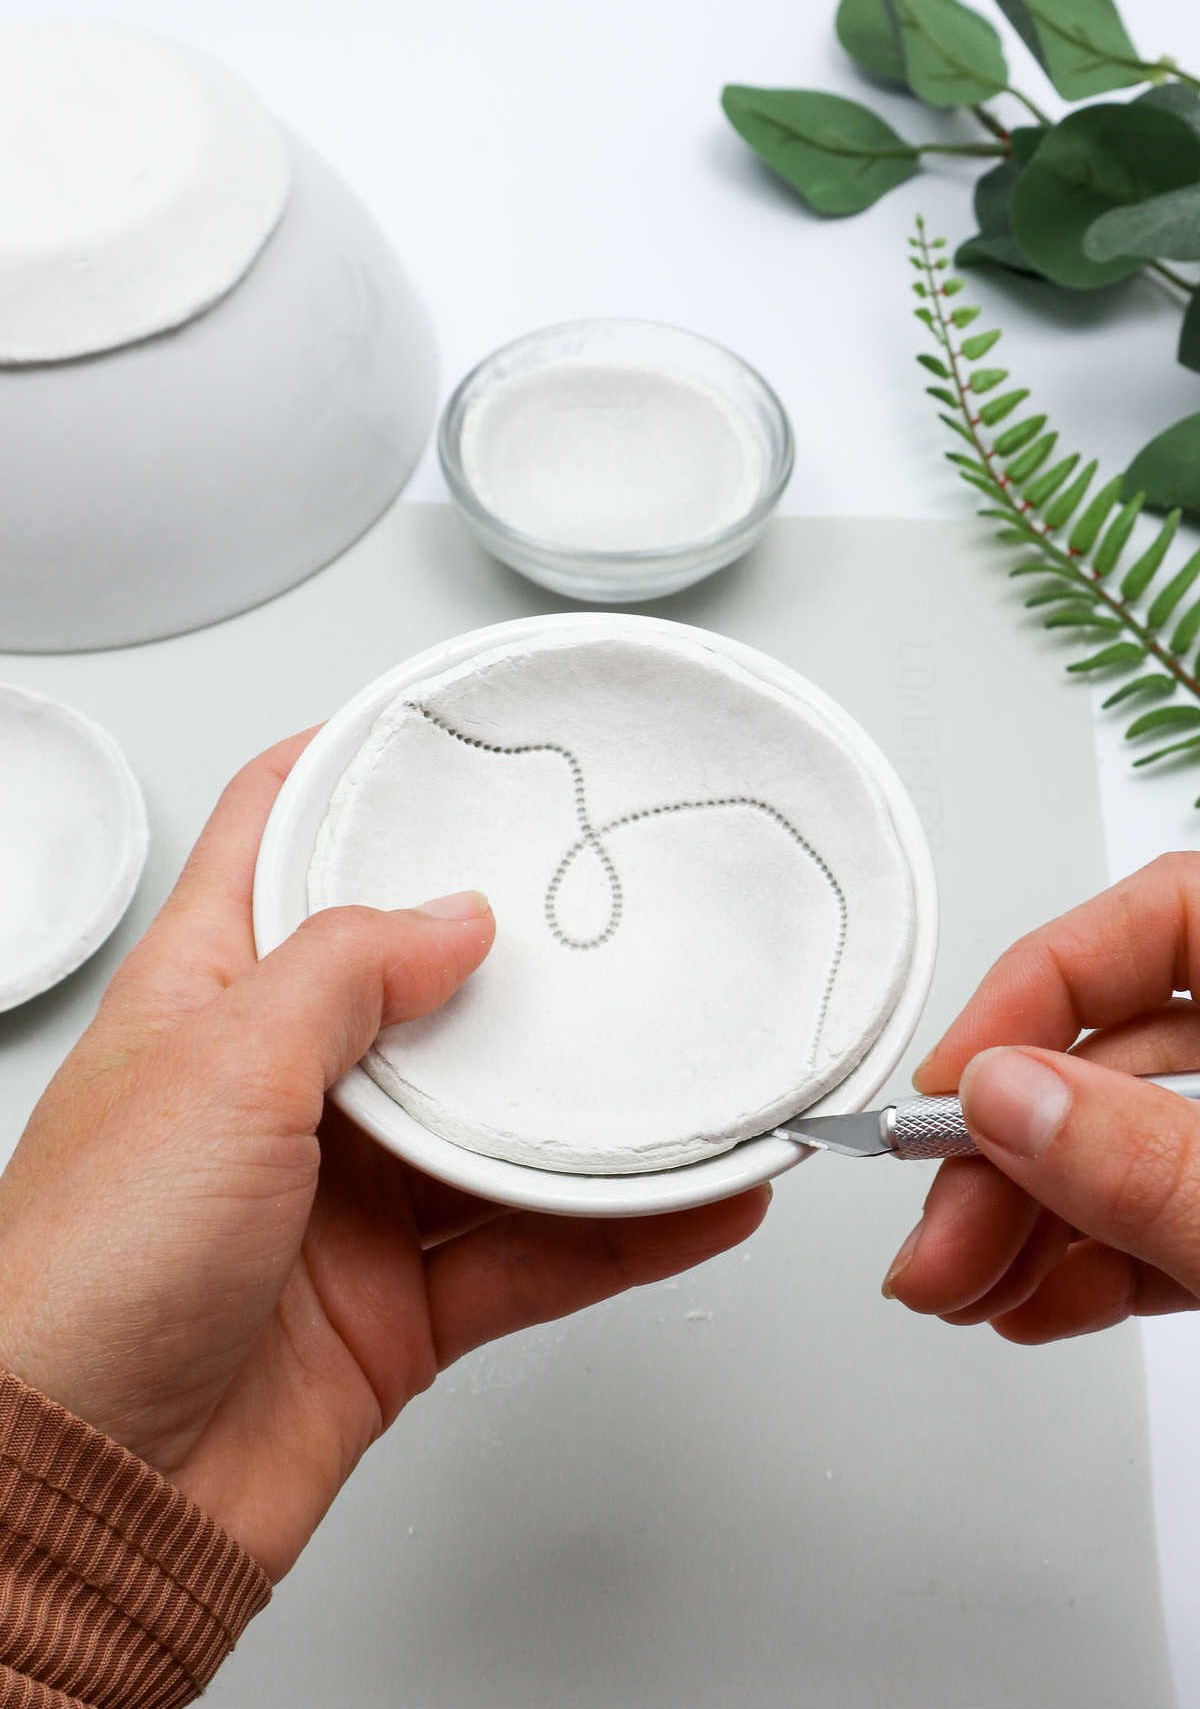
To create the desired shape, place another bowl on top of the molded clay, with its rim aligned with the imprint. Using a cutter or similar tool, trim the excess clay around the rim, leaving a smooth edge.
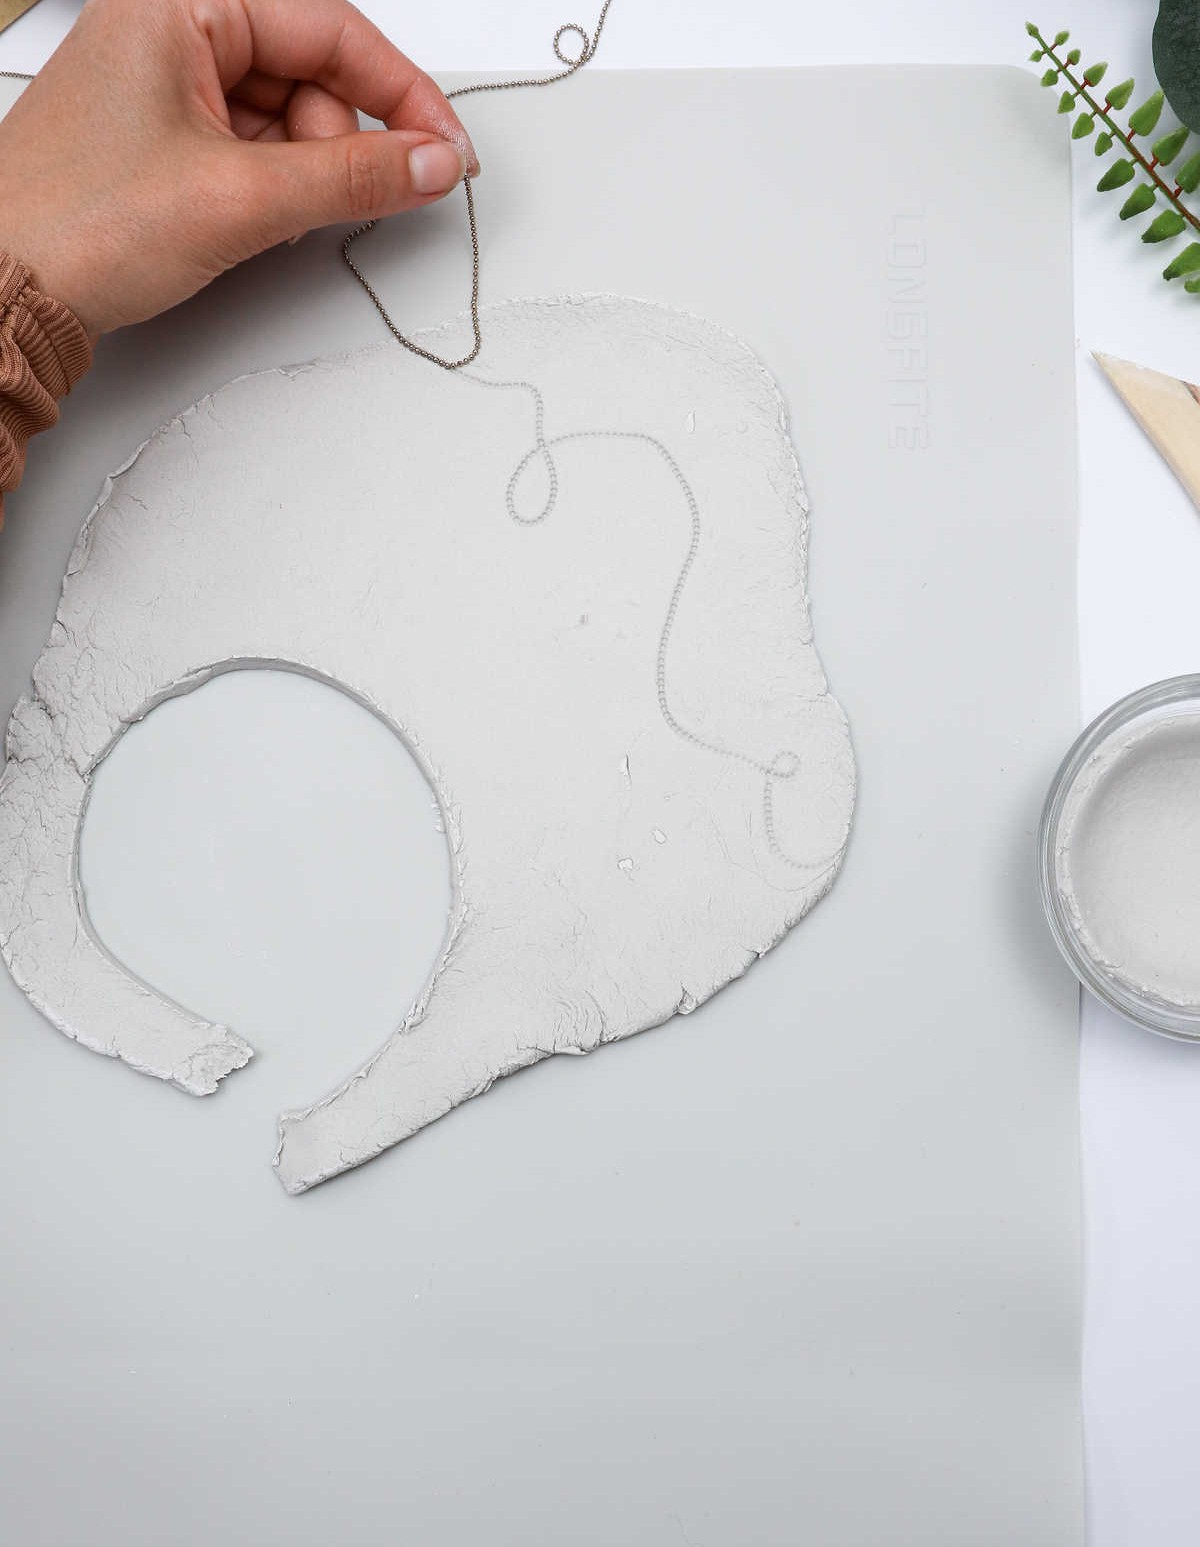
Next, carefully remove the excess clay from the bowl by gently peeling it away.
To complete the process, use your fingers to carefully blend the embossed design into the bowl’s surface. If necessary, add a small amount of water to help fill in any cracks or imperfections.
Step 7
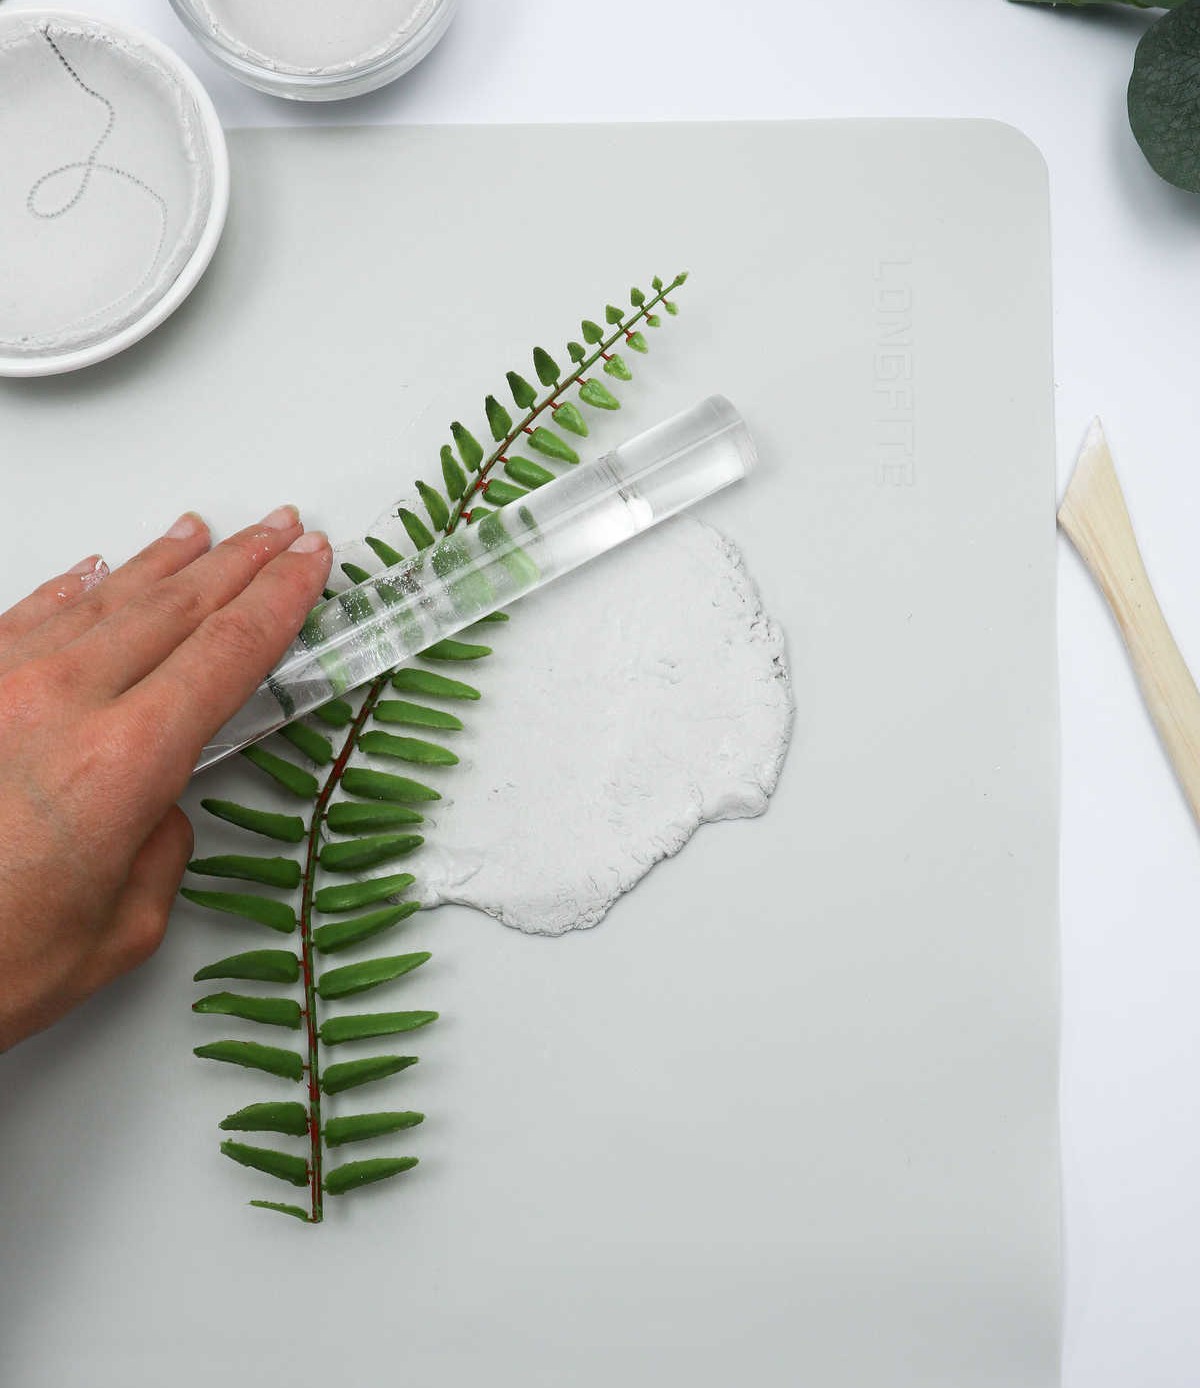
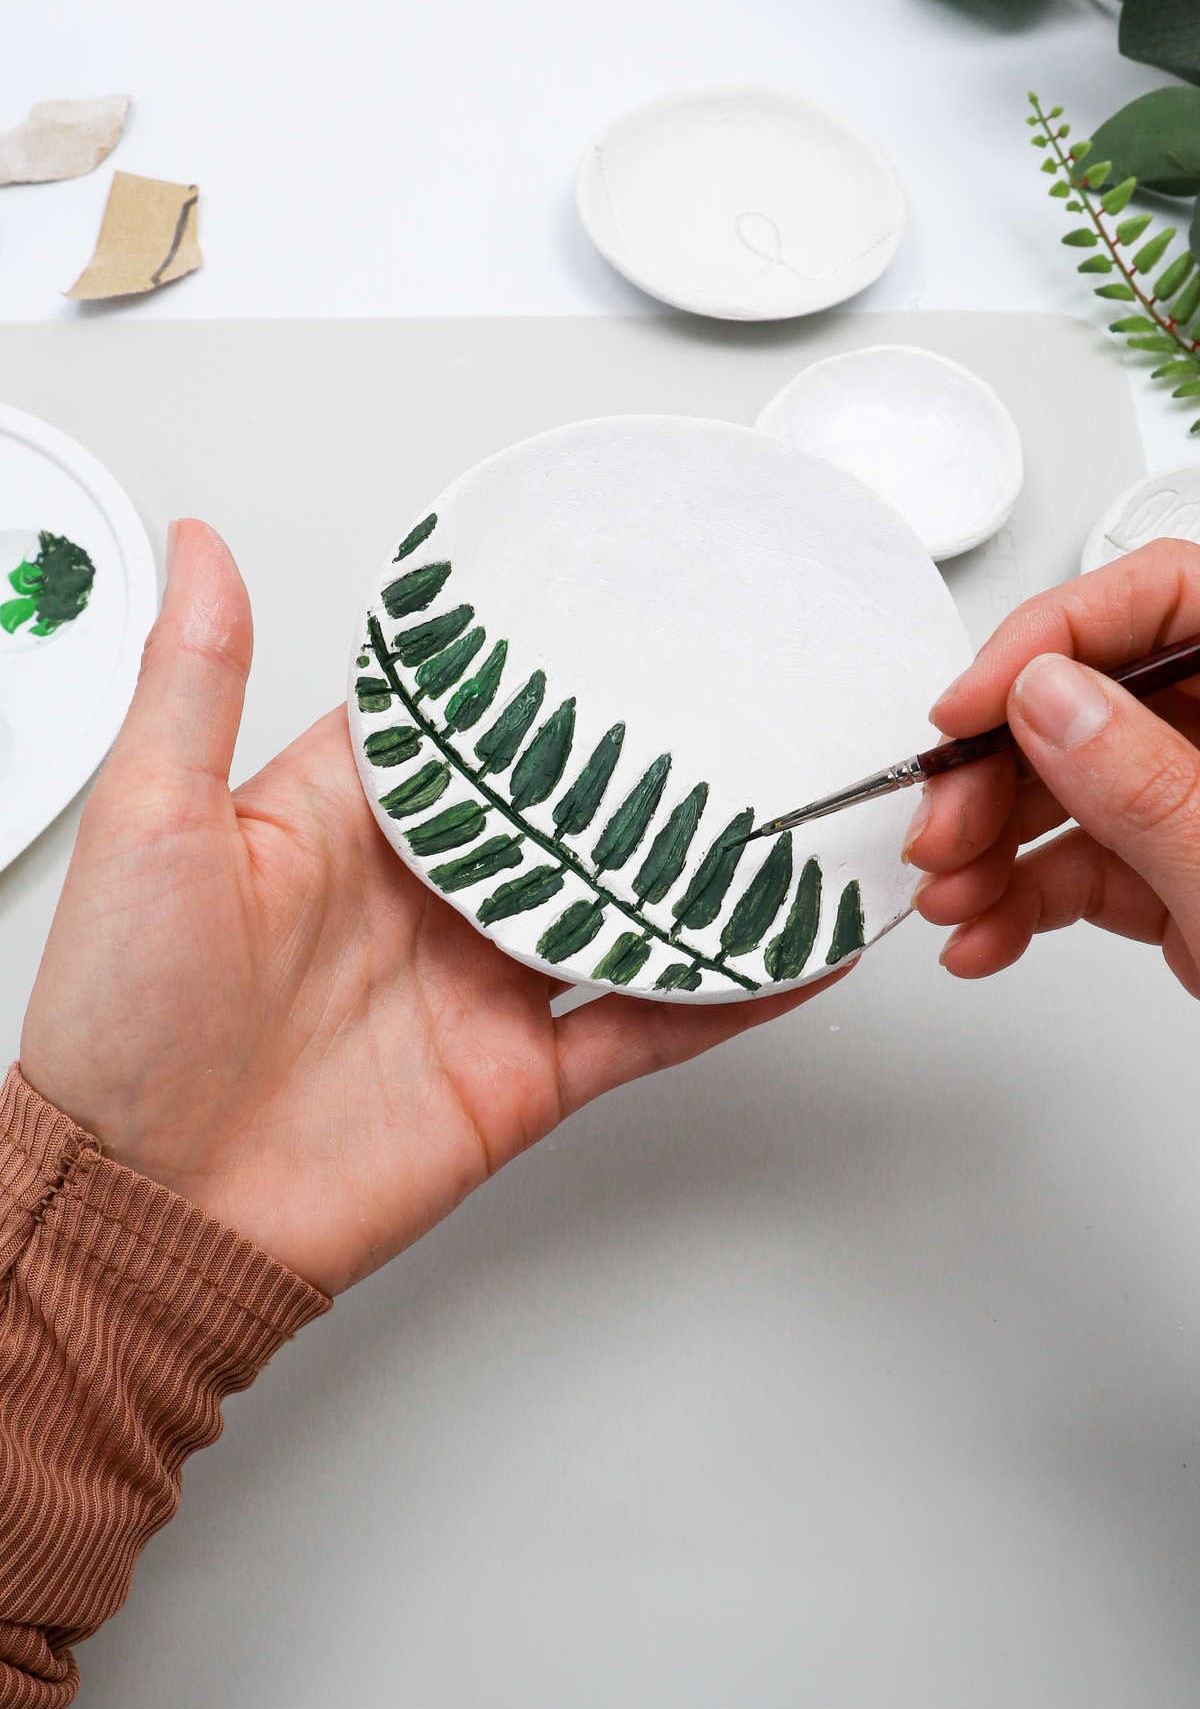
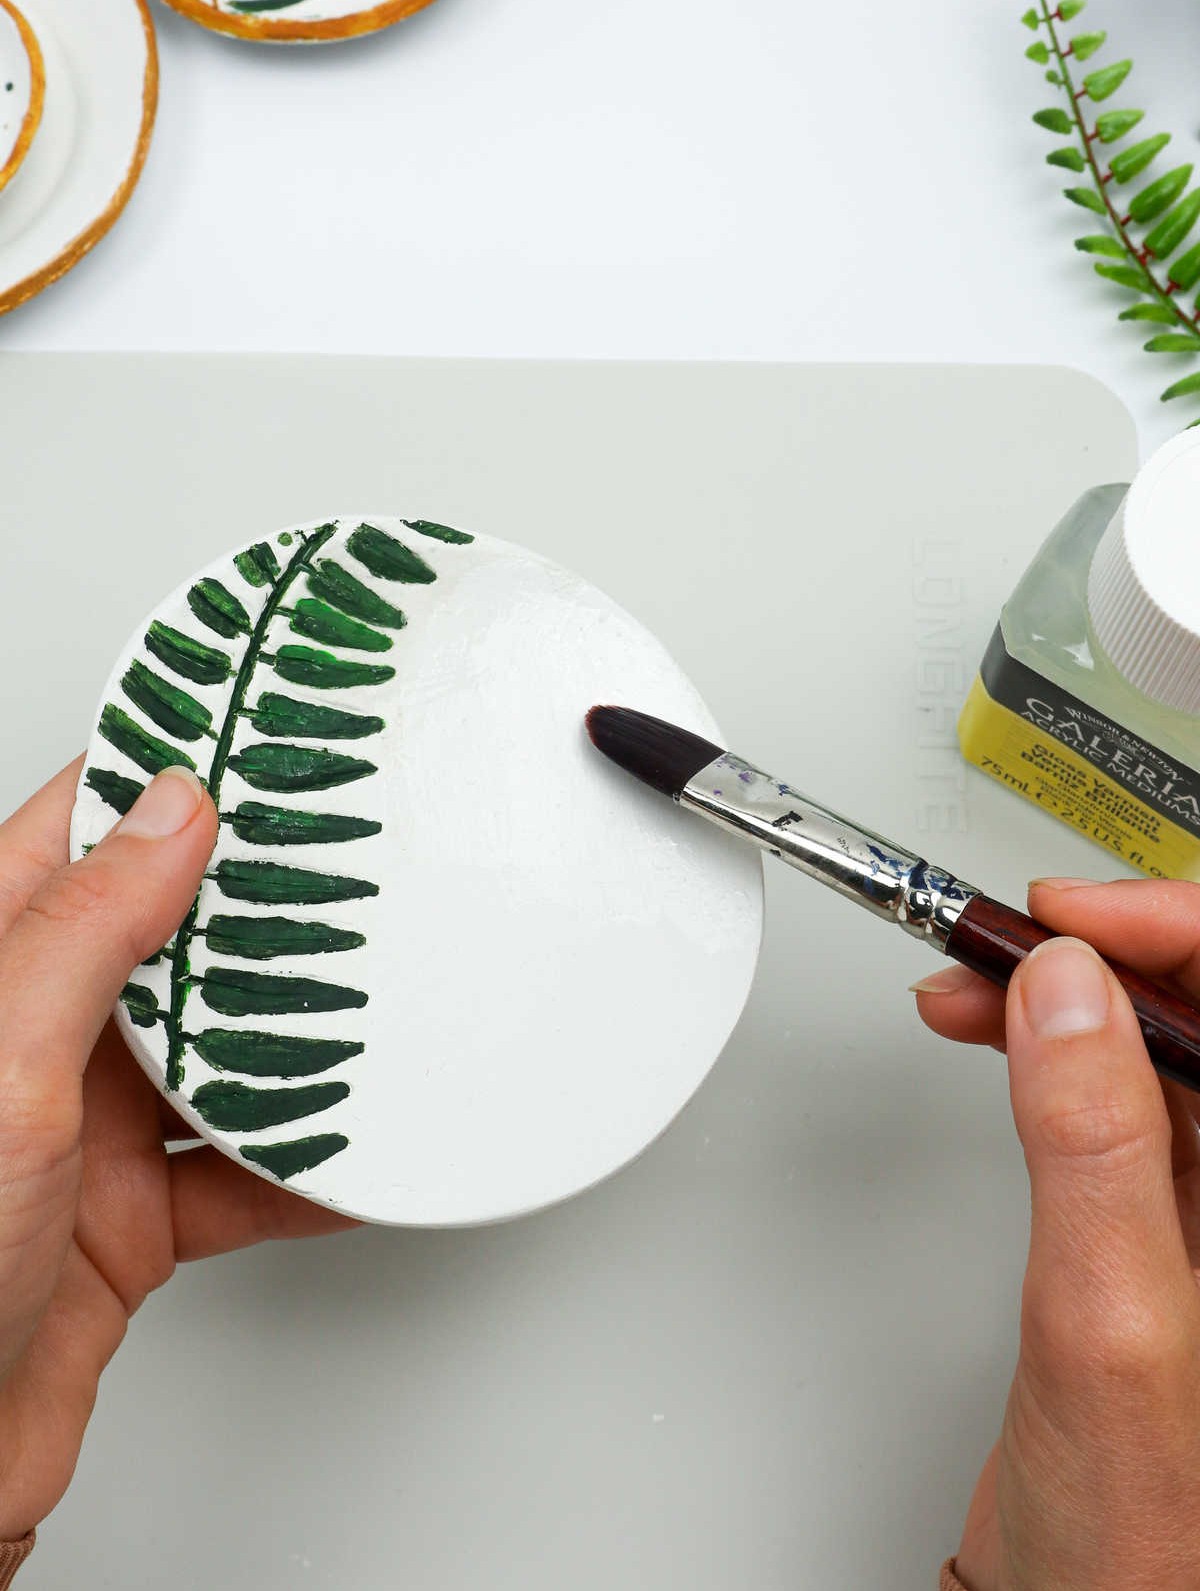
The third design is a timeless classic. To create this stunning piece, start by selecting a branch with lush leaves. As you gaze at the image, you’ll likely remember the process: take hold of the branch and gently press the leaf onto the clay using your trusty rolling pin.
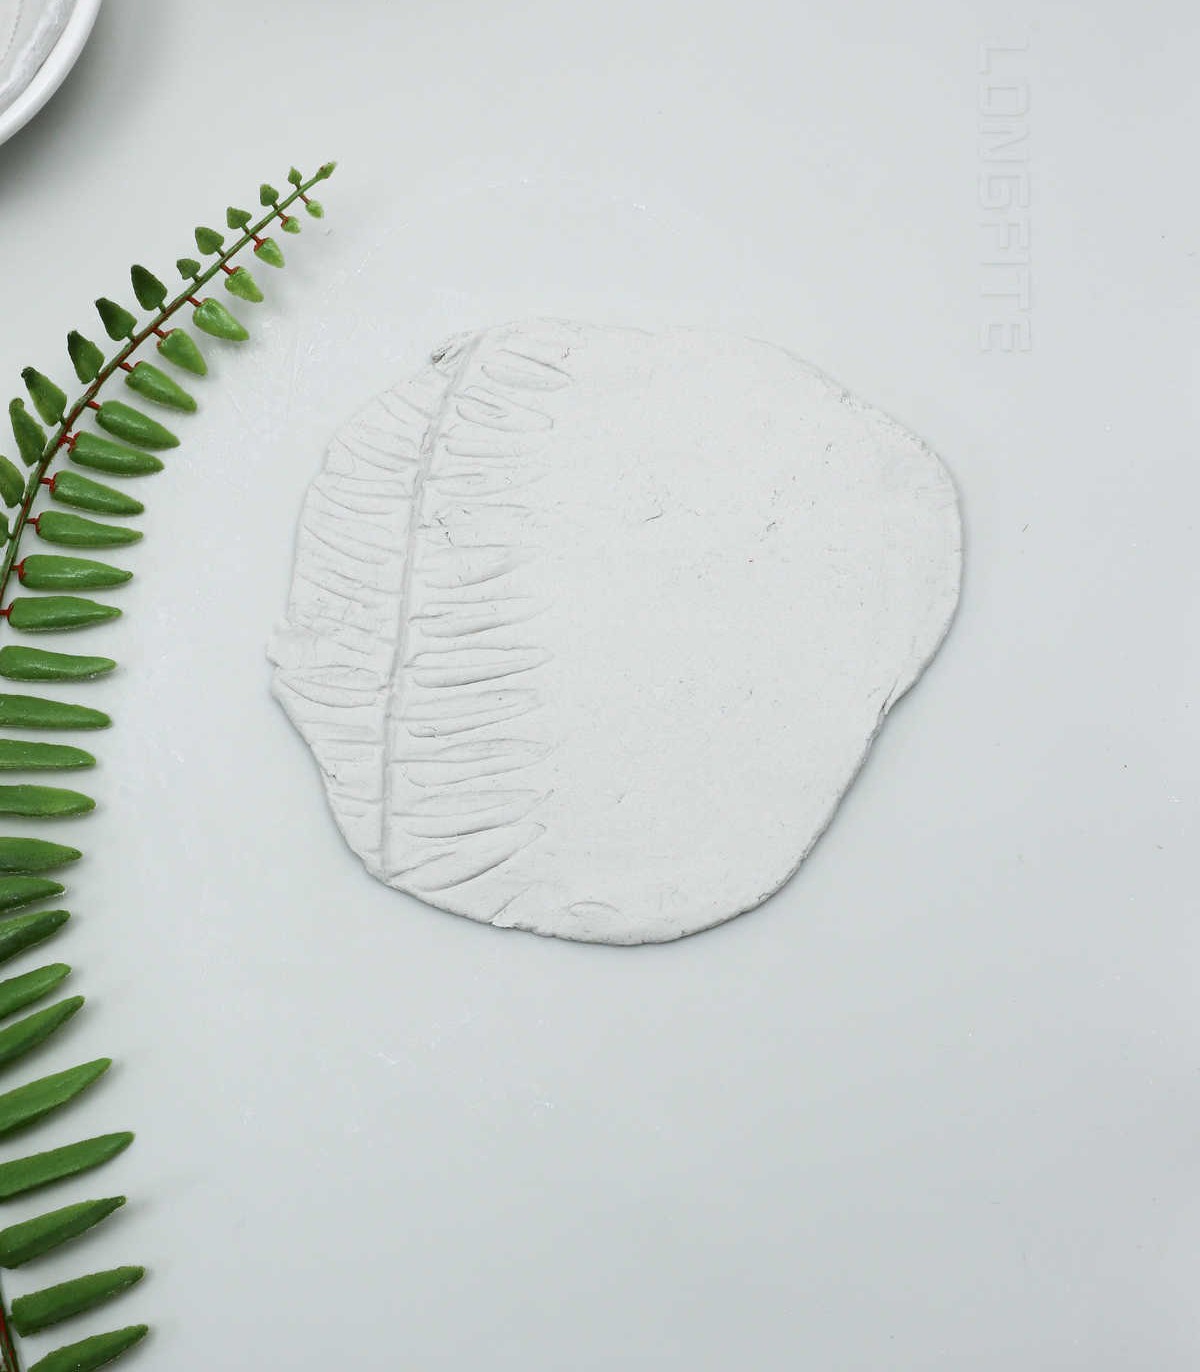
As you lift the leaf away from the clay, the result should resemble the following.
Step 8
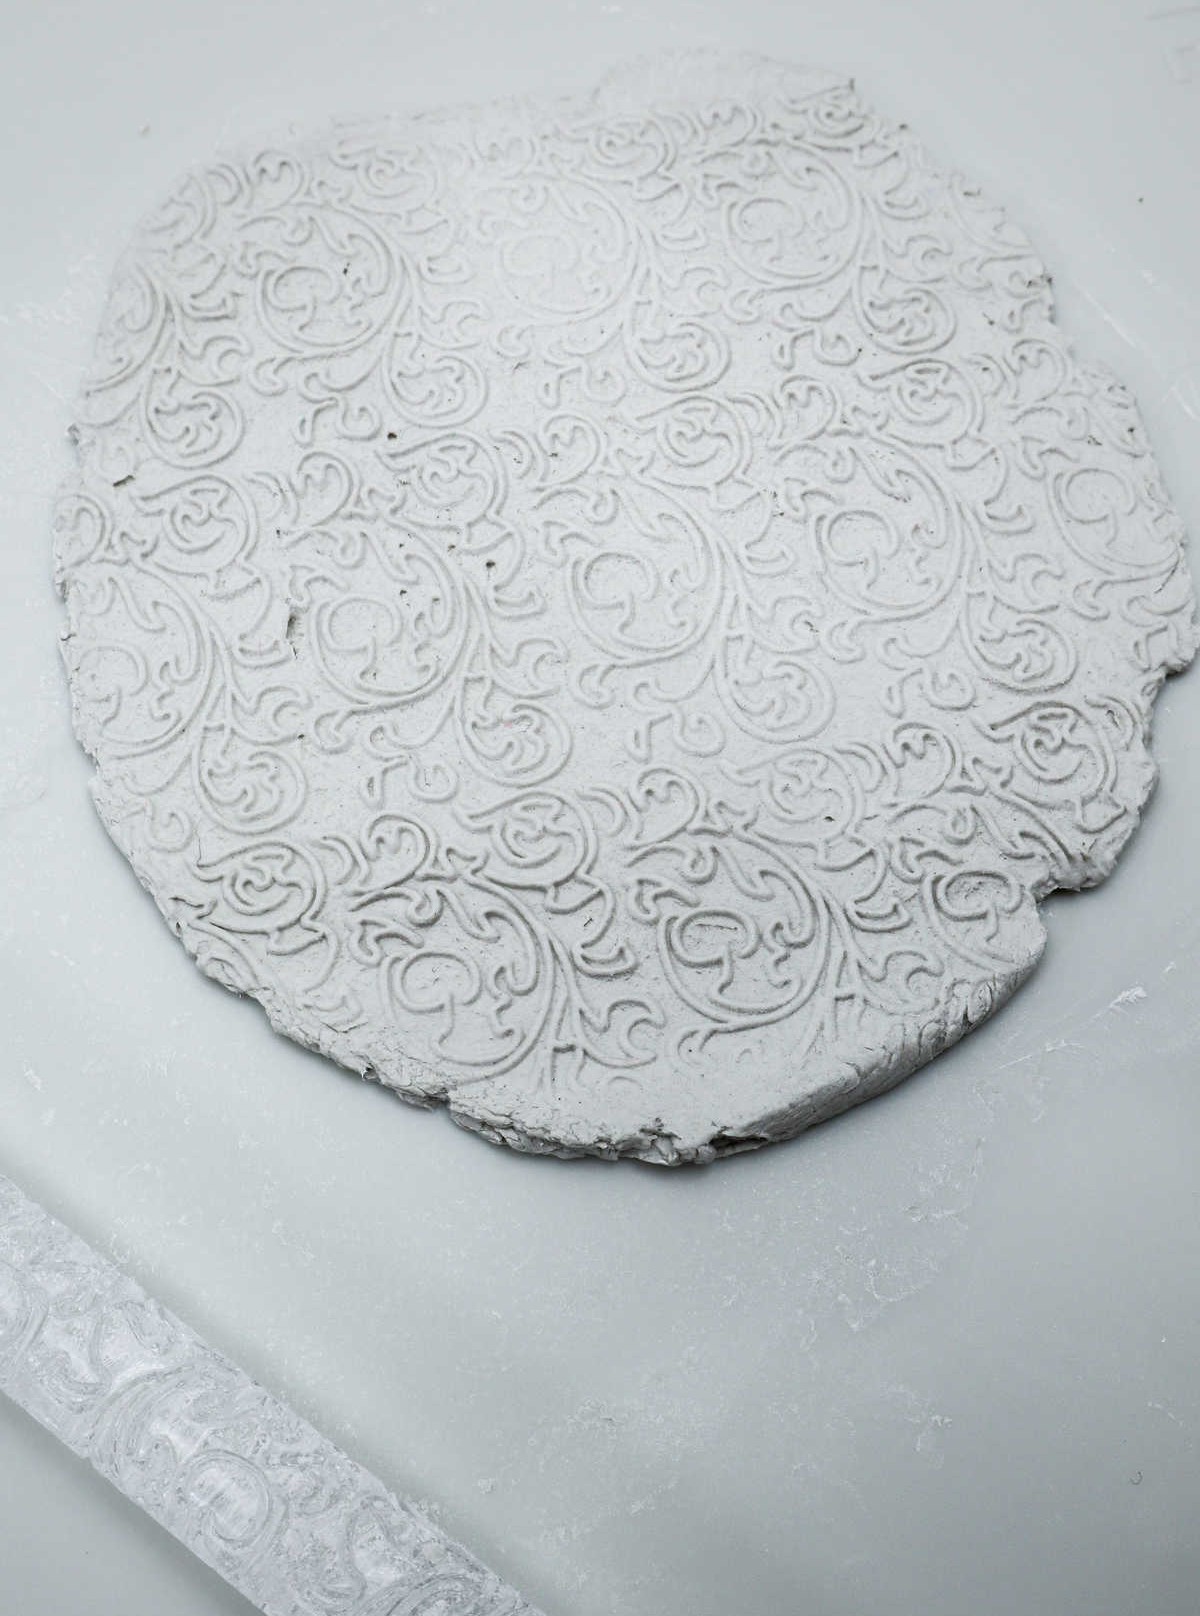

To add visual interest to your ceramic creation, you can use an embossing rolling pin or stamp to create a unique pattern on the surface of the remaining clay. This technique allows for intricate designs and textures that can enhance the overall aesthetic of your piece. Once you’re satisfied with your design, it’s time to shape the clay into its final form.
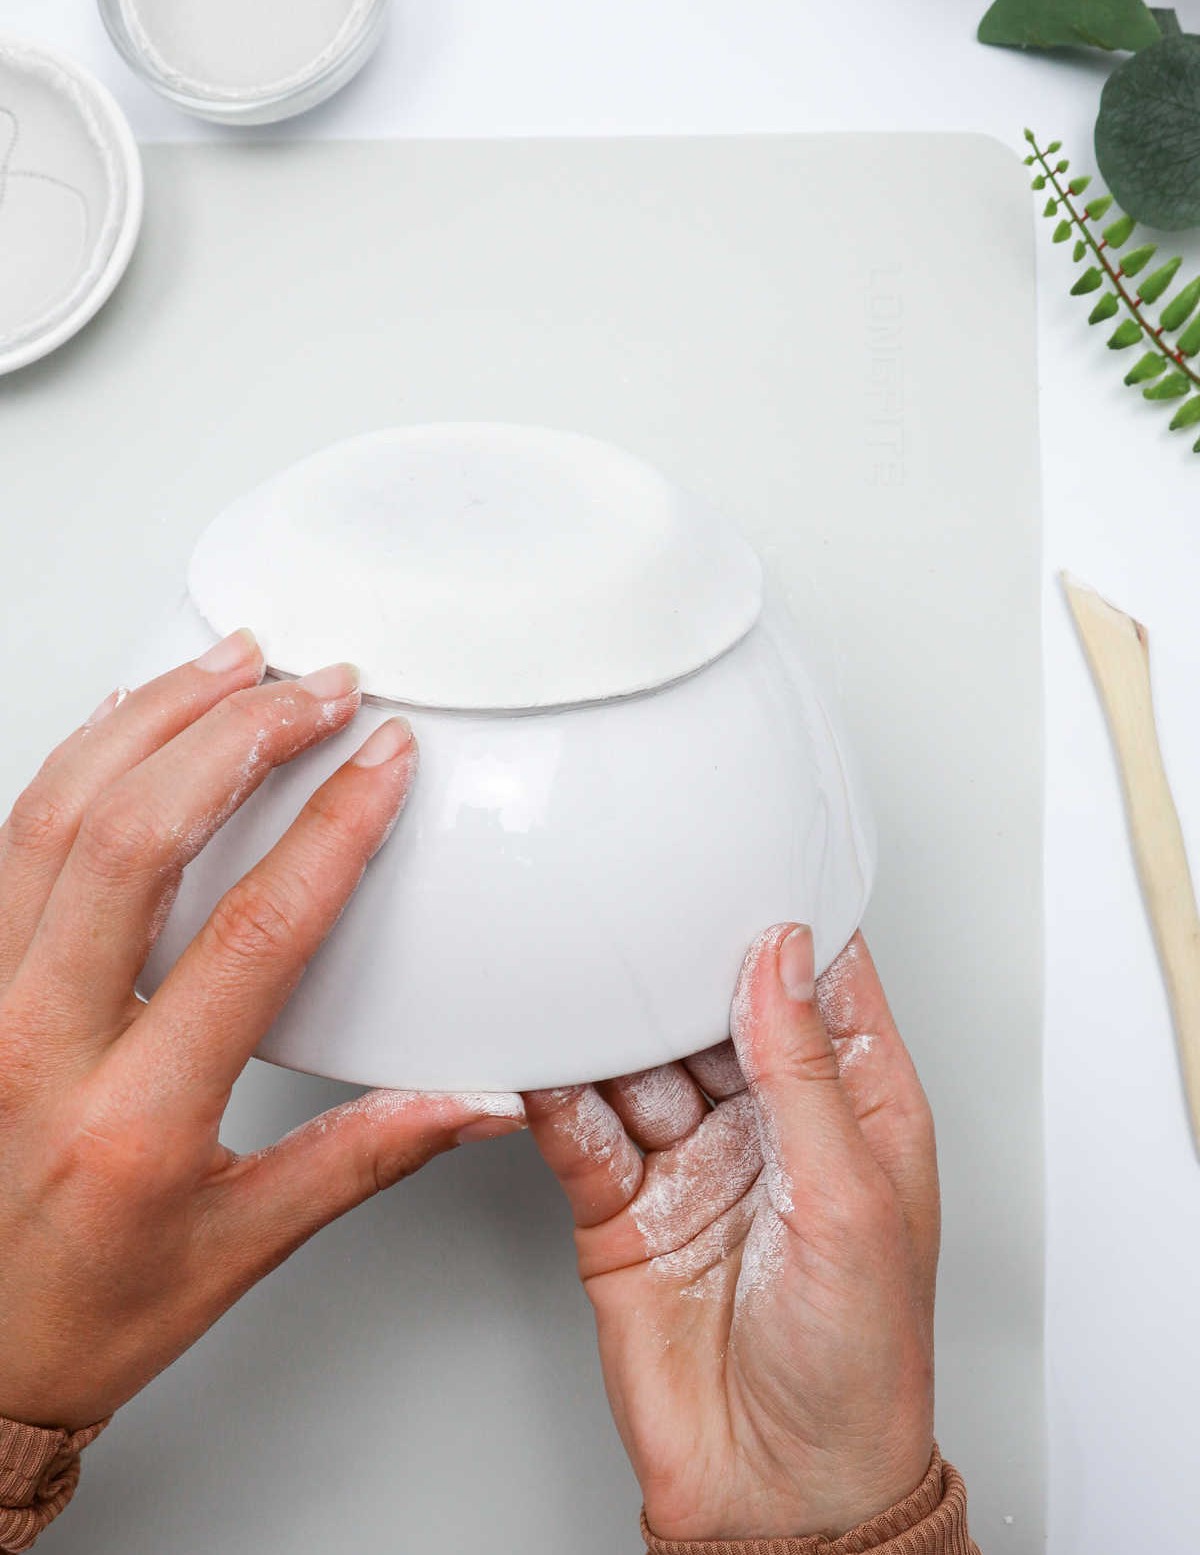
To do this, carefully place the clay over the underside of a bowl, ensuring it’s evenly distributed and then use your fingers or tools to mold the edges into the sides of the bowl. This will help create a seamless transition between the clay and the bowl, giving your piece a polished appearance.
Step 9
As the final step in this process, allow the clay to fully dry and settle for at least 48 hours – a crucial waiting period that ensures your creations are stable and ready for their next stage. When you do finally release the clay from the bowl, you should be able to lift it out relatively effortlessly. However, if you encounter any resistance or stubbornness, a sharp knife can be used to gently pry the clay free, carefully cutting around its edges to avoid damaging your artwork.
Step 10
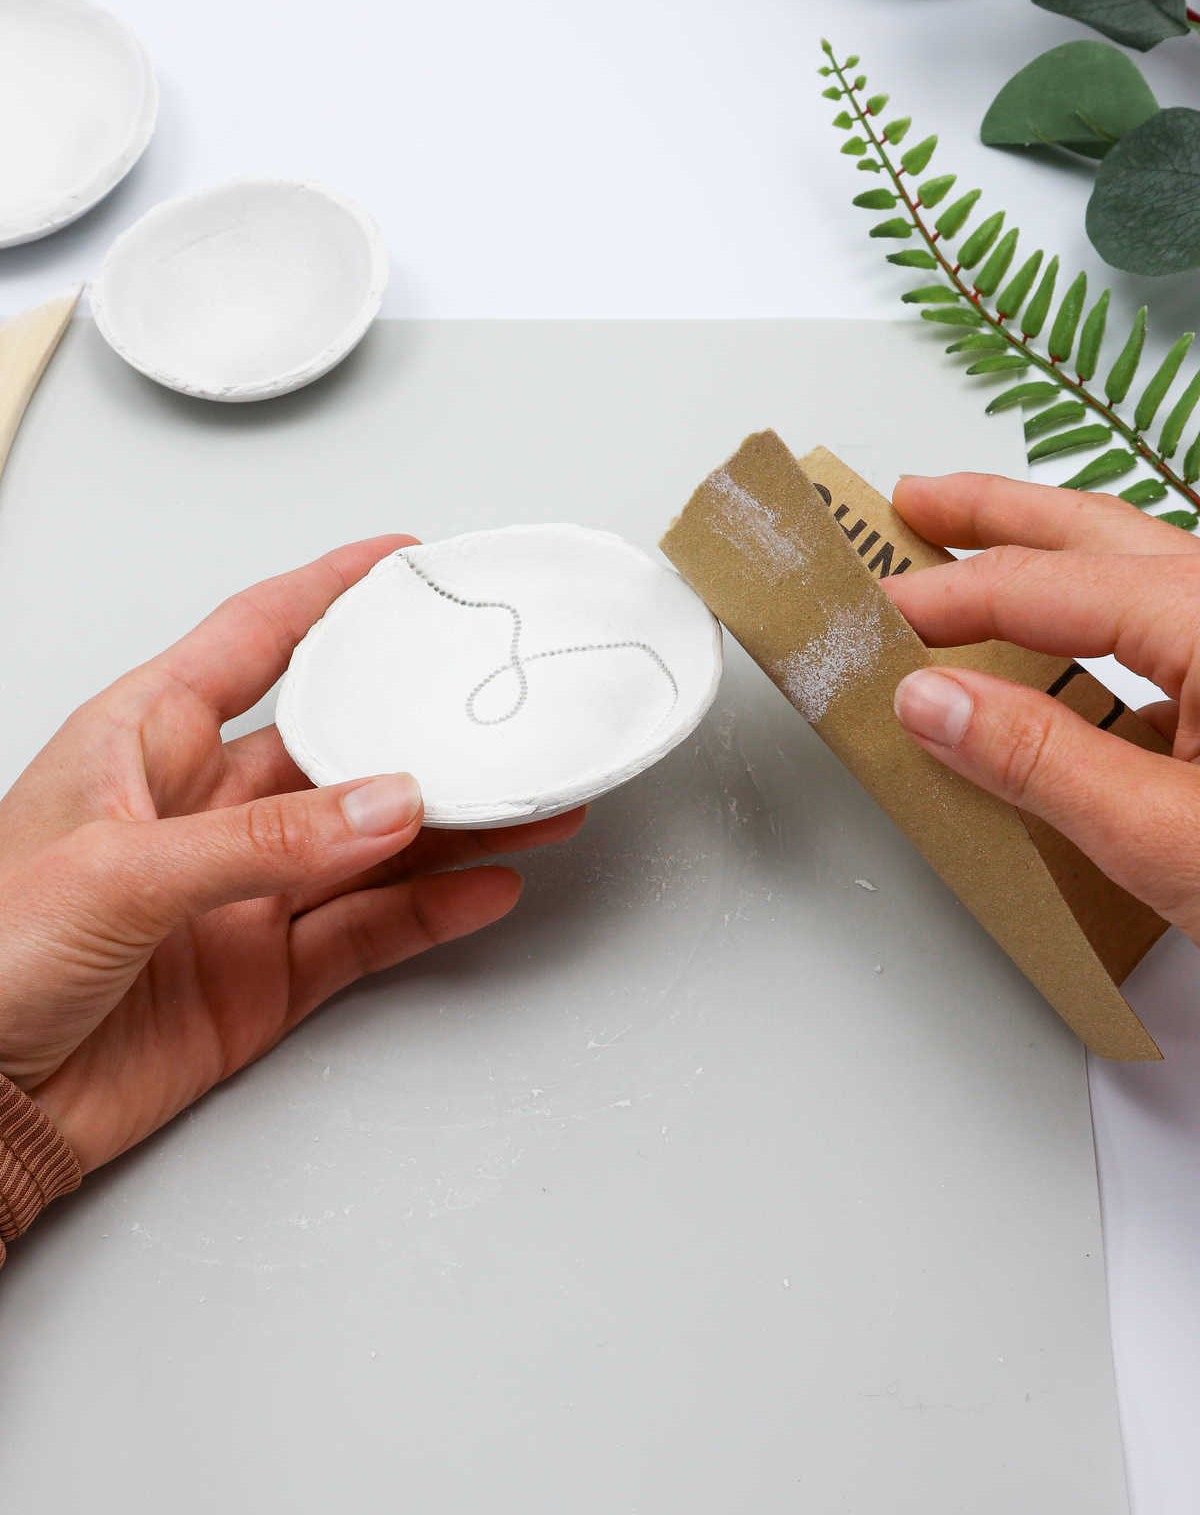
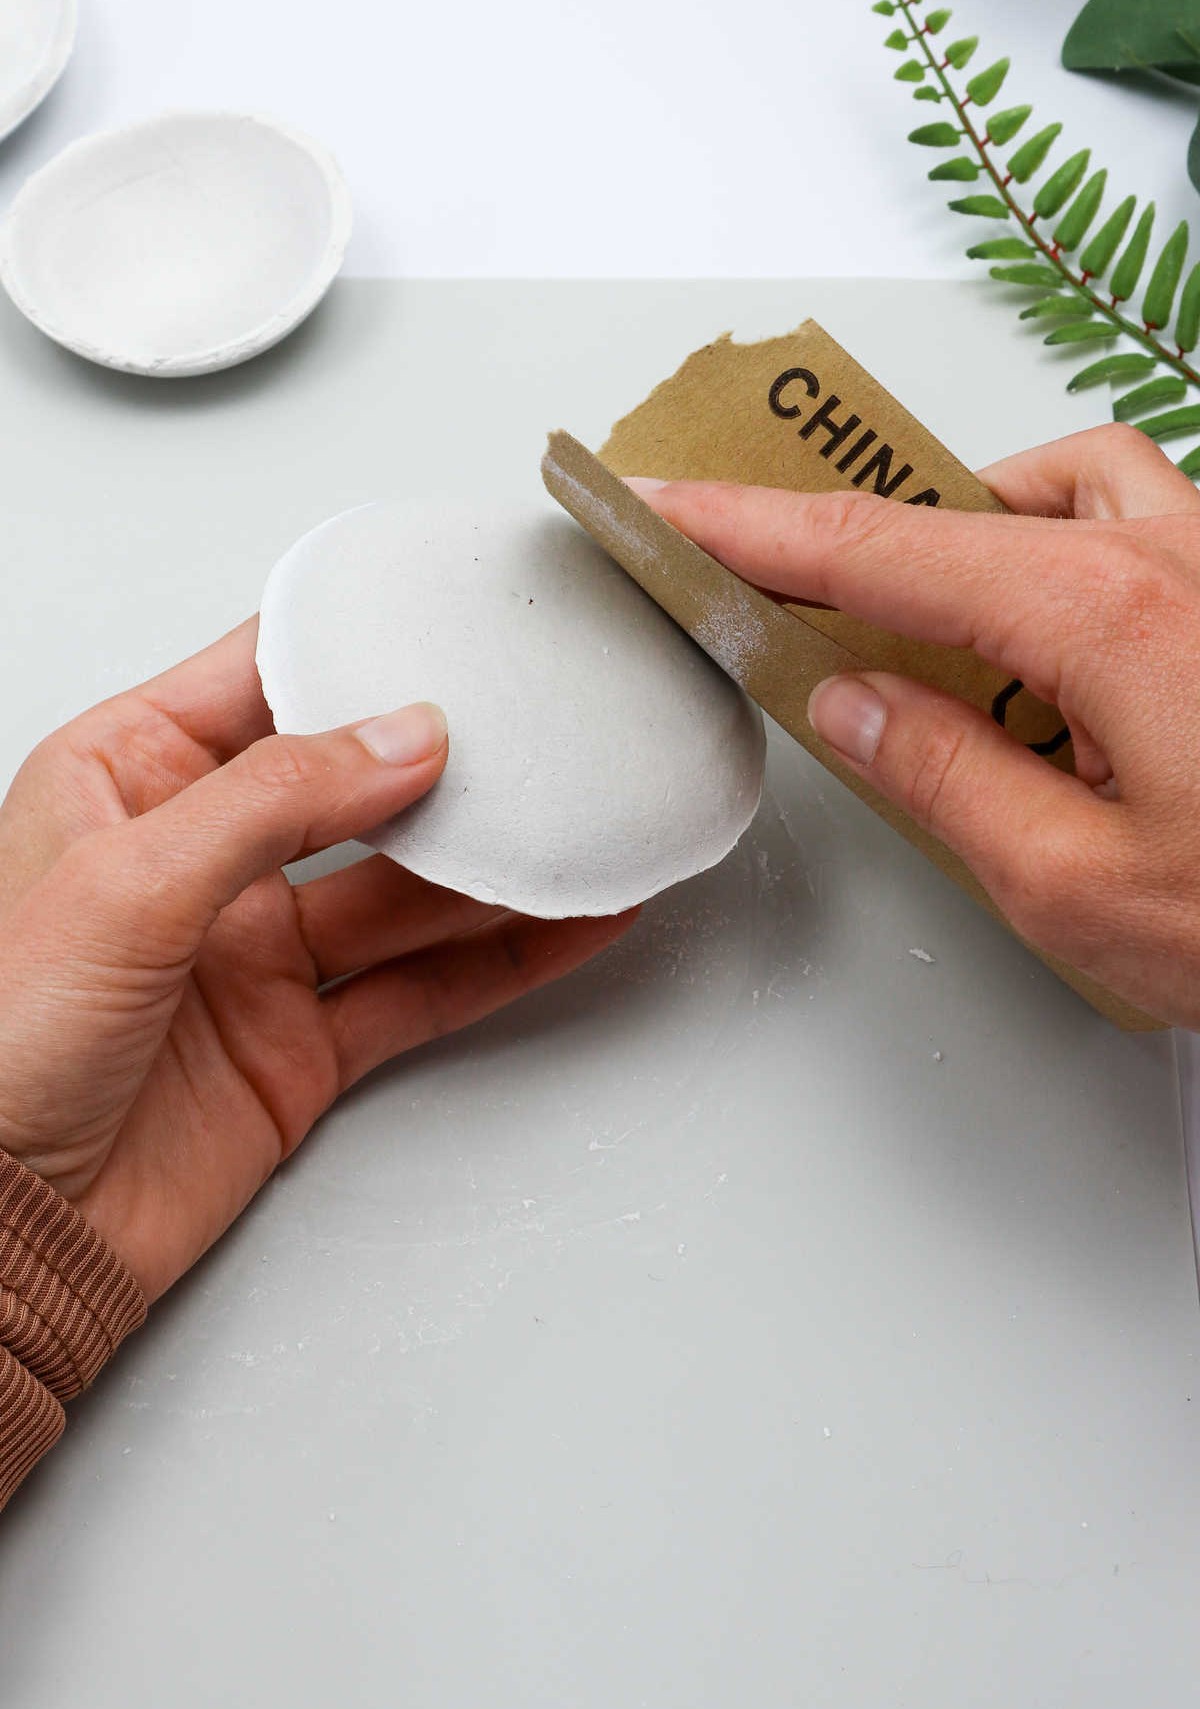
The highlight of this process is undoubtedly sanding, and I’m thrilled! To achieve a silky-smooth finish on your clay creations, start by sanding the sides and edges with a piece of sandpaper. This step helps remove any rough textures or imperfections.
Don’t overlook the bottom of the bowl in this process – make sure to smoothen it out as well.
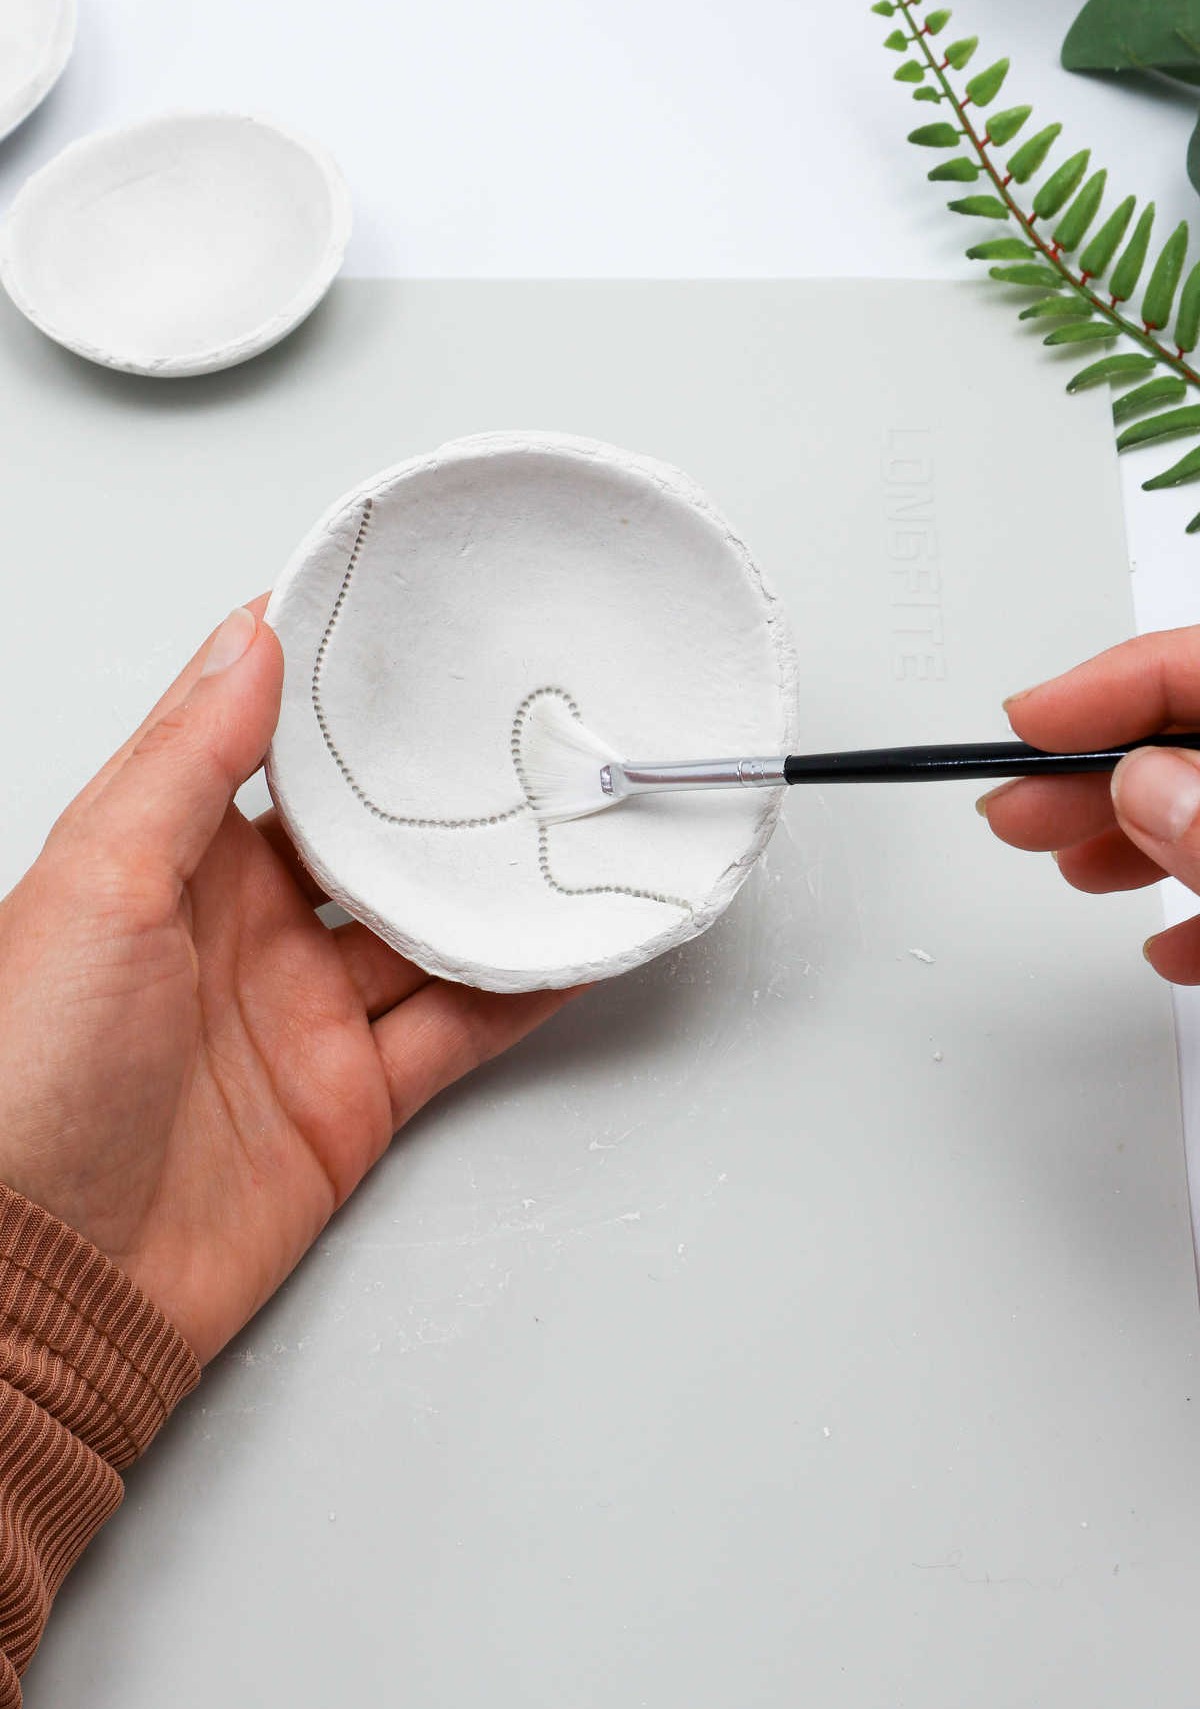
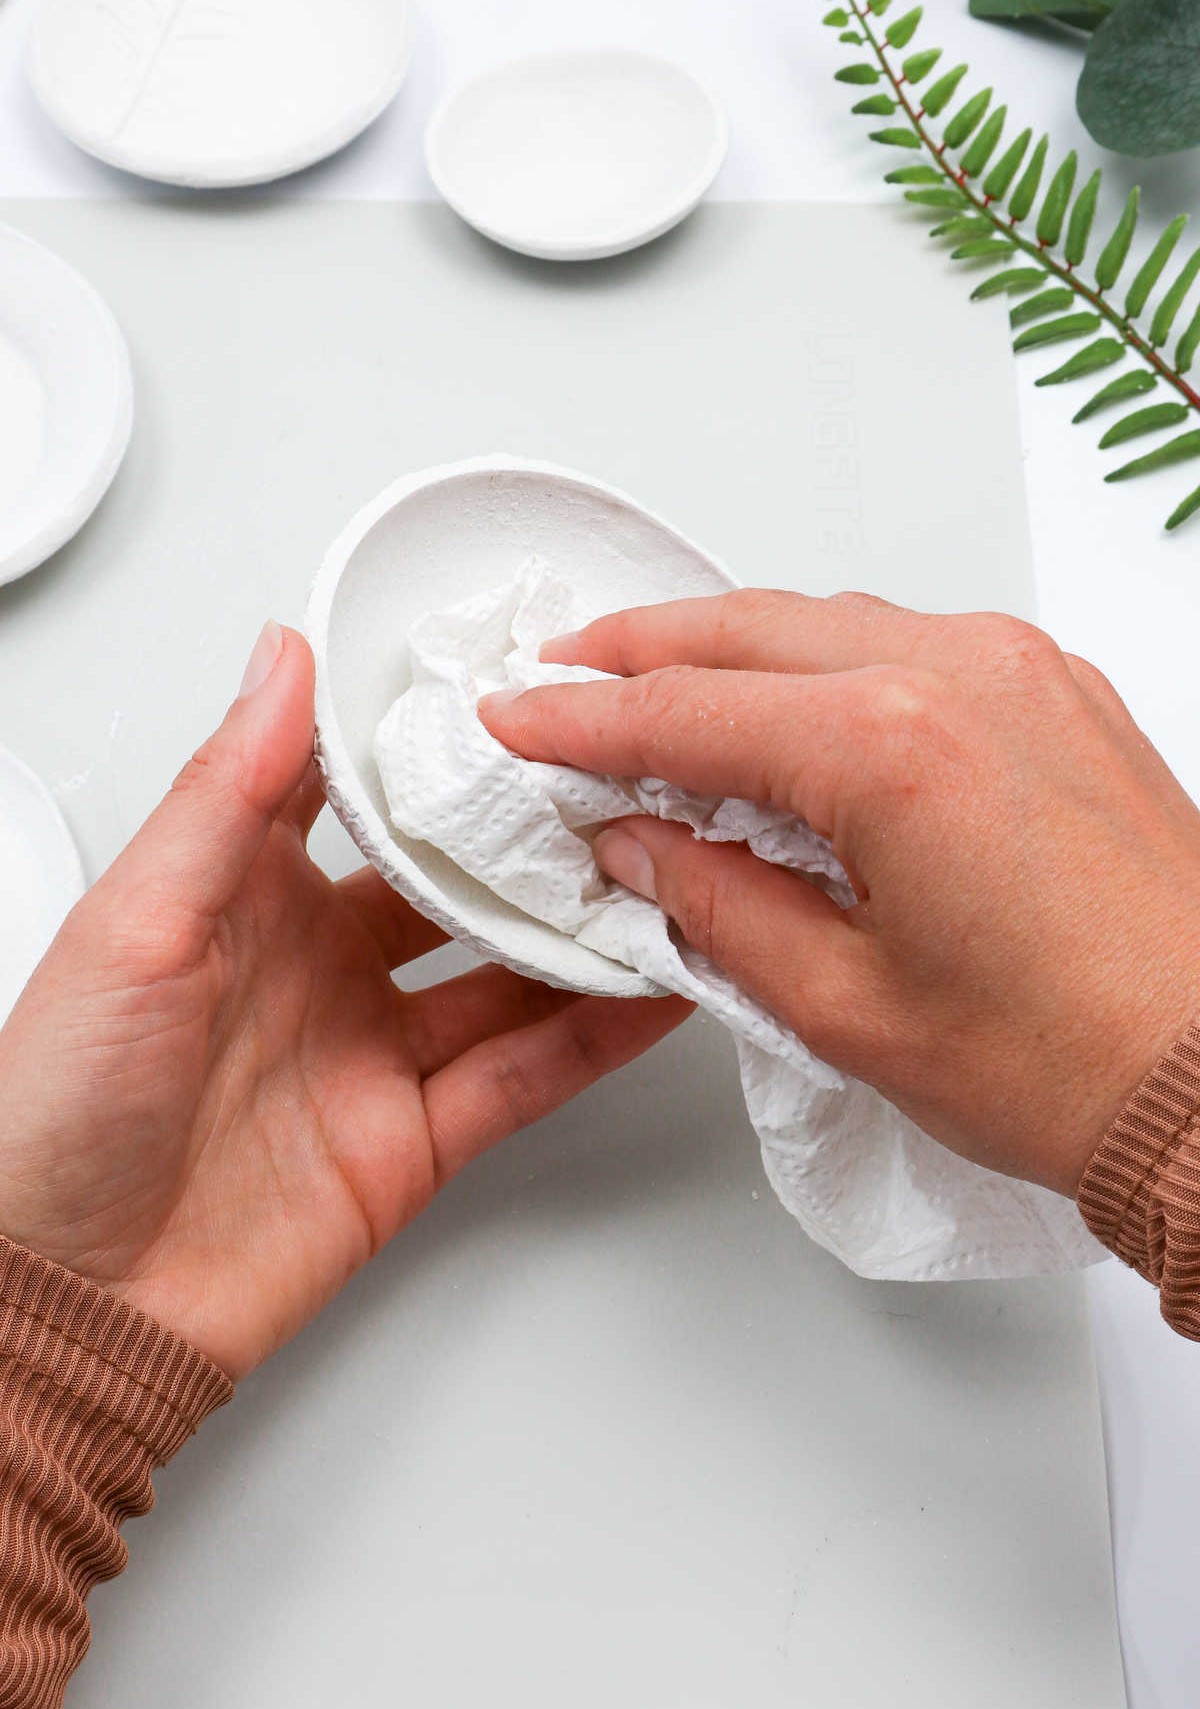
To ensure the area is spotless, use a fine-bristled brush to gently sweep away any powdered clay particles.
Be particularly cautious when working with patterned pieces, as the dust can settle into the actual prints if not removed properly. A gentle touch and a few strokes should do the trick.
Alternatively, you can also use a paper towel to wipe off any stray particles that may have escaped your brushwork.
Step 11

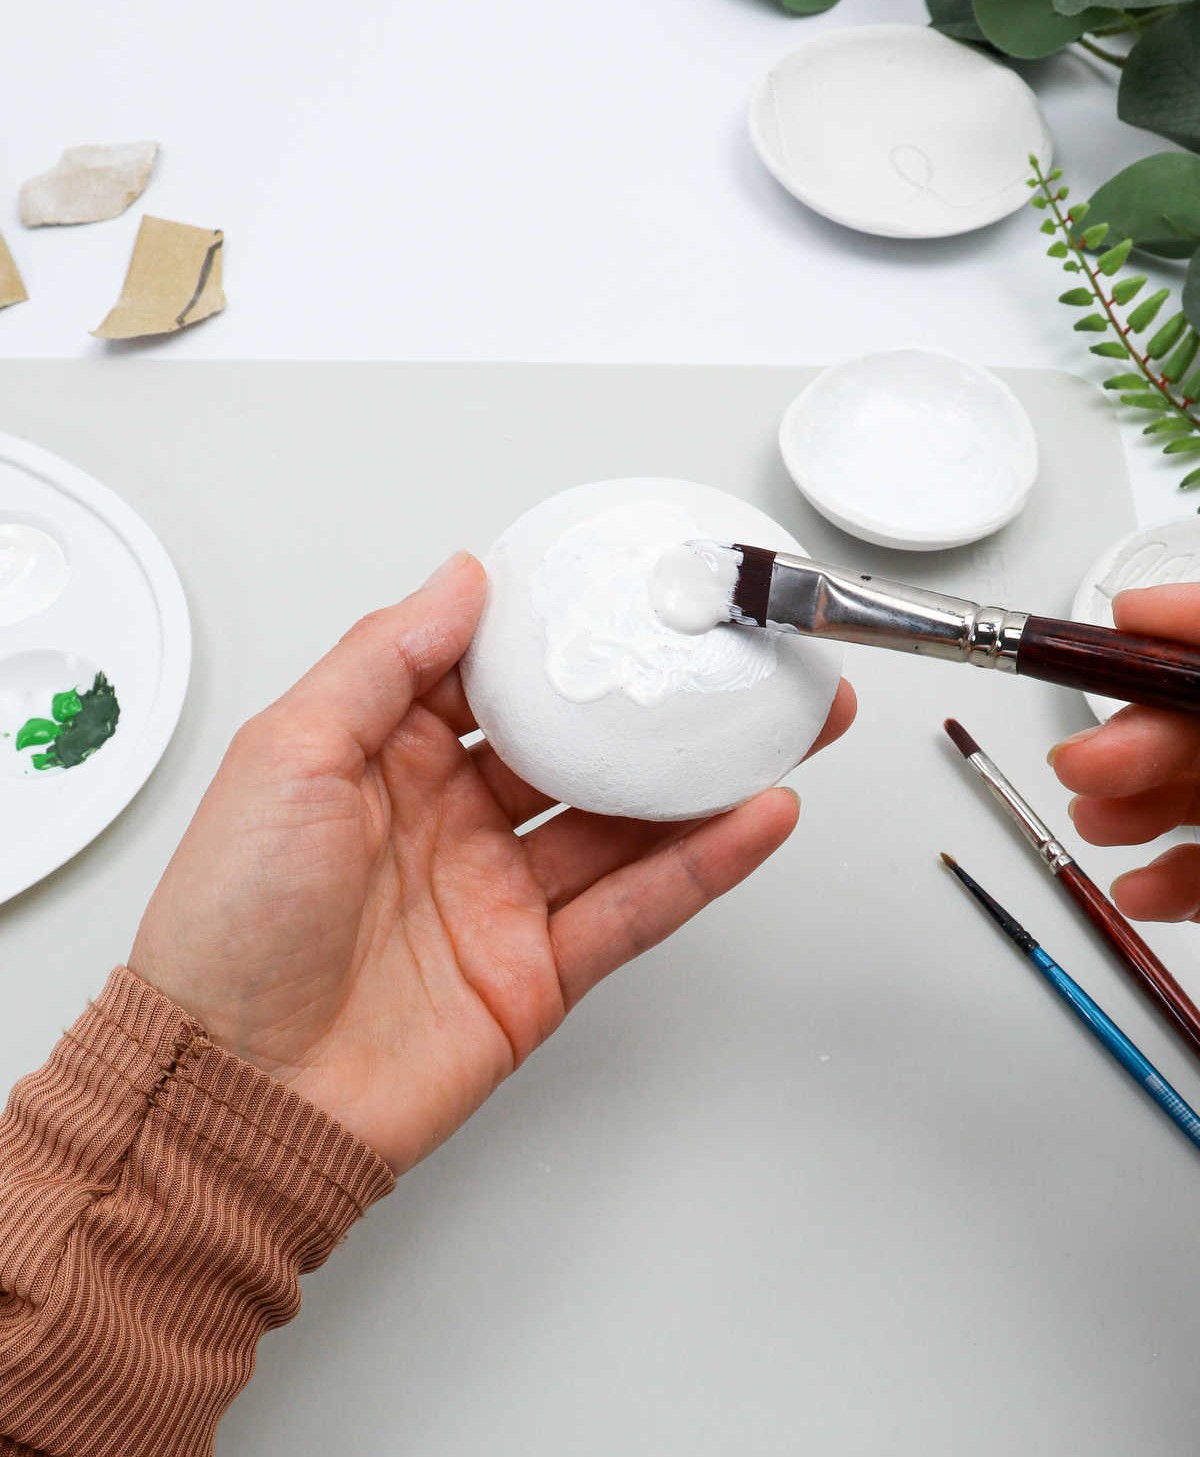
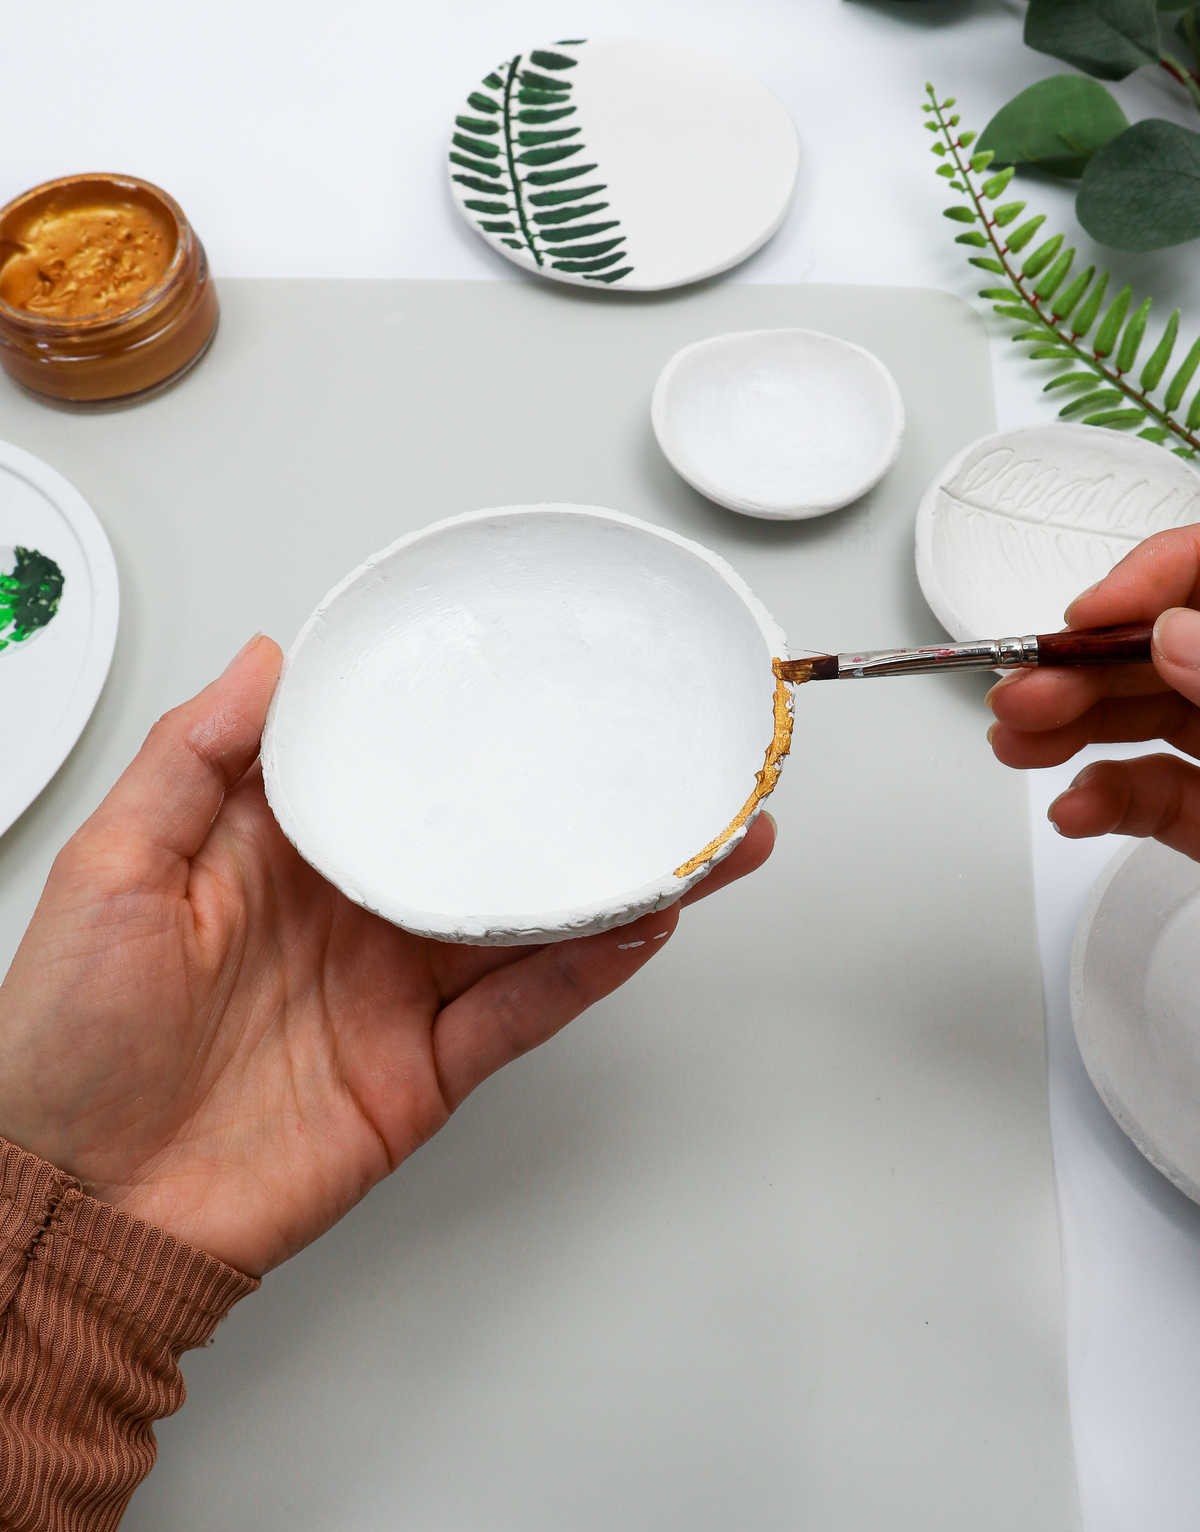
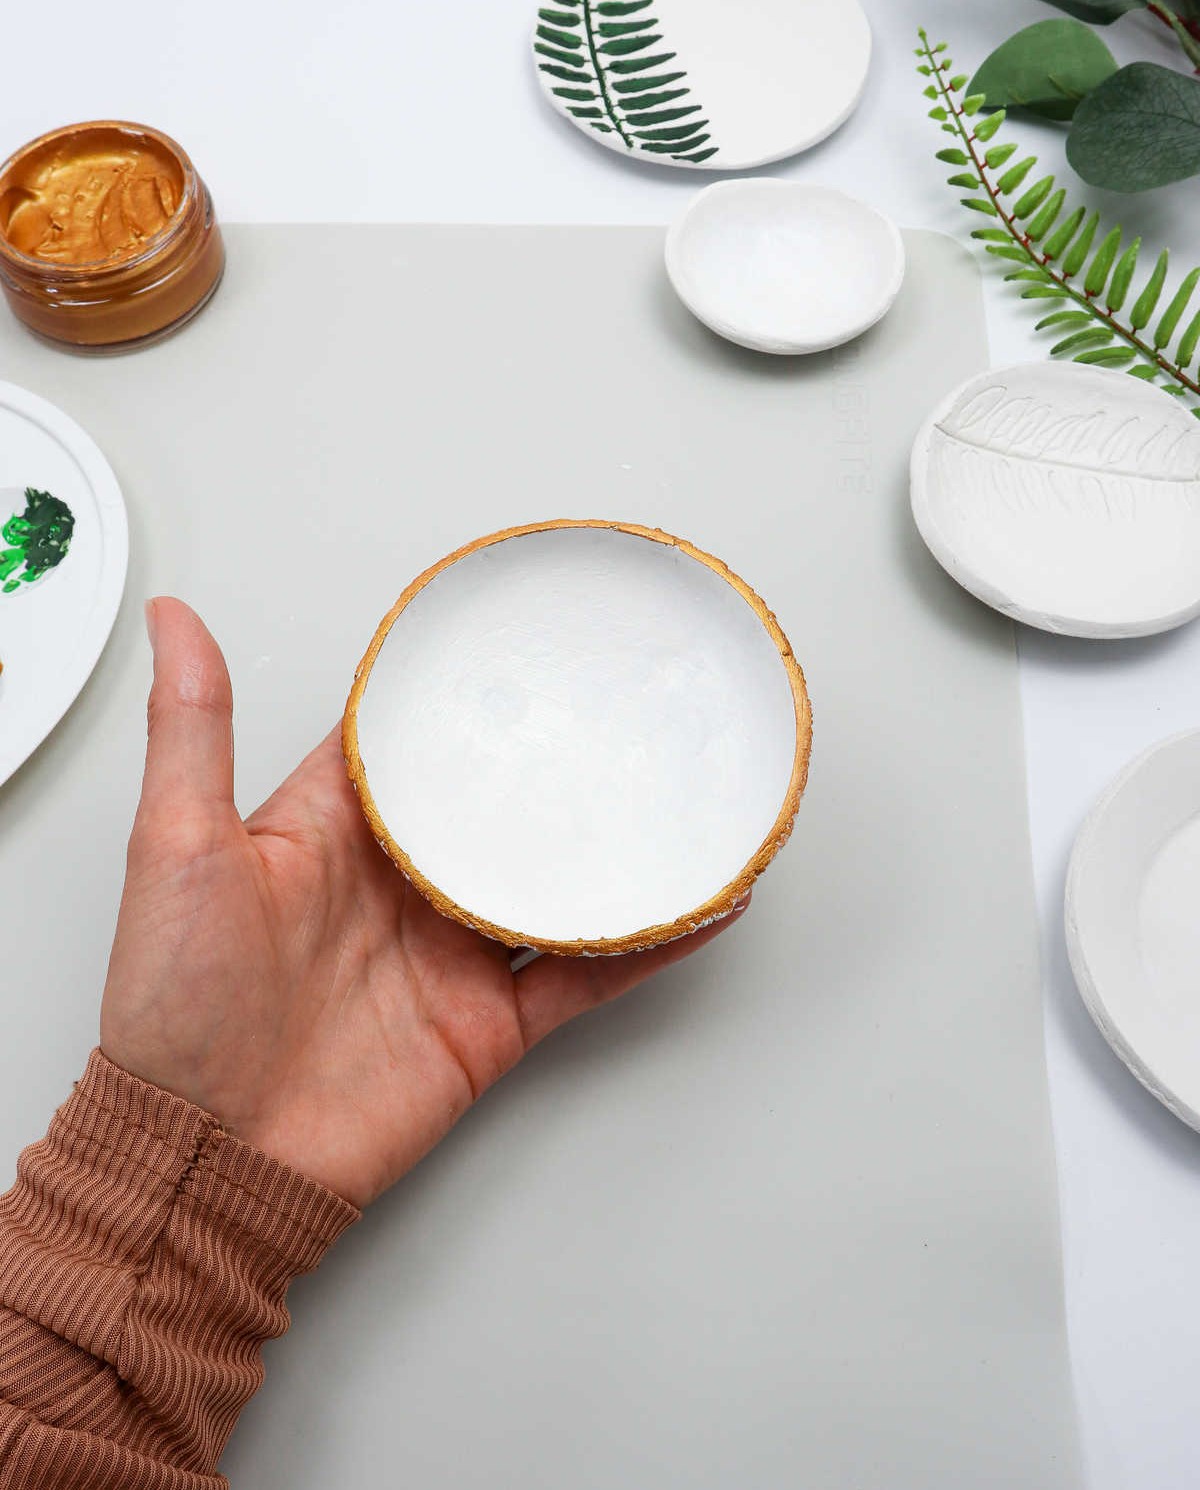
If you’re satisfied with the existing shabby-chic finish, you can consider your project complete. However, if you’d like to add some extra flair, acrylic paint is a great option. To achieve the desired look, apply two to three coats of paint, allowing each coat to dry before moving on to the next one. This process will give you a smooth and even finish. Additionally, you can also paint the underside of the bowl and its rim to add more visual interest.
As demonstrated in the example provided, a metallic color for the rim can significantly elevate the overall elegance of the piece. When it comes to painting over decal and etchings, feel free to use the same base color or opt for something bolder with a fine-tip brush, depending on your personal preference.
Step 12

The final step involves protecting the painted design with a clear coat. Reach for a flathead brush and apply a gloss or matte-finish varnish, allowing Mod Podge to be your trusted sealant of choice when working with acrylic paint on clay mediums. As you let the sealant do its thing, give the bowls time to fully dry, revealing a stunning finish that’s almost too beautiful to hide.
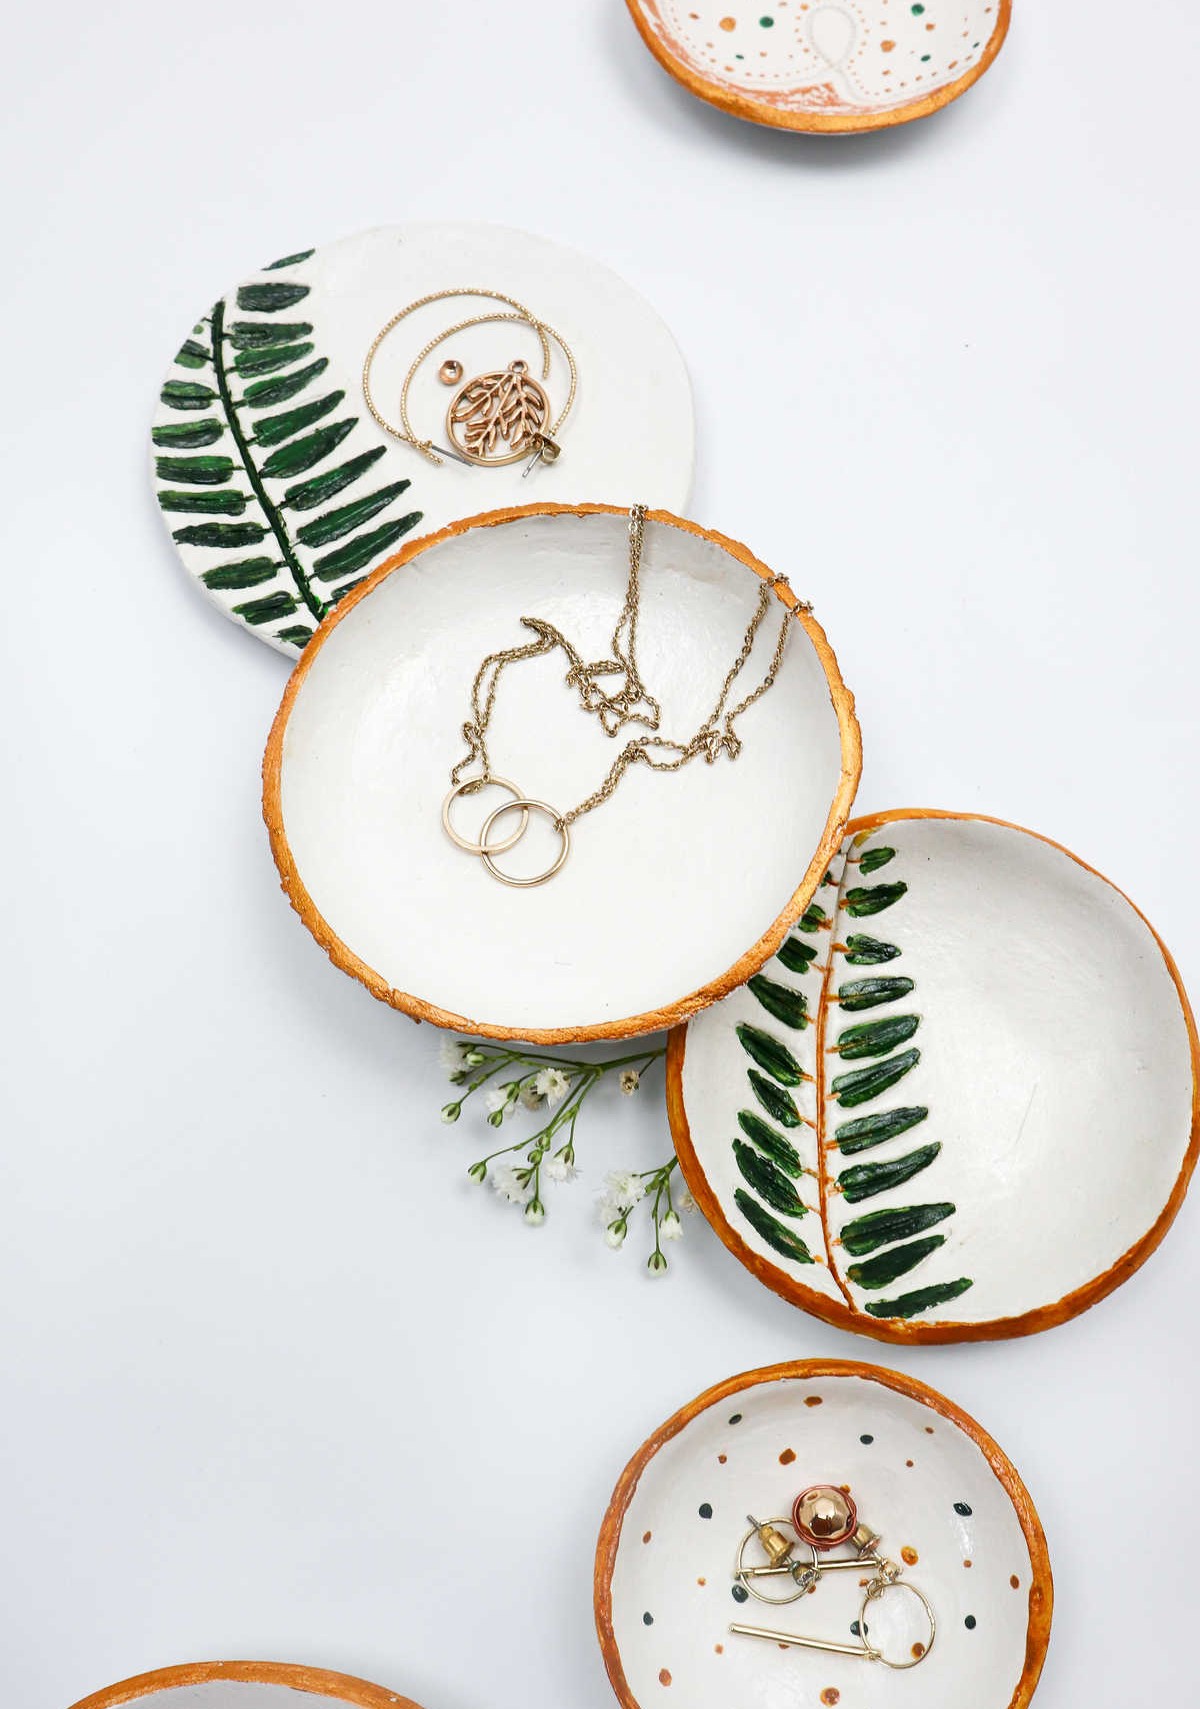
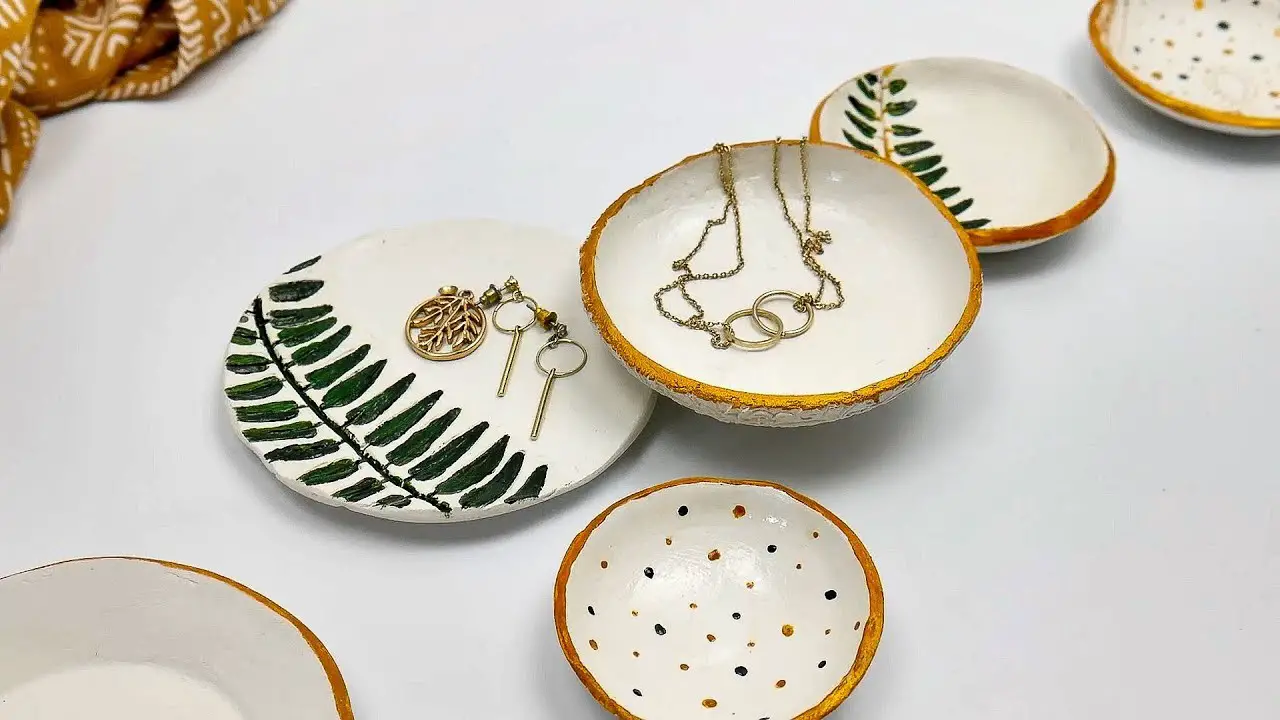
What You Can Use These Clay Bowls for?
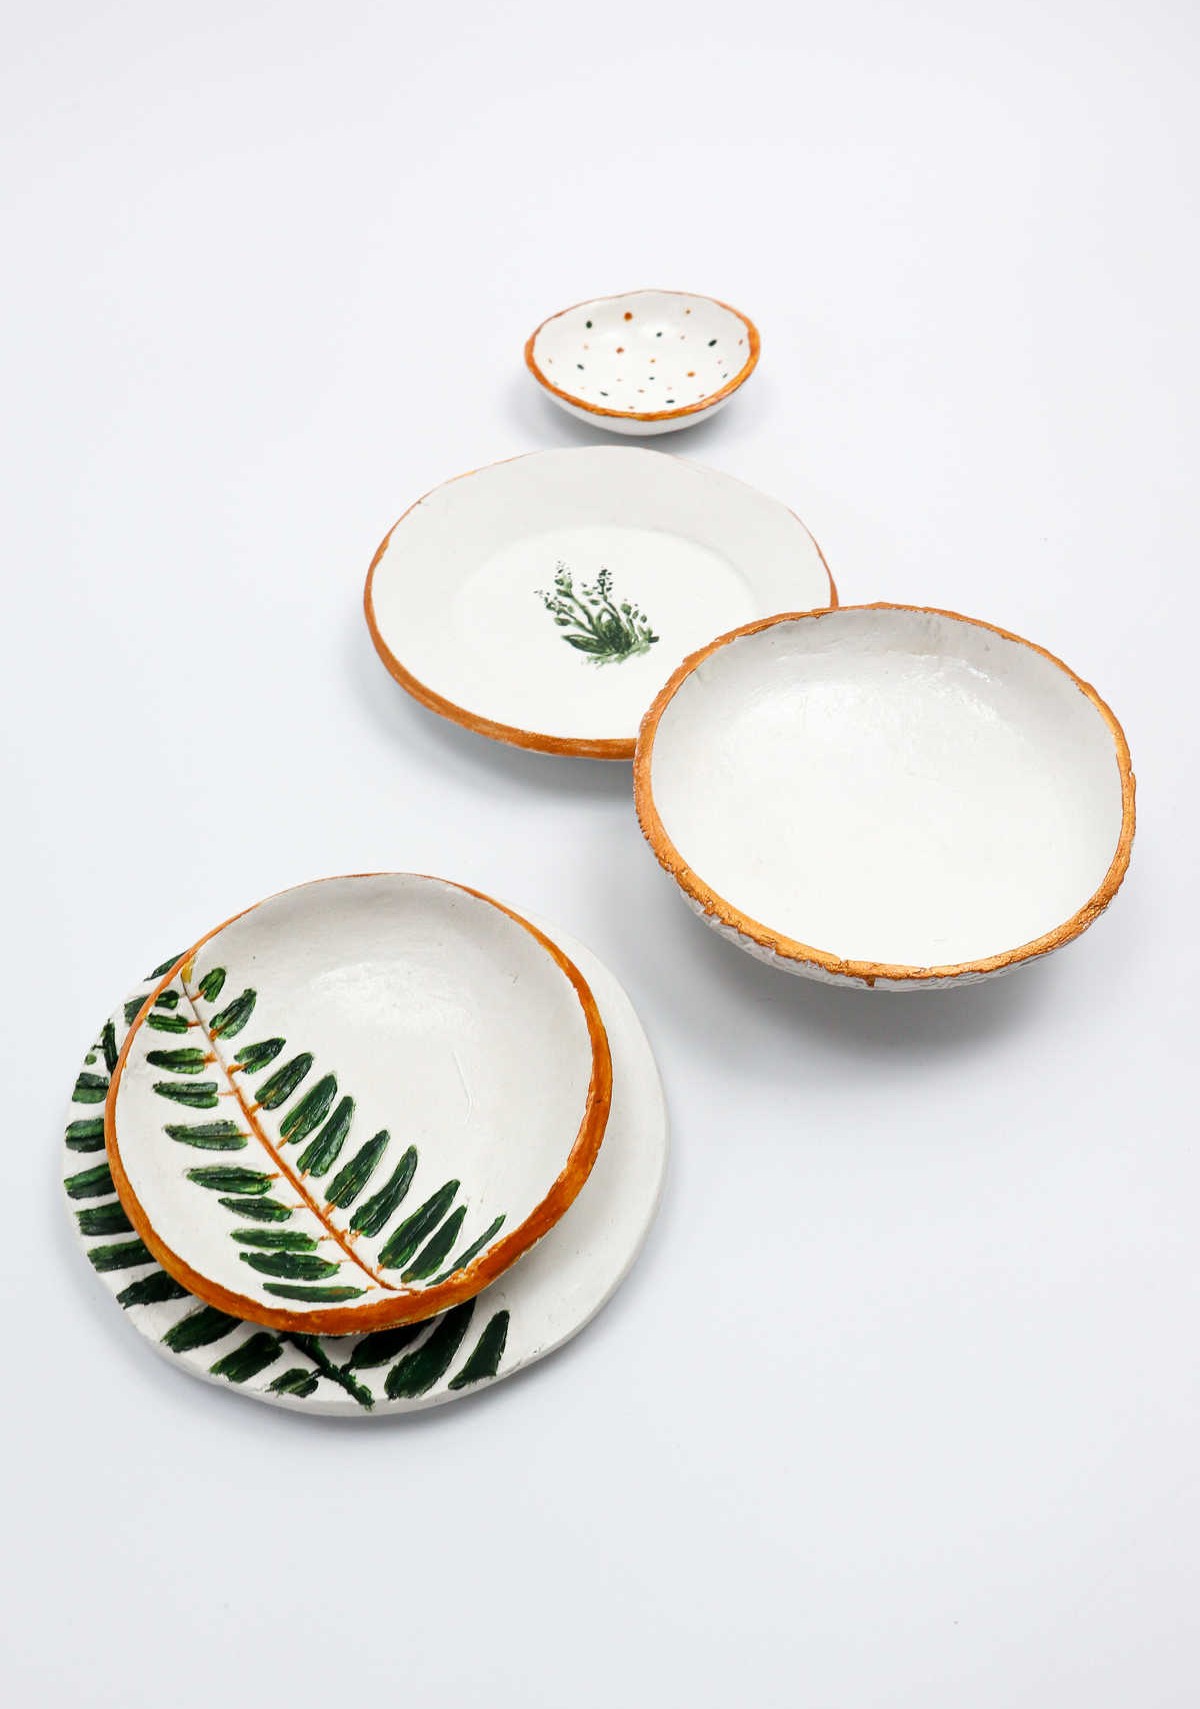
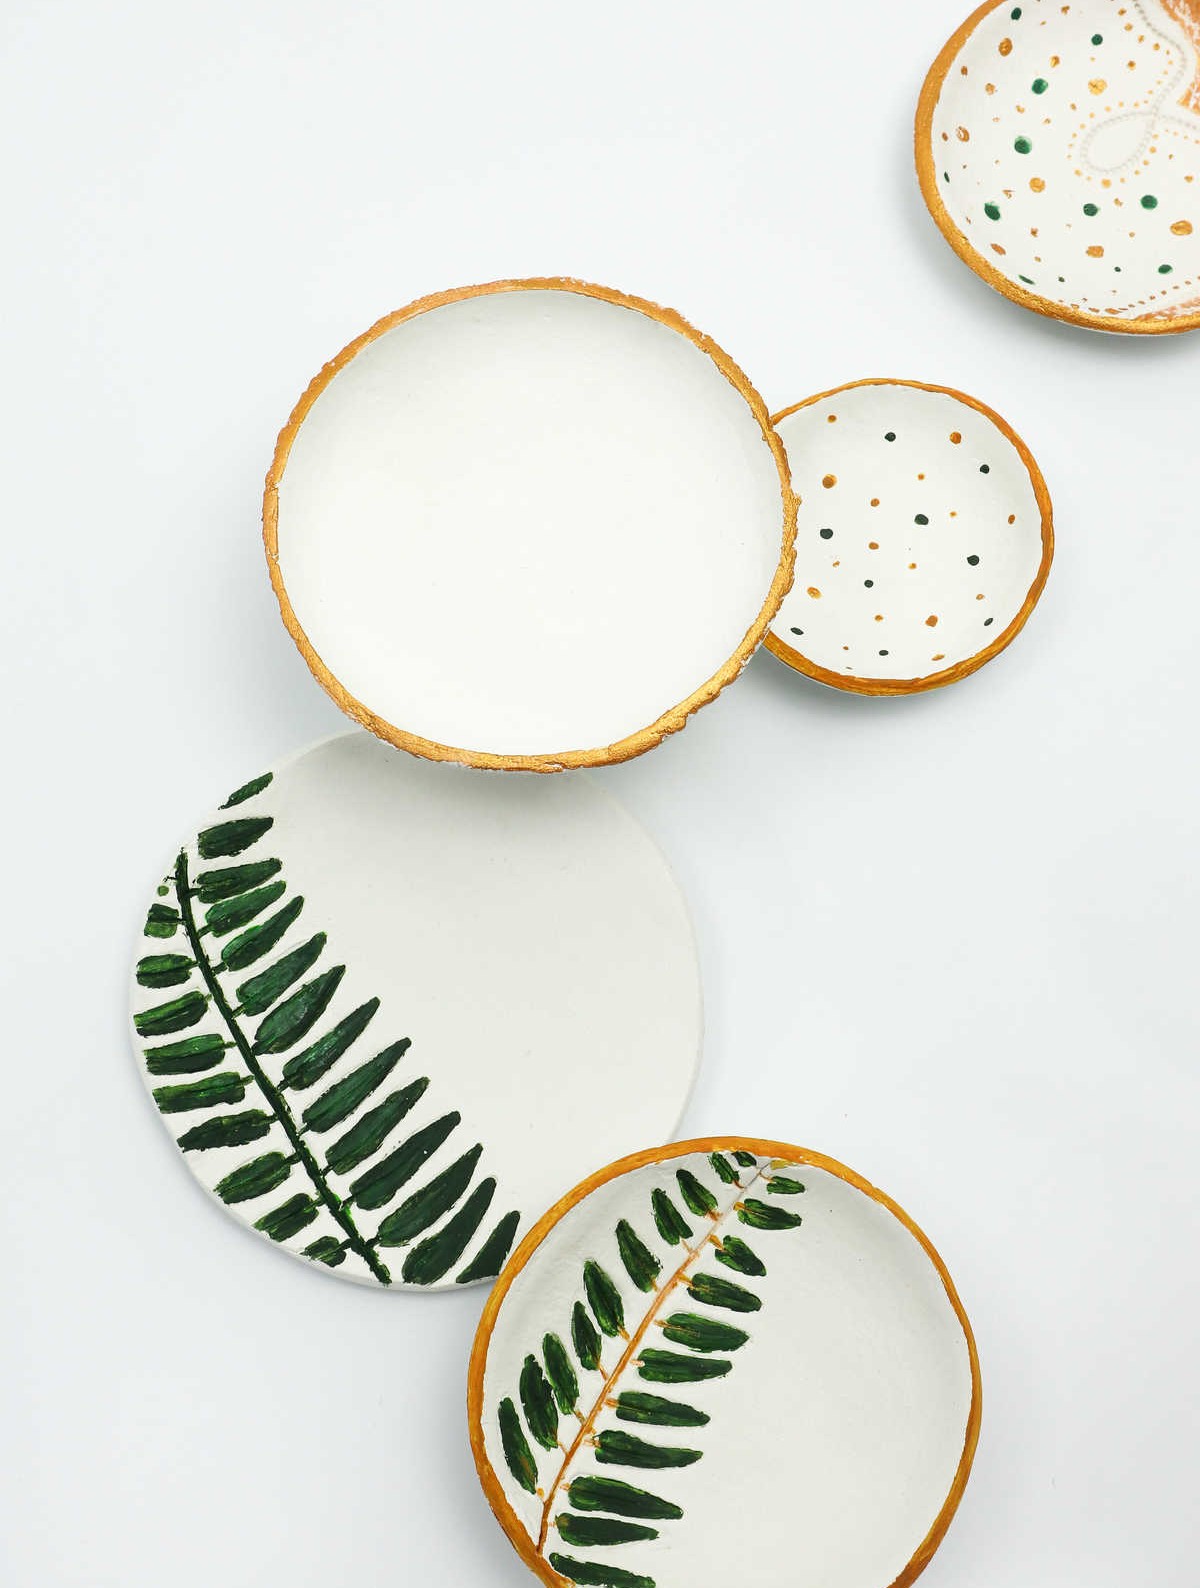
The beauty of these bowls lies in their adaptability. They can be repurposed in numerous creative ways, making them an incredibly appealing project. One moment they’re a trinket dish, and the next, a thoughtful vessel for storing your accessories, display piece, or even a lemon bowl. You might use them to corral your keys, loose change, and miscellaneous items, or let one stand proudly on the mantel or coffee table as a decorative accent.
How to Make Air Dry Clay Bowls (DIY Jewelry Trays)
Crafting with air-dry clay has never been easier or more rewarding. Create stunning jewelry trays in just a few hours, perfect for teens and adults alike. With only 30 minutes of active time required, you can quickly get started on your creative project. Once the initial shaping is done, let the magic happen as the clay air-dries over the next half hour. The end result is a beautiful, functional piece that’s both elegant and practical.
To make these lovely bowls, you’ll need just $3 worth of materials, making it an affordable and enjoyable activity.
Equipment
To embark on this creative journey, you’ll need a few essential tools. Start by gathering an acrylic roller or a bottle that can double as a makeshift mold. A nonstick placemat will come in handy for protecting your work surface from any potential messes. For shaping and molding the resin, have various sized bowls at the ready to use as molds.
In addition to these, you’ll also need paint brushes for applying colors, a craft knife for cutting and trimming, fine sandpaper for smoothing out rough edges, and ball chain or beaded chain (if you choose to add a decorative element). Finally, consider investing in an embossing rolling pin and stamps if you want to take your designs to the next level.
Materials
When it comes to creating a stunning and long-lasting piece, three essential elements come into play: Air drying clay, Acrylic paints, and Acrylic gloss varnish – with an optional touch of Artificial leaf for added texture.
Instructions
To begin, collect all the necessary materials and tools. Store any excess clay in an airtight container to keep it fresh. Next, work the clay with your hands until it becomes soft, pliable, and lump-free. Then, use a rolling pin or glass bottle to flatten the clay into a sheet about 5mm thick. Place a bowl over the clay and carefully cut around the rim using a craft knife.
Peel away any excess clay and gently press the remaining clay into the bowl, taking care not to press too deeply or leave fingerprints. If necessary, add a small amount of water to help smooth out any cracks or rough edges.
To create unique designs on your bowls, place a leaf, ball chain, or other engraving on top of the clay and use a rolling pin to imprint the design. Gently pull the object away, leaving the pattern in the clay. Repeat this process for each bowl you want to decorate.
Allow the clay to dry completely for 48 hours before handling it further.
Once the clay is hardened, use a sharp knife to cut around the rim if necessary. Then, use sandpaper to smooth out the entire surface of the bowls, including the sides, underside, and rim. Brush away any dust or debris with a paper towel or soft brush.
Finally, paint and decorate your bowls as desired, adding color to finer details and designs.
To seal your work, apply a clear gloss or matte-finish sealant like Mod Podge or varnish. Allow the sealant to dry completely before using your clay bowls. Alternatively, you can choose not to use a sealant for a more rustic, natural finish.