As you consider crafting your own dreamcatcher, imagine the cozy ambiance it will bring to your room, while also expertly capturing those unwanted nightmares. The nostalgic charm of dreamcatchers is undeniable, reminiscent of the fervor that surrounded them a few years ago, as they became a staple in many young people’s bedrooms. But beyond their decorative appeal, what lies at the heart of these talismans’ significance?
They are deeply rooted in Native American literature and culture, with the circular ring and woven web serving as a potent symbol of protection during our most vulnerable moments – when we’re asleep. According to tradition, dreamcatchers skillfully ensnare bad dreams, allowing only pleasant ones to pass through, thereby earning their name. With this newfound appreciation for the magic behind these mystical objects, let’s embark on a journey to create one of your very own.
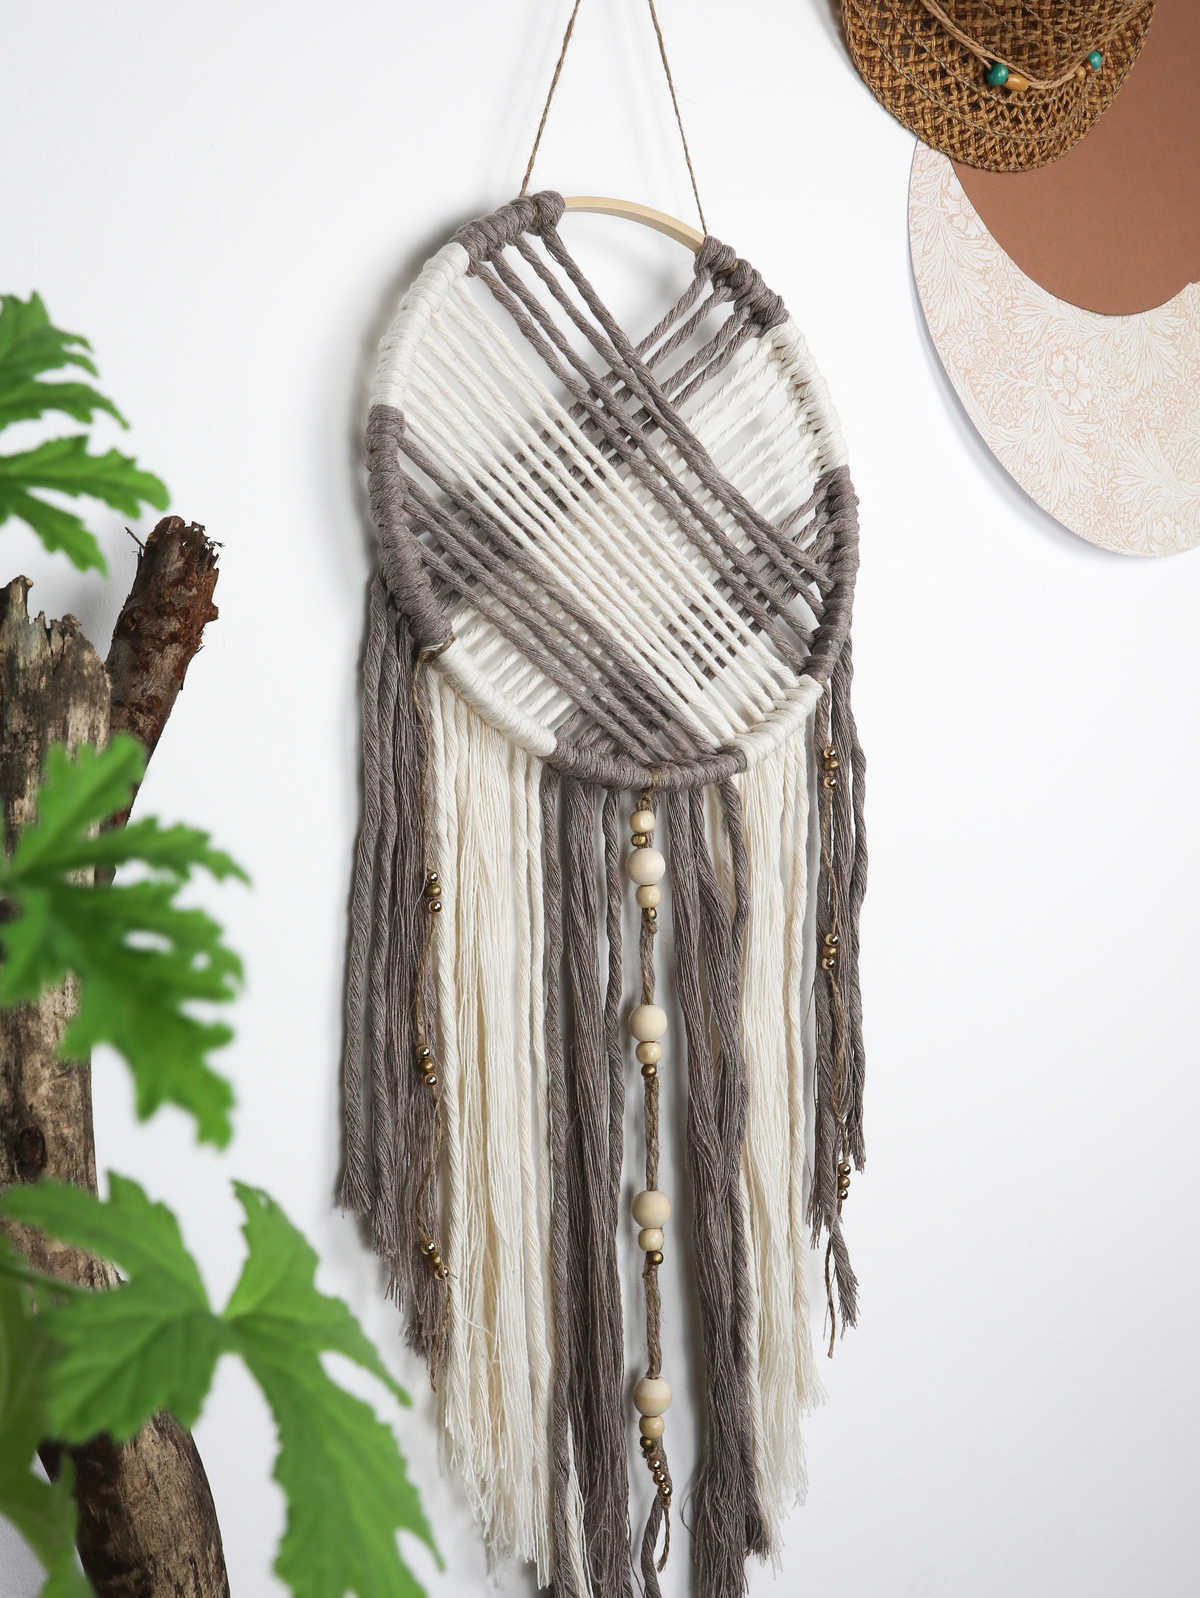
Watch: DIY Dream Catcher
If you prefer a more visual approach or don’t have the time to read through our comprehensive guide, we’ve also got you covered. You can check out our accompanying video tutorial that provides a step-by-step walkthrough of the process.
Supplies and Tools for the Dreamcatcher
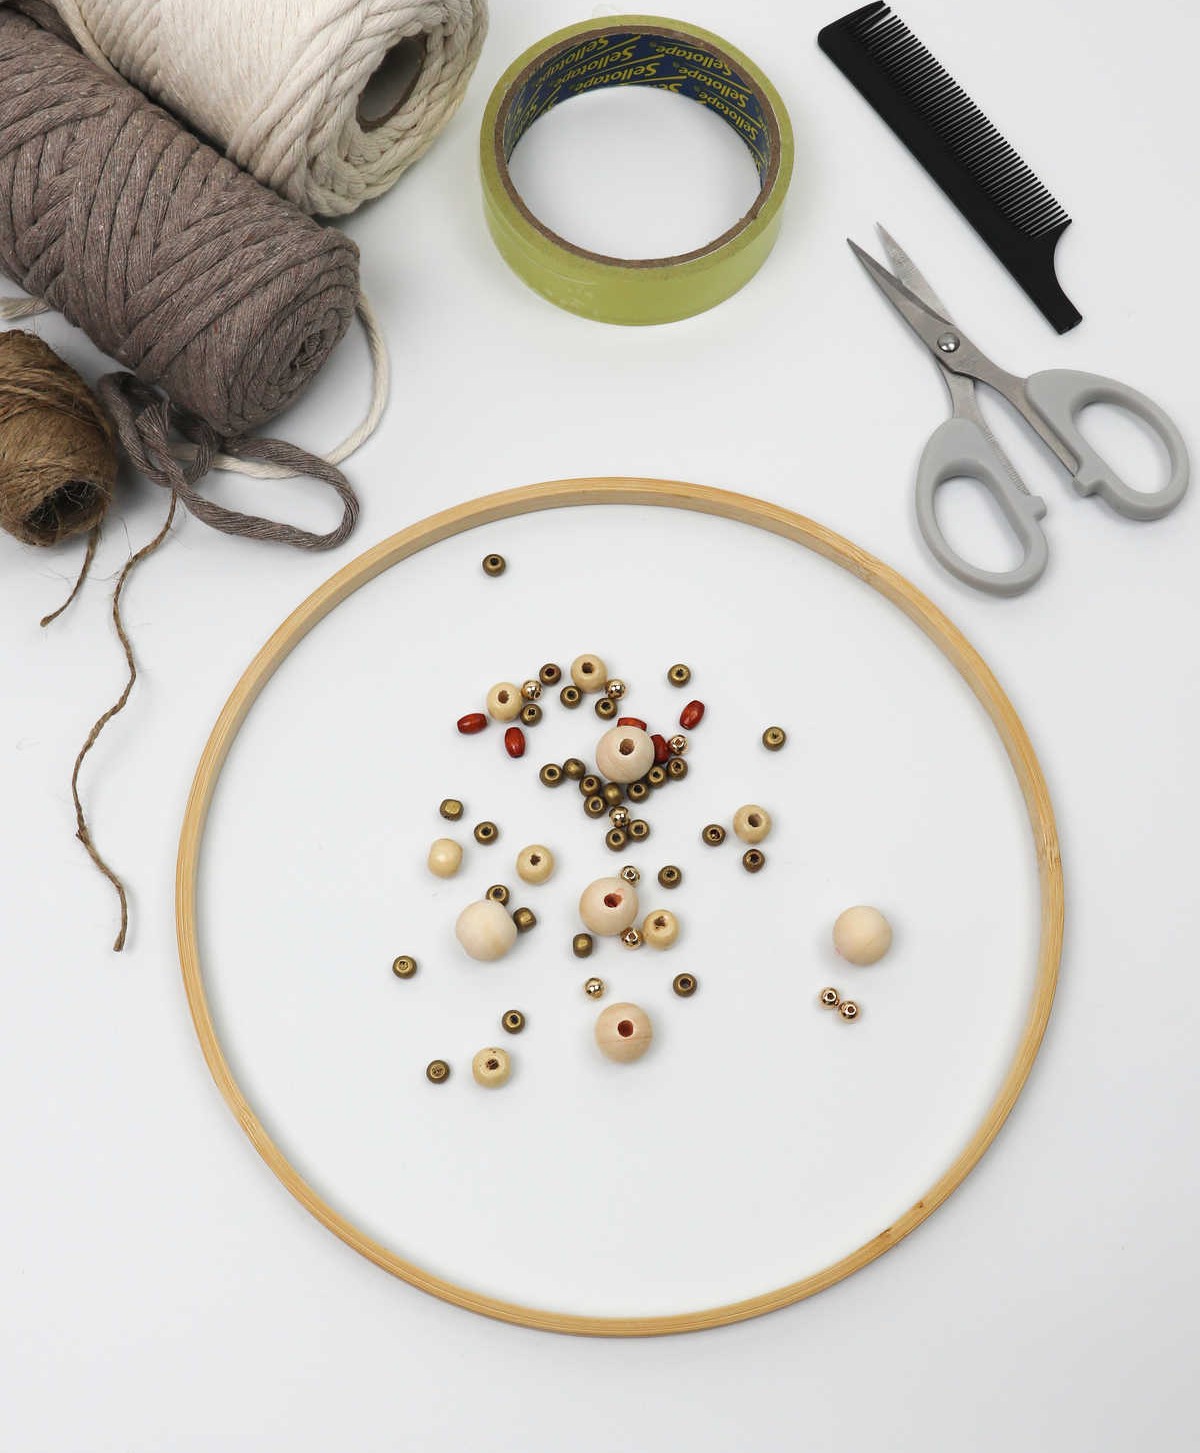
To get started on this project, you’ll need the following essential items:
* A wood hoop with a diameter of 10 to 11 inches.
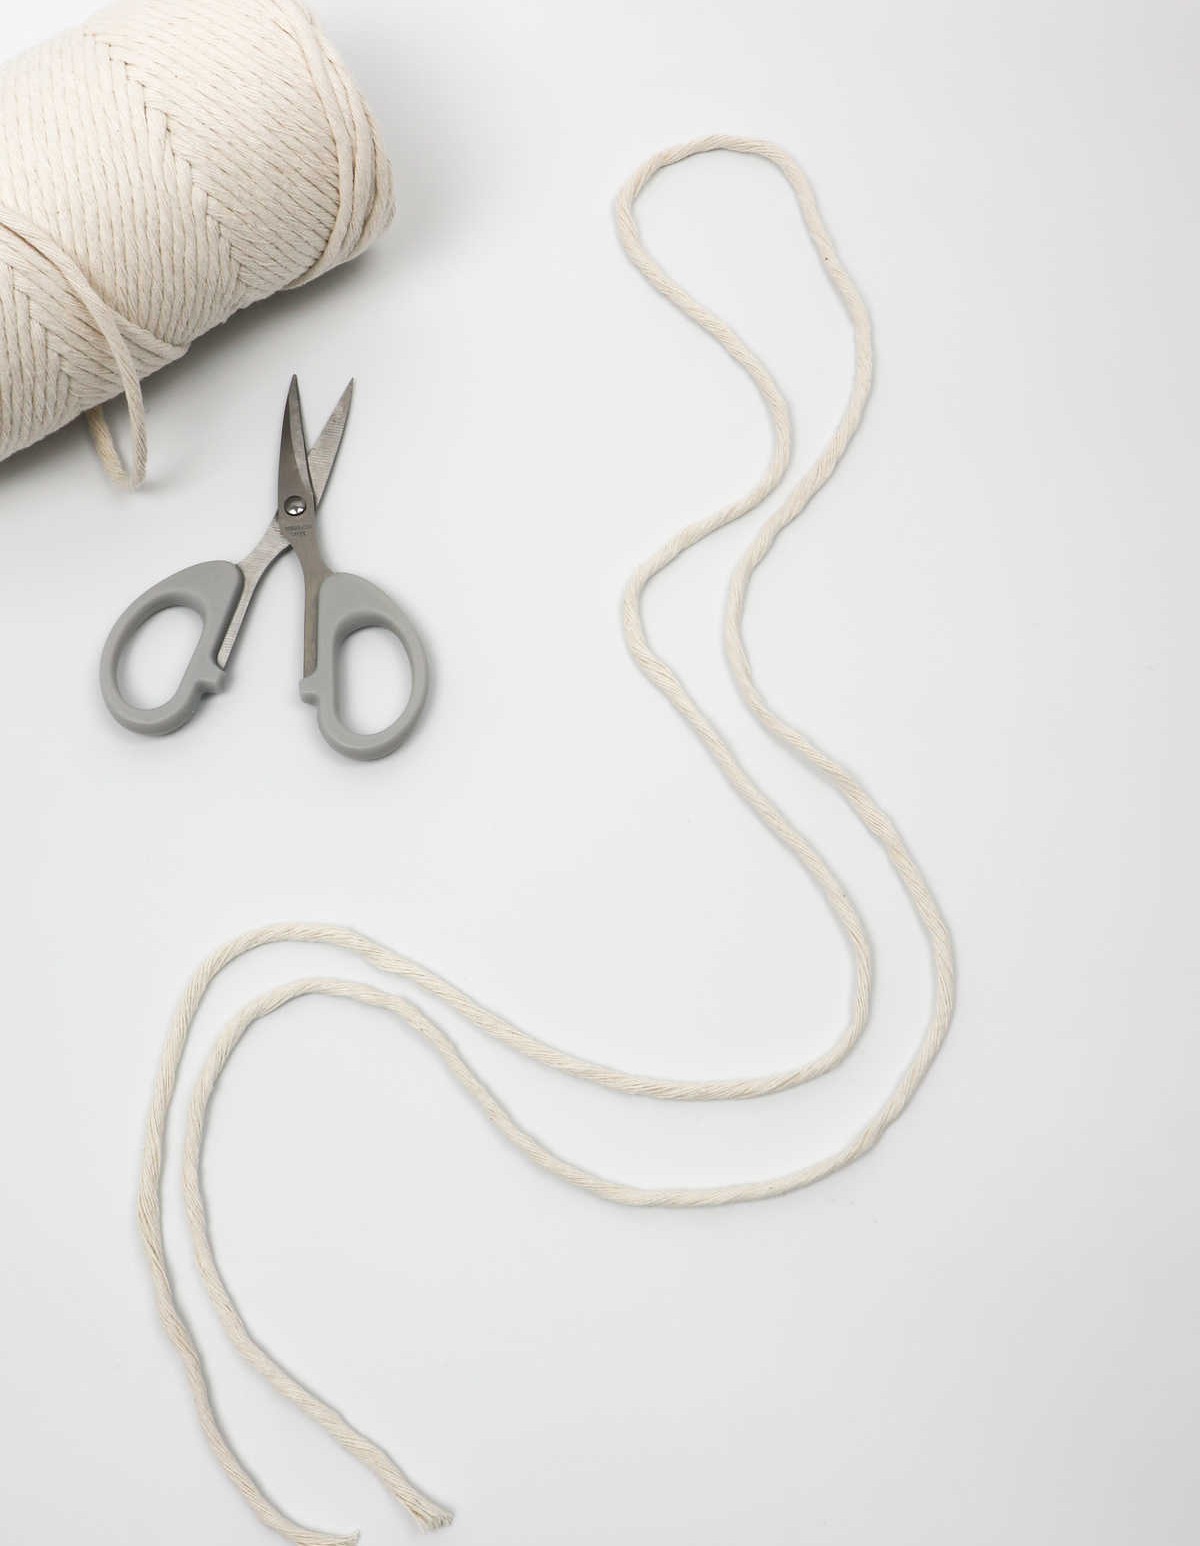
* Fifteen inch thick single twist cotton cord in cream and cappuccino colors.
* Scissors for cutting the cord to the desired length.
* Beads to add some flair and personality to your project.
* Hair combs to help secure any stray hairs or embellishments.
* Optional: tape to keep everything in place, and jute twine for added texture and interest.
How to Make a Dreamcatcher?
Embark on an artisanal adventure and learn how to craft your very own dreamcatcher from start to finish. Follow this comprehensive guide as we break down the process into manageable steps, ensuring that you can recreate this mesmerizing piece of art with ease.
Step 1
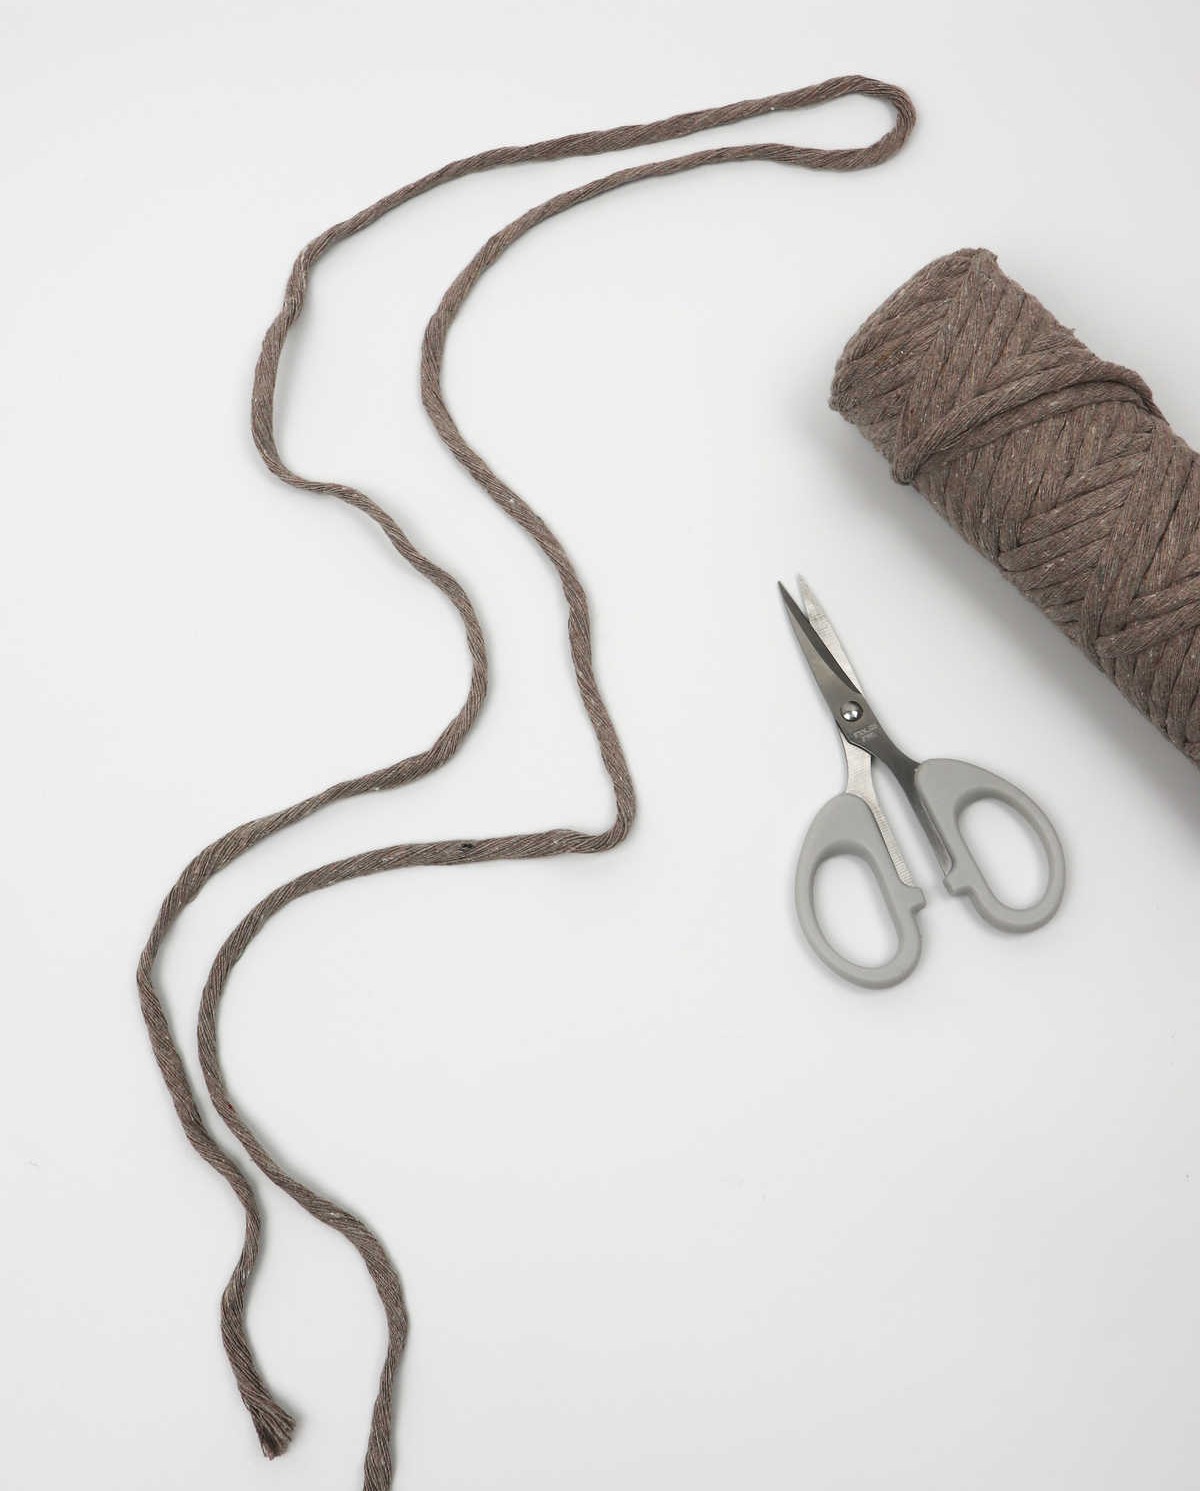
To begin, start by carefully untangling your cord. Next, take precise measurements and mark off a section approximately 60 inches long. Cut the cord along this marked line to create your first string. You’ll need eight identical strings in total, each measuring 60 inches. Arrange them neatly on a flat surface, following the desired pattern.
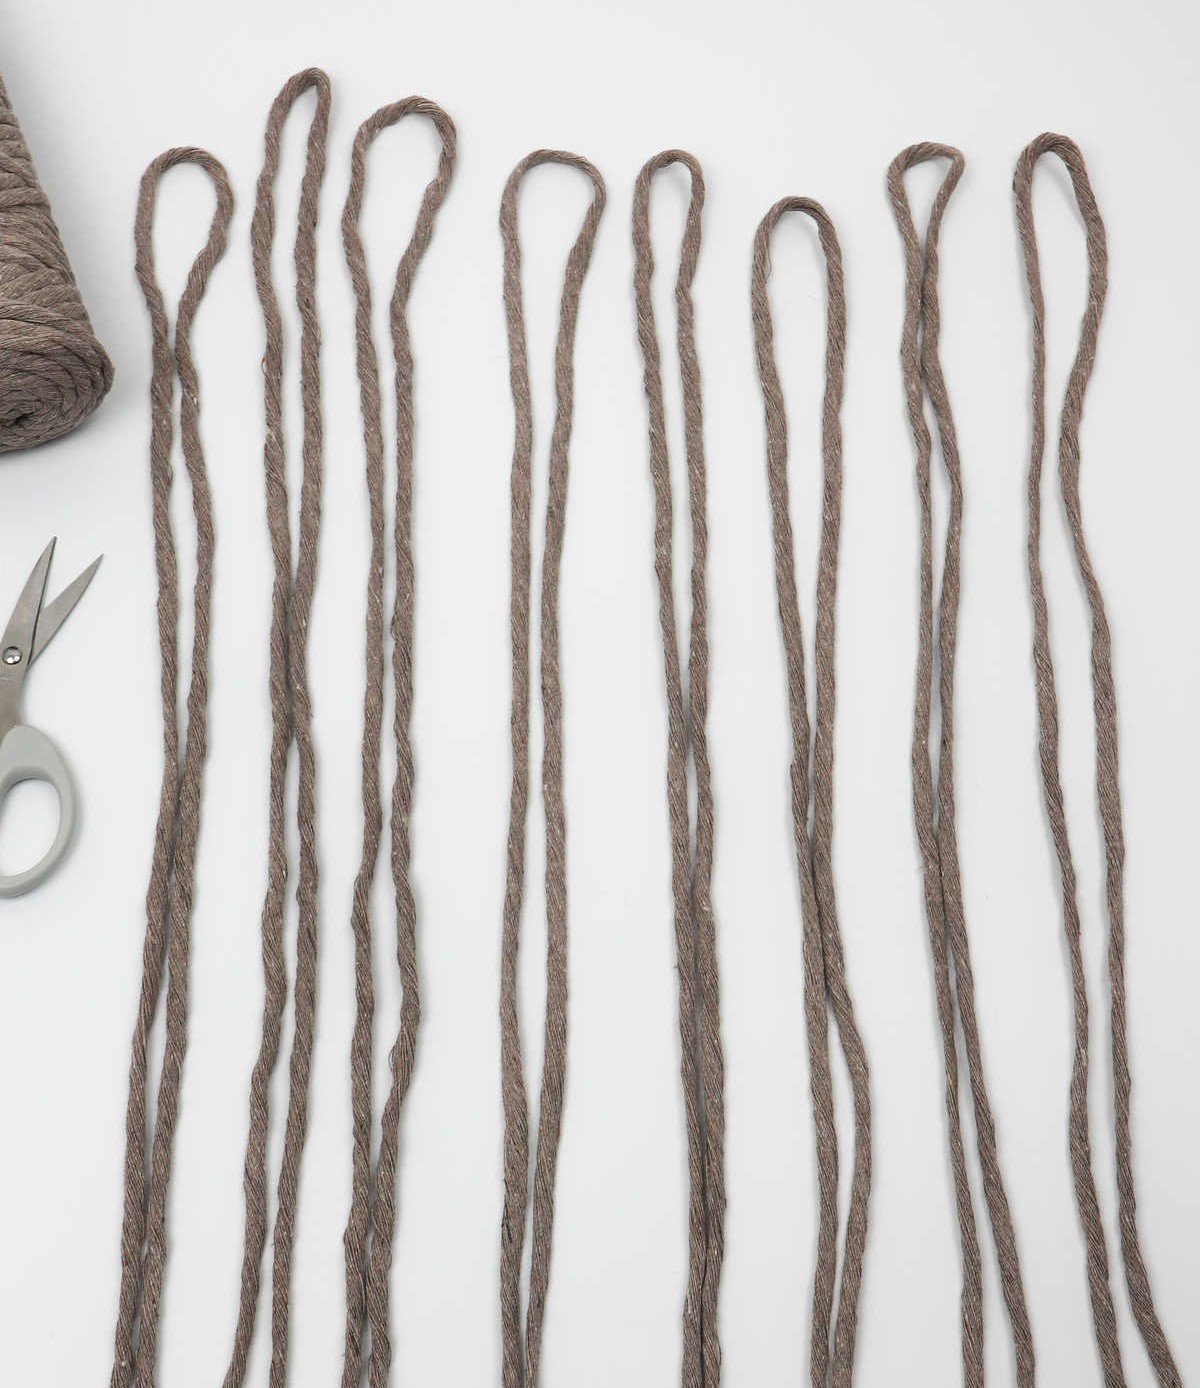
Step 2
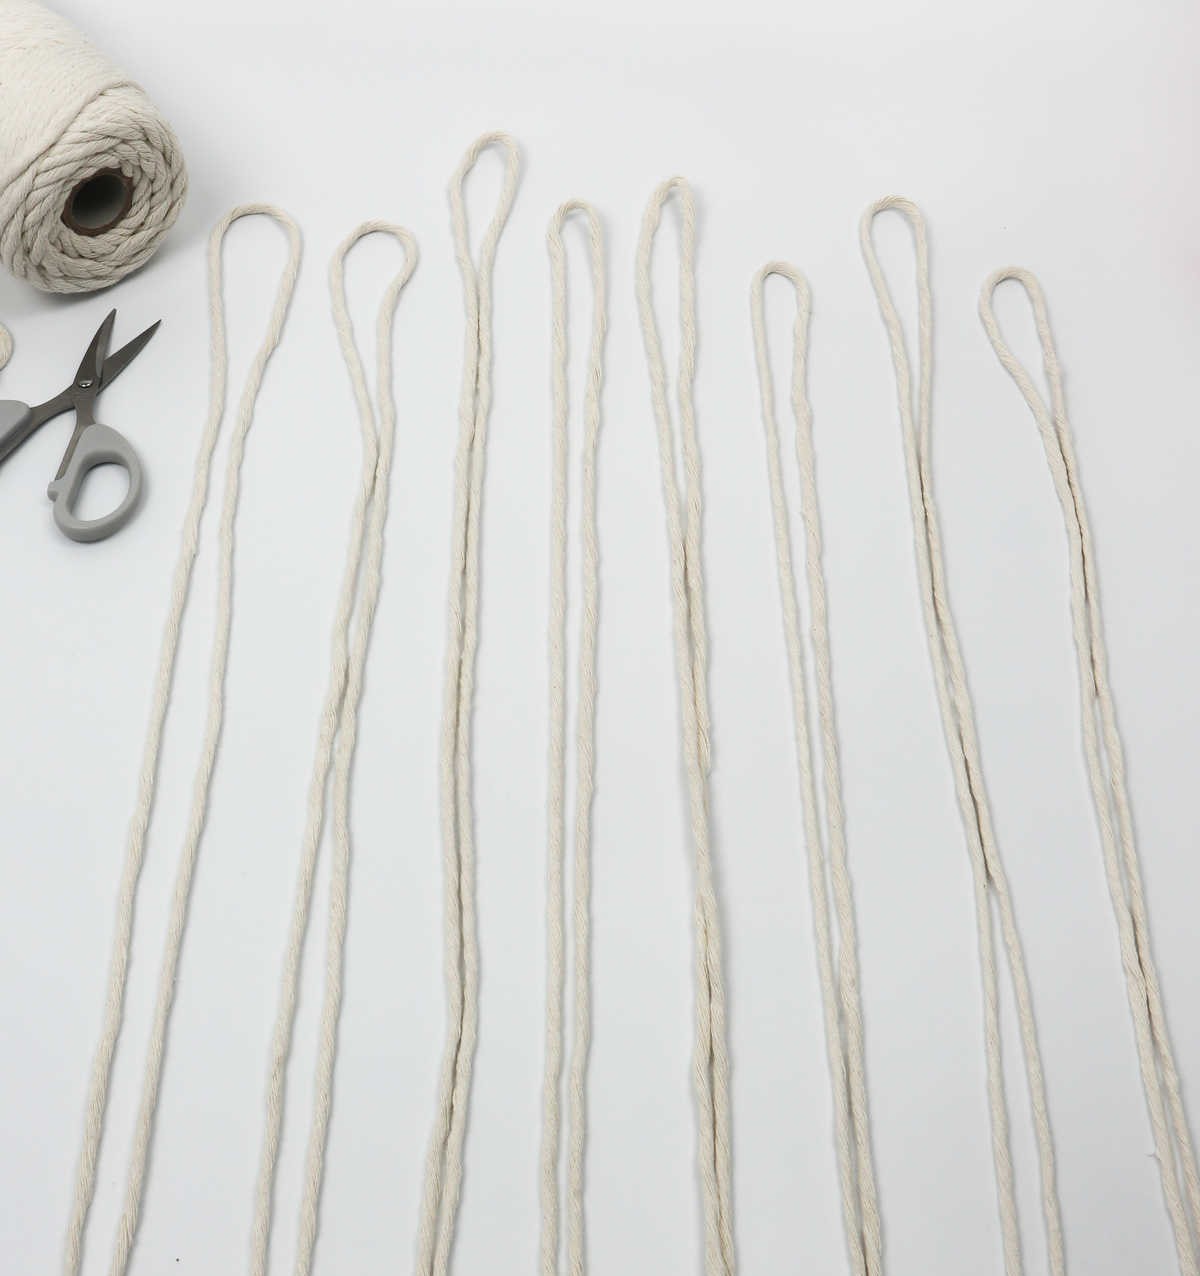
To get started, you’ll need to follow the same process for each individual cord color used in your project. For instance, with a total of 16 cords – eight in cappuccino and eight in cream – you’ll want to repeat this step accordingly.
Step 3
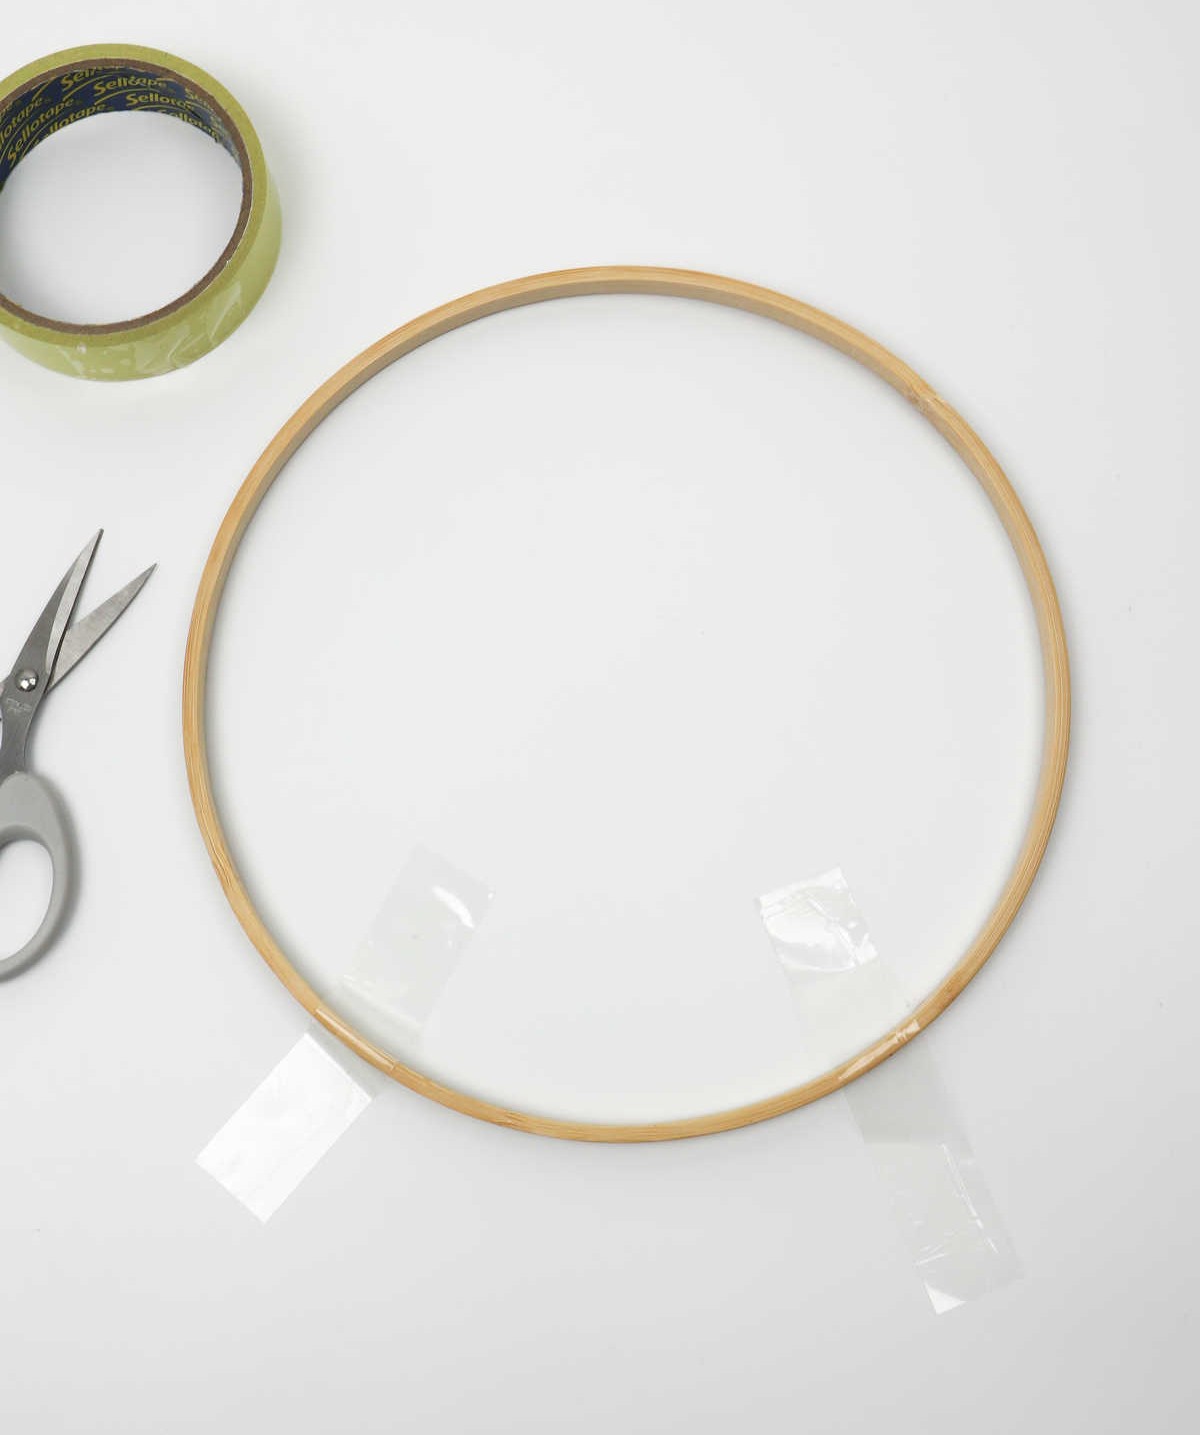
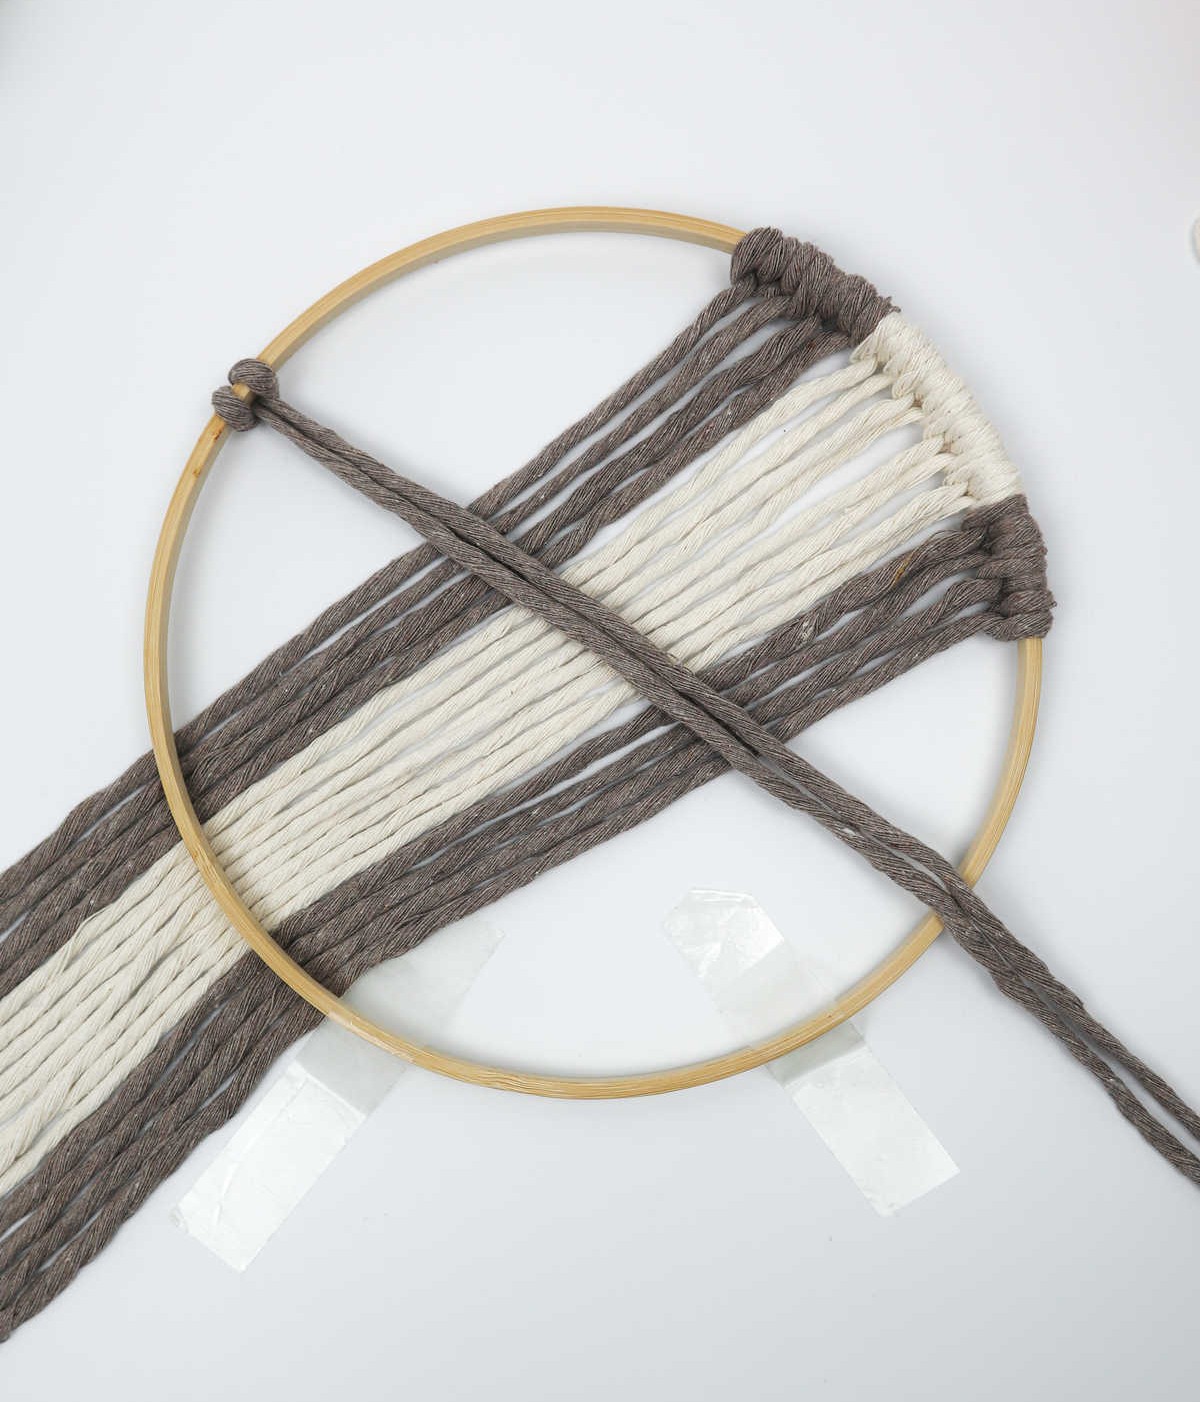
Secure your hoop or ring firmly to your work surface using tape, preventing any movement during the process. You’ll appreciate this step later on, as it guarantees a smooth and effortless experience.
Step 4
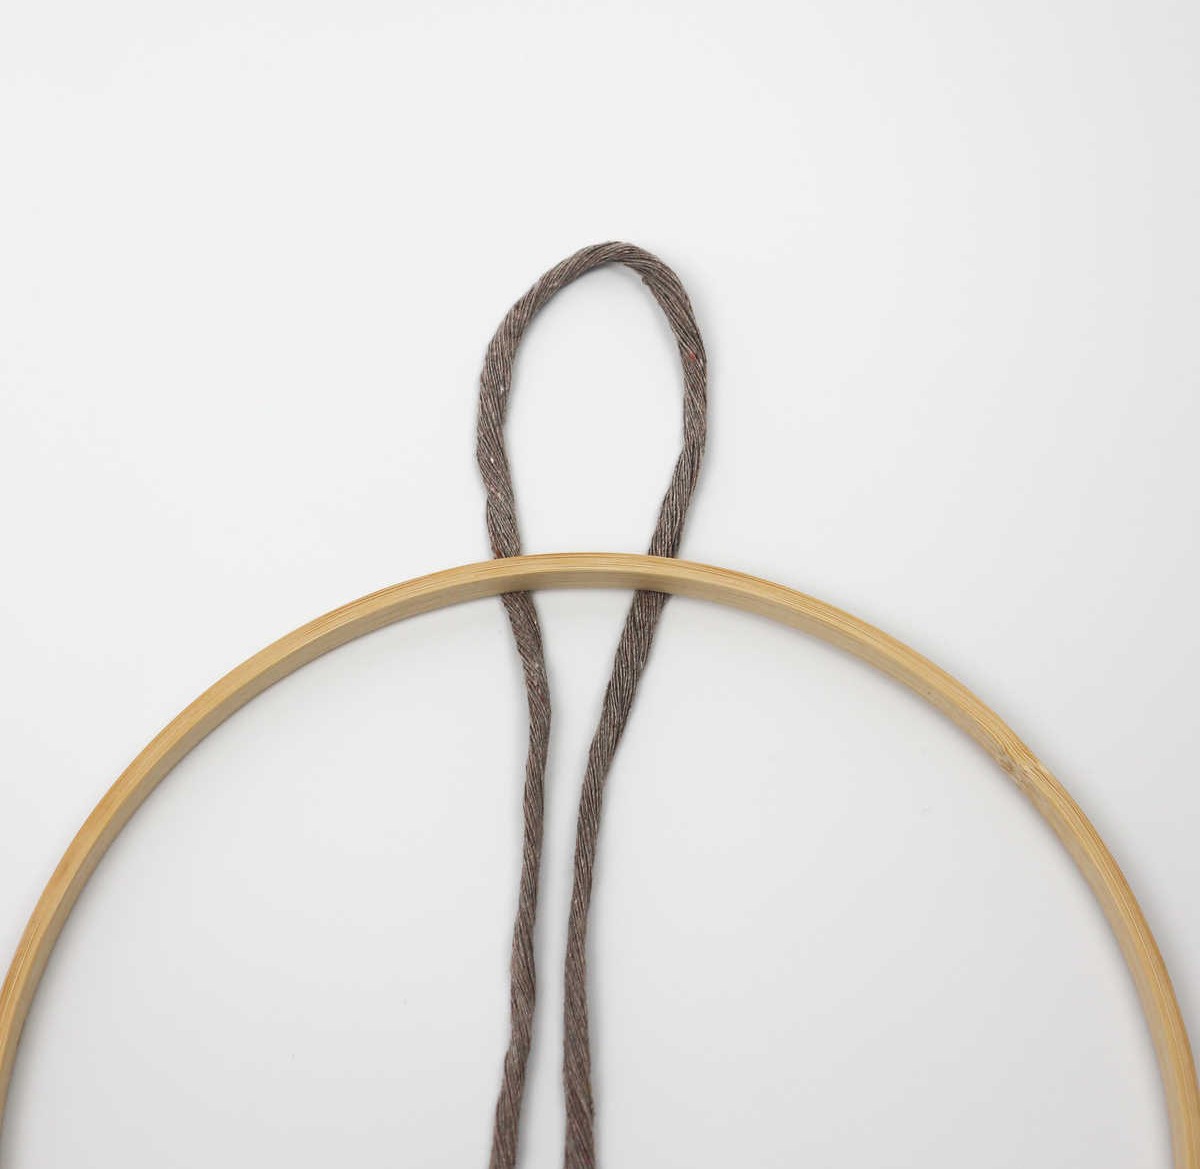
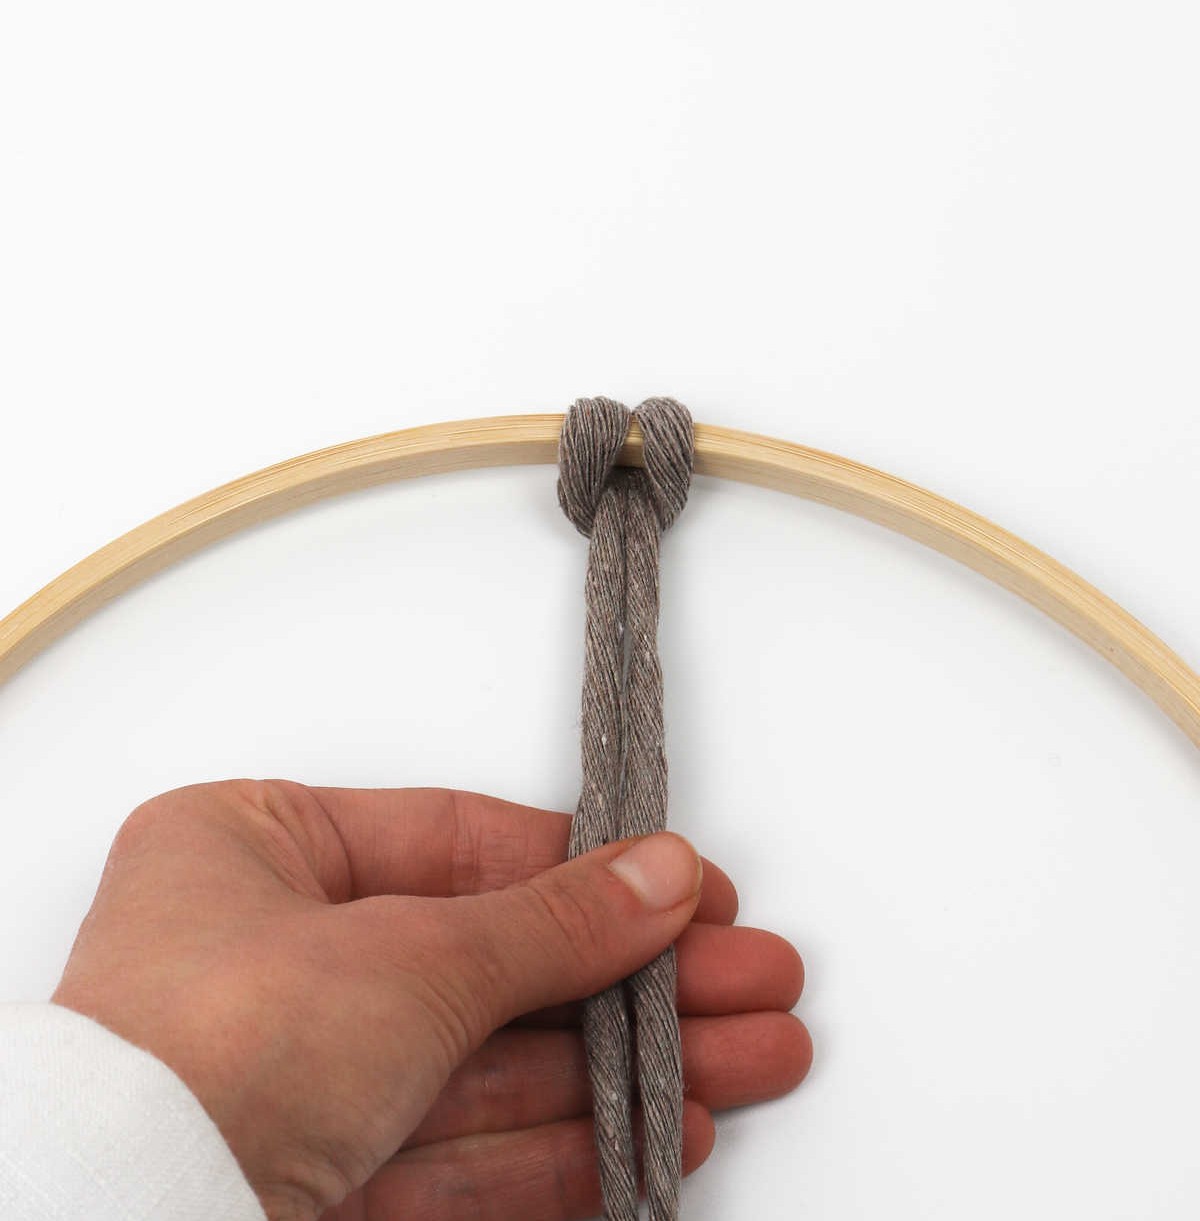
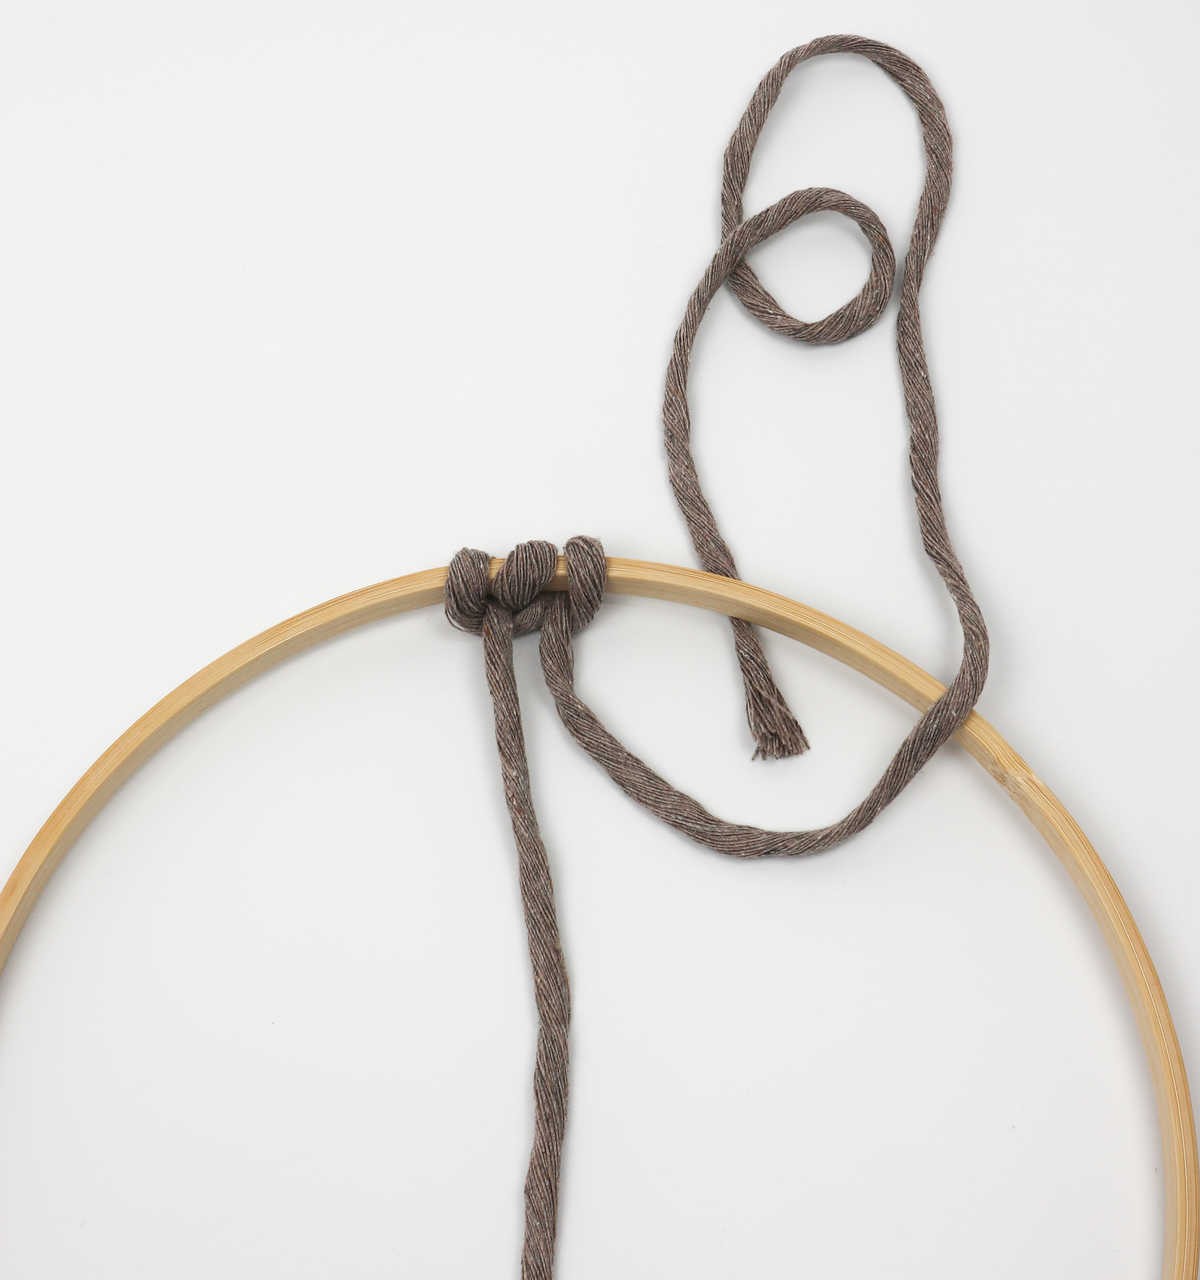
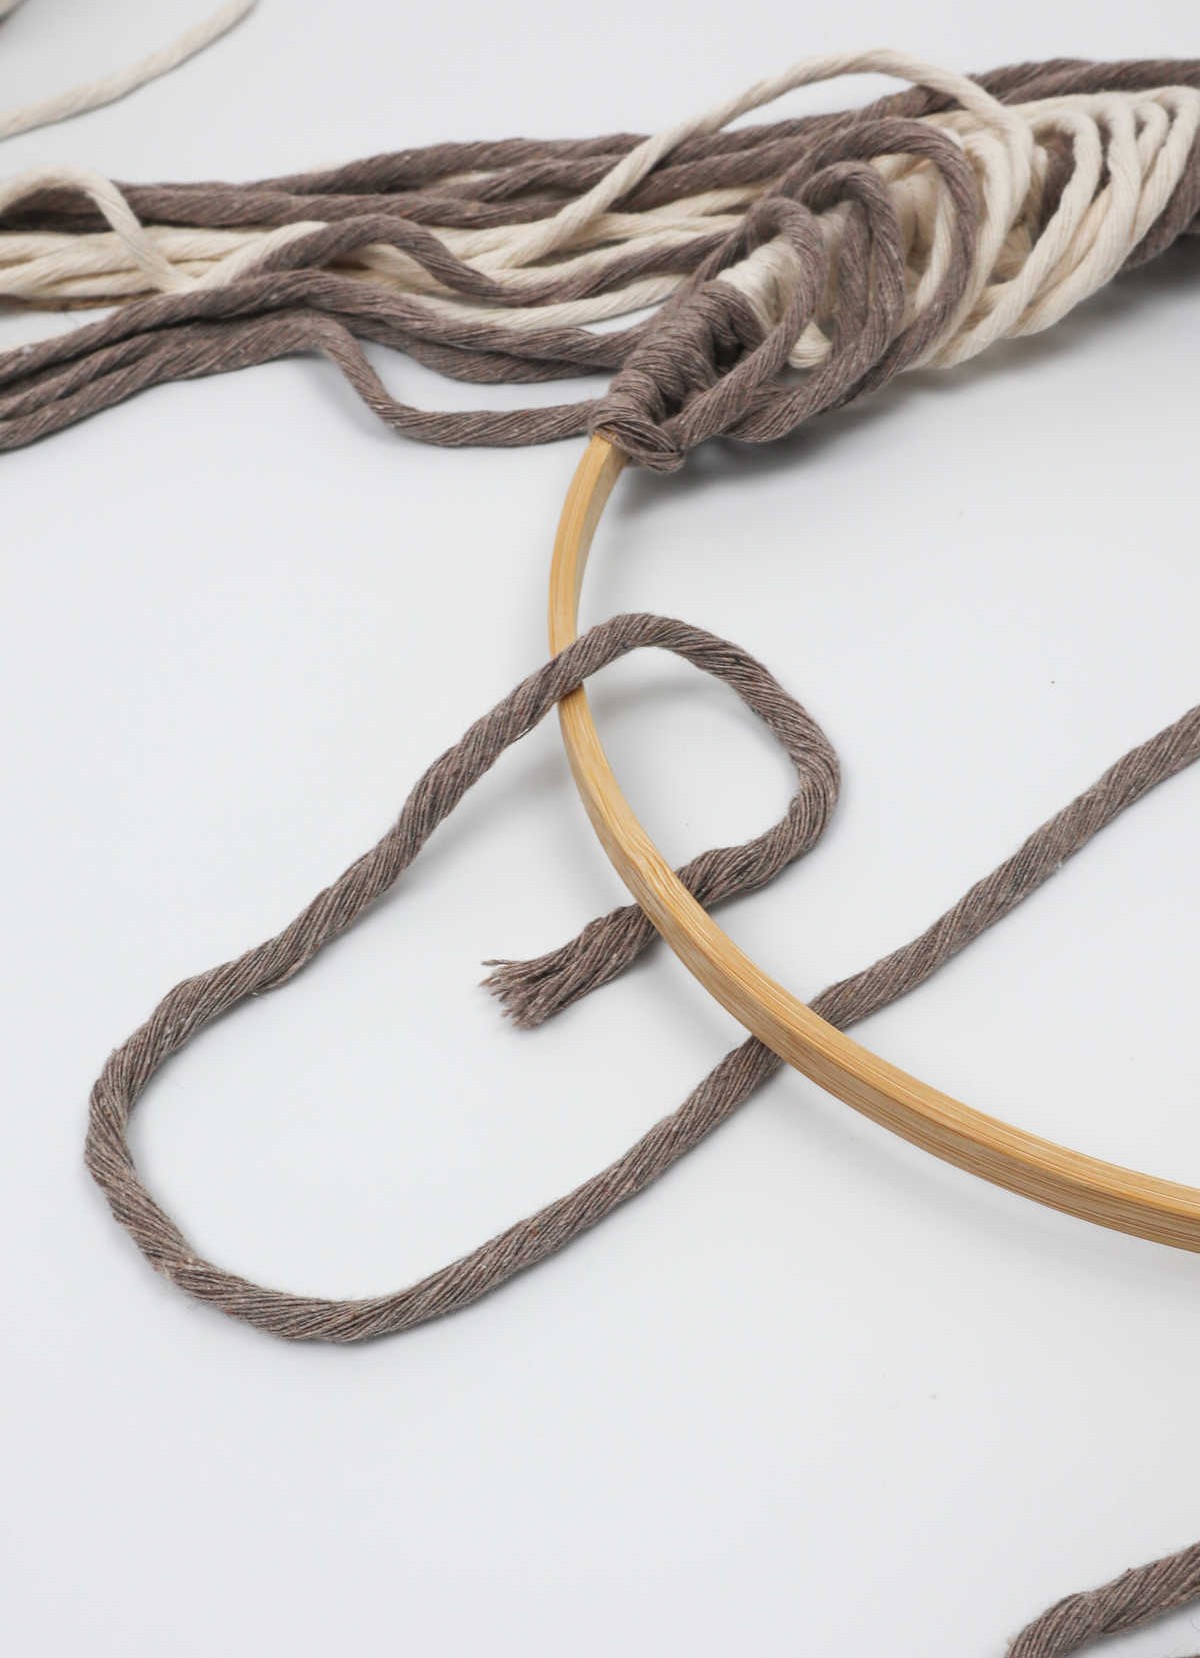
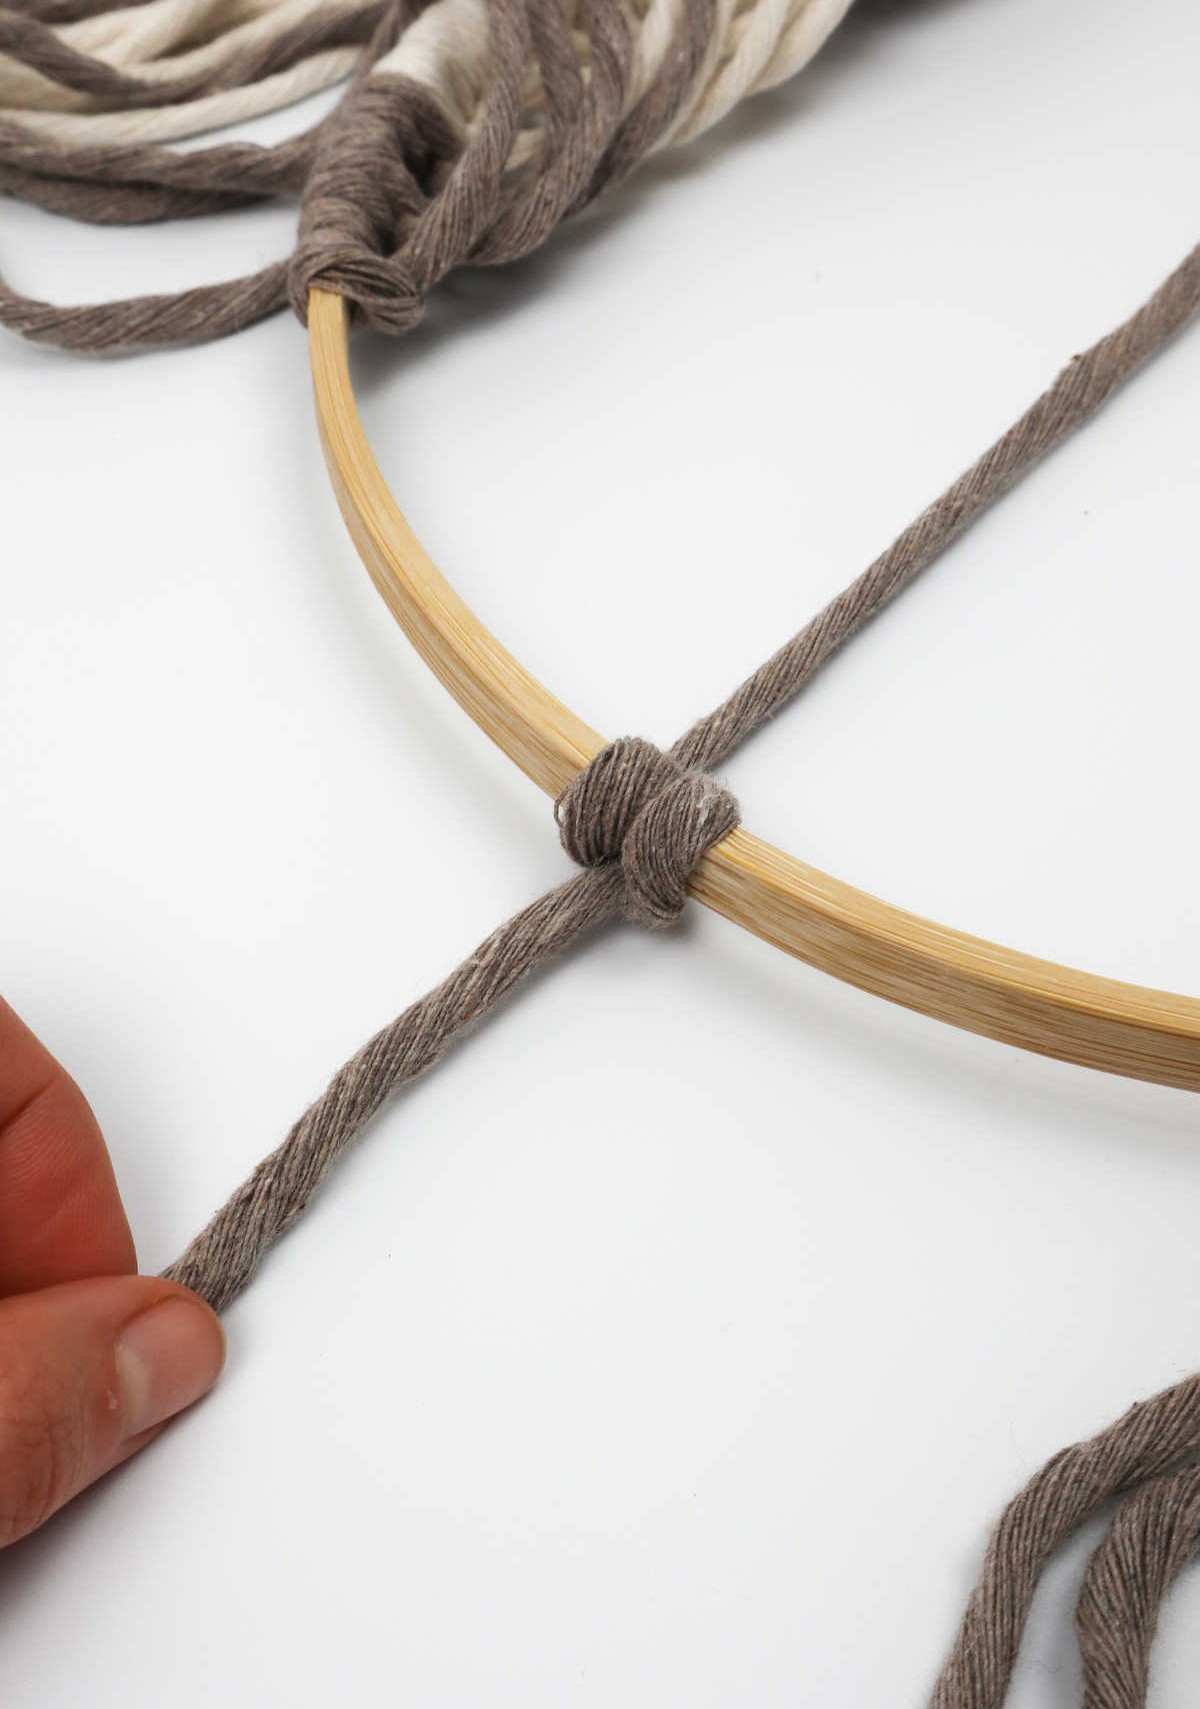
To initiate the knothead knot, start by folding the cappuccino-colored cord in half and bringing it down and under your hoop. Next, take the folded loop and bring it over the hoop, allowing it to overlap with the two loose-ends. Grab hold of these loose ends and thread them through the newly formed loop. Finally, give the ends a good tug to tighten the knot and create the knothead shape.
As you work on this first knot, remember the process as you’ll be repeating it around the hoop to complete your design.
Step 5
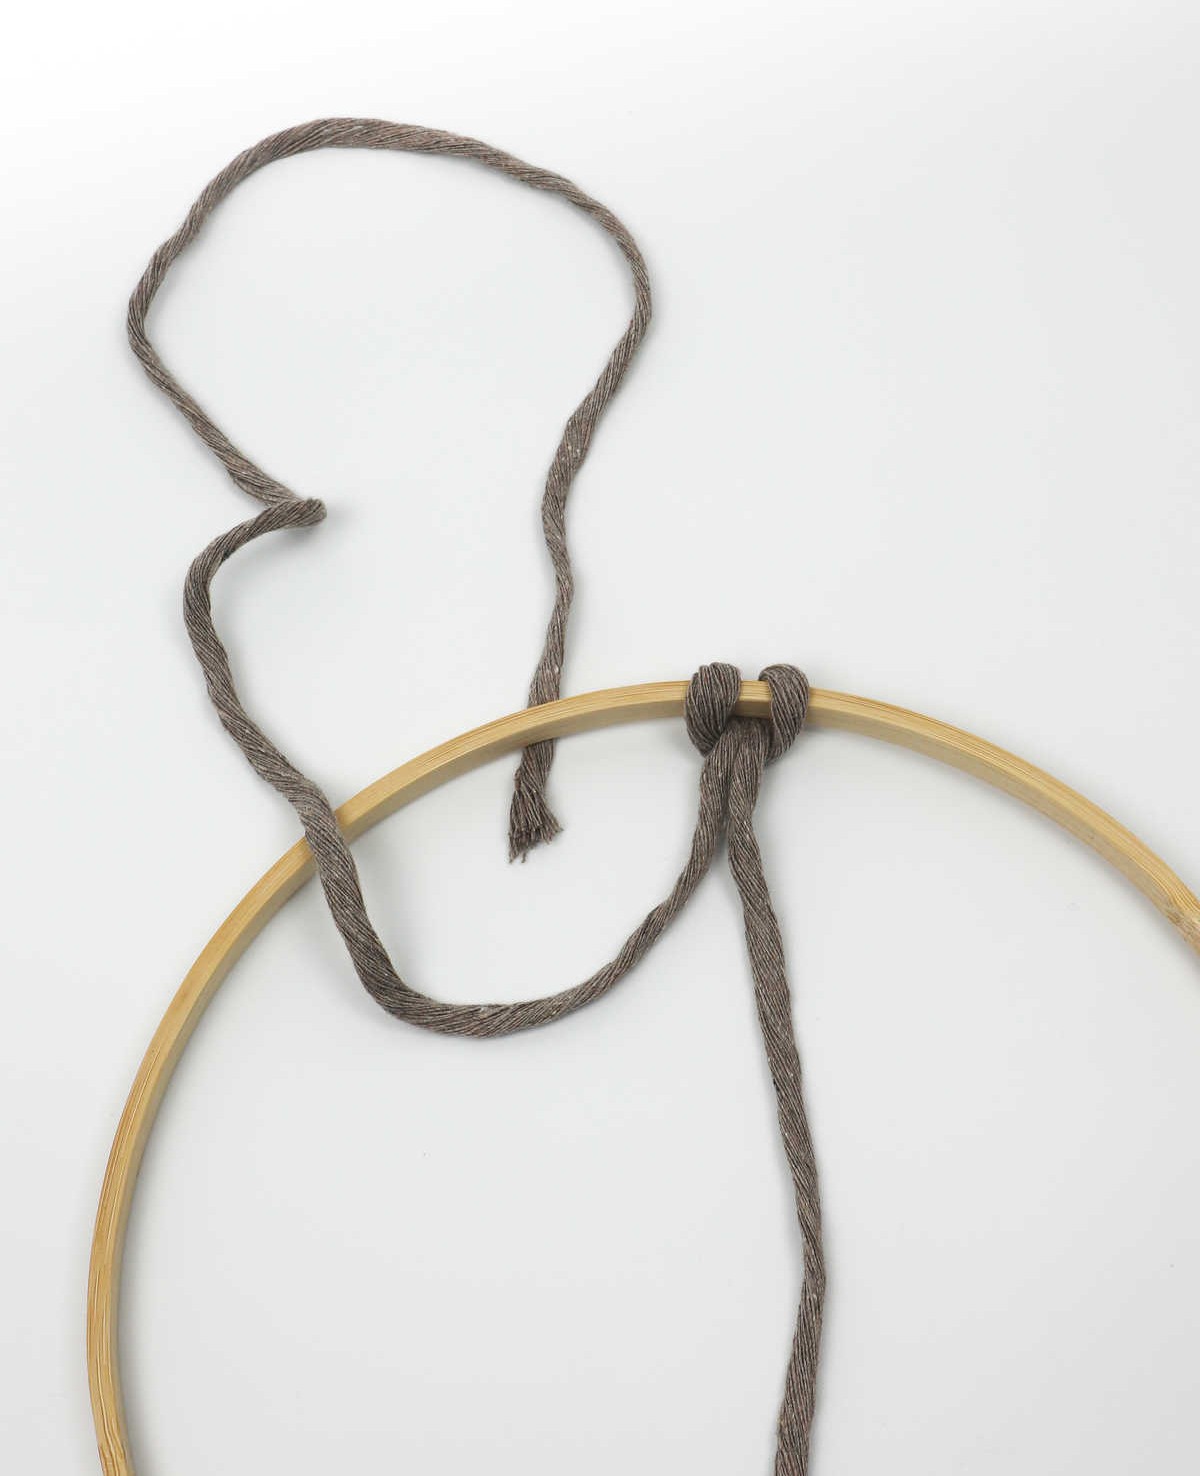
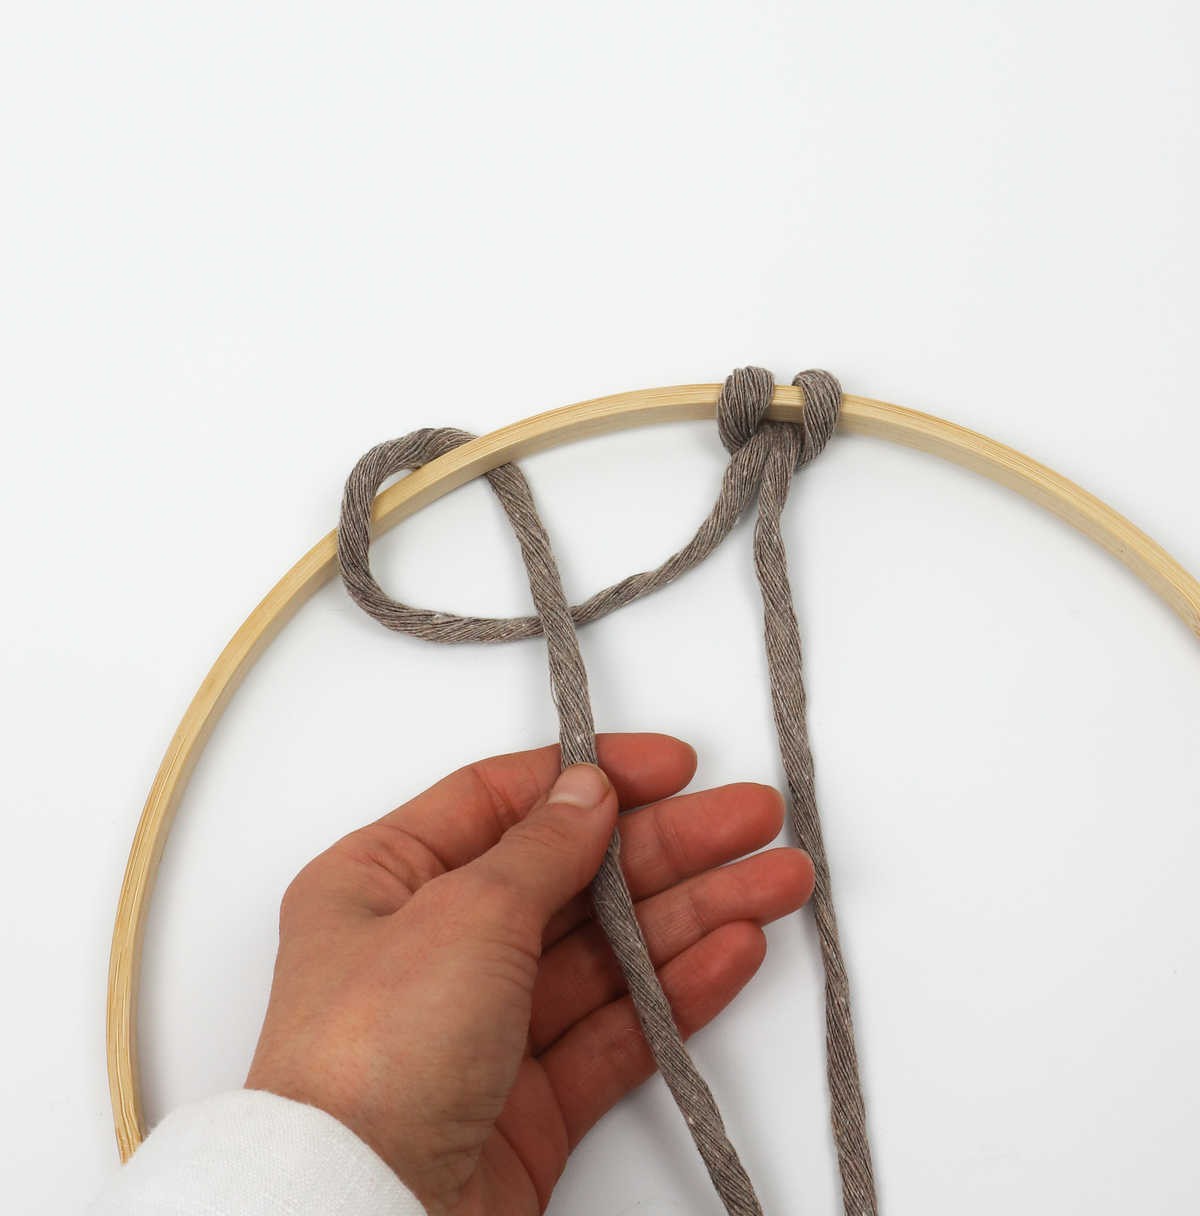
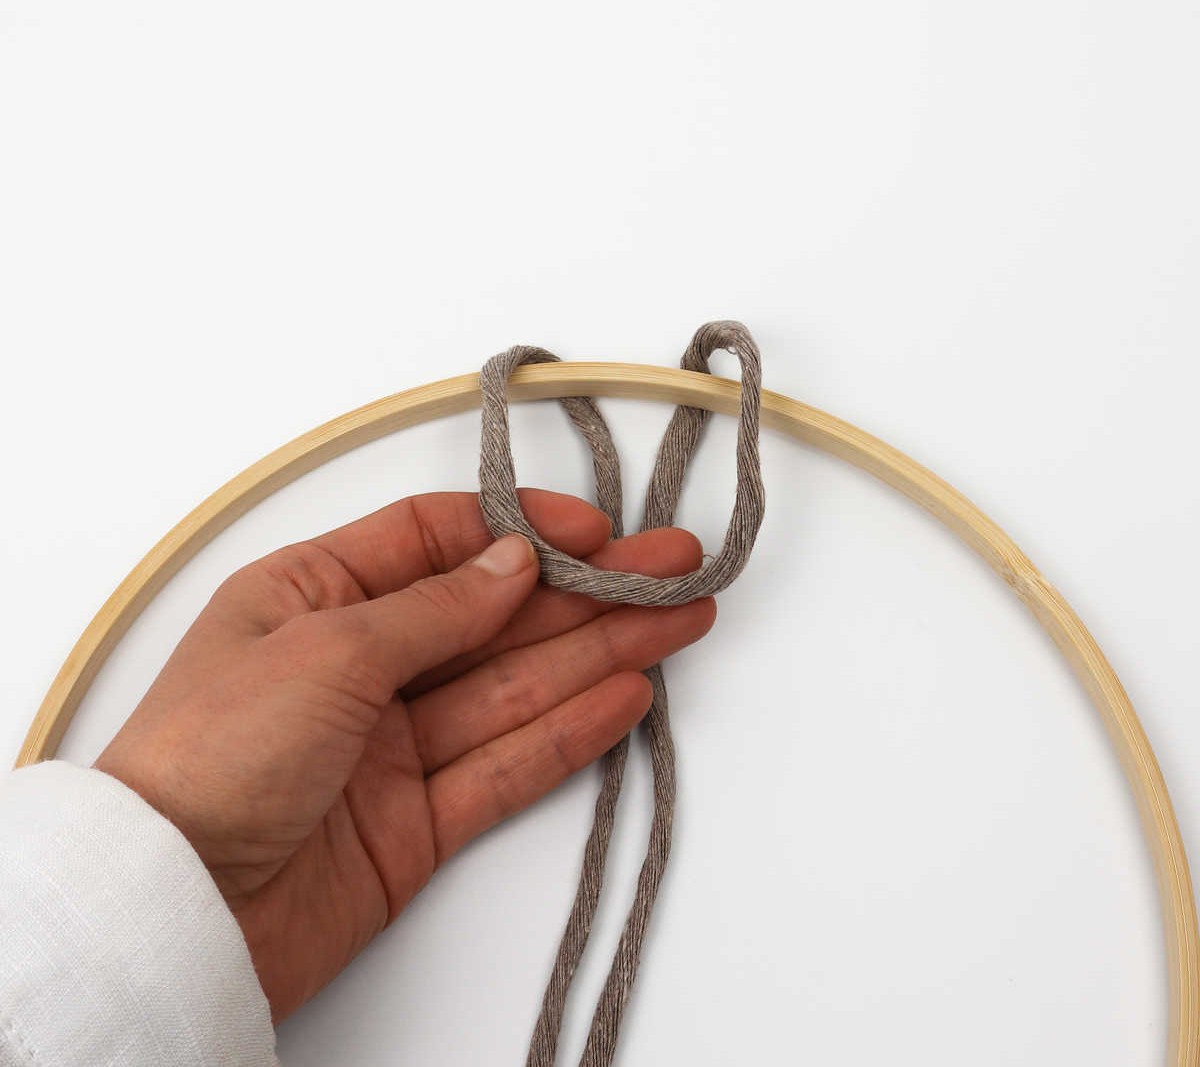
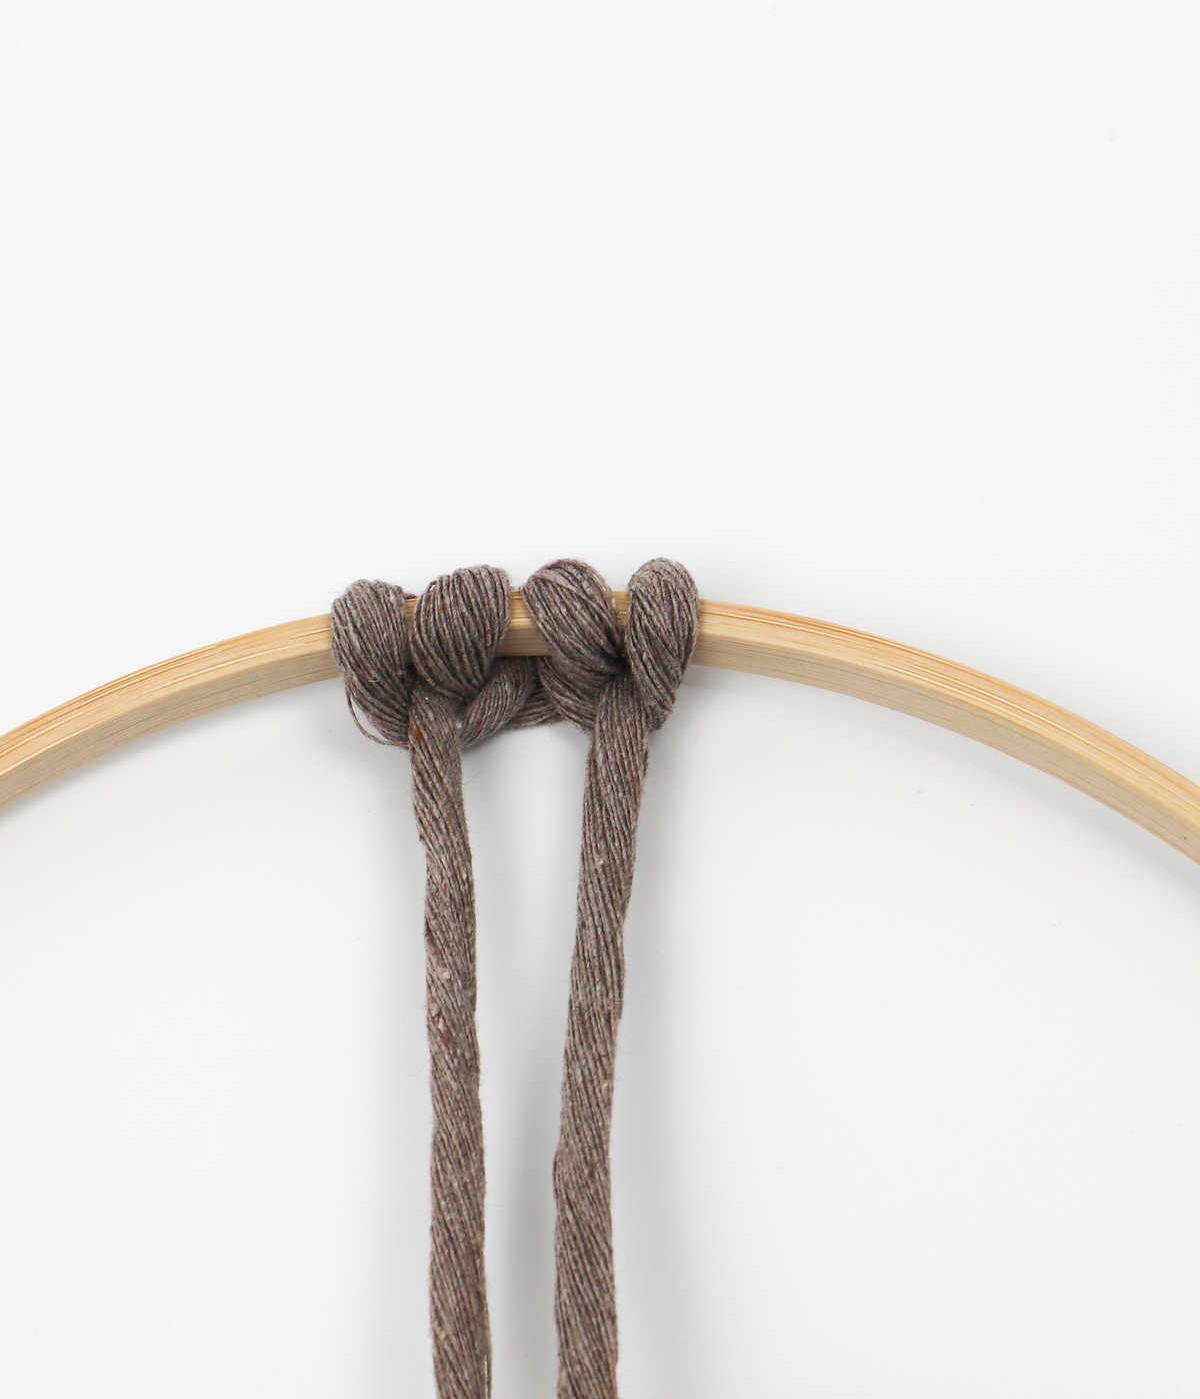
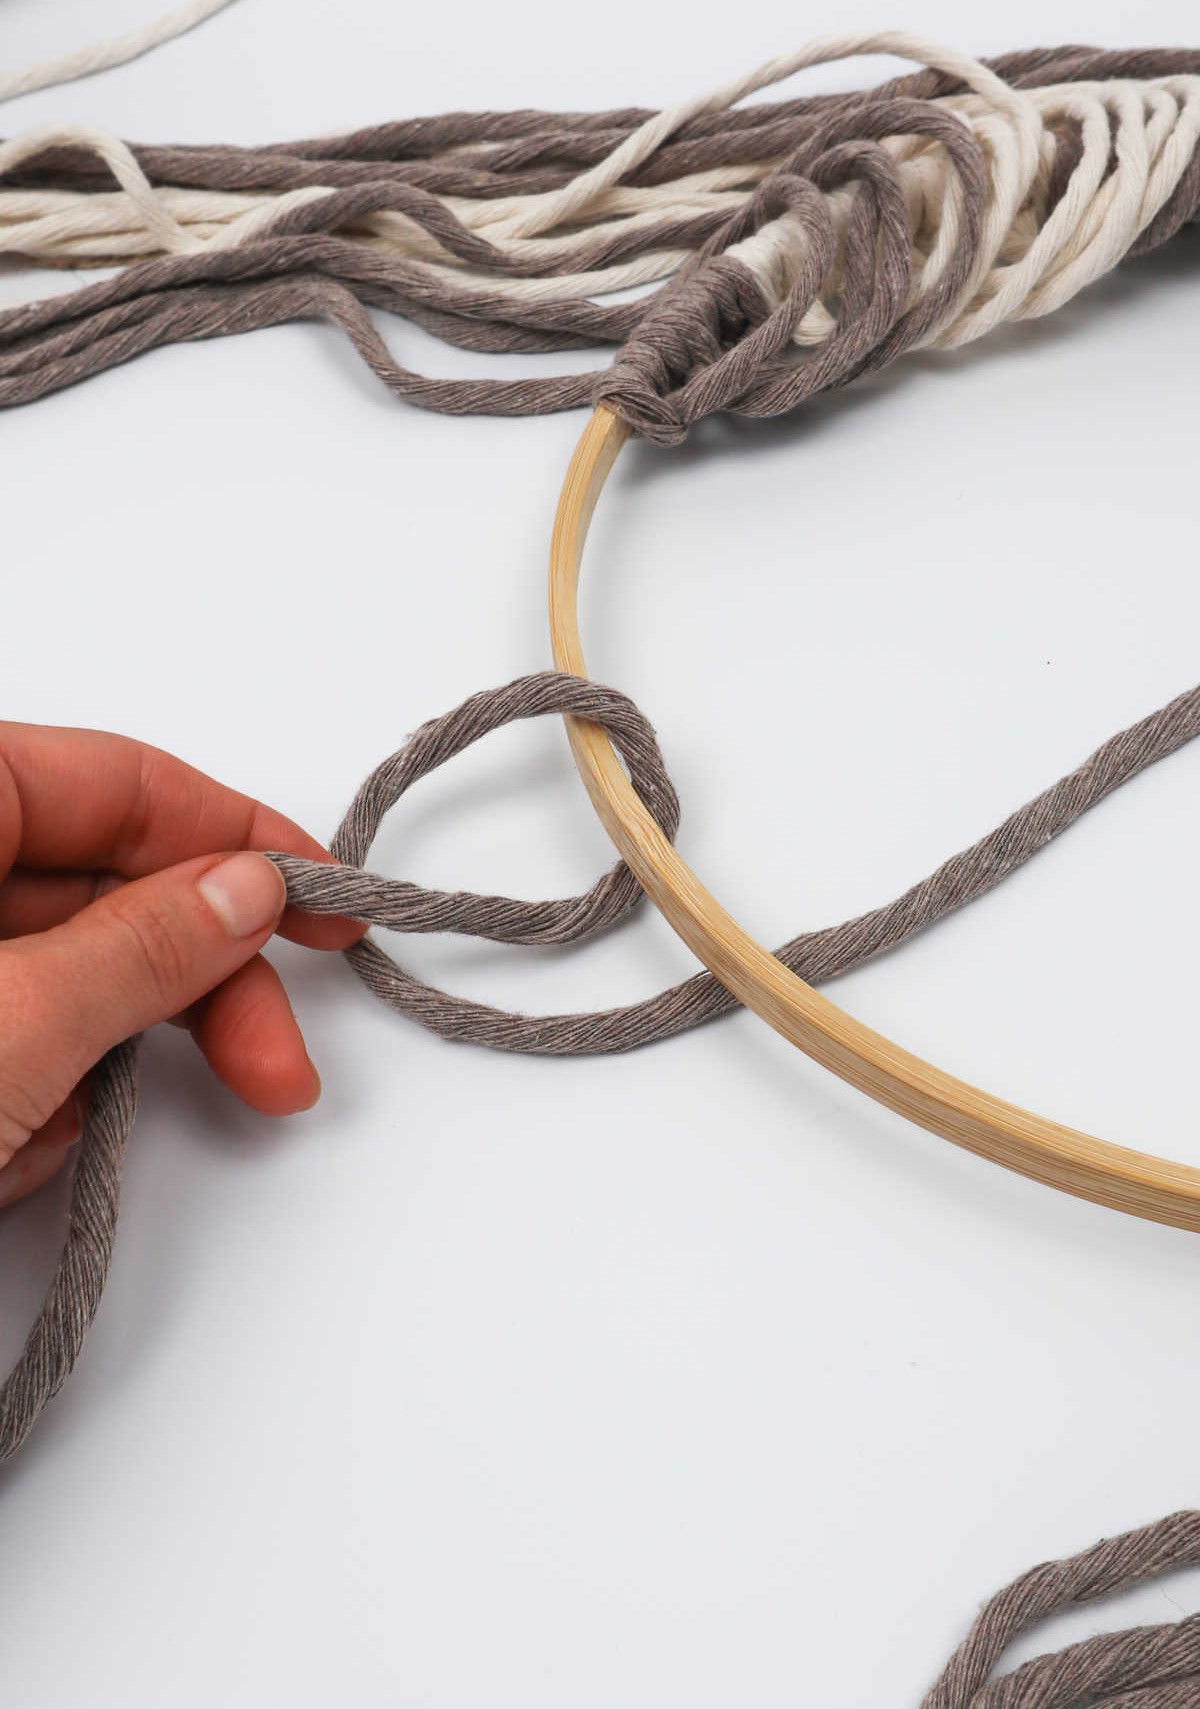
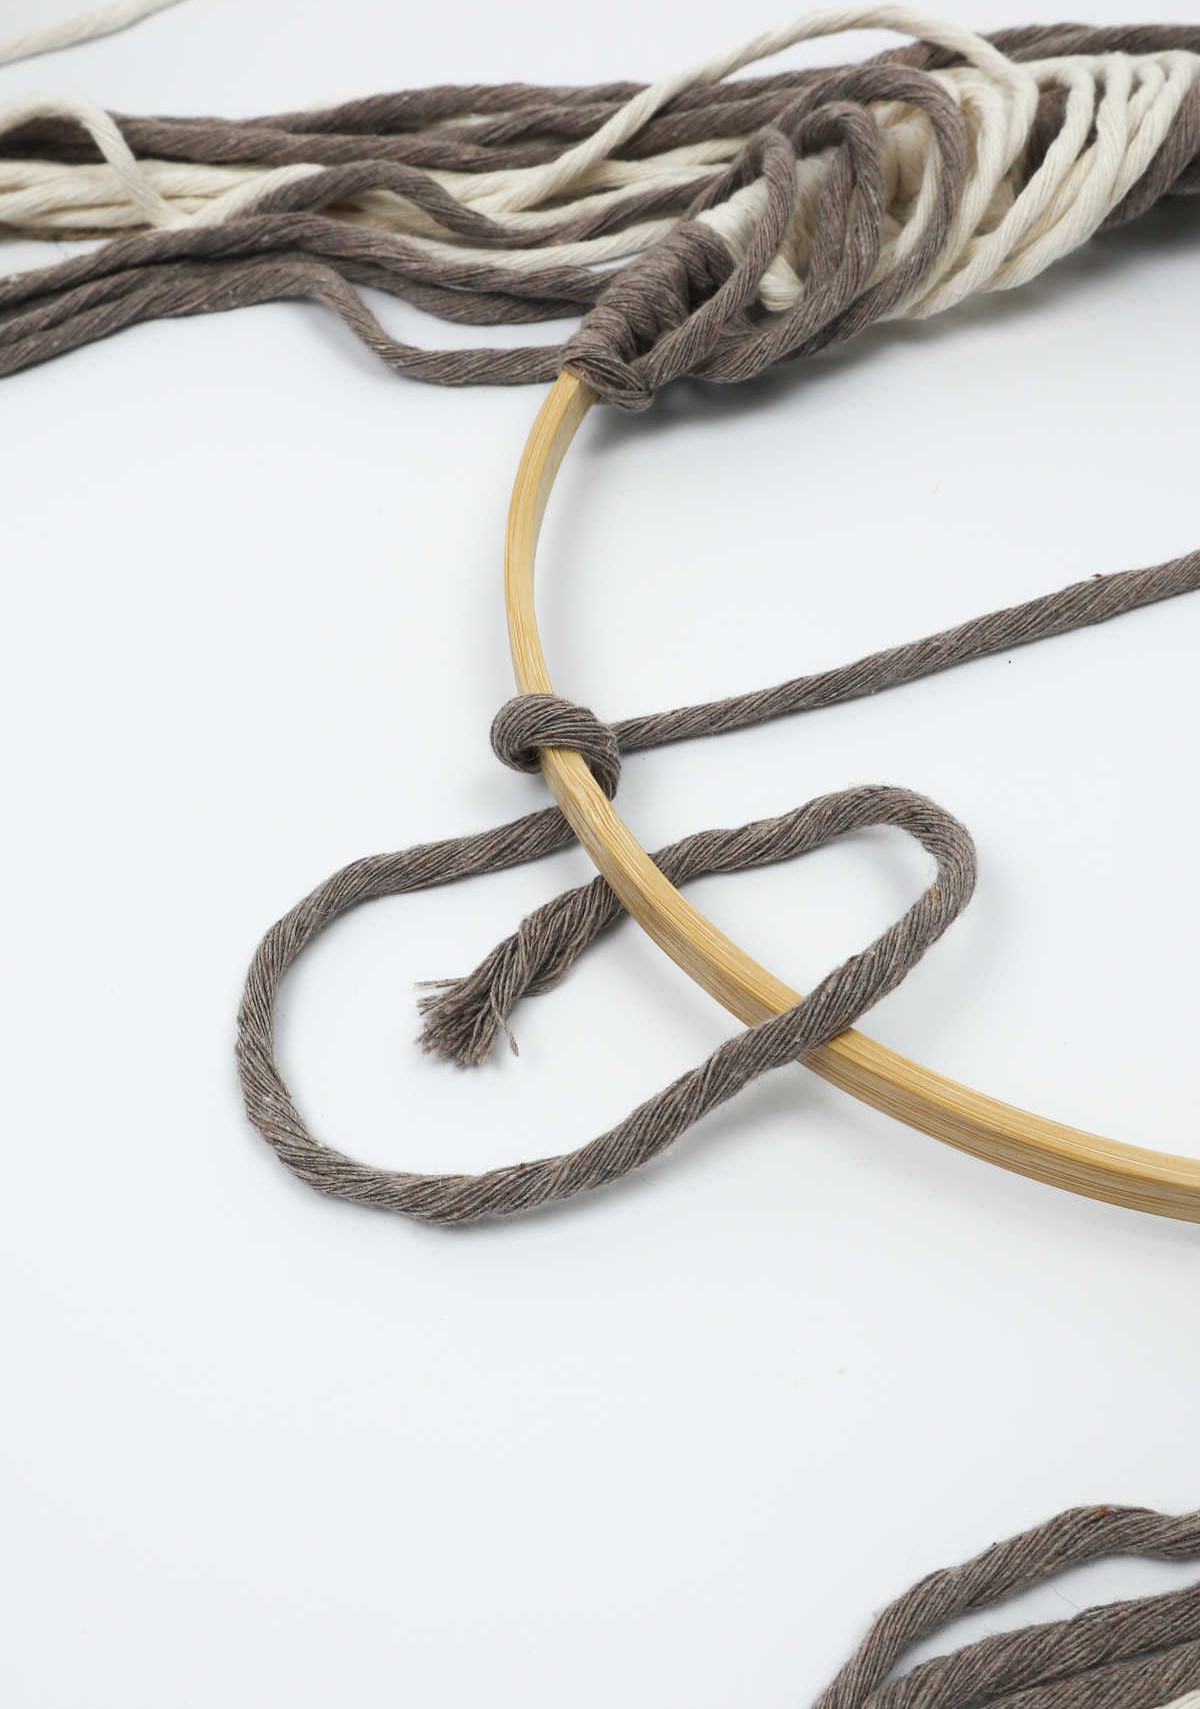
Before moving on to the next color, make sure to complete the task at hand! To do this, take the remaining string – the left one, as seen below – and gently guide it over and then under the hoop. Next, thread the end of the string through the loop, making sure it passes through the center of the hoop and over the top of the initial string. Once you’ve done this, give the string a good tug to tighten the knot in place.
You should now have another secure knot head forming on the left side, adjacent to the original one.
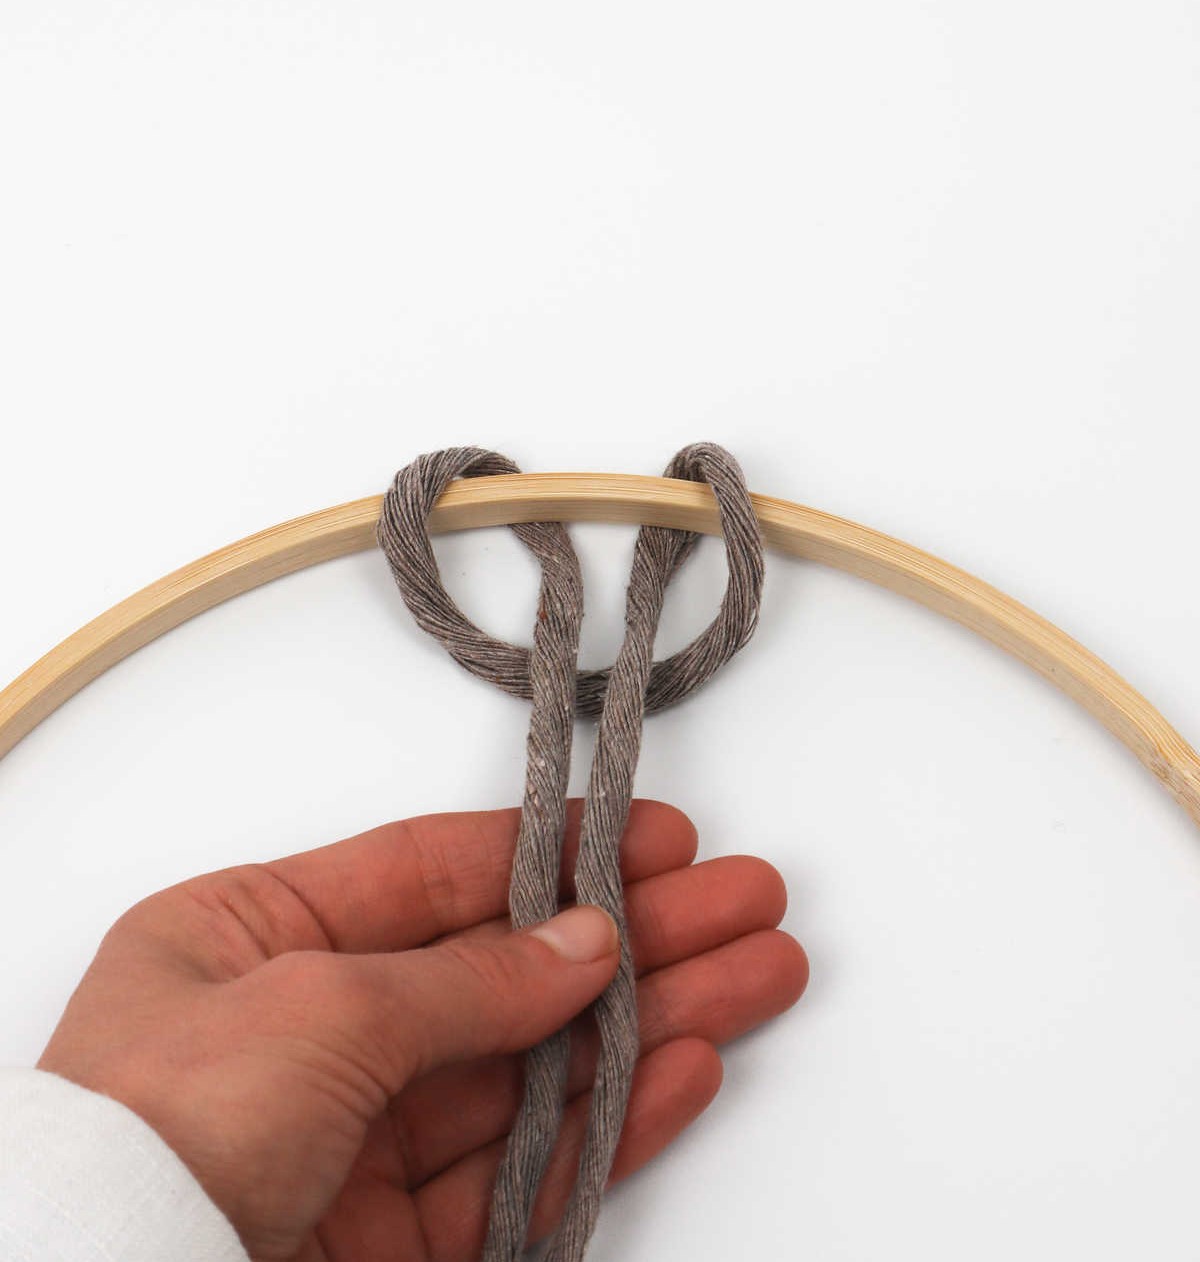
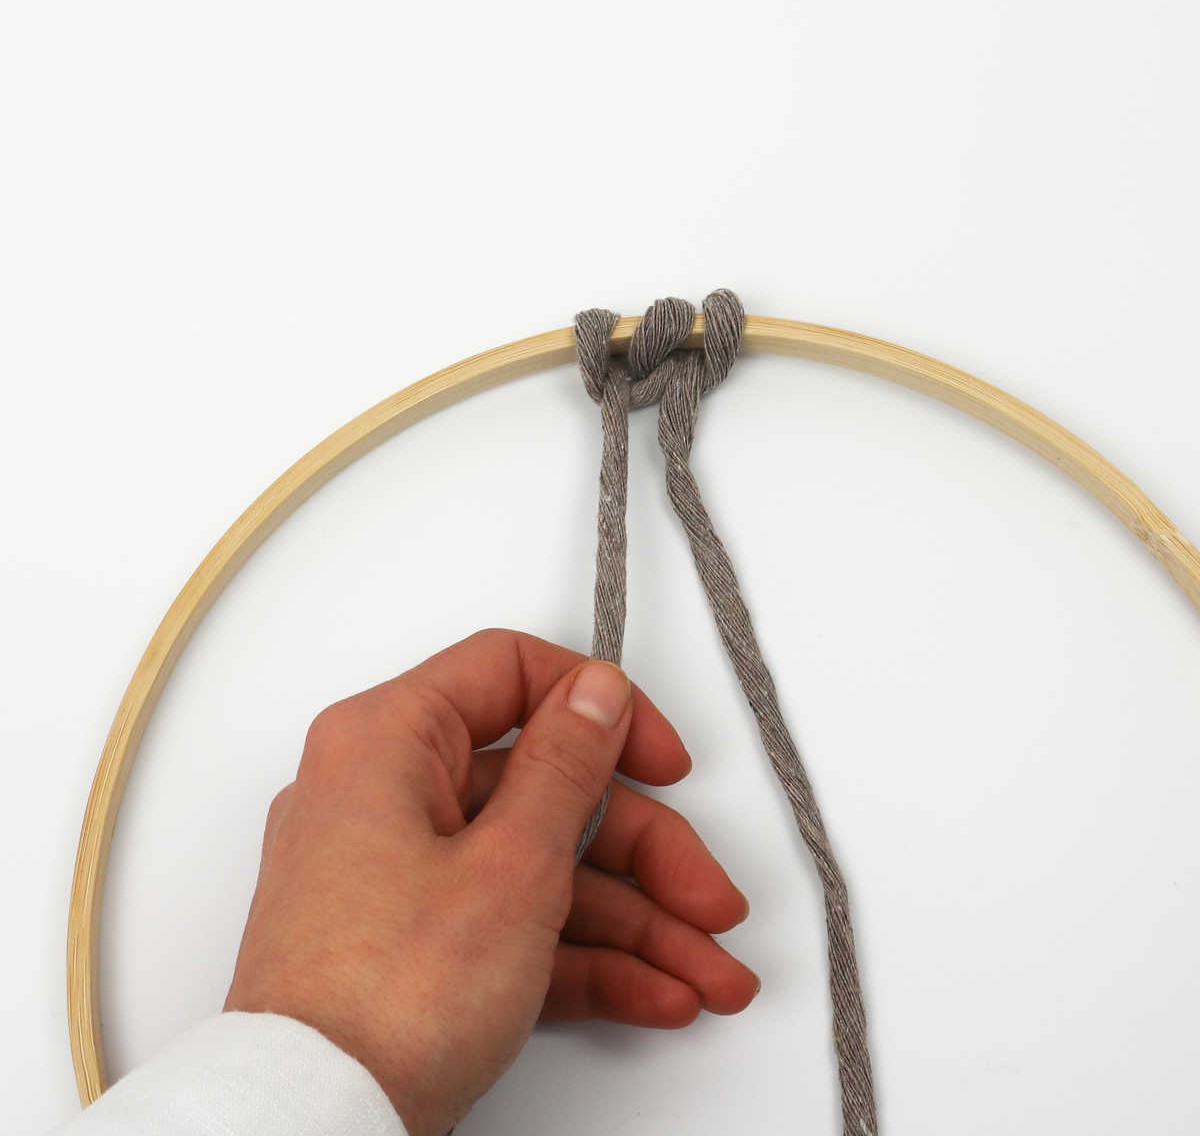
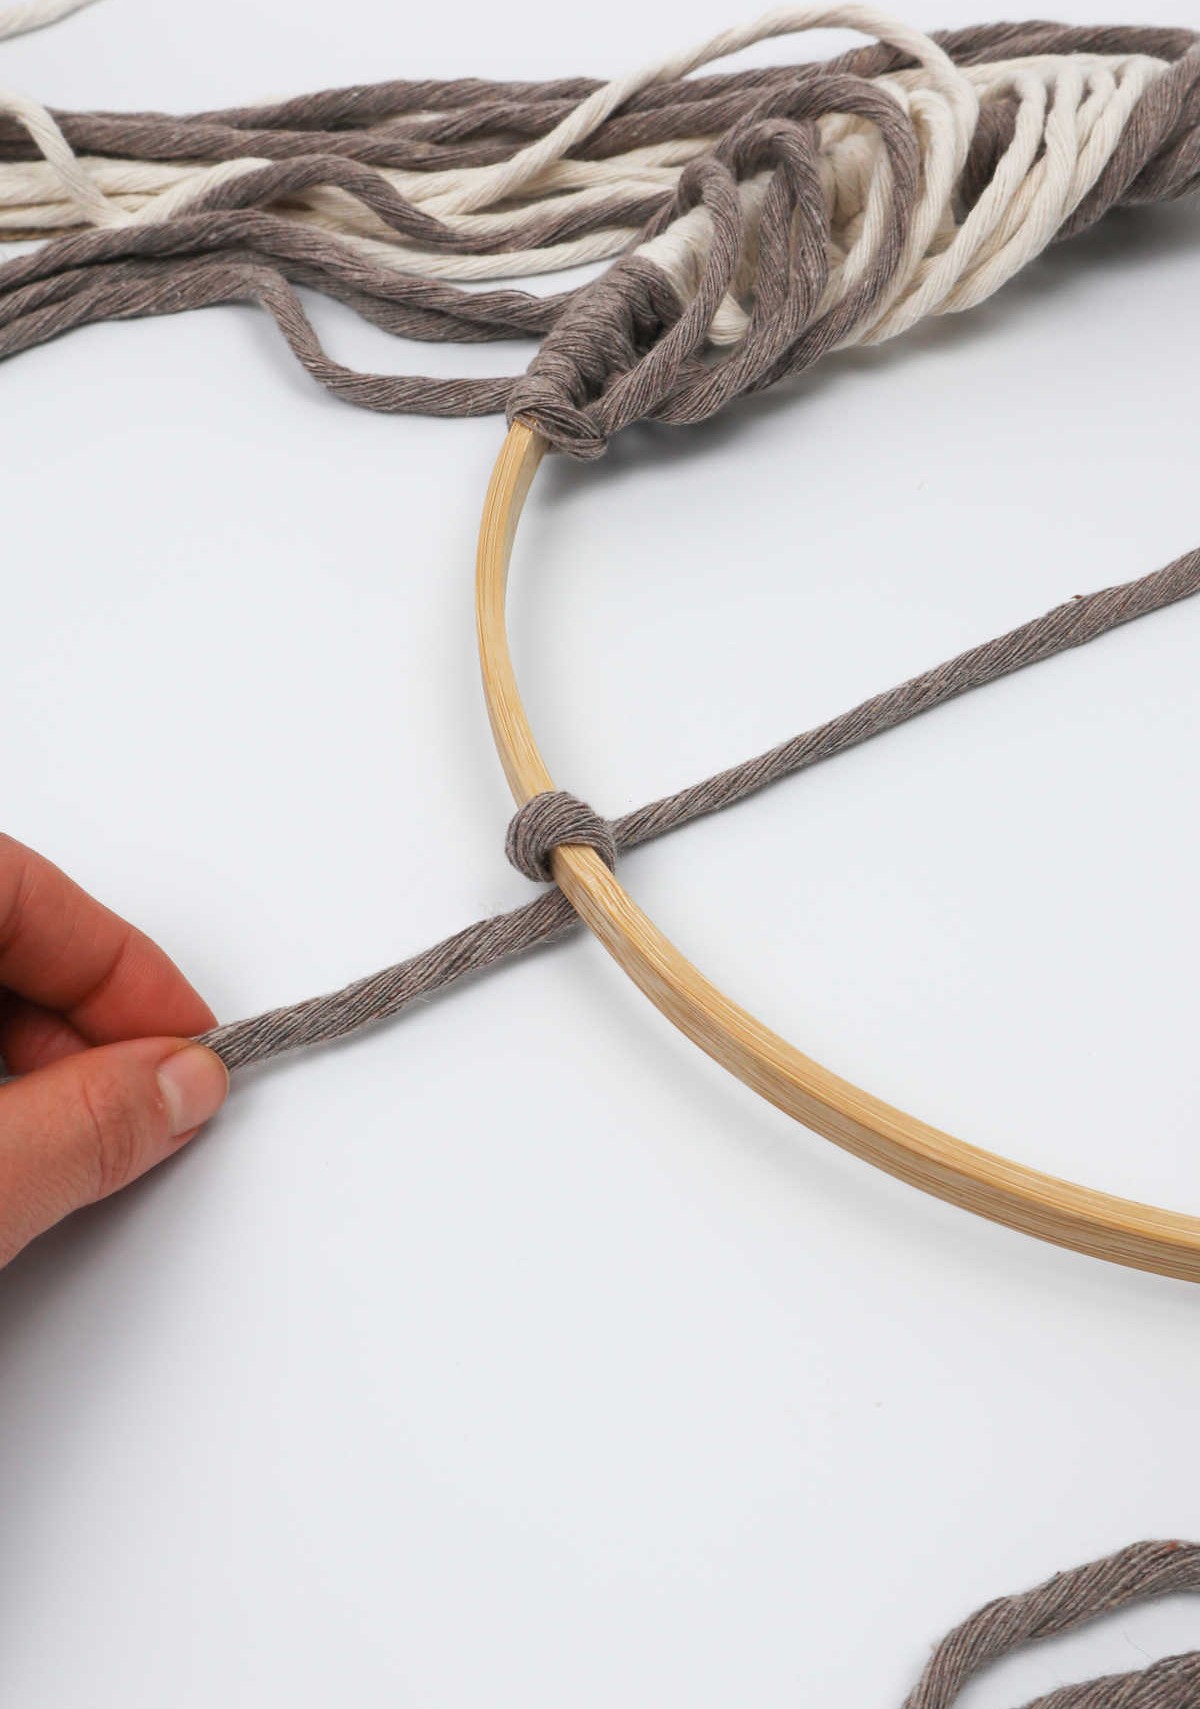
Step 6
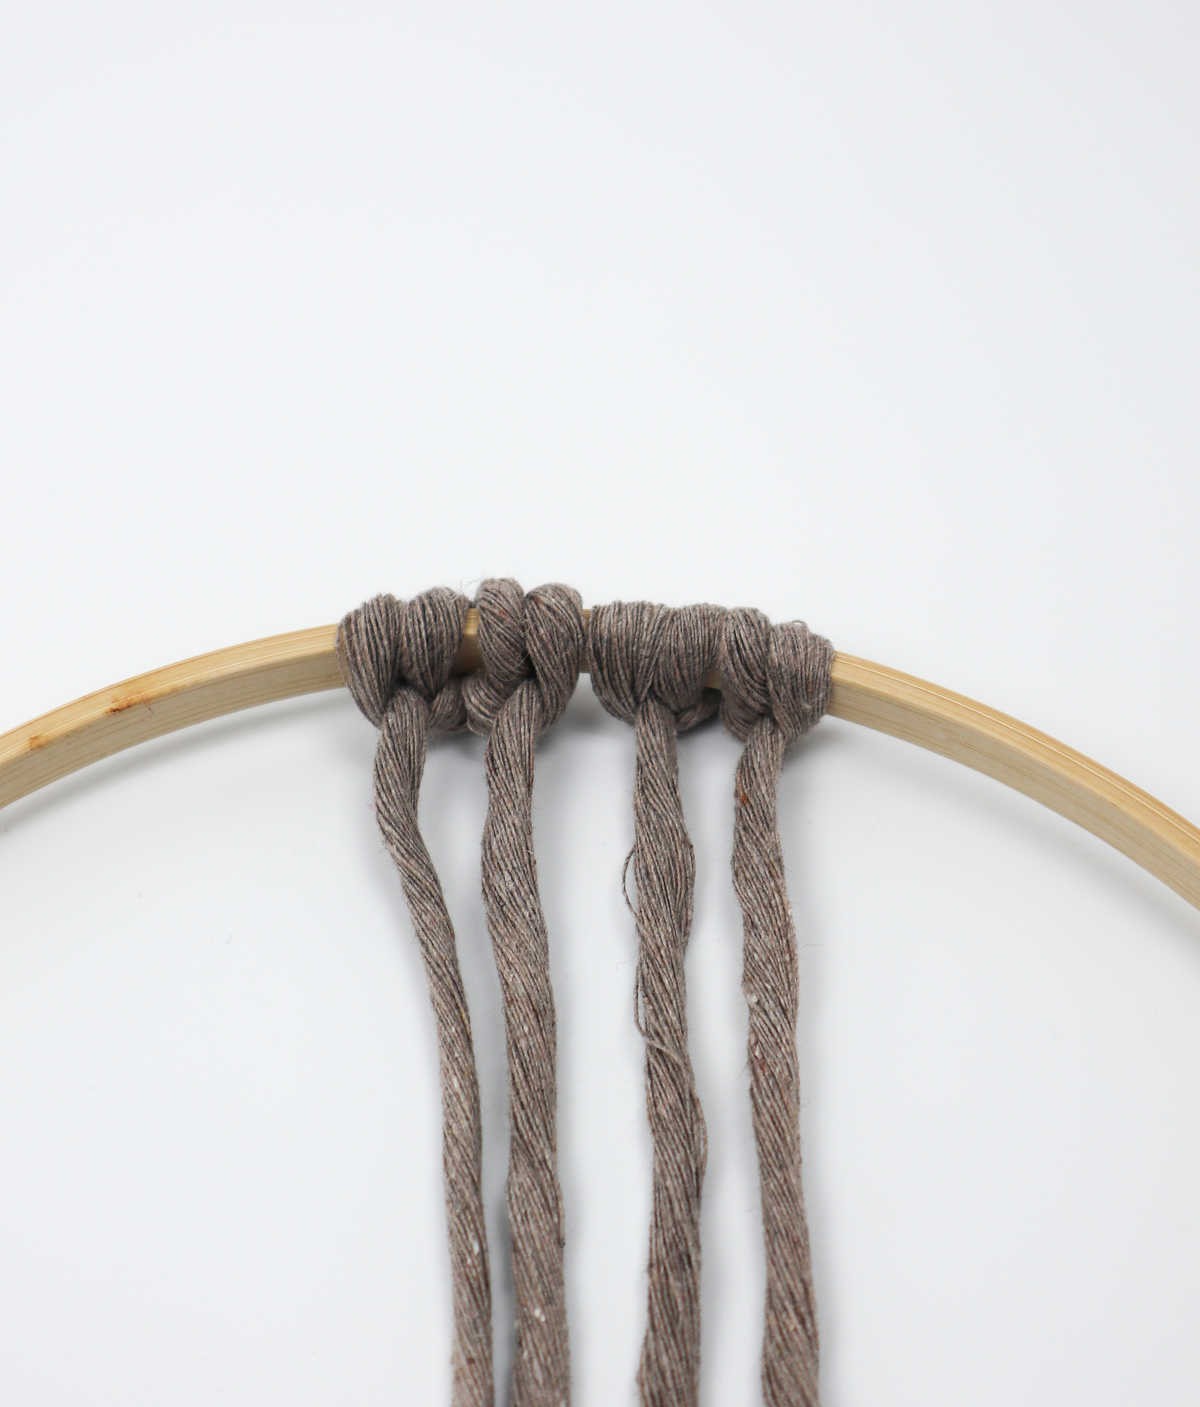
To secure the knot head in place, firmly tug on the end of the string once it’s been pulled through. This ensures that the knot heads don’t shift around as you work your way around the hoop. With this set of knots established, you’ll be repeating steps 4-6 with each of the remaining 15 cords to create a series of identical knots.
Step 7

To create an additional set of knotheads, consider alternating between colors or adding a third cappuccino-hued cord to maintain the pattern. Rest assured, you’ll soon be moving on to the cream-colored cord.
Step 8
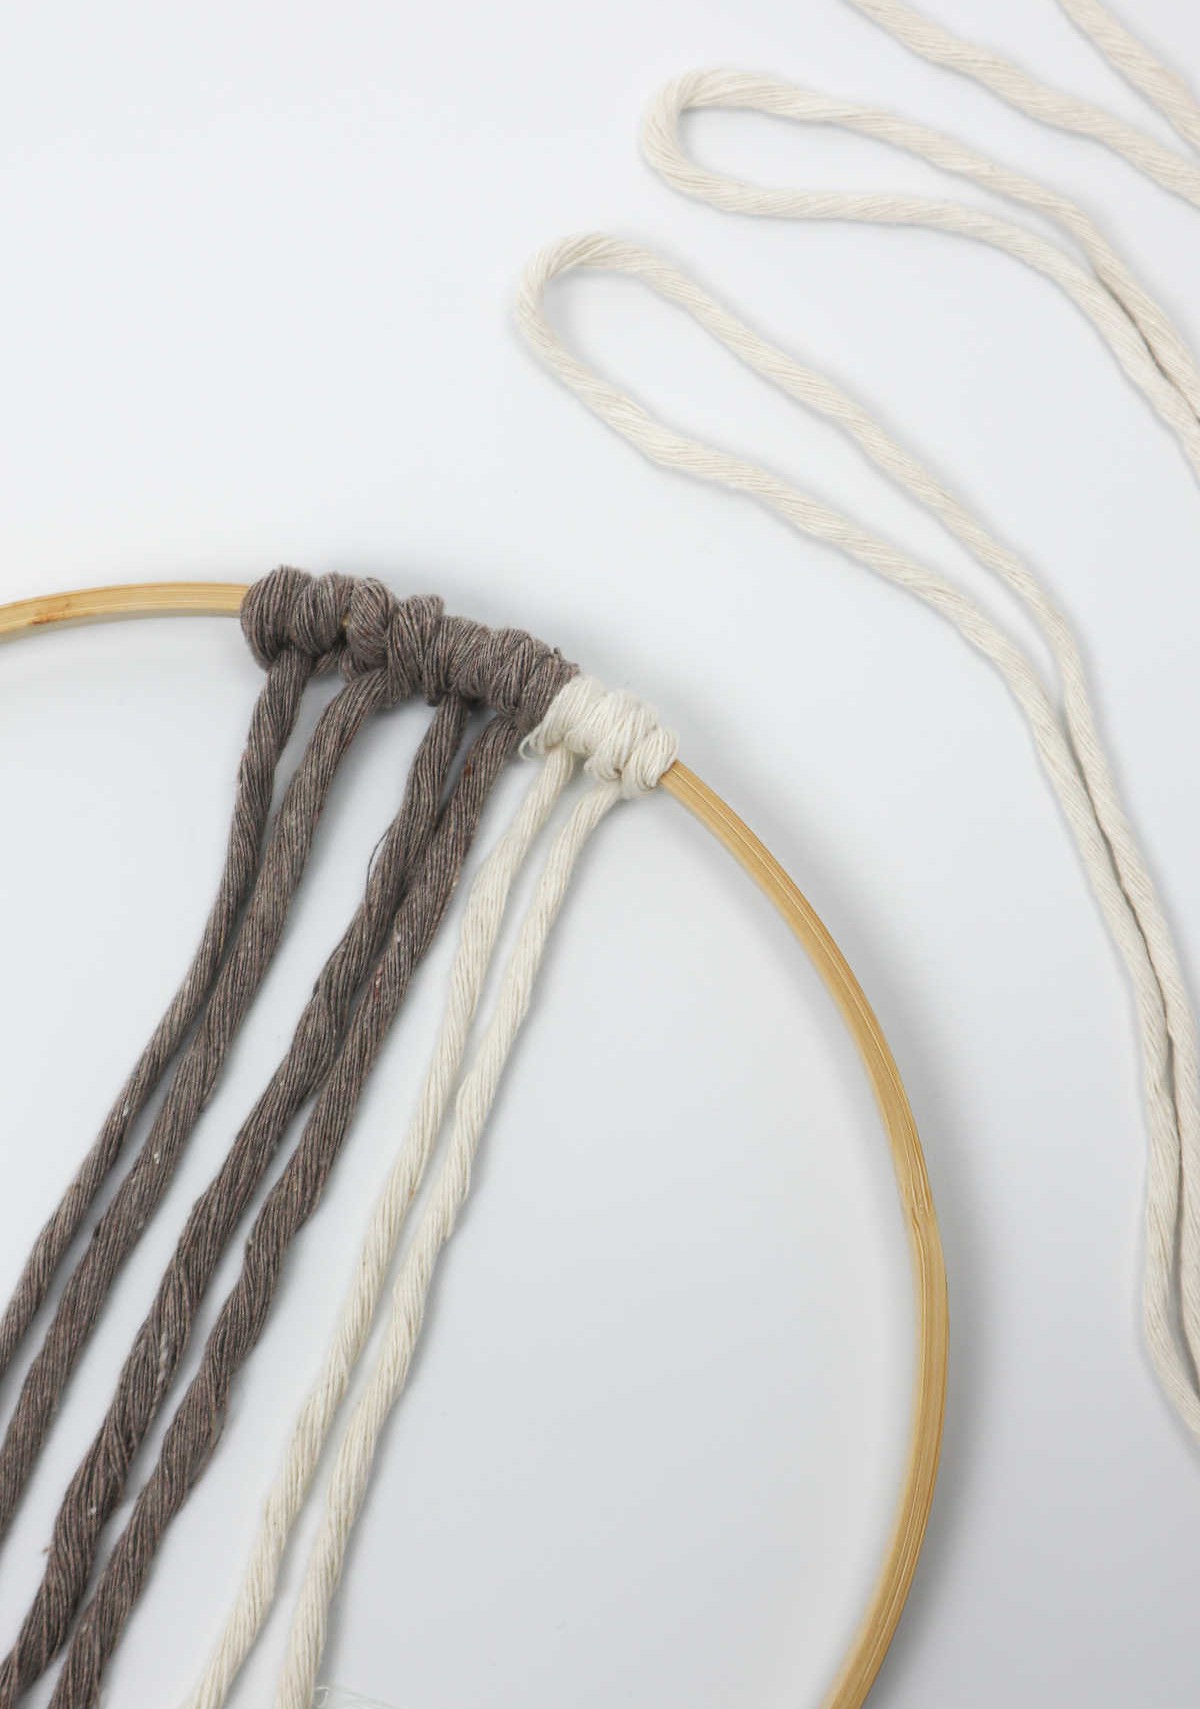
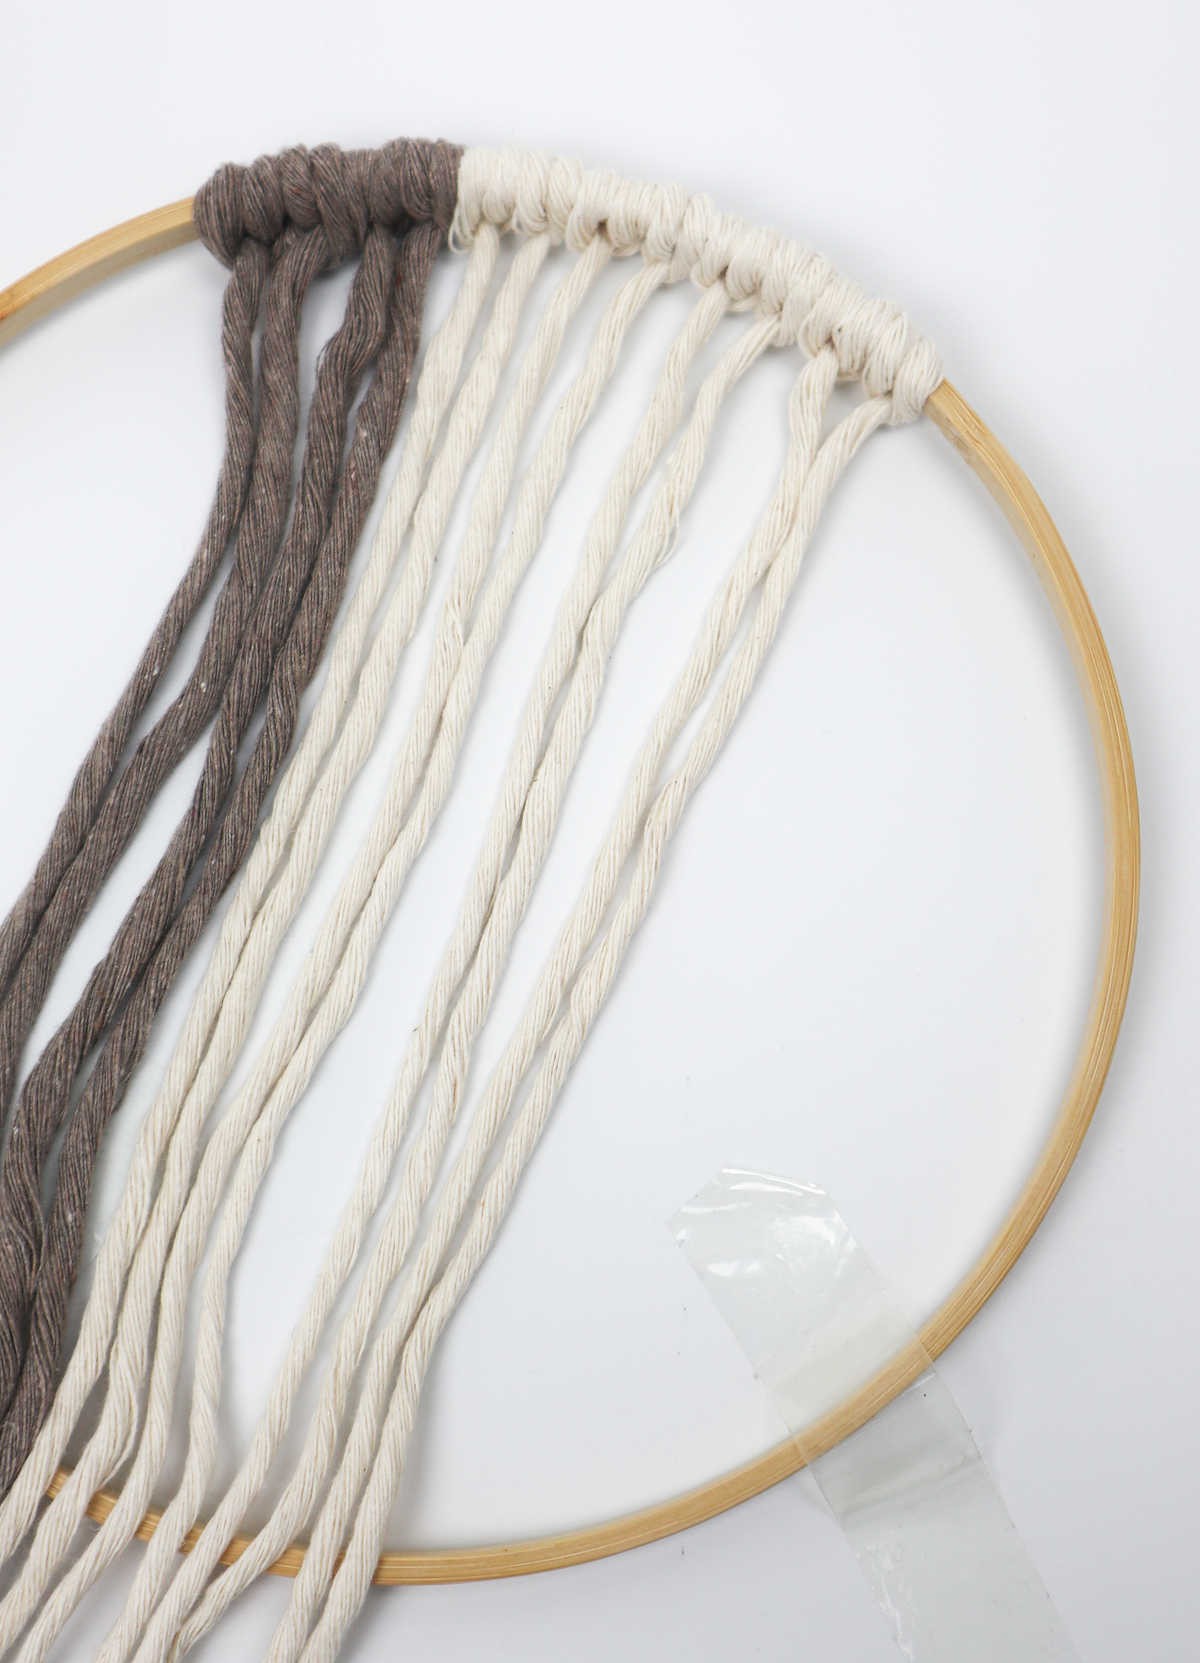
Now it’s time to get creative with your cream-colored cords. Pick up those cream cords and start wrapping them around the hoop, situated to the right of the already-knotted cappuccino cords. As you work, take note that you’ve now combined two cappuccino cords with four cream cords to create a unique and eye-catching design.
Step 9
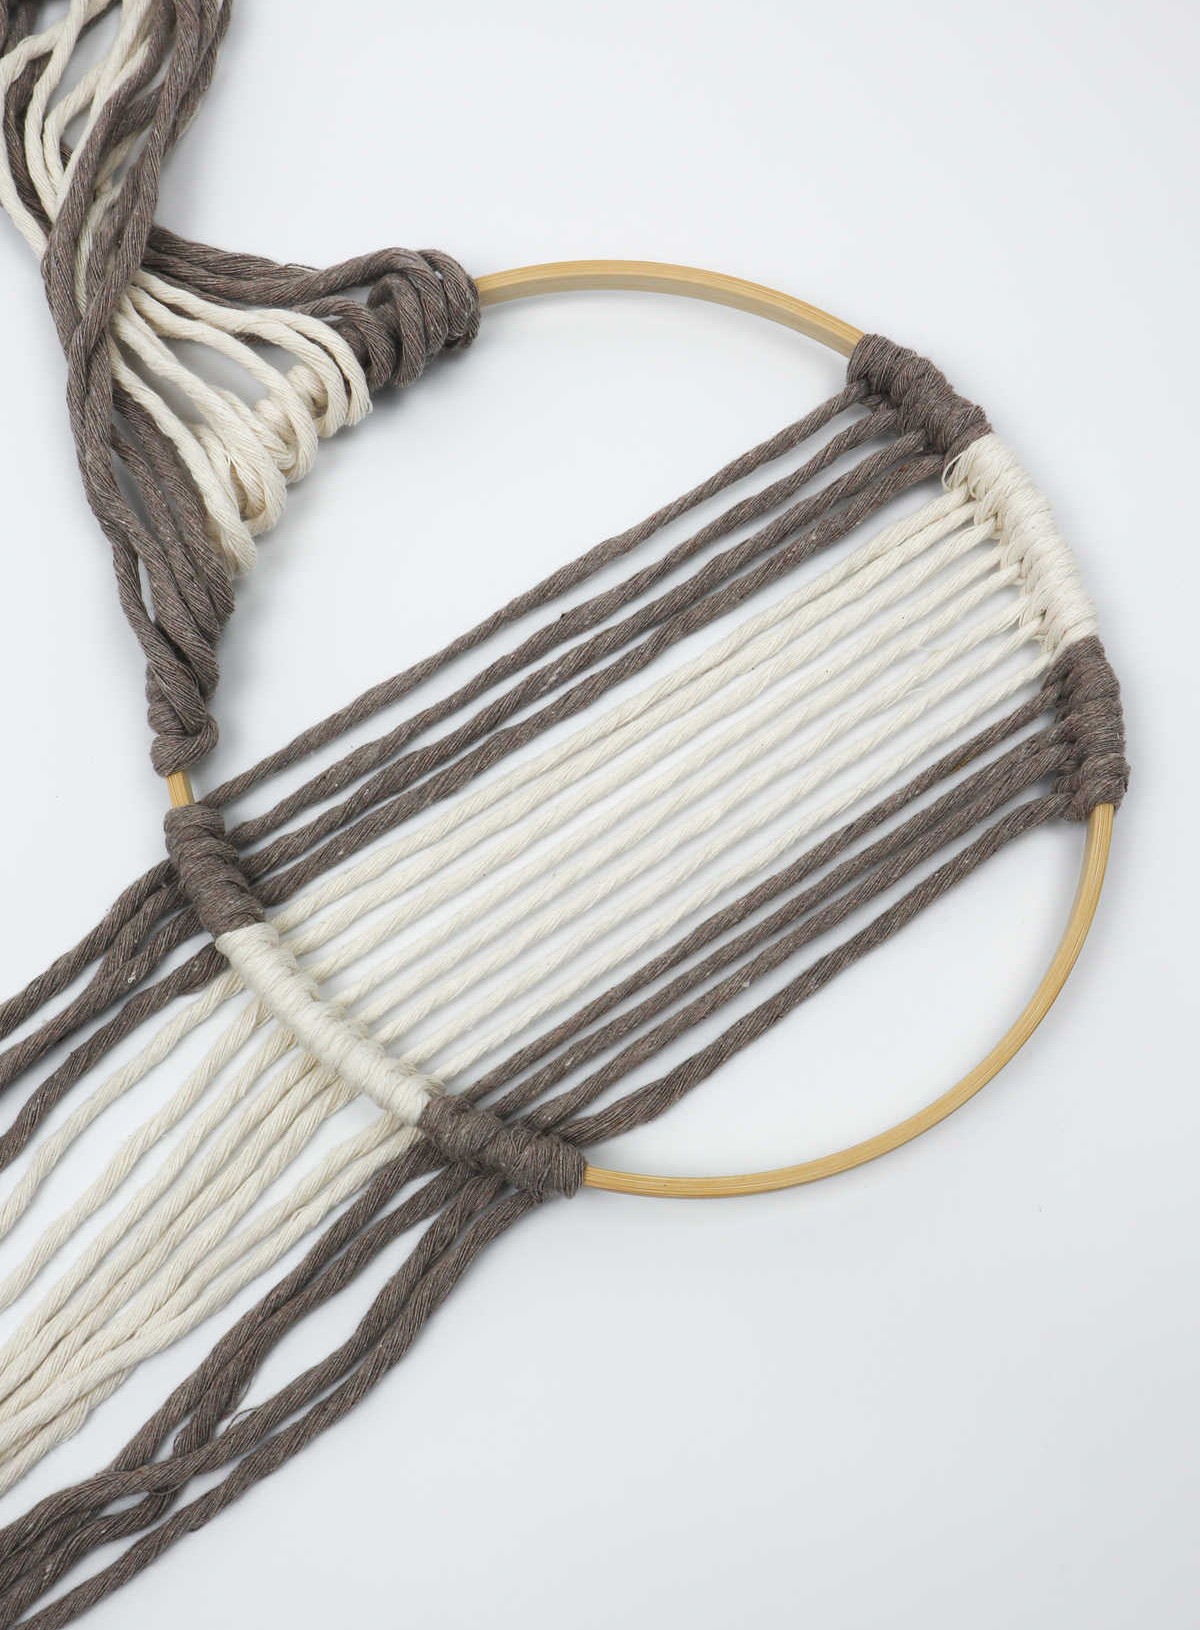
To complete your knot heads, repeat the same steps and secure two sets of cappuccino cords in place. The pattern should resemble 2x cappuccino cords, followed by 4x cream cords, and finally 2x cappuccino cords once again. Once you’ve achieved this configuration, it’s essential to carefully guide all your strings through and under the hoop, allowing it to rest comfortably on top of them. When done correctly, you should be left with a cohesive structure similar to the image below.
Now that you’ve successfully tackled one side of the knot heads, it’s time to shift your focus to the opposite side – the left.
Step 10
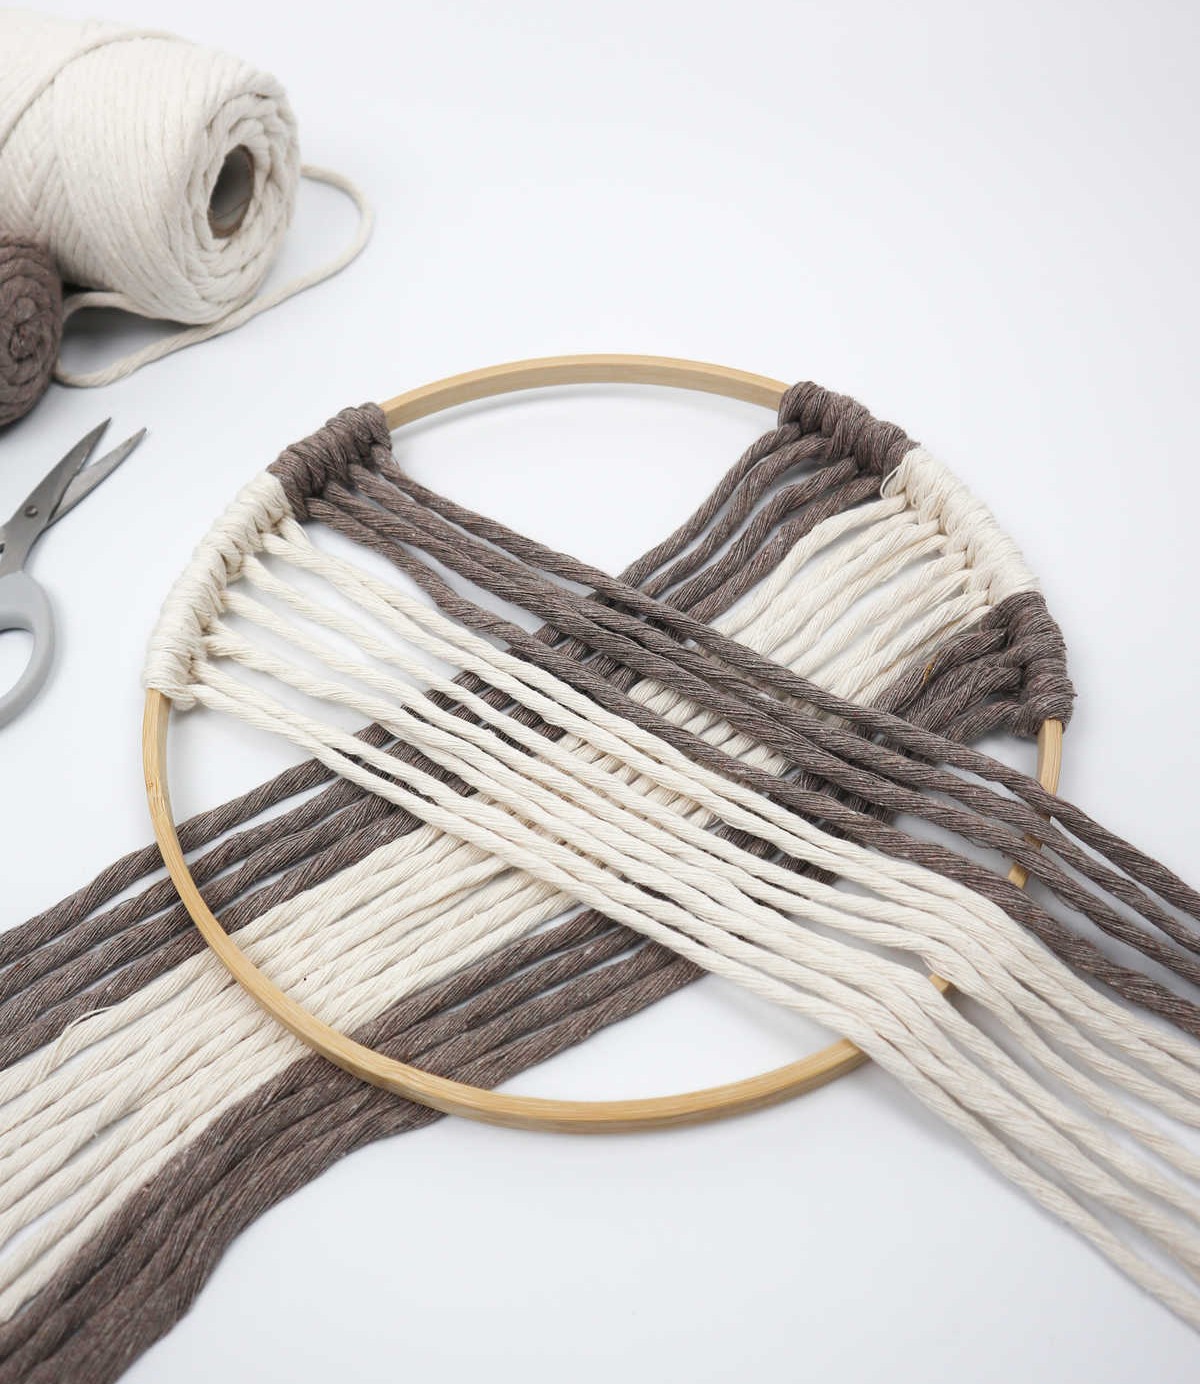
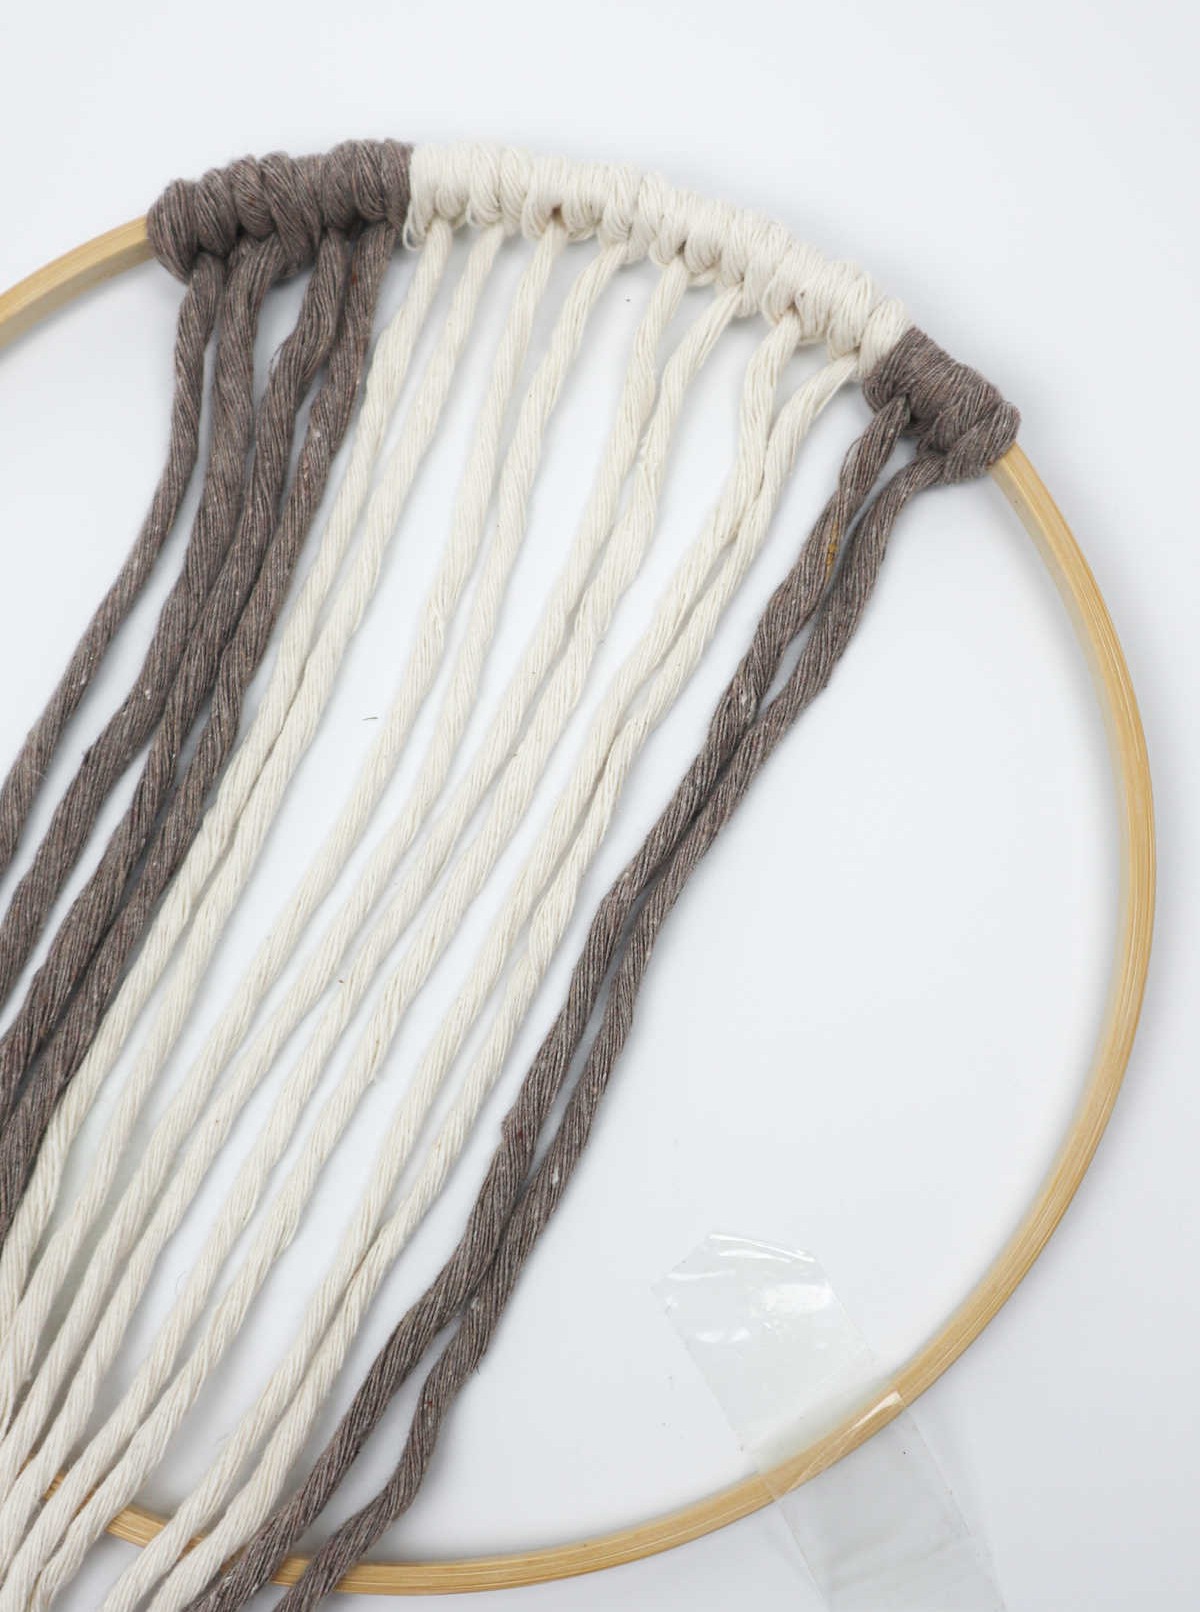
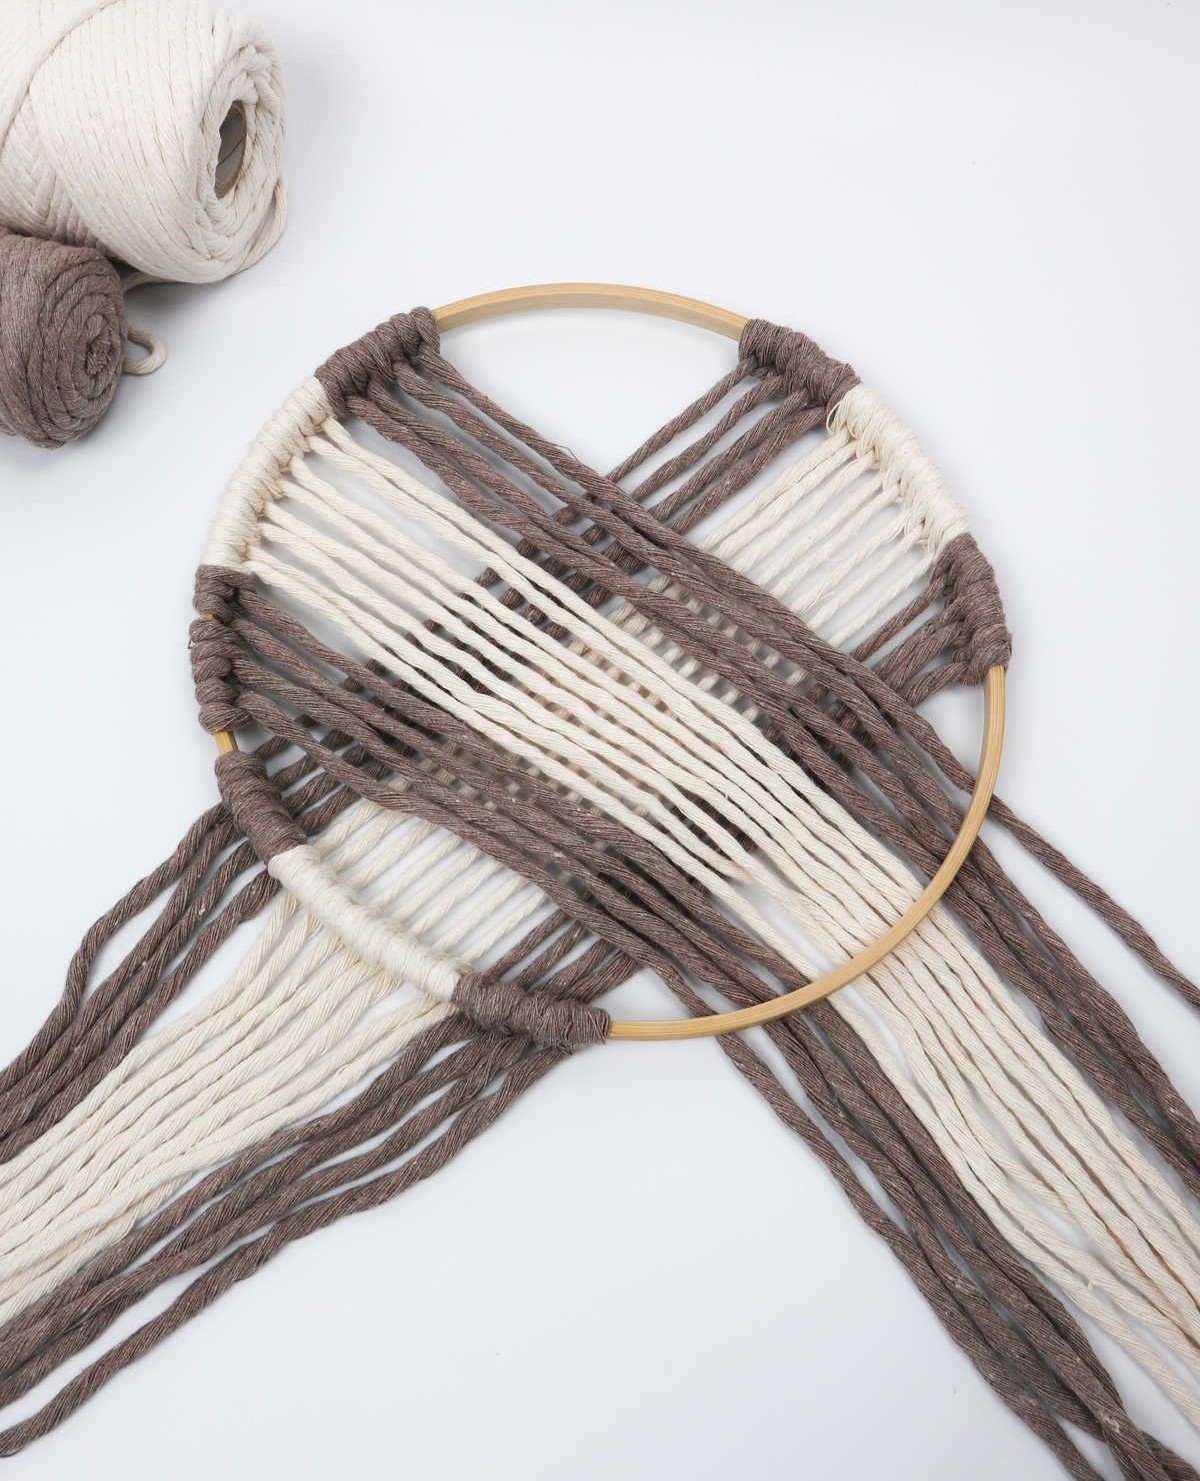
Begin by creating the initial knot pattern on one side of the hoop using your cappuccino-colored cord, working in sets of knot heads. To complete the design, repeat the same sequence of knots and color scheme on the opposite side of the hoop. The resulting pattern should consist of 2x cappuccino cords, 4x cream cords, and another 2x cappuccino cords. Unlike the previous step where you gathered all the cords under the hoop, this time they will remain above it.
The reason for this will become clear in the next part of the process.
Step 11
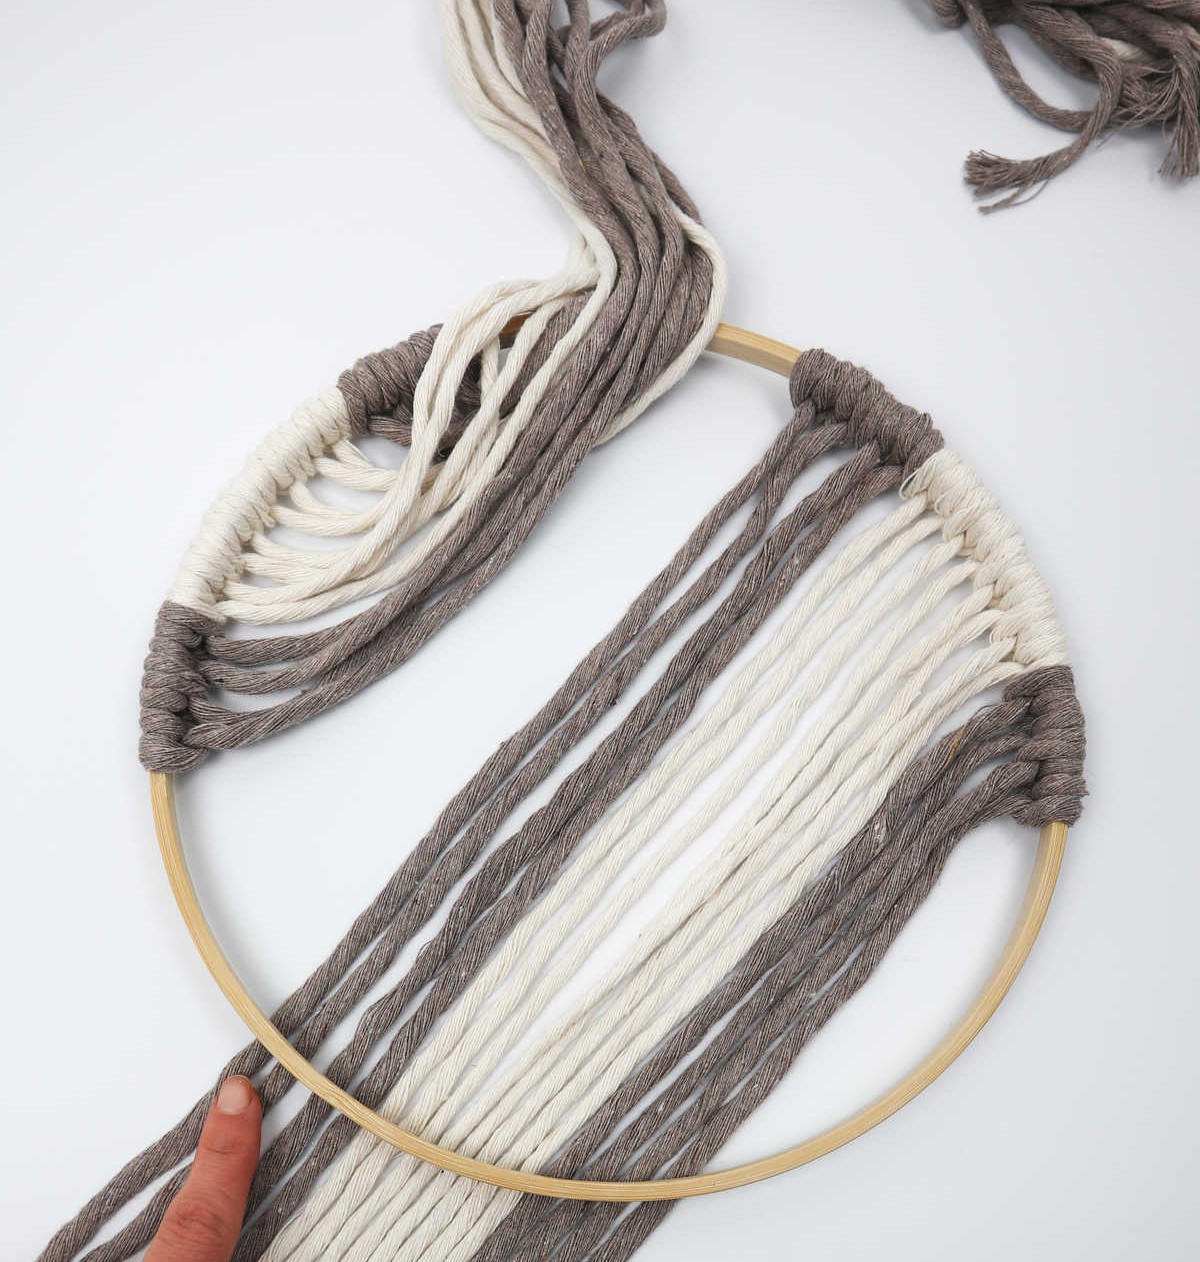
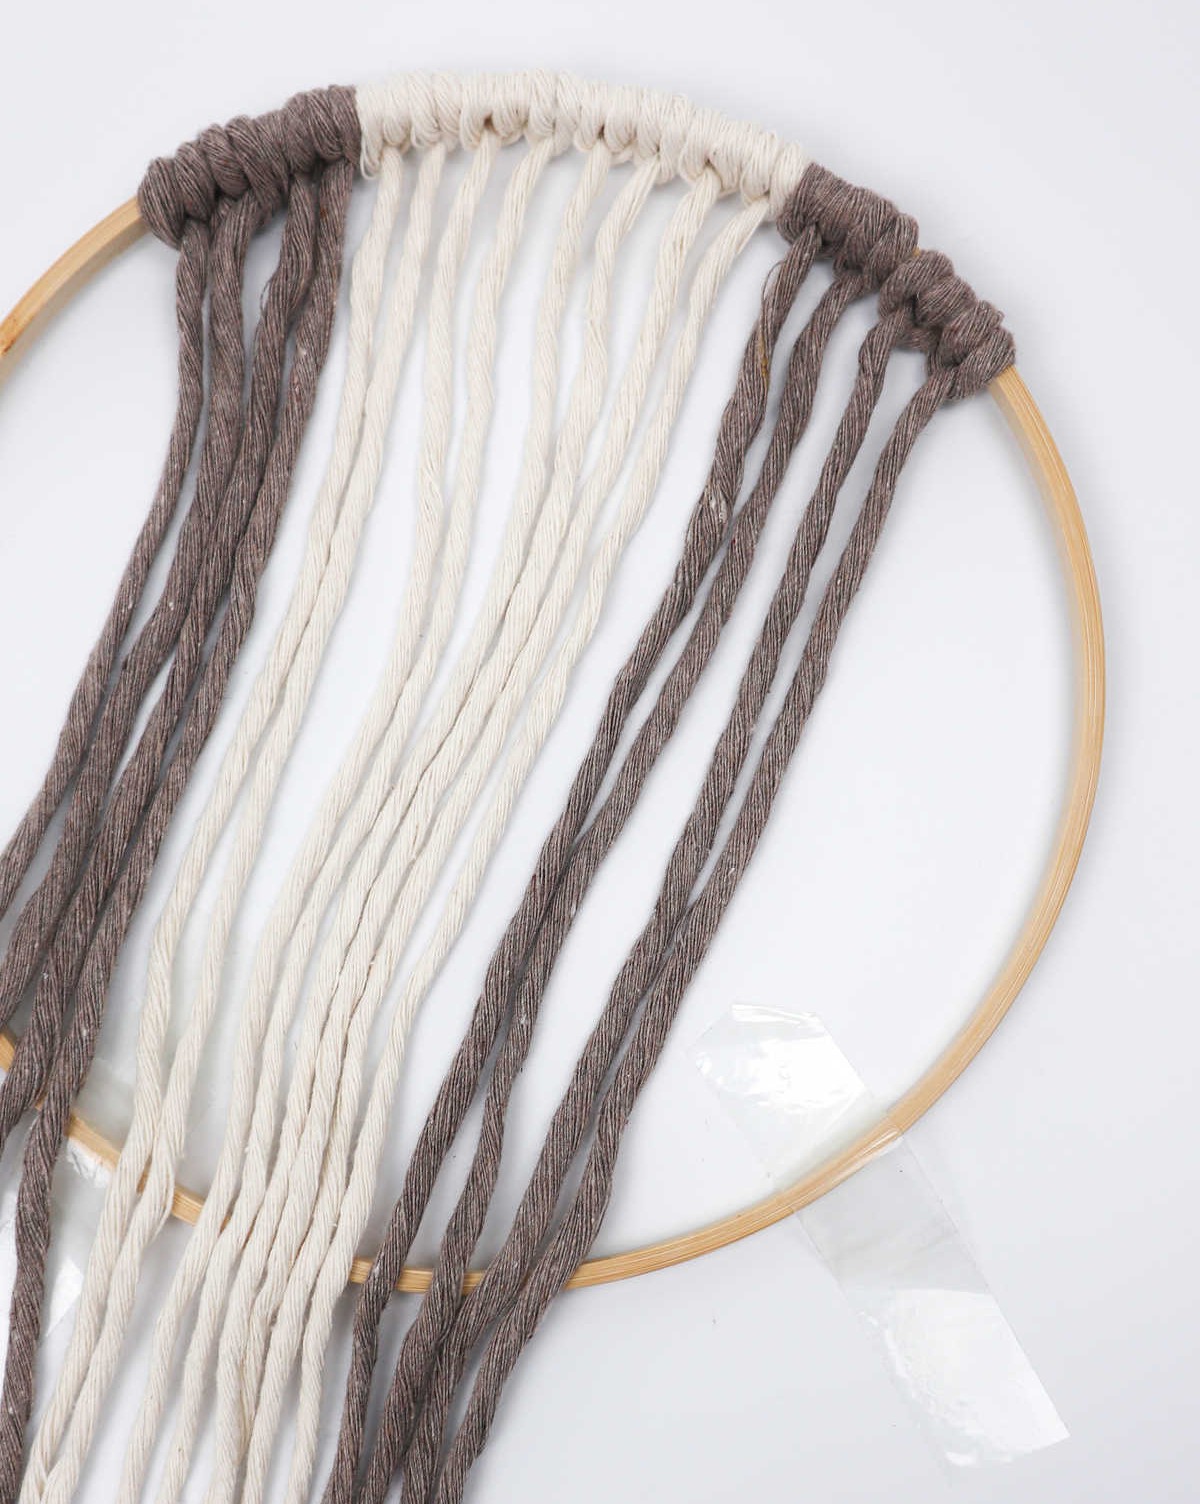
To avoid any confusion, methodically collect the loose ends of the strings on the left side of the hoop, taking care not to entangle the cords in the process. This will provide a clear path to access and work with the right side of the hoop without any hindrances.
Step 12
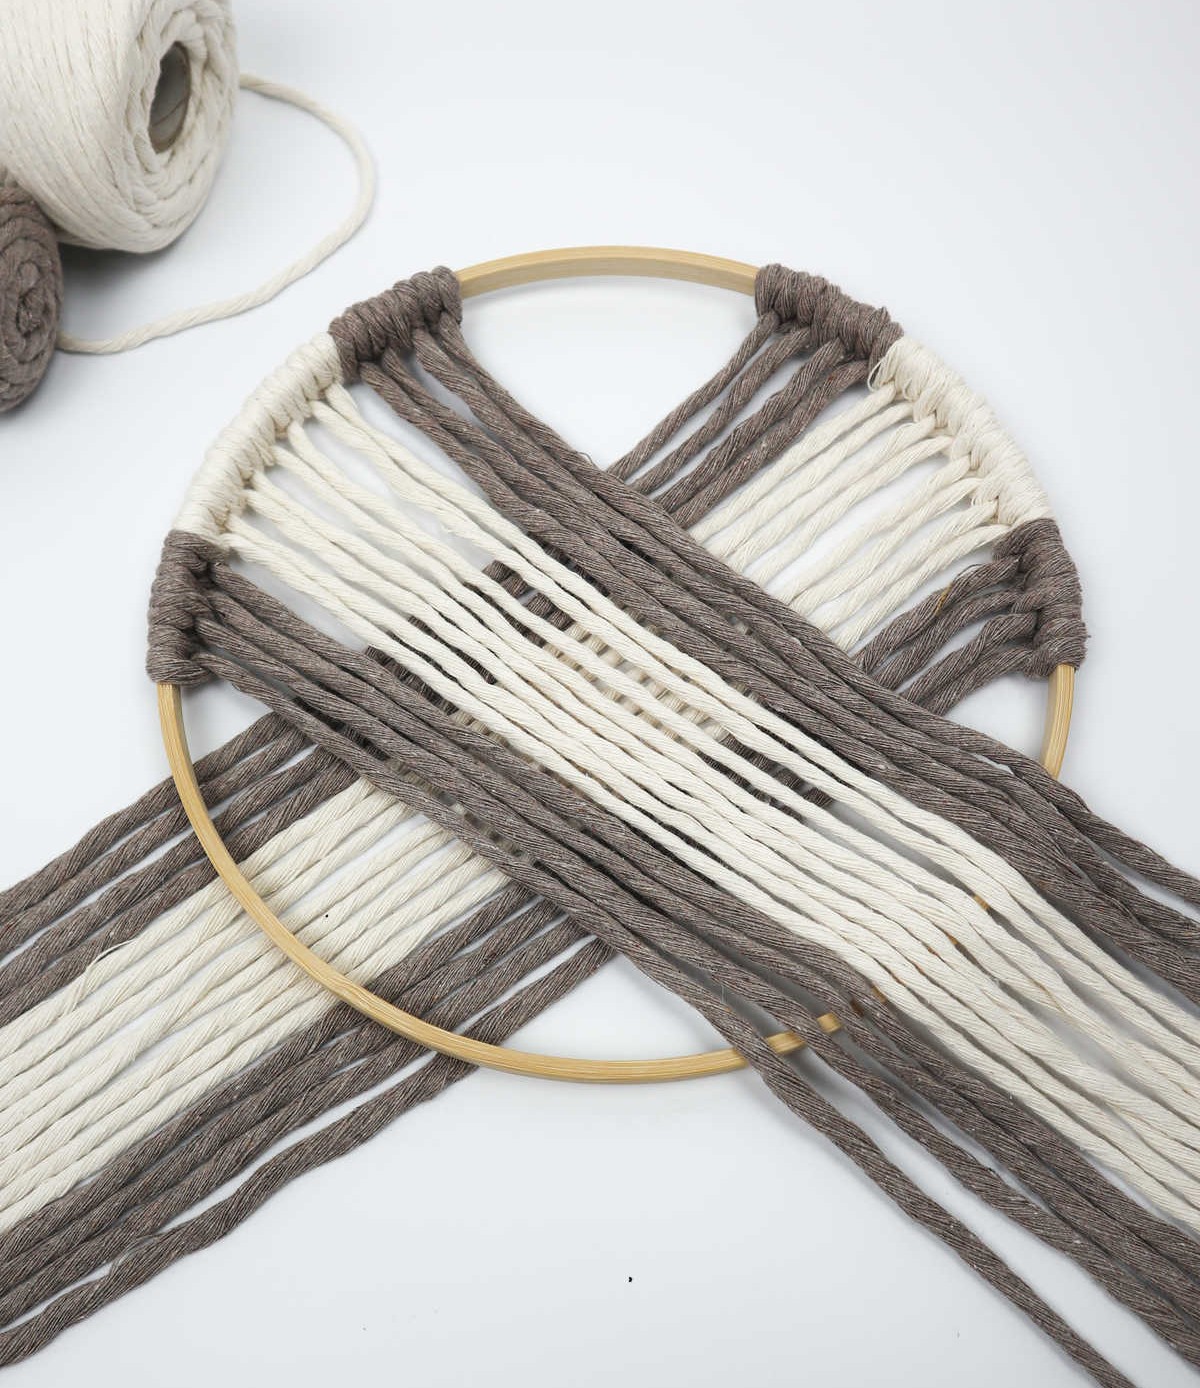
To complete the macrame wall hanging, we’ll now secure the cords to the bottom of the hoop. Since we’re working diagonally, the top right cords will be tied to the bottom left of the hoop. Start by taking one of the cappuccino cords and passing it over the hoop, then under it to form a loop. Ensure the end remains hidden beneath the hoop.
Next, take the free end and pull it through the newly created loop. This will establish a half knot that you can build upon.
Step 13
To secure your knot, simply repeat the process by taking the same string and placing it to the right of the first half-knot you created. This will result in a fully formed knot that’s now more robust than before. With this step complete, take a moment to admire your handiwork.
Step 14
As you continue with the process, simply follow the same sequence of actions: grab a new cappuccino-colored cord, and then perform steps 12 and 13 to create another identical two-part knot. This consistent pattern will help you efficiently work your way through all the cords, ultimately resulting in the desired finished product.
Step 15
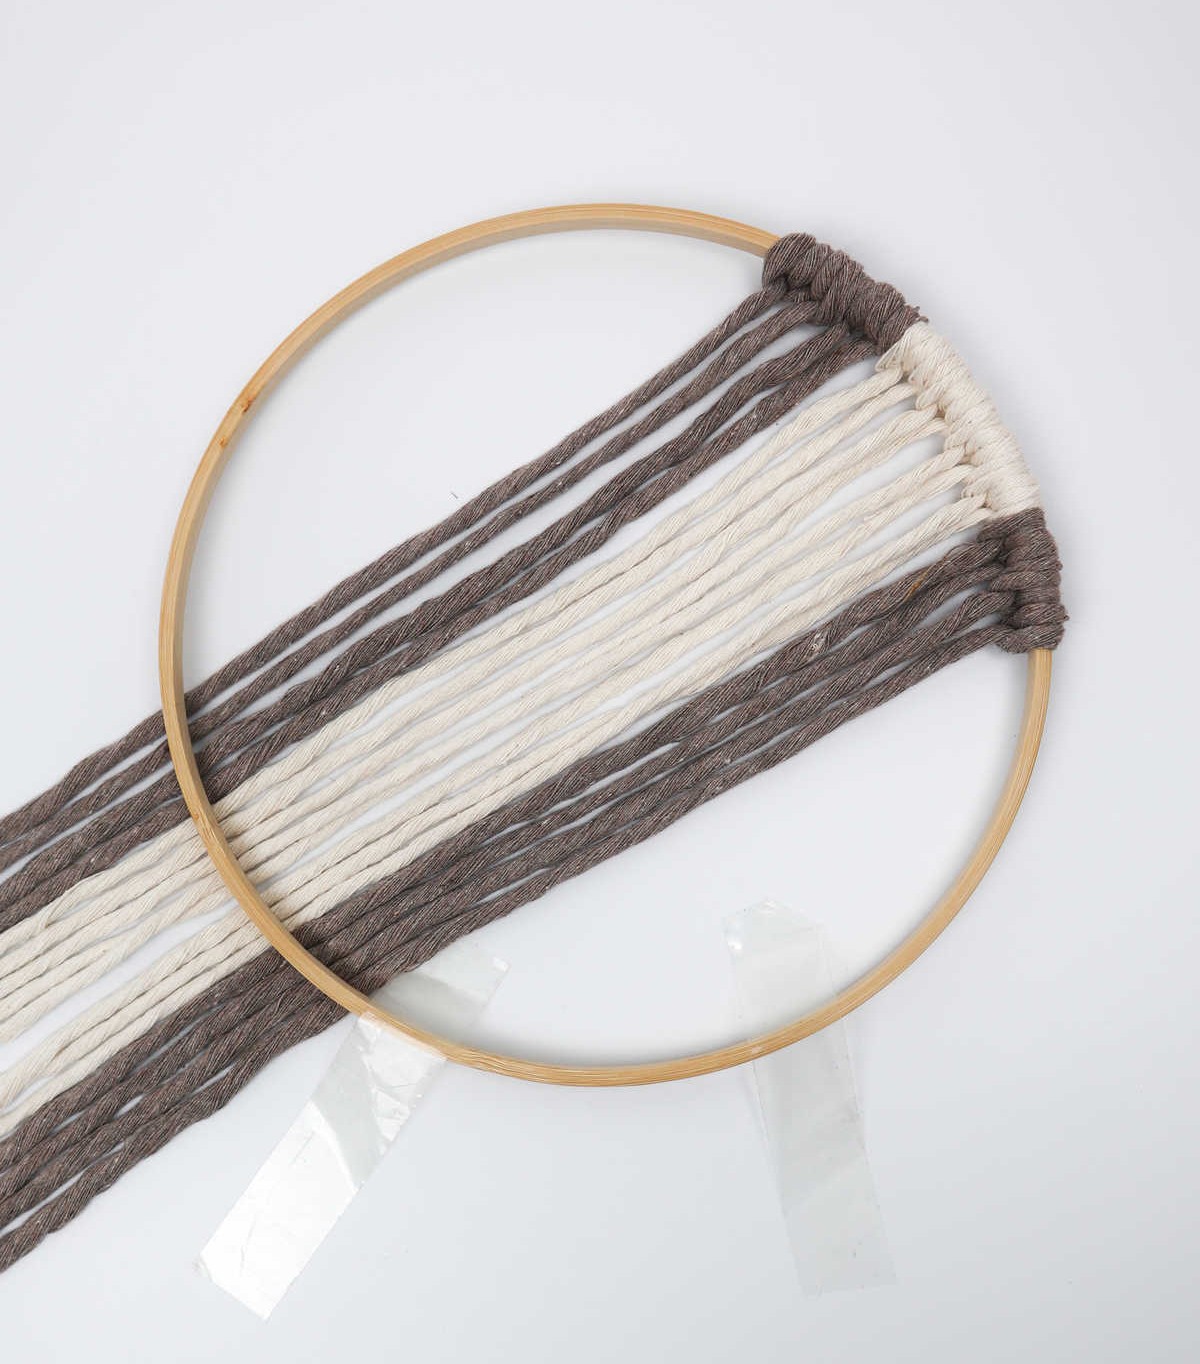
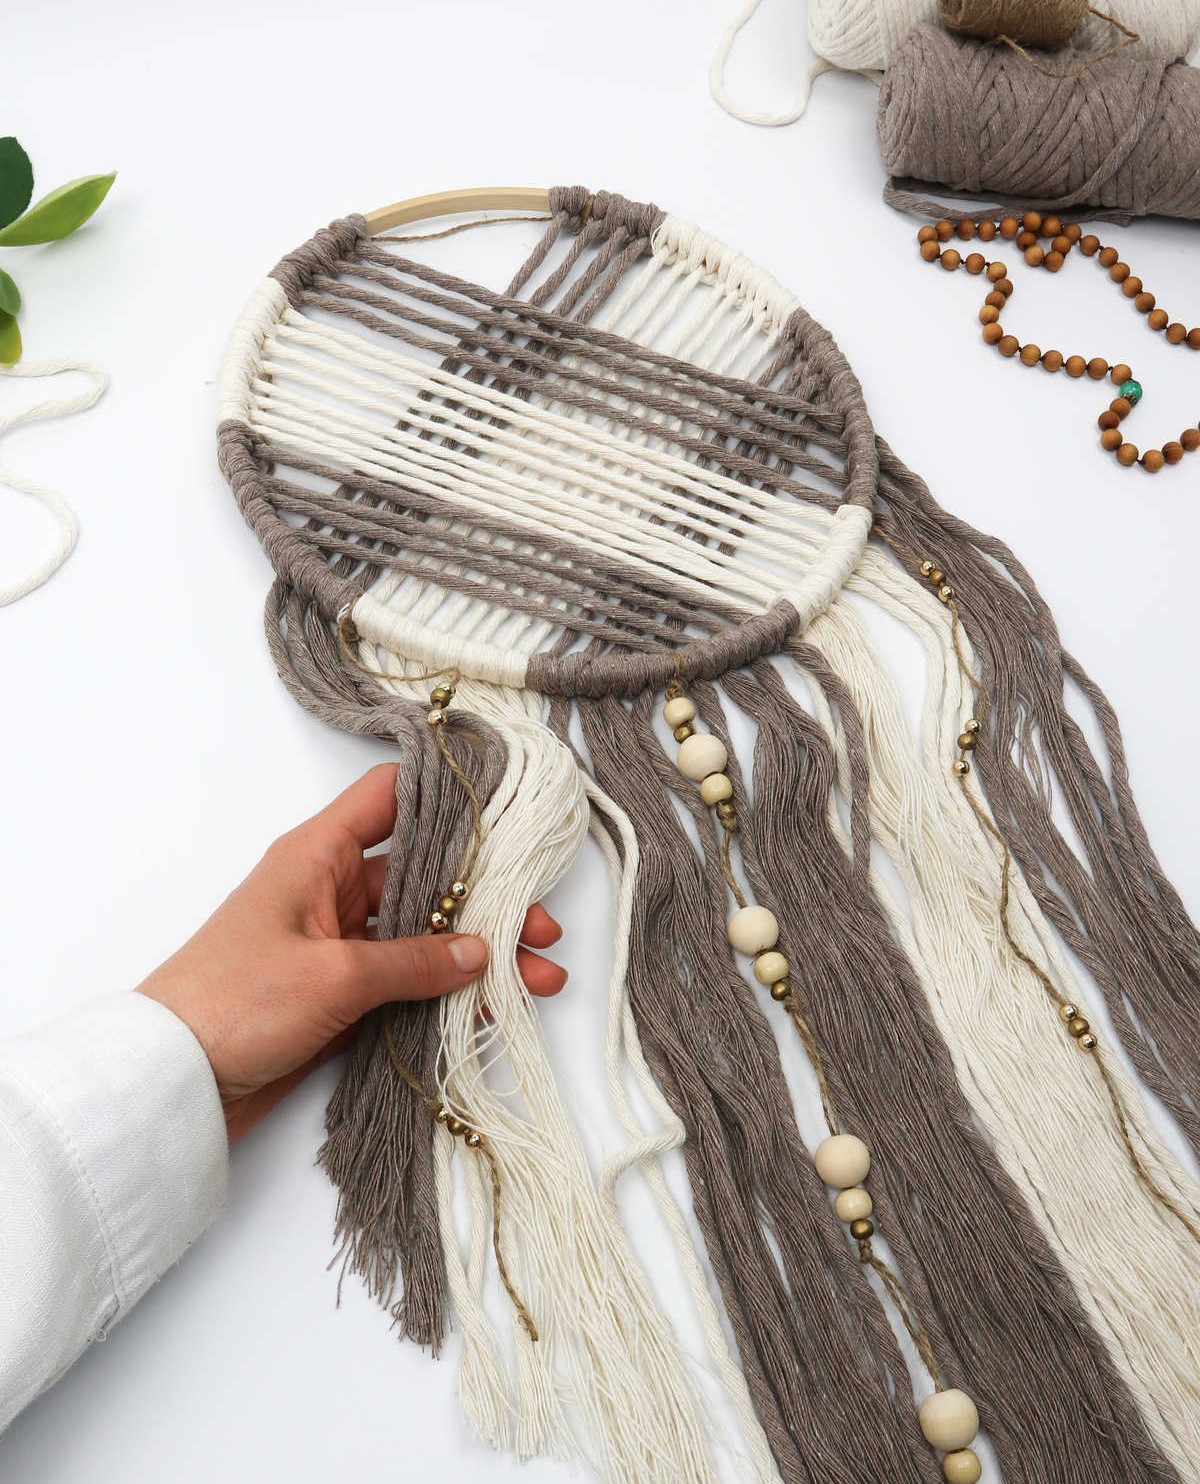
Once you’ve completed the cords on one side of the hoop, it’s time to tackle the other. The process is identical, but this time you’ll be working with the remaining 16 strings. As before, carefully pull these under the hoop, ensuring they sit snugly at the bottom right corner. With each string in its new position, the hoop should remain centered, providing a sense of stability and control as you move forward.
Step 16
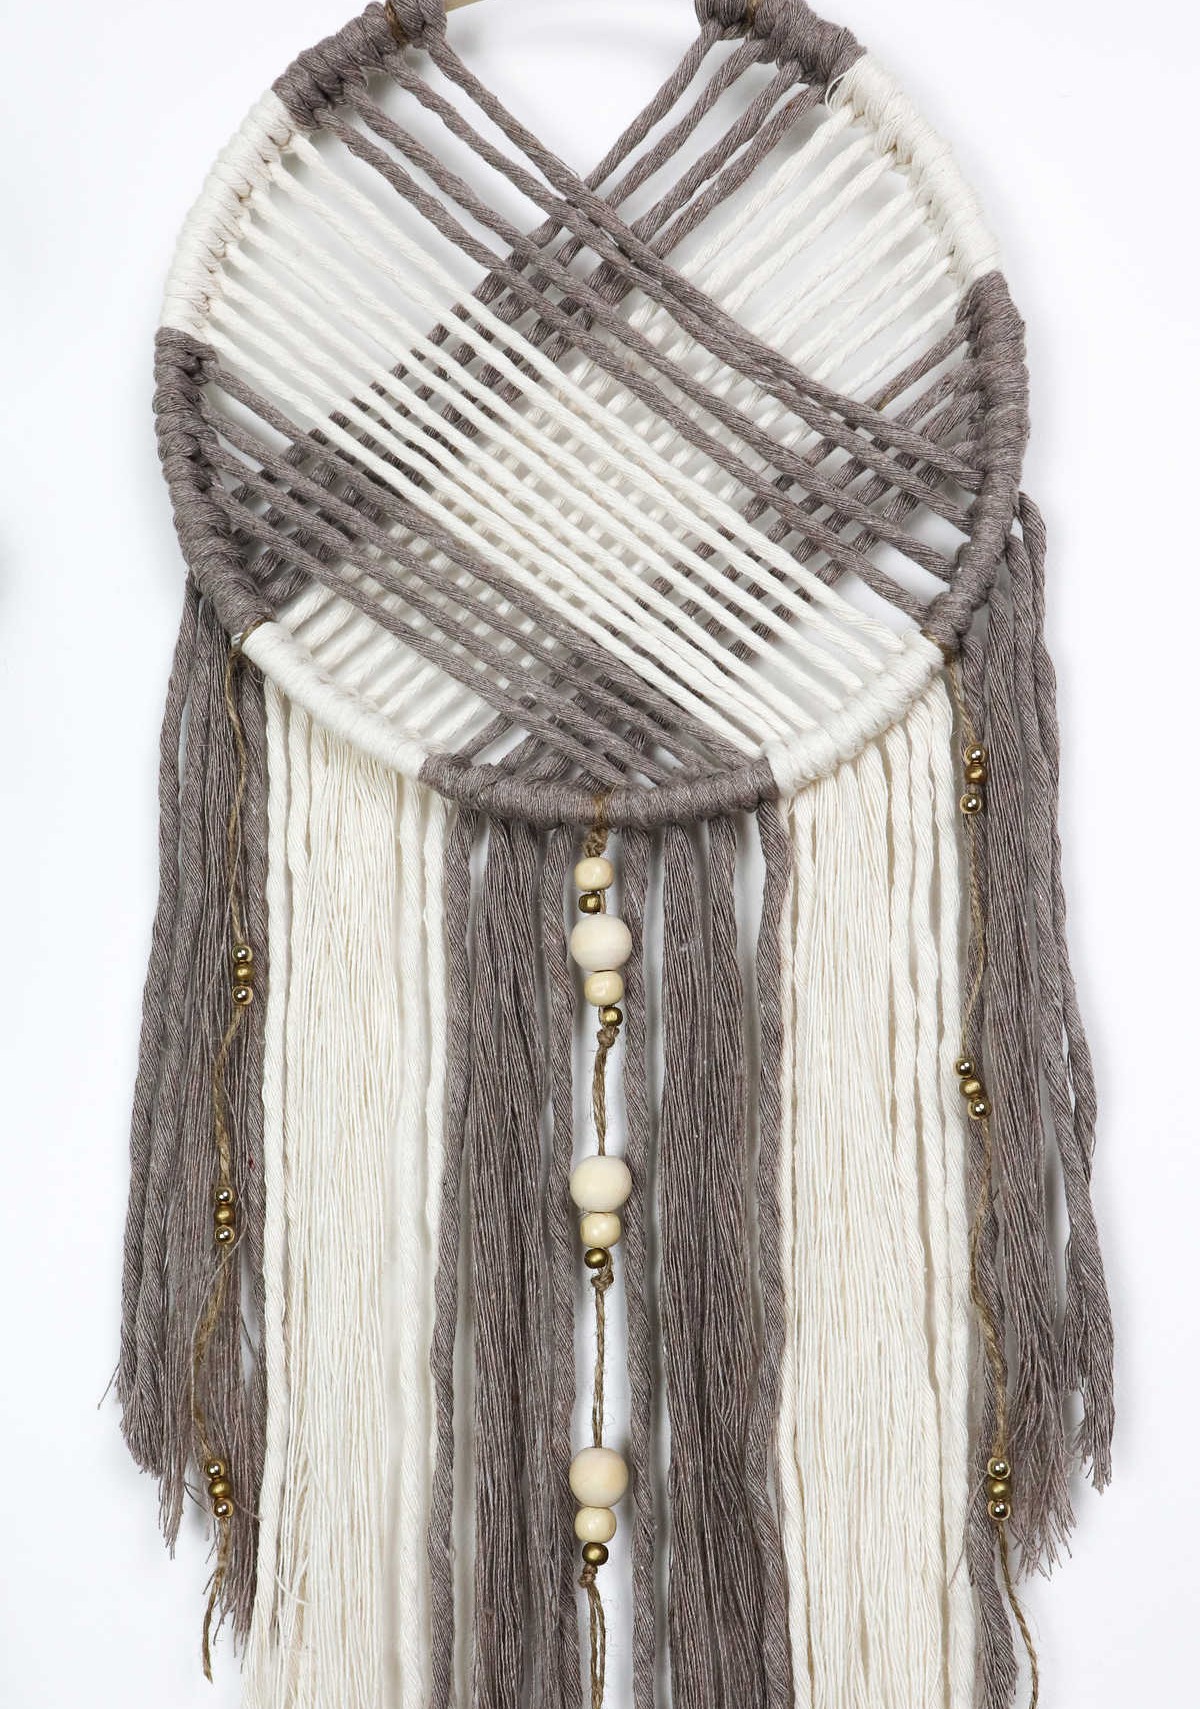
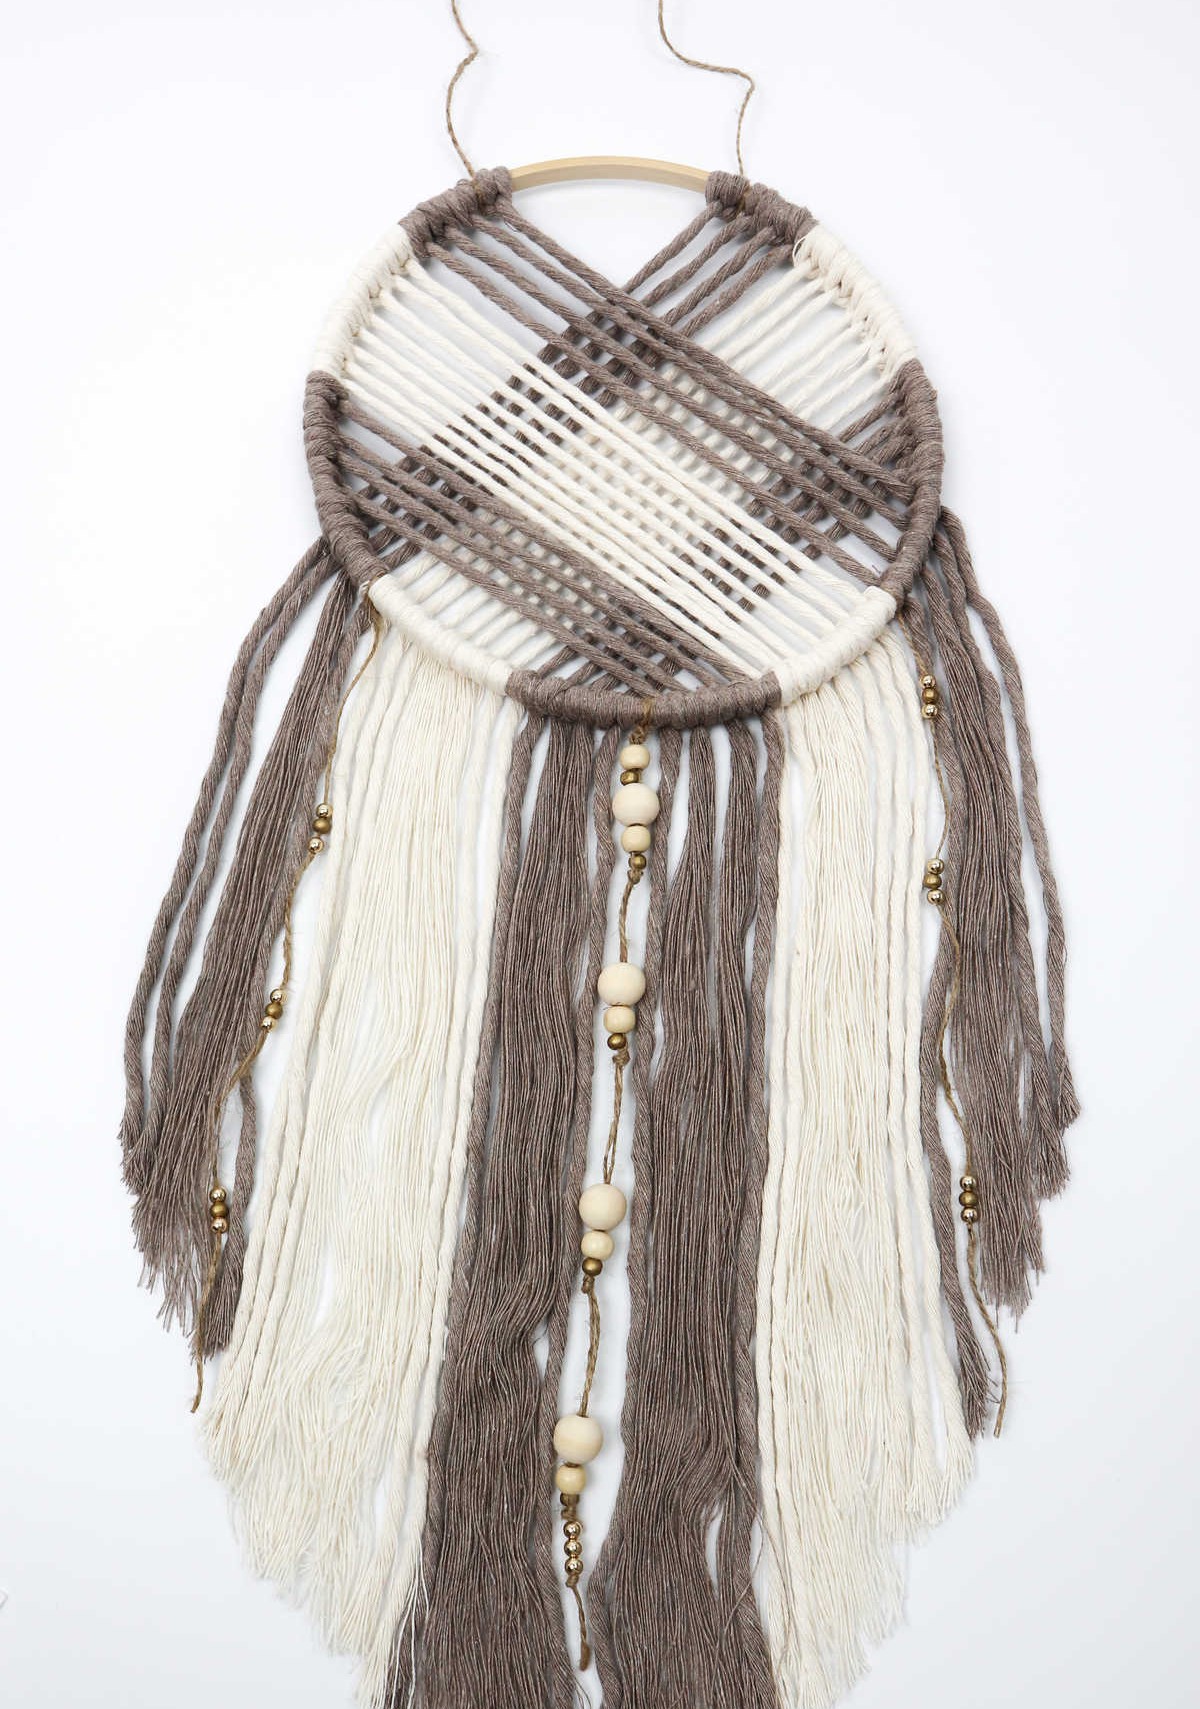
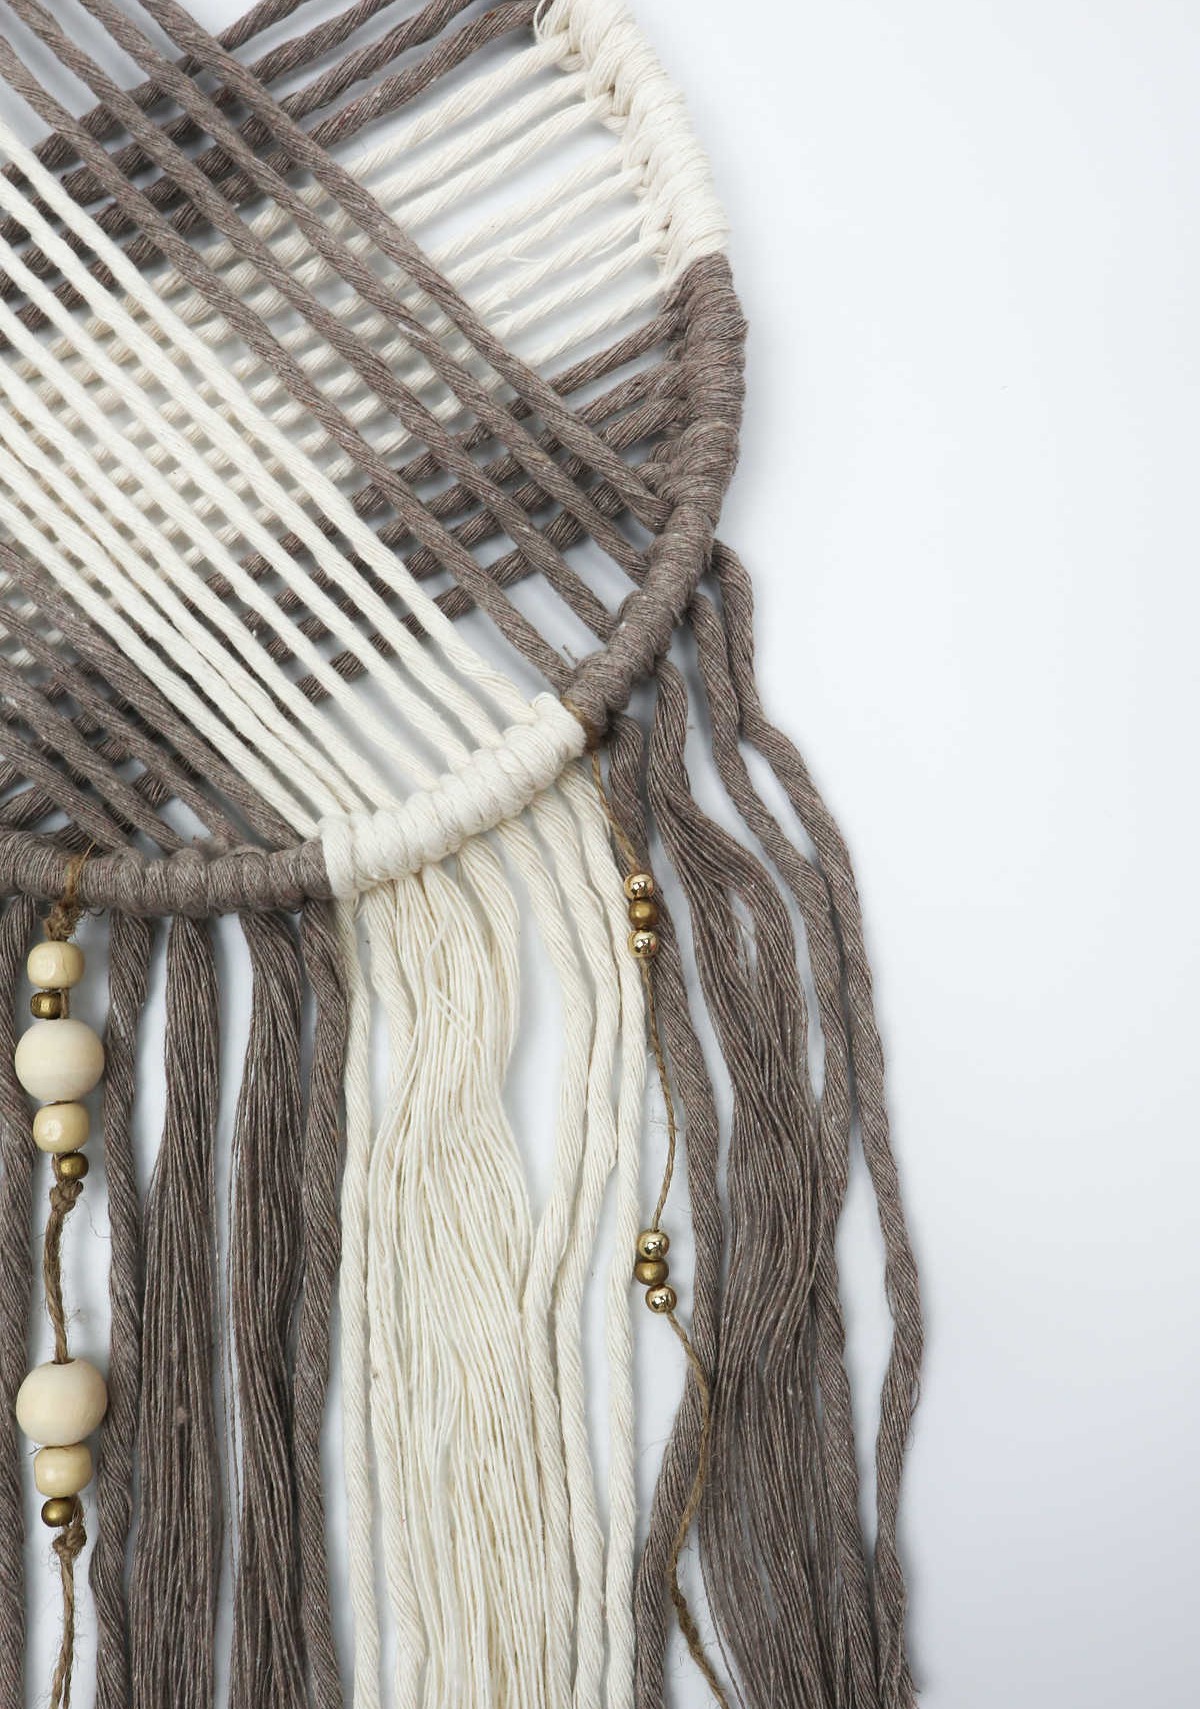
As you tie off steps 12 and 13, focus on creating intricate knots at the bottom right of your dream catcher. The resulting design should resemble a whimsical masterpiece. Take note of how the carefully arranged cord patterns – specifically, the alternating sequence of 4 cappuccino cords, 8 cream cords, 8 cappuccino cords, and finally 8 cream cords, followed by another 4 cappuccino cords – lend to its dreamy allure.
Step 17
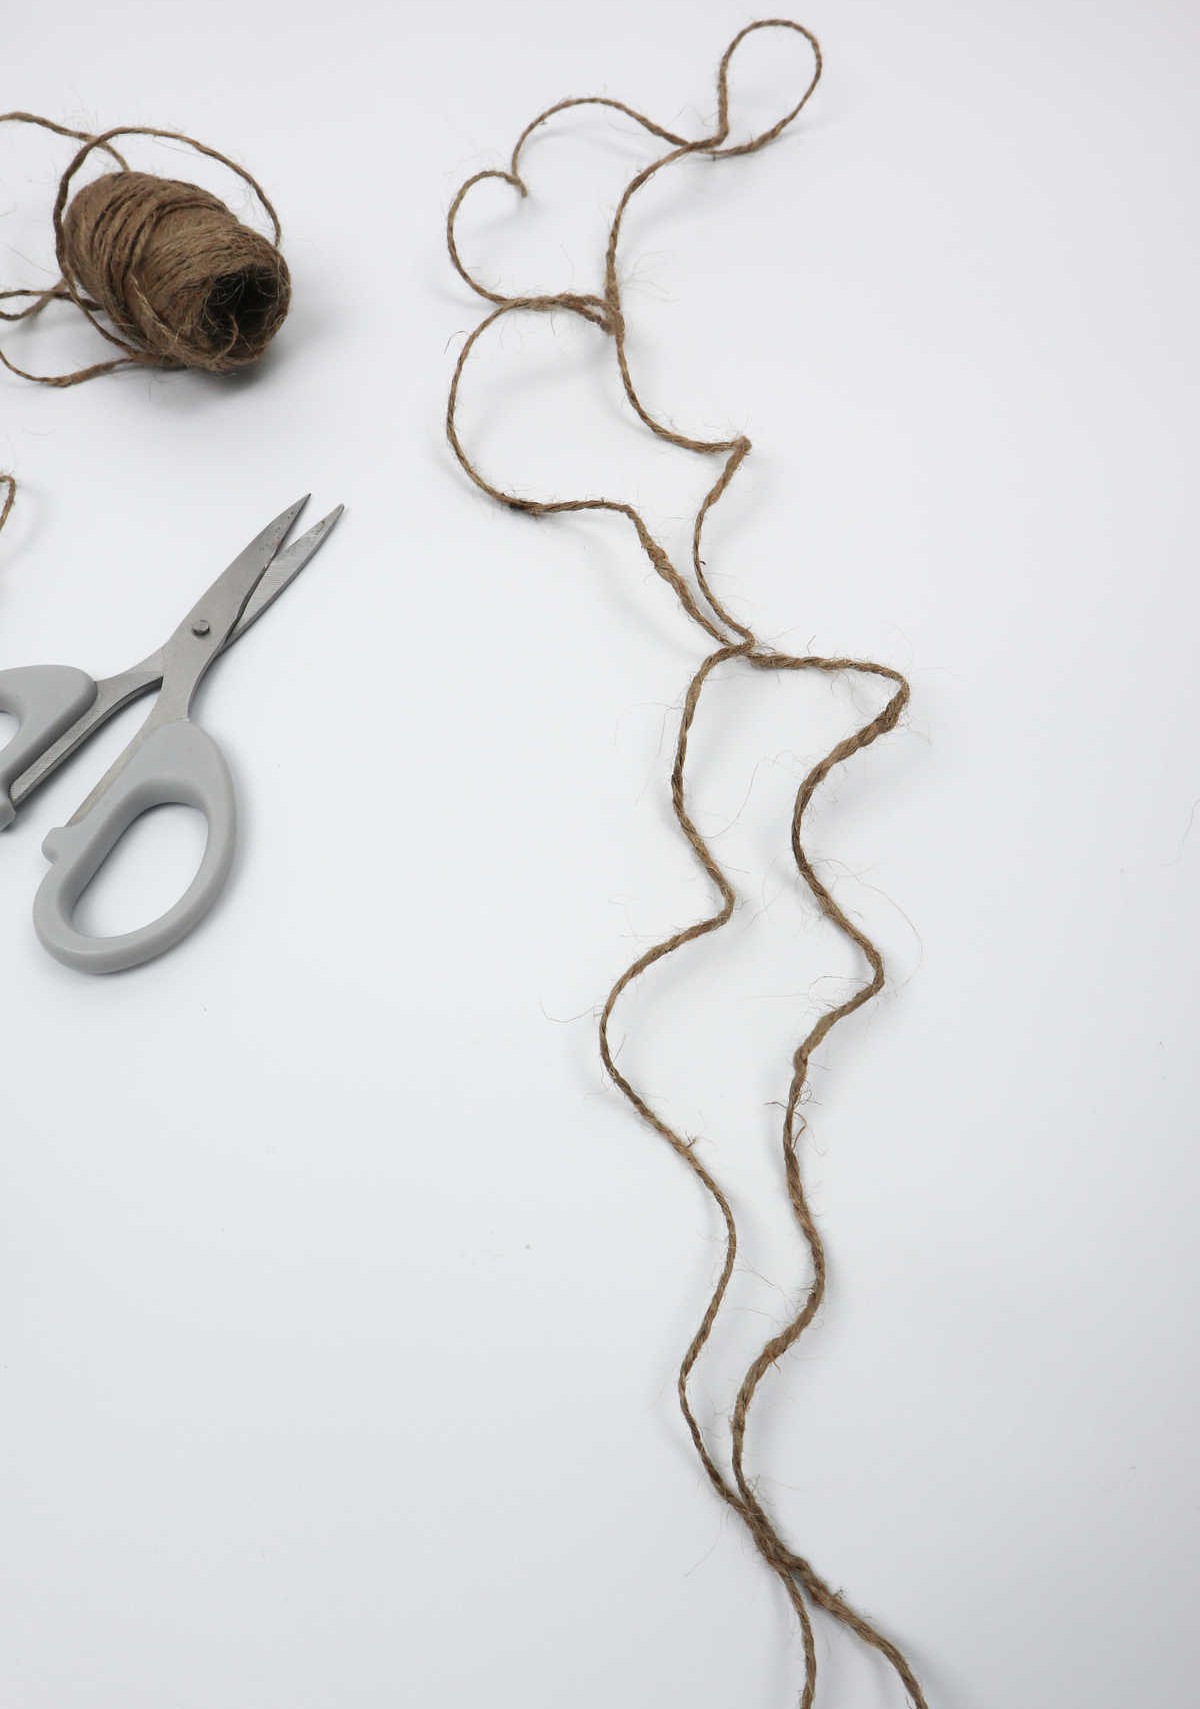
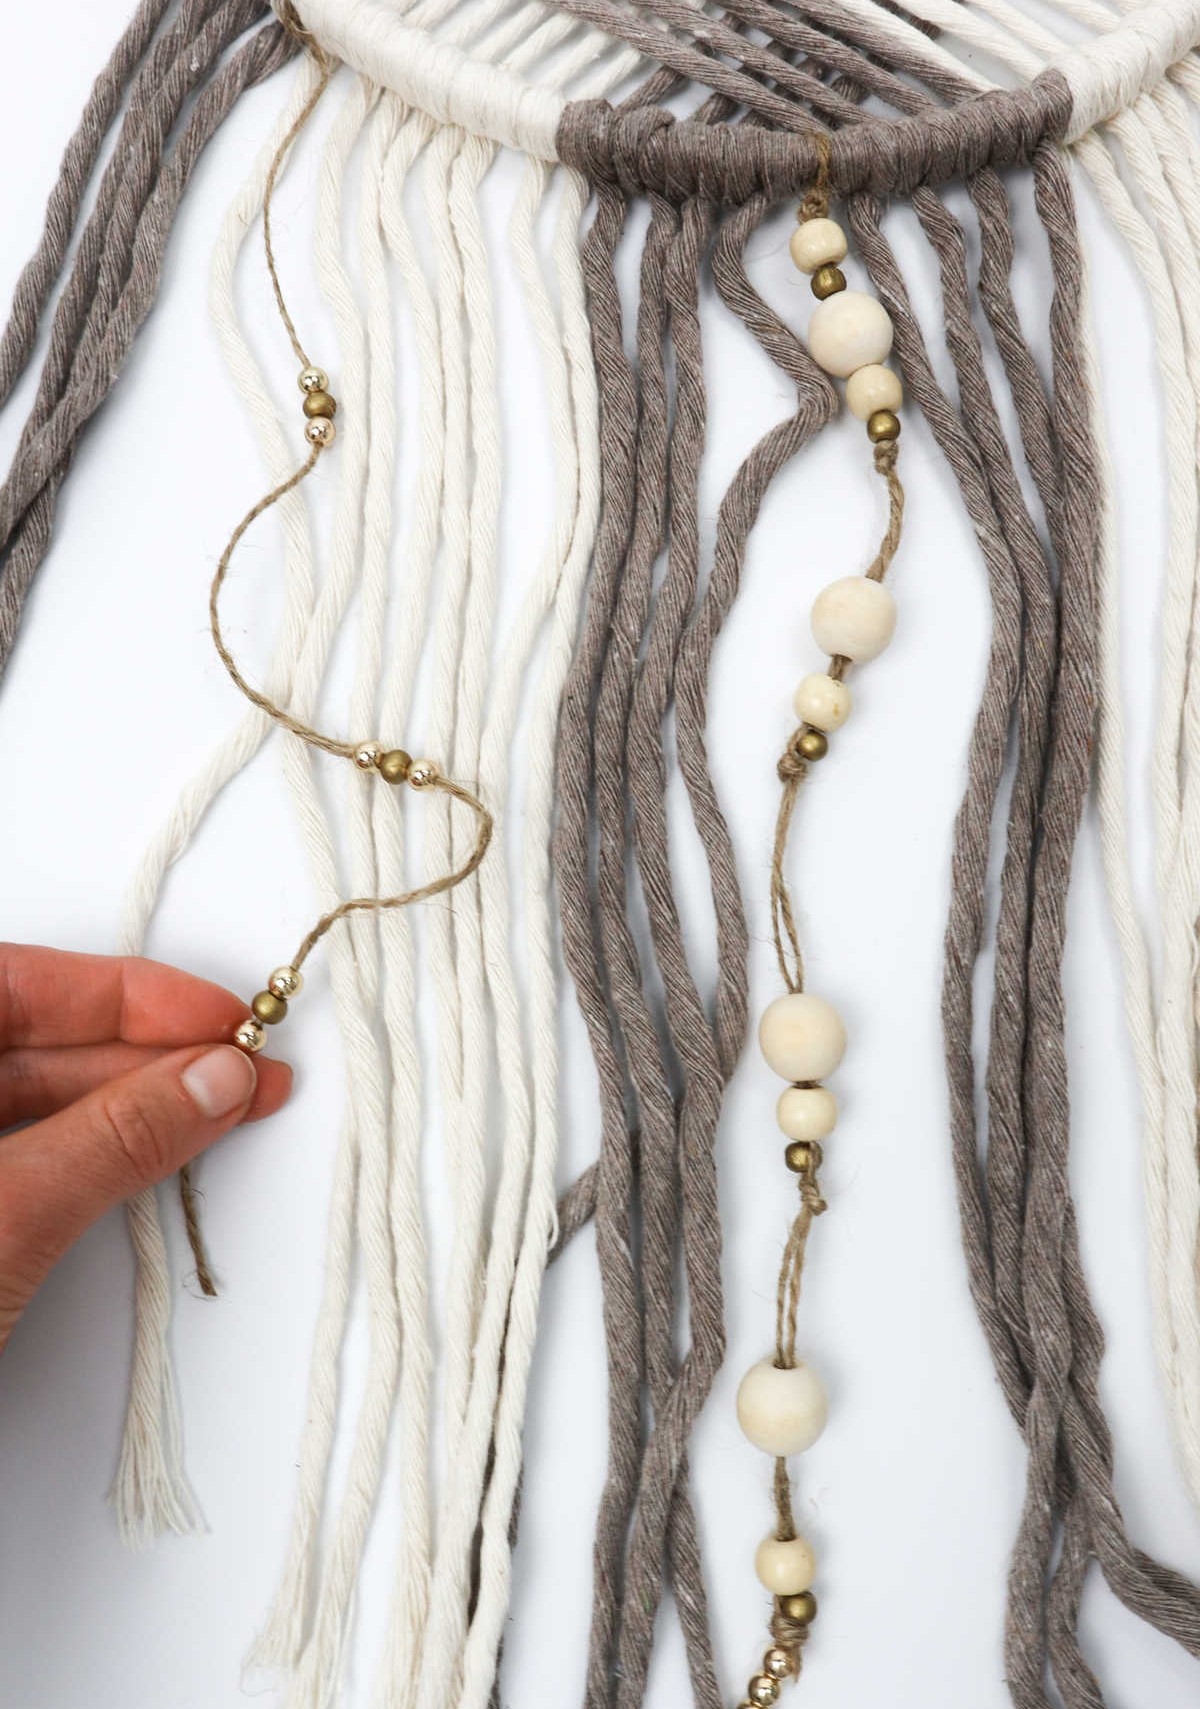
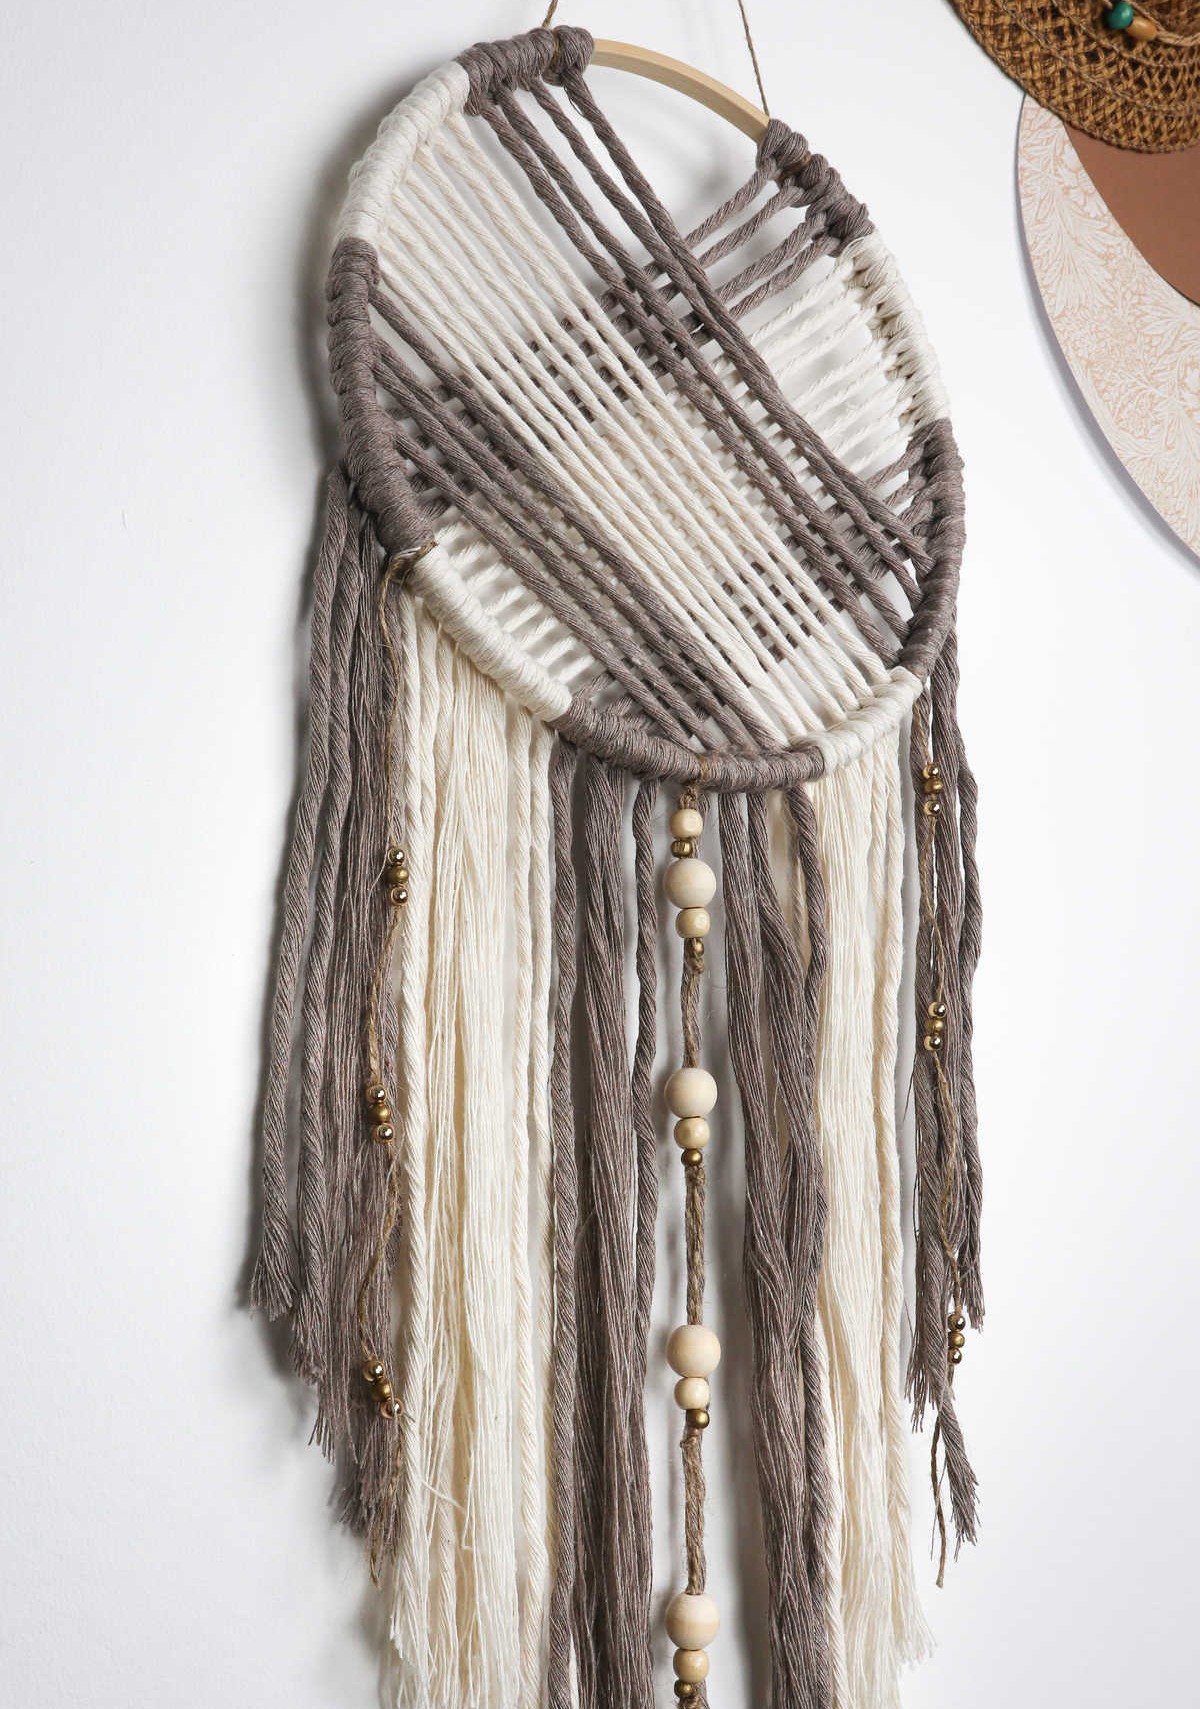
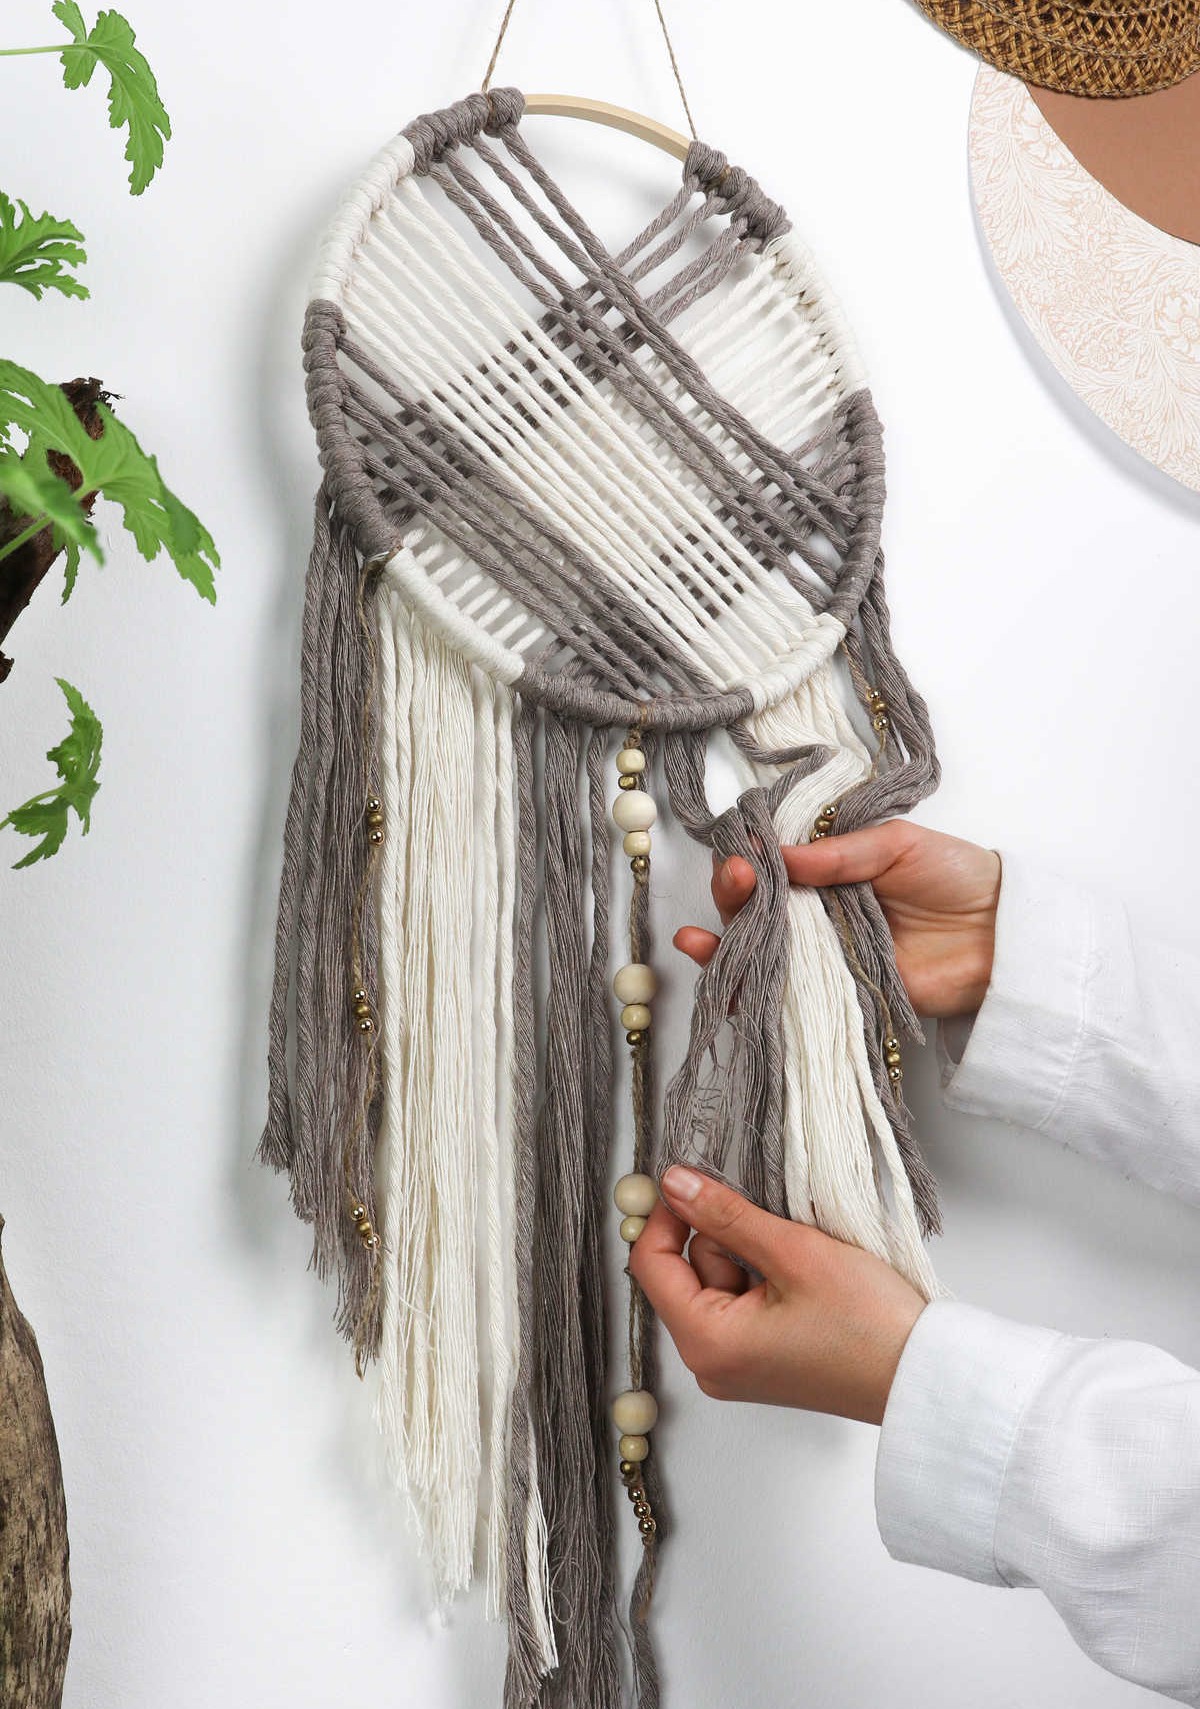
While adding beads to your dream catcher is entirely up to personal preference, I believe they can significantly enhance the overall aesthetic. To incorporate beads into your design, start by threading jute twine with beads and secure them using knots. This will prevent the beads from falling off during use. Once you’ve achieved the desired pattern, tie the beaded jute twine between the cords, allowing the beads to dangle below.
Additionally, create a loop at the top of the hoop by knotting some twine, making it easy to hang your dream catcher. The result will be a unique and eye-catching piece that reflects your personal style.
Step 18
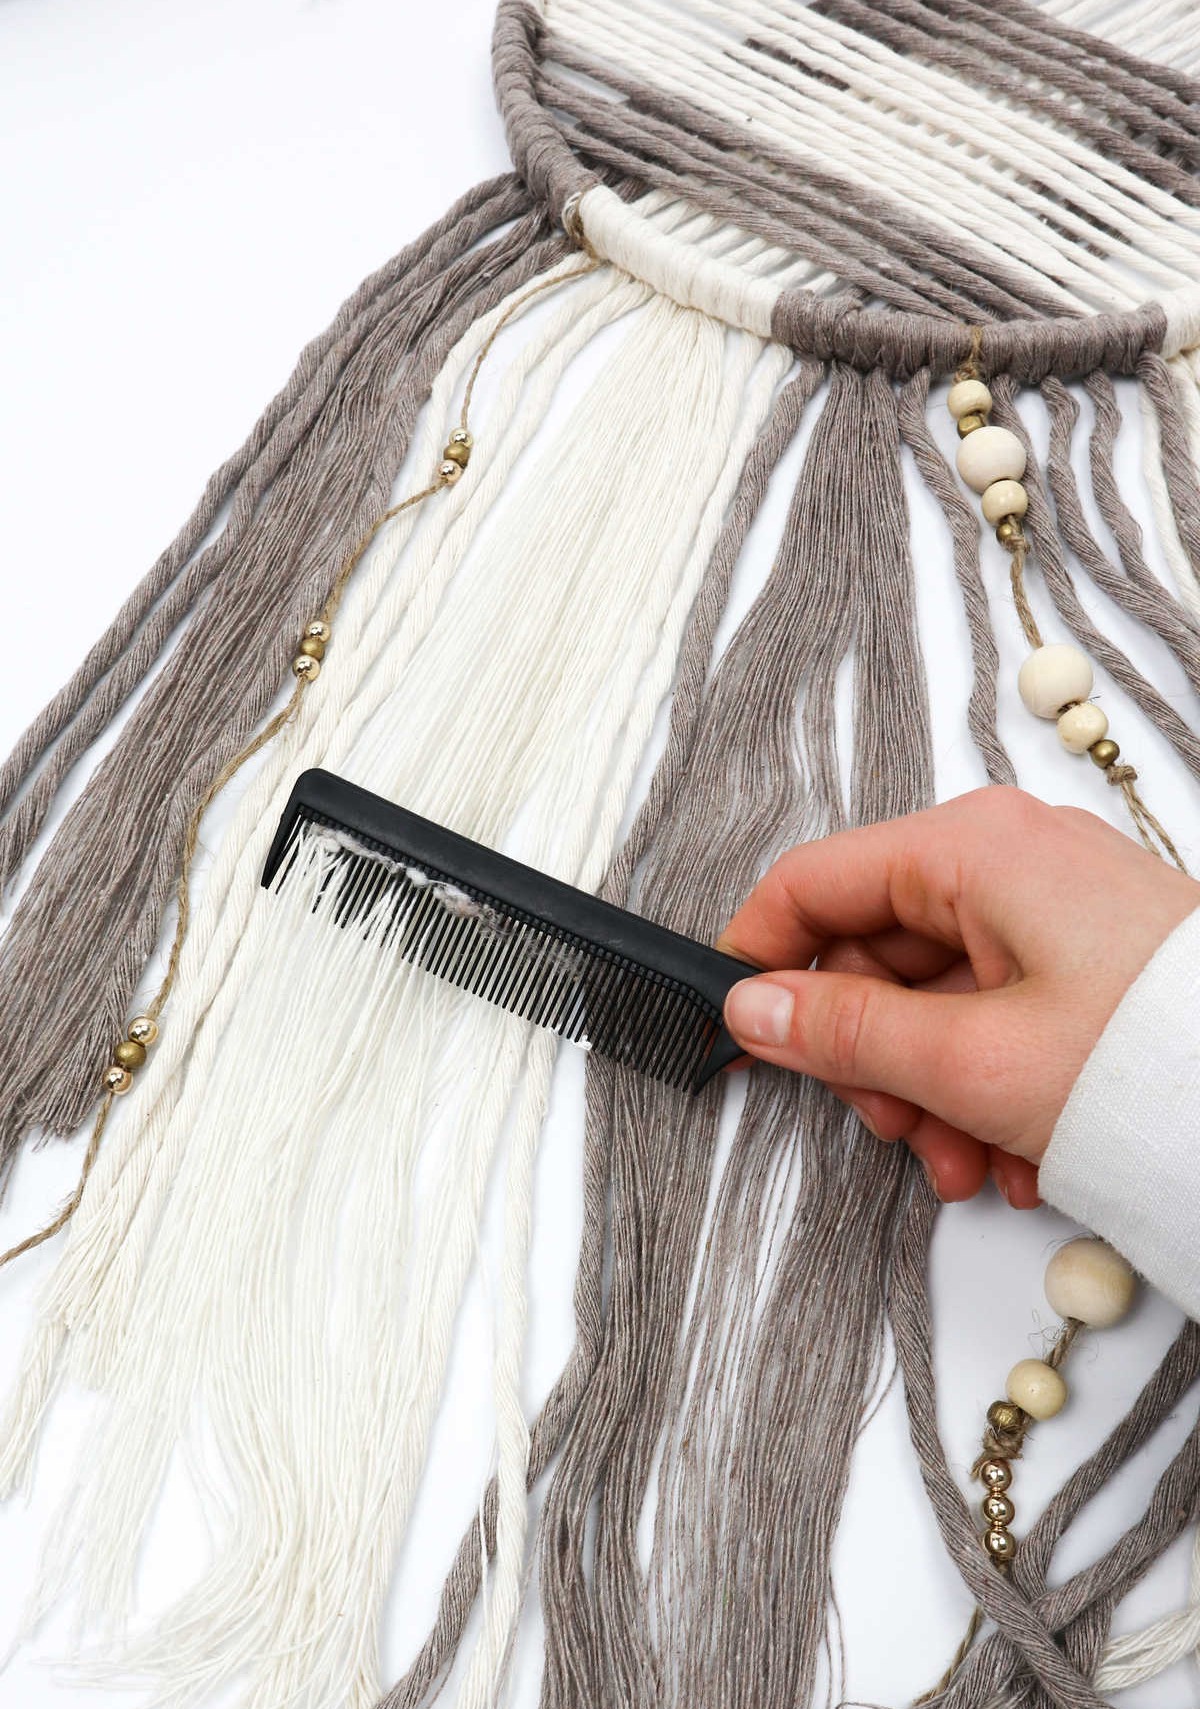
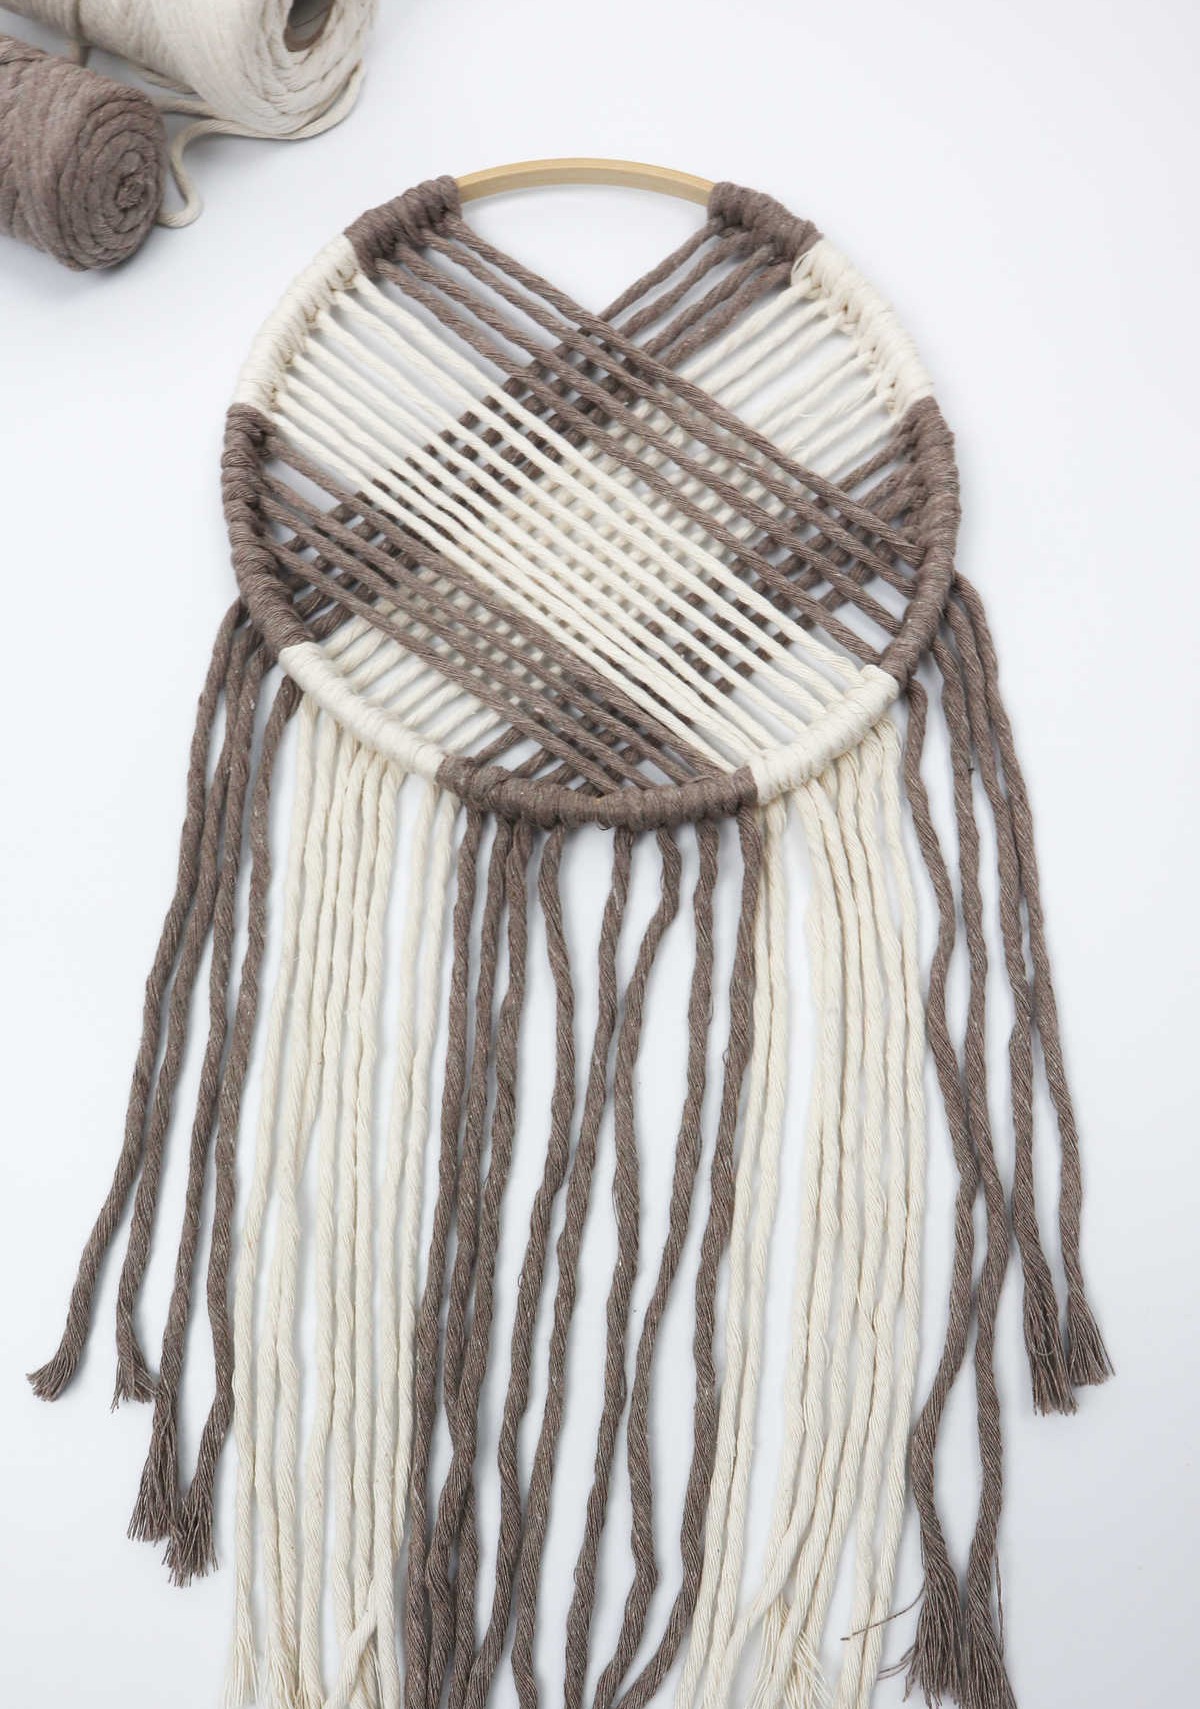
Before trimming the cords, consider taking a moment to comb them out. While not essential, this step can help achieve a smoother appearance if desired. If you prefer the natural texture and chunky look of the cotton cords, simply leave them be. Alternatively, combing them out can result in a sleeker finish.
Step 19

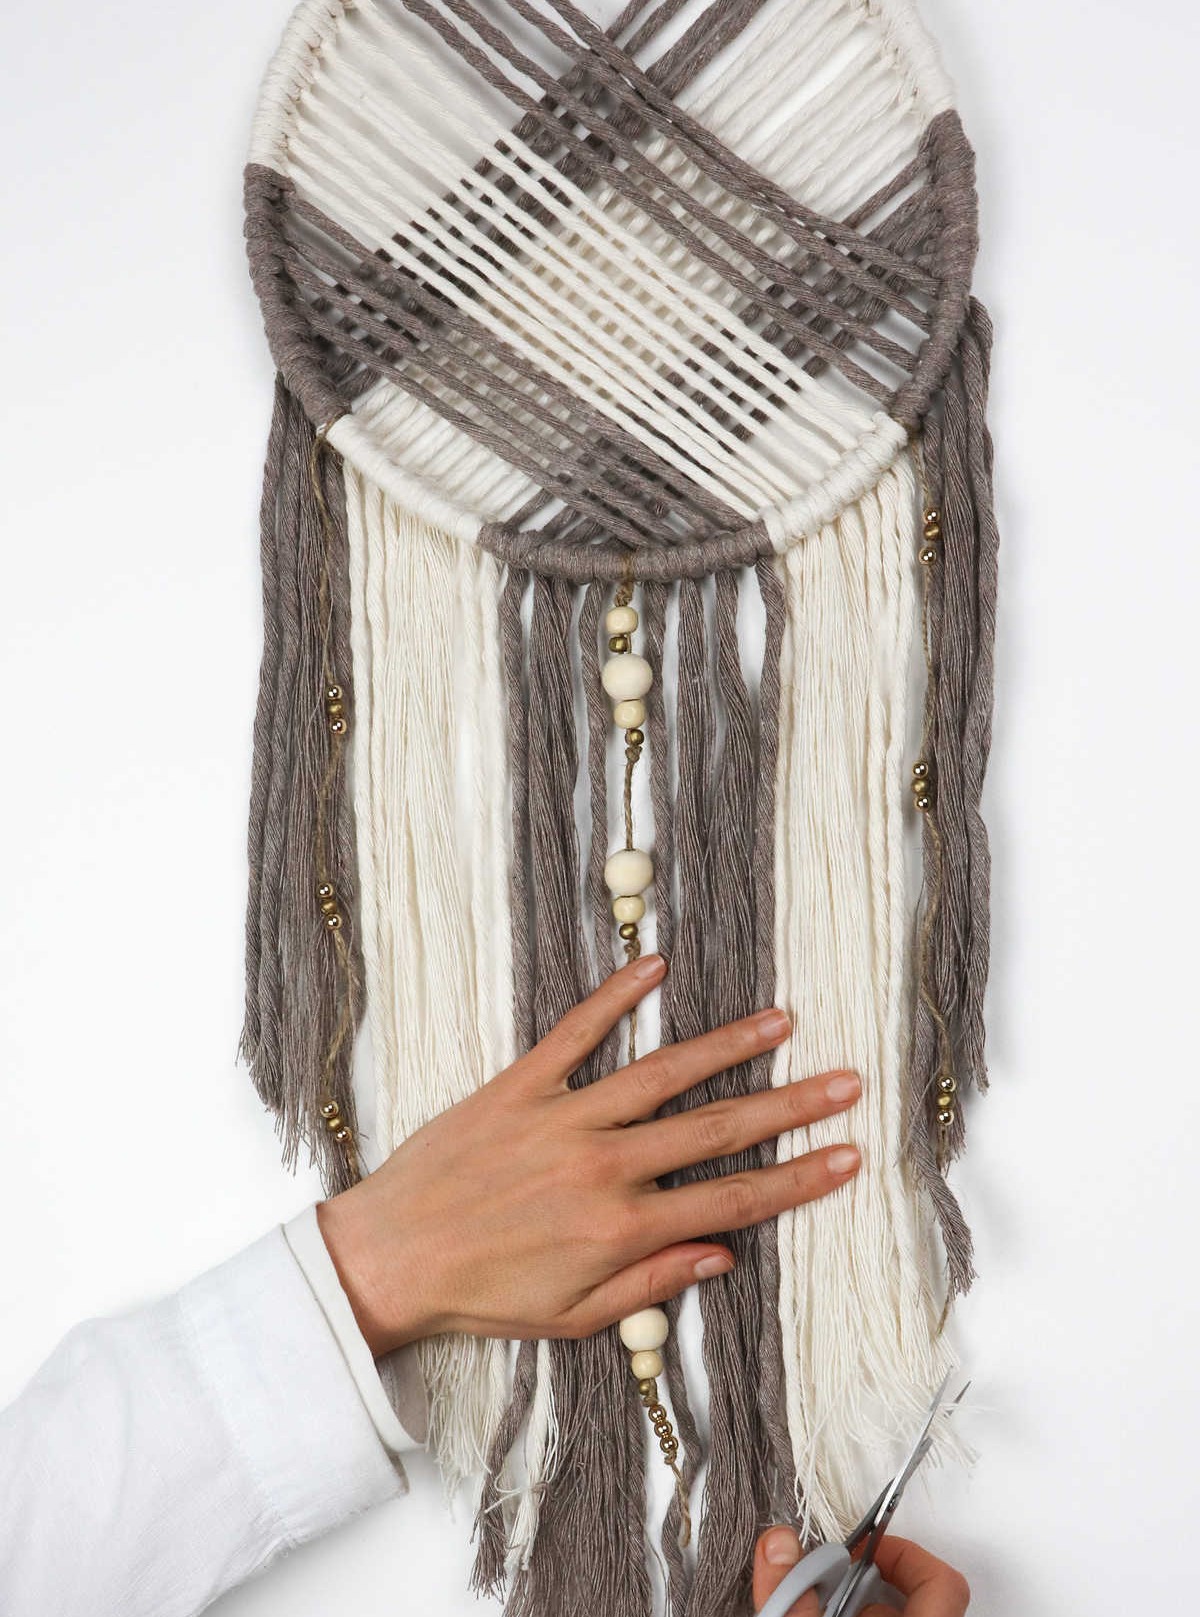
To achieve a neat and tidy look, begin by gently snipping off the frayed edges of each cord with scissors. A tapering effect can be achieved by gradually reducing the length from the sides to the middle, as demonstrated. For added precision, ensure all cords are smoothened out beforehand to guarantee even ends.
How to Customize Your Dreamcatcher
To give your dreamcatcher a personalized touch, consider experimenting with various creative elements. For instance, you can opt for a hoop of a unique size or material that reflects your personal style. Additionally, play around with the colors of the jute twine to match your favorite hues or create a striking contrast. Furthermore, embellish your dreamcatcher with an assortment of materials such as ribbons, feathers, beads, and gemstones to make it truly one-of-a-kind.
Do Dreamcatchers Really Work?
While it’s natural to wonder whether dreamcatchers truly hold the power to filter out negative dreams and let positive ones through, their efficacy ultimately depends on our collective belief in them. If we genuinely believe they work, then yes, they can be an effective tool for capturing bad energy and allowing good vibes to flow in. Furthermore, when we put our own hands on a handmade dreamcatcher, imbuing it with personal intention and meaning, its significance is amplified, don’t you agree?
The simple act of creation infuses the object with emotional resonance, making it a potent symbol of our hopes and desires.
Where Do You Hang a Dreamcatcher?
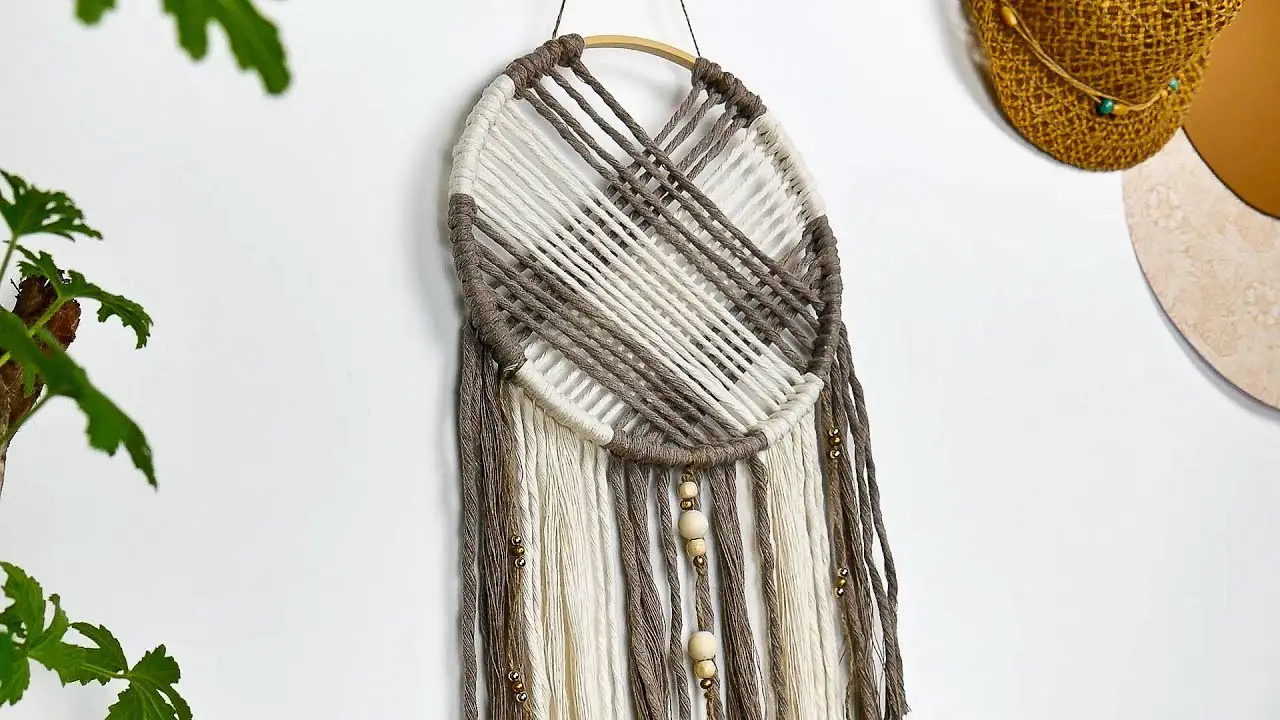
When it comes to deciding where to hang your dream catcher, the possibilities are endless. For decorative purposes, you can choose to display it proudly as a wall hanging outside on your porch or deck, adding a touch of Native American flair to your outdoor space. Alternatively, if you’re looking for a more personal and portable option, consider attaching it to your handbag, purse, or even the rearview mirror of your car.
For those who want to utilize their dream catcher as a protective charm, there are several strategic placement options to explore:
Your bedroom window, or any large window in your home, is an excellent spot to hang your dream catcher, allowing it to filter out bad energy and promote peaceful slumber.
You can also place it above a doorway, creating a sense of protection and warmth as you enter a room.
If you’re looking for a more unique approach, consider hanging it from the top of your headboard or a post on your bed frame.
Finally, don’t forget about the often-overlooked areas like your basement or attic – perfect spots to add a touch of mysticism and create an eerie yet fascinating ambiance.
What Do the Colors on a Dreamcatcher Mean?
When selecting colors for your dreamcatcher, it’s common to associate symbolic meanings with each hue. Here’s a breakdown of the most popular colors and their corresponding interpretations:White represents the embodiment of purity, innocence, and goodness. It’s a popular choice among mothers who create dreamcatchers as gifts for their children. Black, on the other hand, is often linked to mystery, power, and even negative connotations such as evil, grief, or death.
However, in a decorative context, black can add an air of sophistication and elegance, much like dark grey which signifies ambiguity and the complexities of life. Blue is calming to the human mind, evoking feelings of stability, peace, faith, and piety. It’s not uncommon for dreamcatchers to feature this soothing color. Finally, red is a vibrant representation of passion, love, and intense emotions.
In the context of a dreamcatcher, it symbolizes courage and can be balanced by combining it with orange and yellow hues which embody joy, creativity, happiness, and energy.
How to Make a Dreamcatcher (Step-by-Step)
Transform your space with a personalized DIY dreamcatcher, perfect for adults and teenagers alike. This creative project allows you to weave together a beautiful decoration that will attract positive dreams while repelling negative ones. With just an hour of active crafting time, you can create your very own unique piece of art. Take note that the total time required is also one hour, from preparation to completion.
As a bonus, this DIY dreamcatcher project is brought to you by Karo @ CraftsyHacks. com, ensuring high-quality guidance and inspiration throughout the process. The cost-effective nature of this project means you can get started for just $6.
Equipment
Materials
For a unique and rustic wood hoop, you’ll need the following materials: a 10- to 11-inch wood hoop with a thickness of 0.15 inches. To add some natural texture and color, consider using a single twist cotton cord in cream or cappuccino hues. For added embellishments, you can also incorporate beads into your design. Additionally, you may want to include tape and jute twine as optional materials to further enhance the look of your wood hoop.
Instructions
To create your dreamcatcher, start by preparing your materials. Cut eight 60-inch strands of colored cotton cord in various colors, ensuring you have a total of four cappuccino and four cream cords. Secure your hoop in place with tape to prevent it from shifting while you work. Begin by creating the top-left pattern on the hoop.
Starting with the cappuccino cord, fold it in half and place the loop under the hoop, then bring it over the hoop and pull both loose ends through the loop, securing a knot with firm tugs. Repeat this process on the left side of the previous knot by pulling one end over and under the hoop to form another loop, then pulling the end through and securing another knot. Alternate between the right and left sides, working your way across the top half of the hoop in an alternating pattern.
Switch colors as needed to maintain the sequence: 2x cappuccino, 4x cream, 2x cappuccino. Ensure that all ends are tucked under the hoop with the hoop resting on them. Once you’ve completed the top-left portion, move on to the top-right side, repeating the process and adjusting for the opposite direction (i. e., the ends will be over the hoop rather than under). Continue knotting until you’ve reached the desired pattern: 4 cappuccino, 8 cream, 8 cappuccino, 8 cream, and 4 cappuccino.
To add some flair, thread beads onto jute twine and hang them down from your dreamcatcher. Loop some twine at the top to create a hanger for your finished piece. You can also choose to comb or leave the cord ends as is, finally trimming the excess so that they taper naturally towards the center.