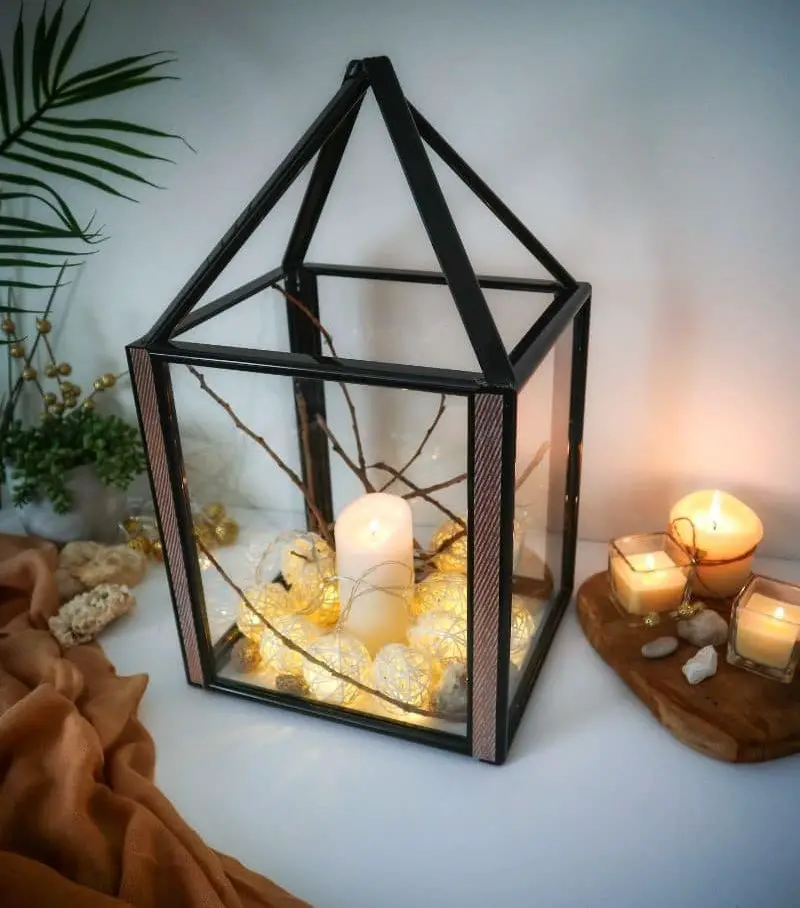

Crafting is all about creating unique pieces for your home that you may not be able to afford otherwise. I’m sure many of us share this mindset. With the rise of online tutorials and DIY inspiration, it’s easier than ever to find ways to recreate items we love without breaking the bank. Dollar stores, in particular, offer a treasure trove of affordable materials for our creative endeavors. Take, for instance, this stunning DIY lantern that can be made using Dollar Tree frames.
Not only is it an easy project, but it’s also an excellent way to add a touch of elegance to your home without spending a fortune. Follow along and discover how you can create your very own beautiful DIY Dollar Tree lantern!
Supplies to Make the Lantern
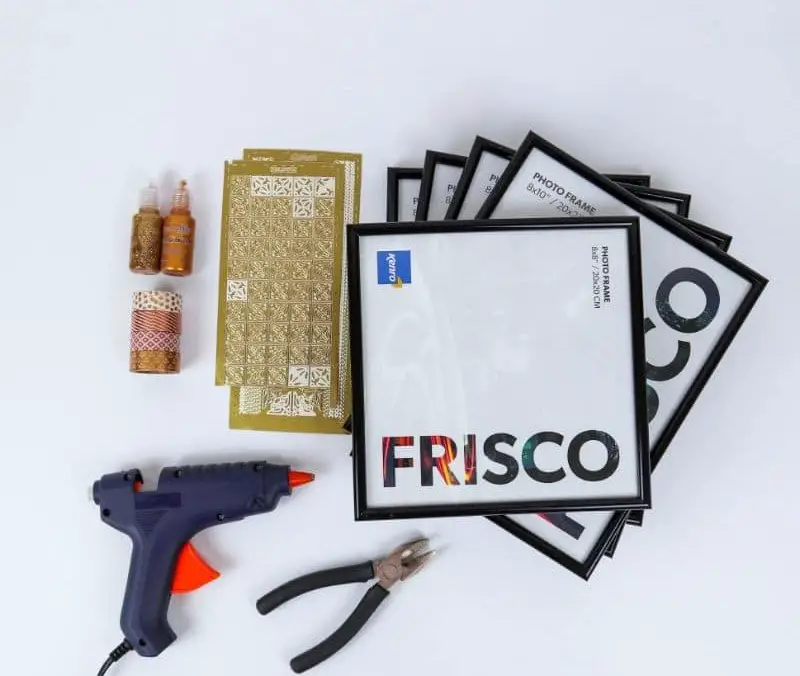
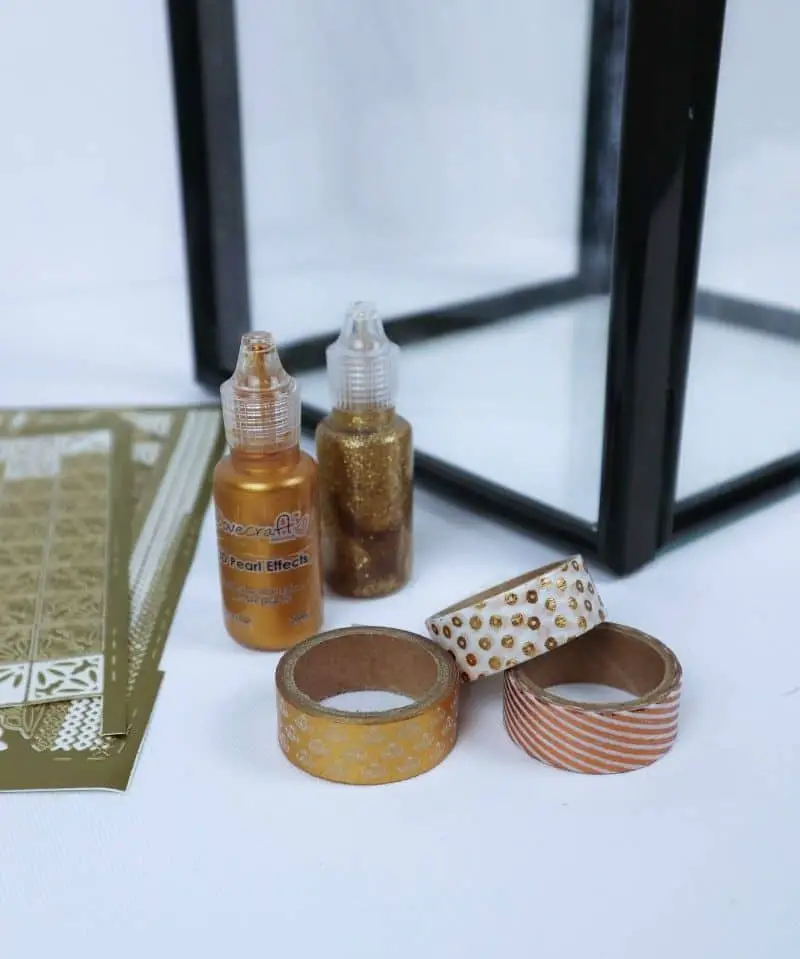
To get started on your DIY picture frame project, you’ll need the following materials: a total of four Dollar Tree frames measuring 8×10 inches each. Alternatively, you can opt for one 8×8 inch frame from Dollar Tree or two more 8×10 inch frames. Additionally, you’ll require a hot glue gun and a pair of pliers to help with the framing process. To add some extra flair, consider incorporating decorative tape, glitter glue, sticky labels, or even spray paint, depending on your desired aesthetic.
How to Make Dollar Store Lantern
To bring your project to life, follow our easy-to-follow, step-by-step guide and discover the simple yet elegant process of crafting a stunning lantern. With each deliberate move, you’ll be amazed at how quickly your creation takes shape.
Step 1
To embark on this creative journey, begin by preparing your workspace. You’ll only require one essential adhesive: hot glue. Ensure you’re situated near a power source, as you’ll need it to fuel your crafting endeavors.
Step 2
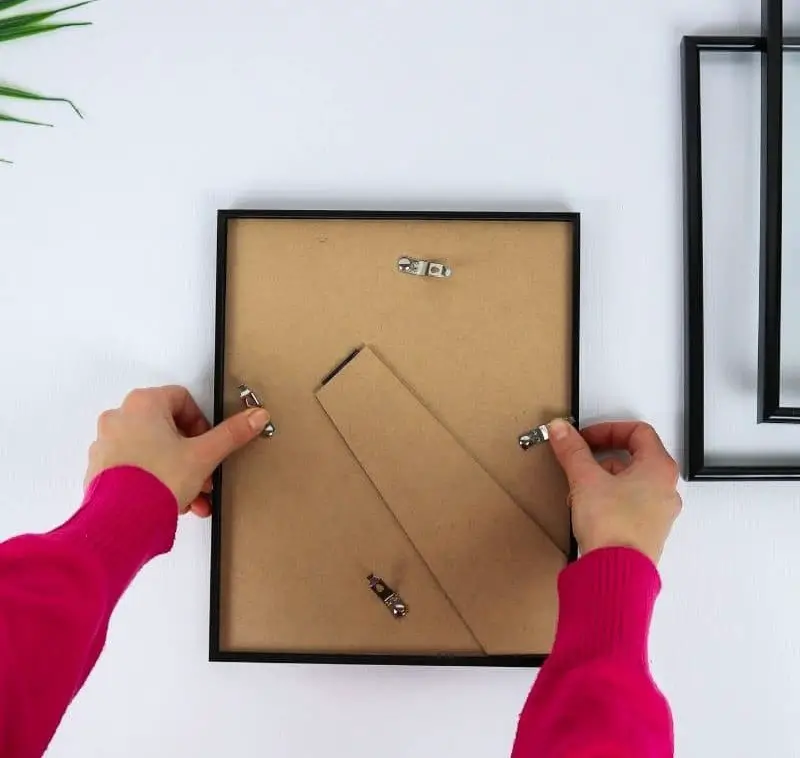
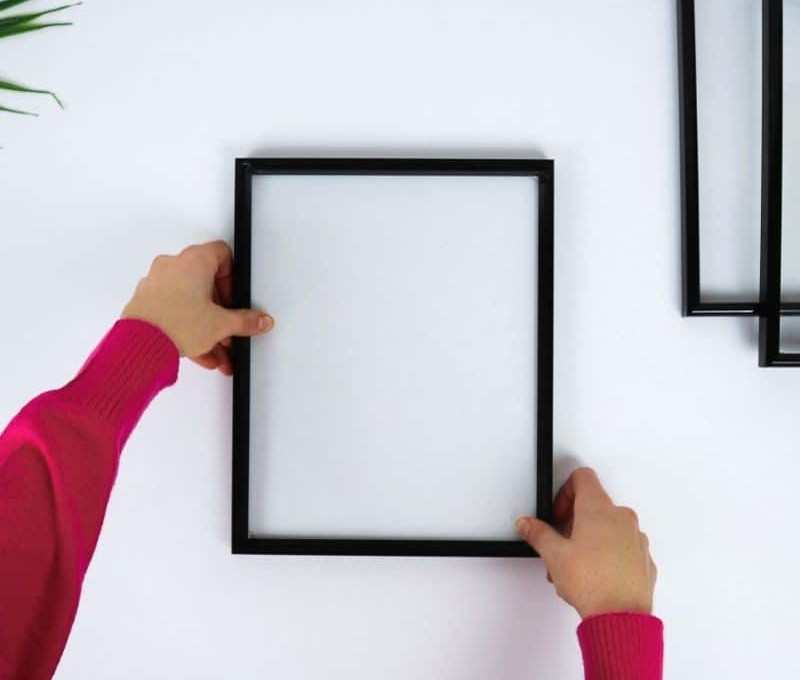
Before commencing with the assembly process, take a moment to prepare each frame by removing its wooden backing. Set these apart from their respective counterparts, ensuring both sizes are ready for further manipulation. If you’re unsure about the intended use of your frames, consider harnessing the adhesive properties of Mod Podge to craft a freestanding picture display that can be enjoyed without being constrained by traditional framing constraints.
Step 3
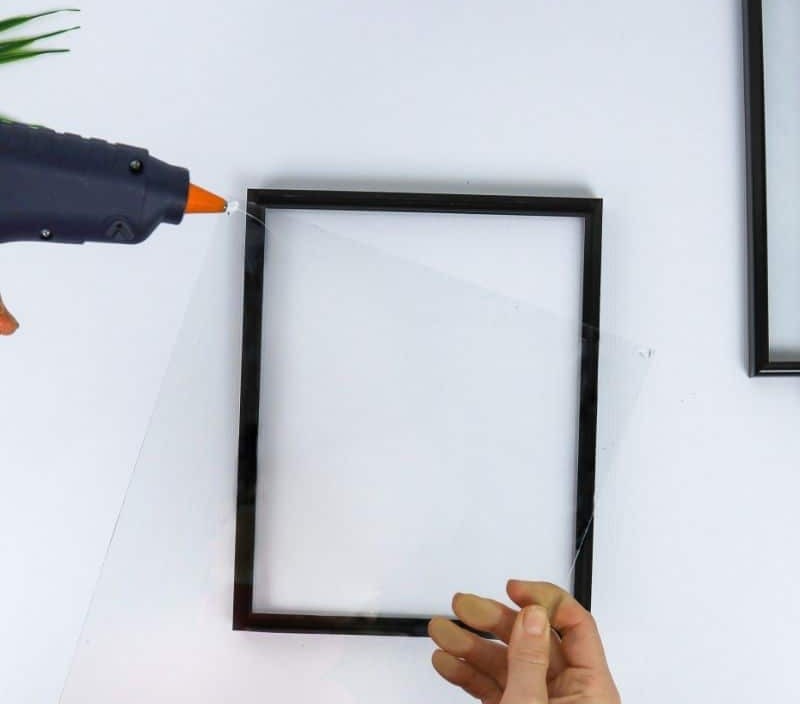
To prevent the glass from shifting or falling out of the lantern when it’s standing upright, apply a bead of hot glue along the edges of each glass frame. This simple step will ensure that everything stays securely in place.
Step 4
To secure the smaller glass frames, place each one onto the inner surface of its respective frame, applying gentle yet firm pressure to ensure a strong bond forms. Repeat this process for all four of these smaller frames, allowing them to set before proceeding with the larger ones.
Step 5

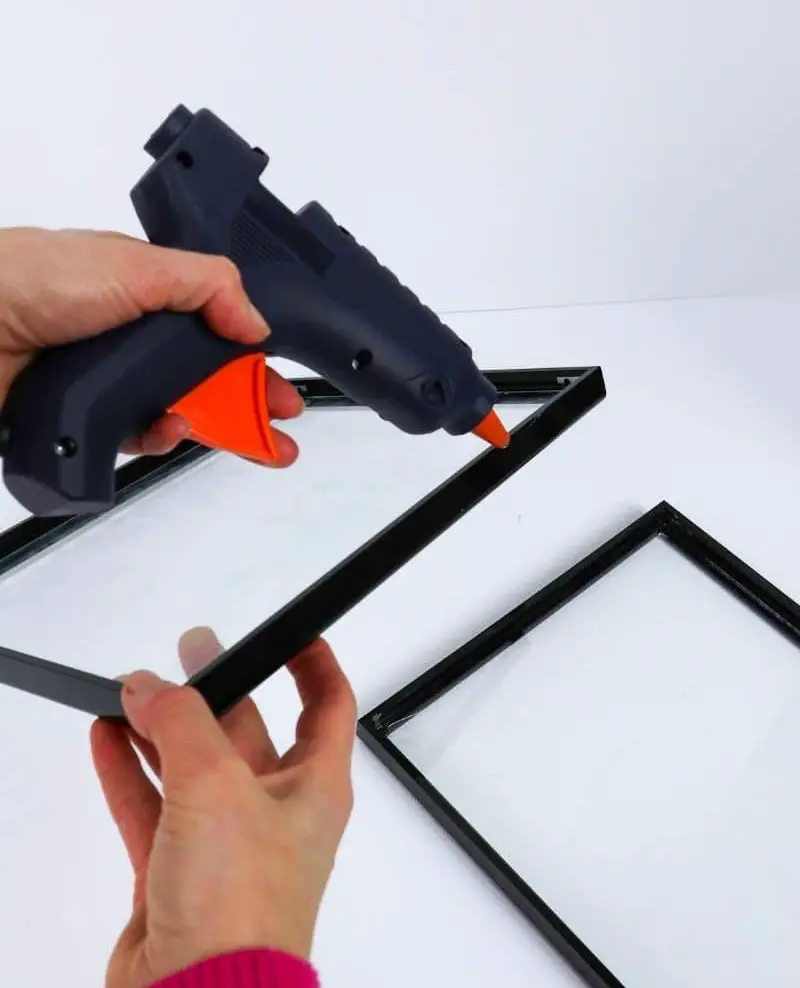
To build the lantern, start by assembling the frames into a tall rectangular shape. Begin by running a thin bead of hot glue along the long edge of the first frame, positioning the second frame adjacent to it. This will create a strong bond between the two pieces, allowing you to construct the lantern’s foundation.
Step 6

To secure the long edge of the first frame, attach it perpendicularly to the corresponding long edge of the second frame. For added precision, utilize a reference point like the edge of a table or a specialized right-angle tool to ensure a precise 90-degree angle.
Step 7
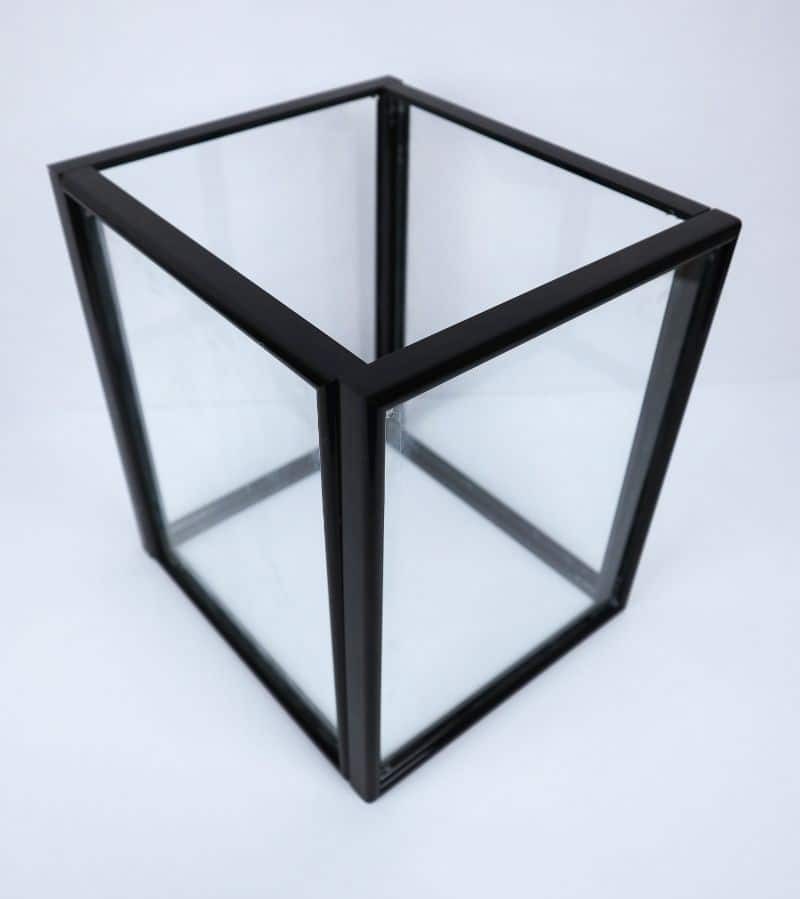
To ensure precise and accurate construction of the rectangle, it is crucial to maintain a consistent approach throughout the process. A flat and level surface is essential for this purpose, as any variation in height or angle may compromise the final result. This can be achieved by working on a sturdy table, counter, or any other suitable platform. It’s vital to double-check every corner to guarantee that each one meets the standard right-angle requirement.
Step 8 (Optional)
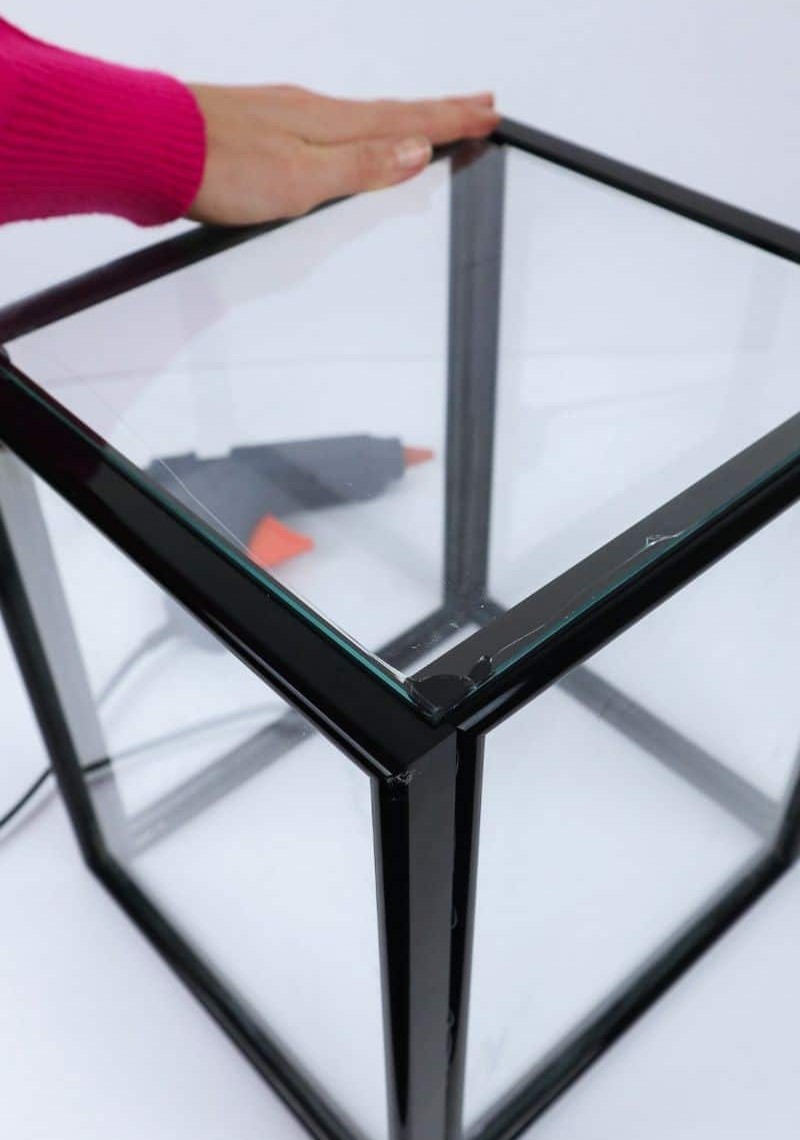
To add a base to your lantern and create a space to catch ashes, simply repurpose the glass from an 8×8 frame. Attach it to the bottom of the rectangle, allowing it to dry completely before flipping it over. You can stop here if you’re aiming for a sleek, modern look. But if you’re looking to give your lantern a rustic farmhouse charm, keep reading!
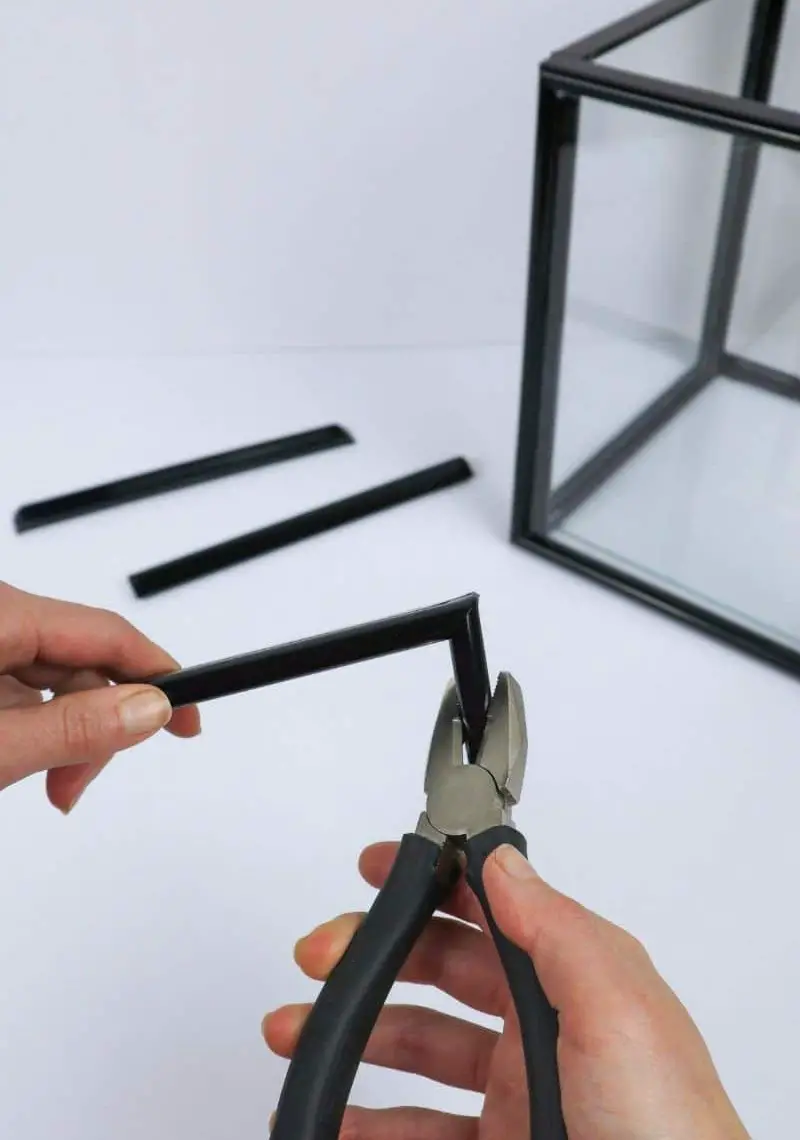
Step 9
In what can be a remarkably fulfilling step, it’s time to bring in your pliers. The goal is to ultimately have four equal segments, each measuring eight inches long. If you’re fortunate enough to possess an 8×8 frame, you’ll already have the necessary pieces at hand. Simply reuse all four parts from that single frame. However, if you’ve been working with 8×10 frames instead, don’t worry – just disassemble two of them and utilize the eight-inch components to achieve your desired outcome.
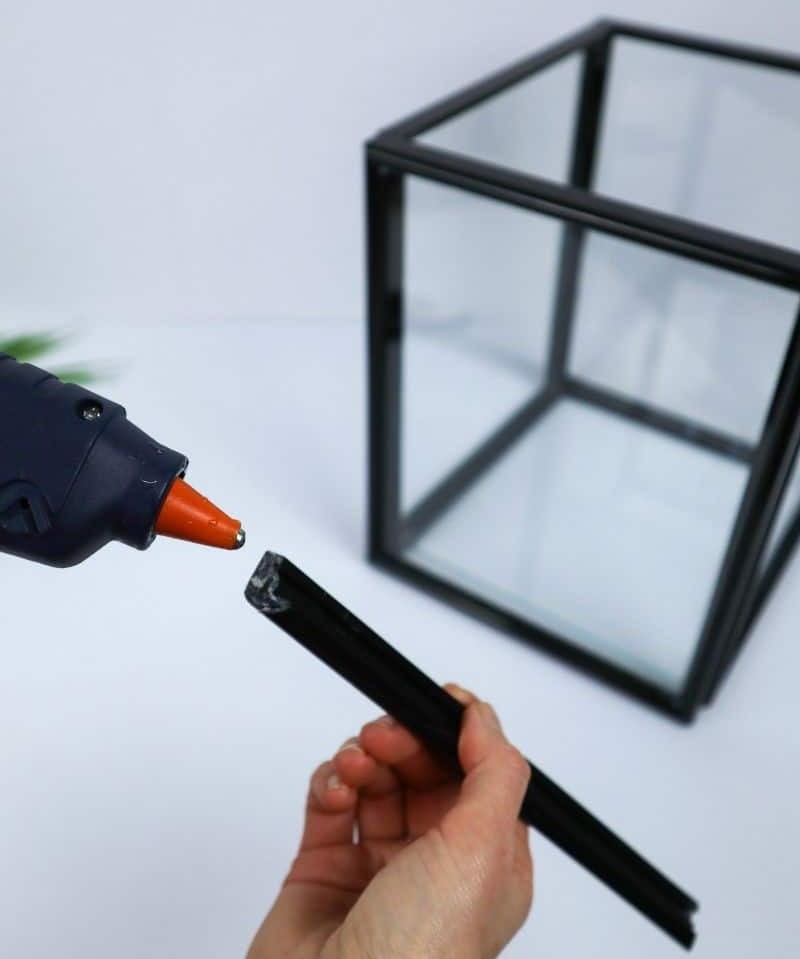
Step 10


As you begin crafting your lantern, start by applying a small amount of hot glue to one end. Position this glob at an angle, allowing it to extend from the corner of the lantern’s shape and meet with another arch piece in the middle. This initial bond will form the foundation for the lantern’s unique structure.
Step 11
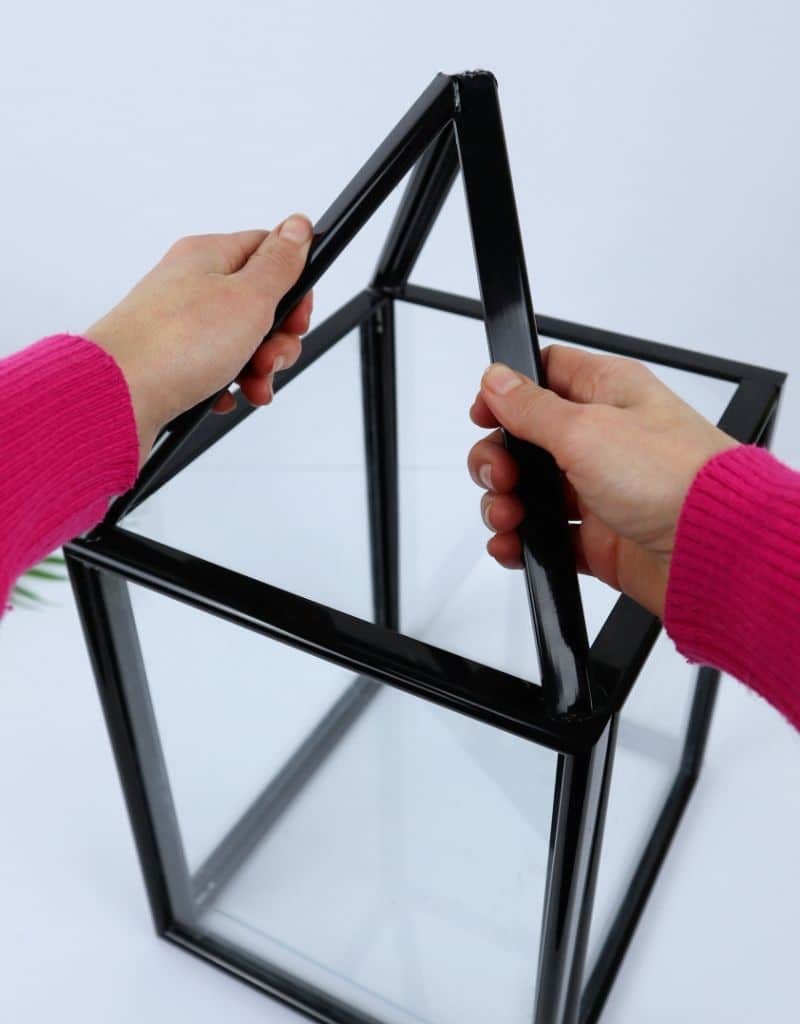
To ensure a precise fit, I suggest applying glue to both ends of the two pieces simultaneously. Hold them against your lantern while the adhesive sets, taking care not to move them until they’re firmly bonded. This streamlined process will save you time and frustration in the long run.
Step 12
As you continue to build your lantern, the structure is taking shape. To complete the frame, carefully position the middle strut and secure the third piece, ensuring a precise fit at the center of the assembly.
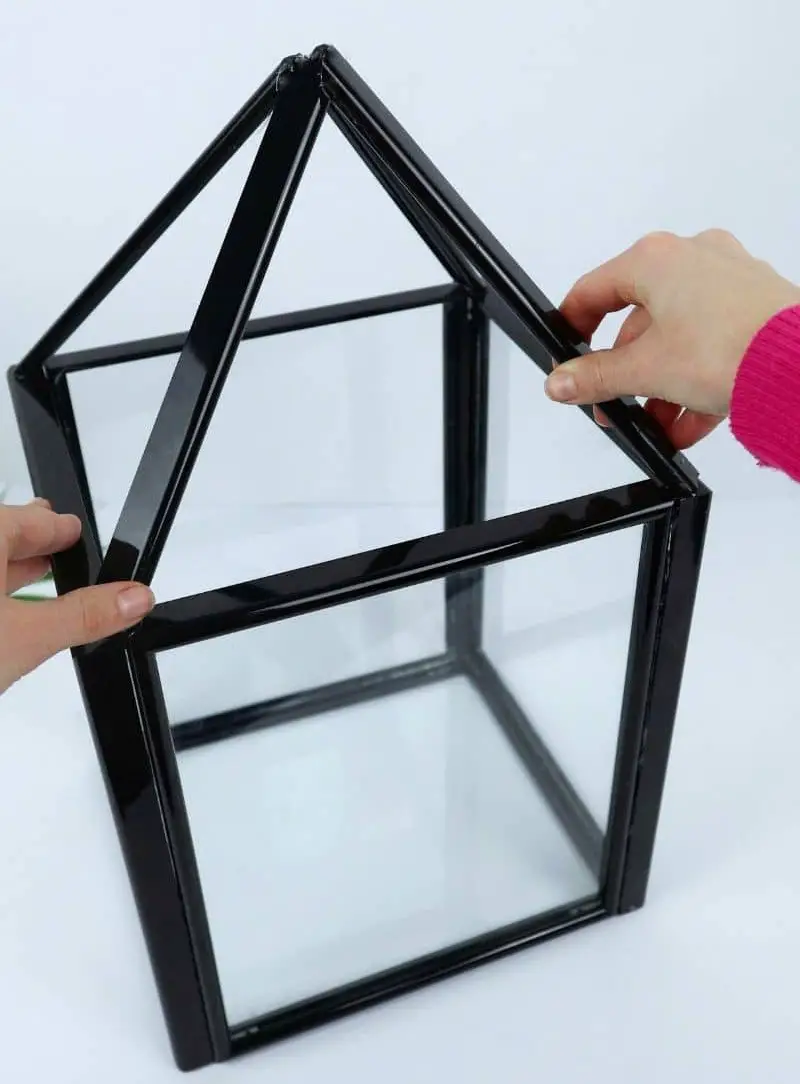
Step 13
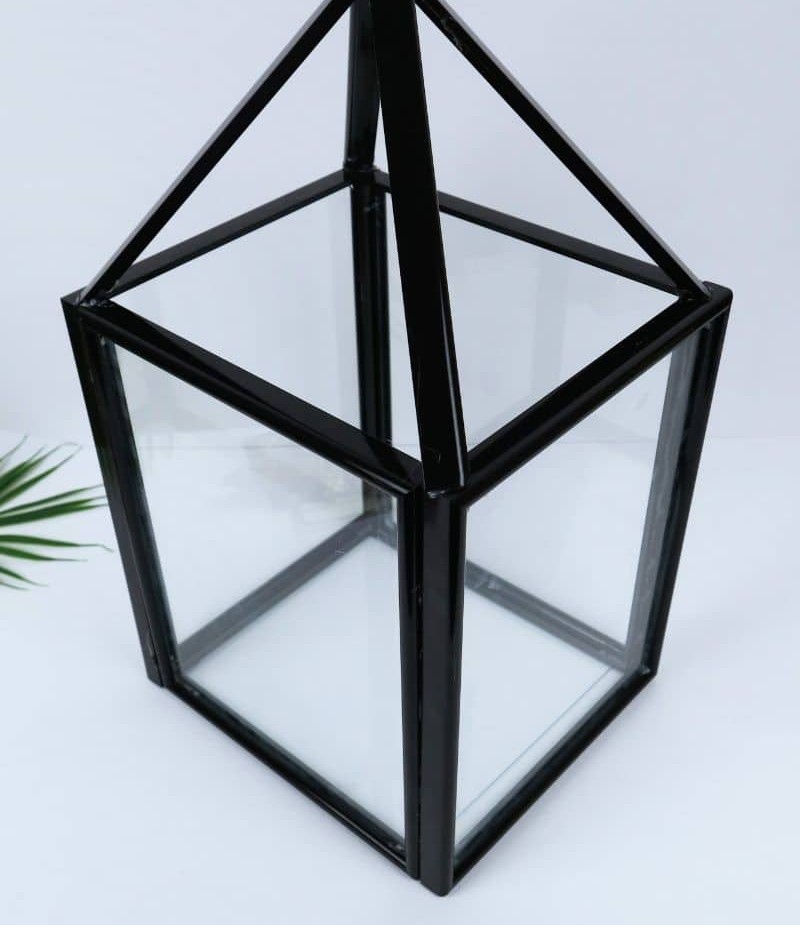
As you near the end of your project, attach the final arch piece in place. For added stability, consider applying a small amount of hot glue at the intersection point, but this is entirely optional. With this step complete, you’ll now possess a fully constructed lantern base.
Step 14
Transform your creative space by gathering a collection of decorative essentials, from playful stickers to versatile washi tape. Get inspired and get started on crafting a visually stunning atmosphere that reflects your personal style.
Step 15
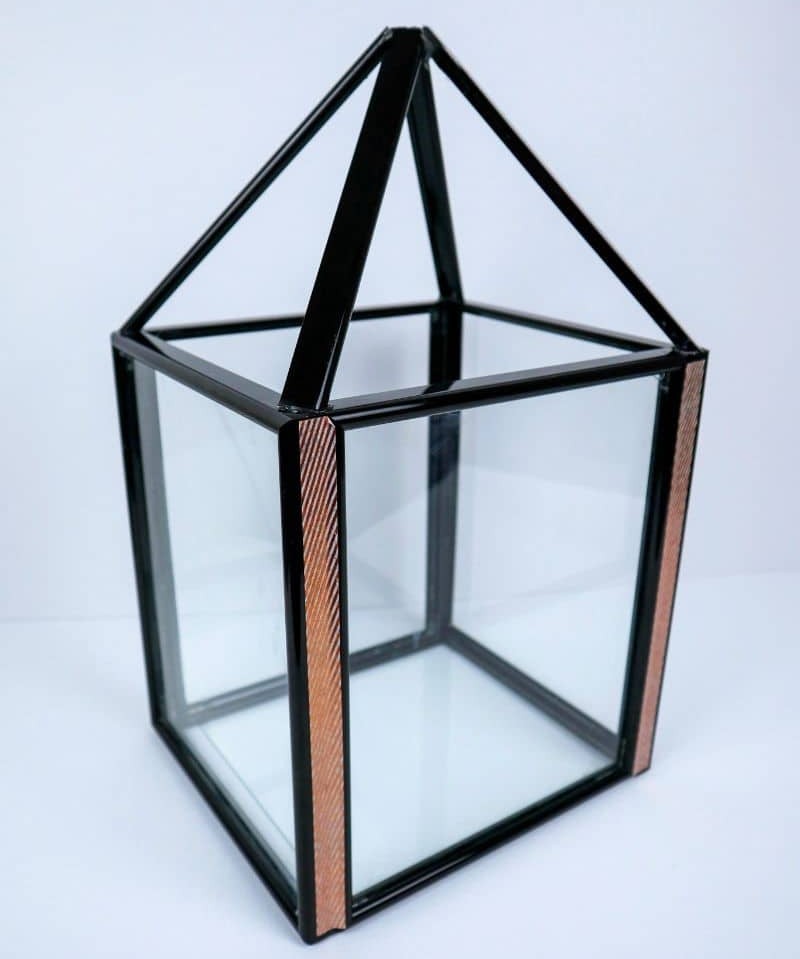
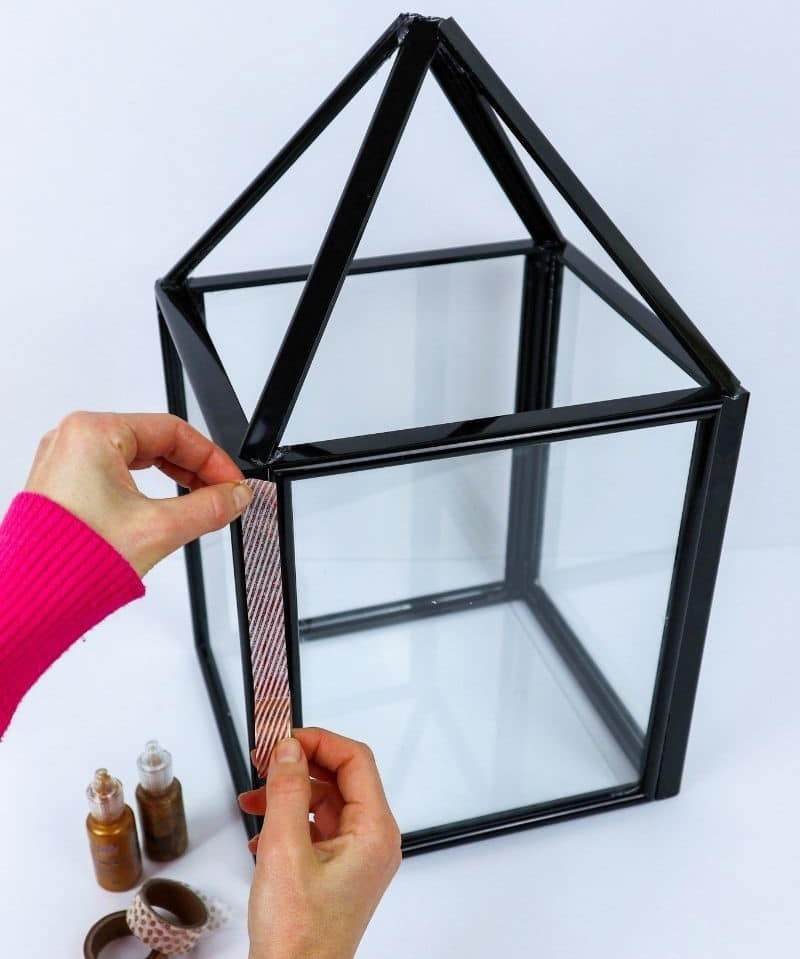
To elevate my lantern’s aesthetic, I opted for washi tape. If you’re not planning to add candles, consider wrapping burlap, ribbon, or artificial foliage around the arch instead. These unconventional materials can add a unique touch and transform your lantern into a stunning centerpiece.
Once you’ve completed the decorating process, you’ll be ready to fill your lantern with your chosen items.
Where Can You Use This Dollar Tree Lantern?
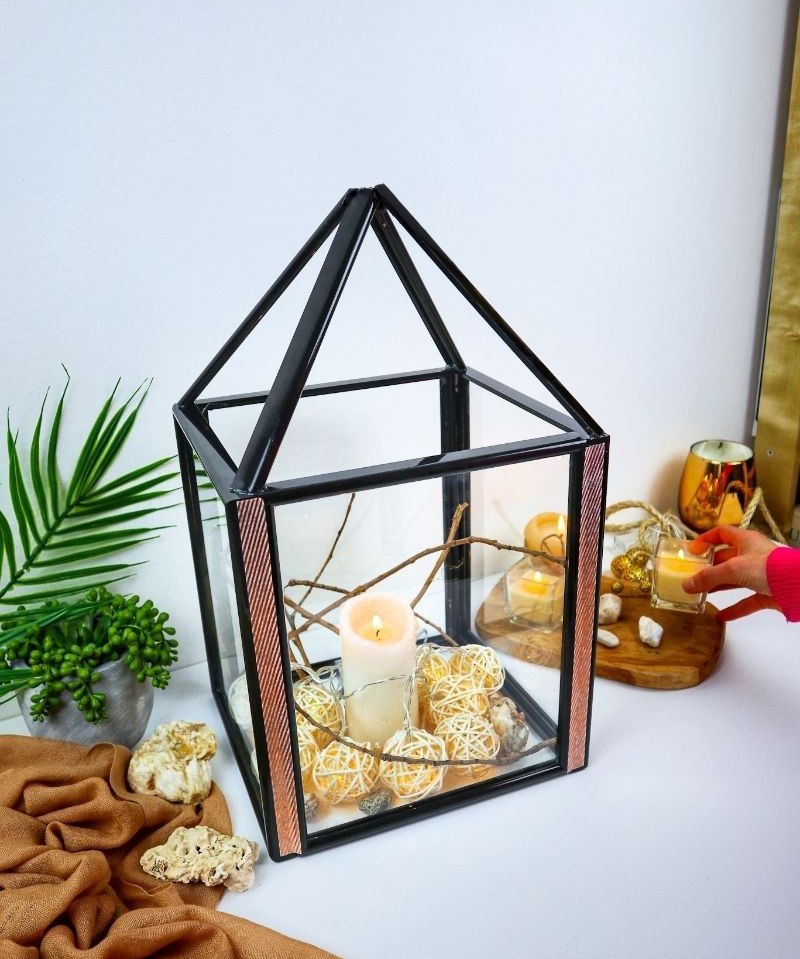
This lantern’s adaptability makes it perfect for various settings, from indoor spaces to outdoor areas. Whether you’re looking to add a pop of color to your desk or create a charming ambiance on your porch, this versatile piece is sure to impress. I’m particularly fond of filling it with succulents and using it as an outdoor accent, as seen above. The lush greenery adds a touch of natural beauty that’s always in season.
DIY Dollar Tree Lantern
Transform any outdoor setting or gift-giving occasion with this ingenious DIY project from Dollar Tree. The simplicity and affordability of this lantern make it an ideal choice for a quick and easy creative outlet. With only 25 minutes of active time required, you’ll be surprised at how quickly you can create a professional-looking piece that’s sure to impress. To get started, set aside about 40 minutes in total, including the additional 15 minutes needed for preparation.
That’s it – no complex skills or materials necessary. Plus, with a cost of just $7, this project is an absolute steal. The end result? A beautiful lantern that will add ambiance to any outdoor gathering or make a thoughtful gift for friends and loved ones.
Equipment
Materials
To create a unique and budget-friendly picture display, start by gathering the following materials: four Dollar Tree frames measuring 8×10 inches, one frame that is either 8×8 inches or can be doubled to measure 2x (8×10 inches) in size. Additionally, consider using decorative tape, glitter glue, sticky labels, and spray paint as optional embellishments.
Instructions
Start by preparing a flat workspace. Begin by removing the wooden backs and attaching the glass inserts into the 8×10 inch frames. Allow them to dry completely before proceeding. Set aside one or two 8×8 frames for later use.
Once the 8×10 frames have dried, it’s time to assemble them. Apply glue along the long edges and bring the four frames together to form a vertical rectangle. Permit this assembly to dry as well.
To add a floor to your lantern (optional), take the glass from an 8×8 frame and attach it to the bottom of the rectangle. This will provide a solid base for your lantern.
If you’d like to create an arch for your lantern, start by disassembling any leftover frames using your pliers. You’ll need four 8-inch pieces in total.
Apply a small amount of glue to one end of each piece and position them at the corners of your lantern.
Ensure each piece meets its counterpart in the middle at an angle, forming the arch shape.
Finally, feel free to decorate your lantern using any materials you prefer. With these steps complete, you’ll have a finished lantern ready to adorn any surface in your home.