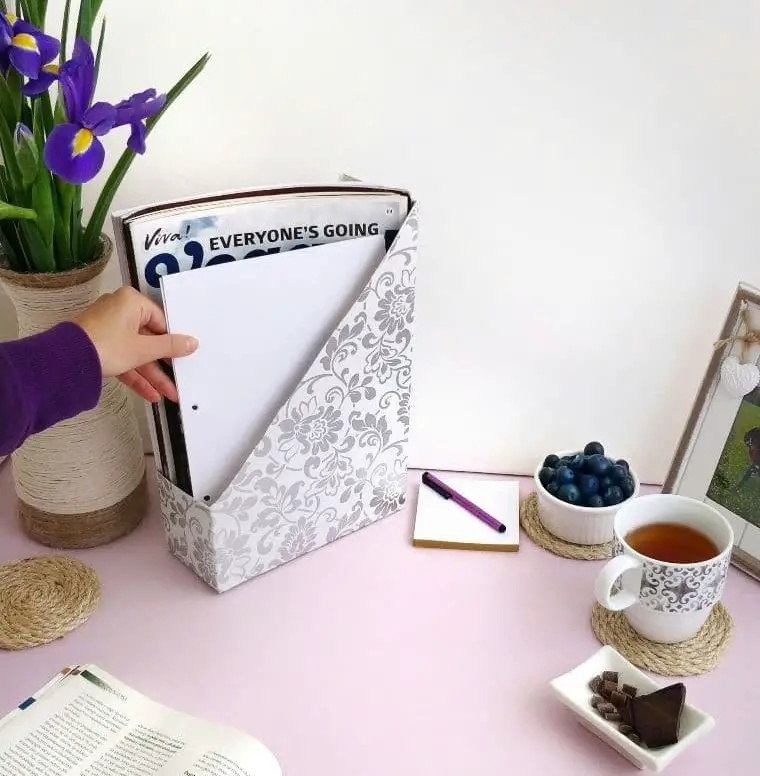
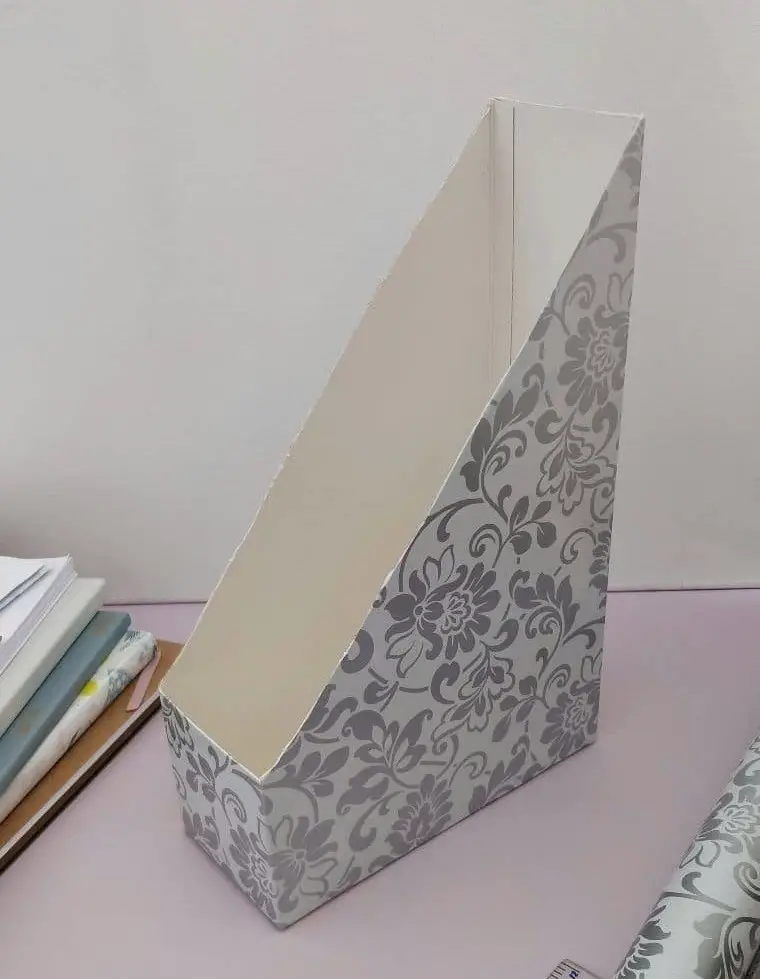
While magazines can be a great source of inspiration and entertainment, displaying them can be a challenge. Rather than investing in expensive organizers, I opted for a creative solution that not only saves money but also reduces waste. By repurposing cereal boxes, I was able to create a unique and functional display system that allowed me to express my personal style. I chose a floral silver design to match my home office’s eclectic vibe and complement my favorite teacup.
This DIY project not only saved me money but also gave me the freedom to customize it exactly as I wanted, unlike store-bought options which can be limited.
Supplies for the Organizer
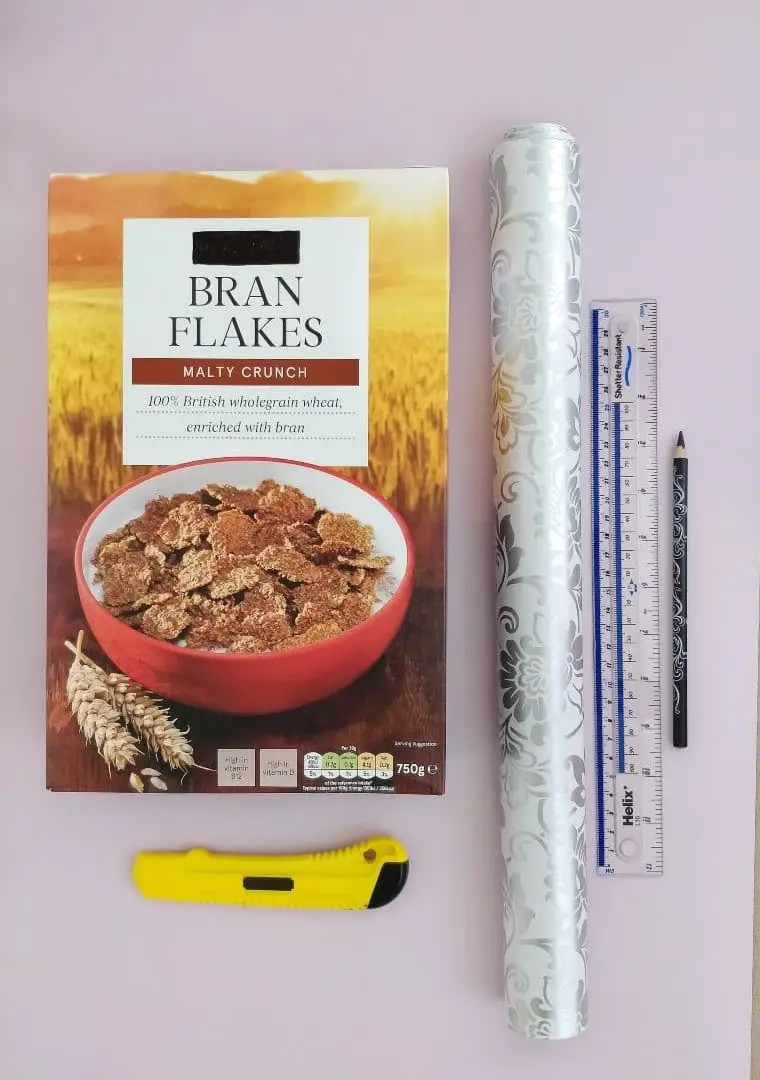
In the creative process, having the right tools is crucial. For a craft project that requires precision and creativity, consider gathering essential supplies like a cereal box – perfect for upcycling or creating a unique design. Next to it, a ruler will come in handy for measuring and drawing precise lines. A pencil is another must-have for sketching out ideas and making fine adjustments. For added versatility, have some self-adhesive fablon on hand to add texture and dimensionality.
Finally, a craft knife allows you to make precise cuts and trim excess material. With these basic yet effective tools, you’ll be well-equipped to bring your creative vision to life.
How to Make a Magazine Organizers Out of Cereal Boxes
Create a magazine organizer from a cereal box without needing to be an expert crafter or DIY enthusiast. With basic cutting and drawing skills, anyone can tackle this project. It’s accessible enough for children to take on independently or with adult supervision, making it a fun and collaborative activity.
STEP 1
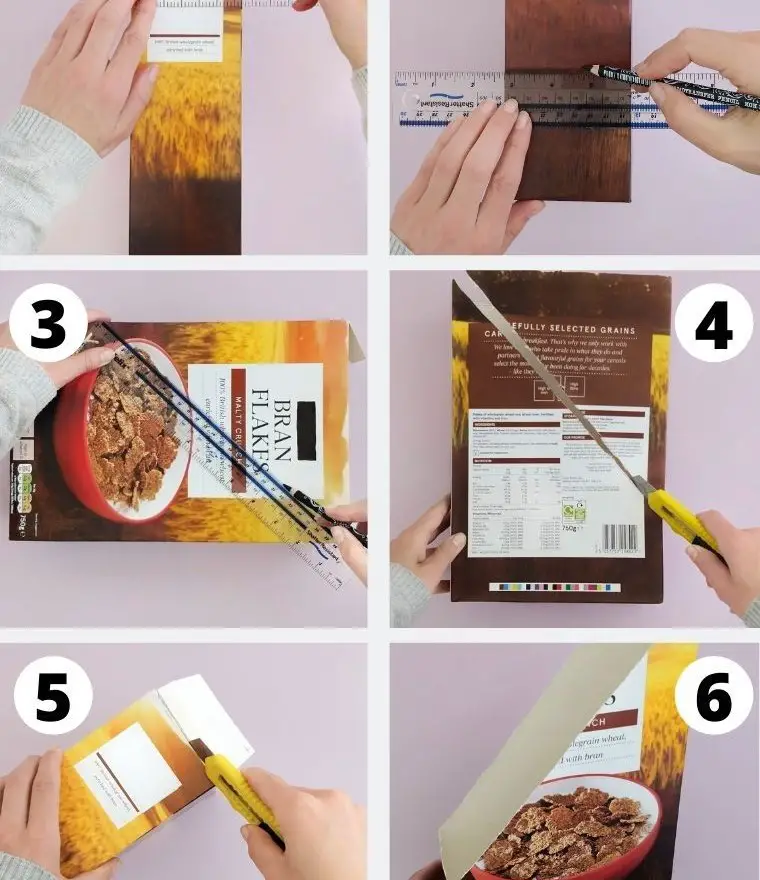
Begin by positioning the cereal box with one of its shorter dimensions aligned with your viewing direction. Next, utilize your pencil and ruler to create a straight line approximately 0.5 inches below the box’s uppermost edge.
STEP 2
Next, rotate the box to present its narrower side. A new guideline should be drawn, situated precisely four inches above the bottom edge.
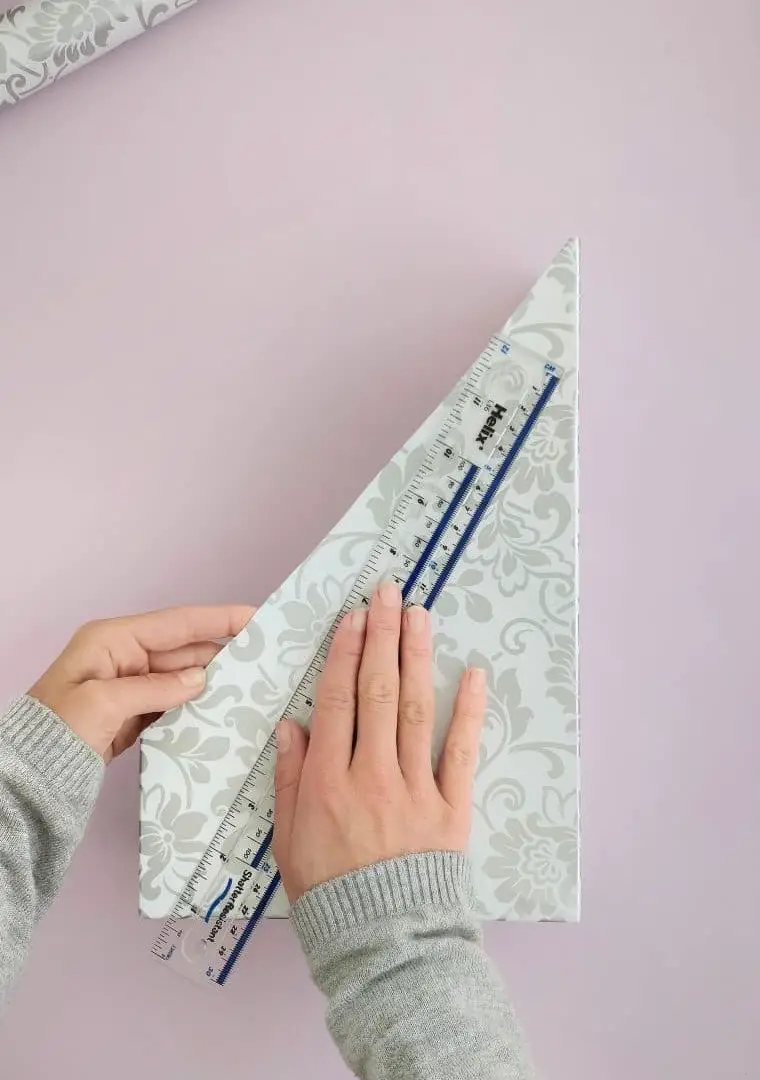
STEP 3
For this step, you’ll need to rotate the cereal box so that its longer dimensions are facing you. On the front panel, create a diagonal line that intersects with the two lines you drew earlier on either side of the box. Be sure to mirror this action on the back panel as well, drawing another diagonal line that meets at the top and bottom edges.
STEP 4
As you prepare to embark on the process of cutting out your design, grab your trusty craft knife and carefully follow the lines you’ve drawn. Make sure to apply gentle pressure as you make precise cuts along the edges, taking care not to deviate from the path.
STEP 5
When preparing your packaging, make sure not to overlook the often-overlooked step of trimming excess material from the flaps. Specifically, don’t neglect to remove the extra portion on the narrower side of one of the boxes’ flaps.
STEP 6
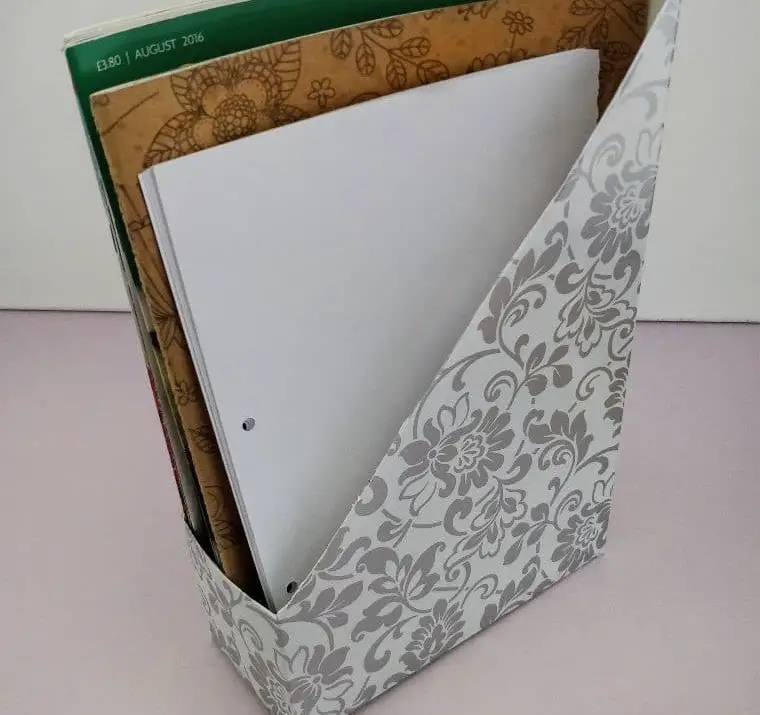
By this point, your DIY magazine organizer should be taking shape, resembling a sleek magazine holder similar to one you might find in a high-end store. If you’re satisfied with its current form, feel free to use it as is – it’s ready for duty. Alternatively, if you’re looking to add an extra layer of sophistication and style, you can proceed to the next steps to take your project to the next level.
STEP 7
Begin by carefully unrolling your self-adhesive Fablon, ensuring that the inner surface is facing towards you. If the material tends to roll back up, consider employing a heavy object as a makeshift weight to keep it secure. Once in place, position the cereal box on top of the rolled out Fablon, ensuring a smooth and even base for your creative project.
STEP 8
When preparing your DIY project, make sure you have at least two inches of Fablon extending beyond the bottom of the box. From there, cut the material to an appropriate width and length that will provide seamless coverage for the entire cereal box surface.
STEP 9
To begin preparing the cereal box for modification, start by removing the backing from a piece of adhesive paper that’s roughly the same width as the larger side of the box, leaving enough excess to cover the narrower side plus about half an inch of overlap. Next, firmly press the cereal box onto the adhesive fablon, ensuring a secure bond.
STEP 10
As you work with the allowance, ensure that it extends evenly across the box’s edges. For optimal results, aim to have the Fablon overlap approximately half an inch as you transition from one wider side of the box to the next, creating a seamless and secure bond.
STEP 11
As you near the end of the wrapping process, remove any residual backing from the adhesive paper to ensure a smooth finish. Proceed with carefully winding the paper around the box, maintaining an even and consistent layer.
STEP 12

Achieve a flawless finish by carefully smoothing out any excess wrapping material. As you complete the wrapping process, strive for a result that resembles a neatly packaged rectangular box, with no visible seams or rough edges to detract from the overall appearance.
STEP 13
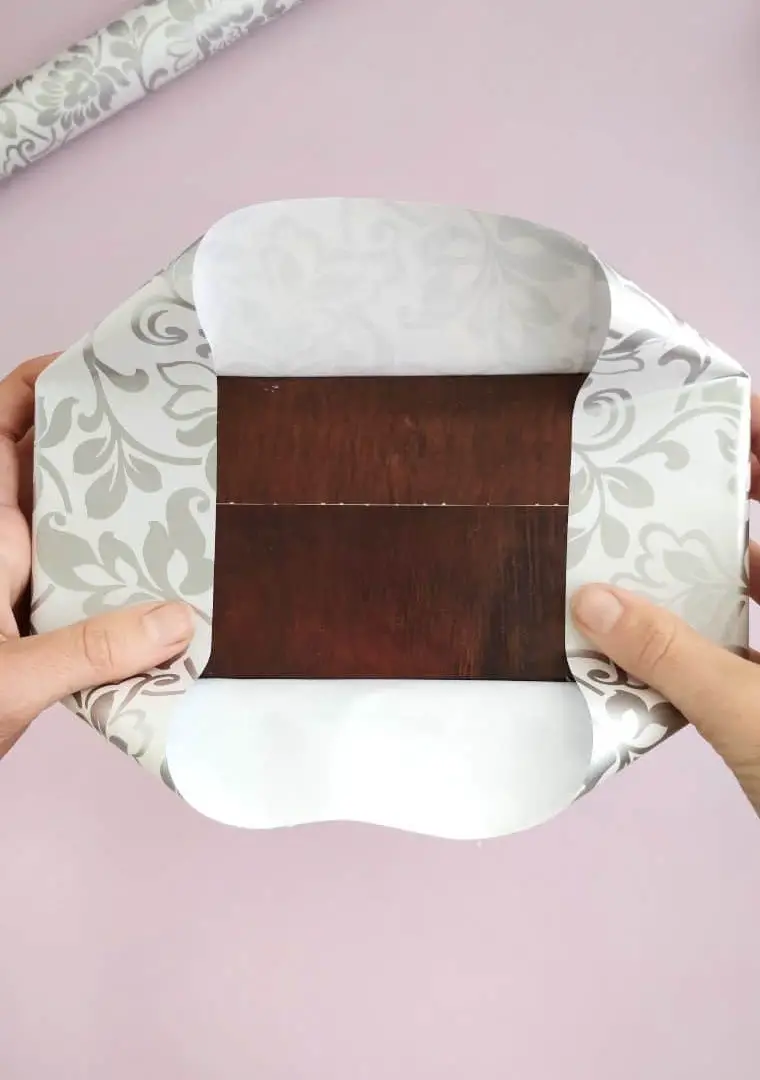
To complete the gift wrapping process, begin by flipping the box over and securing it with a fold at the bottom. Next, start wrapping the narrower edge of the box, working your way around to ensure a smooth and even finish.
STEP 14

Begin by addressing the underside of the wrapping material, which is typically the wider side. Start at the bottom flap and work your way up, ensuring a smooth and even application.
STEP 15
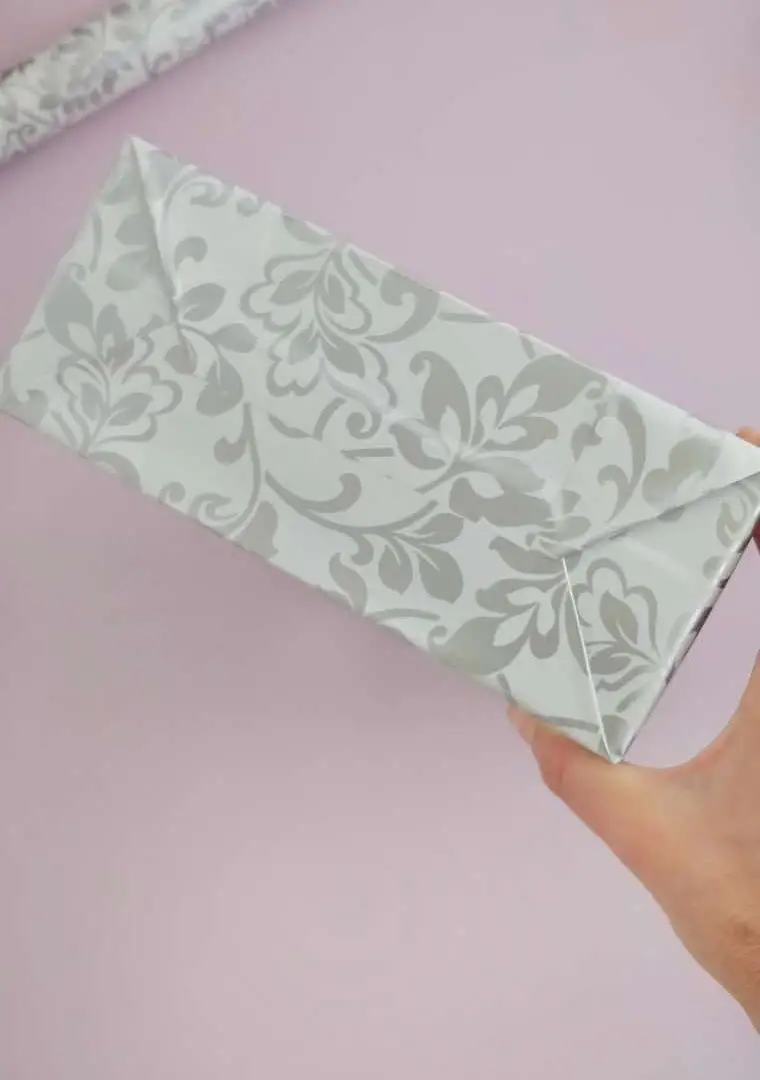
As you near the final stages of assembling your gift, take a moment to complete the top wrap by folding the upper flap over the lower flap, ensuring a secure and visually appealing finish.
STEP 16
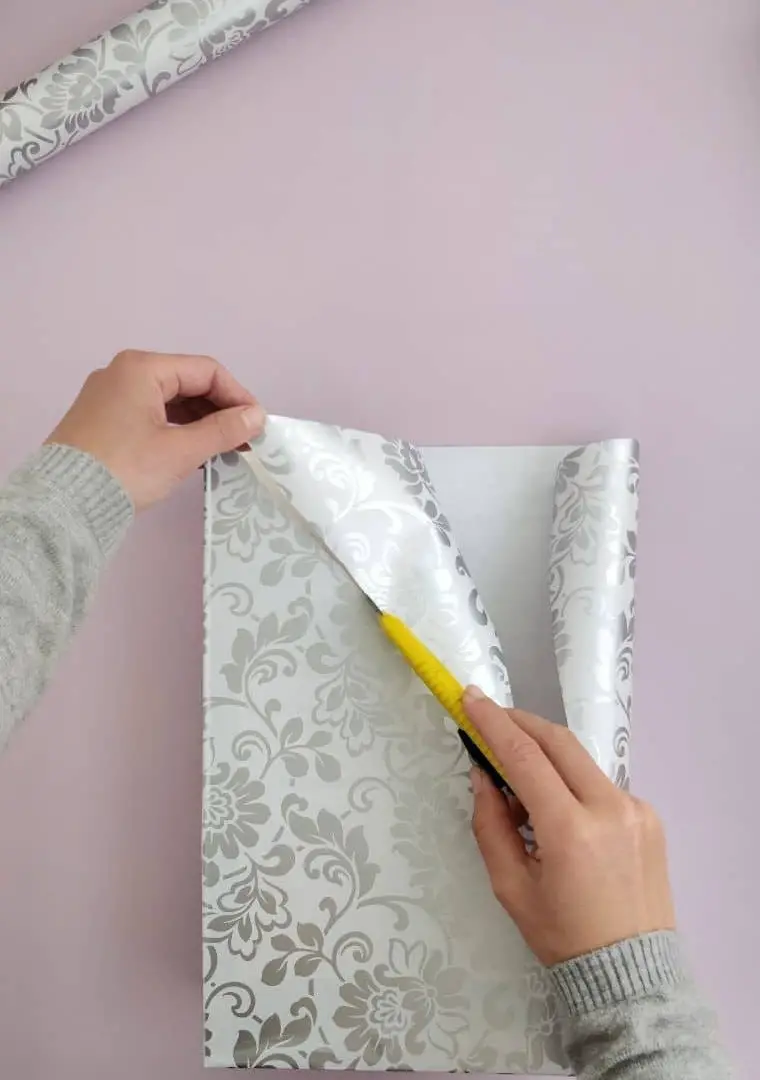
To achieve a seamless look when working with self-adhesive paper, it’s crucial to eliminate any excess material around the edges of your box. Begin by carefully trimming away any surplus fablon using your cutter. For an added layer of precision, consider employing a ruler to gently push out any air pockets that may have formed while wrapping the fabric-like material around the box. This simple technique will ensure a snug and even fit.
If you do happen to encounter air bubbles after completing the wrapping process, don’t worry! Simply use a small pin or needle to carefully prick the bubble and release the trapped air.
Where Can You Use These Organizers?
When it comes to managing paper clutter on your desktop, these upcycled organizers are more than just magazines. They’re versatile containers that can store loose papers, keeping your workspace tidy. For added functionality in the office, consider creating two identical organizers and labeling them ‘In’ and ‘Out’. This simple solution allows you to sort your physical mail efficiently.
Beyond office use, these DIY organizers can be used to categorize various documents at home or in a craft room setting. With minimal effort, you can create multiple containers with custom labels, such as bills, receipts, manuals, school notices, and more, making it easy to stay organized.
DIY Desk Magazine Organizer Out of a Cereal Box
In just a few short minutes, you can create a practical and eco-friendly magazine organizer using a humble cereal box. This cost-effective solution will keep your paperwork tidy and organized, making it easy to stay on top of tasks and responsibilities.
The process is surprisingly simple:
Prep Time: 5 minutes – just gather your materials and get started!
Active Time: 15 minutes – cut out the box, create compartments, and assemble the organizer.
Total Time: 20 minutes – from start to finish, you’ll have a functional magazine organizer in hand.
Yield: 1 magazine organizer – perfect for keeping track of important documents or supplies.
Author: Karo @ CraftsyHacks. com – a creative and resourceful individual who’s sharing their expertise with the world.
Cost: $4 – that’s right, just four dollars for a clever solution to keep your life organized.
Equipment
Materials
Instructions
Begin by transforming an ordinary cereal box into a custom magazine holder. Start by drawing two parallel lines on opposite narrow sides of the box, with one line 1/2 inch from the top and the other 4 inches from the bottom. Next, create a diagonal connection between these lines to form a rectangular shape. Repeat this process on the other side. Using a knife, carefully cut along the lines to release the flaps.
Cut out a piece of self-adhesive fablon that fits the box’s dimensions, then wrap it around the box, ensuring all edges and corners are secure. Use a ruler to smooth out any air bubbles that may form during the wrapping process. Finally, trim the excess fabric with a cutter and use a small pin or needle to pop out any remaining air pockets. With these simple steps, you can create a unique and affordable DIY magazine holder.