Transforming your bedroom or living room with a personal touch has never been easier. If you’re searching for simple yet effective painting ideas to get creative, look no further than canvas painting techniques perfect for beginners. With just a few basic materials like canvas boards, acrylic colors, and oil paints at hand, the possibilities are endless. By combining different hues and experimenting with various strokes, you can bring your unique vision to life.
Our easy-to-follow steps guide you through the process, allowing you to confidently take the first step in unleashing your artistic side.
Giant Wall Art
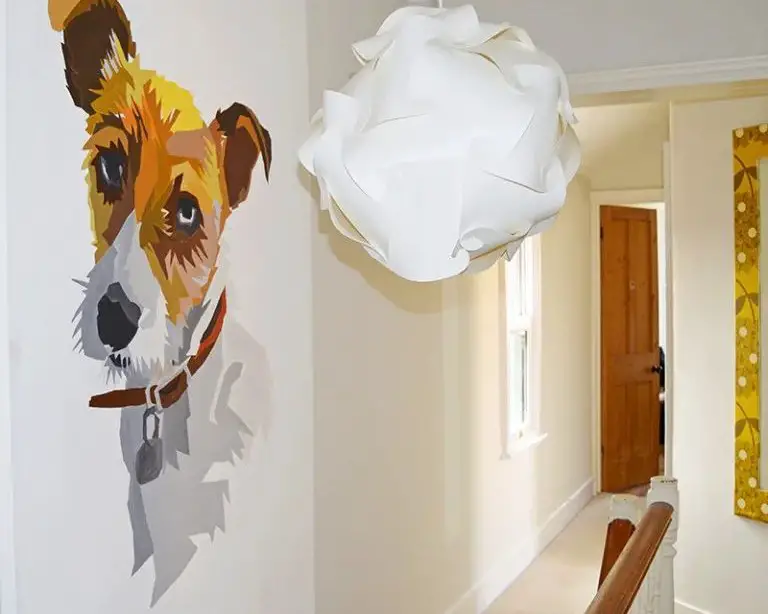
While painting dogs may appear to be a task reserved for skilled artists, it’s actually within the reach of anyone willing to learn. The key to creating a realistic and soulful depiction is capturing those endearing puppy dog eyes. Take a look at this stunning wall art as an example – it’s not as intimidating as you might think! To get started, simply plan ahead and invest in a large canvas, available for purchase here.
Next, select your paints and consider investing in an overhead projector or art projector from here to serve as a reference guide. This will allow you to project your photo and bring your artistic vision to life.
Stenciled Art
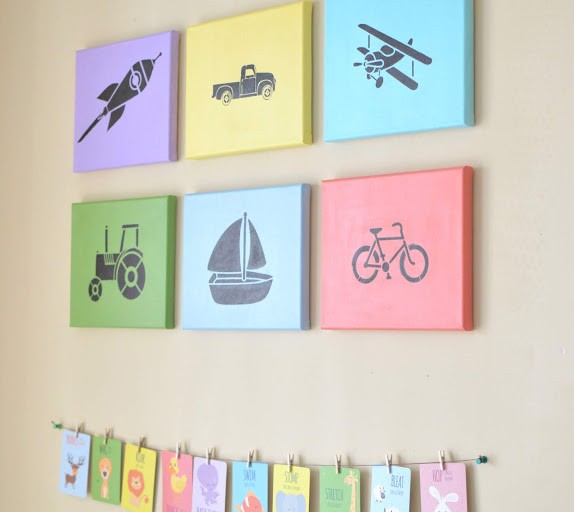
This DIY stenciled wall art is an excellent way to introduce kids to the world of art without feeling overwhelmed by complexity. Its simplicity makes it perfect for a nursery or children’s room. What’s more, it’s an ideal starting point for young artists to develop their creative skills. Starting them early can only be beneficial, and this project is an engaging way to do just that.
By choosing stencils featuring adorable farm animals, vehicles like airplanes, sailboats, or tractors, or even bicycles, you’ll create a visually appealing piece of art that’s sure to delight kids. It’s the perfect way to get them excited about creating and exploring their artistic side.
Funny Bathroom Sign
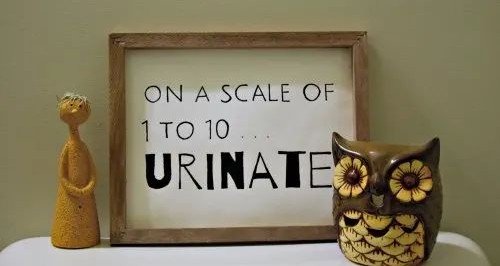
There’s nothing quite like stumbling upon a quirky sign in the bathroom – a daily dose of humor that can put a smile on your face, even before the coffee kicks in. Take for instance this amusing example: ‘On a scale of 1 to 10… Urinate!’ The possibilities are endless when it comes to creating your own bathroom art. Simply search online for inspiration, grab some canvas and paint, frame your masterpiece, and proudly display it in your guest bath – or wherever you need a daily laugh.
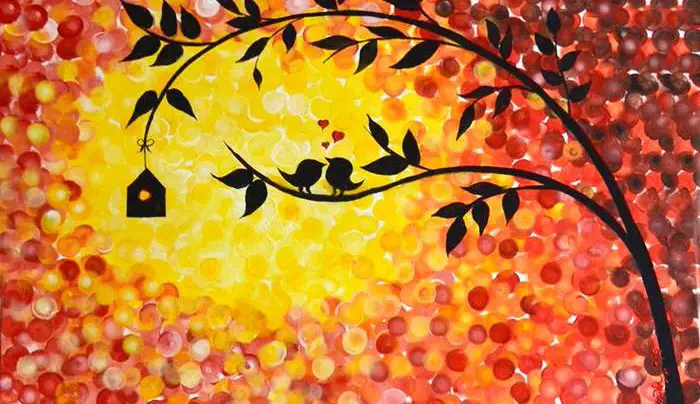
Tissue Paper Birds
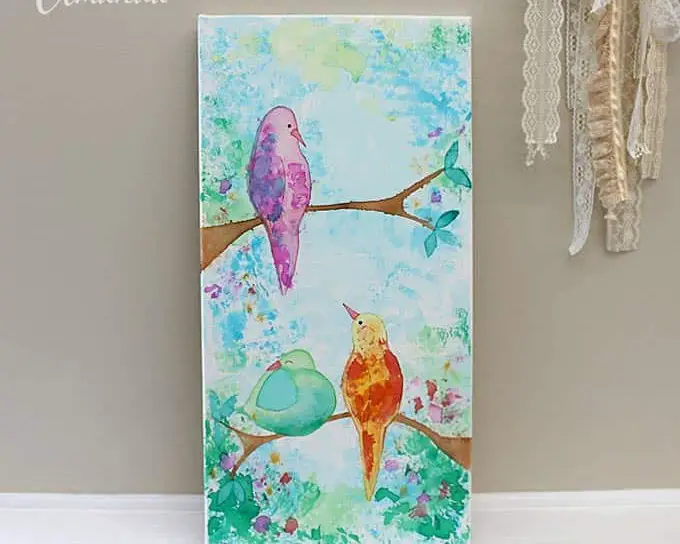
Discovering the art of tissue paper painting, a unique and innovative technique that can add an exciting twist to your creative endeavors. What better subject matter to start with than the beauty of birds? To get started, gather the essential supplies: a roll (or two) of toilet paper, a flat palette or paper plate for paint absorption, and your canvas of choice.
As you embark on this creative journey, keep in mind that red paint may not be the best starting point for your avian subjects.
Until you master the technique, it’s best to steer clear of vibrant hues that might give your birds an unsettling appearance.
Shamrock Shiplap Sign
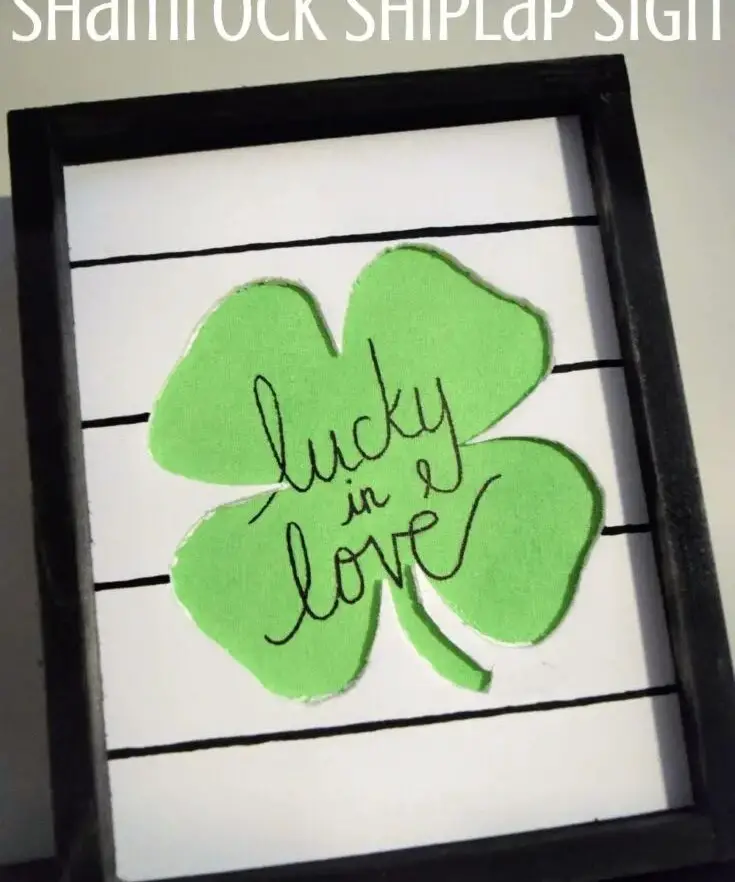
While the phrase ‘Lucky in Love’ might seem a bit trite at first glance, there’s no denying its charm when you’ve experienced it firsthand. And what’s more, this particular lucky charm comes with an added layer of good fortune – a rare four-leaf clover to boot! To create this extra-special token of love, simply start by cutting out a four-leaf clover shape from foam, then set the stage for your message by carefully removing a stretched canvas from its frame.
With the leaf in place, you’re ready to bring your lucky words to life.
Dandelion
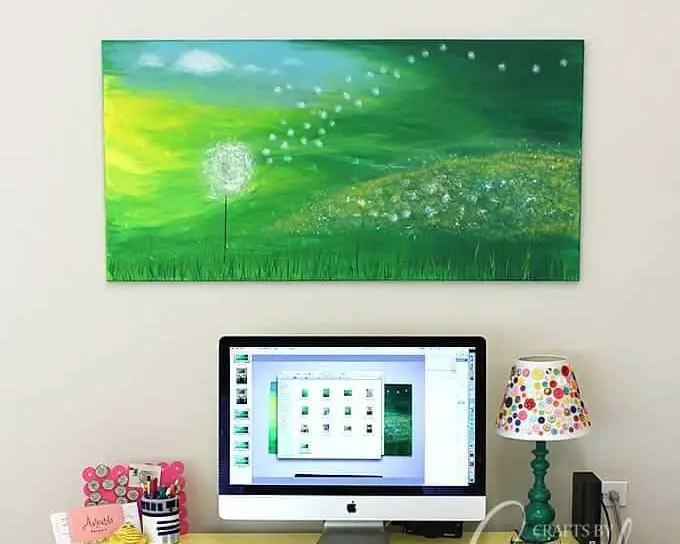
As you begin to paint dandelions on canvas, the initial challenge lies in capturing the ephemeral moment when seeds float away. To achieve this, it’s essential to also convey the vibrant colors and dynamic movements of the surrounding fields and skies. Developing your blurring technique through practice can be particularly helpful in achieving a sense of airiness and freedom.
Once you’re satisfied with your piece, consider proudly displaying it above a mantle or headboard, where its grandeur can be fully appreciated. With patience and creativity, this beautiful artwork is sure to bring joy as you work on it.
Moon
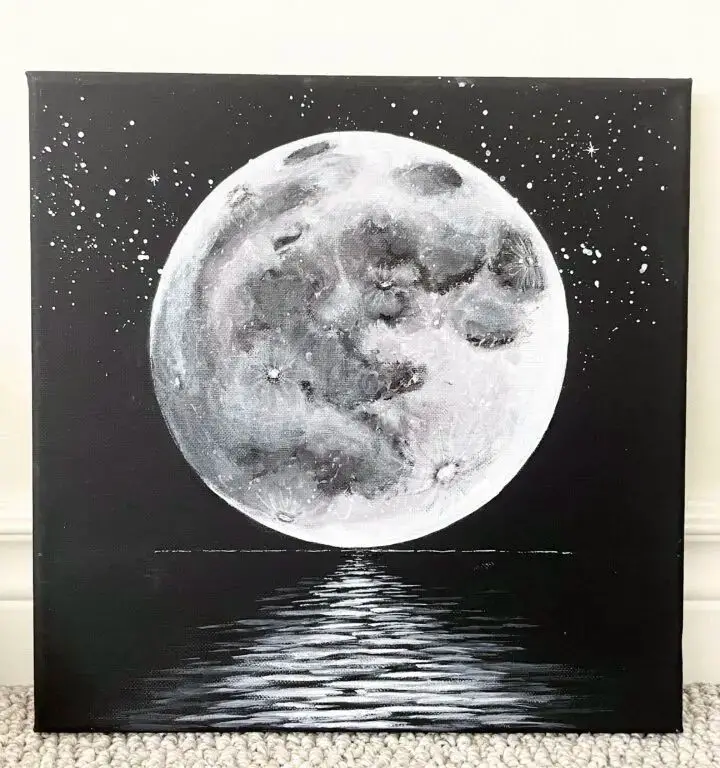
Imagine being able to gaze at something so captivating that time stands still. For me, that something is the moon. Its perpetual allure makes it an ideal subject for a painting, which also happens to be a thoughtful gift idea. What’s more, you don’t need a vast color palette to bring this celestial body to life on canvas. This project is accessible to painters of all skill levels. To get started, find or purchase a square canvas and paint it black.
Alternatively, opt for a pre-primed black canvas. Next, locate a circular object that can serve as a tracing guide for the moon’s shape. Once you’ve got your template, begin filling in the moon with a few strategically placed craters. This exercise also provides an opportunity to hone your shading skills. As you complete the lunar surface, feel free to add some finishing touches by incorporating the surrounding celestial landscape.
Imagine the moon suspended above serene waters, surrounded by a star-studded sky. The possibilities are endless, making this project a fun and engaging way to express your creativity.
Home
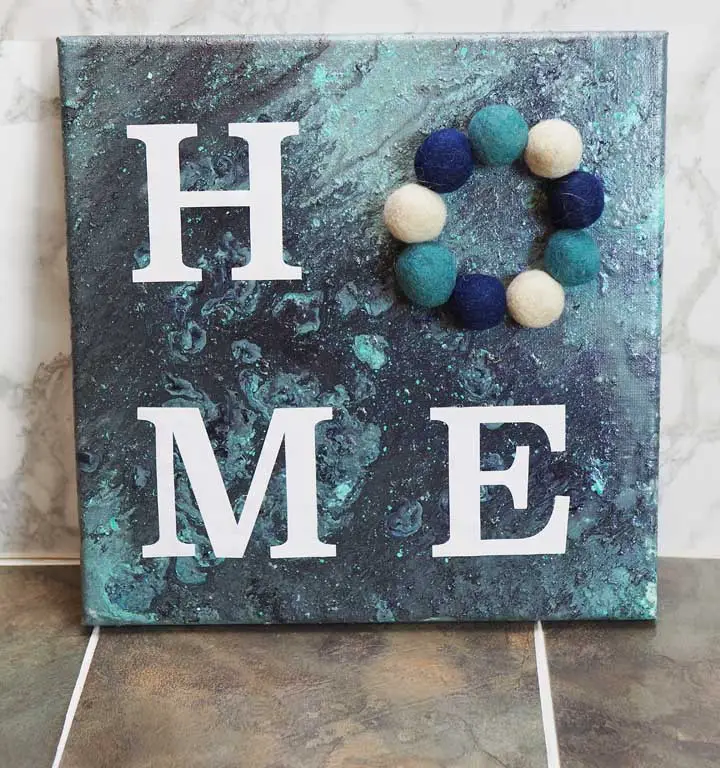
Painting a house or home theme can be a universal appeal for artists of all levels. But why settle for the traditional chimney and house setup? Instead, try adding some three-dimensional flair to make it truly stand out. Start by selecting a canvas and painting the base with your preferred design. Then, grab some stencil letters and bring your creation to life. However, take things to the next level by getting creative with the letter O.
Use hot glue to attach pom poms and give your home-inspired artwork a playful twist.
Floral Stencil
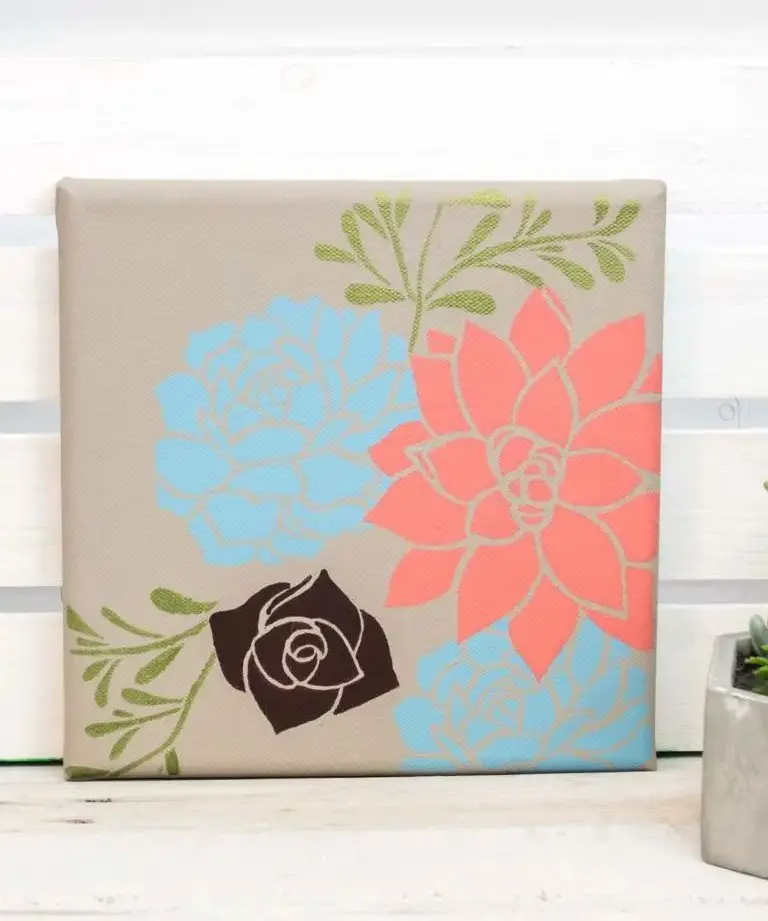
When it comes to stencil art, I firmly believe that it can hold its own against traditional painting. What’s key is not having artistic experience, but rather having access to quality stencils. To get started, define your theme and color palette, then determine the size of your canvas. Next, seek out the perfect stencils – a crucial element in bringing your vision to life. Don’t forget to stock up on paint and brushes as well.
If you’re feeling adventurous, consider using alternative painting tools like sponges or cotton balls to add texture and depth to your work. The end result may differ from traditional methods, but that’s what makes stencil art so exciting – the freedom to experiment and push boundaries.
Autumn Tree with Cotton Balls
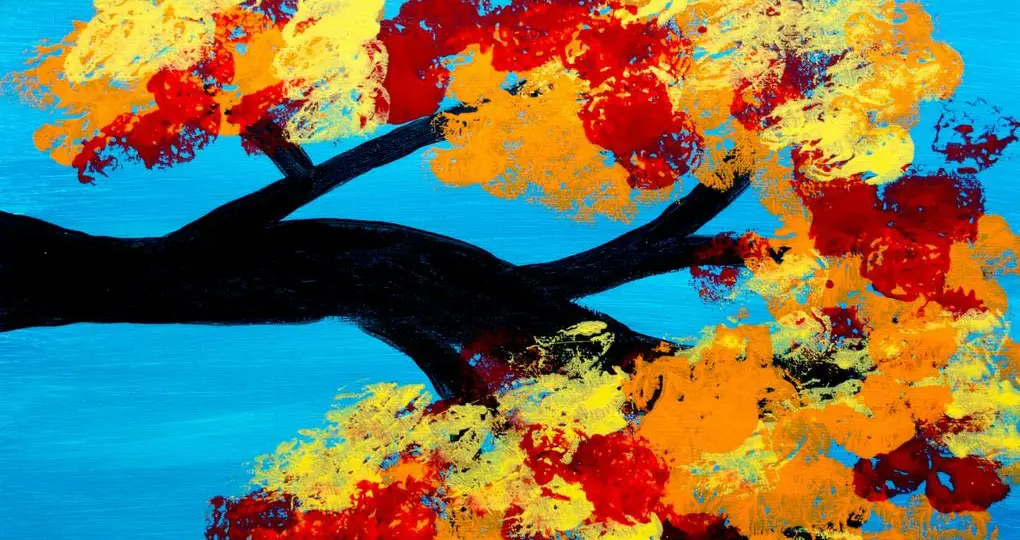
Before storing away those cotton balls, you’ll need them for an autumn tree painting project. This activity is suitable for a wide range of ages, including young children and toddlers who enjoy exploring textures and making a mess. The fluffy and porous quality of the cotton balls lends itself perfectly to creating sweeping, billowy patterns that resemble leaves. For added precision when applying paint, consider using clothespins to clamp the cotton ball in place. This method also reduces mess.
For inspiration, check out these 27 fall crafts for kids of all ages.
Watercolor
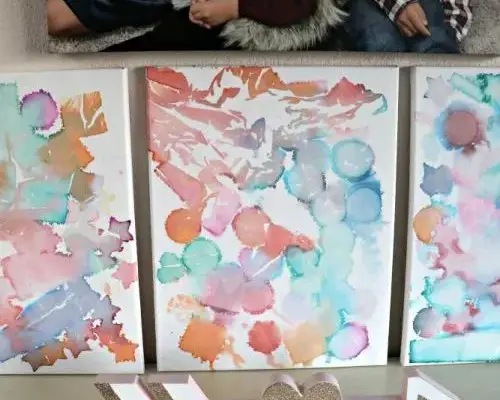
Abstract enthusiasts may find watercolor painting to be an excellent alternative. This medium offers a unique combination of ease, affordability, and creative flexibility. The beauty of abstract art lies in its subjective nature, making it challenging to go wrong with the final product. For this technique, you’ll need to revisit your tissue paper collection and the bleeding art method.
As before, toilet rolls will come in handy, but consider upgrading to artist-grade tissue paper (check out [insert link]) for optimal results. A spray bottle filled with water is also essential for this project. Additionally, don’t hesitate to experiment with paint dripping on a surface before applying it to your canvas.
Initials
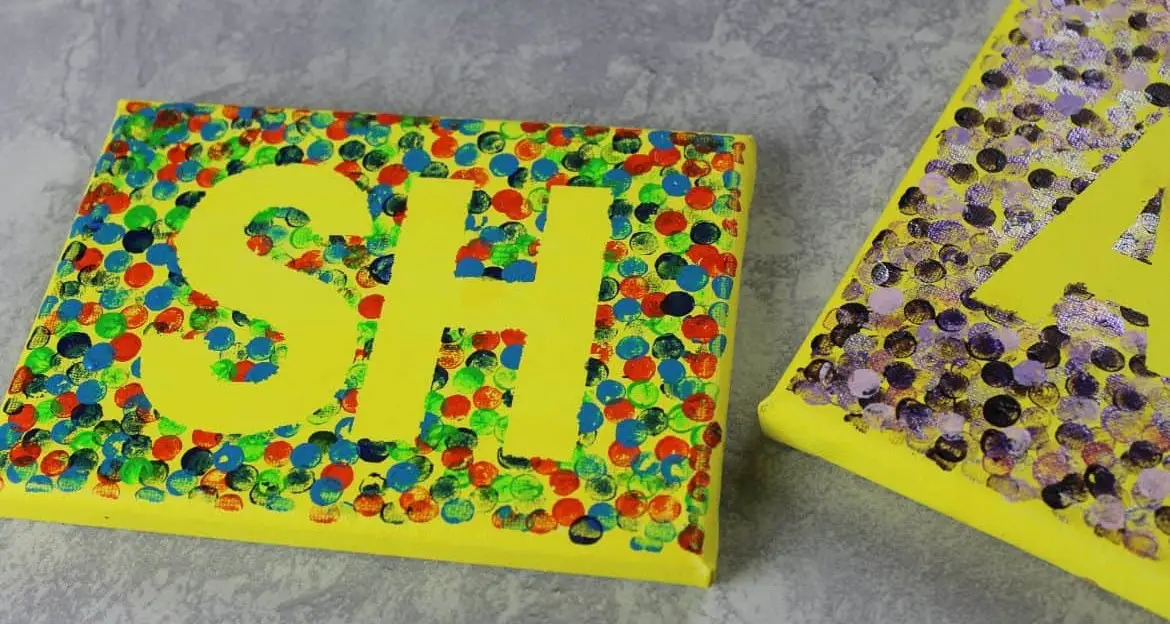
When it comes to easy canvas art ideas, painting your initials is a timeless classic that’s hard to beat. It’s a quick and effortless way to add some personal flair to your space.
What makes this idea truly special is the fact that it allows you to put your own unique spin on things. Just because it’s simple doesn’t mean it has to be sloppy – think of it as an opportunity to get creative with font styles, colors, and even add some extra flourishes.
Getting started is a breeze, too.
Simply gather up some letter stickers, acrylic paint, a few brushes, and a palette or two. And don’t forget to lay out some newspapers to protect your workspace from any unexpected mishaps.
This project is also a great way to get the kids involved in decorating their own room – they can use this as an opportunity to add their initials to the mix and really make it their own.
Impressionist

While many may have varying opinions on impression art, I’m excited to explore its creative possibilities. With impressionist art, you can unlock a world of canvas painting opportunities. To get started, gather these essential tools: a canvas frame, masking tape for precision, paints in your preferred colors, and an assortment of brushes – including sponge brushes that add texture to your work. Keep in mind that impressionist painting is as much about experimentation as it is about creating art.
Embrace the learning process, let your creativity flow, and enjoy the journey.
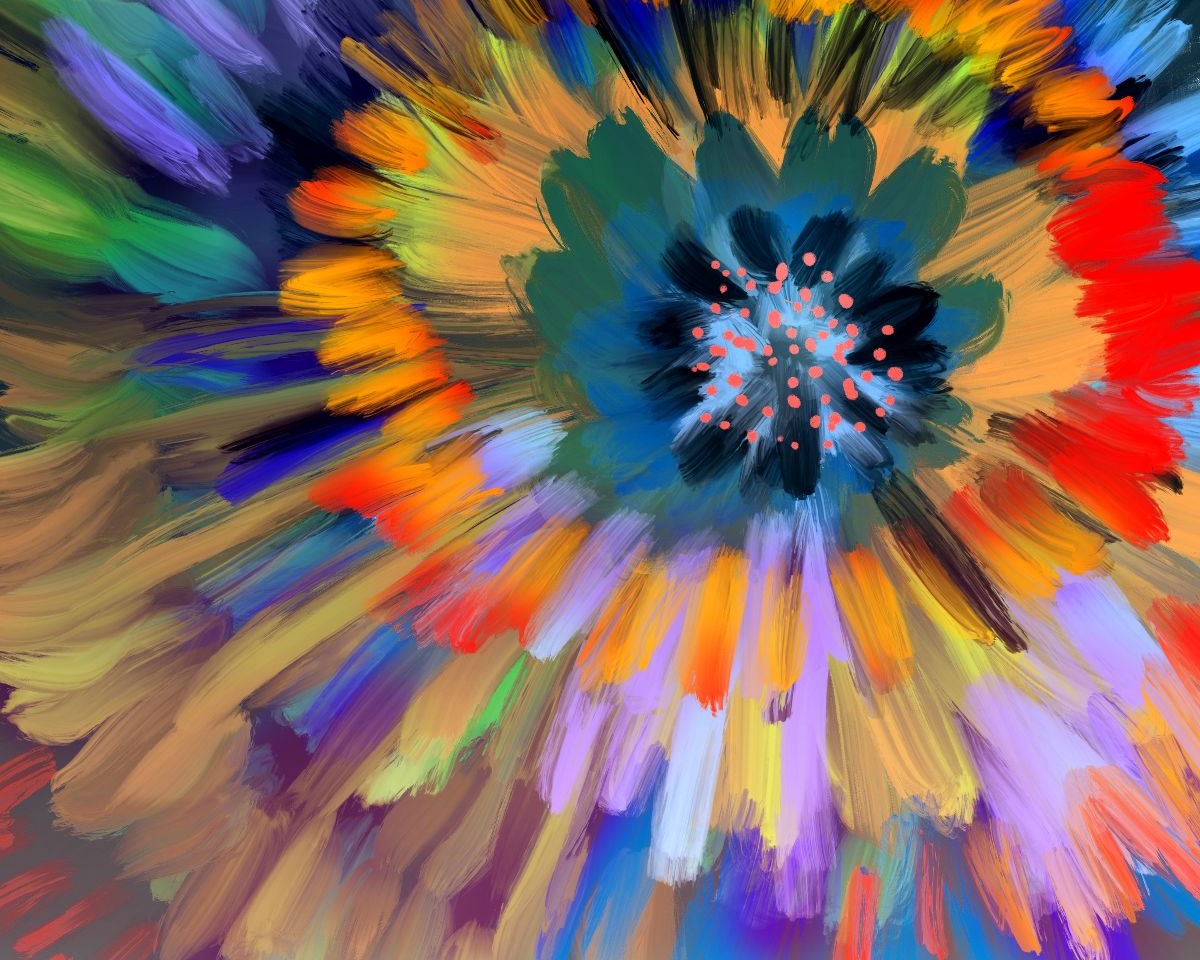
Abstract
When it comes to abstract art, there’s no one-size-fits-all approach. While some people may argue that it’s all about flair, I firmly believe that it’s actually quite the opposite. What makes abstract artwork stand out is not necessarily its grandeur, but rather its ability to be custom-made, unique, and modern. This is because abstract art on canvas has a certain je ne sais quoi that transcends its frame.
Whether you choose to repurpose an old frame or opt for something more understated from a dollar store, the painting itself will still exude a sense of sophistication and individuality. In other words, the focus is squarely on the artwork, rather than the framing.
Eggshell Art
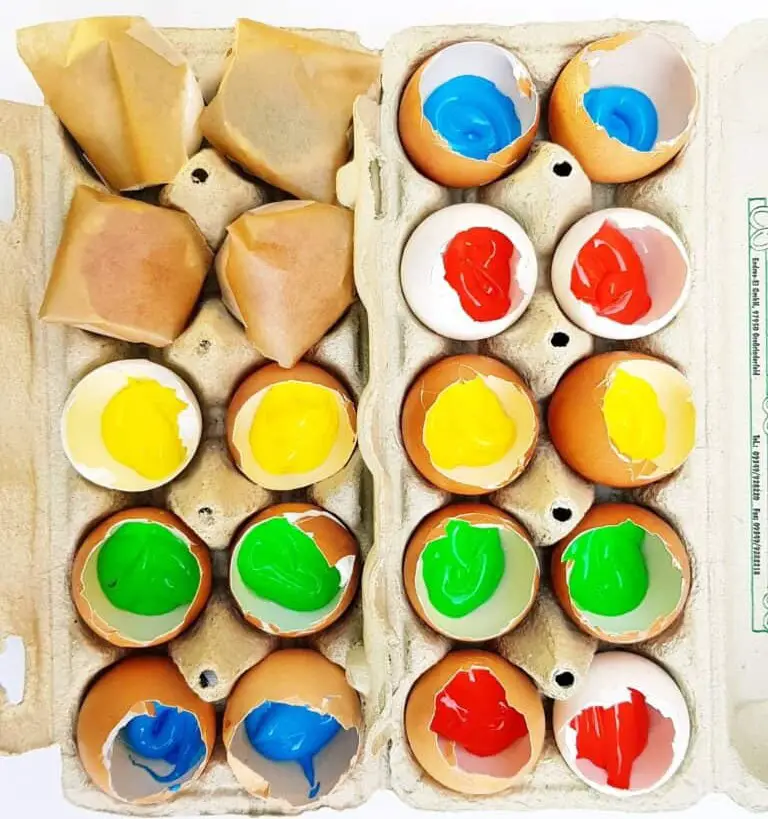
Get ready to experience a tactile delight! Eggshell art may not have an unpleasant odor, but it can get messy – in a good way! Before you start, make sure to thoroughly clean your empty eggshells and pat them dry with paper towels. You’ll want to keep plenty of extra supplies on hand, especially if kids are joining in on the fun. A generous stash of paper towels will be your best friend throughout this creative process. Once your shells are prepped, it’s time to add some color.
Fill those eggshells with your chosen hues and get ready for a splatter-tastic experience! Simply toss the filled shells at the canvas, indulging in the satisfying crunch of the shells and the vibrant colors that will spread across your artwork.
String Art Graffiti
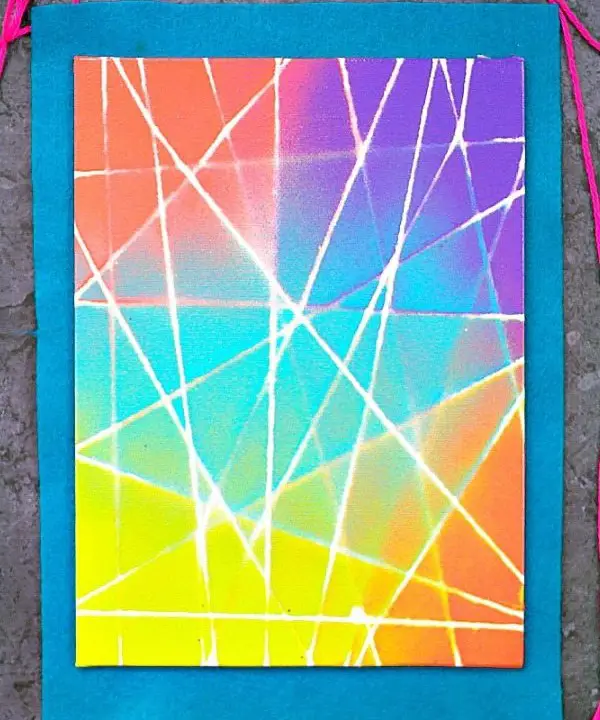
Imagine the vibrant fusion of string art and graffiti on canvas – it’s a match made in heaven! The marriage of these two creative forces yields an astonishingly cool collaboration that will captivate both kids and adults. String art, a timeless favorite among all ages, gets a thrilling boost when merged with the edgy flair of spray paint. To initiate this artistic fusion, gather some yarn or string – you can also repurpose an old tie-dye kit at home.
Once you’ve created your desired design, carefully cut off the excess string and remove the tape only after allowing the paint to dry for a minimum of 3-4 hours.
Twig Heart Canvas
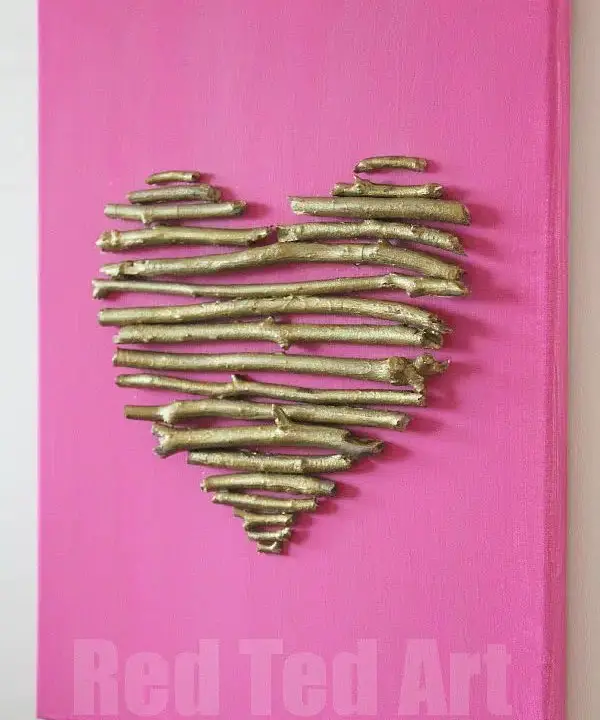
When it comes to creative activities with kids or dogs who love to play fetch, making the most of their enthusiasm is key. One fun and easy DIY project that’s perfect for this is creating a customized art piece using natural elements like sticks. Simply start by laying out plenty of newspapers and placing your collection of sticks on top. Next, grab a can of gold spray paint and give them a coat or two to add some extra flair.
Once the paint is dry, set up an easel or grab a canvas and apply a base coat of paint. When this dries, use hot glue to attach your painted sticks in a creative shape – like a heart for Valentine’s Day or a star shape for a birthday gift.
Glitter Painting

As I gaze upon these vibrant psychedelic glitter paintings, my mind wanders to the idea of Glitterati! Envisioning an entire canvas bursting with these radiant illustrations is nothing short of mesmerizing. To bring this creative vision to life, begin by gathering essential supplies: a stash of glitter (available at your local Dollar Store), mod podge for adhesion, and a sealant spray suitable for acrylics.
Once you have these materials in hand, start by creating an outline on paper using a pencil, before transferring it to the canvas as the foundation for your masterpiece.
Kids Silhouette Painting
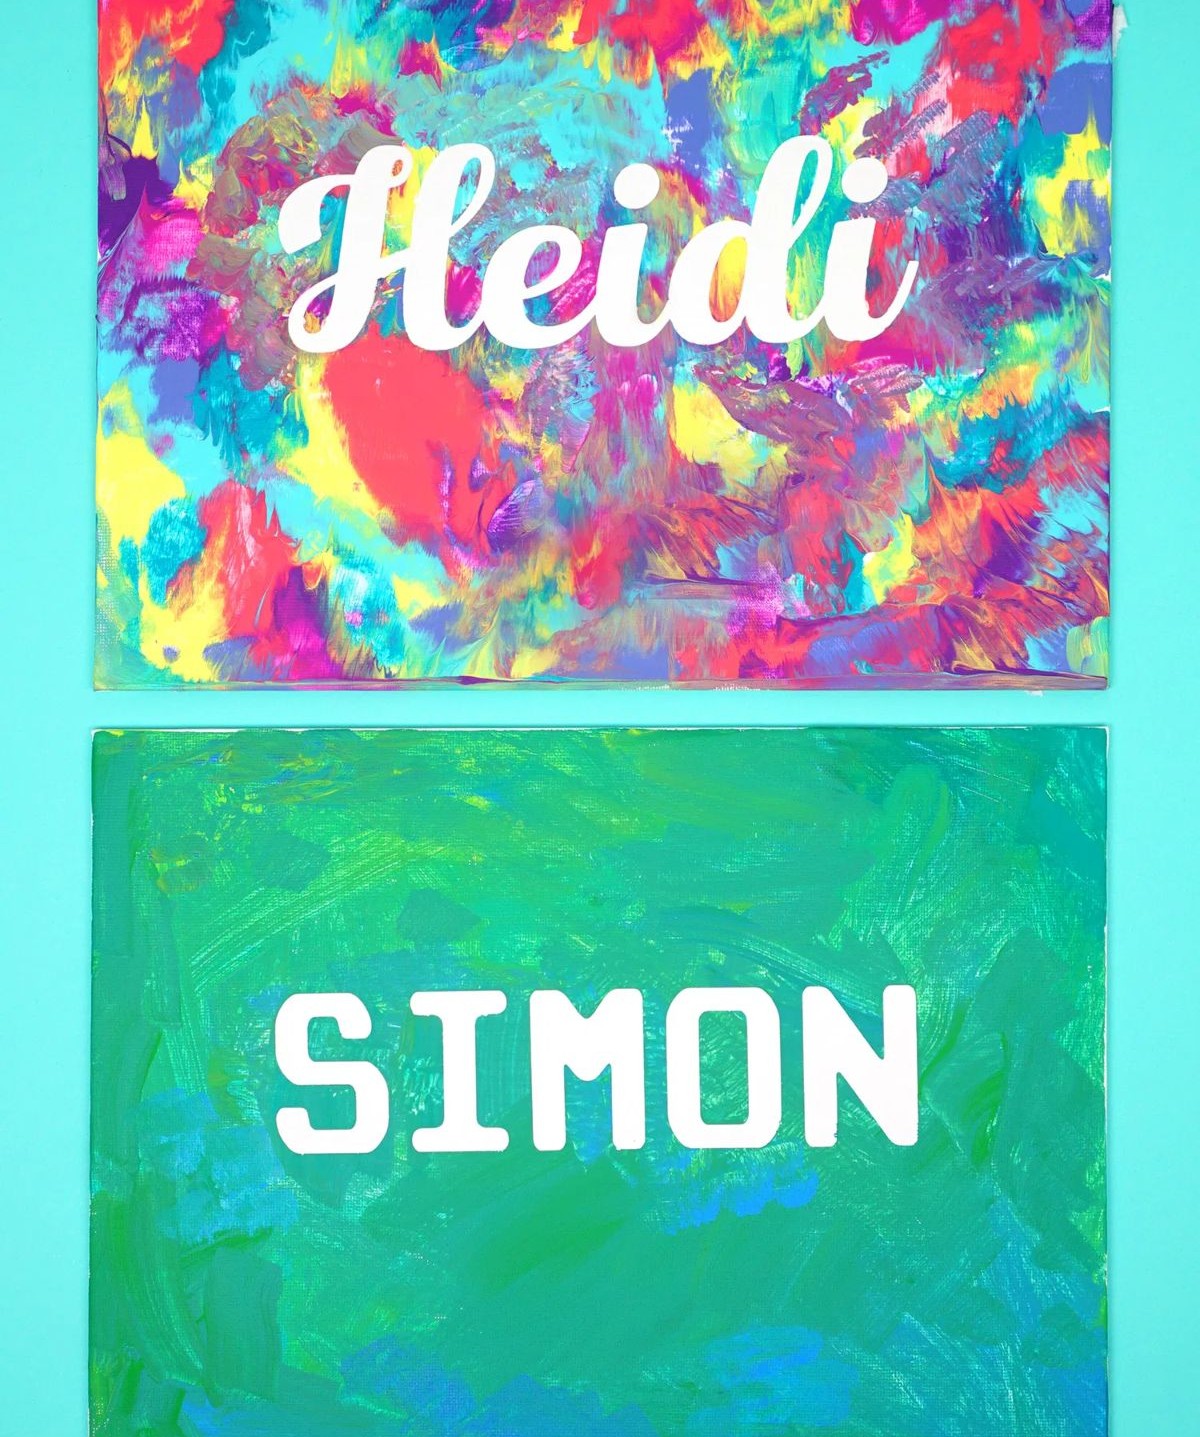
Developing silhouette art skills in children is an excellent way to nurture their creativity. A great starting point for this artistic journey is by personalizing a canvas with their name. To do so, all you need is a blank canvas and vinyl letters that add dimensionality to the design. Once complete, applying one or two coats of sealant can enhance the overall appearance.
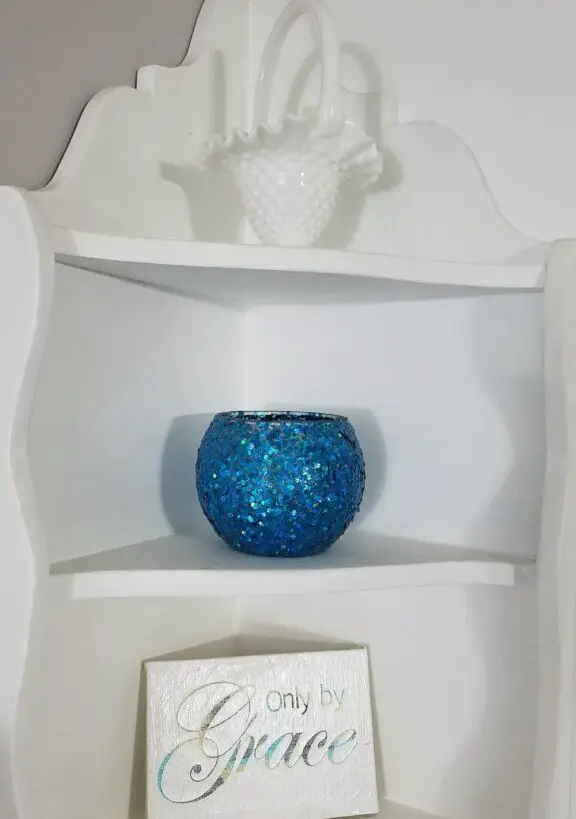
Word Art
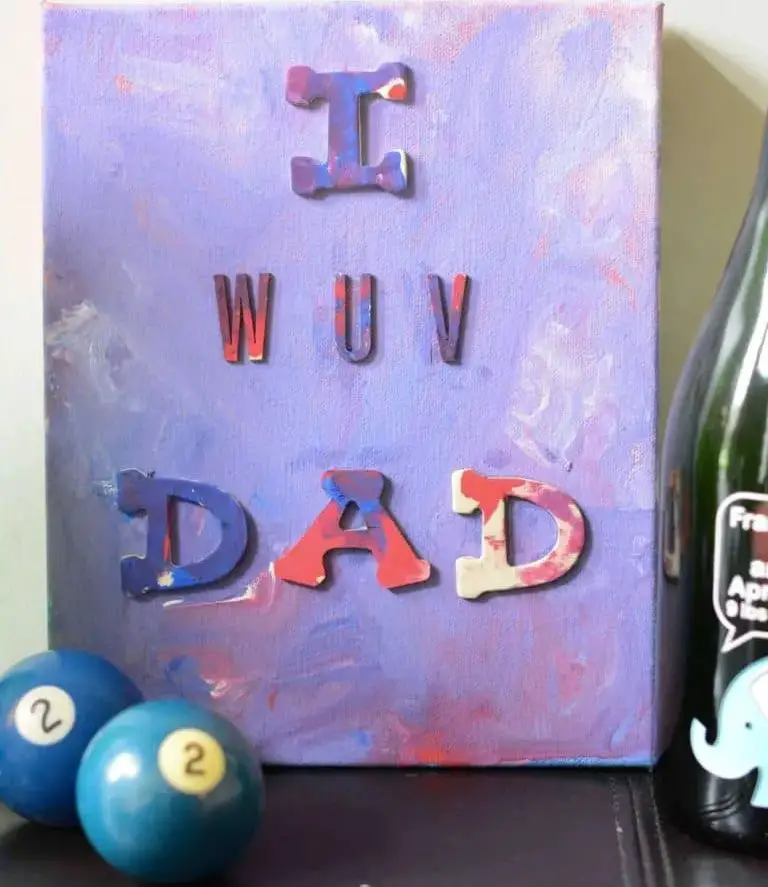
One creative and budget-friendly way to elevate your living space with canvas artwork is by creating a word art painting that’s both elegant and playful. The finished piece boasts a charming finish that adds a touch of sweetness without overpowering the room. This project also presents a fantastic opportunity to involve your little ones, making it an excellent bonding experience. Simply provide them with watercolors as their medium of choice, and let their creativity shine.
One unique aspect of word art is its flexibility – you can spell out anything that inspires you, even unconventional messages like ‘I WUV DAD,’ which only adds to the charm.
Cardinal
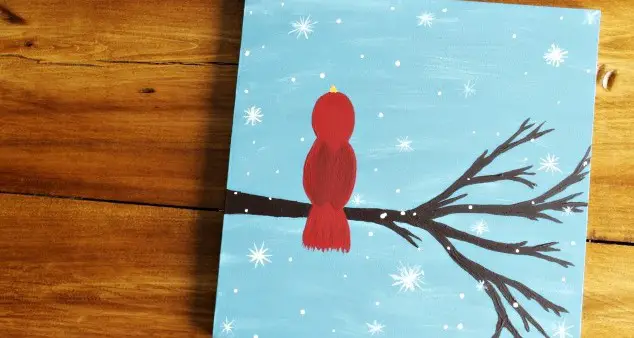
When it comes to bird-themed art, cardinals are a popular choice for beginners. Their vibrant colors and distinctive features make them a joy to depict. With a little creativity and attention to detail, even novice artists can create stunning works of art that showcase these beloved birds. The process is straightforward: simply follow the steps provided and add your own unique flair as you go along.
To ensure success, it’s also helpful to have a template at hand, which can be found [insert source here]. Additionally, if you’re running low on acrylic paint supplies, now is the perfect opportunity to stock up.
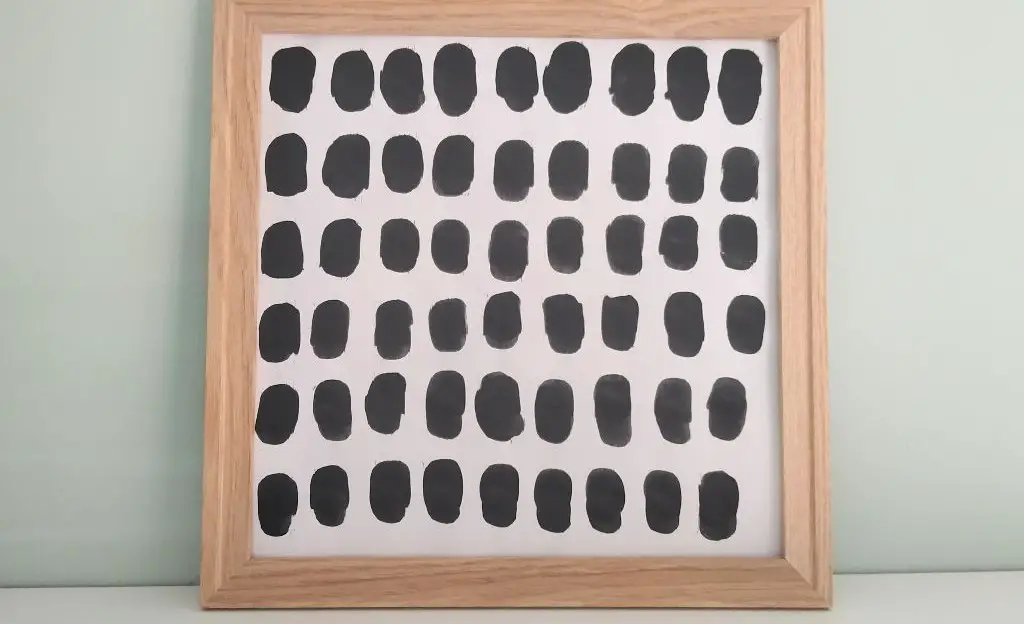
Minimalist for Beginners
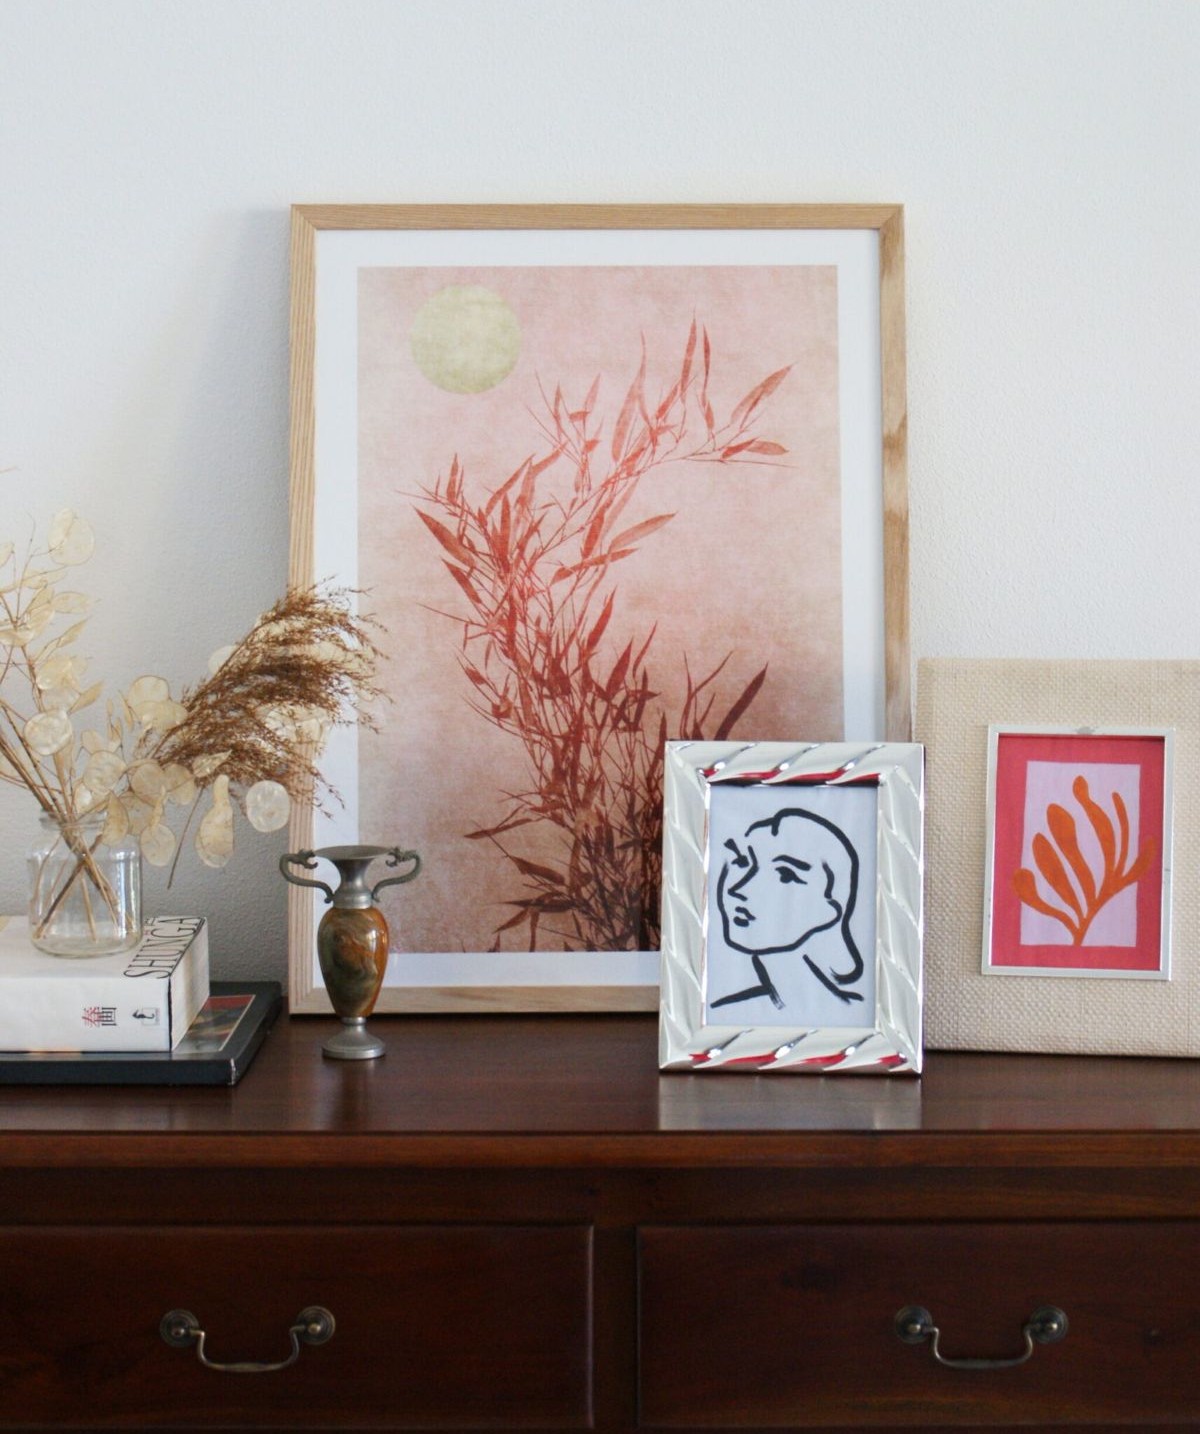
While minimalism often gets reduced to an austere, bare-minimum approach, it’s actually about creating understated elegance through thoughtful balance. It’s not just about leaving a lot of empty space, but about combining artful elements like color, light, and texture in harmony. This subtle yet powerful approach is what makes Henri Matisse’s works so iconic – and what I aim to capture in this painting.
Handprint Fall Tree
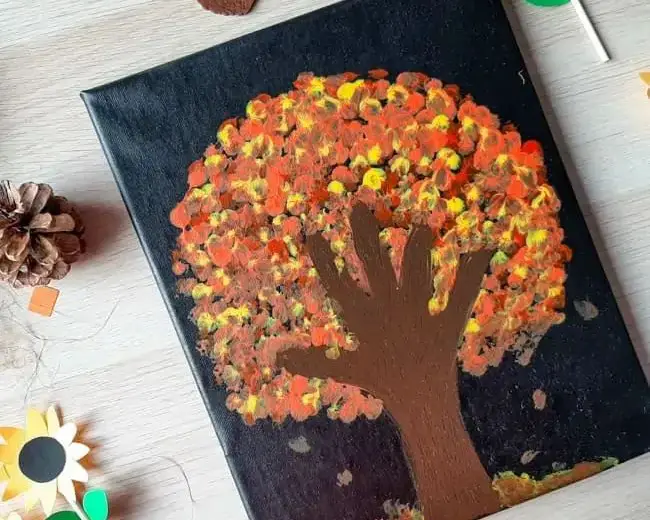
When it comes to timeless creativity, handprint painting remains an unwavering favorite. Take your children on a creative journey with this engaging fall tree activity. The season’s vibrant colors and textures offer endless possibilities – explore the rich oranges, fiery reds, warm yellows, and earthy browns that autumn has to offer! To add an extra layer of depth, consider using finger painting techniques for the leaves, creating a tactile experience that kids will love.
And why not shake things up by opting for a dark canvas instead of the traditional white? The possibilities are endless!
Cherry Blossom Tree
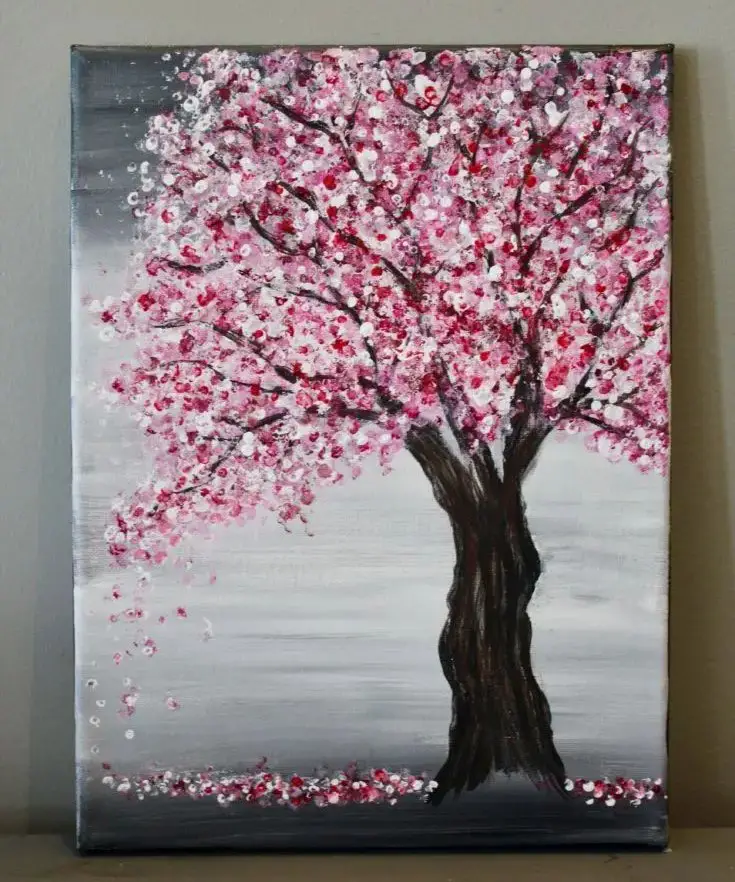
When it comes to incorporating color and texture into a painting, cherry blossoms offer a delightful opportunity for creative expression. Their delicate petals also make them a versatile element that can blend seamlessly into various decor styles. To bring this beauty to life on canvas, start by preparing your materials. Take five or six Q-tips and bundle them together with a rubber band, creating an impromptu stamp applicator perfect for capturing the blossoms’ intricate details.
Begin by sketching the tree’s branches and trunk, then paint these elements before moving on to the blossoms themselves. Dip the bundled Q-tips into your chosen colors and use them as stamps to create the blossoms, arranging them around the tree as desired. This DIY project has the potential to be a lucrative venture, offering a unique and captivating piece that can be sold or treasured.
Easy Canvas Art for Teenagers
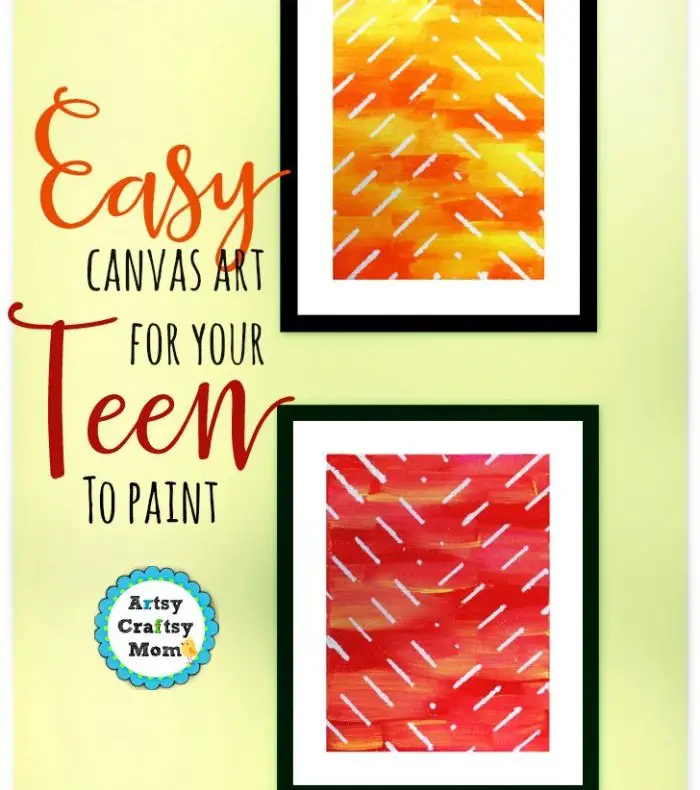
While it’s common to associate creative activities with children, teenagers can also reap significant benefits from structured craft time. A fun and engaging session of painting can be a great way to occupy and entertain a teen. Additionally, taking a break from their mobile devices and iPads can be a welcome respite. For this reason, canvas art painting is an excellent activity for teens.
To achieve the desired wide strokes needed for the background, it’s recommended to invest in thick, wide brushes, which are available here.
Whale
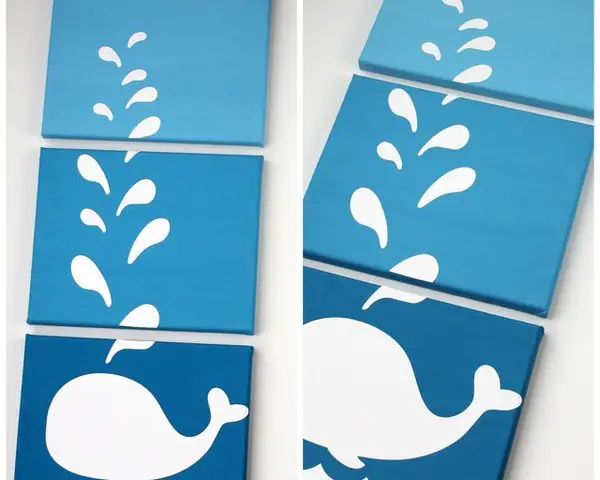
I recall a period in my artistic journey when I became fixated on the concept of split canvases. This technique involves creating a single, progressive painting that spans multiple canvases, which are then framed and displayed separately, allowing for a cohesive yet fragmented visual experience.
My personal favorite example of this style is a beautifully simple whale painting, divided into three vertical frames. The overall effect is one of freshness and elegance.
Of course, the same technique can be applied to create horizontal displays as well, provided the original image or painting has a horizontal orientation.
Paint Chip Art
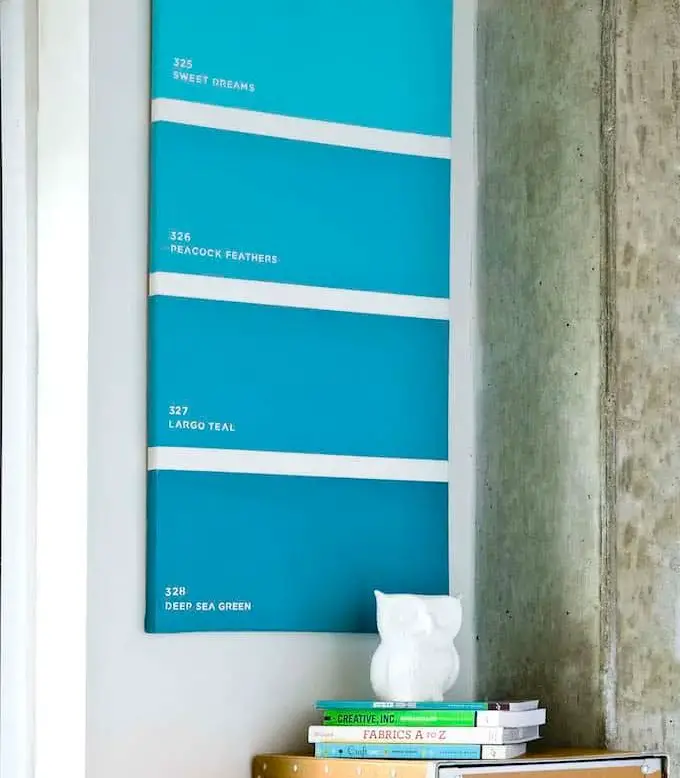
Have you ever found yourself wandering into a hardware store to grab a single paint chip only to leave with a handful? The vibrant colors and gradient effects of those tiny swatches can be truly captivating, don’t they? Why not take it to the next level by blowing up a strip of paint chips and transforming them into a stunning faux art piece on canvas?
You could even incorporate the numerical code for each shade alongside its name, creating a one-of-a-kind masterpiece that’s equal parts creative and unique.
Outdoor Landscape
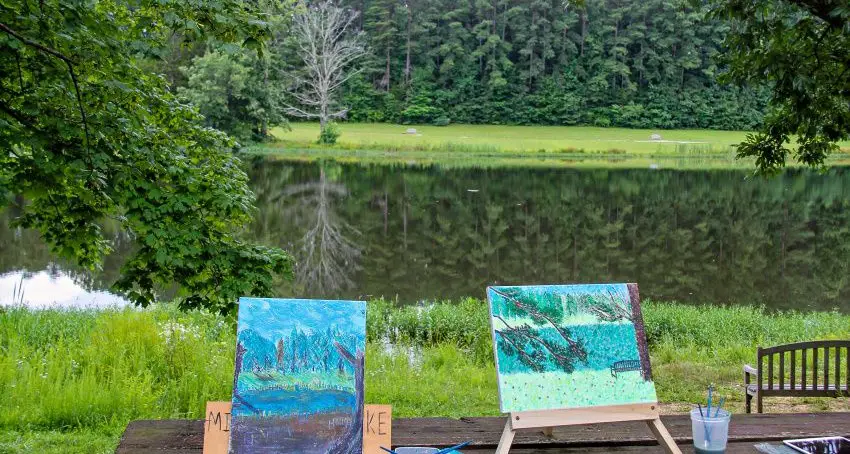
When it comes to canvas paintings, landscape art is a timeless classic that never goes out of style. For those who love to travel and have been fortunate enough to visit numerous destinations, capturing memories of these breathtaking views on canvas can be a wonderful way to preserve the experience. The beauty of this process lies in its accessibility – you can acquire the necessary supplies almost anywhere, set up your easel or workspace, and start bringing the landscape to life.
And when you’re finished, simply frame it and display your masterpiece in your living room for all to enjoy.
Mountain
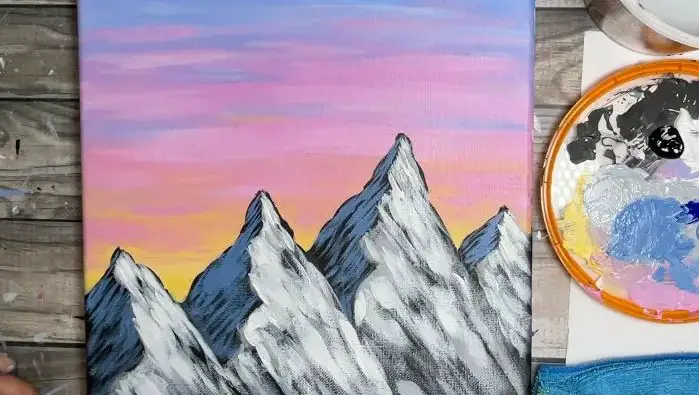
Mountains are a staple in many artists’ portfolios, often rivaling landscapes, birds, and flowers in terms of popularity. As one of the first subjects taught to young painters, mountains offer a unique opportunity to hone various techniques. The beauty of this art form lies in its versatility – you can experiment with different shading methods, from subtle gradations to bold contrasts.
To get started, grab your brushes and focus on developing your shading skills.
Notice how the modern colors used in this piece complement the traditional snow-capped mountains? You’re not limited to this palette, of course. Why not try replacing the vibrant purple-pink sunset with an otherworldly display of emerald greens and mystic purples, reminiscent of the Northern lights?
Fork Christmas Tree
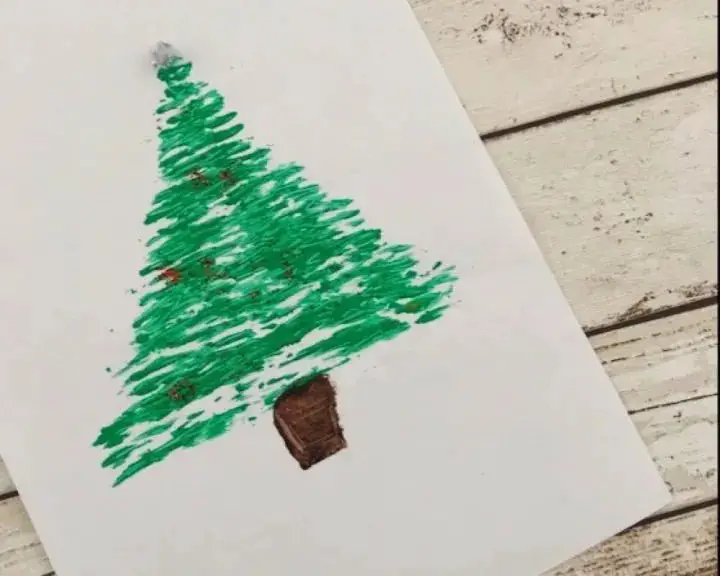
Get creative with a festive twist! Take a fork – yes, you read that right – and use it to create a one-of-a-kind Christmas tree masterpiece. You can even rope in your little ones to join in on the fun. Simply place a paper plate over a palette or surface, dip the fork into paint, and press it onto the canvas to stamp out the spindly needles of your pine tree. Don’t stop there! Use a paintbrush to add some festive flair with ornaments and twinkling lights.
And finally, finish off your masterpiece by adding a little brown stump for the trunk of your merry tree.
Footprint Flower
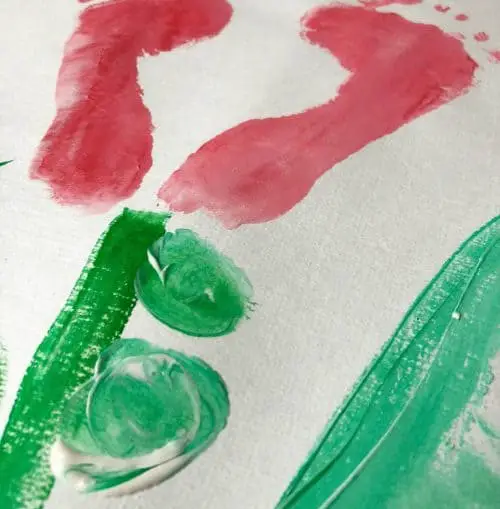
While we’ve all likely gotten creative with our hands, using fingers and handprints to craft beautiful paintings, have you considered taking things to the next level – quite literally? By leveraging the unique shape and size of your footprints, you can add a new dimension to your artistic expression. Simply grab another paper plate, spread some paint across it, and then use either direct dipping or brushes to coat your feet.
Next, place your painted foot onto the canvas, allowing the imprint to take its natural shape. Finally, finish off your floral creations by adding the final touches with a brush. If you’re looking for more inspiration, be sure to check out our collection of flower painting ideas.
Shooting Star
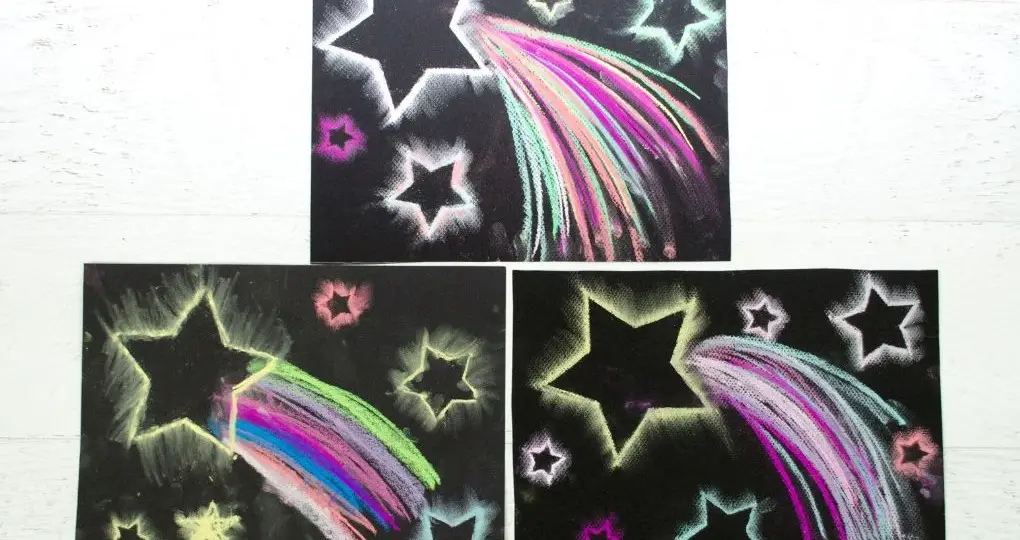
Shooting stars have always captivated me with their mystical allure. Their fleeting appearances can be a life-changing experience, imbuing us with good fortune. Consider this creative endeavor as an opportunity to share the magic of shooting stars with your children. Gather a variety of chalk colors and pastels to bring the celestial bodies’ radiant tails to life.
The chalk finish provides an enchanting quality, allowing for subtle blending and smudging that echoes the ethereal beauty of a shooting star’s passage.
Hearts
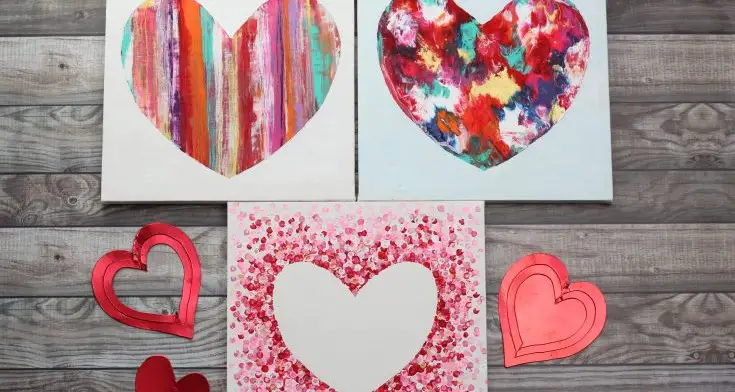
Get creative with three heartwarming painting techniques! To produce a trio of stunning heart-shaped masterpieces, follow along as we guide you through this engaging artistic journey. Your home will soon be adorned with these beautiful pieces, showcasing your personal touch. To begin, gather the essential materials: a roll of contact paper, markers, and paints. With these supplies in hand, it’s time to cut out the heart stencils.
Utilize a credit card or key card to create that distinctive swiped effect, adding a unique twist to each piece.
Watercolor Butterfly
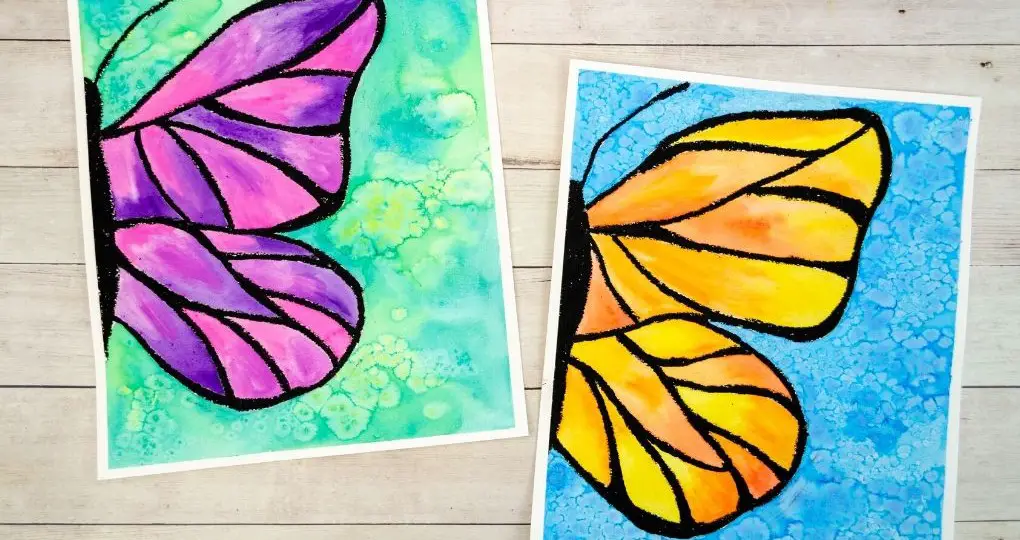
When faced with creative uncertainty, watercolors offer a reliable refuge. This versatile medium is not only easy to work with but also surprisingly affordable. Another excellent choice for artistic exploration is painting butterflies. The possibilities are endless, allowing you to experiment with various styles and techniques. When framed and mounted, the finished piece can be a stunning addition to any room.
To add an extra layer of dimensionality, consider incorporating oil pastels when defining the butterfly’s wing outline. Begin by acquiring some black oil pastels and let your creativity take flight.
Fingerprint Rainbow
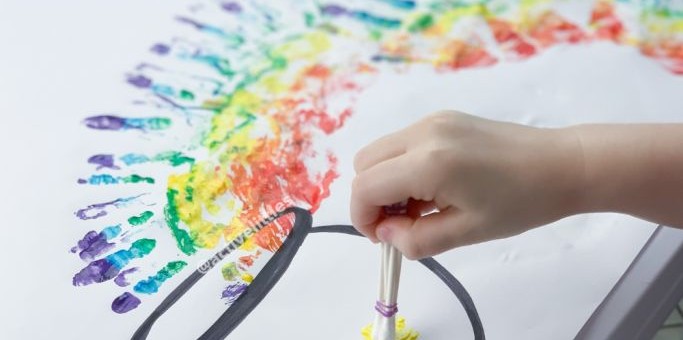
Rainbows hold a special place in our hearts, and it’s no wonder why. They offer endless opportunities for creativity and exploration, making them an ideal subject to delve into with little ones. Not only do rainbows provide a chance to teach color recognition and primary recall skills, but they also encourage tactile learning through hands-on activities like painting. And let’s be honest, what child wouldn’t love getting their hands dirty while creating a beautiful, hand-painted rainbow?
As you work on this project, don’t forget the crucial element of adding a pot of gold at one end – after all, no rainbow is truly complete without it!
Galaxy Night Sky
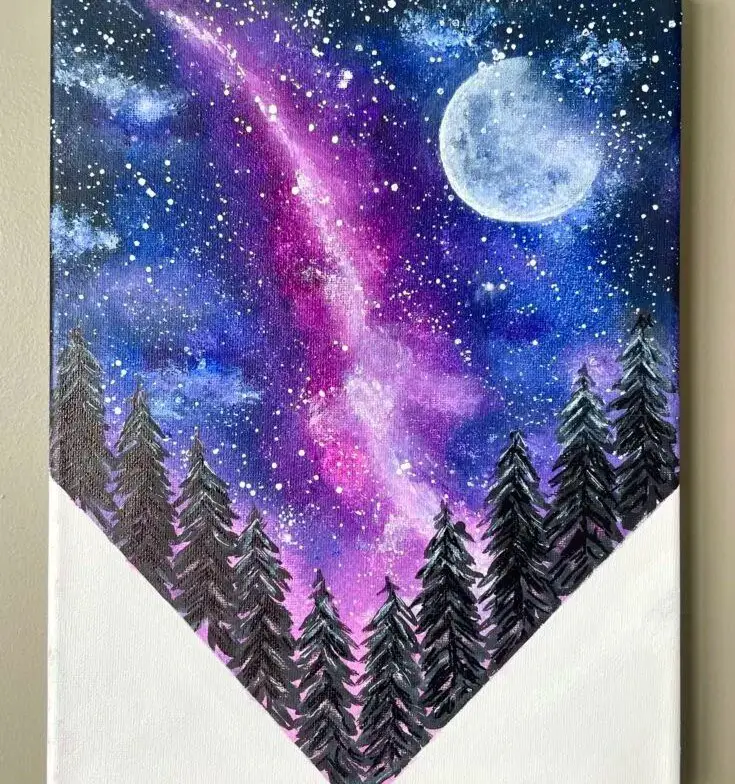
Painting a galaxy-themed masterpiece may seem daunting, but the process is surprisingly straightforward and delightfully messy. For those seeking an effortless way to add fine details to their canvas panels, this project is perfect for you.
To begin, decide on the colors you’ll be using. Stick to a palette that includes staples like black, midnight blue, burgundy, magenta, purple, blue, green, white, and silver. These rich hues will provide a stunning backdrop for your intergalactic artwork.
Abandon traditional brushes in favor of sponges or sponge brushes. This unconventional tool will allow you to seamlessly blend colors and textures, creating a truly out-of-this-world effect.
Flag
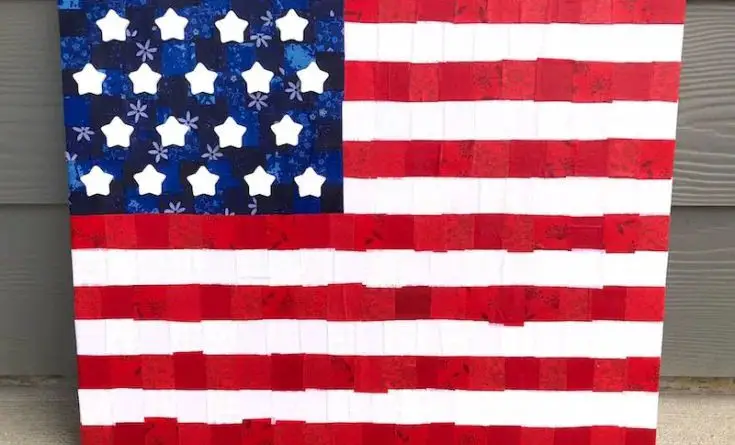
As the thought of painting flags can evoke feelings of national pride, it’s no wonder why many artists and crafty enthusiasts enjoy bringing their country’s emblem to life on canvas. However, for beginners, capturing the intricate details, angles, and textures can be a daunting task.
Fortunately, one way to simplify this process is by turning your flag into a decoupage art project.
This creative outlet not only allows you to showcase your national pride but also provides an opportunity to use up any leftover scrap fabric from previous projects. By combining mod podge and your fabric scraps, you can create a unique piece of art that’s both personal and meaningful.
If you’re looking for more inspiration on how to utilize your stash of scrap fabric, there are countless DIY projects waiting to be discovered.
For instance, explore the 47 DIY scrap fabric projects available online for further ideas and creative outlets.
Spring Trees
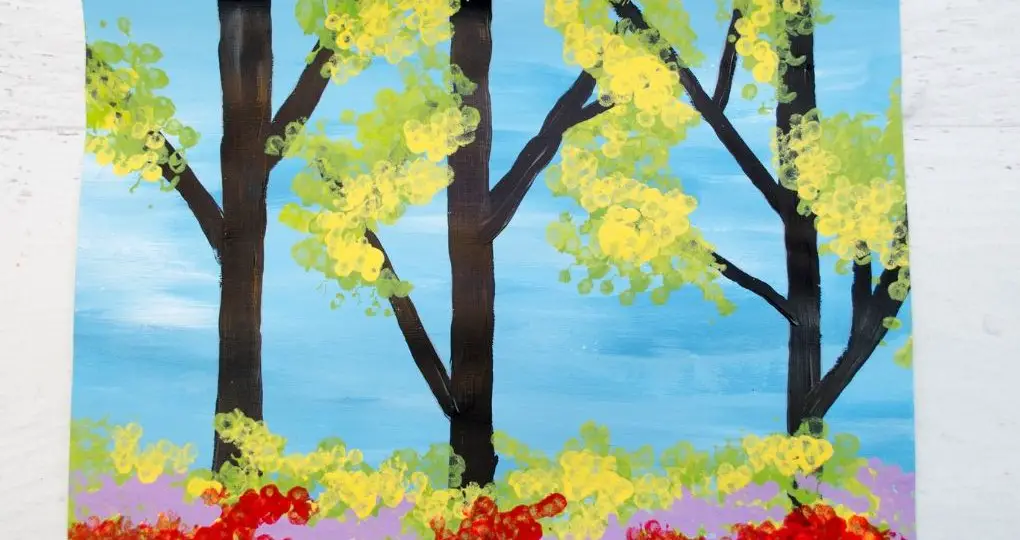
If you’re still holding onto those Q-tips from your cherry blossom tree painting project, now’s the perfect time to break them back out. As you bring your springtime scene to life, Q-tips will be a valuable tool in capturing the delicate petals and lush foliage of the season. To ensure accuracy and precision, download and print a template on white cardstock to guide your artistic journey. This helpful resource will provide the perfect framework for your creative expression.
Birds on a Branch
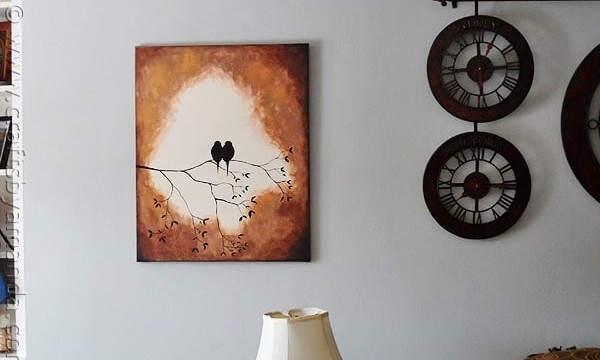
Imagine a serene scene: two birds perched on a branch, gazing out at the horizon as if suspended in their own little universe. The tranquility of this moment is inviting, isn’t it? You can try to capture that otherworldly essence on canvas by drawing inspiration from this elegant painting of two birds on a branch. Whether you’re looking to add some beauty to your home or want to give a thoughtful gift to someone special, this piece would be a lovely addition to any space.
Lavender Acrylic
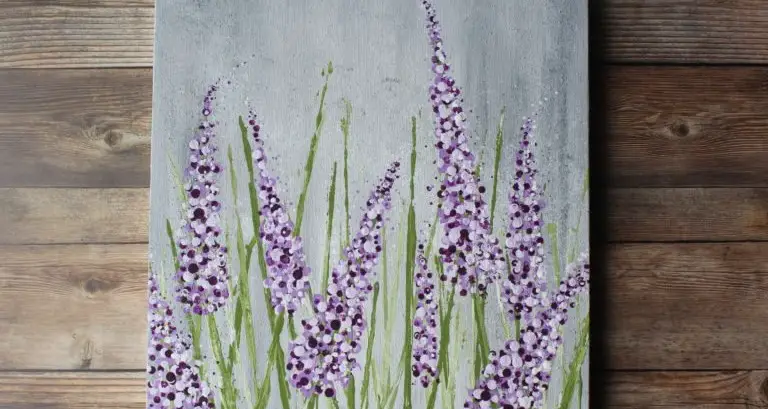
When it comes to painting lavender, the technique is strikingly similar to painting cherry blossoms. The main difference lies not in the method itself, but rather the choice of colors. To start, prepare your canvas by painting the background layer. You can create a scenic landscape with fields, grassy areas, and tall stalks, building up multiple layers for added depth.
Next, use cotton swabs or Q-tips to delicately add lavender buds to the canvas.
Don’t worry if you’re new to this – there are comprehensive step-by-step instructions available to help you master the process.
Spooky Tree
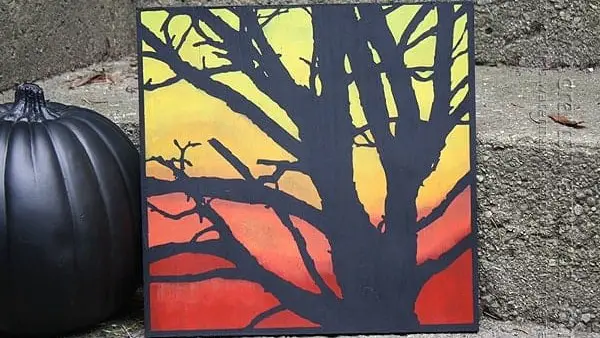
When tackling spooky trees in your art, the focus shifts to silhouettes and shadows. To bring these eerie arboreal creations to life, it’s essential to understand what needs to be done. Start by preparing your workspace – grab some paper towels for any unexpected messes and get your canvas ready. Next, gather your arsenal of supplies: tree stencils from [link], cosmetic sponges from [link], and a can of acrylic sealer from [link].
With these tools at the ready, you’re free to apply a textured coat of paint using the sponges, building up layers as you work your way up the canvas. The result is a hauntingly beautiful representation of spooky trees that’s sure to send shivers down the spine.
Cloud
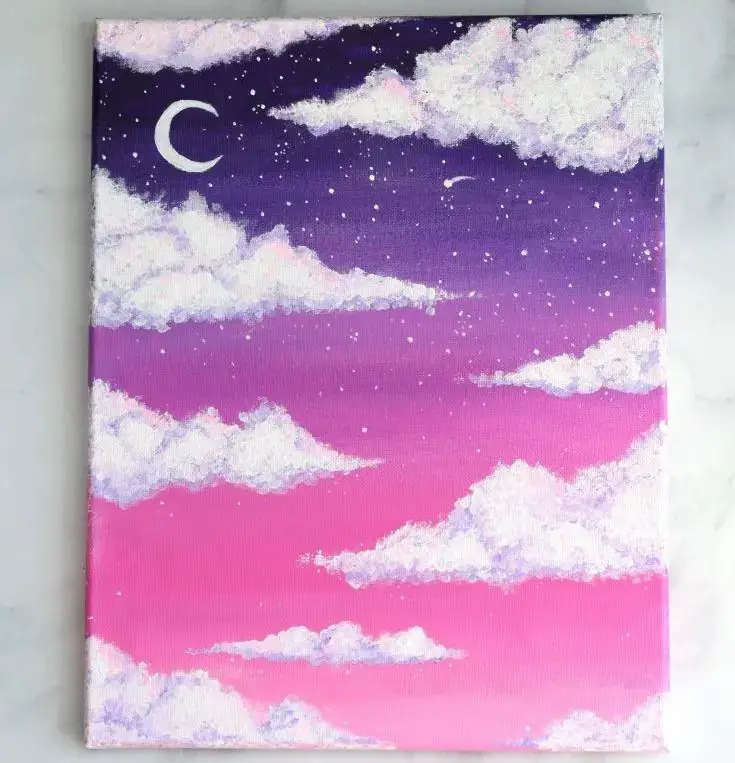
Let yourself unwind by embracing the therapeutic qualities of painting clouds. The meditative process of blending colors, splattering paint, and creating wispy tendrils can be incredibly calming. As you work on perfecting your Q-tip painting technique with these ethereal clouds, you’ll build upon your previous successes in capturing the beauty of cherry blossoms and lavender.
The key to achieving a stunning canvas lies in finding that delicate balance between softness and subtlety – it’s all about mastering the art of subtle texture and dimension. With practice, patience, and dedication, you’ll be amazed at how effortlessly you can create a breathtaking painting that captures the gentle essence of clouds on a sunny day.
Apple Tree
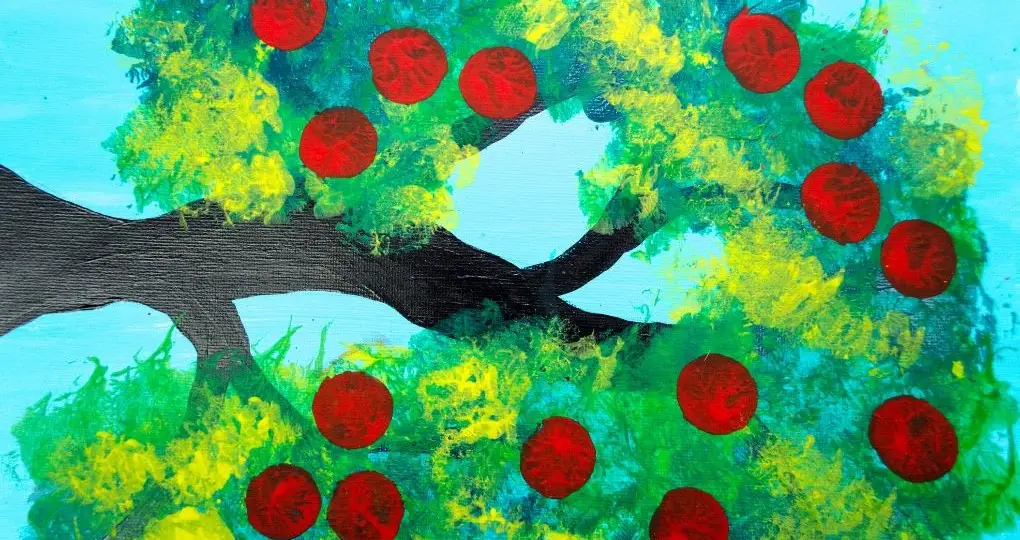
While cotton swabs provide precise control when painting, they may not be the best fit for larger projects. For instance, creating art featuring apples and apple trees requires more surface area than a q-tip can offer. To achieve the desired results, consider substituting cotton swabs with something more substantial. Alternatively, you could opt for clothespins or even switch to a canvas pad – an innovative alternative to traditional canvases.
Snowflake
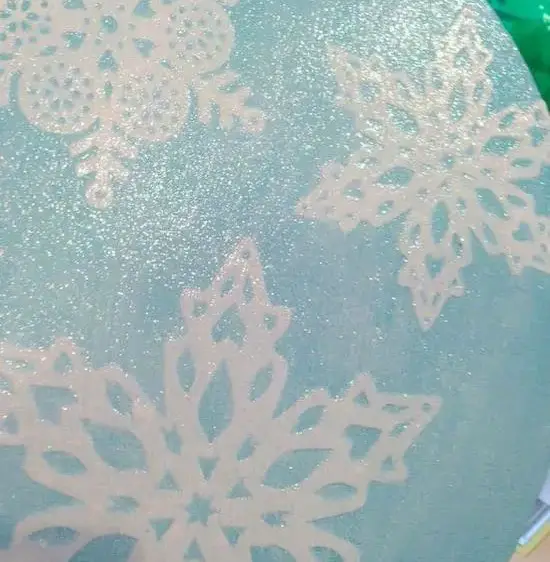
Let’s shift our focus from textured paintings and delve into a set of three stunning snowflake artworks. The oval-shaped canvas is a departure from the standard square format, adding a touch of elegance to any room. The winter-themed piece features an icy blue backdrop and intricate snowflakes that evoke a sense of serenity. To recreate this look, you can use stencils to create your own unique snowflakes.
If you’re looking for more seasonal decorating inspiration, check out 25 winter crafts to keep you busy this holiday season.
Collage Canvas
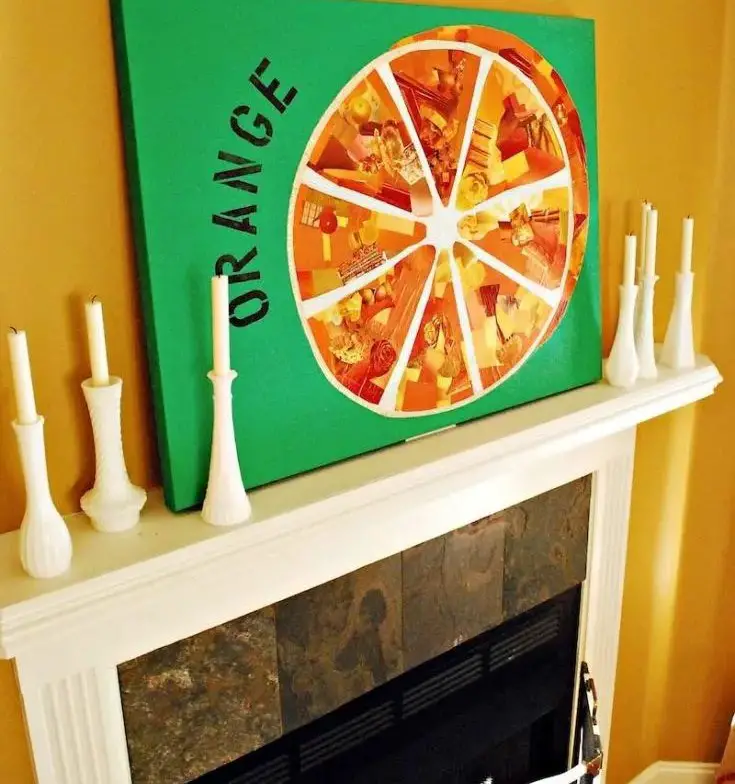
Gaze upon this vibrant piece of art, which bursts with citrusy charm. If you’re seeking a pop of color to brighten up your space, this striking orange painting is sure to delight. With its zestful hues, it’s the perfect addition to any room. But what makes this creation truly special? The magic of Mod Podge! By using this versatile adhesive, you’ll be able to bring together a unique collage that celebrates memories and creativity.
And as you gaze upon the finished product, you’ll be struck by the way it seems to wrap itself around your senses like an orange peel. To create a masterpiece similar to this one, simply combine your Mod Podge with a backdrop of lush green, and watch as your imagination comes alive.
Boo and Eek
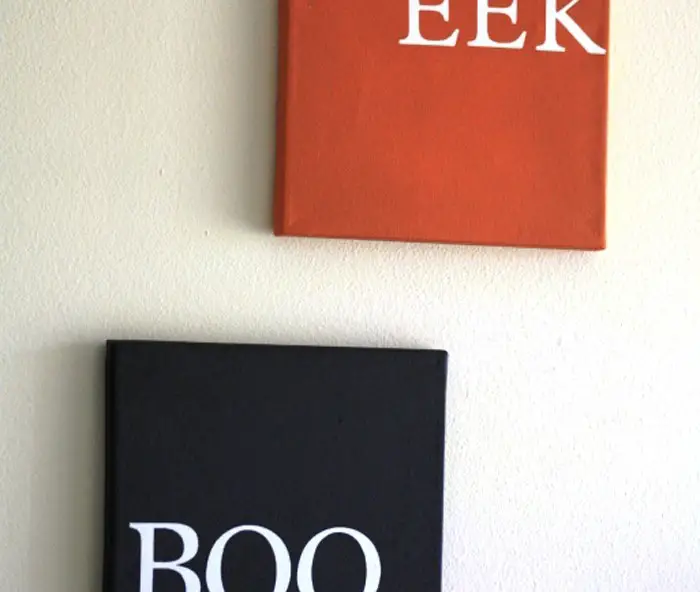
While some might raise an eyebrow at the unconventional duo of Boo and Eek adorning a canvas on display, I see it as a delightfully dry and sardonic Halloween decor piece. To recreate this unique setup, gather canvases, vinyl letters, and cans of orange and black spray paint.
Consider venturing outdoors if the weather cooperates, not only will it prevent splattered paint from ruining your home’s interior but also add to the whimsical charm of the scene as the vibrant hues dance across the canvas.
Stenciled Botanicals
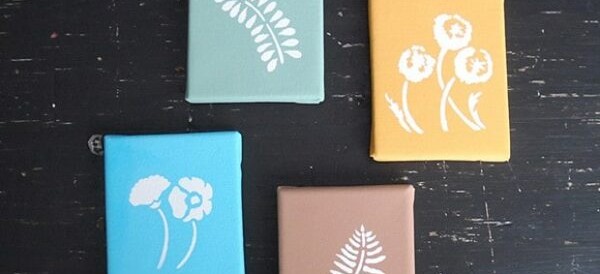
If you’re looking for a decorative solution that won’t break the bank or require extensive artistic skills, consider stenciled botanicals as your go-to fix. Chances are, you already have the necessary tools: stencils, canvases, and paint. With these basic supplies and a can of sealant, you can create a beautiful floral design on a canvas that can be easily customized with various elements like leaves, flowers, or feathers.
Orange Tree
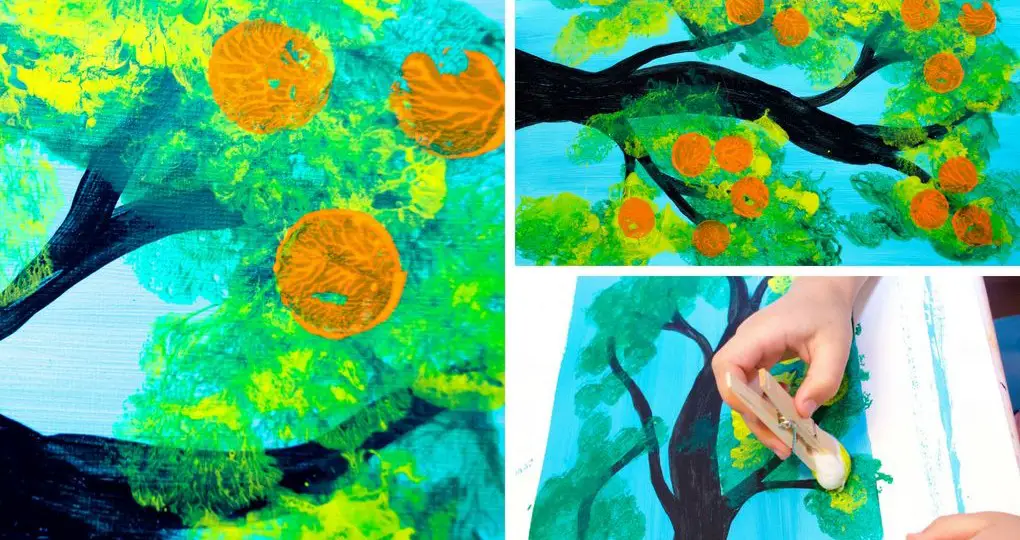
Get creative again with this new citrus-inspired canvas art project. Building on the success of our previous orange-themed piece, why not take your skills to the next level and create an entire tree? To get started, gather your materials: cotton balls, paint, and a few clothespins for added control. Follow the same steps as before, using clamped cotton balls to precision-paint the trunk and branches. Once you’ve got those details out of the way, it’s time to add some lush greenery.
Simply dip and dab your brush with different shades of green, gradually building up the texture and depth of the foliage. Finally, bring some vibrancy to the scene by adding a large, juicy circle of orange. With a little patience and practice, you’ll be amazed at how easily this whimsical tree comes to life on canvas.
Animals on Canvas
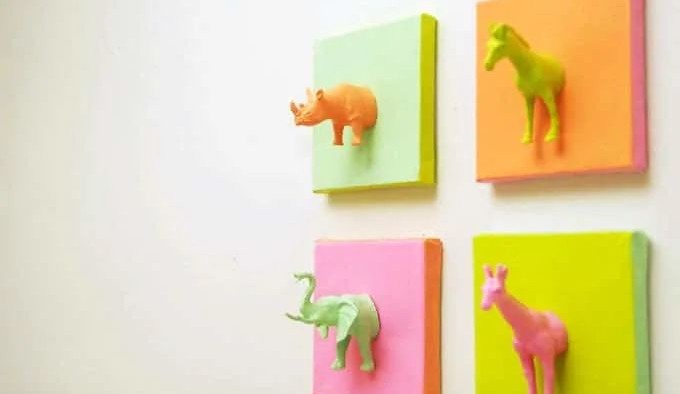
Experience three-dimensional artistry with a twist – literally! Who doesn’t enjoy a good surprise when gazing at a painting? With this unique project, that’s exactly what happens: animals pop out of the canvas, delighting viewers. The process itself is also an adventure, as you’ll discover the morbid thrill of preparing the plastic toys for their artistic debut. To start, grab a heat knife and cut the toys in half, transforming them into canvases-to-be.
Then, simply spray paint your creations and voilà! You’re almost done.
Mosaic Turtle
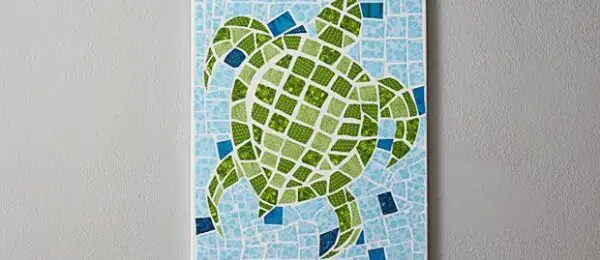
Mosaics bring a unique energy to any space, infusing it with their distinct personality. Whether it’s a tile and grout mosaic or a fabric one, they have the power to transform an area. Fabric mosaics, in particular, offer endless possibilities for creative expression.
To create a stunning turtle wall art on canvas like the one featured here, you can repurpose your old fabrics and scraps. You might be surprised to find that everything you need is likely already at your fingertips.
Just be sure to stock up on mod podge before getting started. Once you have your supplies in order, it’s time to get creative! Cut your fabric scraps into the desired shapes and sizes, then adhere them to the canvas using your trusty mod podge.
Paint Pouring

Ready to unleash your creativity? When seeking unique decorations for your home, customization is key. The thrill of creating your own artwork on a blank canvas is unmatched, much like the experience of watching professional artists at work. To get started, select a canvas that suits your style and preferences, then grab your paints and let the creative process begin.
While freestyle painting allows for spontaneity, planning your color palette ahead of time can help you achieve a desired gradient effect, giving you greater control over the final result.
Herringbone Wall Art
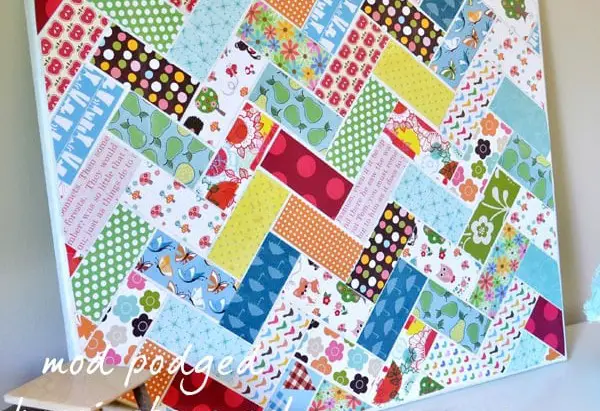
Reimagine the classic herringbone pattern in a unique way – on canvas! Typically used as kitchen backsplashes or bathroom tiles, this design can be recreated using scraps of paper and decoupage techniques. The key to success lies in meticulous planning. First, conceptualize your desired pattern, taking into account the size and shape of the strips you’ll need. For this project, aim for rectangular pieces measuring around 1.5 inches by 4 inches each.
With your plan in place, carefully cut out the required number of strips, and get ready to transform your canvas with a beautiful herringbone design.
Poster on Canvas
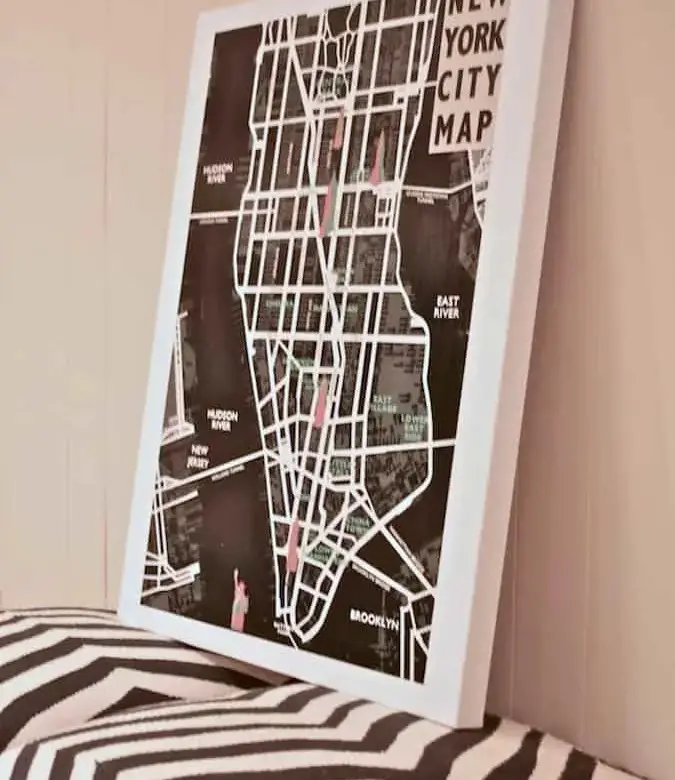
Nostalgia often brings back memories of childhood rooms adorned with vibrant posters, a colorful explosion of artistic expression. I recall having a plethora of posters plastered across my walls, creating a visual feast that reflected my interests and passions. Fast forward to adulthood, and it’s not necessary to bid farewell to this aspect of our youth. In fact, the grown-up equivalent is to transform your favorite posters into stunning works of art by mounting them on canvas.
Birth Stats
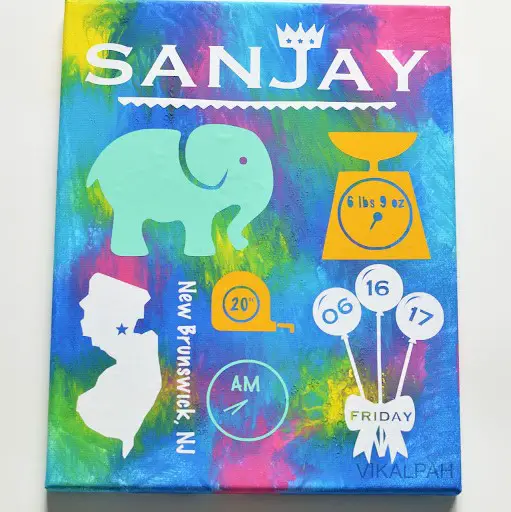
Bonding with your baby through craft projects is a wonderful way to create lasting memories and keepsakes. One such activity is incorporating birth statistics onto canvas. Begin by designing the stats, then use an electronic cutting machine to bring them to life. But that’s not all – take it up a notch by adding random splatters of paint across the canvas for an extra touch of uniqueness.
Tropical Palm Tree
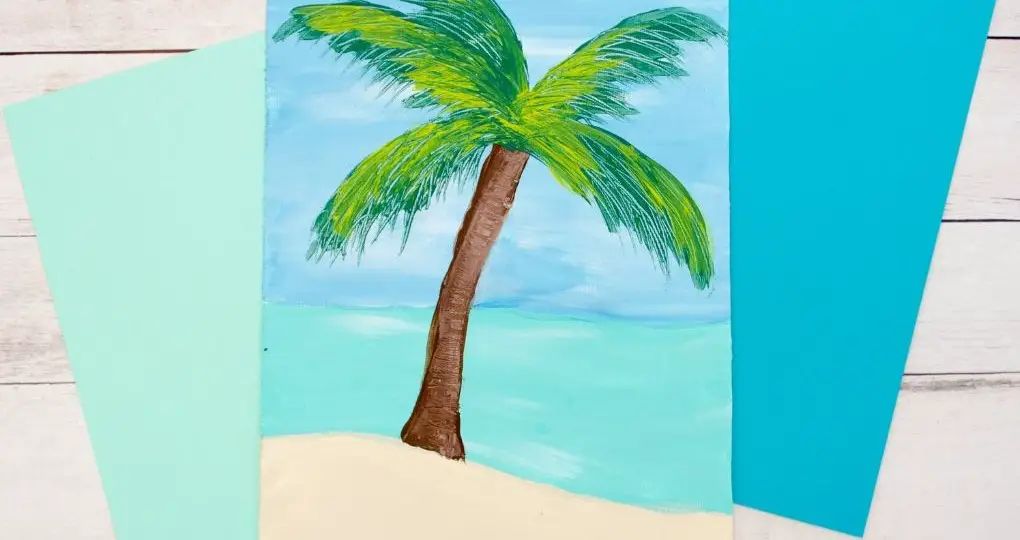
Indulge in the tranquil atmosphere of a beachside paradise, where the gentle sway of palm trees and the warmth of sandy beaches come together in perfect harmony. While we may not be able to transport ourselves to this idyllic setting permanently, we can at least try to bring some of that blissful energy into our daily lives through creative expression. Gather your art supplies – a palette, paints, and a fork (yes, you read that right!) – and get ready to unleash your inner artist.
You can even use a paper plate to mix your colors and create a unique shade or two. Once you’ve achieved the perfect blend, dip your fork into it and let the creative juices flow. As you begin to bring your tropical palm trees to life on canvas, don’t be afraid to experiment with different strokes and techniques. If you’re feeling extra adventurous, why not try practicing your skills on paper before making the switch to canvas?
The possibilities are endless, and who knows – you might just find yourself transported to a beachside oasis, if only for a little while.
Sponge Pouncers
When it comes to texturizing a canvas, sponges play a significant role, closely following the functions of cotton swabs and cotton balls. Interestingly, sponge pouncers are essentially identical to sponge brushes. Available for purchase, these tools feature a flat, rounded base that enables seamless blending of colors, eliminating the appearance of patches.
As with other painting tools, it’s essential to consider the surface area when working with sponges or swabs, as a larger area allows for more efficient mixing and dipping of paint.
Basketweave Stencil
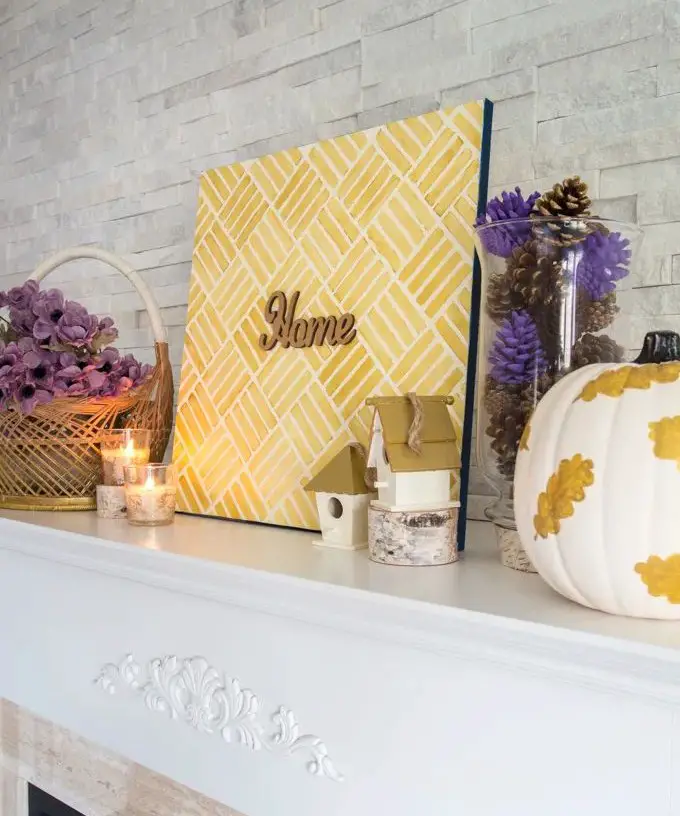
Reimagining the classic basket weave pattern on canvas is a fantastic idea. This timeless design can be scaled up or down to create a stunning focal point in any room. For instance, a beautiful yellow-toned basket weave backdrop can add warmth and coziness to your ‘Home’ decor. Simply place it atop your mantle and enjoy the soft, warm glow it emits.
To create this look, you can use pre-made wooden letters or get creative with your Cricut machine and some vinyl to cut out custom letters that match your personal style.
Shamrock Clover Painting
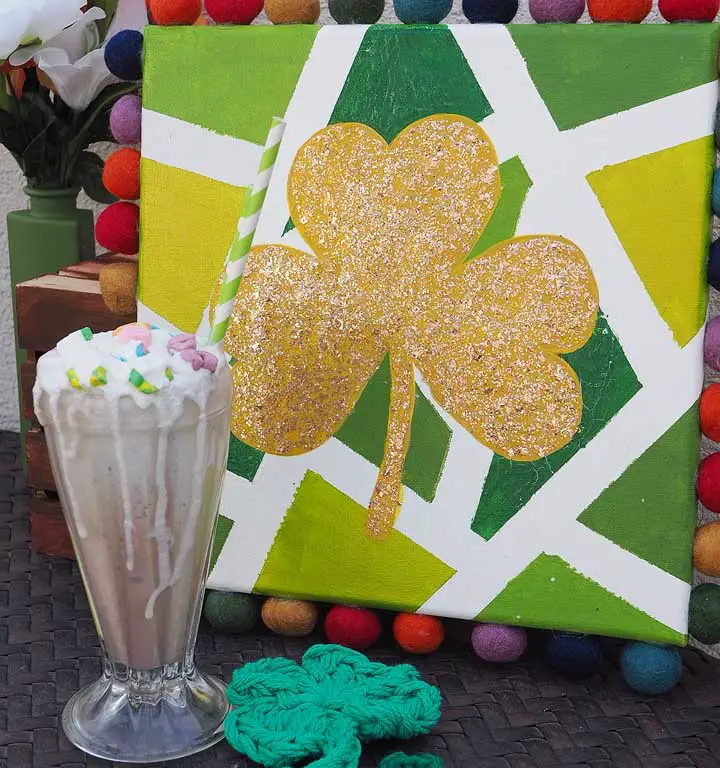
Are you feeling fortunate? Are you surrounded by the warm, vibrant hues of green, gold, and glory? If so, it’s likely time to channel those emotions into a stunning work of art. Take a closer look at this painting, where various shades of green blend together in perfect harmony. And what really makes this piece pop is that glittering golden clover in the center – talk about adding an extra layer of dazzle! To create your own masterpiece, grab some masking tape and mix up different hues of green.
Then, apply the tape to your canvas and let the creative process begin. Start filling the canvas with all that emerald goodness!
3D Bat Painting
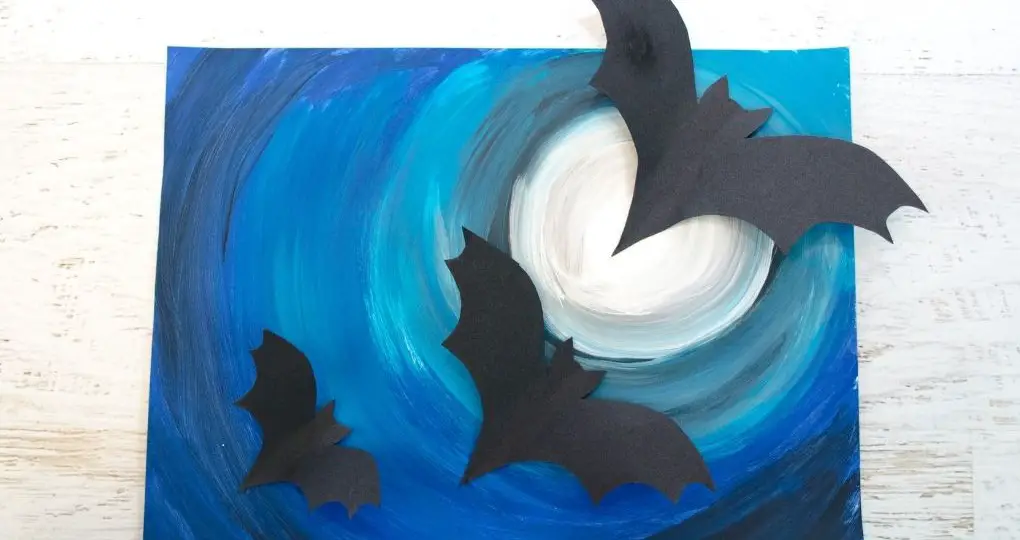
If you recall the 3D pop-up animals we explored earlier, you might be excited to learn about another spooky yet straightforward project perfect for this Halloween season. This one requires minimal effort but yields impressive results. To get started, simply paint your backdrop with a color scheme that resonates with the holiday’s eerie atmosphere. A prominent full moon is essential – what’s Halloween without it?
Once your canvas is complete, move on to creating the focal point: a bat silhouette cut from black cardstock.
Reverse Stencil
If you’re curious about reversed stencils, let’s dive into this creative technique. To get started, you’ll need a few basic supplies: stencils, craft paint, a canvas, and Mod Podge. While it’s possible to purchase pre-made stencils, making your own can be a fun project that also helps refine your calligraphy skills. The process is straightforward – simply apply the stencil to the canvas, followed by a layer of paint and finally seal with Mod Podge.
With these simple steps, you’re ready to create your very own reversed stencil artwork.
Thrift Store Painting
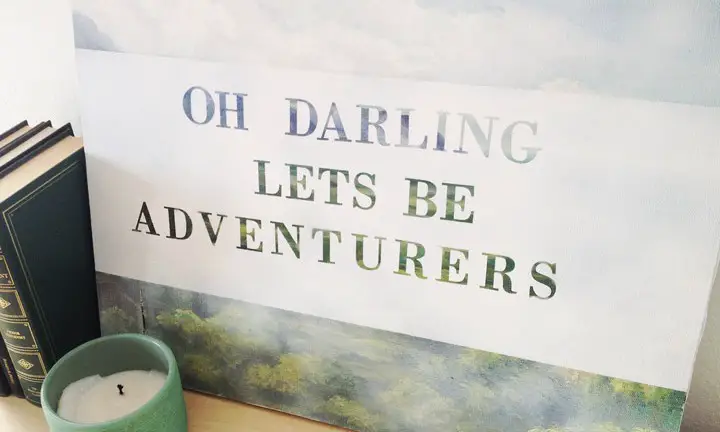
Thrift stores are an alluring treasure trove, where the thrill of discovery is part of their enchantment. The uncertainty of what hidden gems you might stumble upon within their walls is what makes them so captivating. Imagine embarking on a treasure hunt to uncover your perfect painting at thrift stores near you. Once you’ve found the piece that speaks to you, bring it home and transform it into a stunning backdrop for your favorite quote!
Even a simple phrase like ‘Be you’ can take on new significance when paired with a breathtaking landscape. So, gather some vinyl and get creative!
61 Easy Canvas Painting Ideas for Beginners
Got a canvas and some basic painting tools? With just 10 minutes of prep time, you can get started with these straightforward Canvas Painting Ideas for Beginners. The actual creative process will take around 20 minutes, adding up to a total of 30 minutes from start to finish. No artistic expertise is required, as this project is brought to you by Karo @ CraftsyHacks.com, where the only investment needed is a mere $3.
Equipment
Materials
Instructions
Select a painting concept from our previous discussion. Next, collect all necessary supplies, including paints, brushes, and any additional materials required for your chosen piece. Finally, immerse yourself in the creative process, allowing your artistic vision to unfold.