Transforming cereal boxes into a functional cabinet organizer is an innovative way to maximize storage in your kitchen or under the sink. For those who, like me, are frustrated with inadequate storage solutions, this DIY project offers a simple and cost-effective solution.
The area under my sink was a prime example of wasted space, cluttered with cleaning supplies and miscellaneous items.
Frustrated by the lack of organization, I devised a clever hack to create a hanging shelf using old cereal boxes, cardstock, and adhesive strips.
This project requires minimal time and effort, making it an ideal DIY endeavor for those looking to streamline their storage space. By following my steps, you’ll be able to create a practical and visually appealing organizer that can store washcloths, cleaning supplies, or other essentials.
Supplies for the Organizer
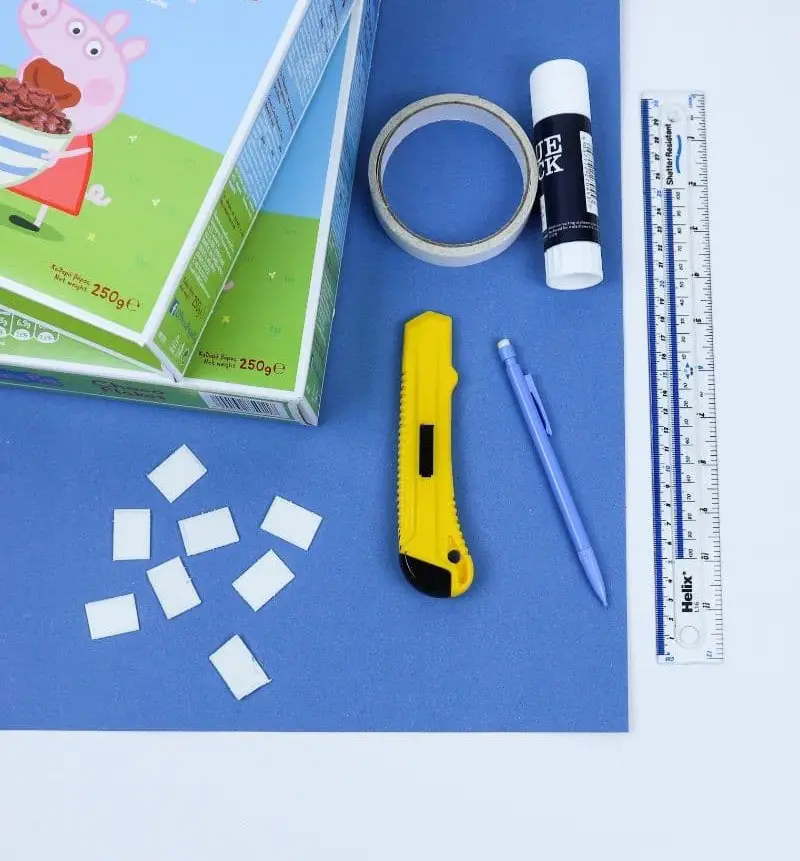
To create your DIY office organizer, you will need several materials. First, gather some thick paper or wrapping paper to use as the exterior shell. For the interior compartments, you’ll require standard paper. You’ll also need two cereal boxes, which will serve as the base structure for your organizer. Adhesive materials include double-sided tape and self-adhesive Velcro strips, while a regular glue stick is useful for any additional bonding needs.
A ruler and pencil are necessary for precision cutting, and a cutter or scissors is required to shape the various components.
How to Make an Organizer
Step 1
To begin with, collect all necessary materials. If possible, select cereal boxes of uniform dimensions to ensure a seamless process. If you only have smaller ones available, you can still utilize them by allocating one to serve as the front pouch.
Step 2
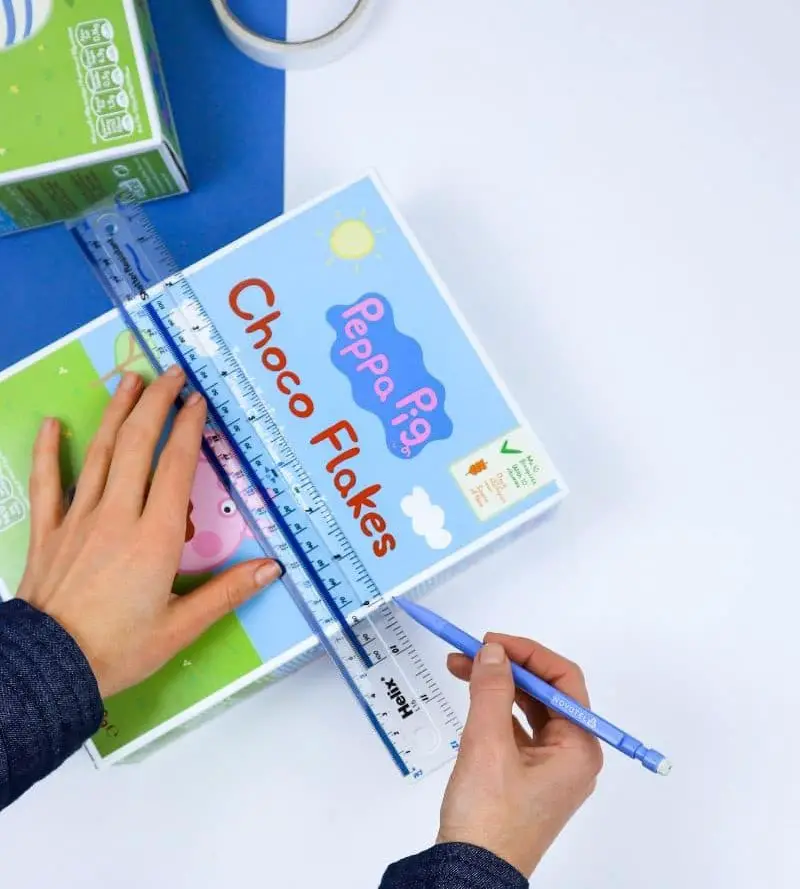
Get ready to transform a humble cereal box into a functional desk organizer! Begin by drawing a horizontal line along the front of the box using a pencil and ruler. This line will serve as the entrance point for your organizer’s main compartment. I opted for a line roughly halfway up the box, but feel free to adjust the size to suit your organizational needs.
Step 3
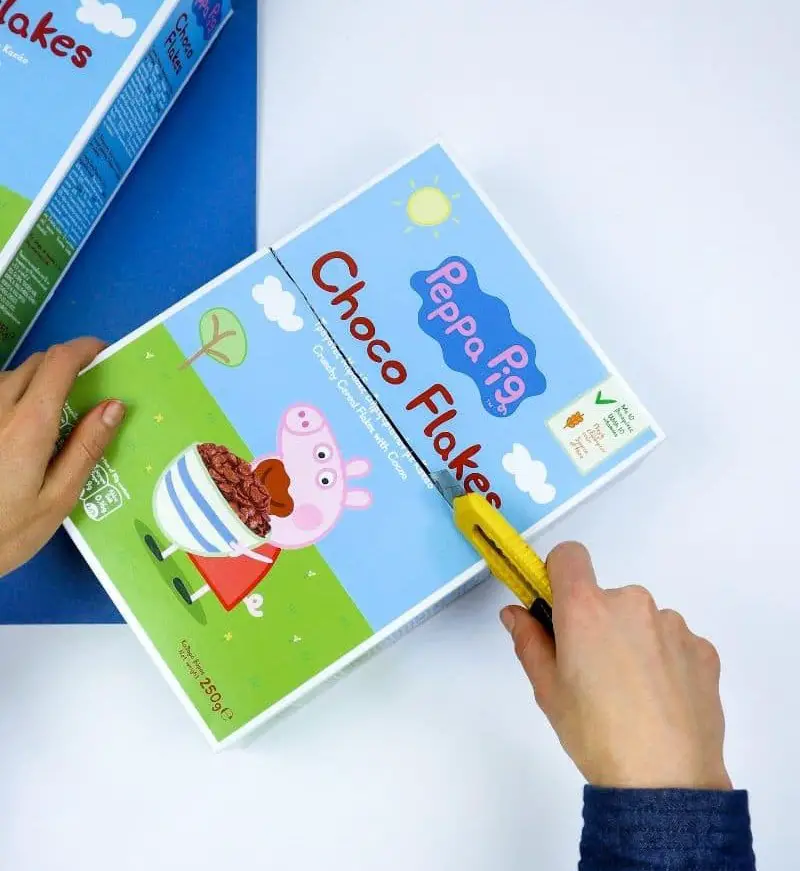
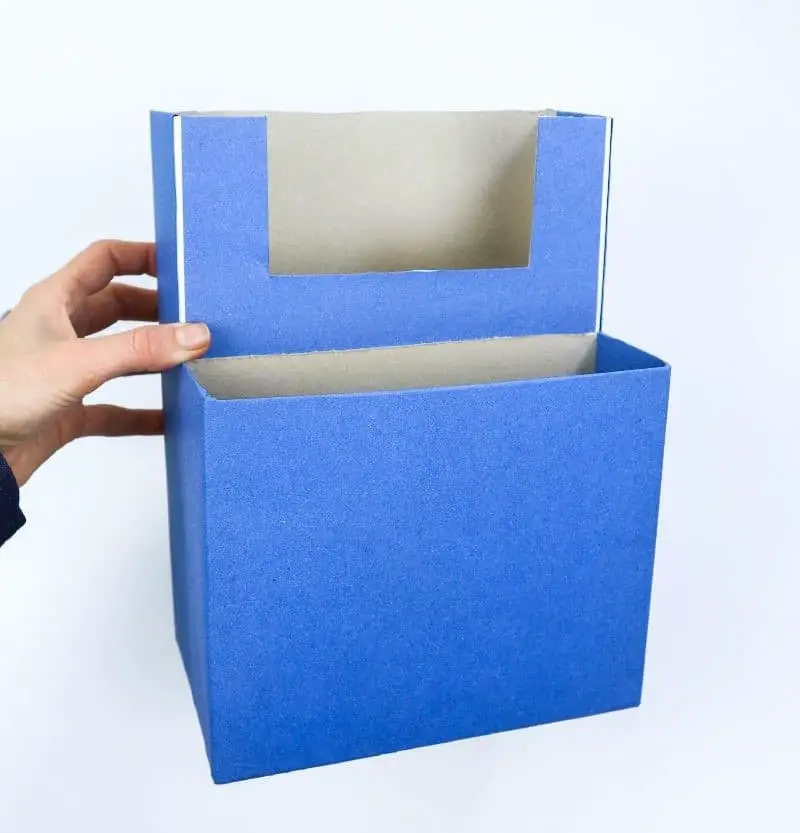
To create a cereal box container, begin by carefully cutting along the edges of the cereal box on all four sides using your craft knife or scissors. This will leave the top of the box open and accessible for filling with your desired materials. For precise cuts, a craft knife is often the best option, as it allows you to maintain straight lines.
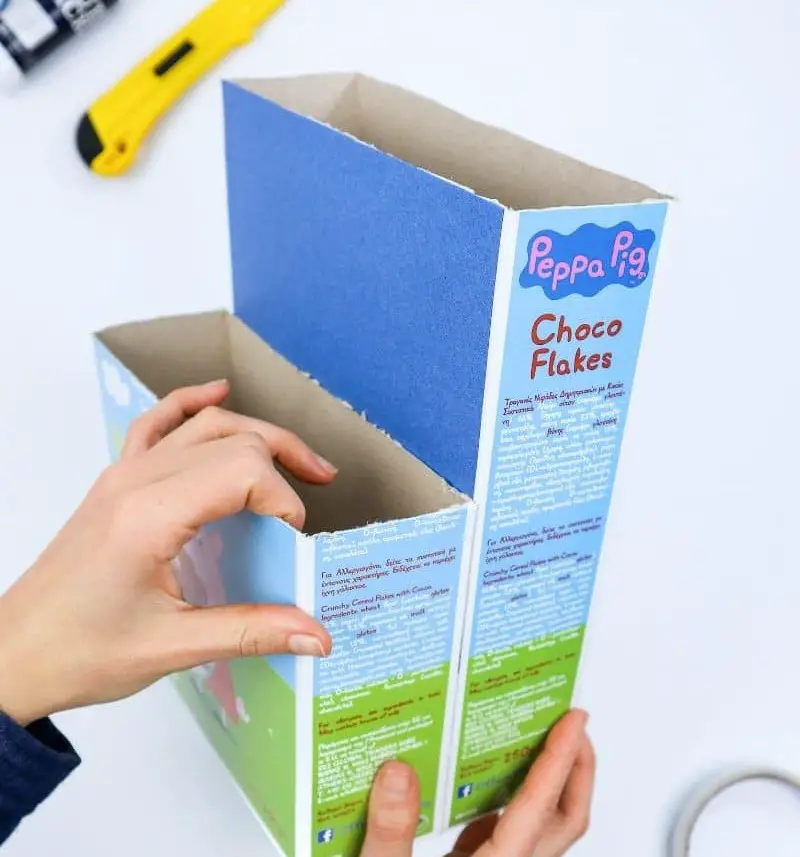
Step 4
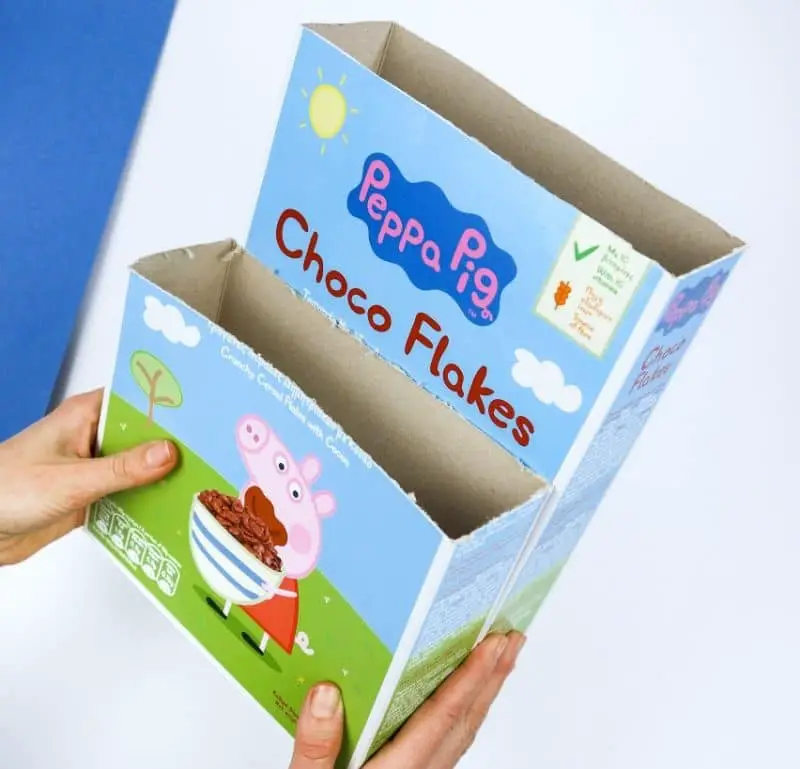
For your second cereal box creation, construct one that’s slightly taller than the initial design. This will allow for a seamless integration of a notch cut into it later in the process. As a visual guide, refer to the provided image, which illustrates the desired height difference.
Step 5
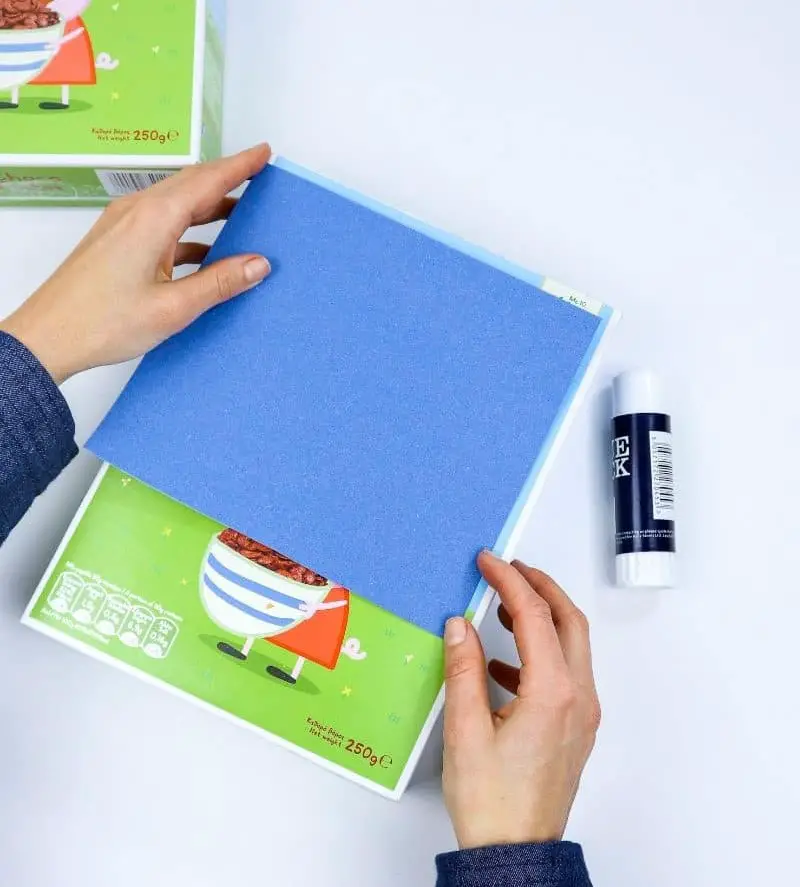
Now that we’ve set the stage for our DIY project, let’s dive into the fun part – customization! I opted for a soothing blue hue for my organizer, but feel free to choose any color that resonates with you. The beauty of this project lies in its versatility, so don’t be afraid to get creative and make it your own.
To start, cut a length of construction paper the same width as the tall box. You won’t need to cover the entire surface, just enough to reach behind where the smaller box will sit.
Secure it with a dab of glue.
Step 6
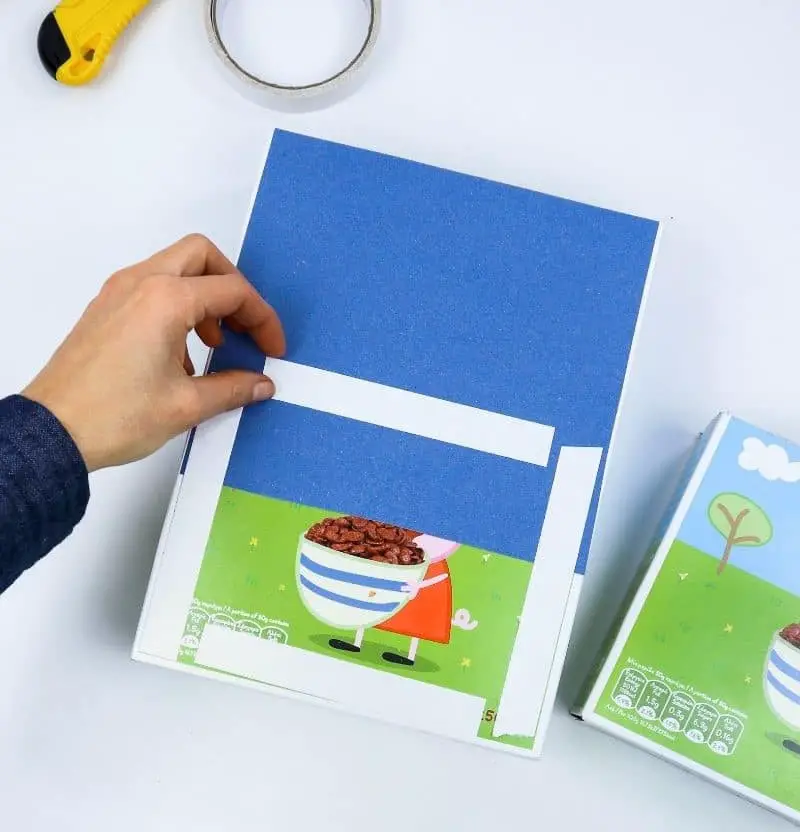
To secure the smaller box in place, we’ll be using adhesive strips. Before applying these strips, take a moment to lightly draw a guideline where the top of the box is intended to rest. This simple step ensures that the box is properly aligned and prevents any potential misalignment.
Step 7
With meticulous attention, carefully mount the small box, ensuring its edges are precisely aligned to create a seamless appearance that resembles a singular unit.
Step 8
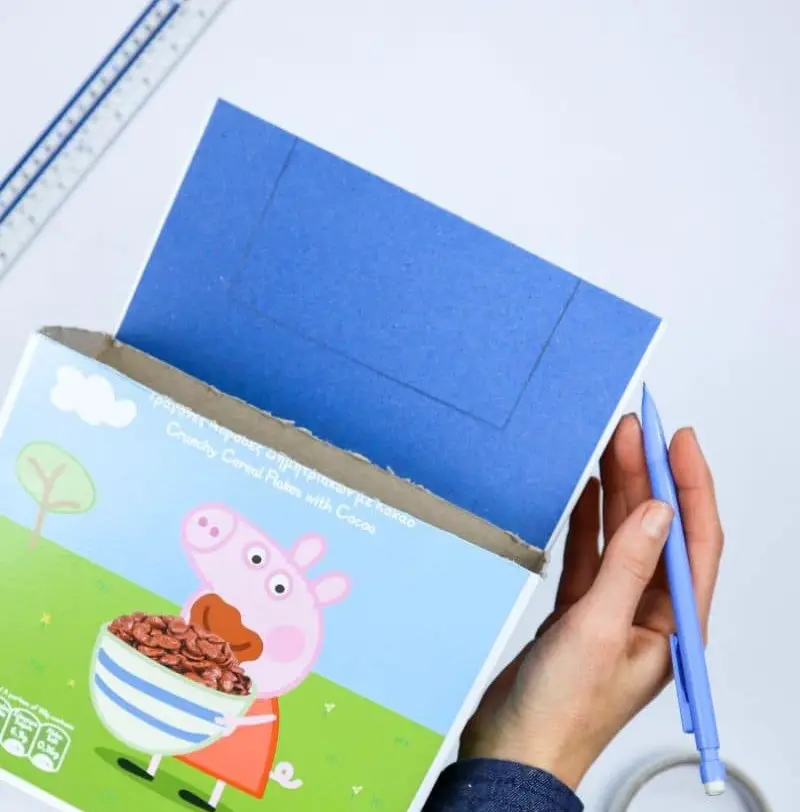
To proceed with creating a notch, begin by sketching a rectangular shape along the top edge of the box, ensuring the borders are symmetrical. For my project, I positioned the rectangle approximately 1.5 inches from each side, excluding the top, to achieve a balanced look.
Step 9
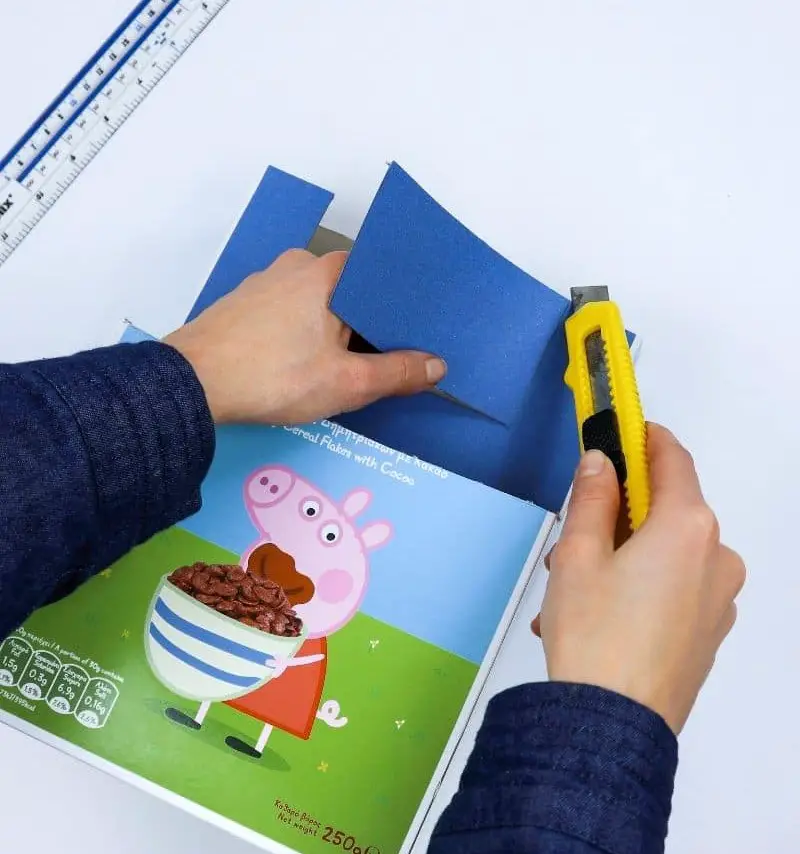
As the creative process unfolds, it’s time to precision-cut your way through the design. With your trusty craft knife in hand, carefully follow the rectangle lines to create a window-like opening. For an added touch of sophistication, consider rounding off those corners for a sleek and polished finish, ultimately resulting in a refined appearance that mirrors the initial concept.
Step 10
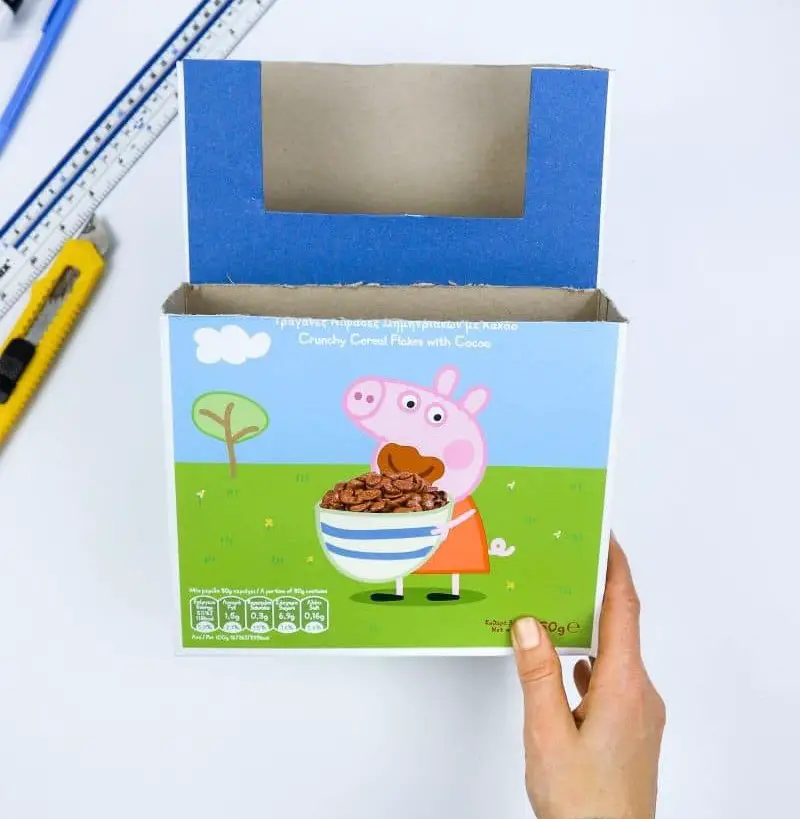

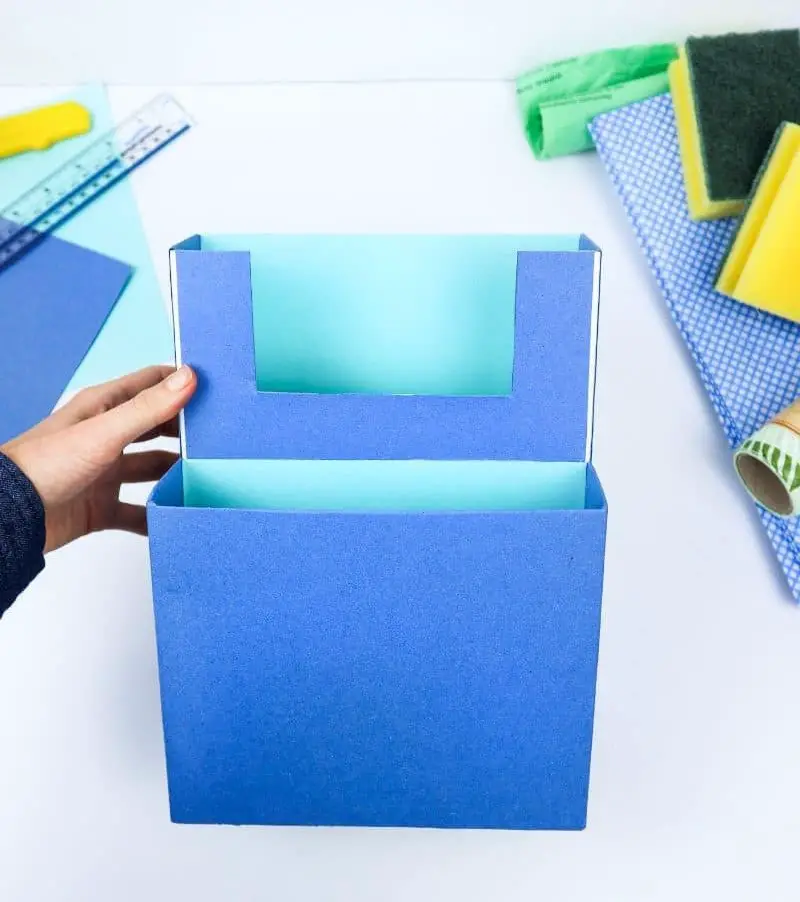
Next, secure the smaller box with a layer of blue paper identical to the top. For added stability, apply adhesive tape along the edges to ensure they remain flat. Alternatively, you can use a single sheet of paper and wrap it around the box or cut individual panels and glue them in place one by one. I opted for the former approach. While ensuring the back remains smooth is important, feel free to focus on the exterior appearance, as this section will be the focal point.
Ultimately, you should now have a wrapped box resembling this visual.
Step 11
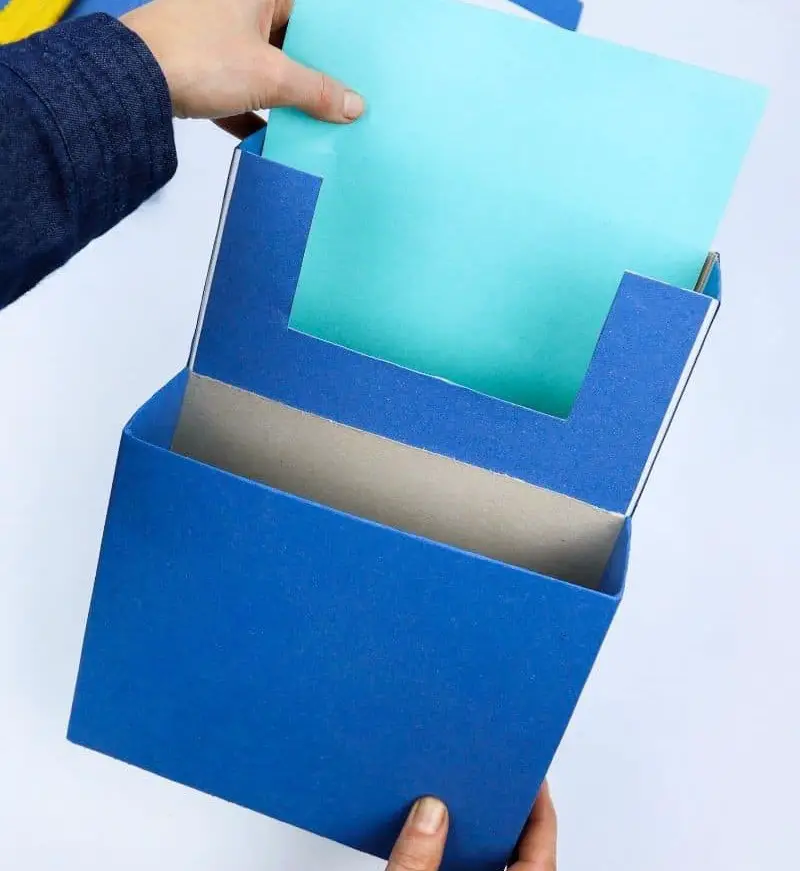
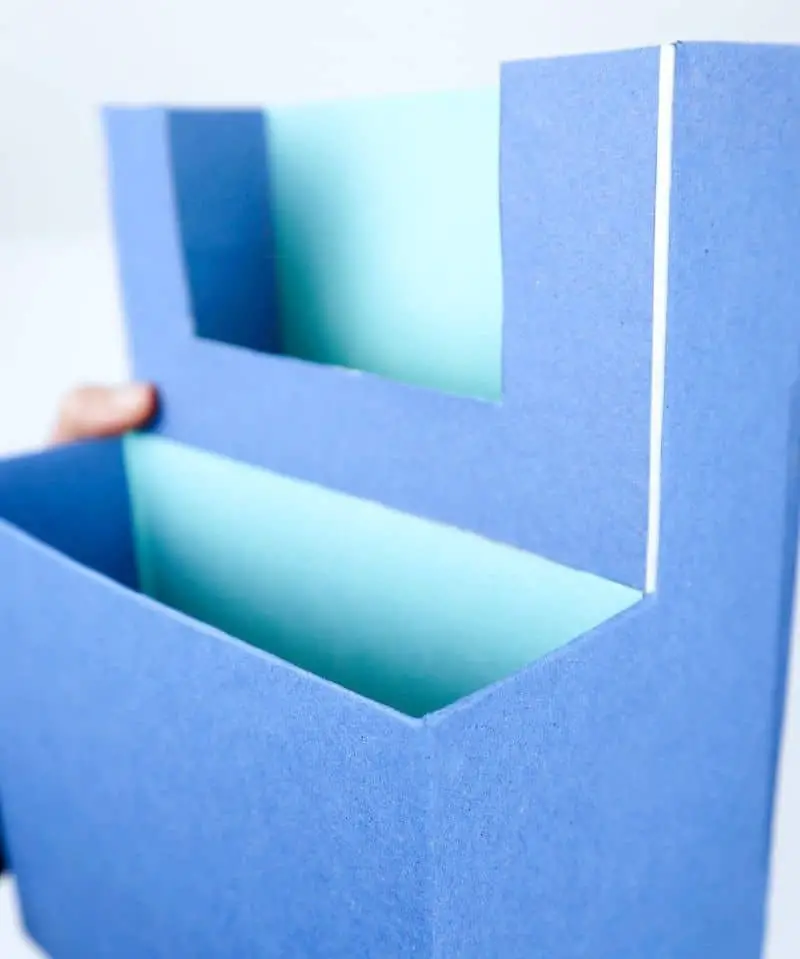
To complete the look, let’s move on to the internal components. A crucial step is lining the interior backs of both segments with a contrasting or lighter shade of paper. This will effectively camouflage any unsightly grey cereal box remnants. Simply apply the paper using your trusty tape, ensuring a seamless finish.
Step 12

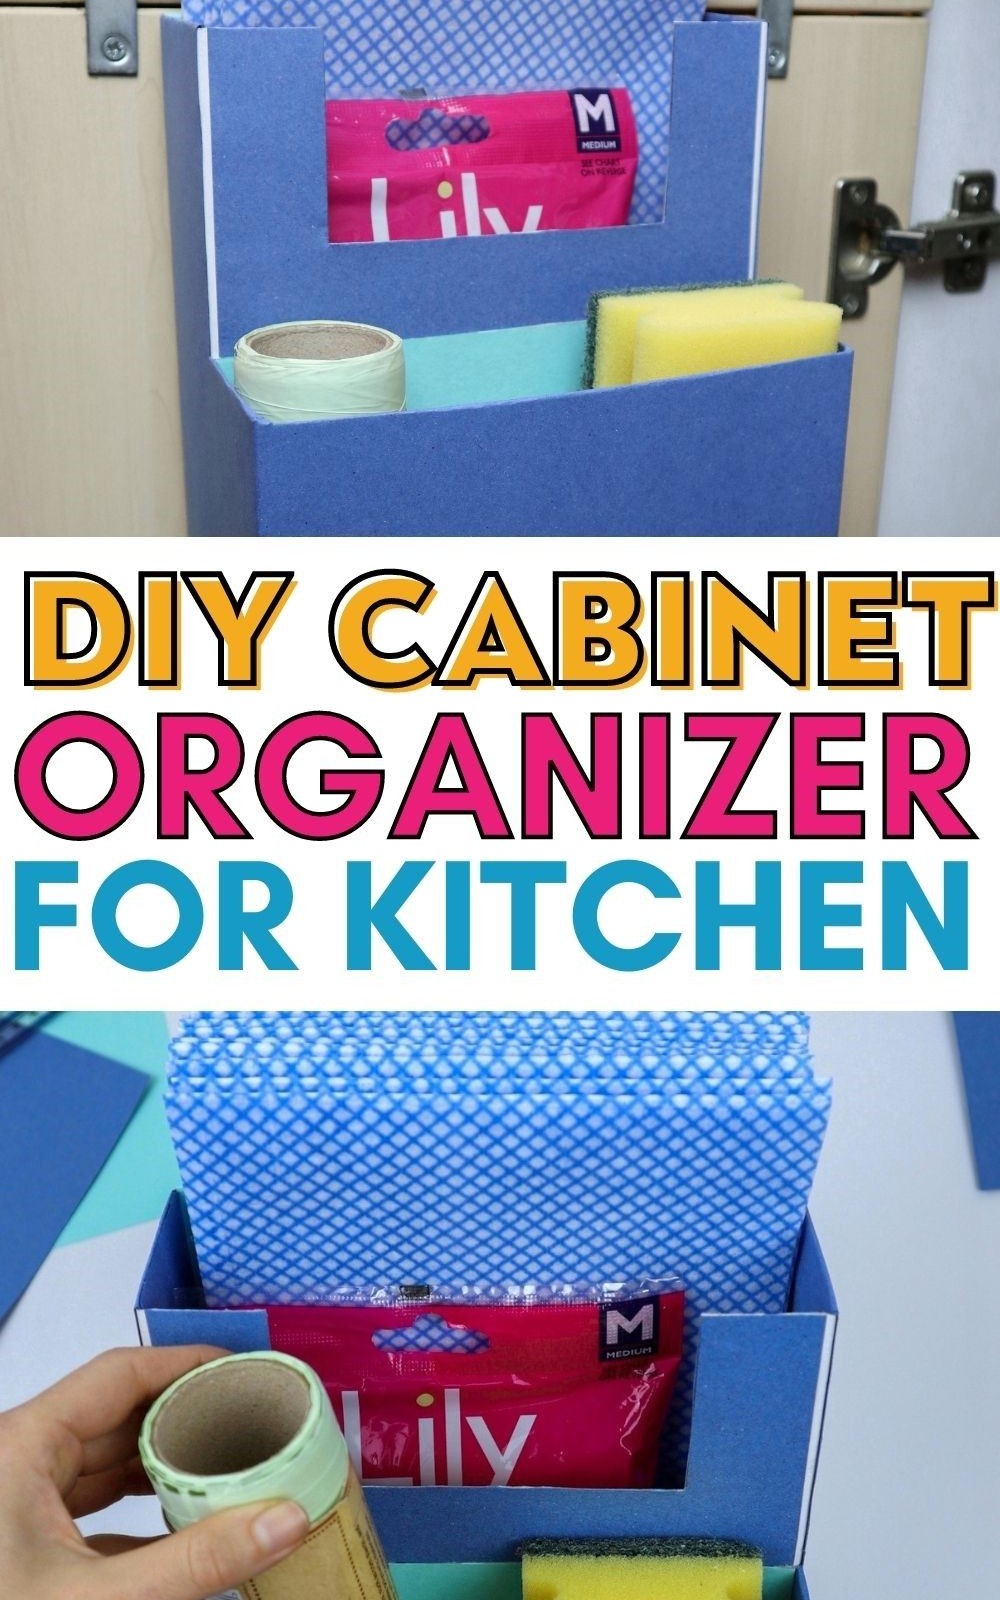
With the organizer now resembling a sturdy and functional piece, the final step involves installing it within the kitchen cabinet door. This allows for effortless access to often-used items while maintaining a tidy and organized space.
Step 13
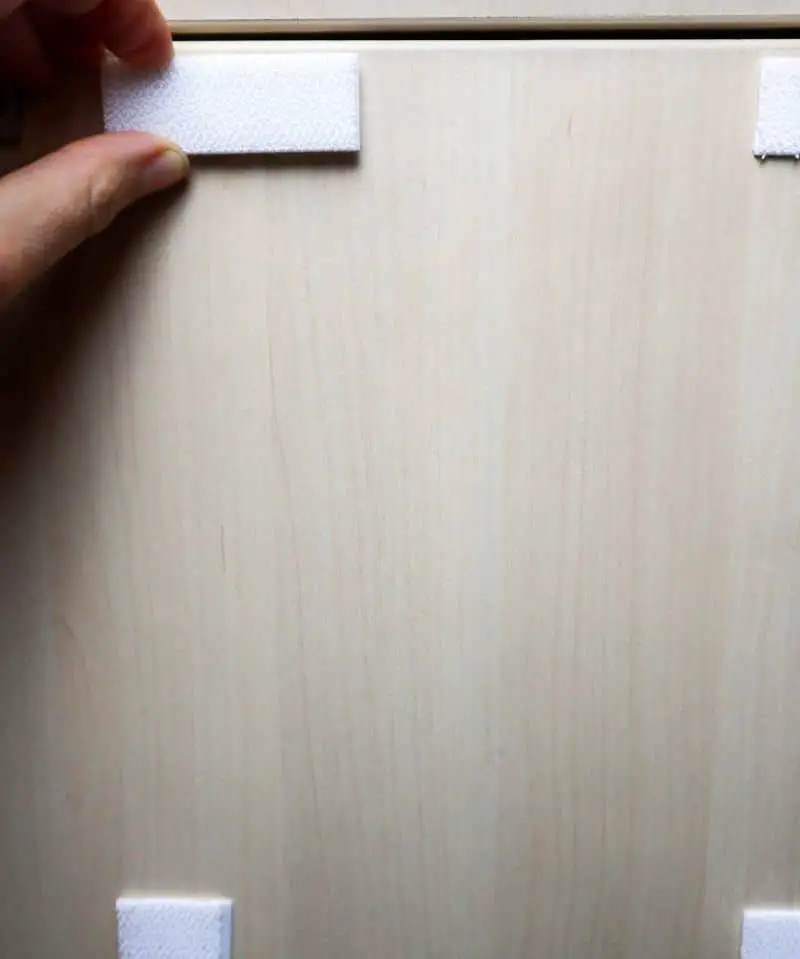
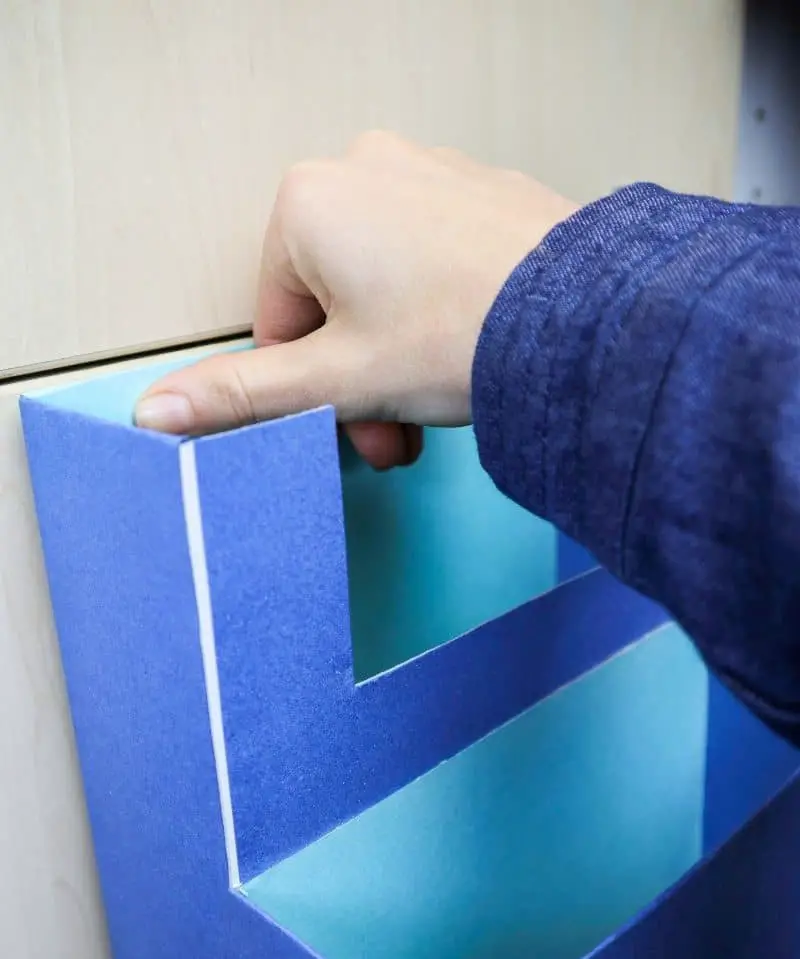
To ensure secure and level installation, I employed Velcro mounting strips to attach my organizer to the door. For added precision, I suggest lightly sketching the outline of your organizer onto the door with a pencil first. This will provide a reliable reference point for spacing your Velcro strips.
Step 14
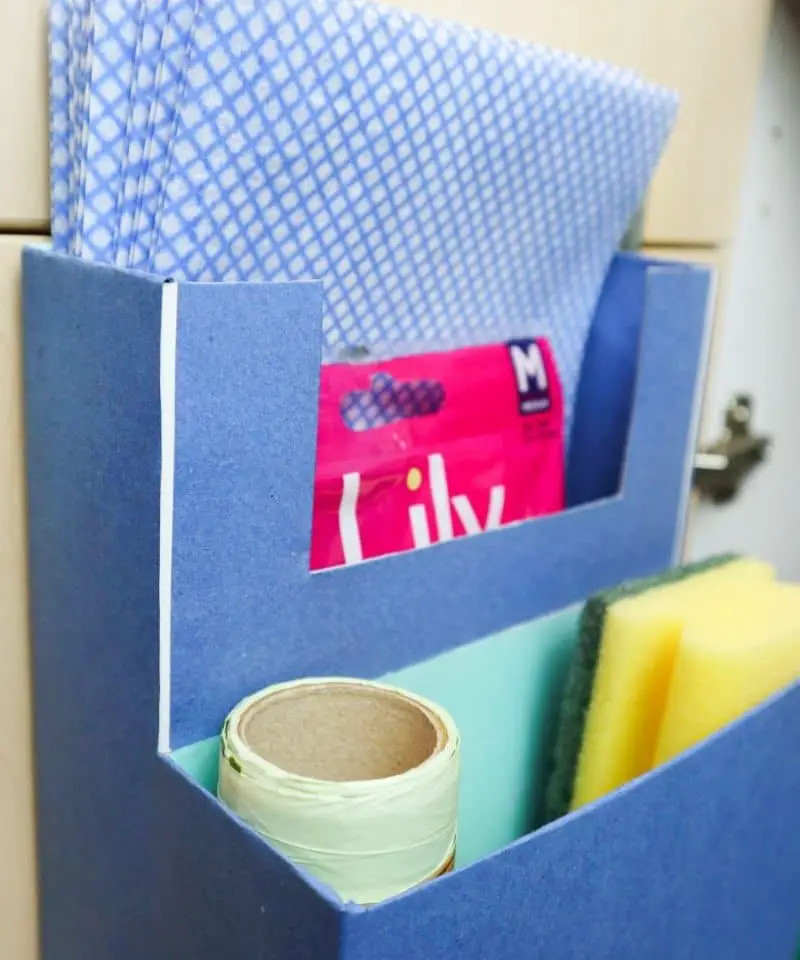
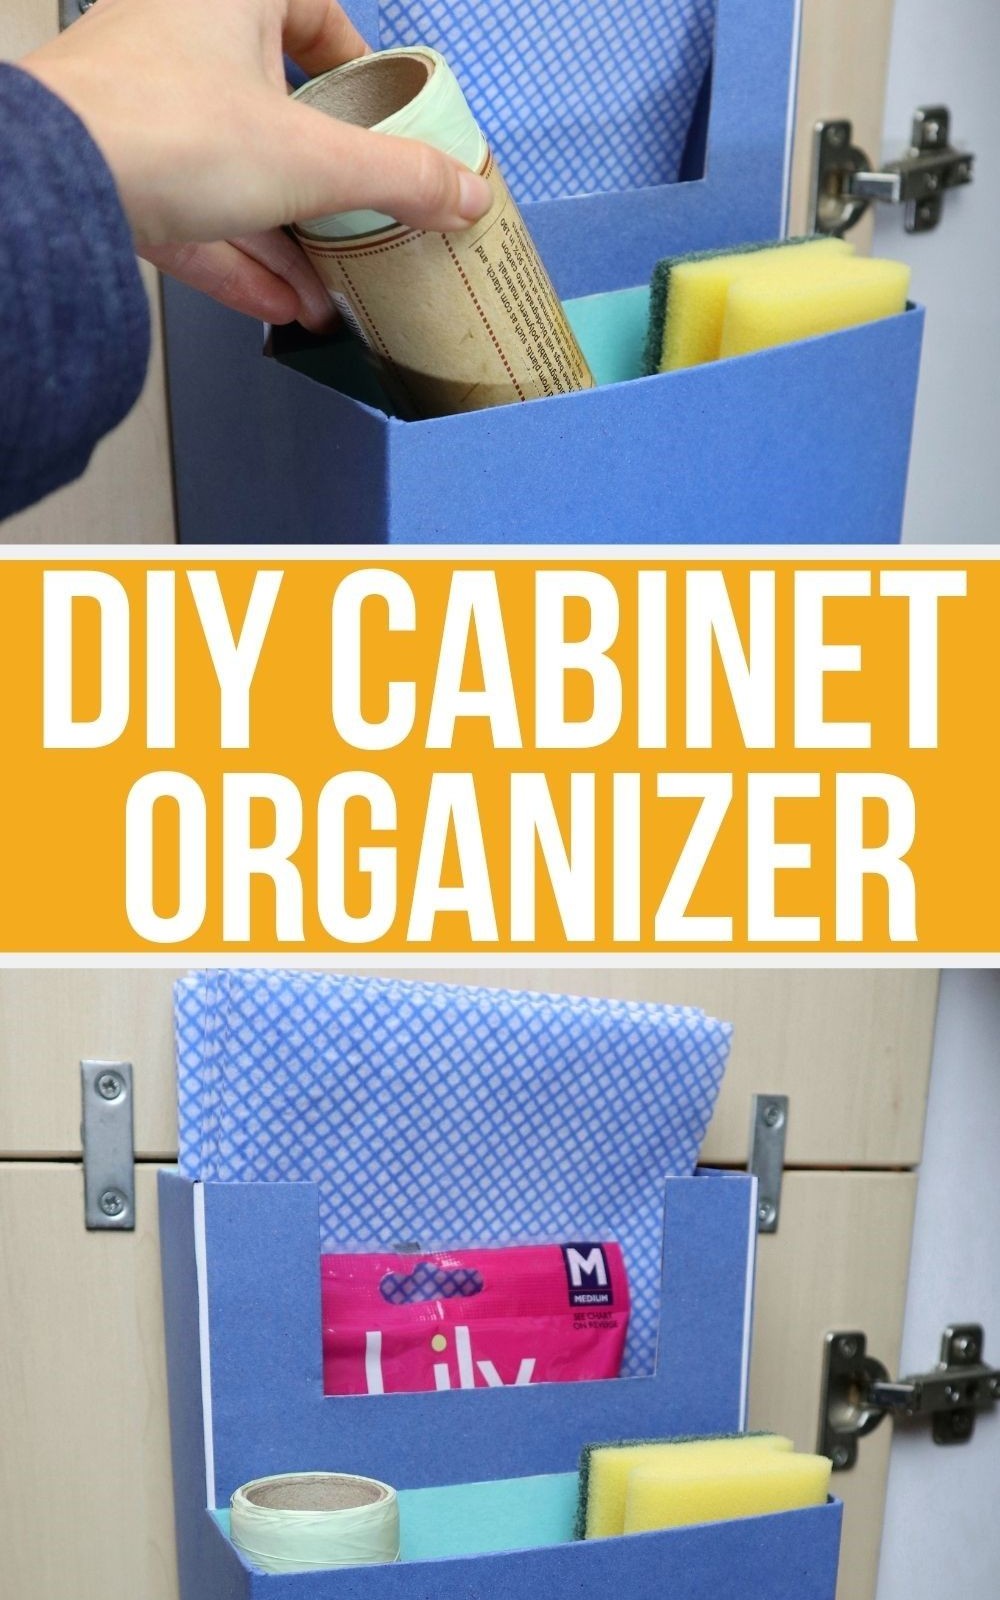
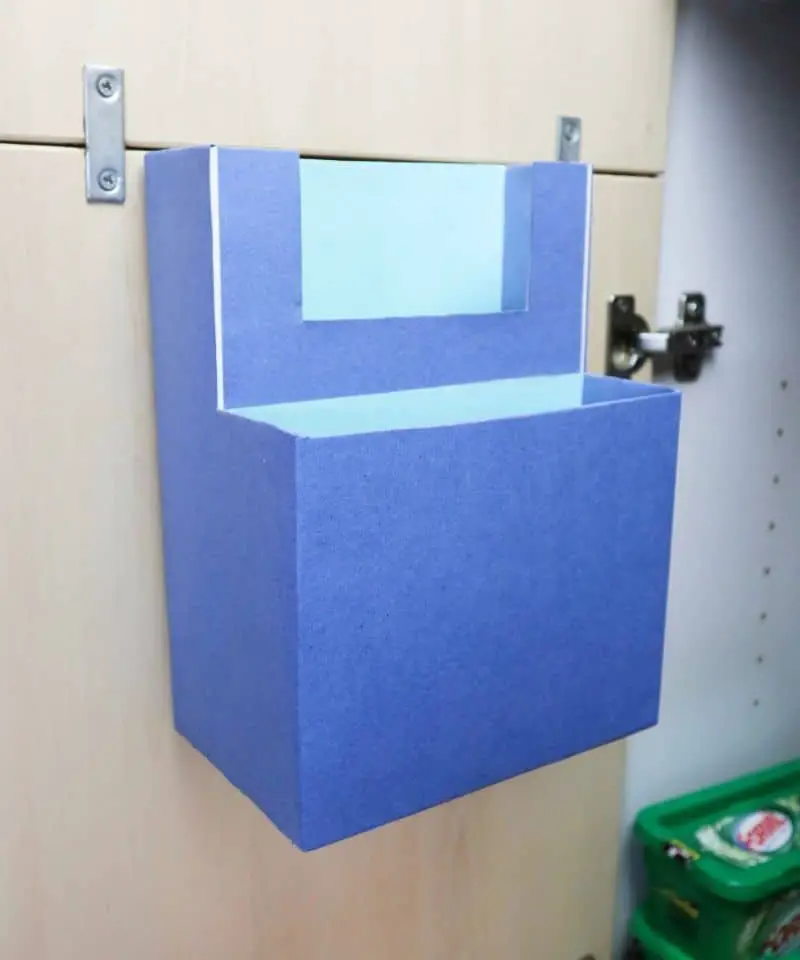
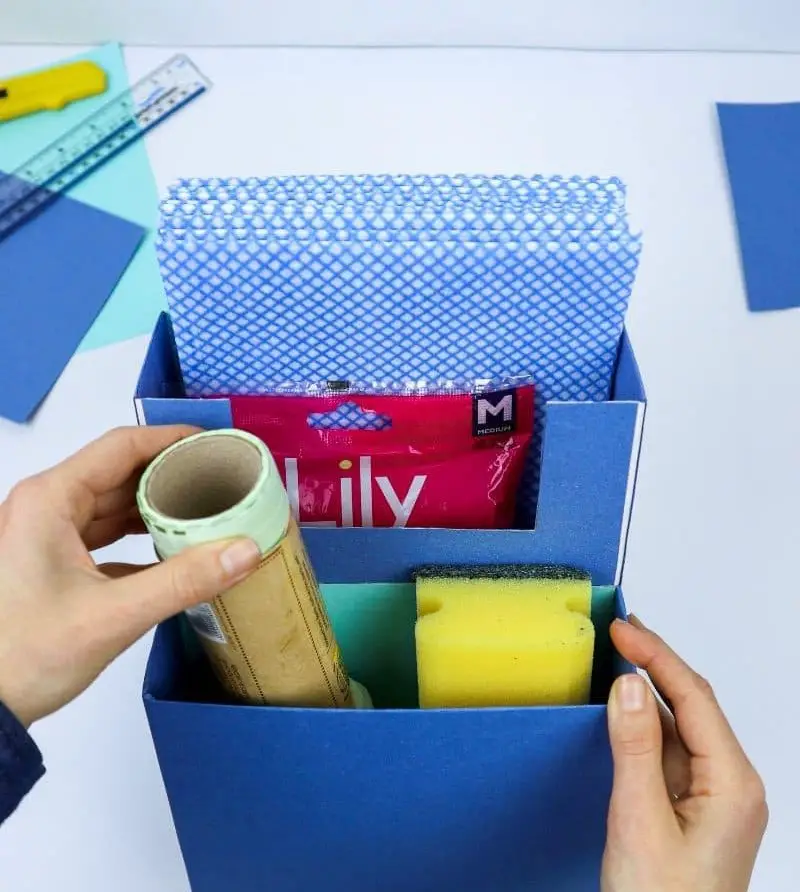
Here’s the culmination of our efforts – a bespoke kitchen organization solution that truly makes a difference in even the most space-constrained areas. Its tailored design ensures maximum functionality and efficiency, transforming what was once a cluttered and chaotic space into a harmonious hub for culinary creativity.
What to Store in This Under Sink Organizer?
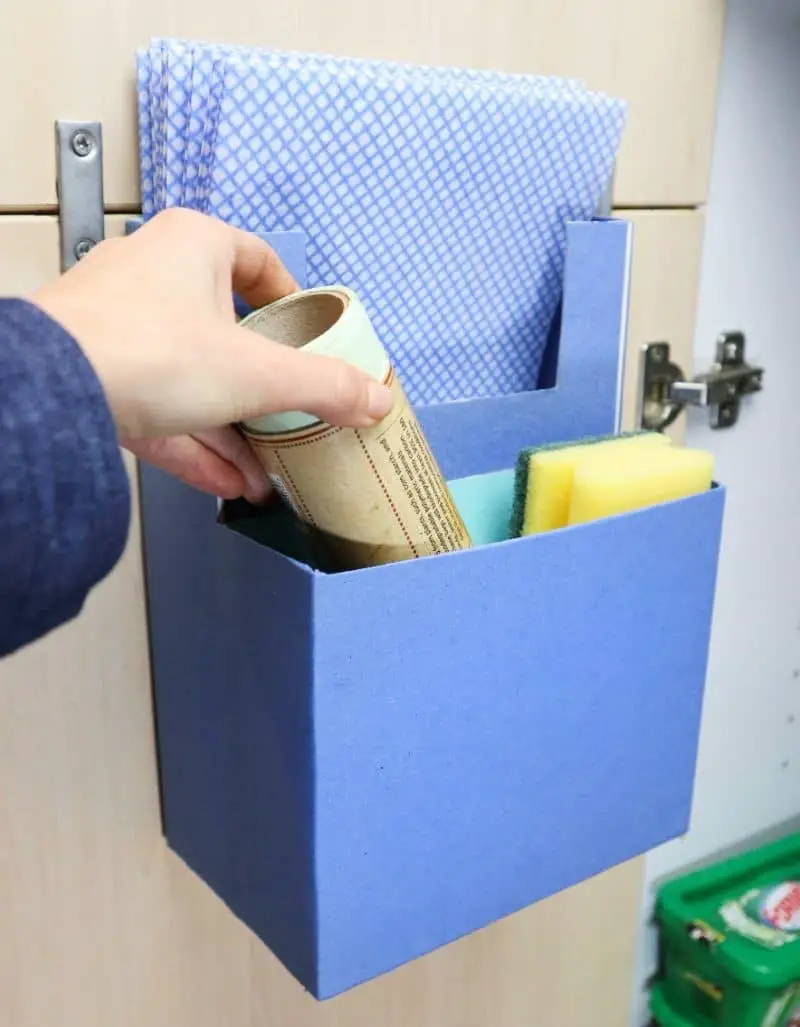
This versatile organizer is ideal for storing smaller cleaning essentials and miscellaneous items. Its compact design features individual slots for holding sponges, dishrags, garbage bags, scrub brushes, and other lightweight items. You can hang it in your pantry to corral dry goods or mount it on the fridge for a convenient spot to stash mail, bills, and other household documents.
When using this organizer in a pantry setting, be mindful of its limitations and avoid storing wet objects within, as they may cause damage over time.
Organize Kitchen Cabinet Without Shelves

Transforming the often-overlooked under-sink area into a tidy haven is a breeze! By repurposing old boxes or investing in affordable organizers, you can create customized storage solutions for even the most clutter-prone spaces. This hack is especially useful when dealing with limited shelf space. Simply multiply your organizers to accommodate various items and enjoy the satisfaction of having everything neatly organized.
For added stability, consider using reinforced adhesive strips or a sturdy mounting medium when storing heavier objects within your organizer. By doing so, you’ll be able to effortlessly retrieve what you need without having to rummage through a messy under-sink area. With this clever solution, the task of finding that elusive clean dishrag will become a thing of the past, and opening the cabinet door will no longer elicit a cringe.
DIY Cabinet Organizer for Kitchen
Transform old cardboard boxes into a practical DIY cabinet organizer for your kitchen. This creative solution not only boosts storage space but also reduces waste by reusing materials. To get started, allocate just 35 minutes of your time – 5 minutes of prep and 30 minutes to assemble the project. The end result? A functional organizer that costs mere dollars (only $1 in this case) and is ready for use.
Equipment
When it comes to crafting and DIY projects, having the right tools at your disposal can make all the difference. Among these essentials are materials that provide a secure bond, such as double-sided tape, glue, and Velcro self-adhesive strips. To ensure accuracy and precision, a ruler is also a must-have.
In addition to these fundamental supplies, it’s often helpful to have a trusty pencil on hand for jotting down notes or measurements, and a cutter for trimming and shaping materials to your desired specifications.
Materials
To get started, you’ll need a few basic supplies. Begin by gathering thick paper or wrapping paper to serve as the liner for your organizer’s inner compartment. You’ll also need two cereal boxes to provide structure and support for your organizer.
Instructions
To create an instant organizational system, start by gathering your materials. Then, cut two cereal boxes to form an open-top container, with one slightly shorter than the other. Next, cover the top of the taller box with your chosen paper using a reliable adhesive, such as glue. Once that’s done, attach the smaller box to the larger one using strong adhesive tape. After that, carefully craft a rectangular window in the taller box by drawing and cutting out the design.
To complete the exterior, wrap the remaining area (excluding the back) of the box with your primary color paper using more adhesive tape. For an added touch of contrast, line the interior back of the boxes with a different hue. Finally, secure the organizer in place using Velcro strips, which will provide a sturdy and adjustable hold. With these simple steps, you’ll have a functional and efficient organizational system up and running in no time.