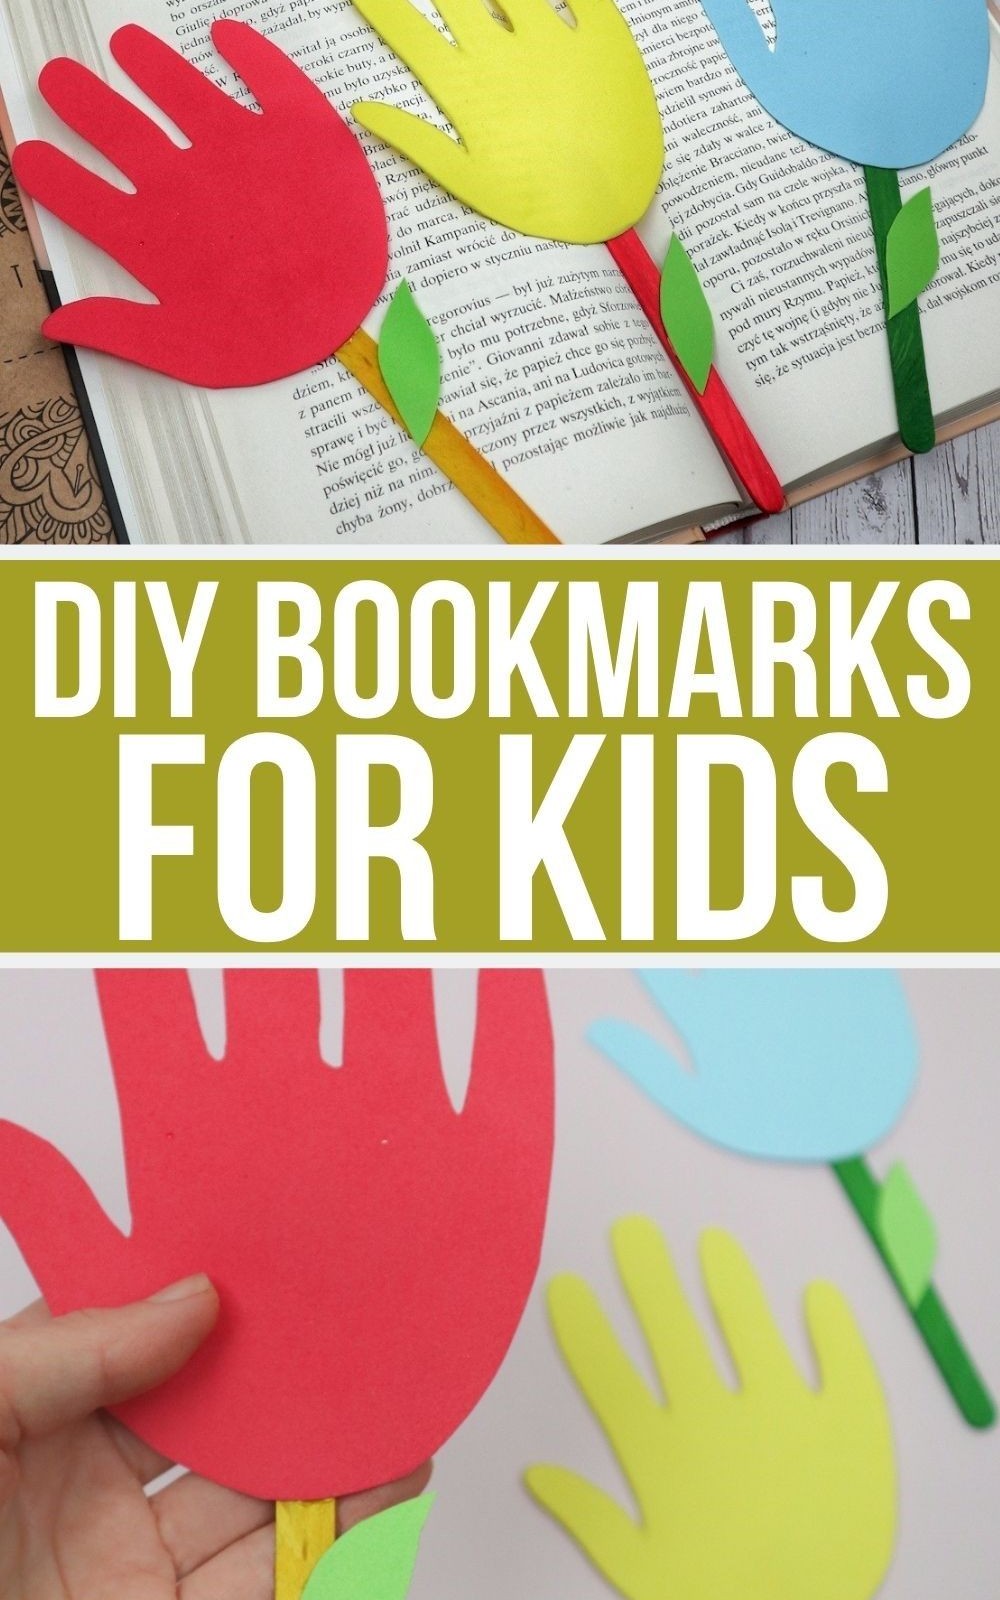
Engage your kids in reading by crafting DIY bookmarks that are both fun and functional. A simple yet effective way to encourage their love for books! Getting children to develop a passion for reading is a top priority for many parents, but it can be challenging when they’re not interested in the subject matter. Fear not, as there’s a solution to make reading more enjoyable for them. Bookmarks offer an excellent opportunity for kids to connect with their reading experience.
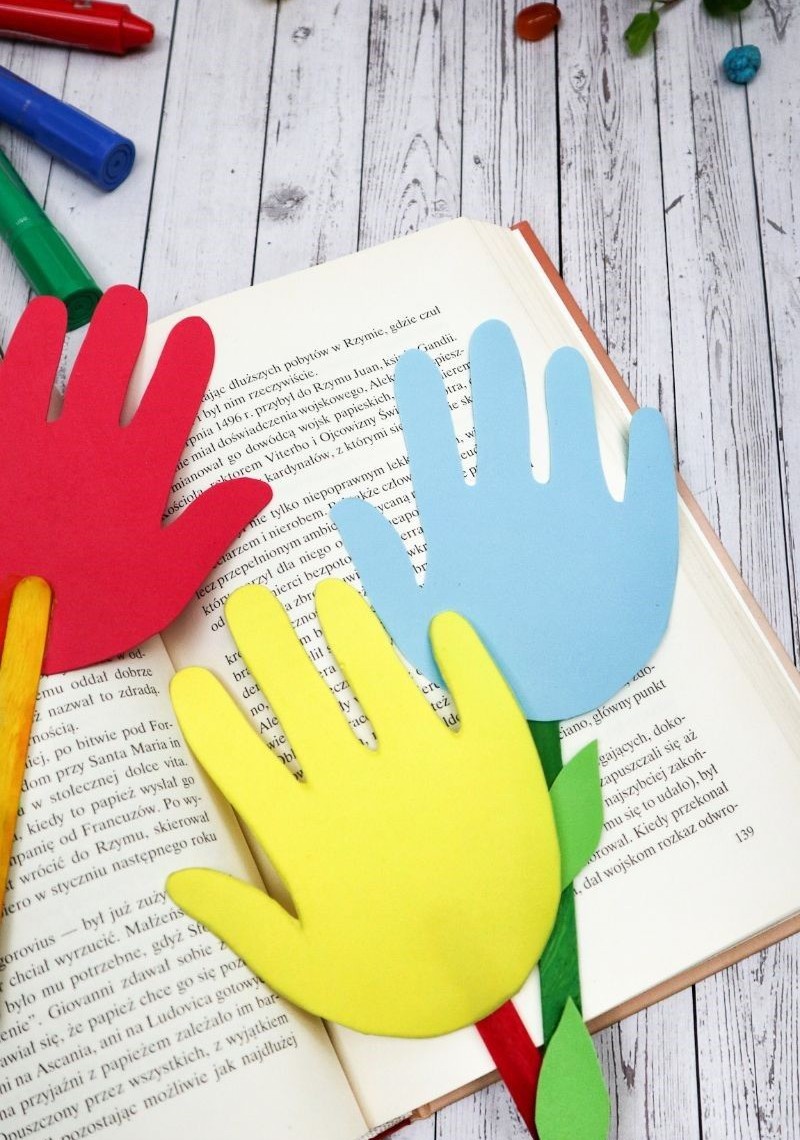
After you’ve finished making these DIY bookmarks, head to the library together to explore new books and discover new stories. These vibrant bookmarks are an absolute blast to create. Not only do they provide an incentive for your kids to pick up a book, but they’re also a fantastic way to spend quality time with them, creating memories that will last a lifetime.
As you make these together, consider the added bonus of having their handprint as a keepsake, providing a nostalgic reminder of their younger years. So, gather your colored paper and popsicle sticks, and let’s get started on this fun project!
Supplies You’ll Need for These Bookmarks
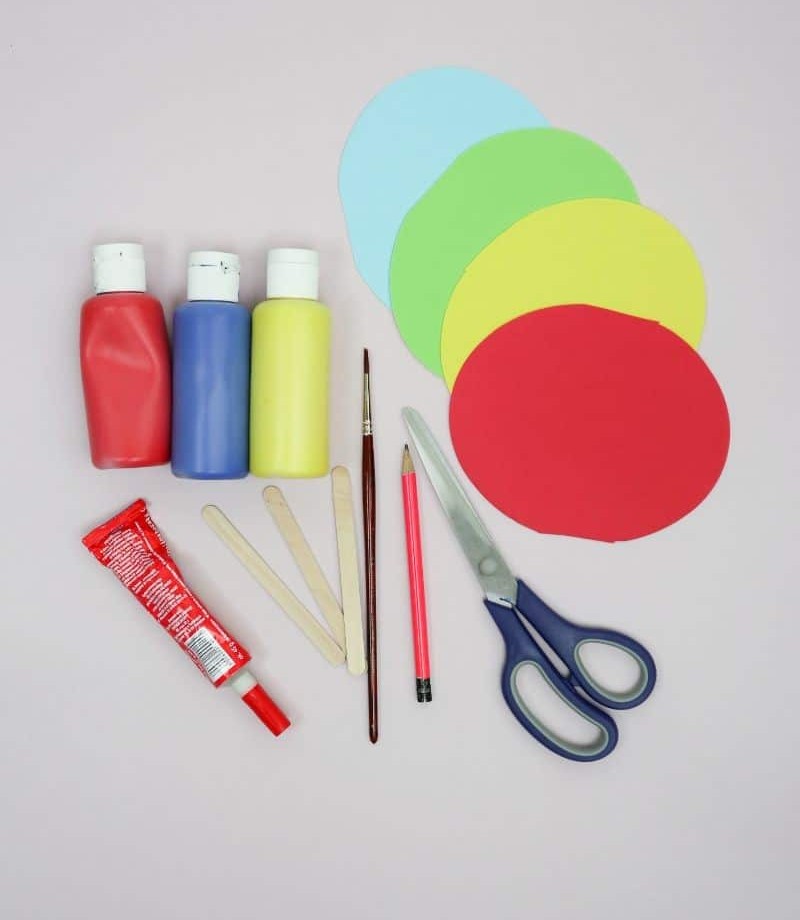
When it comes to unleashing creativity, having the right tools can make all the difference. For a fun and imaginative project, consider gathering an assortment of colorful papers in various textures and hues. To add some dimensionality, bring along scissors that can precision-cut shapes and designs. For precision and fine details, no pencils will do – instead, opt for high-quality writing instruments that deliver rich, bold lines.
Wooden sticks can provide a natural, earthy element to your project, while paints of your choice offer endless possibilities for color and texture. Finally, glue and paintbrushes are essential for bringing all the elements together in a cohesive and visually appealing way.
How to Make Bookmarks for Kids
To create these unique and personalized bookmarks, follow along with our step-by-step guide. What you’ll need to get started is a few simple materials, including cardstock or thick paper, scissors, a glue stick, and any embellishments you’d like to add, such as stamps, stickers, or ribbons.
Step 1
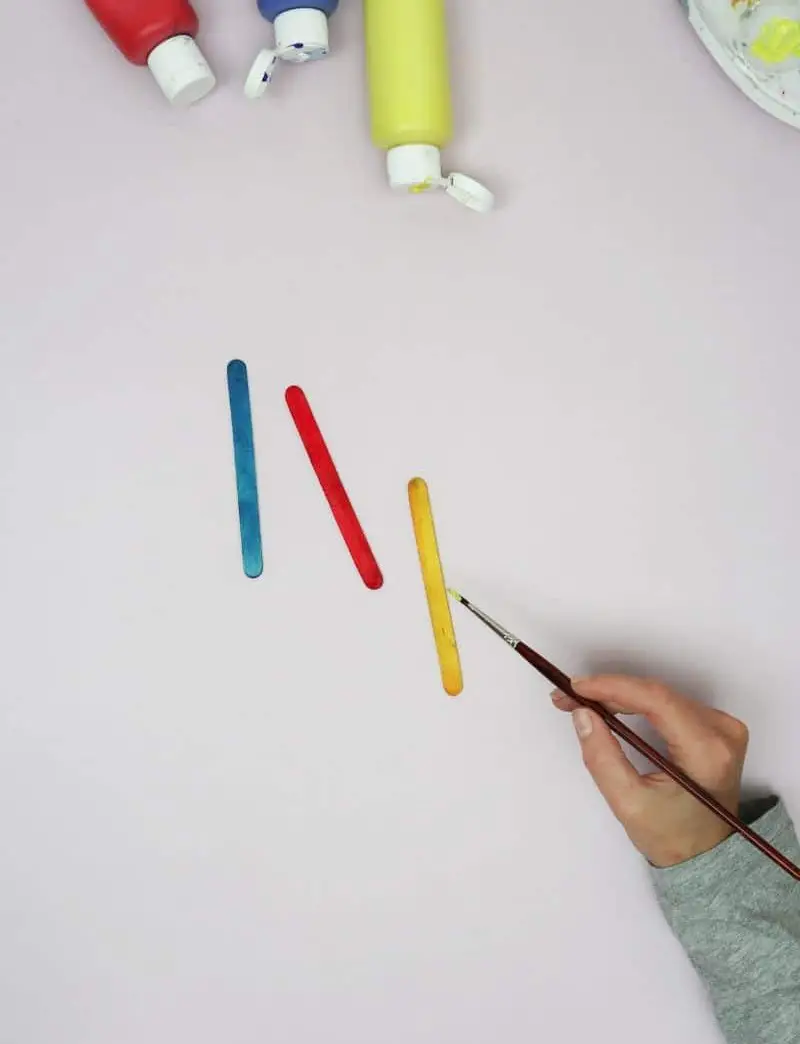
With your creative juices flowing, it’s time to get started on crafting those bookmarks. For a seamless experience, consider using double-sided tape instead of glue – it’s a great way to minimize mess. Don’t forget to have some non-toxic paint readily available as well.
When it comes to selecting the perfect paint for your project, I opted for poster paint due to its numerous benefits.
Not only does it come in large packs with an array of colors, making it ideal for kids, but it’s also incredibly easy to use and cleans up effortlessly.
Step 2
Unleash the creativity of your little ones by setting up an outdoor painting station! Grab some popsicle sticks and let them get messy, splattering paint everywhere. The sunshine will help bring out the vibrant colors as they work their artistic magic. Once they’re done, find a spot for them to dry in the sun – it’s almost like watching their masterpieces come to life!
Step 3
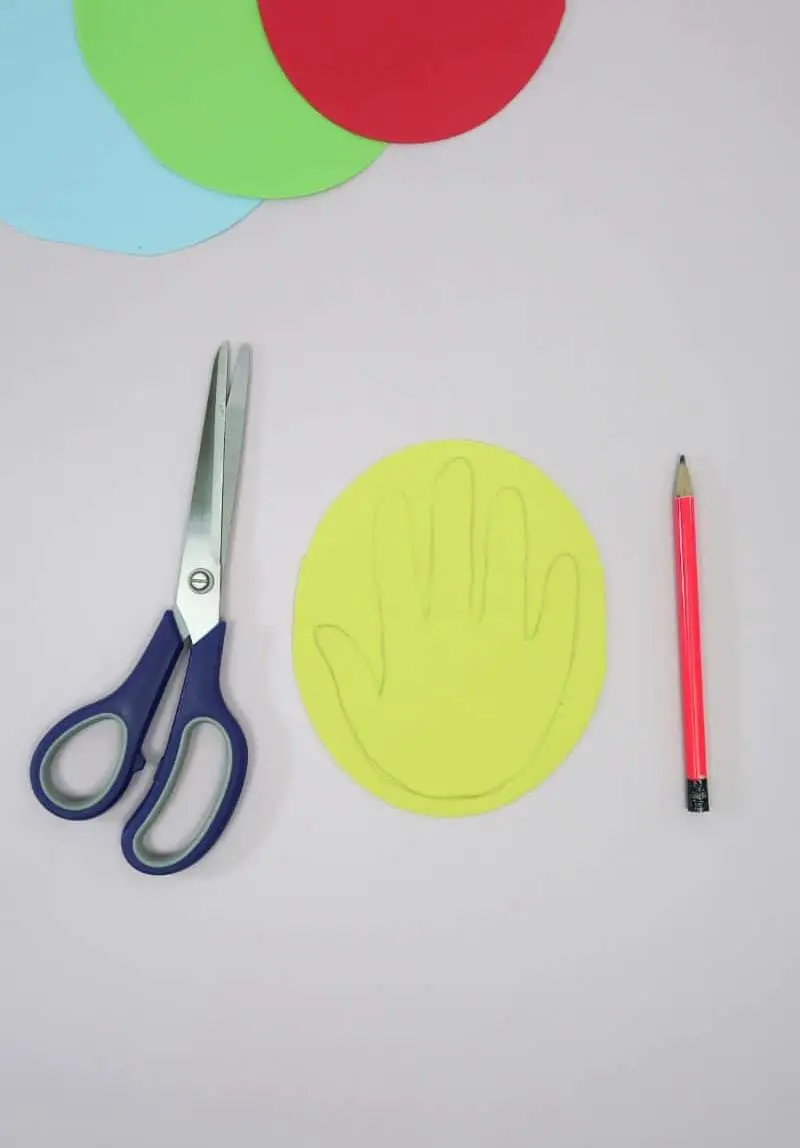
To commemorate this cherished moment, consider utilizing your child’s unique touch to make it even more personalized. Rather than relying on pre-made templates, try having them place their hand on a colored paper circle. Using a pencil, gently outline the shape of their hand, focusing on capturing the overall form rather than minute details. This method adds an extra layer of sentimental value to your creation.
Step 4
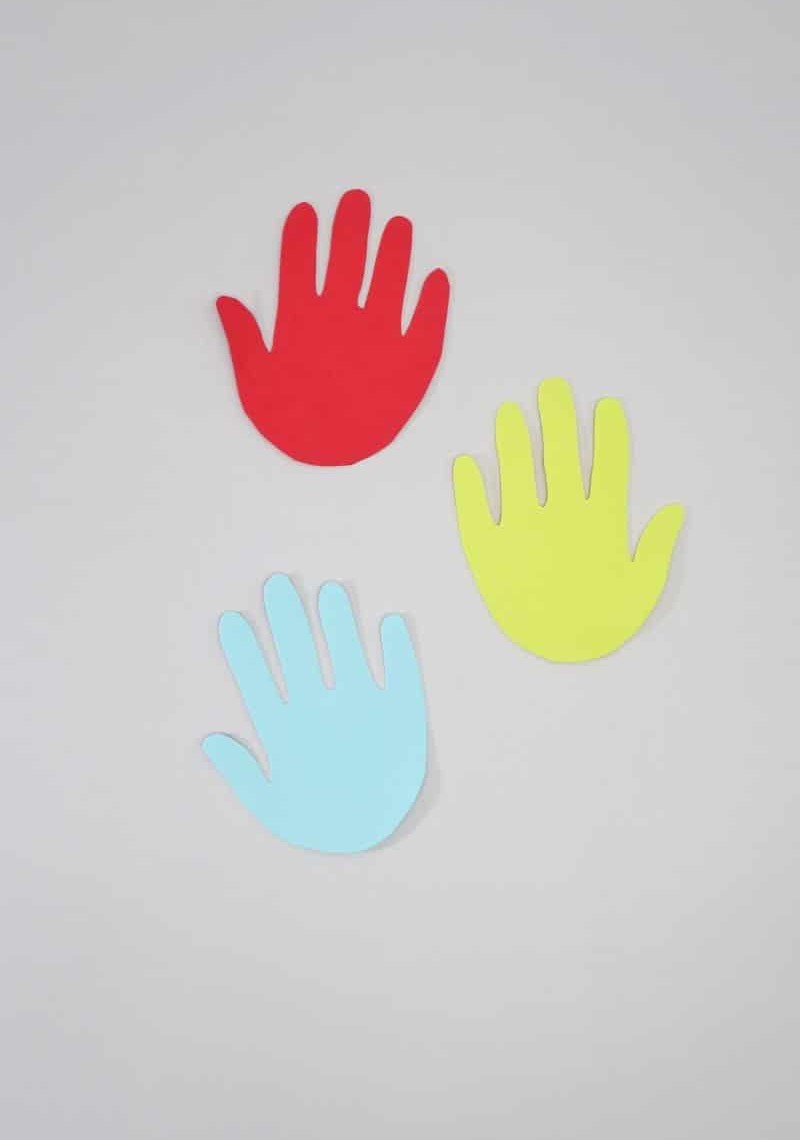
Feel free to get creative and craft multiple hands from the provided materials. While maintaining a straightforward 1:1 proportion of hands to popsicle sticks, you’re welcome to experiment and join two hands together using glue to create a unique, double-sided bookmark. The possibilities are endless, so let your imagination run wild!
Step 5
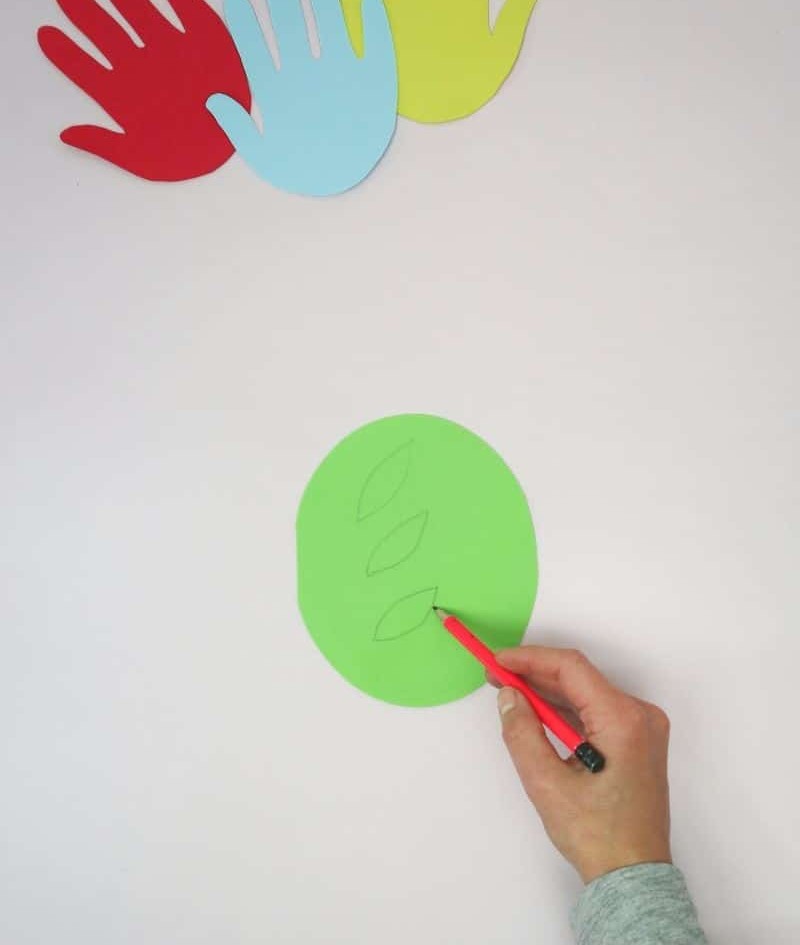
To add some foliage to our miniature tree creations, we’ll need to create some leaves! You or your kiddos can draw the leaves onto green construction paper before carefully cutting them out. If you’re looking for a more realistic touch, feel free to use a template to guide your design. Alternatively, simply sketching the fundamental shape of a leaf can also yield great results.
Step 6
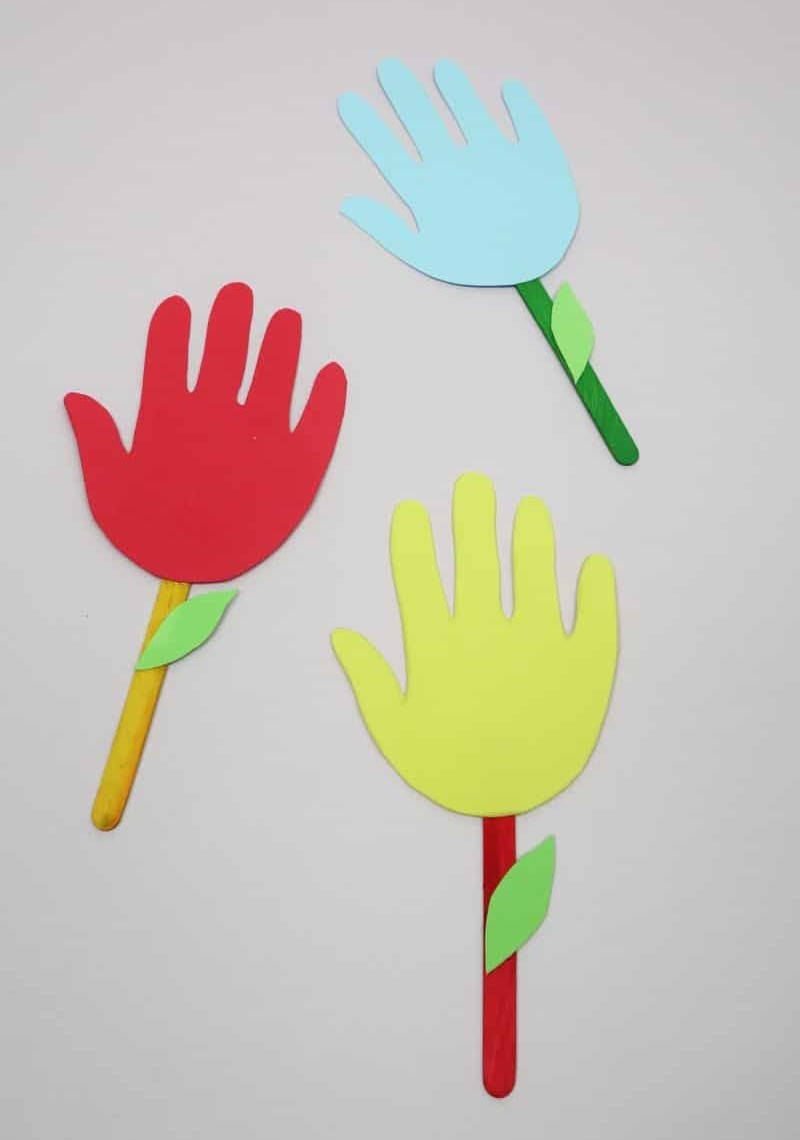
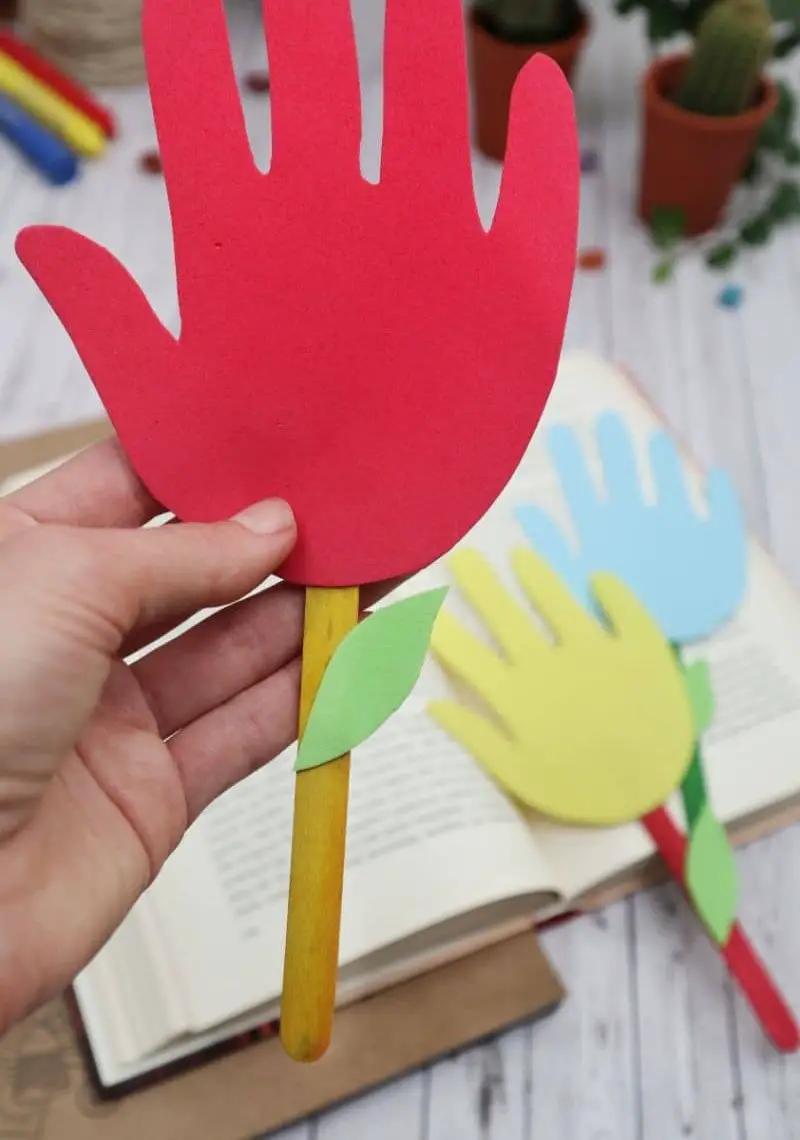
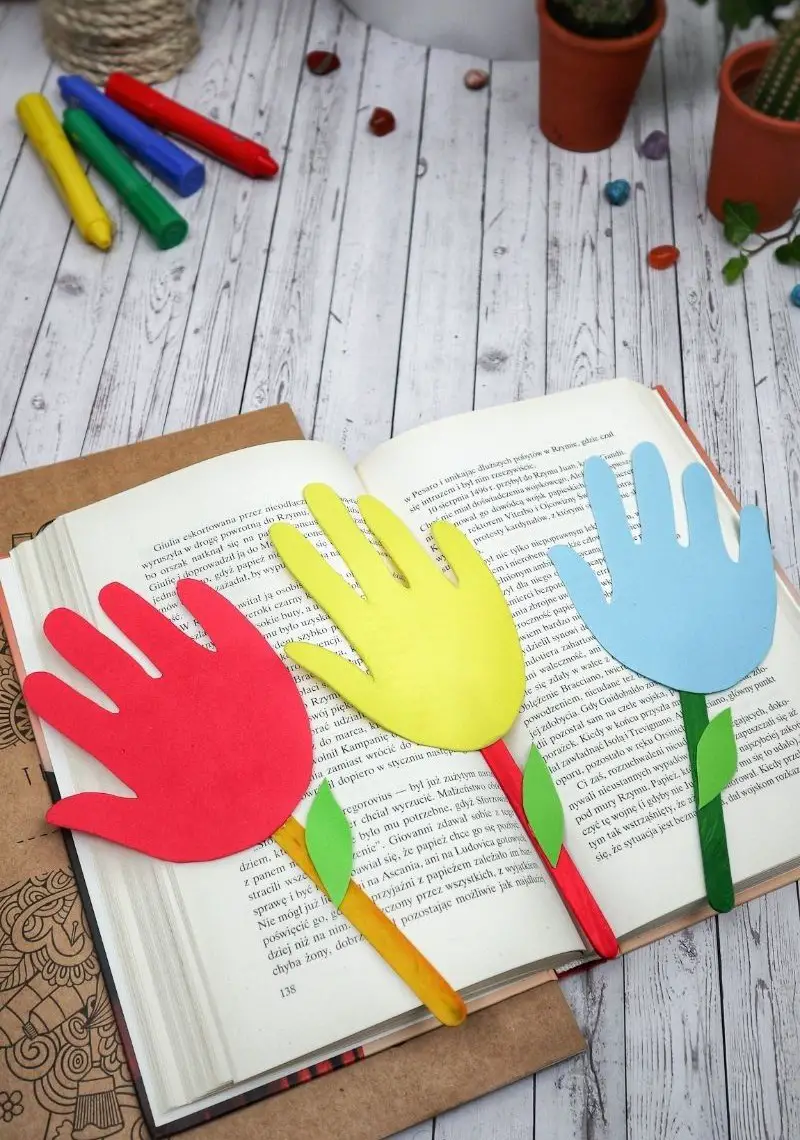
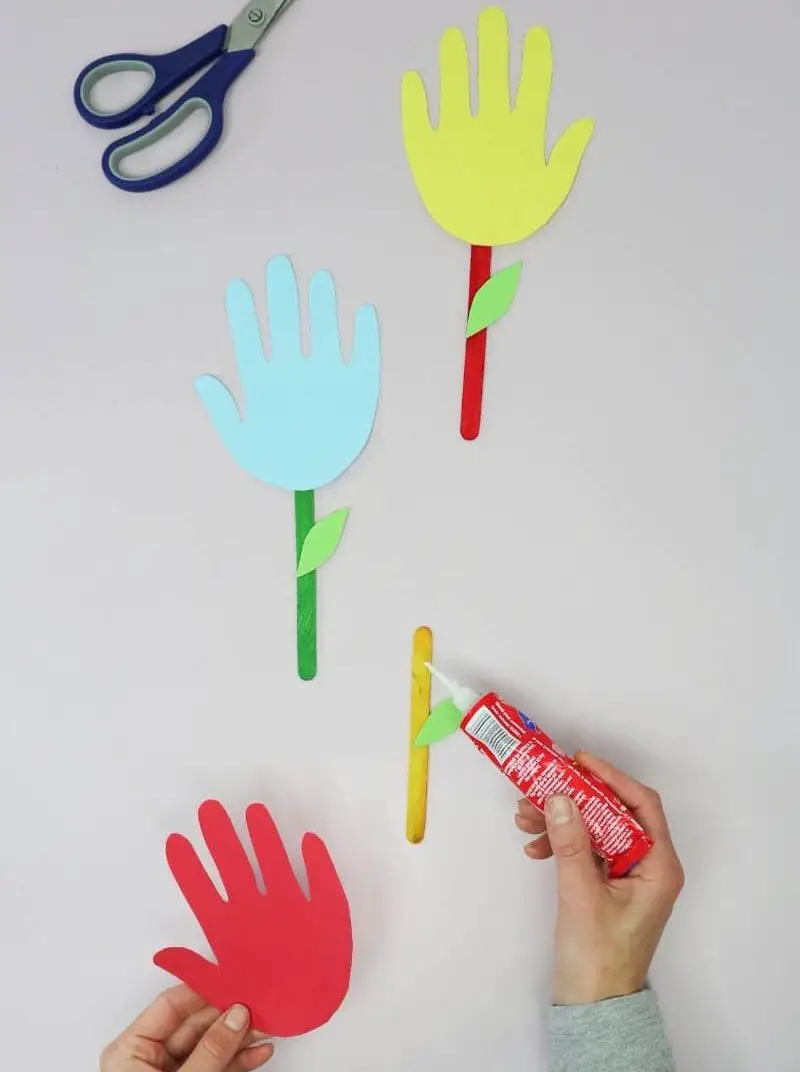
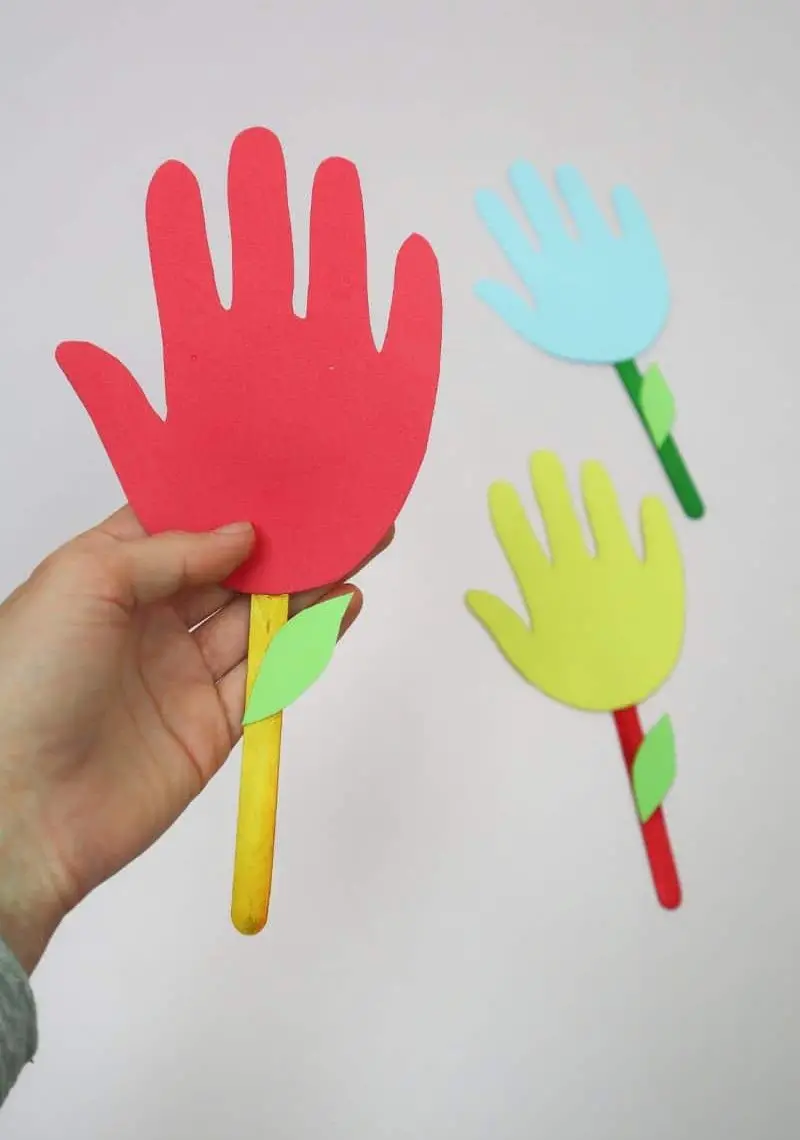
Assemble all your components by attaching the paper to the popsicle stick using a quick-drying tube of glue, or opt for adhesive tape or a hot glue gun if you prefer. Begin by sticking the hand shape onto the top of the popsicle stick, then add leaves (or multiple leaves) around the middle section. Once complete, your charming hand bookmark is ready! This simple yet effective craft is perfect for kids, making it an excellent choice for family-friendly activities.
For younger children, simply cut out the shapes and focus on assembly, ensuring a fun and stress-free experience.
What Kind of Paper is Used for Bookmarks?
When it comes to creating successful bookmarks, the type of paper used is crucial. A flimsy or thin paper won’t provide enough structure to keep the bookmark standing upright between book pages. For this reason, I prefer using cardstock or a similar thickness, ensuring the bookmark remains sturdy and intact over time. To take your bookmark design to the next level, consider incorporating colored paper for added visual appeal.
You can even cut out multiple shapes, rearrange them, and create a unique, color-blocked design that will make your bookmark truly eye-catching.
DIY Bookmarks for Kids
These handcrafted bookmarks are an enjoyable and educational activity for kids, perfect for fostering a love of learning through creative expression. With just 10 minutes of active time and a total project duration of 20 minutes, this craft is ideal for families or classrooms looking to encourage creativity and literacy skills. The best part? This fun and easy project can be completed at no cost, with materials valued at just $0.50.
Equipment
Materials
Instructions
Begin by gathering all necessary materials. When crafting with young children, consider simplifying the process by having them assemble the final product after preparing the individual components. Start by placing newspaper on a surface and painting the popsicle sticks in desired colors. Allow the paint to dry before proceeding. For added personalization, use your own hand or a digital template to draw a hand on colored paper. Cutting out the hand adds an extra layer of specialness for children.
Next, create leaves on green-colored paper using a similar method. Once complete, cut out the leaves. To assemble the bookmarks, choose from hot glue, tube glue, or adhesive tape to minimize mess. Position the hand cut-outs at the top of each popsicle stick and embellish with leaves. With this fun and easy project, you’ll be creating an adorable set of hand bookmarks that will surely captivate your children’s love for reading.