When you’re in need of an engaging activity for your 3-year-old, consider whipping up some fun crafts together! Crafting is a fantastic way to introduce little ones to various concepts like textures, colors, and shapes. Not only does it foster creativity and independent play, but it also helps develop their fine motor skills. The best part? These activities can captivate toddlers for hours on end.
If you’re looking for inspiration, here are 41 delightful crafts perfect for 3-year-olds that you can enjoy alongside them.
Fingerprint Glass Magnets
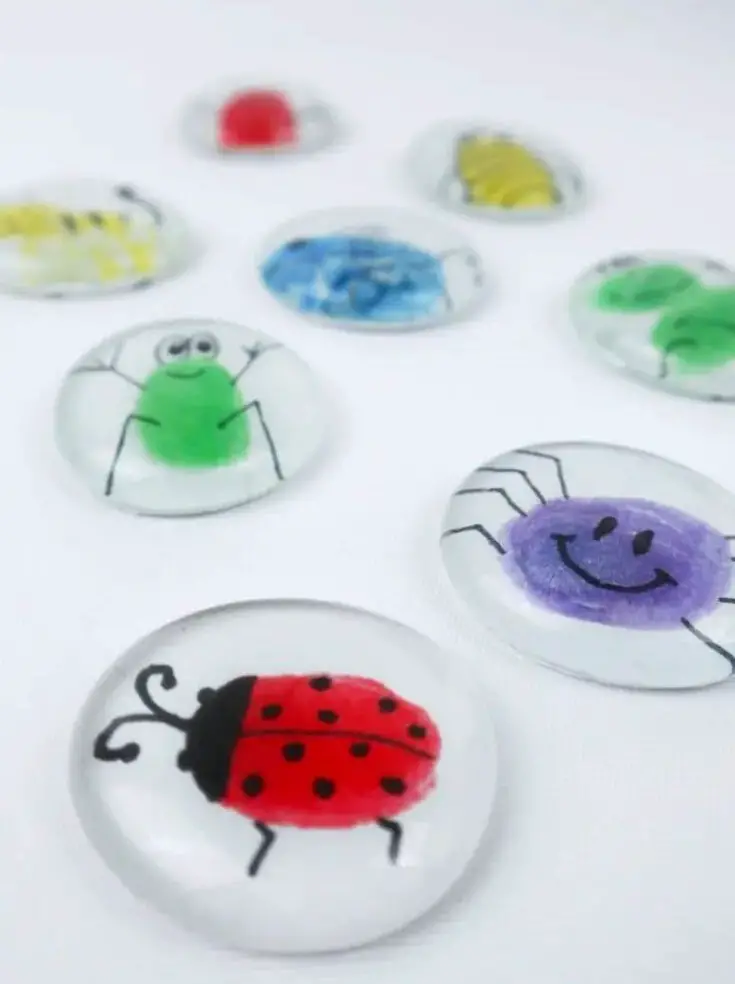
Is your fridge door cluttered with kids’ art? Here’s a fantastic way to preserve their masterpieces without sacrificing valuable space. Introduce Fingerprint Glass Magnets! These unique magnets are an excellent means of keeping cherished artwork close at hand while creating lasting memories of their early creative endeavors.
To create these personalized magnets, you’ll need a few basic supplies, including magnets and large glass cabochons.
If you’re new to the world of DIY projects, don’t worry – you can easily acquire your cabochons online.
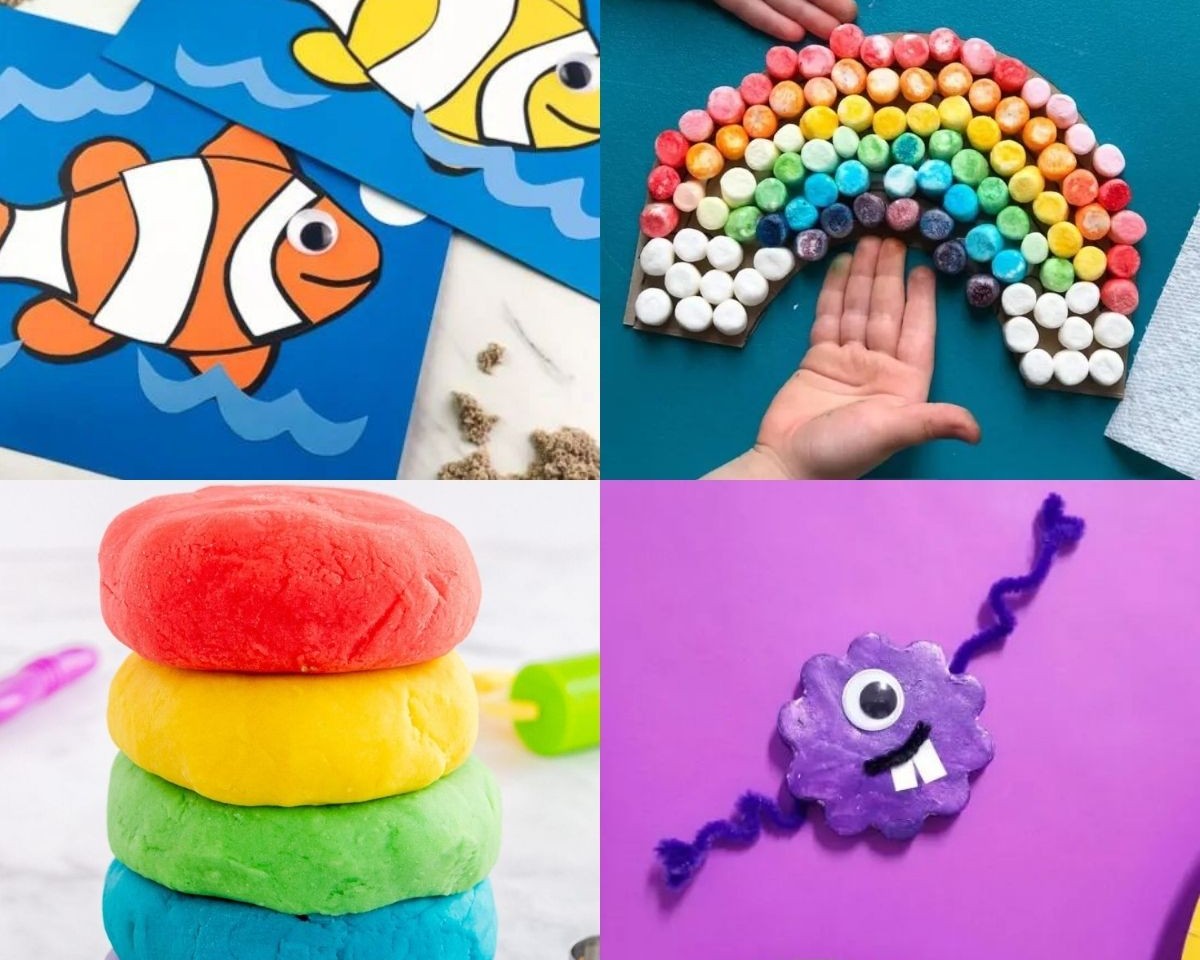
Rainbow Craft
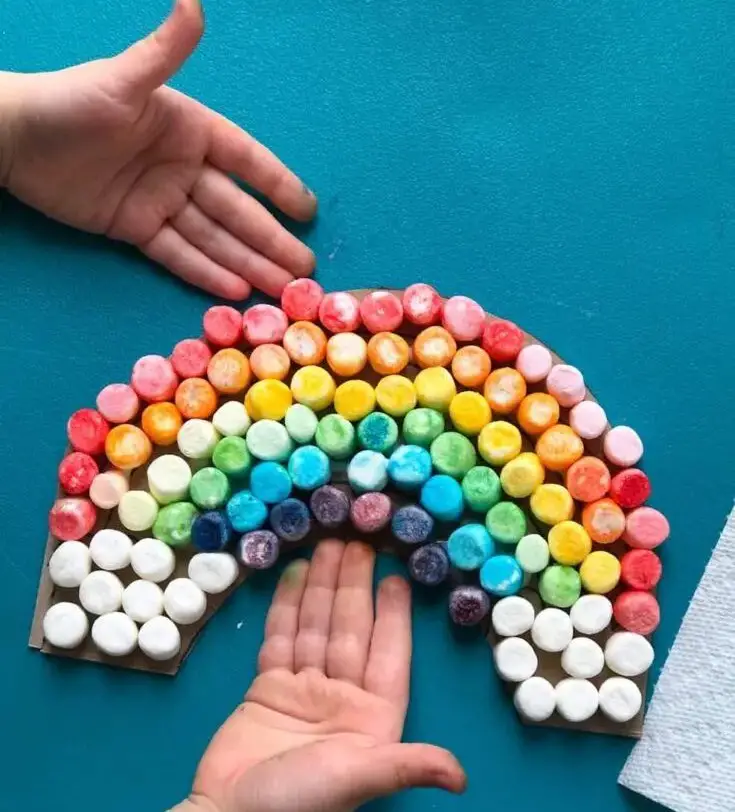
Kids learn colors with ease, but finding the right object to teach them can be a challenge. Preschool teachers often start with a rainbow, which makes it an excellent choice for a color teaching lesson and fun activity. Here’s a simple and engaging craft project that brings this concept to life: creating a colorful rainbow. To make it happen, you’ll need marshmallows, cardboard, a black marker, glue, and some optional food coloring to add an extra touch of creativity.
Begin by cutting out the cardboard into an arch shape and drawing the rainbow lines. Then, help your toddler stick the marshmallows, one color at a time, between the lines. This low-maintenance activity is perfect for little ones, requiring minimal supervision while still promoting learning and fun.
Fish Craft
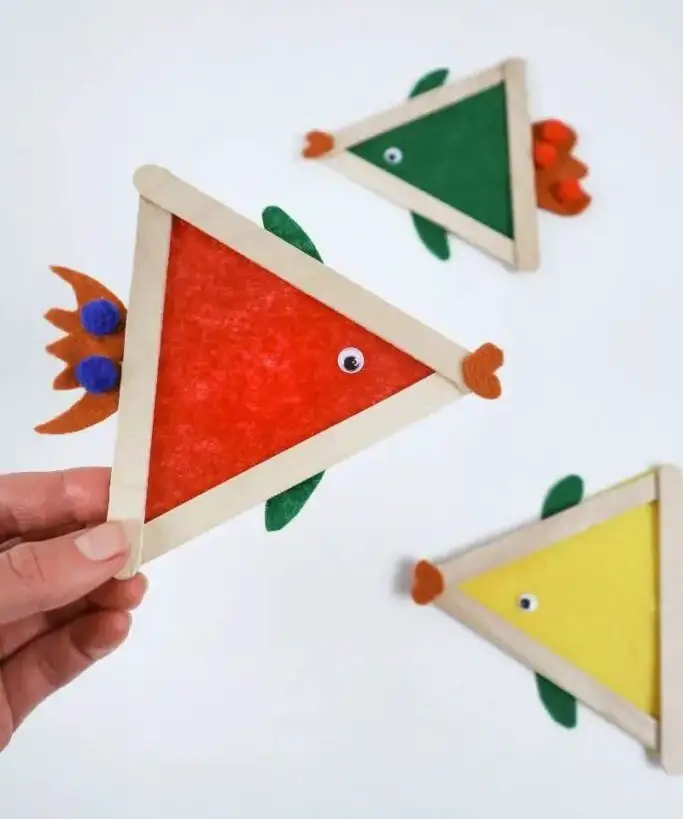
Transforming DIY craft projects into engaging learning experiences for kids is a great way to introduce them to the wonders of the underwater world. For instance, this fish art project is an excellent opportunity to teach children about the basic needs and habits of fishes, such as what they eat, how they breathe underwater, and how they adapt to their aquatic environment.
This creative endeavor is surprisingly easy to execute and can be adapted for a classroom setting or a fun summer project at home. To get started, you’ll need some popsicle sticks, colorful felt sheets (or colored paper sheets as an alternative), and a bottle of crafts glue.
Begin by forming a triangle with your popsicle sticks, then attach the cut-out felt or paper to create the fish’s body. You can add additional details such as fins, tail, mouth, and gills to make it more realistic.
With some imagination and creativity, kids will be able to learn about the underwater world while having fun making their own fish art project.
Tissue Paper Apple
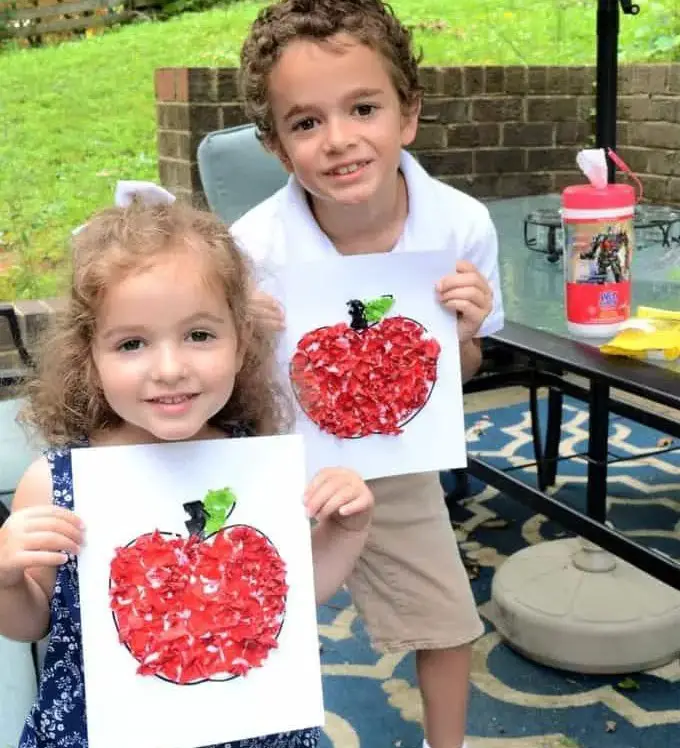
Tissue paper crafts are a treasure trove of creative possibilities for many reasons. Not only are they budget-friendly, as a single roll of tissue can yield a multitude of projects, but they’re also incredibly versatile. One of the most delightful examples is the humble Apple craft. To bring this project to life, you can either opt for pre-colored tissue paper or engage your little ones in a fun painting session.
For our part, we recommend using colored tissue paper to minimize mess and maximize creativity. Simply cut the tissue into small pieces and assist your toddler in adhering them to a pre-drawn apple template. And if you’re looking for more inspiration, be sure to explore our collection of tissue paper crafts.
Salt Dough

Salt dough is an ideal creative medium for kids, allowing them to craft a wide range of items, from ornaments to small trinkets suitable for toddlers. To create the dough itself, you’ll need just three ingredients: salt, flour, and water. For added visual appeal, consider incorporating acrylic paint, which can be ordered in various colors here. To take your creations to the next level, you’ll also require a few basic tools, including baking sheets, rolling pins, and cookie cutters.
You can acquire an assortment of cookie cutters specifically designed for salt dough ornaments here. While these tools may represent an initial investment, they will ultimately prove worthwhile as you continue exploring this DIY project’s creative possibilities.
Sun Catcher
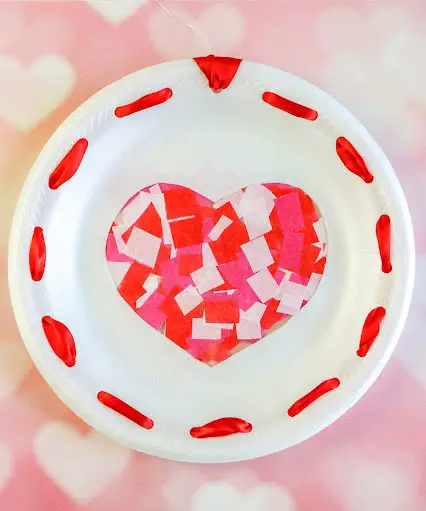
Create a delightful Suncatcher craft with little ones by hanging them in sunny windows and marveling at the vibrant colors reflected in the light. This simple yet charming project requires just a few basic materials: styrofoam plates, contact paper, and tissues. If you don’t have contact paper readily available, there are plenty of online retailers where you can easily order some.
To get started, cut a heart-shaped hole in your plate, then place the contact paper over the opening to create a backing for your tissue masterpiece. Next, shape your colorful tissue into a heart and secure it in place by applying another layer of contact paper. As you work, take pride in watching your design come together and enjoying the end result – a beautiful, one-of-a-kind Suncatcher that will brighten up any room.
Pasta Easter Egg Craft
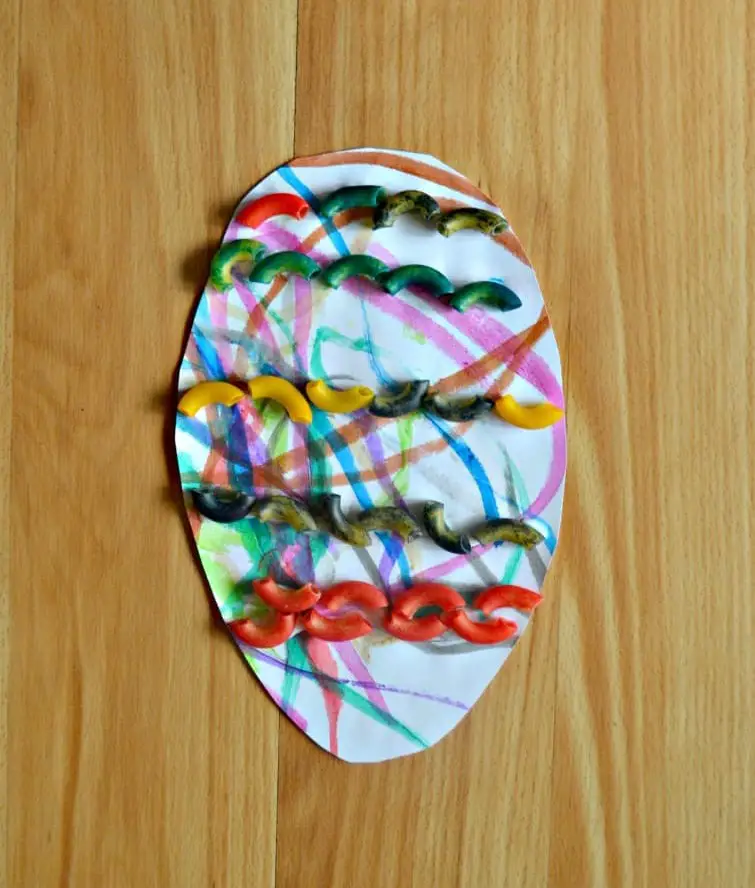
Why wait for Easter to indulge in the fun of decorating eggs? This unique pasta egg craft is a great way to keep the excitement alive year-round, especially for kids who love Easter eggs. The best part is that you likely have most of the necessary supplies already at home. If you’re running low on construction paper, you can easily pick some up from [link]. Once you’ve gathered all your materials, it’s time to get creative!
Have your kids draw an egg shape onto the construction paper, then give them glue and painted pasta to let their imagination run wild and design their favorite patterns.
Penguin Craft
Winter is the perfect time to get creative with your kids, and what better way to do so than with a delightful penguin craft? This activity is not only easy but also requires minimal supervision, making it ideal for little ones to express their creativity. To get started, gather the following materials: colored paper, cotton balls, and glue. Download the penguin template and cut out each part using the template as your guide.
Once all the parts are ready, have your kids assemble the penguin by sticking them together one by one. Finally, let them add some fluffy texture to their penguin’s belly with the cotton balls and then attach the white belly piece over the black body. This craft is a great way to spend quality time with your kids on a cozy winter evening. For more fun penguin crafts, check out our additional ideas.
Melted Crayon Art
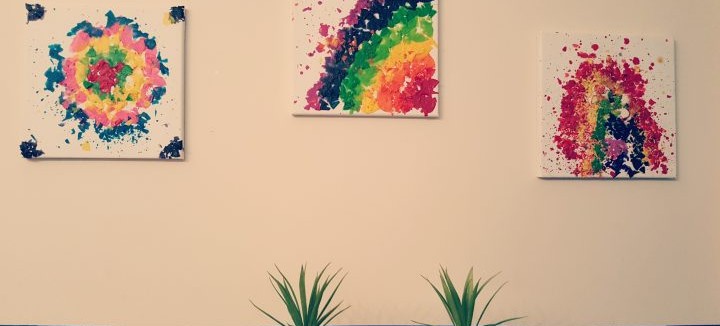
Toddlers thrive on hands-on activities, and this project is a perfect example. With minimal adult assistance, your little one can start and finish it independently. A gentle nudge from you will go a long way in helping them create a neat pile of crayon shavings. Once the colors are organized, they can begin bringing their artwork to life. You have two options: either let them create freely or draw an outline for them to fill with the colorful shavings.
The real fun begins when you set their masterpieces in the sun to melt. Your child will be delighted to check on their paintings every five minutes, watching as they transform before their eyes. This engaging craft is ideal for keeping your tiny tot occupied while you tackle those household chores.
Colour Wheel
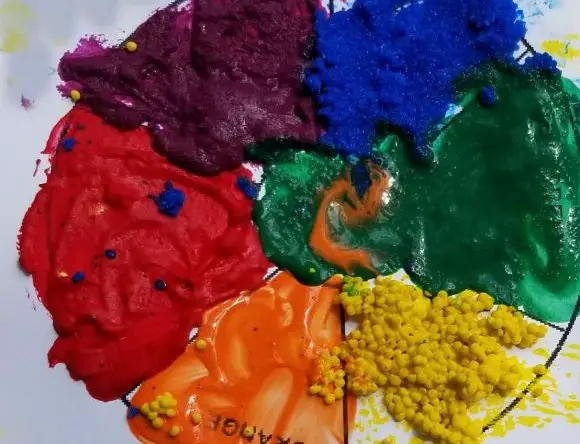
Let’s shake things up with a unique color wheel experience! This activity is perfect for teachers or parents looking to engage their little ones in a creative and educational way. By incorporating different textures into the paint, we’re not only teaching kids about colors but also introducing them to various sensations. To set this activity in motion, gather six colors, six bowls, and a variety of texture materials such as rice, flour, or couscous.
Use a blank color wheel template as your starting point, and get ready to watch your tiny artists bring their own twist to the classic color wheel concept.
Heart Printed Paper Bags

Transform the art of frugality into an exciting learning experience for your kids! With just a few simple materials, you can turn everyday objects into creative canvases. Start by collecting some brown paper bags – if you don’t have any on hand, you can easily order them online and repurpose them later as unique gift wrapping. Next, gather some empty toilet paper rolls and gently bend them into the shape of a heart.
Dip these mini-heart stampers in paint, then use them to create unique patterns and designs on your brown paper bags. Your kids will be thrilled with this fun and interactive painting activity that encourages creativity while promoting frugal living.
Magnet Craft
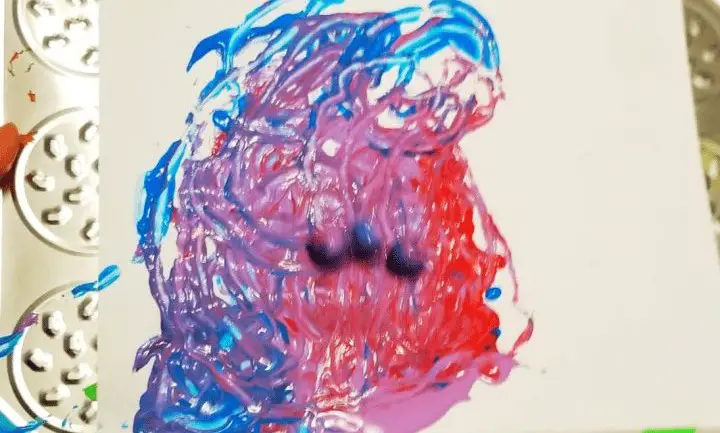
Unleash a creative storm with a unique fusion of paint and magnets! This interactive activity not only sparks imagination but also helps your little ones grasp the concept of magnetic forces. To get started, gather two magnets and some paint. Place your paper on a foil or tin tray, add a few blobs of paint, and then place the first magnet in the paint. As you slowly drag the second magnet under the tray, watch as the artistry emerges.
The mesmerizing dance of colors and magnetic forces will captivate both kids and adults alike, offering a perfect blend of entertainment and education. This activity not only introduces children to color mixing but also provides a fascinating hands-on experience with magnets, making it an excellent way to learn about science.
Spring Lamb Craft
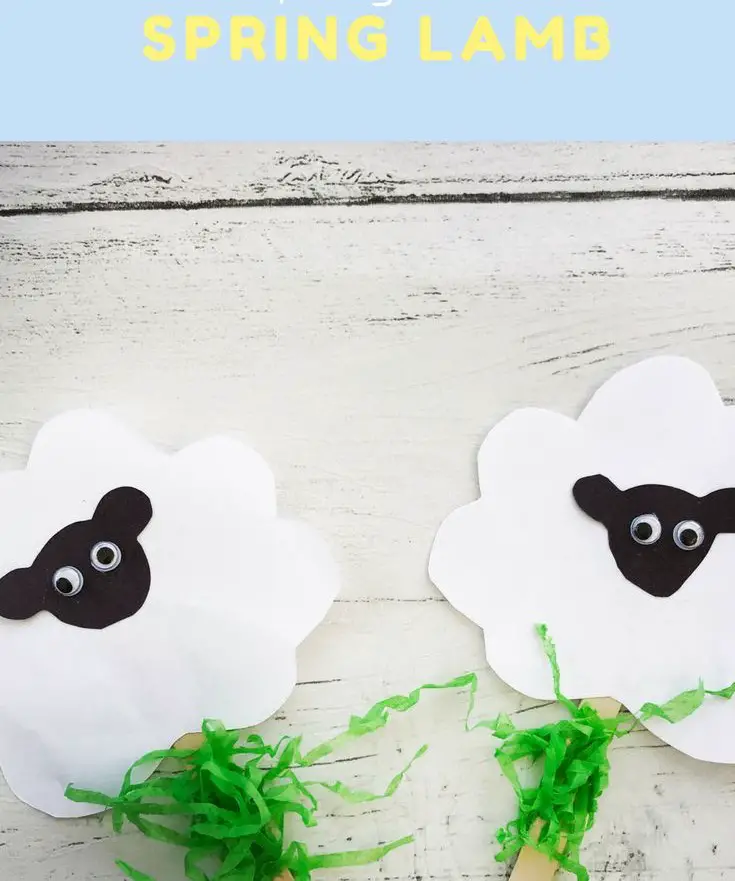
When it comes to crafting with kids, I’m always on the lookout for simple yet engaging projects that spark their creativity. One such project that has become a favorite among my little ones is this adorable sheep craft. What makes it so appealing? It’s incredibly easy and requires minimal supervision, making it perfect for young children. To get started, pre-cut the necessary pieces – the white body, black face, and any other details you’d like to add.
With the help of your mini-me’s, glue on some googly eyes (or order a pack online if you don’t have them already). These can be reused in future DIY projects, making it a great investment. Once all the pieces are ready, assemble the lamb by attaching it to a popsicle stick and adding a bit of green tissue or grass for a realistic farm setting. And just like that, your popsicle lamb is ready to graze on its new virtual farm.
The beauty of this project lies in its versatility – you can create an entire menagerie of farm animals using the same technique, making it perfect for storytime activities and imaginative play.
Carrot
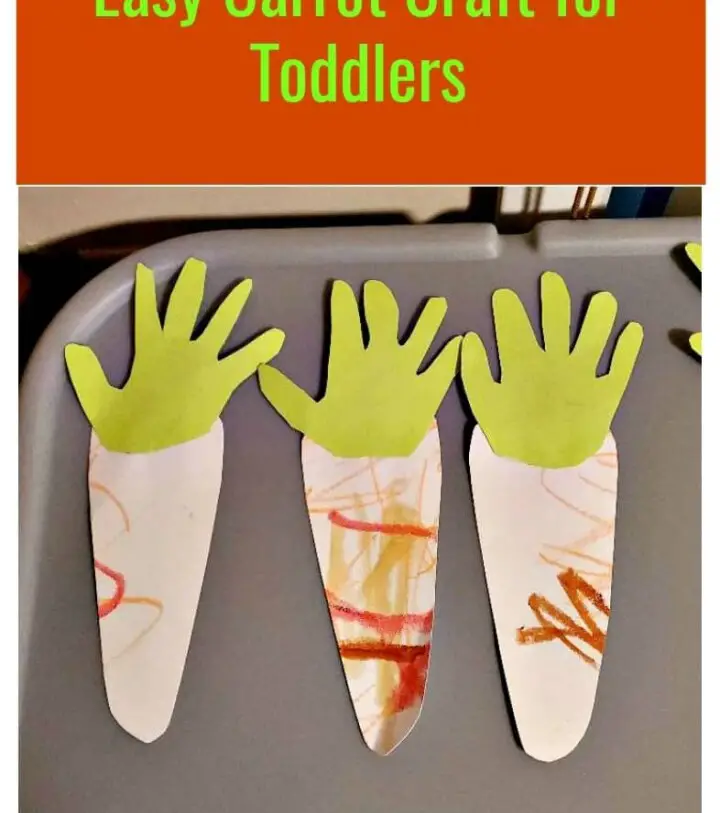
Handprint crafts have a special place in my heart, as they’re not only simple to create but also make for wonderful mementos. Among my favorites is this adorable carrot design, which requires minimal materials and effort. All you need are red and green construction paper and a little creative assistance from your toddler.
Begin by tracing the outline of your child’s hand on the green paper and set it aside. Next, create the shape of a carrot using the red paper, cutting out the desired form.
Then, simply glue the green handprint onto the red carrot, and voila! Your carrot handprint craft is complete.
Comet Craft Activity
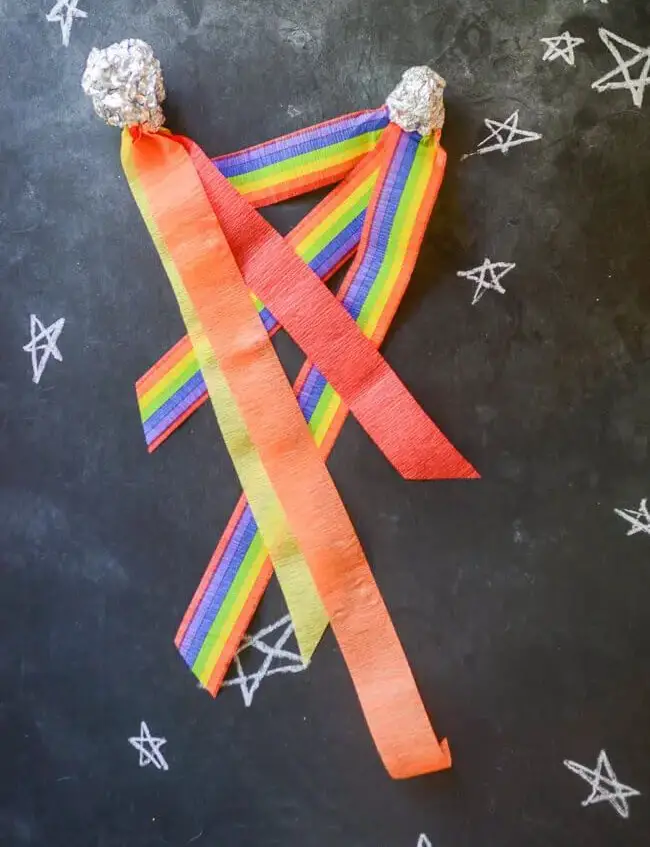
If you’re looking for a fun and engaging craft activity that requires minimal materials yet keeps your little ones busy for hours, look no further than the Comet Craft Activity! This simple yet effective project is perfect for young minds to work on independently, without needing adult supervision. To get started, gather just two essential components: pre-cut foil sheets and vibrant crepe paper strips.
Simply place a few strips in the middle of the foil sheet, then crumple the paper into a ball, trapping one end of the strips inside. You can either use the foil from your pantry or opt for the convenient pre-cut variety available online. Having pre-cut foil on hand saves time and effort, making it an excellent choice when working with multiple children.
Spoon Puppet
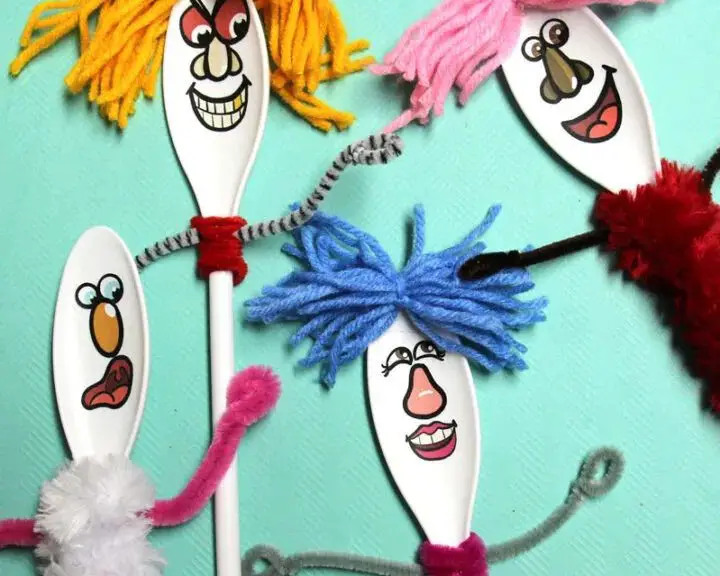
Creating magical spoon puppets is an effortless process that will keep your kids entertained for hours. With just three simple materials – spoons, a Sharpie, and face stickers – you can bring this delightful craft to life. You can either purchase face stickers online or create your own custom designs. To take it to the next level, your kids can add extra details using yarn and pom-poms. Once complete, they’ll be able to name their puppets and put on a thrilling puppet show with them.
This activity is sure to become an instant favorite among the kids.
Paper Plate Whale
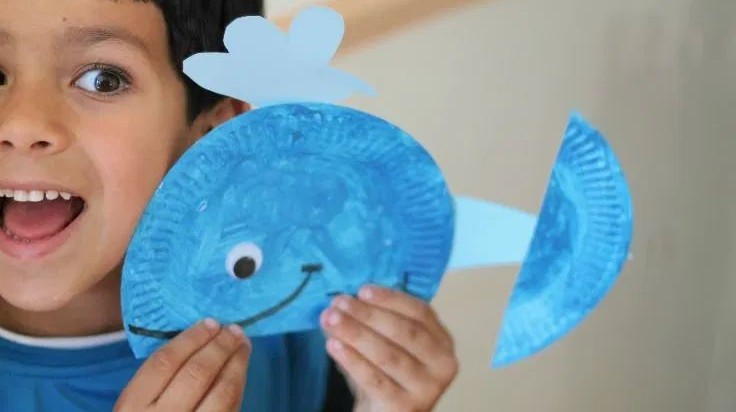
Paper plate crafts are an excellent way to engage your little ones in creative play. One pack of paper plates can yield numerous creative projects, keeping even the most energetic toddlers occupied for hours on end. The beauty of this activity lies in its ease and versatility, allowing you to step back and let your child’s imagination shine. To create a Blue Whale masterpiece with your toddler, start by painting a plate blue.
Once dry, use scissors to cut out the button for the whale’s tail and add some water effects using spare blue paper. Finally, bring it all together with googly eyes and a black marker. The end result is a simple yet adorable craft that’s sure to delight both you and your child. With this project, you’ll not only be encouraging independent play but also fostering creativity and self-expression. So why not give paper plate crafts a try today?
Acorn
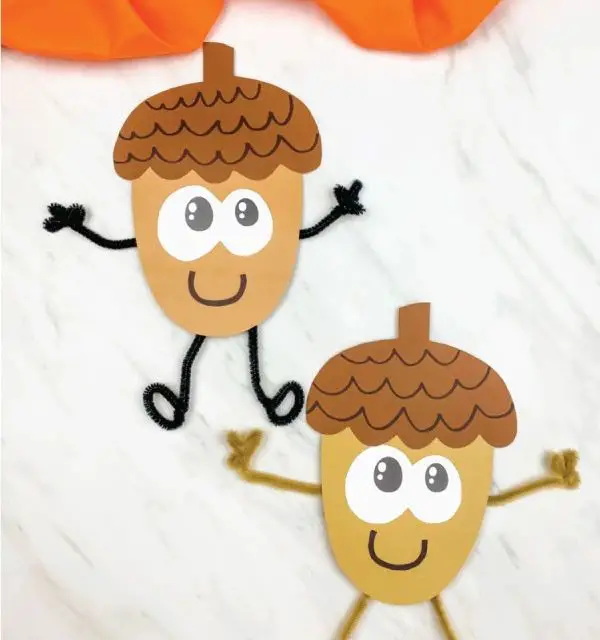
Create an adorable acorn-themed craft that’s perfect for toddlers of all ages, from preschoolers to kindergartners. This project requires just a few basic supplies, including colored brown paper, pipe cleaners, and glue. The end result is not only visually appealing but also fosters creative storytelling and fine motor skills development.
To get started, cut out the shape of an acorn from your colored paper using a template or your own imagination.
Next, use the pipe cleaners to add hands and legs to your acorn puppet. Then, glue on some eyes and a mouth to bring it to life.
This activity is a great way to encourage kids to get creative with glue and paper, while also developing their motor skills. And who knows, you might just inspire some imaginative storytelling along the way.
Snow Globe
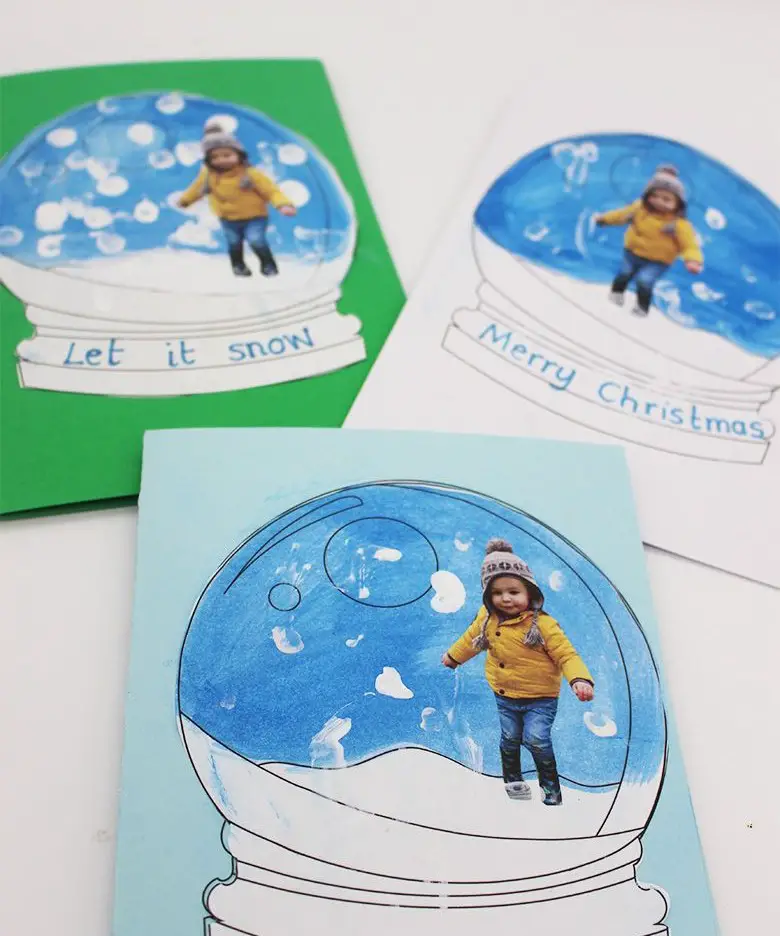
Break free from the monotony of sending identical Christmas cards each year by introducing a creative twist – making DIY cards! Our Snow Globe card is a delightful holiday tradition that’s perfect for getting the whole family involved.
To get started, download our template and print out some adorable photos of your little ones to feature on the card. Then, grab some paint and give the globe a colorful makeover.
Use Q-tips to add some fluffy snowy details and bring it all together with a special photo of your kids.
Create one as a sample, then let your kiddos take over and have fun making their own unique cards. This activity is an excellent way to spend quality time with your family during the holiday season.
Monster
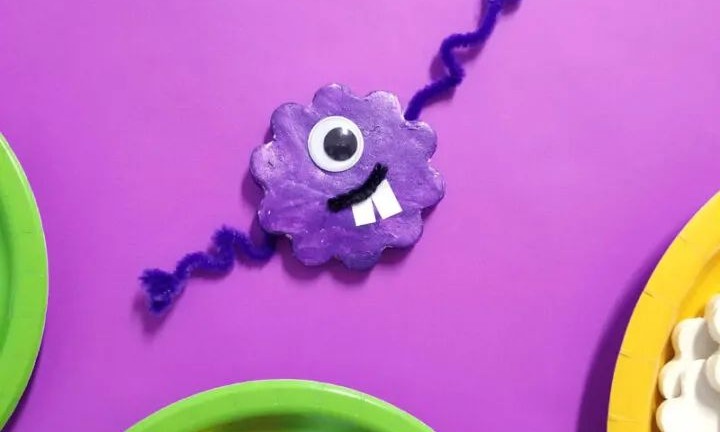
Crafting monster magnets offers a unique blend of creativity and fun, making it an excellent activity for birthday celebrations or classroom settings. While not as budget-friendly as other projects, this one-time endeavor is well worth the investment. To create a stress-free and enjoyable painting experience, consider substituting conventional paints with paint sticks. These long-lasting supplies provide great value for the cost.
For a more manageable at-home experience, consider purchasing a small pack of 12 colors, ideal for crafting with a few kids. Meanwhile, prepare, shape, and dry the dough beforehand to ensure a smooth process. Alternatively, convert this activity into a two-day project by preparing the monster’s base on one day and adding details and painting on the second. This approach allows for a more leisurely pace and a higher level of customization.
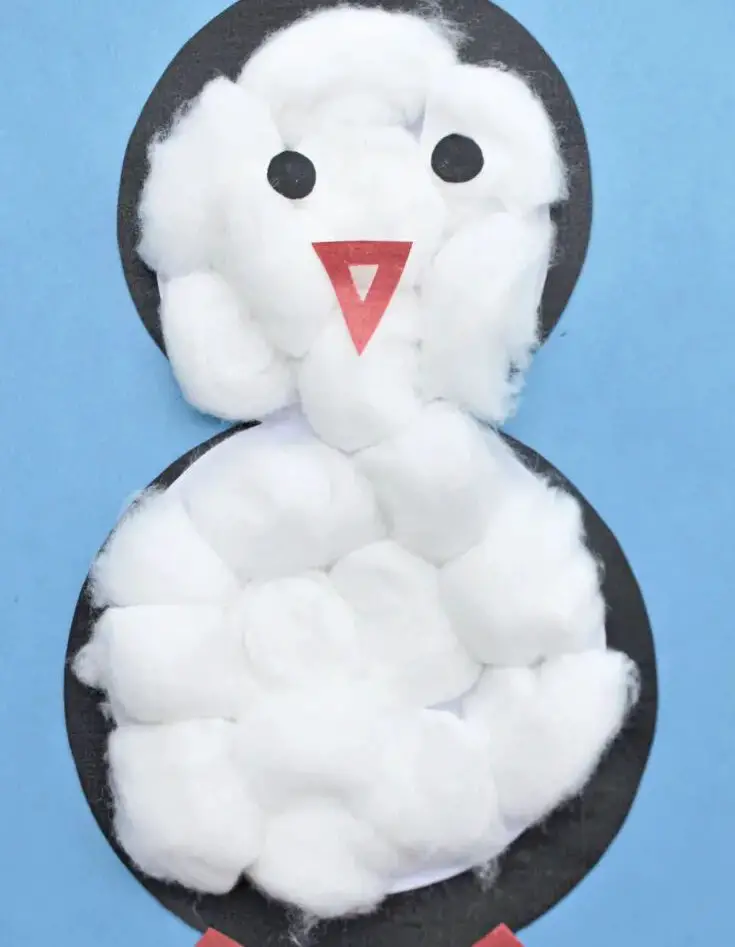
Cotton Ball Penguin
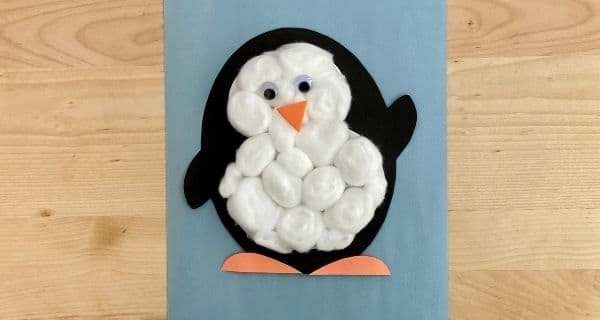
For many children, the penguin is the epitome of cuteness, making it no surprise that they adore crafting activities centered around these adorable birds. This particular penguin craft is an excellent way to spend a cozy winter day with your kids, as it requires only a few simple supplies and can be completed in a short amount of time. To get started, you’ll need a pack of cotton balls, some black and orange construction paper, and a few googly eyes.
With these materials at hand, you and your little ones can create a delightful penguin-inspired craft that’s sure to bring smiles all around.
Watercolour Seashells
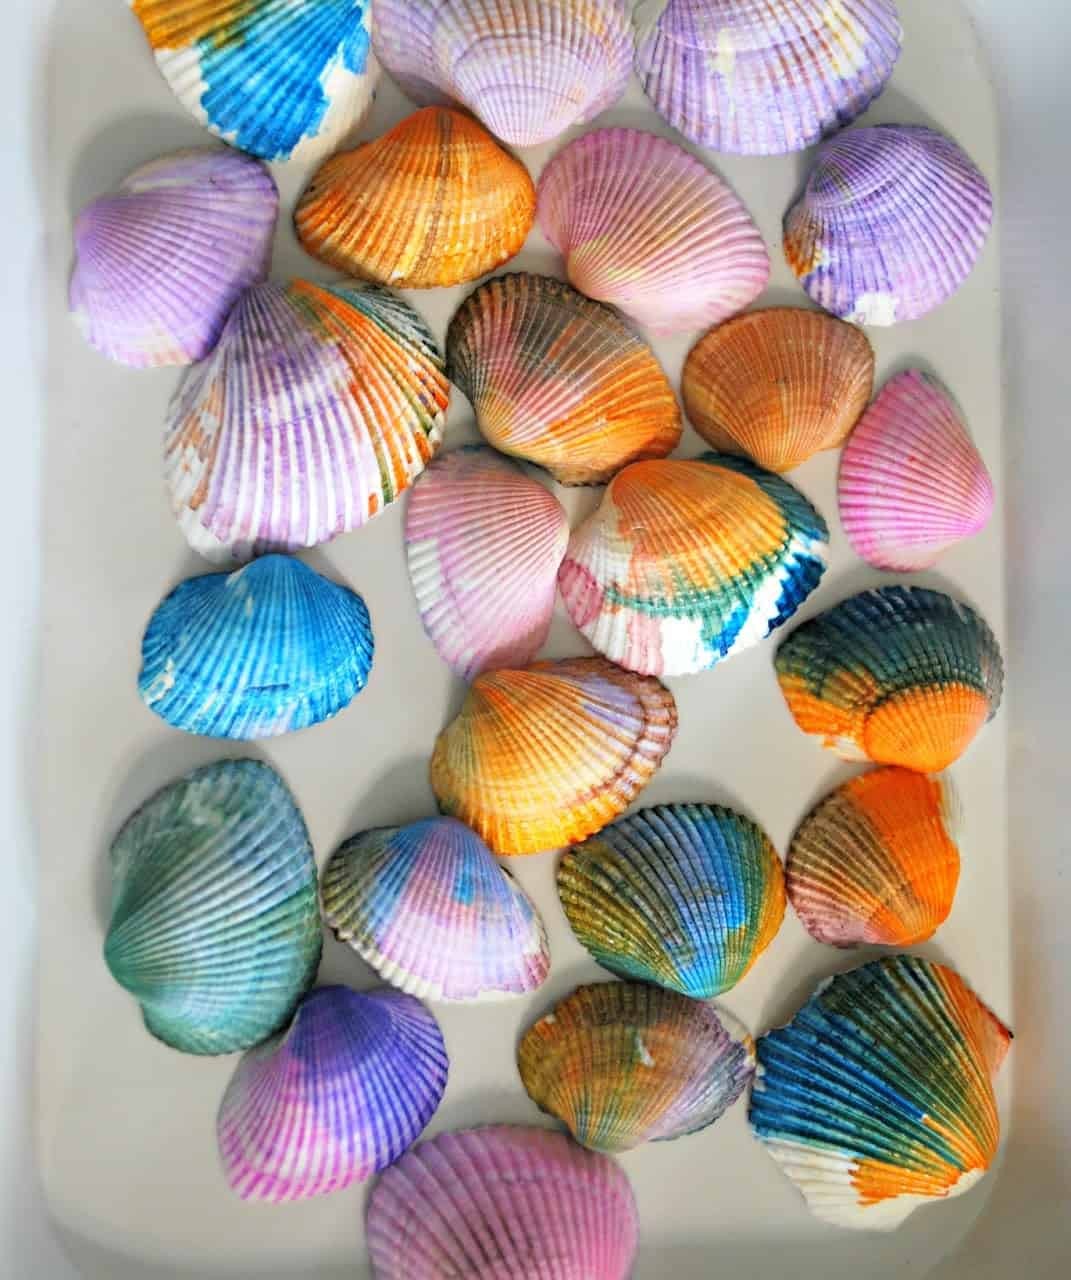
Developing fine motor skills, teaching color mixing, and promoting environmental awareness – this seashell watercolor activity has it all. By using watercolors, children can explore their creativity without worrying about making a mess. The best part? You don’t need to go to the beach to get started; simply order a pack of clean seashells online. All you’ll need is a few basic supplies and a willingness to let your little ones get creative.
So why not set up a painting station with old t-shirts, watercolors, and those shells, and watch your kids’ imagination run wild?
Playdough
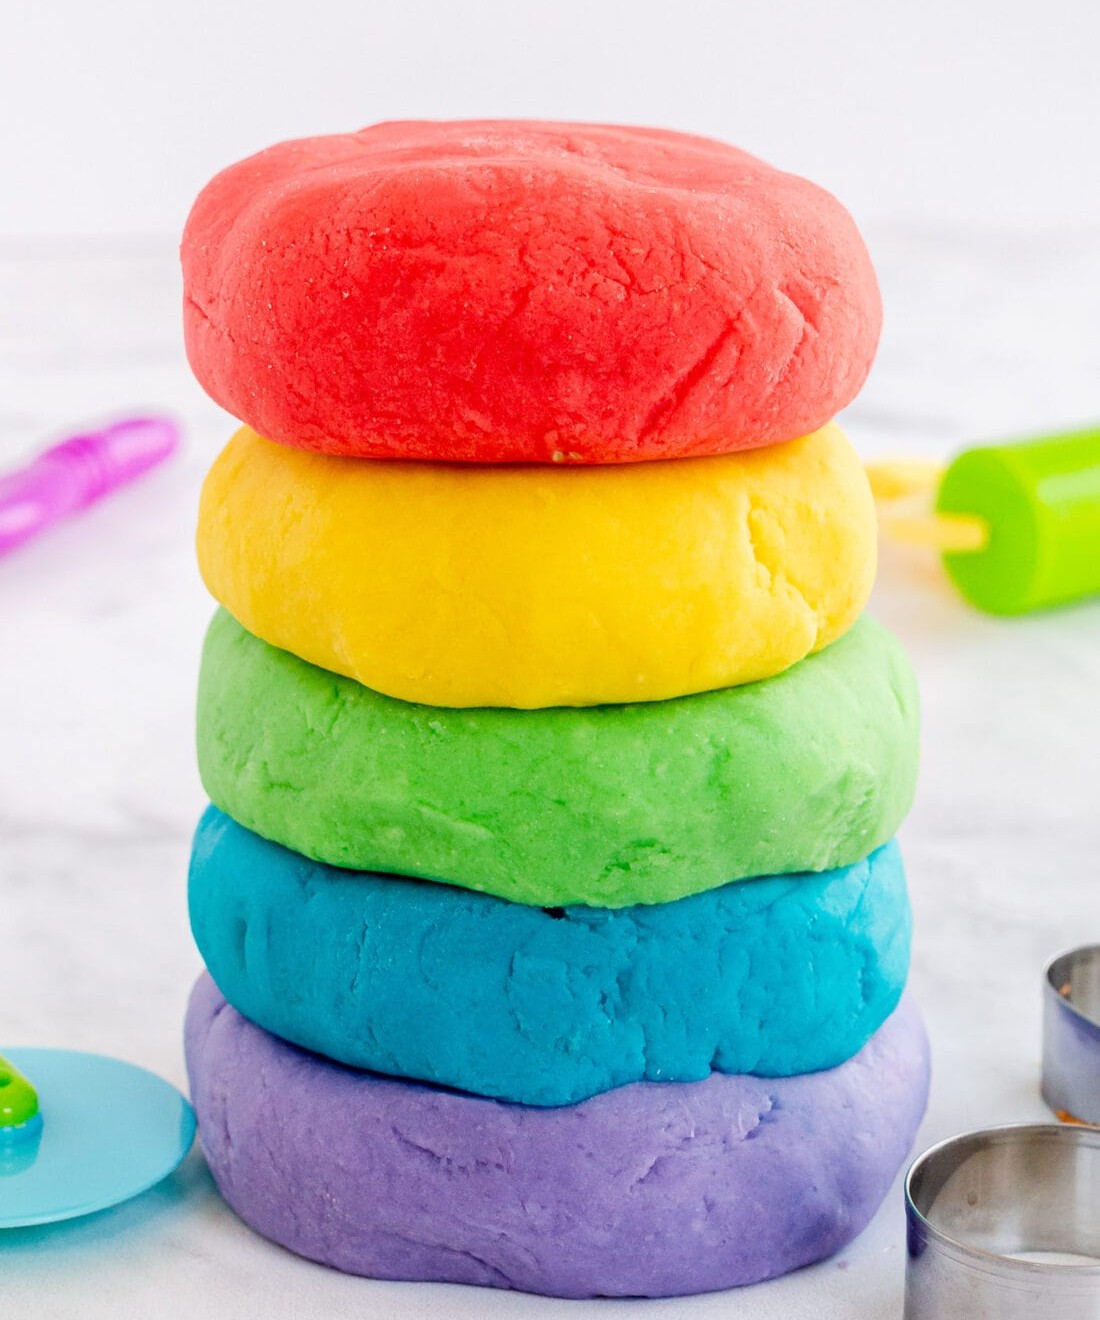
Playdough’s versatility as an activity supply lies in its rapid preparation time, allowing parents to provide their toddlers with hours of imaginative sensory play without a significant time commitment. This simplicity is particularly appealing to mothers of young children, who can create the dough using just six ingredients and enjoy extended periods of independent play from their little ones.
A key component of this playdough is cream of tartar, which maintains the dough’s softness and suppleness, ensuring endless fun for kids as they mold and shape it to their hearts’ content. Additionally, food coloring can be used to add a pop of vibrant color to the dough, allowing parents to easily customize the shade to suit their child’s preferences.
Smush Paintings
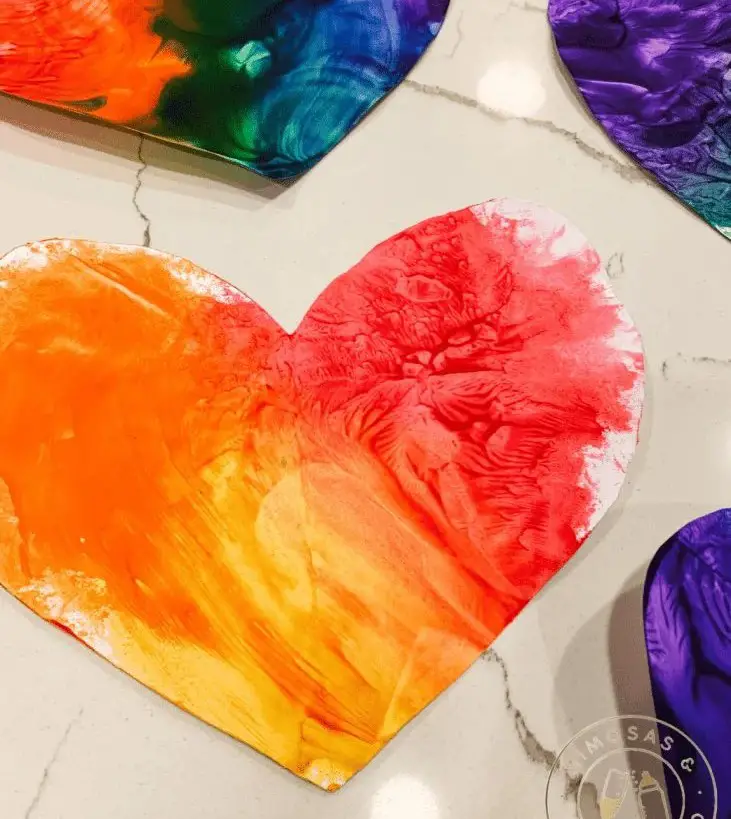
Say goodbye to messy painting sessions with kids! Our mess-free smush painting activity is a game-changer for parents who dread the aftermath of creativity. Not only can your little ones express themselves freely, but you can also relax while they paint without worrying about a sticky situation. This versatile craft is perfect for any holiday or theme – imagine hearts for Valentine’s Day, a Christmas tree for Christmas, and a rainbow for St. Patrick’s Day!
To get started, gather just three simple supplies: cardstock, paint, and ziplock bags. You can order the latter onlinehere. Once you have everything ready, simply place the cardstock in the bag, add some colorful paint, and let your kids’ imagination run wild as they smush and squish their way to artistic greatness. When they’re done, gently remove the cardstock paper, let it dry, and admire the beautiful masterpiece that’s been created.
Frog Headband

Planning an animal-themed party for your child’s birthday? Look no further! We’ve got a fun and easy DIY project that’s sure to delight kids of all ages: frog headbands. Not only are they simple to make, but you can also customize them to fit different animals, making them a versatile accessory for any celebration.
To create these adorable frog headbands, you’ll need just two things: green cardstock and a template.
You can find pre-made templates online or design your own using cardboard or foam. To add some extra flair, consider investing in a pack of headband extenders to ensure the band fits comfortably around any child’s head.
The process is straightforward: simply cut out the various pieces according to the template, glue them together, and voila! Your frog (or other animal) headband is ready to wear.
With this project, you can create an entire menagerie of animal-themed accessories in under 10 minutes, making it a great activity for kids and adults alike.
Splat Painting
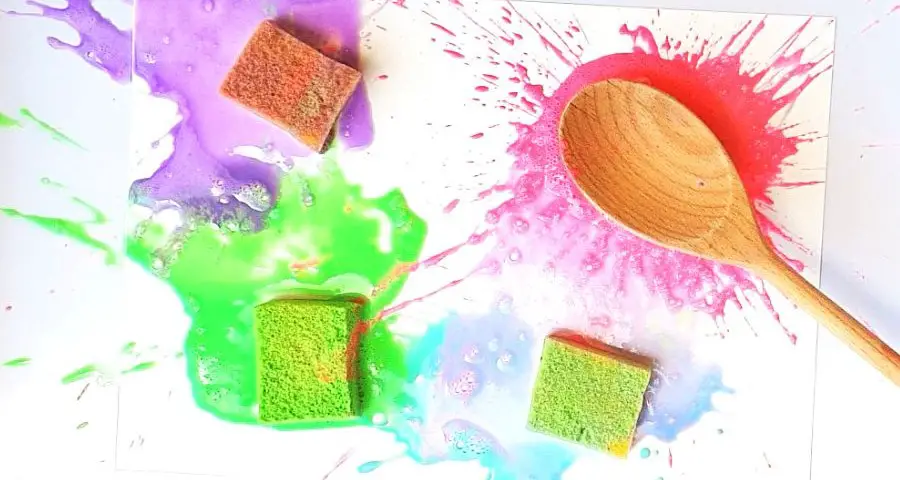
Weekend fun just got a whole lot brighter with splat painting! Kids can’t get enough of this activity once they master it. And why not? It’s the perfect way to spend quality time together and create some amazing art pieces. When it comes to setting up, remember to do it outdoors or in a dedicated area – you wouldn’t want paint splatters all over your home’s walls! To get started, grab some acrylic paint and sponges (you can even order them online).
For an added twist, try cutting the sponges into smaller pieces for more creative possibilities. Once everything is set up, place those paint-soaked sponges on white cardstock paper and let your little ones go wild with wooden spoons. Before you know it, you’ll be holding a couple of one-of-a-kind masterpieces that will make you proud!
Potato Stamp Art
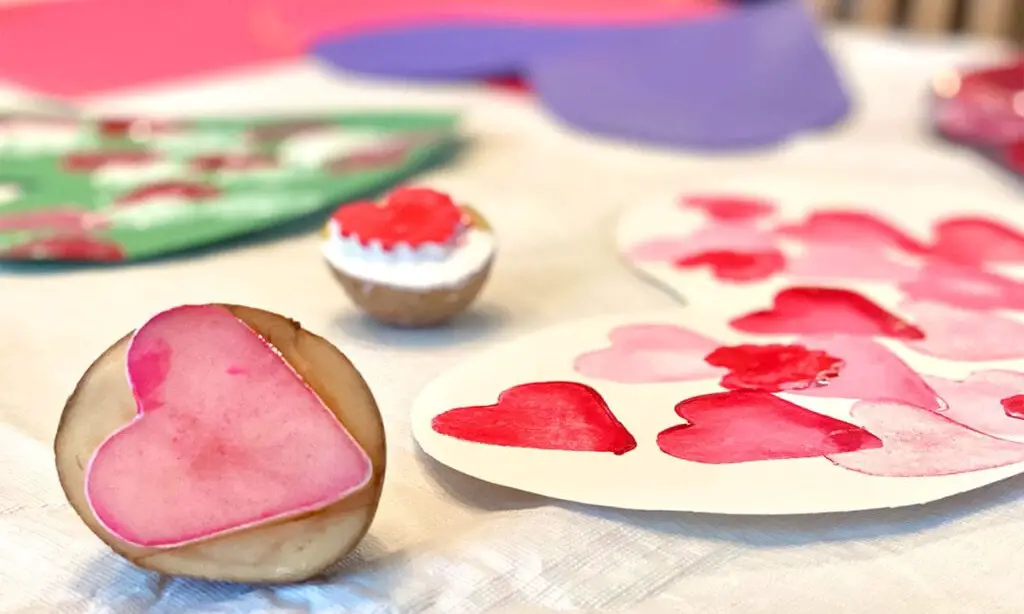
For many children, stamping activities are a thrilling way to express themselves creatively. However, the constant need to repurchase stamps can be frustrating, especially when toddlers have a knack for misplacing small toys. Fear not, for we’ve discovered a simple and fun solution: creating potato stamps! By combining cookie cutters with paint, you can create a unique and engaging activity that’s sure to delight your little ones.
Simply provide them with the stamps and paint, and let their creativity shine. Plus, using metal cookie cutters, which can be easily ordered here, means you can wash and reuse them for future activities, making this project not only enjoyable but also cost-effective.
Paper Plate Dinosaur
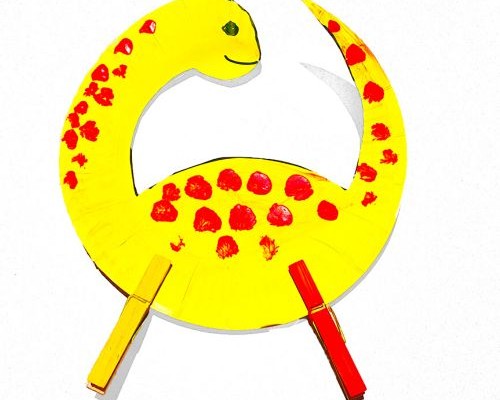
Turn a paper plate pack into a fantastic dinosaur activity that’s perfect for teaching kids about numbers, colors, and matching skills. If you don’t have paper plates, simply order a pack here. This fun project is also an excellent way to introduce your little ones to the world of dinosaurs. To get started, let your kids paint wooden clothespins – they’re easier to work with than metal ones and can be ordered here as well.
Once the clothespins are dry and painted, help your kids cut them into shapes and use them as legs for their dinosaur creations. You can take it to the next level by adding dots to count together or using multiple colors for the legs to practice matching skills. For more creative ideas like this one, check out our collection of paper crafts for kids.
Q Tip Skeleton
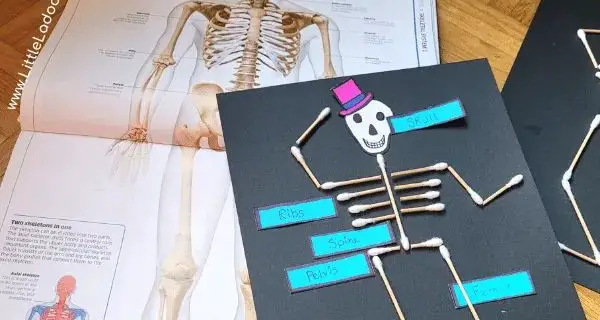
Turn science lessons into fun craft activities with our unique approach! We’re living proof that learning can be an enjoyable experience, even for kids. Take the Q-tip skeleton project, for instance. This engaging activity helps youngsters discover different bones in the human body while having a blast. To get started, you’ll need dark-colored Cardstock, glue, and Q-Tips. You can grab white Q-Tips here to create a realistic skeletal system.
Have your child follow the bone structure of a human skeleton by arranging their Q-Tips accordingly. This project is more than just biology; it’s an opportunity for kids to develop their creativity, fine motor skills, and problem-solving abilities, making it a well-rounded and enjoyable learning experience.
Marble Apple Painting
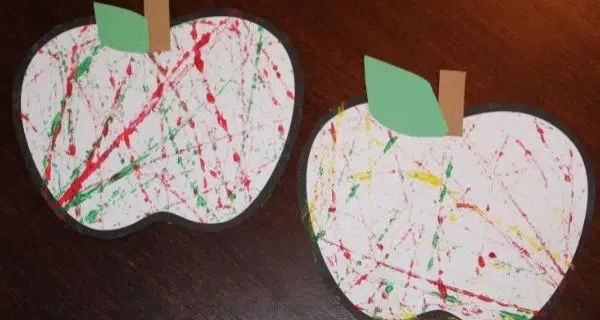
Painting with marbles is an exciting and engaging way to get creative with your little ones. For this fun activity, you can use any type of paint, but washable paints are highly recommended. To make things easier, I suggest using Crayola Washable Paints, which you can easily find by clicking here. To start, print out a large apple template and place it inside a flat box or deep tray. A cereal box works perfectly for this craft, so feel free to get creative with an old one you have lying around.
Next, grab some marbles and roll them in paint until they’re nicely coated. Then, let your kids take over and help them create unique patterns on the apple by rolling the painted marbles up, down, left, and right. As they get more comfortable with the process, you’ll be amazed at the beautiful designs they come up with. It’s not uncommon for parents to be proud of their little Picasso’s creations! For even more indoor activities that are sure to delight your kids, check out our collection.
Paper Tube Binoculars

Transforming ordinary toilet paper rolls into binoculars is a fun and creative activity that can be enjoyed by both children and adults. If you’re looking for a way to breathe new life into empty toilet paper rolls, look no further! With just a few simple steps, you can turn them into functional binoculars perfect for indoor or outdoor play. To get started, download a template on cardstock paper and follow the instructions to fold and cut out the necessary shapes.
Once you have the holes for the toilet paper rolls prepared, simply insert the roll and glue everything together. With this DIY project, your kids will be able to go on their own safari or bird watching adventures, potentially sparking a lifelong interest in exploration and discovery.
DIY Crayons

Transform useless leftover crayons into brand new colorful friends with your kiddo! If you’ve accumulated a stash of old, unloved crayons, it’s time to breathe new life into them. Gather some silicone molds – or get creative and find unique shapes online – and sort through those crayons. Add the waxy wonders to their new homes and pop them in the oven to melt their way into something entirely new.
As the crayons settle, you’ll be left with a fresh batch of vibrant, usable colors, perfect for teaching little ones about states of matter and the magic that happens when solids become liquids through heat.
Zoo Animals
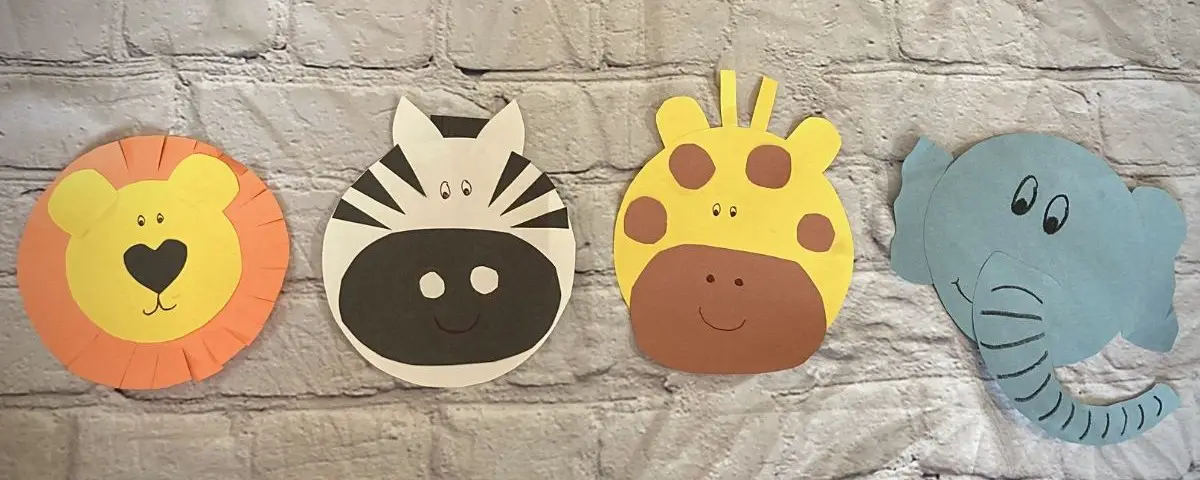
If your little one has been buzzing with excitement since the last zoo trip, this fun activity is sure to delight! With just a few simple materials, you can bring the zoo animals to life using colored construction paper. Perfect for preschoolers and toddlers alike, this craft is an excellent way to encourage creativity and bonding time with your child. Simply cut out the shapes and details beforehand, then let your mini-me glue them into place with your guidance.
And if you’re in need of some colorful supplies, click here for a convenient ordering option.
Bumble Bee
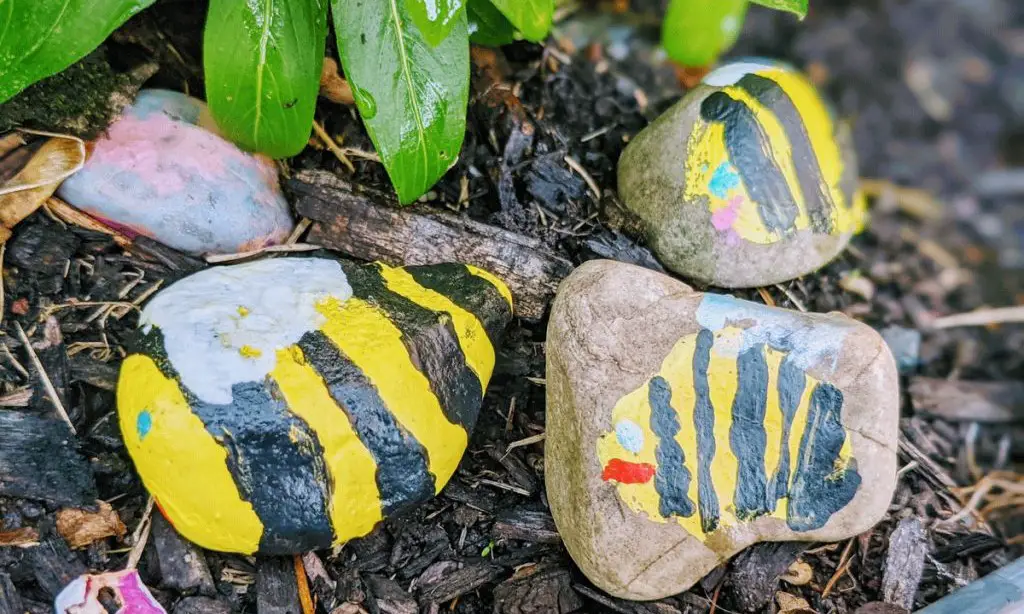
Painting rocks with toddlers can be a delightful experience, creating meaningful gifts for family members like aunts, uncles, and teachers in the process. To get started, you’ll need some smooth rocks, yellow and black paint, and a reliable sealer – I recommend checking out this option [1]. Begin by painting your bee design, allowing the colors to dry completely before applying a coat of sealant. Once sealed, your charming paperweight is ready to be put to use or presented as a thoughtful gift.
Rock painting

Just like bees find inspiration in various sources to create beautiful patterns on rocks, you can tap into any theme or idea that sparks your creativity to color and paint stones. For this engaging activity, you’re free to collect a variety of stones, though we recommend the smooth river rocks – they’re perfect for kids’ painting sessions too. You can acquire these unique stones by visiting the link provided here and unleashing your inner artist.
If you or your little ones happen to craft an extraordinary piece, consider sealing it and using it as a paperweight. This activity also makes for a memorable birthday celebration. For more inspiration on rock painting ideas, explore this collection of creative endeavors.
Water Balloon Painting
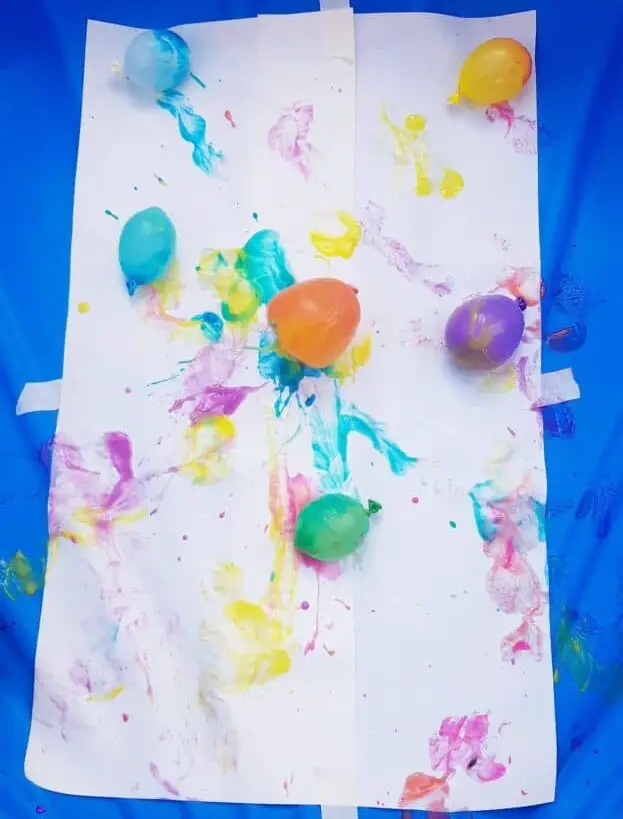
Combine the excitement of water balloons with the creativity of painting for a summer sensory activity your kids won’t forget. Simply fill a muffin tray with paint, and then use inflated water balloons as makeshift brushes to create a unique masterpiece on paper. Just be sure to remind them to handle the balloons gently, as a sudden pop could ruin their artwork and require a fresh start.
This fun and engaging activity not only encourages motor skills development but also fosters focus and concentration. So why not give it a try with your little ones this summer? With just a few simple supplies – including water balloons of various sizes that can be easily ordered online – you’ll be well on your way to creating a splashing good time for the whole family.
Walrus
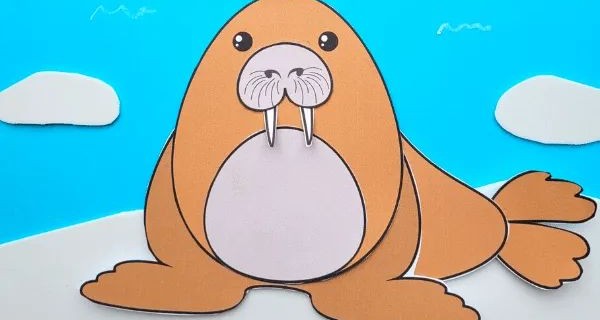
Cut and paste crafts are an innovative way to keep children engaged and learning during the summer break. This versatile approach not only keeps them occupied but also provides opportunities for skill-building and creative expression. The walrus cut and paste craft is a particularly effective tool for teaching kids about these fascinating creatures and their natural habitats.
By downloading and customizing the template, parents can encourage hands-on creativity while exploring important topics with their children. For older kids, this activity offers an added layer of challenge as they work to assemble the puzzle, developing problem-solving skills and spatial reasoning along the way.
Paper Plate Watermelon
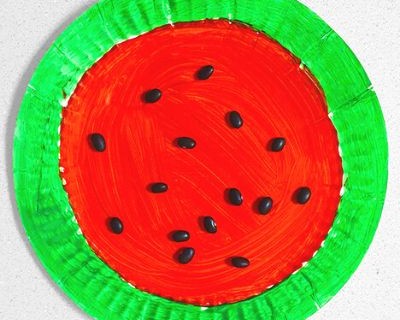
Our creative journey continues with another delightful paper plate craft – a juicy watermelon! These fun activities are a staple in our household, fostering imagination and self-expression. By incorporating crafts like this, we’re not only encouraging creativity but also providing an outlet for our little ones to express themselves.
To get started on your very own watermelon paper plate masterpiece, gather the following essentials: a pack of paper plates, green and red paint, and a handful of dried black beans – which you can easily source online. Once your paint has had time to dry, simply glue those seeds into place to complete the look. Imagine the pride and joy on your child’s face when they showcase their colorful creation at school or in a family gathering. This craft is sure to bring smiles all around!
Alphabet Puppets
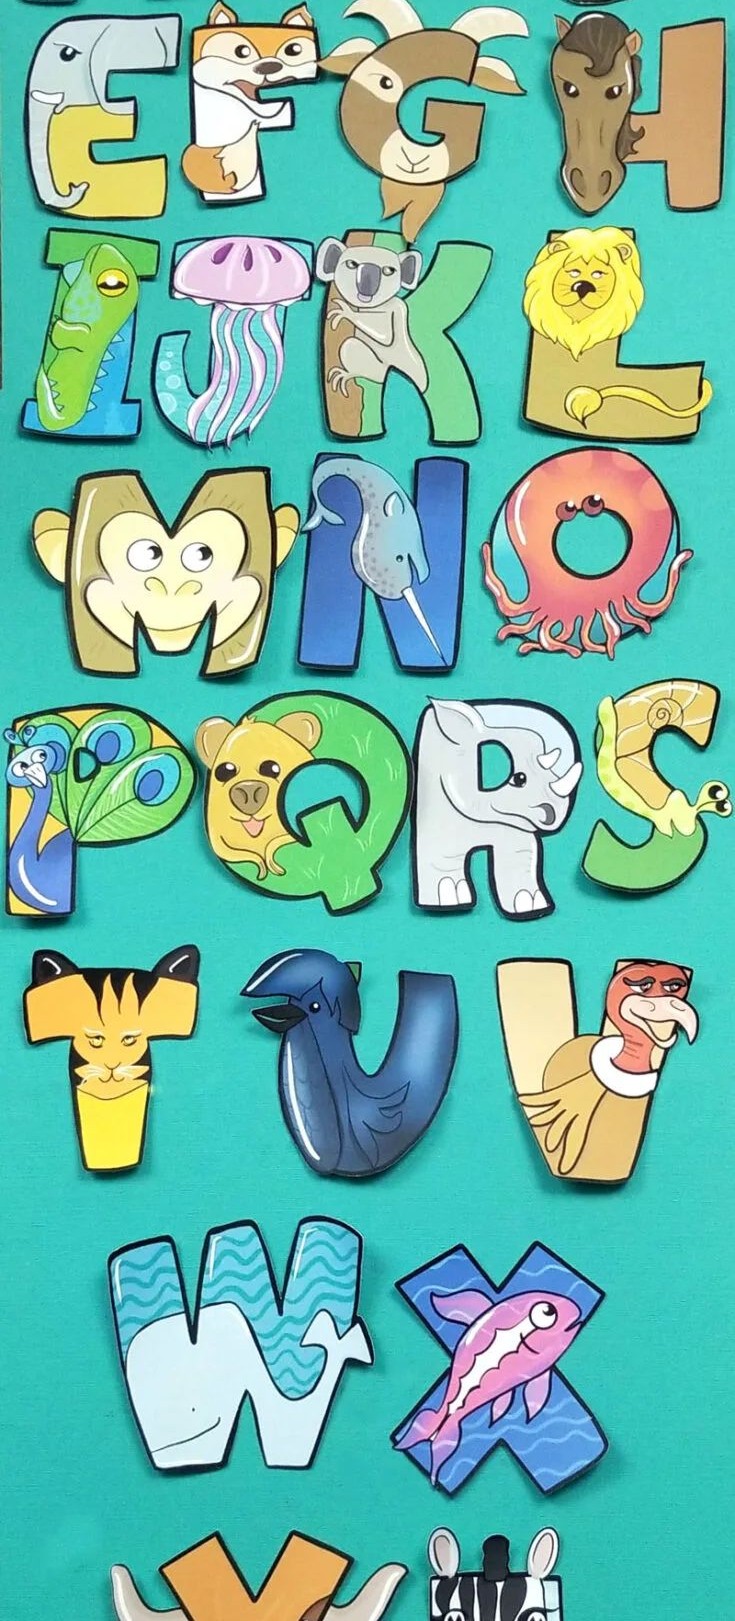
Teaching ABCs with crafts can be a delightful way to engage young learners. To bring this activity to life, I recommend creating Alphabet puppets using jumbo craft sticks and printed puppets that have been painted for an extra touch of creativity. If you don’t already have the necessary materials, you can easily obtain them from [insert source here]. By incorporating these unique puppets into your letter series, you’ll be able to make learning fun and interactive for your children.
Under the Sea Shape
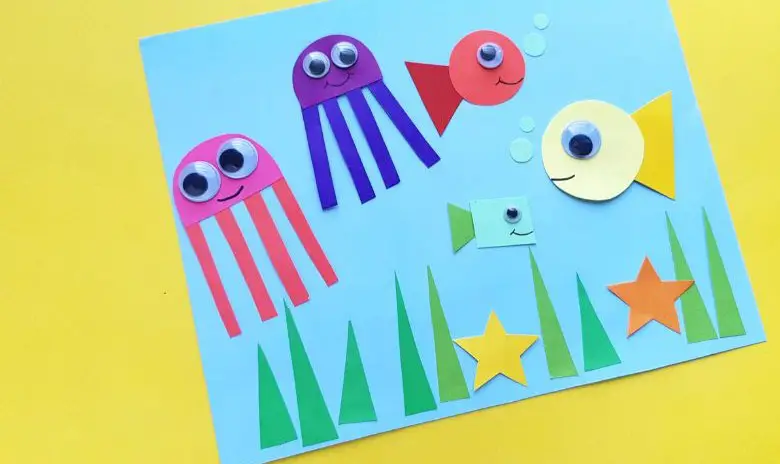
Teaching children about shapes can be a fun and engaging experience for both kids and parents. One effective way to do so is by incorporating creative activities like crafts into your lesson plan. A unique and entertaining approach is an under the sea shapes craft that combines learning with imagination.
To get started, all you need are basic crafting supplies such as scissors, colored construction paper, and glue.
Begin by cutting out various shapes from the paper, then lay them out in front of your child. Use this opportunity to guide your kid in recognizing each shape, and then work together to create a visually appealing under the sea scene using the shapes and some creative liberties. This hands-on activity allows children to develop their spatial awareness and understanding of basic geometric forms while having fun exploring an underwater world.
Clownfish
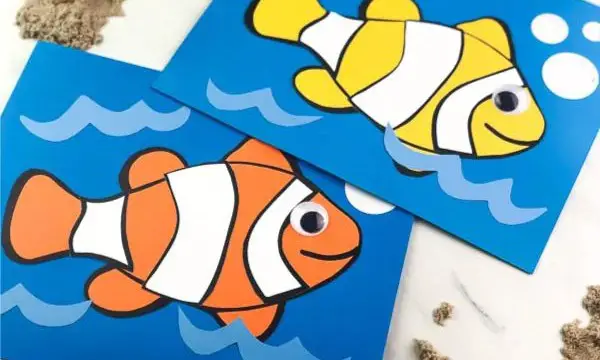
If you’re a parent who has shared the delightful experience of watching Nemo with their kids, you might have noticed how captivated they were by the lovable clownfish. And if that’s the case, this DIY craft is an excellent way to extend that fun and creativity. For those who haven’t introduced their little ones to the underwater world of Nemo yet, now’s the perfect opportunity to combine movie time with a delightful craft session.
To create your very own clownfish, you’ll need just a few simple materials: colored card stock, googly eyes, and some glue – Elmer’s School glue is our top recommendation, which you can order here. Once you have these essentials ready, simply use the provided template to cut out all the pieces and stick them onto blue construction paper. The final step? Let your little ones name their new pet and proudly display it in their room.
This DIY project not only offers a fun way to spend quality time together but also provides opportunities for toddlers to develop essential skills such as independent play, self-expression, creativity, focus, and fine motor control through arts and crafts.
41 Fun Crafts for 3-Year-Olds
Looking for creative ways to keep your 3-year-olds entertained? Look no further! These delightful and easy-to-create crafts are perfect for little hands. With a prep time of just 10 minutes, you can get started right away. Once you’re ready to get creative, the actual crafting process will take around 20 minutes. In total, you’re looking at about 30 minutes from start to finish. A great way to spend quality time with your child and encourage their artistic side!
Materials
Engage your little ones in a world of creativity with these 41 fun and easy craft activities for kids! From making magnets out of fingerprinted glass to creating colorful puppets, there’s something for every budding artist. Get inspired by the vibrant colors of rainbow crafts or dive into the ocean with a paper plate whale. Let your child’s imagination run wild with melted crayon art, playdough creations, and splat paintings.
Add some 3D fun with potato stamp art, rock painting, or water balloon paintings. And don’t forget to get cozy with cotton ball penguins, q-tip skeletons, and a spring lamb craft activity. Whether you’re looking for a quick and easy project or something more in-depth, these activities are sure to bring out the best in your child’s creativity.
Instructions
Embrace your creativity by selecting a craft that sparks joy. Next, gather all the necessary materials and supplies to get started. Then, invite the kids to join in on the fun and get crafty together!